SJSoane
-
Posts
1,655 -
Joined
-
Last visited
Content Type
Profiles
Forums
Gallery
Events
Everything posted by SJSoane
-
 Hi Alan, Congratulations on retirement! More time for yourself, but less sand in the hourglass of life. That keeps me very motivated, although I am shocked at how time flies by. A friend defined retirement as taking all day to do something that only took you an hour when you worked.... Mark
 -
Ed, I forgot to ask about a previous post. You are using wipe on poly for the spars and masts, not your usual turps and wax as on the hull. Is there a construction reason for this? Mark
- 3,618 replies
-
- 1
-

-
- young america
- clipper
- (and 1 more)
-
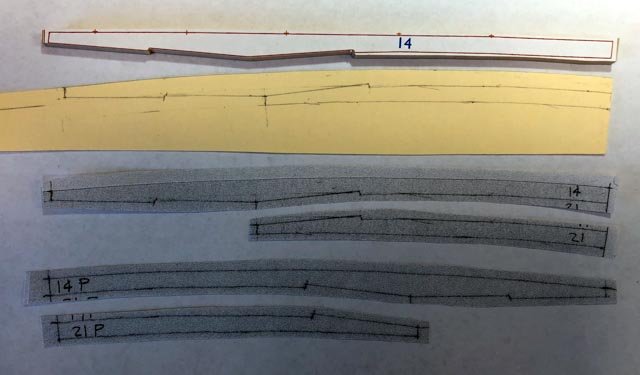
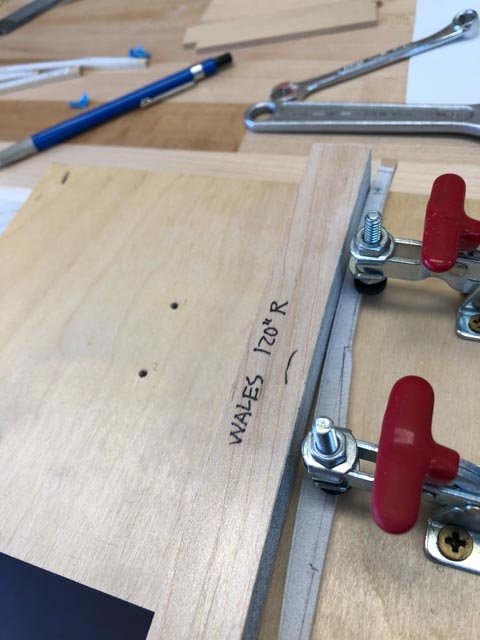
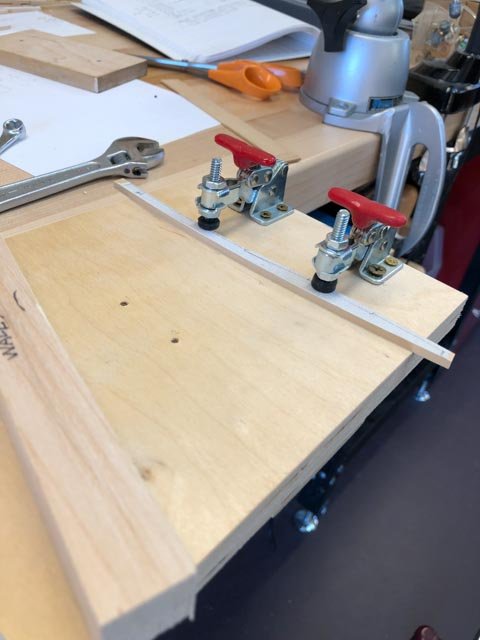
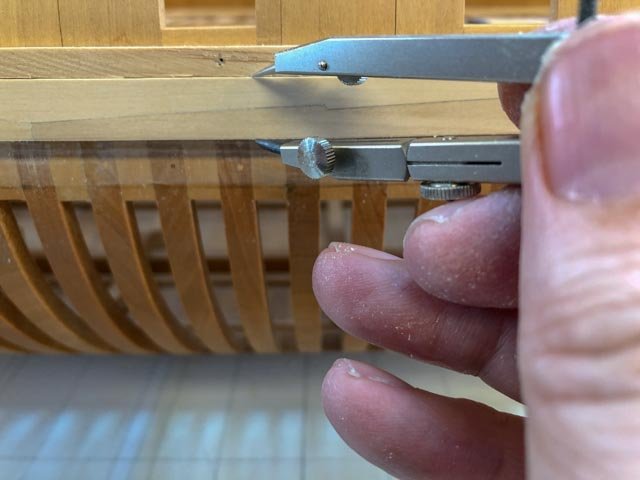
Thanks, everyone, for your support. I was taken away from the shop for a few days, to rig up a hoist for kayaks--real rigging. I am starting on the lower two strakes of the wales. I originally cut the foremost planks at the round of the bow according to my CAD drawing. But when I spiled to the strakes already installed, I discovered that the upper curve was much more dramatic than my original piece. The photo below shows the original piece at the top, and the card with the spiled edge below, showing the difference in curvature. In hindsight, I realize that I assumed the wales would be dead straight vertical, since they are so at midships; not so at the bow or stern! I made xerox copies of the spiled card for port and starboard. A couple of more pieces for the mistake box. I had spent a great of time on the first two strakes sanding and filing the edges of the planks. I did this freehand with shaped sanding blocks. The challenge was to keep the edge square, or tapered slightly where needed to tighten up the joint. It was a little hit and miss. So I am trying a little jig shown below, which clamps into my jeweler's vise block. The two hold downs secure the plank, and then I can run the sanding block against the edge, keeping it exactly perpendicular. When I need to angle the edge, I will slip a thin spacer under one edge of the plank to change its angle to the table. Mark
-
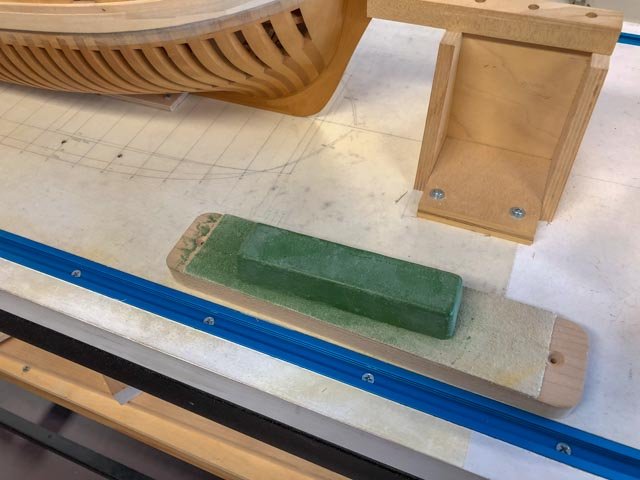
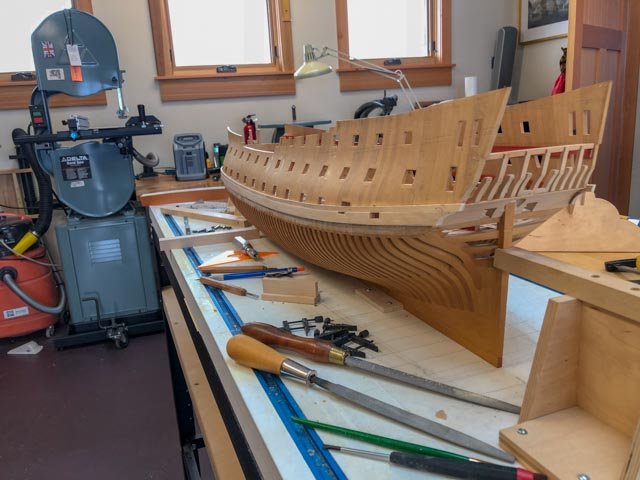
A couple of further thoughts on chisels, I do use small chisels, for example, in the hundreds of mortises in the gun deck framing below. The dockyard chisel shown works very well. Also, I use a strop with green compound, and strop my chisels large and small every few cuts. It helps maintain the sharpened edge, and I can really feel the difference when the chisel is freshly stropped. Sharp makes all the difference in the world when cutting miniature joinery! Mark

- 18 replies
-
- 10
-
-
I concur with druxey's recommendation on Veritas. Equivalent quality at Lie-Nielsen, which is what I now use. The virtue of a good chisel is that it can be sharpened well, and then keep its edge. My experience with too many cheap chisels that I have bought over the years is that they don't sharpen well or hold their edges for very long. I wish I had bought good chisels the first time; the number of cheap chisels I ended up throwing away could have paid for the good ones to last the rest of my life. Also, when I started on my ship model at 3/16" scale, I thought that I would mainly need small chisels, like the Dockyard sets. I use these, and they are good. But I have found that the vast majority of my chisel work uses standard sizes, mostly ¾" and ½". This is because the larger chisel has a wide face that you can more easily align to a cutting line. Too narrow a chisel, and you can't see if it is parallel to your intended cut. Also, a good polish on a wide chisel allows you to use it as mirror to ensure that the chisel is being held absolutely vertical to a cut. The great books by David Antscherl on the Fully Framed Model, and Ed Tosti's books on his projects, give very good advice on how to cut miniature joinery with large chisels. I have tried no end of sharpening techniques, and have personally settled on waterstones with a Veritas Mark II guide. I never could make an oilstone work, but each to his or her own preferences. Mark
-
Hi Siggi, I was away for a few days, and I missed this entire discussion about the mouldings. I enjoyed catching up, very interesting conversation. The drawing from Falconer looks like the best evidence, and it is closer in time to the Tiger. I did notice that the Falconer drawing shows a waterway that is probably not accurate. It looks like a wedge sitting on top of the deck planking, while most other evidence says that it would have been a thickened and shaped plank sitting on the deck beams. Does this call into question how the other details, like the mouldings, are drawn? I would still be inclined to follow the Falconer drawing for the mouldings. Best wishes, Mark
-
Hi Ed, It is looking quite wonderful. What a great series of lessons on metalwork, clipper rigging. I have a question about the jackstays. Were there any fastening devices to keep these from sliding out of the eyebolts? Or were they ever intentionally slid out? Mark
- 3,618 replies
-
- 3
-
-
- young america
- clipper
- (and 1 more)
-
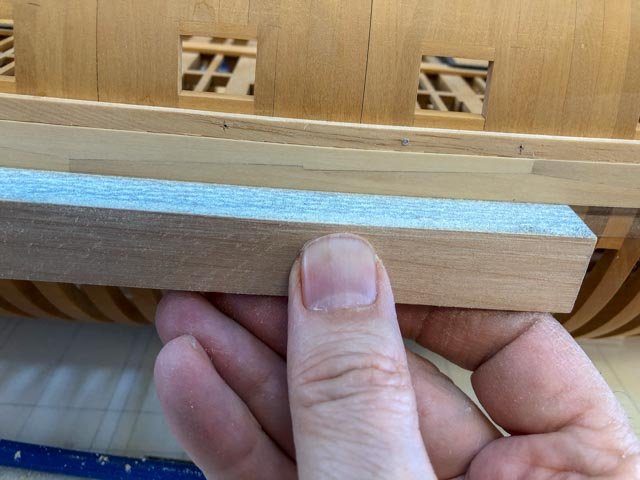
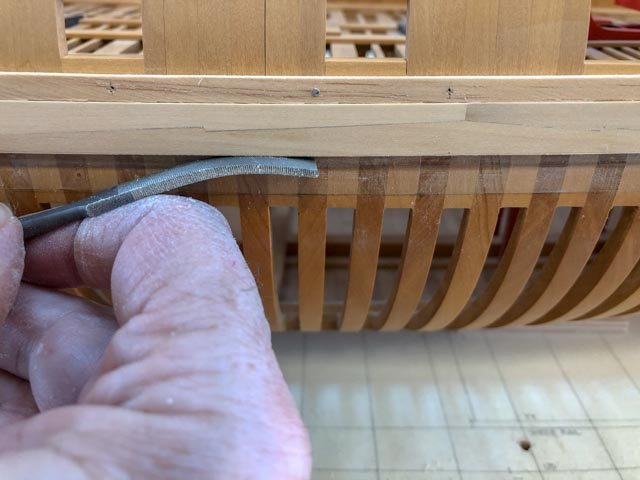
I have spent a tedious weekend fairing up the lower edge of the upper two strakes of the wales. I had made each plank a bit oversize in width, concerned that the careful fitting of the hooked scarphs could throw off the outer edges slightly, and this proved to be the case. The upper edge is fair because of the batten, but the lower edge wavered a little from plank to plank. A simple matter to draw a line parallel to the top with the compass, and a not so simple matter of then fairing to the line. I had to use a coarse riffler in places, followed by a sanding block cut to the radius of the wale. For some reason, sanding was very slow, perhaps because I was not keen to use a coarser sandpaper and risk marring the lower edge. Oh, well, who is in a hurry? Mark
-
Siggi, it looks great. I am noticing for the first time, how straight the fore edge of the stem is, in relationship to British ships later in the eighteenth century. Very distinctive! Mark
-
That step is like finely crafted furniture! What is the wood? Mark
-
ancre Chebece 1750 by Jeronimo - FINISHED
SJSoane replied to Jeronimo's topic in - Build logs for subjects built 1501 - 1750
Beautiful work, exquisitely crafted. Mark -
Oh, my, those quarter galleries look difficult and complex! You are doing a great job. Mark
- 1,035 replies
-
- 7
-
-
- royal katherine
- ship of the line
- (and 1 more)
-
Gary, The planking is looking really great. Are you going to leave some of the side un-planked to show the framing? Mark
-
druxey, I truly married up, but not enough to share sharpened chisels. A ding in an edge could challenge the best marriage...
-
Thanks, Håkan, we moved to a rural area in Montana with limited resources like shops, but beautiful views. druxey, my wife is not only a retired architect, but also furniture designer (two of her designs are in the Kirkland Museum of decorative arts in Denver). The lightning bolt is a prototype for a candlestick holder she is working on. We share the shop, split right down the middle. We share most tools, but not my carefully honed chisels....🙂 Mark
-
Finished the last port plank in the upper two strakes. Now I need to trim up the lower edge before beginning the final two strakes. I got this done just in time, because you can see in the third photo a lightning bolt is about to attack the ship from my wife's side of the shop... Mark

-
Thanks, Siggi, that makes sense. Mark
-
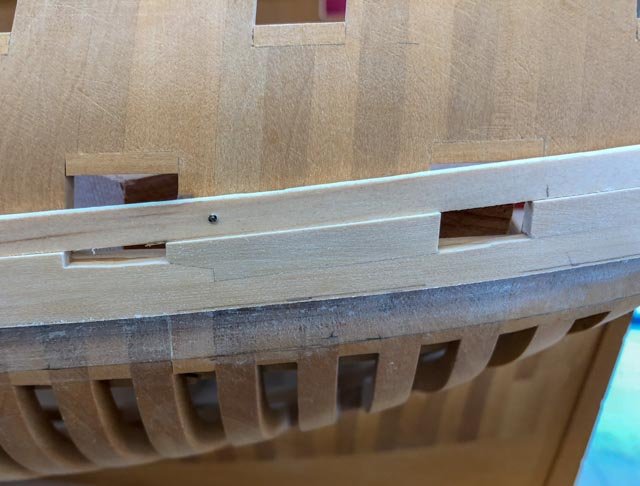
Siggi, It is looking great. You are inspiring me to try to move faster! I notice the line you have drawn for the sheer rail, the next line of thicker planking further up the side. It does not match up or align with the "knuckle" or sharp bend in the foremost frame. It may be different in your ship, but in mine the two line up (see photo below). Best wishes, Mark
-
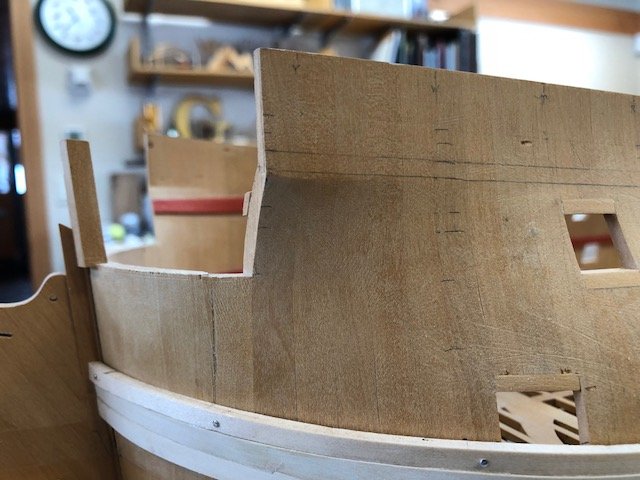
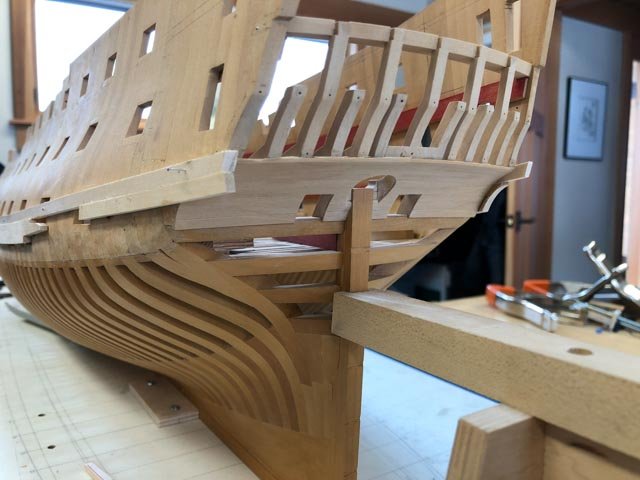
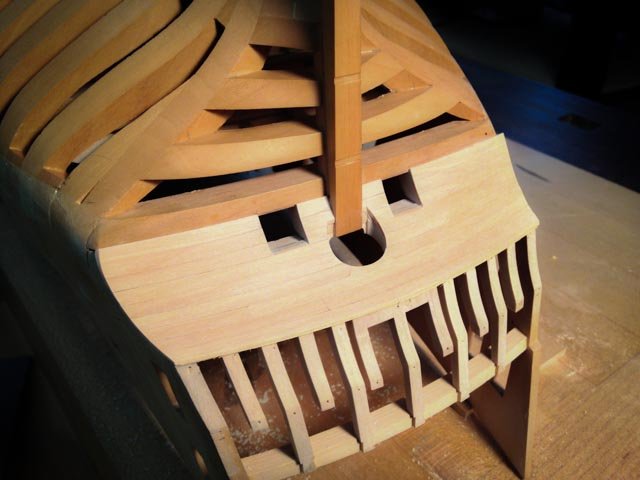
Thanks, druxey and Ed, you have both caught me from mistakes in the past, and please keep checking up on me! In this case, I followed the advice in the Naiad book and in David Antscherl's Fully Framed Model books, and planked the counter some time ago. Although it hasn't shown in my recent photos, I see. Here are photos from a few years ago when I planked the counter. The photo from the port showing the wales underway does raise an interesting question on this, though. I had started to shape the wale to the counter on the starboard side, as you can see, but I quickly realized that I was likely to damage the counter because I could not see very well upside down. I assume I will have to turn the hull upside down again, and then shape the wales to the counter. And as long as I am at it, I wonder if it would be a good idea to color the wales upside down, where I can really see the critical painting edges between the lower edge of the wale and the hull (which remains unplanked in this model style), and between the wales and the counter. I also need to try a few samples of coloring, which at this point will include Fiebing Leather Dye, Speedball ink, or possibly airbrushing with diluted acrylic paint. I am looking for something revealing the wood grain slightly, but I don't want to mess with a top coat of tung oil which I see has caused some problems for others in the past. As Ed well advises, I will test extensively off the model first! Best wishes, Mark
-
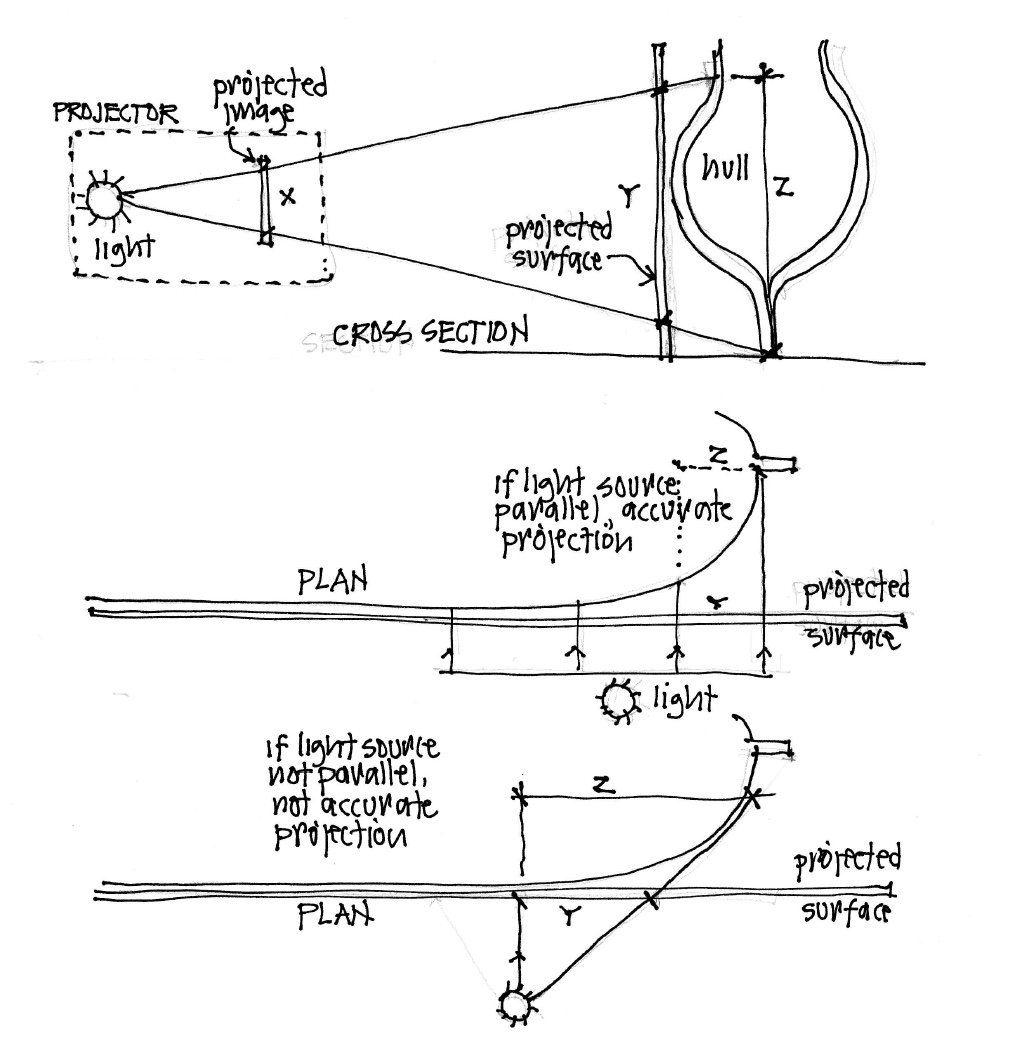
Hi Gaetan, I have been thinking about your projector experiment. I have attached a diagram showing what the issues might be. In the first diagram, showing the project and ship hull from the side, if the light source is a single point, then the image lines will radiate away from the source. An image at X is projected to a greater Y on the projected surface, but the image will be an even greater Z at the hull. The second diagram shows the setup in plan. If the light source creates parallel rays, the image on the projected surface will be accurate, even around the curve at the bow. But if the light source is a single point, as in the third diagram, the distance on the hull at Z will be greater than the distance at Y on the projected surface. and the curve at the bow will not be accurate. You could avoid this problem if you could take each point on the projected surface, and then project it onto the hull exactly at right angles to the projected surface. Maybe this could be done with your laser beam. Just some thoughts in your very interesting experiment! Mark

-
Two pieces to go. I discovered, when recutting the upper, sternmost plank of the wale, that leaving it much longer than necessary helped with steaming to the correct shape. Having a little extra length reduced the springback and gave a better purchase when gluing. Sometimes, as in the case of my first failed blank here, cutting rough blanks too close to final size is "penny wise and pound foolish". New lessons learned all the time. Mark
-
Siggi, Very nice, and also very fast with perfect quality. Did you steam or heat bend the plank in your jig? Mark
-
Hi Gaetan, I look forward to seeing the results of your experiments. This would indeed be a very useful tool. Mark