Geordie Tyne
-
Posts
64 -
Joined
-
Last visited
Content Type
Profiles
Forums
Gallery
Events
Everything posted by Geordie Tyne
-
 Thank you Andrew. Also thank you for the thread. I will delve into it now. Regards
 -
Thank you very much. Regards
-
The latest to begin the Model Shipways 3 kit set
Geordie Tyne replied to Taken Aback's topic in New member Introductions
You can't go wrong with picking up the Sherbourne kit. It is a fantastic kit and their are some very informative build logs on this site dealing with her. Regards -
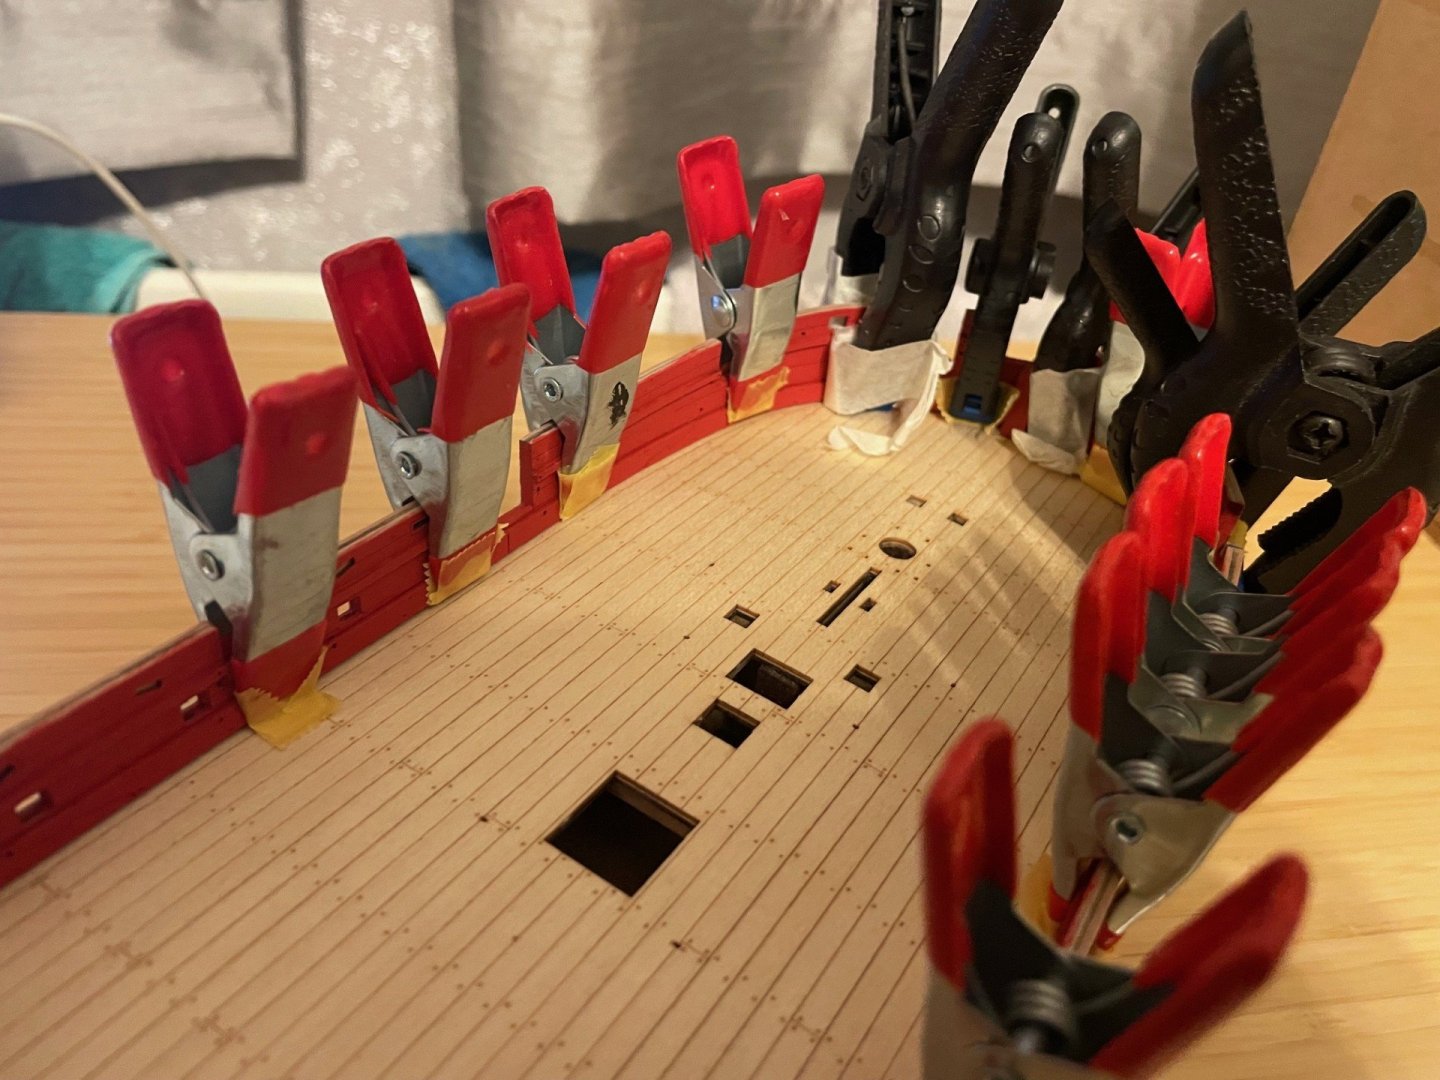
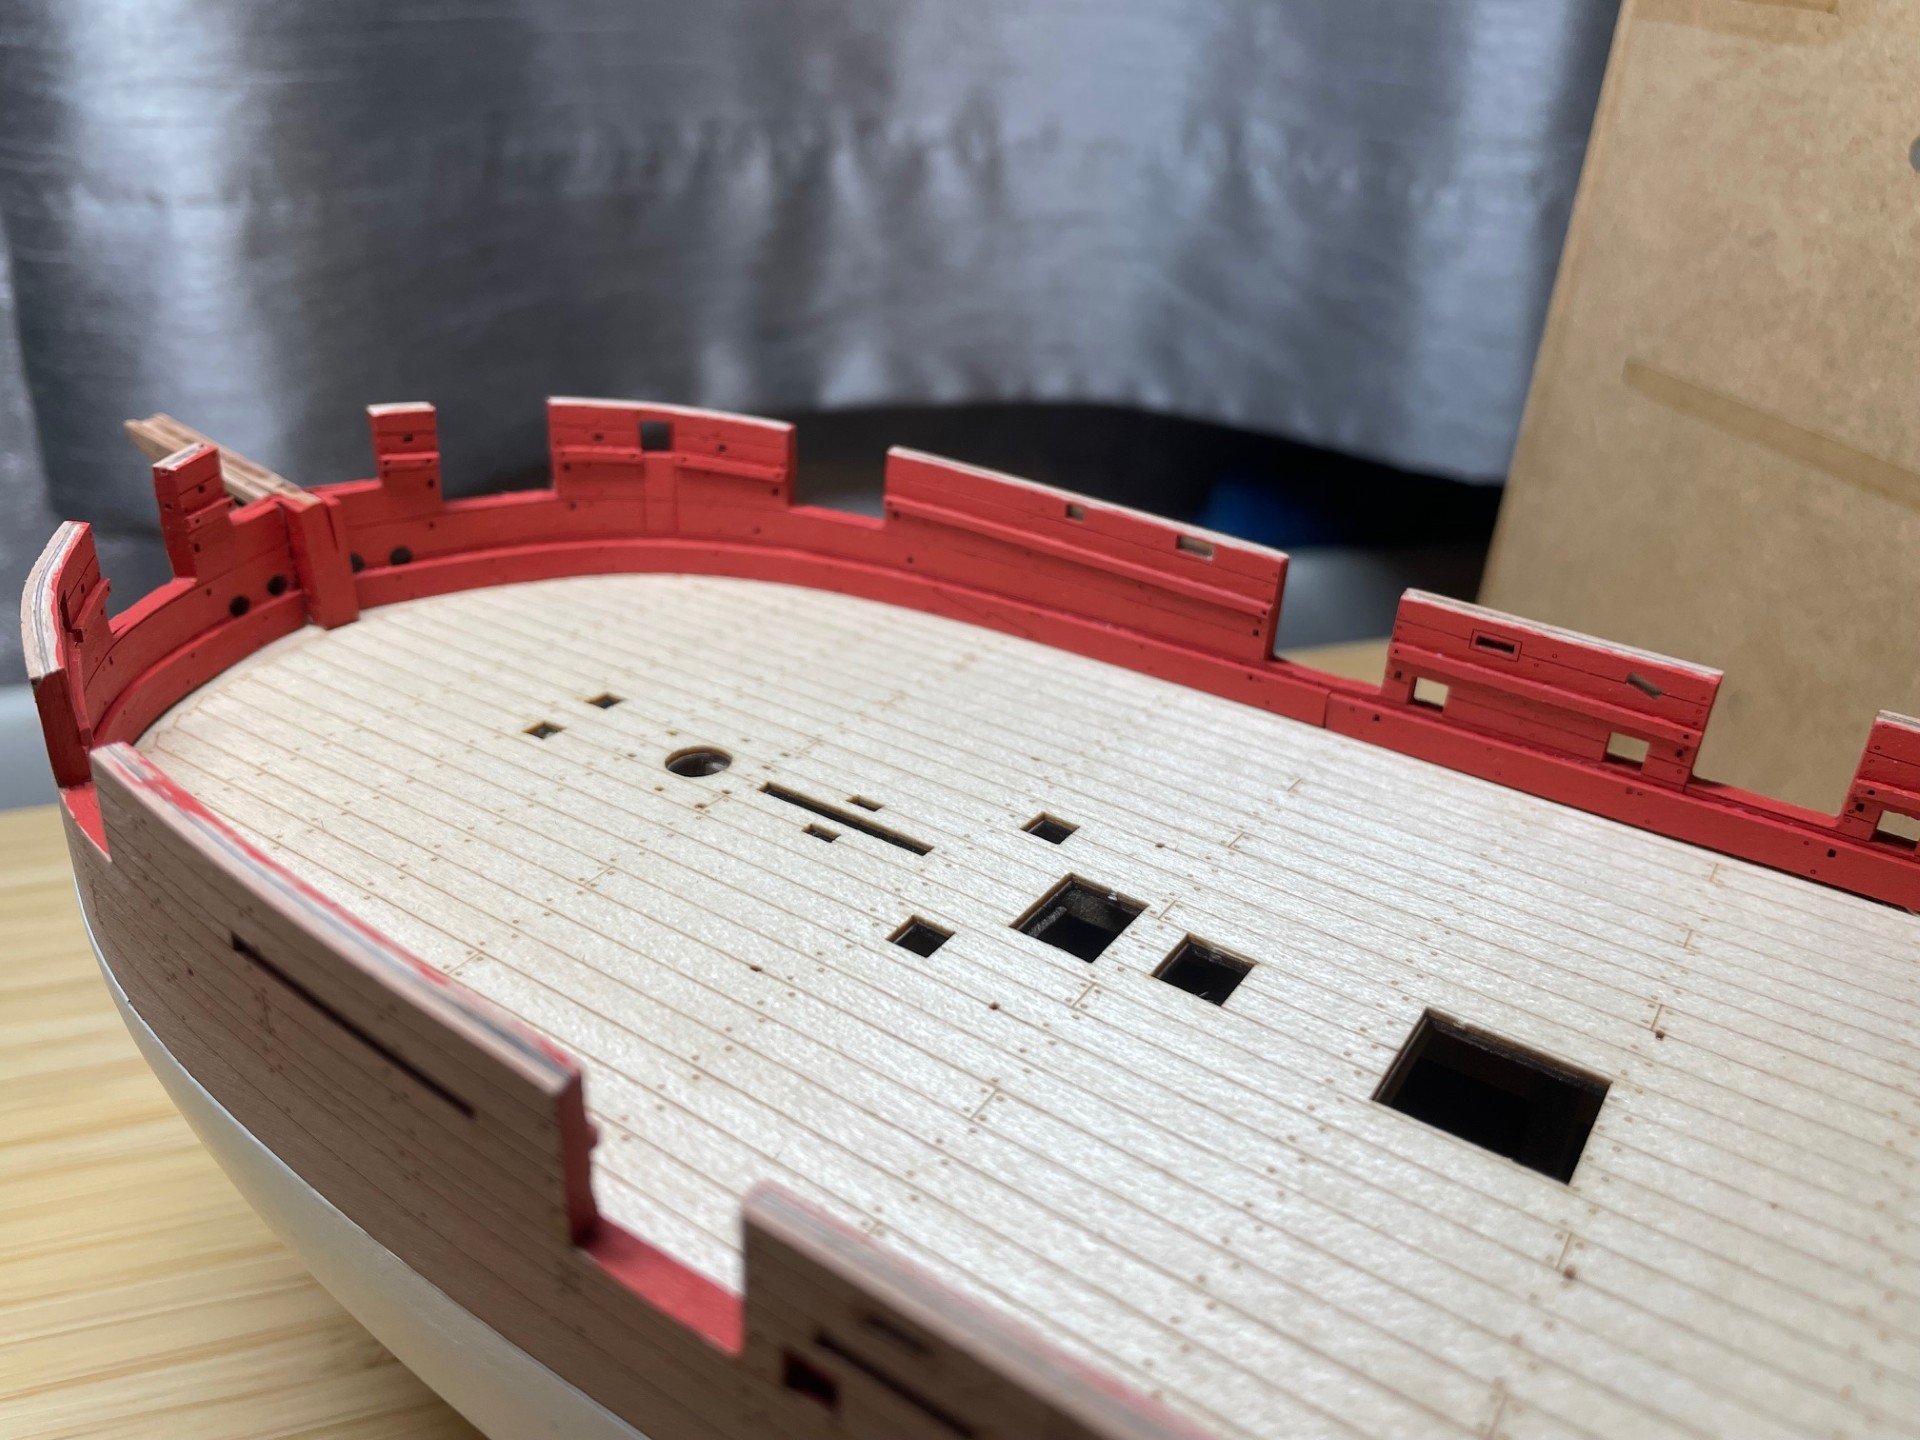
Build log 4 - Upper rails, Bulwark painting and Deck fittings. Various deck fittings had their char removed and then assembled with PVA. All parts were then treated with AK Interactive Matt Varnish. The tops of the standards were painted with AK Interactive Black. The wales had their char removed and were coated with AK Interactive Matt Varnish. The wales then had two coats of AK Interactive Black paint applied. Wales applied using PVA glue and pinned in place. Once the wales had dried, I snipped the ends of the pins and applied a coat of AK Interactive Black paint to the pin area. The upper rails were glued on (PVA) and clamped in place over night. The upper bulwarks were painted black using the method described previously. This is how Adder looks so far. I am currently researching how to rig the 24 pounder Cannons and the 18 pounder Carronades. I hope to share my progress on this within the next few days, time permitting. Thank you for reading my build log. Regards Geordie


-
Congratulation on the completion of your build. I have enjoyed watching this fantastic model take shape. Regards
- 42 replies
-
- 2
-

-

-
- card
- Speeljacht
- (and 2 more)
-
Billy is looking mighty fine already. Lovely bit of weathering as well. Regards
-
Very smart looking. The toggles look very nice sitting atop the tops. Regards
-
I like the contrast of the black handle and bare wood of the quoin. However you are the captain in charge, so ignore me and go with what you think will suit best. Judging by your previous builds, whatever you choose to do will look great. I am currently trying to figure out the fittings and sizes for my ships guns, so seeing the work you are doing with yours is proving really informative. Regards
-
I am glad the AK Interactive paints have worked out for you. They seem to be a good acrylic paint range so far. I have ended up using the regular black for my wales now. It does look like a nice colour so far. I think for my next ship, I might still have a go at mixing my own though. Regards
-
The Cavalry Brown and Scarlet Red mix has a nice richness to it. Regards
- 30 replies
-
- 1
-
-
- Lady Isabella
- zulu
- (and 1 more)
-
The latest to begin the Model Shipways 3 kit set
Geordie Tyne replied to Taken Aback's topic in New member Introductions
Welcome to the forum, Brian Regards -
Welcome to the forum! Regards
-
You are very welcome, Allen. Regards Geordie
-
Welcome! I look forward to seeing your builds Regards
-
Great save. I don’t think anyone will see the difference. Your hull is looking really good. Regards
-
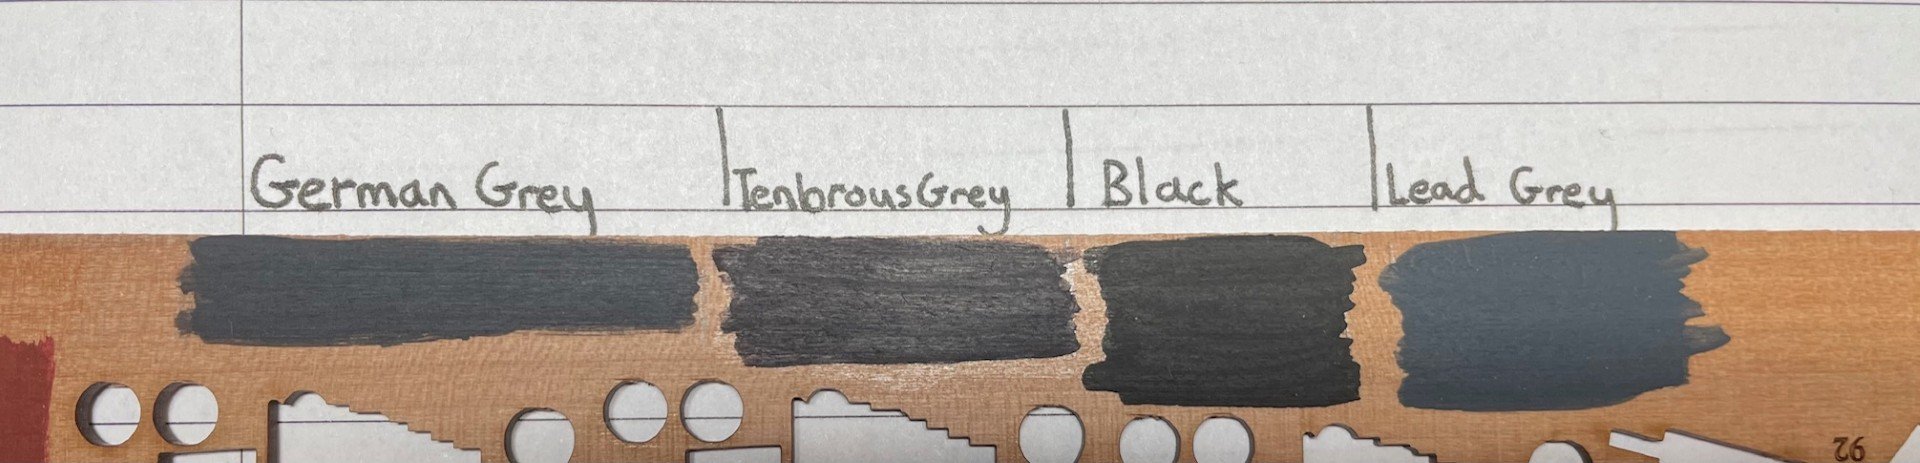
Hi Andrew, I have whittled it down to either Tenebrous or the regular AK black. I did apply German grey as a test to the wales, however this ended up looking to dull for my tastes. It seemed to have too much of a dull blue tint to it. Another idea could be mixing my own black with a blue and burnt umber. Although I think this is delving far to much into the weeds. Regards
-
Thank you for the kind words Nick. With regards to the Matt Red. I did thin the paint with a 50/50 water to paint ratio. The piece to be painted was given 3 coats. Prior to that, I did also Matt Varnish the pieces to be painted. I used AK Interactive Matt Varnish. All painting was done by brush as well. Regards
-
Congratulations on the completion of the deck. Your Albatross is looking very nice, indeed. Regards
-
I have to agree with Coyote_6. The windows are fabulous . I keep double checking the picture with the coin in it. Lovely work and at such a small scale as well. Regards
-
Thanks for the tip ECK. I will use that hair dryer tip next time to remove a piece. Regards
-
HMS Victory by ECK - OcCre - 1/87
Geordie Tyne replied to ECK's topic in - Kit build logs for subjects built from 1751 - 1800
Your Victory is looking really good. I can imagine sewing in the netting will not be a quick job. Regards -
Welcome to MSW Darren. I look forward to seeing your ships. Regards Geordie
-
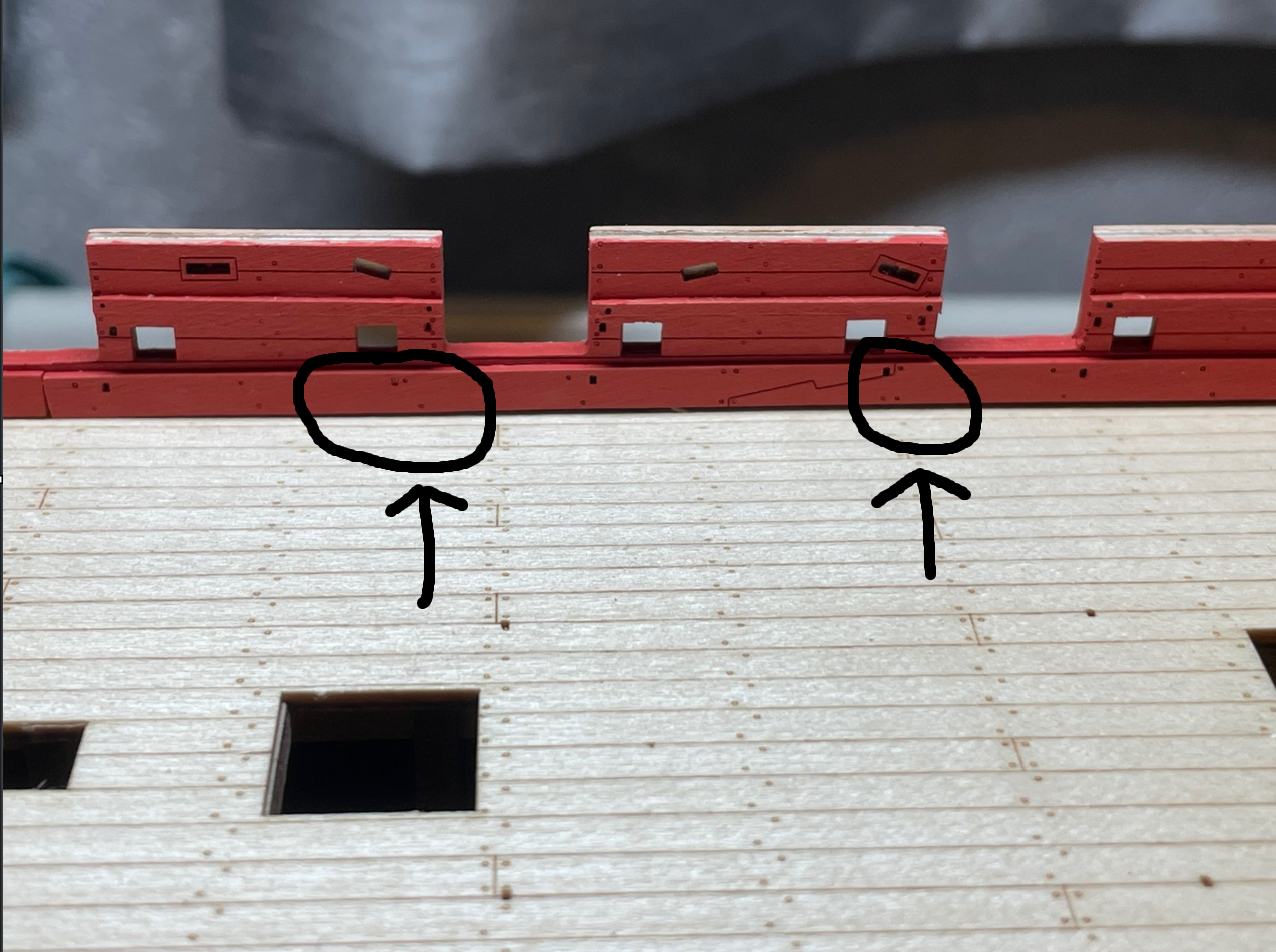
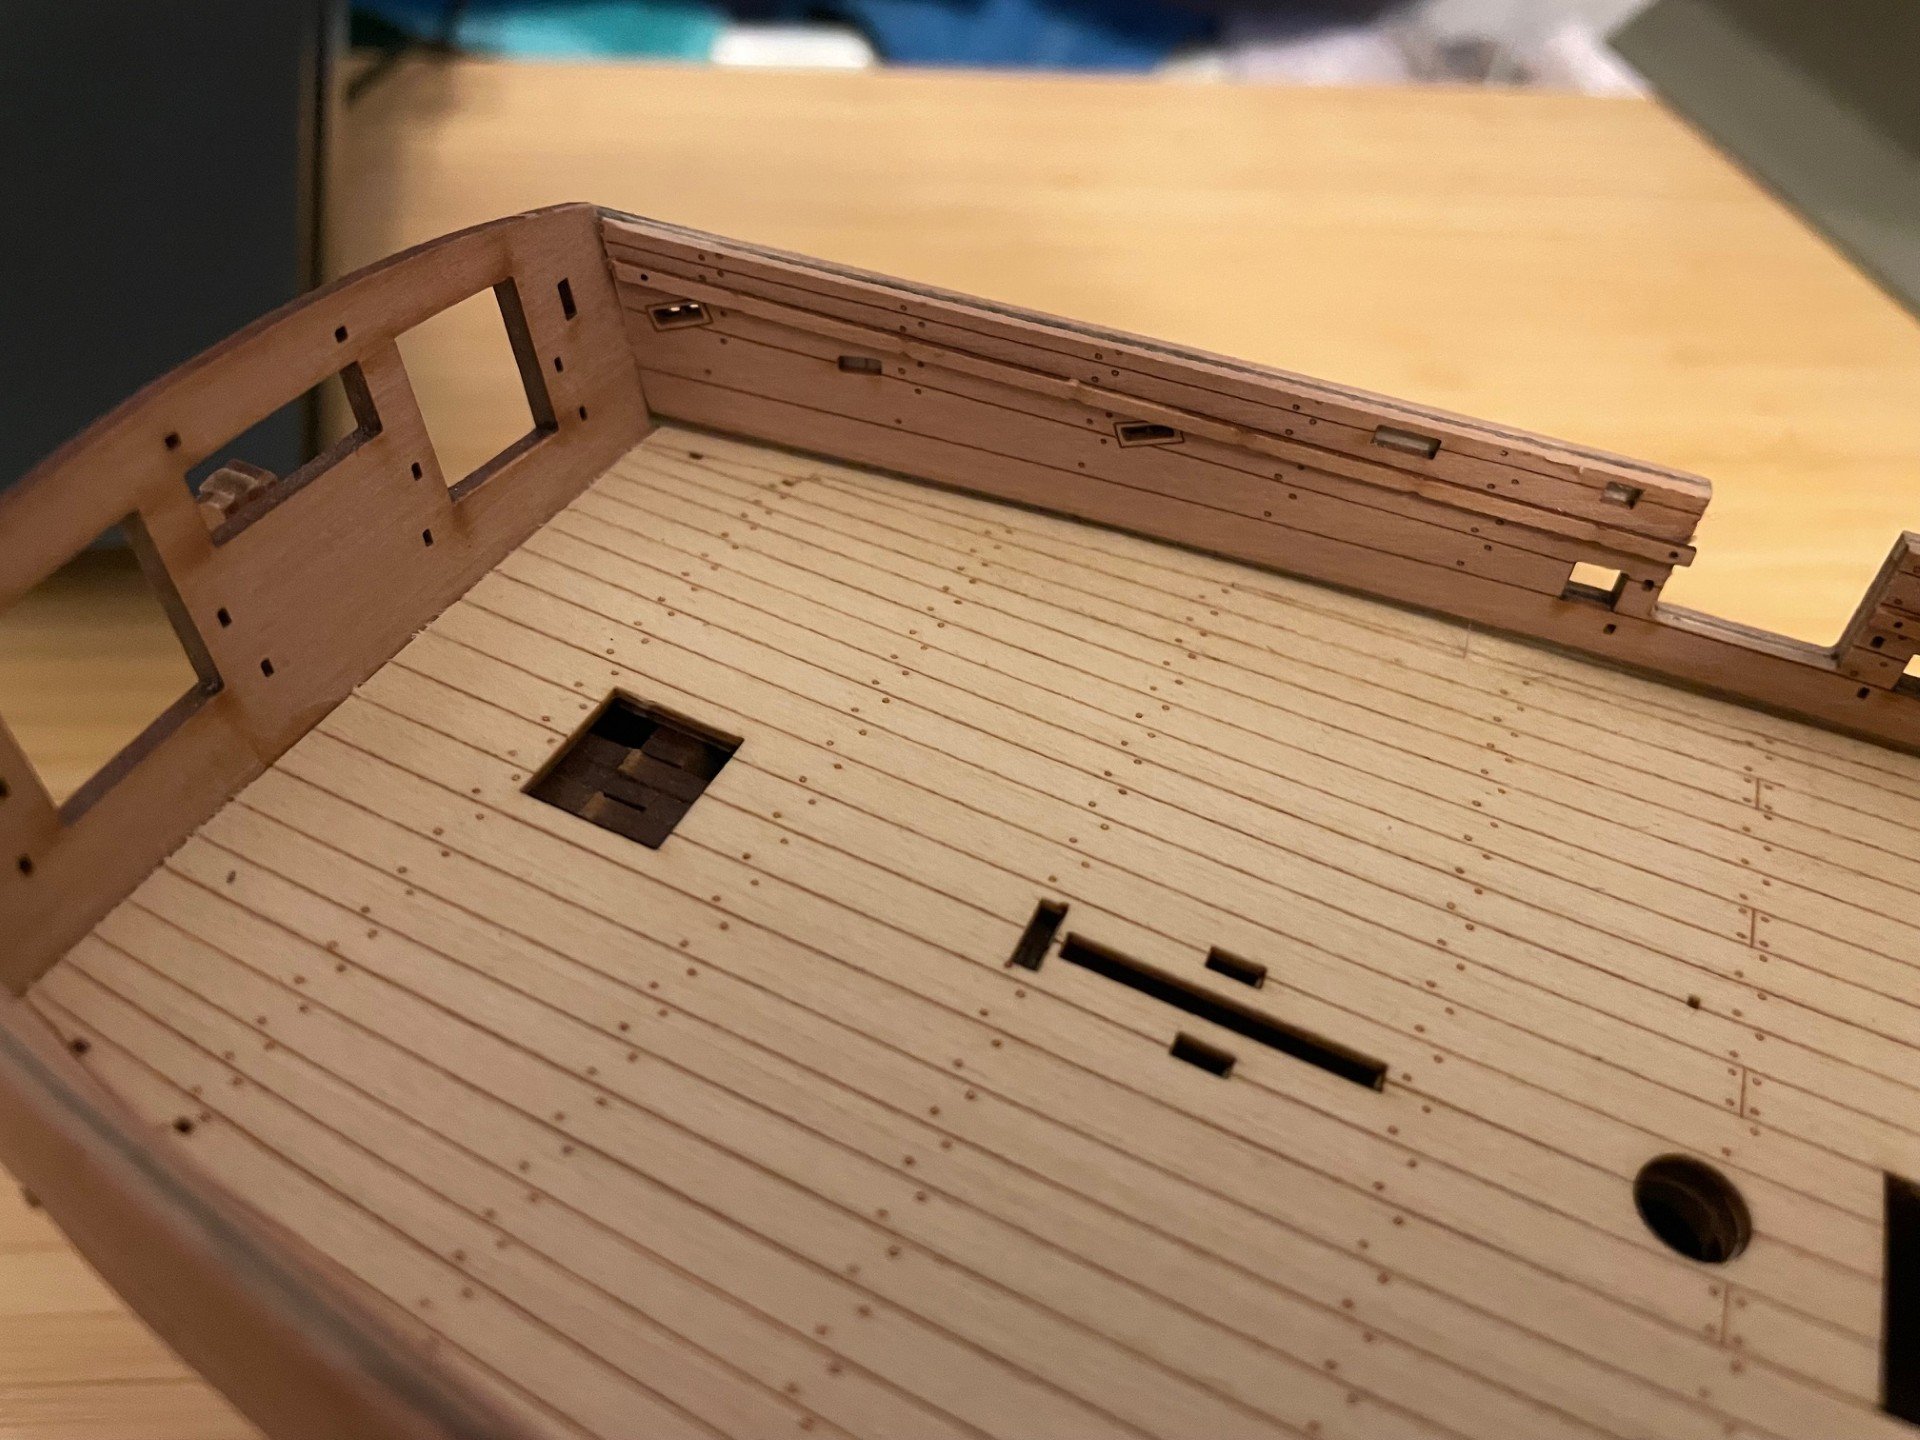
Build Log 3 - Stern board, Inner bulwark rails, Spriketting and painting inner bulwarks. This section of my build has taught me to hold my horses. A few mistakes wholly down to rushing ahead have occurred and which will be shown below. With that being said, the painting of the inner bulwarks has been a part of this build, I have been looking forward to the most. So it was good to get to this point and add some colour to the bulwarks. Inner stern board. This piece was given a coat of AK Interactive Matt Varnish. It was then given 3 thin coats of AK Interactive Matt Red. MISTAKE 1 - I then fitted the inner bulwark rails with PVA glue. This was my first mistake, as I should have fitted the inner stern board first. Luckily, I was able to rectify this with some careful cutting with my knife. I did debate trying to work the inner rail off with warm water but was worried about warping or staining the inner bulwark pattern. The inner spriketting patterns were given a coat of varnish and then given 3 thin coats of Matt Red. They were then glued to the bulwarks and clamped in place for 24 hours. Mistake 2 - After removing the clamps, I noticed that the eyebolts on the starboard side spriketting pattern did not match up. This is nothing to do with the kit and everything to do with me sanding down a piece without double checking the alignment. I will rectify this by filling the misaligned eyebolt holes and using my pin vice to make ones in the correct position. This is how adder looks as of now. Next up will be adding the wales after settling on a colour of black that is to my liking. Below is a test strip of the various blacks in contention. Currently I am inching towards German Grey. All the colours shown are from AK Interative. Thank you all for taking the time to read my build log. Regards Geordie