HOLIDAY DONATION DRIVE - SUPPORT MSW - DO YOUR PART TO KEEP THIS GREAT FORUM GOING! (Only 20 donations so far - C'mon guys!)
×


cookster
-
Posts
416 -
Joined
-
Last visited
Content Type
Profiles
Forums
Gallery
Events
Everything posted by cookster
-
To add my 2 cents, I've been using full size woodworking saws most of my life. They are as safe as you make them. My number one safety rule: never, never, NEVER wear any loose clothing around the cutting area. This applies not only to saws, but drills, routers, mills, all of them. Loose clothing can get pulled into a blade faster than you can ever react to and it will be a horrible injury. Table saws are safe as long as you use them safely. It's been a long time since I read any table saw books but I'm sure they all talk about safety. If you follow common sense safety rules, always use pushsticks, and start using the saw slowly to get a feel for it you'll be fine. Don't grab a piece of 8/4 (2") hard maple and run it through using a crappy blade for your first cut. All that will do is scare you and make a bunch of smoke (yes, hardwood will smoke on a saw from to fast a feed rate, excess friction and dull blades). Once you get a few simple cuts under your belt your confidence will increase and you can move on to more involved cuts. Google "table saw kick back" and I'm sure you'll get some eye opening horror stories, and 99.9% of them were probably caused by doing something stupid... NEVER, NEVER crosscut anything using the miter gauge that is riding against the rip fence all the way through the blade. This is kickback no-no #1. You may get away with it once, or a hundred times (if your lucky) but eventually it will happen and it's DANGEROUS! Use the most expensive blades you can afford. For 10" table saws expect to pay 75-100$ for the good ones. Don't expect a 25$ cheapo to cut like a 75$ blade. They won't! Especially when you move to hardwoods. And, dull blades are DANGEROUS! Use them as designed, think safely, and you'll be fine. If anything you're about to do makes your butt pucker up, stop and think of another way - even if it means using a hand tool.
-
Hey, thanks for all the support and info! I was worried I might "offend" some of the "die hard" scratchbuilders with my unconventional build method... Glad to see not the case (yet, anyway... ) Sam, I will look for the material you pointed out. It's been brutally cold here in the southeast the last few days, we had a low of "8" (Fahrenheit) yesterday, which for us is WAY below normal. So, work in the shipyard has been halted temporarily due to "it's too d*** cold"..... For us Southerners anyway.... Thanks for following along!
-
Thanks everyone! I hope I can pull this off and not disappoint! I'm sure I can get the frame built, it's the historical accuracy (or trying to achieve it) that could drag me down, or even sink me... I've had this concept in my mind 6 months and I'm so glad to finally commit to some wood... Robert, my Conny's definitely not being abandoned, I just needed to work on something else for a while. Between deck planking, and cad drawing, I needed to make some saw dust again!!
-
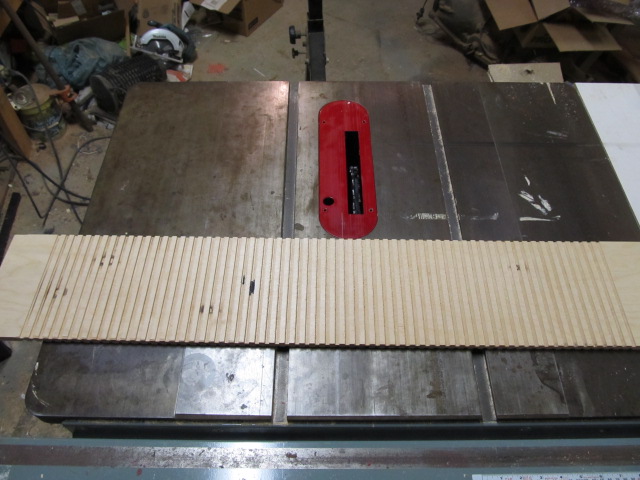
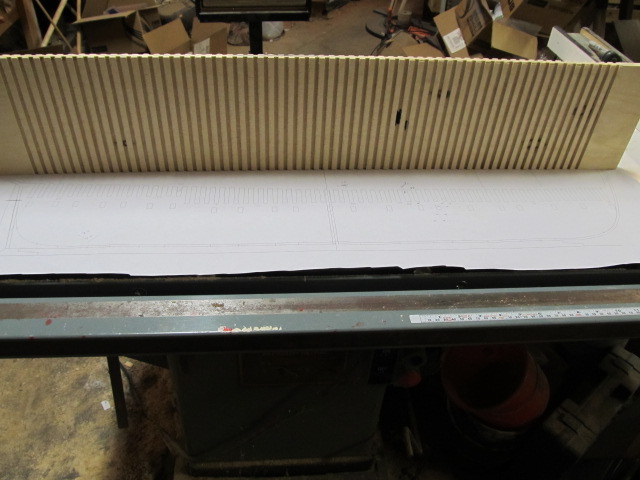
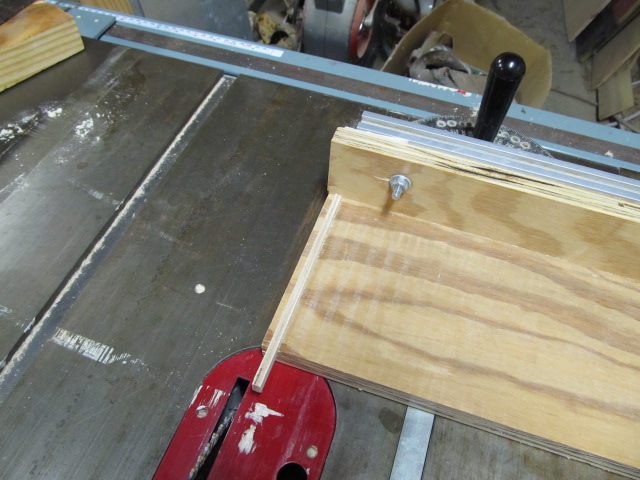
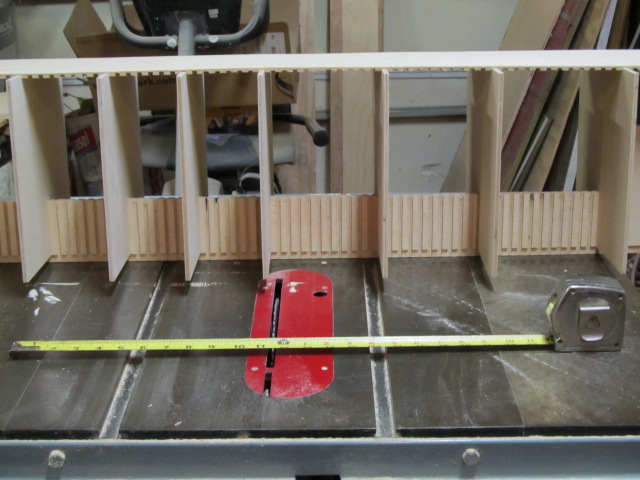
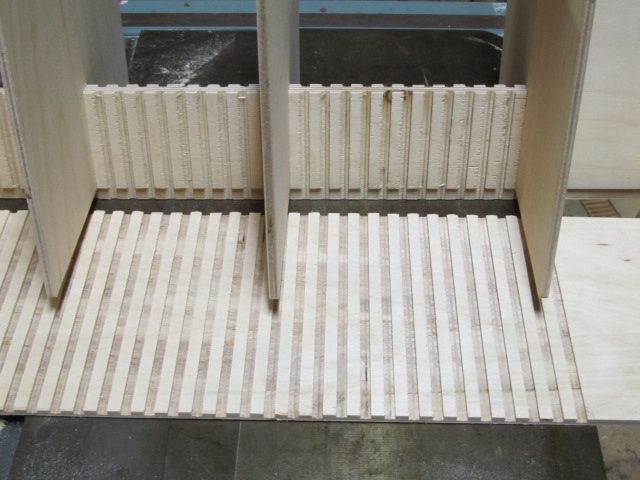
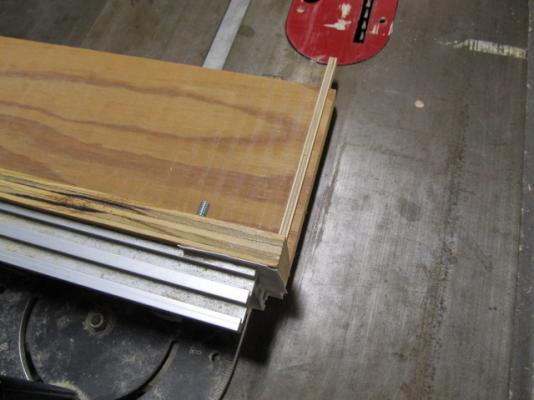
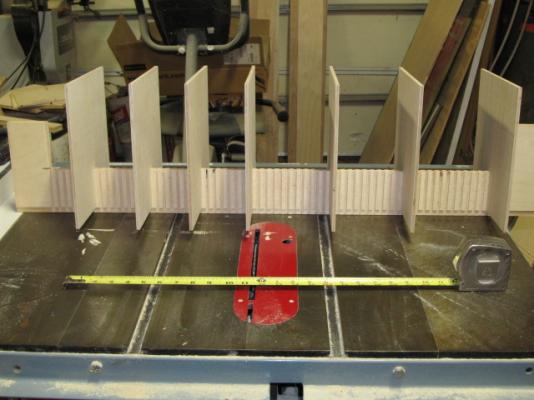
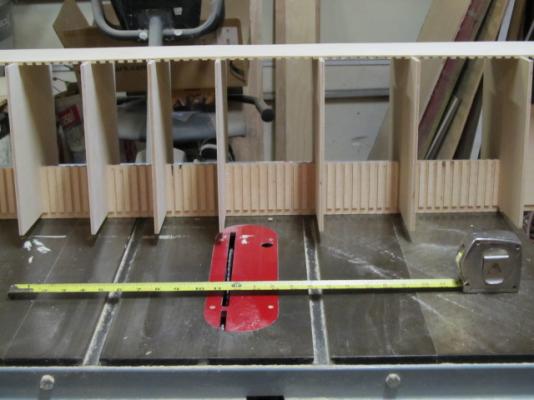
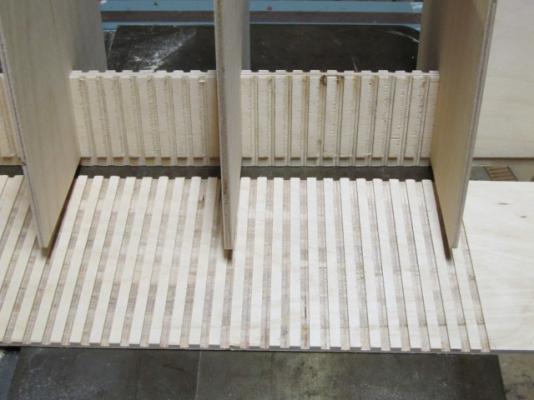
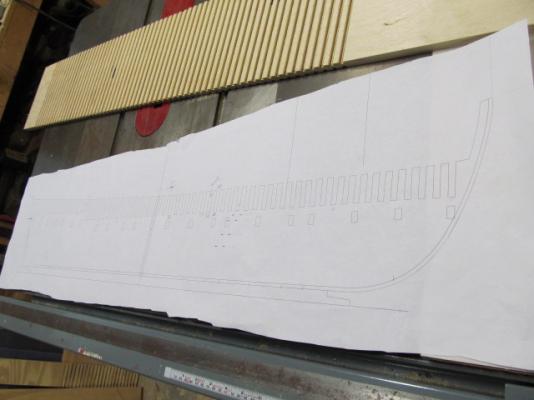
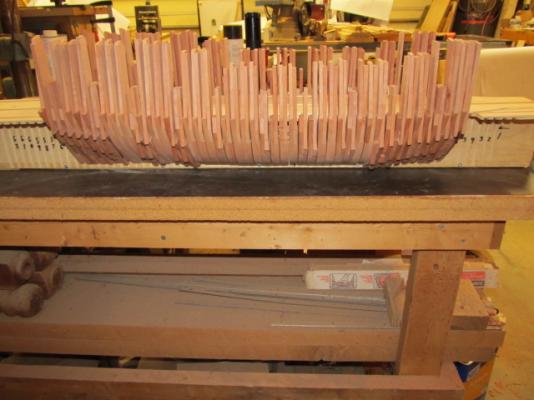
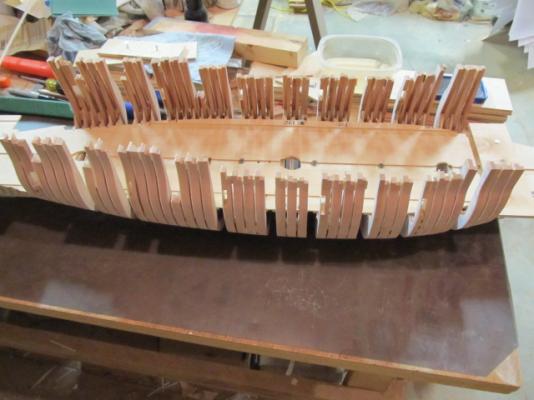
Here is the center bulkhead. It's made from 1/2" Baltic Birch. I've cut dadoes at each frame location for the ply bulkheads to slip into. I took a pic showing the bulkhead drawing but it's pretty hard to see.... Here's another (the little rectangles are just reference marks for me, not used for the build) I built a jig to cut the dadoes at exact spacing. The ply alignment strip in set in a dado, then the jig is adjusted to give the needed spacing from the blade. I used a dado blade to cut the slots. Using this method is an easy way to cut exactly spaced slots (dadoes), once you get the spacing set of course... If you're still a little confused on how this jig works, just google "box joint jig" for lots of explanations.... (I just noticed the dado blade wasn't in the saw when I took the pic, woops!) Here is the ctr bulkhead after I've cut down the center section to a point below the where the gun deck will be. I've also slid in a few of the bulkhead blanks. The bulkheads are 1/4" Baltic Birch. They are very over sized, so don't try to get a sense of final size from this pic... (The tape measure is set at 2 feet for size reference) Here is the false deck, which is nothing more than a stiffener for the bulkheads. It's dadoed just as the ctr bulkhead for alignment. (each bulkhead slips into it's dado to give positive alignment). The bulkheads will be cut down of course, this is just to show the concept. I will cut more dados on top of the false deck to accept rails which will provide the actual curve and crown for the gundeck. Hard to explain, when you see it, it should make sense. The rabbet at the bottom of the ctr bulkhead is for the keel. Instead of making and attaching a separate keel, I'm going to glue thin pieces of pear into the rabbet on each side of the bulkhead which will serve as the finished keel. The false keel will attach to the bottom of the bulkhead. The ctr bulkhead is not cut to shape, as I'm keeping everything square (right angles, no curves) until as many framing pieces as possible are cut. This makes accurate cuts SO much easier... More to come!


-
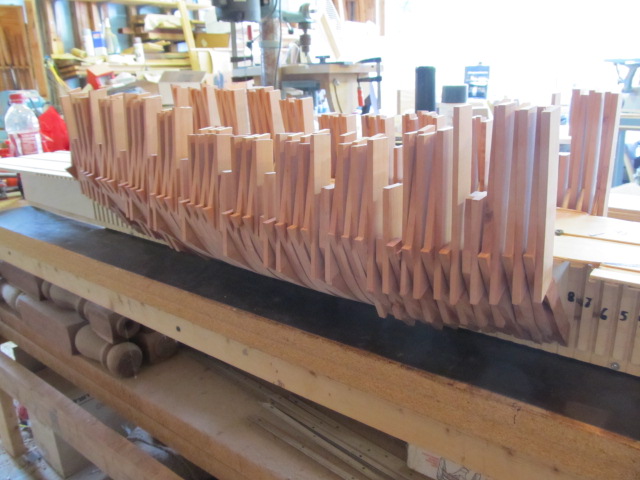
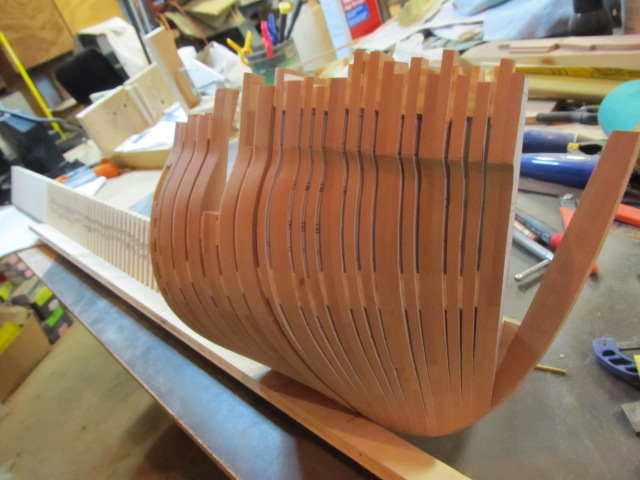
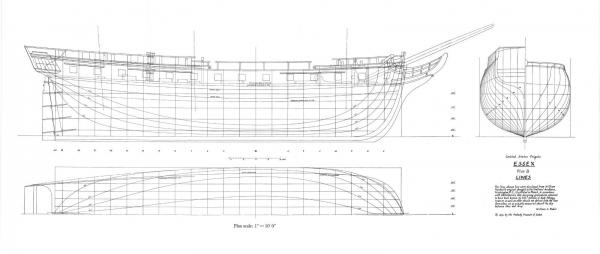
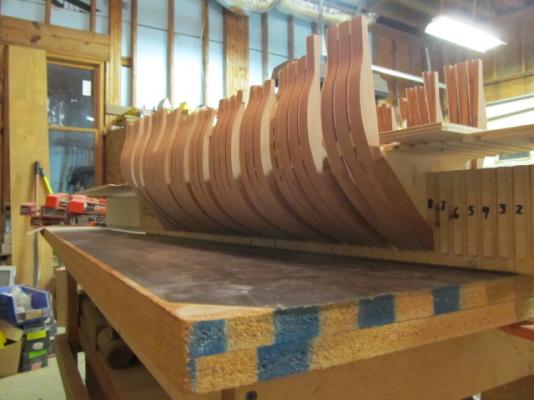
Well, little did I think a year ago when I started my first wooden ship build that I'd ever be posting in the scratchbuild forum, but here I am. I've been contemplating a scratch build since mid-summer 2013, from looking at all the wonderful scratch builds on MSW and from the amount of scratching I've been doing on my Conny build. I wanted to try a scratch build. I think I have the woodworking skill as I've been building in wood my entire life. The thing I still lack is detailed shipwright knowledge, but I'm learning... The one thing I know for a fact though is a fully detailed POF build is not for me, I don't have the knowledge or time to do so. I bought several books that everyone seems to quote as bibles for wooden shipbuilding, including Goodwin’s "Constructing an English Man of War". Next was selecting a subject to model. I first thought of the HMS Surprise, and bought “The Frigate Surprise” book to do some research. I also thought of buying the Latina 1/48 Surprise kit and scratch-bashing that. I then thought about the Essex. I had been in contact with Sam Cassano about his MSW kit earlier and decided to ask his advice. Not only did he offer any help he could, but also sent me a set of his drawings which I could use as a basis for my build drawings. Sam’s kit is of Essex in her 1799 launch configuration, my attempt at Essex will be as close as I can come to her 1814 configuration at Valparaiso. I bought Portia's AOTS Essex book and "The Frigate Essex Papers" which contain William Baker's wonderful drawings and Josiah Fox's detailed measurements of her from her 1807-09 rebuild. I'd like to thank Sam Cassano and Steve, (Frolick on MSW) for giving me invaluable help on acquiring info and dwgs. My build will be a POB, but with a different twist. One side will be fully planked, but the other side will show her frames from somewhere near the bow to near the stern, and from a point several strakes above the garboard (I haven't determined where yet). The reason I chose this method was to show her frames, but to not have to build all the intricate framing of the keel, floor timbers, deadwood, all cant frames (both bow and stern) etc. There also won’t be any internal details below the gundeck. This may seem to be cheating, or an "easy way out" solution, and I guess it is but for me it's the way to go. I'm achieving this by placing plywood bulkheads at each frame location, but on the frame side I will cut off the ply and glue on hardwood frames, probably Pear. This should give the look of individual frames and their futtocks from the outside, which is what I'm going for. I chose 1/48 as the scale as I wanted to build in a larger scale. It will be a big one, maybe bigger than I want, but 1/48 is what I’m going with. I hope to fully mast and rig her, if I have the years and patience to do so…. I'm drawing my own build drawings, still a lot of work to do, and will post some images when they are far enough along. I am cutting the center bulkhead and bulkhead blanks right now and will post pics when they're done. It’s as much a proof of concept as it is a chance to get started! Some may wonder how I can start building without completed drawings, but I pretty much have the design finished in my mind, I just have to create the dwgs so I can build her. This may be a bumpy ride but we'll see where this goes! Here is William Baker's dwg from 1808 or 9. This is the overall configuration I'm going for. Here is Baker's redrawn lines based on William Hackett's original draughts. This is the dwg I used as the basis of my layout, along with Sam Casanno's dwgs. I used Portia's framing dwg as a guide only. (These are a gif and jpg, resized down from original size so I don't think I'm violating any copyrights by posting them) Edit 4/15. I decided to add a pic here at the very beginning of this log so future readers will know what the heck I'm doing. Here are Essex's frames before I cut them down and sanded them. I now call this method either the "alligator skin" or "Godzilla" method. Looking at the frames before they're trimmed will show you why. Reading through the beginning of the log where I'm just making frames and bulkheads I'm sure had a lot of you stumped as the what the heck I was making. Hopefully this :before and after (frames) will give an idea. Here's the hull after initial fairing. Better, huh? Edit 12/31/15 Here's after cant frames have been added and more fairing done.


-
Hi all, sorry I haven't posted in a while, had to get through Christmas and new years... Work on my Conny continues, I'm still deck planking. Will try to post some pics this weekend. I've also started on my new scratchbuild project, will post that in the scratch forum when I have enough content to post. My Christmas present finally arrived today, a Sherline 5400 mill and accessories. I took advantage of their Christmas sale and ordered right before Christmas. Now, I have to put it together, take some pics, then try to make something! I also got their "Tabletop Machining" book, just looking at the first few pages makes my mouth water. This should be an awesome book... I hope everyone had a Merry Christmas and will have a prosperous new year!
-
Nice work on the windows Bob. I know you and Sam both said those windows are a critical fit, glad to see you got through it.
-
Steve, good luck on your Conny. I had not intended to add any "extras" to my build when I started out, but as I got into the build and got comfortable with my skills, and I found so much info on MSW, I decided to "go beyond the kit". Good luck on your Conny! No update for my Conny at the moment, I've added more deck planks but nothing worth showing. I have been spending a lot of time lately at the drafting table (read: computer) working on dwgs for my next build. Not at liberty yet to say what it is, but I hope it will be an interesting subject. I hope to work on a proof of concept during my 2 week Christmas break from work. I'll post more Conny pics this weekend. Again, thanks to everyone for looking in!
-
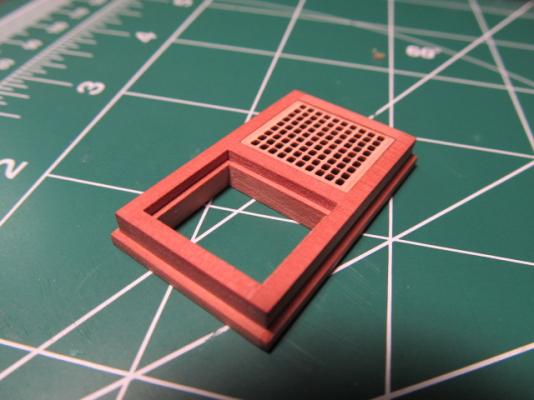
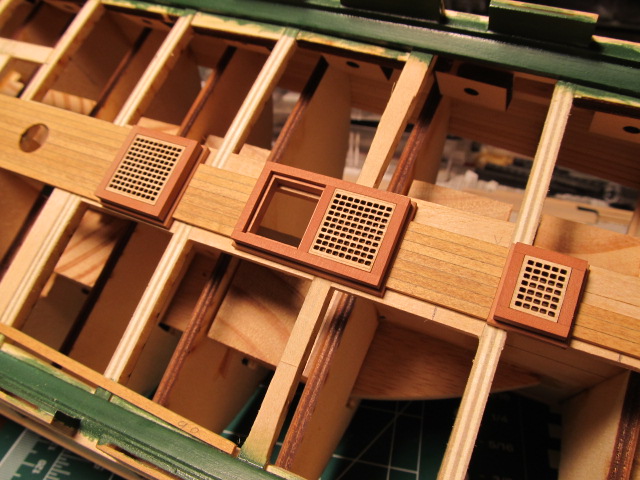
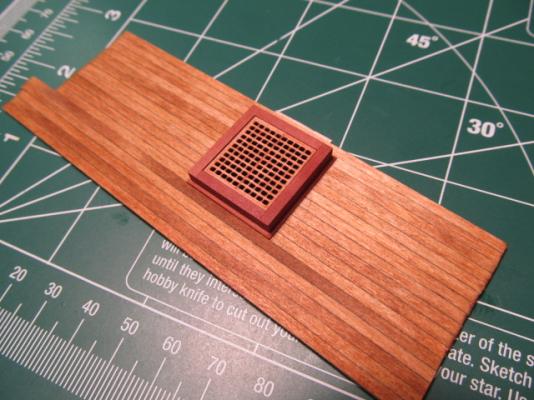
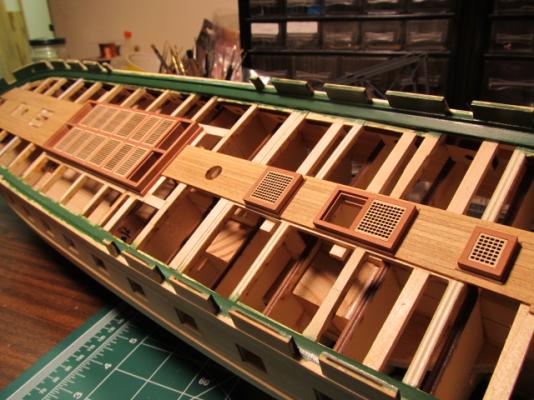
Thanks Mobbsie! OK, still working on the gundeck planking sections (that will be barely visible . Got 2 sections done and stained. I put wipe on poly on the coaming and stained the grate. I thought I would like the stain, I had tried it on a test piece - but after seeing it in the coming I don't think I like it. So, I will probably leave the grates natural on the spar deck. Here's the first section installed....

-
Very nice Rich, looking good! All that time spent soaking and bending planks has paid off! Your ahead of me now... I still gotta finish planking my hull.
-
DC, use the plans to get the gunport locations, that's how I did mine. Bob Hunt gives the dimensions in his practicum, but they are the same as the plans. I checked... I set all my posts vertical. Good luck!
-
Richard, I saw the MicroMark mill on sale yesterday and almost pulled the trigger, but didn't. Let us know how you like it, good luck with it!
-
Hey guys, Sherline has the 5400 on sale for $680 until Christmas. It's reg $800. I had pretty much decided on the MF70 due to cost, but now at this price, I may have changed my mind... Oh decisions...
-
Once again, thanks guys! Popeye2, you're the reason I made that extra hatch, thanks again! (I think ) Rich, been watching your build, just take your time, she's looking good! Thanks Sport! Geoff, I already have some case ideas (Mahogany w/cabriolet (queen Anne) legs and a printed sea or port of Boston backdrop) but I think I'm a couple years away from needing it.... As far as the mini-camera, don't give me any ideas... There's only extra (almost) hidden stuff in 2 places really anyway. But my next build, well, you never know.... And as far as this mini-woodworking, there's still several pieces I'm VERY worried about, namely the bitts and fife rails. I know how I want to build them, but it's gonna be tough. Simple butt joints aren't going to do. Accurate half-laps and mortises at that small size are gonna be a pain. Then there's the sheaves... and cleats... Then I gotta pin them to the deck. I wanted to cut notches in the deck for them very badly but that would've required MUCH planning, and I finally decided against it. Pinning them will work, but drilling a few holes in hopefully the right spot, and *hoping* they fit just won't cut it. I've thought of numerous jigs for this and I probably won't settle on one until I actually start making them. But alas, that's for later... Now back to planking
-
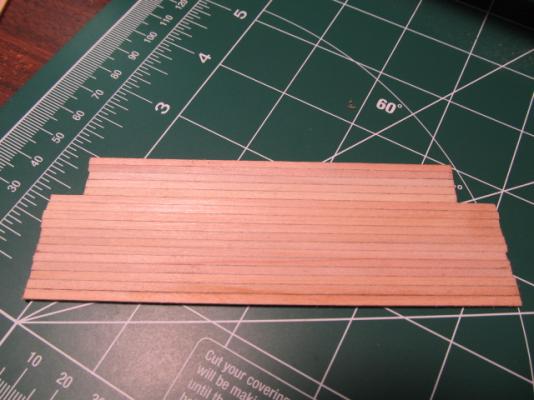
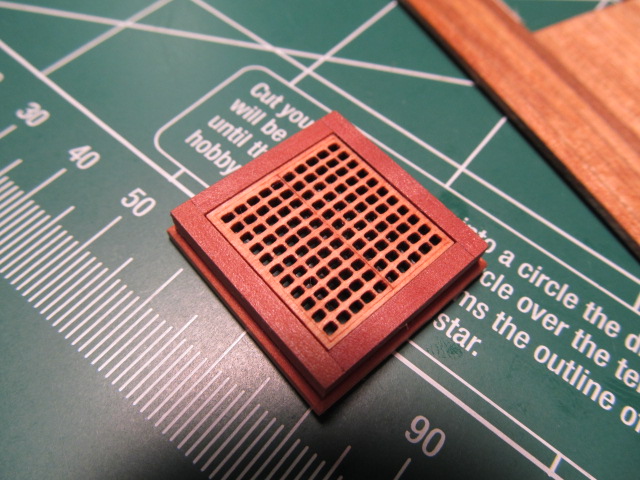
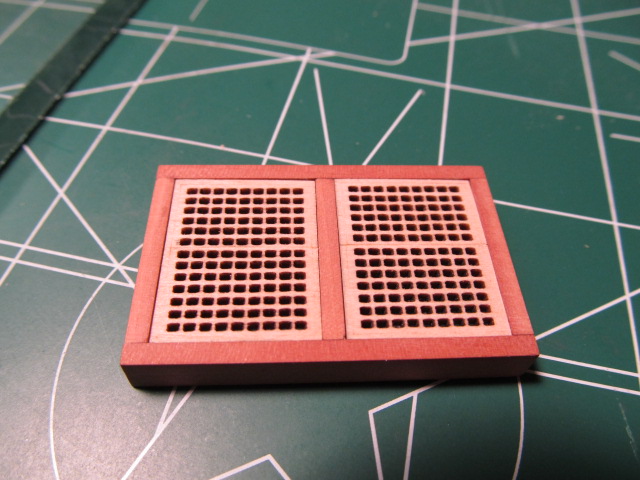
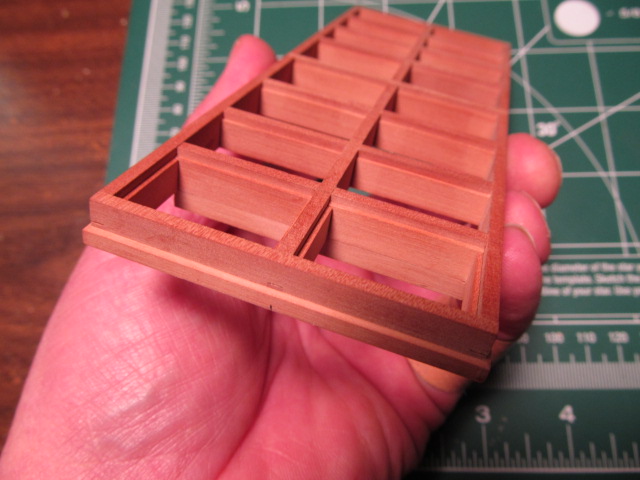
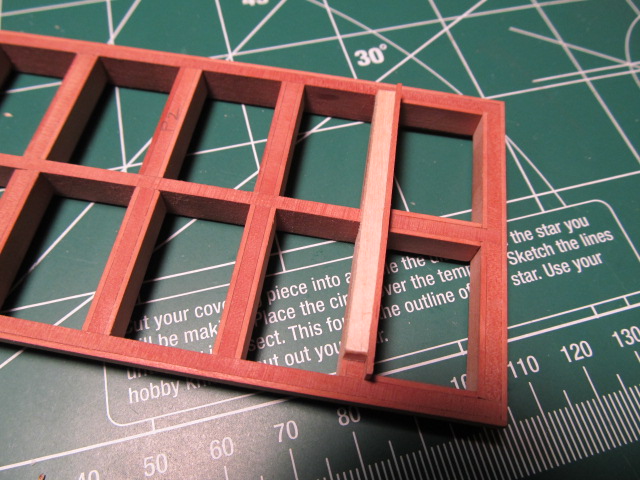
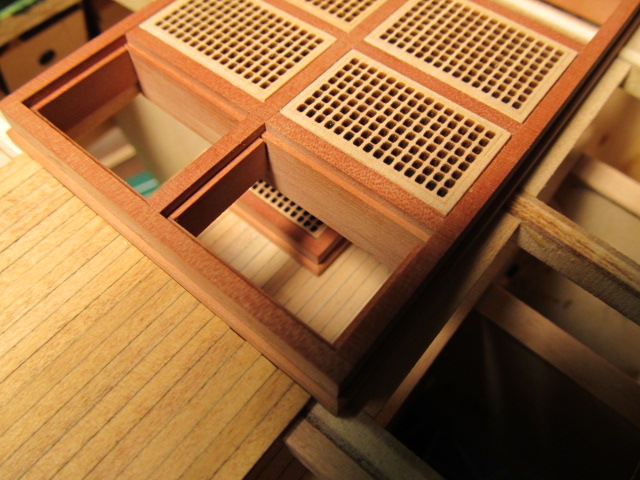
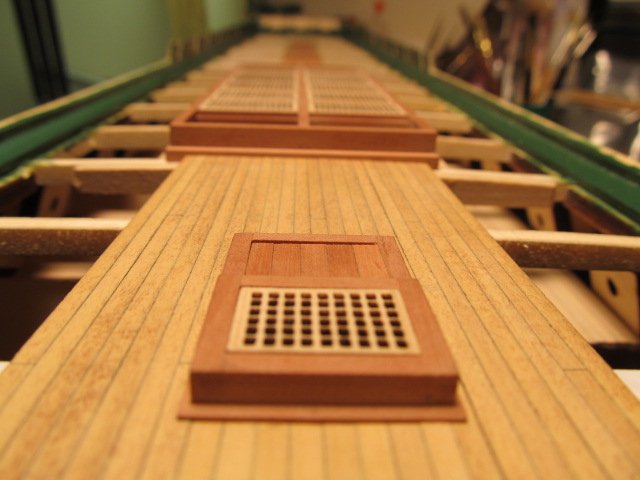
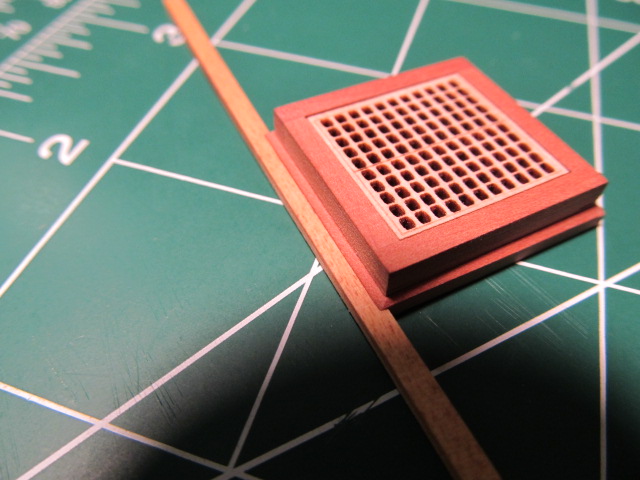
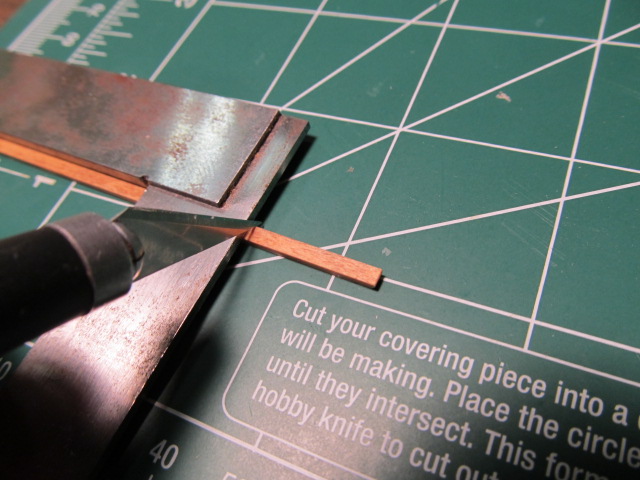
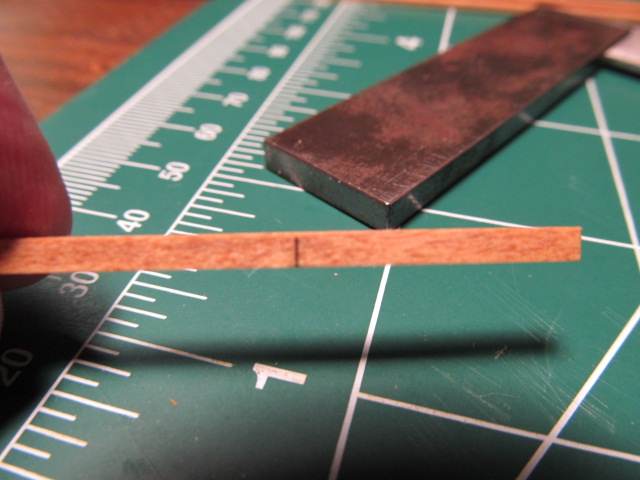
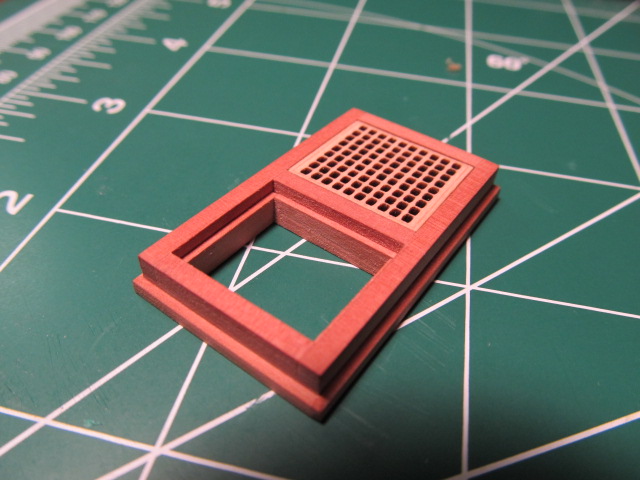
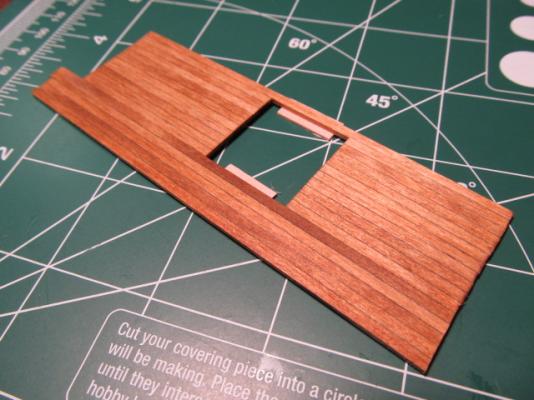
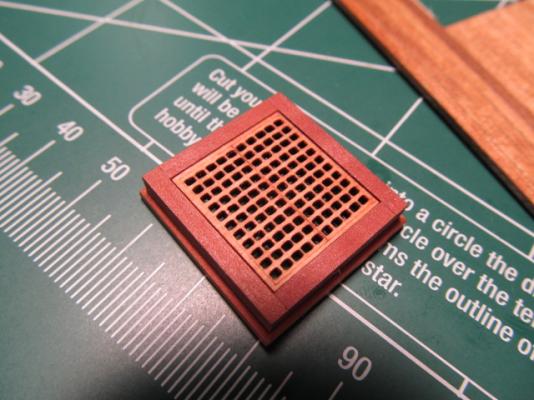
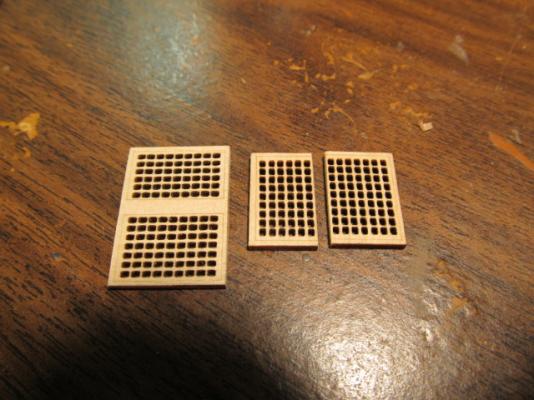
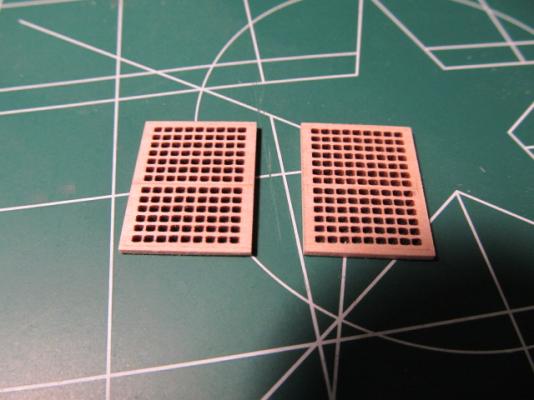
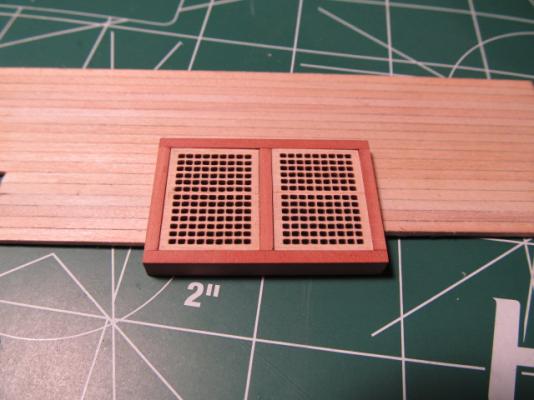
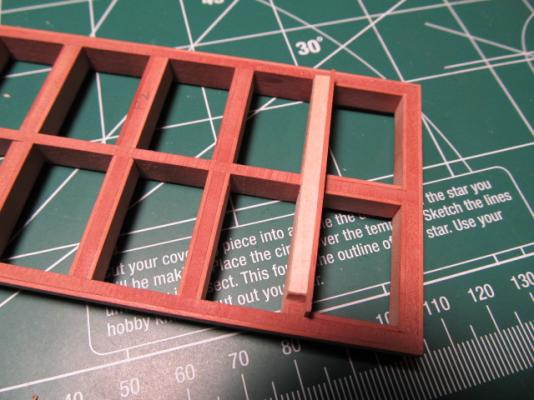
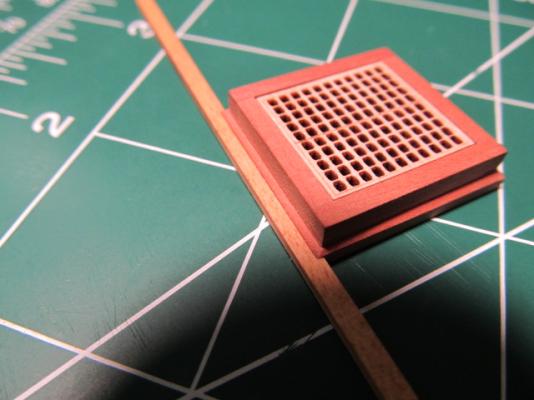
Well, I thought I was done making hatch coamings, but I wasn't..... Since I needed one more hatch under the main hatch I had to make it. I did not have the size grates I needed, but I did have some extras I could cut down. So I cut them down, then glued back together. Not perfect, but they will do. I made the hatch coaming with simple butt joints, (I know, I can hear the moans from here!) but it was easier and faster. All done - not perfect but for the hard to see gundeck I'll take it. Started cutting out the gundeck section for the hatch to fit. I'm also still adding deck planking...


-
Looks really good Augie, the closeup of the sheave shows how nice it looks. Planks look good and straight and smOOth!! Congrats!!
- 2,191 replies
-
- 1
-

-
- confederacy
- Model Shipways
- (and 1 more)
-
Good call Wwolf, I checked the Marquardt dwgs and the front of the gundeck hatch is in line with the front on the main hatch. So, I will do that.
-
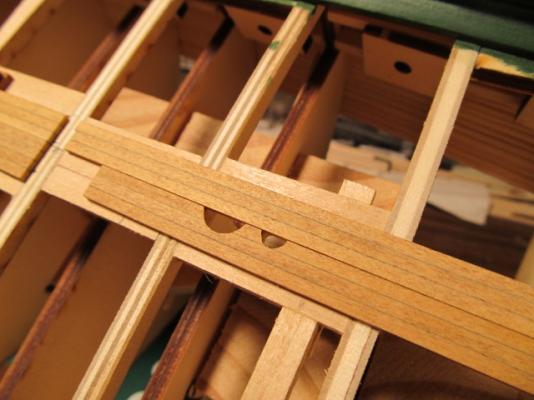
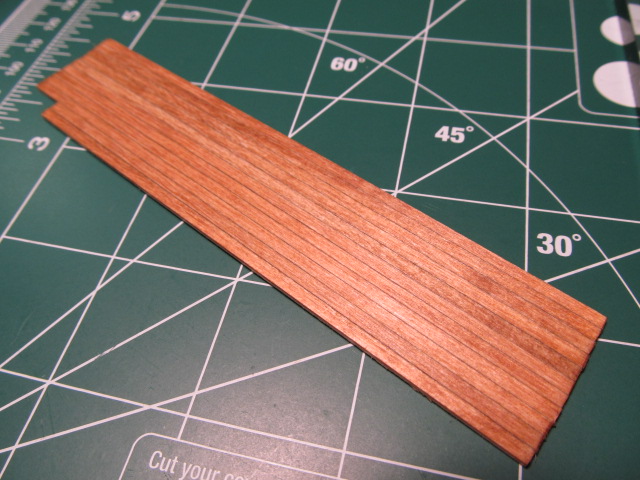
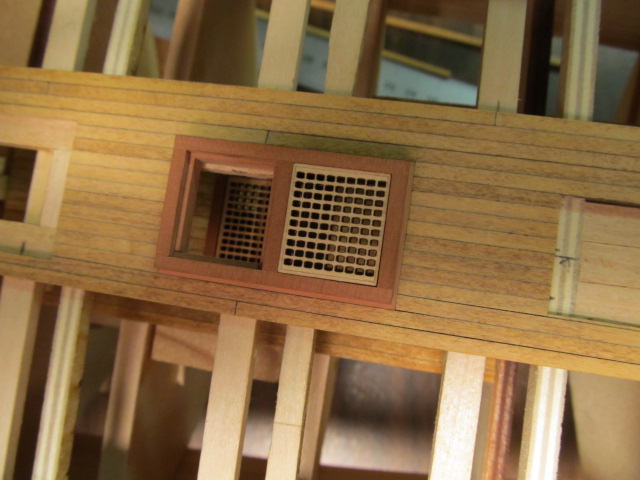
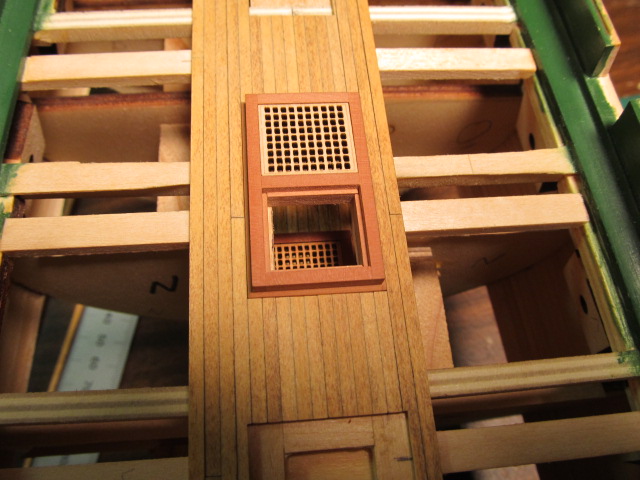
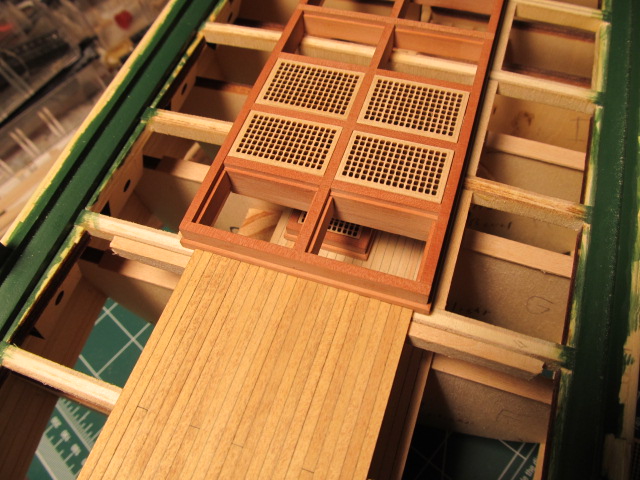
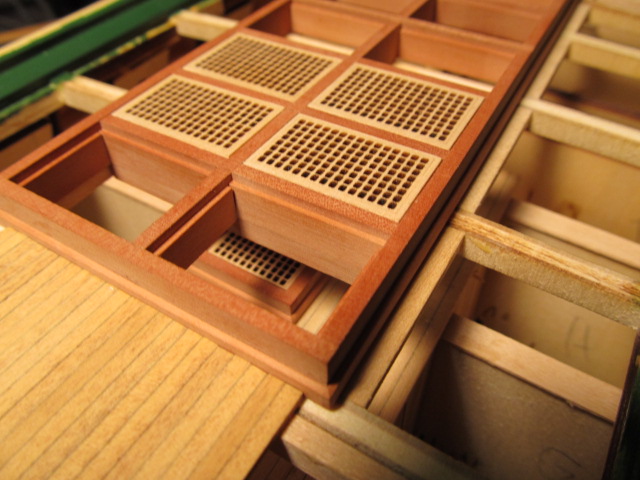
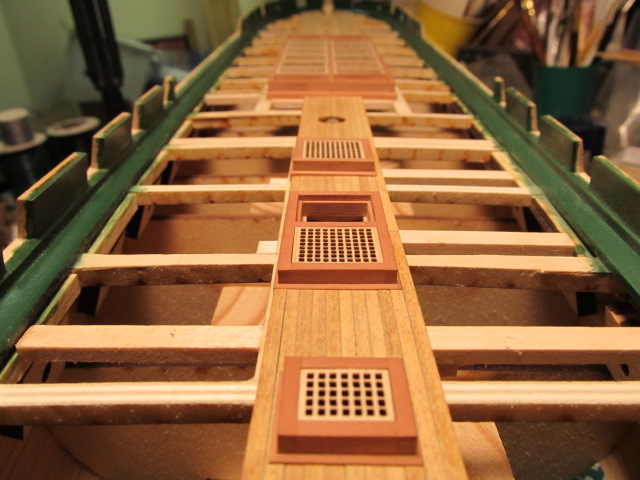
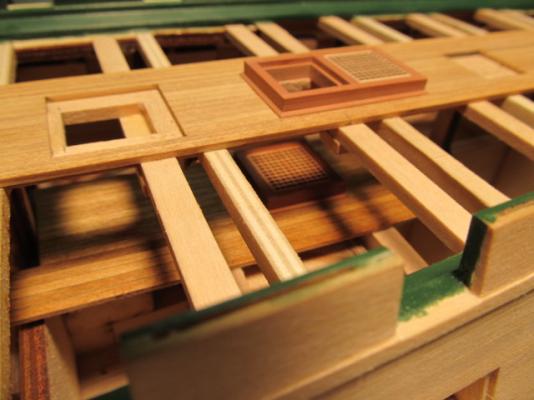
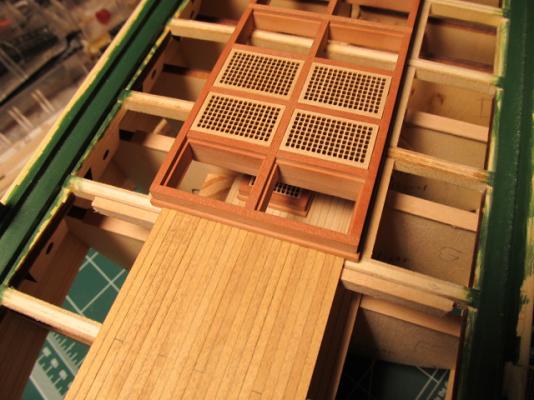
One more quick topic: I added a strip of pear to act as the beam under the main hatch. I did this by gluing on a 1/8" square strip on the coaming, then a 1/32 strip of pear to simulate the beam. I will also do this to the ply bulkhead and basswood strips on the front and sides of the hatch. On the advice of Popeye I decided to try and show the gundeck hatch under the main hatch. I had an extra coaming so I thought I'd try and use it. Here it's temporarily placed it on the gundeck. I think this should be a dual hatch, but by only leaving out the front 2 gratings you won't be able to see if it's a single or dual. I may have it too far forward here though. I just put it where it shows a little. There will also be ladders here as well. Thoughts?


-
Thanks everyone! I really appreciate all the kind words... Robert, since you've been to the real Conny (I haven't) you saying it matches the real thing makes my "modeling" day!
-
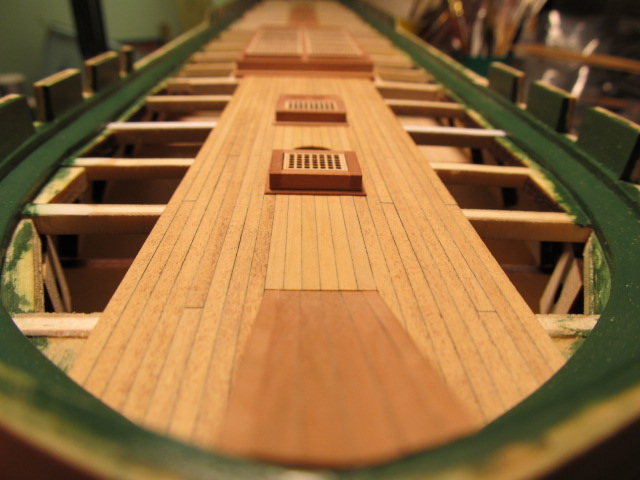
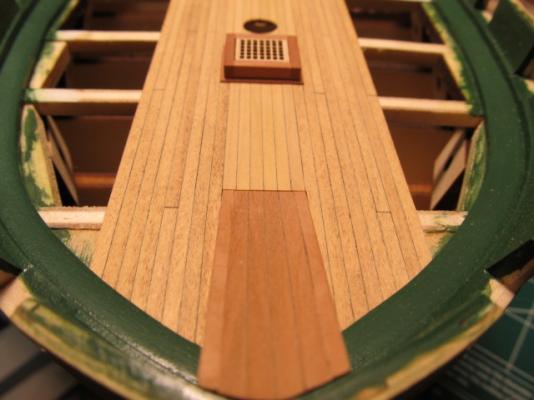
Thought I'd try a few close up shots... And overall.... You can also see in this pic I added support "beams" for the deck planking made from basswood because the ply bulkheads were too far apart. If I had used full length planks and scribed joints as Bob Hunt did this wouldn't have been necessary, but I didn't want to use full length planks. Also, I might as well admit my plank lengths aren't scale length, but without rebuilding the entire deck structure this really wasn't possible (without scribed joints) So I will live with it. On my next build I will do better!


-
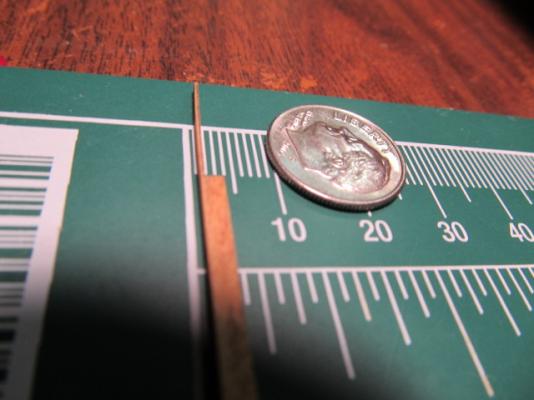
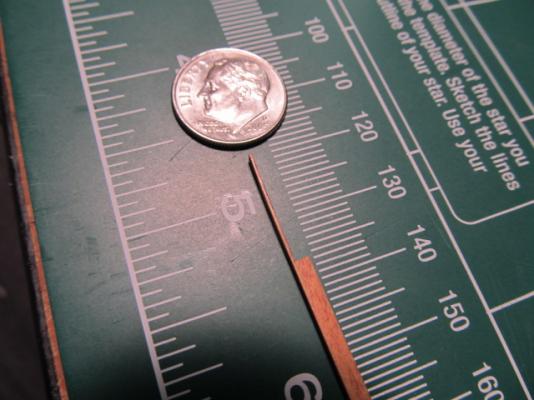
I've planked around all the hatch coamings except for one last notched plank, and the main hatch. Whew!! I had to notch one plank very deeply, to the point I thought it wouldn't work. But with boxwood it came out fine. That sliver is at or a little less that 1 mm wide - yea I couldn't believe it either at first.... Also attempted my first plank notched on both ends of a hatch. This is the second attempt, first one not good... I used a #11 blade and a straight edge. I also tried scribing plank gaps. Bob Hunt planked his entire deck this way, but I didn't want to go that route. Here's a spot where it would've been very short to cut a plank. I scribed the joint with the back of a #11 blade against a straight edge. I got this technique from another builder, but I can't remember who... (sorry) Rubbed pencil lead in the cut Then used a damp q-tip to rub the excess lead off. And in place. BTW, 2 of the three joints in this pic are scribed in.


-
As far as drill bits, there are plenty of on-line tool places but I use McMaster Carr. They have EVERYThing! Not kidding, it's a hardware store on steroids... They have several warehouses around the US and ship same day. Not sure if I can post the web address, just google McMaster Carr and it will come right up. You can order i drill bit or 50....
- 1,477 replies
-
- 2
-
-
- essex
- model shipways
- (and 1 more)
-
Oh Popeye, thanks for the info. Not sure I want to scratch the gundeck hatch. Oh wait, have a spare coaming I already built, maybe I could use that - although it may be the wrong size. I'll check my AOTS book and see if it's close. Oh, and that gundeck planking section is not yet glued down so I have time to modify it if I wish. I gotta stain it too... Thanks for the info!
-
Very nice Bob, she's coming right along. Can't wait to see what other scratch items you have in mind...
-
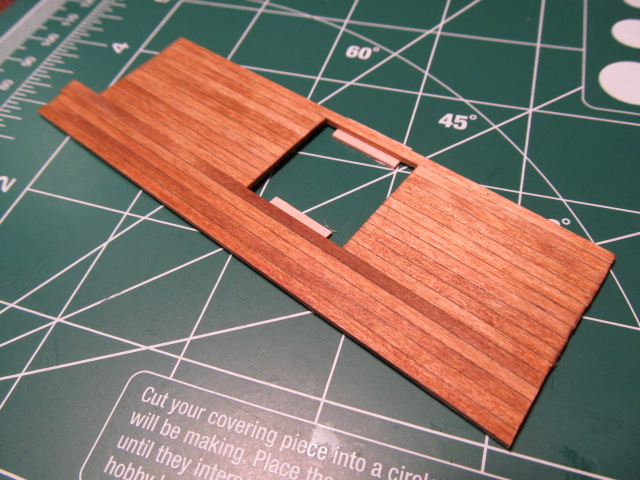
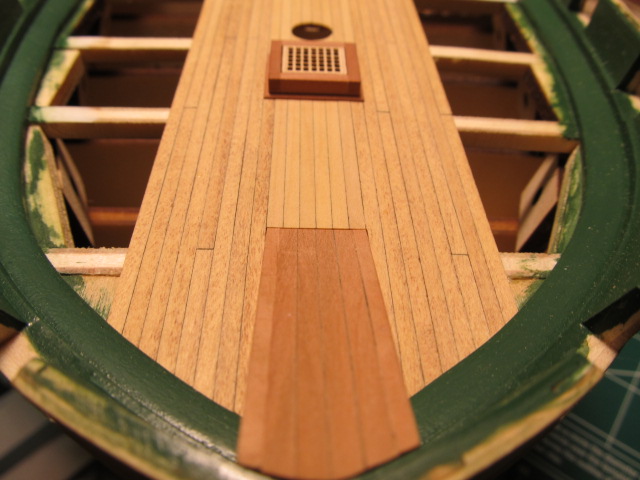
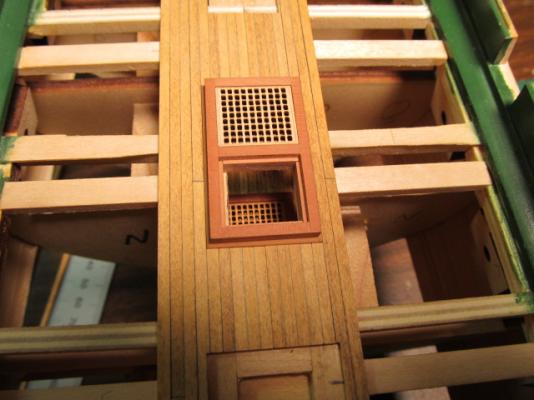
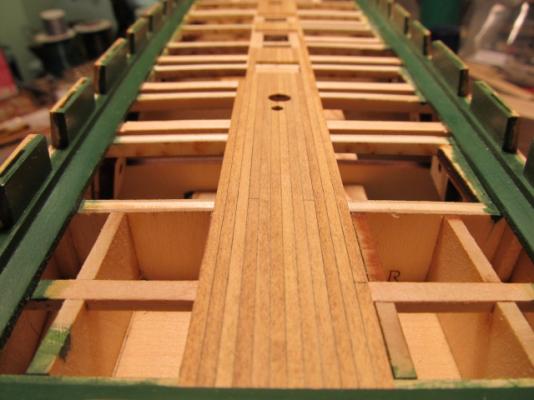
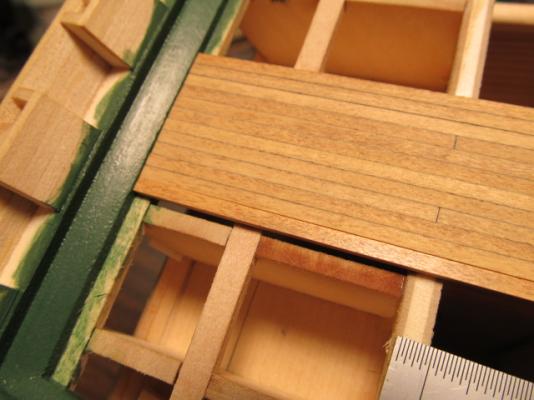
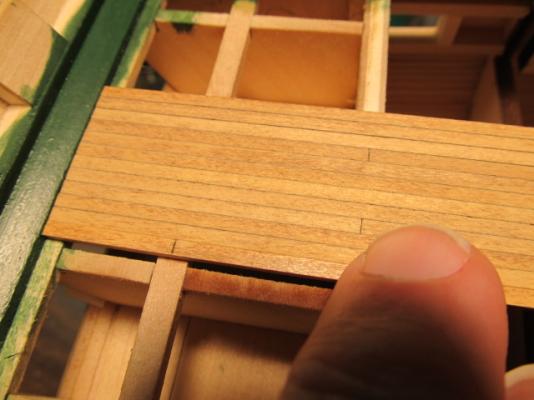
Quick update. Finished the aft dual hatch coaming. The front side will be left open and I'll install a ladder there. Made the other side of the planking for the mizzen mast, still need to cut out the mast holes. Making the deck plank section for the gundeck under the front of the main hatch. It's not finished yet, here's where it will go.