HOLIDAY DONATION DRIVE - SUPPORT MSW - DO YOUR PART TO KEEP THIS GREAT FORUM GOING! (Only 20 donations so far - C'mon guys!)
×


cookster
-
Posts
416 -
Joined
-
Last visited
Content Type
Profiles
Forums
Gallery
Events
Everything posted by cookster
-
Bob I've just gotten caught up on your build. You've come a long way in a year, she's looking wonderful! All your addtions and scratched items look great.
-
HI Mobbsie, just checking back in after my long break. Your Aggy looks great as always! I can only hope to get my rigging looking as good as yours - whenever I get there. Add me to the list that is very interested in the CC Surprise kit, although I certainly don't need it. I almost bought the A.L. Surprise, or the Victory Vanguard, or the Aggy the other day for my birthday. Luckily common sense prevailed and I didn't. Great work mate!
-
Tom, I've now found your build after coming back from my long break. Very nice! You've done things I wish I'd thought of before it was to late. The gundeck is a great addition. Your 1812 modifications are great, you're doing better than me for sure on those mods. Keep up the good work!
- 1,350 replies
-
- 1
-

-
- constitution
- model shipways
- (and 1 more)
-
WOW, Thanks all for the kind words! I was kind'a thinking you folks might have forgot about me and moved on... I got my warm fuzzy for the week for sure! Anyway looks like I lost pics from my log as well due to whatever happened this time, so I will work on re-posting them later, luckily I have them all saved. I've missed you guys (and gals) and am glad to be back!! CARRY ON MISTER...
-
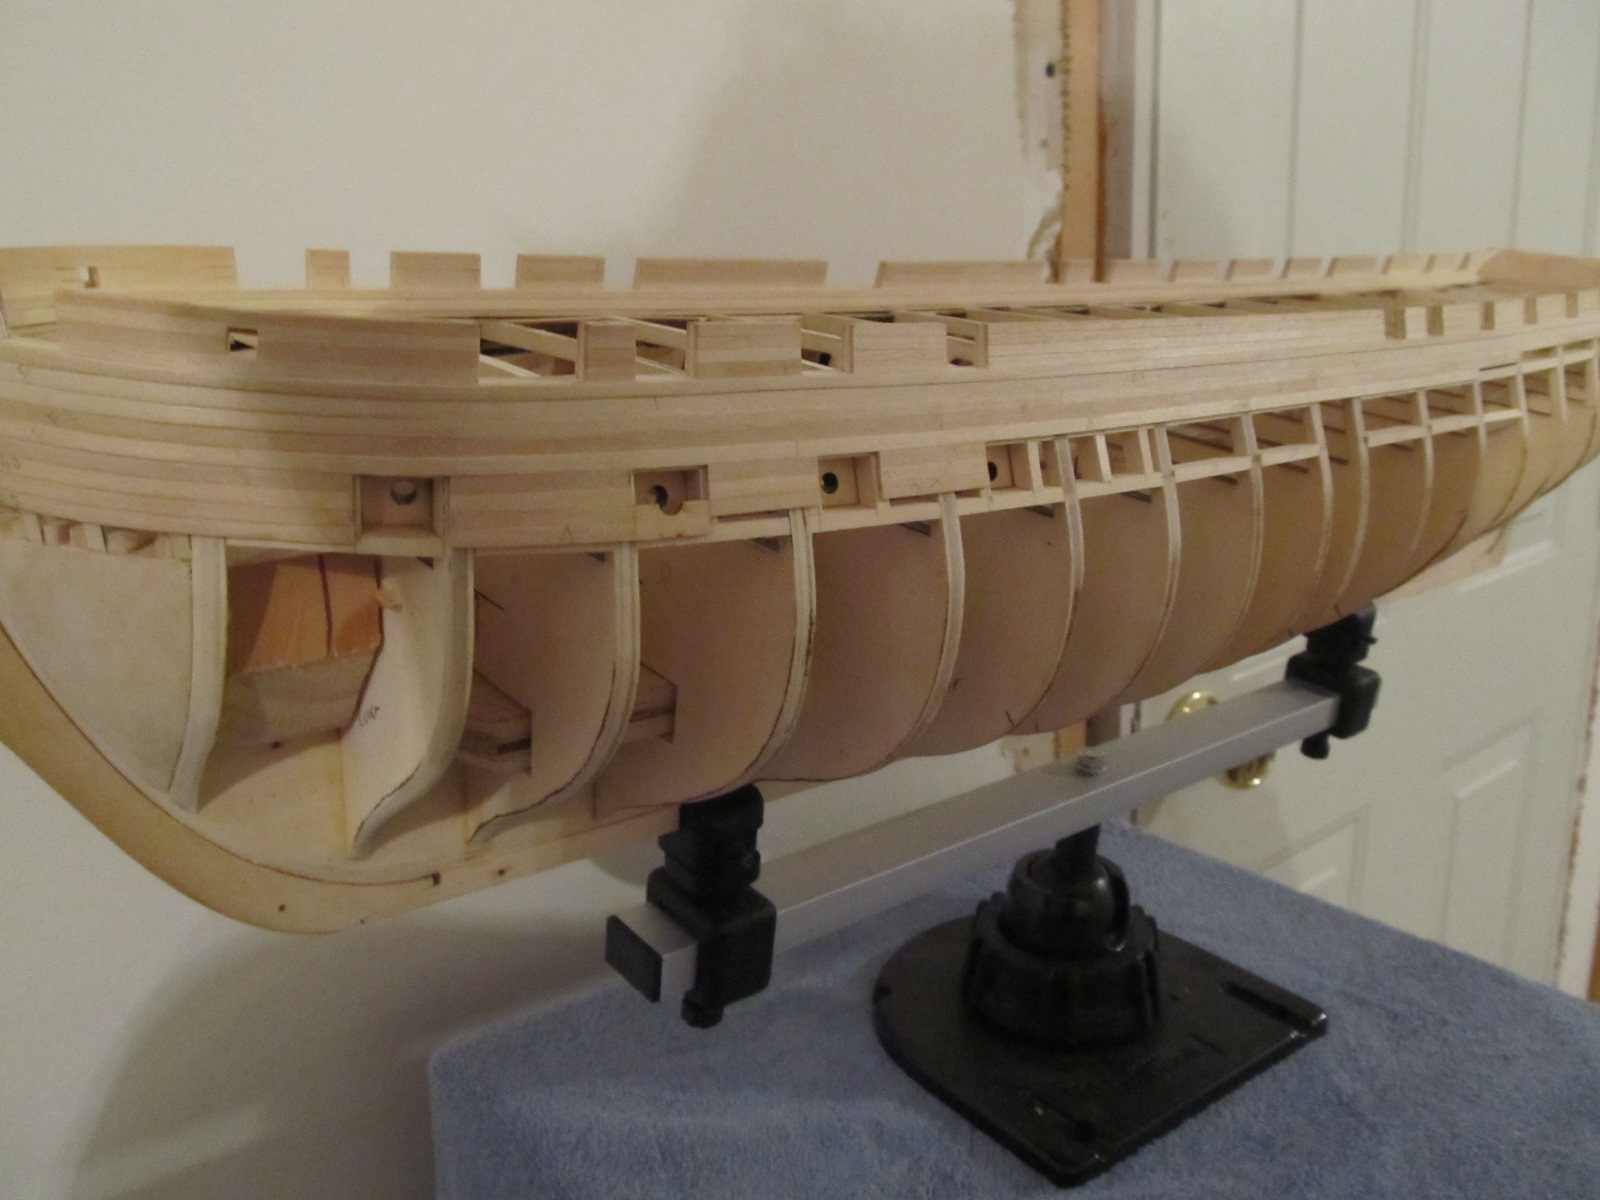
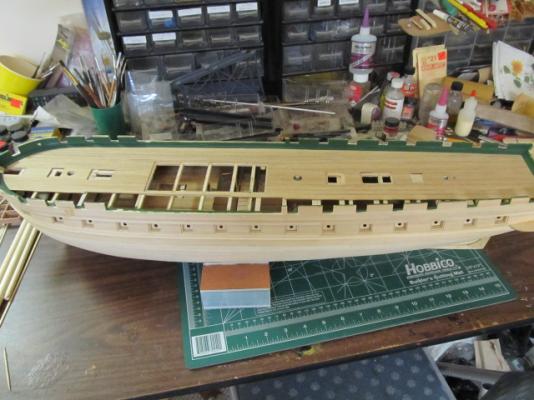
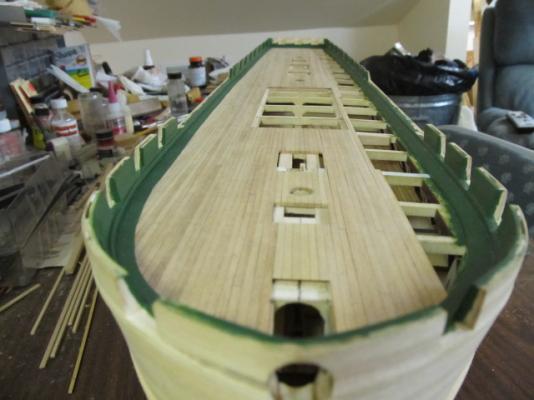
Hello all, just a quick note to say I'm back. No need to go into details other than to say both my parents passed away of natural causes, one day apart, in March. I've tried to model a few times since then but without any progress. But finally today I picked up the modeling tools and got back to work slowly. Here's a few pics of where Conny sits today. I hope to finally be posting updates on progress again. Thanks and happy modeling!

-
Hi Bob, just checking back in after being away for a while. Your Essex is really coming along, I love all the little details you've added. Keep up the good work sir!
-
Augie, I've been away too long, just checking back in and she's gorgeous as usual! Keep it up, she'll be spectacular when finished!
- 2,191 replies
-
- 1
-
-
- confederacy
- Model Shipways
- (and 1 more)
-
Hi all, I want to apologize for being away so long without any comment. Both my parents died in March so modeling has taken a back seat to real life. I have made a little more progress on my decking just to get my mind off things, but sorry no pics at the moment. Not sure when I'll make any significant progress on Conny again, hopefully this summer when the humid Ga heat finally drives me back inside. Until then happy modeling to everyone!
-
Bob, you're the one viewing the real thing, if it looks good to you that's the opinion that counts! I would never criticize your work, please don't think I was.
- 1,477 replies
-
- 1
-
-
- essex
- model shipways
- (and 1 more)
-
Very nice furniture Bob, especially at such a small scale! One thought for you, you might consider making the cushions out of styrene to avoid the wood grain cushions. I'm not criticizing, please don't take it that way, just offering up a suggestion...
-
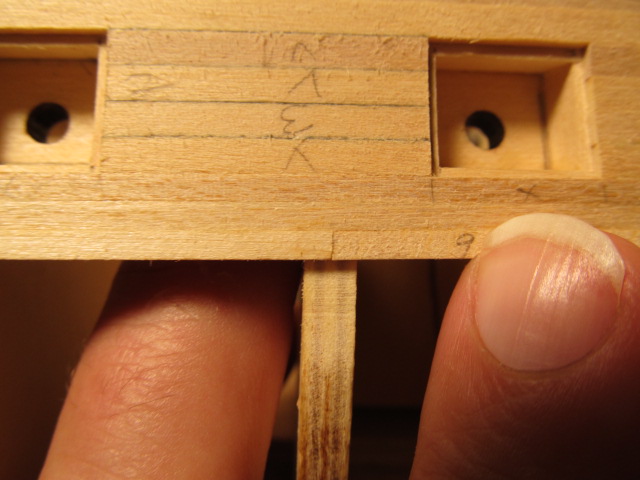
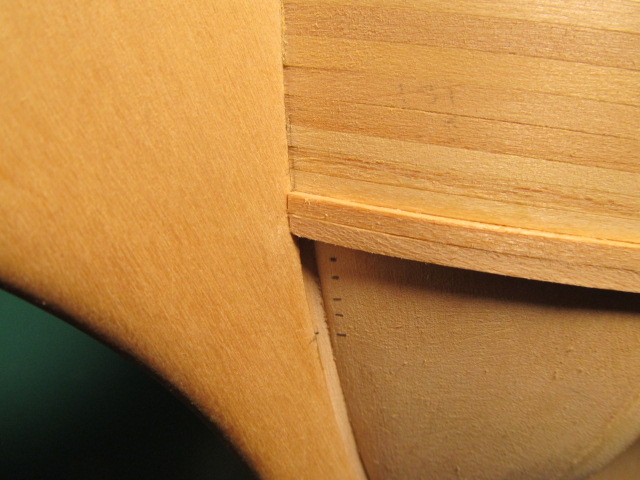
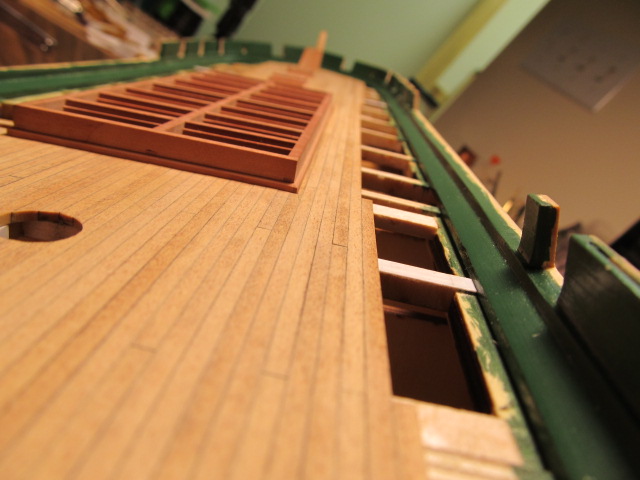
I've had a couple PMs regarding how I cut my gunports so clean, so I thought I'd link to the particular posts here: In these pics the inner bulwarks were completely planked first. Then the gunport frames were installed on that planking. A #11 blade was used to cut out the gunports, then nail files (that's all I had at that time) were used to sand down to final finish. http://modelshipworld.com/index.php?/topic/2862-usf-constitution-by-cookster-kitbashed-to-1812-model-shipways/page-2#entry79965 The outer planking was then put on long, and trimmed down with a #11 then sanded flush. http://modelshipworld.com/index.php?/topic/2862-usf-constitution-by-cookster-kitbashed-to-1812-model-shipways/page-2#entry79968 The lower gunports were planked by cutting each plank a little long, then final finishing to exact length with my true sander, and finally glued on. I also used the gunport lids as a gauge for the lengths. Here's a pic I didn't post showing this planking underway. Oh and I took this pic at higher resolution (by accident actually) so you can click it for a larger view Planking the gunports was very tedious, especially the way I did it. So if you get impatient, add a few planks until you get frustrated then move to something else, and come back when you're fresh. This next pic shows planking strakes where the butt ends did not match, so I sanded them true by hand with a sanding block. And, just for the heck of it here's the upper wale plank notched and beveled to fit the rabbet and stem. Hope this helps!


-
Augie, I just assumed boxwood . My bad... Whatever you chose I'm sure will be gorgeous! Maybe teak? (we can dream right?)
-
Tripp, I would never imply Mobbsie would do any such thing.... Myself on the other hand? Yes, I'm afraid so....
- 1,279 replies
-
- 2
-
-
- agamemnon
- caldercraft
- (and 1 more)
-
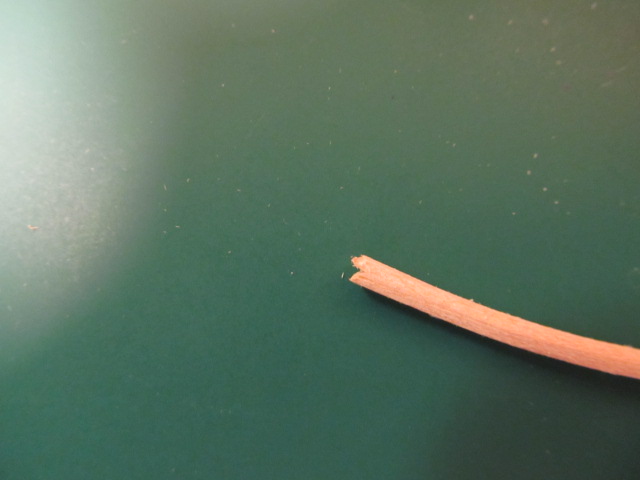
She's looking good Rich! One tip on the broken pieces of planking, if you take the broken piece and put it back on where it came from, it should fit with virtually no gap since it split/broke with the grain - as long as you don't attempt to sand or dress the broken edge(s). A little glue and you should be good to go for an almost invisible repair. Good luck!
- 1,756 replies
-
- 1
-
-
- constitution
- constructo
- (and 1 more)
-
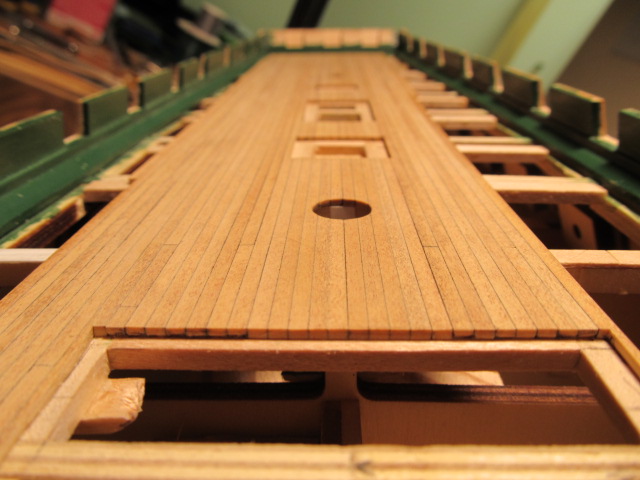
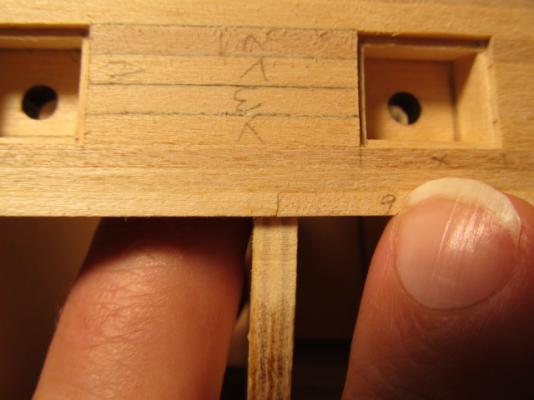
Thanks Augie and Popeye! Augie, you'll love planking the decks with Jeff's boxwood. You've done a fine job on your hull planking with basswood, so you'll have NO trouble with the boxwood. It's great to be able to pick up a plank and not have to dress both edges to HOPE to get a tight fit. All I've done is use a caliper to make sure planks that are butted end to end (which are cut from different planks) are the same width. I have found there are .001 to .002 (thousandths) down to .0005 (5 ten thousandths, or 1/2 of a thousandth) variation in plank widths so all I have to do is sort for matching widths. This may seem extreme, and probably is, but in my quest for straight, gapless plank runs this must be done... Oh, and the pencil lead on the plank edge technique that I found in some of my very first readings on MSW works like a champ! With the boxwood and cherry stain I think the look is perfect (of course that's my opinion, yours may vary) I can't wait till the day I take the same pics with guns rigged on the deck. But alas, that's still a long ways off...
-
Hi Mark, I quietly followed your first Licorne build and thought you were doing a fine job, but I also understand your frustration with things that cause errors, and mistakes, and once they start compounding on each other they begin to spiral out of control. We the builders are our own worst critics, as it should be, so we must please ourselves first before anyone else. Being a fellow perfectionist we must always try do our best, but also realize that at some point our best is a good as it's going to get - whether that stacks up to a master builder or not is not the point. I was sorry to see you start over, but I fully understand your reasoning. And, more than likely the lessons you learned on V1 will quickly apply in a positive way on V2 and you'll not only have better results but faster as well! Good luck!
-
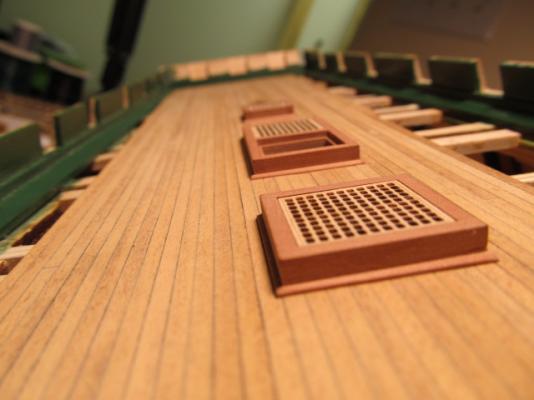
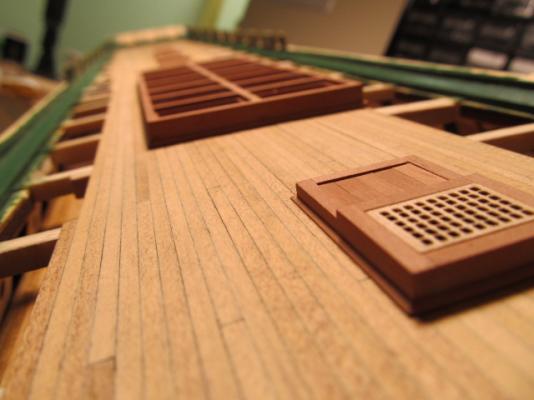
Let me ask for your indulgence as I post a few gratuitous "here's my planking pics". I do think these look pretty cool, from a "crewman's" point of view. I also want to add again what a pleasure it is to use Jeff Hayes (Hobbymil) supplied boxwood deck planking. Makes all the difference in the world over basswood...


-
Now Mobbsie, I haven't tied the first knot.... Don't know a clove hitch from a what-knot. (well I do now....) Gluing pieces of wood together is one thing, but rigging? When I get to rigging you folks are gonna watch me shed some tears for sure.... And use sailor's language. I just hope I can come close to the many ship builders here, you included!
- 1,279 replies
-
- 1
-
-
- agamemnon
- caldercraft
- (and 1 more)
-
Mobbsie, I'm just catching back up on your build, your ratlines are superb. Love your method with the alignment sticks! That's one beautiful build you've got going there. keep it up!
- 1,279 replies
-
- 1
-
-
- agamemnon
- caldercraft
- (and 1 more)
-
Augie, been a while since I checked in, she's looking great! Your planking looks splendid! Very, Very nice.... Can't wait to see you finish the planking up - I wish my Conny planking was moving along as fast as you are...
- 2,191 replies
-
- 1
-
-
- confederacy
- Model Shipways
- (and 1 more)
-
Looking great Bob! As far as my Conny kit, yes I think she has eyebolts, I was just curious where you got yours for my future scratch efforts.
-
Well, it's been awhile since I posted, I've had many things to deal with lately that have kept me out of the shipyard. Even my scratchbuild of Essex is suffering, but at least on that one I have been working on my drawings. On Conny I have been adding deck planking slowly whenever i had time. I actually had forgotten where I was when I last posted so there's been more progress than I thought, although it is slow going. With that said, pics of current progress ....


-
Bob, your coppering job looks great! I'm glad someone took the plunge and tried using full lengths of tape, instead of all those single plates. You proved it can be done and looks awesome! Now, can I trouble you for what brand and where you bought your eyebolts and ringbolts? Thanks and great job!
-
Good luck with your Byrnes saw, I hope to get one sometime this spring...
-
Richard, the splitter would be for ripping boards that have internal stresses in them that cause the board to compress in on itself as the cut leaves the blade. Kind'a hard to describe if you've never seen it. Imagine someone pressing the 2 cut halves together (in effect clamping on the blade) while being cut. This will bind the blade and if severe enough could kick back. Go get a piece of cheap 1x12 pine shelving and rip it in half and I can almost guarantee it will pinch the blade to some degree. However, this is nothing horrible, it happens all the time. The other method of kickback would be if the piece being ripped (the 2 halves) were allowed to be pulled into the blade as they exited the blade. If they were caught just right by the blade, they could kick back. BUT, if you use proper technique when ripping - ie, make sure both pieces are pushed fully by and away from the blade (it takes both hands for this BTW) then there's not much chance for kick back. There's also the case of ripping off small width pieces, sometimes they float around the table near the blade and CAN kickback, but more likely they just glance the blade and it harmlessly kicks them away. If they're close to the blade and won't move away from it, cut the saw off BEFORE removing with your hands. If the piece got caught and pulled into the blade, guess where your hands are? On full size table saws the splitter is usually part of the blade guard assembly. The mini saws like Jim's probably don't have one. And I guess I'll go ahead and admit I removed the guard from my saw years ago, it just gets in the way. But, I am also very deliberate about my safety so removing the guard for me was OK. As mentioned earlier, use your common sense and be diligent in practicing safety!