HOLIDAY DONATION DRIVE - SUPPORT MSW - DO YOUR PART TO KEEP THIS GREAT FORUM GOING! (Only 20 donations so far - C'mon guys!)
×


cookster
-
Posts
416 -
Joined
-
Last visited
Content Type
Profiles
Forums
Gallery
Events
Everything posted by cookster
-
Very, very nice Bob. Can't wait to see the deck, bulwarks etc come together.
-
Alexi, you're doing a great job! I think you're transom framing came out much better than mine, I too had sweated and fretted those details and I still made errors. If you intend to plank the entire gundeck, then I assume you'll be cutting out the bulkhead "cross beams" above the gundeck.. On thing to keep in mind, the way Bob H's practicum works is all the hull and bullwark planking register off the waterway, which sits on the bulkhead cross beams. I would leave enough of the cross beam in place for the waterway to sit on. If you don't, you'll have no reference point. And then you'll have to add cross beams back for the spar deck. You could make splice plates and glue the original cross beams back in their original position, all except the main hatch where they will need to be moved and placed in the proper positions. Well, there's my 25 cents on that!! Good luck on your gundeck!
-
OH NO! Hope you were able to recover from the accidental paint job! Good luck!
- 2,191 replies
-
- 1
-

-
- confederacy
- Model Shipways
- (and 1 more)
-
JPett, love the yellow ochre color! The black also looks very nice. Sorry about your tough moments in the build, we all have those... Congrats on conquering them and moving forward!
-
Thanks for the kind comments everyone! Alexi, I haven't looked for that specific note on the plans, I will look for it. I also have the Conny AOTS book, I'll look for any references there. Removing 1/16 from the bulkeads would be tad tricky, but should be possible if you take your time. You'll have to remove the center supports and crossbeams anyway, so cutting that amount off with a knife (probably how I'd do it) or razor saw should be possible, especially if you haven't installed the bulkheads yet. Another option you might consider is making up for some, if not all, of the height mismatch wit your gun carriages.. If you scratchbuild them you'll be free to do as you want. Kit supplied ones could be tweaked some.... Good luck!
-
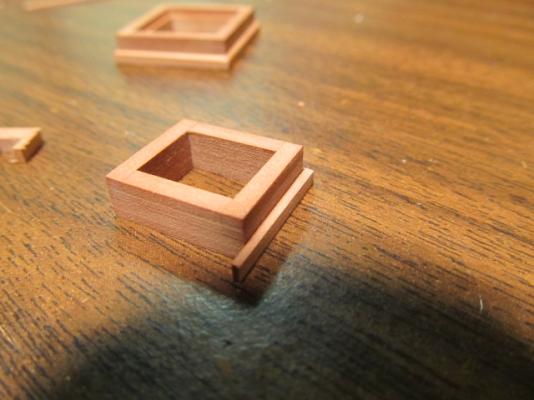
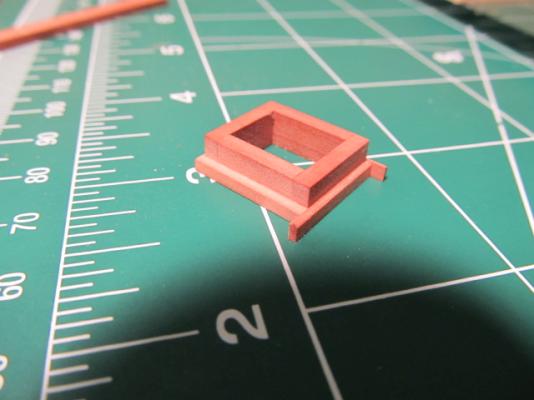
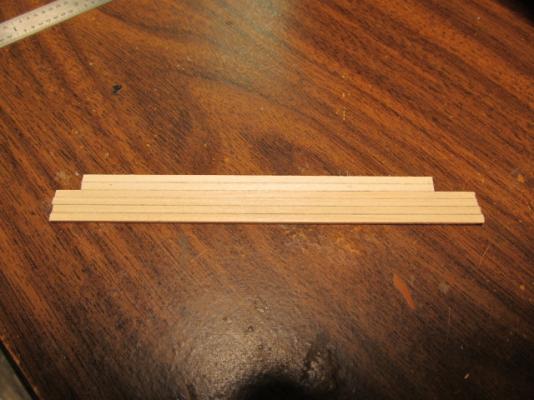
Since Augie is distracted by pictures, I'll show how I put the molding on the little Coaming. I beveled the edge with a sanding block. I glued on the first side, ran long on both sides. Then I glude on the second side. Trimed the long edge with a kinfe blade, then sanded it flush with the true sander. I used a sanding block to bevel the corner sticking out. Added the other 2 sides, trimed and sanded as before. Finished


-
Augie, now that made me LOL!
-
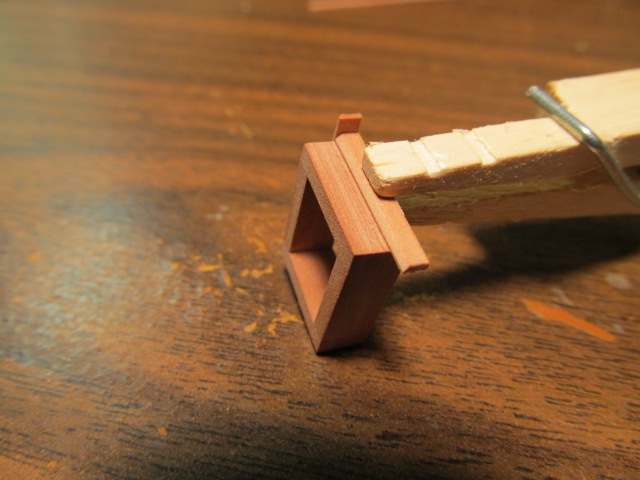
Augie, just for you... If it distracts you don't look Still have to add the molding around the edge, I'll be sure and post pics of that too!! The Little Coaming that Wes built


-
Augie,what can I say to that? Ummm...... no. In all seriousness though, I'm flattered my all the comments but there are people on here who's precision I'll never match!
-
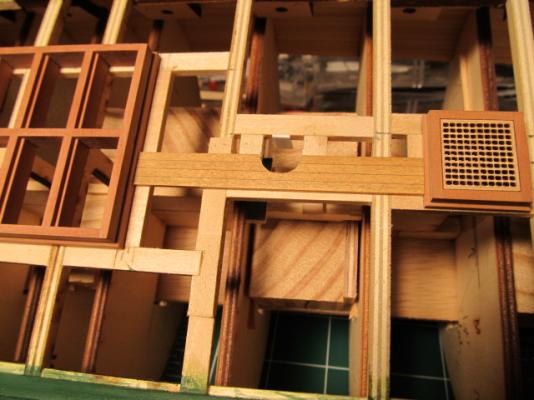
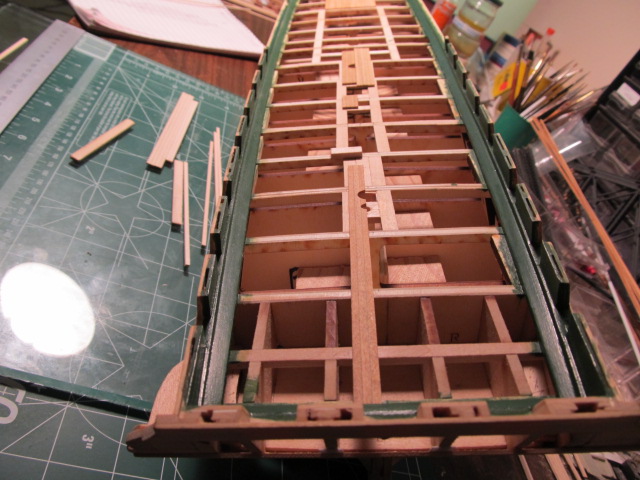
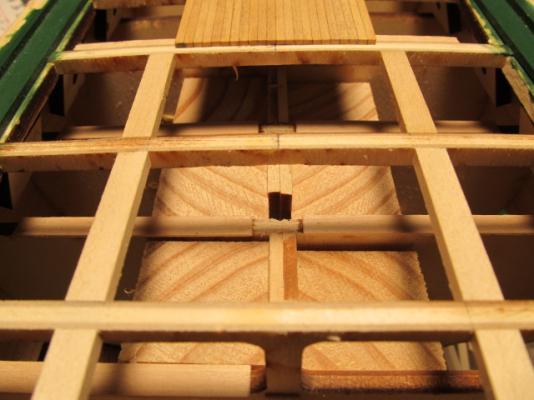
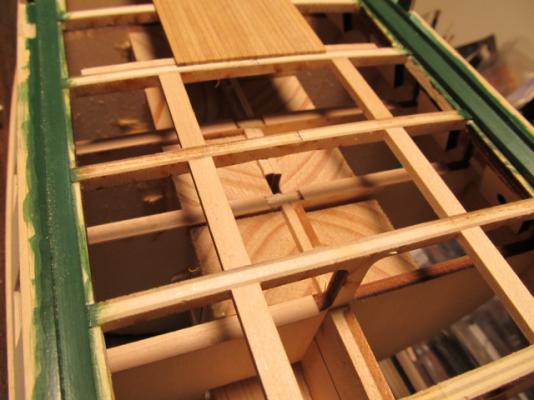
Added planking at the rear of the deck including the first half of the mizzen mast section. I made the plank section for the other side of the main mast so I can cut out second half of the mast hole (as I did with the fore mast) At the front of the main hatch I cut out the ply bulkhead uprights so I could add planking on the false gundeck section where I plan to leave the hatch grates out and install ladders. Started making the gundeck planking section. Next I have to make the rest of the coamings so I can continue planking.

-
Hi Rich, I'm not familiar with Sapele, but could it be the orientation of the grain? Also, I think I've read in a few logs that when planks in some kits get old they dry out. I wonder if soaking the entire plank, then letting it air dry (don't bend it) might help? Maybe that would restore some pliability to the planks. Might be worth a test... And your Conny is looking good!
-
Very impressive Mike!
-
WOW Bob, didn't expect to see a planked hull! You and Augie are picking 'em up and putting 'em down! (old American expression from the CB radio days, it means your speeding while driving) Looks really good!
-
Very, very nice Mike.! Looking forward to more...
-
Planking looks great Augie! I'm amazed how fast you're getting this done...
- 2,191 replies
-
- 1
-
-
- confederacy
- Model Shipways
- (and 1 more)
-
Robert, I read through your build log. Very impressive! Love your scratch built cannon carriages, your using the same methods I plan to when i get to mine. I Will be following along!
-
Sherry, I have been silently following your build, magnificent work - especially at such a small scale. You have my sincere condolences for your loss.
-
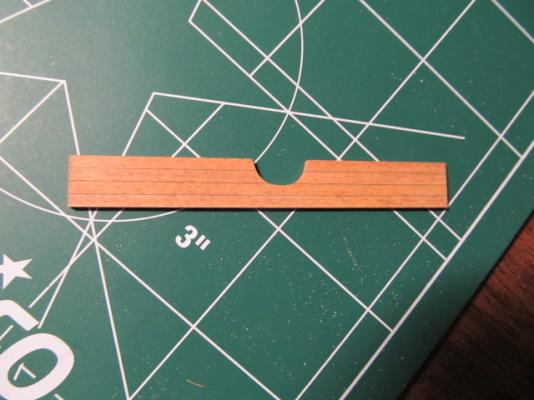
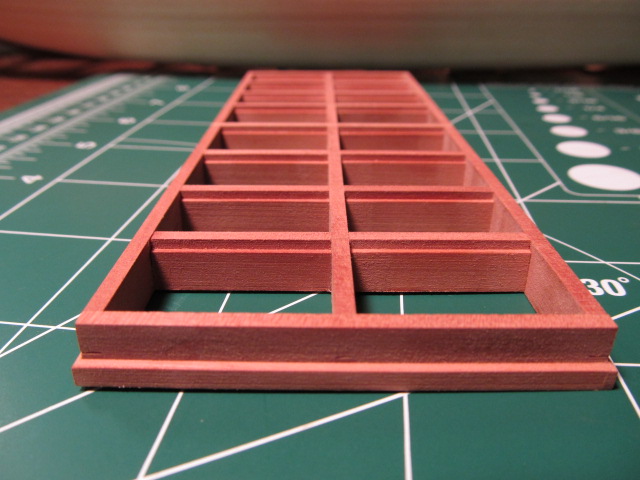
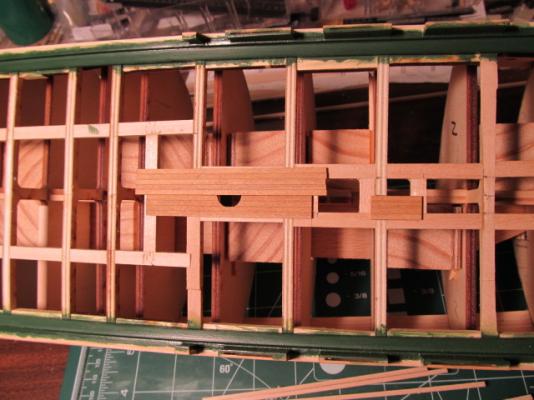
Next hatch decision is whether to use a single hatch or a dual hatch like the Revell model. I kind'a like the dual so maybe I'll go with that. Single (with have to make another coaming though) Dual
-
Thanks Evan, and I have been to that Conny virtual tour site but glossed right over the skylights.... Dopey me I looked at my revell model when I got home and I think I'll build the double hatch coming that's behind the capstan, and the small hatch at the helm between the Binnacles you mentioned.... I think the hull model will support that as well, I'll take a look. Thanks again for all you input!! With your knowledge and approval I'll be that much closer to being as accurate as I can - except for the darn main hatch. But that ship (pun intended) has already sailed....
-
Thanks again Rich - hope you Conny is treating you well. Wow Robert, thank you! I will check out your Mars build!
-
Thanks Evan for the compliment and advice! So on the skylight, I thought I had seen in another source(s) somewhere there were skylights over both the ward room and captain's cabin... I did look at the Hull model last night and didn't see it there, that's where I thought I had saw it. I'll accept your knowledge on this for sure. I assume this also means no skylight over the captain's cabin either... Well darn, I was kind's looking forward to building them. The MS model has 3 coamings/hatches one behind another (more or less) behind the main mast. The front one I modeled, the second one was going to be the ward room skylight which now I guess will be a hatch coaming and the third was the odd shaped one with the small coaming attached to the back of it - I know this one is wrong and should be just another rectangular hatch coaming. Does this sound right to you? I'm at work and can't get you pics of what I mean but I can when I get home if you need. Thanks again for the info! Oh and I'll look for info from Tyrone Martin.
-
Hey the rope walk, cool!! Can't wait to watch you (two) rig her...
-
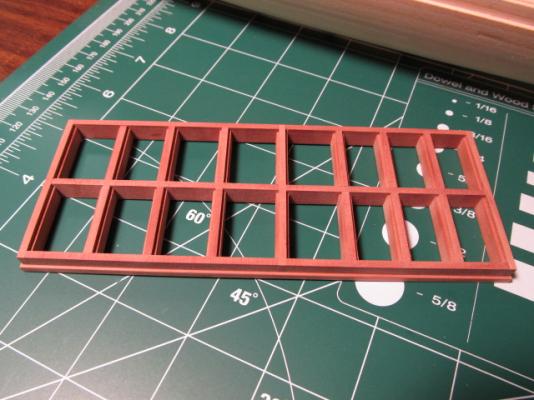
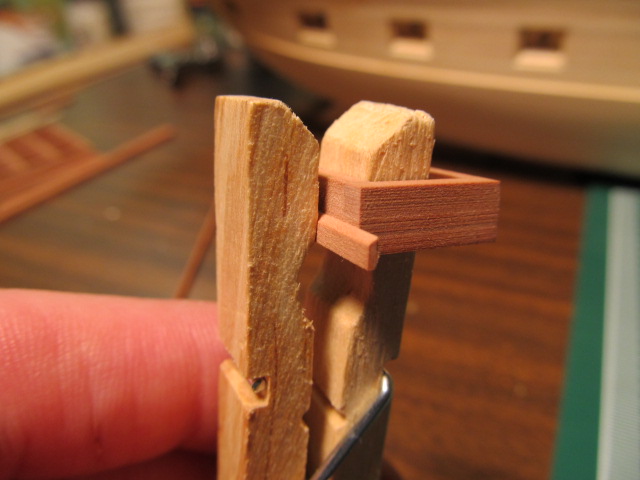
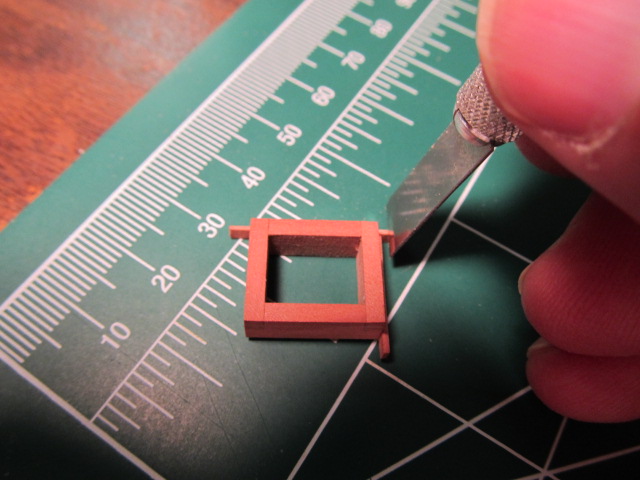
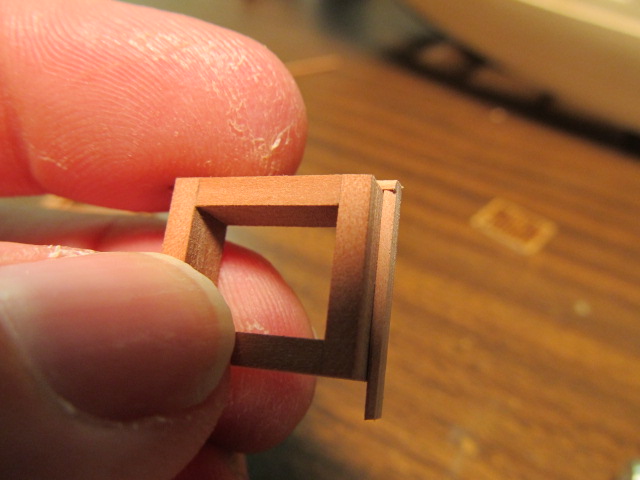
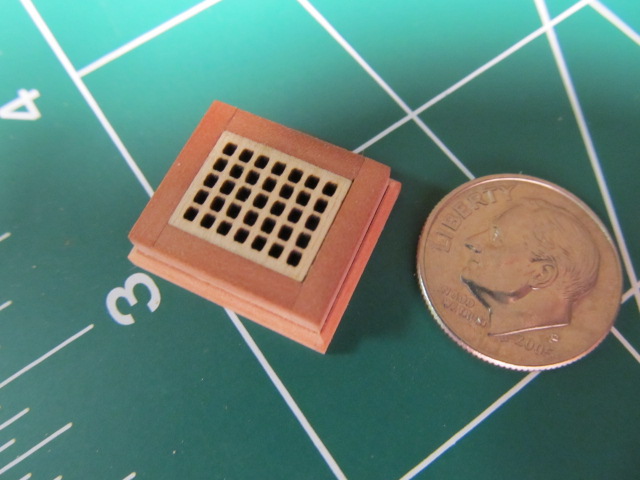
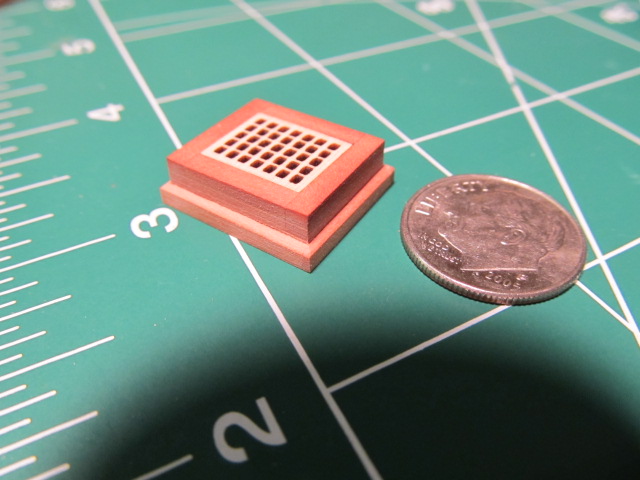
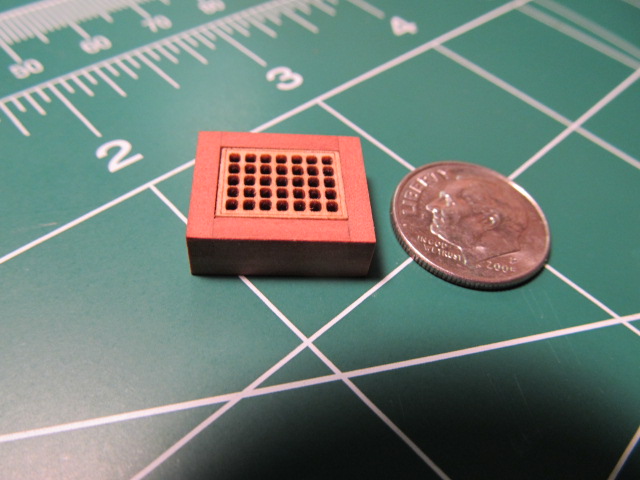
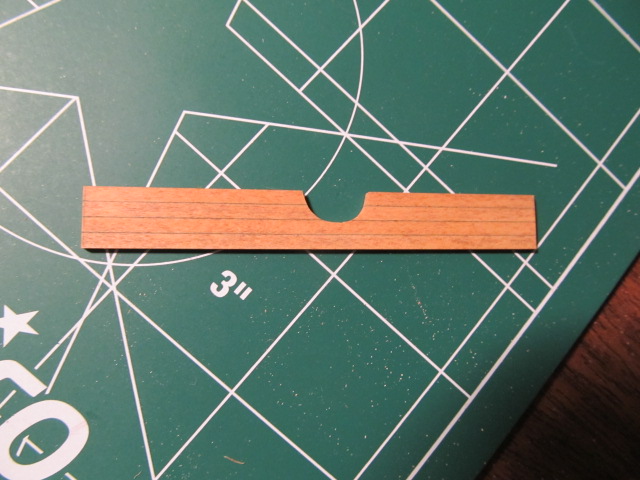
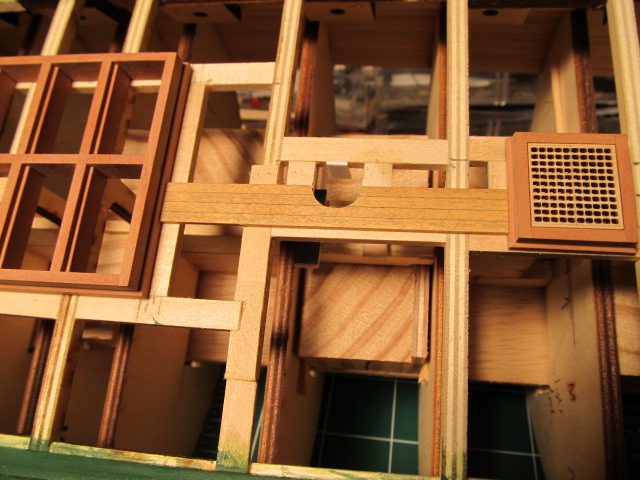
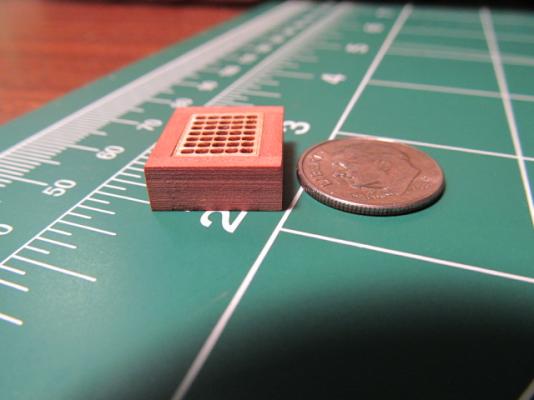
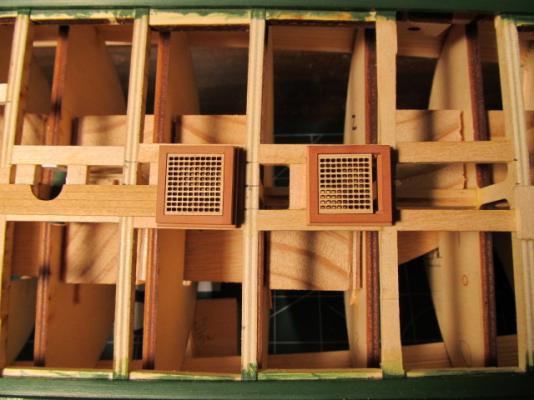
Thanks Geoff. I was a little worried about cutting the grates apart, but it was worth it in the end. The worst part about building the main hatch that caused me the most concern was making the hatch openings fit the existing grates. That's why I chose to only butt joint the cross beams (except the middle and ends) so I could make them fit the grates without having to worry about cutting lap joints in the right places. The way this should've been done was to make the coaming grate openings first, then make the grates to fit. But making those grates from scratch was not in my plan! Augie, you didn't miss it. I forgot to mention what stain I used, then I decided to wait and see if anyone noticed... The deck planking is boxwood. I love it! I tried 3 different stain colors, I think I still have the pic somewhere of the 3. Anyway this is minwax Cherry stain. This is my favorite stain, I've used it on a lot of the furniture I've built. I thought for sure it would be too dark so I almost didn't try it, but since the boxwood grain is so tight it absorbs very little of the stain. The cherry gave me just the amount of the "dirty" color I wanted without being too dark, red or orange. The other 2 colors I tried were pecan and colonial maple, but they came out to yellow/orange for the effect I wanted.
-
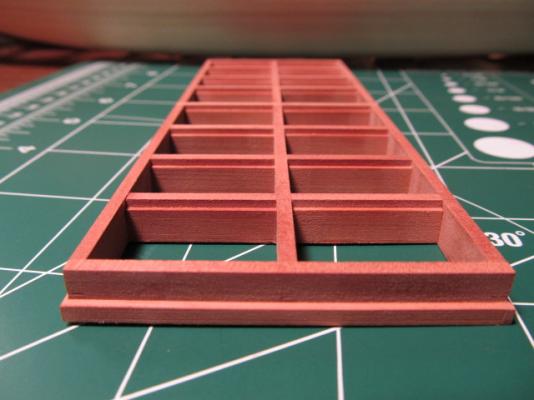
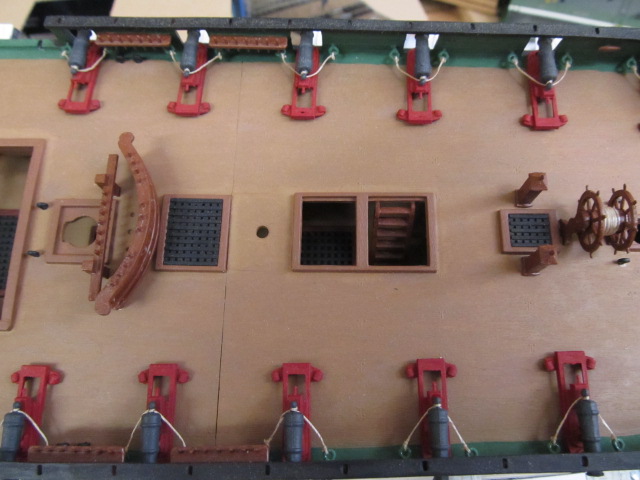
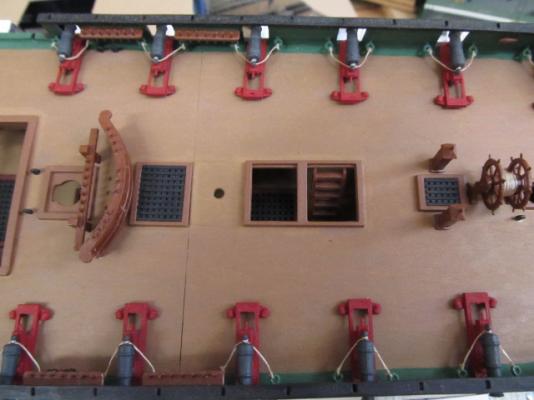
Oh, and I must add about the main hatch, this isn't correct for 1812. It should be open an coaming to below. I actually considered abandoning the one I made and making a new "correct" one, but the missing deck guns below would show and there's no way I can install (especially rig) them now. So, I'll have to live with this. I AM going to leave a few of the companionway grates out, maybe all 4 (they go in the four corners), install some deck planking on the gun deck (but still no guns ) and make and install some ladders to the gun deck. I'm also going to scratch build the skylight over the ward room, the the MS model only has a hatch coaming and grate there (which I guess is how she sits today) OK edit here. NO SKYLIGHTS Thanks to Evan (Force9) for pointing out there were no skylights in 1812 so I will not add them.
-
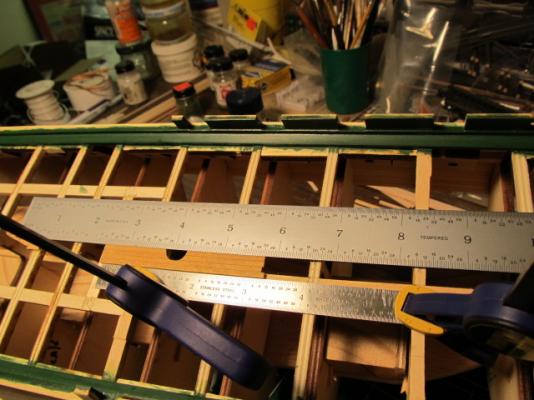
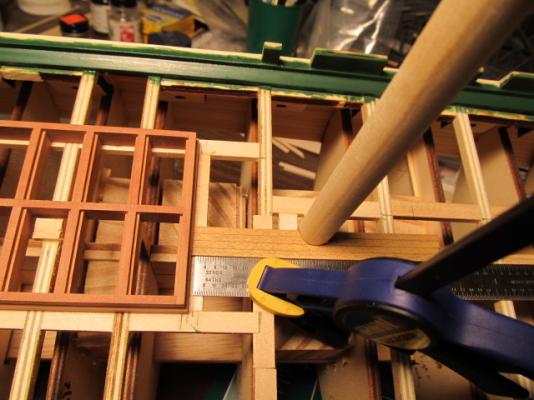
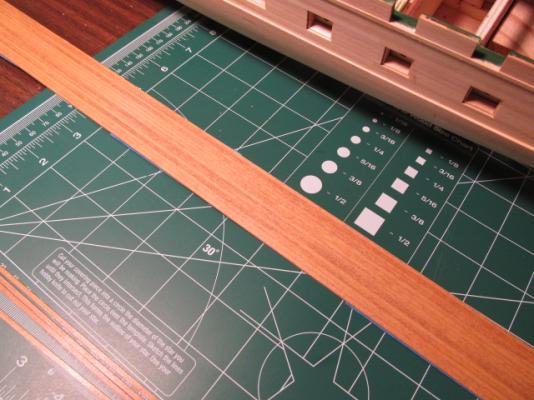
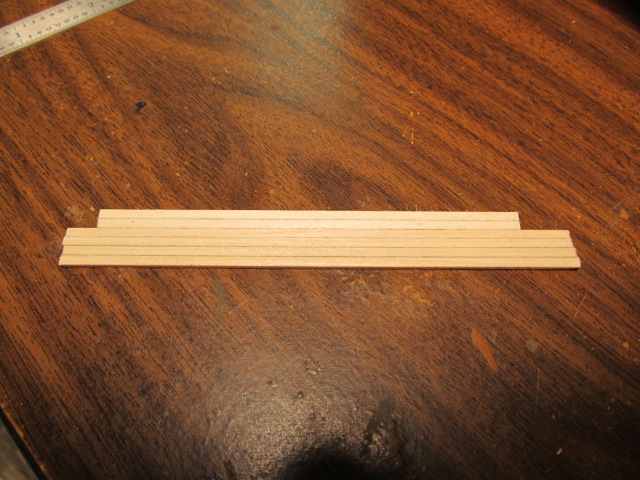
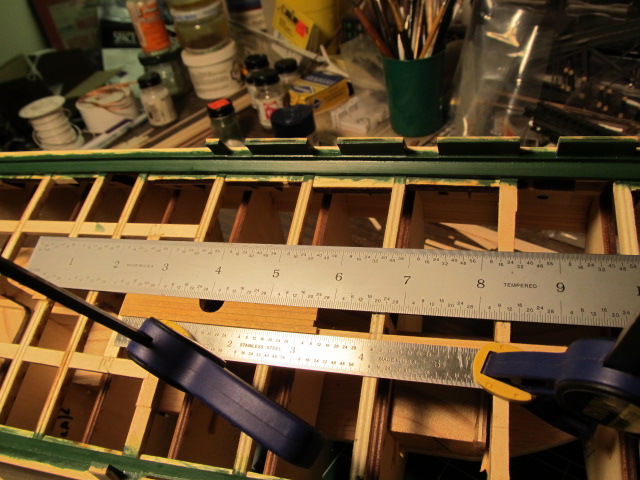
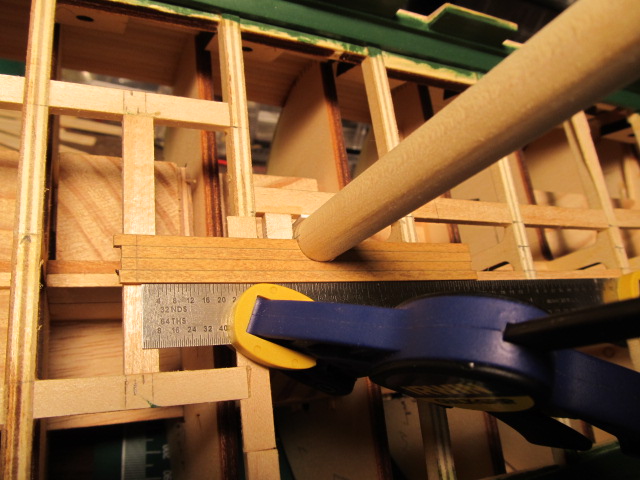
Thanks everyone! Main hatch coaming is finished. A started on the deck planking between the main hatch and next coaming as before. I placed a steel rule on the centerline using the stops as a guide, and since the mast hole had to be clear I added another steel rule to locate the other side. I glued half the section together, cut out the mast hole, fitted it, trimmed each end, trued it up and glued it down. I forgot to mention earlier I'm pre-staining my planks. They're stuck to a piece of blue painters tape. The color here looks a little redder than it actually is, the color in the planking pics is about right. The color is slightly "dirty" without being to dark. I'ts not prototypical but I really like the color.