pirozzi
-
Posts
843 -
Joined
-
Last visited
Content Type
Profiles
Forums
Gallery
Events
Everything posted by pirozzi
-
 Hi Denis, It seems like it is going slow to me. I guess I am just anxious to see her progress. On the deck planking, the kit came with walnut which is a little too dark, but I soaked it in bleach for 20 minutes and it comes out lighter with a weathered look. Looks just like what a deck would be for real. Vince
- 593 replies
-
- 1
-

-
- royal william
- euromodels
- (and 1 more)
-
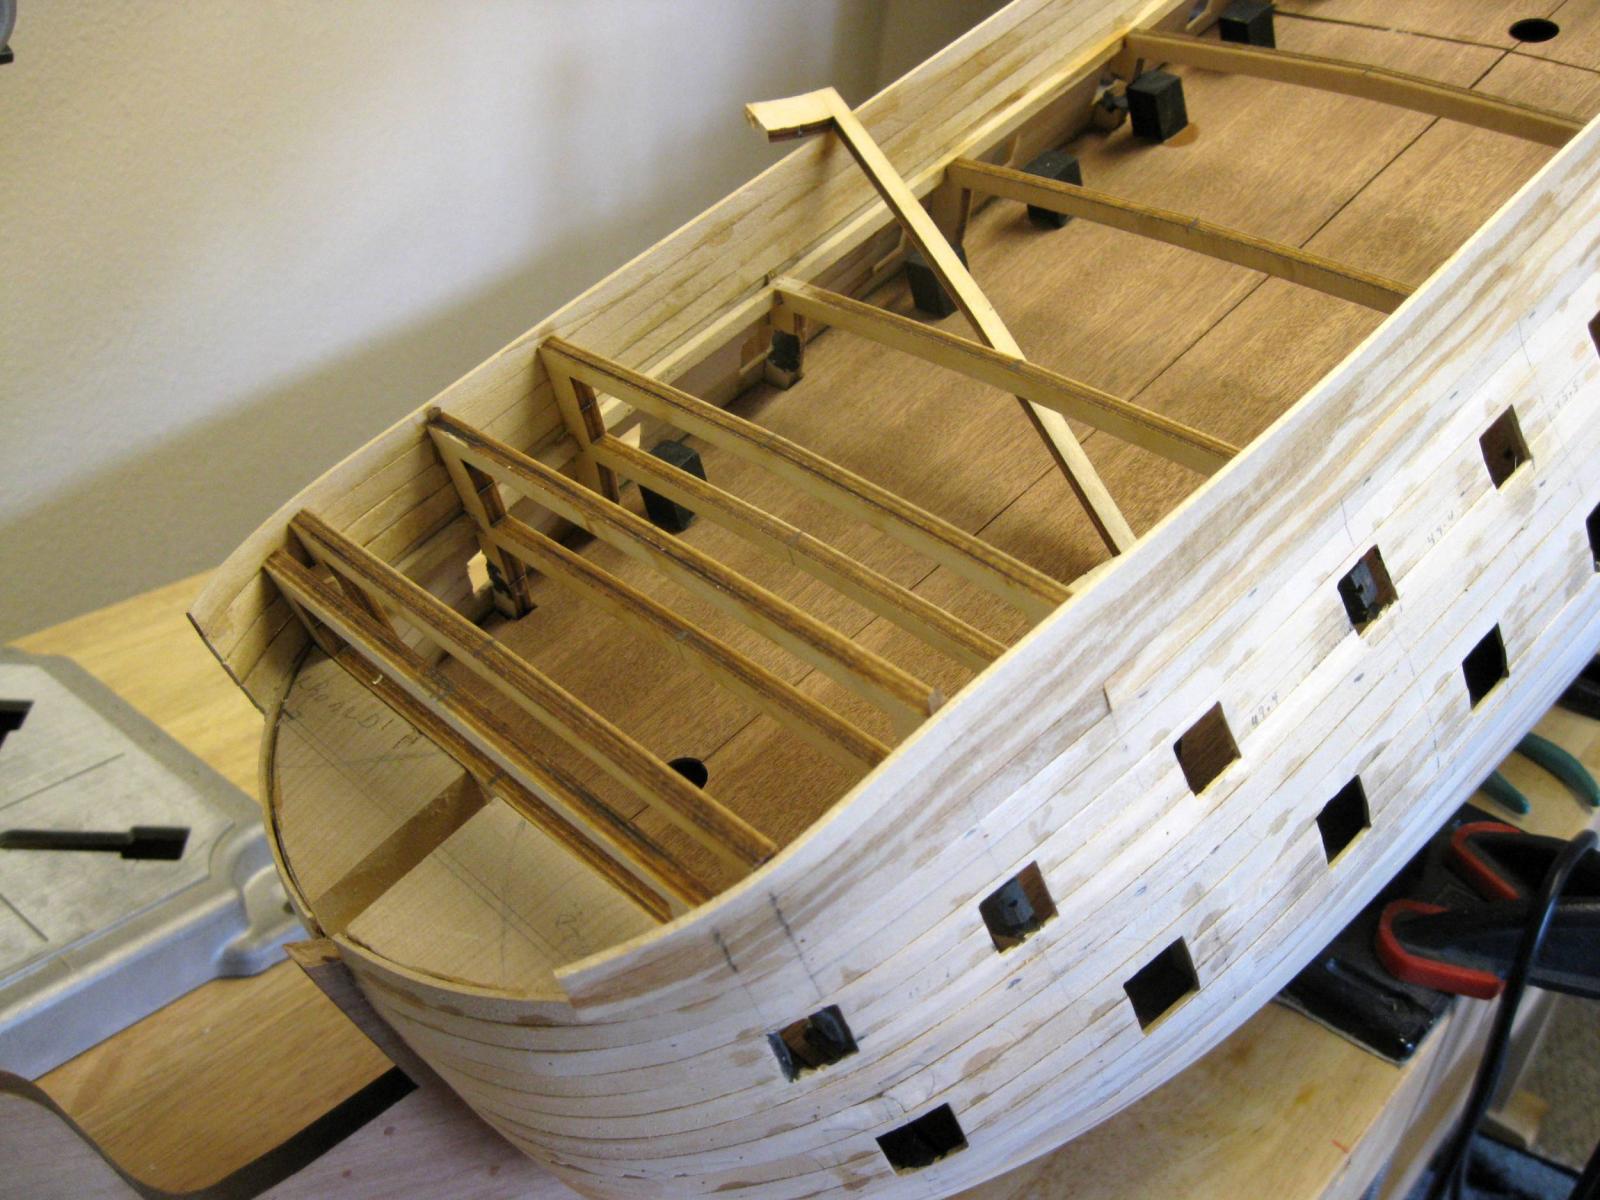
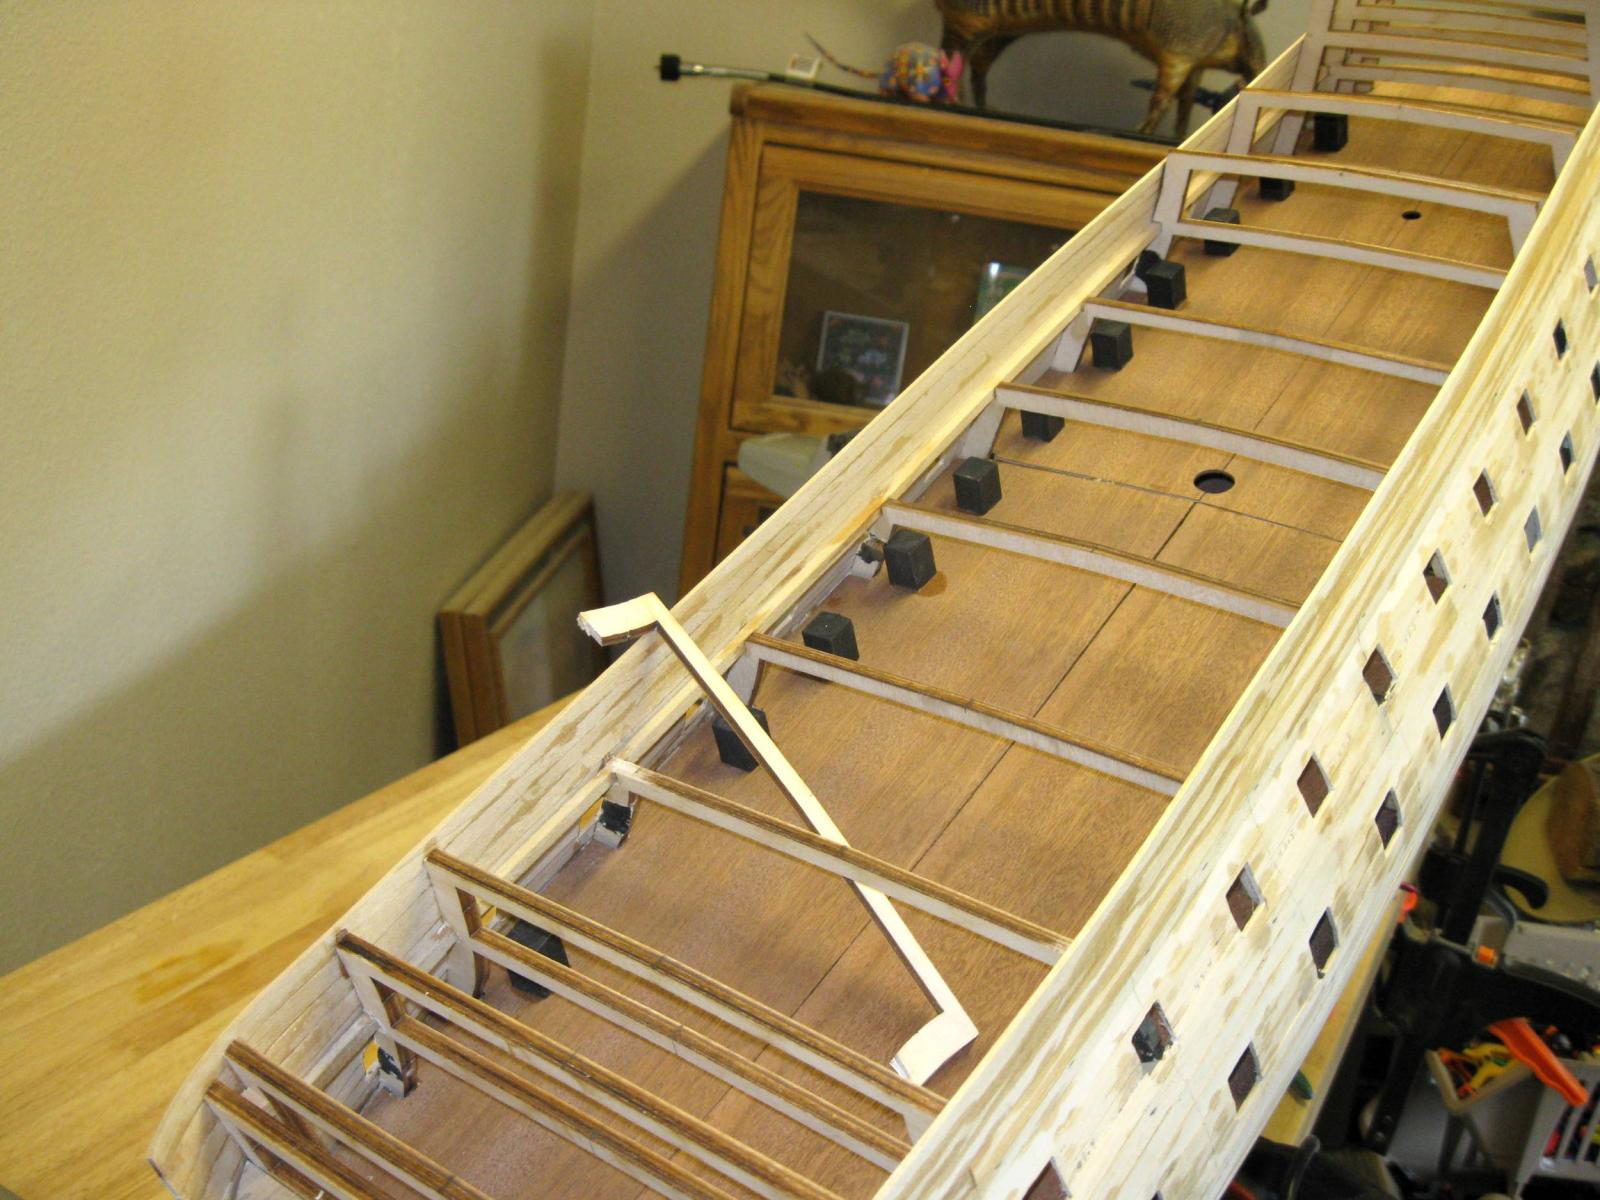
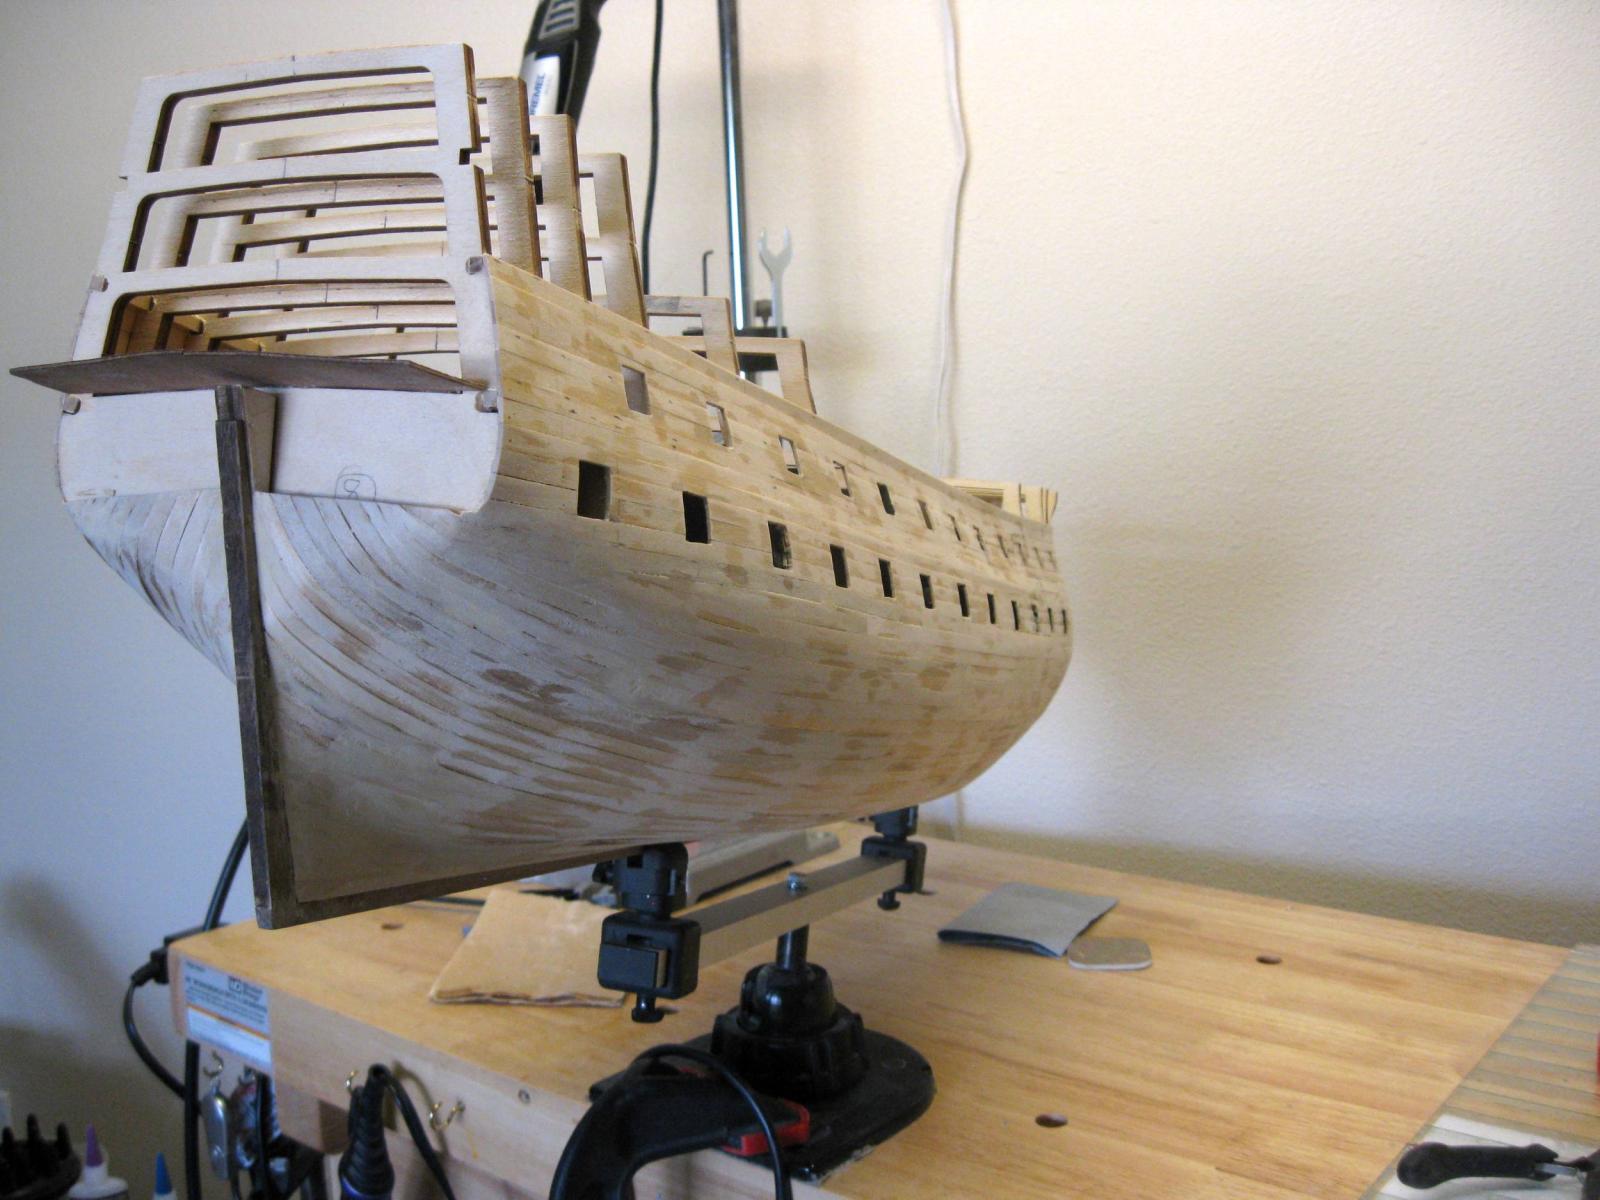
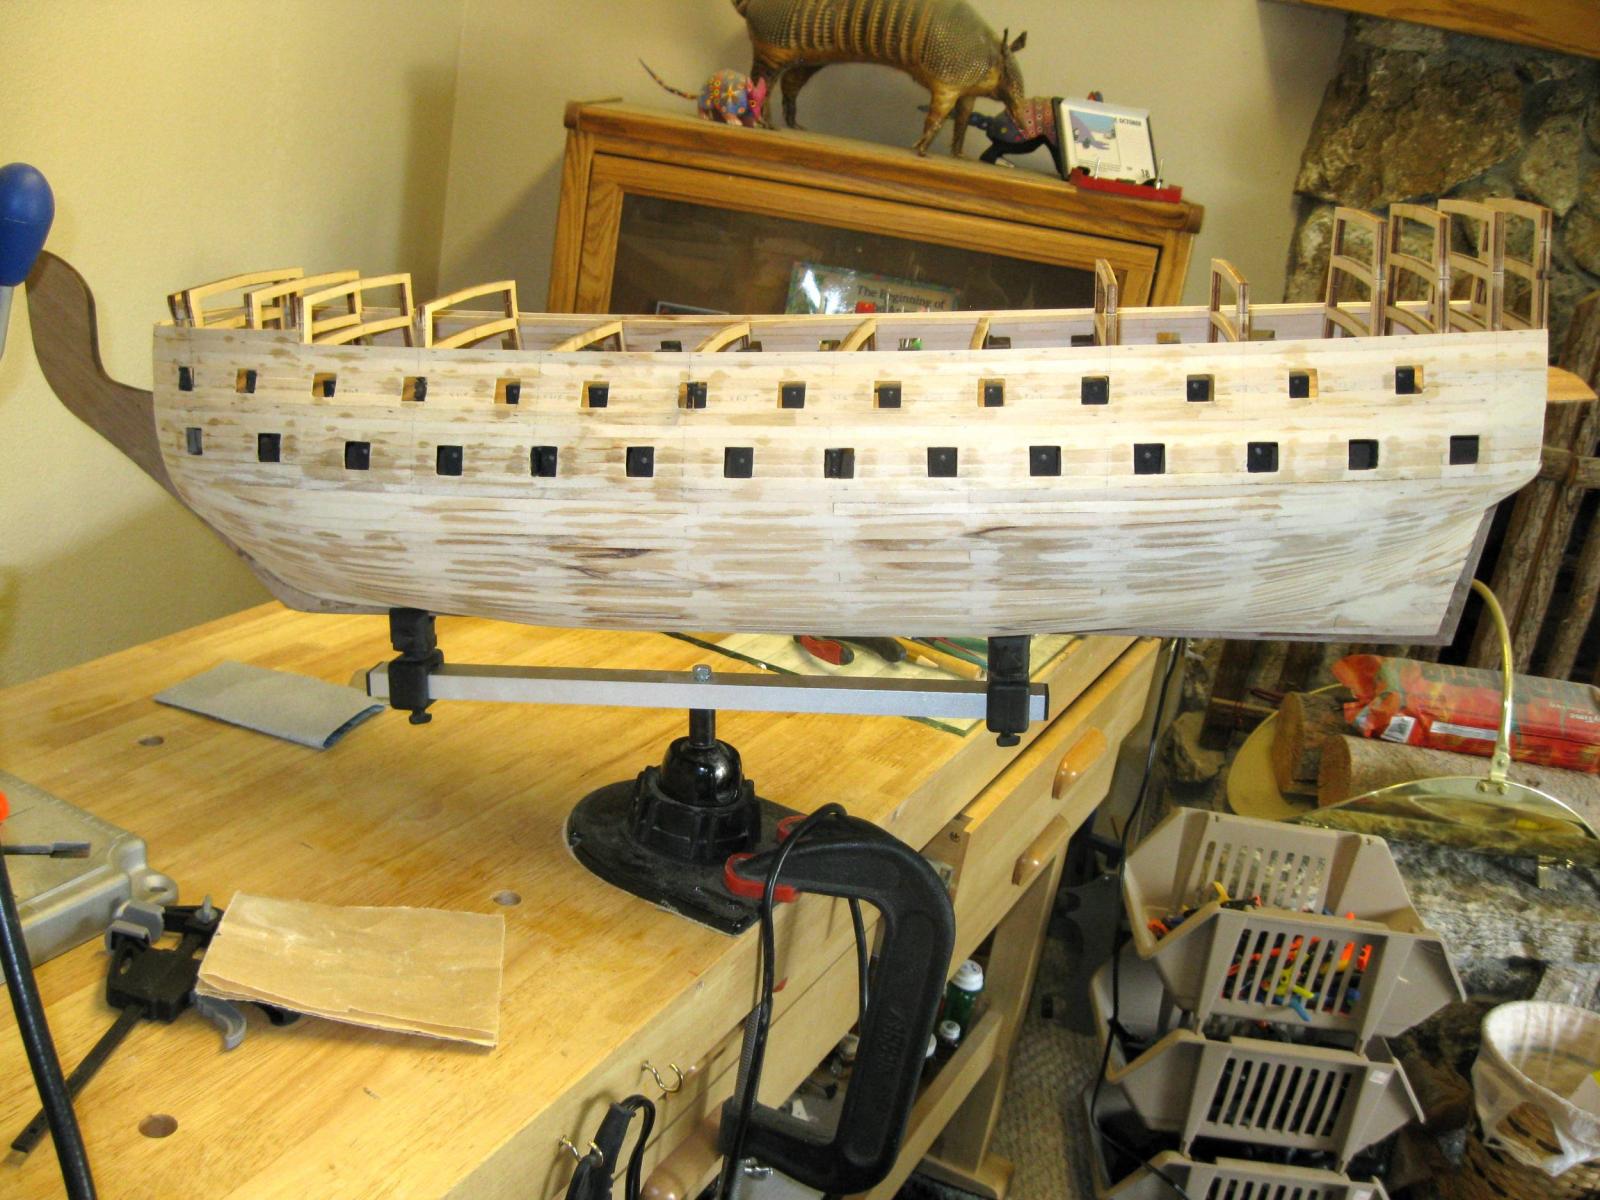
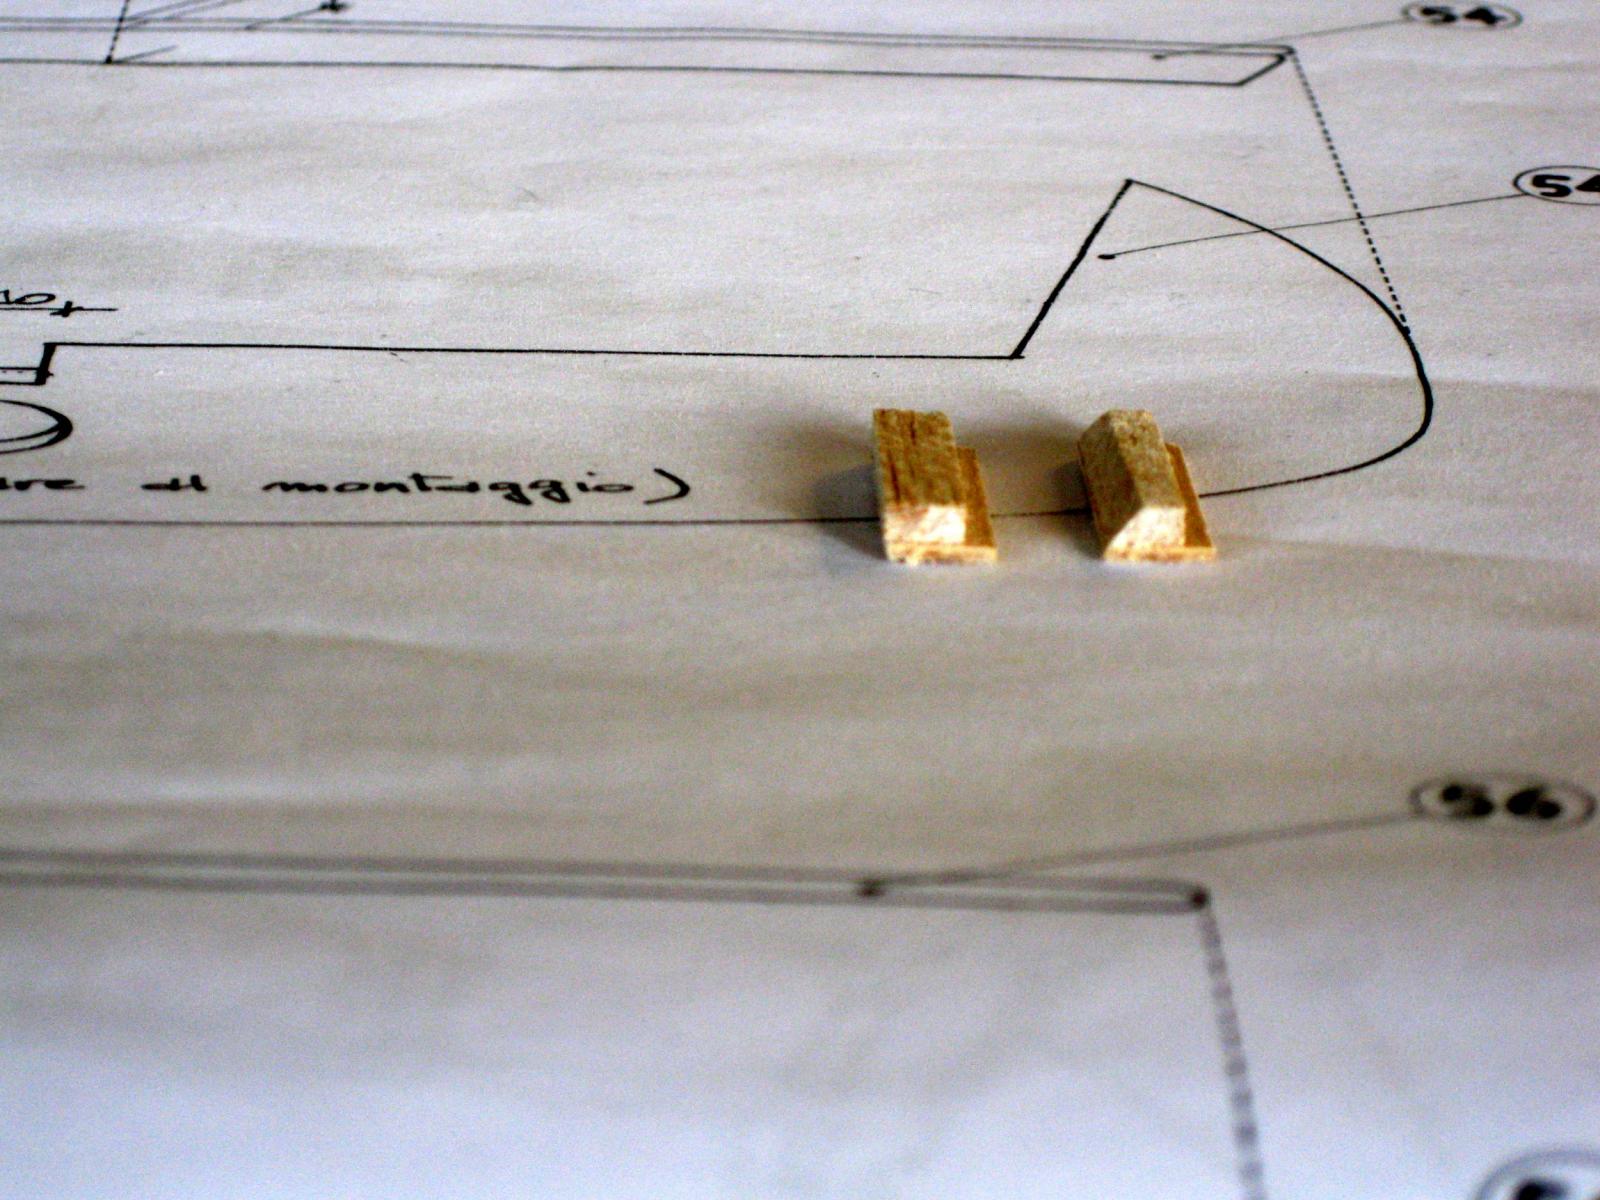
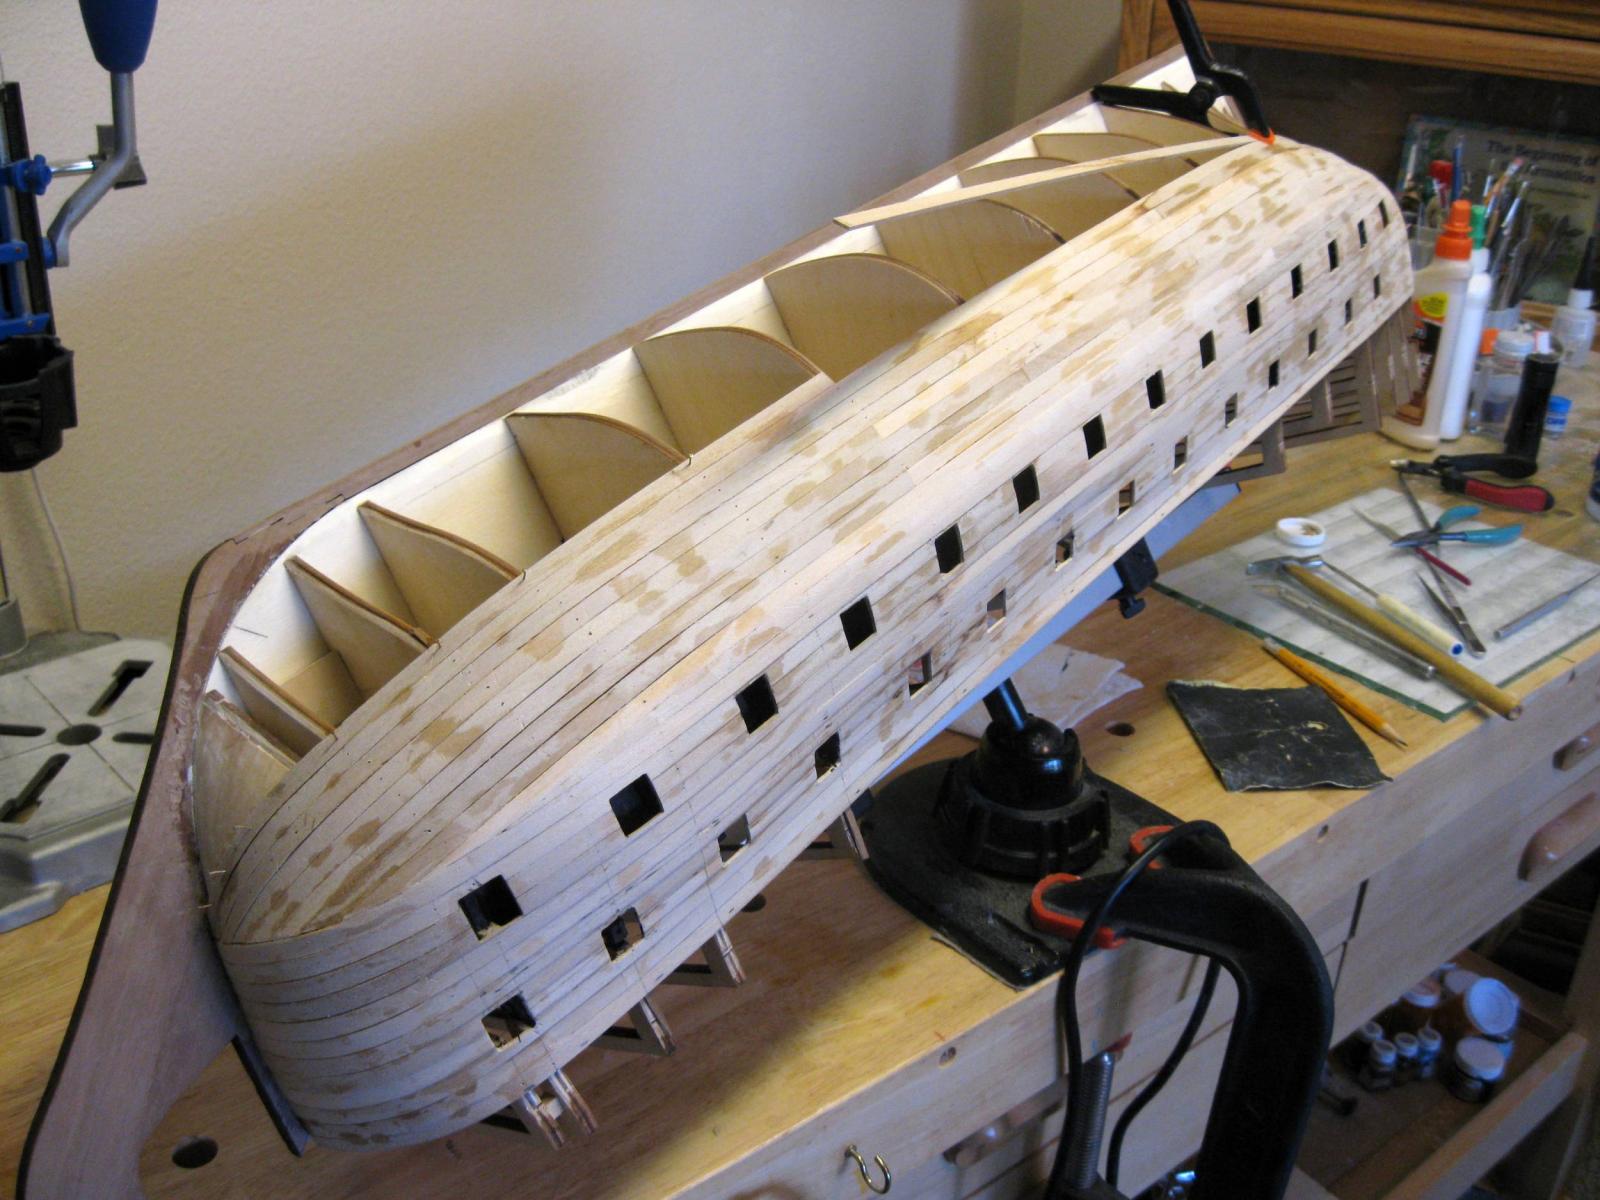
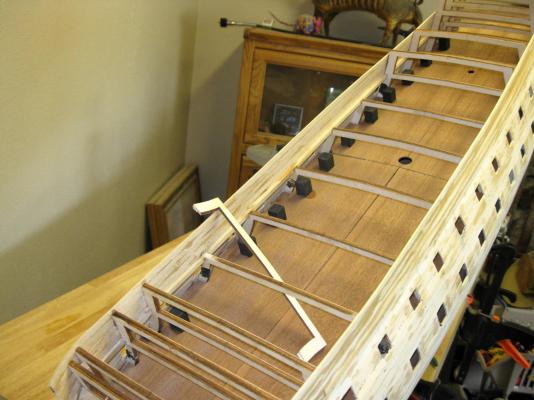
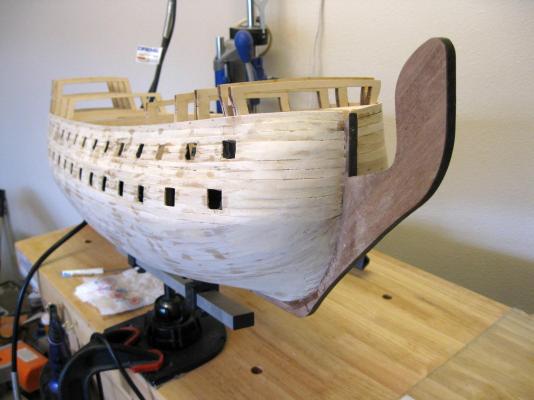
Before placing the main deck, it calls for slicing off the top section of bulkhead "B" to accomodate the forecastle later on. When to cut this is not clear, but it does help support the main deck bulwark planks. I decided to add the 4 planks that will make up the main deck bulwarks first making sure not to glue the planks to this bulkhead, and then cut it off. The plans call for an 18.0mm height at the lowest point of the bulwarks, but it should be more like 20.0mm to allow placing the decorative siding later on. With 4 planks it came to about 24.0mm. It can be shaved down later on. Also, the planks need to be longer at the bow by at least 15.0mm past bulkhead "F" and flush with the last bulkhead at the stern. I still need to trim that. Next up is tp place the main deck and plank it. Vince P.

- 593 replies
-
- 12
-
-
- royal william
- euromodels
- (and 1 more)
-
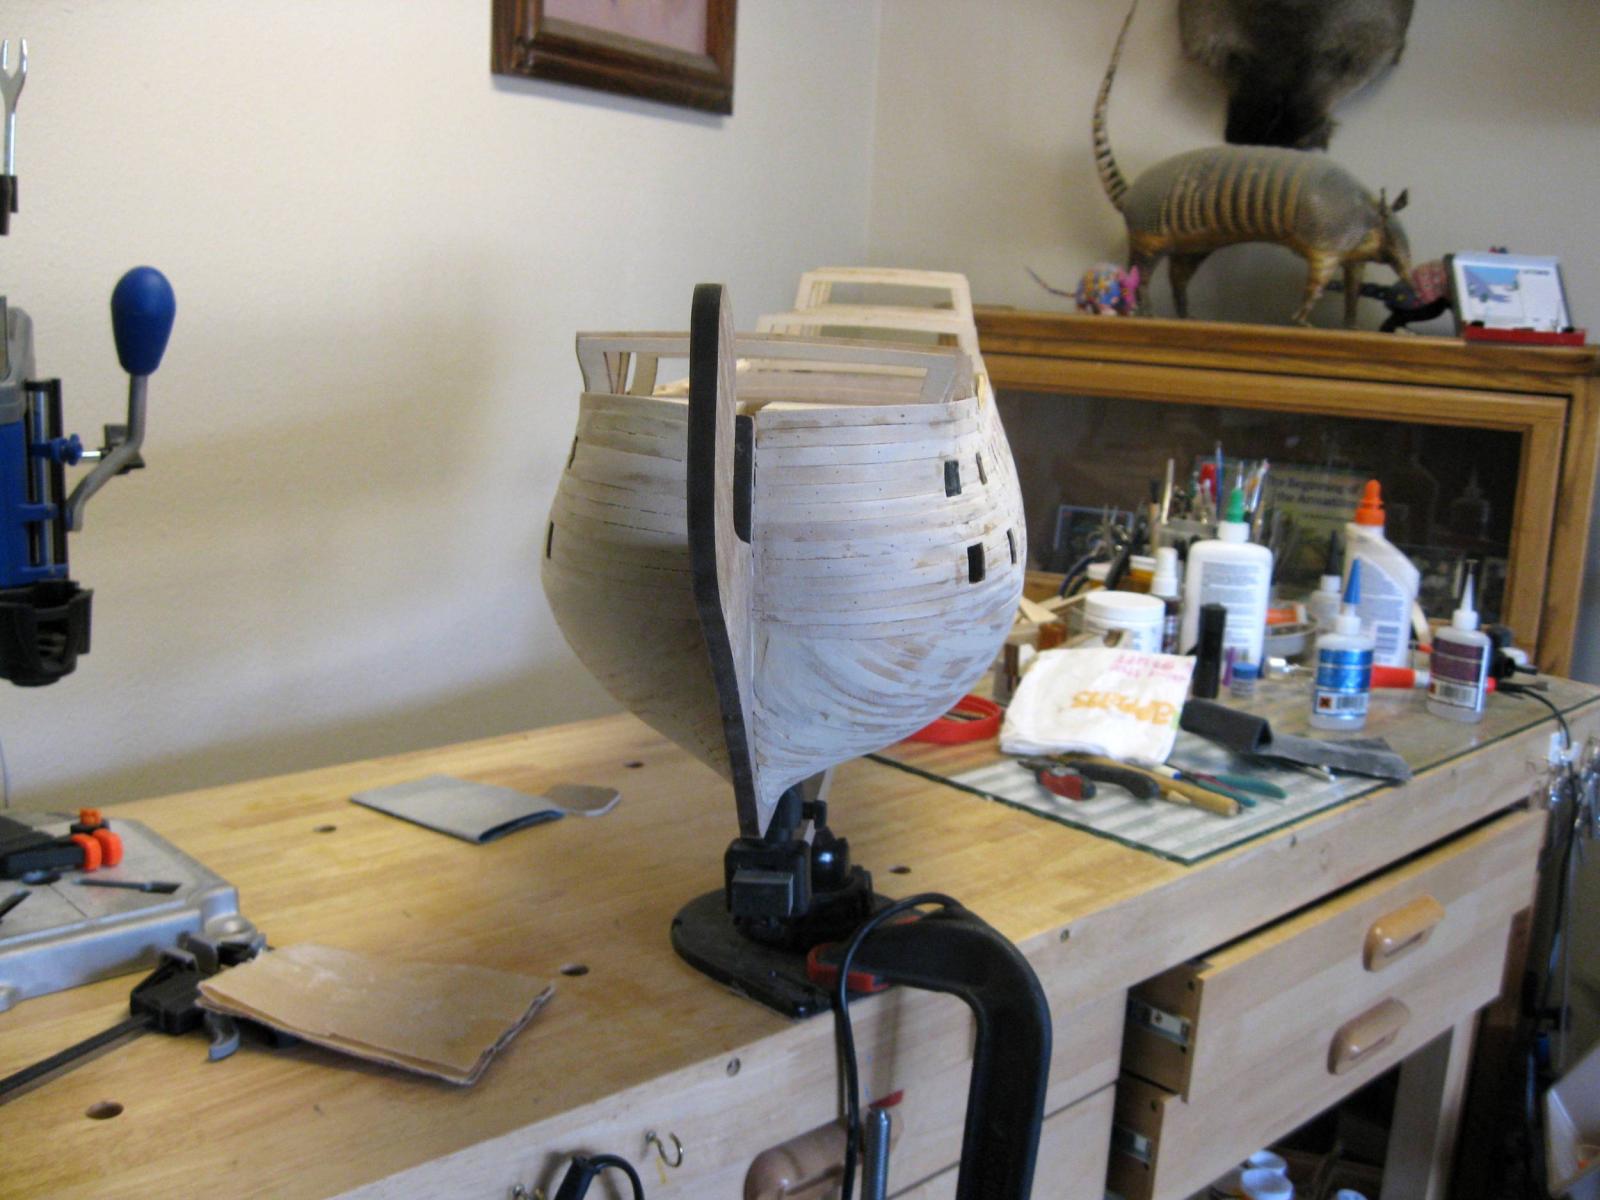
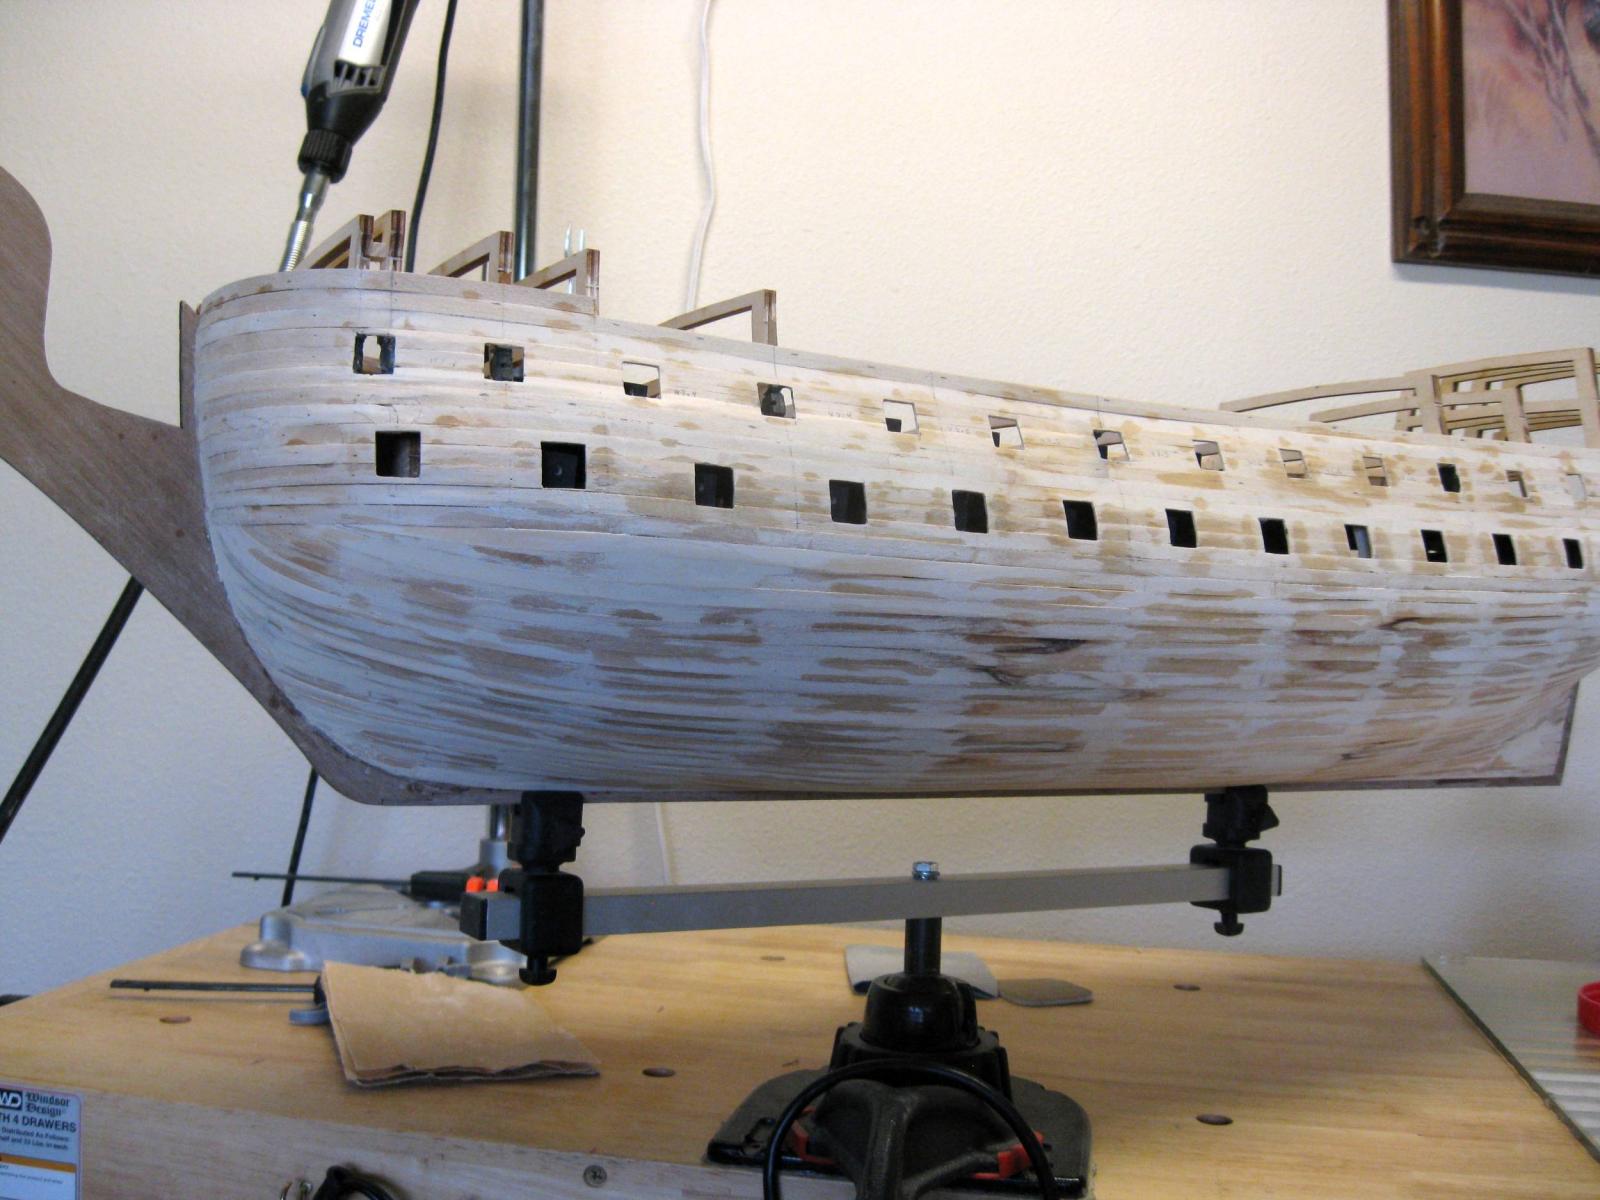
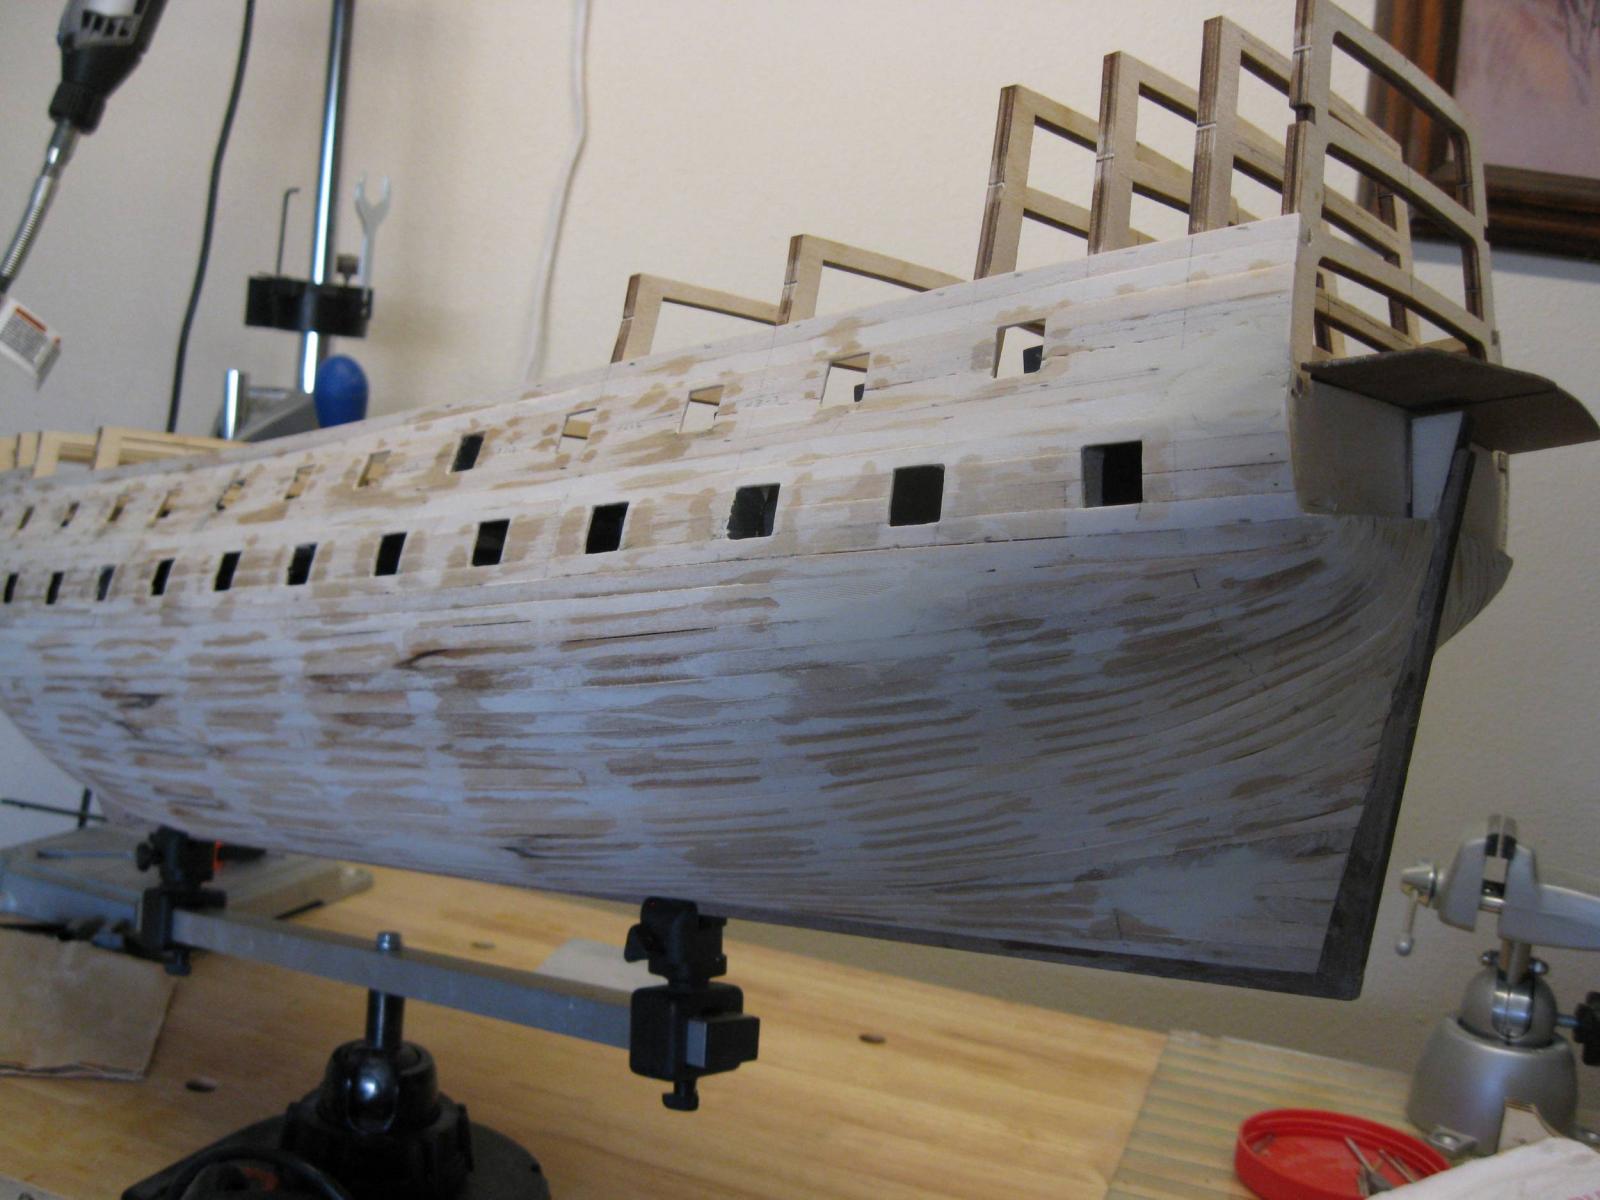
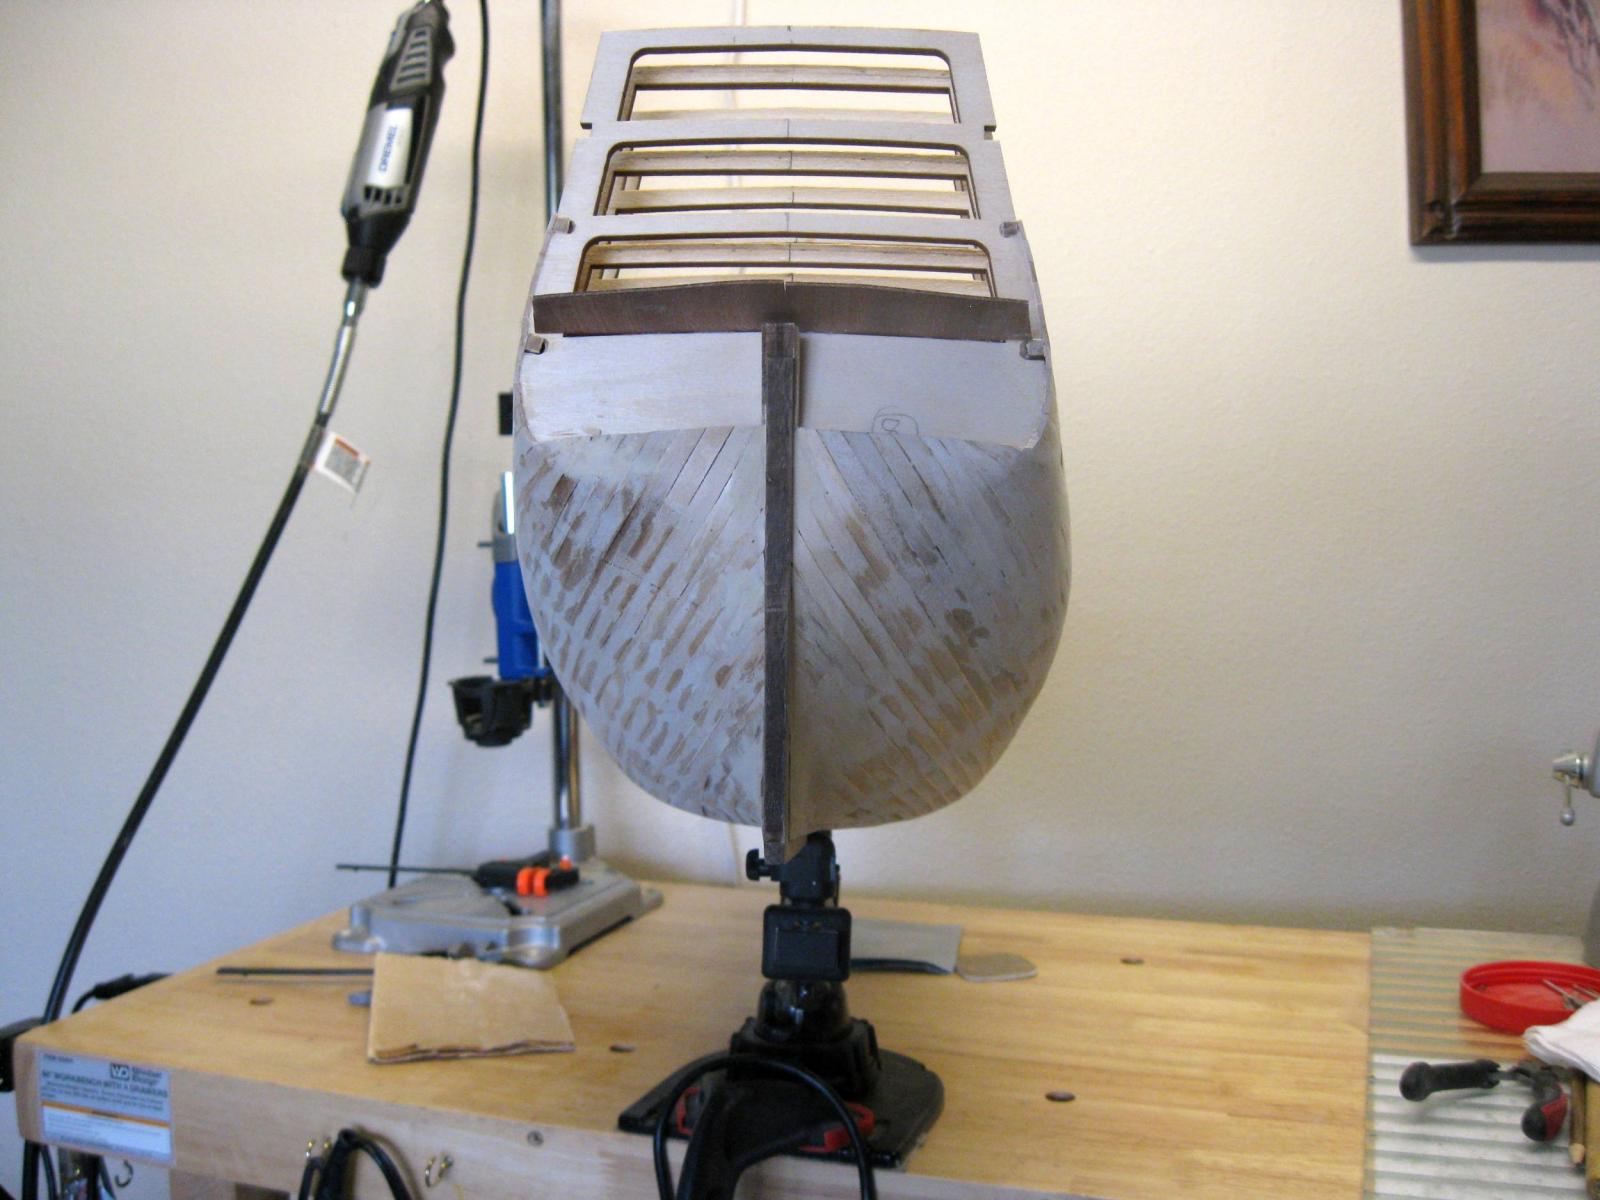
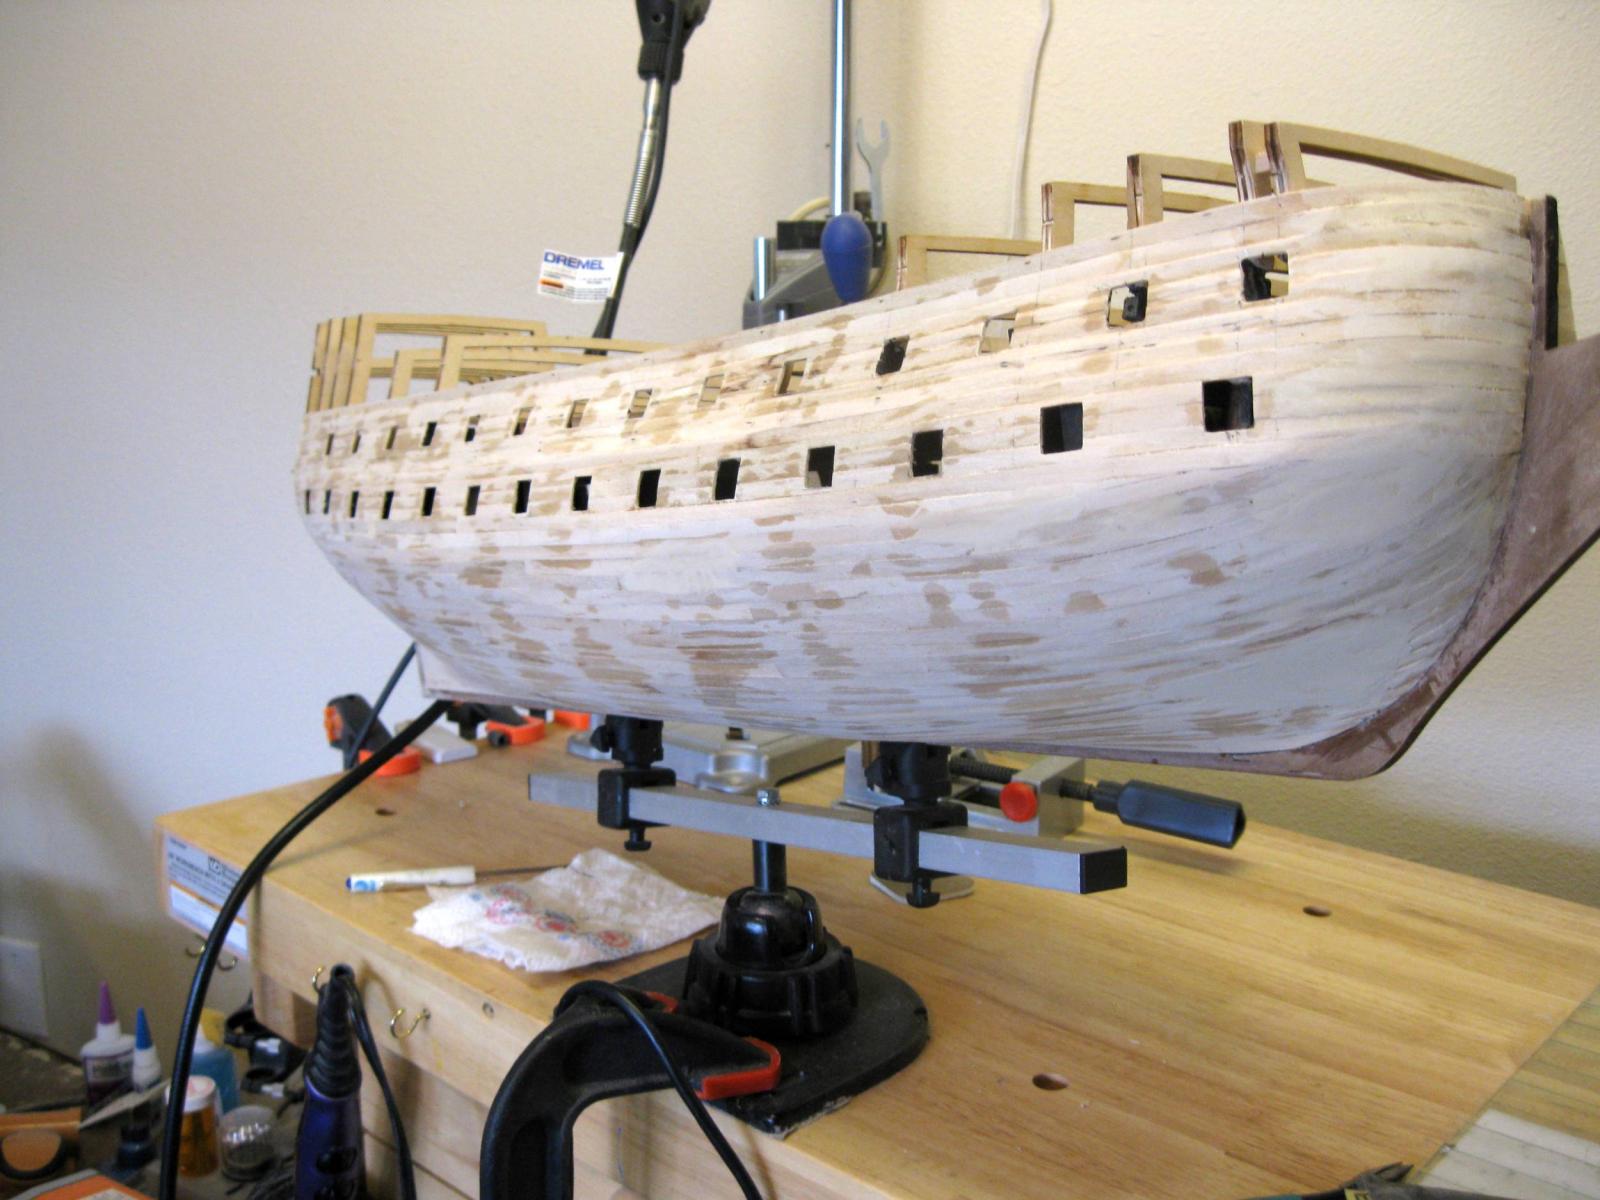
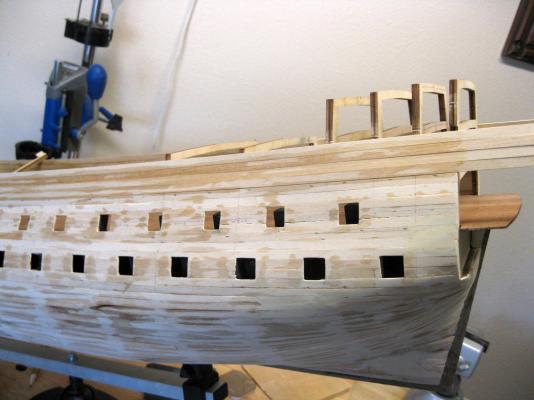
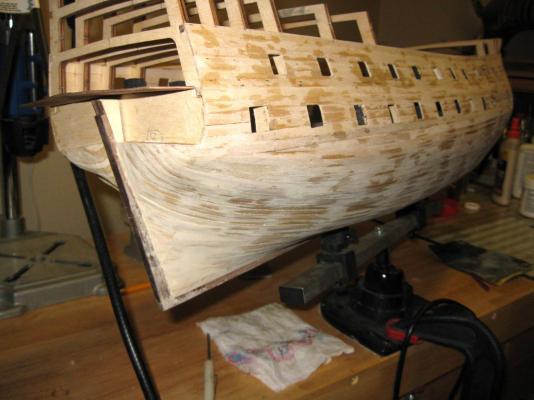
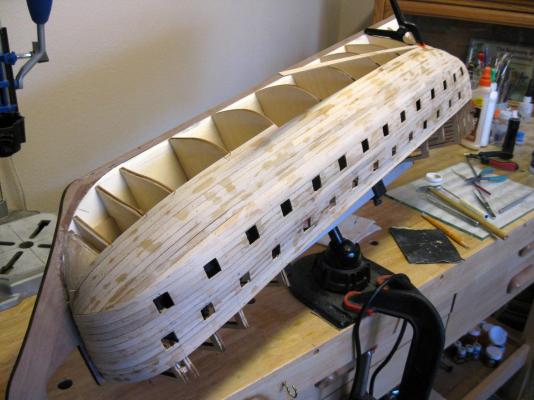
I have finally finished the first layer of hull planking below the main deck. This took over a month and a half. Considering the size of this hull, that was a whole lot of planking. This is definetely the most difficult of the planking. The planks above the main deck are nice and straight, and the second finish layer has a bottom surface to lay it on. The only thing about the finish layer is that it has to be precise and pretty. Next up is to install and plank the main deck. Vince P.


- 593 replies
-
- 13
-
-
- royal william
- euromodels
- (and 1 more)
-
Hi Andy, In regards to foot ropes on the SOS. She went through 2 major rebuilds during her long career, and both well after 1640. It is very possible that she did indeed have foot ropes added since they were used on English ships of the 1660s and up. One of her rebuilds was in the 1670s. I built mine with foot ropes on the lower courses and topmast yards as would have been proper for a ship in the later part of the 17th century. Also, a little known fact is the original design of the SOS had 4 upright masts, not 3. She had 2 mizzens. One was removed shortly after her launch in 1637. Vince P.
-
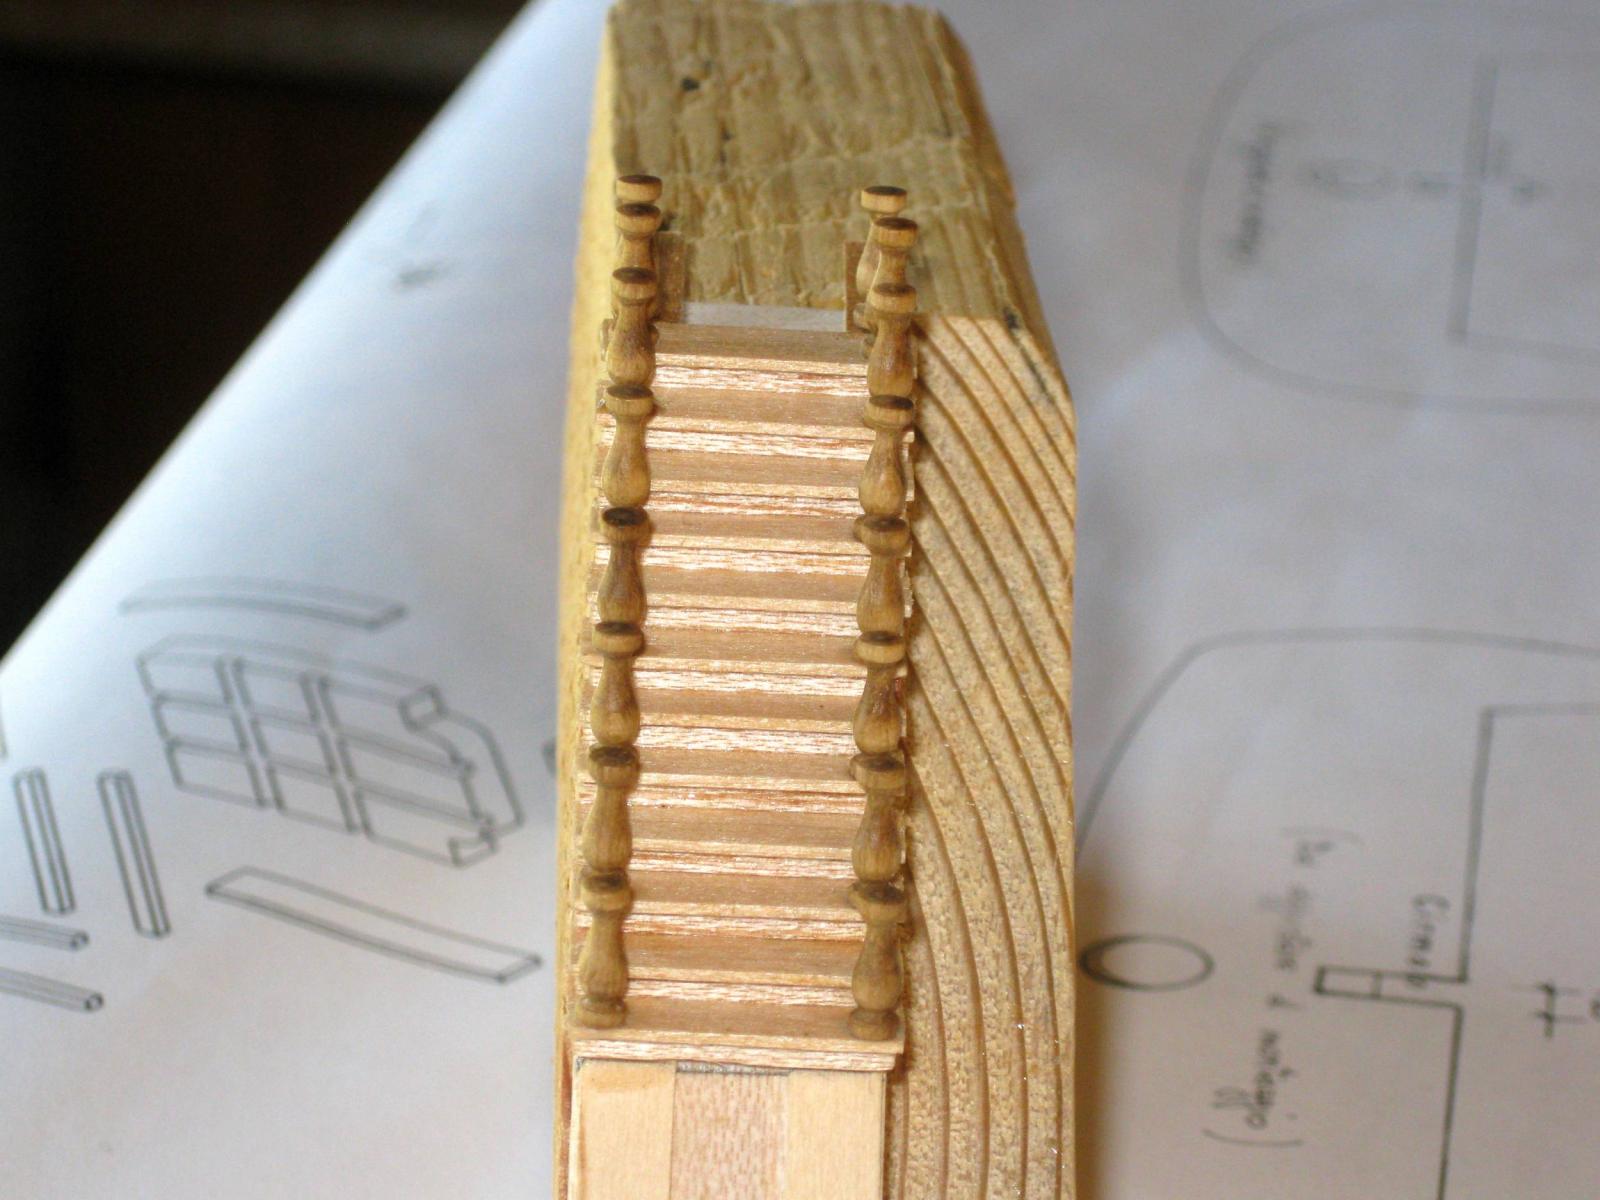
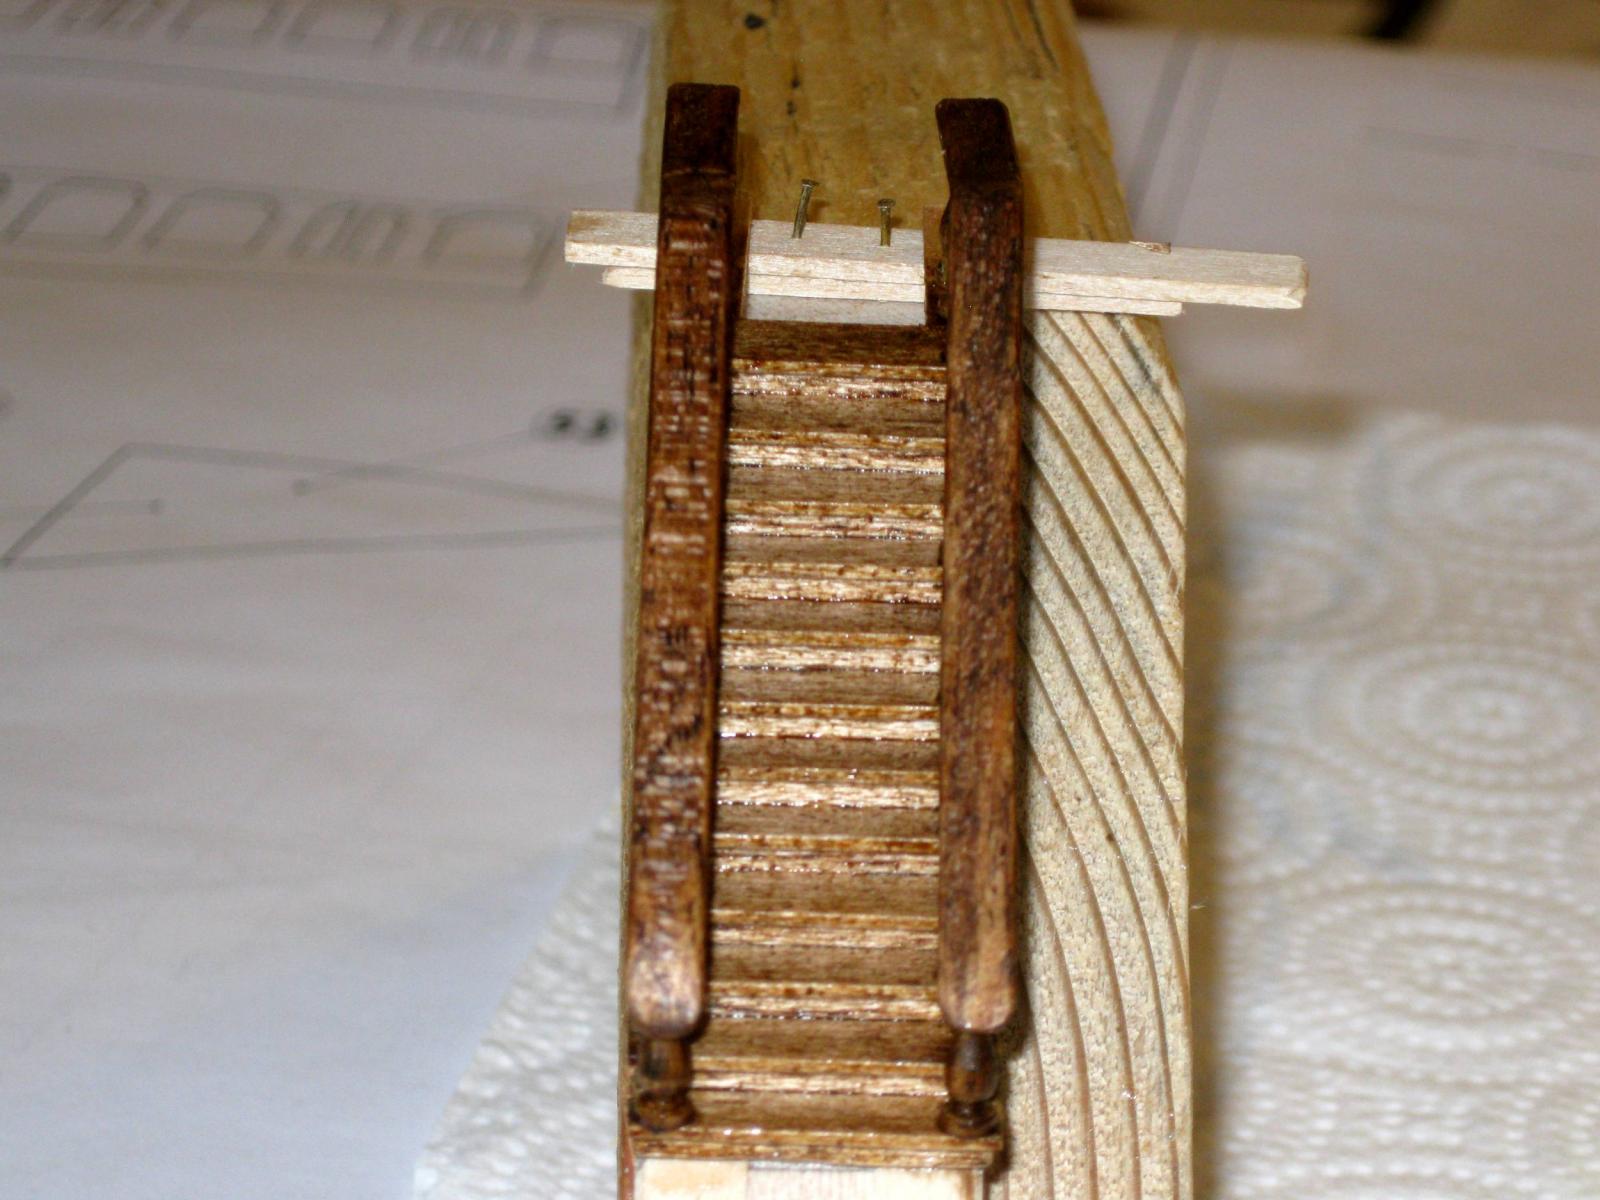
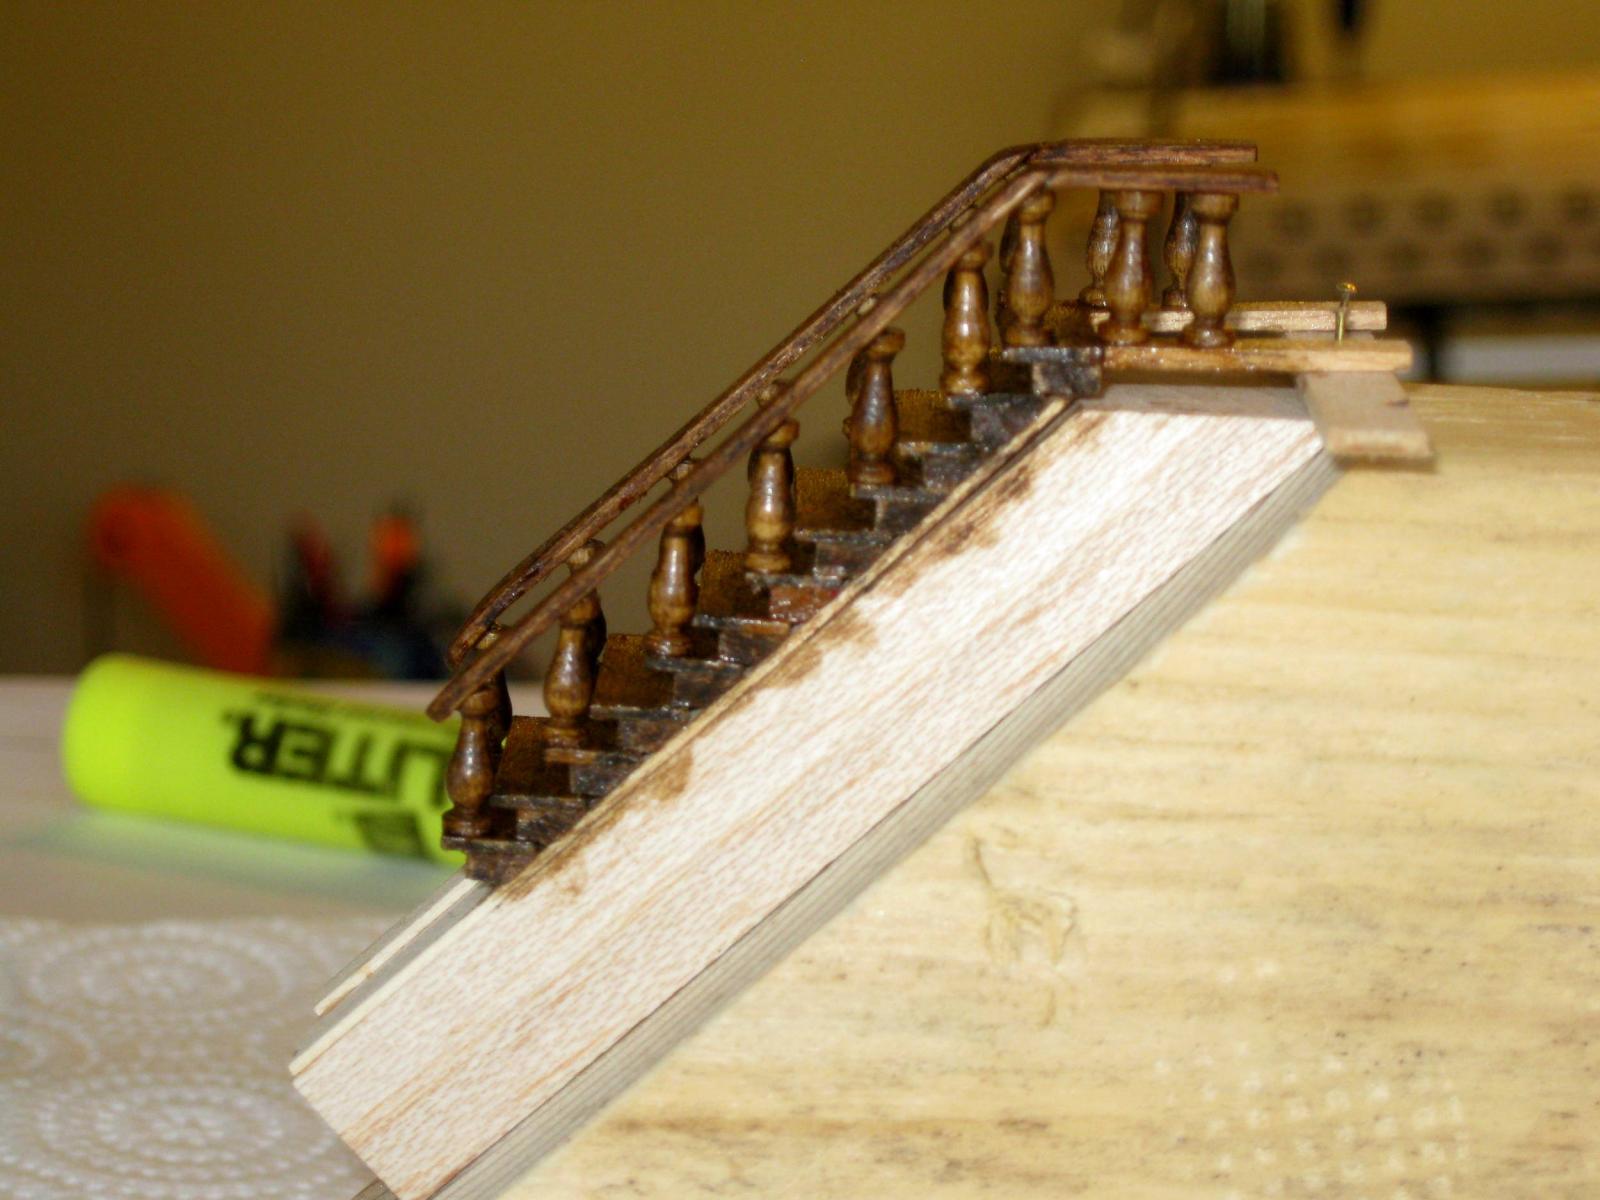
Hi Mike, On the staircase, I waited until the stain I applied got tacky and I then took a small sponge wet with paint thinner and dabbed it until the finish took on a uneven faded look. Learned that trick many years ago from another experienced modeler. Vince P.
- 593 replies
-
- 1
-
-
- royal william
- euromodels
- (and 1 more)
-
OK, I have reposted all of the missing photos. There were about 25 of them. Only one photo that was posted by Brian C. is still missing since I do not have copies of photos sent in by others. Having worked for the government for decades, I got into the habit of making backup copies of everything and storing them in a safe place. Vince P.
- 593 replies
-
- 2
-
-
- royal william
- euromodels
- (and 1 more)
-
Once again I am very disappointed. Having lost my entire SOS build log in the great crash was one thing. Now I see that most all of my early photos in this build log are gone as well. I will have to repost all of them. It will take time to do so, but once again I will do it. There is no sense in posting a log if the users can not see the photos. . Vince P.
- 593 replies
-
- 2
-
-
- royal william
- euromodels
- (and 1 more)
-
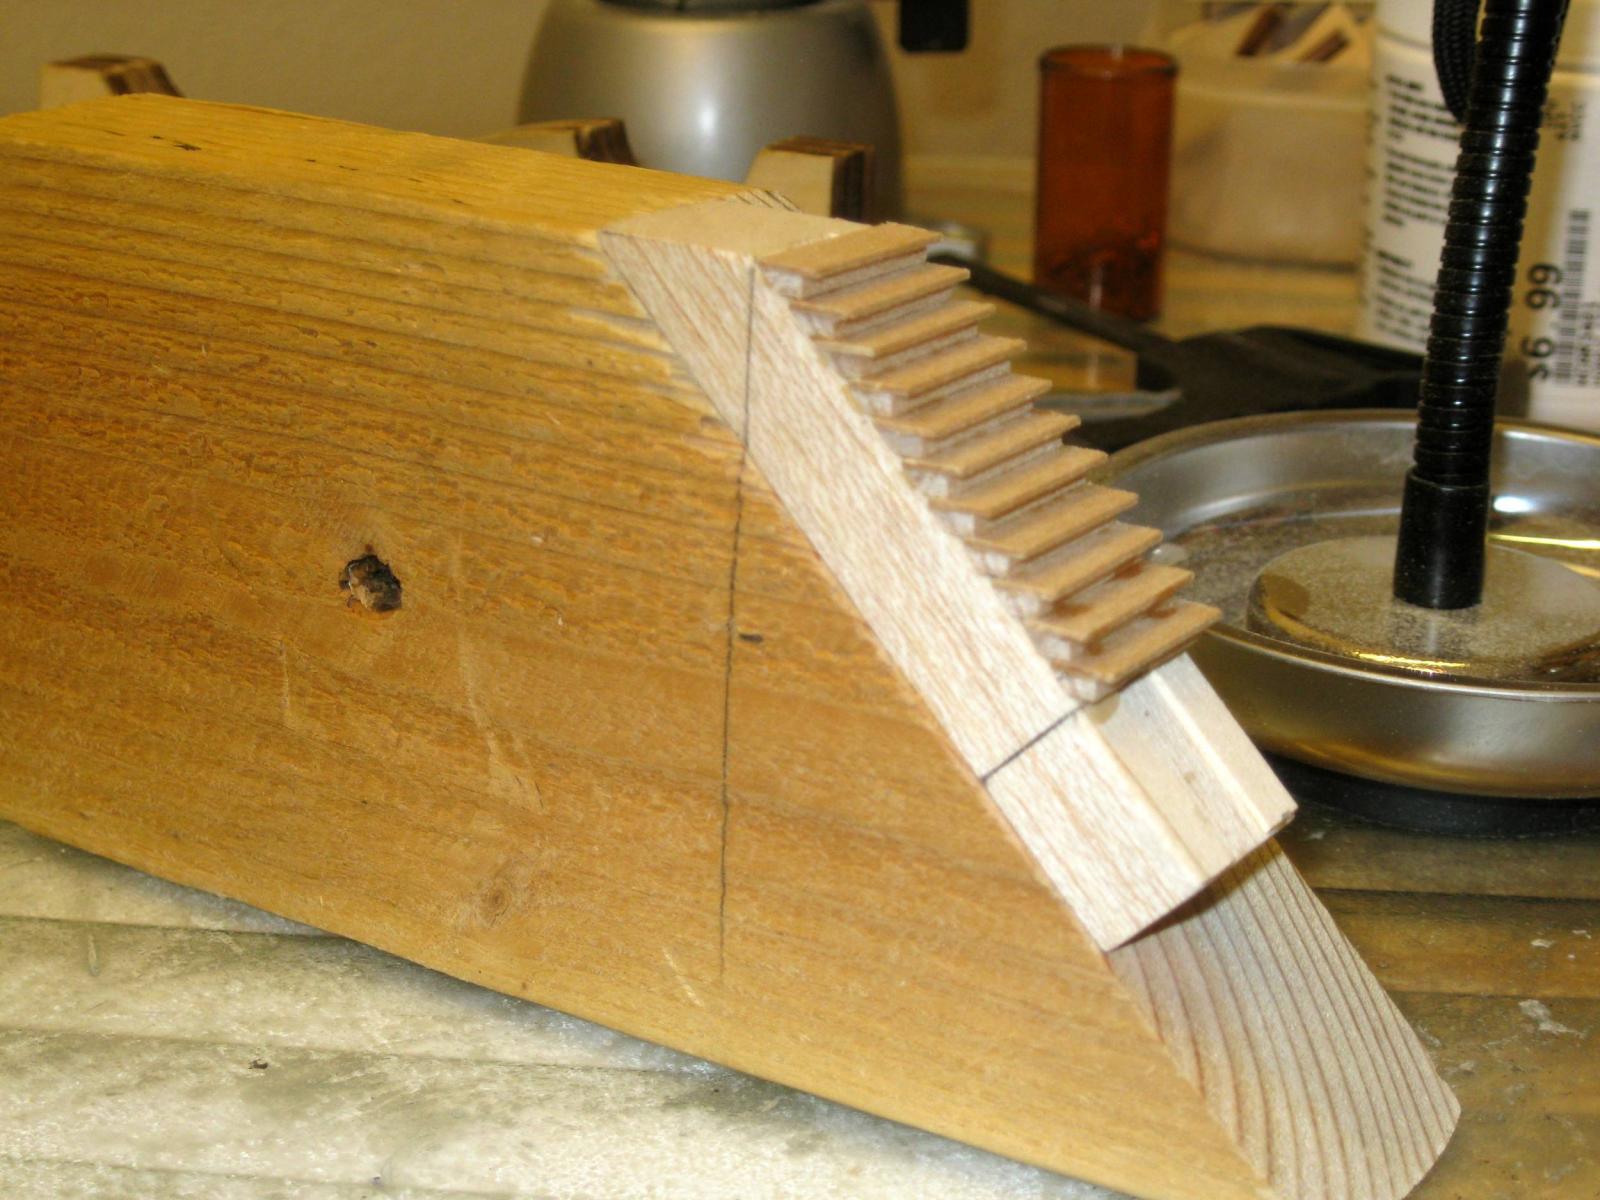
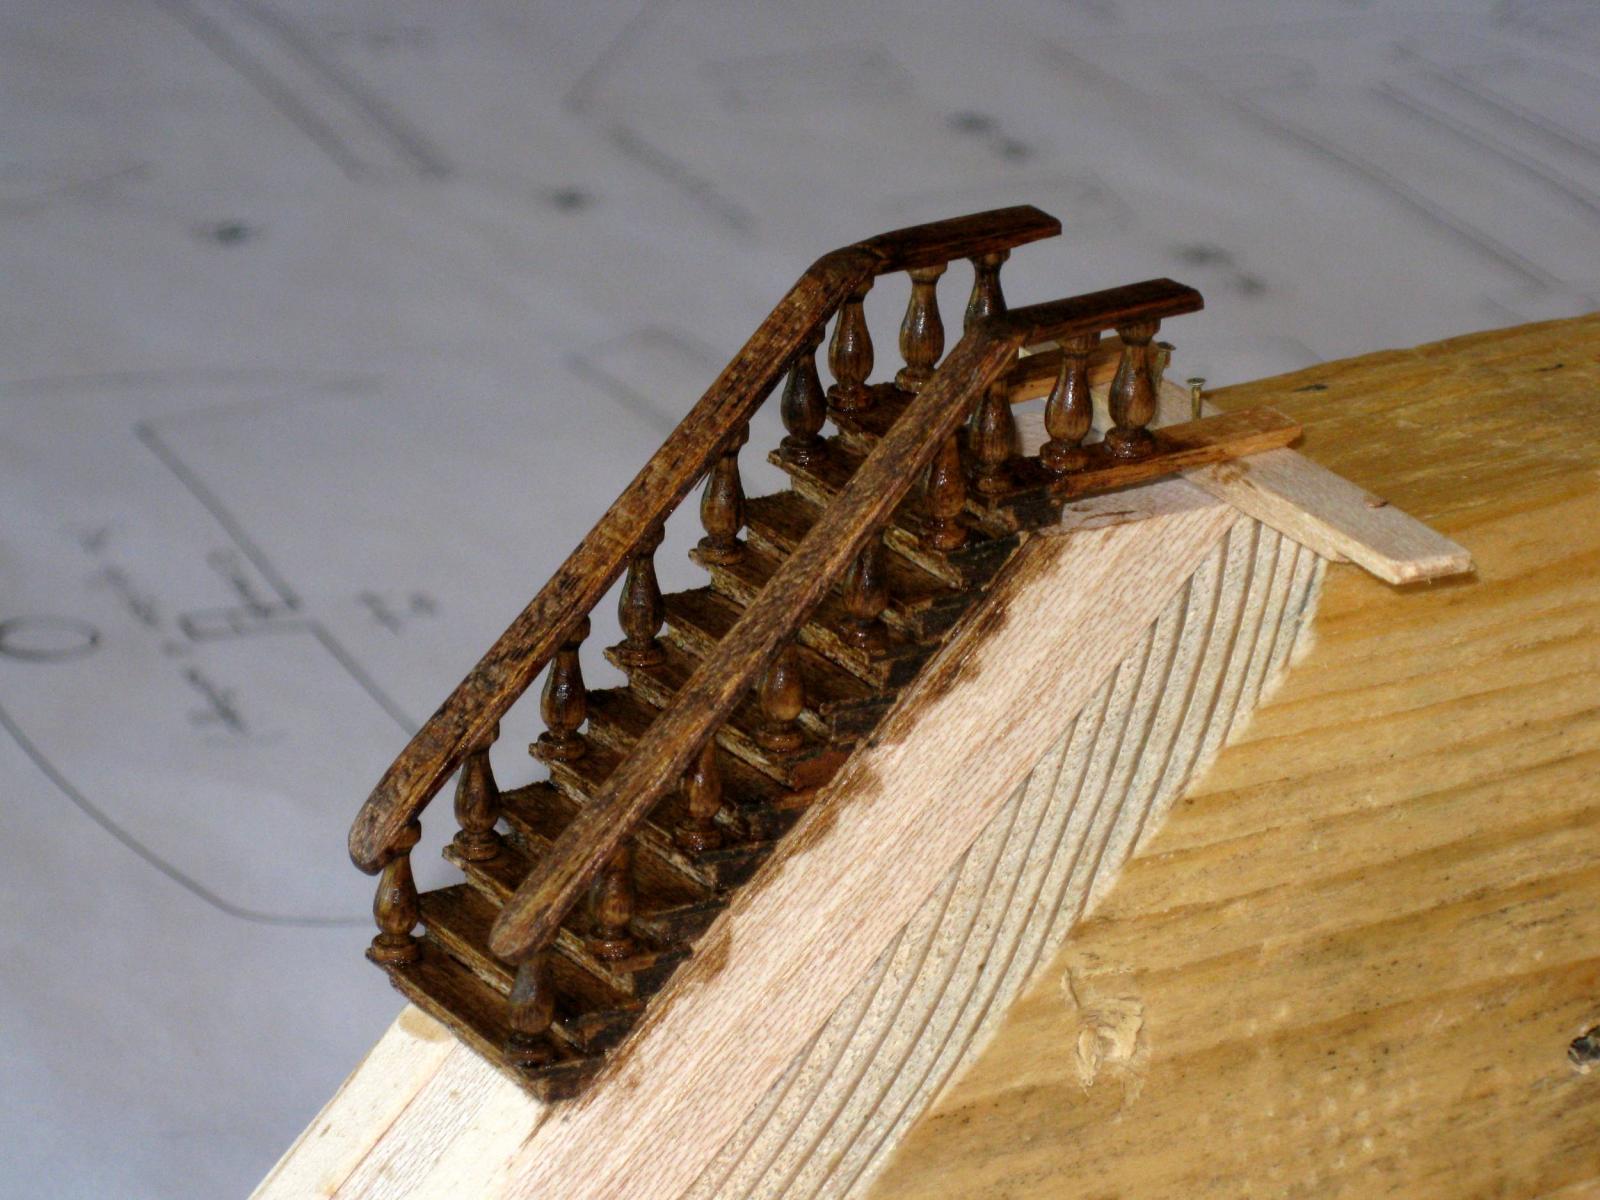
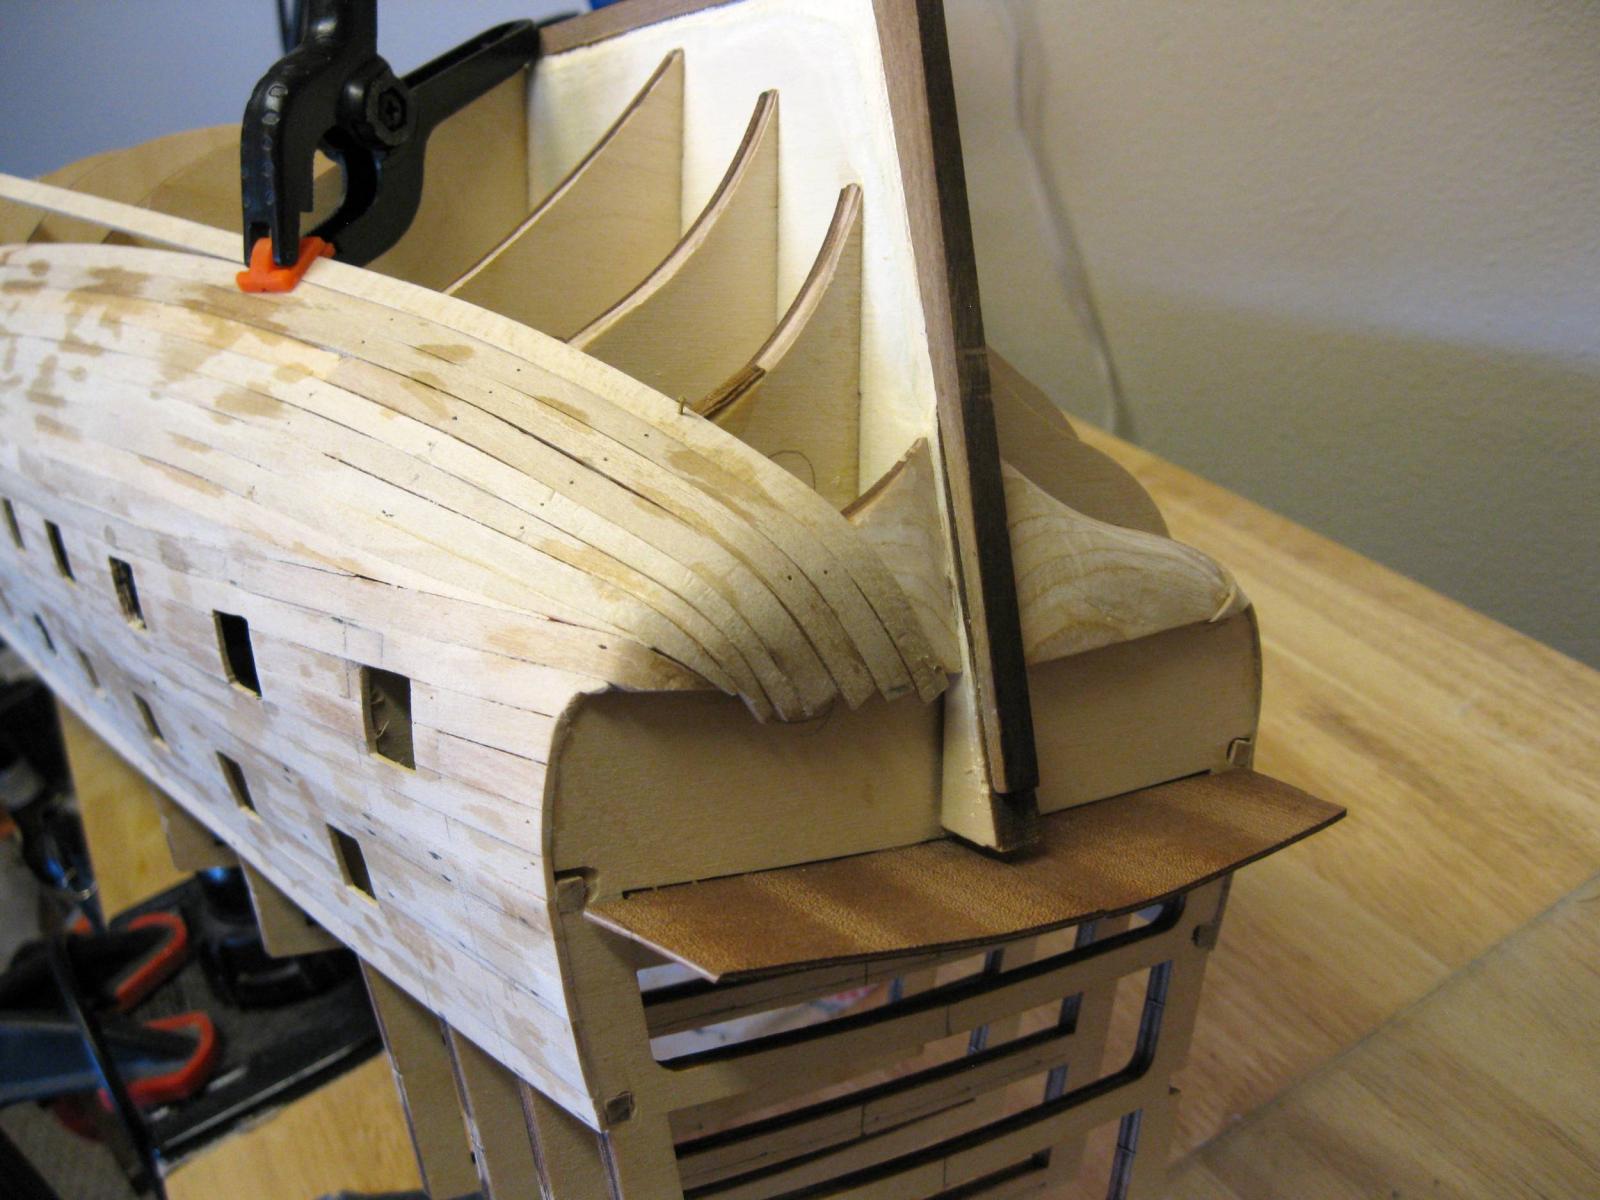
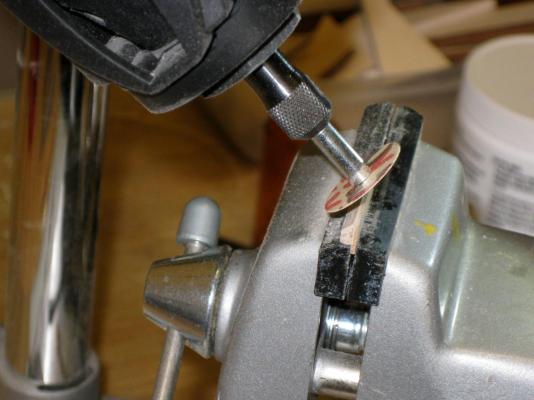
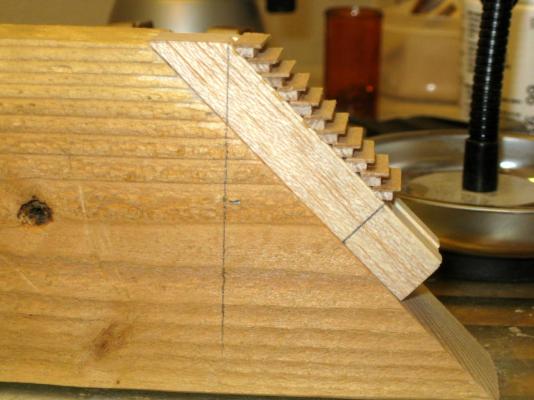
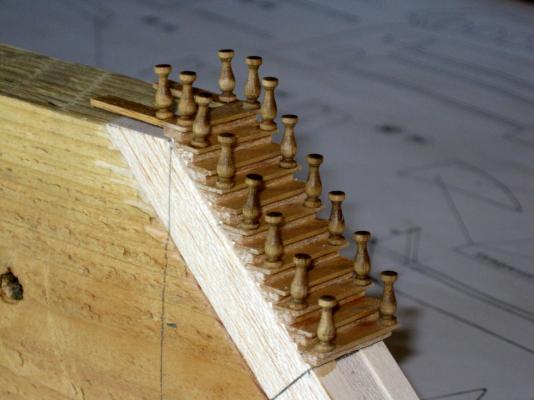
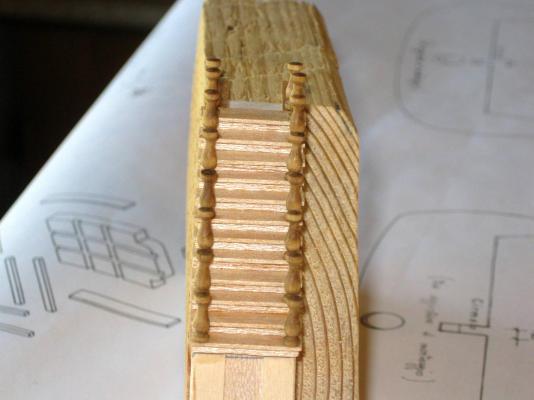
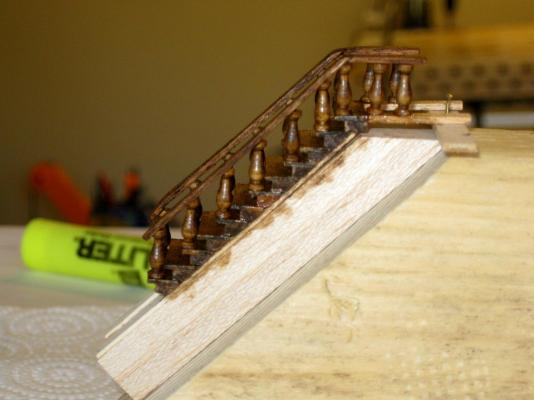
Construction of the main deck staircase from scratch. This is included on the plans but not supplied in the kit. Even though it will not be visible once the upper decks are placed, it was a nice touch and a challenge to build. Each step is made up of 2 parts and needs to be beveled at 45 degrees. I jig was made from lumber and the steps placed on top of each other. Once the whole thing is completed, it can be lifted off the jig. I did find some nice stanchions at Model Expo that were pretty close to the correct size, and only had to be cut down a little and beveled on the tops. I finished the whole thing in red walnut and weathered it to look old. Once the main deck is installed and planked, the staircase hole will be cut and the assembly placed down into the deck. A "C" shaped bannister will have to be constructed to match the staircase and attached to the outside wings so it encloses the opening in the deck on 3 sides. Vince P.


- 593 replies
-
- 18
-
-
- royal william
- euromodels
- (and 1 more)
-
Hi Adam, Thanks for the link. His ship is fabulous. Do you know if it is the Amati setup, or is it a scratch build. The decorations are great and I wonder if they are the Amati set. Thanks, Vince P.
-
Still working on the first planking. Almost finished. Also constructing the main deck staircase. This has to be made from scratch and I am getting an education in the process. Even though this will not be visible when the upper decks and fixures are put in place, it was a challenge so I am building it and will place it on the ship. Photos coming soon on this and the finished first planking. Vince P.
- 593 replies
-
- 1
-
-
- royal william
- euromodels
- (and 1 more)
-
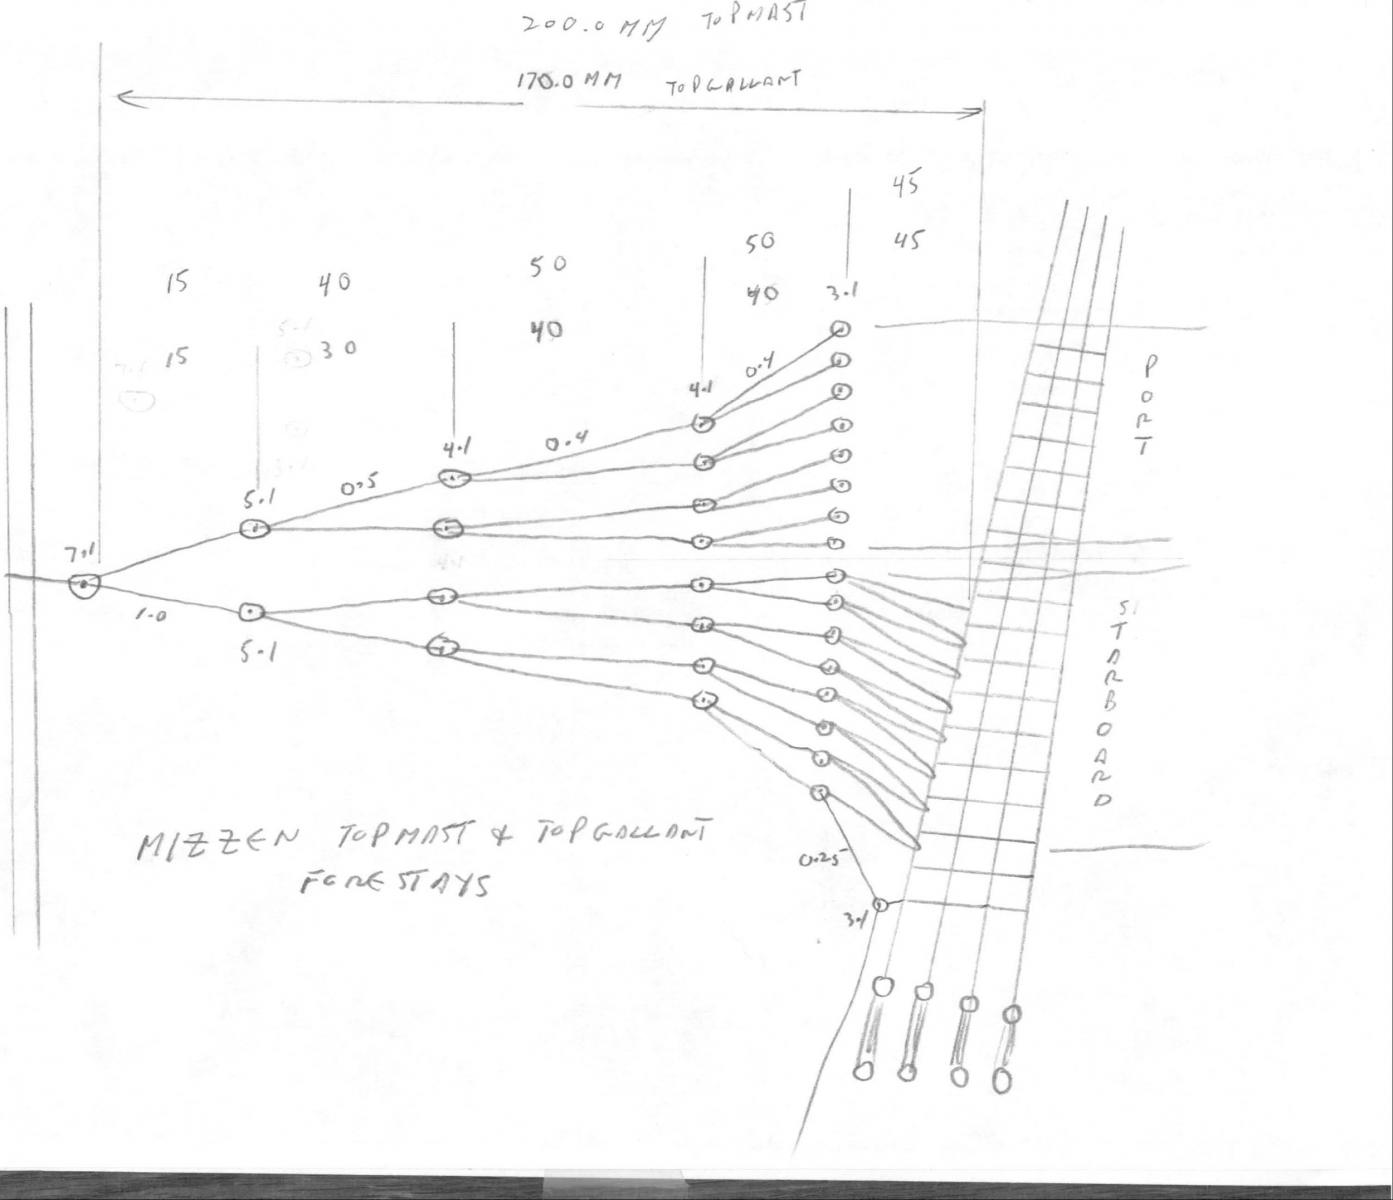
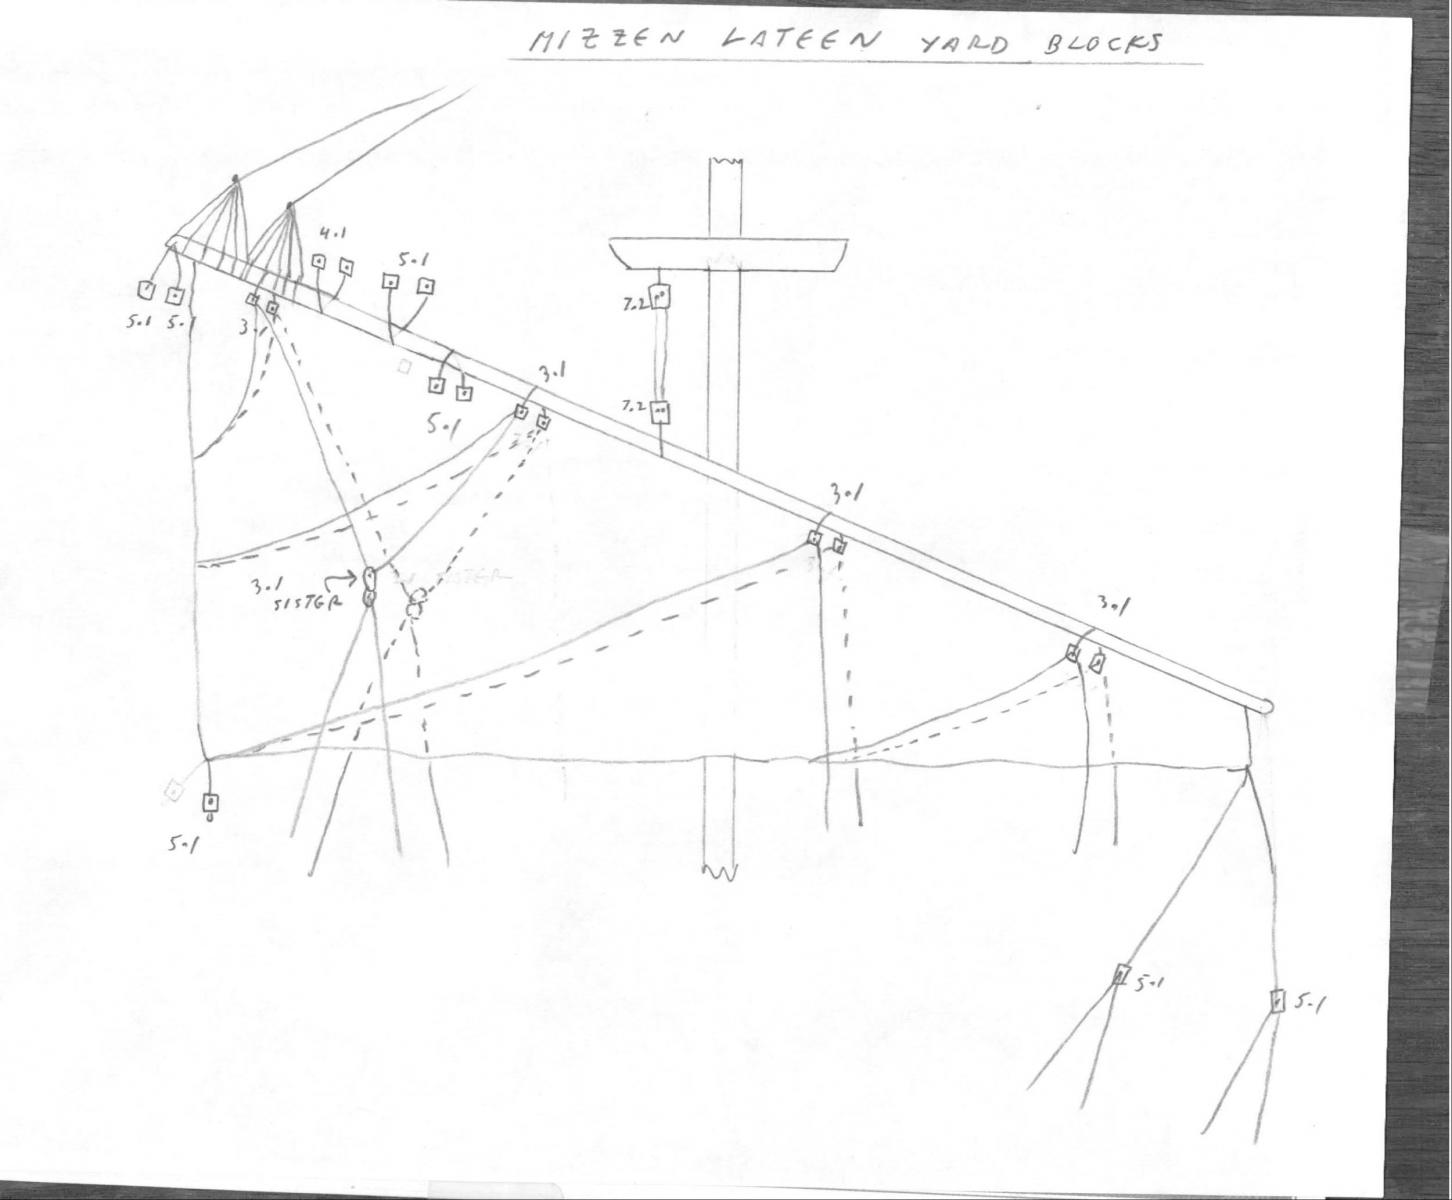
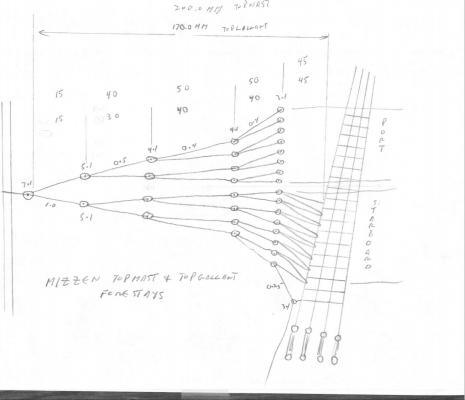
Here are the rigging diagrams for the lateen sail and yard, and the mizzen topmast and top gallant forestays. Vince P.

- 264 replies
-
- 1
-
-
- sovereign of the seas
- mantua
- (and 1 more)
-
Hi Trevor, The guns you are referring to were called "Murdering Guns". They were usually loaded with anti-personell schrapnel and fired across the ship's own decks to kill and mame boarding parties. I can only imagine they got some of their own crew as well. Vince P.
- 555 replies
-
- 3
-
-
- sovereign of the seas
- mantua
- (and 1 more)
-
Denis, She is looking fabulous. I think the sails are fine as they are. Don't be so critical of your work. You are as good as most that I have seen. Vince
- 555 replies
-
- 1
-
-
- sovereign of the seas
- mantua
- (and 1 more)
-
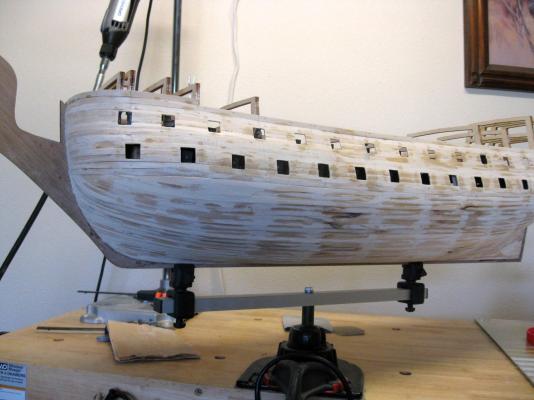
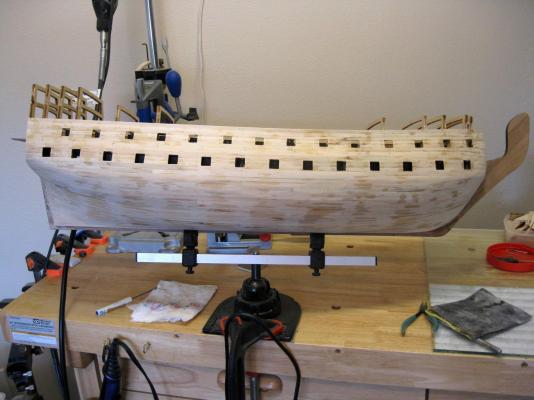
Completed one side of first planking layer below main deck. Sanded it down and filled in any low spots and small gaps between planks. Before completing the other side, I made sure the masts would seat properly in the slots of the false keel and upper gun deck. It is necessary to mill the lower end of the main mast to a flat of 10.0mm in order to fit in the slot of the keel. Vince P.

- 593 replies
-
- 10
-
-
- royal william
- euromodels
- (and 1 more)
-
All of your pictures are not there anymore. Vince P.
-
Great job Ulises. Congrats on your completion of a great ship. What's next? Vince P.
-
Hi Adam, Thanks for the link. Vince P.
-
Brian, I had the same concerns.The numbers don't add up. The Constructo hull should be well over 1000mm long at that scale. Vince
-
Hi Hamilton, I spoke with ME a while ago and they said companies like Mantua were dropped because of poor customer service. Right now, "Ages of Sail" out of California propbably has the best selection of kits from most all of the manufacturers. I have purchased several from them over time and their service is excellent and delivery quick. Vince P.
-
Thanks much, Nigel. I assume you can go to their website and order the plans and parts? Vince P.
-
Hi Rich, Thanks for the response. I am aware of the Mamoli kit. While I like their kits and have built some, their Prince is a 1:144 scale, which is too small to my liking. The Amati kit was something like 1:64. Constructo makes one in about the same scale as Amati did, but I like the Amati kit for its better detail. If I can't find an Amati, I will get the Constructo kit and add the detail myself. Thanks, Vince P.
-
Hi Everyone, Amati used to make a kit of the HMS Prince. If you know anyone, or if you have it in your stash and want to sell it, I am very interested. Also, if anyone knows where to possibly get one, I would be greatful. Thanks, Vince P.
-
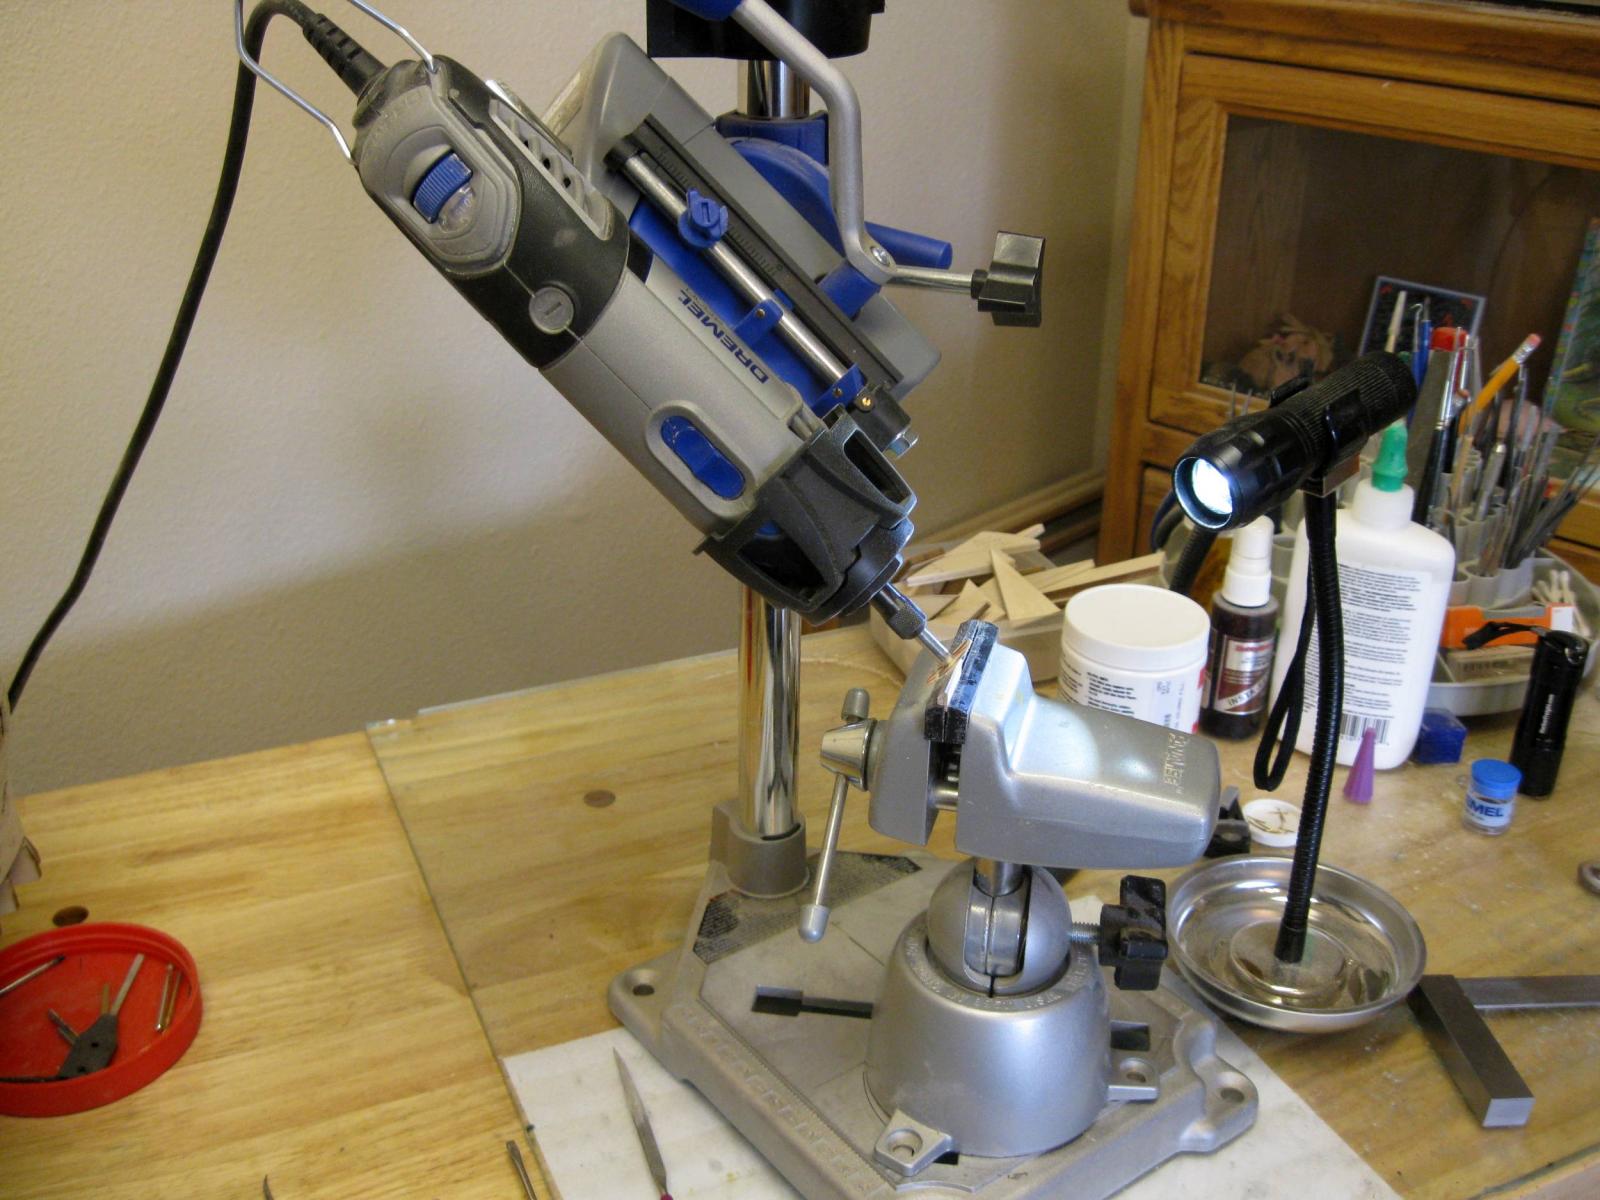
ARGGHHH!! I am in the middle of planking the hull and my electric plank bender burns out. Murphy's Law strikes again. I am bending them by hand until a new one gets here. Vince P.
-
Walnut can be good and bad. It depends on the moisture in the wood. If it is really dried out, like many pieces in kits, it is very brittle and hard to work with in small thin pieces. Good quality wood has some moisture content and will not break if handled carefully. If you are having brittle issues, try soaking in water for a couple of hours and then just blow dry so they are still barely moist. I do this often and it makes the wood easier to work with and reduces breakage considerably. Vince P.
-
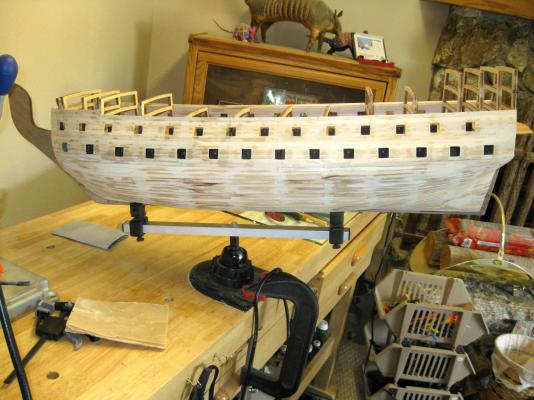
Working on completing the first layer of planking below the main deck. Very slow process on a ship this size. You will notice many glue spots. I want to make sure the planks are very secure as the basis for the final planking. This will get all covered up with the pretty second layer. Vince P.

- 593 replies
-
- 11
-
-
- royal william
- euromodels
- (and 1 more)