pirozzi
-
Posts
843 -
Joined
-
Last visited
Content Type
Profiles
Forums
Gallery
Events
Everything posted by pirozzi
-
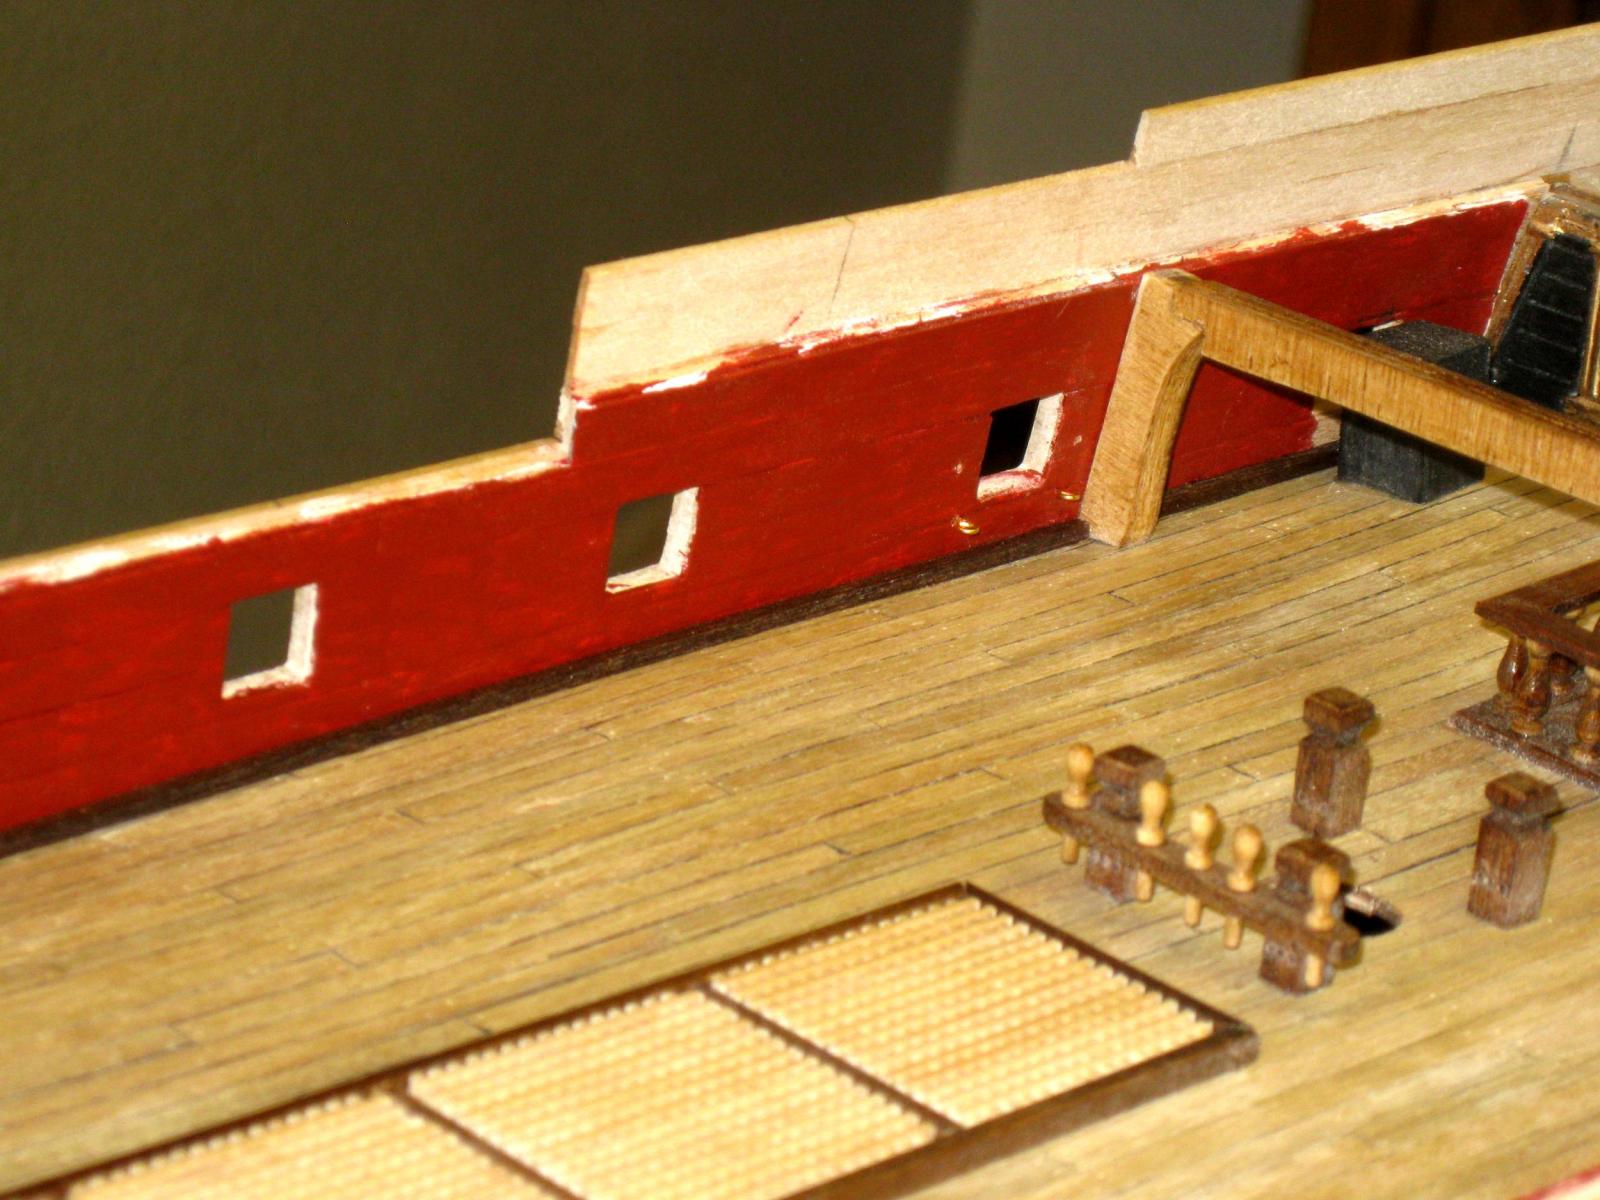
 The main and forecastle deck waterways have been added. They are just raised strips of wood running along the bulwarks where they join the deck. Walnut 2x2mm strips were used. The plans don't really show these because they are covered by the railings when looking down on the decks, but in plan sheet #8 there are what looks to be waterways in the hull cross section views. Also, if you are going to full rig the deck guns as I am, the last gun aft in the open on the main deck on each side will pretty much be coveed by the quarterdeck, so the eyebolts on the bulwarks for the rigging need to be placed now. There ar 4 eyebolts per gun. The upper ones can be added later, but the holes should be drilled now. The lower ones should be placed now. Next up is placing the false quarterdeck. Vince P.
- 593 replies
-
- 6
-

-
- royal william
- euromodels
- (and 1 more)
-
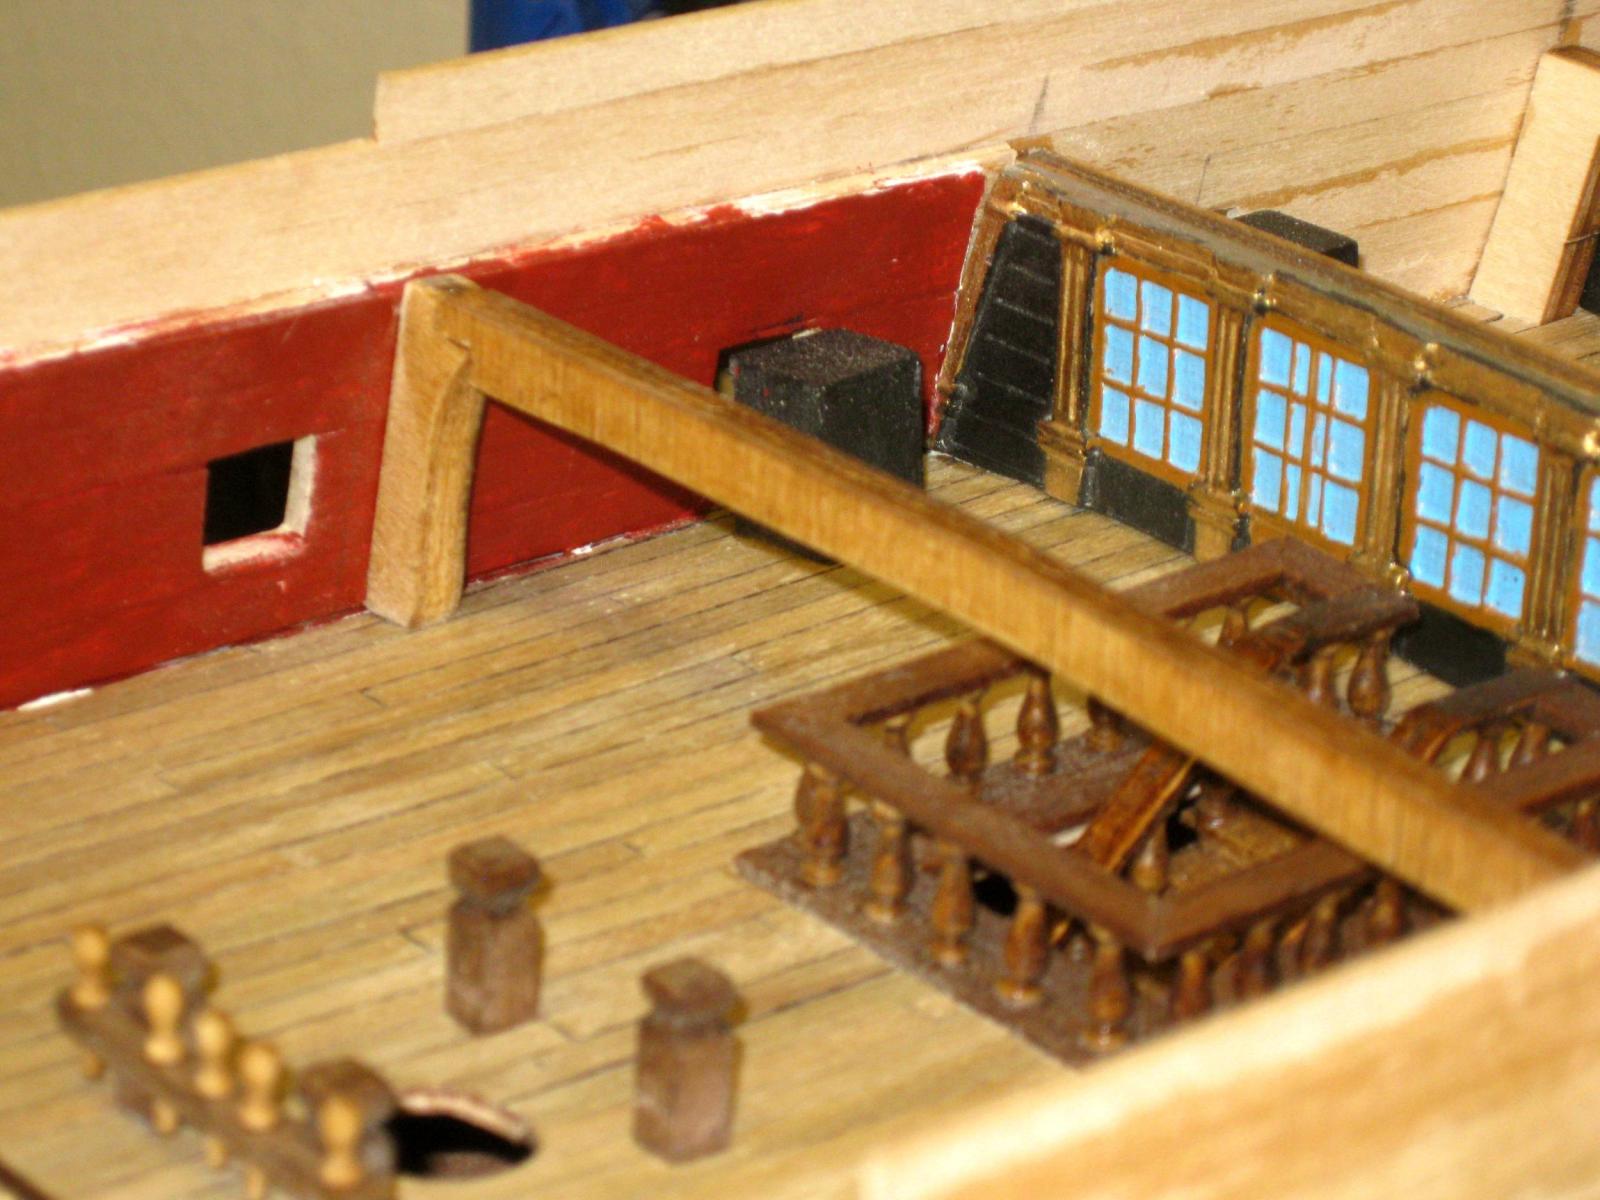
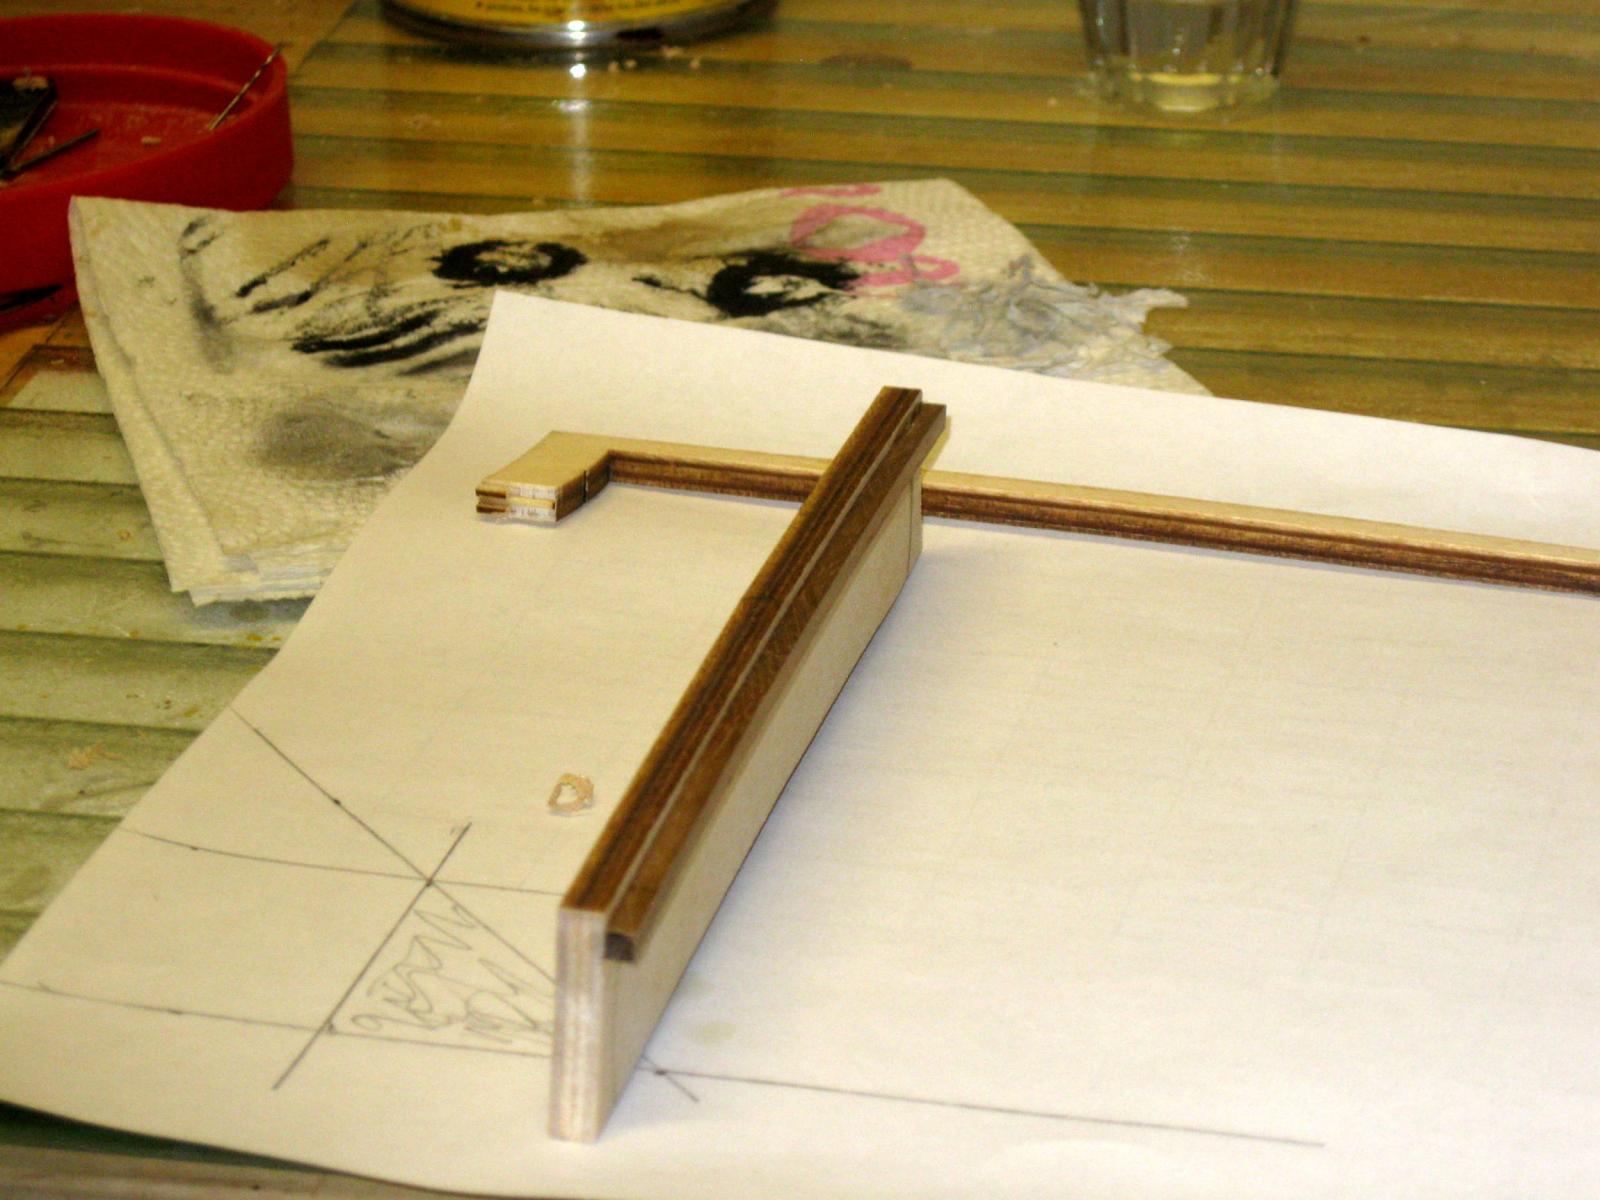
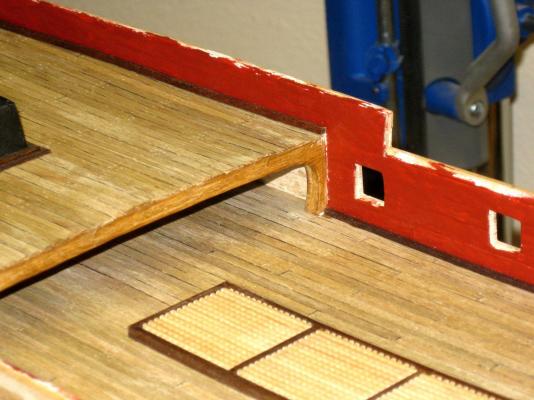
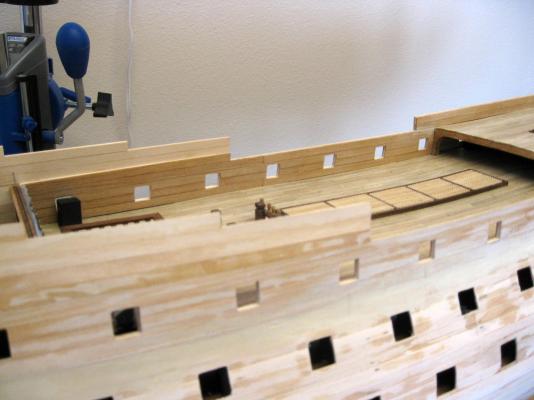
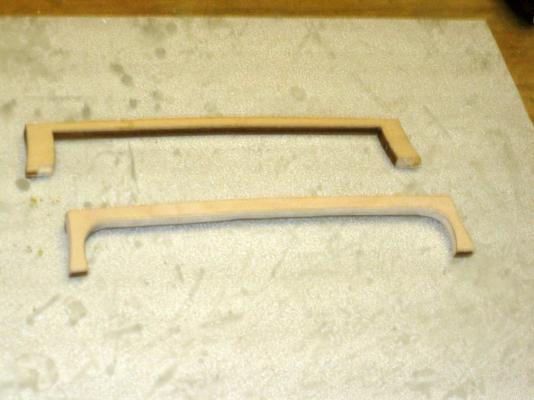
Before placing the false quarterdeck, it is necessary to fabricate a breast beam similar to the one under the aft end of the forecastle. The quarterdeck extends considerably forward of the supporting bulkheads and therefore needs this supporting beam. Unlike the forecastle, I recessed the beam slightly under the quarterdeck to make clearance for the main deck guns placed just at the forward end of the quarterdeck. I used scrap pieces of plywood stock left over from the bulkheads to construct the beam. Next up is to place the main deck and forecastle waterways. Vince P.

- 593 replies
-
- 8
-
-
- royal william
- euromodels
- (and 1 more)
-
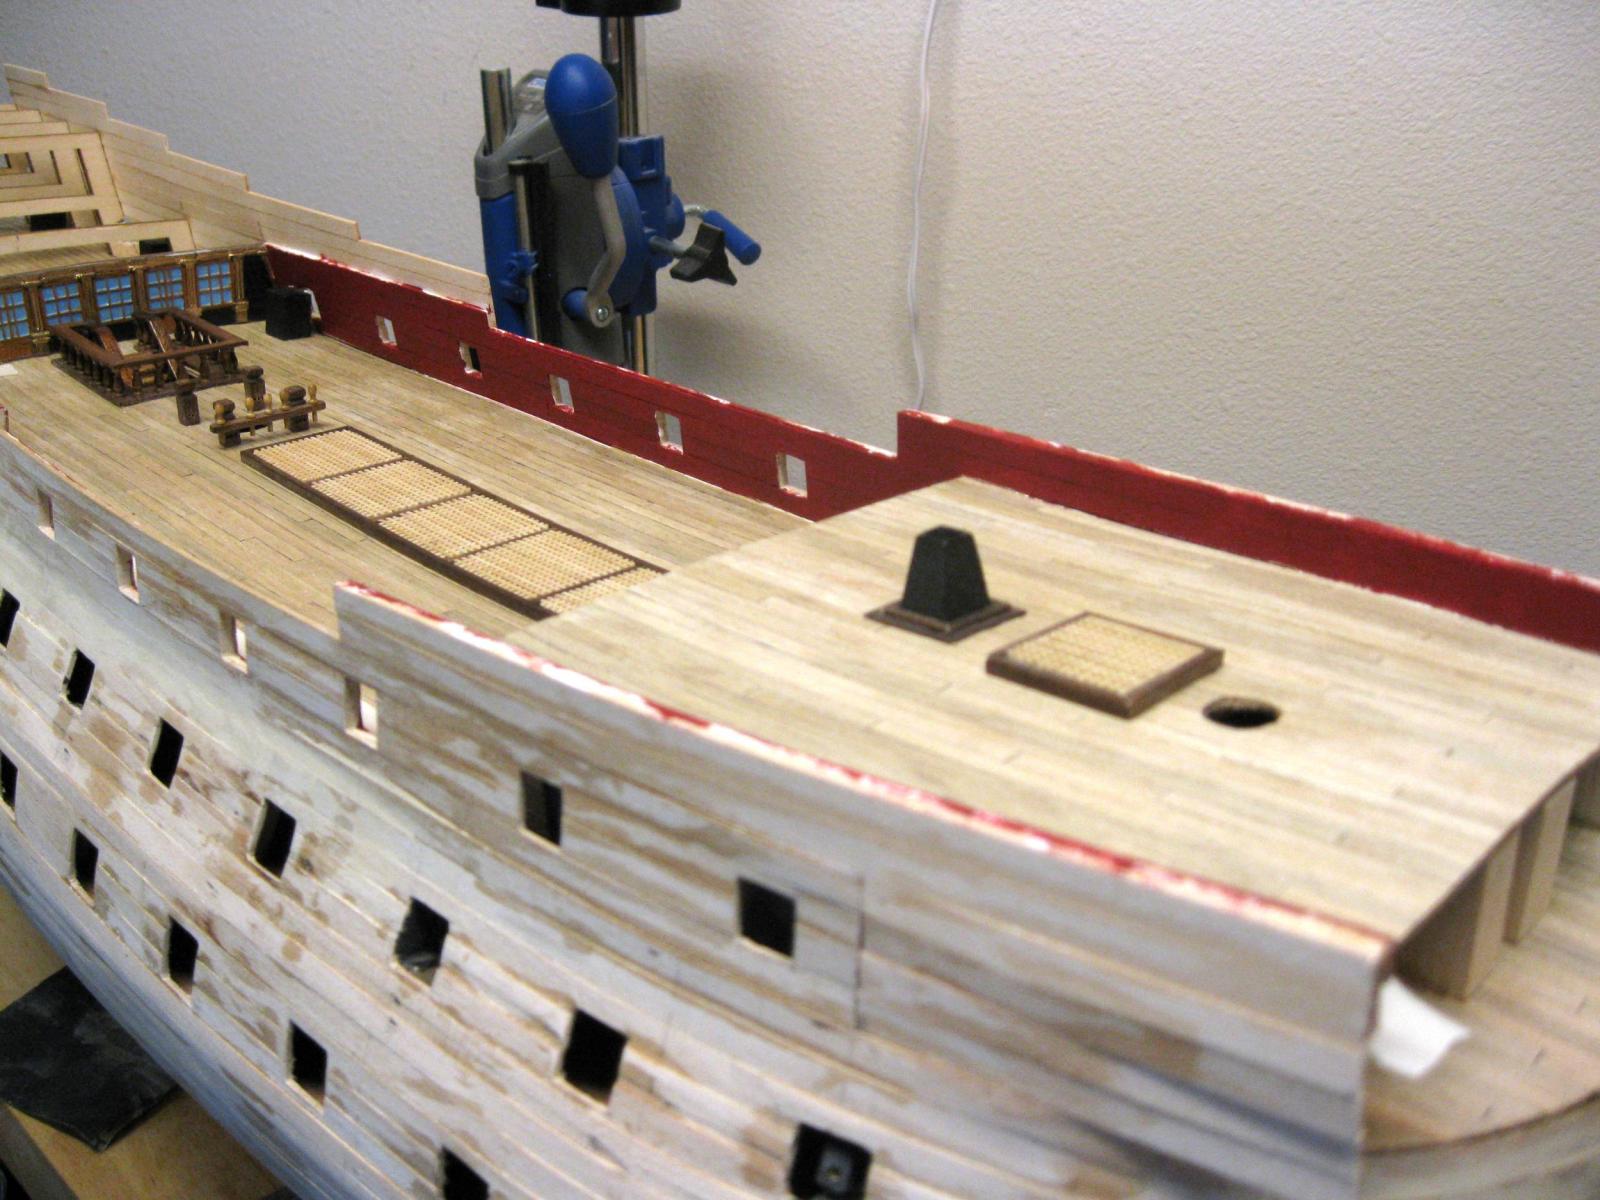
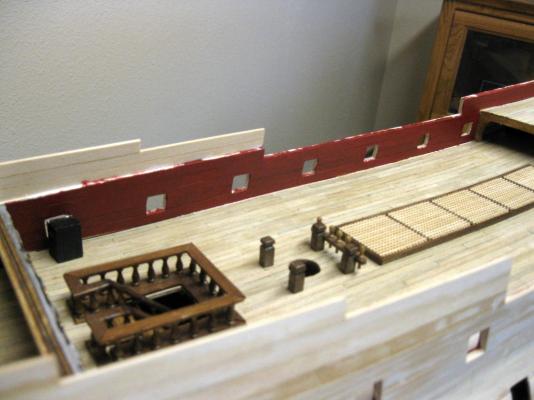
I have painted the inside of the main and forecastle bulwarks a red color. Since I could not find a color that was satisfactory, I mixed some bright red, brown, and black paint until I got the desired results. I am satisfied that this color is pretty close to the darkened and brown tinted color of the actual paint used for ships of the period. Once the framing is added to the ports, the upper railings, and the deck waterways, it will look all neat and pretty. Vince P.
- 593 replies
-
- 11
-
-
- royal william
- euromodels
- (and 1 more)
-
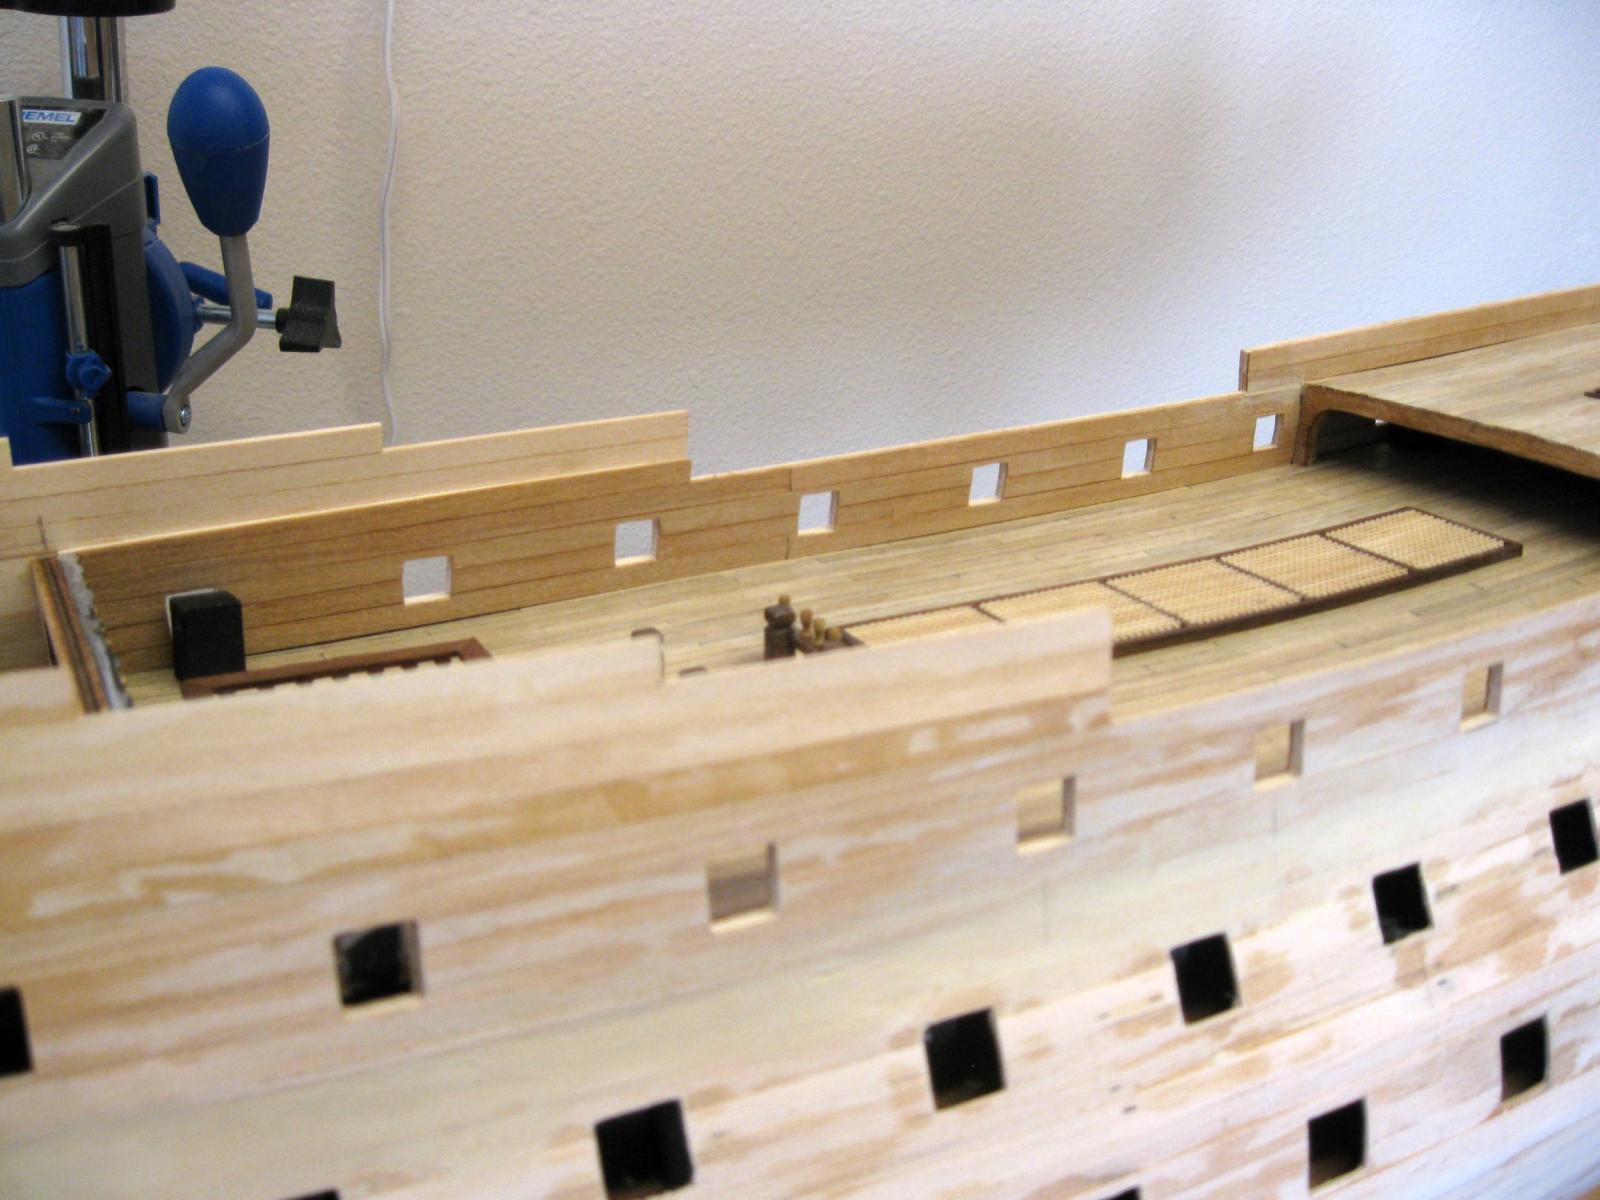
I have placed the finished layer of walnut planking on the inside of the main and forecastle deck bulwarks. Since the gun ports are planked over again, it is necessary to cut them out again. When cutting them out you have to be super careful to not damage the hard walnut planks. Applying just a little inward pressure with the knife will splinter the walnut. I had to do most of the cutting either from the inside out or use cutting stokes from inside to outside. I think the next step will be placing the quarterdeck. Vince P.

- 593 replies
-
- 9
-
-
- royal william
- euromodels
- (and 1 more)
-
If you look at photos of the actual Victory and the Constitution, it appears that the width of the wales remains constant from stem to stern. Vince P.
-
I bought it too. Built it and tried it on the SOS. It does not work very well in squaring and securing the parts of the hull framing (just what it was designed for). It is now in my pile of useless tools purchased. Vince P.
-
HMS Royal William by kay
pirozzi replied to kay's topic in - Build logs for subjects built 1501 - 1750
Hi Kay, Superb work. I have been looking for some nice closeup photos of the prowdeck bulkhead because I am going to make mine from scratch and not use the metal kit parts. Your photos are perfect and if you don't mind, I would like to use your work as a reference. Thanks, Vince P. -
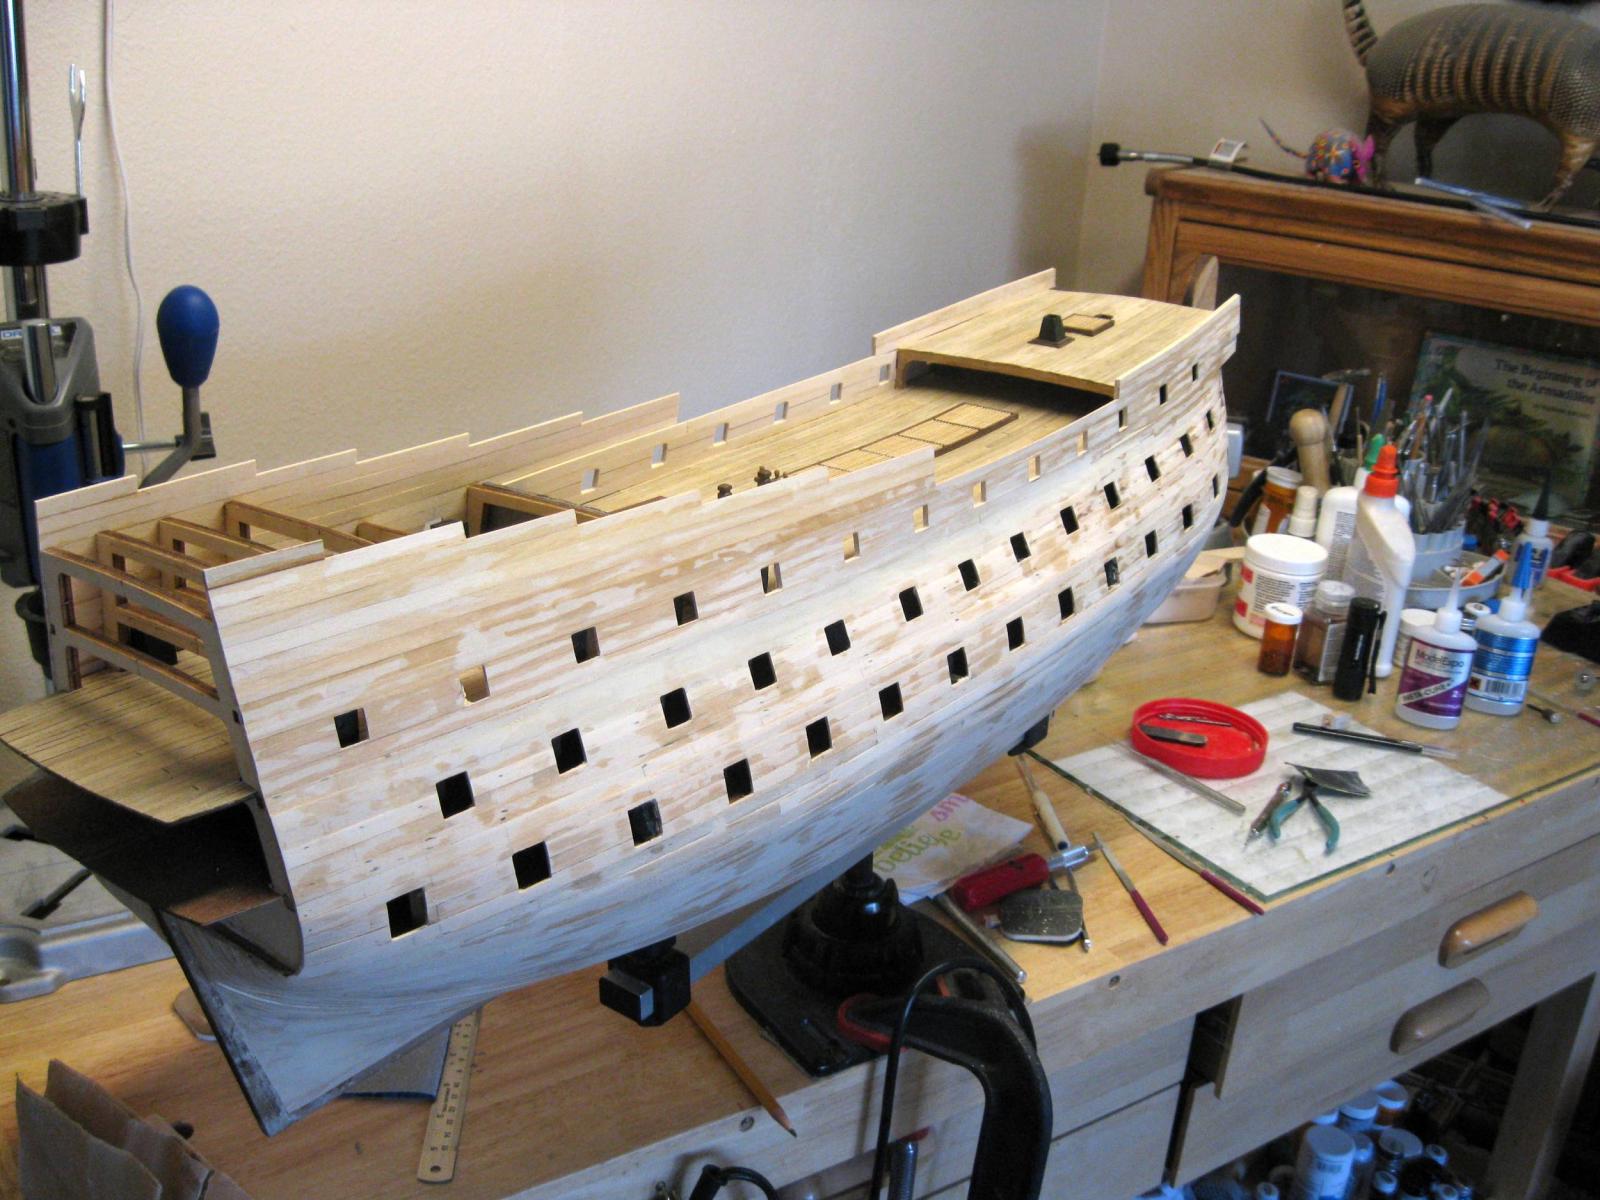
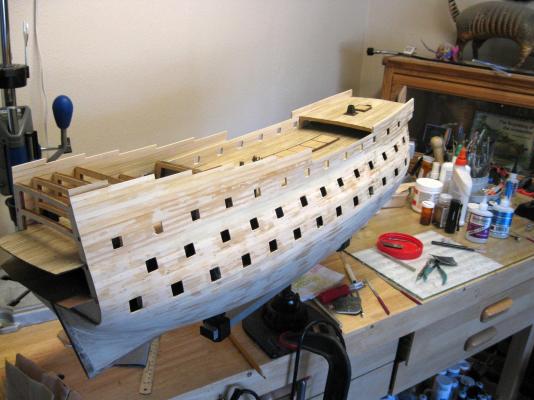
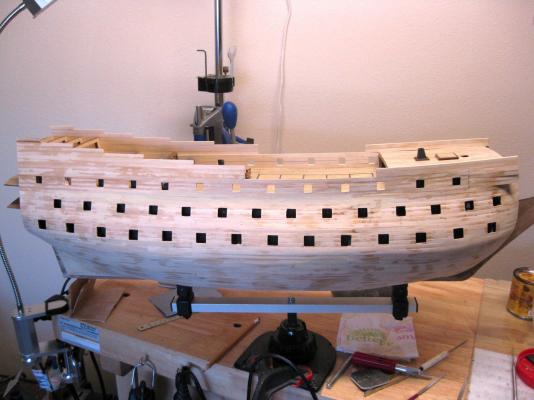
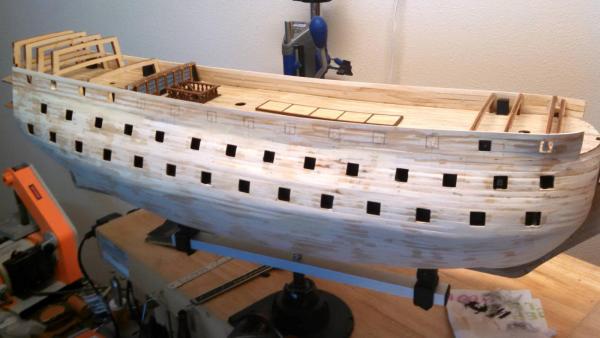
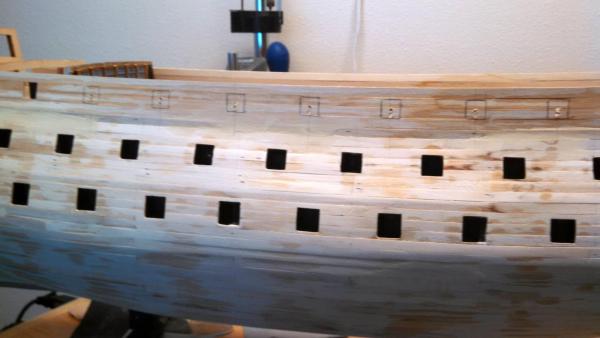
The first layer of planking all the way up to the upper deck bulwarks is completed. I have added some length to the upper deck bulwarks planking just to make sure the metal siding pieces will fit, and then I can cut off the excess later. All of the main deck gun ports are also cut and the doubled layer of planking on the inside of the main and forecastle bulwarks has been added. I am not sure exactly what is the next step until I do some research, but I am thinking of applying the finish layer of walnut planking to the inside of the main and forecastle bulwarks and then installing the quarterdeck. Vince P.

- 593 replies
-
- 14
-
-
- royal william
- euromodels
- (and 1 more)
-
Nice job Mark. She is really a beauty. Vince P.
-
Hi Christi, It is trully a great kit and will make a dandy model. There are however many issues with the instructions and plans. The materials are excellent. Make sure your plans are dated "2008", if not, you need to get the latest set. I have a detailed build log here, where I outlined most all of the problems I encountered along the way from start to finish. There is also a gallery I posted on the finished model. You will have a great deal of fun with this one. Give me a buzz if you have a question. Vince P.
-
On actual ships, the rattling was left without tar, but the shrouds that they were tied to were indeed tarred. Vince P.
-
Hi Brian, You are correct about different approaches. I have been building ships for long time, as you have. You develop a style that works for you. Still, I learn something new all the time from others like yourself. That is why I spend so much time on this forum. I have noticed however, that there are some that are convinced that their ways are the only correct ways. I am never closed to learning new ideas and this has really helped me along. Thanks, Vince
- 593 replies
-
- 5
-
-
- royal william
- euromodels
- (and 1 more)
-
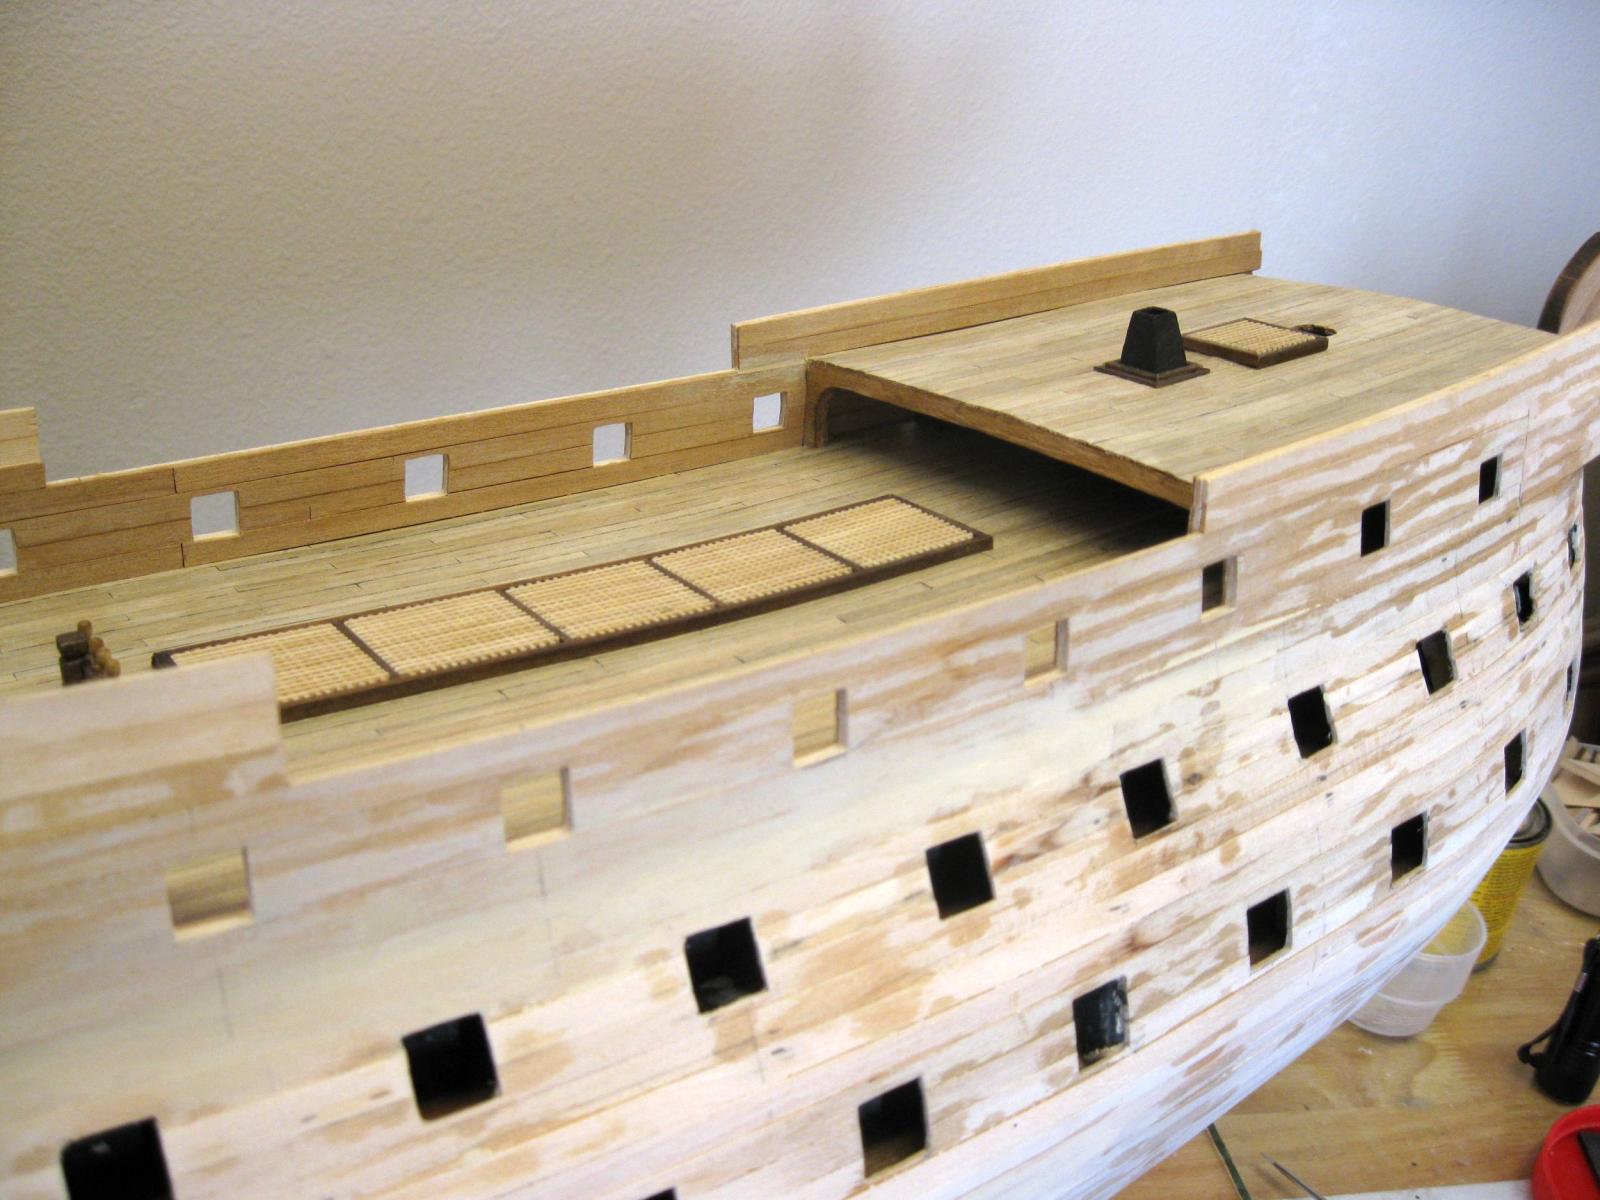
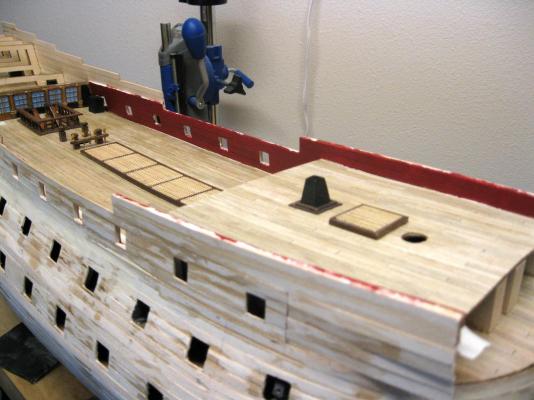
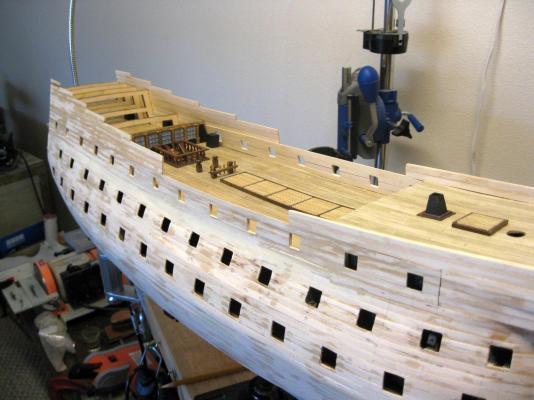
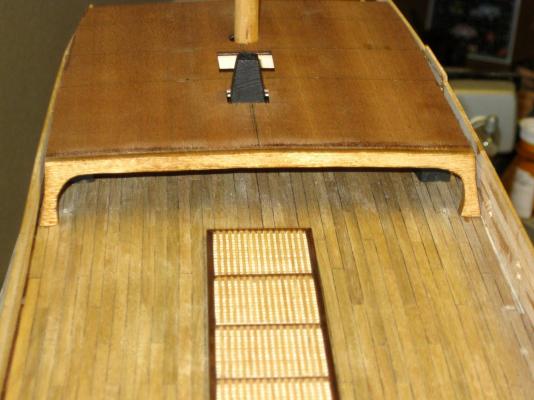
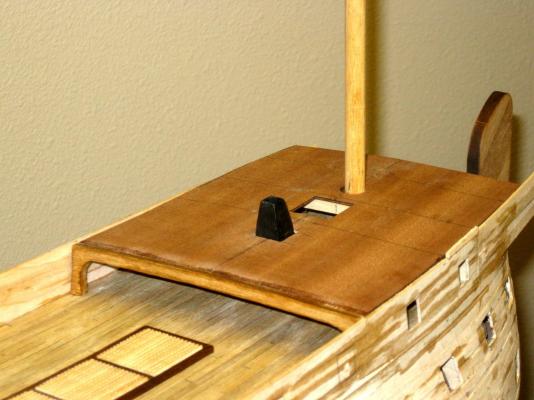
The forecastle deck is finished, planked, and the foreward supporting blocks in place to hold up the deck and as a backing for the prow deck in the future. The double frame around the stove chimney has been added along with the grating. There is some inclination to place other deck fixtures at this point such as bits and fife rail, but I will not do this just yet. The whole hull will have to be inverted at some point to add the second finish layer of planking and anything protuding up to or past the bulwarks could get in the way or be damaged. I had no choice with the stove, as it had to be placed before the deck was installed. I think next up will be to add the second layer of first planking to the inside of the bulwarks and then extend the first planking up beyond the main deck along the entire hull to correspond with the aft upper decks. Vince P.
- 593 replies
-
- 7
-
-
- royal william
- euromodels
- (and 1 more)
-
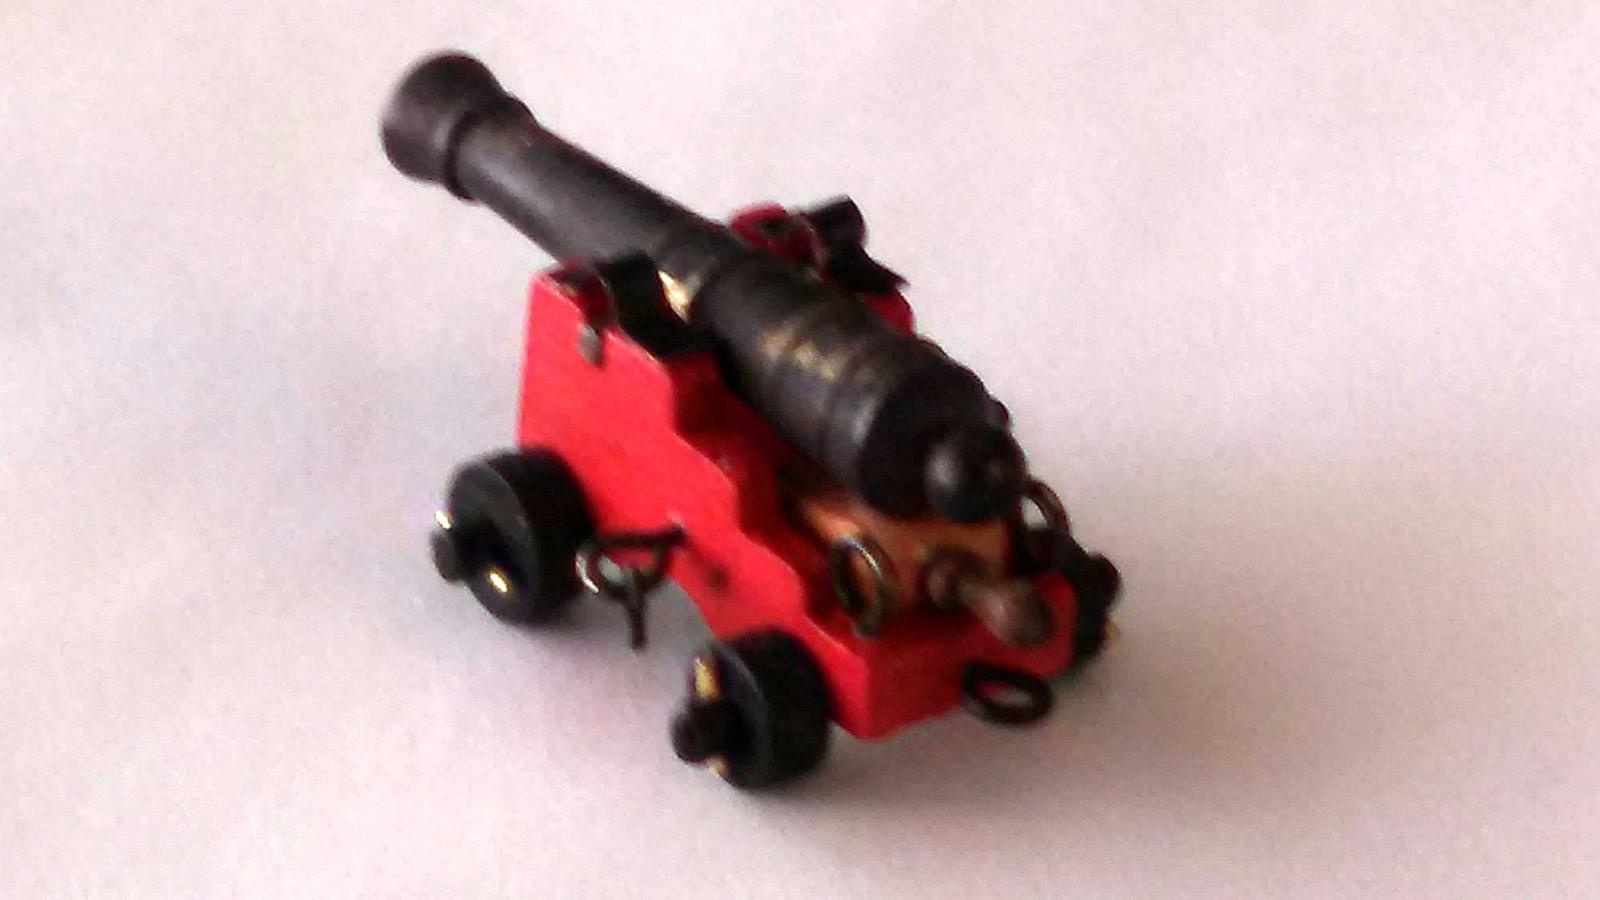
I obtained some 2.0mm wide x 0.3mm copper strip from Ages of Sail. I cut it to 9.0mm length and bent it around a 1.5mm drill bit to make the trunion band for the gun carriages. It came out pretty good, but the photo is a little blurry (crappy camera). Vince P.
- 593 replies
-
- 5
-
-
- royal william
- euromodels
- (and 1 more)
-
Yes, the color is very much like bricks. I have a model railroad shop nearby and they have a brick red color paint that I think will be perfect. Vince
- 593 replies
-
- 2
-
-
- royal william
- euromodels
- (and 1 more)
-
Hi Keith, You are exactly correct about the shade of red. The purpose of painting them red was to offset the bloody mess created by combat. If I can't find a suitable color, I will take the darkest red I can find and maybe mix it with black to get the dark, almost maroon color of blood. And it should be a flat base as you say. Vince
-
Hi Brian, Thanks. I am planning to paint the bulwarks red as was customary for warships of that era. Vince
- 593 replies
-
- 3
-
-
- royal william
- euromodels
- (and 1 more)
-
Hi Keith, I am planning to add another layer of first planking and the inner finish layer. Since both Julier and Pete suggest not applying the second outer layer of finish planking to the areas covered by the metal ornamental siding, this will give 3 layers in all and will not intrude too far into the inner spaces of the main deck, which will cause issues with the bulkheads and other fixtures. I believe this is the way to go. As far as keeping the bulwark planks straight, mine are pretty straight but not perfect. When placing each one. I applied tension lengthwise and glued each piece on the edge first about 1/2" at a time with CA glue and a hair drier. When the second layer is added they can be clamped with strips of thick hard wood (plywood cutout scaprs) to make them really staight before the glue dries. Vince P.
- 593 replies
-
- 2
-
-
- royal william
- euromodels
- (and 1 more)
-
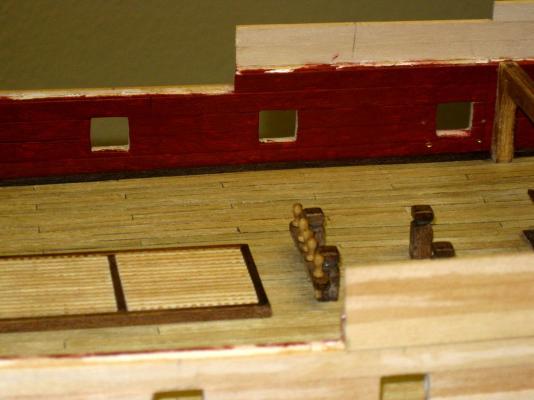
Hi Brian, I was going to buy extra gun kits since Euro only supplies enough to do the exposed main deck guns but after looking at the plans it seems unnecessary to me. After adding the walkway over the main deck which connects the forecastle to the quarterdeck, the ladders, the foreward most main deck gun which is right up to the forecastle ladders, the capstan and handles, it pretty much makes it impossible to see under the forecastle unless you were inside the ship. I decided to just use the dummy guns there. Vince P.
-
Hi Brian, Where you see the dummy supports, that area of the main deck will be completely covered by the Quarterdeck. The area between the fore end of the quarterdeck and the aft end of the forecastle on the main deck will get the full carriage guns. Vince
-
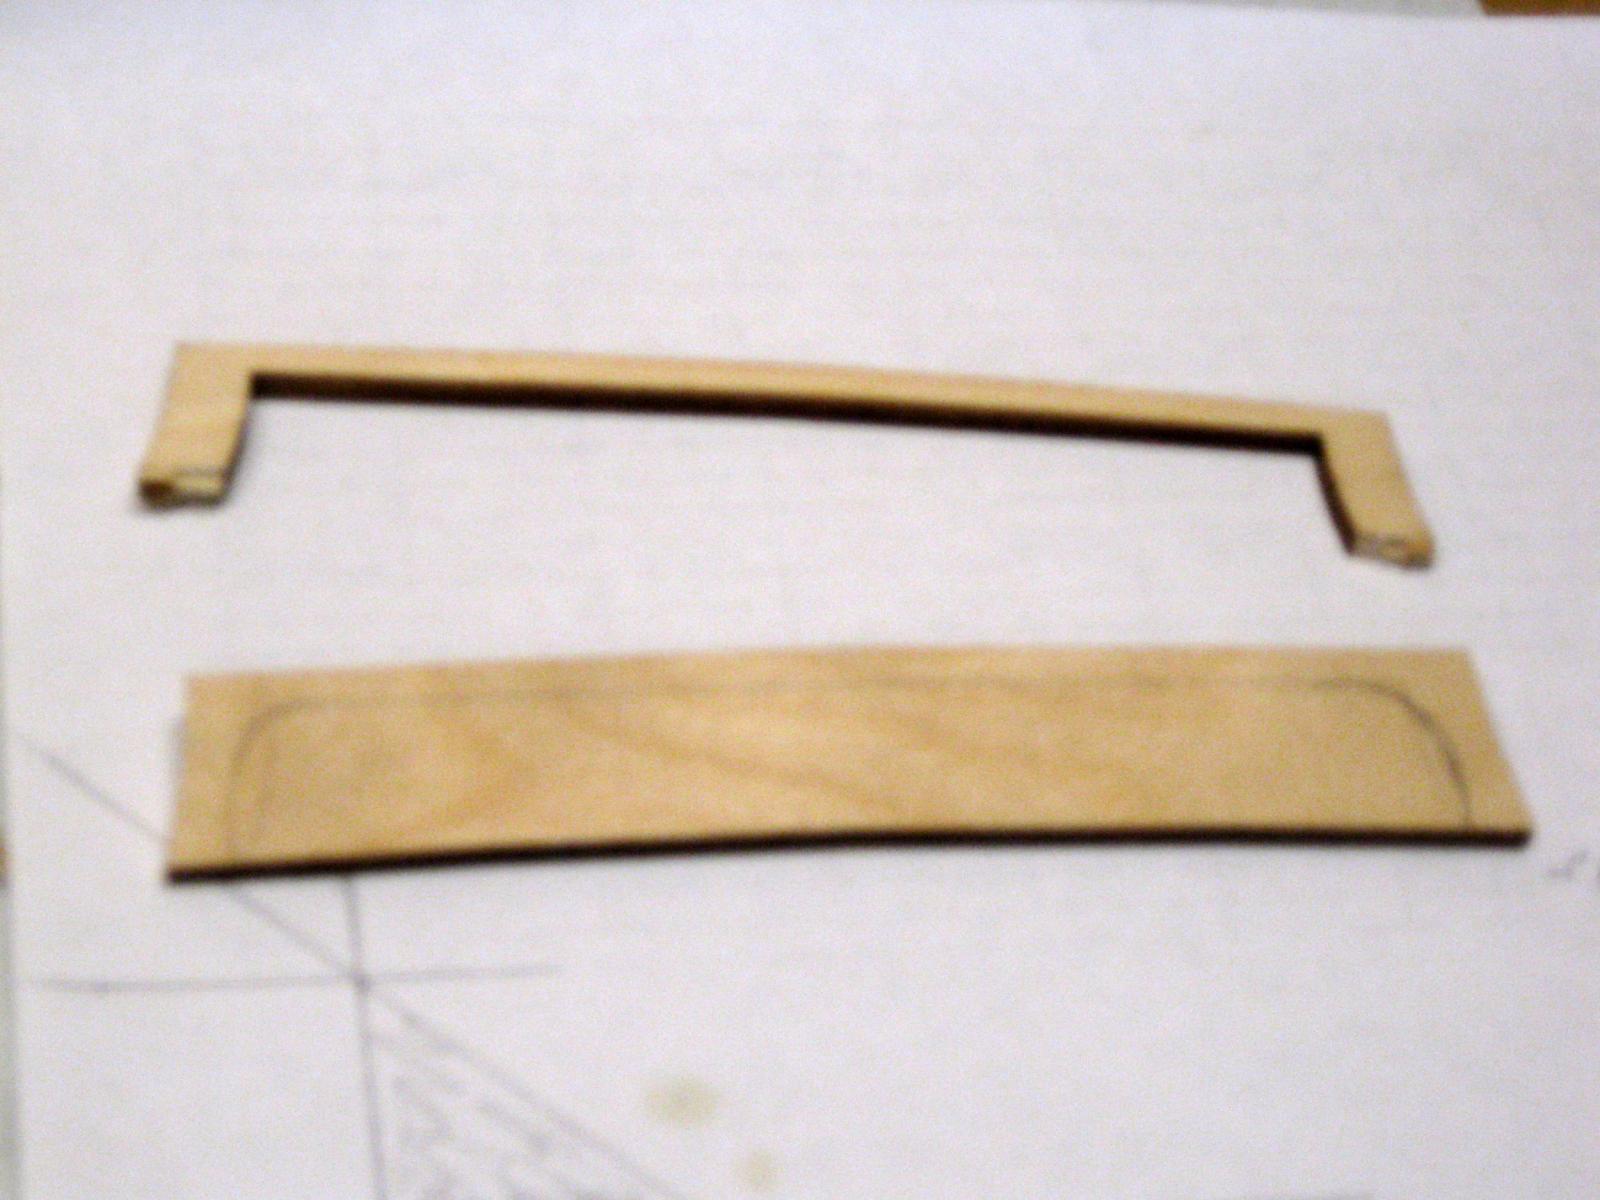
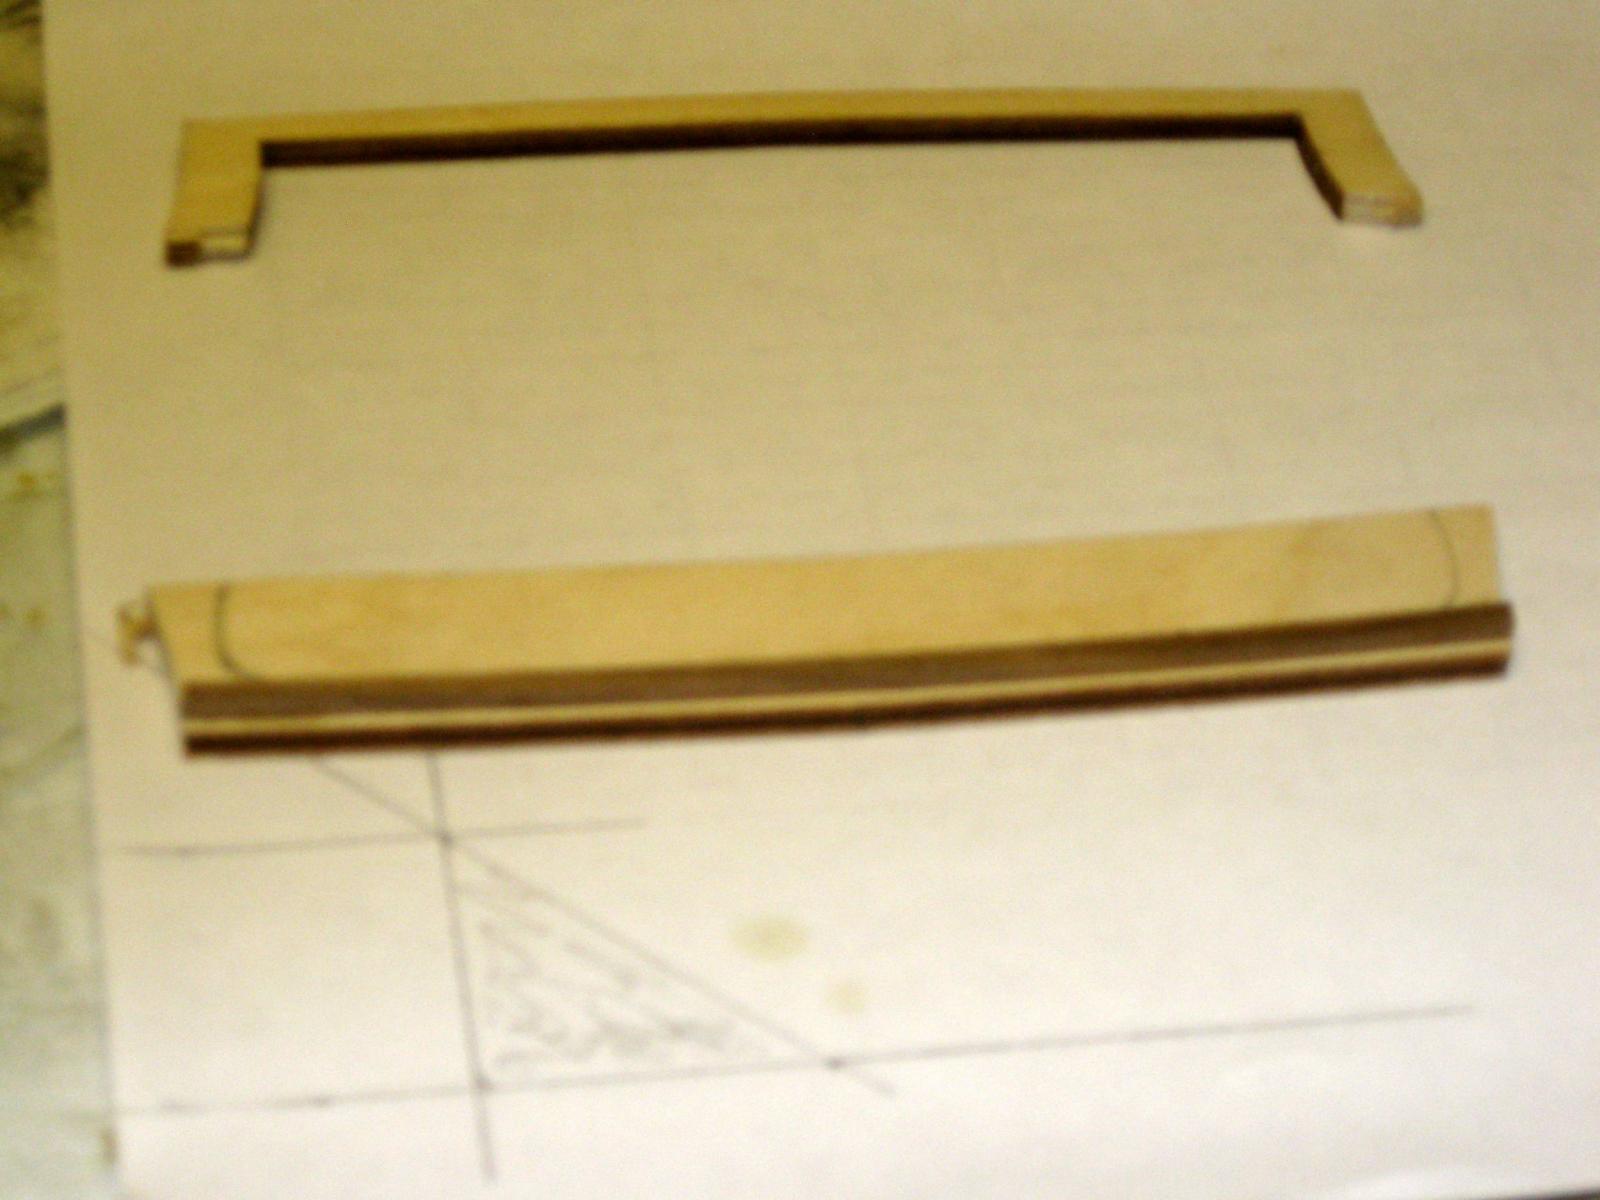
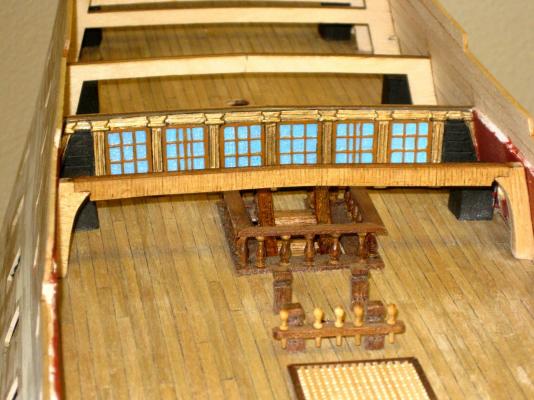
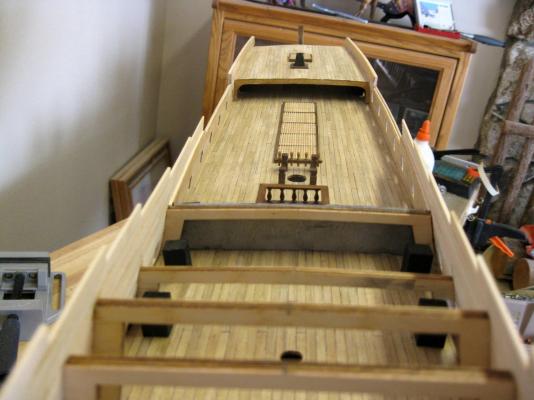
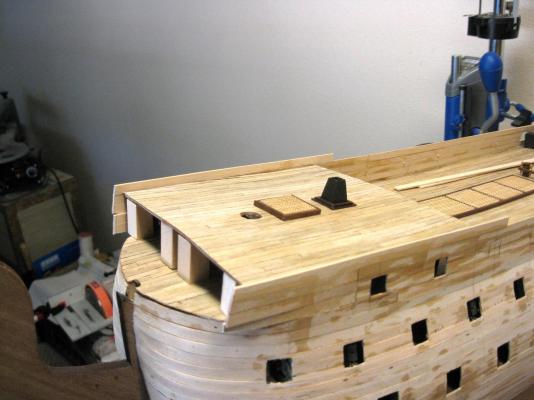
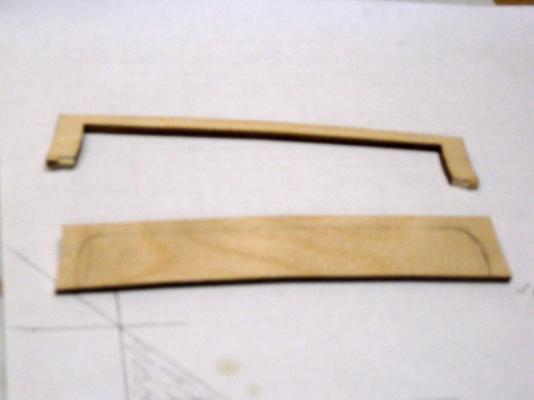
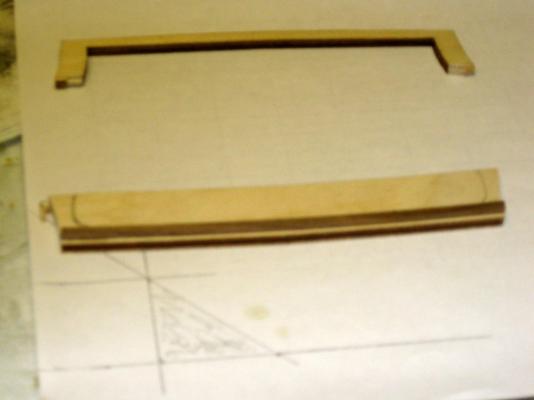
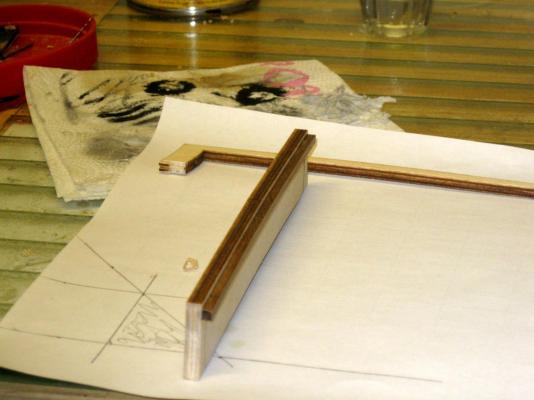
Placing the forecastle deck. It sits on top of bulkheads "B, C, D, E, F", but the upper section of bulkhead "B" has to be cut away at the level of the main deck. This leaves a considerable length of the forecastle hanging with no support at the aft end. Ships had support members called "Breast Beams" to support the overhanging ends of upper decks. Here this has to be made from scratch. I used the cut off top of bulkhead B to mark off the convex slope of the deck onto the lumber used to make the beam. I used a piece of plywood that was one of the cutouts from the laser cut bulkheads. I measured the width and height needed from the ship and cut it out with a jig saw. I then took a piece of 4x4mm stock and curved it to match the deck curvature and glued it across the top with a recess equal to the thickness of the false forecastle deck. This will provide a rebate across the top of the beam to support the false decking and apply the correct curvature. It was then finished with a coat of golden oak. Before placing the deck, the stove was placed and a cutout made to the deck for the stack. The foremast was also inserted to make sure alignment was correct since the mast goes throught 4 decks. Once the deck was aligned and secured, the breast beam was placed and secured as well. The spaces you see at the edges where it meets the bulwarks will be filled with the 2 inner layers of planking to be added to bulwarks. Vince P.

- 593 replies
-
- 3
-
-
- royal william
- euromodels
- (and 1 more)
-
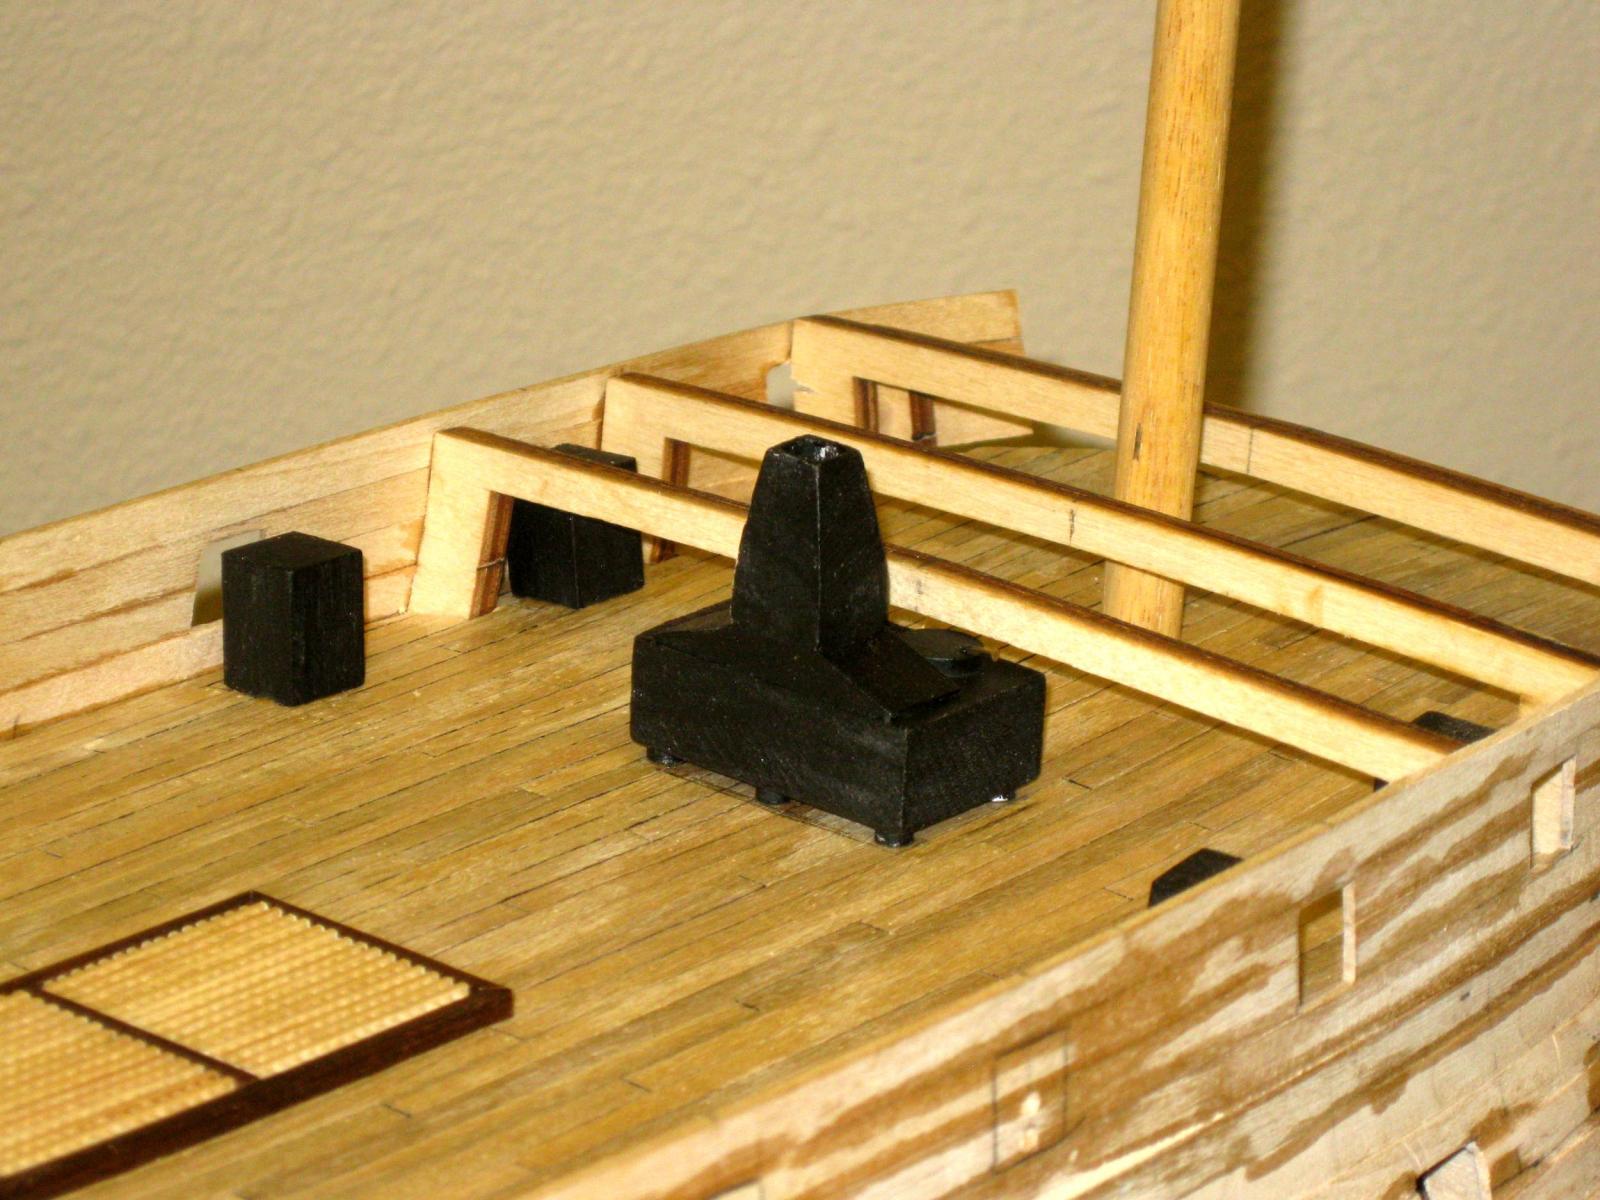
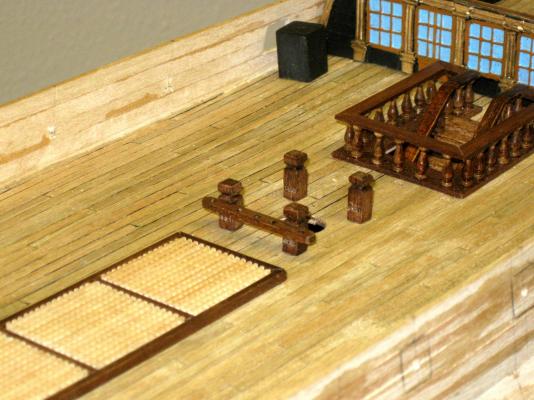
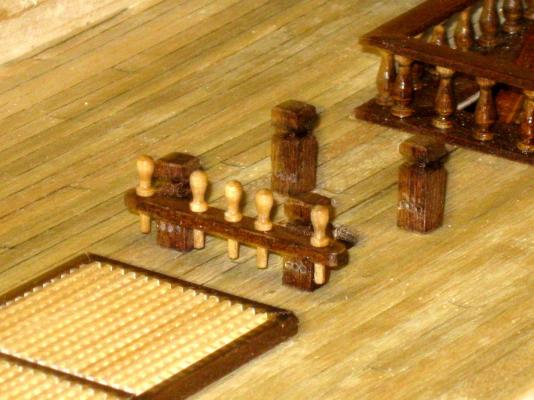
Placing the bitts and fife rail around main mast. The plans do not show belaying pins in the fife rails and they are not included in the kit. The original ship was launched as the HMS Prince in 1670 which was just about the time that belaying pins started to be used. The Royal William was launched in 1719 as a rebuild of the Prince. There is more likelyhood that the RW had belaying pins than not, so I added them. The foremast will have 2-3-2 configuration and both the main and mizzen will have a 1-3-1 configuration. I will not add the taller anchor bitts until the quarter deck is in place because they have to be at the same height and I will use the quarterdeck as the reference. Vince P.
- 593 replies
-
- 5
-
-
- royal william
- euromodels
- (and 1 more)
-
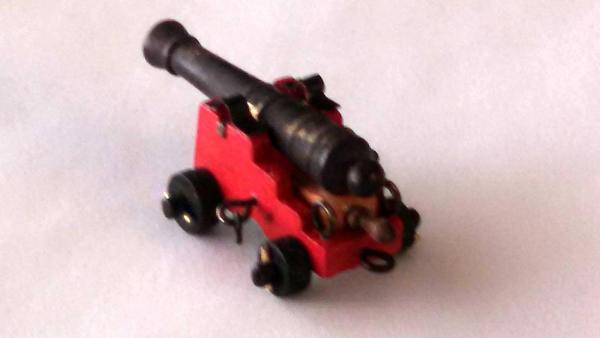
Hi Carmelo, Wow, those are collector's items. Nice find. If you are going to build them, the lead parts should be no problem. Just use gloves when handling them and stay away from your mouth. Vince P.
-
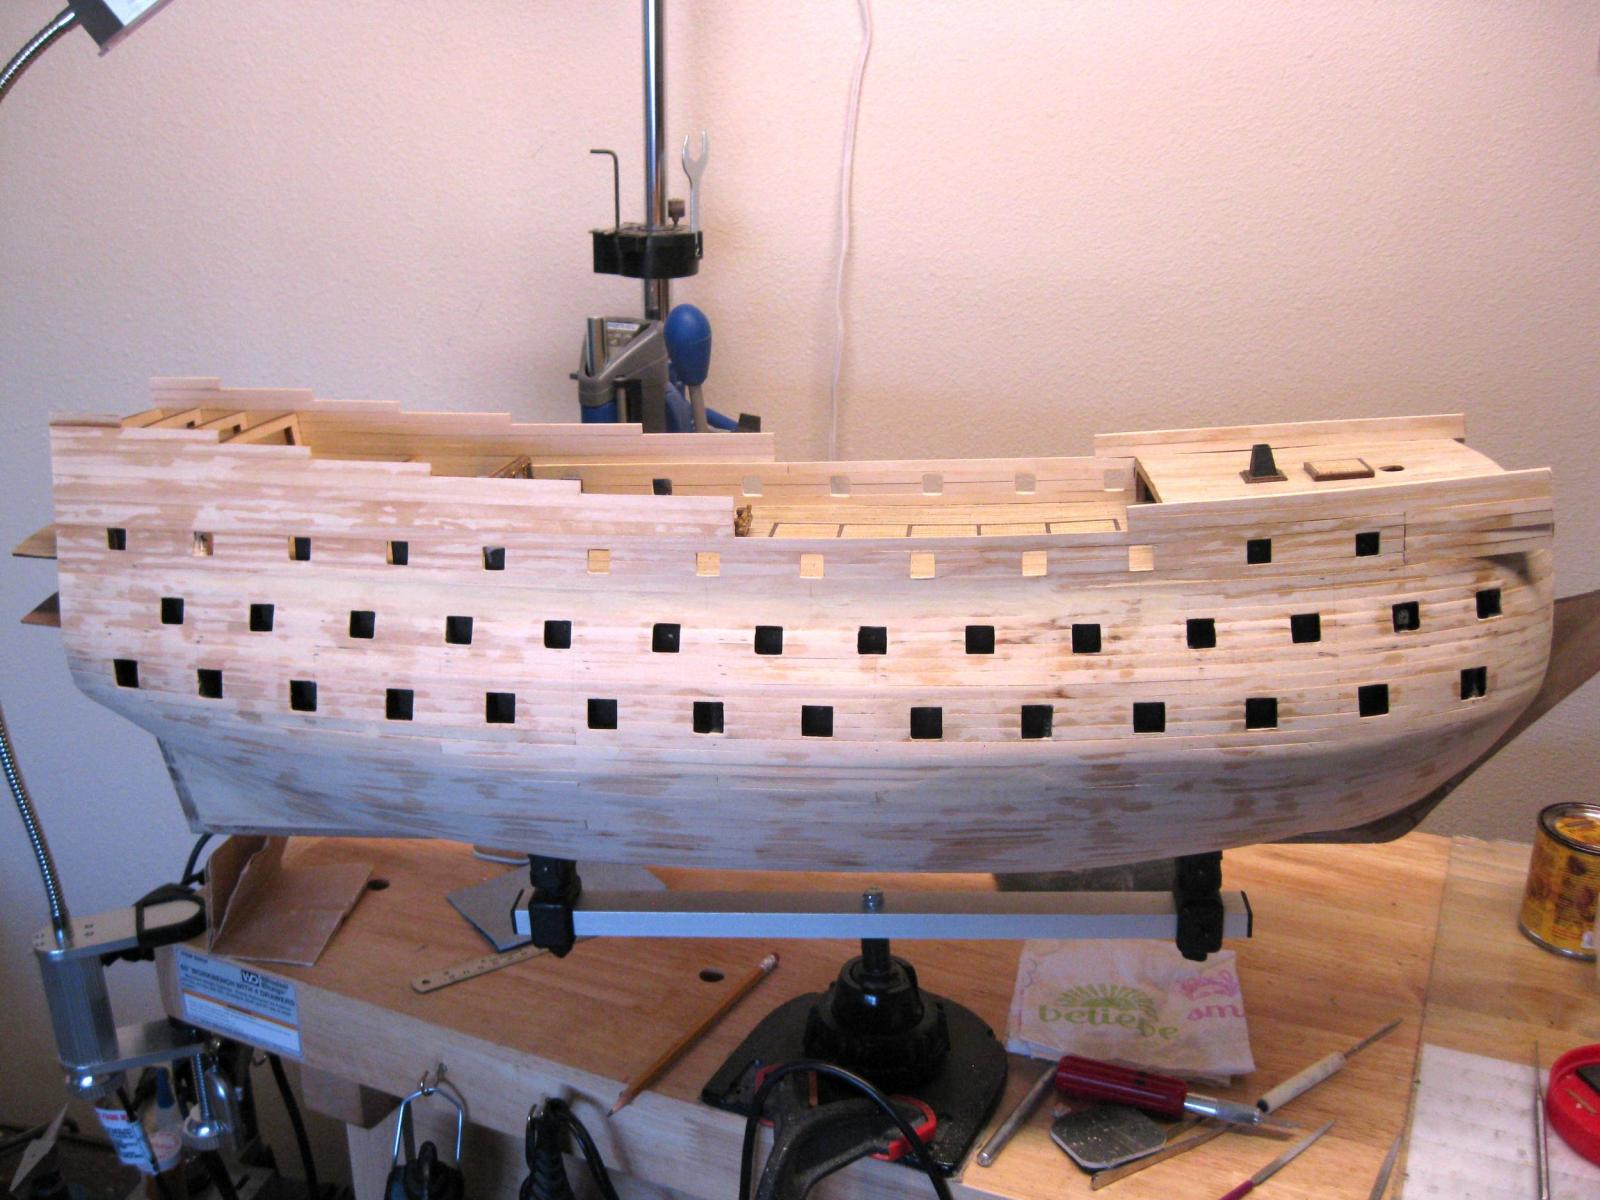
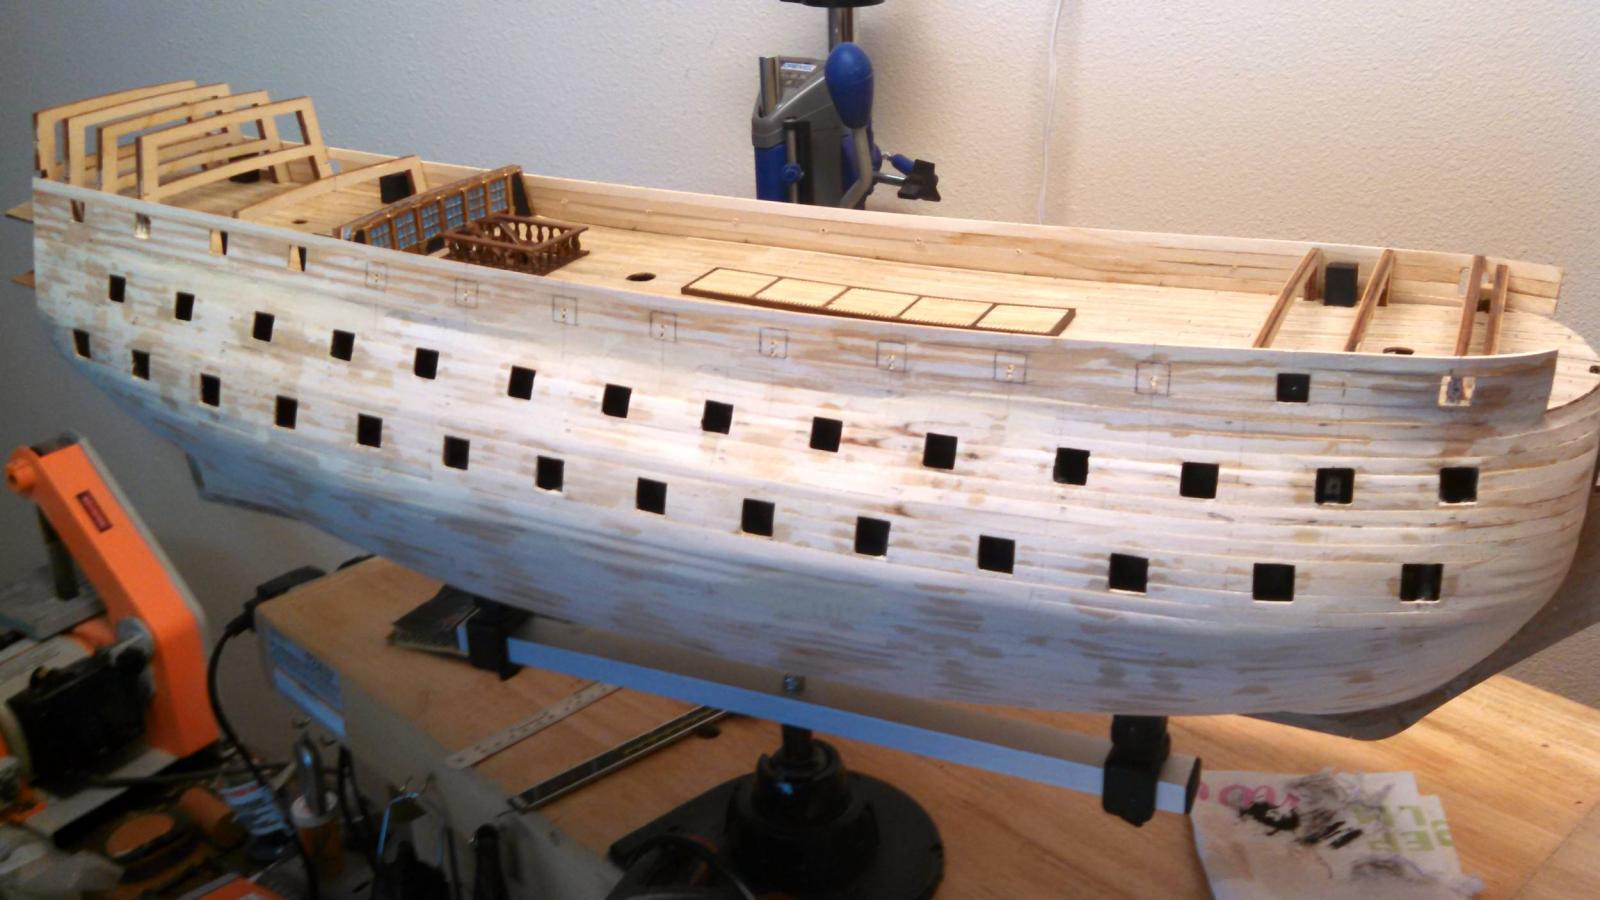
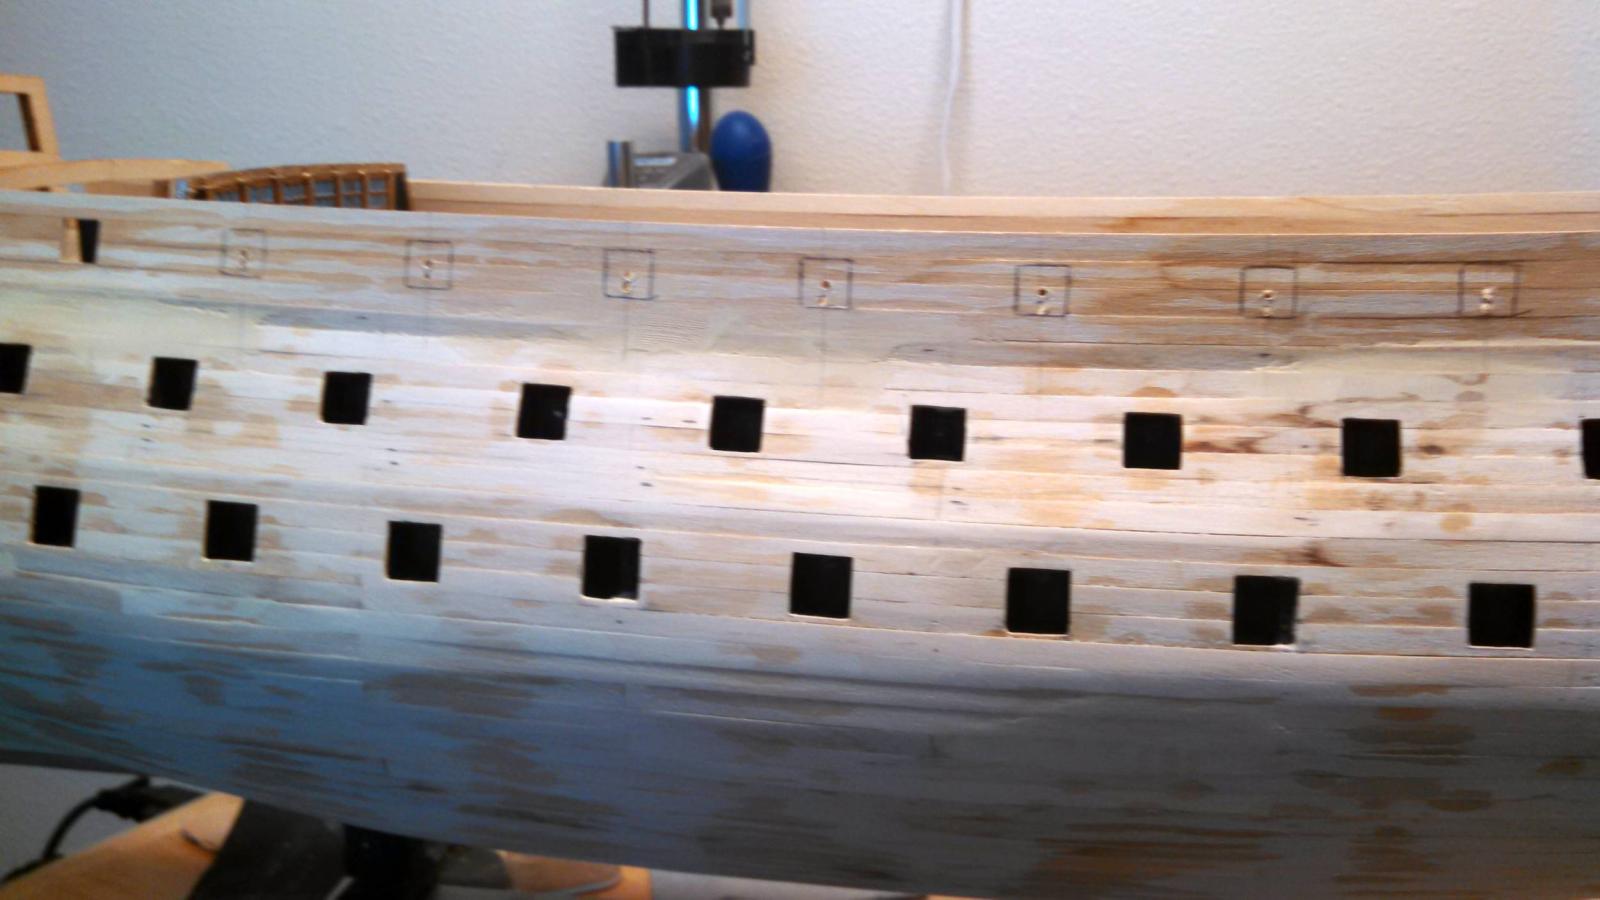
All of the main deck gun ports are either just marked or cut out. Since I am adding another duplicate layer of first planking inside the bulwarks to strengthen it, I only marked those ports. Once the duplicate layer is added (next up), I will cut out the ports. The others below the quarter and forecastle decks are cut out and the gun supports are in place. On all the ports that are in front of bulkheads, I cut them out too, but will close them off with a cover. Vince P.

- 593 replies
-
- 6
-
-
- royal william
- euromodels
- (and 1 more)
-
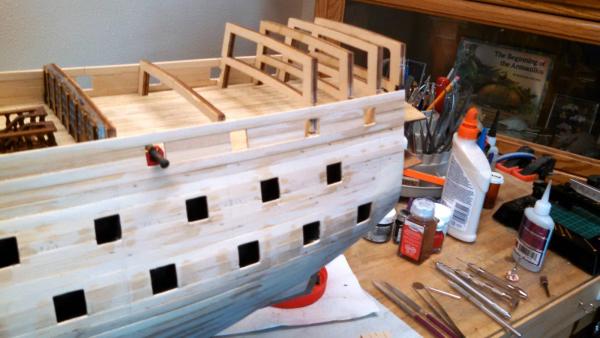
Since the Quarter and Forecastle decks are to be positioned soon, it is necessary to cut out the gunports below them on the main deck. Plan sheet #8 gives locations horizontally, but the height off the deck should be measured from an actual gun assembly. I noticed a note from KeithW. that no mention is made of the different gunport sizes in the plans. This is not correct as they are clearly marked with dimensions on the plans. Vince P.

- 593 replies
-
- 7
-
-
- royal william
- euromodels
- (and 1 more)