keelhauled
-
Posts
788 -
Joined
-
Last visited
Content Type
Profiles
Forums
Gallery
Events
Everything posted by keelhauled
-

Cutty Sark by NenadM
keelhauled replied to NenadM's topic in - Build logs for subjects built 1851 - 1900
Hi Nenad, I ended up putting the pin rails in place. I haven't decided upon where to stow the ladders. When the were under sail, would they have stowed them under the forecastle deck? Maybe as you say tie them to the stanchions on the bulwarks. Thank goodness that Captain Woodget took photos. I wished that he had taken more or if he did, that they had published them on the internet. I haven't decided on the net under the bowsprit. I don't see it in Tudgay's paintings, Woodget's photos, or Campbell's plans. Also what about the anchor cranes? Campbell's plans mention them, but I can't find a photo of her with them in place. I made them. Maybe I'll stow them on the boat skids with the accommodation ladder if I ever build it. Thanks Marc- 4,152 replies
-
- 5
-

-
- cutty sark
- tehnodidakta
- (and 1 more)
-
Cutty Sark by NenadM
keelhauled replied to NenadM's topic in - Build logs for subjects built 1851 - 1900
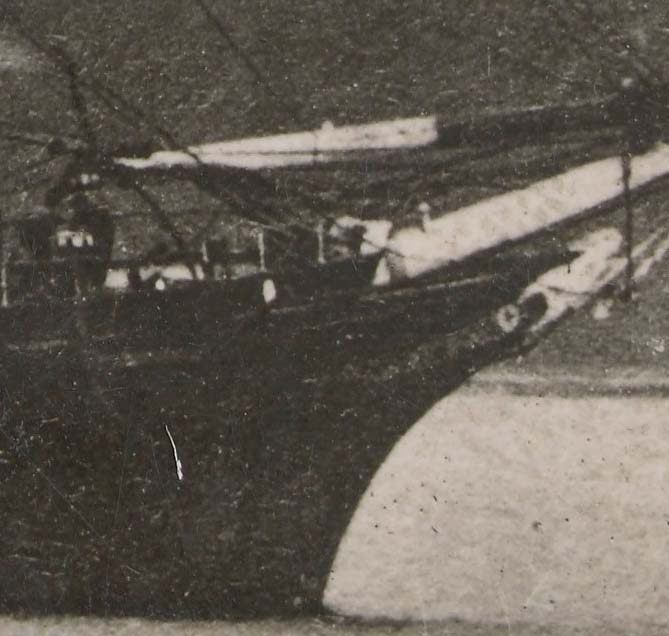
Hi Nenad, As to the rail on the monkey or aft cabin. Woodget's photo of the Cutty has the rail. This was taken when she was carrying wool and racing. The forecastle had rails. As to the protective nets on the forecastle rail. She didn't have them. The rails are removable for fishing and stowing the anchor. This was standard in the clippers and windjammers.There is a photo on page 93 in the standing rigging of topmast in Longridge's book (the rigging - part 2) that shows the removable section of the rail gone from the cat head to the back of the anchor board while the Cutty is being towed. Here is a photo of the bow in sydney that Woodget took. to rails at the aft edge of the forecastle. Campbell's plans and photos of her in Sydney don't show it present. Also if it had been in place and the ladders removed the sailors would have a hard time getting to to forecastle. on a tall ship in Sydney as sailor showed me how he got up and down without the ladders and it was by stepping on the windlass. On that ship they were removable, but since they had customers, they kept them in place when sailing. Also notice that the pipe railing for the forecastle ladders that is on the museum version were not present in Woodget's photo even when the ladders were in place AS to the pin rails on the forecastle in Campbell's plans located where the removable ladders go.. The pins are for the sheets of the jibs and fore stay sail. You can see this in Tudgay's painting that was used for the restoration. If you don't put the pins there and you rig the sails you won't have any place to belay the sheets for the jibs. It is my understanding that those ladders to the forecastle were just for port. Marc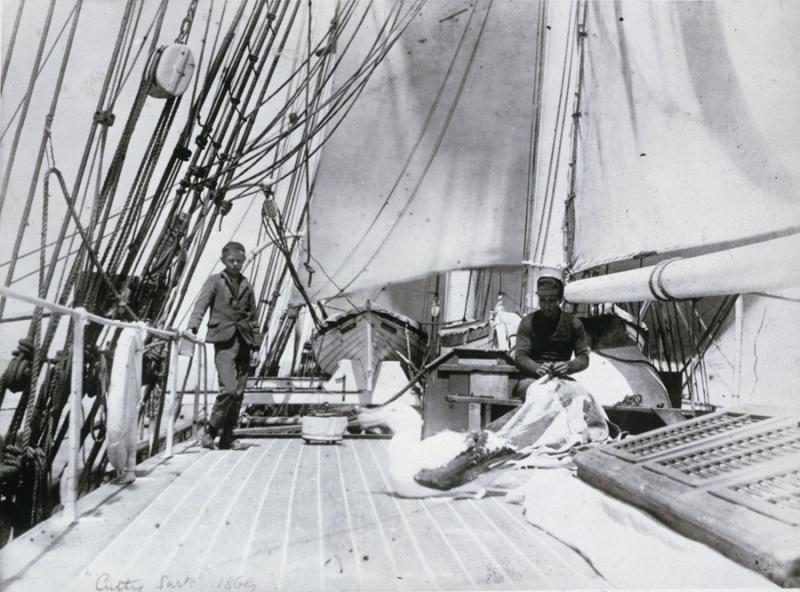
- 4,152 replies
-
- 6
-
-
- cutty sark
- tehnodidakta
- (and 1 more)
-
Thanks for the kind words and encouragement Chassseur and Nenad! Nenad, I agree about keelhauling the model author! I've figured out the rigging situation with missing deadeyes and stays. They should be ok and I don't think anyone will ever know unless I point it out. There is nothing else to do with them at this point in time. God only knows why the kit author/designer decided to leave them off. thanks Marc
- 525 replies
-
- 1
-
-
- cutty sark
- mantua
- (and 2 more)
-
Your rigging is coming along really nice. I have to say, you have incredible patience and outlook considering the set backs. Were your shrouds served? I think I would have had to go on vacation if they were. i don't know how they are on the Victory, but on the Cutty Sark they served every shroud and stay from the dead eye to the the mast - drives me crazy. If it had been me I don't know what I would have done. Although I had a room mate that accidentally snapped off my jib boom just after I finished the last knot on my model of the Constitution and he's still alive. You still have a great deal of patience and forgiveness! Keep up the great work! marc
-
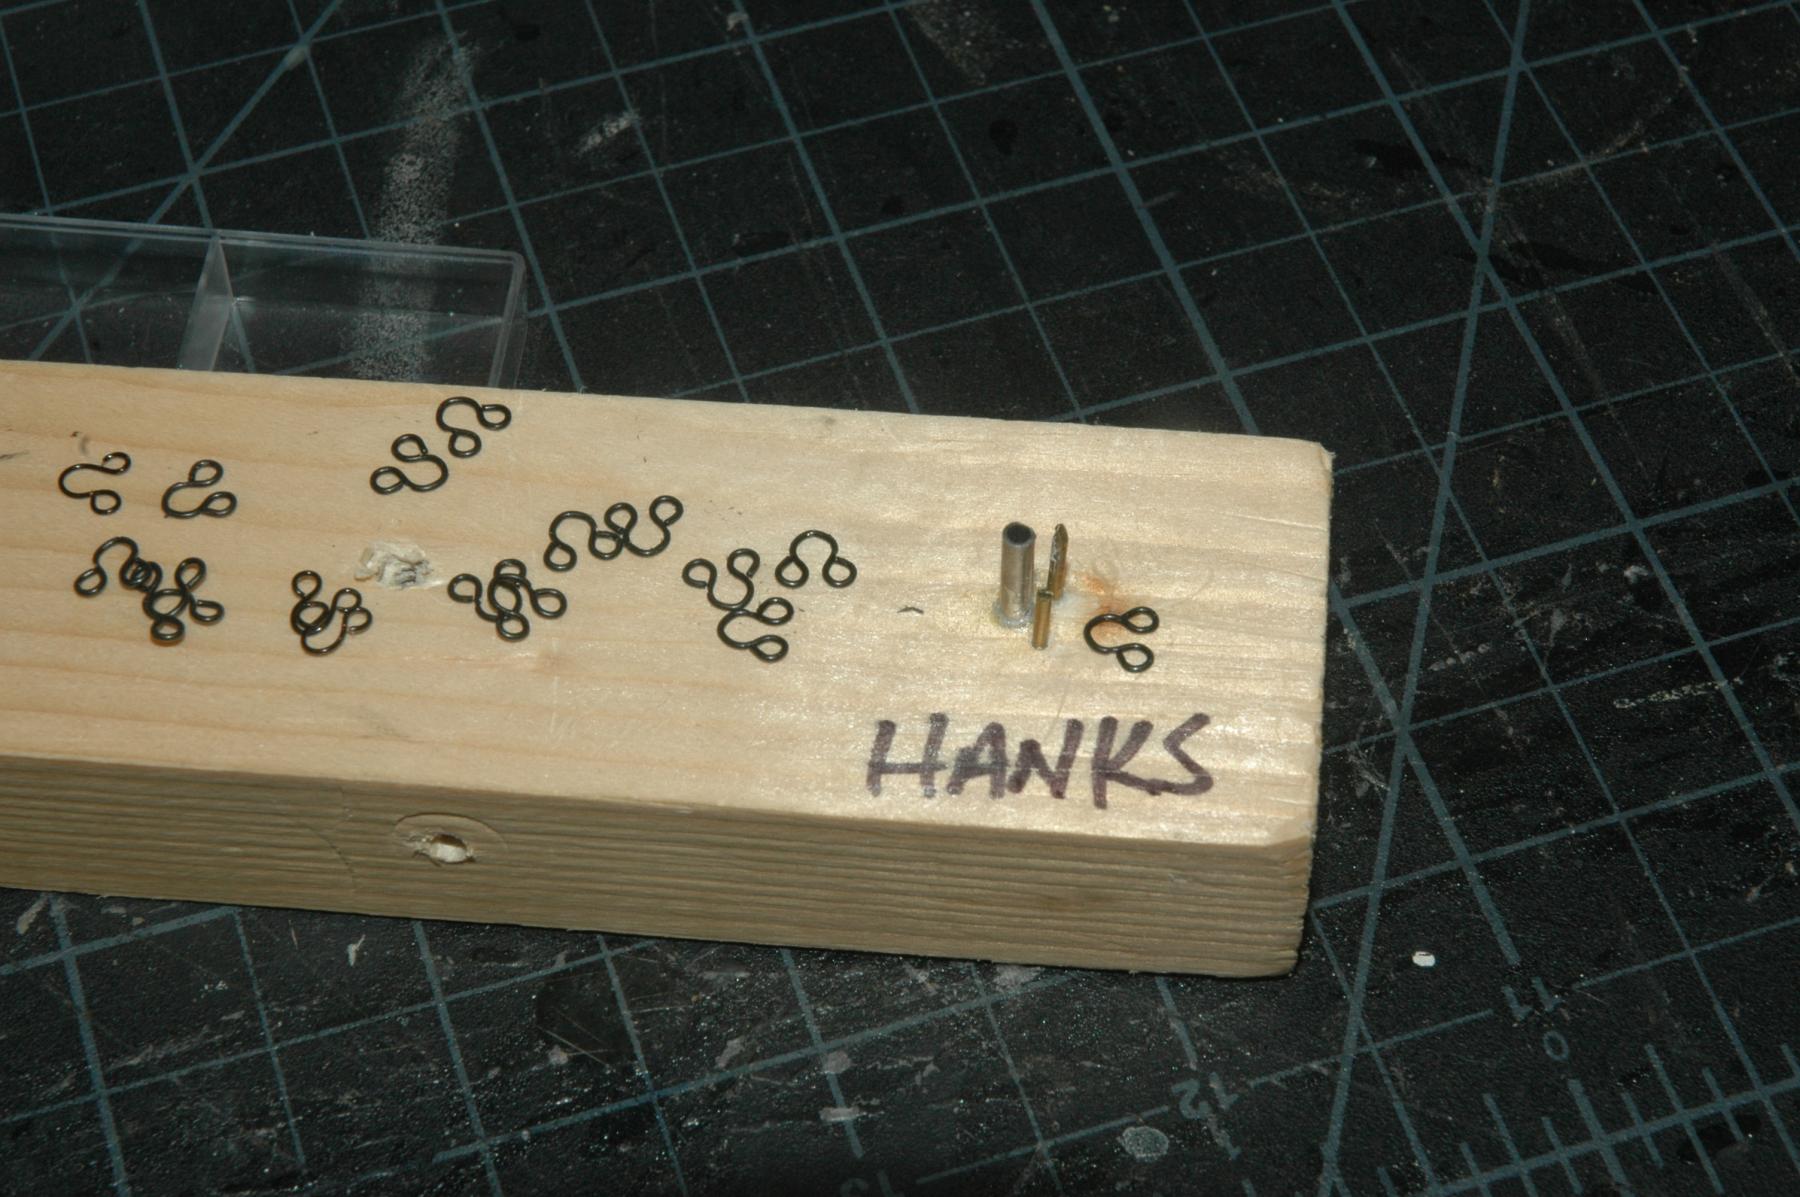
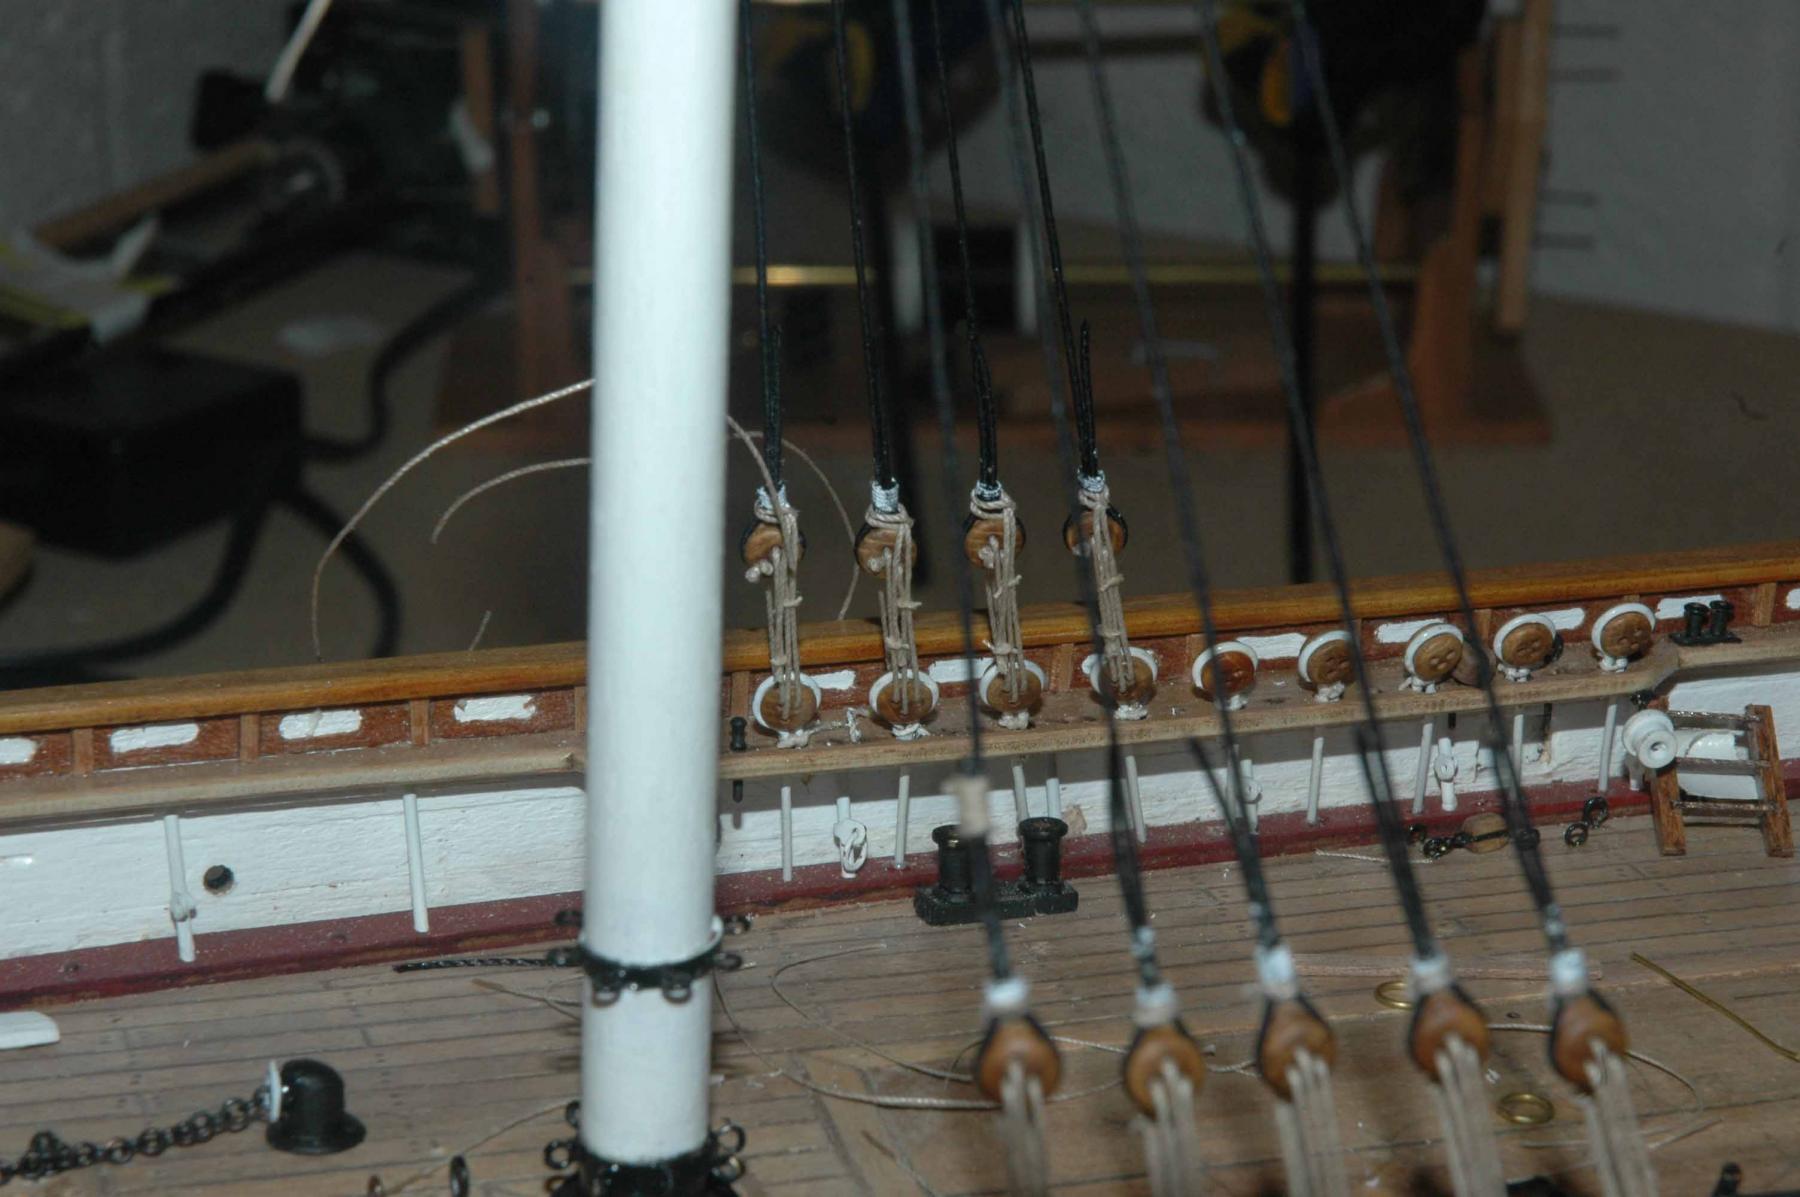
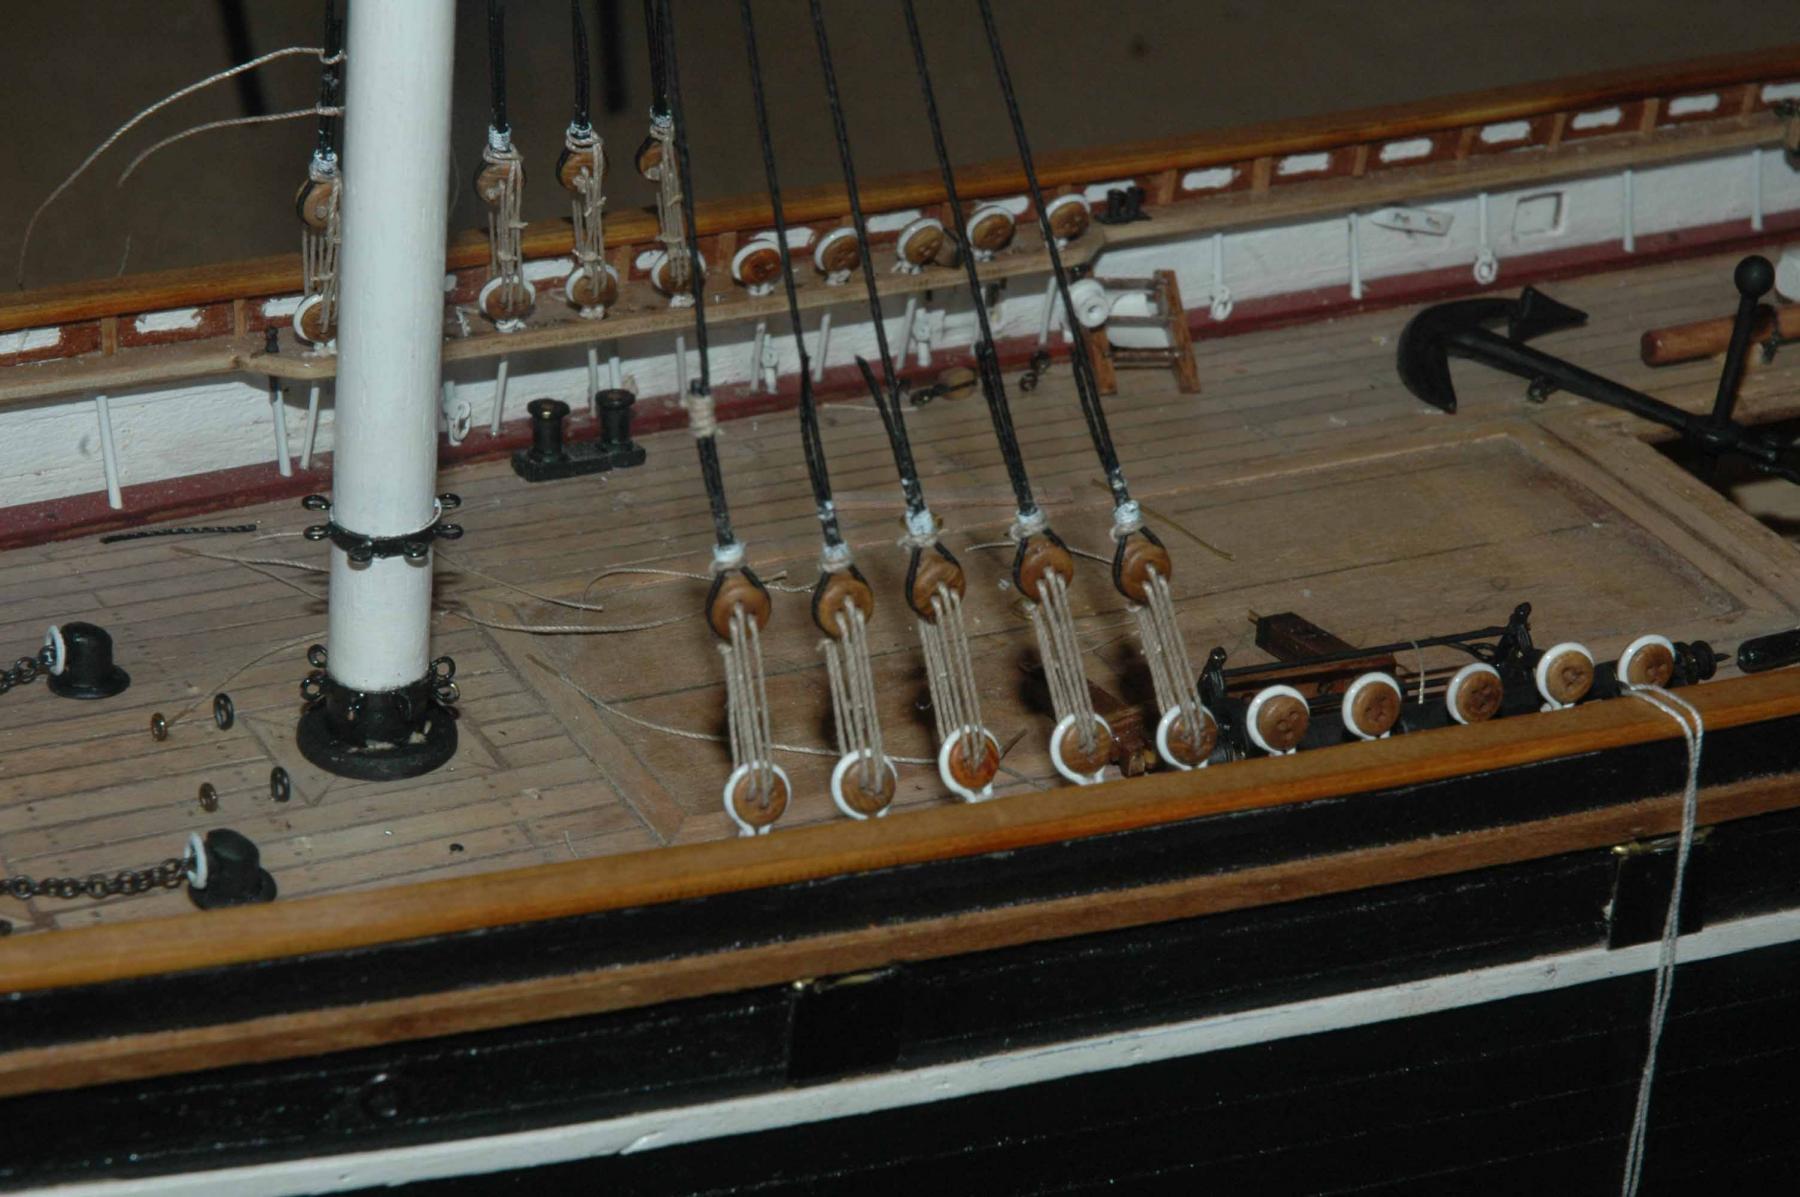
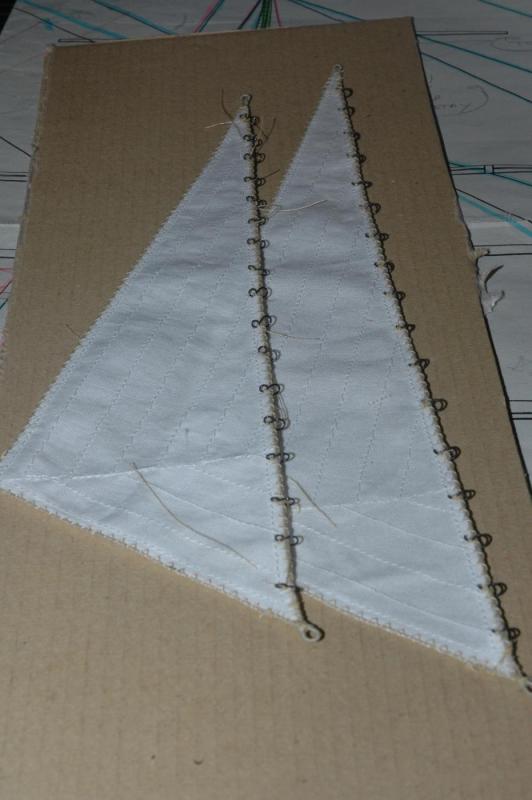
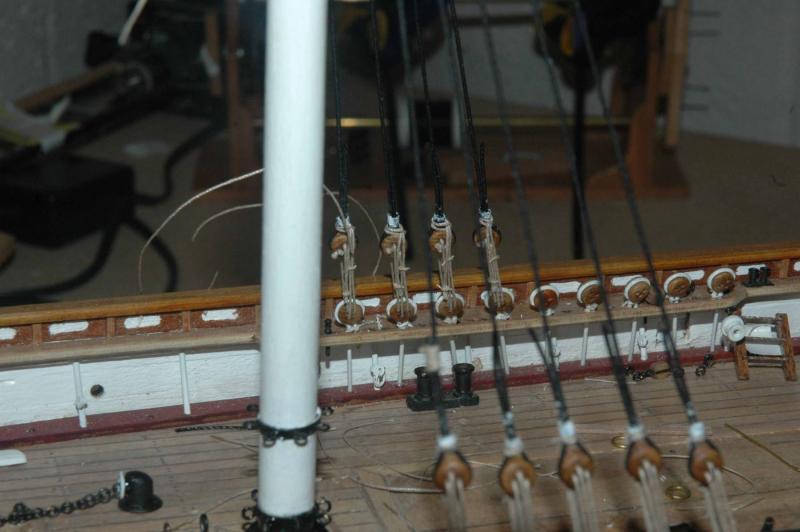
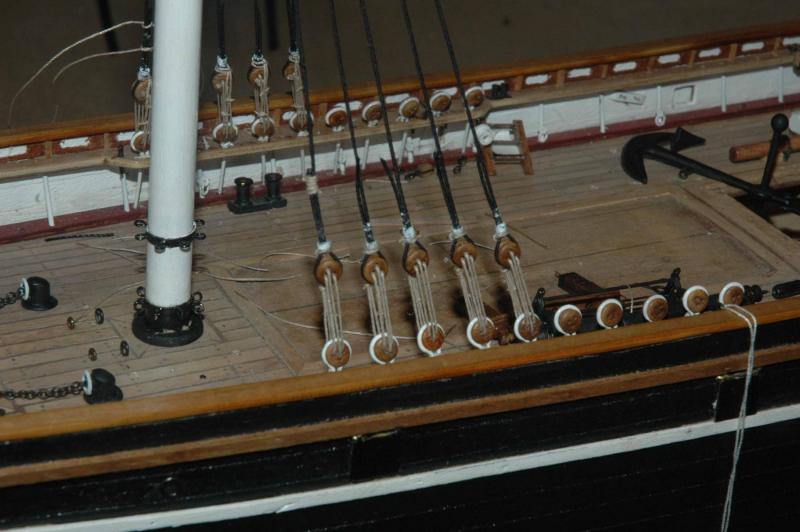
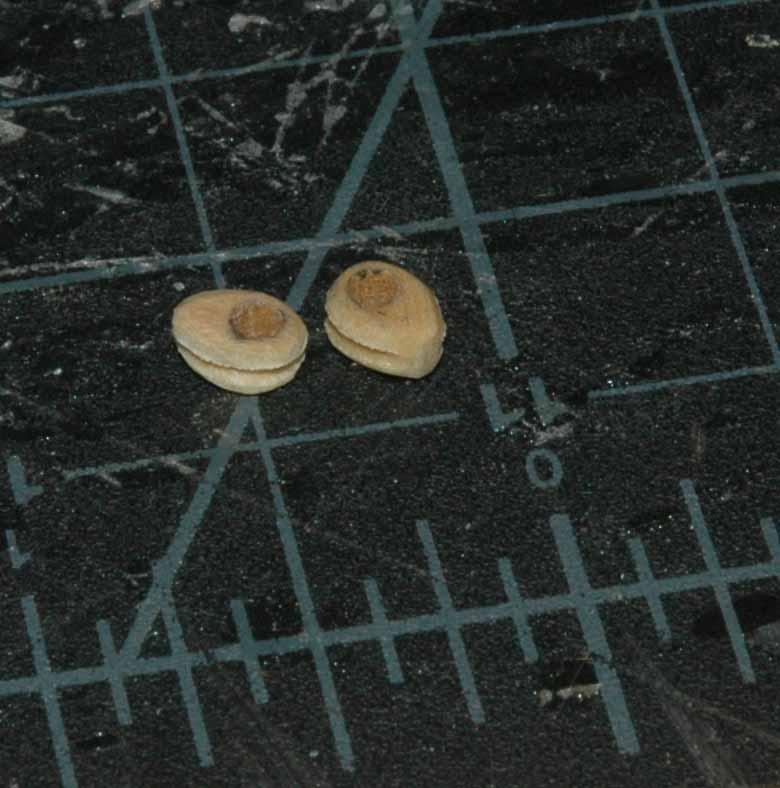
I've completed the Lower stunsul/stay sail/ jib, and flying jib. All the hanks are in place. Someone a couple of years ago recommended using hook and eyes used for clothing, the bra in particular for the hanks. size o for my scale. I bought a pack, which I thought was expensive and found that only 7 of the eyes our of the pack were the ones that I needed. Since it looked like I was going to spend a small fortune on these, I decided to build a jig and make my own for about the cost of one pack (the cost of the wire). Here is my jig with the hanks. Here is the stunsul and jib. I decided that they looked a little bulky (right) so I cut the ears off. (left). In my research both versions were found on ships during that time. Also, I went to finish the fore stays and put the forward pin rail in place and found that there wasn't enough room for the pin rail. I mounted the hearts on the knightshead based on photos that I took of the ship and separately I made the pinrail and located based on the photos that I took. So what went wrong??? I'll tell you what went wrong.. the (expletives go here) stupid model kit with which I started this build is off in the framing and height of the bulwark in this area!!!!!!!!!!!! I tell you, I've ended up scratch building almost everything on this ship past the frame and the pinrails (also with exceptions of the deck pump, deck wench, ship's bells, mast caps). I should have stopped and thrown the hull in the garbage back in 15 years ago when I first noticed something was off and just used the hand full of fittings and scratch built everything. I by the way, the pin rail on the bulwarks are missing 3 back stays.. Stupid model... too late to go back now. Ok rant over. If it was not for this model kit, I would have never started to build in wood and a I would have never found that I actually had the ability to build things from scratch... Here is the fore stay before. The run of the stay goes directly through where the pin rail should be. I can't move the bollard on the rail (can't think of the correct name) back toward the cats, they are epoxied on the rail and actually they are in the correct position anyway. So after lots of thinking about fixes, I decided to bite the bullet and remove the forestays and hearts and rebuild/replace them. I thought that if I didn't do this, I would tick me off for the rest of my life when I viewed the model. I was able to keep the upper hearts. I had to remake the lower hearts. luckily the stays were in pretty good shape. I hadn't actually glued the siezing yet (still concerned about the epoxy from the previous issue). the acetone that I used to soften the expoy on the bottom of the brass wire mounting the hearts to the knightshead did a number on the paint finish - no big deal. I damaged the lower hearts with pliers drying to pull them out of the knightshead. Here is the result. The forward pin rail can go into its correct position and the heart and stays clear the pin rail and the look is close to the actual ship. Sorry for the mess of all of the extra line. After I'm sure everything is ok, I'll take photos without all of the extra line removed. Thanks for the help, advice, and likes. Marc


- 525 replies
-
- 5
-
-
- cutty sark
- mantua
- (and 2 more)
-
Thanks for the tip Popeye! I've never run across that suggestion. Also thanks for the "likes" everyone.
-
Hi Daniel, Congratulations! I'm glad that Mamoli will live on! I was heartbroken to hear about the fire. I kept checking every few months just in case I it wasn't that bad or they were rebuilding. The website never changed never addressed what was going on. They are my favorite kits. I bought several, thinking someday I'd build them. I have the large Victory which will be my next build. I look forward to seeing what you do with the company. I might even repurchase some of the kits if they have changes and also in support of your effort! all the best! marc
-
Cutty Sark by NenadM
keelhauled replied to NenadM's topic in - Build logs for subjects built 1851 - 1900
nice drawings! Wish I had your computer skills! I probably would have had hot head convert all of the drawings. Isn't drawing ships about the same as architecture - of course ships are cooler since the move around Don't forget the seats in the head. otherwise your little people will fall through the hole!- 4,152 replies
-
- 5
-
-
- cutty sark
- tehnodidakta
- (and 1 more)
-
Nenad, Jeff, and Thomas, Thank you for the compliments and encouragement. Thanks for the info Jeff. I sounds like good advice for checking the epoxy. The next steps are to work on the rest of the fore back stays and then I start with jibs and the fore stays! I've found that I hadn't finished putting the hanks on the jibs. So I started making more hanks. thanks Marc
- 525 replies
-
- 2
-
-
- cutty sark
- mantua
- (and 2 more)
-
Thanks Jeff. I really appreciate the kind words. I rigged the fore shrouds to the deadeyes. only the lower hitch is in place in these photos. and made fast the cow hitches All of the shrouds are served as are the stays. I made a set of hearts for the fore stay And then the next day after temporarily rigging the fore stay, I noticed that it had slacked slightly. Odd because i haven't had any served lines stretch. I tighten the stays then had the same slack the next day. Then I noticed that the irons securing the hearts were pulling out of the knights heads. The epoxy had failed. So, I've removed the fore stay and have cleaned the old epoxy off. mixed new epoxy and remounted the iron and heart. I saved the sheet that I mixed the epoxy on, which is hard as a rock the day after mixing. I'll give it another 24 hours before testing their strength. I guess I had never tested the strength of the previous attempt. Lucky that I had only temporarily rigged the fore stay!! Otherwise I would have had to serve another set of stays.

- 525 replies
-
- 5
-
-
- cutty sark
- mantua
- (and 2 more)
-
Cutty Sark by NenadM
keelhauled replied to NenadM's topic in - Build logs for subjects built 1851 - 1900
That pump on the side of the WC is salt water for various uses on deck. There is also a fresh water pump in front of the fore hatch that is removable. usually you don't see it in place in old photos.- 4,152 replies
-
- 7
-
-
- cutty sark
- tehnodidakta
- (and 1 more)
-
Cutty Sark by NenadM
keelhauled replied to NenadM's topic in - Build logs for subjects built 1851 - 1900
Nenad, what scale are your working in? Thanks Marc- 4,152 replies
-
- 3
-
-
- cutty sark
- tehnodidakta
- (and 1 more)
-
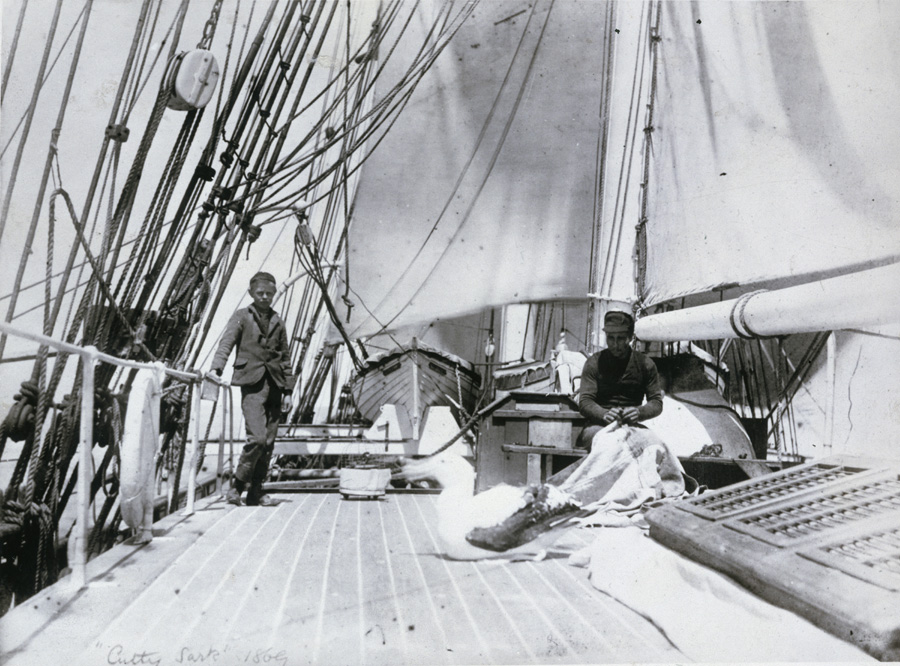
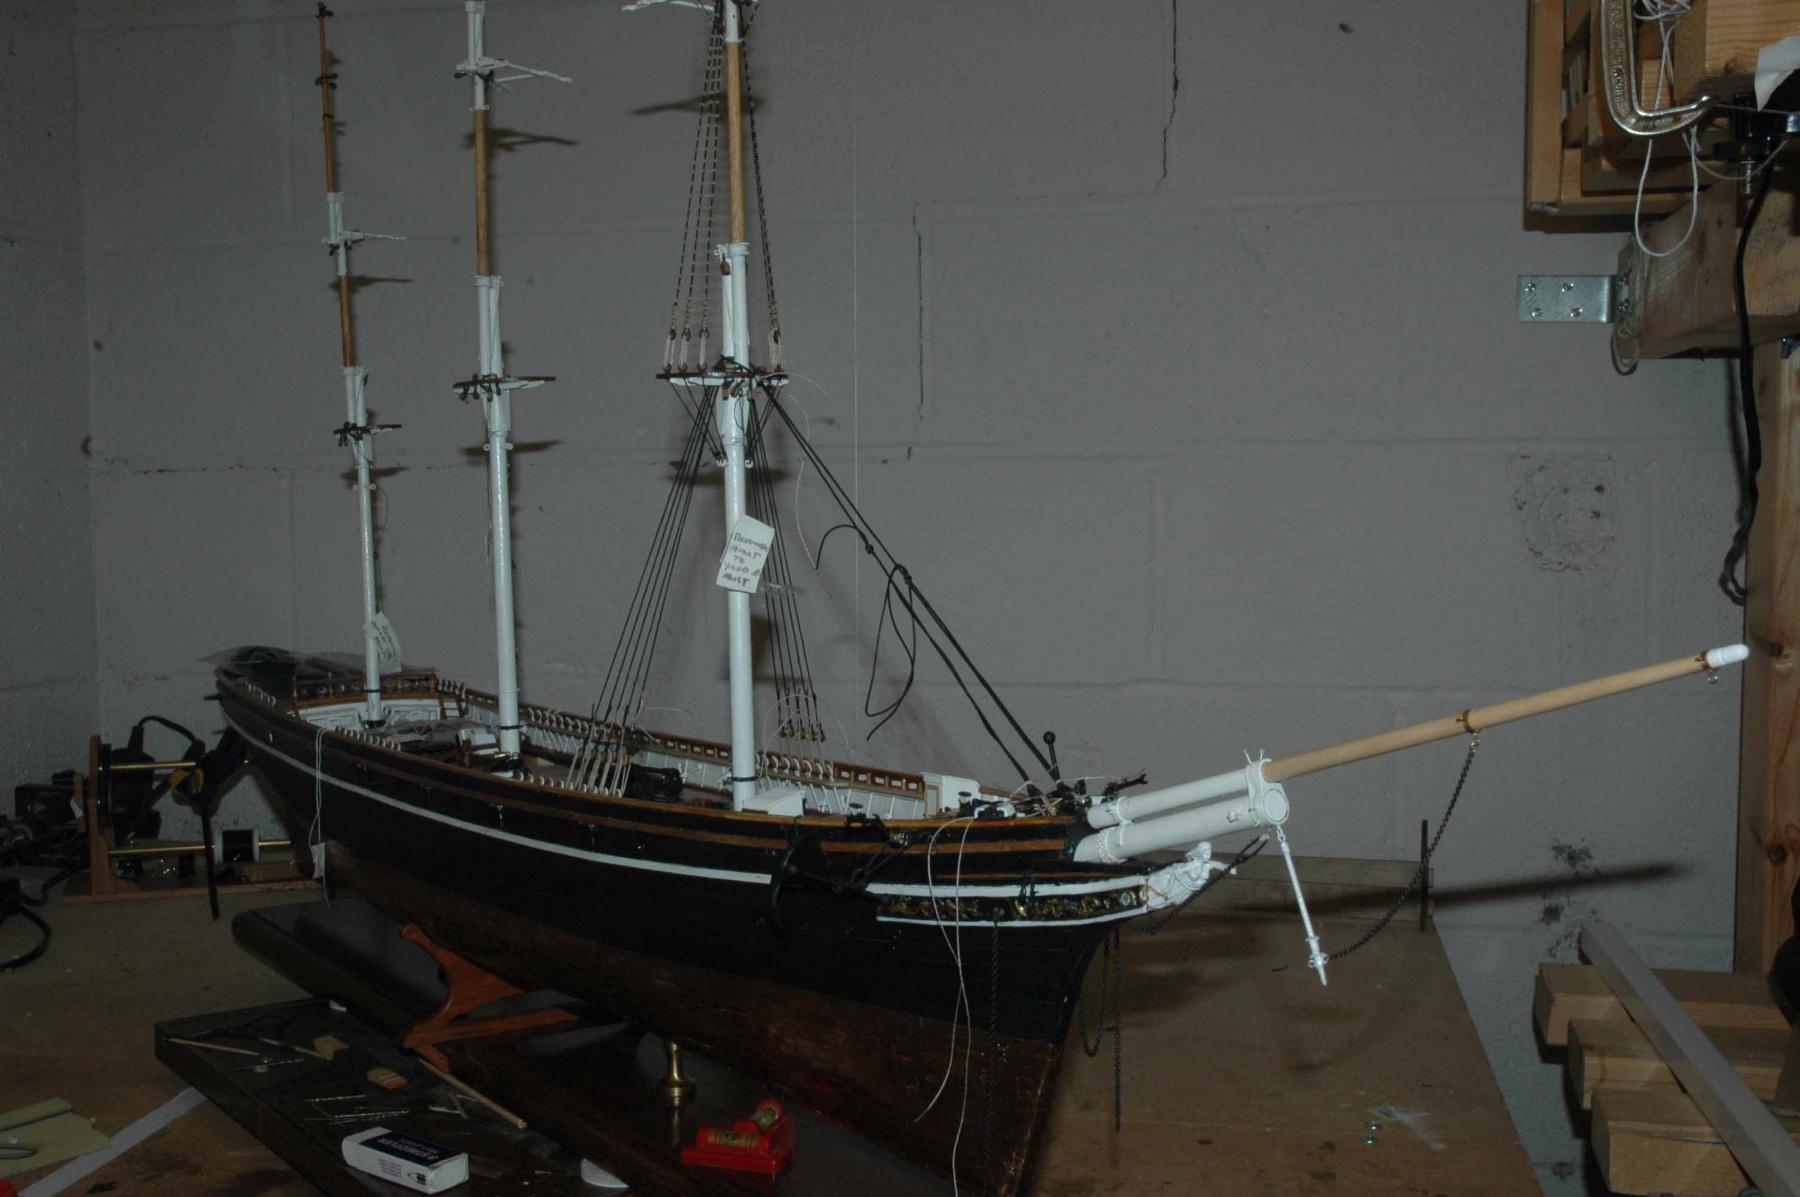
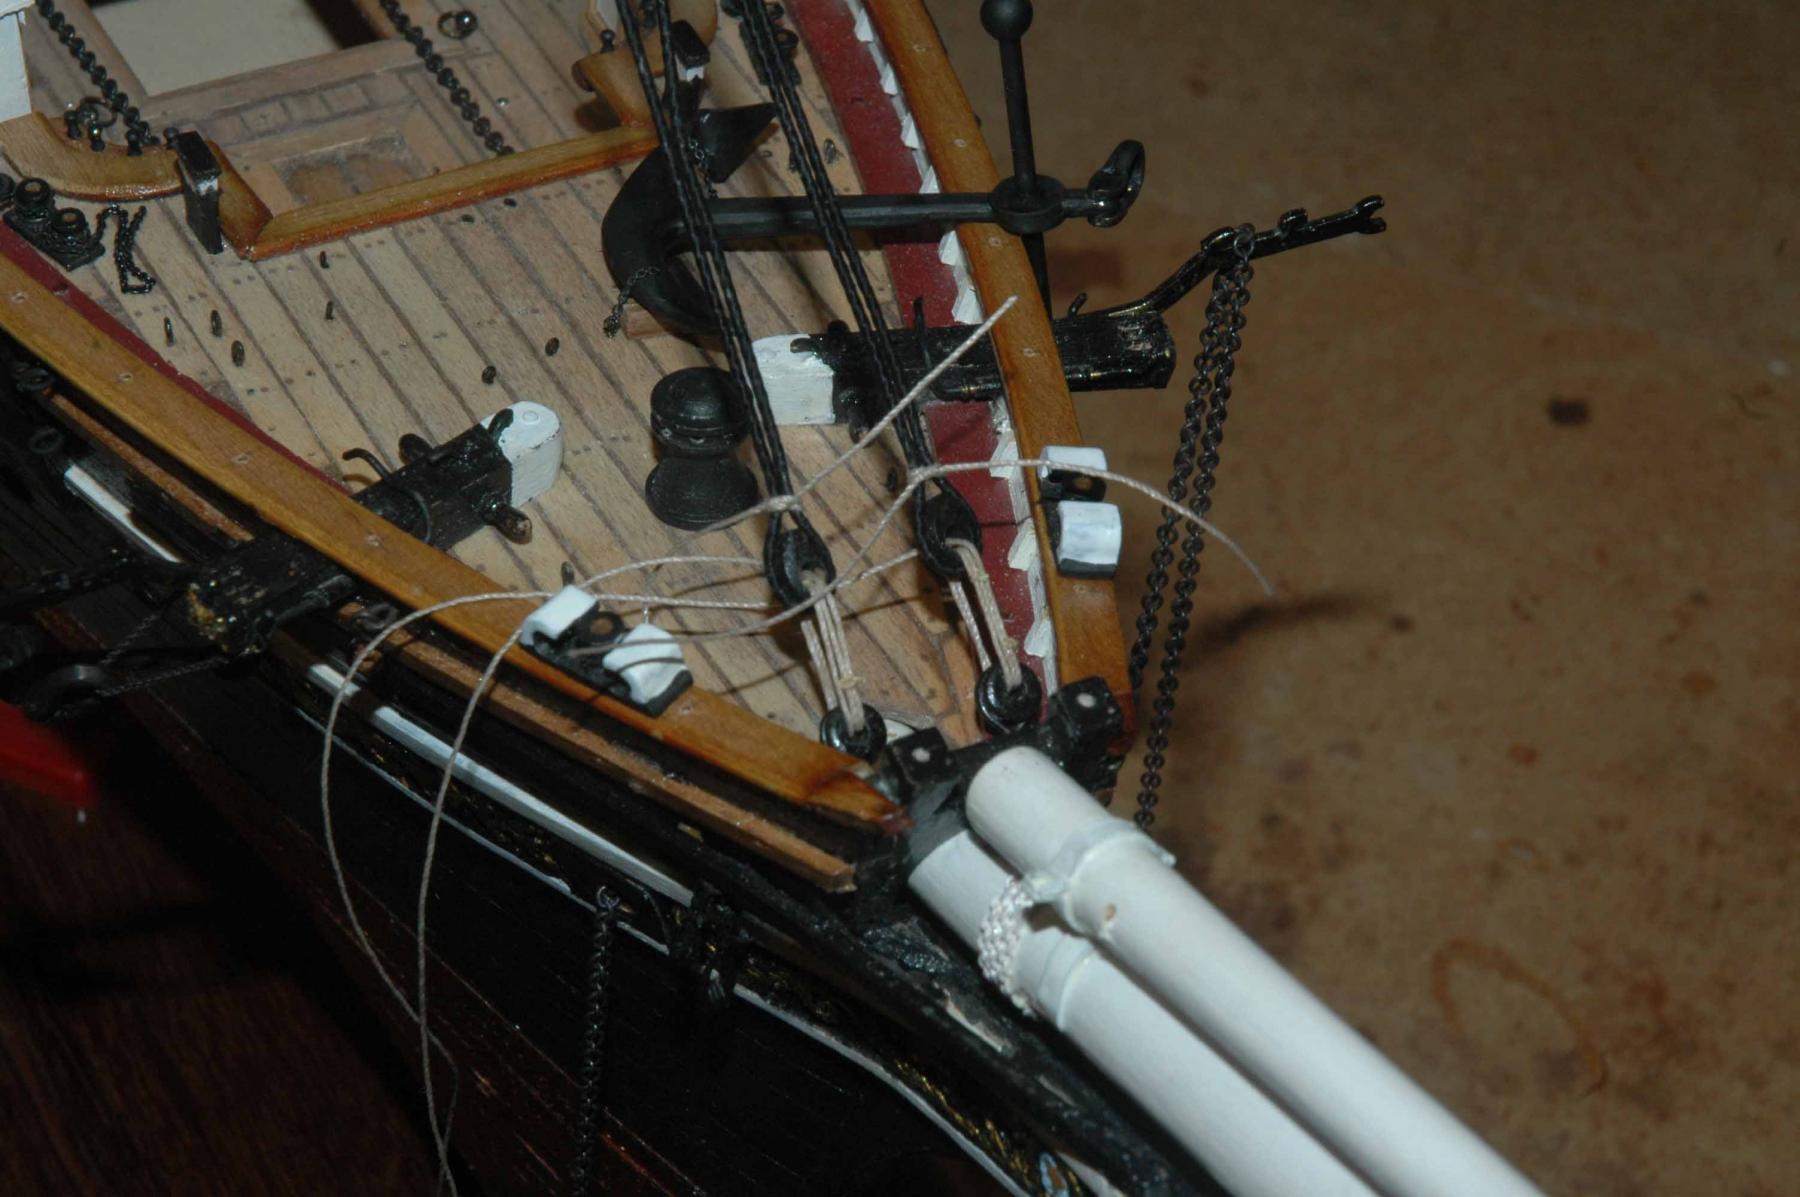
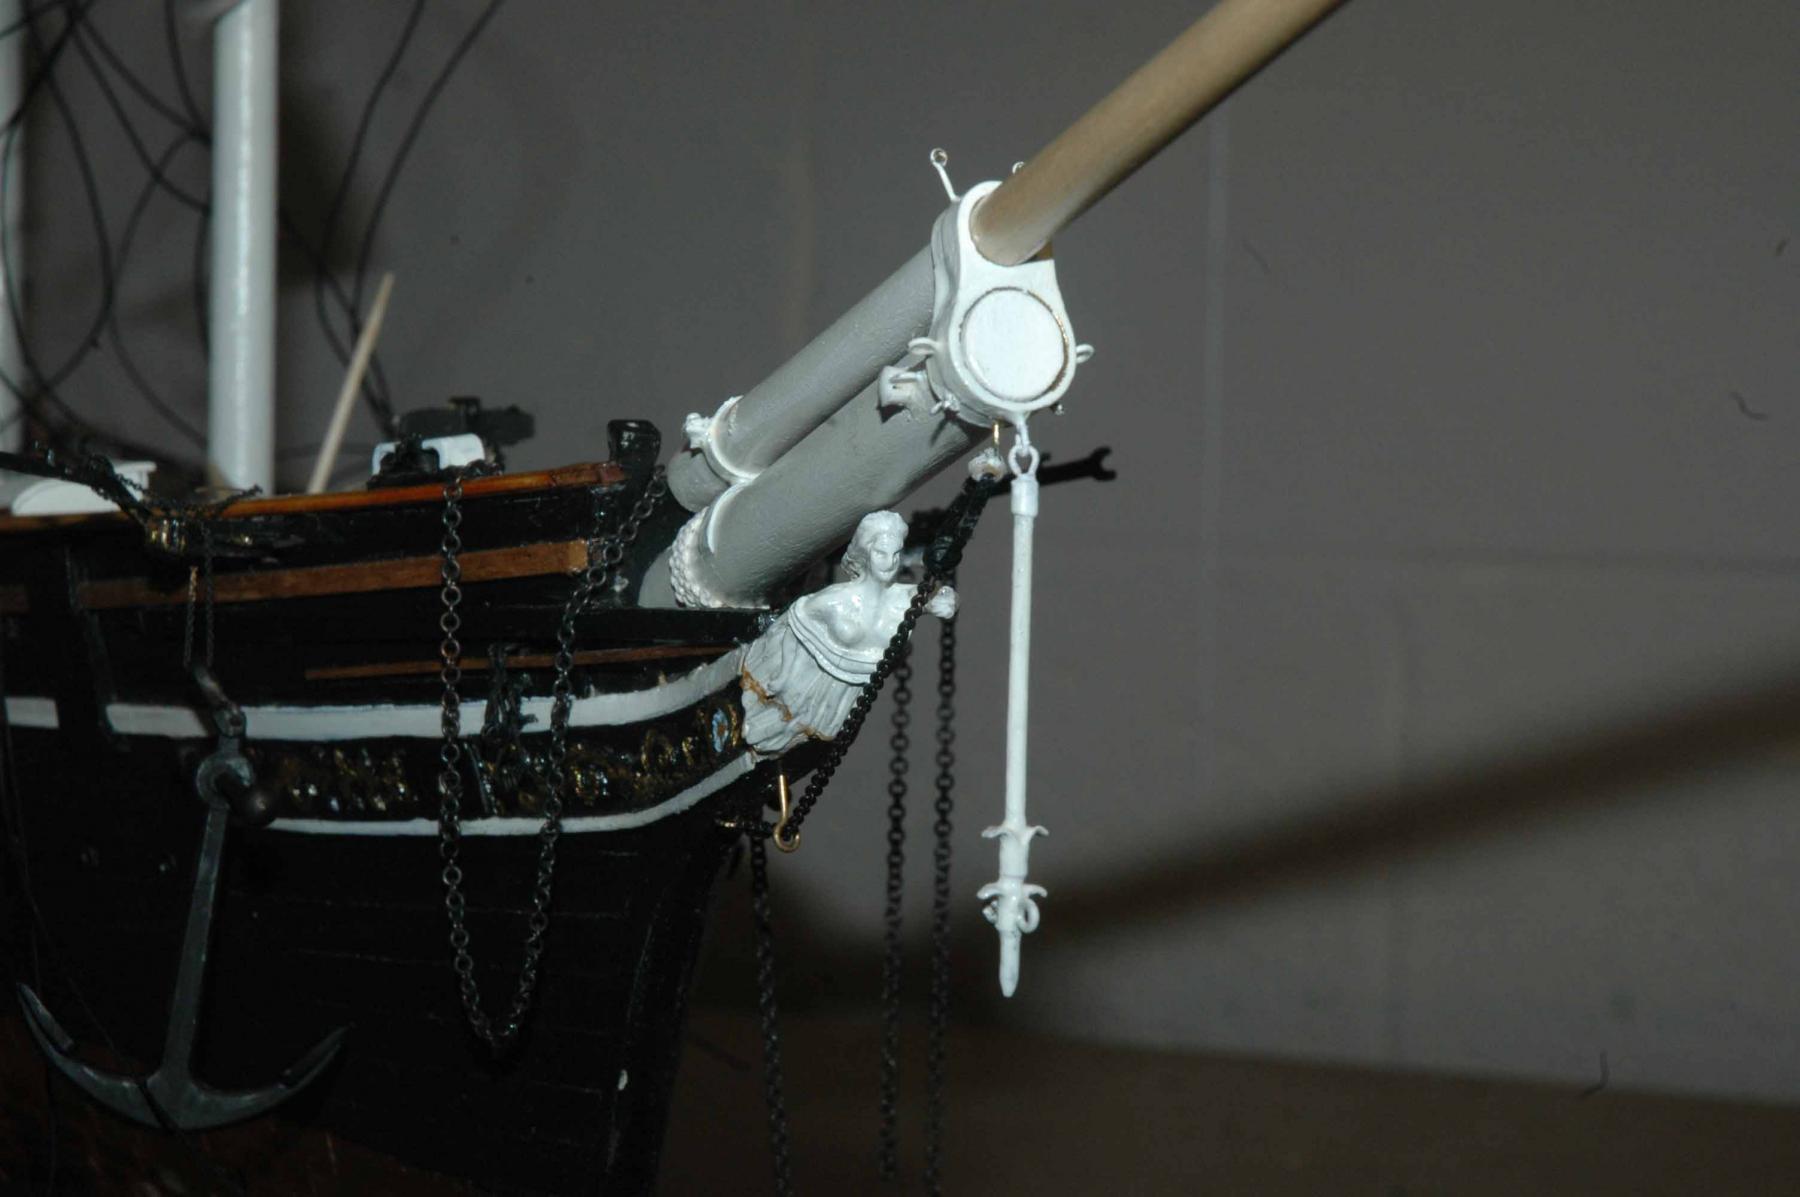
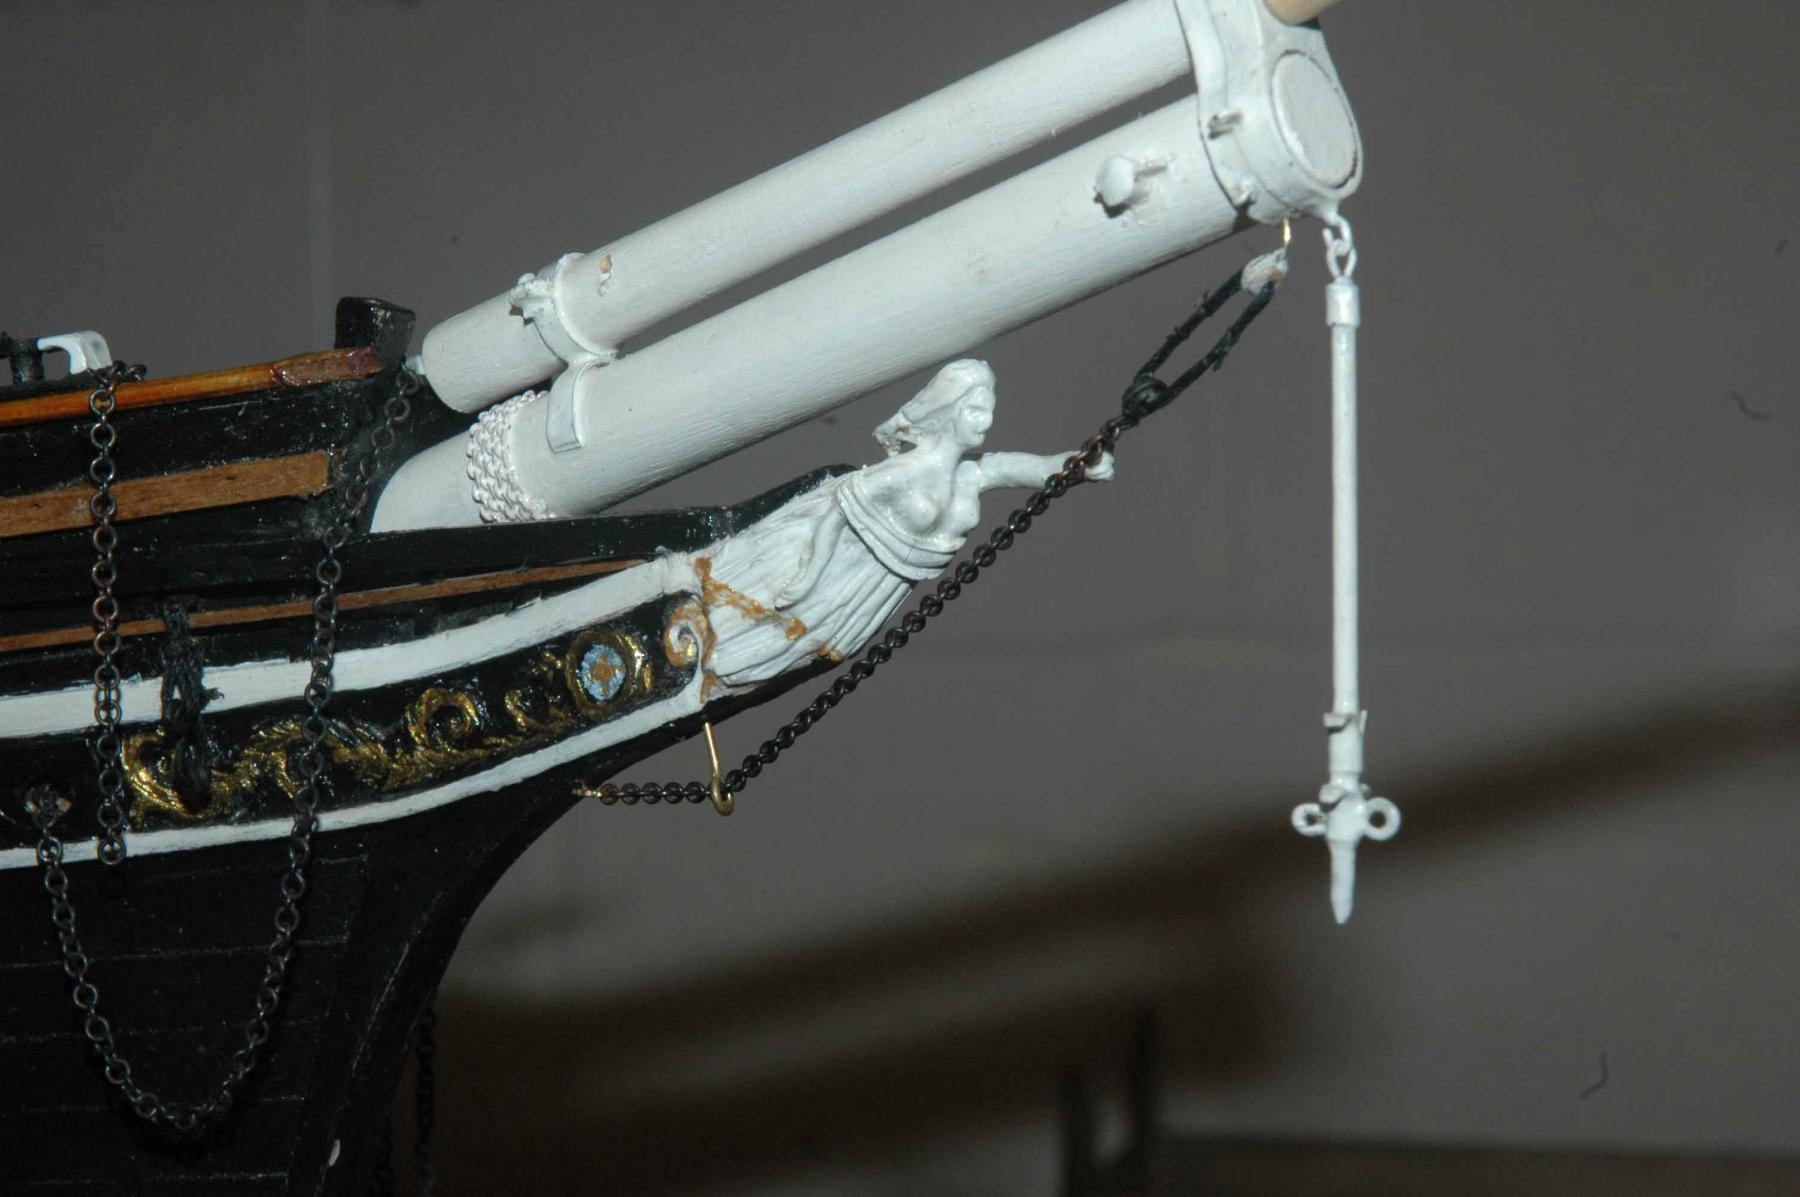
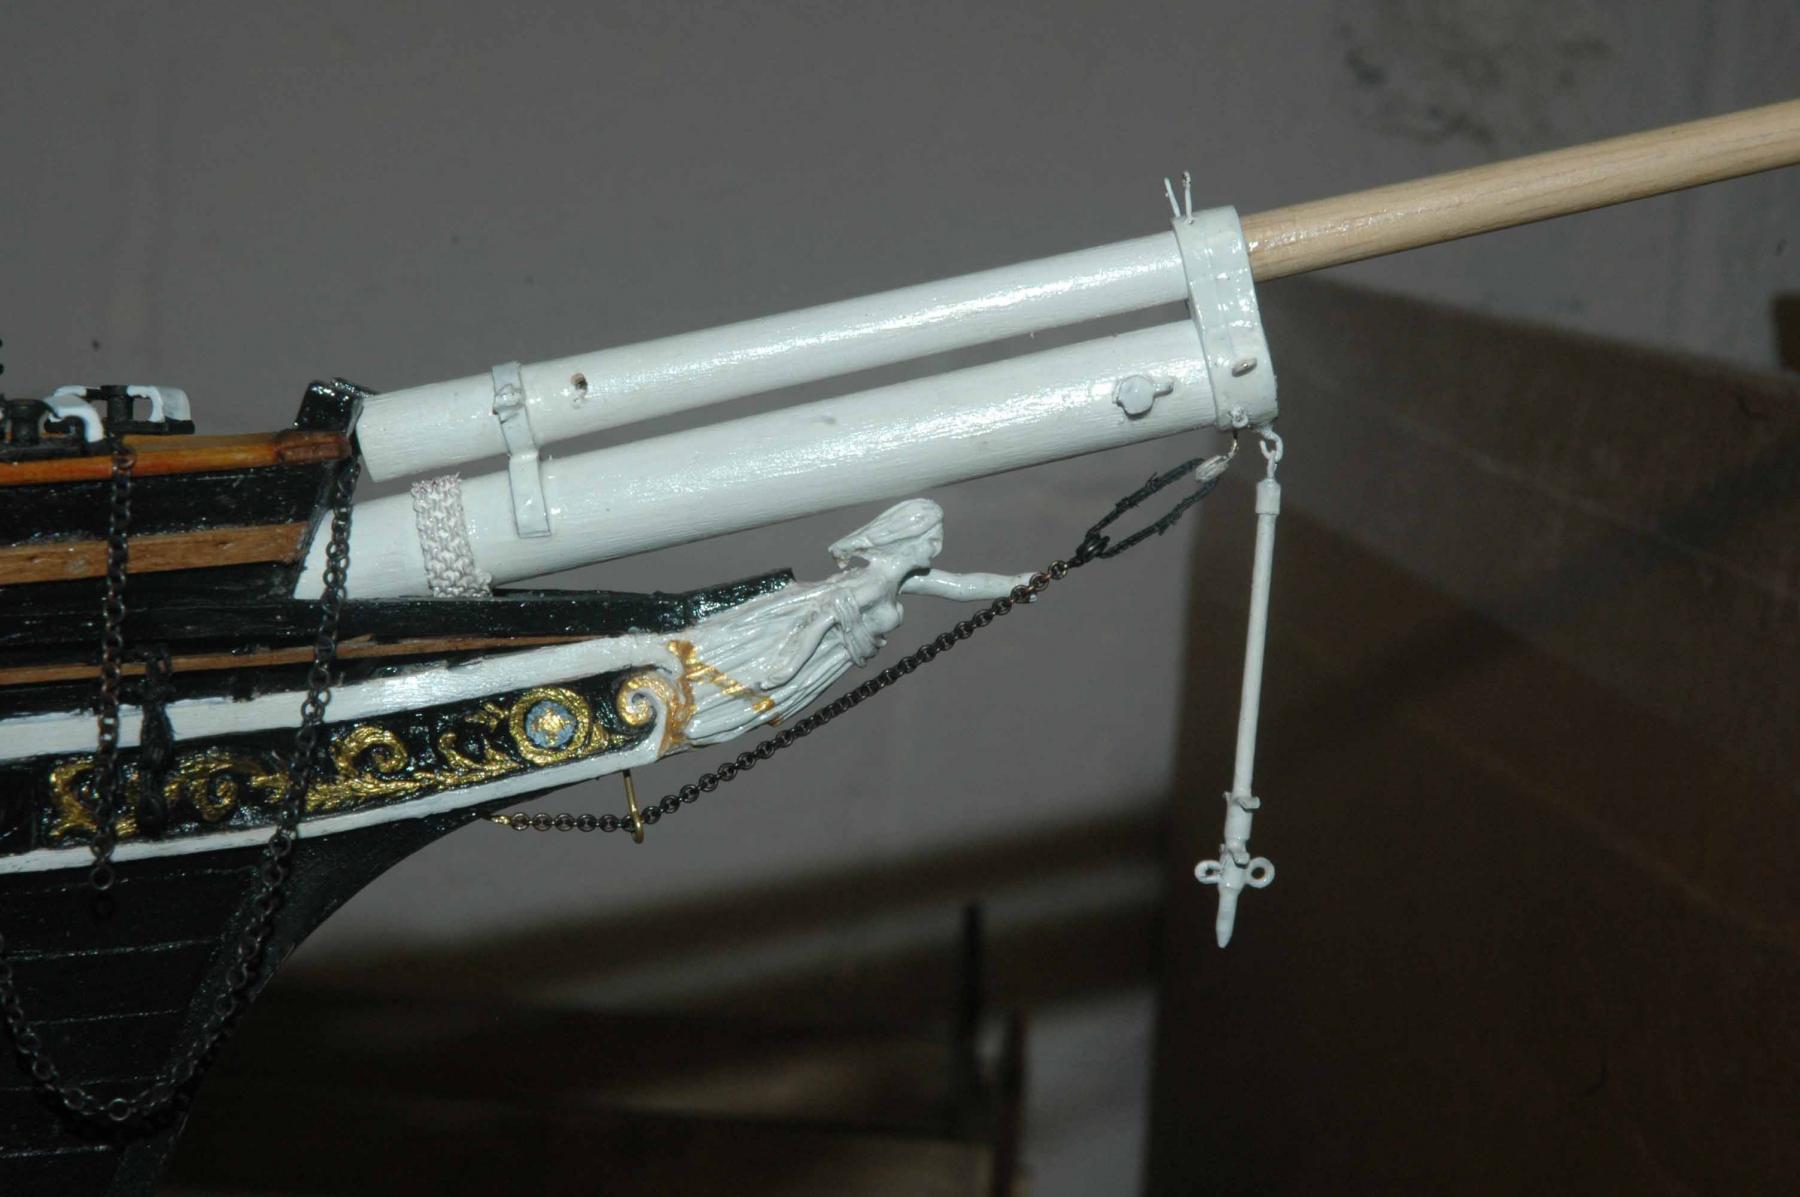
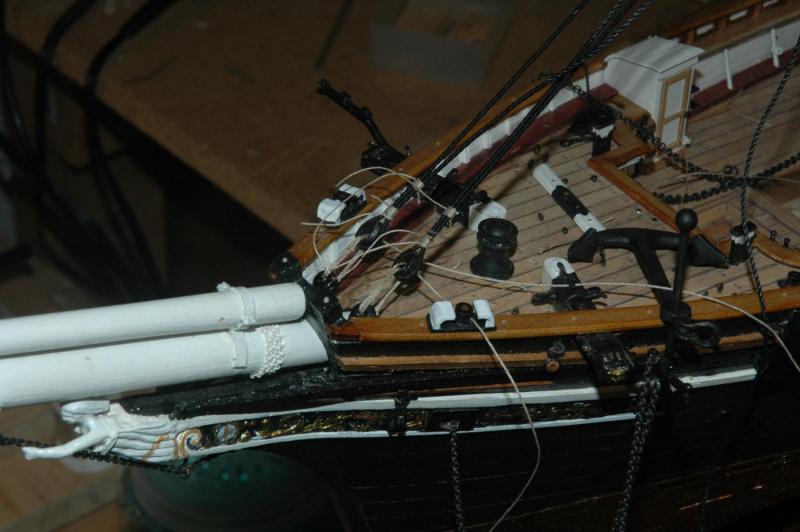
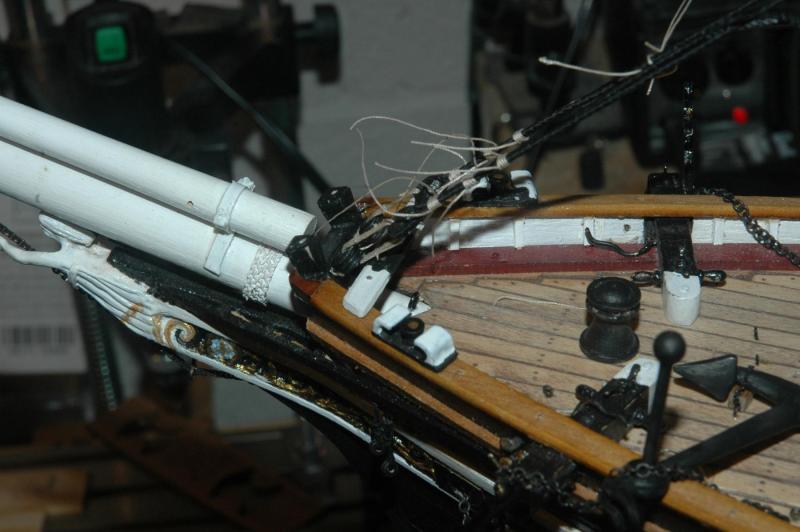
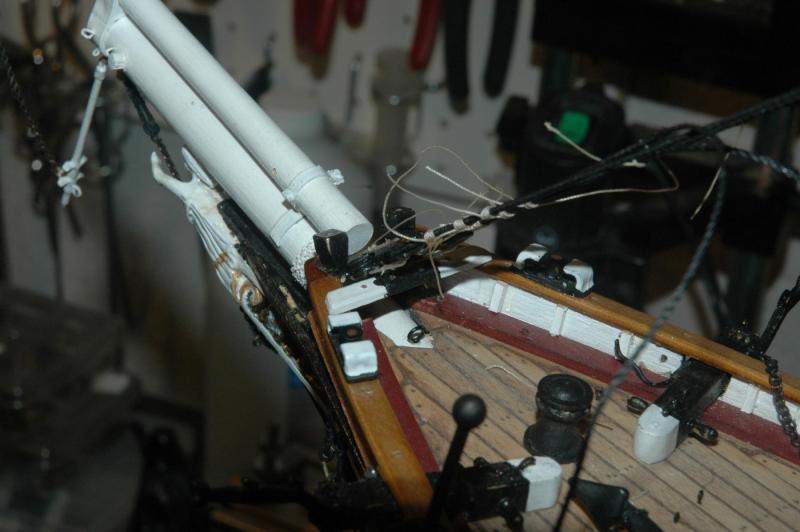
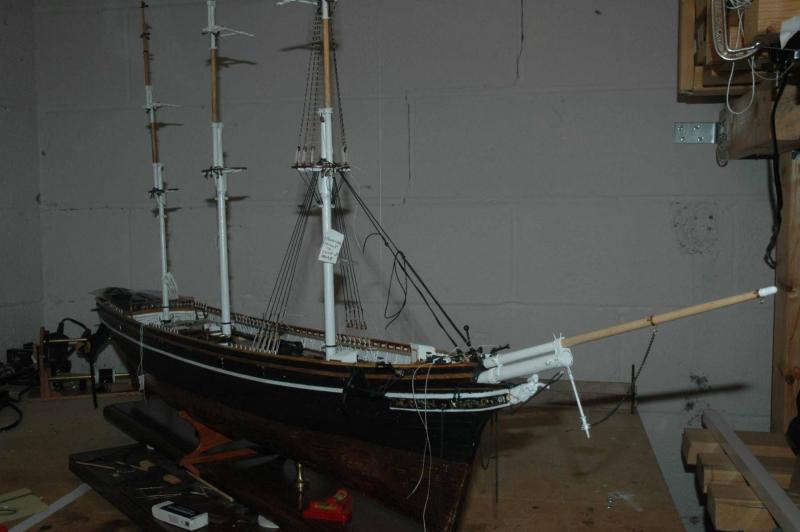
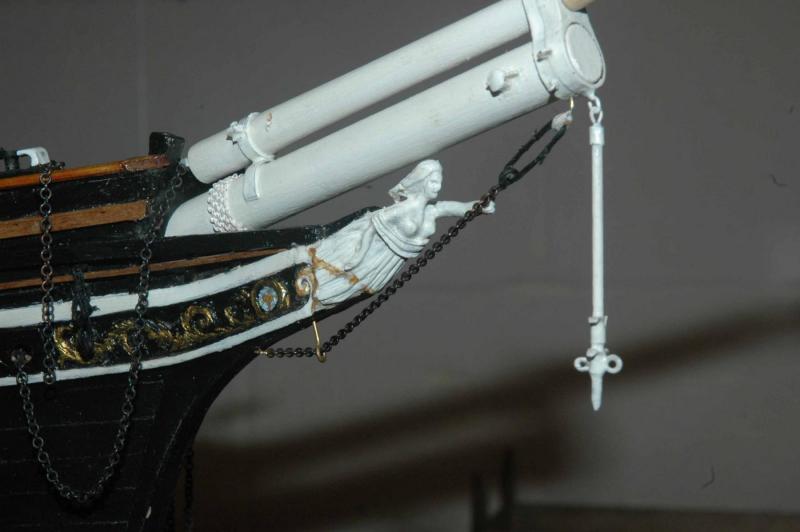
First actual rigging! The bowsprit is now permanently connected to the ship. Exciting and scary! I had it temporarily attached earlier, but now the chain and eyes are epoxied in place The size of the chain made this a pain! But i think it looks good. real ship for comparison historic photos and photos before the restoration have the lines connecting the hearts with a dark tar. so I used the black line.


- 525 replies
-
- 5
-
-
- cutty sark
- mantua
- (and 2 more)
-
Cutty Sark by NenadM
keelhauled replied to NenadM's topic in - Build logs for subjects built 1851 - 1900
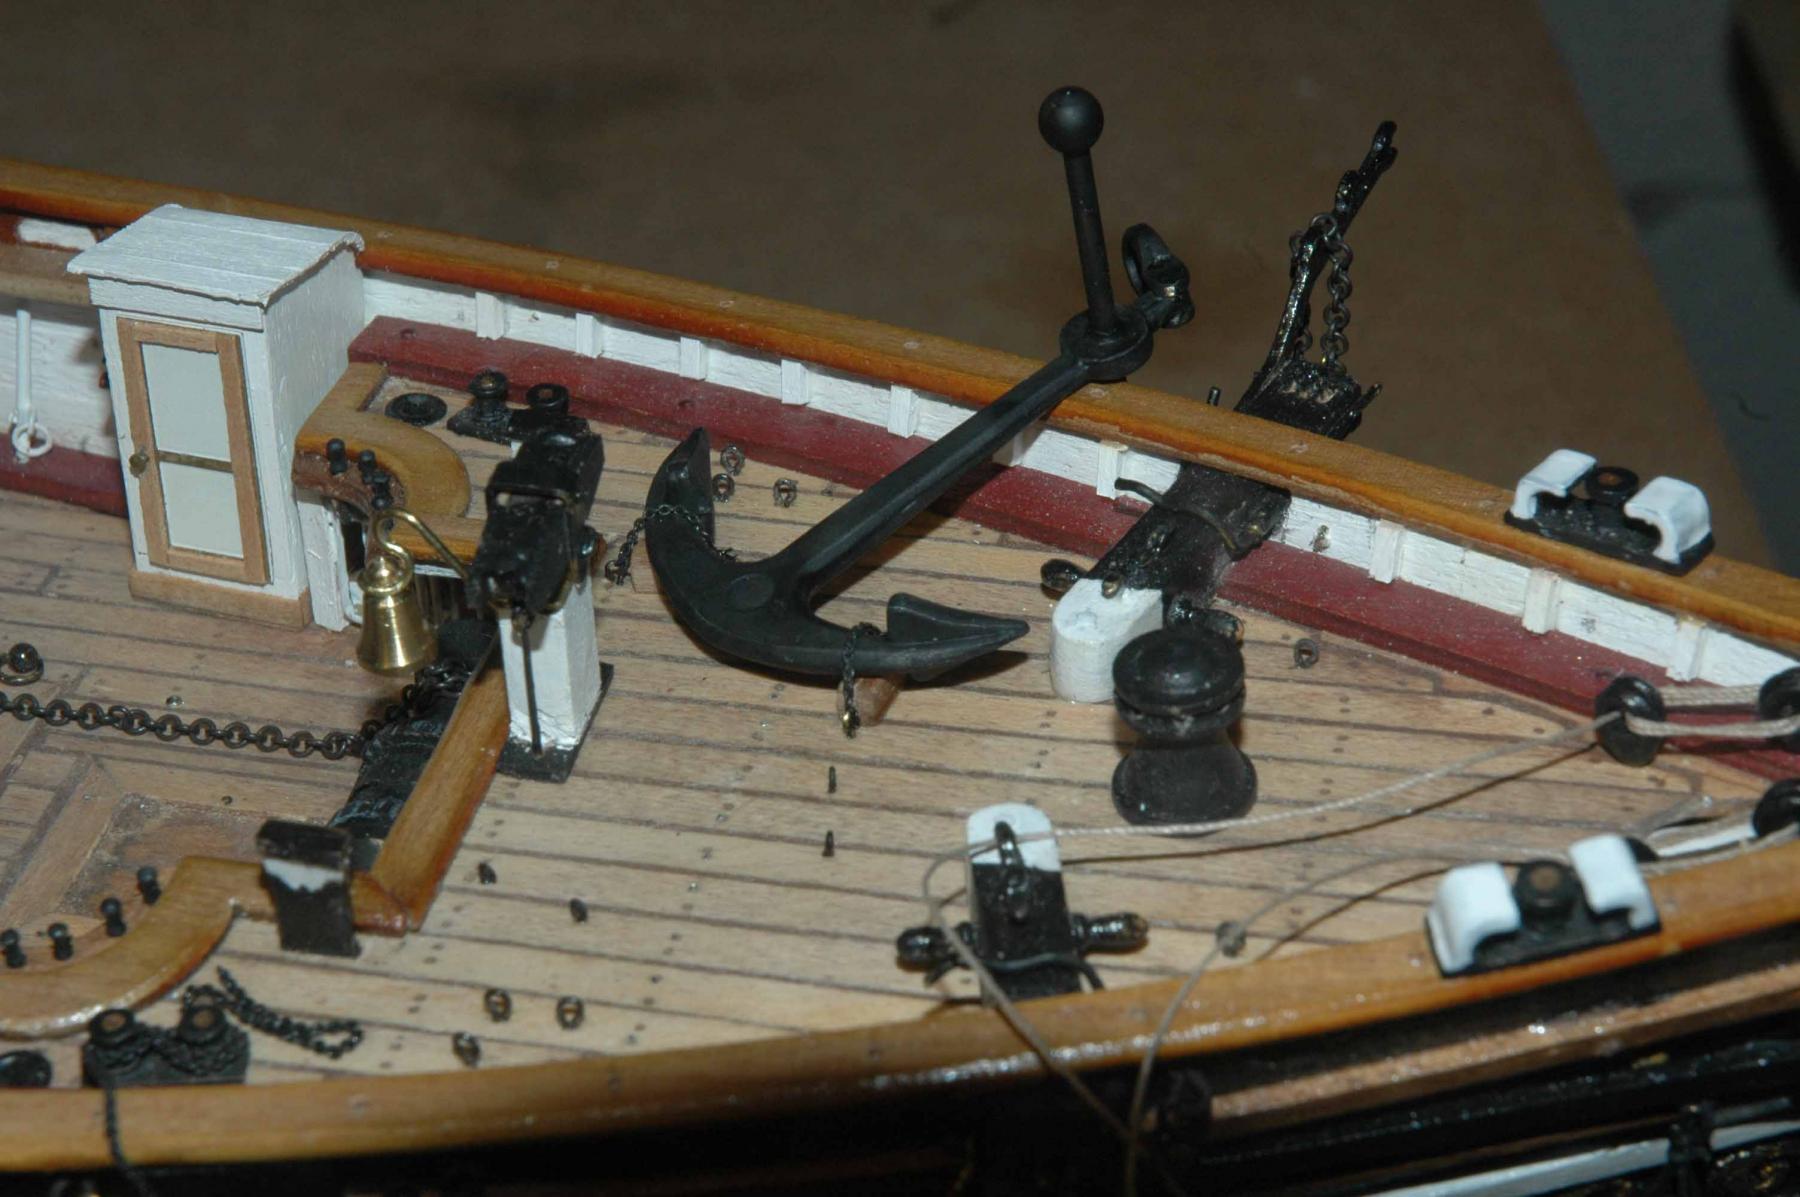
Hi Nenad, I was just looking at the original specifications for the Cutty. The original specifications for the cutty have listed under "No.68 Carpenter’s and Boatswain’s Stores". "1 Teak accommodation ladder with Crane complete." So it looks like the ladder was always on the ship. I know it was on the starboard side before the restoration. No info on the anchor davits. But it also didn't have specific details about the anchors. Marc- 4,152 replies
-
- 5
-
-
- cutty sark
- tehnodidakta
- (and 1 more)
-
Cutty Sark by NenadM
keelhauled replied to NenadM's topic in - Build logs for subjects built 1851 - 1900
Nenad, really nice work! I think that you note it in your reply about the accommodation ladder. not only is the ladder mentioned with the detail of the davit in the elevation plan, but in the deck plan just below the elevation plan with the davits the ladder is shown attached on the starboard side and then the outline of the ladder is shown on the starboard drawing just belwo the deck plans on the same sheet (general arrangement). Marc- 4,152 replies
-
- 4
-
-
- cutty sark
- tehnodidakta
- (and 1 more)
-
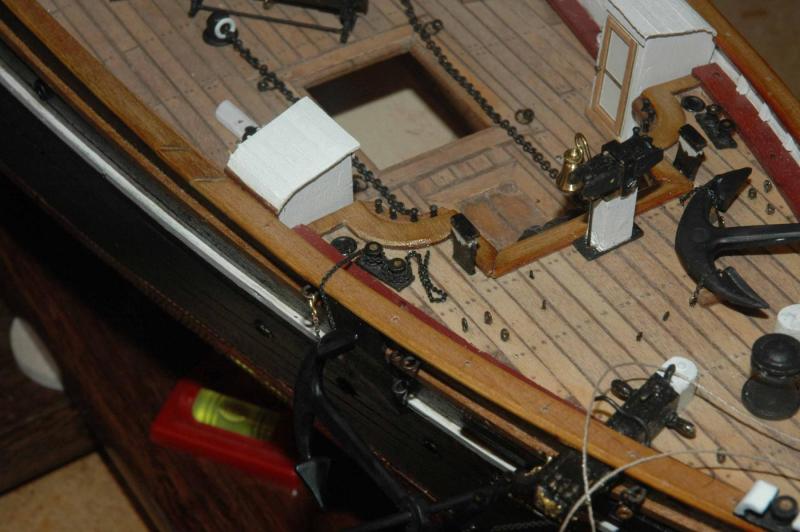
Thanks Popeye and Nenad! I appreciate the feedback. Nenad, I did make a pair of anchor davits and the corresponding fixtures on the fore castle per Campbells plans. However, Longridge says that she didn't have them and I haven't been able to find a photo with them in place. If you have a photo with them could you send it to me? I haven't made up my mind whether to add one or both to the ship. they are built and just have to be rigged. If I add one it will probably be with the outboard anchor, like they are waiting to pull it on deck. Thanks! Marc
- 525 replies
-
- 1
-
-
- cutty sark
- mantua
- (and 2 more)
-
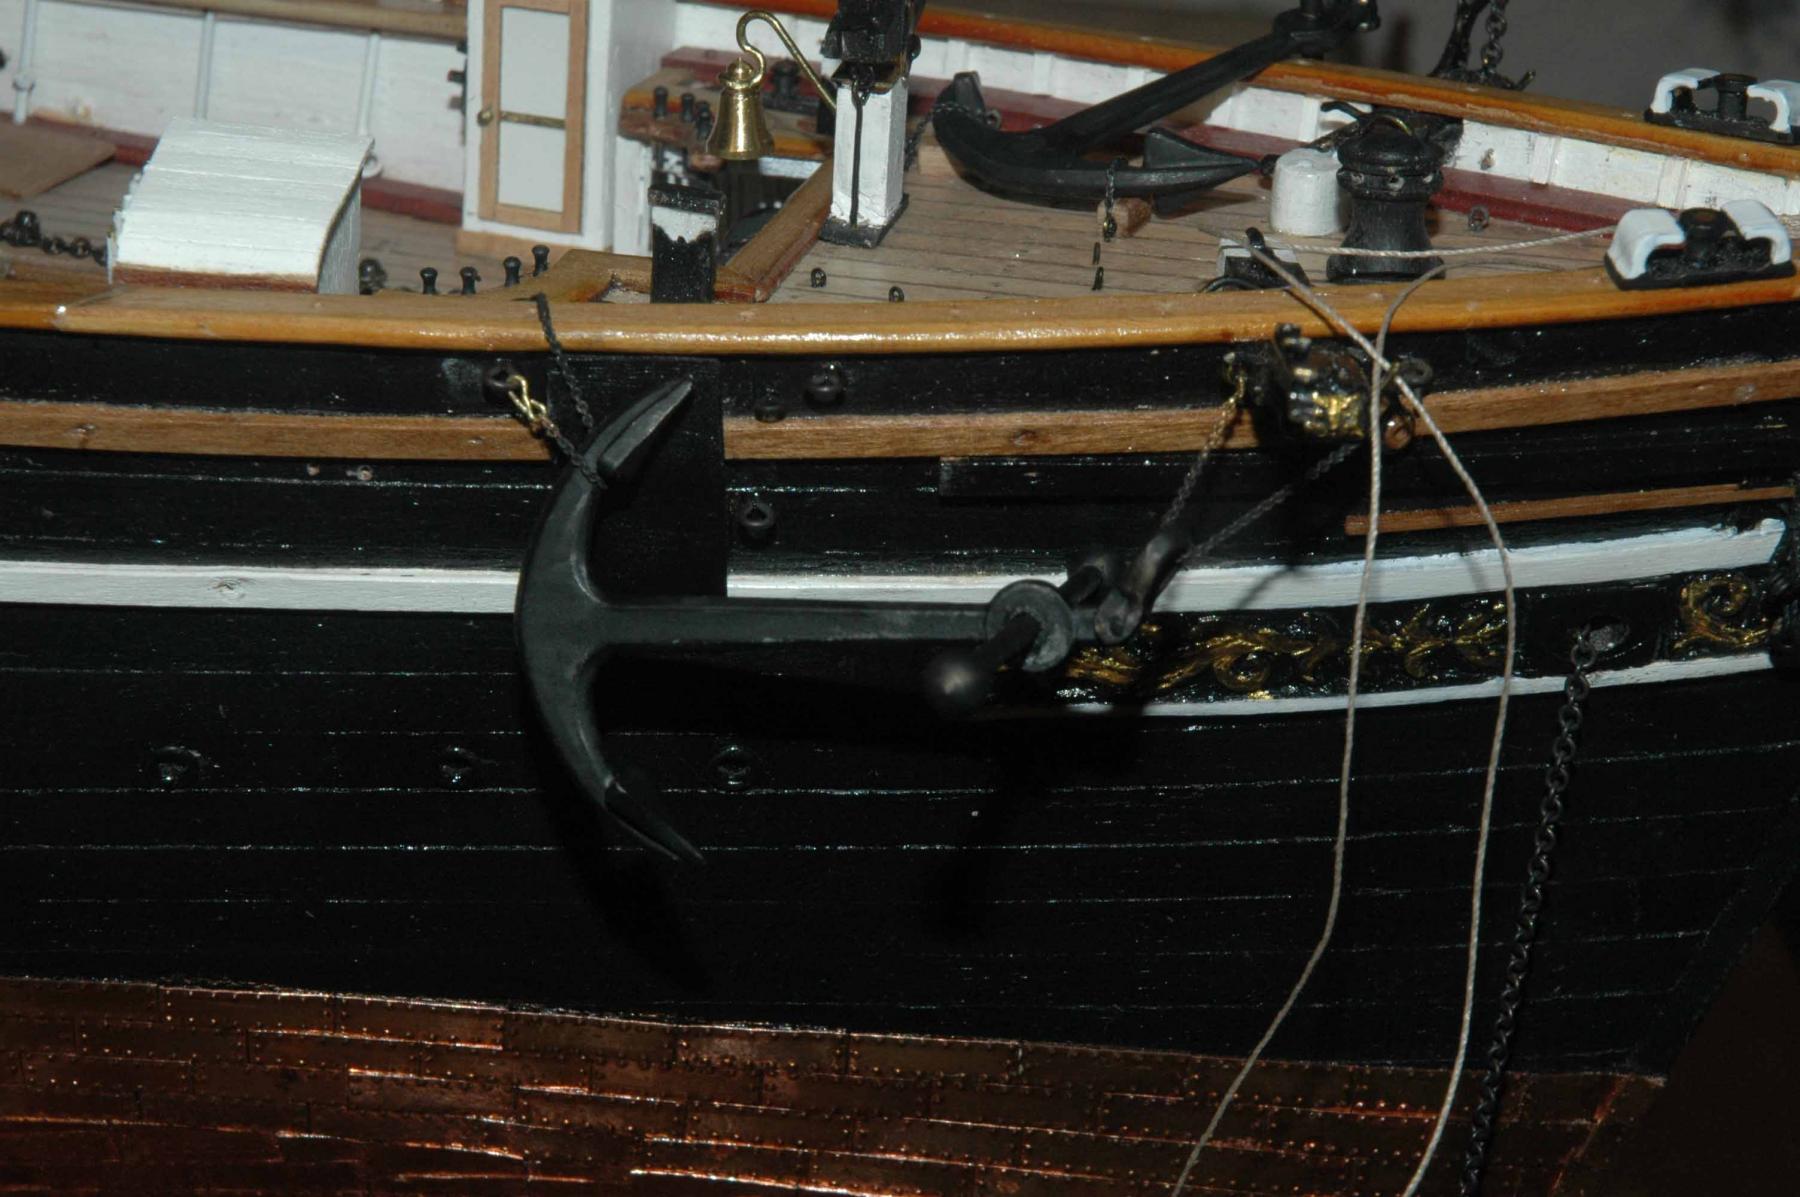
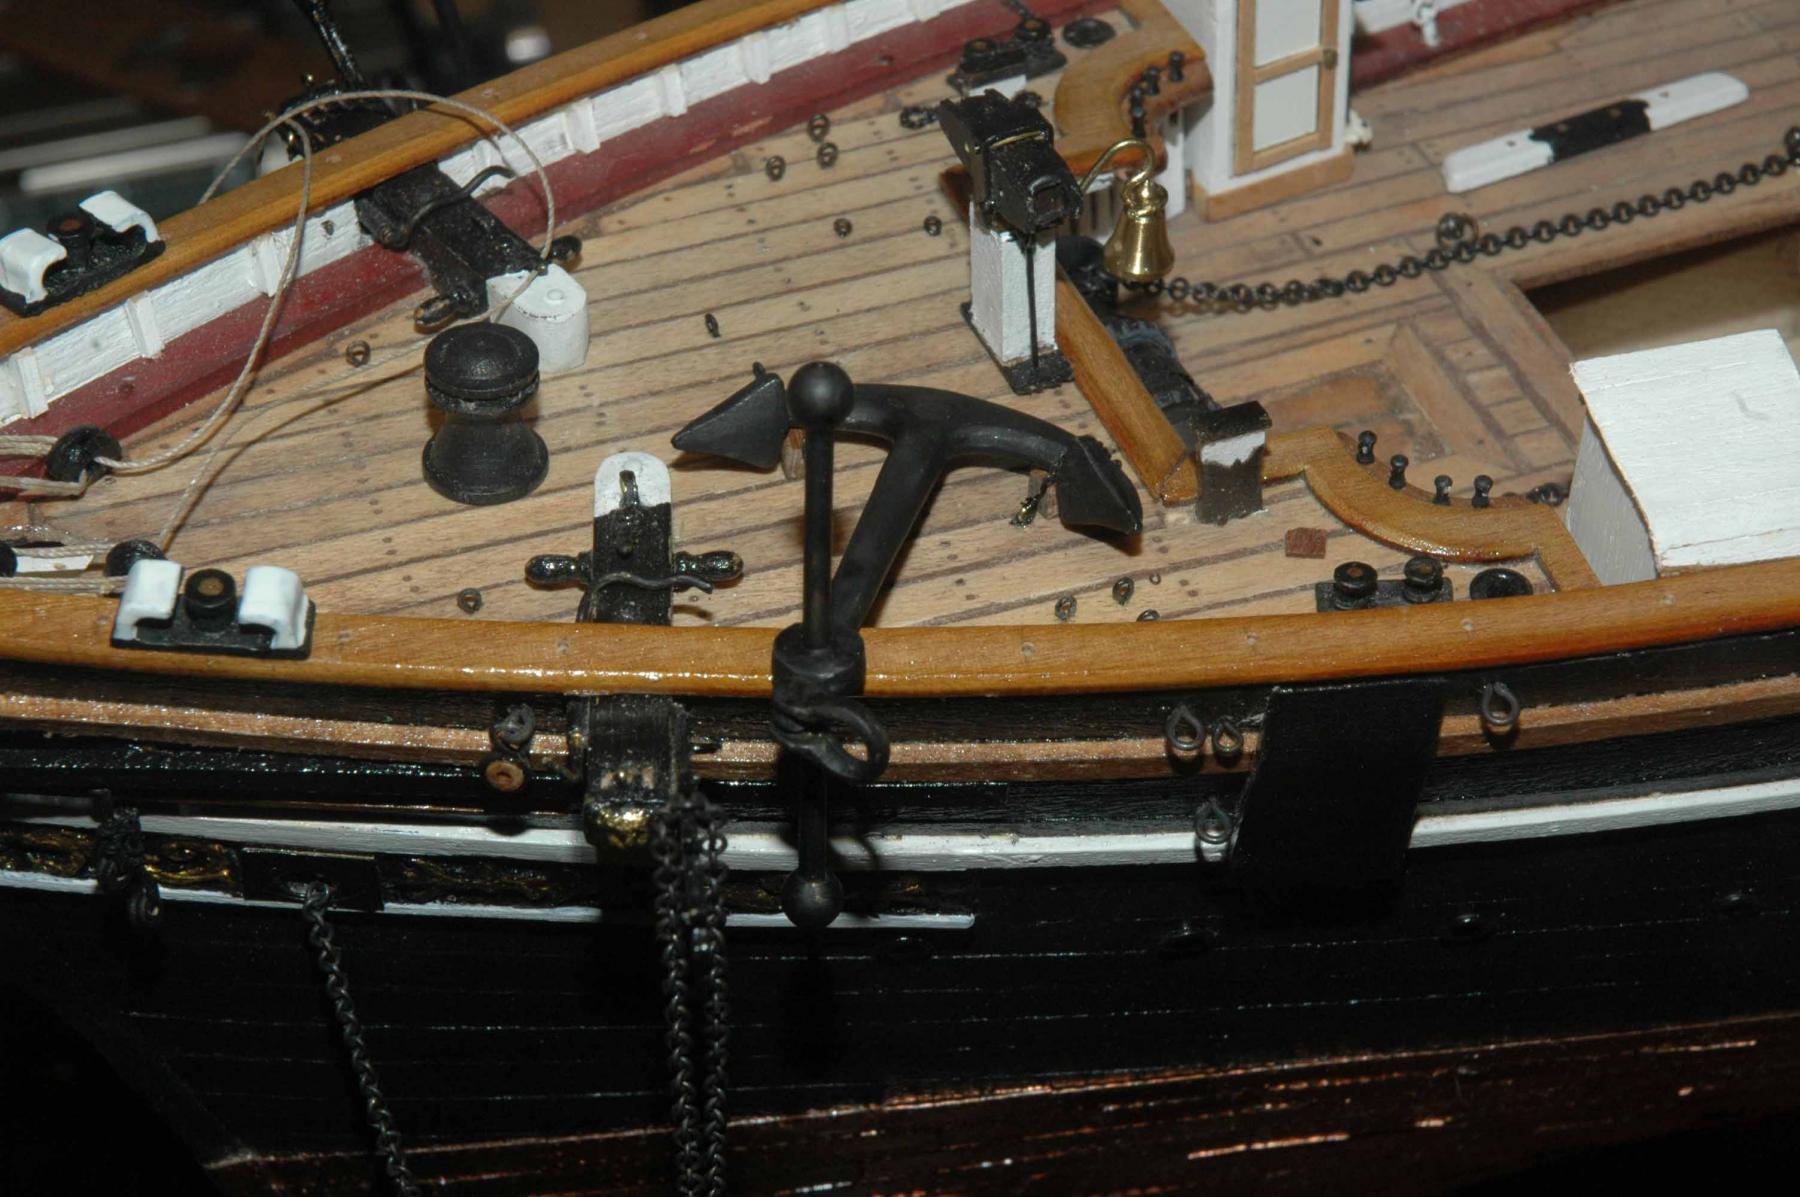
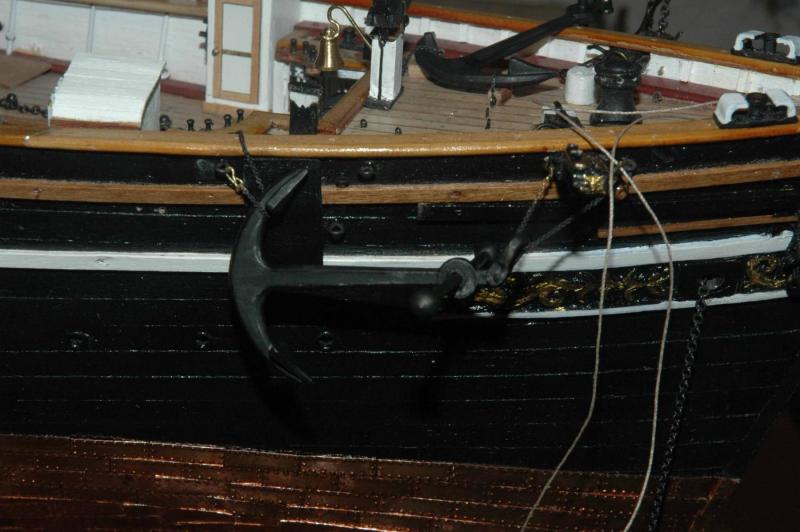
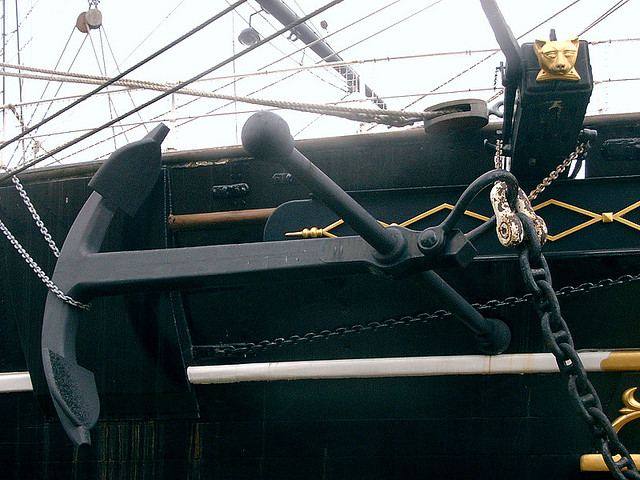
more anchor work. I decided to stow one anchor outboard and the other inboard. This wouldn't be unusual when heading out to open water or coming into a harbor. Here is the inboard anchor. I used drawings and historic photos of the cutty and Longridge's book. and here is the outboard anchor The real one for comparison The outboard anchor was only temporarily mounted so that I could remove it and continue rigging the ship Marc


- 525 replies
-
- 5
-
-
- cutty sark
- mantua
- (and 2 more)
-
I own both the proxxon KS 230 and the Byrnes. There is no comparison, and I wouldn't even try to explain the difference. I will say that you can mill very thin pieces of wood the KS 230 with two simple alterations. I used a couple pieces of tape around the blade to prevent the wood from being sucked into the hole. Second was I glued a piece of wood to the fence so that there was no space between the fence and the table surface. Also the wood glued to the fence stopped just past the beginning of the blade to prevent any kickback or binding. I made pieces smaller than 1/32 of an inch. Here's the real issue with using this saw. repeatablity. if you move the fence, you'll never be able to get the same width at that small of a scale. That is where the Byrnes with it's micrometer attachment blows this saw away and why I ended up getting the Byrnes in the end. However, the proxxon is a good saw if you are only ripping that width once and you don't have to repeat that width exactly again. If that is the case, Then that $130 dollar saw will shine with those alterations. Just be aware the the proxxon's fence moves when you tighten it and if you need those boards to be exactly 1.0mm it will take some time (and wood) to set it up. Marc
-
clipper close hauled question
keelhauled replied to keelhauled's topic in Masting, rigging and sails
Thanks Henry! I've been pondering that question for awhile. I didn't see an advantage of using a tail verses just dealing with easing one set of lines, while hauling the other set. But it now makes sense, especially if you think of the limited crew on a clipper. Thanks again Marc -
thanks Nenad. I appreciate your input
-
Cutty Sark by NenadM
keelhauled replied to NenadM's topic in - Build logs for subjects built 1851 - 1900
Thanks Nenad, I appreciate your thoughts. I've been thinking this over for some long period of time. It appears you have as well. So far, I think it makes sense to put it between the boats on the skids on the aft deck house. Marc- 4,152 replies
-
- 4
-
-
- cutty sark
- tehnodidakta
- (and 1 more)
-
Cutty Sark by NenadM
keelhauled replied to NenadM's topic in - Build logs for subjects built 1851 - 1900
Nenad, Are you going to build the accommodation ladder that is used on the side of the hull to get down to the ships boats when they are in the water? If I remember correctly you are rigging sails. Do you know where they stowed the accommodation ladder while underway? Was it on the boat skids, below in the hold...? I wondered if you had come across a reference to it. thanks Marc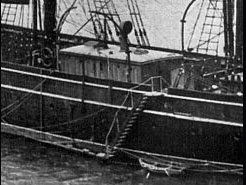
- 4,152 replies
-
- 5
-
-
- cutty sark
- tehnodidakta
- (and 1 more)
-
clipper close hauled question
keelhauled replied to keelhauled's topic in Masting, rigging and sails
Thanks Henry, So how would they move the tail line from the tack to sheet position, by carrying it across the ratlines and shrouds? Thanks Marc