MORE HANDBOOKS ARE ON THEIR WAY! We will let you know when they get here.
×


keelhauled
-
Posts
788 -
Joined
-
Last visited
Content Type
Profiles
Forums
Gallery
Events
Everything posted by keelhauled
-
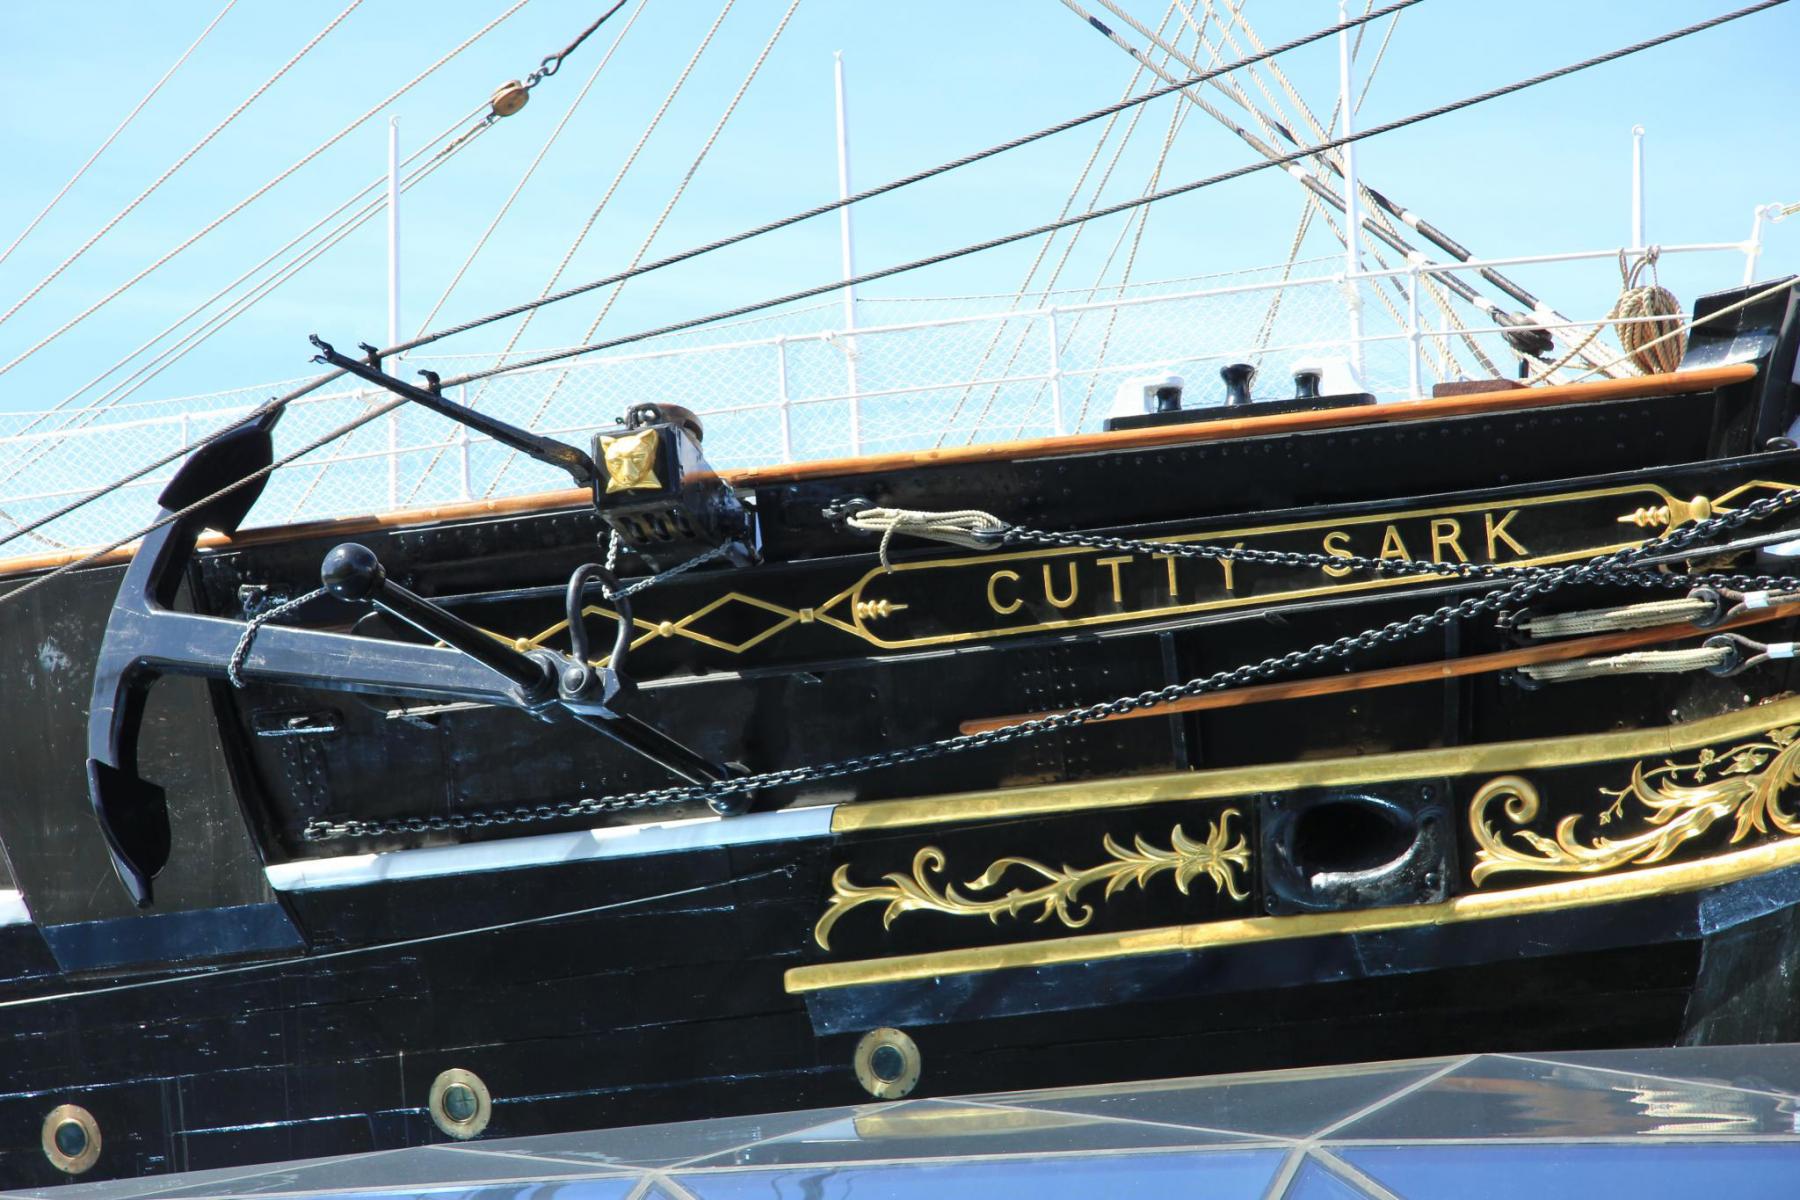
Hi, So I have a question and need help. I want to rig my cutty sark close hauled. Longridge says that the fore coarse sail had a tack block hooked to the eye on the cat and shackled to the corner of the sail and that the sheet block would have been removed and stowed beside the bulwark behind the fore pin rail. And that the other side of the fore coarse would have the sheet attached and the tack block unhooked and stowed on the forecastle. It also said that there was a tail rope permanently shackled to the corners of both sides of the coarse to control the sail as the tack blocks and sheet blocks were being added and removed during tacking. So is this correct. Did they actually switch out the sheet and tack blocks on the course sails during tacking? It seems unnecessary, why not leave both connected all of the time as I see on modern square rigged ships? Also how did the tail rope work? I could see it working to bring the sail forward to attach the tack if it was always running forward to the forecastle. But then it wouldn't be in the correct position to help pull the said inboard to attach the sheet. What am I missing? Thanks Marc
-
 I have a question about stowage of the accomodation ladder here: http://modelshipworld.com/index.php/topic/13960-question-cutty-sark-accommodation-ladder-stowage/ feel free to join in! I haven't built the accommodation ladder yet. do you think I should include it or not? Since the ship is being modeled under way it would be stowed if I include it. But where to put it?
- 525 replies
-
- 1
-

-
- cutty sark
- mantua
- (and 2 more)
-
Cutty Sark by NenadM
keelhauled replied to NenadM's topic in - Build logs for subjects built 1851 - 1900
beautiful ladders! lot's of progress! very exciting!- 4,152 replies
-
- 3
-
-
- cutty sark
- tehnodidakta
- (and 1 more)
-
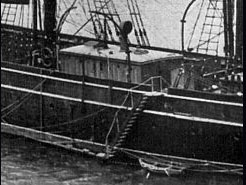
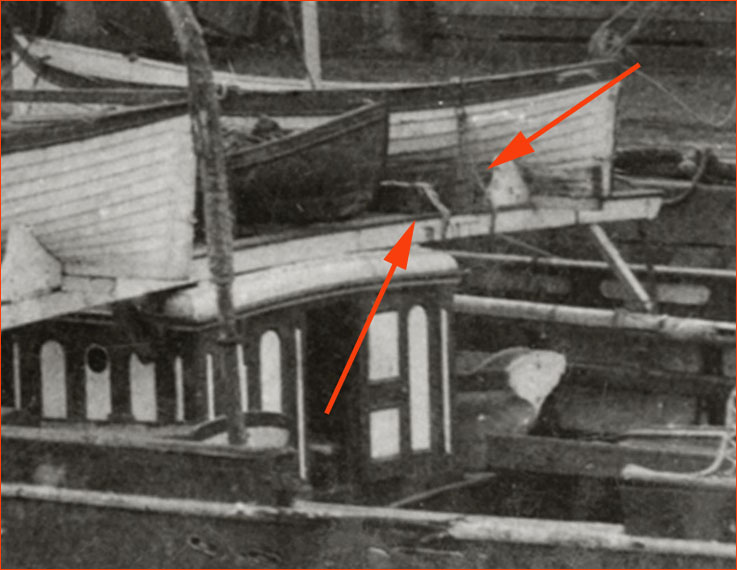
I tried finding photos of the cutty's boat skids from when she was in service Here is a photo of her mored to a pier. It looks like there is something that has the shape of the accommodation ladder. Here is a photo of the accommodation ladder with the same deck house for comparison Do you think that it is the accommodation ladder on the boat skids in the 1st photo? marc
-
Cutty Sark by NenadM
keelhauled replied to NenadM's topic in - Build logs for subjects built 1851 - 1900
Very nice Nenad ! You and I seem to build two of everything. Actually, you tend to build more than two of everything. But yours gets better every time! How are you enjoying your new office? Take care, Marc- 4,152 replies
-
- 6
-
-
- cutty sark
- tehnodidakta
- (and 1 more)
-
Cutty Sark by NenadM
keelhauled replied to NenadM's topic in - Build logs for subjects built 1851 - 1900
awesome to see piggy at home!- 4,152 replies
-
- 4
-
-
- cutty sark
- tehnodidakta
- (and 1 more)
-
In case you haven't heard George Lakie, aka glakie passed on. He was always supportive of me both in this forum and others, as well as private messages. I used to kid him about his power tool collection which seemed to grow constantly. I'll miss his support, suggestions, feedback and humor. You can see others that he touched: http://modelshipworld.com/index.php/topic/13935-rip-george-lakie-glakie/page-2 Marc
- 525 replies
-
- 2
-
-
- cutty sark
- mantua
- (and 2 more)
-
Cutty Sark by NenadM
keelhauled replied to NenadM's topic in - Build logs for subjects built 1851 - 1900
Nenad, always looking good. Your sail lockers are actually chicken coupes. The chickens keep piggie company, if he ever comes around again. Sorry to hear about George. He was indeed a great supporter to all of us. He will be missed. Take care, Marc- 4,152 replies
-
- 6
-
-
- cutty sark
- tehnodidakta
- (and 1 more)
-
Hi, I read that the Cutty Sark's accommodation ladder was removed and stowed when she was underway. It makes sense if you see how it is attached (hook and eye). What I haven't been able to find is where the ladder was stowed. Anyone know? Thanks Marc
-
Cutty Sark by NenadM
keelhauled replied to NenadM's topic in - Build logs for subjects built 1851 - 1900
The office is looking good. Hothead seems to know what he's doing. I like hiding the wire in the molding. Great Idea!- 4,152 replies
-
- 6
-
-
- cutty sark
- tehnodidakta
- (and 1 more)
-
Alexandru, Thank you for the detailed explanation! I really appreciate you taking the time to fix your old computer to get the photos and then providing such a detailed explanation! I've been wondering how to tackle this for quite some time. You really nailed the stern. I'm just amazed with your work. It was a pleasure to follow and I continue to go back to again and again for inspiration! thanks for sharing with us! Marc
-
Very nice work! She looks like a fast boat! Love the details. Marc
-
Thanks Popeye and Ir3! Marc
-
looks great! Nice job on the shrouds and ratline repairs! Marc
-
Alexandru I went to your sight. Beautiful photos. I saw that you did more work on the stern gallery. Can you explain how you did the balusters? I saw the photos, but I wasn't sure how you formed them. thanks Marc
-
Hi Nenad! I used to work calculus problems for relaxation - partly because I liked solving the problems and partly because I was always afraid that I would forget how to do calculus if I needed it for work of If I went back to school. (24 years as a chemist and I only used calculus for work twice - although I did teach it for a year). I tried Sudoku. The admiral loves these games and goes through several books a year of NINJA level Sudoku. I tried these puzzles, but find them too tedious. Nenad, my hat is of too you for your skills with these games! I was blown away at how much work the sails required. I'm sure that they will be worth it. I'm now trying to figure out what deck features have to be put into place before rigging the mast verses what deck features will block rigging that mast. Now that is a puzzle!! Take care and enjoy your Sudoku and chess! Marc
- 525 replies
-
- 2
-
-
- cutty sark
- mantua
- (and 2 more)
-
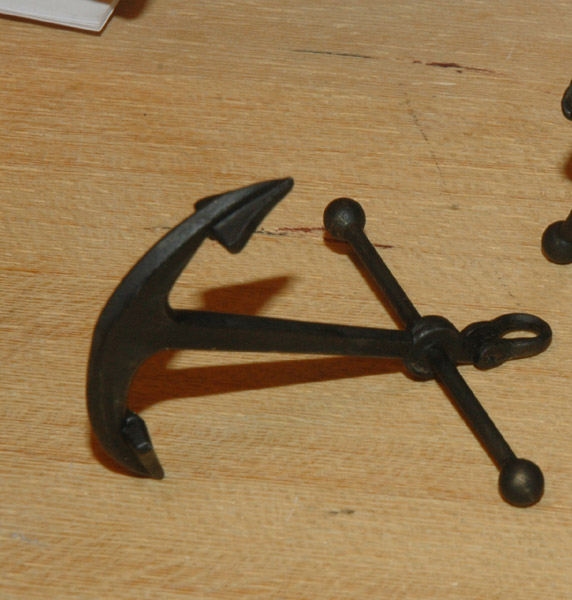
Hi, Worked on the anchors. They came from the kit, but required quite a bit of grinding work (still under progress in the photos). Also I had to plug and re-drill the shank for the anchor stocks - the opening was much too large. Here they are assembled And painted

- 525 replies
-
- 4
-
-
- cutty sark
- mantua
- (and 2 more)
-
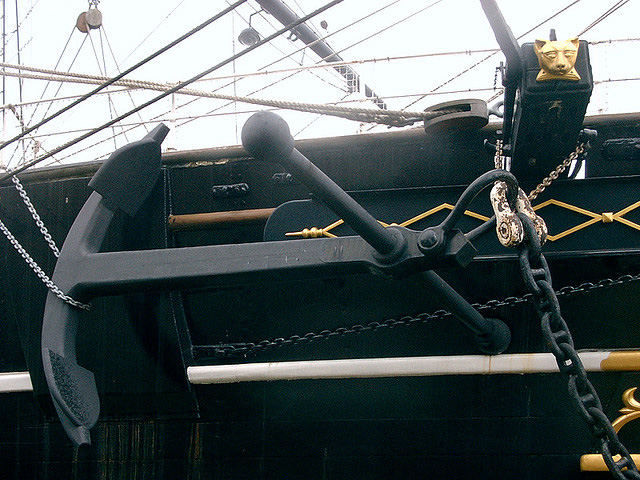
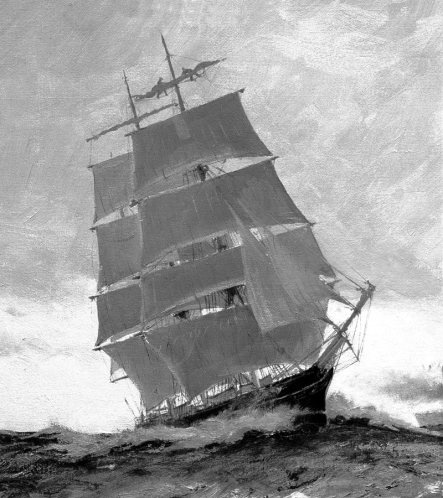
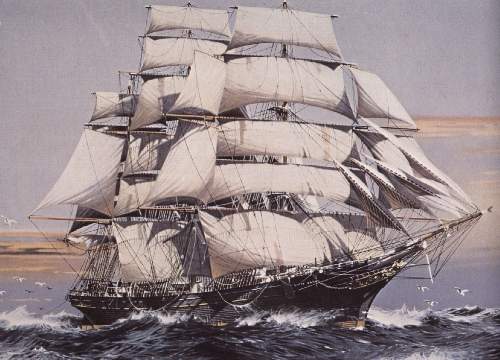
Thanks Popeye and Nenad! I'm started working on the anchors today. I think that I will just stow them on the sides. Longridge has his anchors on deck - see page 82. Had to find photos of the anchor stowed. Here a a couple. Hopefully it will help when you get to this point. I believe that the first photo is before the restoration. It has the fluke on the billboard and the has the shank painter chain made fast similar to Campbell's plans I think that this is after the restoration and has the fluke up on the rail. This is true for photos after the restoration. Not sure why the fluke is on deck instead of the billboard. The billboard is to protect the ship from the flukes. Also the shank/fluke chain is forward which wouldn't have been stable. Anyway. Hope this might help when you get to this point. I'll photo my anchors after I'm done grinding the seams. Here are a couple of paintings of the cutty with sails. Nenad, here she is with almost everything set. In this painting she is still missing several stunsails!! You'll need a big case, she is about as wide as she is tall! This is probably how I will have mine set (approximately) Thanks Marc

- 525 replies
-
- 2
-
-
- cutty sark
- mantua
- (and 2 more)
-
Congratulations!! What a beautiful piece of art!!
-
Congratulations!! What a beautiful piece of art!!
-
Thanks for the thoughts Popeye. I'll probably end up just having the anchors on the sides. As far as the sails, I do have a set of full size sails for the ones that I have furled, Just in case I changed my mind (I'm crazy - all the extra work). I would just have to switch them out on the yards. thanks! Marc
- 525 replies
-
- 1
-
-
- cutty sark
- mantua
- (and 2 more)
-
Cutty Sark by NenadM
keelhauled replied to NenadM's topic in - Build logs for subjects built 1851 - 1900
shiny and bright! it looks like her Captain and master are driving their crew when it comes to cleaning. I've read that during the tea trade, the captains kept their ships clean and painted like yachts.- 4,152 replies
-
- 5
-
-
- cutty sark
- tehnodidakta
- (and 1 more)
-
Hi Nenad, years ago when I was at the University I built the Revell model of the Constitution, which is a plastic model about 1:98. I set all the sails including the stunsails. The model looks great, but it really blocked most of the details and also created a massive bulk to the look. So I decided to set the Cutty so that it was easier to see the deck and less bulky looking. I saw a painting that had a cutter with a sail arrangement that I though would work well. So I'm setting the Cutty as if she is close to the bowline with strong wind. The royals and sky sails will be furled. The main and mizzen courses will raised up into their gear to give an unobstructed view of the deck. The fore course will be set as will the upper and lower topsails and the t'gallents. Three jibs will be set as will the spanker and probably the t'gallent stay sails (I don't want to block the details of the back of the masts so if I don't have them set I'll remove them). I will probably furl the lower stay sails so that the deck isn't obstructed. also there won't be any stunsails set. I was thinking of only setting one jib, but I think that she would look better with them set. Also if they were furled, either on the boom or fo'cle they would block all of that detail and look sloppy to anyone without the knowledge of how they should look. The next question is the anchors. I was thinking of having one anchor being shipped onto the deck with the rail removed and the deck anchor davit lifting the fluke. As I understand it, The bertrum pendant was used to raise the anchor during catting as well as lifting the shaft or ring during shipping the anchor onto deck. If anyone knows differently, please let me know. I was going to have the other anchor stowed on the side. However, they probably wouldn't have done this during the whether that would require shortening of sail. Does it matter? If they had been at sea for any period of time the chains would have been removed from the anchors. But then to most people looking at the model it will probably look like I forgot the chains. Also I was going to run the chains around the windlass to the chain pipes. I think it would look more interesting. But if the chains were removed from the anchors they would have been stored in the locker and wouldn't be left on deck where they can cause damage and be a danger to the crew. So many decisions. Nenad, are you going to put sails on your Cutty. If so, which ones? thanks Marc
- 525 replies
-
- 1
-
-
- cutty sark
- mantua
- (and 2 more)