


keelhauled
-
Posts
788 -
Joined
-
Last visited
Content Type
Profiles
Forums
Gallery
Events
Posts posted by keelhauled
-
-
Thanks Harry.
I'm considering just adding another set of bollards beside the pin rail. Or just making it fast to the pins. I had already placed the existing bollards aft according to Campbell's plans. To me it doesn't make since not to use the sheave in the fairlead. To rig the sheet aft without it running against the sheave would cause excessive wear to the sheet. Also the sheets for the larger courses run forward from the bulwark Fairless to much smaller bollards on the rail.
I have time to figure it out. I realized that the starting points for the braces need to be addressed while I can still maneuver the sails. With the sails in place, the sails are making access the starting position of the bracing line difficult to access and attach to the shrouds. There is a similar issue with the brace pendents. I won't rigg the braces till the end. But I need the sails in their braced position when I tension the lines coming from the yards and sails. Also with yards in their braced positions, the eyes to attach the pendants on the leeward side are facing inboard and difficult to access. Thus if I don't add the pendants and braces to their origins now it will be almost impossible later.
Best
Marc
-
Hi,
I need some help determining where and how to belay the cro-jack sheets on the Cutty Sark. I'm looking for help and insight.
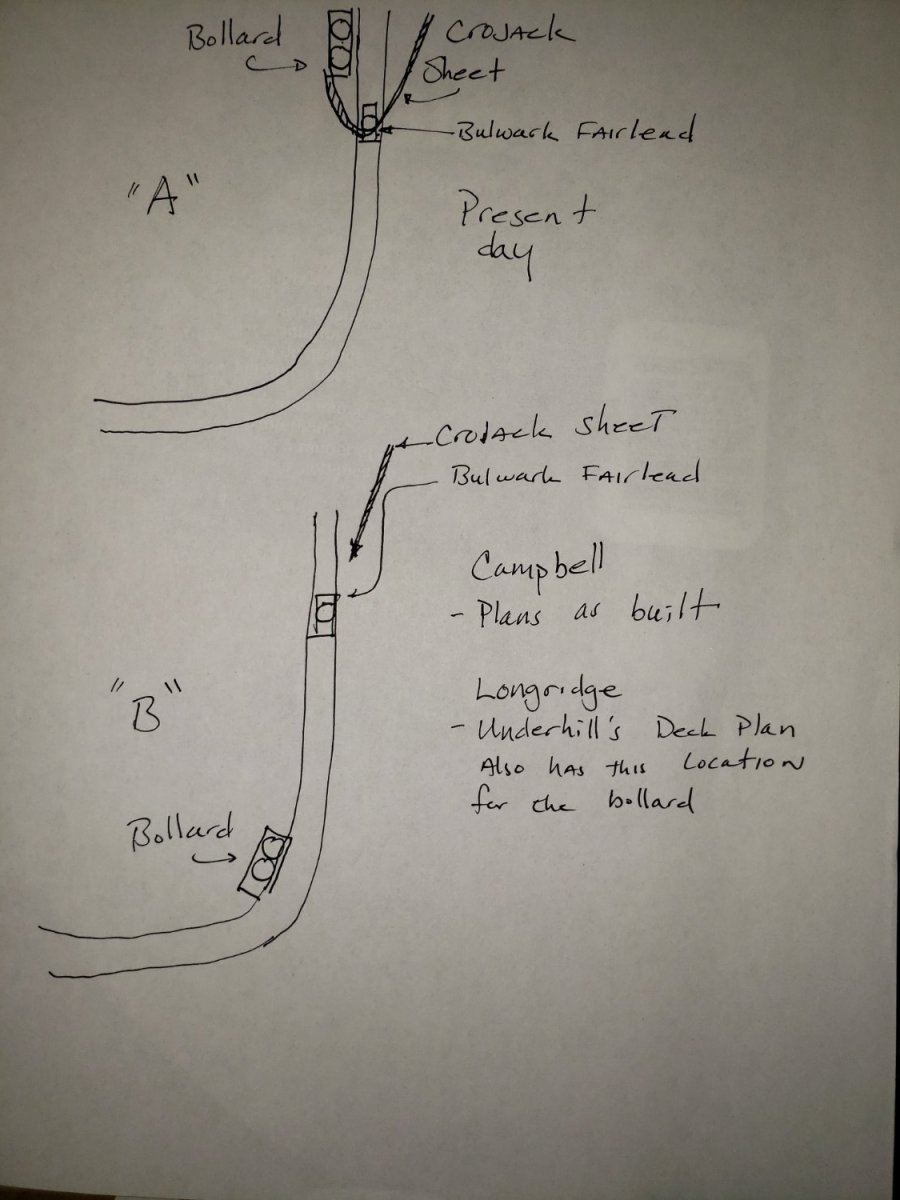
In researching the belaying point I've looked at the actual Ship in London, Longridge's the Cutty Sark with Harold Underhill's plans and the Campbell's Plans, which were used as one of the primary references when they restored the ship. I've drawn this diagram to help the discussion.
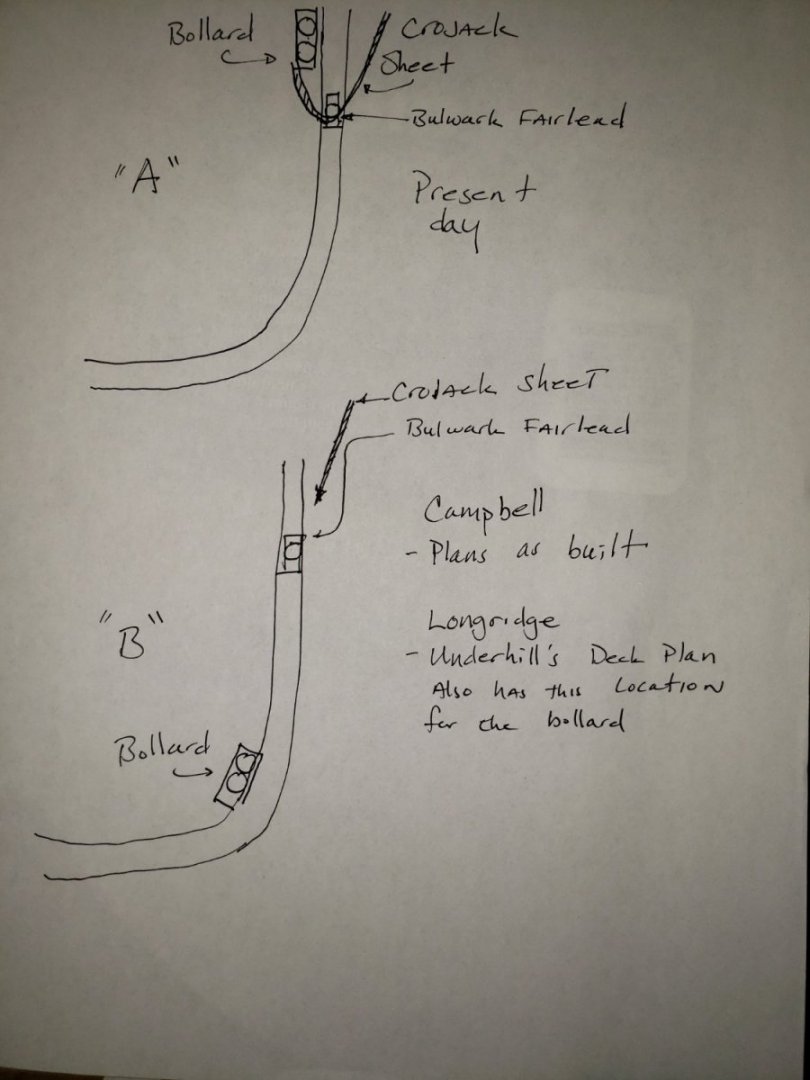
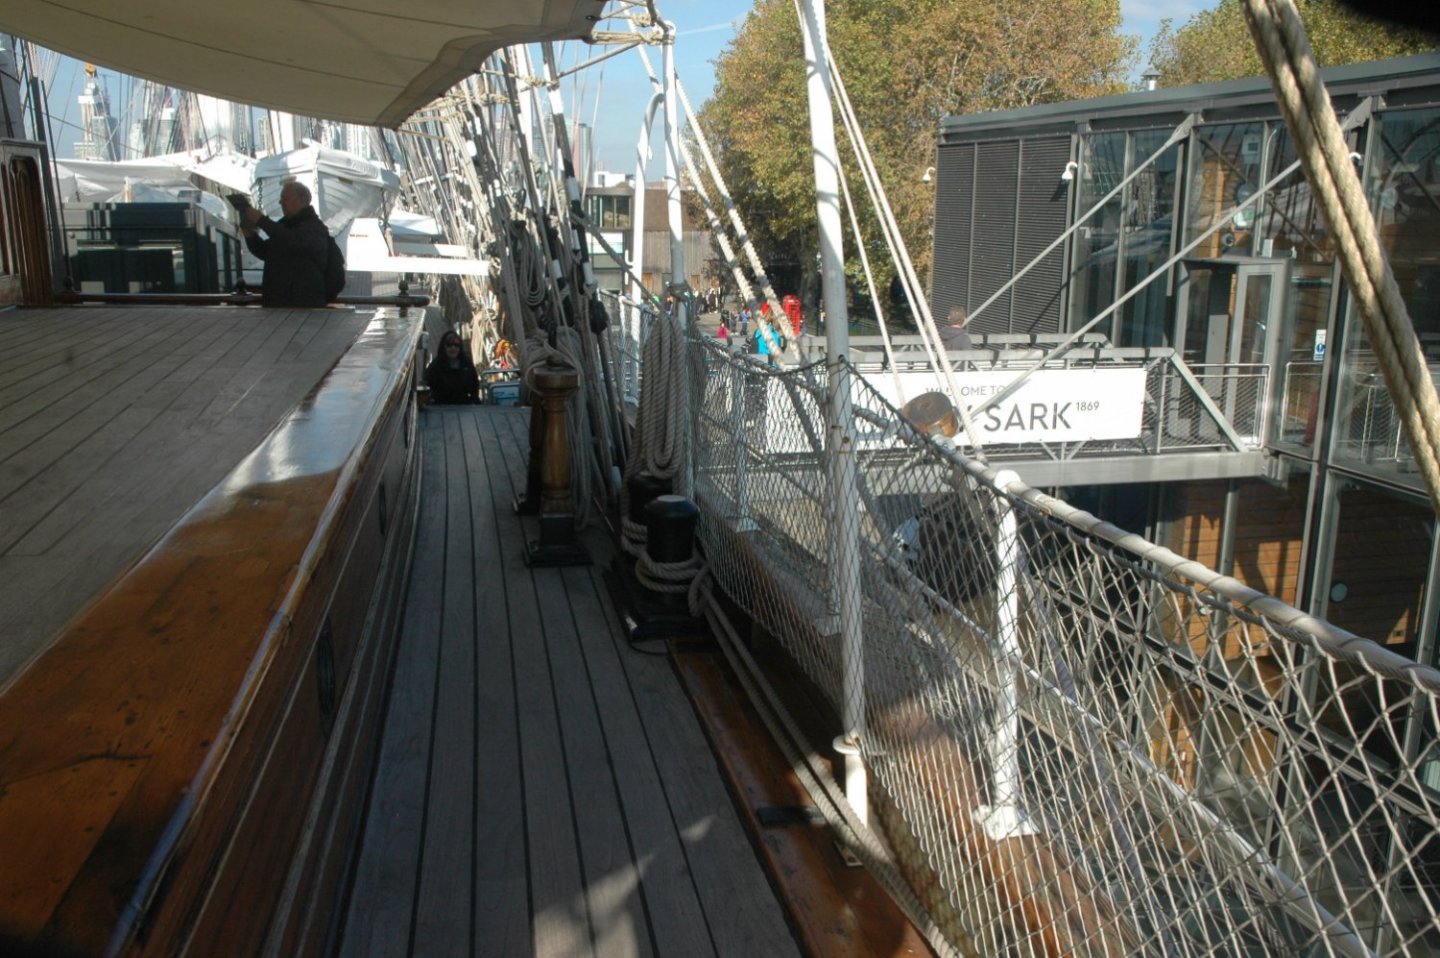
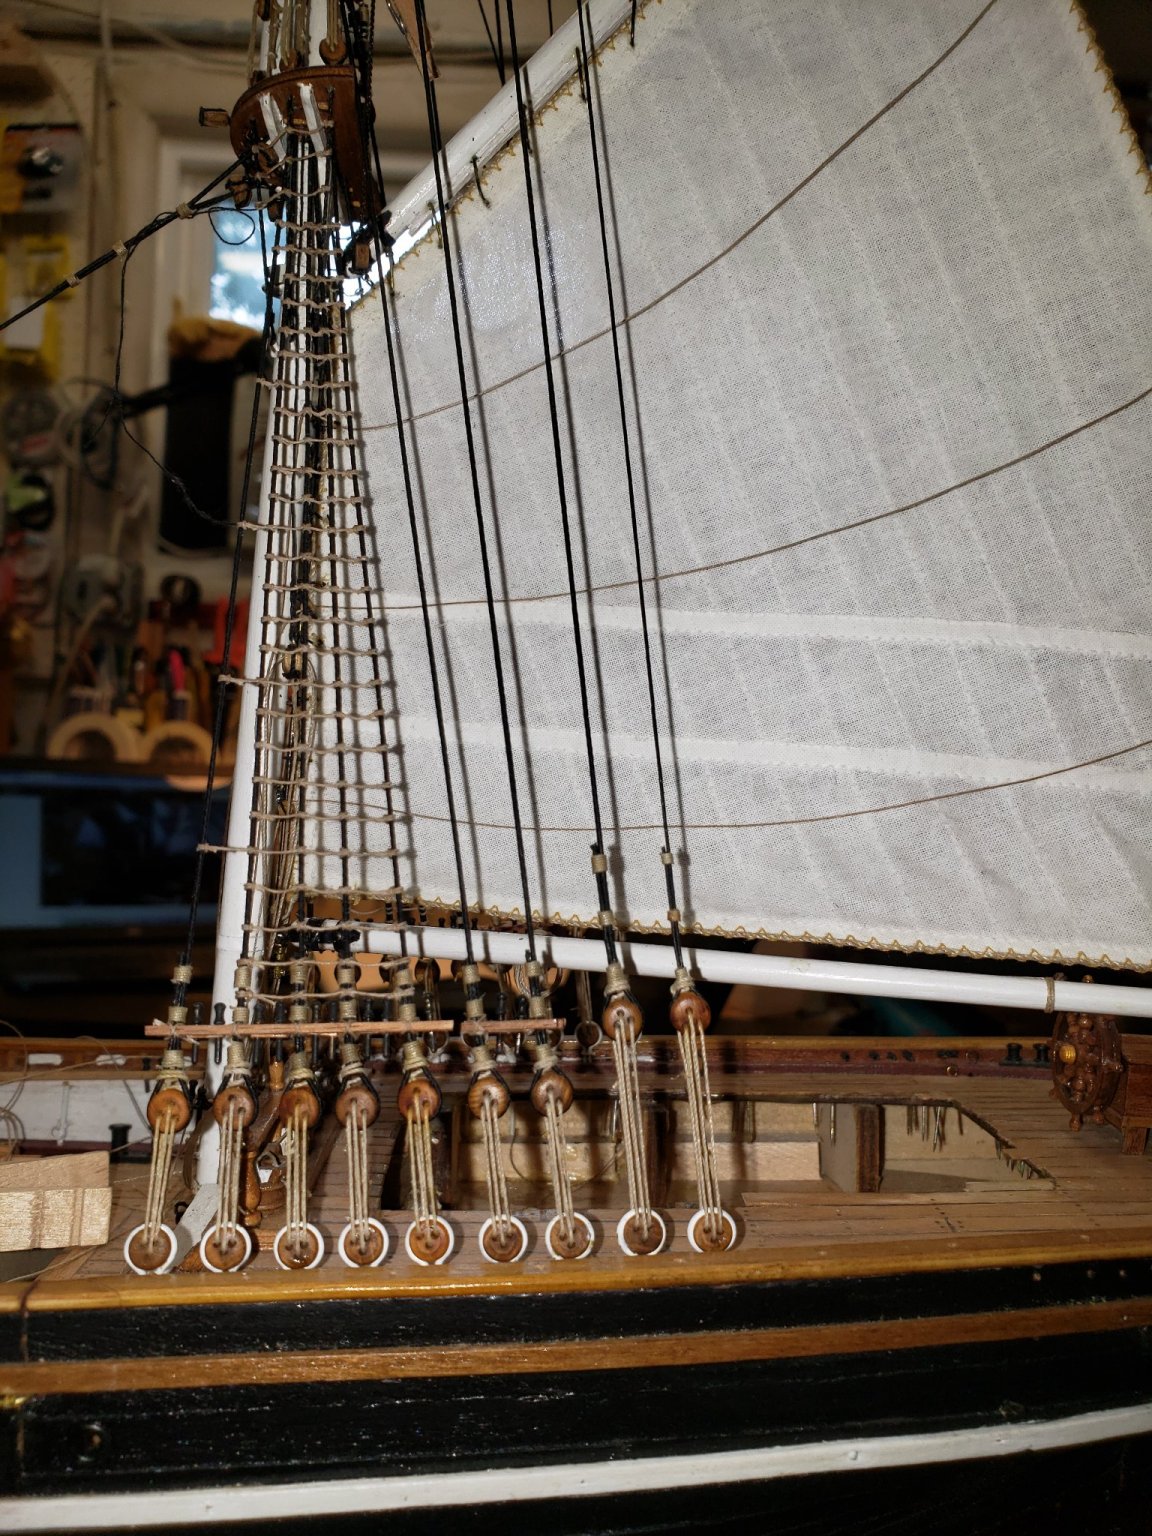
In figure A. I've illustrated the ship as she was in 1990 and 2019 when I last visited her. The Crojack sheet goes through the bulwark fairlead where is goes around the sheave and out onto the deck and is belayed to large bollards forward of the fairlead. This is actually the way all of the other coarse sheet are rigged currently. The fore and Main course sheets are also rigged this way with small bollards on the rails. Here is a shot from 2019

The oldest references which are Campbell and Underhill's plans have these large bollards aft of the crojack bulwark fairleads as illustrated in B. It is my understanding that the bollard was moved forward when the ship was owned by the Portuguese company. I can't imagine that the sheet would go through the fairlead and then aft to the bollards. Unless, perhaps if the crew pulled the sheet forward and then stopped the farilead and made the sheet fast to the bollards aft of the fairleads? I was thinking of the way that the has a procedure for stopping the line when raising the halyard lines and brining them up to the pins?
As you can see in the photo above there is a pin rail located forward of the fairleads, but these are completely full when the ship has sails. unlike some of the other pin rails, these don't have wooden bollards, just a knob-not even a pin. If you think that the sheet would be belayed here, how would it be made fast/secure?
Thanks in advance for the help!
best
Marc
-
Hi,
I need some help determining where and how to belay the cro-jack sheets on the Cutty Sark. I'm looking for help and insight.
In researching the belaying point I've looked at the actual Ship in London, Longridge's the Cutty Sark with Harold Underhill's plans and the Campbell's Plans, which were used as one of the primary references when they restored the ship. I've drawn this diagram to help the discussion.
In figure A. I've illustrated the ship as she was in 1990 and 2019 when I last visited her. The Crojack sheet goes through the bulwark fairlead where is goes around the sheave and out onto the deck and is belayed to large bollards forward of the fairlead. This is actually the way all of the other coarse sheet are rigged currently. The fore and Main course sheets are also rigged this way with small bollards on the rails. Here is a shot from 2019
The oldest references which are Campbell and Underhill's plans have these large bollards aft of the crojack bulwark fairleads as illustrated in B. It is my understanding that the bollard was moved forward when the ship was owned by the Portuguese company. I can't imagine that the sheet would go through the fairlead and then aft to the bollards. Unless, perhaps if the crew pulled the sheet forward and then stopped the farilead and made the sheet fast to the bollards aft of the fairleads? I was thinking of the way that the has a procedure for stopping the line when raising the halyard lines and brining them up to the pins?
As you can see in the photo above there is a pin rail located forward of the fairleads, but these are completely full when the ship has sails. unlike some of the other pin rails, these don't have wooden bollards, just a knob-not even a pin. If you think that the sheet would be belayed here, how would it be made fast/secure?
Thanks in advance for the help!
best
Marc
-
-
-
-
-
Looking good! Keep up the great work!
-
very impressive work going on there!
You're very creative.
Hope all is well with you and your family!
best
Marc
- My Fathers Son, NenadM and mtaylor
-
 3
3
-
-
-
Hi everyone,
Peter, thank you for your comments. I'm always conflicted about the sails. I like the way they look, but the amount of work is unbelievable. Sometimes I think it takes as long to create and rig the sails as it does to build the rest of the ship.
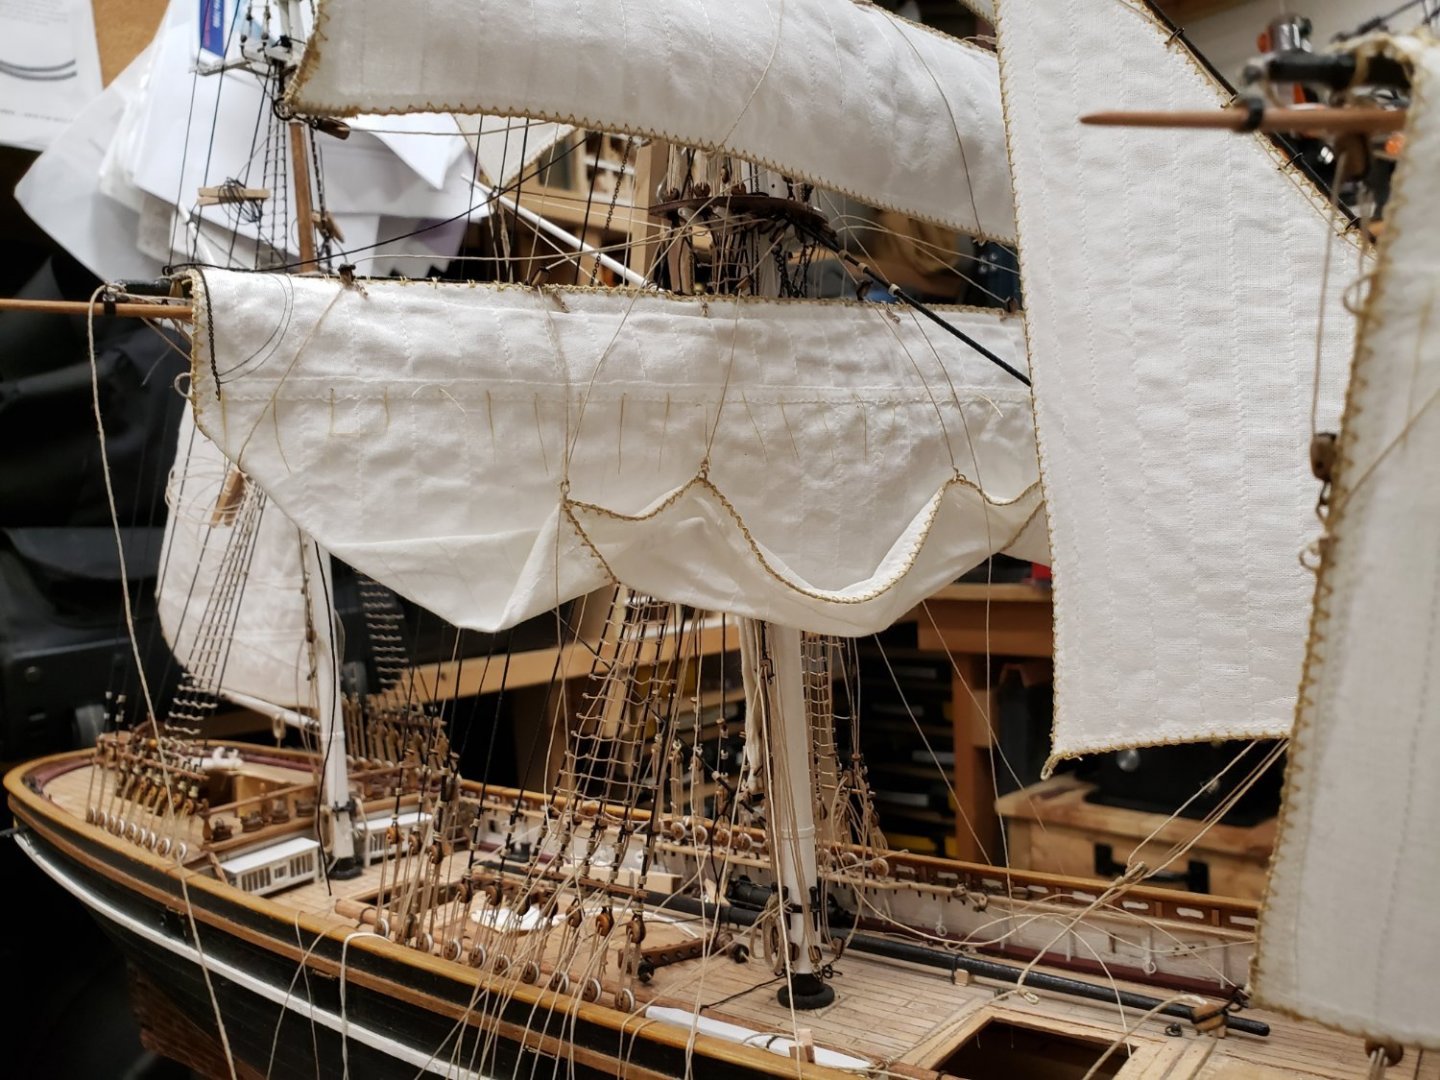
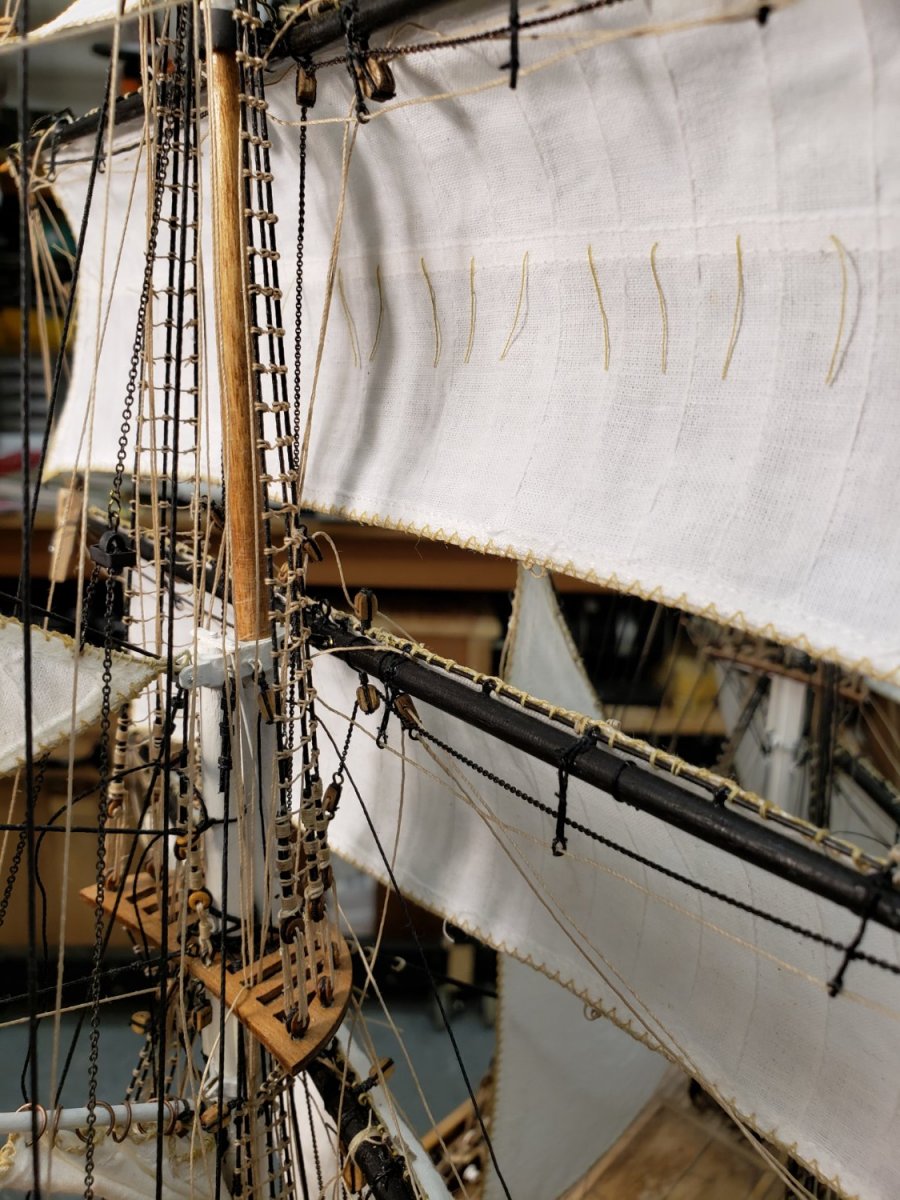
In my March 14 post, I spoke about the main course and moving the buntline locations on the foot of the sail. As I said a lot of work and not sure it made any difference. I'm late on getting the images for you, but here they are.
Originally, I had the buntline locations on the foot of the sail proper aligned to be brought up for furling and had does these adjustments with the sail actually pulling the lines up as a dry run off the ship. Then I was looking at the oldest painting of the Cutty and Campbell's drawings and saw that the location of the blocks on my ship didn't line up with those sources. So I decided to move the block locations to match those sources. However, I forgot to move where the buntlines were attached to the sail. The new locations of the blocks would now allow the foot of the sail to be pulled up to the blocks correctly. As I said this was a huge deal to me and I thought that it was obvious to the casual observer (whomever that might be. Certainly no one who will actually see this in my house or the family member that inherits this model and tosses it in the garbage or sells in in a garage sail).
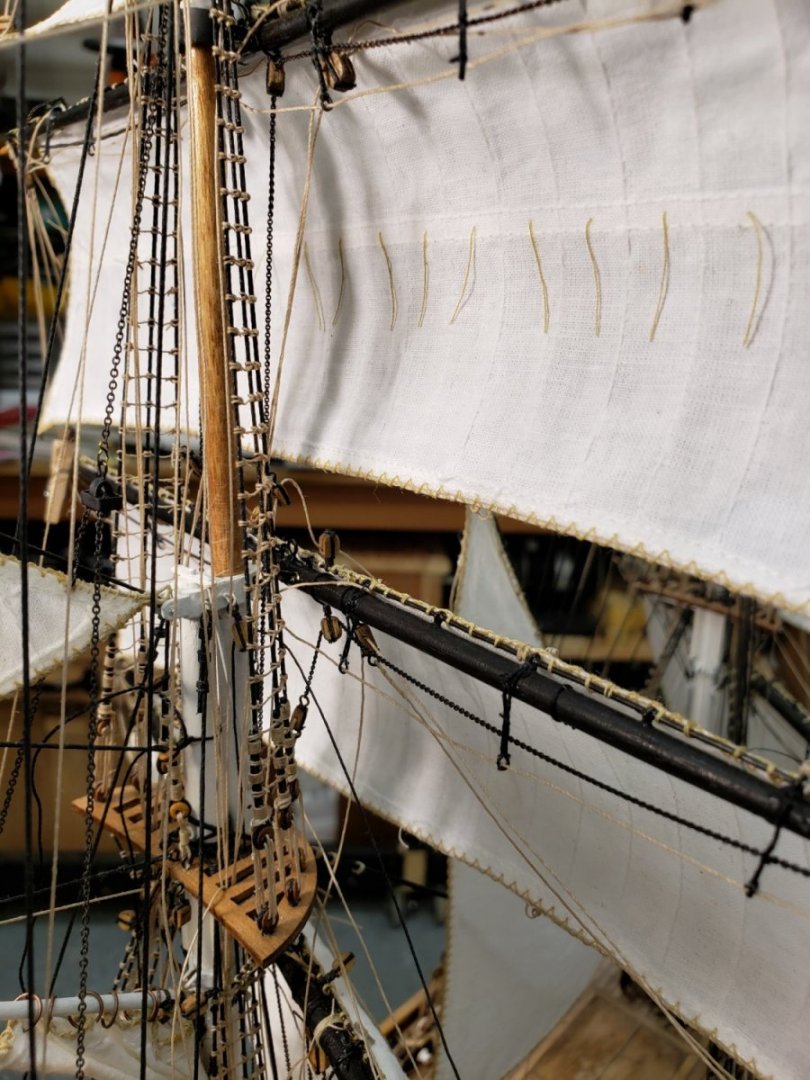
Anyway, here is the photo of the old course buntline positions.
And now after a full day's work and several nights of researching the topic in several books, in the new locations. This time I made sure that the lines will pull the foot up to the blocks as shown in my references on the topic.

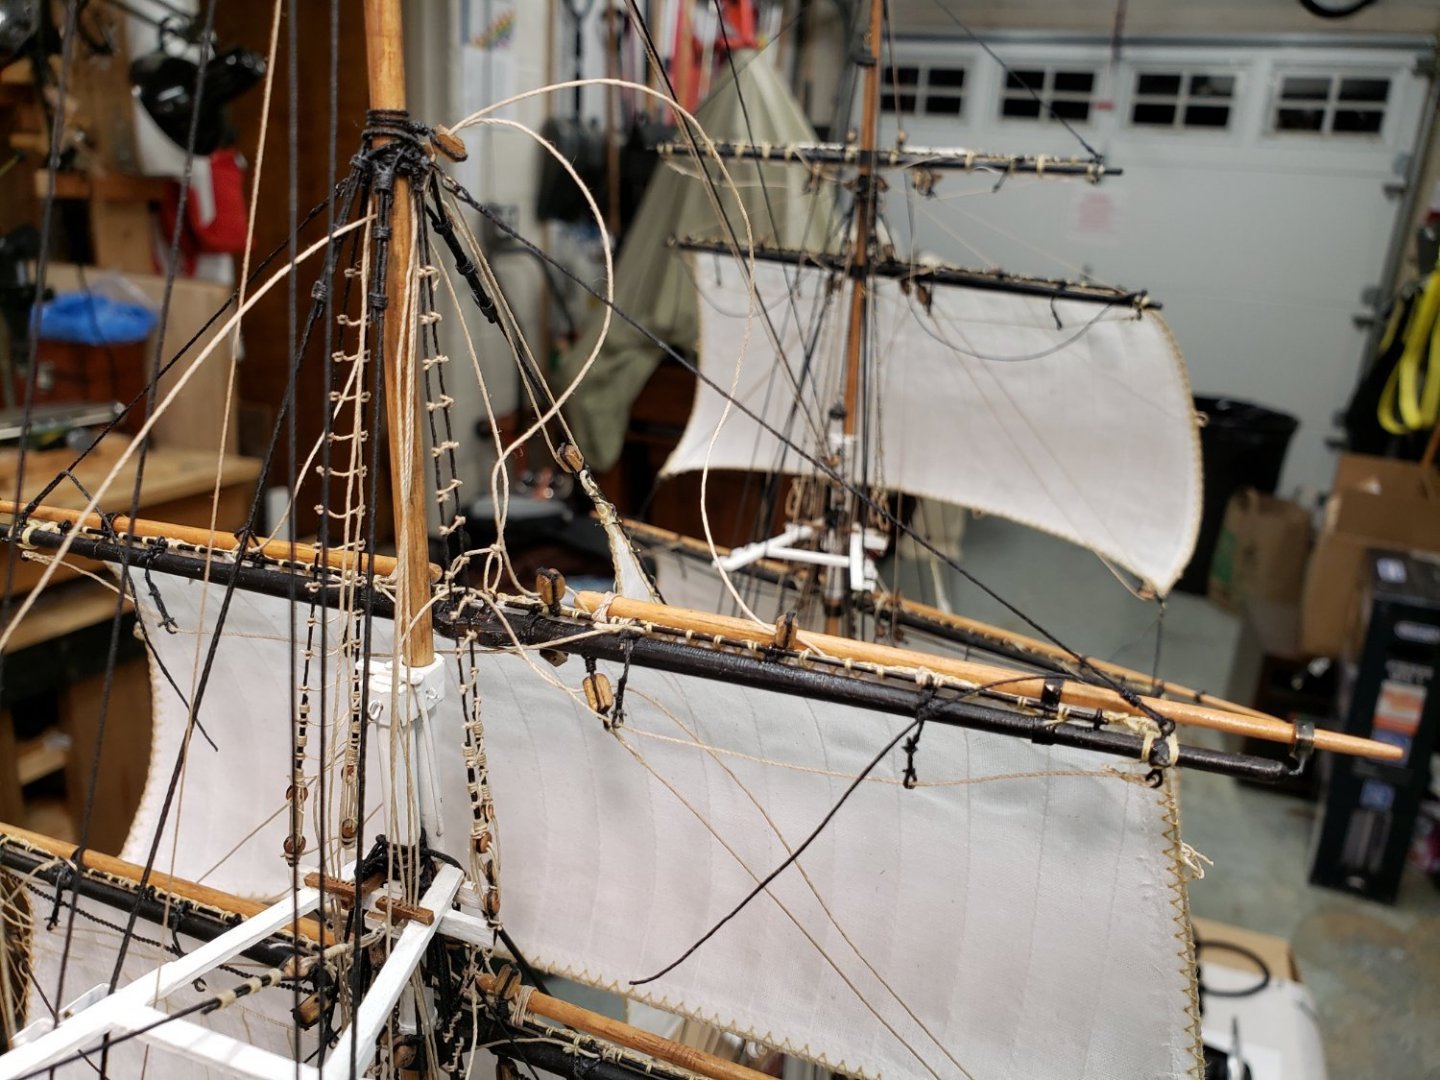
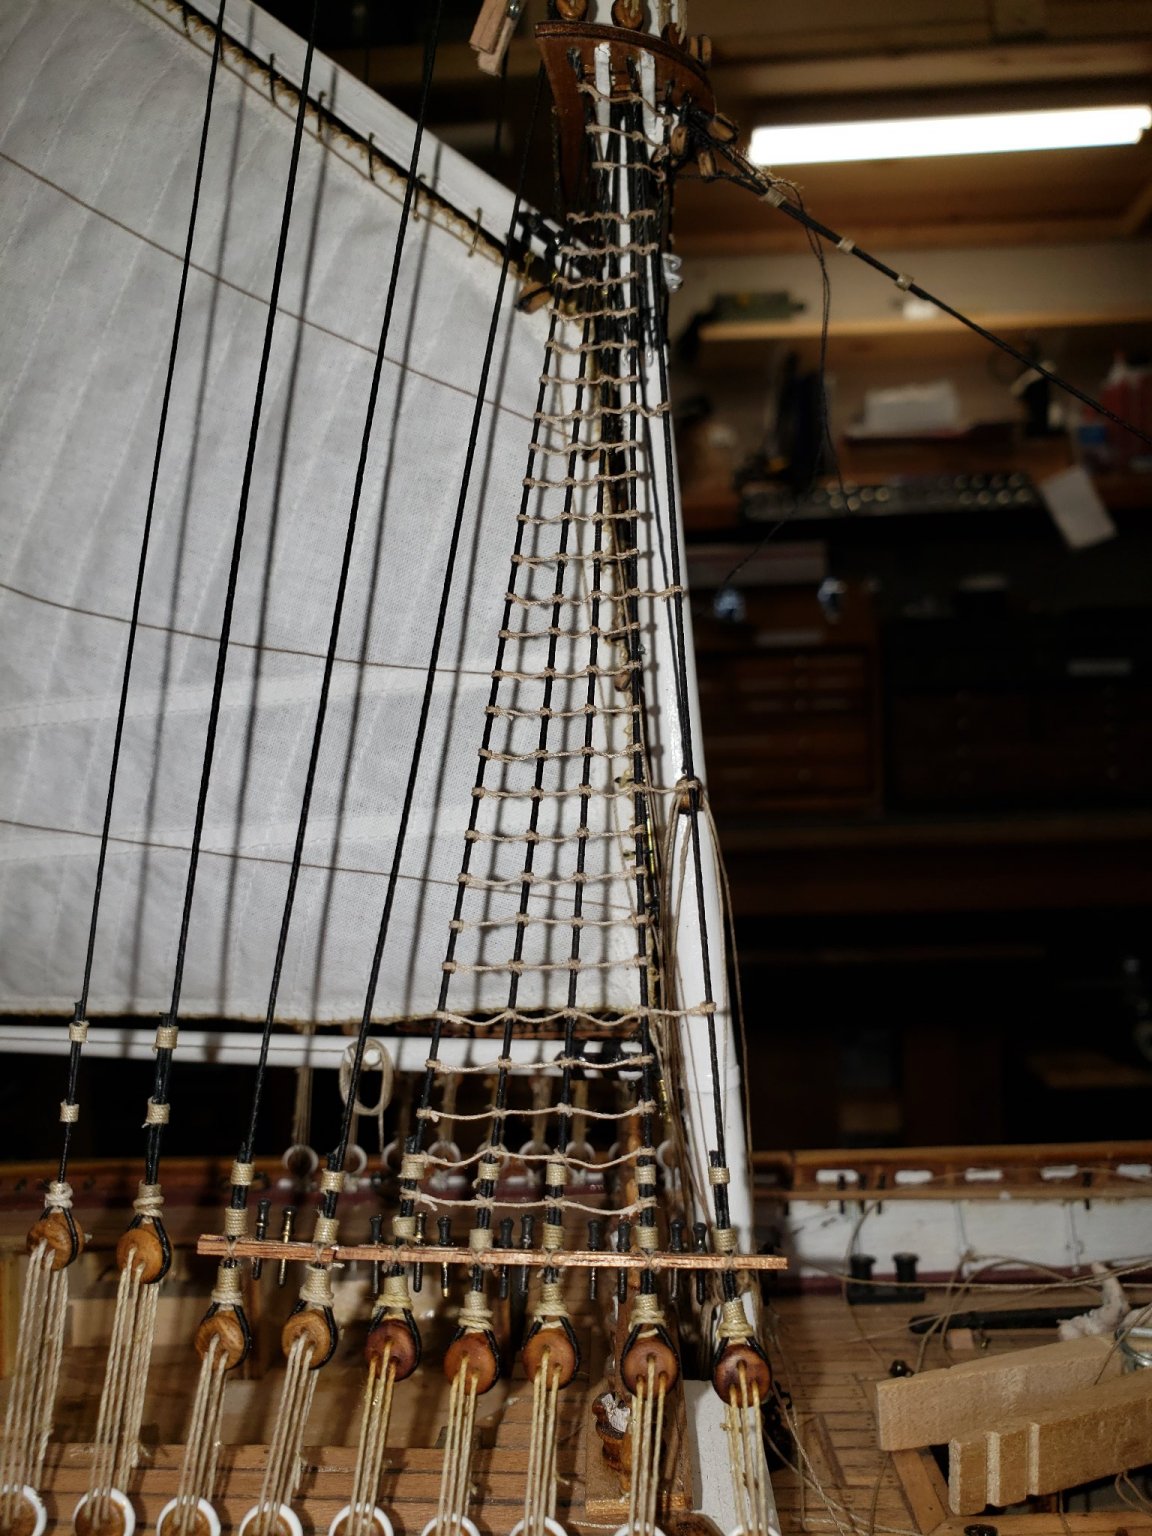
On a topic of making sure that lines are actually long or short enough. I thought that I'd share how I determine the length of the permanent lifts when the sails are set. It's easy. I determine the lengths of the lifts, by actually lowering the yard to the position where it would be with the furled sail.
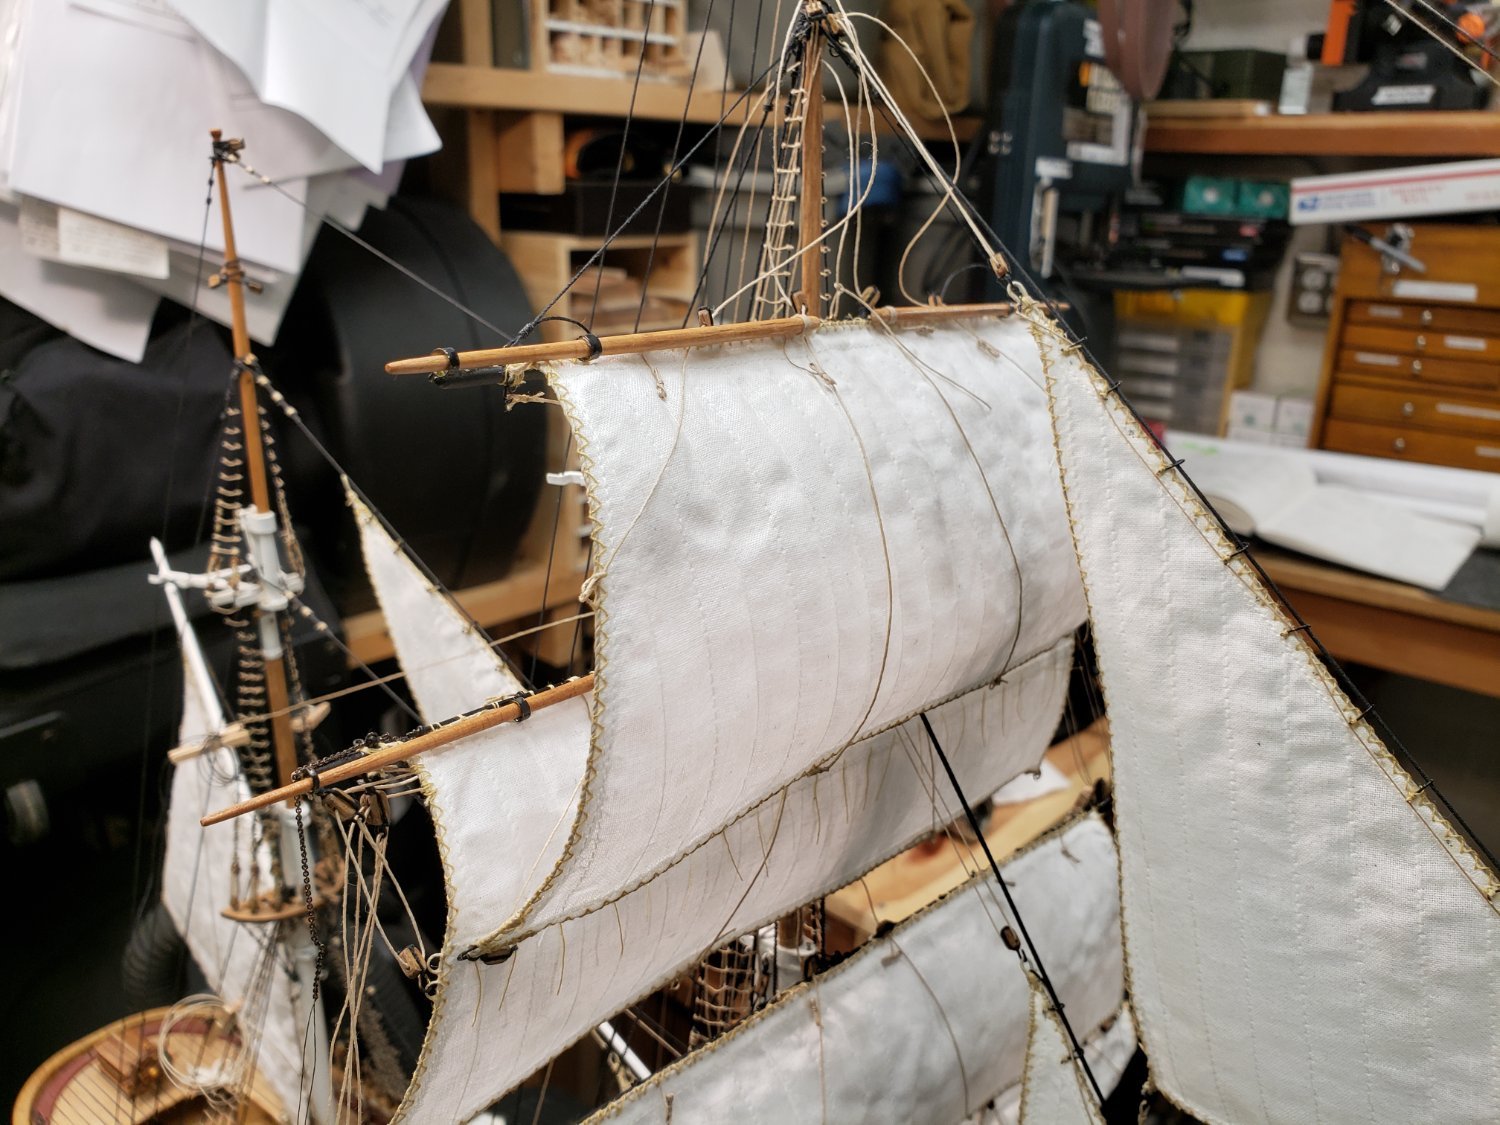
Here are images of the t'gallent sail with the yard hung in its lifts. When I secure the lifts, I'll raise it up to the proper position.
please ignore the slack lines. The photos do show the fairlead planks pretty well. One word of advice using fairlead planks to to check, then check again, then again, that the all of the holes are drilled large enough to accommodate the lines. You don't want to have to drill these holes larger or chase them while they are on the ship with the rigging. Ask me how I know this wisdom. Answer is that I only checked twice. I should have checked one more time with the mast in off the ship then again with it in place, but not rigged.


Thanks for looking,
Marc
-
Hi Harr, Grant, and Simon,
Thank you for your kind words. I really appreciate the support!
I spent part of the weekend moving the bunt lines on the main course sail. I had previously moved the buntline blocks to be more in line with the oldest painting and Campbell's drawing. However, I forgot to move where the buntlines were attached to the sail. I adjusted the connections further out which would now allow the foot of the sail to be pulled up to the blocks correctly. When I was done, I couldn't really see much of a difference. I'm sure no one would be able to tell. Before, I made this change I thought that it looked way off. now I know that it didn't actually look off even though it was. I guess that is what experience gains you. I kind of feel like I waisted the afternoon. However, if I hadn't of made that change it would have always bothered me and I would have always thought that it was a glaring mistake.
I'll take a picture and add it to the post so that you can take a look at the difference.
Thanks
Marc
-
She's looking great! It looks like you'll be done in no time ☺️
-
Hi all,
I have been slowly making progress. But I have made progress. I find it amazing that what I think will take 15 minutes takes an hour to rig. I find that I run a line, then find it wrapped around something or needs to be run differently not to fowl another line, etc. Then I have to pull it out and re-rig it another time or two. It's taking much longer than I anticipated. However, it's fun when I'm not getting aggravated at reworking lines. One step forward, two steps (or more) back.
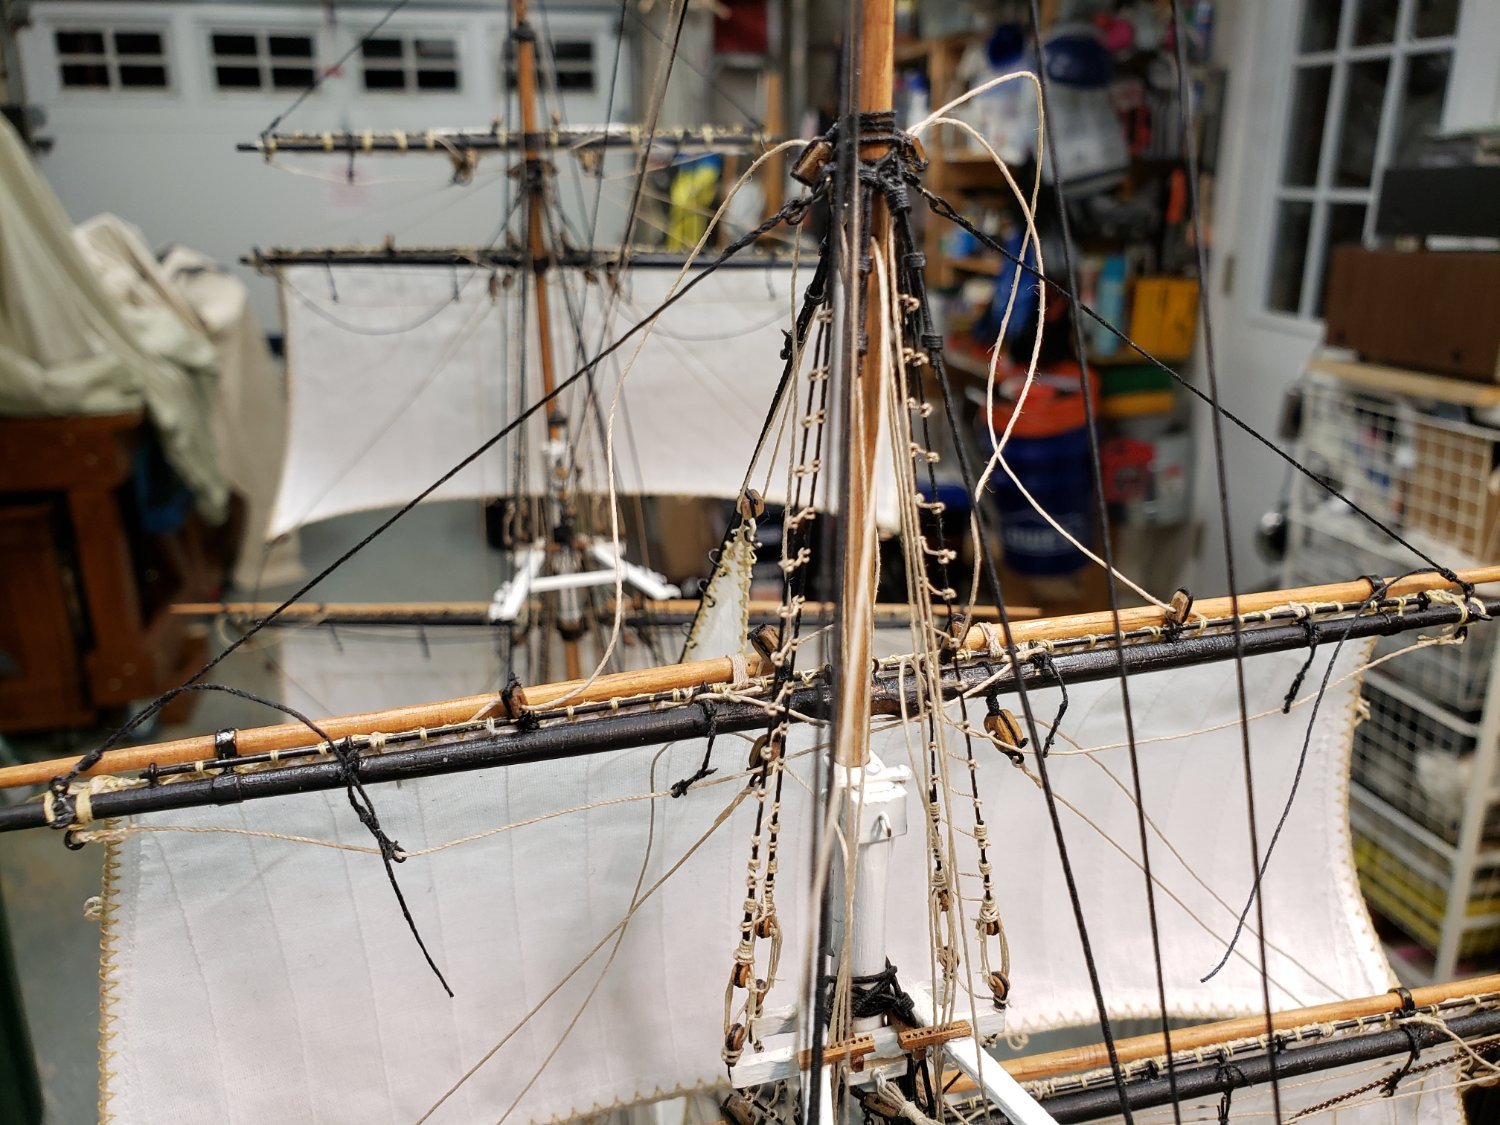
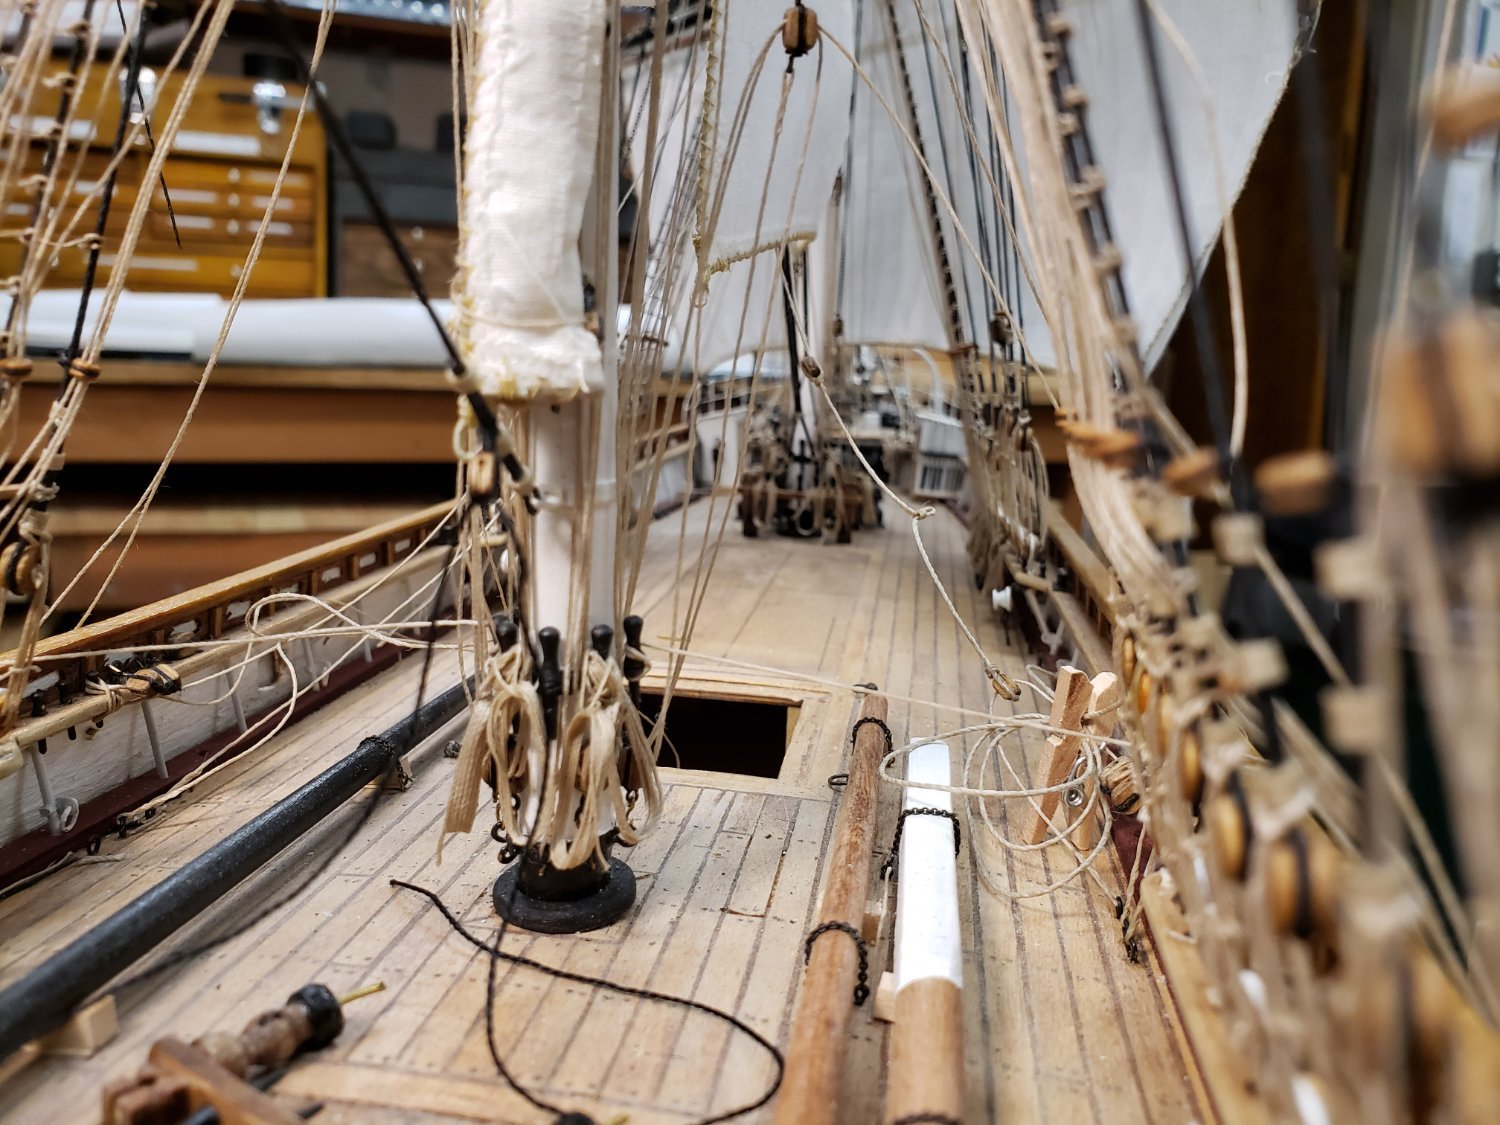
This is where I'm at tonight.
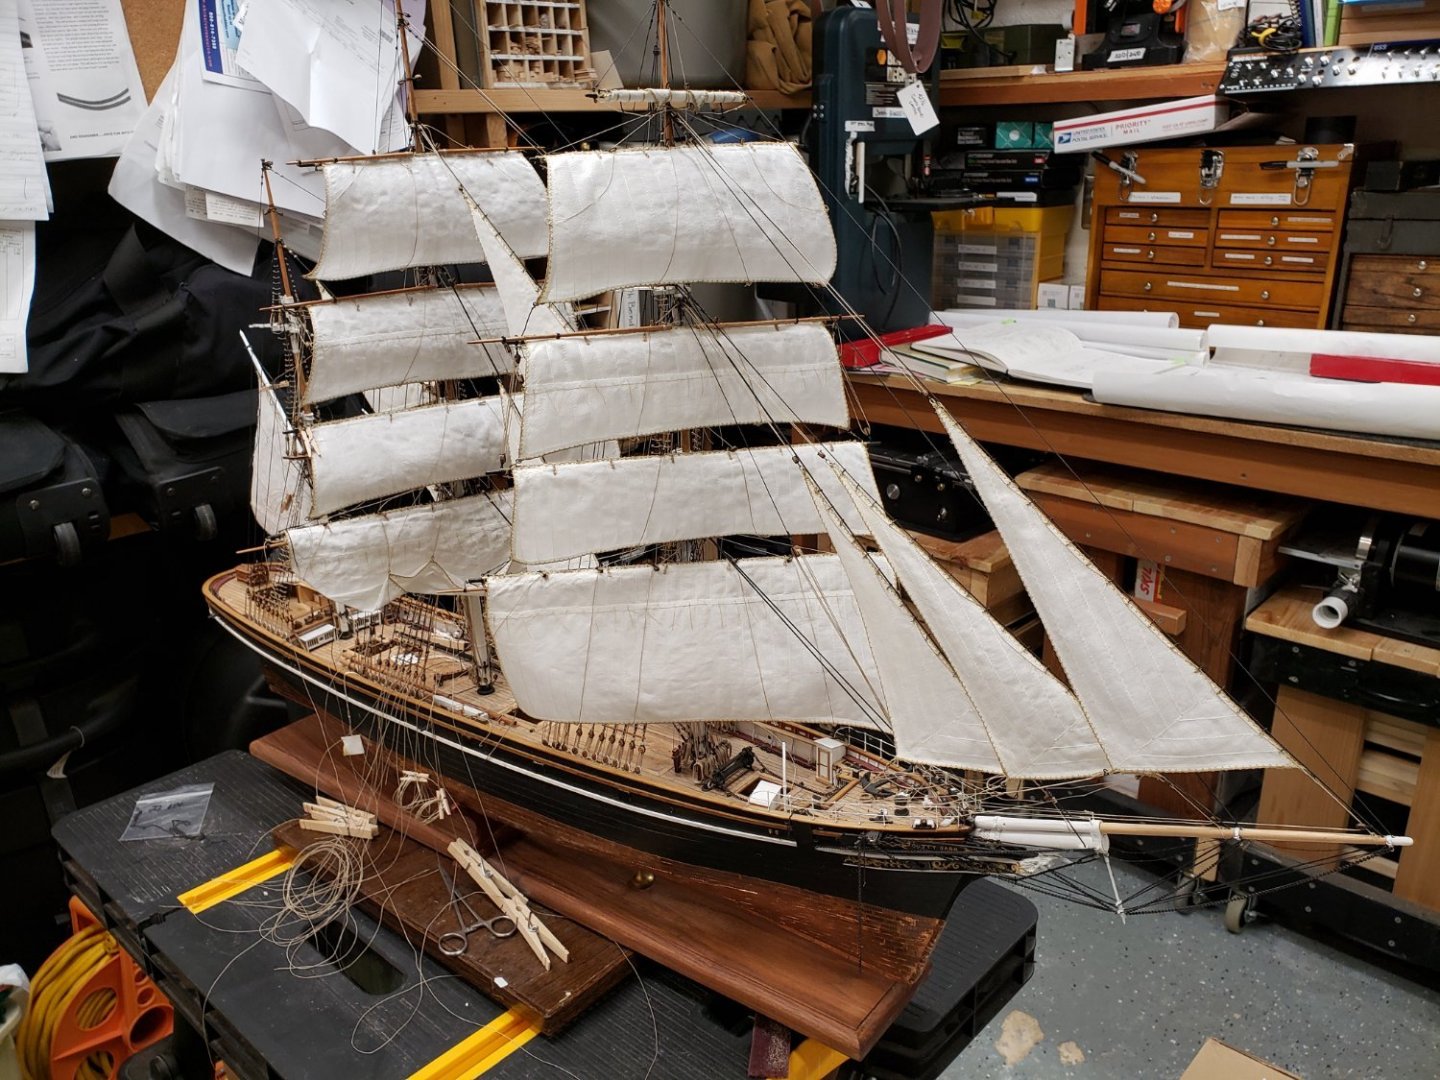
When I rigged the mast I braced around the yards as I worked from bottom to top. I didn't have any of the actual brace lines rigged. Per Harry's (HOF) recommendation, I will wait until the end to rig the actual braces. I just lightly glued the yards into position. This allowed me to run all of the rigging through the fairleads and to the pins as I rigged. I glued the lines to the pins as I went and this allowed for a very clean process. However there was a price. I had a heck of a time running the lines with the yards braced around. Maybe I should have rigged top to bottom? Anyway For the main mast I decided not to brace the yards around. I'm running all of the lines through the fairlead board (where applicable) then through the fairleads on the shrouds and then I just pulling the lines through the rail to the outboard of the ship. My thought is that at the end, I move the yards (brace) into their final position and adjust the tension on the lines and belay the lines to the pins, let it sit for a few days and adjust any tension needed, then glue the lines to the pins. So far, I've gotten the course through the t-gallant rigged and it seems to be working ok.
here's a shot. I have taken more photos and will post them after I move them from my camera to the computer.
Take care, stay well, and stay safe.
best,
marc
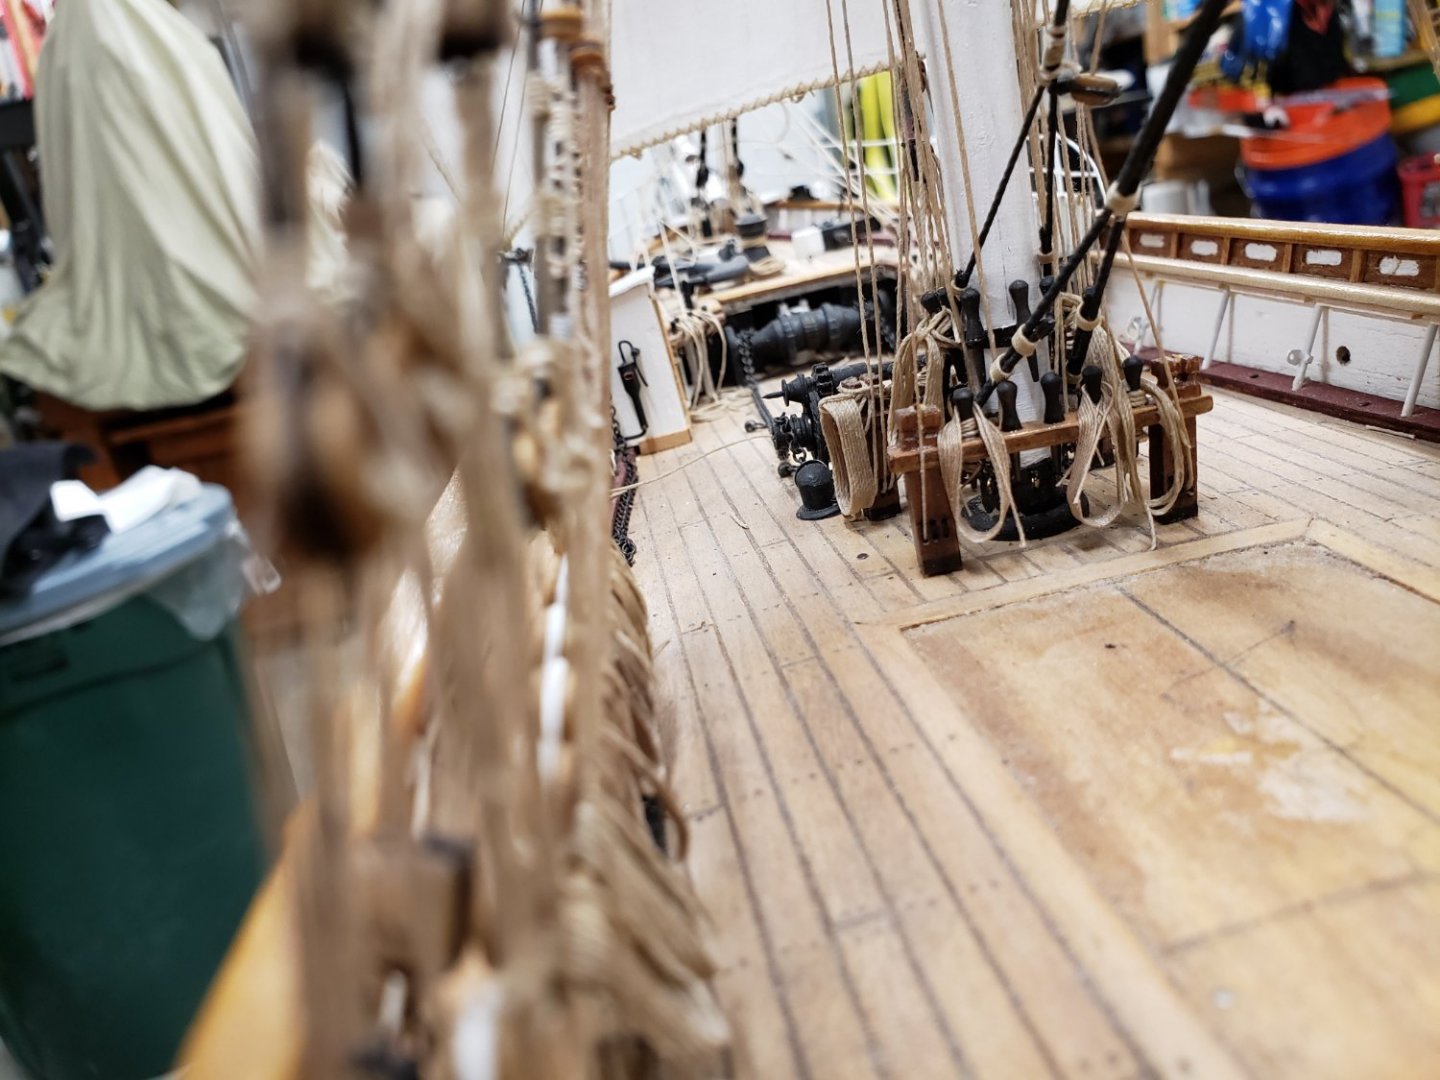
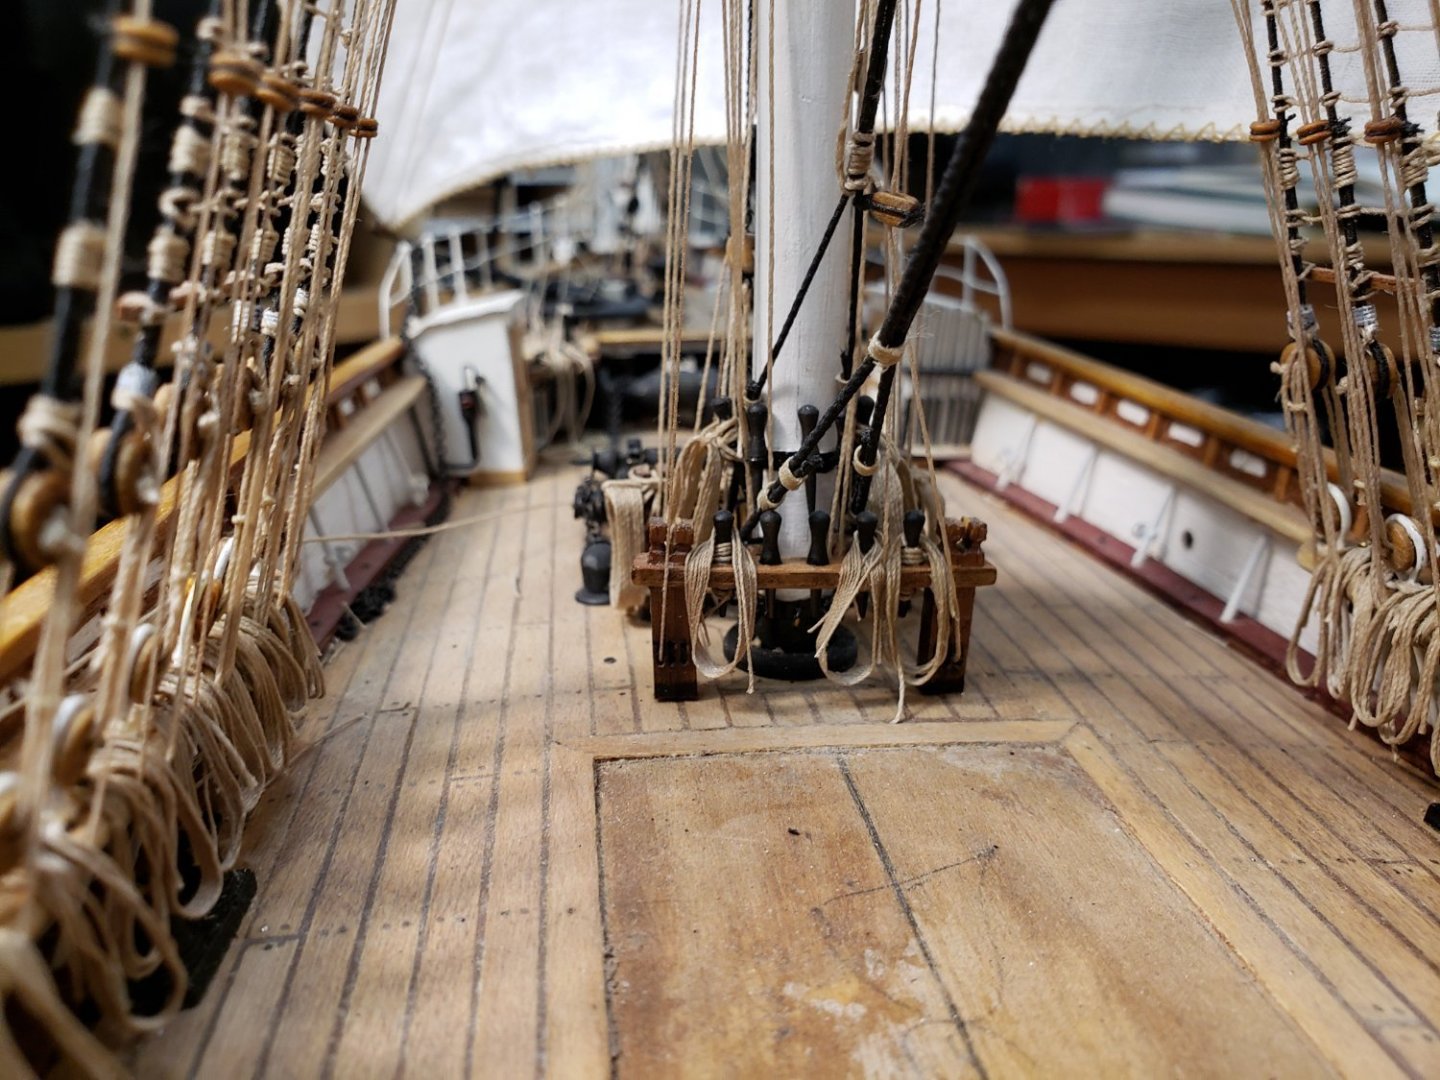
A few shots of the model

Main mast -rigging is loose

Aft fore mast rail
main mast progress. loose rigging
Aft side of the main mast spider band - work in progress


-
Hi Nenad,
Catching up on your progress. very nice. Love your photos. You are very talented. Artist, musician, sculptor.
Stay healthy, happy, and well!
Marc
-
-
Hi Harry,
Thank you for the reply and encouragement. It really means a lot to me.
I hope you and your loved ones are doing well. I trust that you're settled into the new house.
best,
marc
-
Hi all,
I'm still alive. Sorry I haven't posted in almost a year. I think the whole COVID situation has killed my attention span outside work. I can't seem to stay focused and my energy level is at a minimum. I'm exhausted at the end of the workday or after I've done the necessary chores on the weekend. Even staying connected with friends seems harder.
I haven't done a lot of work since my last burst of energy. However, I did accomplish some in small sessions here and there. I completed all of the mizzen deadeye - shroud rigging and finished all of the ratlines. I took a couple of photos on my phone. I'll take better ones and upload them. My phone doesn't do a good jog capturing the details in focus.


I've been trying to buy a mill during this whole COVID mess. The dealer will ship everything you want to buy in the crate with the machine and you only have to pay the same shipping charge on the machine. I wanted to take advantage of this great savings, but all of the higher/heavier large ticket items were never in stock at the same time as the Mill. When items came back into stock, the Mill was out of stock for several months. Always two or more items on backorder (not the dealer's fault). Anyway, I broke down and ordered everything that was in stock when the mill was finally back in stock. So here's the new addition to my shop.
Happy Mother's Day
best
marc
-
Hi Simon,
The Cutty is looking good. Nice details. I look forward to seeing how you do with the davits. I made mine out of Brass, but I'd be interested to see how you do with the wood. Be careful in wood not to introduce to much bend all at once, you don't want to split the wood. Also, drastic bends can be very difficult with thicker wood or dowels. At least they are for me ☺️
Good luck!
marc
- Keith Black and mtaylor
-
2
-
Hi Harry!
I'm glad that your move was successful and no damage to the ships!!! I'm looking forward to seeing more building from you. I had more delays on my build. My wife and I relocated to our house in Florida for a couple of months. Tired of seeing the inside of our house in Virginia -working at home from COVID. Back in Virginia again and access to the ship.
Vladimir, Thank you for your comments on my build. Your build of the Cutty is wonderful. I impressed on your 1:24 scale!!
best,
marc -
Hi Bill,
Mark's right about the sudding sail booms. they were inboard when not in use. Also, note that depending upon the direction and strength of the wind, the cutty wouldn't have had her spanker, mizzen, and spencer rigged. You can see photos where the wind is coming from astern or rear quarters and she is rigged in this manner. These sails would rob the wind from the main and fore. In fact, often the main wouldn't be rigged as well. Just some thoughts..
best
marc
-
Thanks Grant! Appreciate your feedback!
best
marc
-
Hi Michael,
I'm excited to follow the offset bowsprit rigging. Very nice modification. I always wondered about building this model.
best
marc
- FrankWouts, Old Collingwood and EJ_L
-
3


CUTTY SARK by keelhauled - Mantua - kit bashed - First wooden ship build
in - Kit build logs for subjects built from 1851 - 1900
Posted
Ian thank you for the information and video. I really appeciate the help!!!
Harry, thank you for alerting me to possible issues!!! Keep on doing so and reminding me of what i need to keep an eye on. I have continued to check the fore deck house. The staysails dont have their sheets rigged yet because if I do i loose access to install the forward deck house. Im still trying to figure out how to best rig some lines that will be on the pin rails beside the forward de k house. Sometimes is lind of a chicken/egg issue. Same with the aft deckhouse.
Keep reminding me!!!!!!!!
Thanks
Marc