


keelhauled
-
Posts
778 -
Joined
-
Last visited
Content Type
Profiles
Forums
Gallery
Events
Posts posted by keelhauled
-
-
Hi Barbara,
I'm not able to express how impressed I am with the ship or the amazing attention to detail. Truly spectacular!!!
I'm also glad that you and your father have the hobby to share with each other. Your patience and outlook is awesome.
Not that your father needs any help, but should you need help or assistance with the build, this site is full of wonderful people that love to help each other. My life and model building experience are much richer due to the group here. Feel free to reach out to other builders of the Victory through their build log or the builder of any log and I'm sure that you will get a great deal of help. Just posting a question in your build can also generate helpful responses.
Thank you for sharing this wonderful model and the journey forward.
Best,
Marc
-
thanks for sharing the artwork with us.
- Piet, popeye the sailor and NenadM
-
 3
3
-
Thanks Mark!
I wish that I had your building skills. Your Licorne build is beautiful!
-
Mark,
I've been doing some catch up on your build. Truly impressive and beautiful!
I'm in awe!
thanks for sharing your work with us
Marc
- popeye the sailor, Piet, mtaylor and 3 others
-
6
-
Hi Jeff ,Michael, and Dennis!
thanks for all of the kind words and encouragement!
Michael, I like the idea about the TV and Stereo, but I think the admiral would shut down the ship yard. I already feel bad that I'm spending too much time in the ship yard. However, I do have a 4K 60 inch screen (she picked it out) with a 1500 watt stereo system about 20 feet away! - Just in case I need something to do while I have to wait for glue to dry.

Dennis, you are always too kind. Sometimes I worry that I have too many supplies, until I need something that I don't have and can't make (usually wood). Then I'm furious.
 It's also why I build more and more scratch built items including metal and wood fittings. I've made brass and wood thimbles, brass eye bolts, bollards, etc. That way I never worry about loosing, running out or breaking items. If I need another fitting, I can just make it. It's very liberating. But you're right I have bought a crap load of stuff prior to learning how to make it or having the equipment to do so or items that I won't be able to easily make - like very fine brass chain.
Best!
Marc
-
Hi Nenad,
your art is very beautiful! You're very talented!
best
Marc
-
Hi everyone,
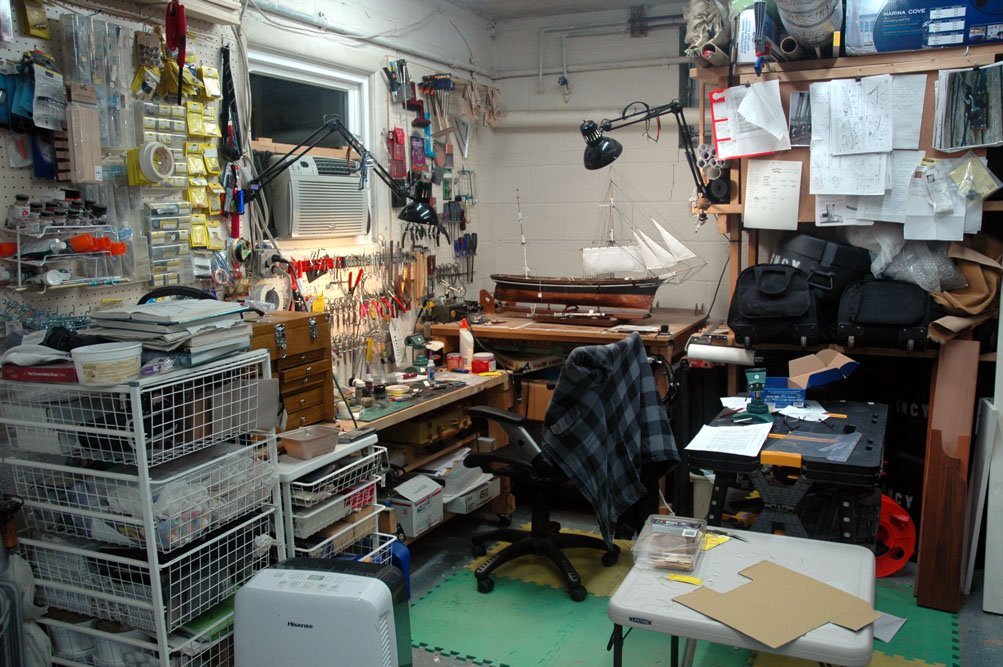
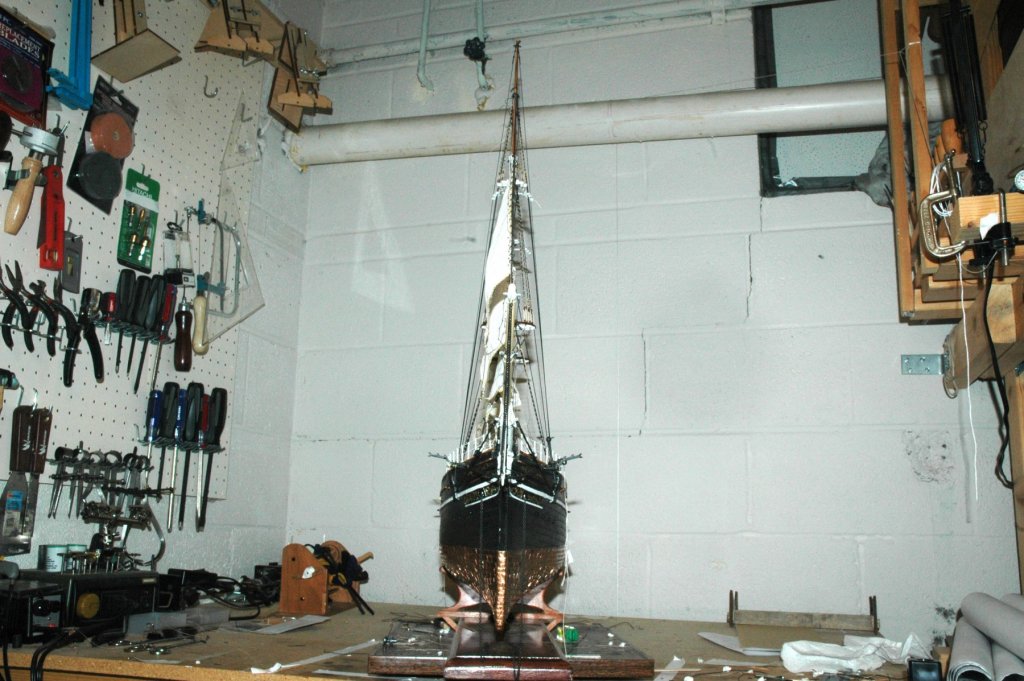
So I'm still alive. And I have worked on the Cutty over the past few months with several long breaks due to travel etc. and a side track into improving my working area.
I'll cover the side track in improving my work space. The side track was due to being aggravated that my gear was always boxed up. So I built a workbench on the opposite wall of the garage and then noticed that there was no lighting nor an electrical. So I had two lines pulled to the garage and four new four outlet power boxes and seven LED shop lights installed. Now I have lots of light!!

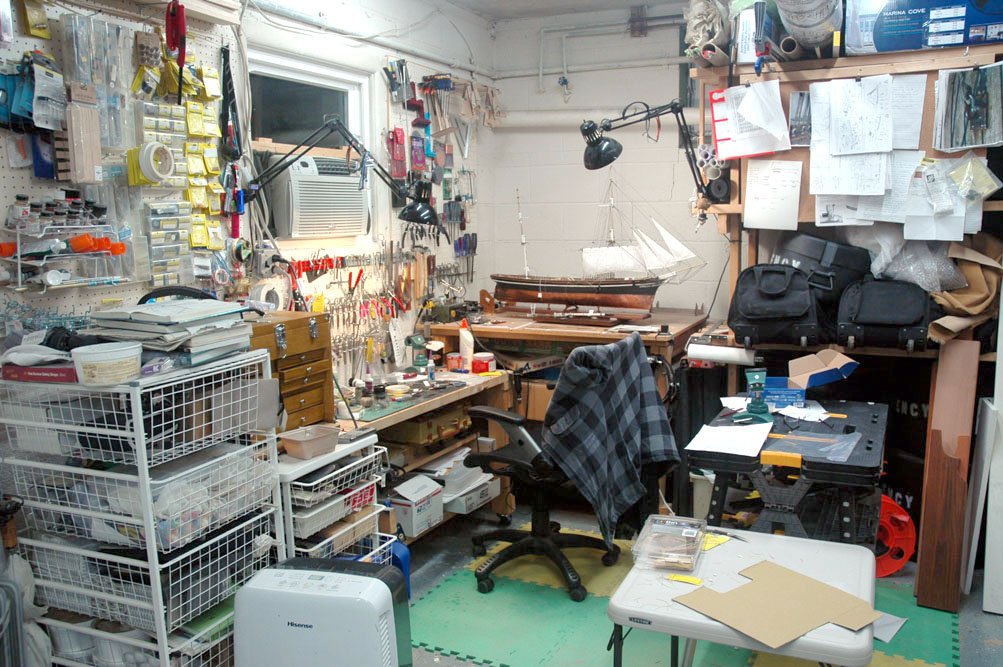
I also added more space for more tools! Excuse the mess, I was in the middle of working when I took the photo
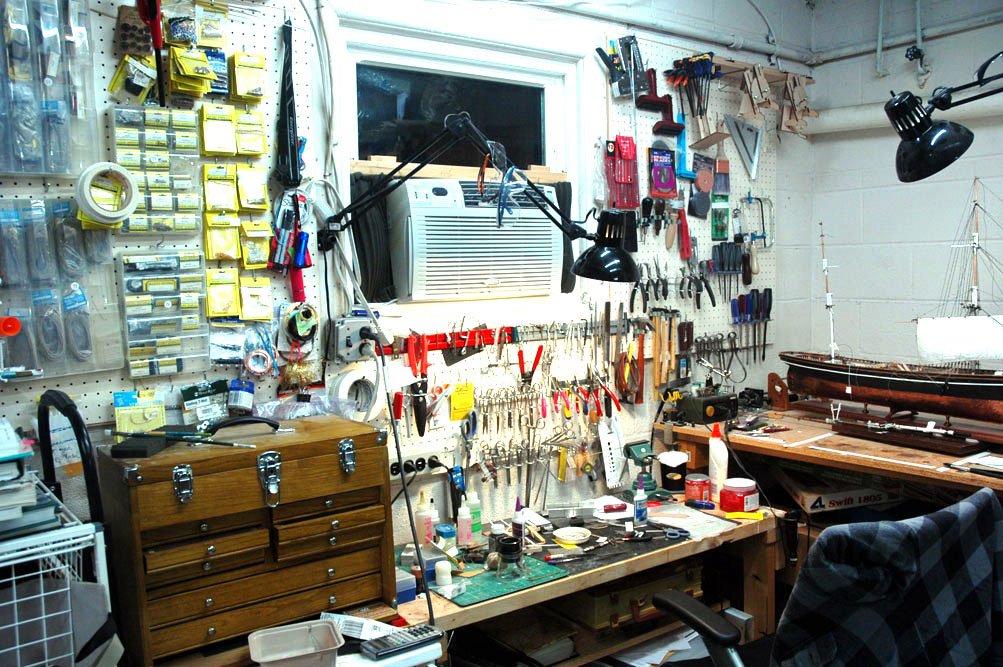
The other side of my workspace. this is the new bench with my new toys from the past couple of years. Finally out of the boxes (almost - the lathe is still back in its box, but it has its own storage shelf). As I said, up to this point, if I needed to use the sander, table saw, drill press, etc, I had to unbox the tool. Move the ship to another location, put the tool together put it on the bench where the ship was, use the tool, box the tool and put the ship back into its original location. UGH!
Problem is now solved.
Almost all of the wood was left over from two pergolas that I had built for our house or other left-over scraps. so the benches and carts are the prettiest, but the function well and I saved a ton of money.
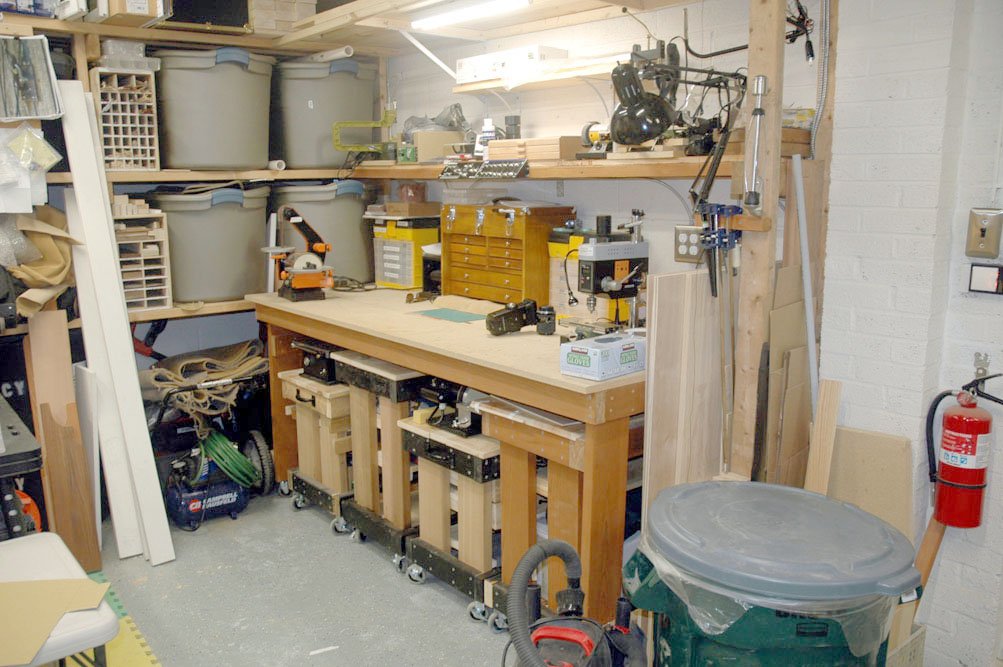
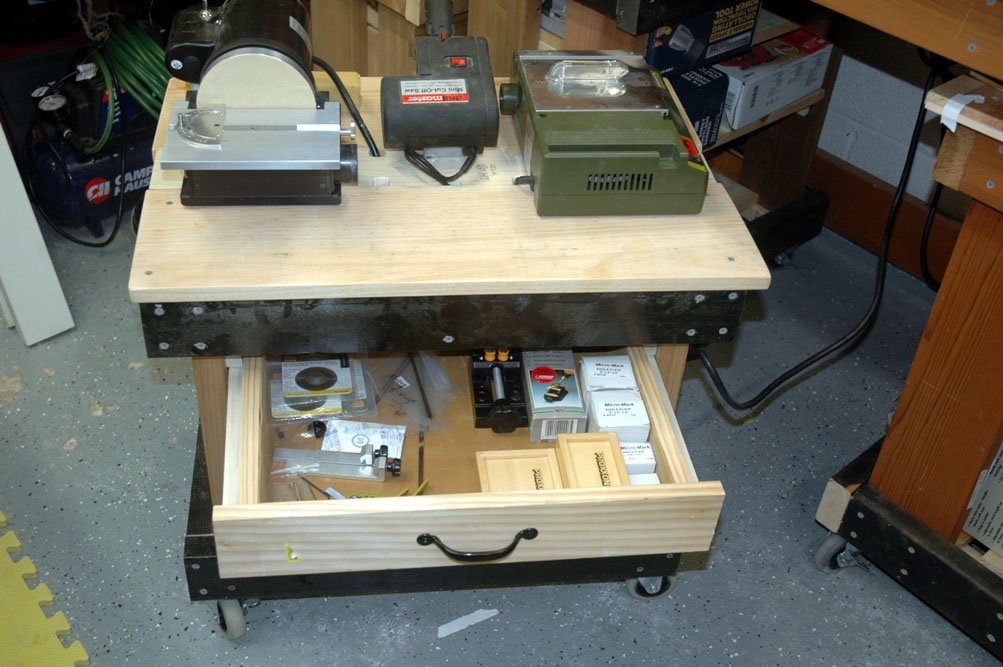
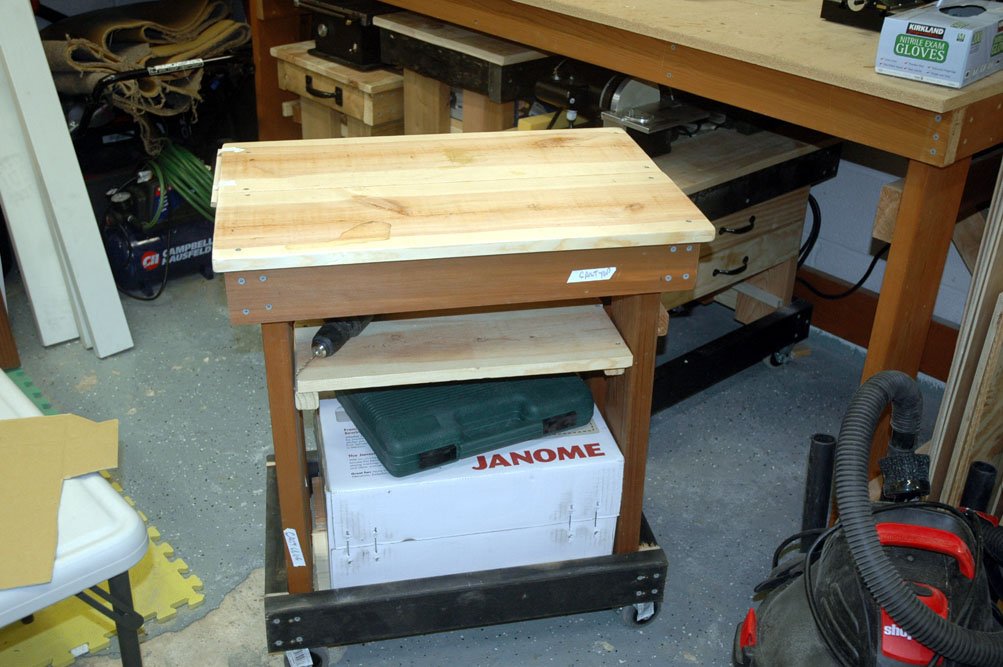
So under the bench are four carts that roll out and are full of equipment storage. There are two short and two tall carts.
The short carts have the Byrne saw and sander as well as the Proxxon table saw and a chop saw permanently housed on their tops. I also made drawers for these carts and lined them with velvet from several yards of velvet from the bargain bin I found in the fabric store.
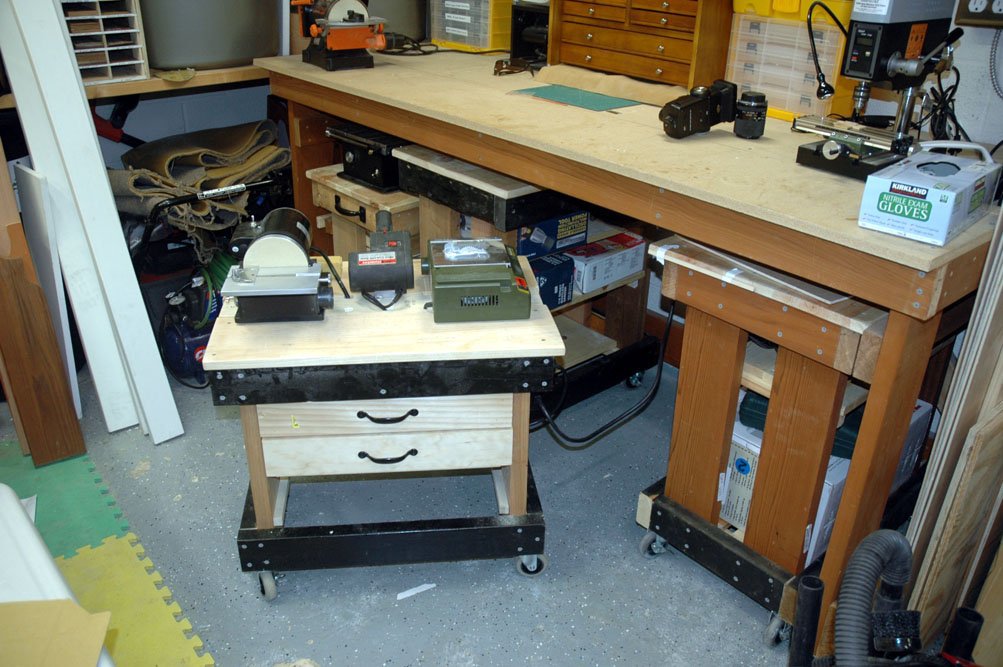

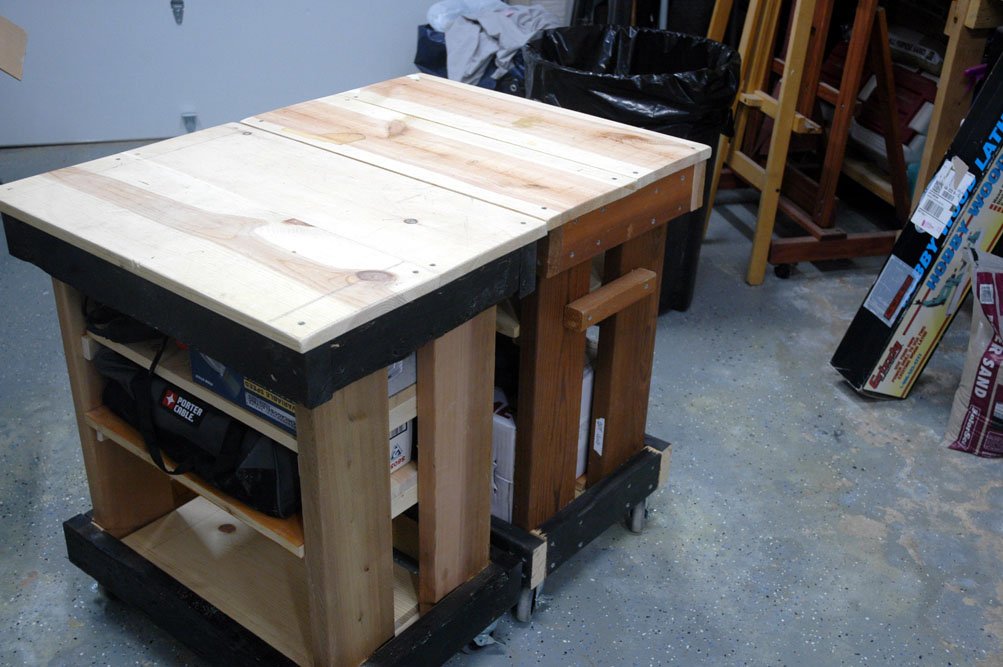
The two tall carts are exactly the same height and can be clamped together to create larger work tables. They are also the correct height to act as out-feed tables for the Byrne's. I made a bridge that attaches to the Byrnes saw and the edge of the tall carts for that purpose.
Now on to the ship!
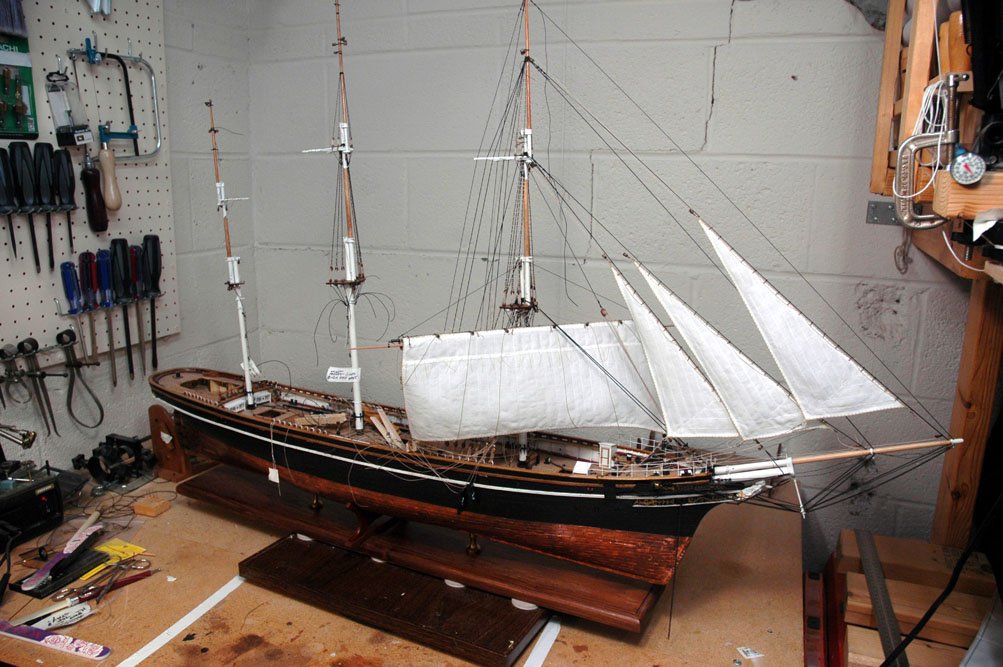
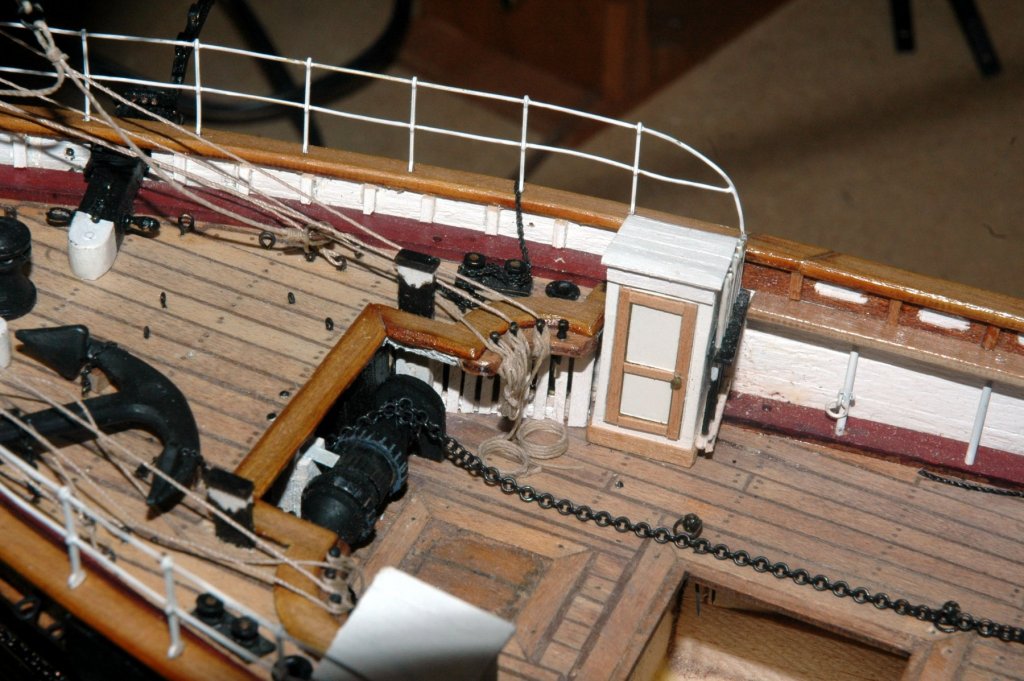
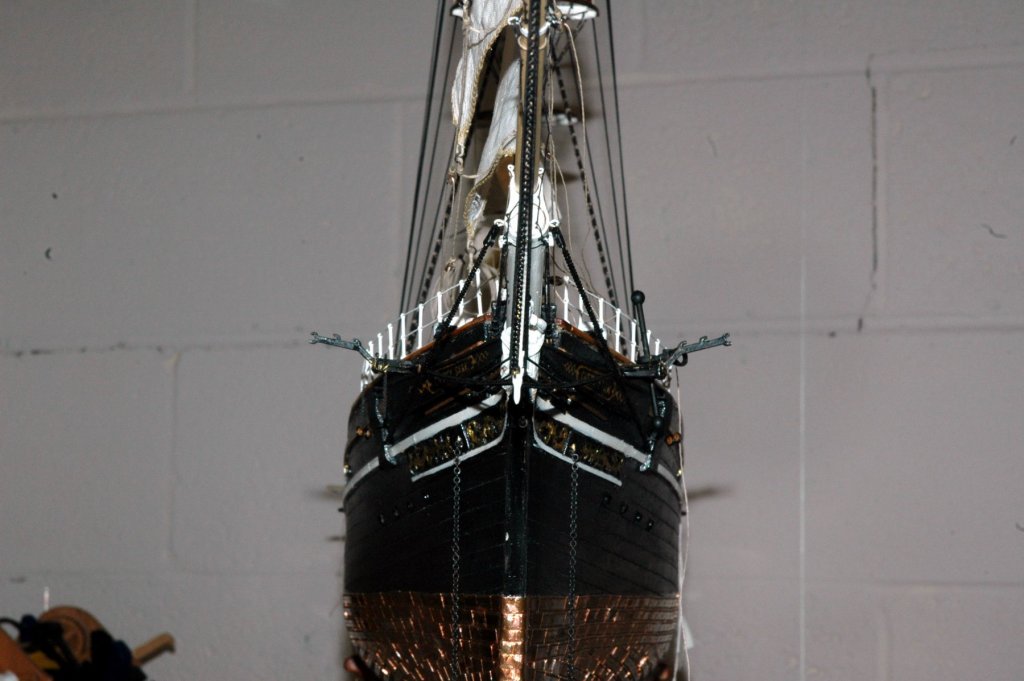
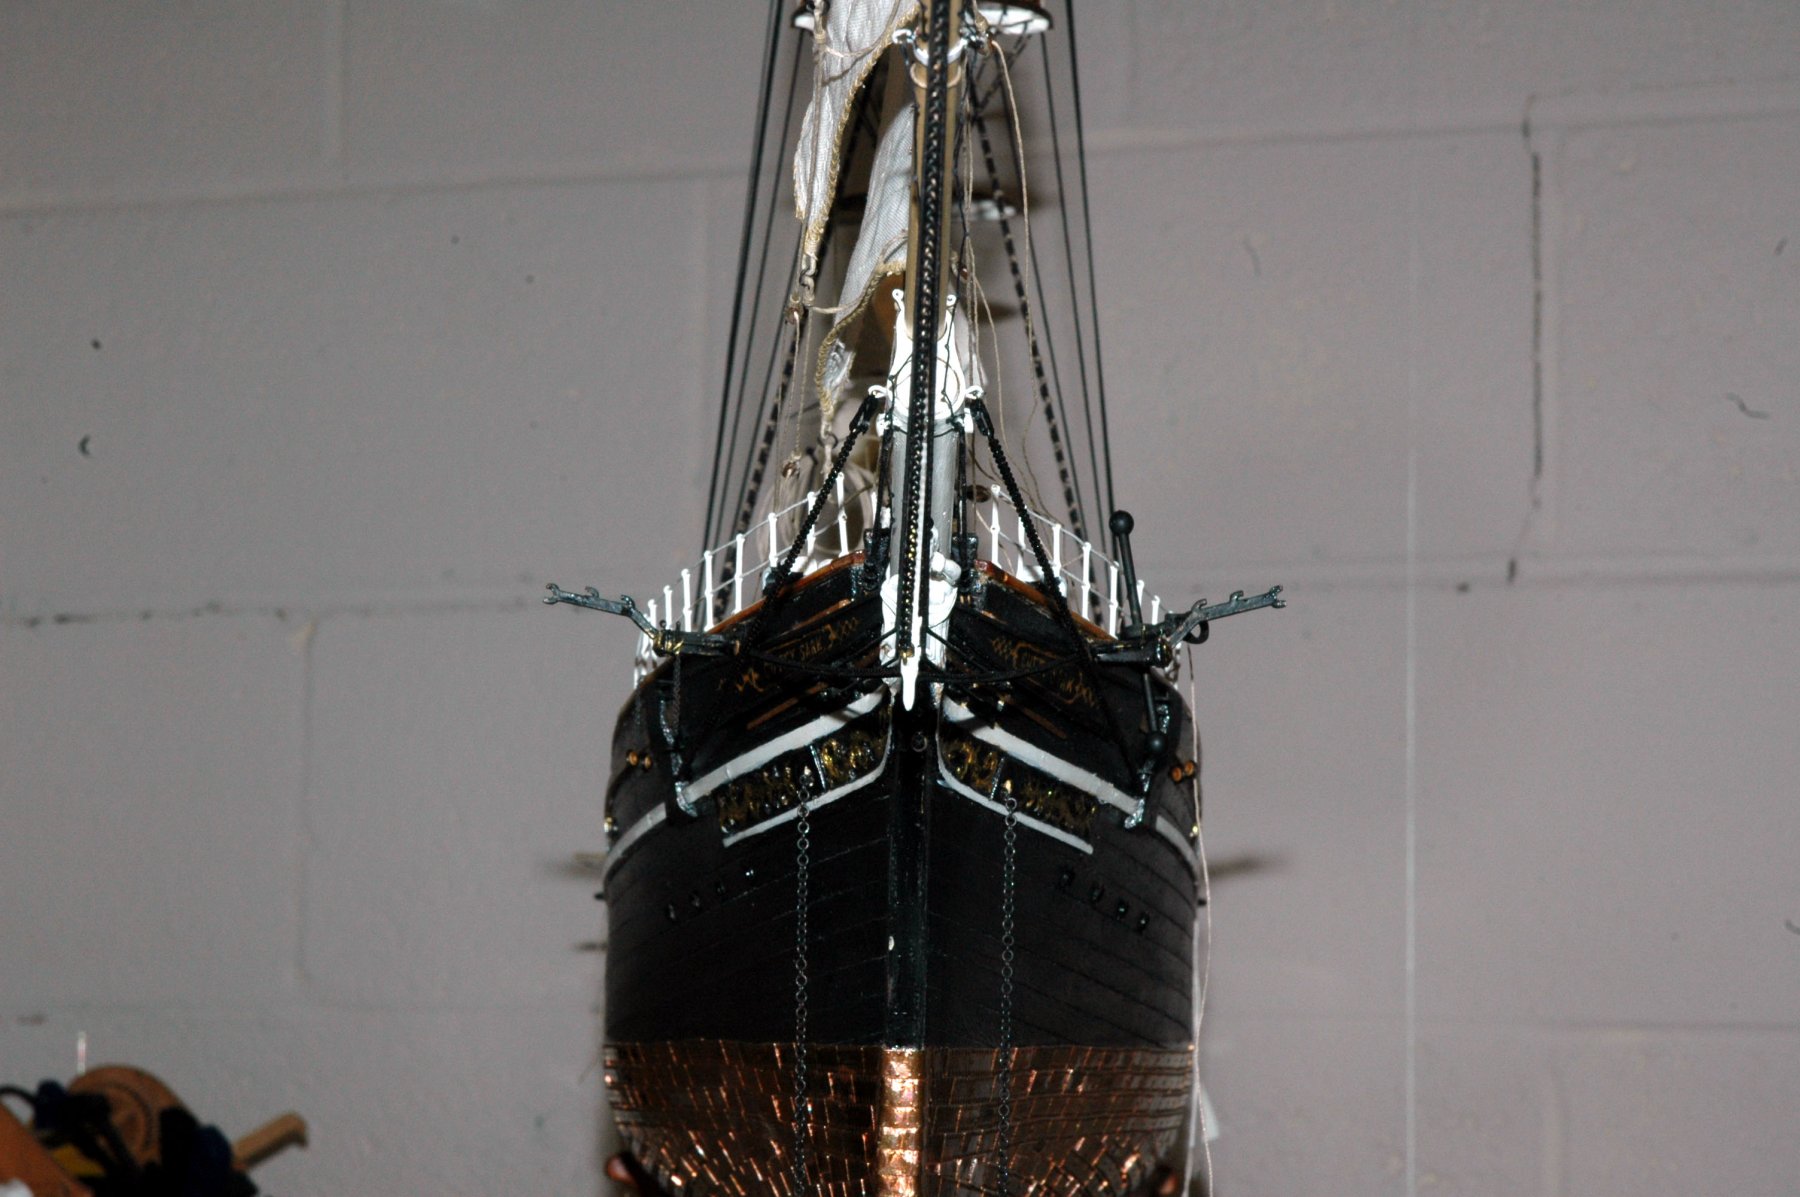
I have the fore sail in place as well as all of it's rigging is attached, but not belayed yet. In a previous post I spoke about the need to step the Main mast and install all of it's standing rigging before I can continue with the fore sail. I've also rigged and jibs and have belayed all of their rigging except the halyards which are run through the blocks but not belayed yet, waiting for the Main mast standing rigging to be executed.
I think that the shape of the sails look good. To me they look like they actually have wind blowing on them.
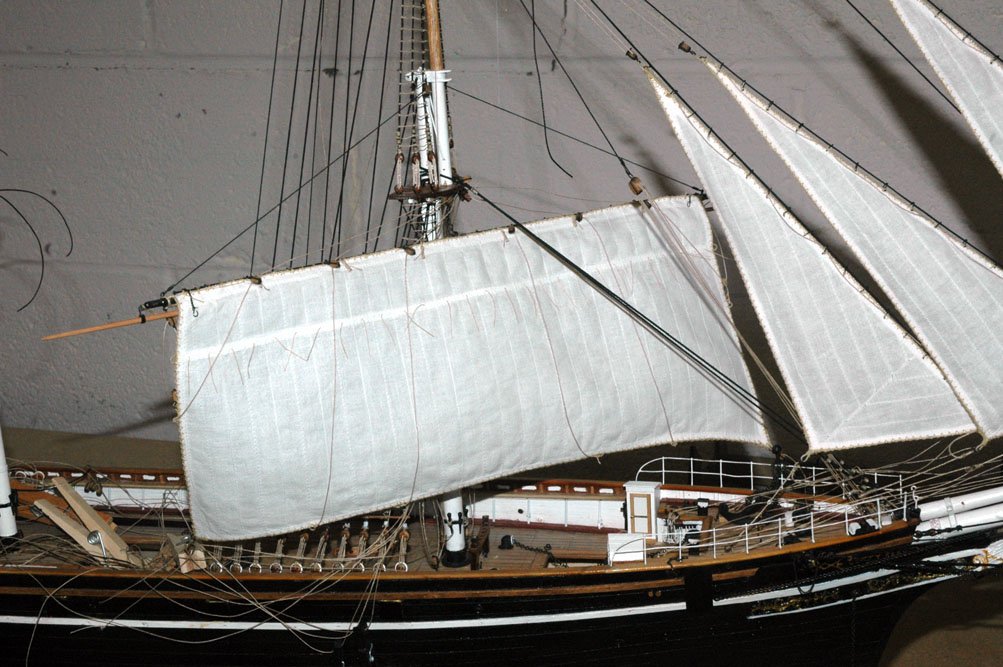
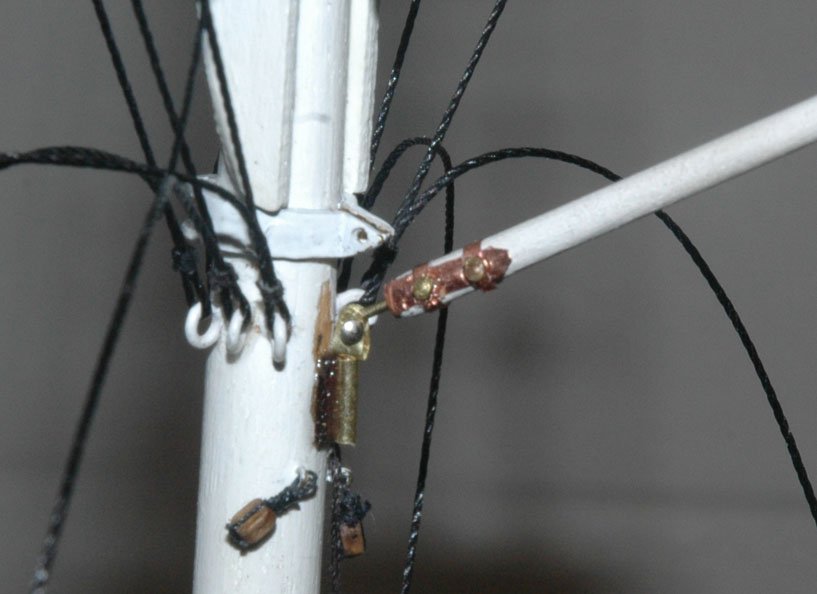
In the next photo you can see the sheet chains from the lower top sail sheet running through the fore course yard. I can tell you that these chains are a royal pain to rig through the mast and blocks.

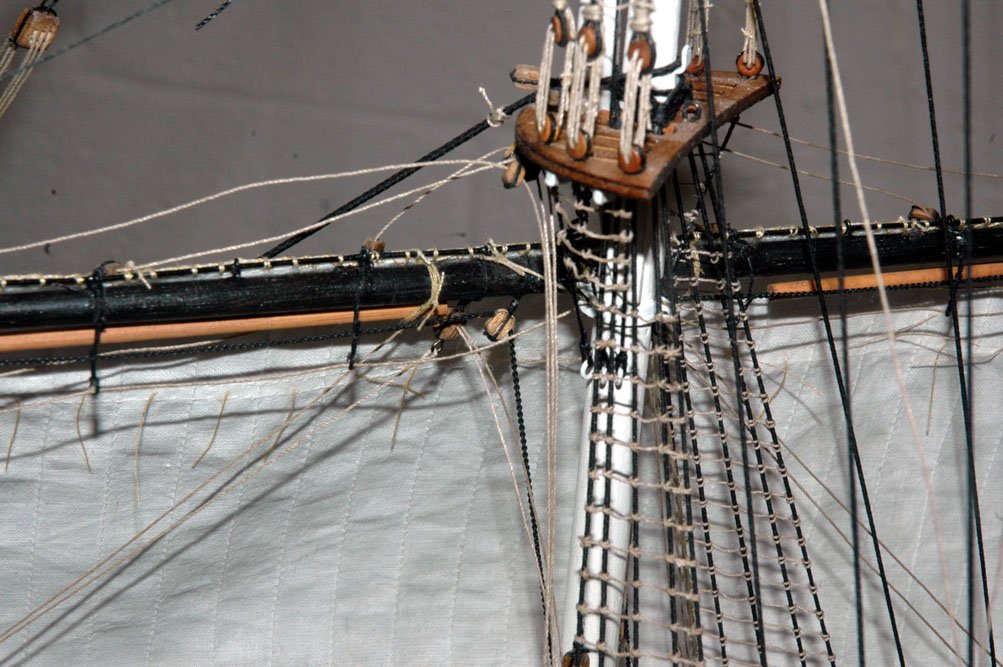
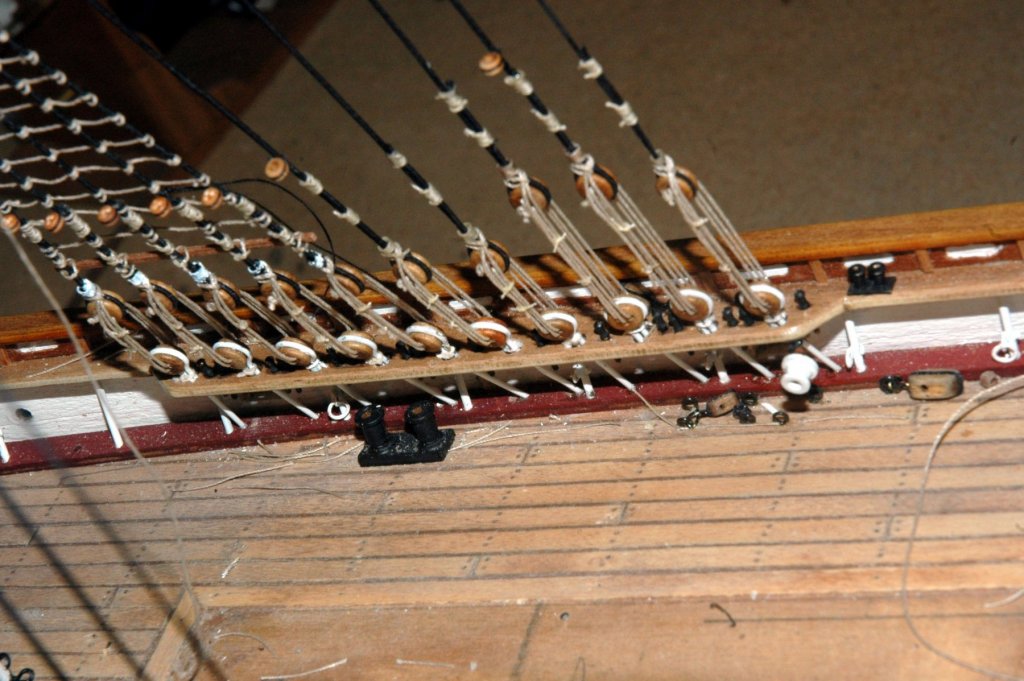
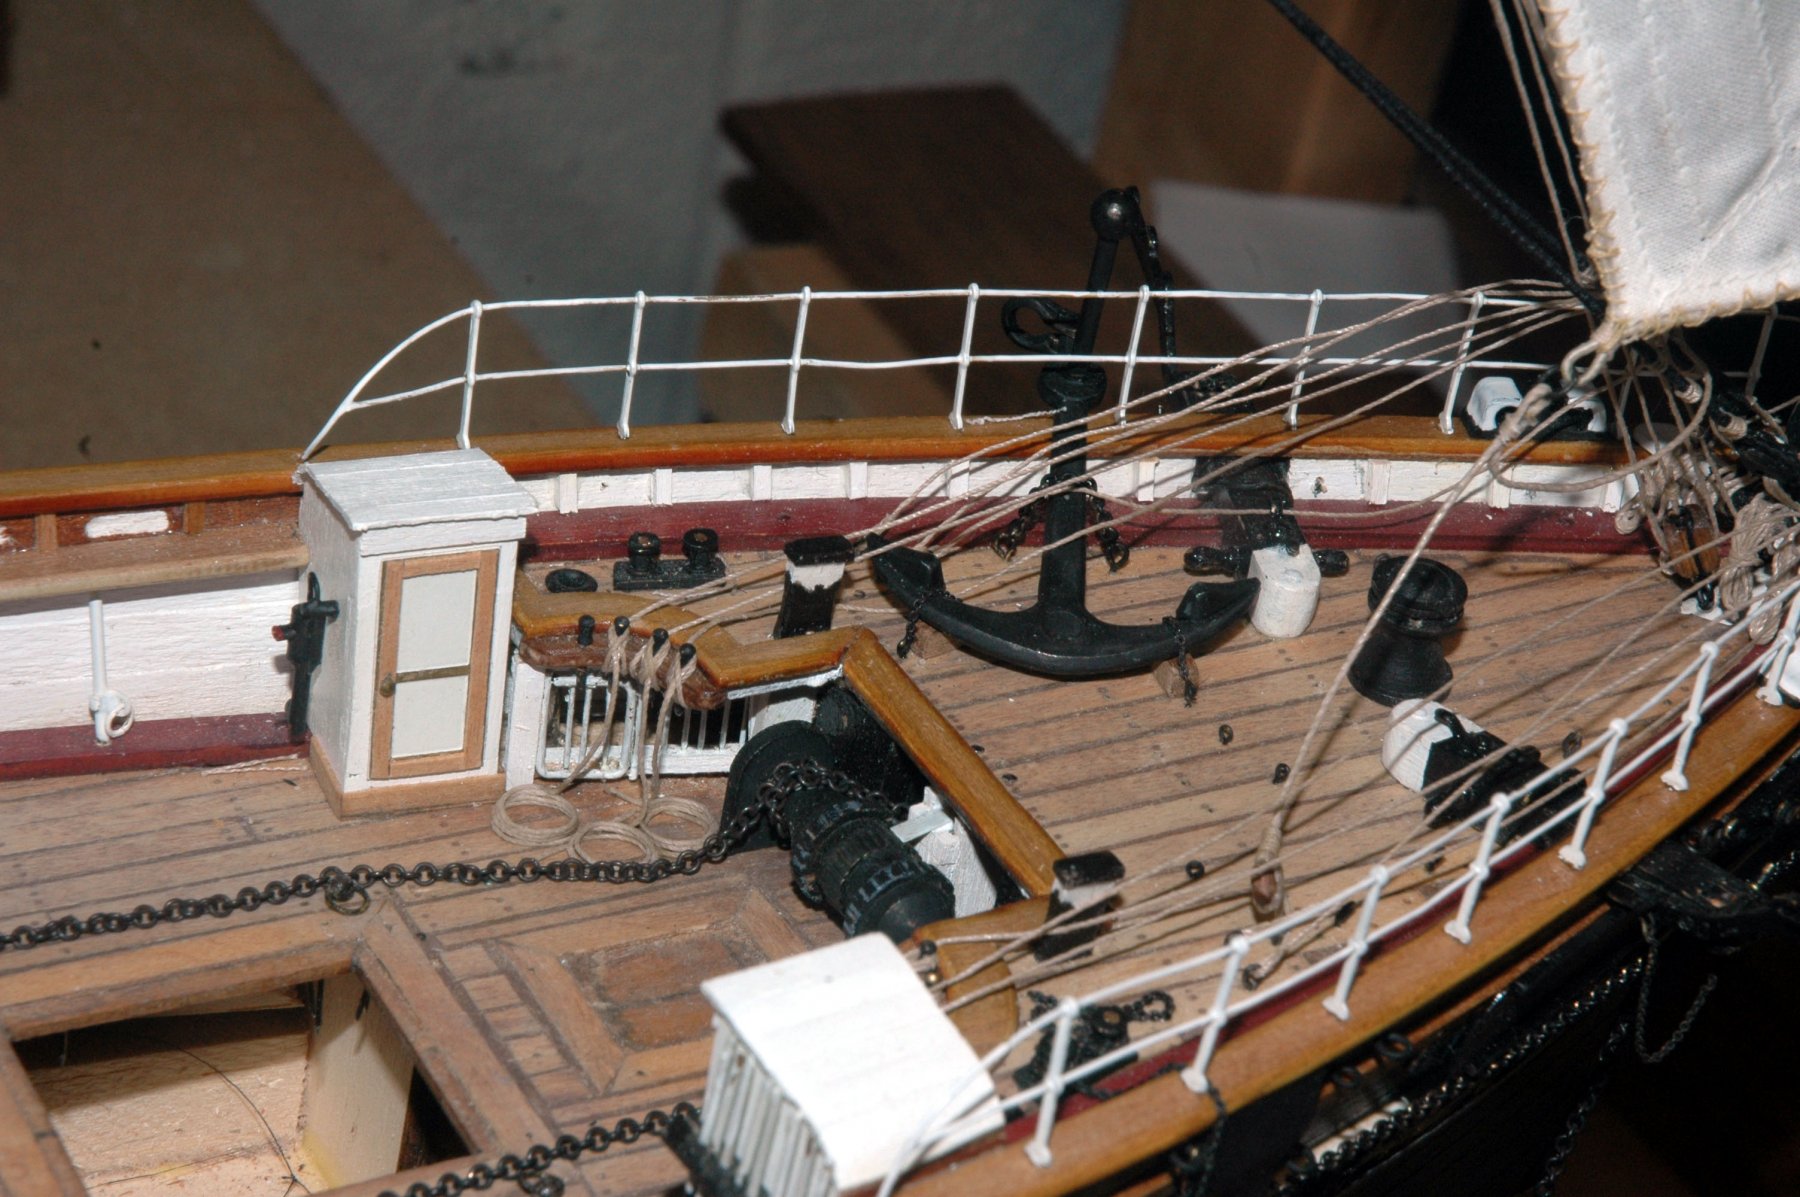
the fore rat lines with the bunt and clew from the course sail feeding through the fairleads

detail of the fairleads - nothing is had been pulled tight yet or belayed.

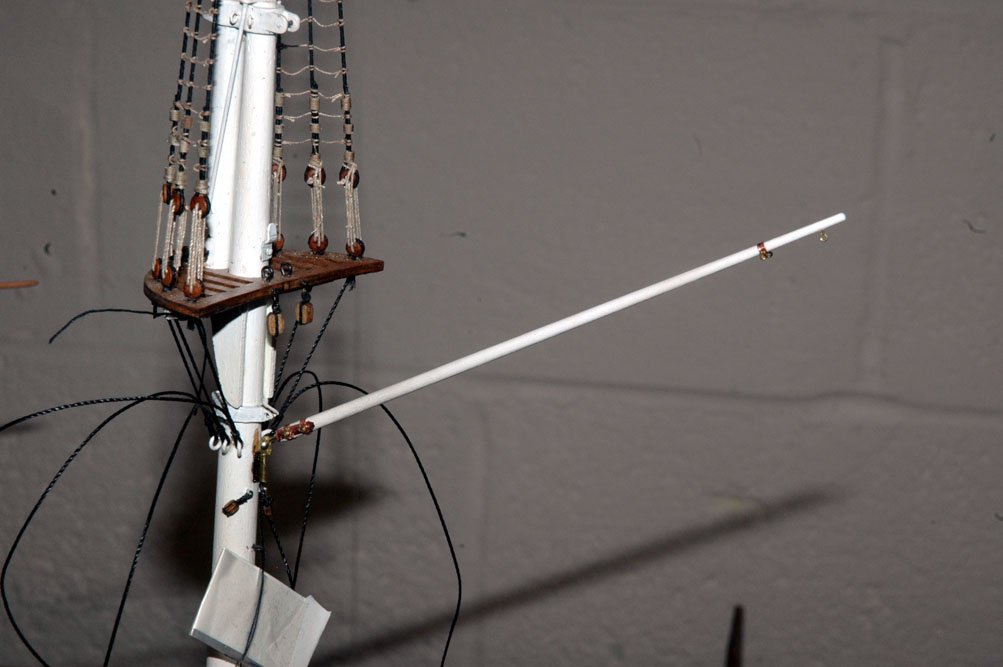
Last night I built the spencer gaff goose neck and other rigging eyes and installed the gear into the main mast and spencer gaff.
Sorry for the great delay in posting, but a great deal of work was in serving all of the standing rigging for the main mast, which took forever because the cutty has the standing rigging 100% served! UGH! Also, I didn't think showing progress of rigging the ratlines on the fore and main mast exciting so I didn't take any photos or post that work. I ended up having to tear all of the upper ratlines out and re-rigging them because I used the wrong size line!!! oh well, I'm always doing one step forward two to four steps back! But I'm still having fun!
thanks for checking in!
Marc
-
Hi Nenad,
Happy to see you back in the ship yard! Also I'm glad that all went well with the surgery.
all the best
Marc
- douglaspbrown, mtaylor, Omega1234 and 2 others
-
5
-
Great news. Thanks for saving these models! I was heart broken when I heard about the fire. I've always been impressed with these models and glad they will continue!
All the Best!
Marc
- Canute, CaptainSteve, mtaylor and 2 others
-
5
-
Hi Nenad,
Happy to see you back in the ship yard! I hope all is well with you and your family!
Great vacation!
The captain's gig looks good!
Marc
- mtaylor, Omega1234, CaptainSteve and 2 others
-
5
-
Hi Tim,
I know what you mean about the candy store. I spend hours and hours walking through builds on this site. Let me know if I can help answer any questions you have. If you haven't visited Nenad's build, you should - look at the top of this page and you'll see a post from him with a link to his build He is a great guy and does great work.
all the best,
Marc
-
Hi Tim,
Sorry for the late response.
Life has gotten in the way. Although I did get half of the shrouds on the main mast completed. I'm hoping to return to building soon. I had a few time sensitive projects that I've had to tackle.
As to which side I'm displaying........that's a good question. I haven't decided yet. I keep going back and forth. I will probably leave it to the Admiral.
All the best!!
Marc
-
-
-
Michael and Chasseur,
thank you for the kind words!
Marc
-
Thanks Dennis and Nenad. The compliments mean a lot to me coming from you gentlemen.
I attached the fore course and started rigging the lines. shouldn't have been that much work, but the chains for the lower top sail sheets were a pain and I ended up breaking a chain which meant I had to undo all of the work and replace the chain and start again. I'll have to wait a couple of weeks to post photos.
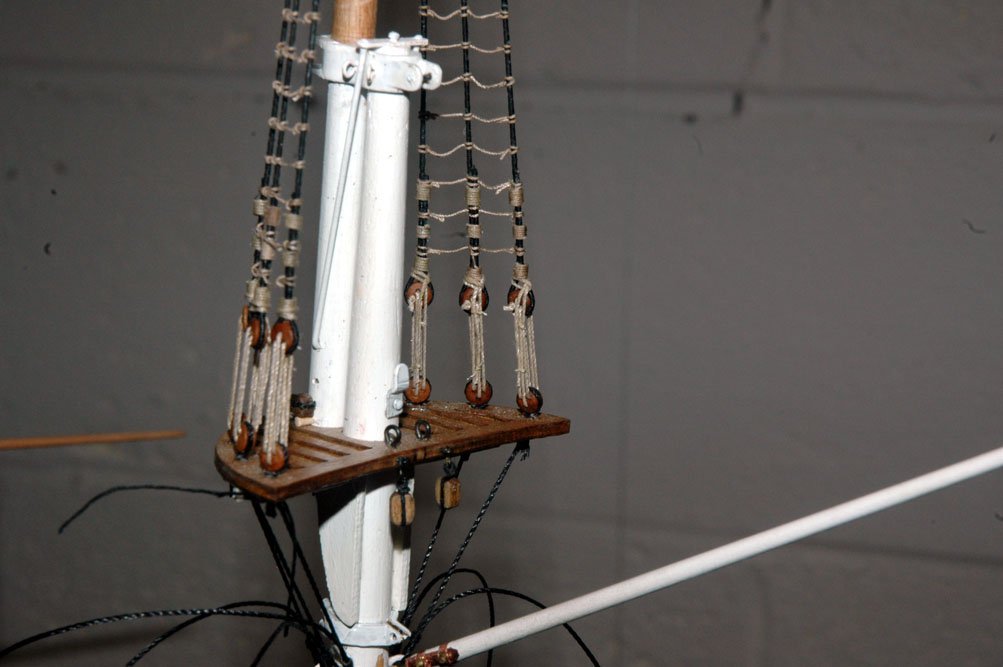
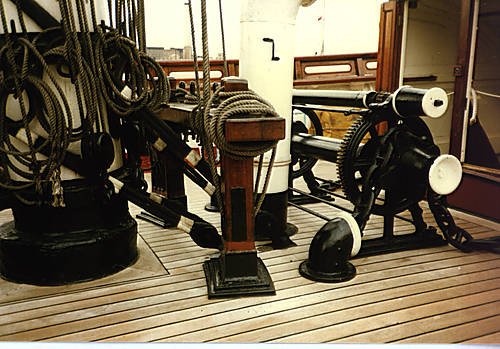
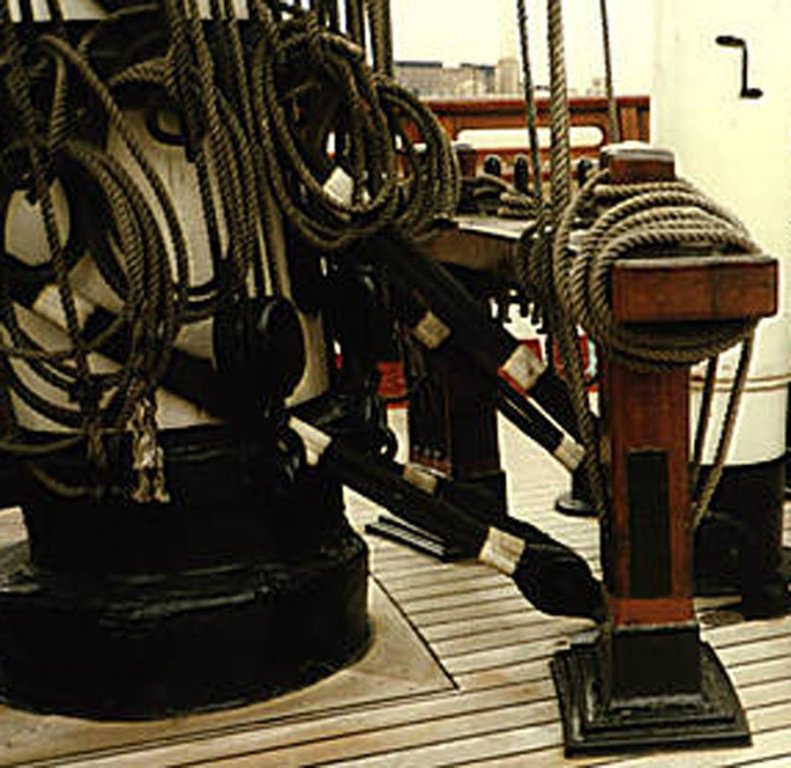
Another snag. My original thought was that I would rig the standing rigging of the fore mast, install the sails on the foremast. I would then repeat the procedure with the main and mizzen masts respectively. As opposed to installing all of the standing rigging and then installing the sails and running rigging. My thought was that I would have unobstructed access to the aft of each mast as I was working on it and it would be easier. Probably true. However, the problem I have is that the Main Mast stay and Main top stay run extremely close to the spider bands, sheet blocks and lift blocks on the main mast. In fact the stays run behind the blocks - that is between the blocks and the mast. I might not be able to judge the correct distances or correct any issues due to scale issues. Hopefully these photos show what I'm talking about. I think that I need to install the stays and then the blocks with the running rigging. I can adjust the hooks on the bottom blocks for the main stays or the distance between the blocks to accommodate the main top mast stays, but I can't change to the location of the stays to accommodate the running rigging - at least not after the fore mast is rigged. So I will revert to the traditional method of rigging.
Marc
-
Hi Nenad,
Happy to see you back in the ship yard! I hope all is well with you and your family!
The captain's gig looks good! What are you using for planking?
Marc
- cog, Piet, popeye the sailor and 2 others
-
5
-
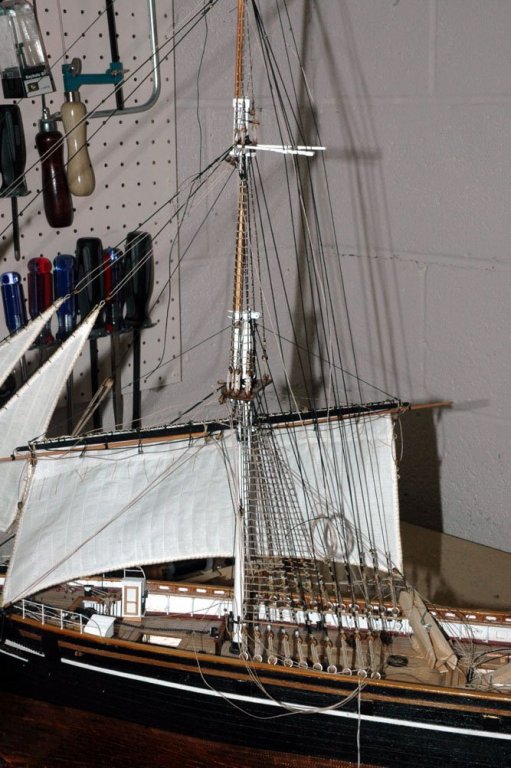
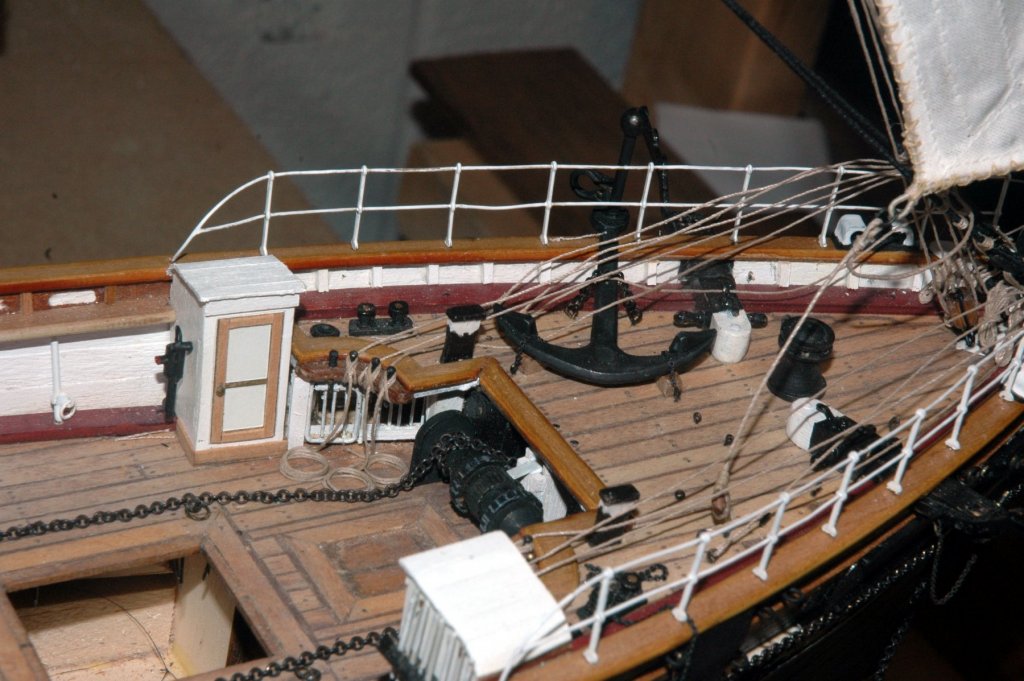
So more progress while I continue to serve lines for the standing rigging of the main mast.
Here are some shots of the sheets for the fore staysail and jibs belayed .
A few shots of the shrouds with the deadeye lanyards finished with cow hitches per cambell. Also the fairleads have been attached for the running rigging

A couple of shots checking the alignment of the masts. You can't see it in the photos, but I used a suspended plumb bob and levels on the hull to check the vertical alignment.
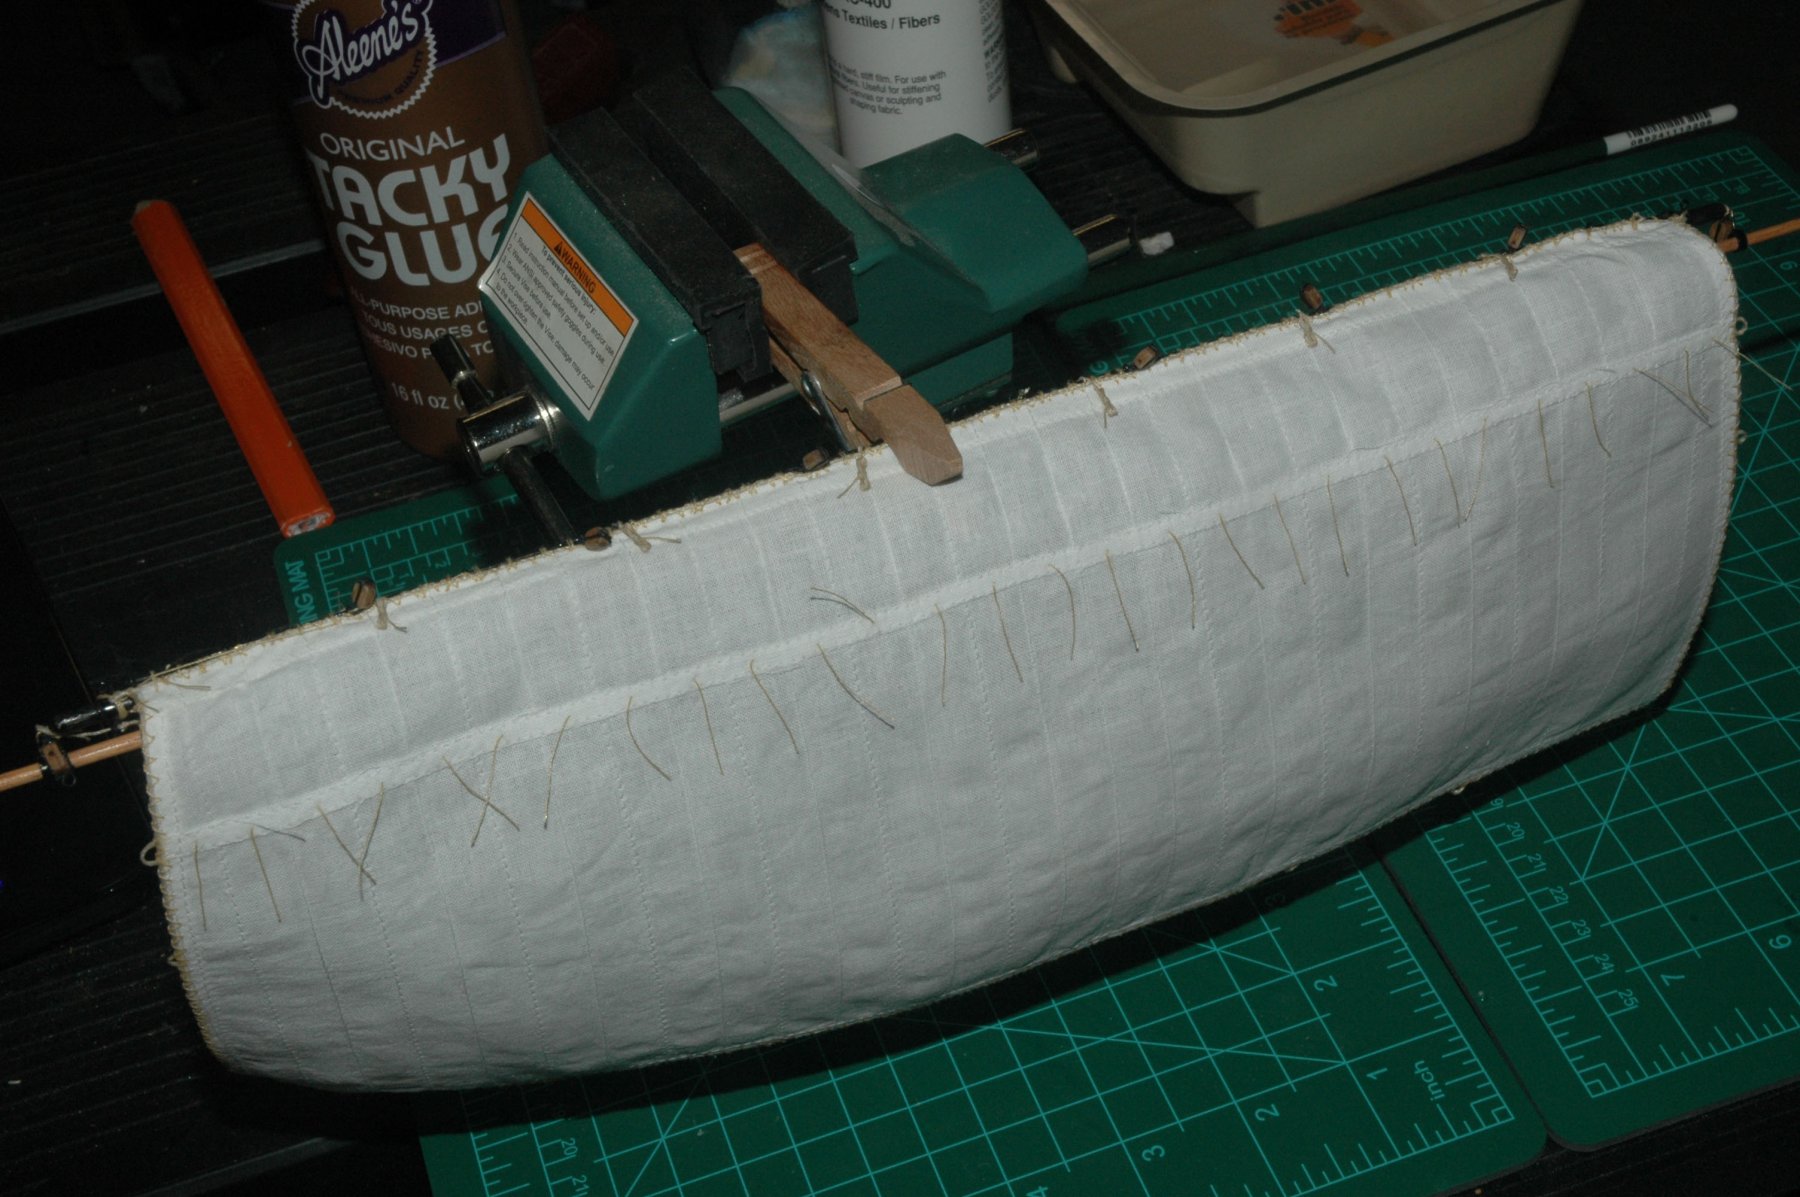
Here is a photo of the course being formed using the same method as used for the jibs.

- NenadM, Chasseur, popeye the sailor and 4 others
-
7
-
Thanks Dennis. Life does get in the way. Although, I wouldn't have it any other way
") .
.
Spent this evening in the ship yard serving lines. All of the Cutty's standing rigging is fully served. I must have spent hundreds of hours now on Chuck's serving machine. Tonight was the topmast shrouds and the t'gallent stays. My fore arm is killing me now. I must endure pain for my craft!
-
Thanks Popeye! I appreciate the feedback. By the way you have quite a pirate ship you're working on in addition to your clipper. very nice!
-
Looks like you're having fun!! Good to break up your other build with a light distraction every now and then.

- popeye the sailor, Omega1234, Piet and 1 other
-
4
-
I like the large guns. never know when the pirates will strike!
Also, when she is racing, she could used them to blow out the competitor's stern if she is passed.
Marc
- popeye the sailor, vossiewulf, EJ_L and 2 others
-
5
-
-
Interesting change. This was the ship that started my hobby. I ended up rigging the model in much more detail than the kit using other sources, but always went back to check against the kit instructions because of their clarity. Still think this is a great model kit.
Marc
- reklein, thibaultron and kruginmi
-
3


CUTTY SARK by keelhauled - Mantua - kit bashed - First wooden ship build
in - Kit build logs for subjects built from 1851 - 1900
Posted · Edited by keelhauled
Thanks Harry!!
You did a great job with your build.
I'll be down in your part of the world - sort of.
I'll be down in Melbourne and Craigieburn (Rather be in Wellington!)
But since I'll be in the office all day, it probably doesn't matter.
Cheers!
Marc