


keelhauled
-
Posts
788 -
Joined
-
Last visited
Content Type
Profiles
Forums
Gallery
Events
Posts posted by keelhauled
-
-
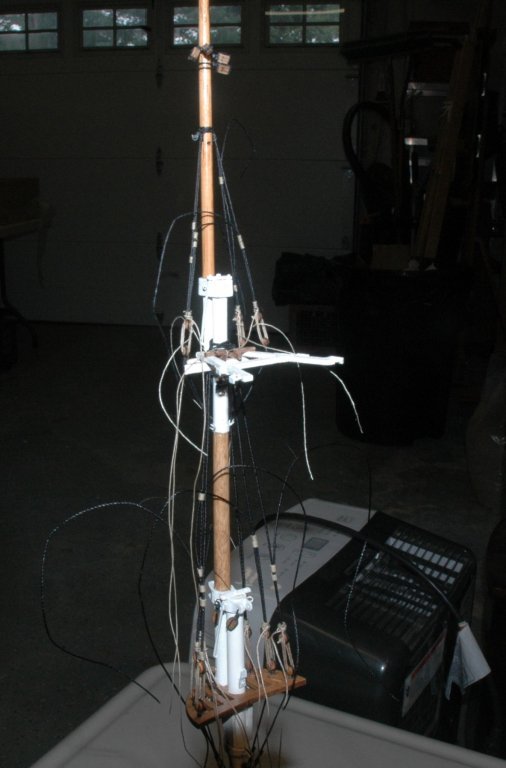
Weekend (plus a few days) update!
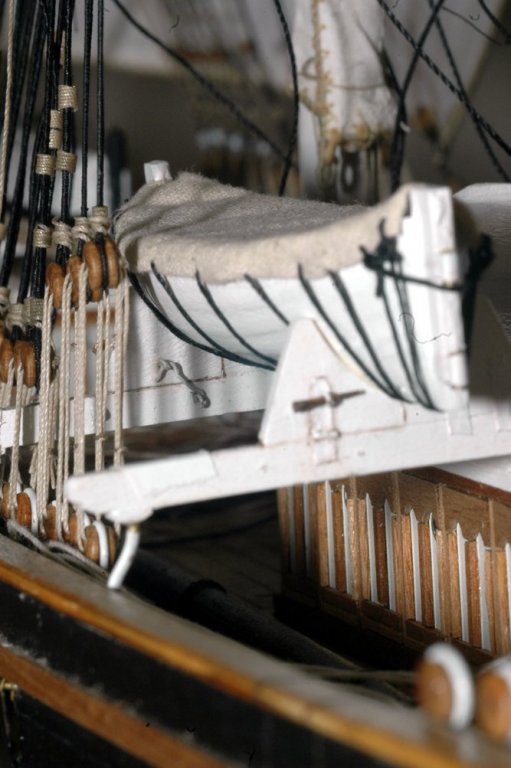
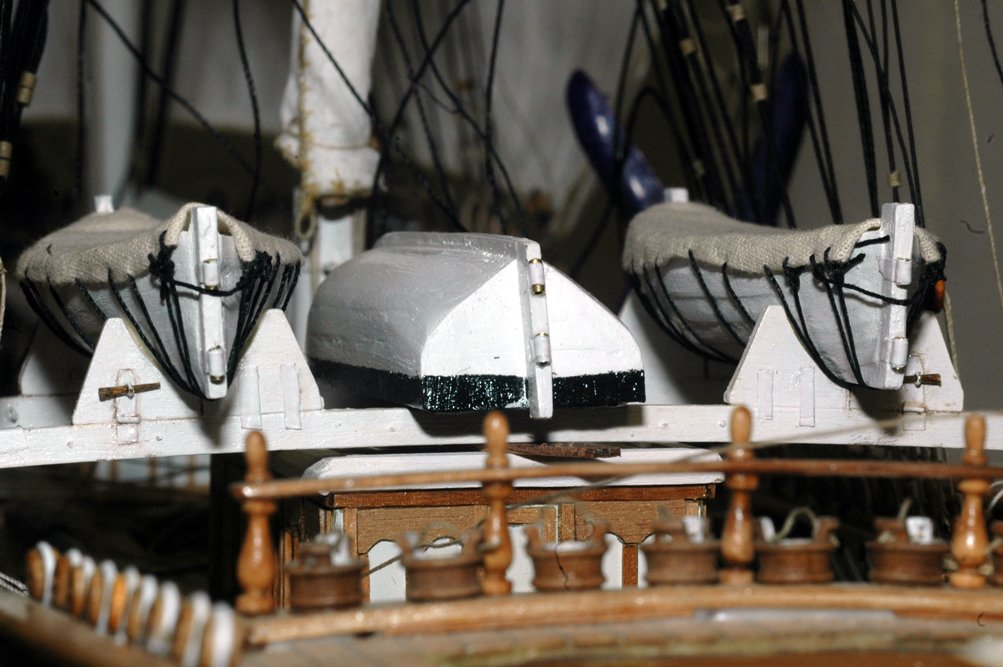
Working on the boat skids
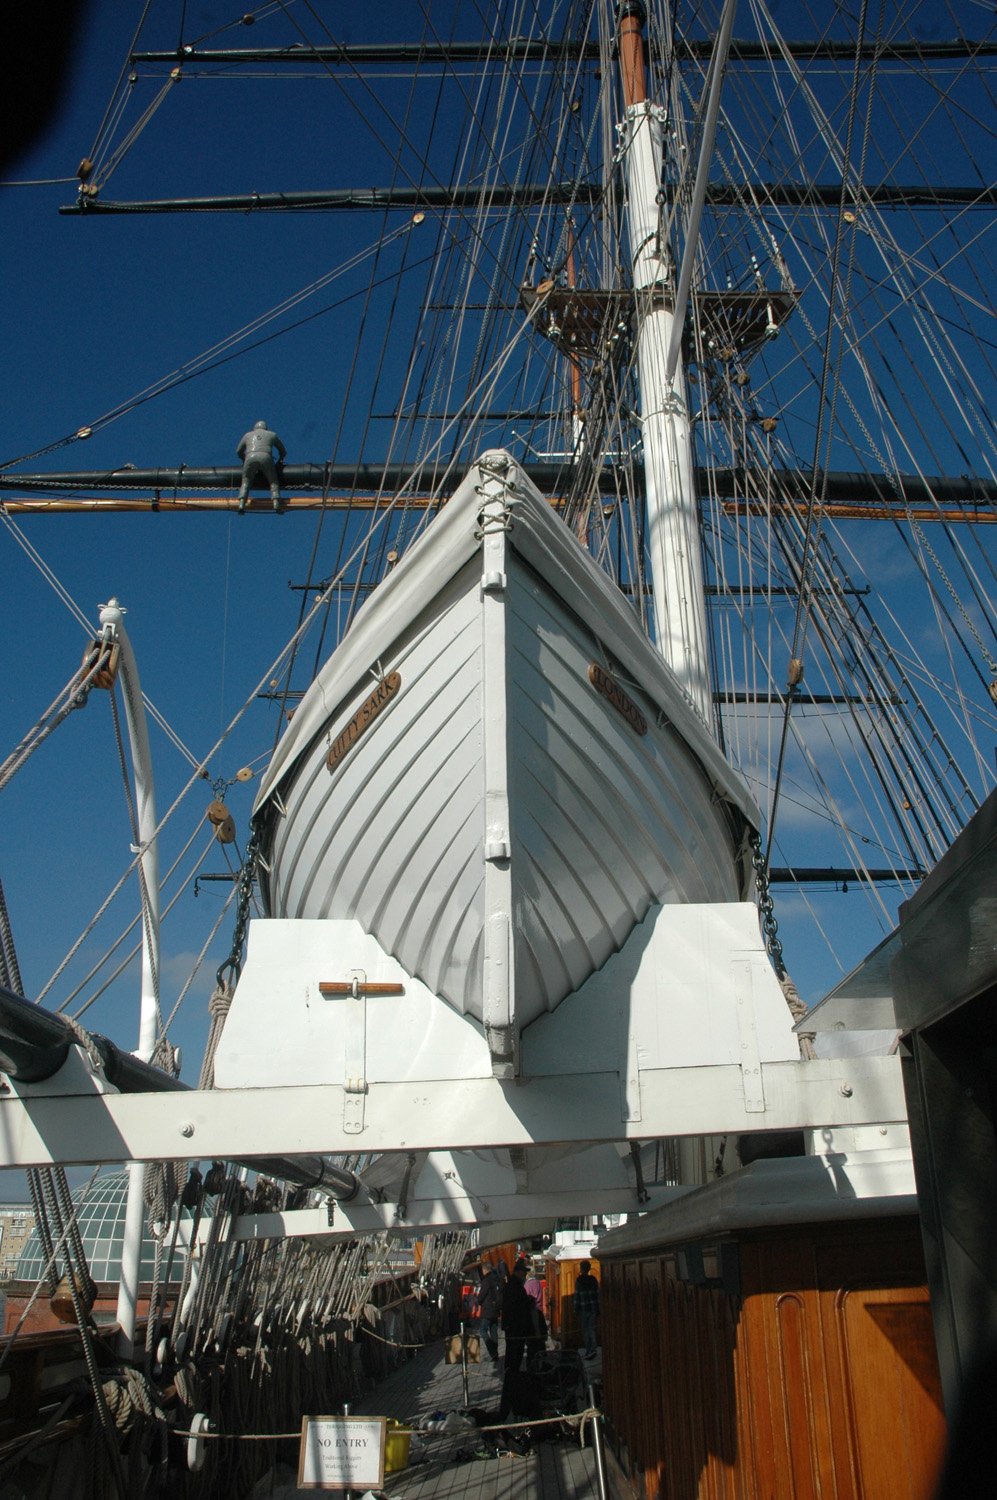
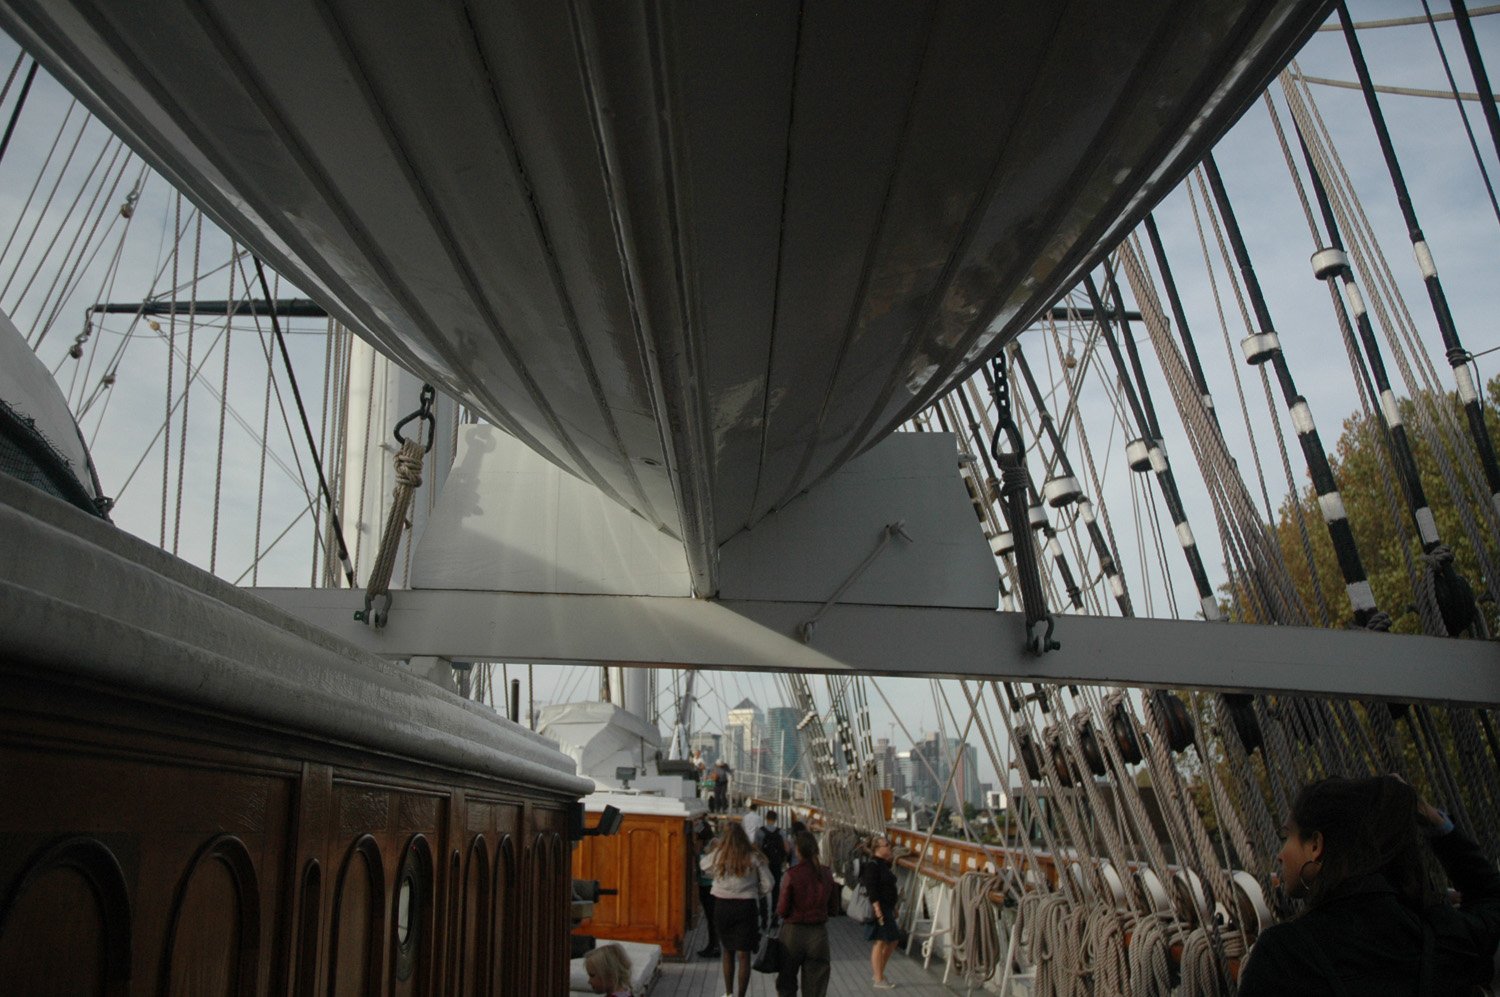
Here are some reference photos. Note the differences in the canvas covers. I'll post the photos that I took of the cover in 1990. I don't have them digitally right now, so I'm post them later. She now has different covers which you can see in the photos that I took in October 2018.
My original post had some place holder photos of the Cutty's boats/skids that I downloaded from the web. In the original post I had stated that they were from the web, but unknown to me, the photos had their copyright watermark removed by someone. I'd like to make sure that the owner has credit. The photos were copyrighted by Lou van Wijhelong
My apologies Lou.
As the boats appeared in 2018


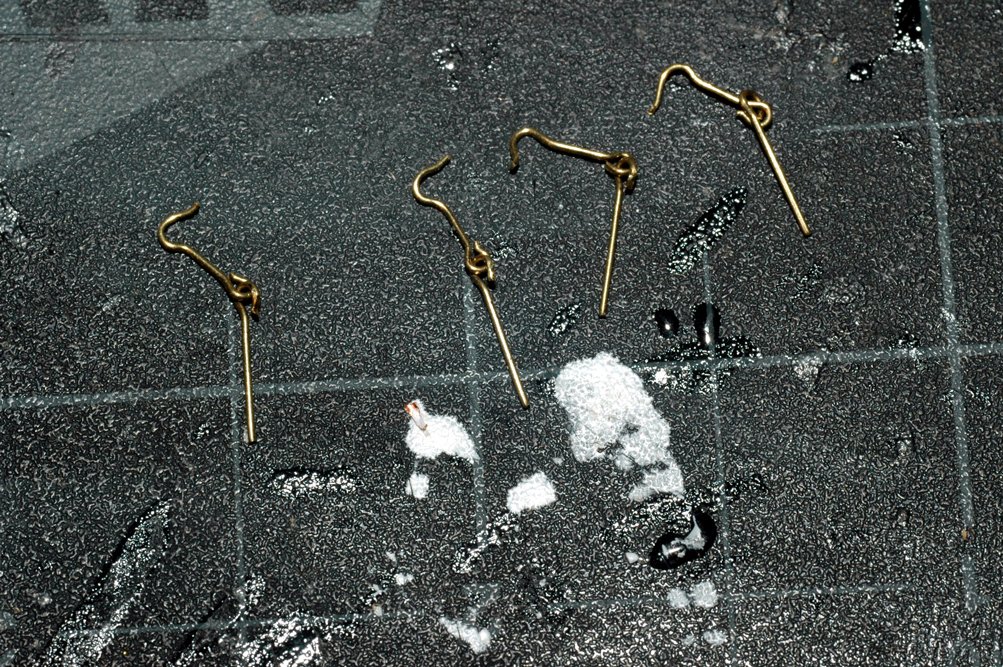
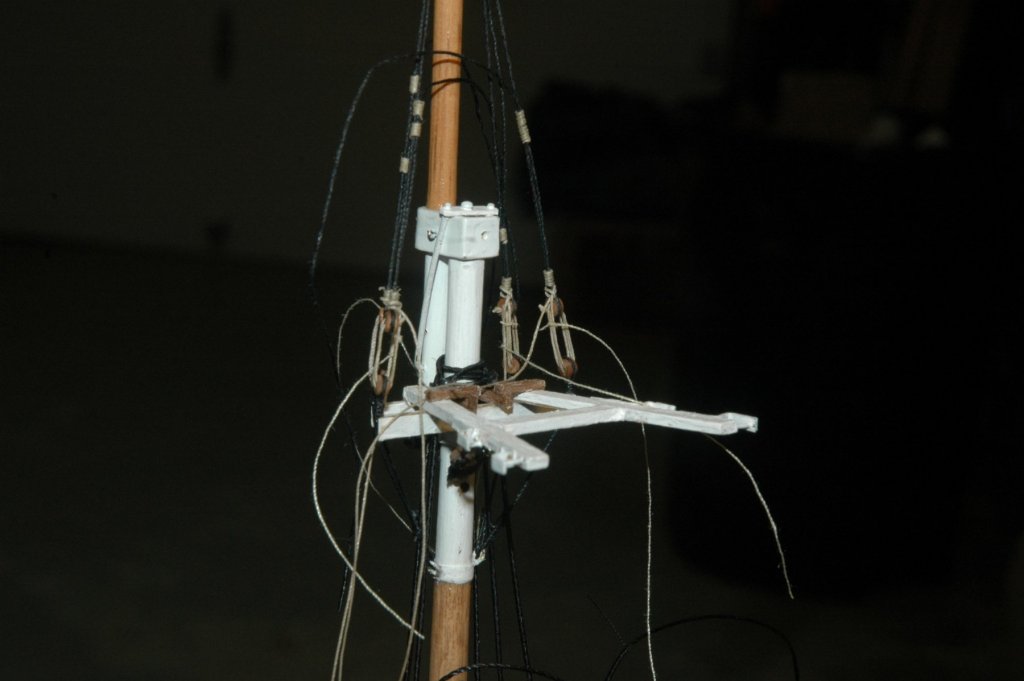
So here are the hooks that I made for the inboard sides. For scale reference, each square of the grid is a half inch (1.625 cm)
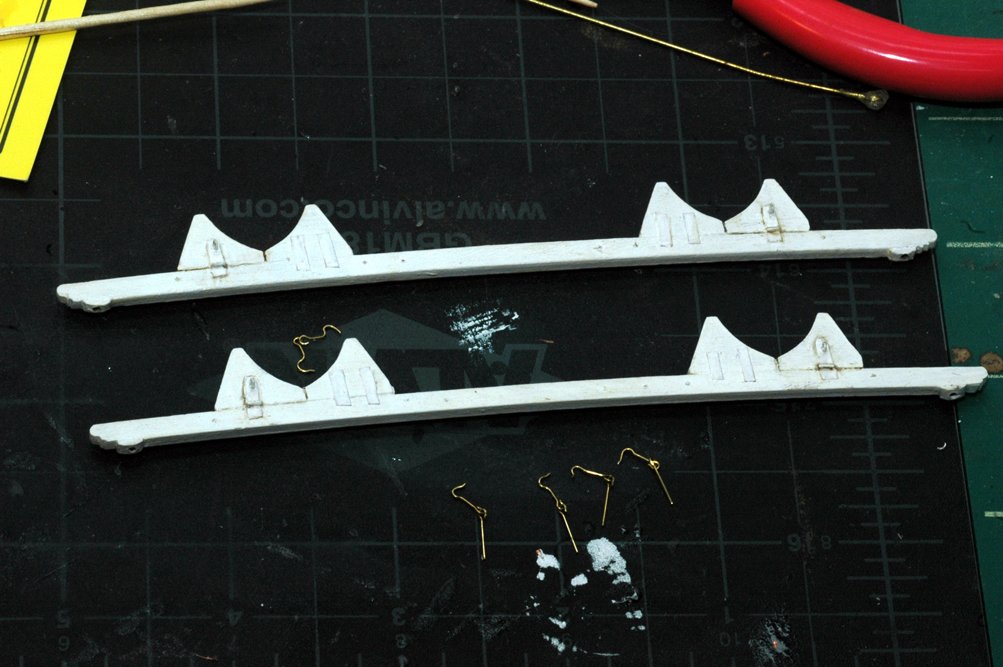
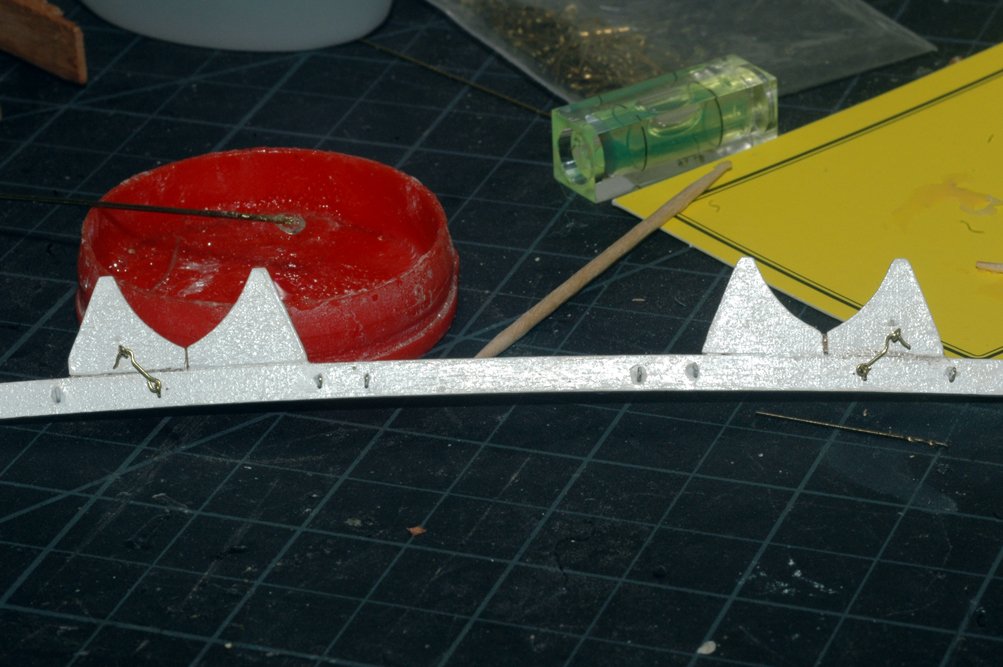
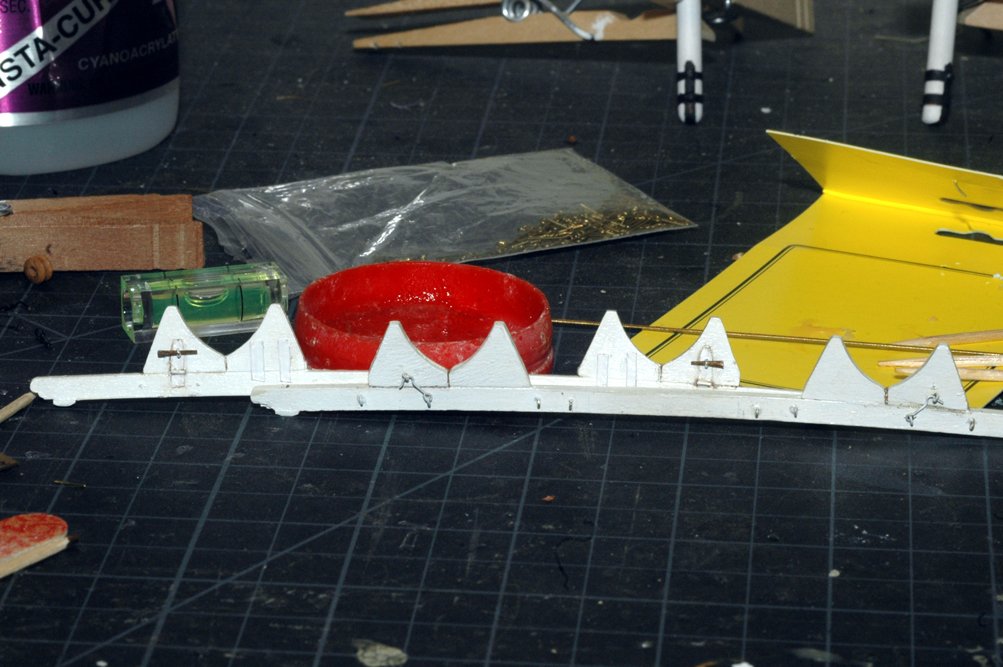
And my attempt at simulating the hardware on the skids
And finally with in place with the boats on the skids. I still have to rig the boats to the skids.
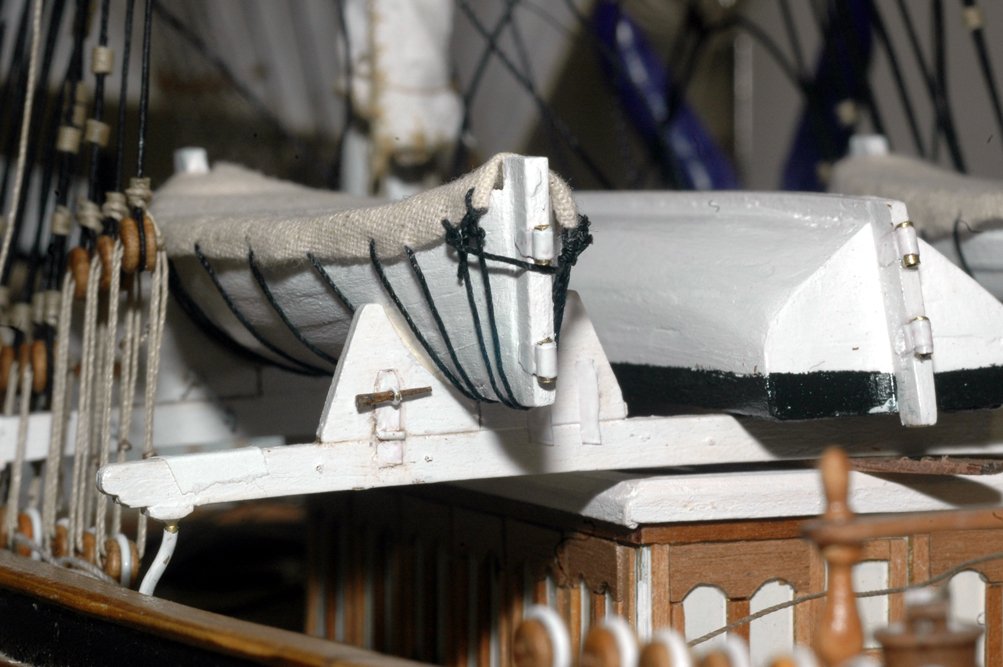
Thanks for looking!!
Happy New Year!
Marc
-
Thanks Dennis.
I think that we just have to remember that the ship evolved and changed when she was in service. Likewise when they "restore" these museum ships they constantly change. There are numerous examples. The storage of and the number of boats stowed on deck is one example, another is the arrangement and methods of the canvass covers for those boats.
best
Marc
-
Hi Chuck,
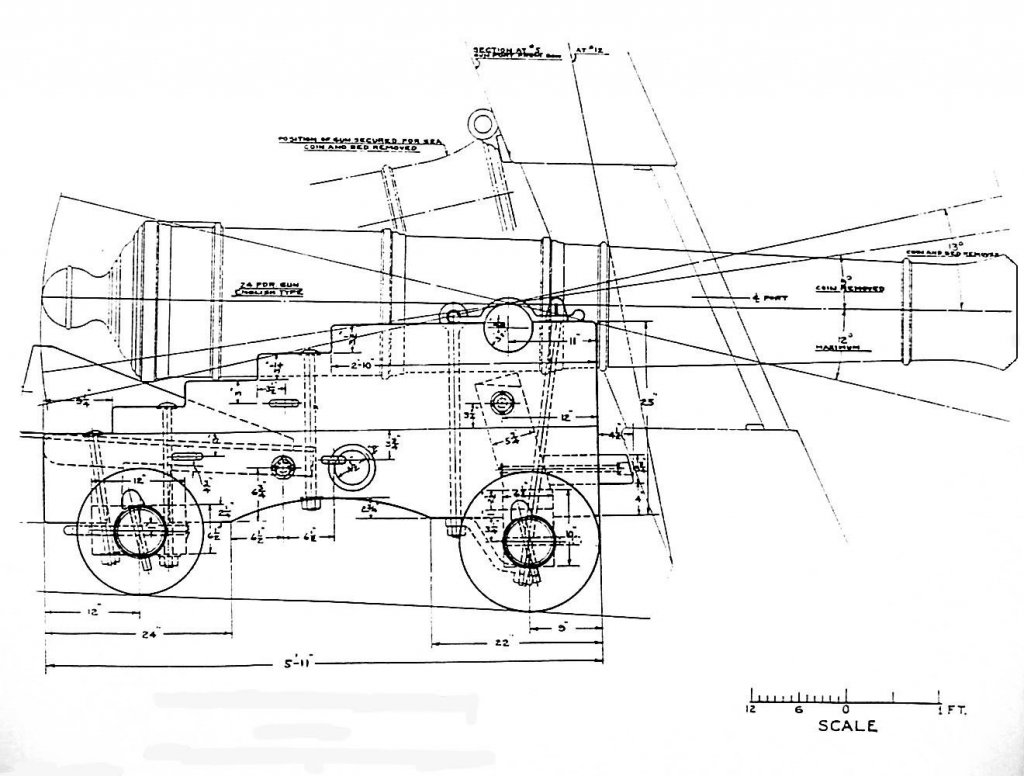
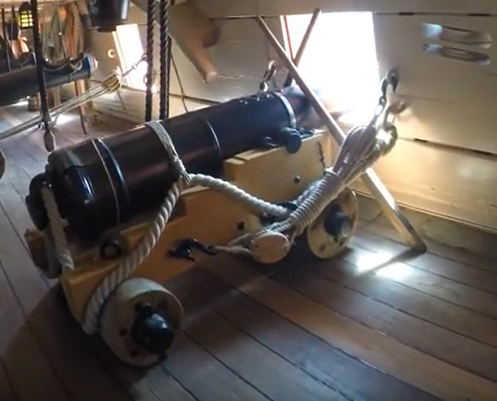
I agree with you. From everything I've read it would be stowed inboard with the barrel elevated and made fast to the bolt and muzzle against the hull as in the diagram in my earlier post. however, I thought Dave might like to see the breech rope actually rigged as in his drawing. I think that if you don't want to rig the tackle, then it might be a nice alternative for adding some detail.
Marc
-
-
I should have been more clear. The stowed gun doesn't have the barrel running through the hull/bulwark. The attached image of the constitution's gun has a reference to this method at the top of the image showing the muzzle up against the hull and the made fast to the ring above.
If you need a better image of this, let me know and I'll take a picture from one of the books
best
marc
- paulsutcliffe, jud, mtaylor and 2 others
-
 5
5
-
I've seen some ships with the guns secured parallel to the side (fore/aft facing). If you look at books for seamanship during the 1700s and 1800s stowed guns on navel ships have the gun tilted all the way up and brought all the way forward and secured up against the hull with the breeching rope as you show. The period books on seamanship written for midshipmen are great references for how the ships and equipment were operated - including how to stow equipment and even how to step new masts while at sea.
Marc
-
Looking sweet! I love those stairs! makes me want to run up and down them

Marc
-
I think it depends upon how many men it takes to work the line when the line is at its shortest length - when the sails or not set. It would also depend upon which line. Fore example the courses have very long tacks and sheets to accommodate the long runs to the fore and aft sheaves, blocks, winches and even capstan.
-
paintings and old photos are other good reference sources. Each sail also have operating ranges for wind speeds. direction of the wind also dictates which sails are set. Clippers would sometimes have their main and mizzen courses clewed or furled with the fore course set when close hauled. It's my understanding that it had to do with balancing the driver. You can find old photos and painting reflecting this set with the top sails set.
-
Hi Denis,
she's looking great. You are a model building machine!! Once again making me look bad with my lack of progress
")
best
Marc
-
Dennis,
You are a ship building machine!!!
I've been binge reading your build.

What a Beautiful build! nice attention to detail.
thanks for the fun!

Marc
-
Hi Moab,
that sounds right. My friend uses lemon oil first, then applies the Tung oil a couple of days later (furniture). Just another idea.
- mtaylor, thibaultron, Canute and 1 other
-
4
-
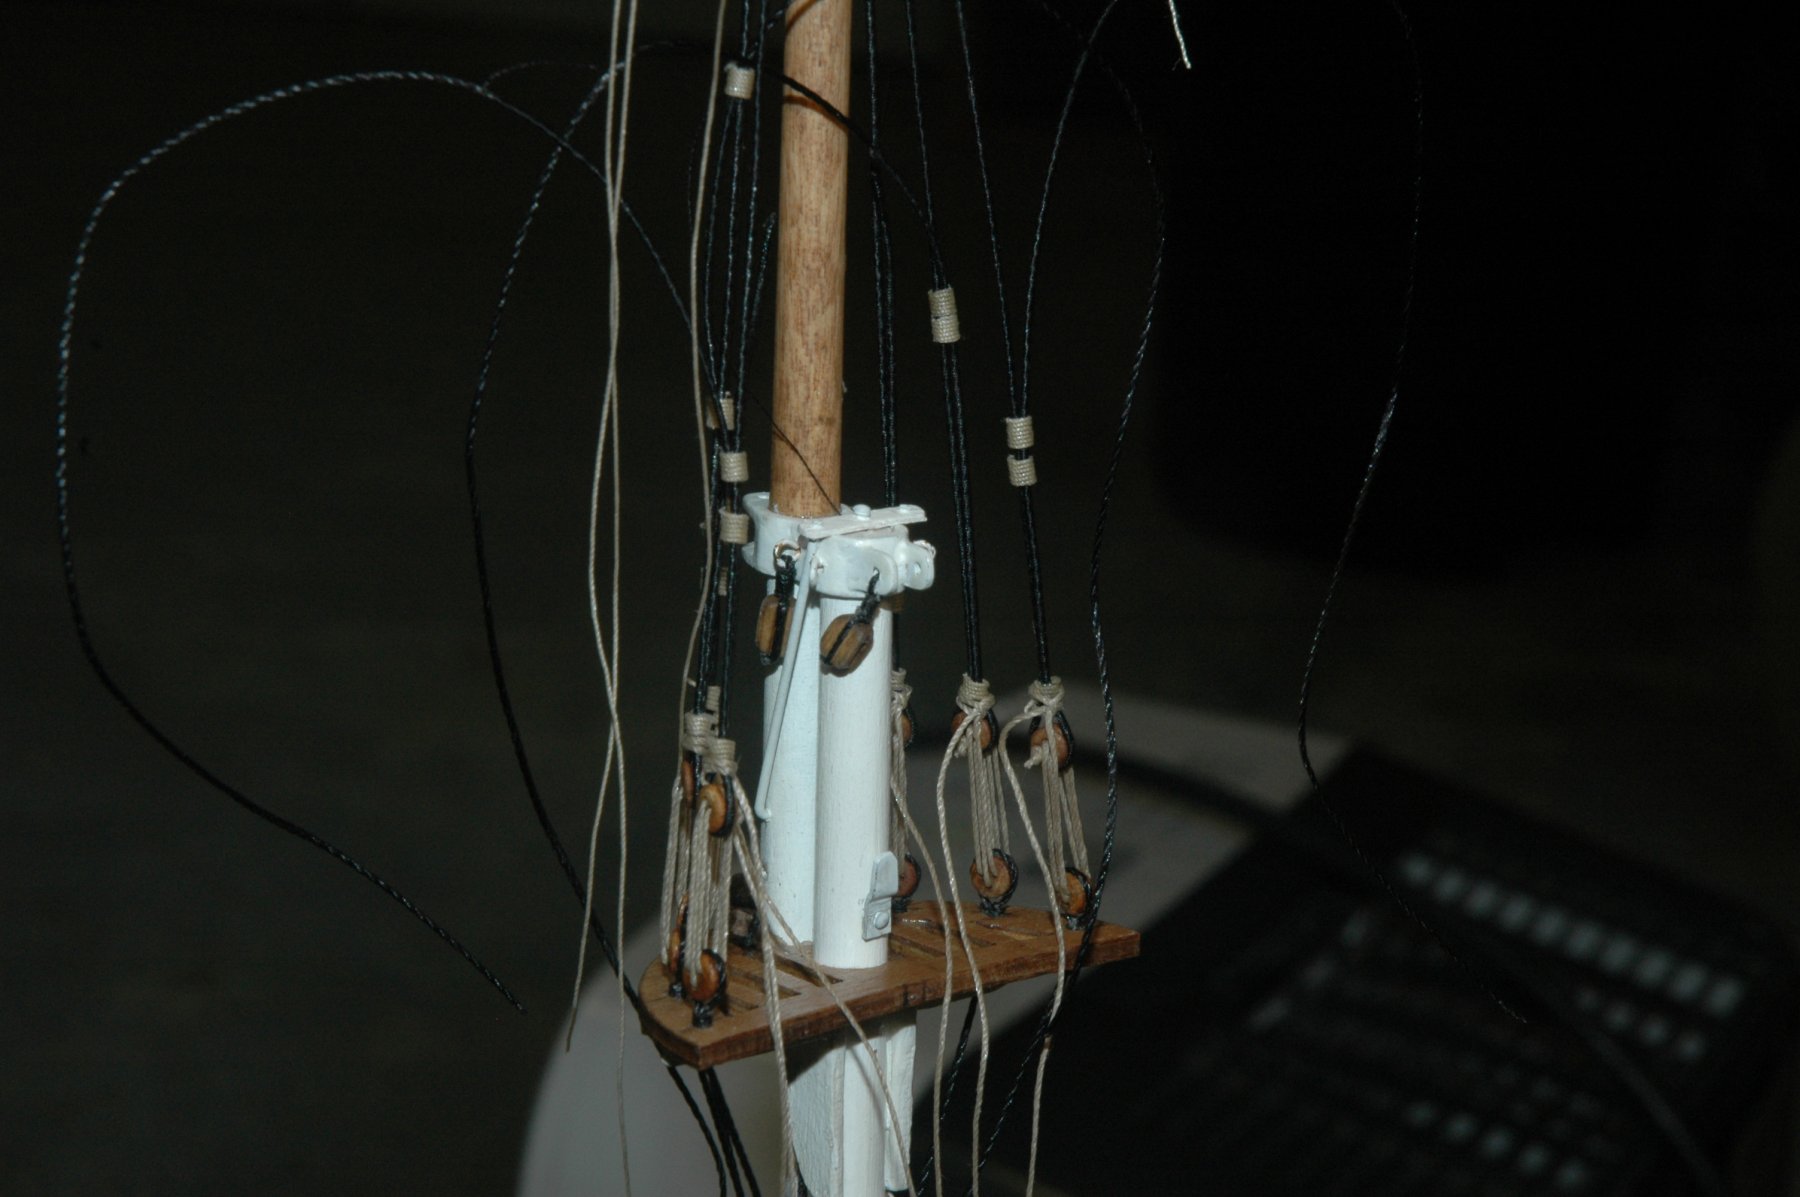
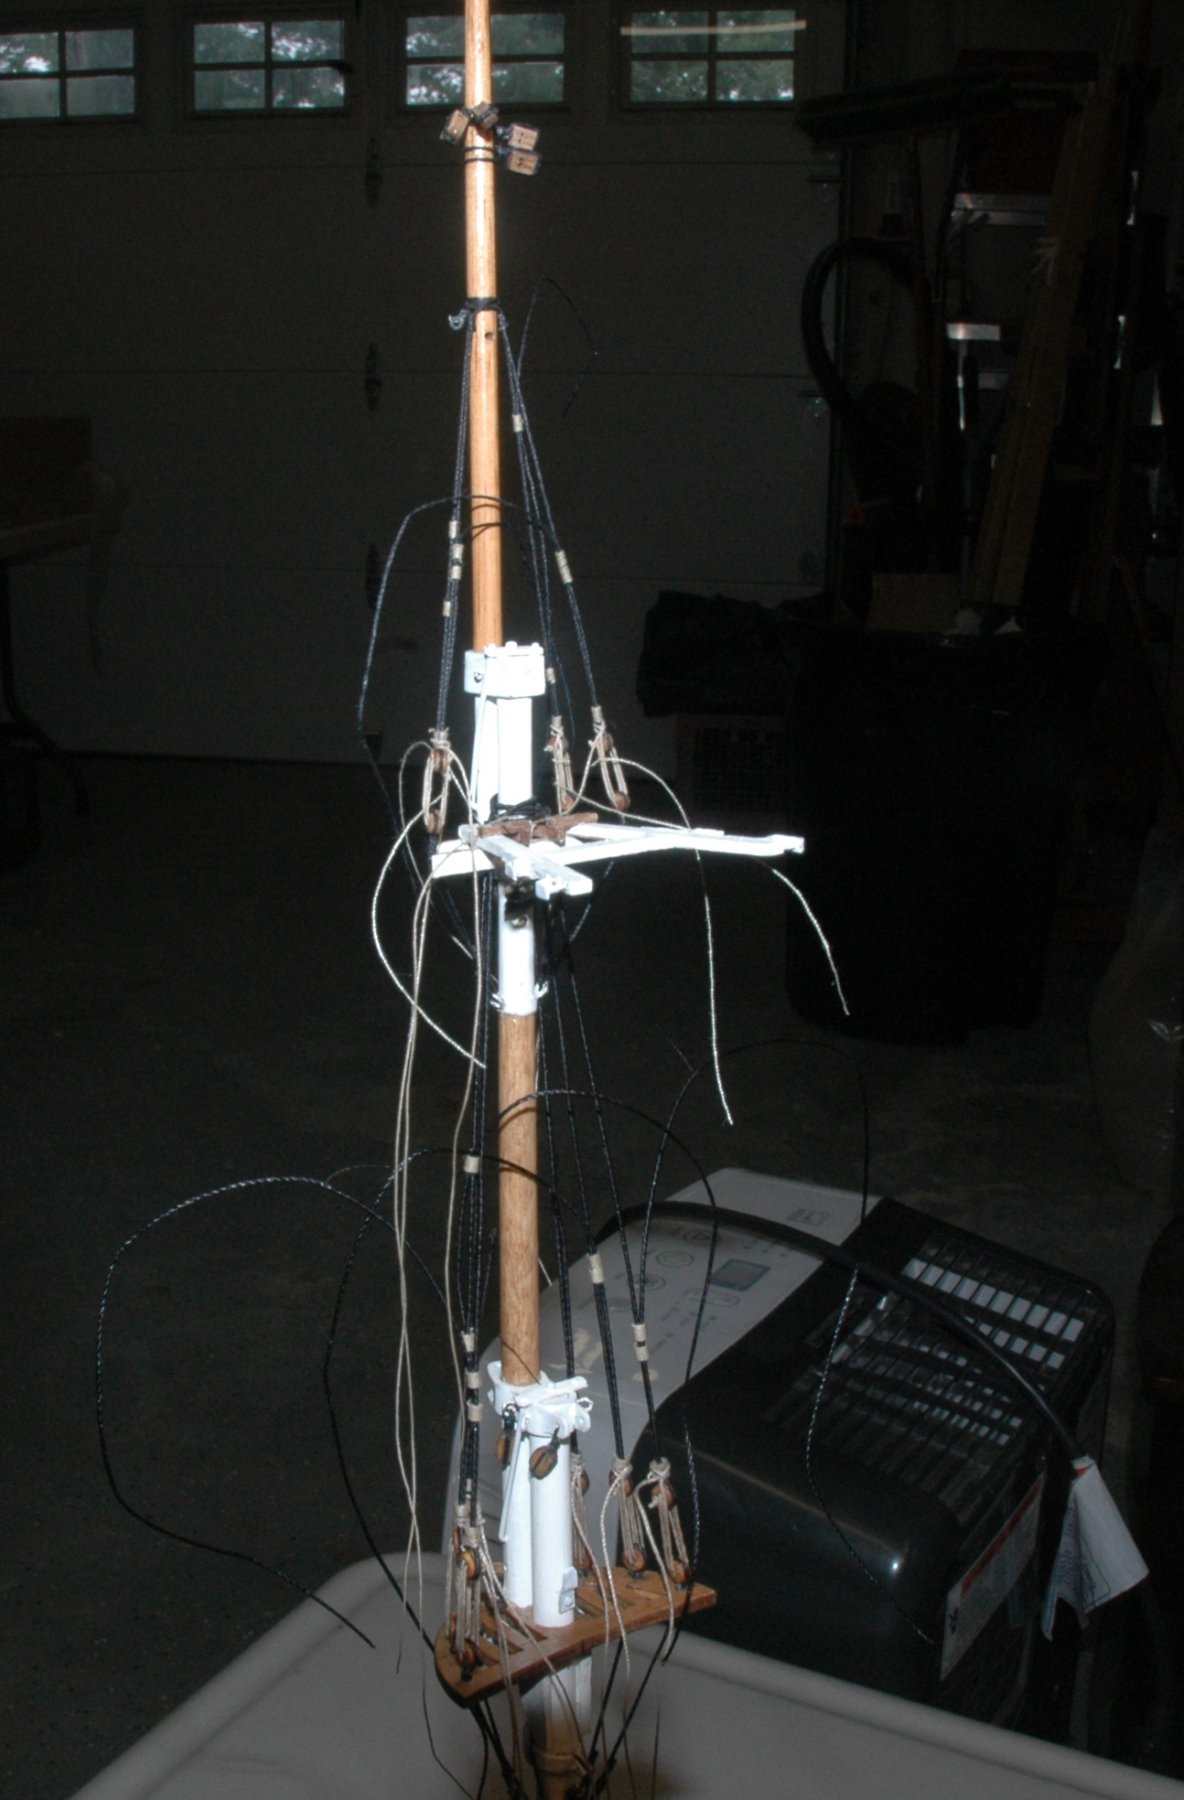
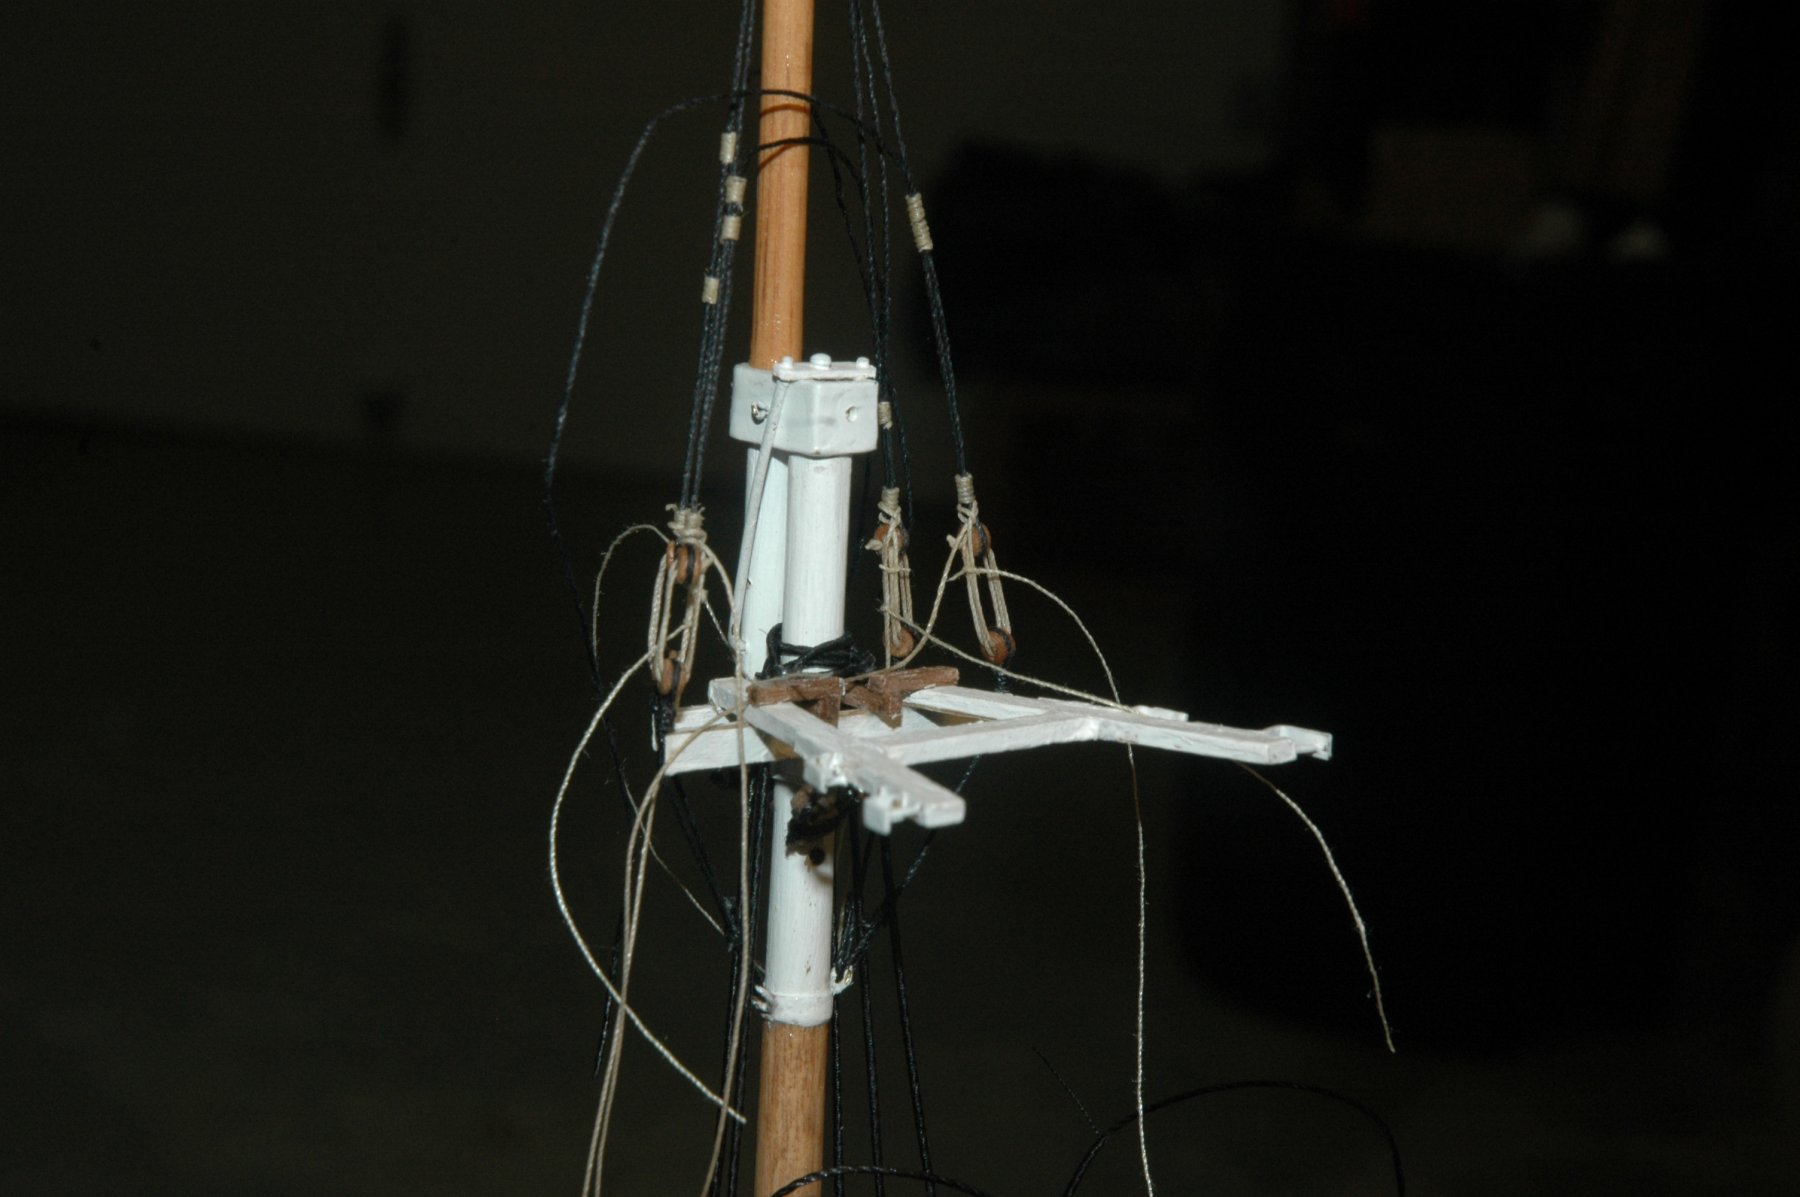
Fore and Mast Stay re-rigging adventure.........or don't do work on the ship late at night 😖 Make sure that your read all the way through the post!
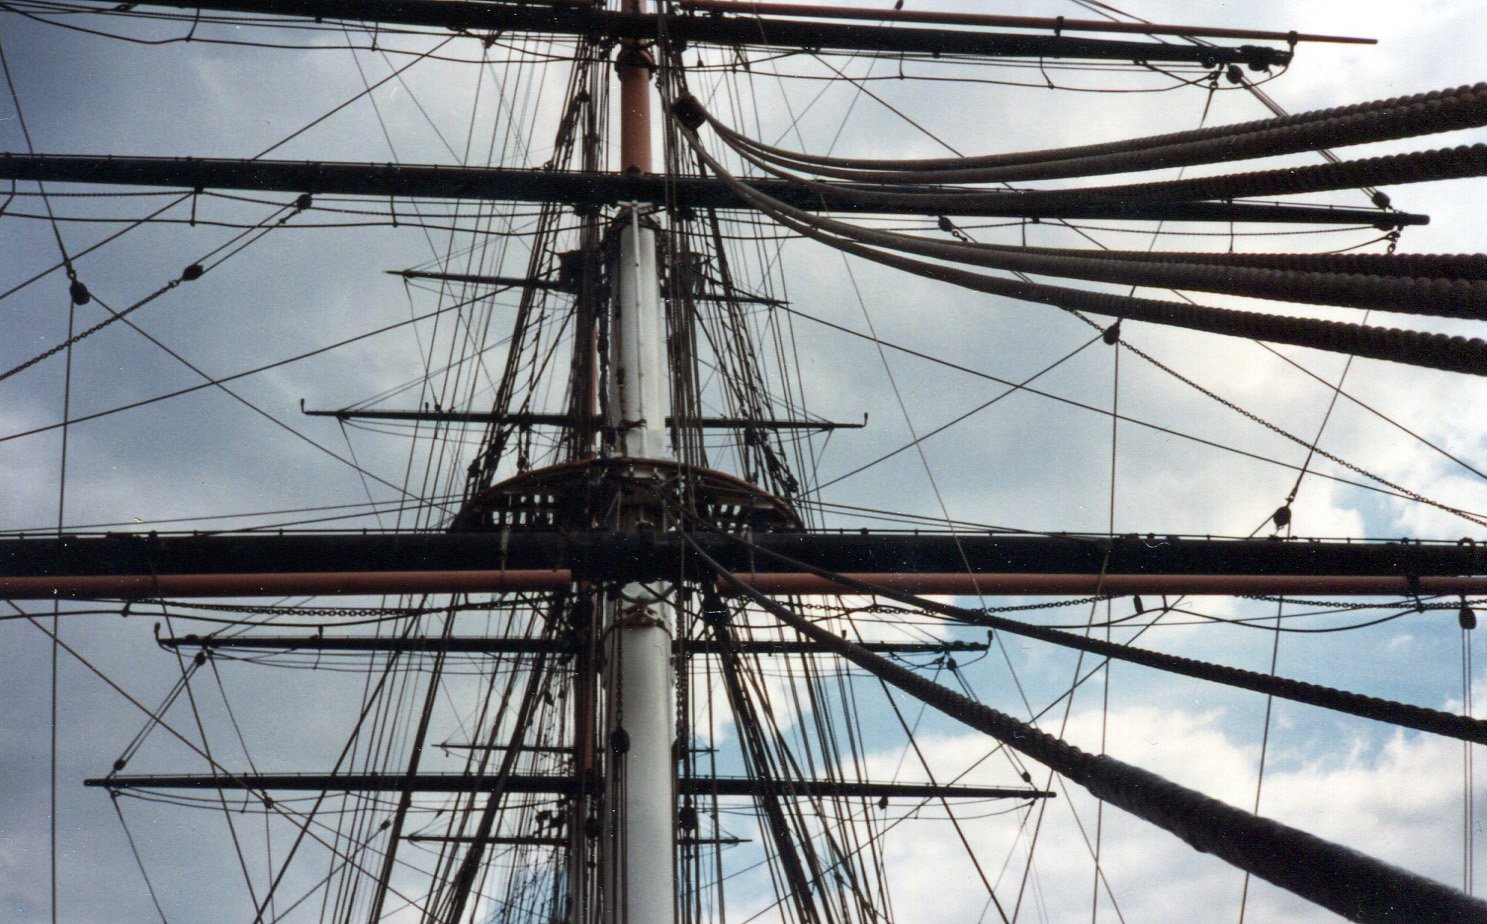
So, first day back in the shop since my travels. I was looking through Underhill's Masting and Rigging the Clipper Ship and Ocean Carrier and saw a diagram of rigging the stays and the top the "correct way" (through the lubber holes) and the "incorrect way" (over the top) of doing so. I remember thinking "novice mistake." Later in the evening (about 10:00 pm) I was sitting looking at my model and noticed that both my fore and main stays were rigged over the top! 😲
I jumped on my computer and brought up the photos that I took on the ship two weeks ago and other photos that I had. Yep, the stays are through the lubber hole. So I spent the next three hours re-rigging the two says. As you can expect very tedious work, un-bonding glue, removing the seizing, trying to save the fully served stays, etc. Shortly after 1:00 am, the stays were both now rigged through t he lubber holes and tensioned in place just waiting glue. I wanted to let them sit tensioned over night before gluing. I was now happy, but exhausted. Success!!
Before turning in, I wanted to make sure that I knew where the main stays were seized near the fore mast. As I was looking through the cutty photos, one caught my eye.


This one
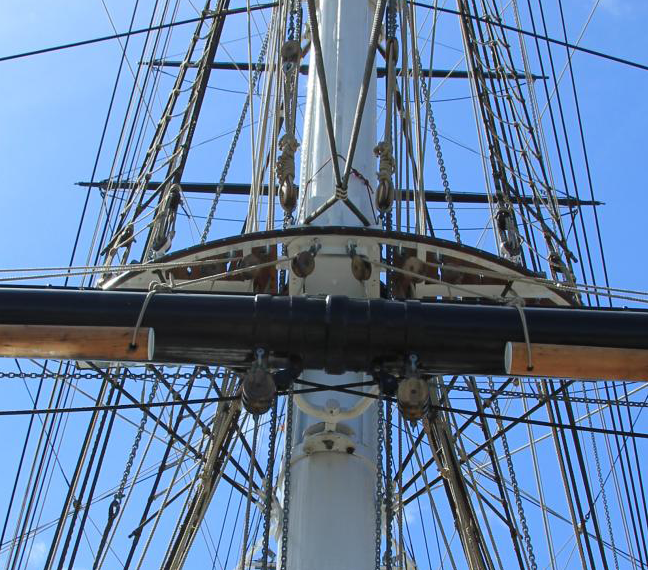
I blinked several times. Is that stay going over the top?! I checked out another couple of photos of the foremast. Yep, over the top, not through the lubber hole!!! I had checked photos. How did this happen? I raced to pull up photos of the mainmast. Here is the photo of the mainmast.
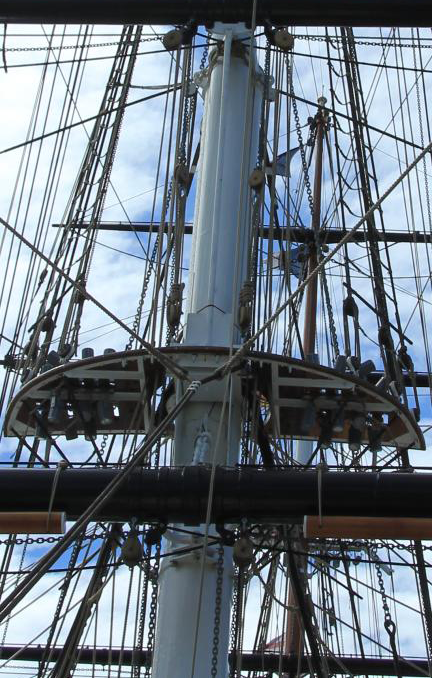
I must have pulled up photos of the mainmast thinking it was the foremast and must have been influenced by Underhill. I couldn't believe it. Still can't. The fore stay is over the top and the main stay is through the lubber hole.
Thank God that I hadn't glued anything. I went to bed very unhappy.
I thought that I'd point this difference out to you, so that you don't make my mistake in rigging [Edit: not a mistake! see the update]. I was correct for the fore (l'm sure that I must have checked and double checked at the time) and incorrect for the main (I think that I was so concerned about the run of the stay and the running of the blocks at the spider band on the fore that I wasn't paying attention).
Another factor- I was tired. I'm lucky that I didn't damage anything. I did fix a mistake, but I also created one that I now have to go back and fix.
I broke TWO of my rules:
1. DON'T PHYSICALLY WORK ON THE SHIP OR WITH POWER TOOLS WHEN YOU'RE TIRED!!!
2. CHECK, CHECK, AND THEN CHECK AGAIN, BEFORE CHANGING ANYTHING THAT I'VE DONE IT THE PAST. I've usually researched it well during that time. Most of the time my second guess is wrong and what I've done is the past is actually correct.
Best
marc
Here's an update!
I just finished re-rigging the fore stay to over the top and was putting away the physical photos that I took in 1990. These were sitting on my workbench from last night. There was one of the foremast and my eyes popped out!!!
Here is the photo of the foremast.
you can clearly tell that it is the foremast from the fish pendant and you can see the main and mizzen behind.

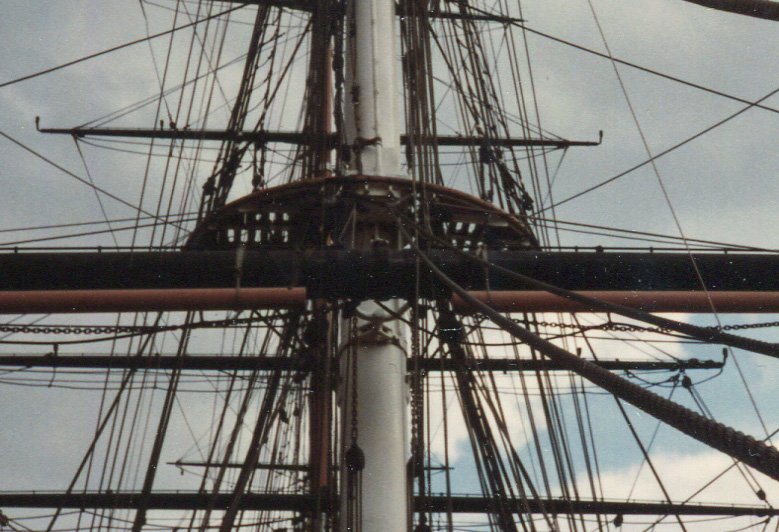
Yep, the fore stay is going through the lubber hole. So, I've just spent the time to move the stay from over the top to through the lubber hole, to back over the top again, just to see an image of the stay going through the lubber hole.
I feel vindicated that I did see the stay going through the lubber hole of the forestay and wasn't mistaken. However I'm not very happy that I've gone made the change, changed, and changed it again. I'm going in circles!!!!!

In most of the photos that I find including Longridge from the 1920's the fore stay is over the top. I actually think that it looks better through the lubber hole and I must have originally had it in this configuration when I determined the height of the cleat, because the line is better. However, since most of the photos have the stay over the top and I'm concerned about the damage being done to the serving of the stay with each re-rigging and the risk to damaging other parts, I'm going to leave the stay over the mast.
However, I did want you to be aware that historically the fore stay has been rigged both ways.
- gjdale and popeye the sailor
-
2
-
Moab,
regarding the raised grain, did you acclimate the wood before applying the tung oil? Also conditioning with a diluted oil, let the piece sit, sand and reapply helps. However, like you, my experience with tung oil is with furniture.
- Moab, Canute, paulsutcliffe and 2 others
-
5
-
-
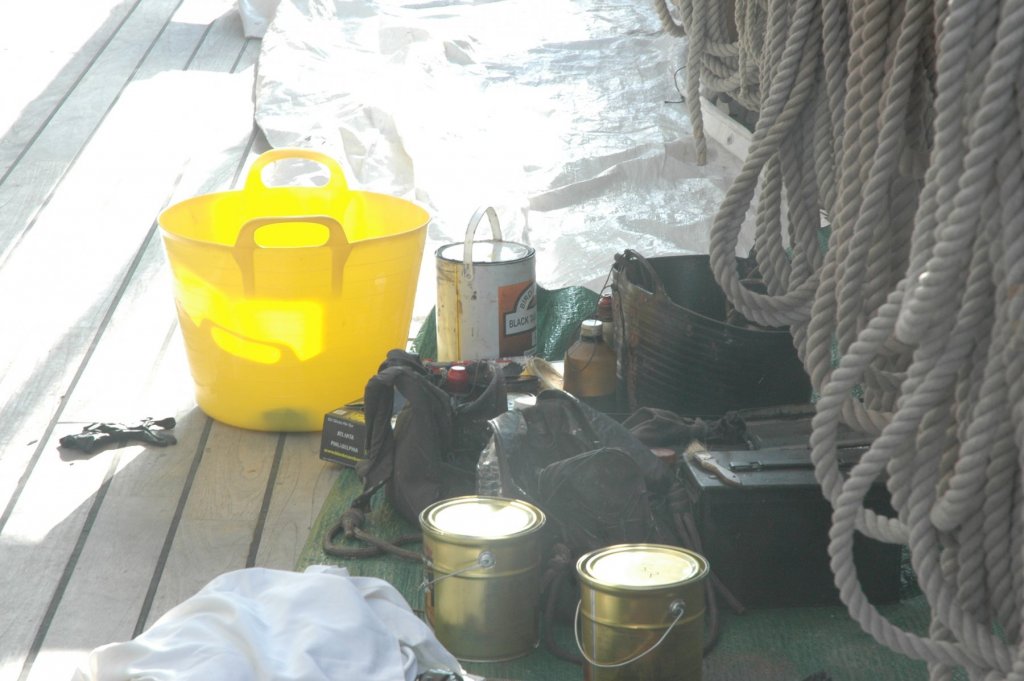
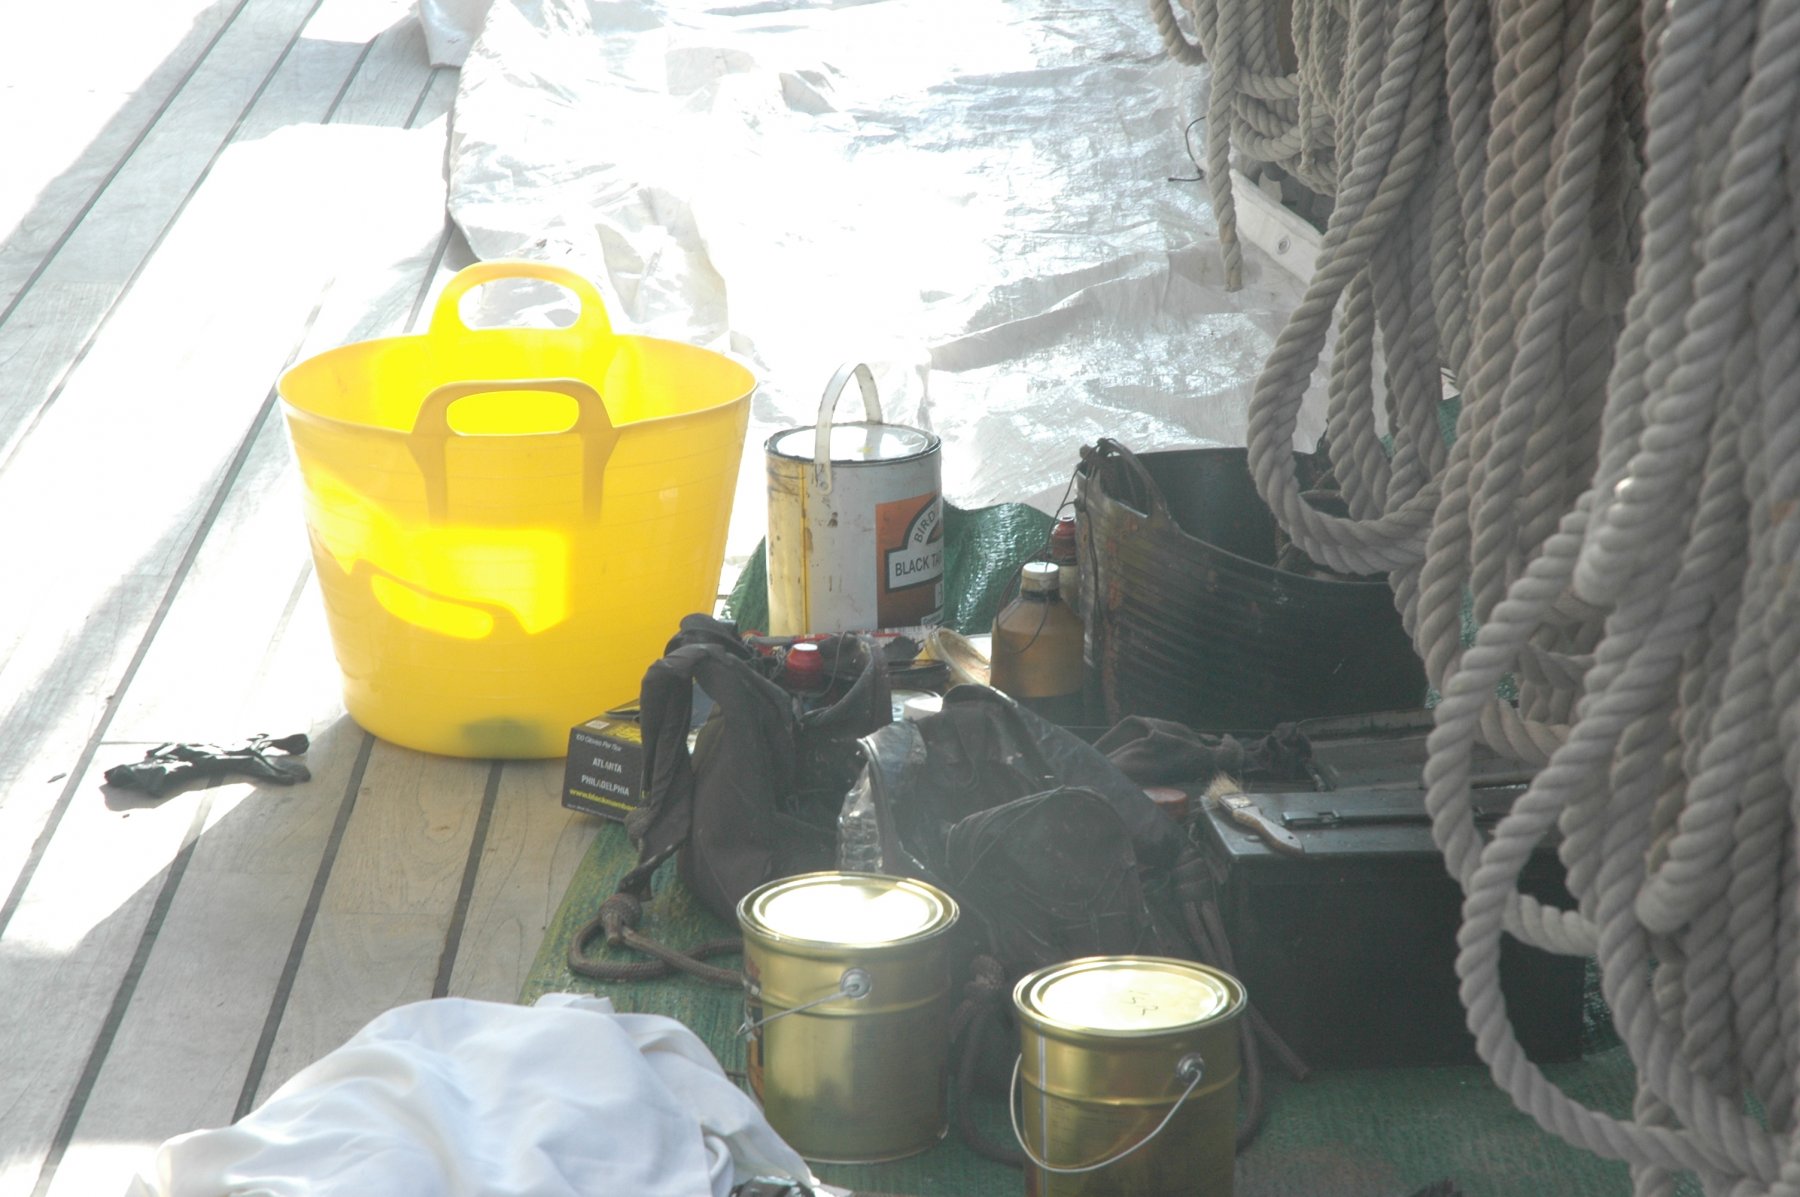
In case you're interested, this is the product that they are using on the Cutty to Tar the standing rigging.
- NenadM and popeye the sailor
-
2
-
I'm with you there Dennis!!
I was in London for the last two weeks for work, but I took a couple of days of leave. I was able to go to the Cutty twice! It took me 15 years to get back, so I spent about 10 hours total walking her decks.
I'm a very happy man!
-
Druxey is right.
My anchors were sealed with nail polish then painted with enamel (I didn't do this to seal the anchors for corrosion, but because I thought that the black enamel paint would be less likely to scratch to the metal during rigging). The anchors split open with the corrosion.
- mtaylor, thibaultron, druxey and 1 other
-
4
-
thanks Dennis!! I never seem to get as much play time as I'd like, but I guess I'm not alone in that!

-
Hi everyone,
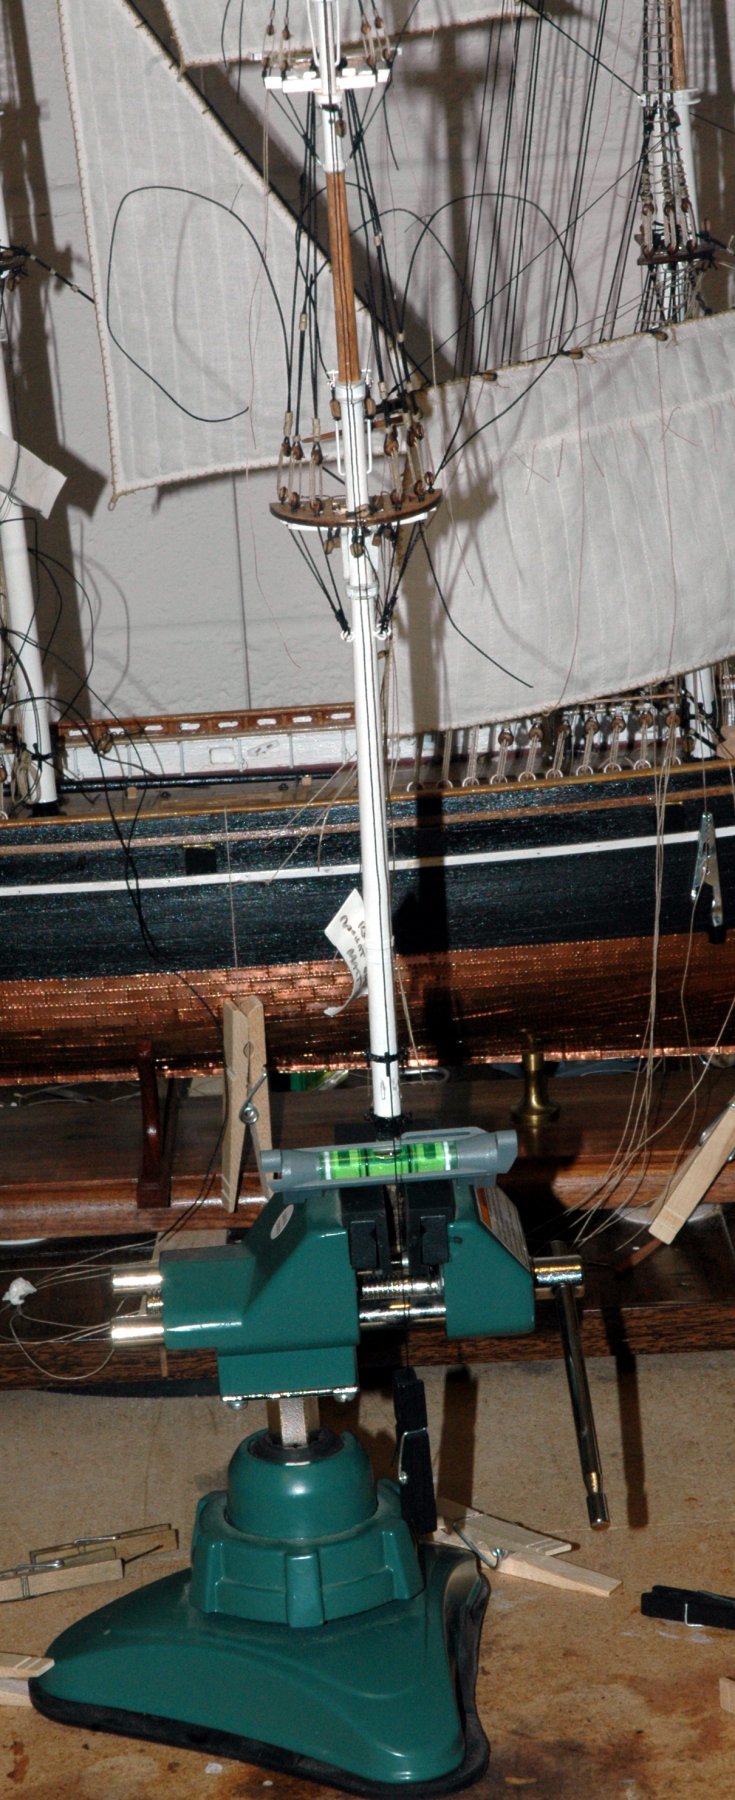
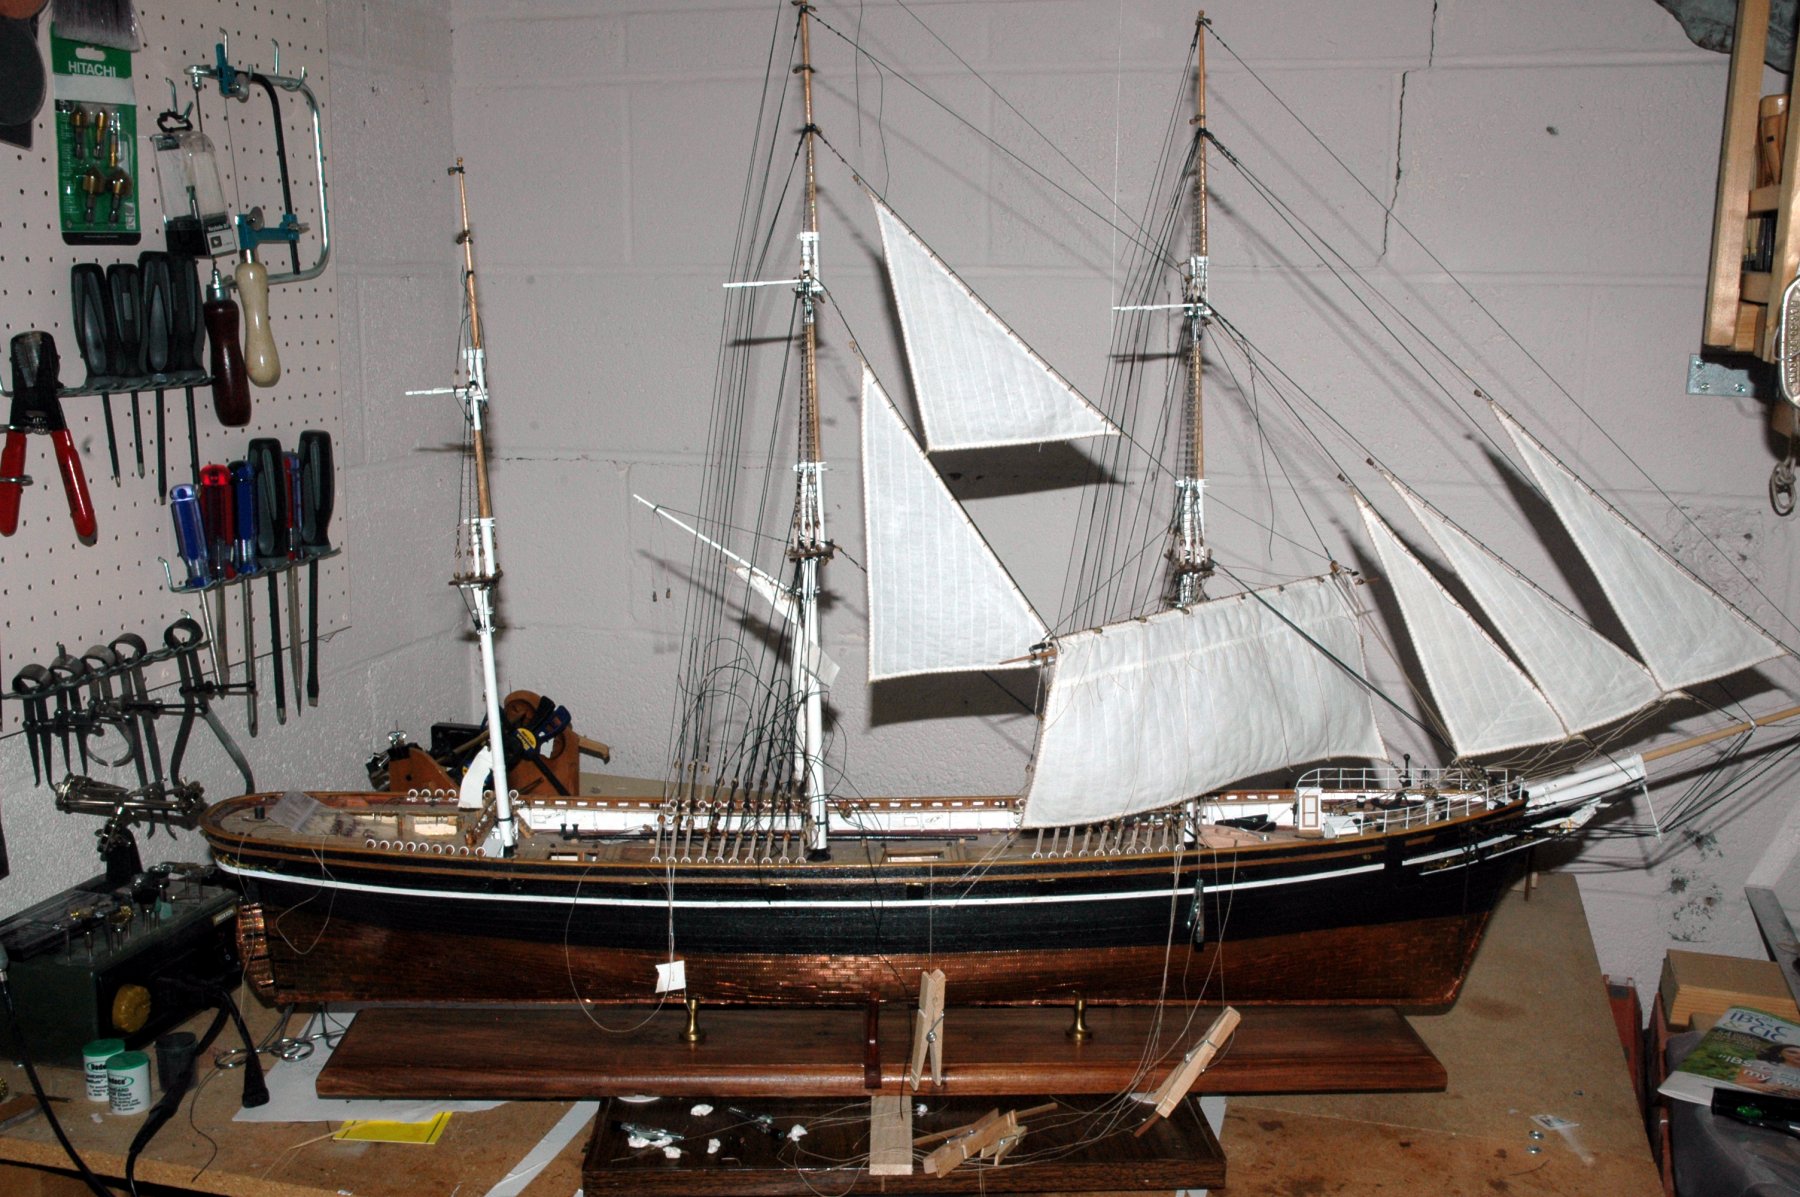
I've been traveling quite a bit for work, but I have made progress. I rigged all of the main mast stays and the lower main shrouds.
As part of rigging the main mast stays in place I rigged the main stays that I intend to fly.
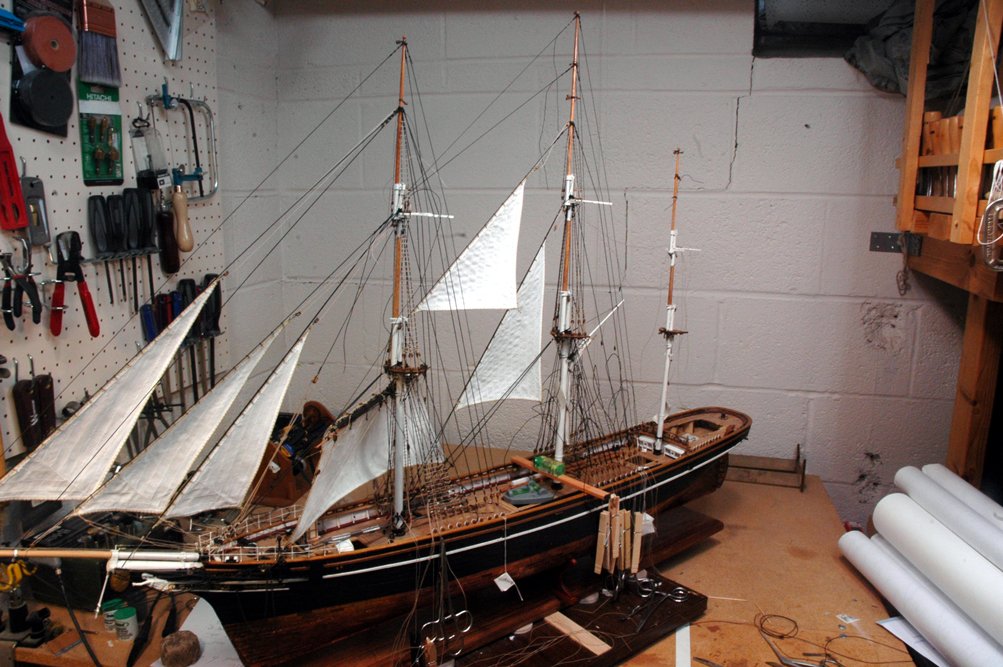
You may also notice the levels on the turn table, across the waist of the ship as well as deck abeam and fore and aft as well as a plumb bob hanging in the back next to the wall. I was continuously checking the alignment of the masts as I went along.
You may remember that I was concerned about the sheet blocks and main mast shrouds intersecting at the fore mast. There isn't much room for the two to exist with out being fouled. Here is a photo showing that after the shrouds and blocks were put into place they just clear. The dental tools are making sure that the glue on my seizing isn't adhering to the sheets. I'll get a photo of everything in place next time. I ended up rigging the block first and then the shrouds. It would have been almost impossible the other way around.
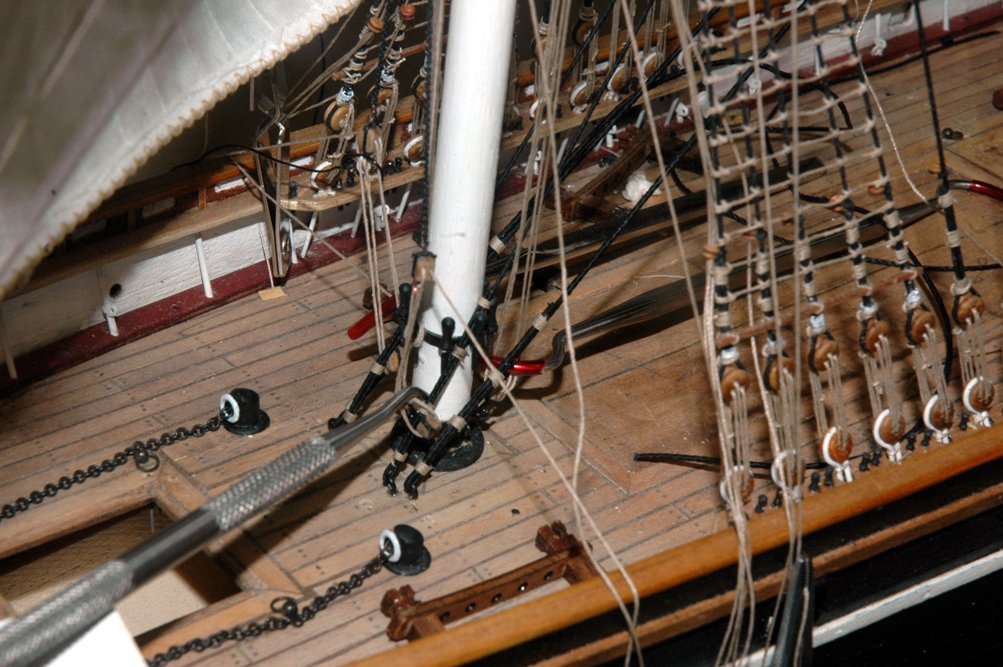
I started rigging the shrouds on the mizzen. In these photos I'm checking the tension of the shrouds and the alignment of the mizzen mast. To make sure that it is straight I have levels and plumb bobs. in one photo my camera angle is off making it look like the mast isn't straight and in the other photo my flash makes it look like there are two plumb lines, but hopefully you get the idea.


Here is some shots of the lanyards and cow hitches being rigged
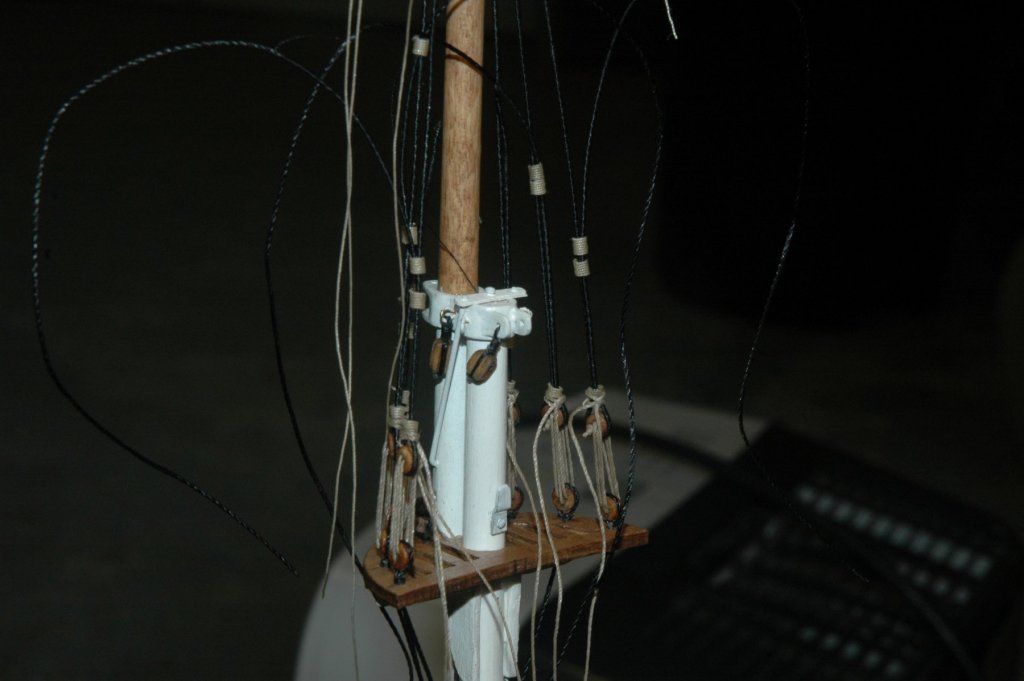
I just started rigging the ratlines on the mizzen tonight.
best
marc

- russ, md1400cs, Fernando E and 3 others
-
6
-
-
Very impressive work!!
-
Nice work Henry,
she's looking great!
- EJ_L and popeye the sailor
-
2
-
Yep, I have a constitution with wonderful corroded anchors. someday, I need to get the case off and replace the anchors, which are attached to the ratlines. what a bummer!! Thanks for showing what happens with this metal in an air tight case! It's heart breaking to put all of that care into the build to see this happen to your model.
- Canute, mtaylor and thibaultron
-
3


CUTTY SARK by keelhauled - Mantua - kit bashed - First wooden ship build
in - Kit build logs for subjects built from 1851 - 1900
Posted · Edited by keelhauled
Thanks Harry and Nenad,
Hope you guys are doing well.
Harry, I am jealous that you'll be the first to see the new year as well as your scenery. Just got back from Melbourne before Christmas, the weather was beautiful - the real heat hadn't hit yet. Do you guys have typically cooler temps than Melbourne?
Harry, The coverings were made using cotton fabric. I didn't do anything special to them. The cloth contoured to the boats really nicely without having to use diluted glue or some other agent. Do you have a build log going for your ship? send me the link or post it here. I couldn't find it.
thanks
marc