HOLIDAY DONATION DRIVE - SUPPORT MSW - DO YOUR PART TO KEEP THIS GREAT FORUM GOING! (Only 44 donations so far out of 49,000 members - C'mon guys!)
×


popeye the sailor
-
Posts
16,007 -
Joined
-
Last visited
Content Type
Profiles
Forums
Gallery
Events
Everything posted by popeye the sailor
-
 I heard about it too........didn't try it though. progress is coming along nicely.........glad your back
 -
never tried one of these plastic hull ships.....looks really good
- 90 replies
-
- 1
-

-
- billing boats
- colin archer
- (and 1 more)
-
good advice to be sure..... thanks everyone I have some stuff on DVD's as well....are they any better? thanks also for look'in in and the kind comments on Wulfie. I still have the other wing to do, and then I can get to the fuselage......bunch of stuff to do there. then it can all some together can't wait to see her in the flesh
-
I dunno........I have plenty of copper paint. I'll see how the hull comes out first......I'm correcting a few things, like the hump at the #3 bulkhead {yea......it bugged me}. just don't forget the patina...I don't think this boat's been in dry dock too often
-
Billing Boats sells it......they used to supply basswood planking in their kits. they started substituting Obechi some time ago. it'a a rough wood, not very dense........when wet it does have some flexibility. it does sand fairly well....doesn't give the hairy appearance that basswood sometimes gives.......I'd have to rub the hull down with a soft cloth to remove it, then a fine paper sanding after that. I also have some thin strip called annegre......it's something like mahogany, but it's not as brittle. I keep a fair stock of both in various widths. I would say that if you were building a larger hull, this stuff could be put to good use {could be used without milling it}, but for small models, it's just plain too large. it would clinker all over the place! the amount of supplied wood in a kit is usually matched to the surface area that it is to cover.......this stuff I highly doubt it. that orange stuff is interesting though.......I love to plank a deck with it, or wall up a structure
- 211 replies
-
- 1
-
-
- agilis
- steingraeber
- (and 1 more)
-
I would say stepped. the Clotilda was a schooner, so looking up a rigging diagram should reveal the rest. the model is set up like a brig.......since the kits supplies tops and adequate yards to outfit her as such. unless you looked up one of the ships named in the Wiki, you could find out how other ships were rigged. 2 section masts, fore and main........if desired, one square sheet can be added to the fore mast, I'd go no more.
-
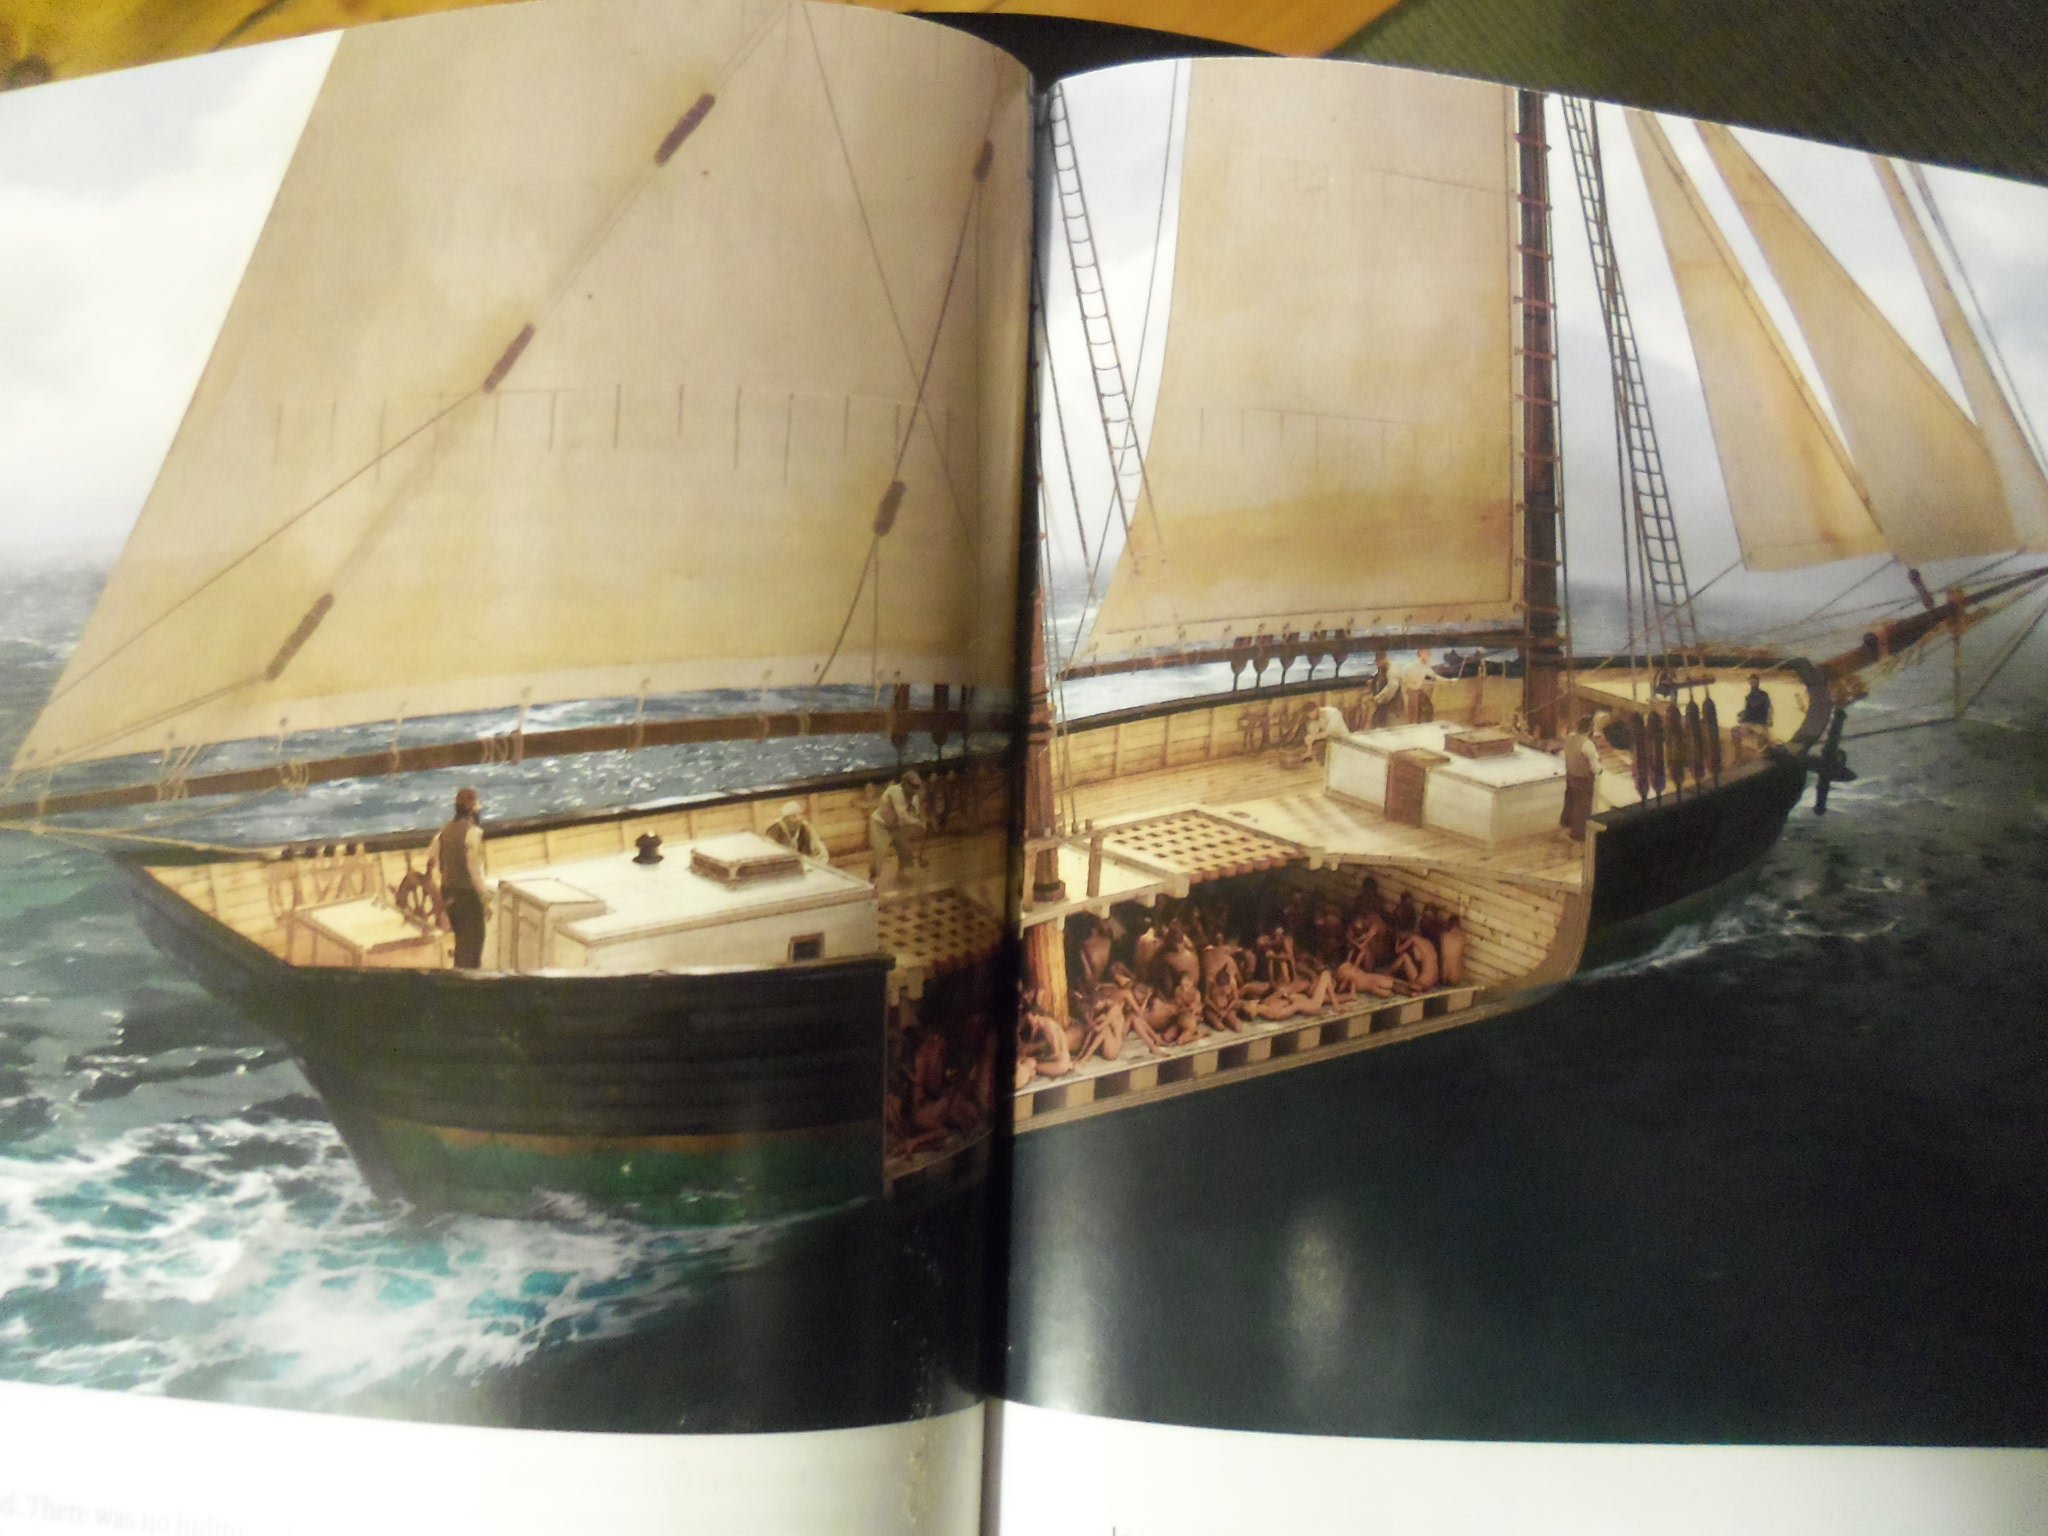
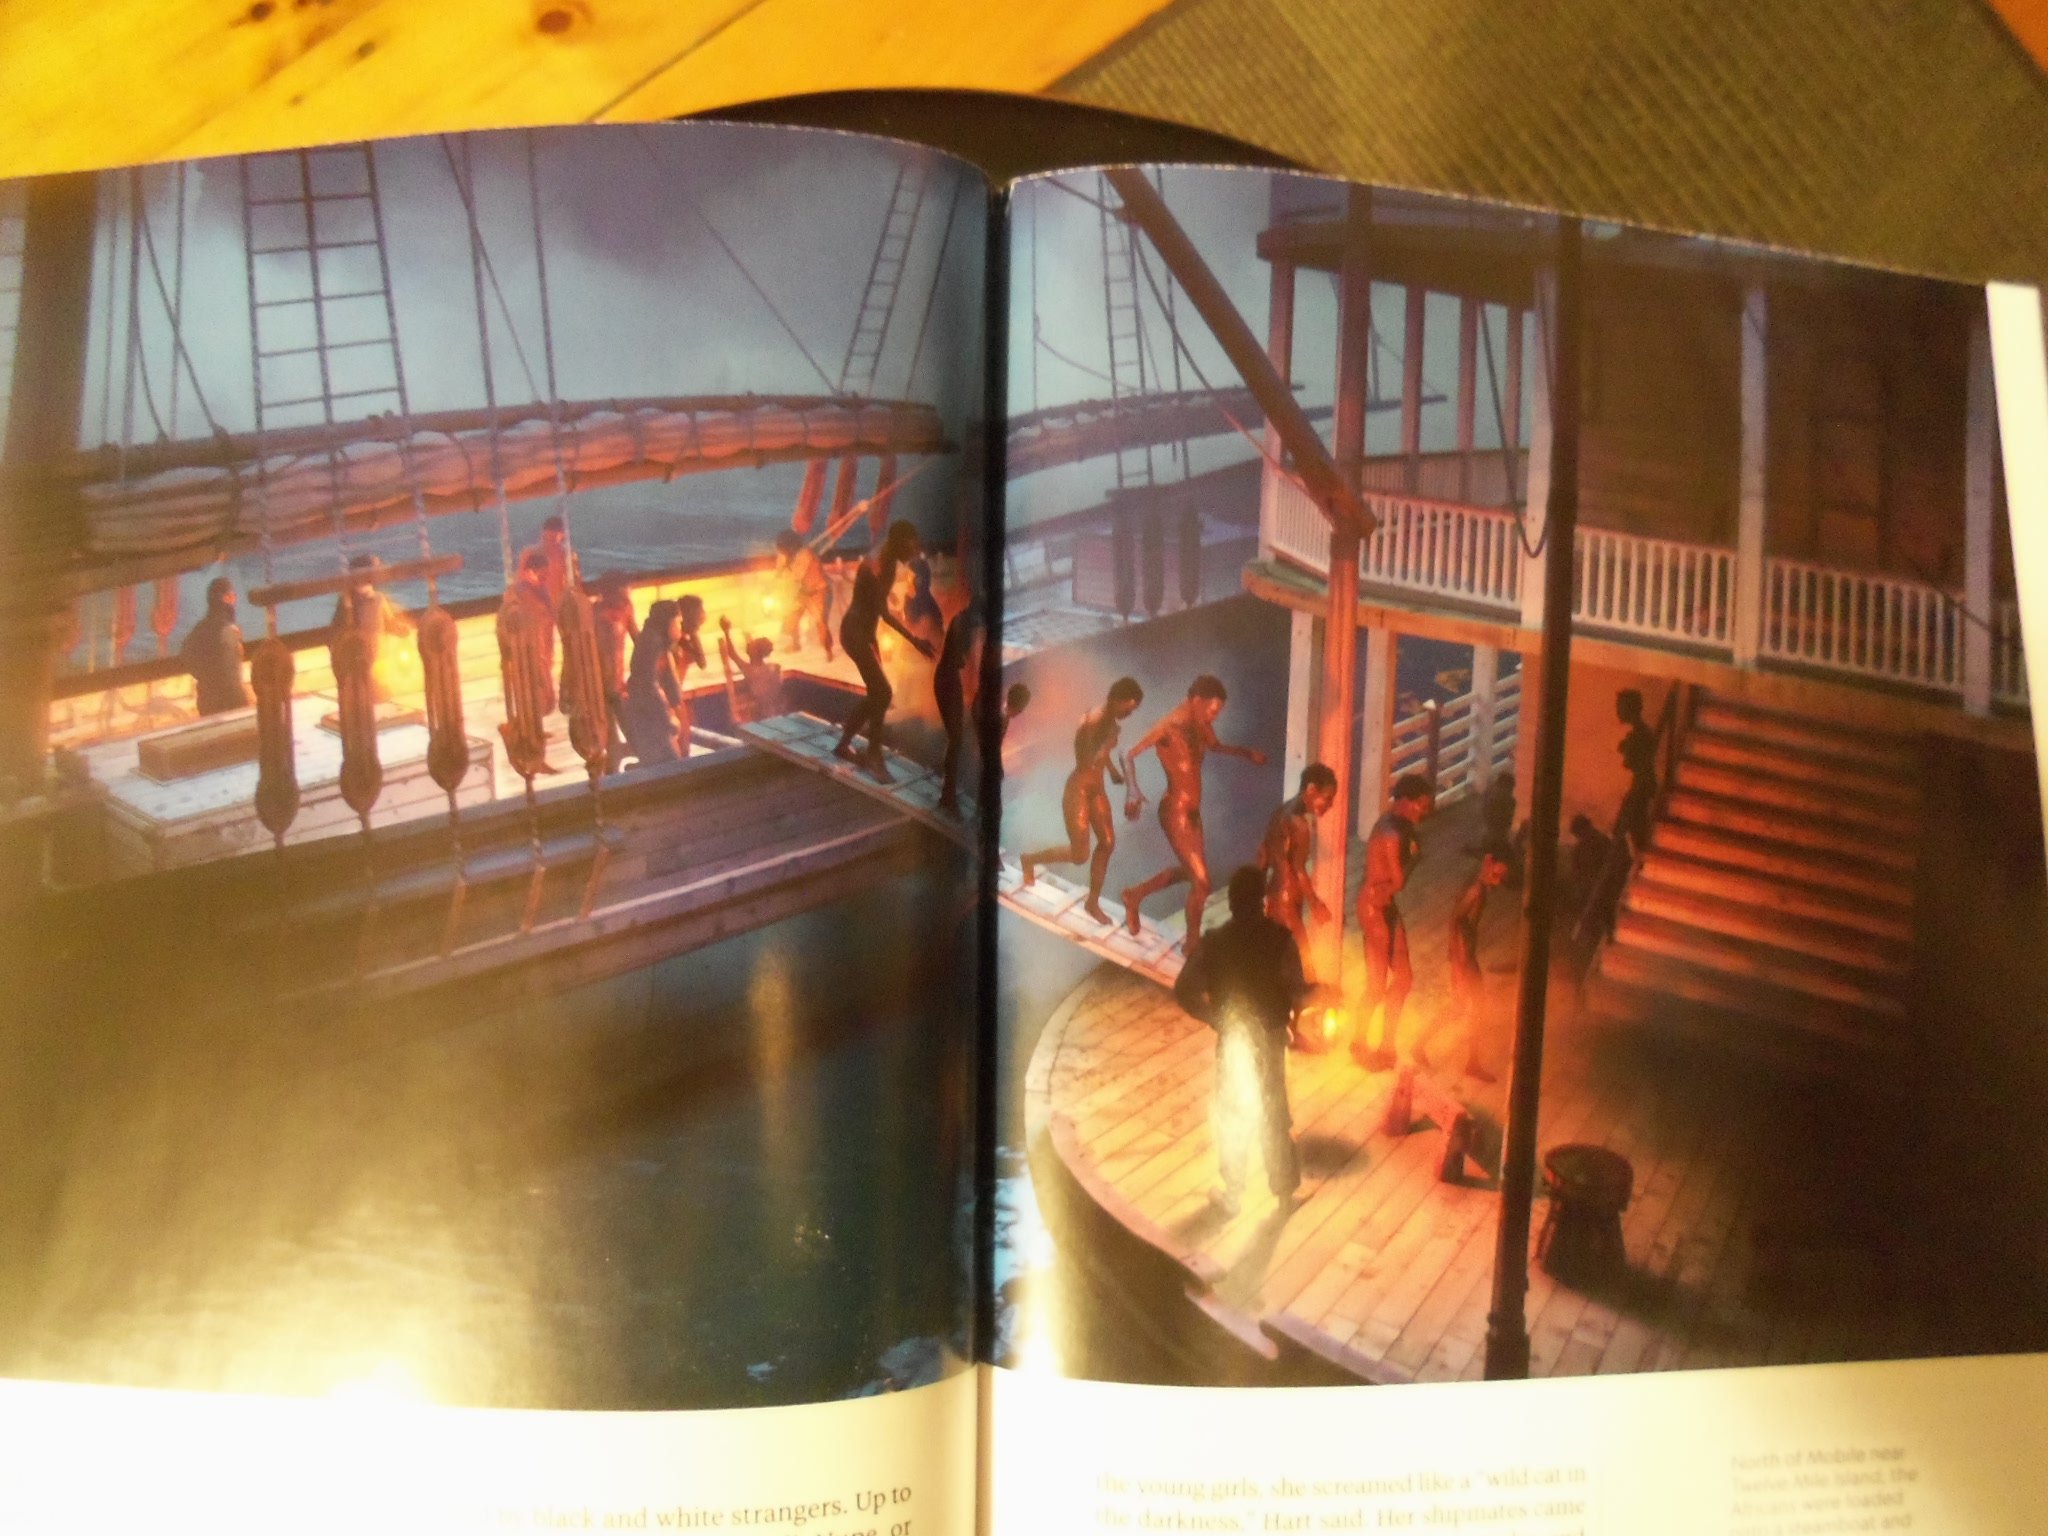
well then.......I'm just in time. no bin for that momma sun........we're build'in them.....I don't care what scow we come up with. {the viking funeral in the end will be fantastic }. too bad you ordered wood......I could have sent you some Obechi. since I posted the pictures on my log, I figured it would be good to post them here too. this is the Clotilda, but I think that the layout will do well for this ship too. note that there is no tiller, but a ship's wheel, and that it utilized a windlass. other striking features can be seen. the stern bulwarks do sweep upward slightly.......interesting aspect to include........and check out the waterline. I've never done copper, so it's either bite the bullet or paint {lots of patina}. they sailed into a secluded cove near three mile Island and off loaded the slaves onto a river boat, which took them inland to a holding facility. there they would be sold and divvied up later on. the Clotilda was then sailed to a more secluded spot, where it was set afire to get rid of the evidence. they were transported naked and shackled to the deck. after the war and they were free, they settled in the very spot where they toiled. they called their settlement, Africatown. the article is very good reference. they went through a lot to get what they { you might as well say } worked for. the remnants of Africatown can still be seen......only a few of the original ramshackle huts remain......time and progress took the rest.


- 211 replies
-
- 2
-
-
- agilis
- steingraeber
- (and 1 more)
-
now that I have the magazine with the article I read, I promised I'd post the pictures. it's of the Clotilda, but I think this model can be outfitted like this and not be wrong. I rather like the layout. when the Clotilda entered and docked in a cove near three mile Island, the slaves were off loaded onto a river boat, which took them inland to a holding facility to be sold and divvied up later. the Clotilda was then sailed to a more secluded spot and set afire, to get rid of the evidence. they were relieved of their clothes as you can see, and shackled to the deck. after the war and they were free, they went on to settle in the place that they toiled. they called it Africatown.


-
it's not my first time
-
just what I need Roger......a yellow submarine no Lou....I just patted everything down and left it to dry. 15 or so model subject's worth of pictures is a lot to lose....probably have room for one more completed model file. good thing it wasn't my 32 GB.....double stored with room for much more. there I also have all my stored instruction files...all on PDF. quite a cry if that one went south
-
thanks OC........nice looking craft I'd have to get a B 17 G for this one.........and silver........I have a surplus of silver. your making my wish list longer.....you know that.......right?
-
AWWWWWWW! that looks so sweet! love turquoise I'd lift my pant leg and thumb for a ride excellent model.......really nice. Lou.......I was like 9 or so when that happened. my father would catch us up there and he warned us that if he caught us up there again, we'd spend the night up there. the barn was where we pulled engines out of cars.....a telephone pole spanned across the middle with a chain fall. the two sides were for hay and there was an area above that connected the two lofts together. we kept some of our stuff up there......my old tryke being one of the items. the car was parked below.......I started to ride it around up there and one of the rear tires went off the ledge......me and the tryke followed rather quickly. put a real good dent in the hood! we had to go to Currier's junk yard for a hood and a valve cover. took a few good falls in my day.........never on my head though
-
any progress to report........I'm all eyes!
-
no MAY about it ..........I'm such a doof..........DOUGH!

-
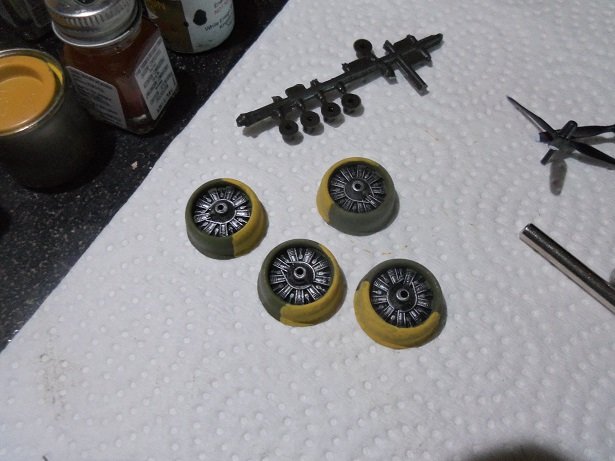
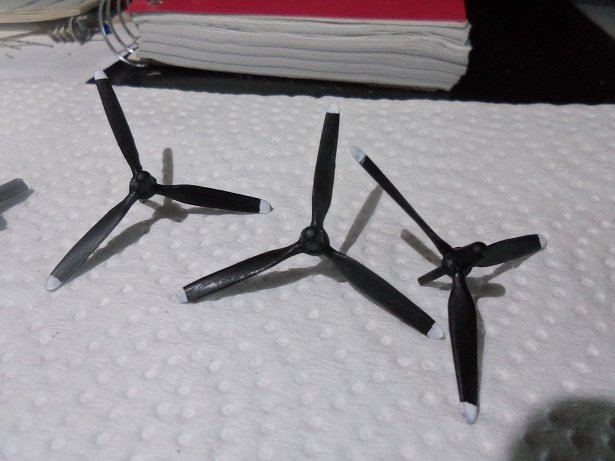
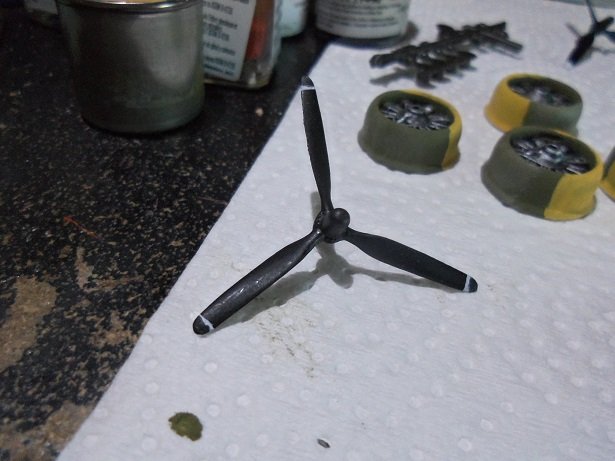
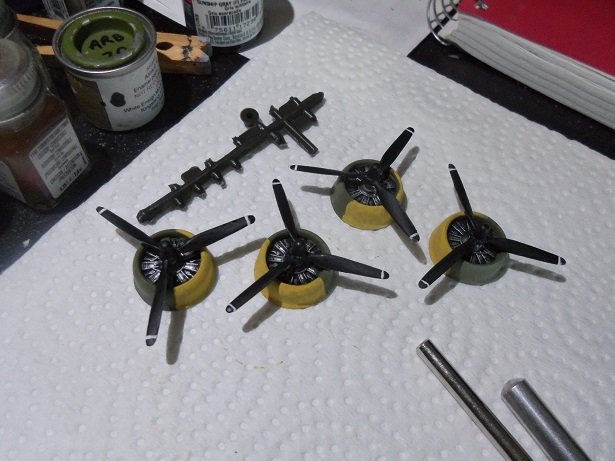
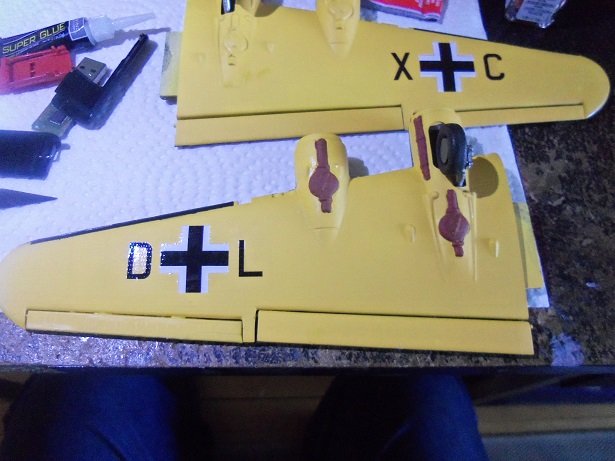
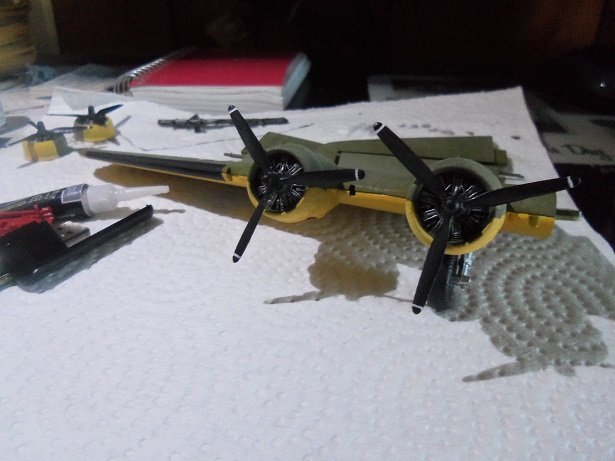
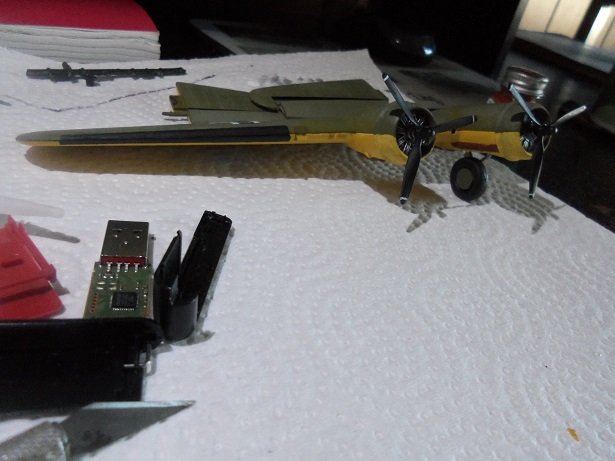
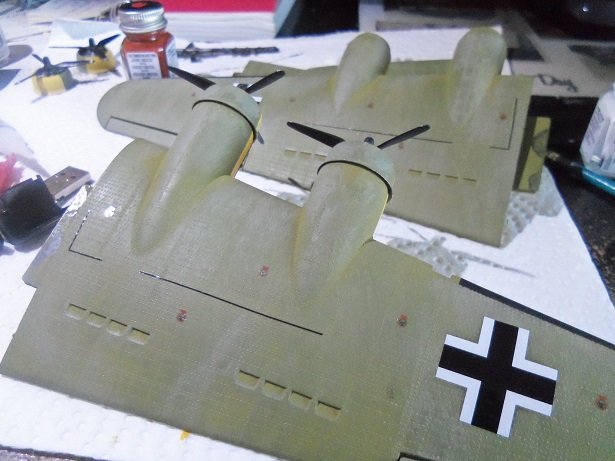
what a scare I got last night.........I put all my pictures and projects on memory sticks. I don't use photo sites.....if I lose 'em, I rather it be MY fault I have 16 GB scandisk, that I've had since 2009.......got at least 15 or so projects in folders and pictures. my Nordkap.....the Cux 87.......the cutty........just to name a few. I have another larger one that houses all the instructions I've downloaded and sent to me from Billing Boats. I use them to follow folks with their builds, back when I used to do customer service for Billing USA. here on the site, I read a comment from a gent who recently bough a Colin Archer model, asking how the planking runs. reaching for the right memory stick, I grabbed the wrong one, and it fell into my glass of Pepsi which was just below where I keep them. I was horrified!....to say the least........the thought of all that content lost..........the admiral recently lost one to some glitch....I could revive it now it's MY turn! of course it sunk to the bottom....I quickly ran to the kitchen to pour the Pepsi into another glass, so I could retrieve the stick before it became totally Pepsilogged!........the feeling of dread......I was too late, I fear. I'm shaking the stick against a paper towel to drive out the moisture.........the admiral looking up remedies for sunken disks. she was reading them to me as I got the idea to take it apart, which was relatively easy to do. some had gotten in there and I patted the electronics dry.......swabbing the interior with rolled up paper towel. it was read that it should be left to air dry for 24 hours, but I reassembled it this morning, after leaving it apart overnight. impatient.......I plugged it in..........the light in the disk came on, but the computer didn't recognize it I pulled it back out, and back in again....and it came up immediately! clicking out of the program, pulling it back out and then back in again, brought it right back up.............I was relieved! happy that it still lives so this morning, I got back to work on 'Wulfie', adding the detail to the cowls...highlights to the engines. last night I had tipped all the props with flat white, not having a better way to paint the stripes on the blades this morning I defined the stripes.......had to redo one blade though.... added them to the cowls, cementing the retainer caps in the back. before the assemblies can go on, the turbos and exhaust needed to be painted to me it looks sloppy, but no different that what I did on the Nine o Nine........on the M. B. this detail will be much better....you'll see the cowl assemblies were added to the wing at this point. there's my scan disk all apart. one saddened note...... as I worked on the wing, a section of the wing walk came off, leaving a break in the walk. couldn't find it anywhere. looking at the other wing, the same area had the walk lifting. I was going to get the decal set to lay it back down, but without any striping left to fix the other wing, I removed the lifted walk. they both look the same now. not quite in the same place, but when fully assembled, it won't be that noticeable. more soon
-
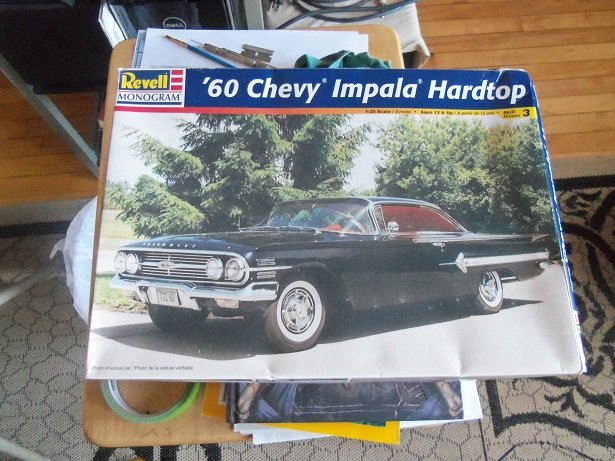
interesting..........very sweet looking car.. what are you using for a camera......not doing it any justice. I recently bought a 1960 Chevy Belair....we had three of them in our family. My Mom's car was a '59 she called Agnes, had an L6. it got taken out late one night by a drunk driver, as she was coming home from work. she was unhurt. my father's car was a '60 or '61....black with an L6 under the hood as well. it went to the bone yard, but before it did, I fell out of the hayloft with an old tricycle and landed on the hood, denting the hood and driving the foot peg through the hood and the valve cover. I was unhurt.......except for my bum afterwards the model has a V8........348 cu. in. with triple carbs.....they tout this model as stock. I don't believe it.....stock would have been an L6, like my dad's. my dad's car to a 'T' ....Mom's was White. my brother had one too, another 1959.......got it from a junk yard, sitting on top of a pile ready for the crusher. it was like buying a cut of meat from the market.......my dad pointed to it.....told Mr. Currier that he wanted it, and they brought it down with a modified skidder, originally used for logging. we picked out four rims with inflated tires, put 'em on and towed it home. his was red and white. I don't recall if it had an L6.......but it drove fine until my brother decided to get gas from one of the old junks out back, 'cuz he was short on cash .....ruined the engine........R.I.P. the kit was produced in 1998, by Revell / Monogram Germany......it's a very nice kit with lots of detail. it includes all the chrome.........I've seen older kits like this.....and in a flip top box to boot. don't mind me.......I'm a Rambler........but never a Nash you build some really nice car models any insight, or can you point me to where I can get an L6 engine for this model.
-
....and all that coming from a guy who couldn't see.........love the song as well.
-
second that ...and as I said, after seeing the great job you did in cutting it out { aside from cutting the upper door jam........I would have done that }, I was confused. I'm sure they got beat up out there......a little battle damage would fit right in
-
did you go by another user name a while ago? you seem familiar......... what do they call that....dislexia?
-
actually.......what you did isn't a bad thing. you could put the original door back in place, and it would actually look like it could open. you did a great job of cutting the door out. if you did elect to use the resin door, you could line it with card or plastic and sand it to fit. you don't want to add too much thickness to it because it will put the rest of the interior out of scale. PE rivets or thin strips of brass or something close to that would add the detail your looking for you don't want me to do what you did........first off.......the door would be history! blow torch anyone?
-
unique engine.......is it an L6? nice looking car.
-
I would think nothing less............
-
awesome job Danny.......your command of the paper medium is off the charts! I have to ask.......you have the loco, the tanker, and the flat car with logs.........must be what looks like a large diorama. where are you displaying them? love to see the entire display
-
ohhhhhhh....the train itself wasn't good enough! you have to go and create this beauty too!!! this is just too cool! awesome job Danny.......totally amazing! 👍
-
that is insanely gorgeous! the train is one thing Dan.......but the tracks! so.......your not totally done........but you can see the light at the end of the tunnel!