
HOLIDAY DONATION DRIVE - SUPPORT MSW - DO YOUR PART TO KEEP THIS GREAT FORUM GOING! (89 donations so far out of 49,000 members - C'mon guys!)
×


popeye the sailor
-
Posts
16,007 -
Joined
-
Last visited
Content Type
Profiles
Forums
Gallery
Events
Everything posted by popeye the sailor
-
 what did you use to anchor the dead eyes? she's still look'in sharp Doug!
 -
I'll have to look and see if I have any of that hard stuff your talking about.......here's a breakdown of what I see: 1-#15 that looks to be the cap rail........they should have been told that there are two sides to a boat, and it doesn't have to be 2 mm thick 4-#21 apparently, these are to cover the inner bulwarks. nice thought, but I don't think I'll be doing that. I'll see what the inner bulwarks look like and go from there. says nothing about pin rails either. 13-1.8 X 6 mm strip this I believe is for above the waterline. the hull is to be double planked. there is no suggestion of what to use below the waterline 25- 1 X 10 mm strip this looks like it's to be the second planking...it can't be used as deck planking, it's too wide. this is the orange stuff.....it must be pine.....if you look close, you can see crystallized pitch on the surface. 16- ? X 10 mm strip this sadly is a jumble of 1.8 and 2 mm wood strips. it was taped together. it's badly warped........I'll use it somewhere, but not here. chances are, this is the stuff your talking about......I have no idea what the wood is. pretty dense....I'll grant cha that makes no sense to plank the hull with 2 different woods, especially if they are different thicknesses. I will post a picture of the Clotilda tomorrow.......it had a coppered hull. chances are, if this was an American or British ship, it may have been coppered too. I like your thoughts on the deck structures.......when you see the picture, you'll have a better idea
- 211 replies
-
- 2
-

-
- agilis
- steingraeber
- (and 1 more)
-
thanks OC and J ....and those who hit the like button I dunno OC........I've never really done that. most of the parts I cut with the scroll saw will never be seen anyway. I know I'm dealing with old wood, but the outer layer shouldn't come off like it has. not only that, tape tends to gum up the blade J.....I basically split the bulkhead down the middle, but then take into account of the keel. it just took some fitting. when I fare the frame, it will be sanded down to the contour of the hull, so the planking will meet the transom part without bulging. sanding is going to be tough......fresh plywood never sands quick. kits use a different type of plywood billet....some even use MDF.......it sands easy and quick with hardly any elbow grease filler blocks.......I hardly ever use them. the frames are relatively close together.....it shouldn't be too much of a problem icky Mae.....
-
is it the #404 or the #606? if it is this model, it is the #606. this is typical of a few of the Billing Boats kits......like the Norden and the St. Roch, which utilizes the half hull construction. the America reissue is another. to plank the hull frame, {for the stern} it looks to me that the planks terminate to the edge of the half keel about half way up. from the half way point, to the top of the bulwarks, a wedge of visible bow and stern stem must be exposed...say 3/16 of an inch. for the bow, the same increment must span down the entire stem. the garboard plank will expose the keel under the hull. I'm looking at the instructions.......your instructions should show this visually, if not in diagram and text. you can terminate the planks to the edge of the keel to make it easy, but you will need to add a keel strip where the two keel parts meet. start a log on your project, I'm sure that there are many here that can help welcome to MSW
-
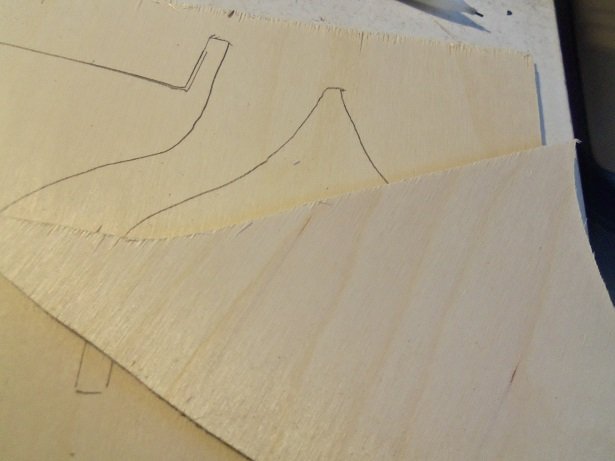
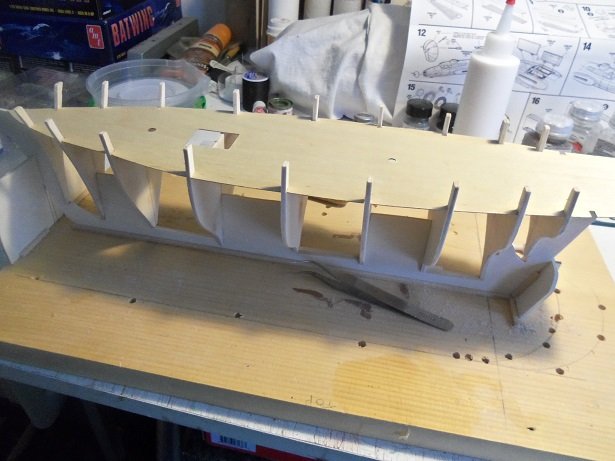
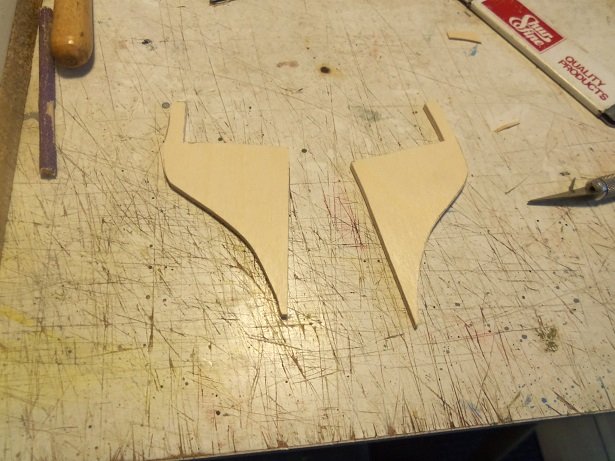
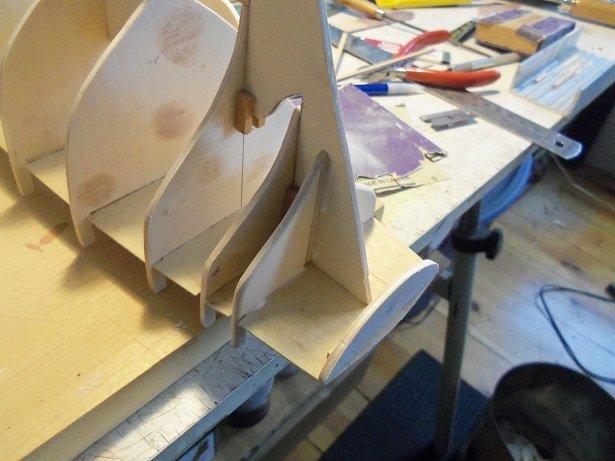
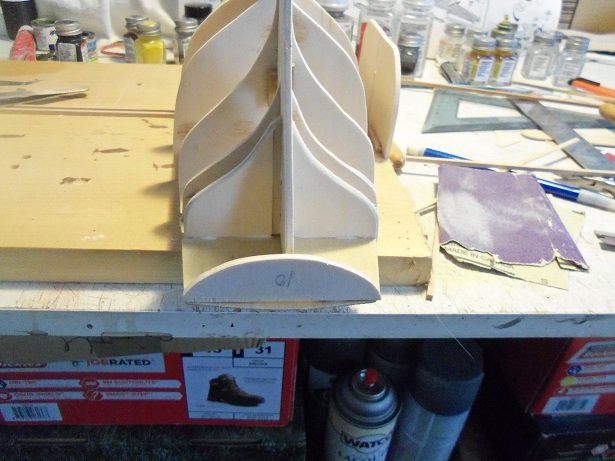
I cut some of the plywood to try it out........not the old stuff.......I'll be attempting it later. here's a before and after comparison of how the splintering looks: before and after four copies of the #9 bulkhead was traced out......no need to do the glue and split method {as can be seen in the above pictures}. I did get some cuts that were ragged, but the wood behaved better on the table {I didn't use the pressure fork either}. it's not as bad though,,,,it looks more like a grain issue now...ripping across the grain that along it. the Craftsman did it too. the hull frame now stands without all the weights and clamps. the deck looks good....I do need to adjust the bow though {it's a bit off}. port side at #3 has a slight rise, but I'm not going to worry about it { a coil of rope will cover it }. it looks worse in the picture...once the hull's planked. I began to fare the frame, but without #10 in place, I'll be doing a second sanding. #10 is the transom bulkhead.......it was cemented in place at an angle; not as much as the stern stem, but enough to give the transom a slanted look. the extra slots intrigued me......I could just plank them over, but that's quite a span to cover. with one of the extra #9 bulkheads I cut out, one was sliced in half and will fill in the slots. I still need to add the braces for the transom. the deck platform is rounded and can be seen protruding above the #10 transom bulkhead. there is a cover that goes over this bulkhead and will give it a curved appearance when cemented in place. likely, this should be done after the hull is planked. I need to dry fit it to see if this is the case. more to come soon


-
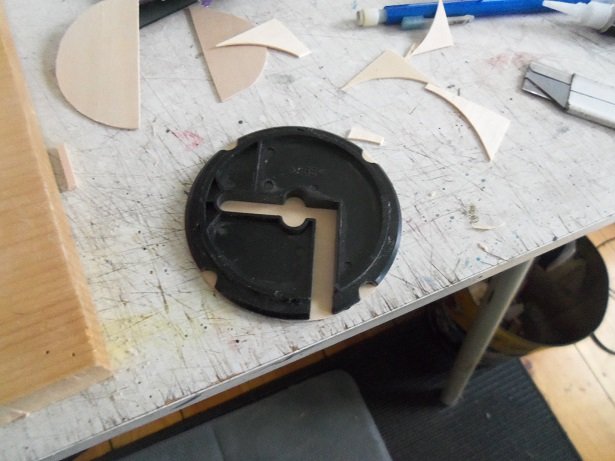
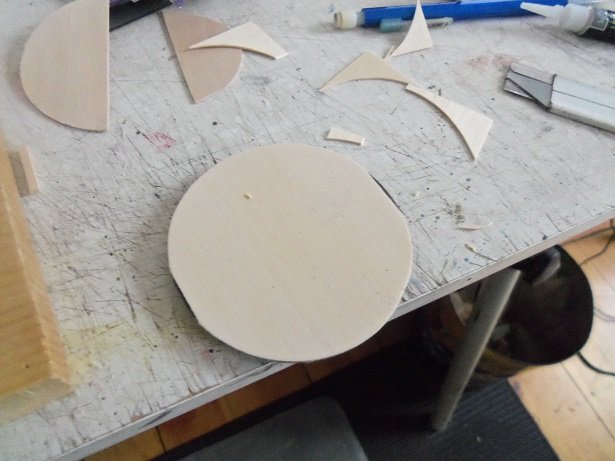
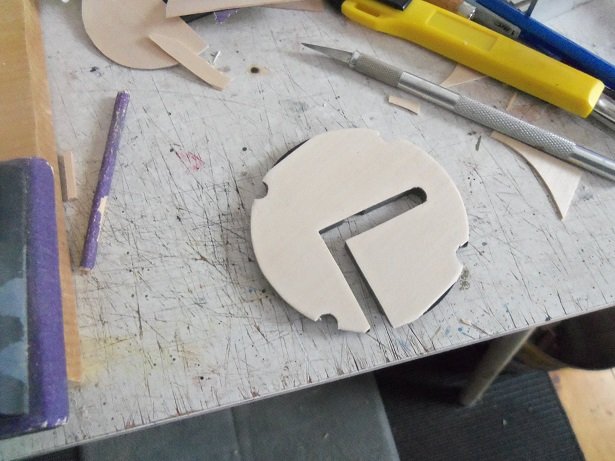
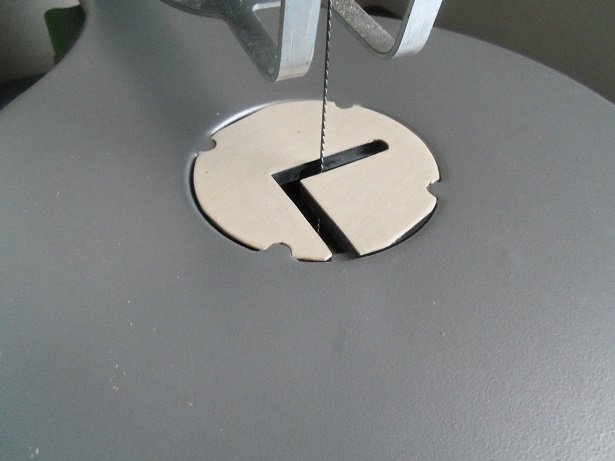
I concentrated on 'Wulfie" to day as I pondered the problem with the scroll saw. I still need to cut a few things.....it would be good to be able to use it without the splintering. I was going to make another center plug out of wood, but I have nothing that thick. I tried to make up a shim for the plug, but that fell through.....it's just a matter of 1/32....... then I got an idea........add it to the original plug. hmmmmmm......sounds like something I'd do.........BRILLIANT!!! so....using CA, I glued sheet wood to the plug. I only have 4 inch stuff, so it doesn't go the entire circumference. the notches were cut out and sanded round....well....half round then the blade notch was cut out.......I wish I could have gotten away from the wide opening, but at this point, I'll be happy if it's an improvement. I didn't bother with that silly center circle. in place, the table is now totally flat

-
are you using it to plank the hull? I hope your ripp'in it down....seems a bit too wide. of course with how dense the wood is, there's little chance of kinking the other stuff....if it's as dry as mine, it will need a soaking
- 211 replies
-
- 2
-
-
- agilis
- steingraeber
- (and 1 more)
-
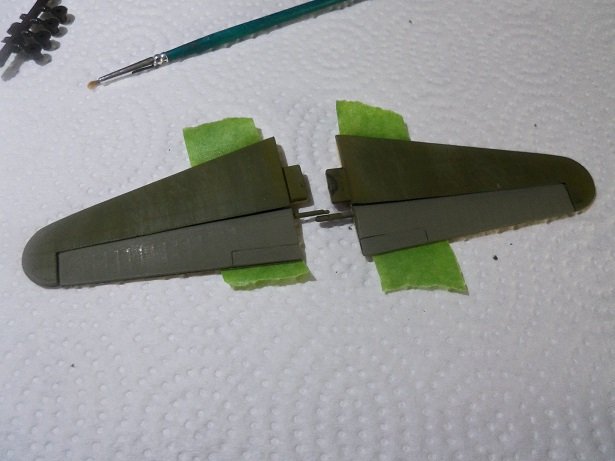
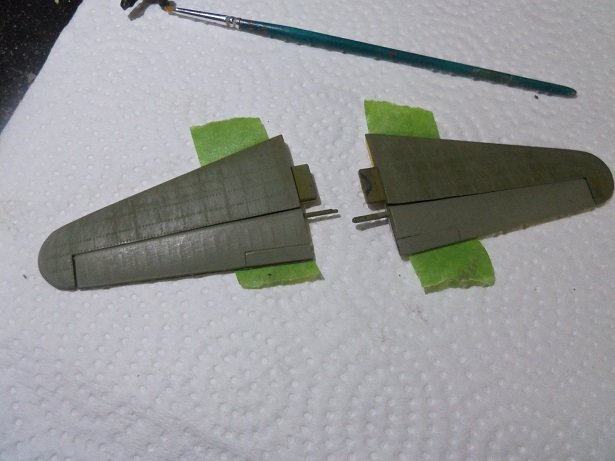
it was quite a draw Lou........at first I though it wasn't real. then I looked it up I don't do a lot of this kind of stuff.........I hardly weather anything. I'm just glad that it's working out. the white striping I mentioned turned out to be an easy problem to solve.......I'm painting the whole tip white and then I'll cut the stripe with the flat black. I'm waiting for them to dry at the moment. thanx for the kind comment the fuselage will be the next tricky part
-
well.........looks like you've definitely found some puzzles. back in the old days, my dad used to use STP.........swore by the stuff. in the winter it was hard to get it out of the can, so he'd put it on a Bunsen burner to warm it up. he didn't think to crack open the can first though..........what a mess! keep at it.........you'll figure it out
-
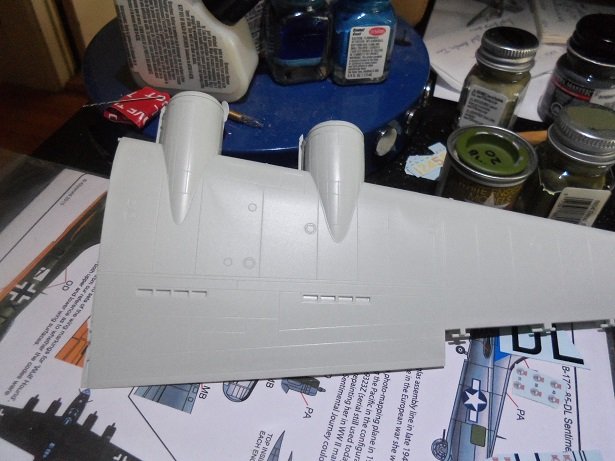
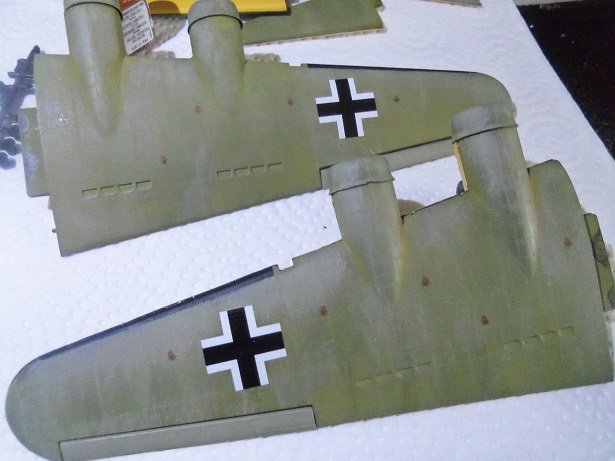
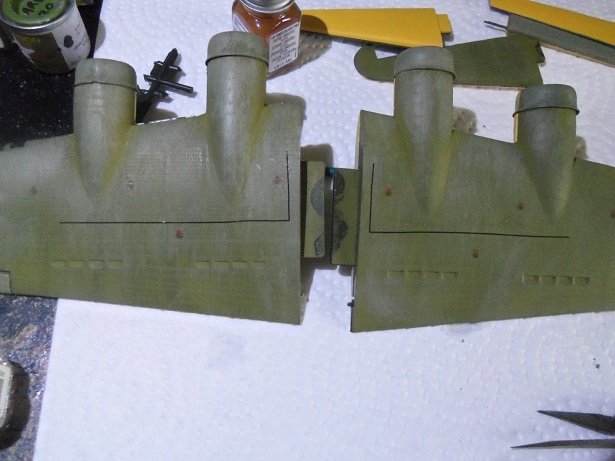
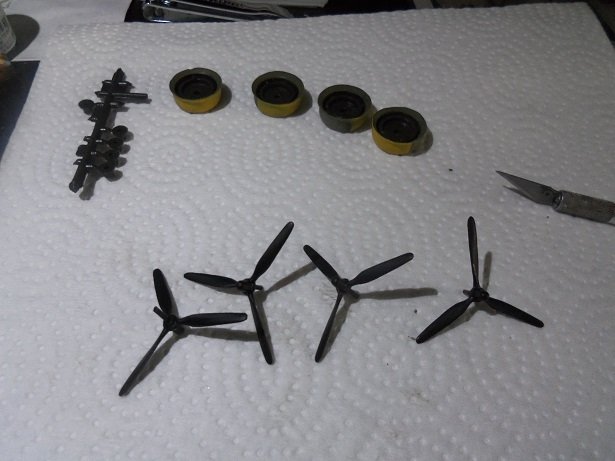
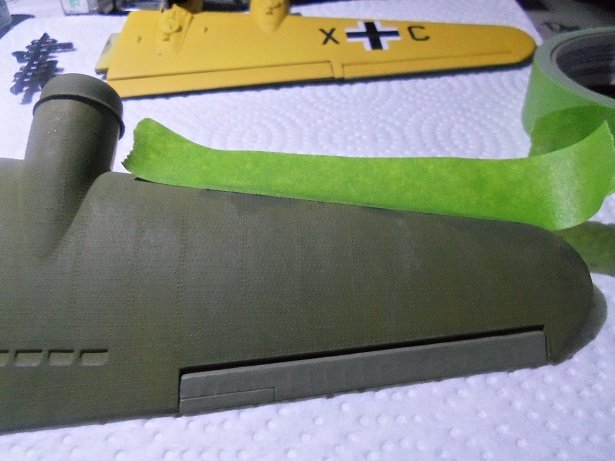
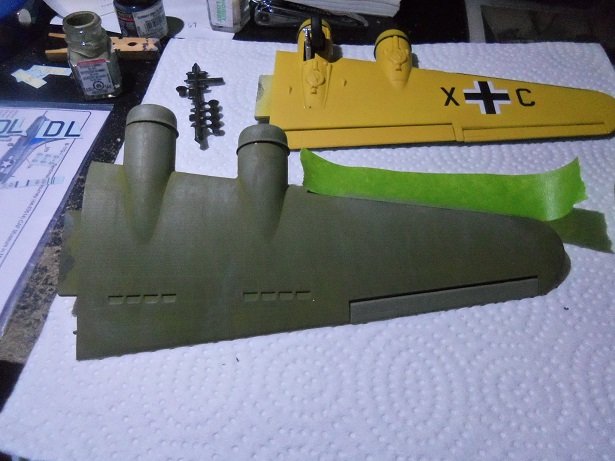
thanks OC and those who hit the like button.........added more decals to the top of the wings. there are to be five fuel inlets..apparently this model had none.......no molded detail at all. I pulled out the M.B. wings to see what they had for detail.......jackpot! I reserved ten of them for the model, along with black striping for the wing walks. the fuel inlets went Ok....... ....but the black striping didn't go so well. losing a section, it spelled the end for the striping I even started to mask the wings to spray them on.....but I'd never get them that thin. so, I took what was left and cobbled some of it together. then the stabilizers and ailerons were set up for the second round of shading.... faded the nacelles and props are next.......gotta paint on the white stripe on the props. I thought of using a paint pen, but but they fail to tell you that repeated use blunts the tip...it only made of felt. so that process is in the works at the moment
- 134 replies
-
- 10
-
-
likely came out at the time that lots of kits came out in multiple color plastic, as an attraction to modelers who don't do a lot of painting. the only drawback was flow lines in the plastics. if you look at the silver parts, you can see it. I'm sure your going to paint it Jack......I agree with Ken on the canvas color. if you do a search on the color choices for the vehicle, you'll find one that'll tickle your fancy dust'in off my seat
-
look'in good OC!
-
things happen.......foresight is 1/2 of after thought. to be honest.......this is a model that you really want to do. perhaps trying this on a model that you don't care about would bring your skills back up to speed. I've run into this many times. I was away from plastic way too long, and am going through some of the same mistakes that I used to battle years ago. don't let it get you down or discourage you. remember, Murphy doesn't discriminate.......he jumps in wherever he can. I hope you can save it I know it's not a Huey.......but I think you'll smile.
-
that's right Lou.........there are "the time that tries men's souls" we try to get as close to the real McCoy as we can........some are much better at it. I've just had one of those moments {I should save it for the log, but it seems fitting here}. I want to put the walkway marking on the Wulfe Hound wings......I have the decals for them. well....to sum it up.......I botched them I was going to mask and spray some on, but they need to be so thin, that doing it seems like a fool's errand. but.......as a true basher, I've assembled enough courage to do a half hearted attempt.........wish me luck never give up Lou! ,,,,,or you either Mark! cheering for you BOTH!
-
sorry to hear about it Lou..........I hope you can repair it
-
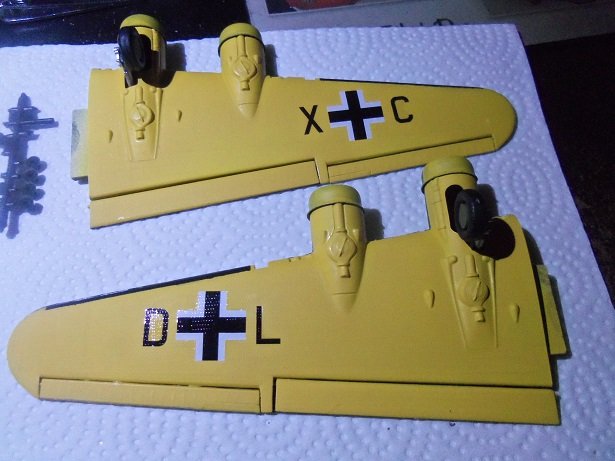
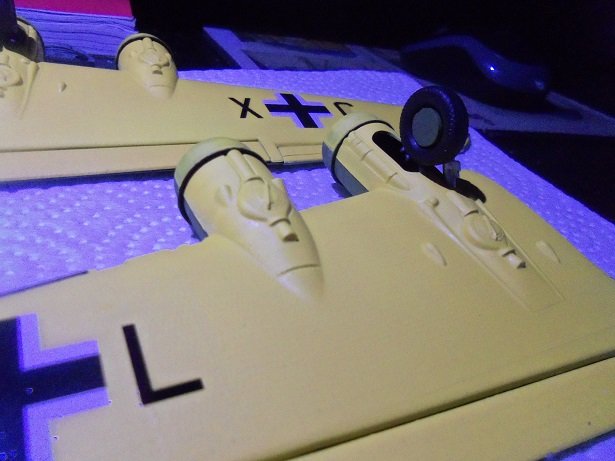
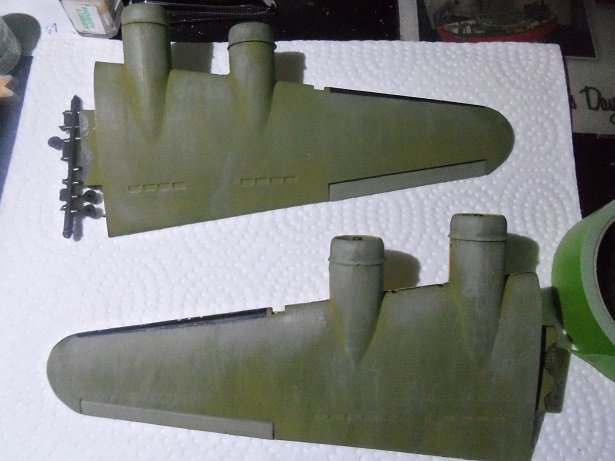
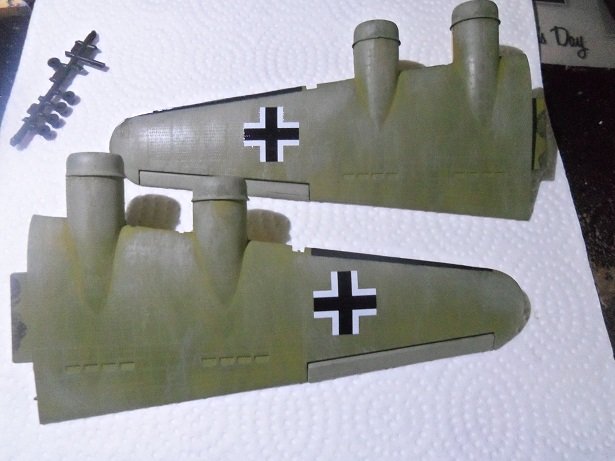
more was done on the Wulfe Hound's wings.......I started with the underside first. I've been dying to get the decals on, so I went there first. the tires are on as well. I will need to check......don't believe I saw it, but I was unsure about the hub color. the backside I left flat black, but the front usually is painted the color of the plane....the color of the underbelly, or some sort of decoration. I have decals for the decoration aspect, but I simply left them the same color as the plane. the turbos will be painted later.....for more decal fun, the wings were flipped over. I noticed there the fuel covers are not detailed on the wings. I will refer to the Memphis Bell wings for this detail, because I have decals for them. I have some repair work to do first though.......those touch ups I made when I did the deicing panels. first was to lessen the color difference of my black touch ups. I also think I did the touch up too soon and the flat black mixed into the drab, causing it.......but I still believe I used the wrong color green. that's what happens when too many of these colors are on the table it still makes me feel like an idiot for not thinking of the white ensign and Humbrol colors. masking up the deicing panel, I was able to dab some of the bomber tan over the offending blotches. in retrospect, I could have left them, as an addition to the color hue and fading. but I needed to fade the nacelles too, so I did it it looks better........I was thinking of doing it.........now I need to do the rest of the plane! with the insignia decals.........it looks even cooler!
- 134 replies
-
- 10
-
-
eeeeyouza! quite a jumble of wires you got there looks very good Michael! are you going to cover the back frame to hide them? splendid model!
-
that's the same place where a large chunk of the outer plywood layer came off. luckily the piece was still intact and I was able to put it back in place. but then again, I ended up not using the keel part anyway, so what did it matter?!?!? I did a little faring to the frame.....but it made me thing that the stern isn't framed and will need to be done later. so, I'm assembling the stern, giving part #10 a bit of a slant.....not as much as the stern stem, but enough to notice. there is a cover part that will be cemented over it......thinking it should be done after the hull is planked. but I'll do something differently just to add flavor to the stew
- 211 replies
-
- 2
-
-
- agilis
- steingraeber
- (and 1 more)
-
real life, it's not. but we're talking about a movie......the idea of amphibious people is like too far fetched........ but if you listen to the right folks, they'll tell you about an underground reptilian race that is trying to take over the world
-
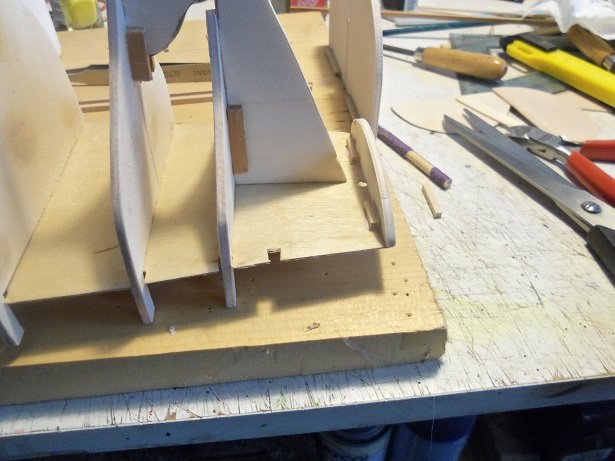
so basically, your adding rabbits to the frame, that will act as a termination stop for the planking. good idea they can be done externally, as you've done, or they can be done internally so the planking will have something to rest on. I see you removed that #13 part........it doesn't look anything like what the diagram shows. did your bow stem break off or something? your doing an awesome job!
- 211 replies
-
- 1
-
-
- agilis
- steingraeber
- (and 1 more)
-
if I have enough......your more than welcome to some
-
hello shotlocker, I read an old thread made back in 2013.......may have pertained to this very model. I'm sure there were other kits...likely these two were the most popular. thanks for showing us the plans that's true J......although I think when planked, there may not be a need for a keel board....in fact, if there is too much showing, extra material may need to be removed. a stern post might not be a bad idea though...it would be a good termination stop for the planking as for belaying pins......I may have more than enough....may even have a windlass handy. I will check on the belaying pin situation. hello Richard......welcome to the asylum....... be sure to follow J's as well for more entertainment than you can stand just got back from Barnes & Nobel.......I have the magazine!
-
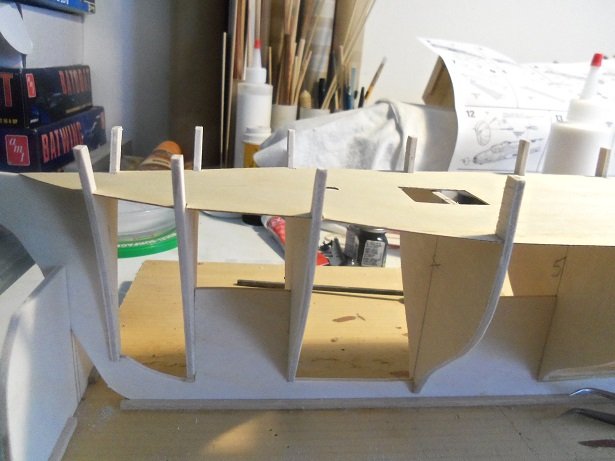
thanks J and John.......happy to see the assembly so far look'in alright. I'm still thinking that the platform is too far back........the tiller hole is not in line with the stern stem. I will need to drill another hole, or do something in an attempt to fake it. the bow gives me the creeps too............I still think it's too far back. the diagram shows a bow stem that protrudes the hull, but planked I think it will reveal gaps on both sides. I'll just have to do it and see for myself. I've got an idea about those two extra slots........I could simply plank over them and be done with it, but I'm thinking the counter will need some help with support. the stern is still in the thought mode.....the deck platform has a curved transom, but the transom piece is flat.........could also use some bulwark posts to cap it off........thinking out loud after our hair appointments, we stopped at grocery store we used to frequent when we lived in the area. they didn't have the National Geographic either. we're having lunch........after which, we're going to go to the local Barnes & Nobel to see if they might have it. got some more cutting to do when I get back
-
always a pleasure to see an update on your fine ship........amazing to see what you've accomplished. she's a fine lady!
- 1,306 replies
-
- 2
-
-
- syren
- model shipways
- (and 1 more)