HOLIDAY DONATION DRIVE - SUPPORT MSW - DO YOUR PART TO KEEP THIS GREAT FORUM GOING! (Only 44 donations so far out of 49,000 members - C'mon guys!)
×


popeye the sailor
-
Posts
16,007 -
Joined
-
Last visited
Content Type
Profiles
Forums
Gallery
Events
Everything posted by popeye the sailor
-
 nice.........you got that book.....and I got the other I have that one coming too. really nice pictures I'll get it by Friday. yes...interesting about the bow spirit........I was thinking of giving it a bit of an angle too. I guess I can toss that idea the bow stem has a slight angle to it........I'll leave it at that. note the single anchor........
 -
good fix! happy to see you got her back together ....and your deck is no worse for wear! good save! oh.......I got the first of the two books today.......Lennarth Petersson's fore and aft craft
- 211 replies
-
- 2
-

-
- agilis
- steingraeber
- (and 1 more)
-
#04279 is the kit number for the Memphis Belle. you've got a 'G'....the decals are no problem to find. thanks for showing me your kit. it looks to be as complex as mine....skill 5
-
B-25 Mitchell "Meet Miss Runyon" by Javlin-HK-1/32
popeye the sailor replied to Javlin's topic in Non-ship/categorised builds
look'in really good........you've made some great progress! -
welcome to the log Craig, I'm sure that if you were to start one, I'm sure you'd do a superb job I'm not an expert.........when I got my first wood project, jee........once I started to work on it, I couldn't stop! I made mistakes too.......but joining this site, I've learned so much. there are many talented folks here. just browse around...... you'll see many different techniques and styles. the only thing I could suggest, is pull one out and start a log........you'll be surprised with how many folks who are willing to help and share their knowledge. I'd be in the front row I'll have to check it out J.........where I do a lot of recreating hulls and stuff.....it would be a big plus. it seems that this model can go many ways......brigg, schooner, Baltimore Clipper, Ketch.........with a bit of modification, it's a wide open field still......a bit down that your having to do all that B.S. I hope it works in your favor. I haven't done any more planking on mine........I devoted the time to the Wulfe Hound, but I took Tuesday off and I'm hoping to get the planking done. I want to see what the deck area looks like first. I know that there will be gaps at the bow.....a fore castle deck will cover the sin.
-
I guess one could call them shackle cleats........common name is eye bolts. nicely done! I see what you mean by tight space
- 188 replies
-
- 1
-
-
- cutty sark
- billing boats
- (and 1 more)
-
wow! really sorry to see all this extra work you've had to do. likely the use of the original wood was the cause. where I've had to cut the parts for mine from newer wood...I don't have that big of a problem. I do have a tiny bit, but I can put the frame back in the slip with very little effort. fingers crossed this works out for you
-
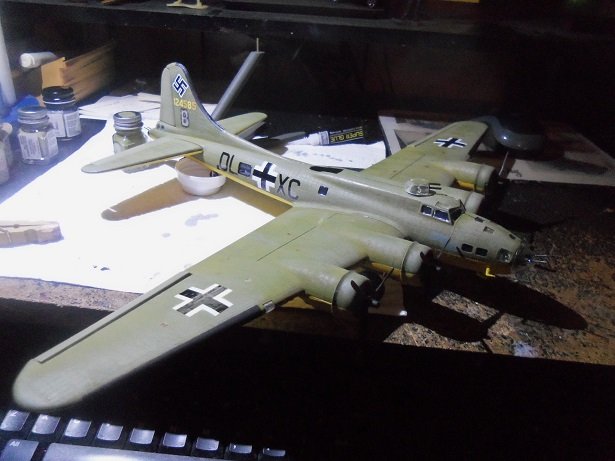
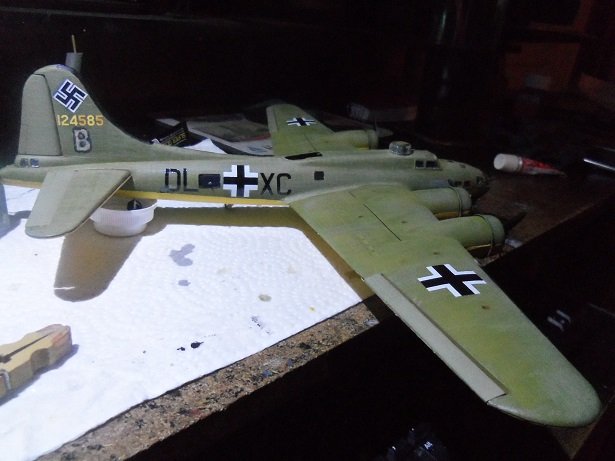
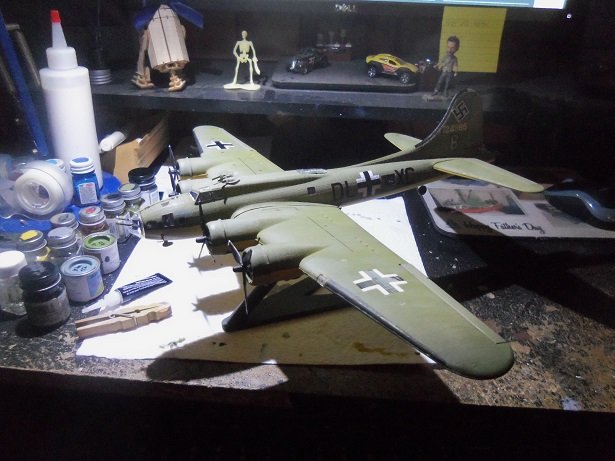
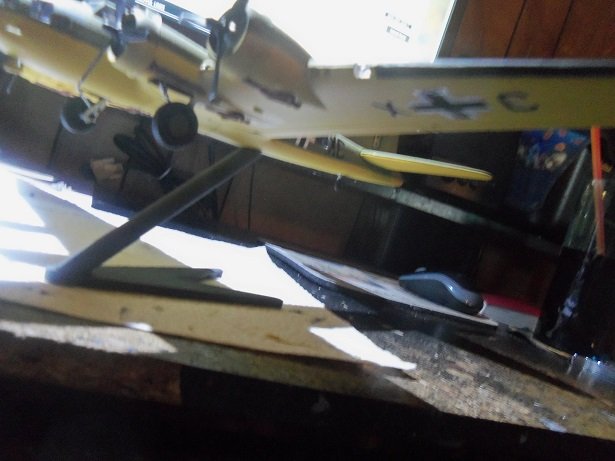
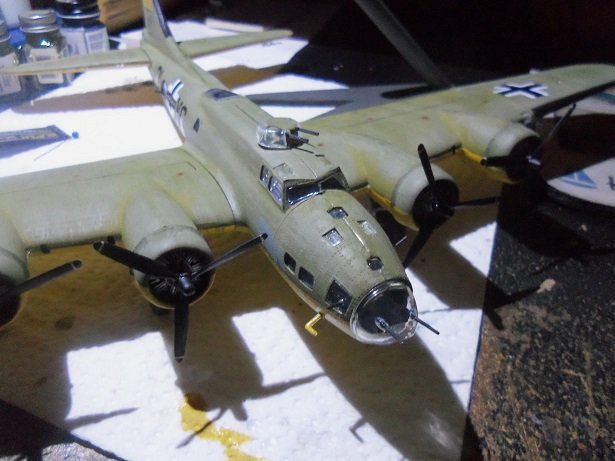
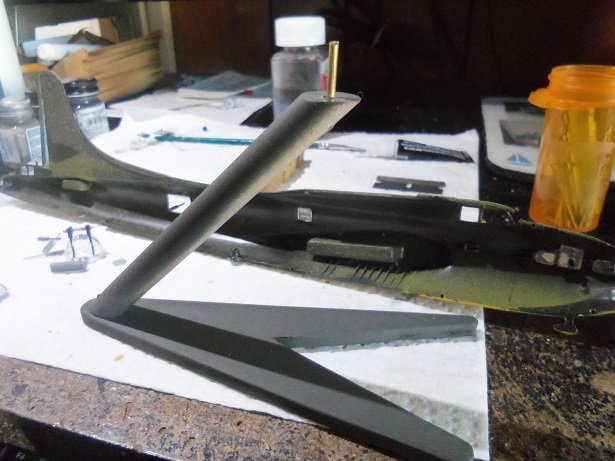
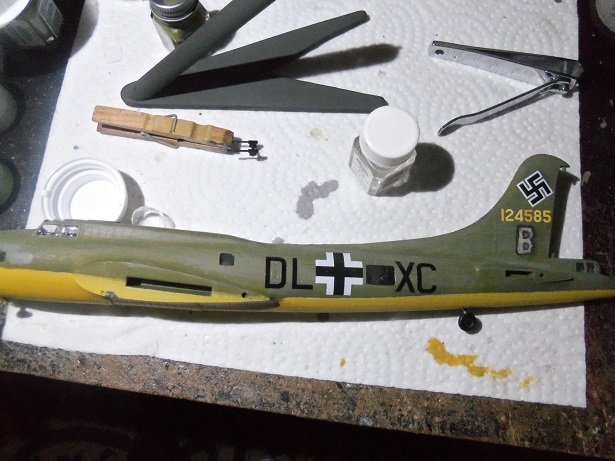
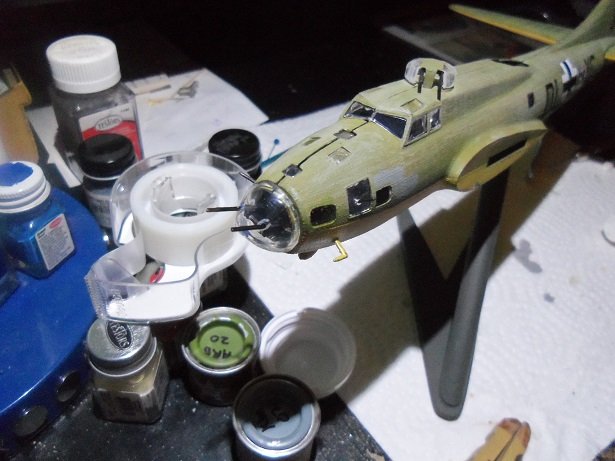
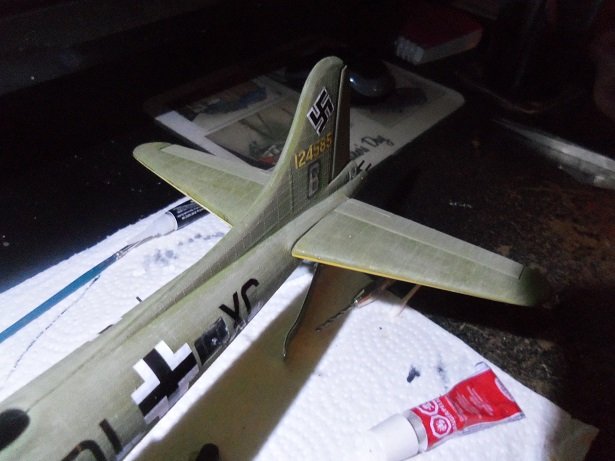
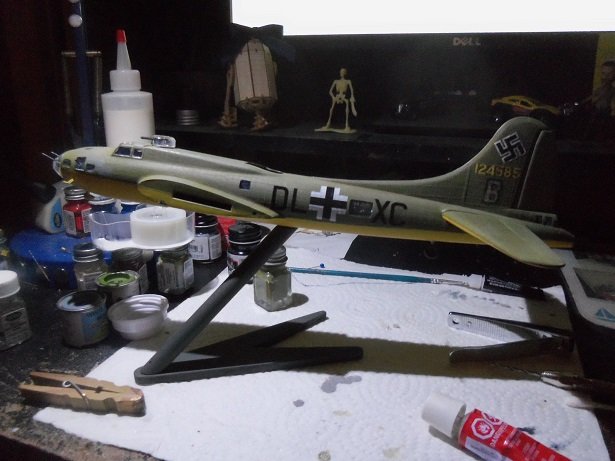
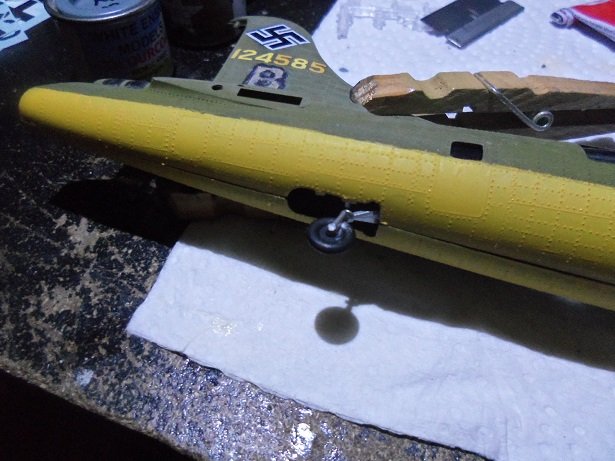
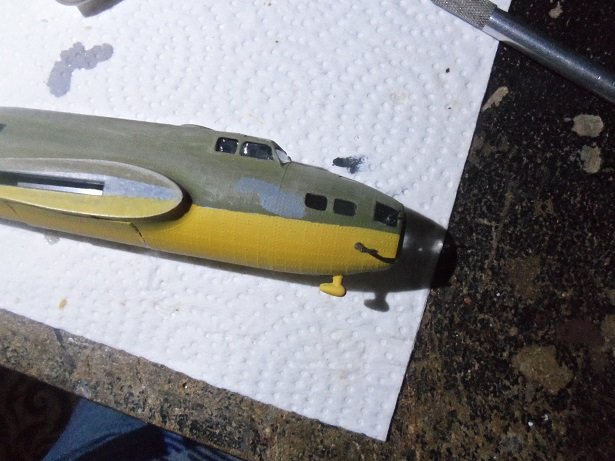
these are just random photos. the wings are on and the stand seems to work well with the model. no.....not on the stand yet.........but it has been on it you can see I'm protecting the tail gear. the deice panel on the tail fin has been painted.......the glass at the tail end of the cockpit bulge has yet to be installed. here she is on the stand.... as mentioned, she is not at her center........that is up around the bomb bay doors. I think the feet of the stand should be splayed out more for better stability......but it works. the glass is installed at this time......the plane is pretty much complete. I do need to do some touching up, and then the final pictures in a less cluttered environment. the gap along the top of the nose has been repaired to my liking. I used the window maker to do it. it's still a little wet.......I touched it up with the olive green, and then muddled it with the bomber tan. the final pictures to come soon.......I found that the pin on the stand is loose...........more glue!!!!! one more bit of detail to go
- 134 replies
-
- 12
-
-
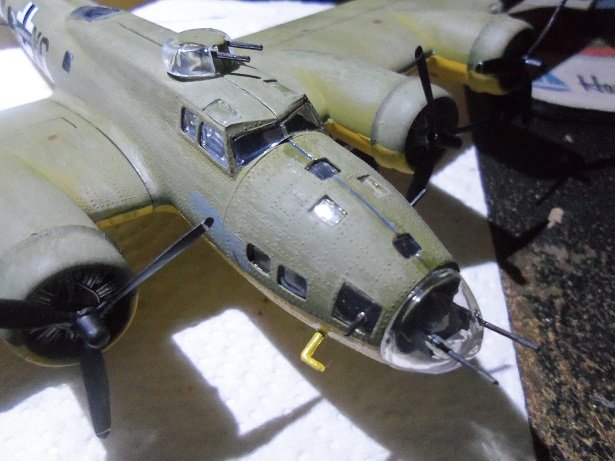
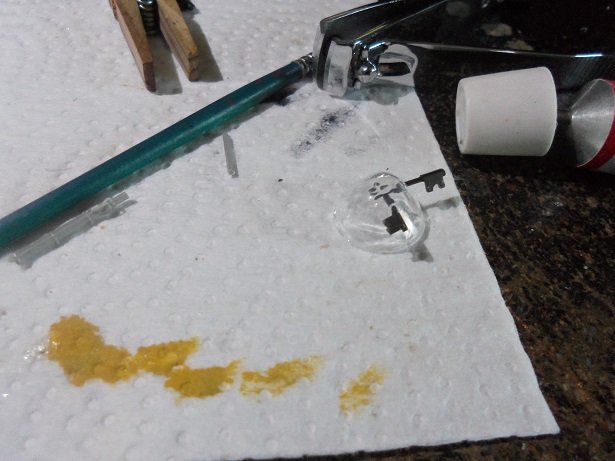
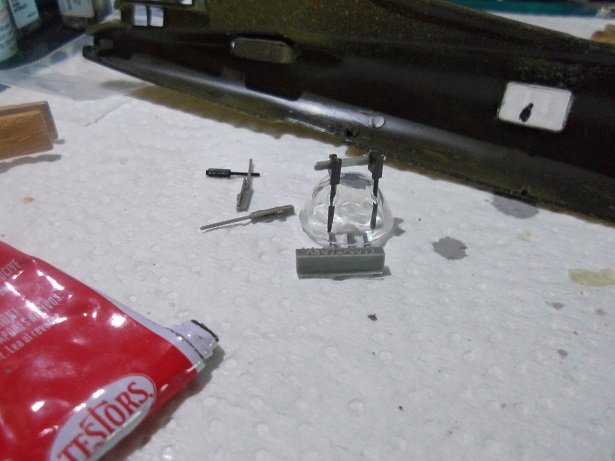
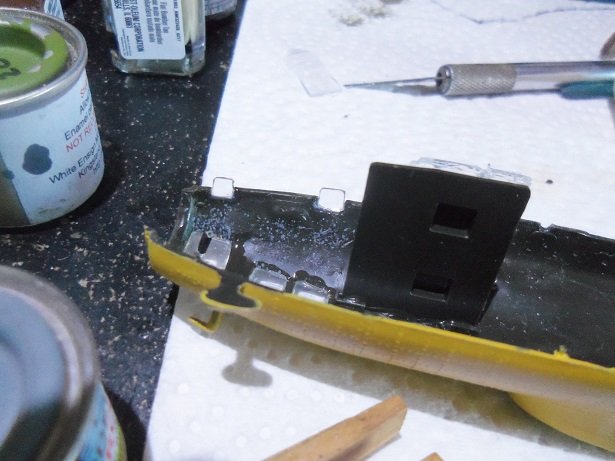
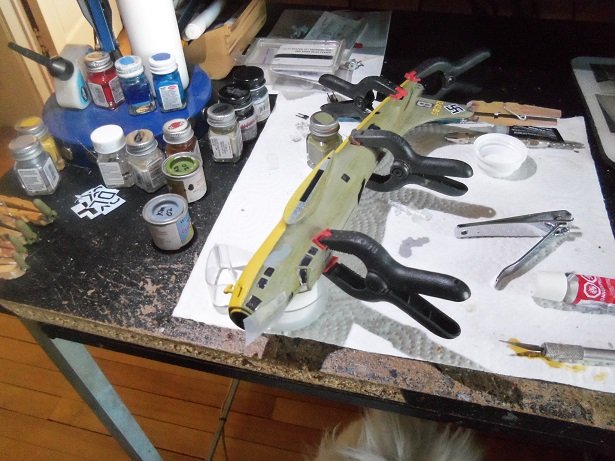
Friday morning was the decider.......the guns that Mark sent me are really nice. but the big factor here is that the guns in this model have a thicker barrel. they would look like toothpicks compared to them. the guns I have for the nose.........I came up short 1 gun. don't know why or how.......all I know is.......I am. since I wasn't using the guns for the belly turret, I took the pair and split them in half. they were very floppy and hard to manage like this, so I went into my spare parts box and found the part you see above....some rod that went to the F 15 Eagle. I chopped a piece off of it and I'll use it to join the two together, spaced enough to fit in the holes provided. if that wasn't enough, the hollow guide tube I added to the fuselage for the stand, had broken off and gone to parts unknown. I needed to find a replacement......and the turret button became the solution. as can be seen, I drilled it out larger, having selected the size pin for the stand....the original guide tube would not have sufficed. glued together, the guns were lined up and left to dry. I had a chance to look at the guns in the Memphis belle kit. the barrels are almost the same size...much closer than this kit. so I will hold them over for the Memphis Belle, a much more worthy recipient in my view the new pin for the stand......and a review of my painting skills I brought it right over to the booth and gave it another shot of paint {it's a sort of green}. the two last window parts were cemented into place.......this will be a good test for the window maker. I'll see if they stay there when I put the two halves together. given time to dry........the big moment has arrived! the two fuselage halves are glued together. these are some of my weaker clamps......didn't want to use the larger ones for fear of crushing the model. that took time to dry.........just as well, we went on our errands. after we got back and had supper, I was able to continue with the model. it was time to use up the rest of the decals. the other side was done as well. the nose guns were painted and when dry, glued into the nose glass. for all the gluing that had to do with the glass, window maker was used. the nose was then glued on the fuselage. here is the the worst of the fuselage union.......the gap along the top of the nose. I think the pilot floor didn't fall into the slots on the opposite side..........I had it held together with scotch tape. at any rate........all that can be done now is fill it. the next problem to arise, was the stabilizer wings....they were a tough fit. I had glued the tail guns in place a short while before attaching them. as I was pressing them in place {one in particular}, somehow I got the idea to use my chest to steady the fuselage.........you guessed it............the guns were bent! there was a saving grace though.........they had come unglued and shifted in a way that they did not break. I was later able to straighten them and reuse them the rudder was easy to install....I used the stand for that. it's also a good thing I'm using a stand for it.......the tail gear broke as well. of course I fixed it, but as a stand alone model, I don't think it would hold out for very long. so until the wings are on, I won't know just how good the stand is.
- 134 replies
-
- 10
-
-
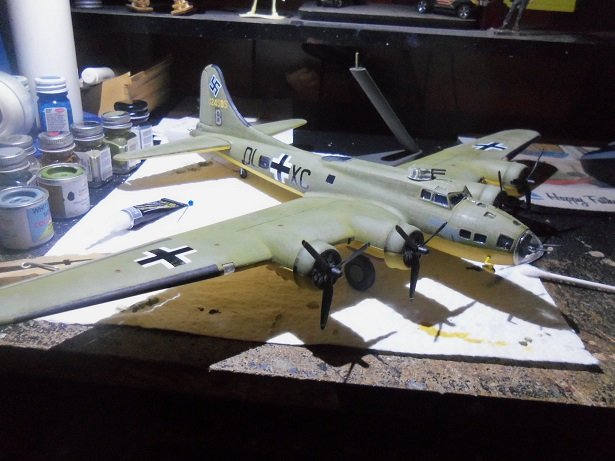
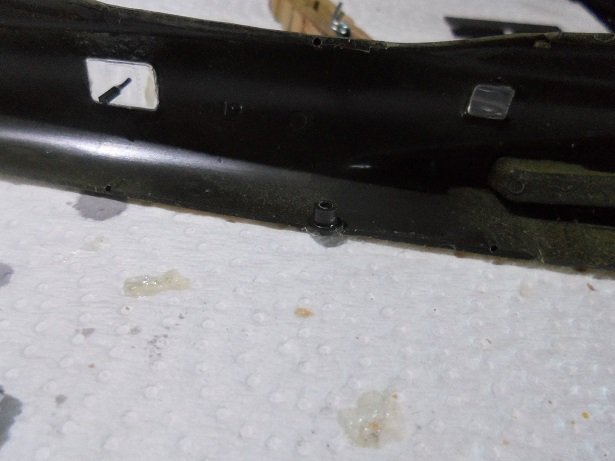
wulfie's getting there OC......a bit premature on the last log.......still quite a bit more to be done, so I have found the tail gear finally got painted.........now that it's had time to dry, it's time to cement in in place. the side that the assembly has focused on, was the recipient of the gear. I use the other half to keep it aligned with the other side, which has a location hole for it as well. the bit of detail that I almost for got about, was the blotted out nose art. there was one on both sides as I have seen, so I did this to both sides. this continued into Friday..........................
-
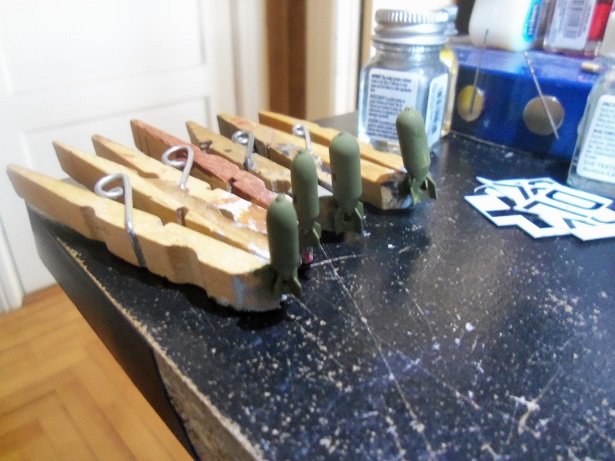
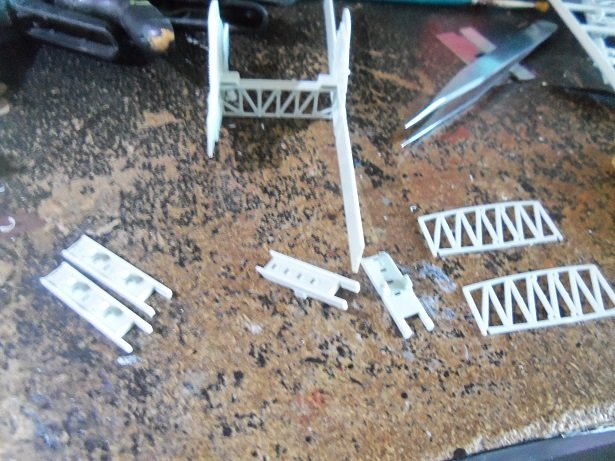
I did do a tiny bit more on her the other day, while I was waiting for things to dry. the bombs are painted....2 different sizes.......dunno know why. the bomb racks are hard to see, but I cemented on the bomb arms to them. the other two racks go on the frames next to them. soon
-
....that is so cool! I saved the image.......I'll put it in my Popeye folder it's getting quite large! thanks a bunch ! thanks as well for all these links....I was looking through Scalemates last night. the only one I came across was for another model / manufacturer. I started to look through the Revell site, but it isn't what it used to be. I was gonna go to Revell / Germany next, but by then I was fed up. oh........and I looked through Mega Hobby too........I probably used a wrong product description. really appreciate it gents.......I'll check 'em out I really like how your ball turret looks......I showed the admiral 'cuz she asked me what I was looking for. now that she's seen what I need it for, she'll stop growling at me I bought two books through her Amazon account the other day.
-
nice! this log will be a good 'go to' when I start to build mine
-
look'in sweet ...... when you ordered your masking set for the canopy and such, did it specify that particular model kit? I've been looking for a set for the Memphis Belle and have been unable to find one for Revell kits.
-
ya run into that quite a bit.......when parts are molded, the corners and edges are not totally square, so sandwiching the halves together shows gaps like crazy. I tend to sand and scrape along the edges to square things up. then there's not a lot to do later. look'in good so far......... as for inaccuracies.......I don't think I've build one yet that was spot on. that's why the aftermarket business is booming
-
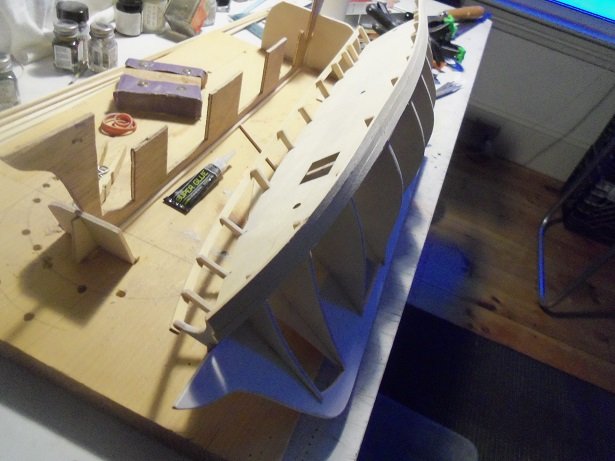
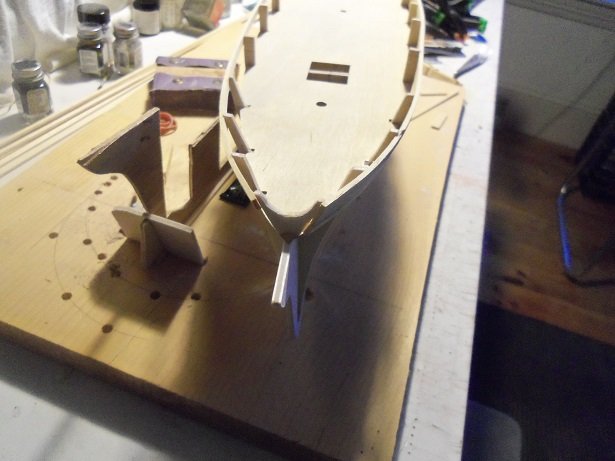
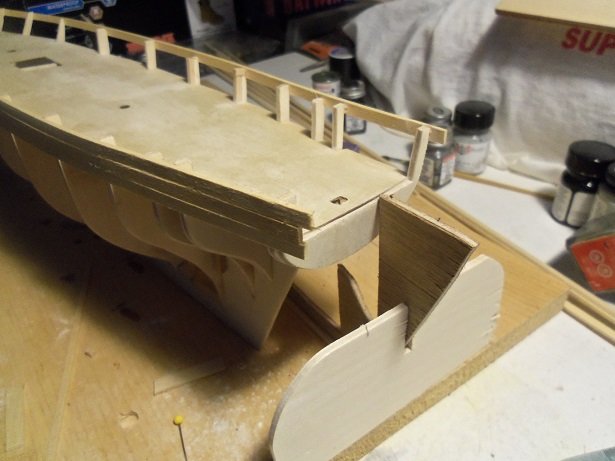
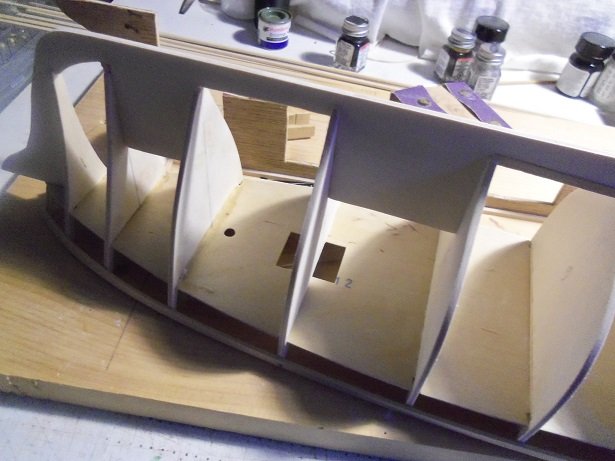
it wasn't easy........that plywood was hard to sand. I wonder where to get sheet plywood like they use to make kits.......the plywood seems to sand so much better. the bulwarks are just about covered now.......there about 1/16 gap at the deck platform. if I had thought ahead with that stern bulkhead I made, I wouldn't have cut the deck area out of it..........but with the curvature at the transom, it worked out. before I go too far with the planking though, I want to make the mast pots.........just boxes for when the masts are fitted in place. it will take a lot of guesswork out of that particular step. it funny you say that.........there are kits that make provision for the holds, some even supply parts for a lower deck. since the Clotilda is a schooner, it makes for a likely choice. I haven't done much digging to see if any of the other listed ships have any info or history. I guess if we had the same foresight, we could have done it I took care of the starboard side problem I mentioned. the cap rail will cover a lot if sin
-
the boats look great with the canvas Kevin.......you got me thinking of the ropes as well. you have to look at it from a functional point of view. leading out from the bottom, are they going to rub on anything when in operation. would they rub on the deck? leading out from the top is what I usually do...a lot less apts of rubbing, and the detail is more pronounce. your structure work is top notch.......looks awesome!
- 337 replies
-
- 3
-
-
- finished
- mountfleet models
- (and 1 more)
-
it's been awhile since I last looked in......good to see you've made some really fantastic progress on her. four years really isn't a long time, if you look at the detailed rigging and tackle........some really phenomenal work! keep up the good work.....she looks superb!
-
jee J........I shudder to think of what mine would have looked like! I wouldn't worry about anything under the deck platform.......but for the bulwark posts, just peel off the delaminated areas and glue on some 1/32 sheet wood and they will look like new already done it to a few of the original bulkheads. while I have the original parts, perhaps I'll make up another hull..........I really do like the brigg angle on the model. I'm sure they got the concept from somewhere........ yea.........looks ugly right now, but once planked and the ground work is done, it will start to look like something. I just put both books on order.......thanks for the head's up I'm sure it will save a lot of searching
- 211 replies
-
- 1
-
-
- agilis
- steingraeber
- (and 1 more)
-
I haven't looked for them, but there are some really neat science kits out there........we get them for our oldest grandson. the last one we got him, he had it assembled in a couple of hours! I used to enjoy the erector sets....buy others and connect them together. mine had hand cranks..........today's kits have electric motors ..........nothing like spoiling a kid.....harumph!
-
beautiful work Ekis.......very nice with the windows and doors
-
hey there Tom...welcome to the fold I have the same B 25J kit........did 2 sets of decals come in yours? both versions are on the sheet, so if yours didn't, then I got a boon! also, did your kit come with 2 clear sprues of clear parts? oh.....never mind.......I just check it and saw that the nose glass is different.......ya, for the two versions it's a good looking kit......just the right scale too. it's too bad I've slated another B 17 1:72 scale to be next.......I'd join you almost finished with the Arizona {I'll look forward seeing what you do with her}. great airbrushes! I use siphon feed airbrushes.........just do a few tests...once you get the feel, you'll be hooked following along..enjoy!
-
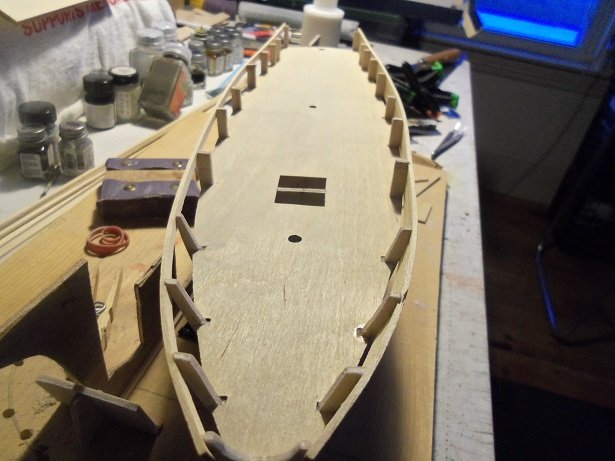
the faring process is pretty much done now......now the planking can begin. starting with the bulwarks, the top strakes were cemented in place. I need to adjust the stern post on the starboard side though, since it's off line at the stern. as I'm fixing that, I continued with the port side. so far.....so good. you can just make out the starboard side problem at the stern ...and like most models, they design a bulkhead in the middle of the hold opening. oh well.....closed it is