
HOLIDAY DONATION DRIVE - SUPPORT MSW - DO YOUR PART TO KEEP THIS GREAT FORUM GOING! (Only 36 donations so far out of 49,000 members - C'mon guys!)
×


popeye the sailor
-
Posts
16,007 -
Joined
-
Last visited
Content Type
Profiles
Forums
Gallery
Events
Everything posted by popeye the sailor
-
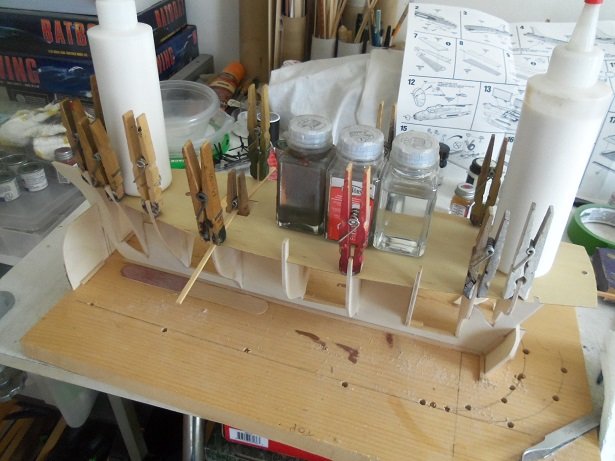
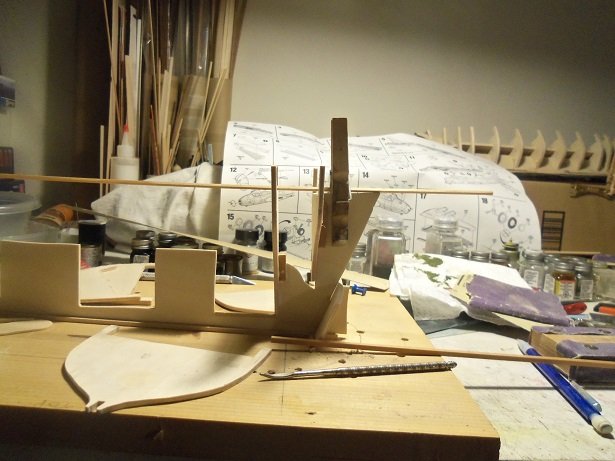
 is it morning...........I feel like I got run over by a truck ....really gotta change jobs one of these days. I always feel sort of laggy after a work week........but that didn't stop me last night though after a bout of falling asleep at the computer, like I always seem to do, I got productive. ....it actually felt good to be at the table after the last bulkhead was put in place, I shut off the light and called it a day. even with how I felt this morning, I took a look at the frame. everything looks fine. for chucks and grins, I dry fitted the deck platform........it went on unbelievably well, only needing a few adjustments of the bulwark posts. the deck isn't pushed down all the way. I did a few trims here and there and fitted it again.......a lot better this time so at this point, I threw caution to the wind and cemented the deck down. gotta go for a haircut........I'll see later when it has dried. I still haven't found the magazine.....I hope I see it at the barbers
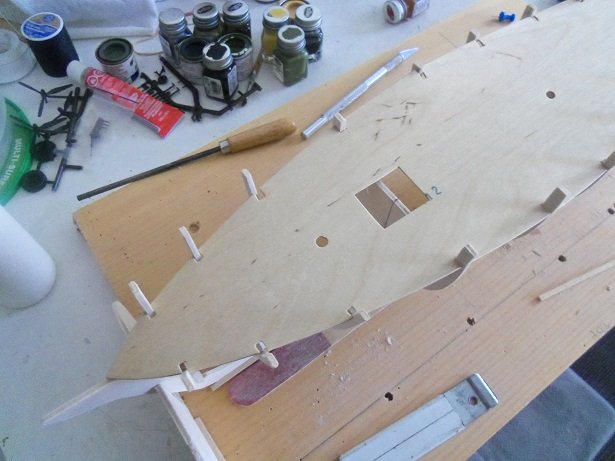
-
that would be capstan Ziggy........windlass's are usually located at the bow, and sometimes under the fore castle deck if the ship has one
-
Revell 1/72 De Havilland D.H. 2
popeye the sailor replied to SigEp Ziggy's topic in Non-ship/categorised builds
looks really neat I'd test it out first though....you never know, it might be fine. -
glad to see you were able to make the repairs and finished. the diorama looks super
-
your really moving on your project now! really nice job! how much does this weigh now? did you leave this as a sectional?
-
the train medium was the last group to embrace the model kit.......they have always scratch built their layouts and pieces when I got into wooden ship.....it was so easy to develop scratch building as a method to obtain the parts I wanted. plastic was no different really........I recall many getting cut by chopping plastic if a car fell out of favor with the way it looked, it turned into a race car that's always been the problem with planes....once closed up, all the hard work is gone. that's why I love the larger scale kits......you get to see more
-
those guns look good Mark......hopefully they come with ammo belts. if not, I'd incorporate the ones from the other gun set {I like the way they look in the first picture}.
-
looks so nice turn it so the light can get rid of the shadow
-
on larger war ships, the bow spirit goes through the spar deck, and even the fore castle deck {if there is one} and is anchored on the gun deck. not being too familiar with types of sailing ships {I just like to build 'em}, I had to look back at the box...a Galleon I have a Half Moon I still need to mast....Billings. I like the construction of this one
-
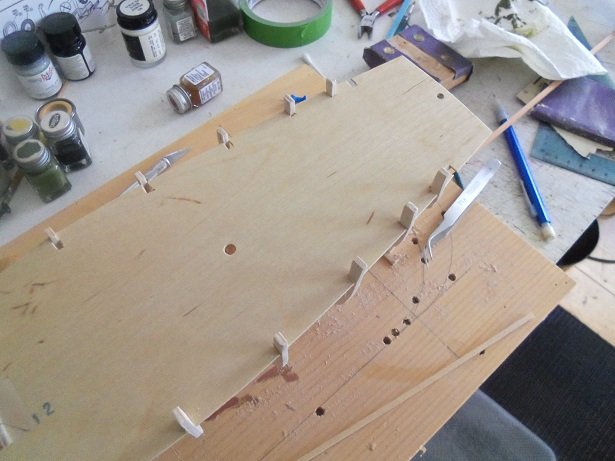
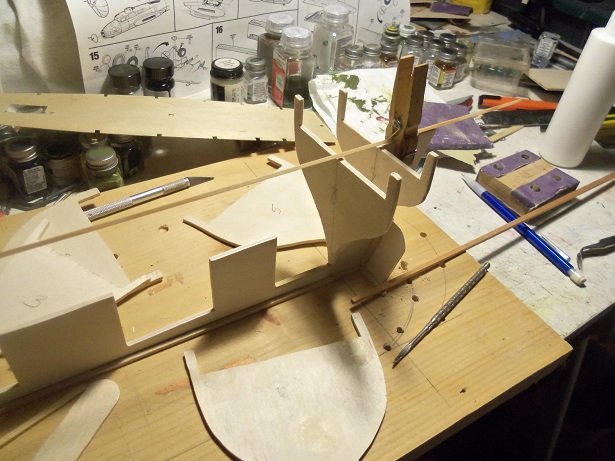
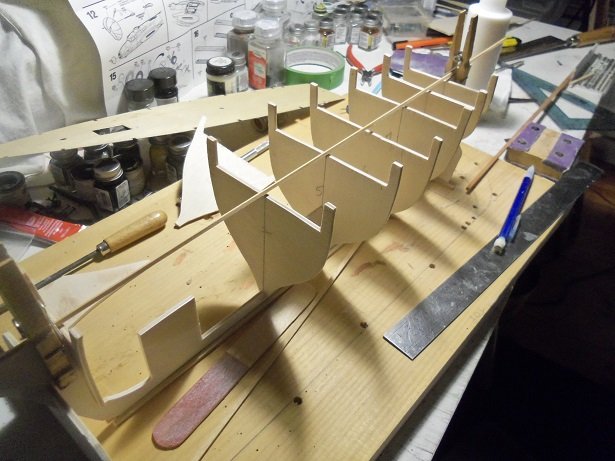
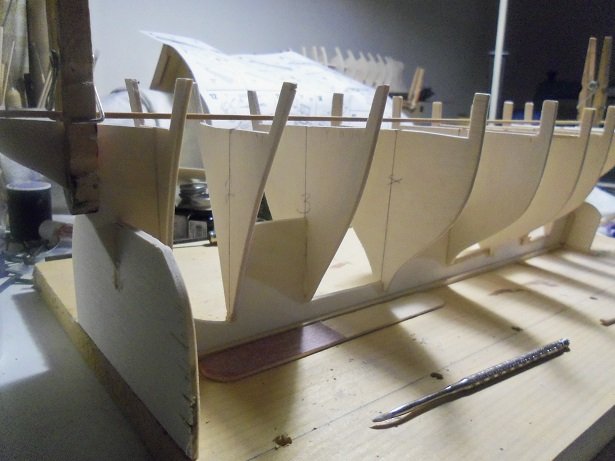
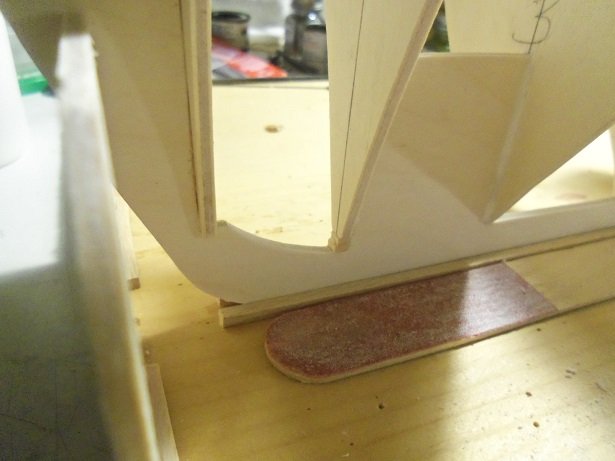
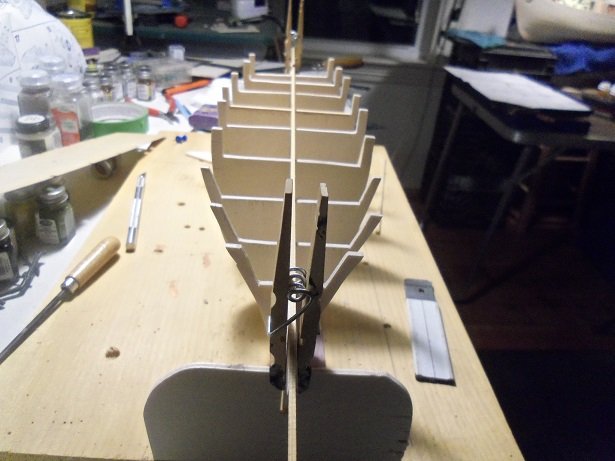
after seeing what J went through to assemble his frame, I might change it up a little. I still want to give the deck a little camber fore and aft....I think that's typical, especially with these ships. taking a straight 1/16 X 1/16 length of strip stock, I laid it bow to stern, pressing it against the tops. #9 and #8 were cemented in place....some shimming was need to bring them up to the line blocks were added to give them more bonding area this went on all the way til I got to #4, making sure that the wood strip was pressed against the stem tops. I saw that #6 was still a bit low........instead of ripping it out and doing it again, I just added a shim across the deck area. others are shimmed to bring them up to the line. all of the bulkheads, except #10 are in place now. at this time, I loosened the strip to reveal how much camber I gave it note at the bow stem...the tip of the bow is higher. pressed down in the center {around #5} it can be seen that the bow and stern are higher than the center of the deck. it's not much camber, but it's enough. #6 and #7 got the most shimming. as well as #2 looking down the barrel of the frame, I notices #3 was a bit off. that one I did remove and reposition....no way to shim my way out of that one judging what J said about the deck platform, I wonder if the supplied platform is even salvageable?! some how, it doesn't seem correct that there should be so much stern overhang, or that the deck so far back at the bow. I'll do a bit more to strengthen the frame, and then we'll check out the platform. it sounds like it will be instrumental in adding the transom.

-
awesome looking kit......nothing looks flimsy deck planking looks nice too.......gonna look even sweeter with sealer on it.
-
awesome progress.......nice touch with the autographs
-
off to a good start!
-
very nice progress Mark........very close to putt'in her together
-
absolutely wonderful build OC..........your detail in the rigging....the figures, as well as you choice of color, makes this a really fine looking model congratz to you!....bet the admiral is VERY happy!
-
nice! you have quite a scene going on there can't help but think, that with the way she's arched, he shot her in the back they look really good!
-
that what I did with the Craftsman.....I don't recall if it had a pressure adjustment. the side to side motion is normal, since there is nothing that prevents it.......there is a tension adjustment {I can play a musical tune } dunno......I'll do something with it before I use it again
-
your further along than I am.........I like the name you gave it I call mine Andy interesting insight........part #13 looks nothing like it does in the diagram. the platform fits weird........I imagined the planking which should go all the way to the bow stem........it will leave a gap at the bow decking, I think. I saw the same thing with the two final slots in the platform........not to mention, how far back the platform sits {the tiller hole doesn't align with the stern stem}. I had a feeling that there would be scratch building with the hull. you may have confirmed it I wanted to do some on mine during my work week.......couldn't get up the energy. I'll work on her tomorrow night.......see what I come up with. which ship is that in the background? looks cute
- 211 replies
-
- 2
-

-
- agilis
- steingraeber
- (and 1 more)
-
really sweet job on the cockpit
-
really nice model OC..........
-
the piece that is attached to the rubber bands.........should it be going though the gears? I take it the energy from the rubber bands, turns the gears, which turn the axles and wheels.....
-
probable that the resin finish may be too smooth for the paint to hold onto. a light sanding with really fine sandpaper....just to skuff up the finish may help. primers are made to prep the plastic.....chemically burnishing the finish so that when dry, will be a good surface for the color paint.....heck, I've seen some that actually melted the plastic! {puckered the surface like crepe } I've had little experience with resin, other that the resin I use on my boar hulls. some aftermarket parts are really nice.......I've used them very little myself ......but as I read from other logs, some aren't worth the trouble and confusion they can cause
-
she's a fantastic model Rob....so very well detailed worthy of a case for sure......
- 1,208 replies
-
- 1
-
-
- great republic
- clipper
- (and 1 more)
-
right Mark....that's not a dive brake to say, but it does perform the same task while landing and taking off. can't imaging flying one of these upside down.......or what the gunners were uttering a good example of dive brakes would be the Stuka. the turbos will be painted another color Lou.........part of the additional painting I need to do. of course I'll need to spruce up the cowls and fix my little pho-par on top of the wings. I love that color yellow...didn't think it would fit the bill, but it does quite well. that paint is like milk.......airbrush would be better than the brush using it. I hope so too.......first time I've made one. I should find a way to reinforce the tube I put in the fuselage........I fear that over time it might break or distort. for the Nine o Nine model, the stand uses a soft rod to support the plane. I still have some, but it is too large a diameter to use on this one. I'll be using a stiff brass rod......I should have figured out what size before I fitted the tube. on well........feel as I go