
HOLIDAY DONATION DRIVE - SUPPORT MSW - DO YOUR PART TO KEEP THIS GREAT FORUM GOING! (Only 44 donations so far out of 49,000 members - C'mon guys!)
×


popeye the sailor
-
Posts
16,007 -
Joined
-
Last visited
Content Type
Profiles
Forums
Gallery
Events
Everything posted by popeye the sailor
-
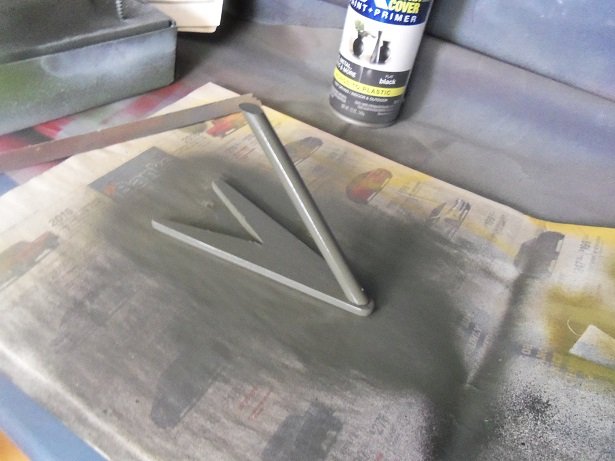
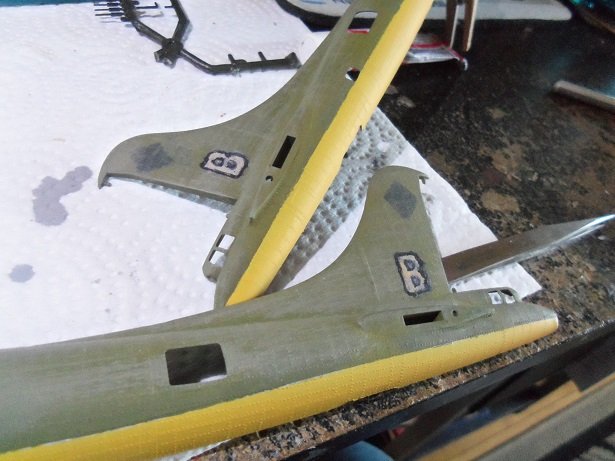
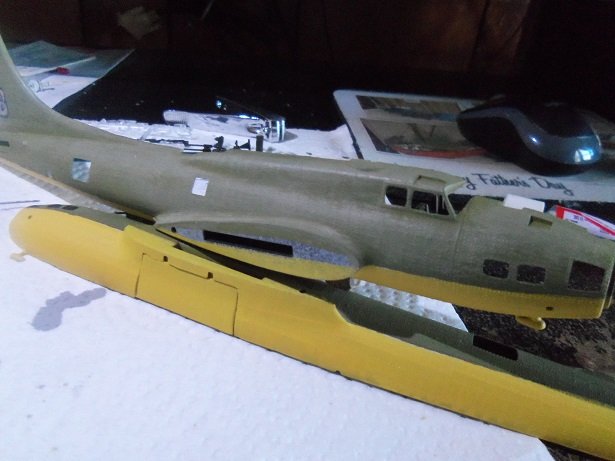
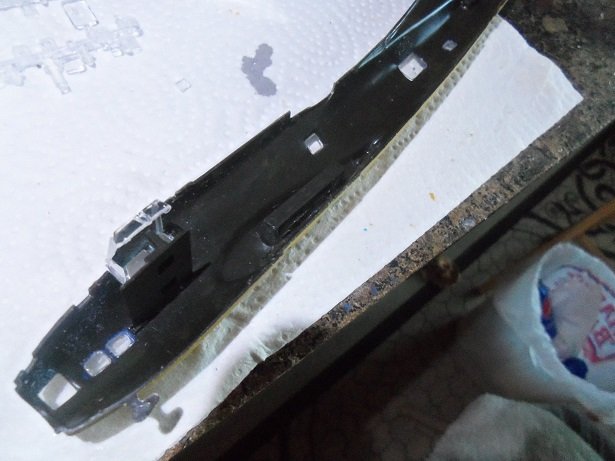
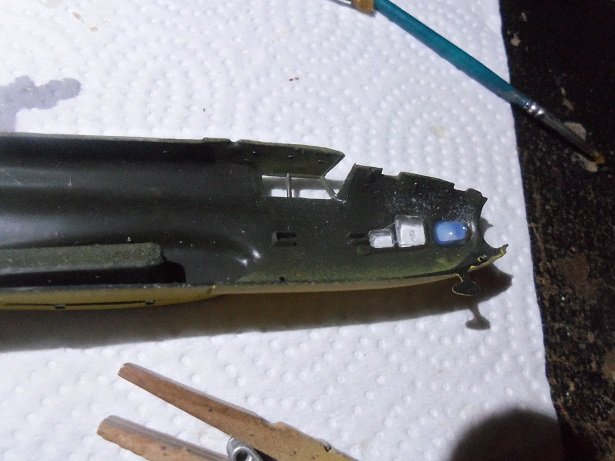
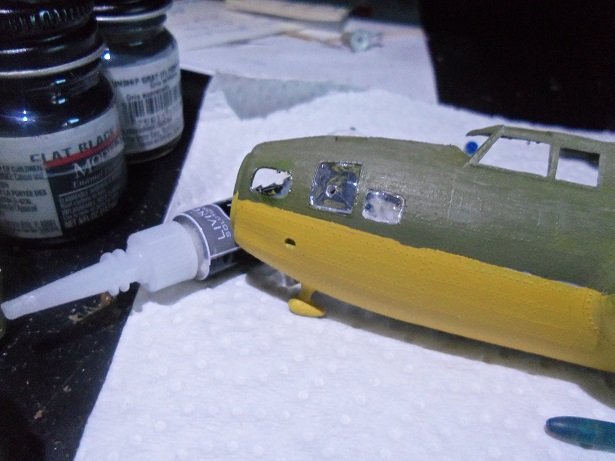
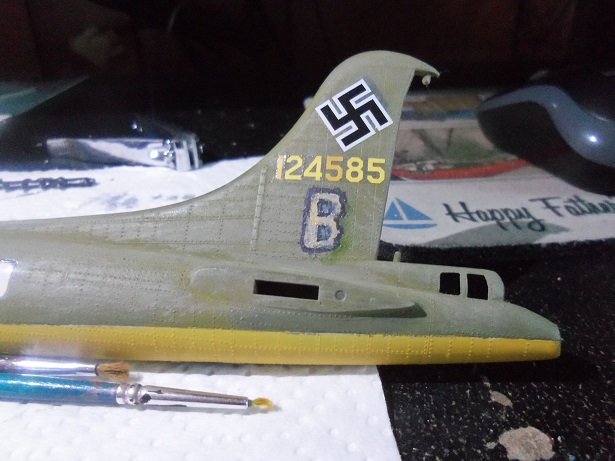
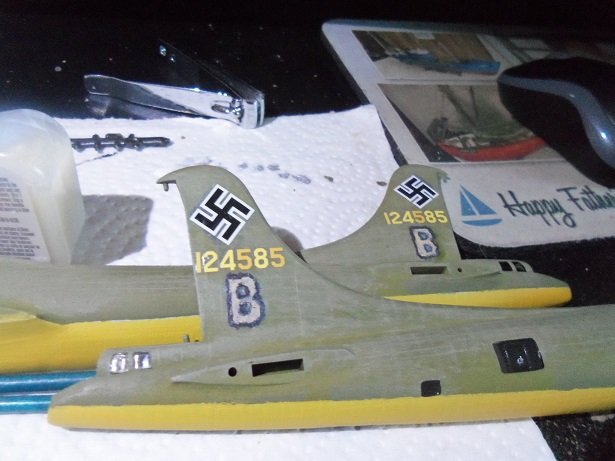
 ....and here's another update on Wulfie! well....after faring on "the frame that tries men's souls", I though I'd put equal time on her. tackling the other wing, I got the painting done on the turbos, touch up paint, the prop assemblies, and both lights done.......they are pretty much complete now. the stand got a coat of paint.......need to make a name tag decal for it now I got back to obliterating those B decals on the tail fin.........I was beginning to think I should have painted them on in the first place. using a Q tip, a German light gray was dabbed on.......any other method would have torn the decal to shreds....flecks had already started to break away. as in the picture I showed earlier, they were bordered with a darker gray........I used a darker color German gray {I have such an array or gray tints now.....it's disgusting}. I didn't dare go any further........ as you might have noticed, I also went over the fuselage with bomber tan, making the fading more pronounce. from here, I went onto the windows......cementing them in place with the window maker. getting most of the windows in place, I happened on one that is not in the kit.......I have nothing for it. 1:72 seems to be the perfect scale for the window maker......I filled in the missing window. this morning I took a look to see how it had progressed. looks a bit different than the plastic glass, but it will have to do. at least there is glass there. the rest of the tail fin decals are in place........I wish Warbirds did the B decal the way they did the call numbers the two together still the guns and tail gear to put in place, and then I can close up the fuselage. there are two bit of glass to go on the top of the nose...........but there's one bit of detail that I forgot.......I just thought of it. I will add them today. actually........there's a few more details, but the last ones I can't add til the wings are in place. one more update I think, and this project will be finished.
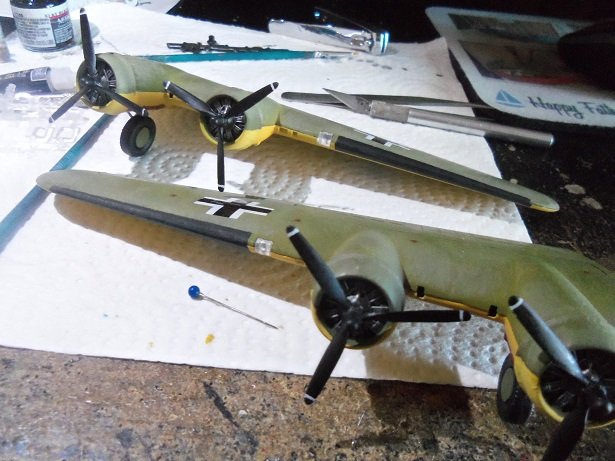
-
you don't need to....we are all in our own class hope you reconsider. we have this bird on our calendar this year.
-
sorry to hear of your ills........interesting you picked this hobby, since it is jam packed with such a roller coaster of triumphs and failures {pardon for being blunt}. it is a plus though if your desire is to keep your problem solving skills up to snuff. your attitude to keep trying is commendable too.......never give up with something you love. you have a small handicap, but we all strive to create the 'near' perfect model.......so we're in the same boat so to speak.........a lifetime of trying..........periods of crying..........perhaps one of these days, we'll catch a break I thought that's who you were.......reading your logs made me even more sure. you are talented, so keep up the good work. have you seen all metal erector projects out there? I would think that if there's a problem, you'll be able to take it apart and fix it. still following .........these sort of model projects are interesting. I'm not a T supporter............nobodies perfect
-
Revell 1/72 De Havilland D.H. 2
popeye the sailor replied to SigEp Ziggy's topic in Non-ship/categorised builds
....and finger prints too........I never forget a paw! our Eskimo, Gibbs is like that. if I drop something and don't pick it up right away, he'll carry it off to his lair {under our bed} and destroy it. I hope you still have that upper canopy part.......you can scratch every thing else. if not.......well, you'll be following her / him around for a little while -
you should post on it
-
second that....great tribute and progress OC!
-
with what I've read, it depended on what time of service the craft was used. take the B 17.........depending on the segment of service {and what squadron}, the call letters and numbers can be a certain color......early seemed to be yellow.......mid war was black, and towards the end was white. some were even white outlined in black or red. I found that out when I ordered that sheet of letters and numbers........I found out that they had their limitations.......I would have to order additional sheets to widen the scope. it's the same with the insignias...........JEEEEEE....stick with one banner people.....pleeeeeze! { my rant with the military} they make it soooo hard on us modelers! look'in good Mark
-
me and a friend { Randy} boated out in lake Dias........ beached on a sandbar and went for a swim. it was coming back when I saw the gator. I think it was also the time where I got a case of roundworm.......very nasty and itchy.......everywhere........even places you can't see!
-
a big hello as well just all around good crazy fun here......I think my admiral is through, keeping up with which medium I'm working in
-
I'd have never thought to do that either......and also gave me more insight. when I get more into the Memphis Belle, I'm going to need this masking stuff..........I've never used it before. being a first for me, I thank you for the info on how to use it. the paint tip is a plus, because the inner framing too will need to be the chromate green. when you see some of the panels, this will be important you'll see soon the blue looks black to me........gotta be the camera. my best friend Mike lives Kissimmee..........closest I ever got was DeLeon springs........lake Dias. there's something unnerving about seeing a gator sunning himself on a log, after swimming and having a good time in the water
-
yea...it's like I said on my log.......the hull frame doesn't seem complete. so far, I've added the part for the bow {whatever it's called}, a more revised stern transom bulkhead, and of course, those two extra bulkheads done as halves. older kits haven't had the input that the more up to date kits have...the more up to date kits have improvements from customer service and complaints. I looked at the other stuff and the boat......hopefully, that ink stamping can be sanded off. the boat does seem large, which is typical of a majority of kits out there......parts are supplied with no thought to scale. I got to look in my inventory and see what I got. it's still early for me...I want to see what the hull looks like. I'm leaning towards a schooner though. I have the extra parts......who knows what I might do
- 211 replies
-
- 1
-

-
- agilis
- steingraeber
- (and 1 more)
-
awesome job Jack! congratz to a job well done
-
look'in forward to it
-
the interior is looking great....nicely done
-
a little added detail is always good you could put in lower deck platforms, like other models....plank it over. where did you see a forward hatchway.......in the picture? the picture shows two hatchways......one before and after the main mast. it shows a forward cabin. what type of ship are you modeling it after?
- 211 replies
-
- 1
-
-
- agilis
- steingraeber
- (and 1 more)
-
hi there J..........man, I hope we are! how is your faring going?
-
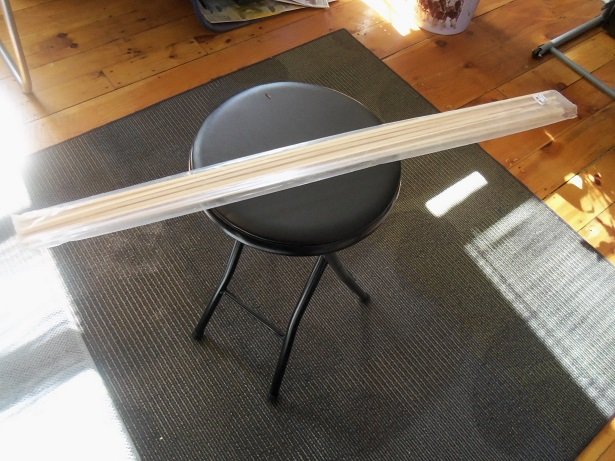
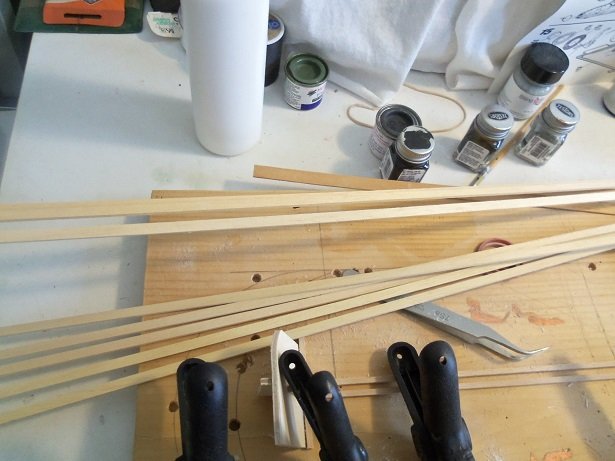
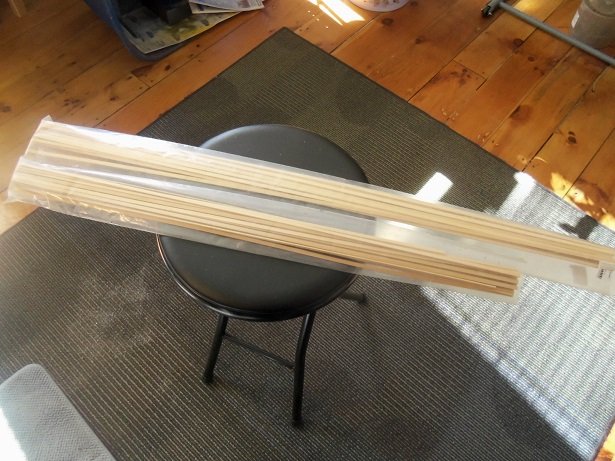
that #3 bulkhead........it has the same problem as #6 & #7. the good thing about it though is that I can break the bond at the deck platform and shift it over. when I do fi get to begin planking, I'll be using 1.8 X 5 X 880 mm planking they come in packs of ten.....I buy it this way for good reason given the length of this hull, I can cut them in two and double the amount of planking. should the hull frame be longer, I can still do full strakes when I need to. for this frame though...half is perfect.......it's almost the exact length {a little extra}. I should have little waste. this pack has 17 full strips and a few oddballs from a past planking job. I should have enough........but if not, I have a fair size bundle of 1.8 X 5 X 550 mm planking. I have plenty of thin strip in various shades of annegre, when I begin the deck planking.....but that's later. ok........breaks over..........back to faring.......pfffffffffffffff!
-
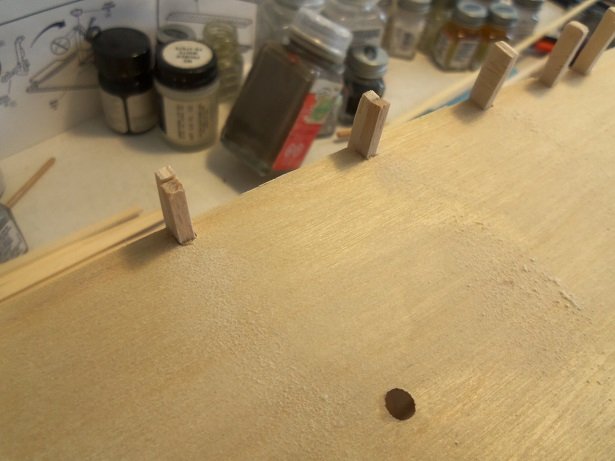
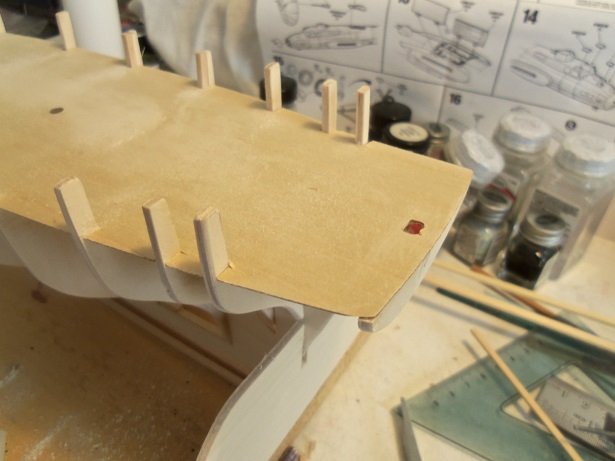
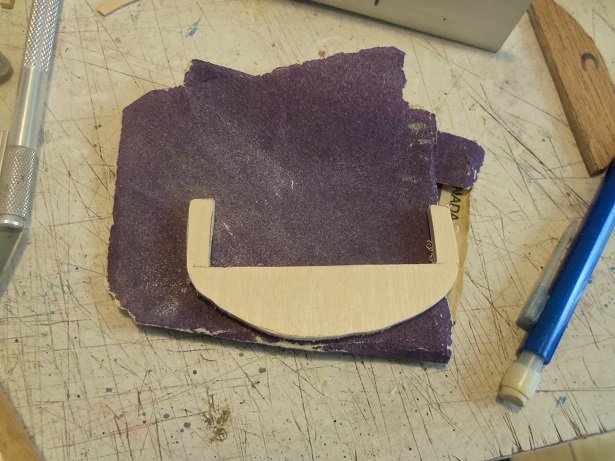
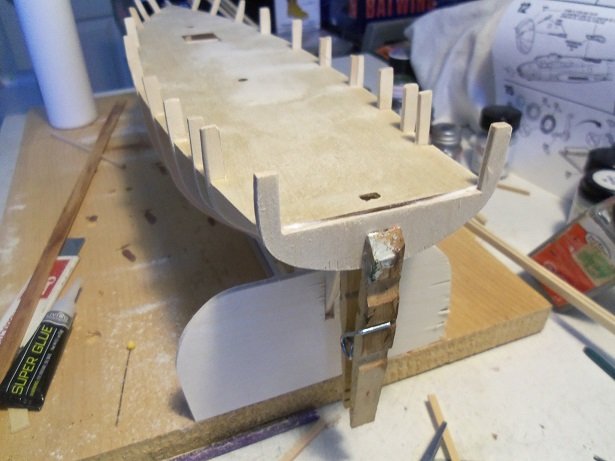
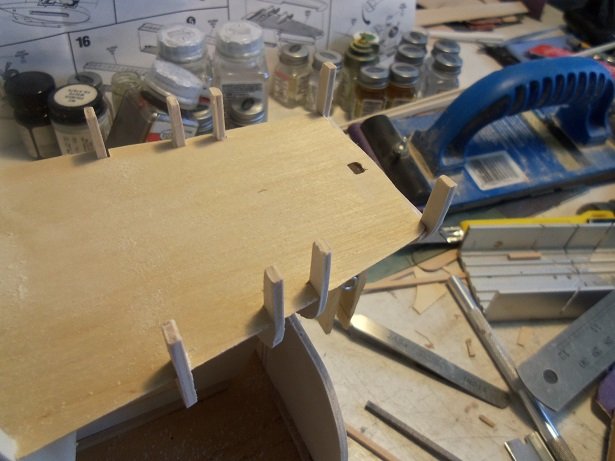
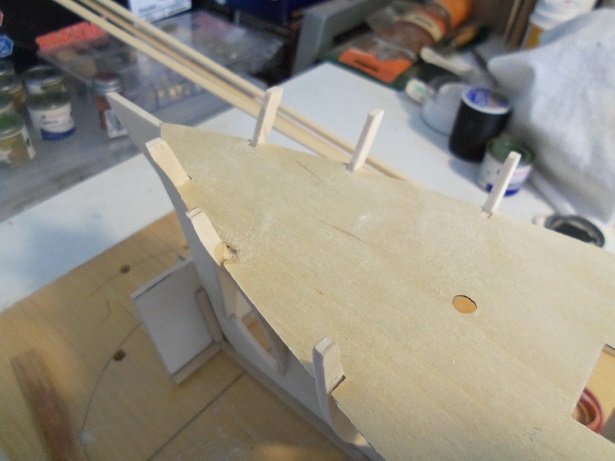
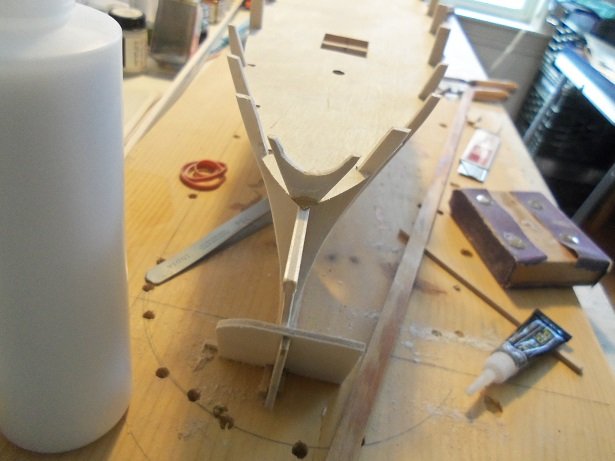
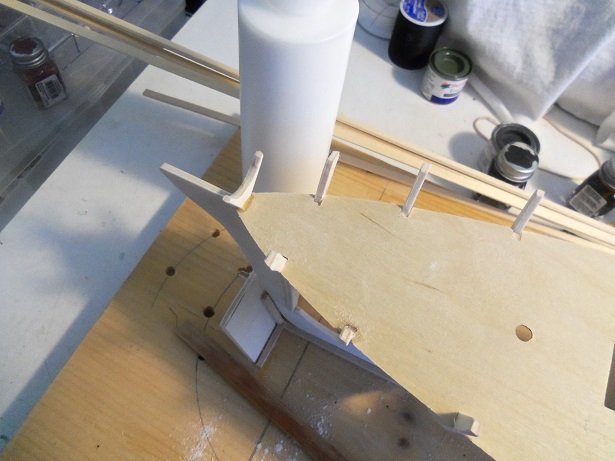
at the moment, I'm faring the frame.......i'm finding some serious flaws. even with finding and following the centers, the shape of the bulkheads are very off. with bulkheads #6 & #7, they line up on the port side, but on the starboard side, they stick out like a sore thumb. I need to sand down the contour quite a bit......that's going to seriously cut down the depth of the posts and reduce them to twigs. the space in the deck platform showed me how much will need to be removed....looks to be about 1/8 of an inch. I cut a couple of pieces and fitted them in to thicken the depth....they fit in the spaces. you can see I already did it........taking down the offending overage, that would have resulted in a monstrous bulge if I didn't. the bow bulkheads are splayed out too much as well. I know that some sanding is required, thus the need for faring the hull frame......but it's pretty dramatic. it's like they designed the frames, to give the bow bulwarks a dual roll...protection of the deck from waves, and to act as a breakwater. I won't do much about it, except cut down on the amount of splay that they have. there is also another problem here, but I'll get to that in a moment.......let's look at the stern. Ideally, I see this frame as unfinished...it's missing a few things. I added those other two bulwark posts / bulkheads......this cuts down on the big gap between #9 & #10. but where are the transom posts that are going to terminate the planking at the stern, with regards to the bulwarks? the #10 bulkhead only fits under the deck platform, and does nothing else. taking the #10 bulkhead and tracing it out, I laid the #9 bulkhead over the tracing and drew in the bulwark posts. cutting it out, it looks like this: after some sanding and fitting, assembled over the #10 bulkhead, the problem is solved. the only thing it changes, is that I won't be going with a curved transom. it fits neatly under what overhangs back here and can be cleaned up with deck planking. you can see that my faring the hull frame has somewhat rounded off the corners of the deck platform. the hole for the rudder / tiller will be planked over to pave the way for a ship's wheel and wheel box....can't think of the name for it. I'm half the mind to scratch a galley cabin and poop deck........knowing that it would dramatically change the specs of the boat.....aaawwwwww, it keeps me from doing it {kick'in the can}. it still has that slight angle that I gave it....at least the bow is missing something too........how does the planking initiate here? with the splay as much as it is, there will be a gap on both side of the bow deck. I can fix it with deck planking, but what of the stem........how would the bow spirit fit? you can see how I removed some of the post splay......even broke one in the process. there will be a fore castle deck.......instead of a capstan, I am going to use a windlass. I do wonder about the two anchors....since I'm emulating the brig you see on the box, this size vessel would probably do well with just one anchor. if anyone has some knowledge of this, please help me out here not sure of the proper name for this part either, I scratched up this little fork like thingie..........I still need to drill the hole for the bow spirit........I left the door open for alternate placement of the bow spirit boom. we'll see how all this will benefit, when I get to planking her. I should have more by this afternoon for ya'll
-
good morning J...........just took a break from my dog's breakfast. Andy is being very uncooperative........finding faults all over the place with regards to faring the hull. two other thoughts I have is the termination of the planking at the bow and stern. there should be some sort of bow bulkhead that will support the bow spirit..........and at the stern, where are the posts for the transom? I'm thinking that my curved transom idea has gone out the window.....show my idea soon. I'm also having to reshape the bulkheads......some are too wide.......some are not in line. it's a mess. more on her soon my friend......I hope your faring better than I. fare the frame.....very important!!!!!
- 211 replies
-
- 1
-
-
- agilis
- steingraeber
- (and 1 more)
-
my good man.....don't leave that in there.......it's to be savored deck framing looks very good! the Boulogne Etaples is set up much the same way......since I wasn't going to build an RC version, I had a heck if a time covering the open area. it wasn't build solid as this one was. the deck showed the ugly lines........took some doing to get rid of them. {I really need to get back to it}. I see your into balsa planes too
- 90 replies
-
- 1
-
-
- billing boats
- colin archer
- (and 1 more)
-
some of the parts are done in wood sheet that is too thick......sometimes best to make from scratch. the pilot house looks very good old kits are fun....aren't they
-
I never knew that.........had to look it up. yea....that's pretty sad....I watched Combat, as well as the Rat Patrol regularly.
-
look'in really nice......the courtyard looks especially good with the greens and fountain. are you going to use some of that scenery stuff? that would give it some realism your moving right along with it...great job!
-
if I recall, I scratch built mine......gave it larger windows and doors that open. another trademark of an older kit.......the printed wood look'in good!