
HOLIDAY DONATION DRIVE - SUPPORT MSW - DO YOUR PART TO KEEP THIS GREAT FORUM GOING! (Only 20 donations so far - C'mon guys!)
×


popeye the sailor
-
Posts
16,007 -
Joined
-
Last visited
Content Type
Profiles
Forums
Gallery
Events
Everything posted by popeye the sailor
-
 I find models that have a connection more enjoyable........one of my projects are the cars that my parents owned when I was a youngster. I haven't started it yet.......waiting an a pair of engines nice looking plane........was it hard to find and source the markings? love the color
 -
good to see you working on her again! I see your out of the box with the airbrush........you'll find there's no boundaries.......the paint looks fantastic! looking really good !
-
I have adopted another orphaned kit
popeye the sailor replied to mtdoramike's topic in RC Kits & Scratch building
the fitting kit you purchased is the new release of the kit.......the original kit had all metal winches.....even the pulleys were metal. those can be found at Cornwall Model Boats. the metal winches can be sourced, but they do cost a bit -
I have adopted another orphaned kit
popeye the sailor replied to mtdoramike's topic in RC Kits & Scratch building
even as an older kit, it's still a very nice model I built mine some time ago........an older kit that was given to me by a gent who had it in his attic for about 30 years. older kits did sell with the fittings separate in the event that the model was never completed {the wood half went for around $150.00}. he had the fittings and couldn't find them.......in the meantime before he found them, I had cobbled together the fittings with the help of Tom @ BB USA. in the end I had two sets of fittings. since a couple of years ago, BB USA {which is now part of Ages of Sail - Product Catalog } the fitting are now available for the Nordkap, the Mary Ann, and other kits that were never available before. I wanted to build a newer kit....the laser cut experience was a huge draw.....so the admiral got me another for Christmas. little did she know, she had bought me another of the older kits that was alright though, because when I researching about the Nordkap kit, I happened onto a clone of this model, the Progress. I have pictures of the finished model......and not long ago, I actually found one of the diagram sheets online. I have a log on her here somewhere........I really need to get back to her. I should have sealed the Nordkap the way you did....would have saved me from the headaches I had painting the hull. my only excuse is that it was my first wood boat model, even though the Cux 87 turned out to be my first finished wooden ship. it's too bad that my log is gone....lost in the big crash some years ago. the printed wooden deck platform showed the margins....I made those from scratch and I planked the deck. I did do a blog on her...if your interested I can give you the link, should have problems. an accomplished modeler like yourself should have no troubles though enjoy the ride.........I certainly did! -
I've never heard of it......I'll give it a try next time. thanks Ken since I knew where I glued it, I was able to cut the parts free with a razor blade......the back ends were the worst, and of course, took the brunt of the damage. I though I had set everything in order......must have had my head somewhere else at the time. I will always post my mistakes OC.......if it saves someone else from doing it, then I've helped with valuable information I made a little bit of progress, but not enough to write home about. more soon
- 104 replies
-
- 11
-

-
Gary's thoughts are my own as well......the realized size of the diorama next to a pair of glasses is amazing! very ....very nicely done!
- 189 replies
-
- 10
-
-

-
nicely done
-
yea....folding wings and such makes the model all the more delicate. for myself, I've only been able to adequately repair a couple......the others I simply abandoned the idea and fixed the wing, attempting it again on another model. in my younger days, I had a lot of models on the shelf looking good......love the repair job with the gap
-
the planking is coming out really nice stove looks great too!
- 419 replies
-
- 2
-
-
- Victory Models
- Pegasus
- (and 2 more)
-
thanks Mike when I thought of this color scheme.....I had to do it. I'd be a fool not to. I'm pleased how it came out. I still have the nose glass to finish.....it's sitt'in here at my desk. the darn paint keeps rubb'in off from all the handling. once I get it done, I'll post a couple more pictures. concerning a third captured plane.........I saw one today! not sure I can pull the trigger, but if I do, it will have an interesting twist again....thanks to all of you for your likes
-
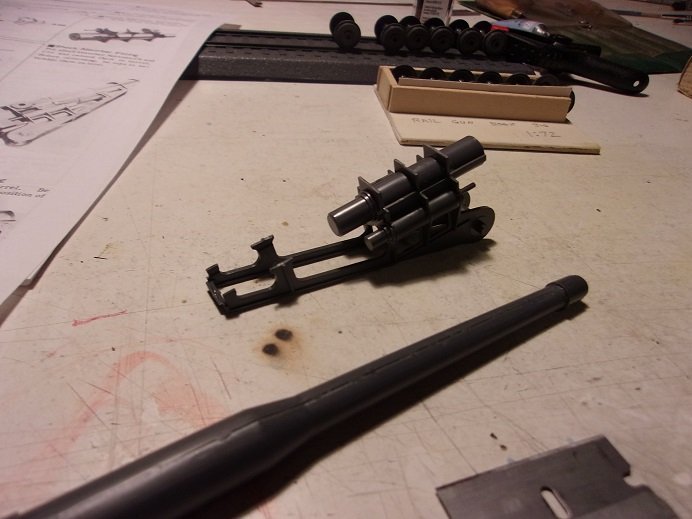
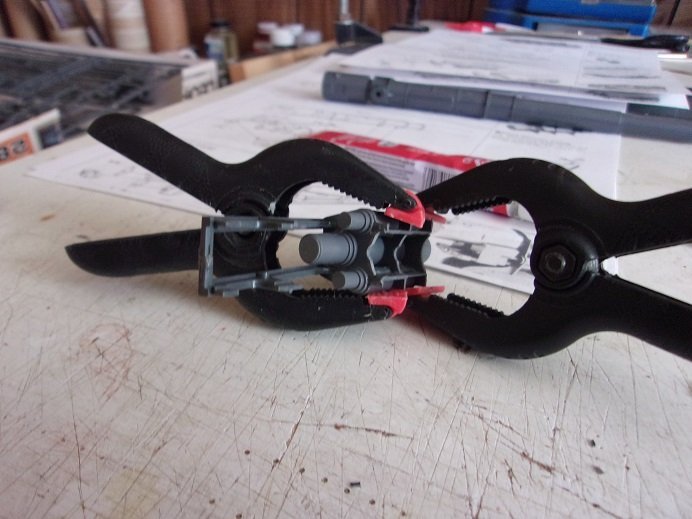
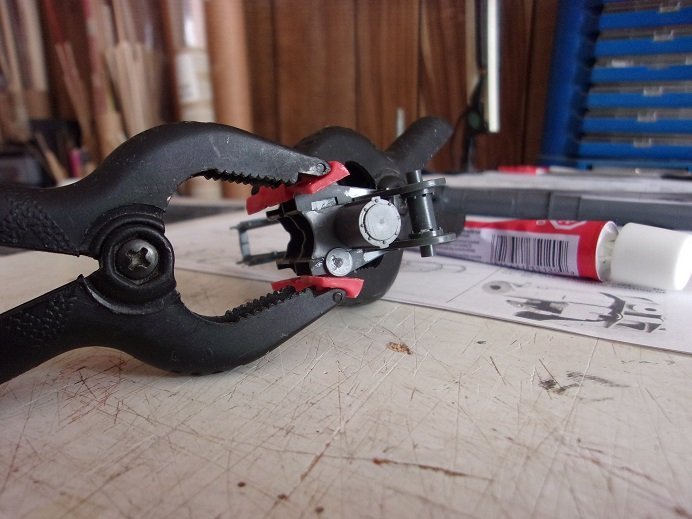
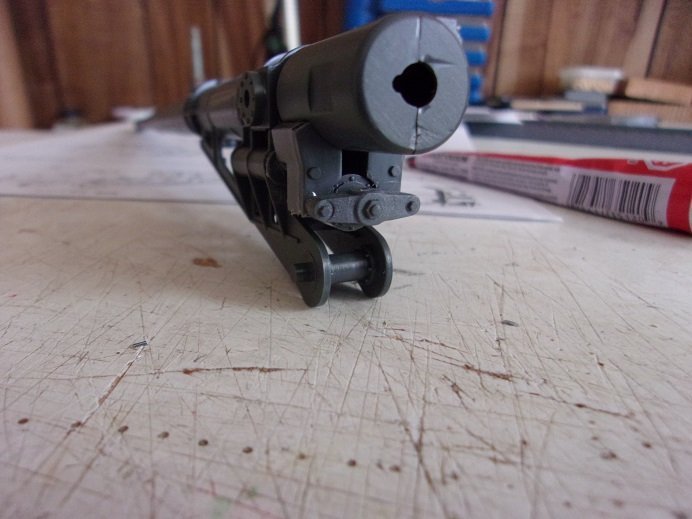
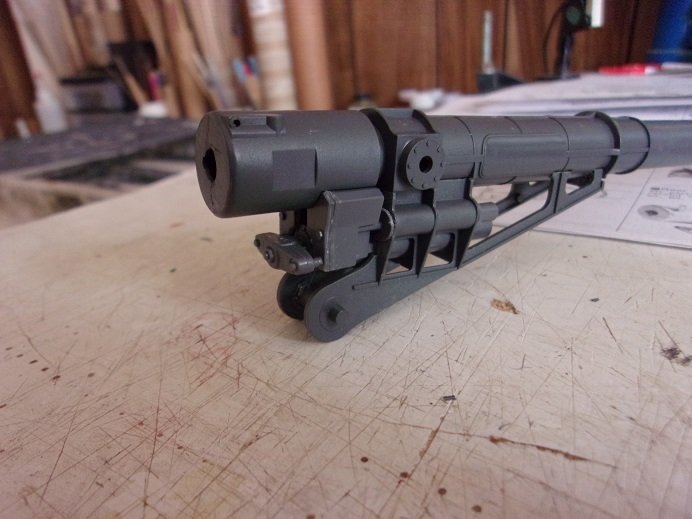
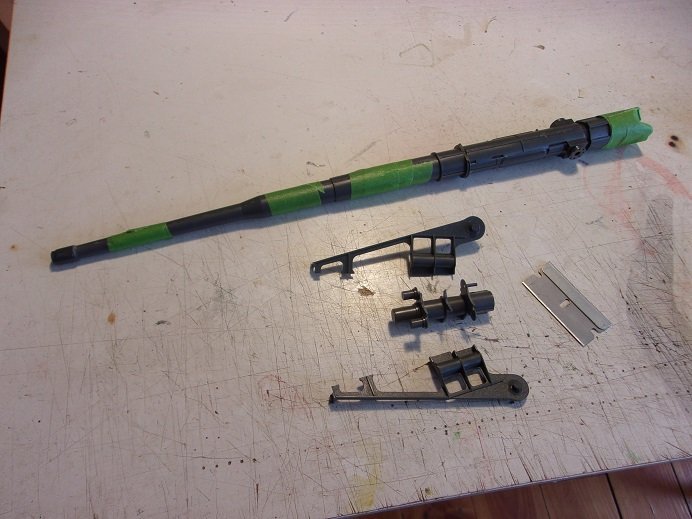
I wish I could say the same OC.........read on. today quickly went sour, when I realized what I had done. can't tell you how many time I fitted these parts....I thought I had it down pat....none the less, I still managed to cement the recoil mech upside down the recoil tube should be neatly tucked between the brackets with the curved sides up, so it can be attached to the barrel. the round tubes in each side are the shock absorbers.......shafts back is correct. of course, I made sure that this assembly is cemented real good.......now I have to figure out how to take it apart. it took a while, trying not to damage it too much......the front ends of the absorbers faired well, but the shaft ends did not. at least I was able to save the pieces, so it can be scabbed back together.. the parts were cleaned up of the dried glue and welded plastic. where the front and rear ends of the tubes are, tabs were trimmed off to better accept being rejoined. when the fit was good again, it was re-glued and clamped. the shock absorber housings haven't been added yet.......they slide over the shafts at the rear and cement to the barrel breech. the shaft have to be rebuilt. it's a mess right now.......you can see where the tabs I trimmed off were to fit. the shafts need to be exact for the housings to fit correctly. each housing has a hole to accept the shafts......I drilled them slightly larger to make it easier. the end of the main recoil tube {the round part with all the bolts} should have a hole in the center, so part B 16 will fit. it has three pins coming off of it, the center being longer that the outer ones. instead of drilling the hole.........when the time came to add the part, I simply trimmed some of the center pin off, enabling the other pins to touch their respective places on the shock absorber housings. there may be a little bit of cleaning up left to do......it should be unnoticeable when it's painted. that's how it's supposed to look........I can't believe I did that just to see what reaction I would get, I showed it to the admiral and mentioned that I should get another kit. I got an unsympathetic "make it work!" I'll have to come up with a new angle I did get to look at the supply of White Ensign paints......I unfortunately don't have the color I'd like to go with. Homepage | White Ensign Models from what I've seen, they cater to ships......little on armor, and nada on planes {as far as paints go}. I wanted to do the dark yellow......looks tan to me and the camo is a red / brown.......it's current scheme at the Aberdeen museum. most rail guns were painted in the original German Gray....I have either Dunkelgrau 2 or a darker Schiffsbodenfarbe III Grau1. I have some Norwegian grays too. Leopold started out in the German Gray, later to be painted in the dark yellow. likely some time before the war's end, it received the camo, as is seen today.

- 104 replies
-
- 10
-
-
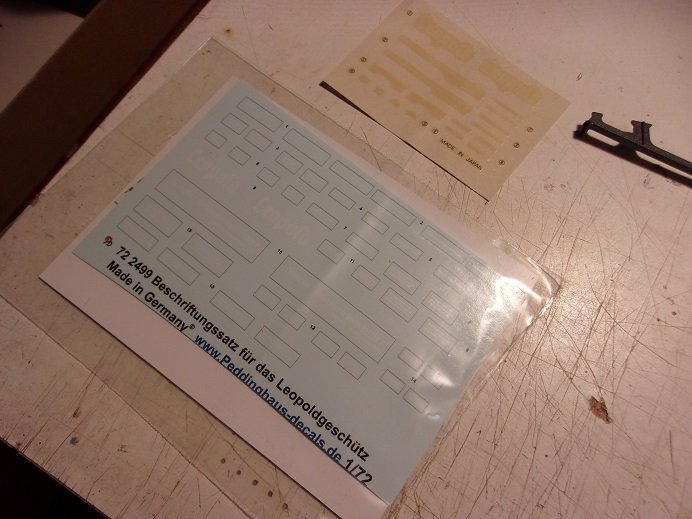
I'm more 'newsy' when building......probably why I like working at my desk. I can sit and read articles and of course, catch up with you fine folks here on the site.. I can also window shop.......very dangerous for me. the admiral cringes when I get updates from oldmodelkits as mentioned, the decal sheet from Peddinghaus has the decals for the trucks, which will be a nice touch. I haven't seen anything as far as the origin of the trucks...whether they were designs for it, or if they were modified from existing train cars. these are the same decals as from Archer....they need to be cut out exact......close to the images. I did get the second set of wheels assembled during the week. the tape was removed from the gun barrel and the seams were sanded....looks pretty good, but I need to do a bit more. ....and as can be seen, the recoil mech has been assembled. will be fine tuned when dry there's more to add to the lower carriage....got a few things to do today. once life is out of the way, I can get some play time in I'm also working on the paint......gonna try and use the White Ensign brand, since I have some of the German colors.

- 104 replies
-
- 12
-
-
nailed it!!!
-
very nice progress Chris....the cockpit came out super! look'in forward in seeing how you'll master the engine....with that many parts, it will come out nice! perhaps you could do a pre order?....I can tell you want it?!?!
-
I recall seeing a picture of one of these cars Roger.......I'll have to look into this I'll see if Marjorie can help with that Mark mid work week.........haven't done much, although I did have an urge to assemble the other set of truck wheels. I won't do it now......I've had a few beers, listened to some 'rockus' music....until the admiral cried 'uncle' 🎶 I'm a confirmed Sabbath fan, so I'm sure the 'metal' weighed heavily on her I received the Peddinghaus decals.......and YES!!! they have decals for the trucks! more on this when I come to earth and get through the rest of the work week.
-
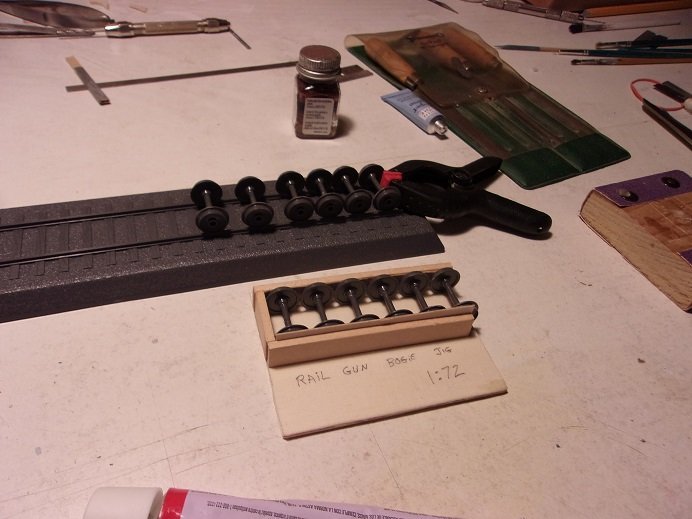
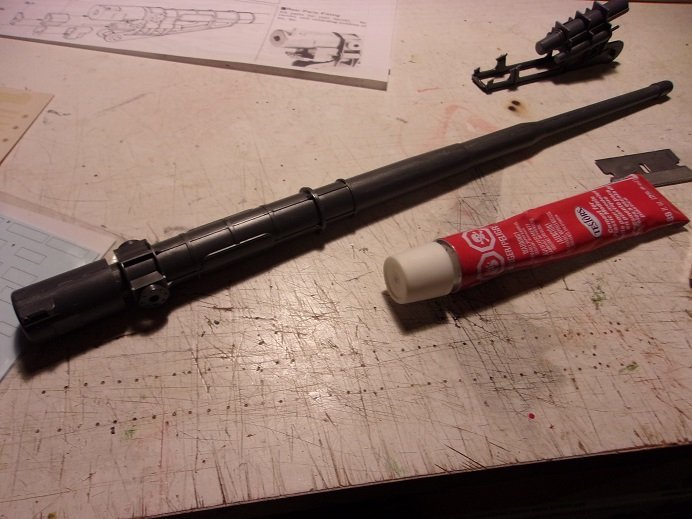
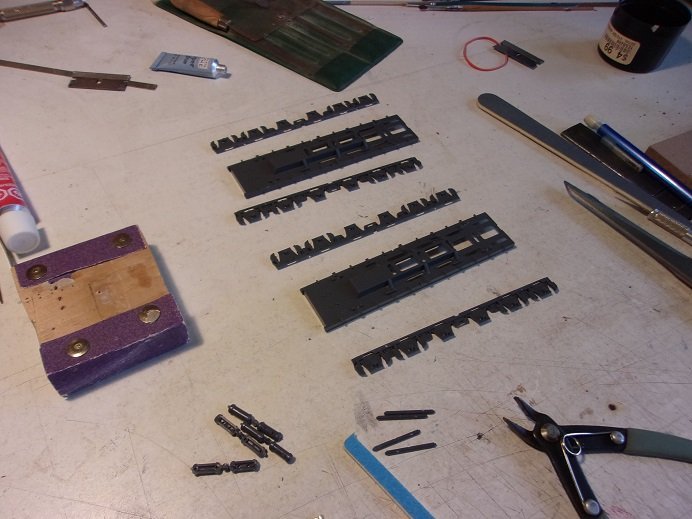
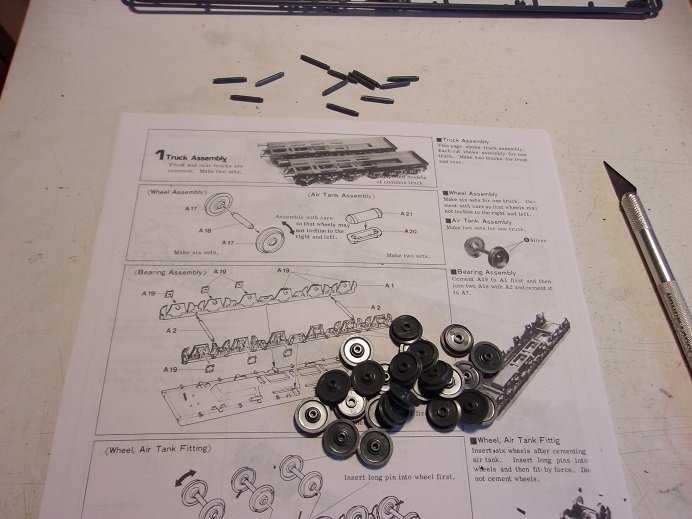
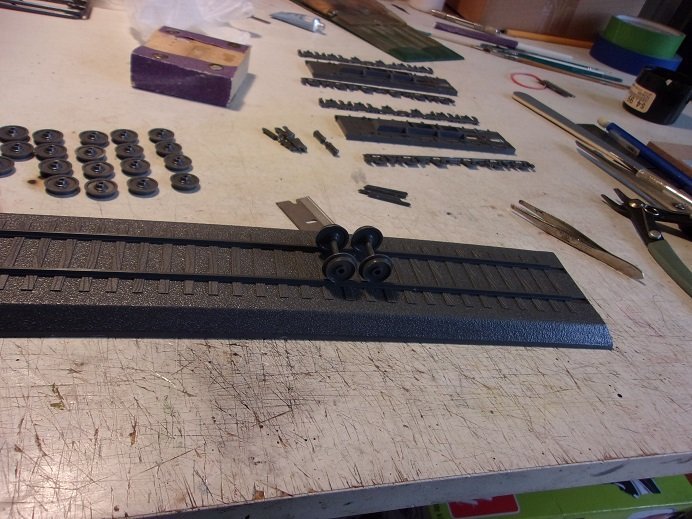
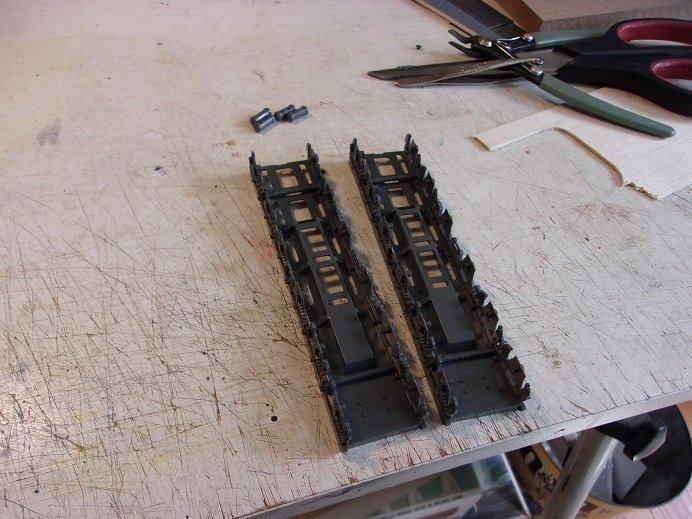
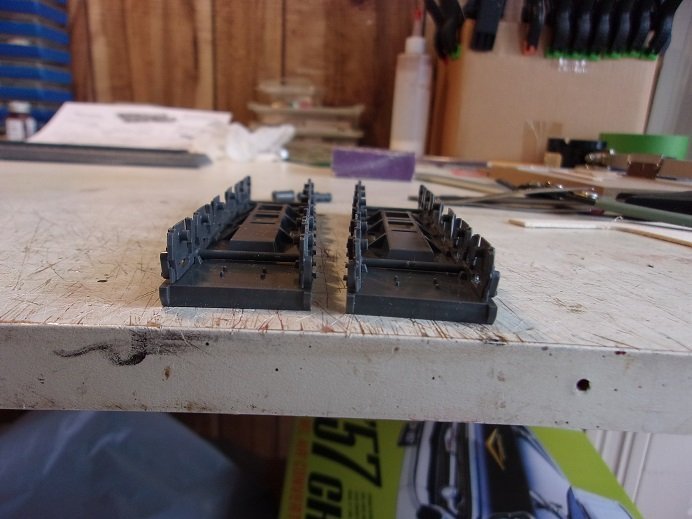
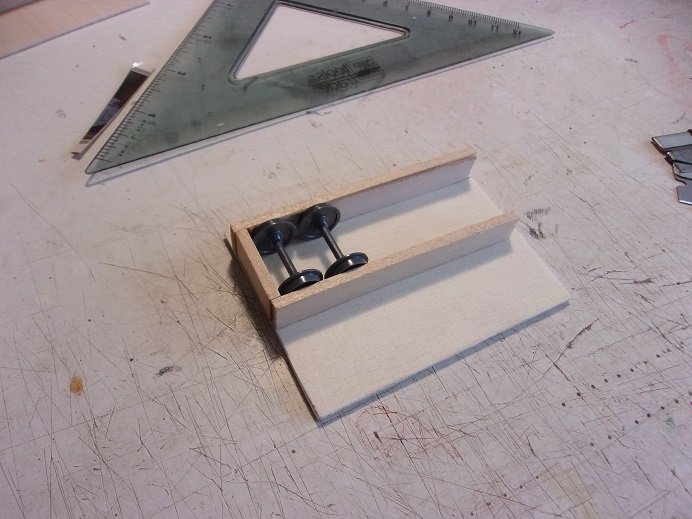
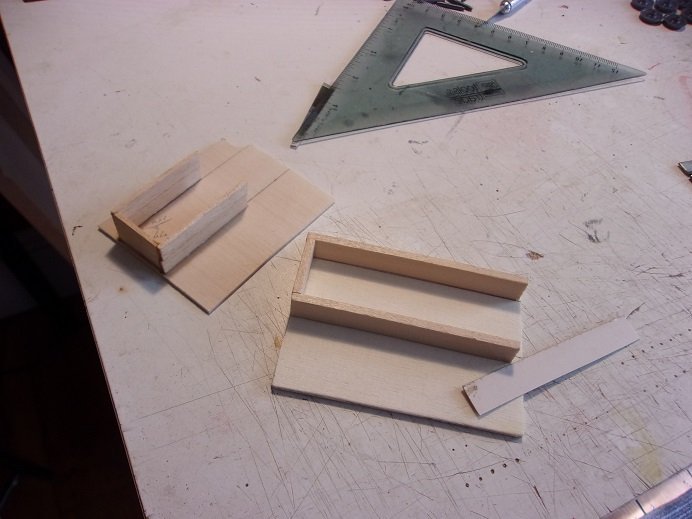
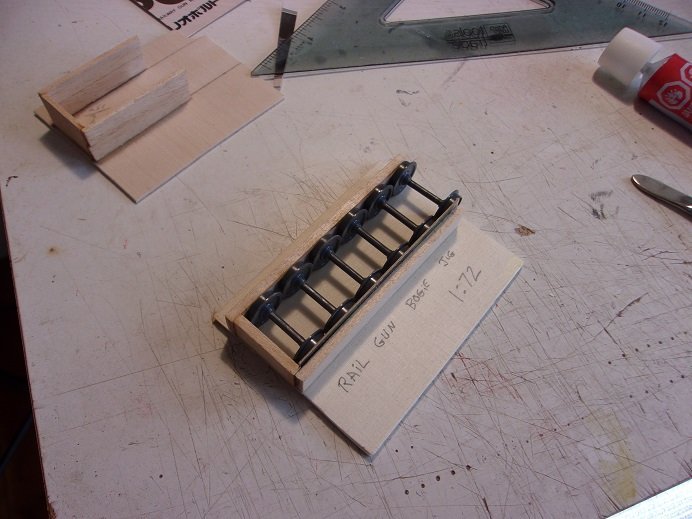
no problem then......I'll chalk it up to misinformation there's a lot of that going 'round, I hear tell. well.......I told myself I would wait, but 12 sets of truck wheels had my mind going. how was the fit? ease of truing them up? before I knew it, I had removed the parts that start off the trucks. there are the air tanks, the spreader bars, the wheel bearing sides and the base, which is the bottom of the trucks. 24 bearing caps locate along the outer bearing sides, but I can add them late. it's so nice to have the English instructions......now if I can just find them for the Missouri and the Shokaku. this amounts to 24 wheels and 12 axles, and I found that they fit rather loose. I assembled two of them so far, and getting them to roll true is a pain.....going to take a while to assemble them all. I will build a jig.......as you can see, the instructions stress this as important {and I do too}. I assembled the terrain base to use as a guide for the wheel assemblies in the beginning, but there is too much side to side play to adequately true them up. so I took measurements to make a wooden jig to do it. as I planned this out, I kept my fingers busy, assembling the air tanks and the bearing sides of the trucks. two spacers are used for each truck. the two sides were joined together, and then set on the truck base to dry. I made sure that there were perpendicular as well. first stab at a working jig failed.......no wide enough, nor long enough. I later figured that if it was long enough, I could do at least one set of wheels at a time. the wood thickness was a problem too.....once together, the wood looked warped. so, the second time, I used some thicker strip wood and I cut the pieces longer. the front was closed off as a stop for the wheels. in theory, as I assembled them, I'd stick them in the jig, and they would butt up to one another, wheels equal in true. the finished jig was tested and I saw that there was still play in the fit. I cut a strip out of the Leopold box top to shim it up. I made up four more wheel sets to put in there.......it was deep enough to fit them all there still seemed to be a little bit of play still, so I added another strip of thinner material to take up the play. my first attempt can be seen here. I made sure I labeled this one.......once made I put them in my small tool box...........some I can't even tell you what I made them for ya never know what the future holds...... these will dry for a while.........once set long enough, I'll make the other set. with all this drying, I looked ahead to see what else I could do without upsetting the apple cart. the gun barrel assembly is an assembly step all in itself, so that's what I did next. some minor clean up, but nothing major {less than I've had with other models}. the recoil chamber was assembled that the bracketing was fitted, but as you can see......not assembled. the barrel fit together pretty good. there's still some sanding to do though. well......those fun loving, whacky carpenters are outside now....using the garage that I rent.......and sucking on my electricity {from the garage}.......so the admiral wants to go and do errands {apparently, they are back to arguing again.......{lover's spat} }. one's an older cranky b..... and the other just found his identity........you figure it out! so, I end it here.......later I may get back to it, if I feel like watching them walk by the window another hundred time, indulging on my hospitality, especially since they didn't ask, nor did I give permission........the landlord's gonna hear about it {but that's another story}.
- 104 replies
-
- 12
-
-
well........I'm glad you made it back in one piece you have a very nice set there.........you consider the weight of each one of those shells. the ammo fired from Leopold weighed somewhere in the neighborhood of 500 lbs. definitely worthy of a diorama
-
super nice yea........perhaps a cart or something.....
-
it's not just short run kits that have locator issues.......I've ben building brands that I've never heard of lately, and the lack of tabs or pins has been somewhat of an irritant. even Revell, which I'm quite accustomed building, has been skimpy in this respect. it depends on the kit really........just be sure you got a good fit before you commit to glue. definite quick builder...
-
1/48 Italeri Hawk T.1A (On Hold)
popeye the sailor replied to Old Collingwood's topic in Non-ship/categorised builds
looking really nice OC........the seats came out super -
nice finish.......remember the 'mottled' factor with use.........comes abuse ........I could come up with a few more..........you did a fine job!
-
M29 Weasel family 1/72 (scratch) by Backer Finished
popeye the sailor replied to Baker's topic in Non-ship/categorised builds
nice to see them back on the table......... -
looking very very good
-
thanks very much!........it's what I envisioned {well.....not 100%, but close}. it occurred to me after I posted the pictures.........so much for seeing that side of the fuselage that got sanded. proof again that paint covers so much sin I may do another one, but I want it to be a known plane this time around..........perhaps the B 17 "spotted cow". I'll be look'in and keep you posted. again.....thank you for all the kind words........I'm very glad you all like her. I'll post pictures when she's fully assembled ***little pun there***
-
I know about the window method Ken, but the plastic created marks on the decals and I don't know if that would show up after putting them on. it also takes time for it to work as well. another thing I noticed, is that the sheet doesn't have decals for the trucks. I've seen a few of the models with them, and I think the sheet that I ordered has them. a chigger in the armor, is that the carpenters we've had runn'in 'round here, are to do the front step area, where our mailboxes are located. the knucklehead took them down yesterday to begin work, and we didn't get any mail. they are back up at the moment, so we'll see what mail we get today....I hope they are in there. I've seen the Dora kit......Hasegawa also released a kit of the 60cm Morser Karl 040, which is a mortar too.......I think it's a 1:72 scale kit as well. Dora could be removed from the trucks and travel under it's own power. believe me.......I've had thoughts runn'in though my head. I constantly think of the tank driven variant........sounds easy in theory. scratch build the main body, and get two 1:72 scale tigers to put under it. good thing there are roots sticking out of the inner walls of the rabbit hole........currently, I'm clinging to one of them .......mustn't get sucked into the abyss! on another good note.......I have the instructions now in English! I didn't realize it, but Scalemates has them for download, but I didn't bother to look at them. another search brought me back to their site and I took a peek.........paydirt! I took a browse through Britmodeler this morning, but found no useful info........I would have thought that a log or two might be there........but no, just the Trumpeter 1:35 kit {a couple logs}. that is a very nice kit too! has anyone experienced any problem getting mail from Australia? I heard about a problem with the mail in that respect
