Supplies of the Ship Modeler's Handbook are running out. Get your copy NOW before they are gone! Click here to order
×
MORE HANDBOOKS ARE ON THEIR WAY! We will let you know when they get here.
×


popeye the sailor
-
Posts
16,006 -
Joined
-
Last visited
Content Type
Profiles
Forums
Gallery
Events
Everything posted by popeye the sailor
-
 my grand kids would love to see this
 -
we had a tractor when we were kids........primarily used to cut and rake hay. my older brother usually drove unless our dad wasn't working. I recall many a time being on the cutter or rake.
-
Wow Kevin.......your progress on the Hearse looks super! when I first started reading, the first thing I thought of was Dracula ......you know......Egor at the reigns..... are you gonna gussie up the pine box? I have two wagons.......I have the Budweiser Clydesdale wagon and the Lindberg stage coach. both came with horses and figures. I'm sure you could find horses for yours. great job so far
-
I just buy the wide masking tape and cut at will I think yours came out really good........should look really neat over the whole plane!
-
hopefully there is an access panel that can be left open .........shame to cover up all this super work
-
agreed! look'in great Jav
-
I didn't mention rods....just engines. the cars my parents owned had L6's in them. I do think it's odd that they would supply V8's and not include the six bangers. I really didn't expect this much interest.......I'd better start a log and continue it over there what I meant was my brother says I have them backwards......Mom had the 60 and Dad had the 59, which is utter B.S. you have to excuse him....he is the one in the family who thinks he is always right, even stuff that he didn't give a rat's azz about believe me........I know the car I dented the hood on! I'll tell ya the story later on the subject of this Atlantis kit........I did make some progress on it yesterday. I used the window maker for those windows I cut out. with the cockpit already glued in place, I assembled the fuselage. I finished painting the top of the other wing and did the paint on the wing I had finished...the deicing panels on the leading edge and the engine detail {what I could do of it. I also did some work fitting the glass on the turret that will locate on the nose. it's not a good fit.......for comparison, seeing that the Pacific Raiders kit is the original Revell kit, I fitted the nose turret for it, and the look is so much better than the Atlantis turret. another interesting note, is that the date stamp inside the Revell kit fuselage is 1955....the Pacific raiders kit didn't come out until 1965. it's very probable that this kit is a clone of the early Buffalo Bill kit....they merely repurposed the kit to fit the subject. these kits are exact in every way........the only difference is that the Revell kit doesn't come with a stand {not at the moment anyway } I'll get some more pictures to show ya. today was kind of a wash. we had a rather vicious storm roll through the other night, and it took part of the tree down in the back yard. today was clean up.........with the help of the trusty saw's all the large part was stuck in the neighboring tree, so after I cut off most of the low hanging branches, I tied a rope to what was still hanging and pulled it down. on the way down, it took out the cross bar of the old clothes line........the other end is gone, and the admiral was using it to hang bird feeders on. the ends were broken.......the tube itself was full of rust..........I fitted a 2X4 across the span for the time being. mowed the lawns........and a few other chores that couldn't be done last week, since it rained almost every day. more soon
-
yea.....I didn't mention all the engine sizes.....I didn't want to breathe too much life into this topic. I should start a log on them, 'cuz it's getting interesting. I made the mistake of mentioning the project on Face book, and my older brother chimed in and said that I was wrong........I have the cars backwards. the model is still being built.......I've been trying to come up with a happy ending.
-
just getting caught up OC.........the farm house looks great! got some really nice colors going on there looks to be an easy peasy assembly!
-
price is my guide too.....for what I want to do, didn't want to buy an expensive model to hack on. you saw the comparison.......right?!?! that is too big a jump to make with scale. I looked into 1:100, which would be a lot closer. it's like what I did with the 909........1:64 as opposed to 1:48....that one worked out quite well. troubling that the fit isn't so good for this one.......the best thing to do would be to get another kit in 1:72. these decals are going to be too big........I won't be able to use them all. I should have bought the MPC kit I saw. I played around with the Revell kit.........very different concerning the plastic........more rigid than the Atlantis kit. the parts are a lot cleaner too......still the same 'ole injection pins though I'm cutting out the windows on this one as well..........there is the exact same dimple {that needs to be trimmed out} on the inside behind the nose window. .......a bit more effort to remove it. I'll compare the decals...that will be the decision maker
-
looks really cool!
-
amazing job on the plane........the weathering and added details really stand out! looks awesome!
-
a very detailed tractor........looks superb and nicely done!
-
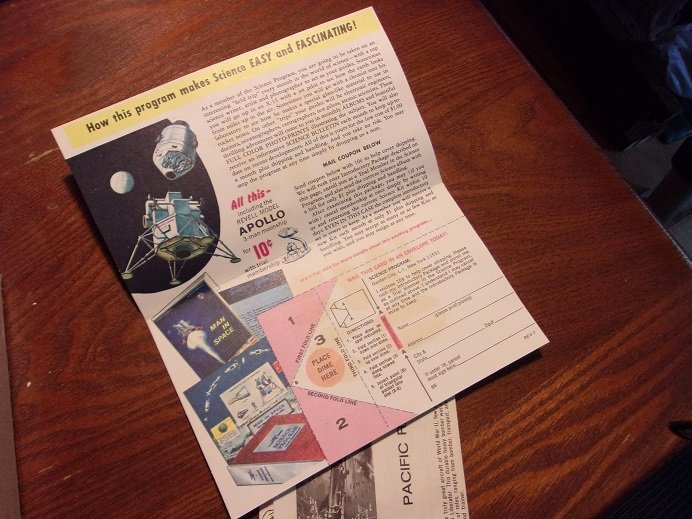
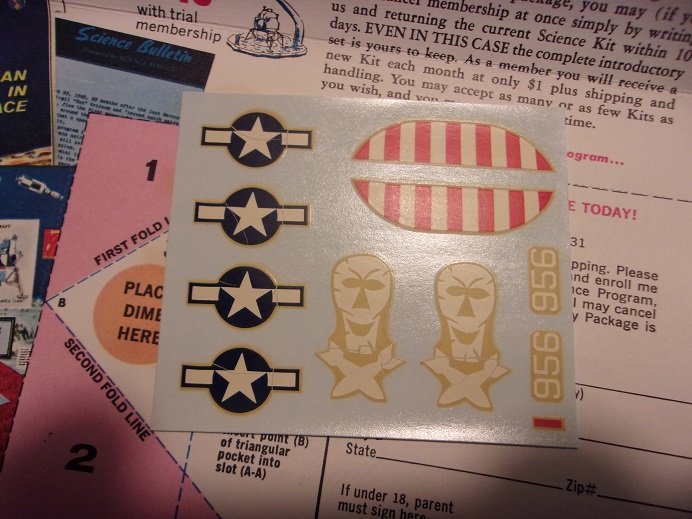
these are the older kits OC.......produced before the change over to uniform scale classification. basically, the big plus here is that molds can be sold more readily.......you see, who wants a bunch of odd scales? back in the days of Aurora, Pyro, LIndberg Line and others who predated the change, that was all they had and produced. when the change happened, new companies sprung up.......AMT, MPC {to name a few} and other companies like Revell, Monogram, Renwall, Hawk, dumped some of them and produced within the new scales. there's a lot more to it.......survivability, the war {WWII} took it's toll......some survived by using other materials for their kits. lately, new companies sprung up........Round 2, Atlantis.......bought up a bunch of these old molds, and are now flooding the market with them. is it a bad thing.......not in the big picture, but the does limit the availability of aftermarket mods and add ons. todays models are so much better anyways so where was I.........oh yes.......how I got hood-winked. I saw a few other lesser model company offerings......and then I saw this one and bought it. it stated 1:72 in the description.........I failed to give it a thought I took a look in the box, and it was just as described.....bagged and unopened. here's a chuckle for you all.........who saw these advertisements in their kit and sent away for it? I did I got the lunar module and lander! sent in the dime......got the start up kit, but when I saw that I had to pay more to get the rest of the stuff, I canceled out. I also joined the Revell model club, but that was short lived too.......kept getting kits I didn't like. as I suspected, the decals are useless. if you look close enough, you can see the micro cracking and the gaps from shrinking decal. I could spray them with the decal bonder, but the cracking is just too severe. the good thing about this kit, is that the rivet detail is not as pronounce, as what I saw in the Atlantis kit. the molds were not as old as they would be now. they still can be seen though...I may try to even them out. some manufacturers will just create the mold to make the parts that will distinguish one model from another......in most cases, it would be the fuselage. this way, they can monopolize on molds they have already created to expand the kit selection. for these two models......there was nothing that needed to be modified.......they are both B 24 J's. for an example, those who follow my crazy antics, read about my future Chevy Impala project. one kit is produced by Monogram, and the other is produced by Revell / Monogram. these two kit have similar parts......the engines are exactly alike....I'm sure there is more. I haven't checked the sprue ID numbers yet, but I believe there will be some that match more on this soon I will need to cut out the windows, like I did with the 'Buffalo Bill'. there are a reasonable amount of loose parts in the bag. being a kit produced in 1965, I would expect nothing less. of course, nothing is broken.........there's nota lot of flash either. cleanup will be easy. I'm gonna try and fudge one of these to the subject. when I got the kit, the admiral wanted to see it.......so I showed it to her. then I told her of the shortcomings.........the effort in getting a kit that will cure all. I chased my tail........I'm back at square one.......went on a fool's errand.....whatever metaphor you want to hang on it......I'm left with the same dilemma. while it would be great to stay with the same scale as the Wulfe Hound.....I can't anything more till next week {still deciding} what to do with these kits?.........crazy thing are forming for anyone who is not familiar with the difference between these two scales......here is a comparison 1:72 to 1:92. I'm going to check out the 1:100 scale decals for anything interesting. I already looked into the 1:87 scale......all American and very few choices.
-
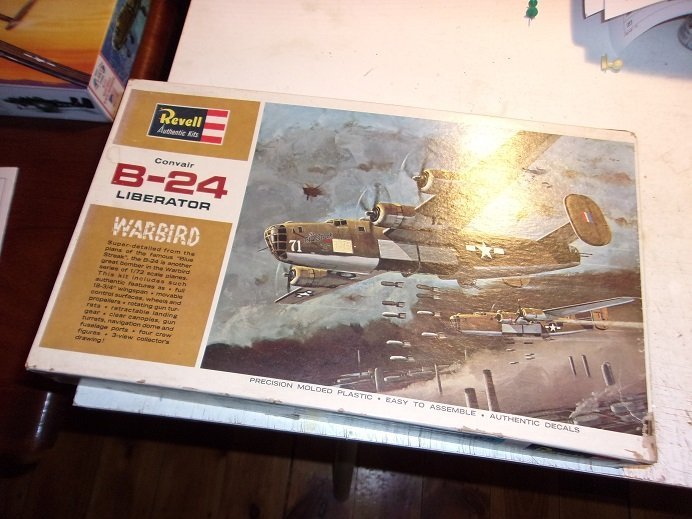
one has to ask himself.......how many times can one shoot himself in the foot? I saw 1:72........I ordered 1:72.....easy. but I guess you have to take into consideration that the person on the other end may not be as up to speed, on something so basic as scale. here is the kit I bought: this is the other kit........the other 1:92 scale kit! I can't blame the person I bought it from......it doesn't say it anywhere on the box, nor in the instructions. but I should have been aware of it.......I've done enough research and even looked it up on Scalemates. the only B 24 produced by revell in this time line, was the B 24D Warbirds 'the Blue Streak', in 1:72 scale. the 'Buffalo Bill' and the Pacific Raider's kit were produced in 1:92 scale. MPC has one in their 'Profile Series', produced in '73......their first production was in '71, preceding the Profile Series. I've got a bit more to show.........the admiral is hungry, so I'll go cook up some burgers. it will give me time to think about my war crimes
-
waiting for the model to arrive.......passing time by fixing a couple of the chairs in the dining room {the seat pads were coming off}. there was another one on the front porch that my younger son sat in and it broke.......fixed it with a 'L' bracket and will serve me well at the other table in the spare room. I also mounted the new crane light on table black. continued on by browsing through the oldmodelkits website.....couldn't believe what I saw. I was on page 111, when I saw a hardware kit for the Dumas PT 109.......3 shafts, rudders, support brackets, and props......3 of everything..........are you ready for this?!?!?!?! $19.00!!!! I paid $40 bucks apiece for the single kits! I guess you know I snapped them up in a hurry! it may be too late to make any mods on her, so I'll save them for when I need them. I went in the spare room and painted chromate green on the insides of the wings. you'll see it in the wheel wells and flaps. I also decided to put the hatches in the waste gunner's windows........I heard the familiar knock on the door. the kit is here I am not totally happy.........more on the 'new meat' soon..........gotta go run some errands
-
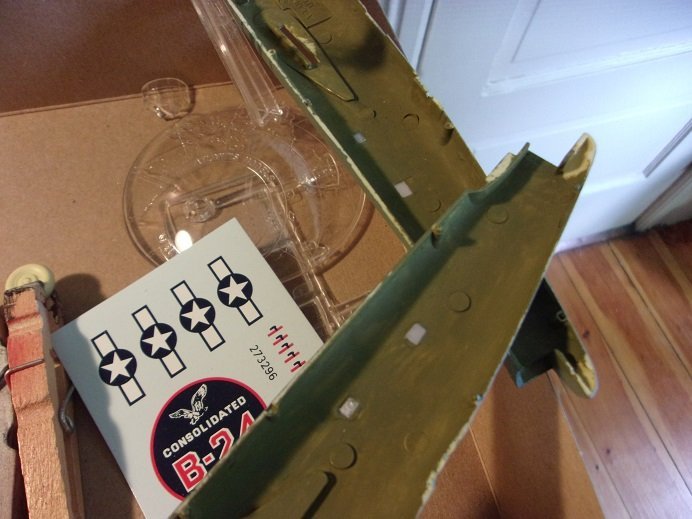
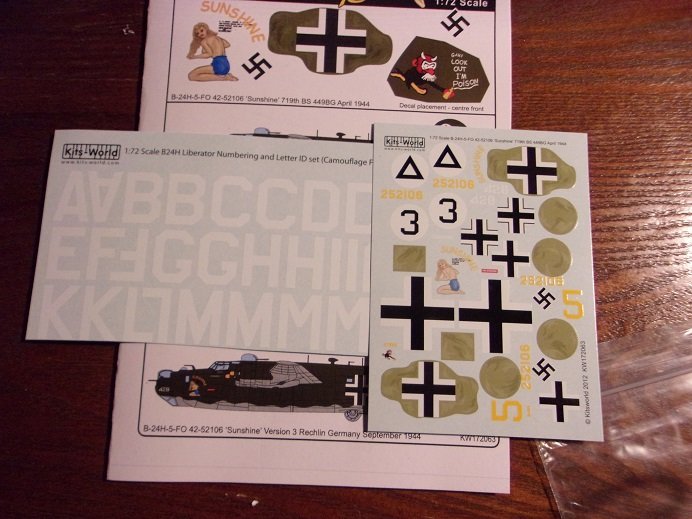
no real armor on these planes to speak of.....they save the weight for the bombs the B 24 was mostly hydraulic, unlike the B 17......I read a lot of comments that the smell of oil was quite prevalent. getting shot up must have been quite messy. one thing I noticed on the model was the landing gear arrangement. looking at the underside of the wing, the gear itself had part of the door attached to it........but where the wheel locates, there isn't anything at all......the tire is exposed. there is a bit of a dome at the rear by the flaps....I'm going to have the flaps down as it's coming in for a landing. I may make a stand for it, since the model will be a tail dragger....unless I decide to add weight somewhere. but this is just one of the idios of the early Revell kits......I'm certain it was the same. on the Atlantis kit, you can't have the wheels down, and the gear doors closed.......didn't look right the first I laid eyes on it. that kit being produced in the '50's, and this one being produced in the 60's...it shows the extent of research and information they used in the production of the model. I've done quite a bit of clean up on this one. the 'new meat' should arrive tomorrow I got the decal set in today's mail.....much more to scale than the other sheet I got. I cut the sheet down so it will fit in the sleeve....I also cut some off the sleeve so it will fit in the plastic bag better. makes it easier to pull it out too! they sent along a free sample.....a set of 3D seat belts. they look to be for a 1:48 fighter plane...I'm going to contact them and see what they fit. there might be another plane in my future ....and if your ever asked to do a review of the product you bought, don't do it in the e-mail. I did it.......and I even mentioned how I thought the decals were for a larger scale {and I wasn't crabb'in}.....I hit submit and it sent me to the website. the review I wrote was gone!......wiped out! so the heck with it........I ain't gonna bother!
-
wow John......just browsed through this project.........awesome job on her, she looks great! very different than the kits I've built the case looks really nice as well. congratz on a job well done!
- 104 replies
-
- 1
-

-
- model shipways
- new bedford whaleboat
- (and 1 more)
-
excellent finish on the Model John.....she looks awesome! this is one boat you really can't go wrong on.......can be outfitted in a number of different ways. I intend on putting a canvas roof on the red 'n white one I showed you, fixed so it can be rolled up for a convertible look she's a very impressive model........I'm looking forward to your next one
- 51 replies
-
- 1
-

-
- laughing whale
- maine lobster boat
- (and 1 more)
-
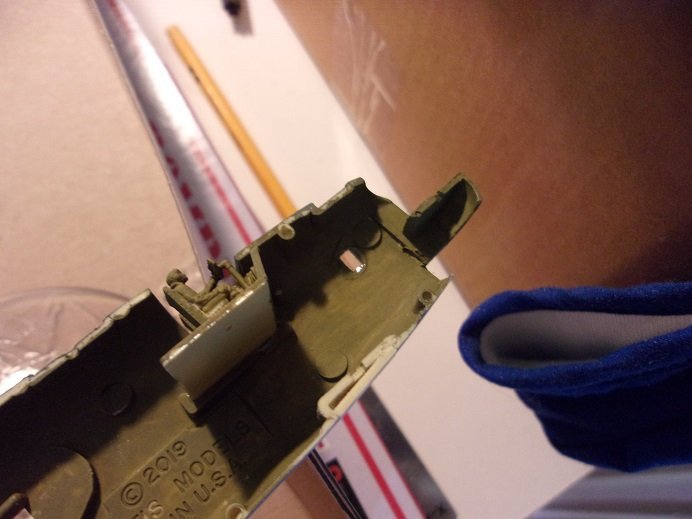
hello all! it's been an interesting couple of days here.......after realizing my blunder, I first took a look at aftermarket. seeing what I saw Ken, I found it more cost effective to simply buy another kit. aftermarket included bomb bay doors, bomb bay compartment, navigation and cockpit enhancements, among some of the more noteworthy stuff. I wish I saw some of the stuff for b 17's earlier.......lots of nice PE stuff I'm not out to do any of interior .....like the Wulfe Hound, I want to put as much as I can on the outside. I have some time Lou.......let the admiral simmer down some.....and it will take some time to get to the point where I'll be needing them. at least with this scale, there are some out there the kit is pretty good, outside of the couple of things wrong with it. I'm able to work around them, so I don't see a problem achieving a decent model from it. in my musings, I did see a kit {or a kit that supplied the markings} that builds into an assembly plane. that has been a thought......if paint doesn't hide the sanding fo-pah on the fuselage, then a collage of colors certainly would do the trick that appears to be the bombardier glass under the nose turret mount. I read something about a guy complaining that the conversion parts he's been seeing, wasn't angled.....or something like that. I looked through a few sites, before giving up. of course the admiral had to know what I was driving myself nutz over.......so I told her. she wanted to hear numbers......from the aftermarket parts I saw, I gave her a round about price for what I would have to get, to mod the model. then I looked up the price for another model. to find a B 24H.....is about as futile. I saw one.....can't recall the scale....but I can't forget the price! .....over $100! the only models that seem to be out there, are either B 24D's or B 24J's. outside of the difference in turret manufacturers and engines, the differences between a 'J' and 'H' are minor, so I ordered a 'J' kit with the admiral's nod. last I heard, it was being shipped. .....and on the car.......I have the '59
-
super job Chris! they both look superb great to see them both at the same point in assembly!
-
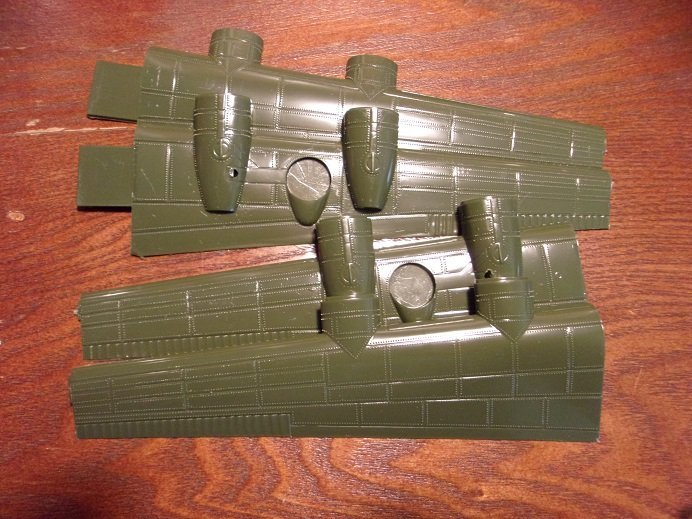
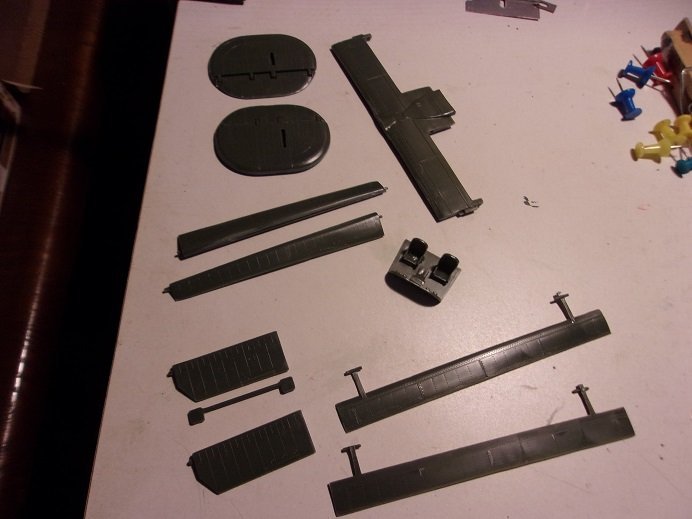
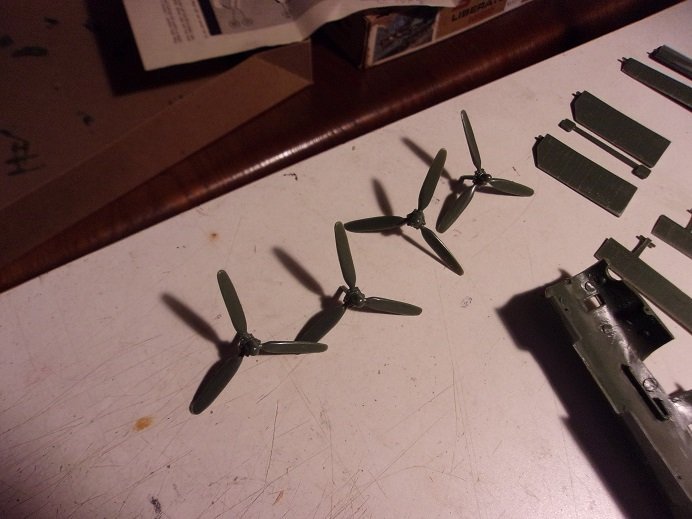
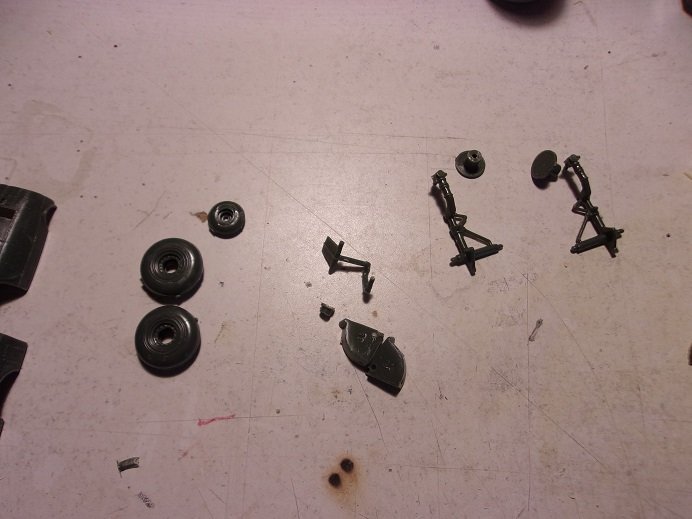
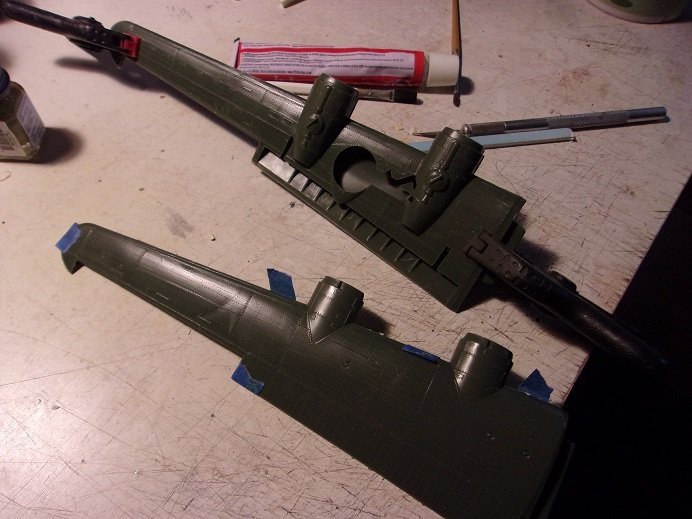
I went on a cleaning spree this morning. it is confirmed........all of the parts are here. it went well, aside from the nose wheel. being so thin a plastic, a small bit was ripped off the tire half. nothing that can't be filled......I also assembled a few bits. first was the rudders, ailerons and flaps.......the sprue contacts were cleaned up and all the edgings were sanded. the minute flash was removed. the seats were cemented in place on the cockpit platform. the broken prop was repaired and cleaned up with the others. it will be given time to dry. I did some scribe work to the sanded half of fuselage. I did cement the waist gunner's mounts in place, but I might add the window panel and do without them. ....and then the fuselage halves were cleaned up. the gear assemblies were also cleaned up and the tires were cemented together. I let 'em dry a bit before I roughed up the tire areas. the wings were the hardest to clean.......the halves kept wanting to pop out of alignment with each other. clamping them the way I did here was the best way to accomplish the task. the ailerons, flaps, and landing gear are all moving parts.........usually, I don't bother with it. one of my peeves is floppy parts that don't stay where you pose them......especially if the model is on a stand. this was a nice kit in it's day........quite a bit of detail considering the year it was produced. I would suggest that if your looking for more interior detail though, you might want to go for a 1:48 or a 1:32 scale model kit. well.....back to my musings
-
thanks Blackreed.........the Atlantis model is fairly new.......a recent production of the old Revell model. this Revell kit here......is old, but it is in amazingly good shape. I've built lots of older kits and I haven't had to use anything different as far as glues go. the one thing I didn't mention, is with the Warbirds kit, the plastic is a lot thinner.........other model manufacturers seem to mold thicker plastics......the worst one I've done to date, is HobbyCraft. as I mentioned in my last post, any decal sheet for this model would be unusable.......I learned my lesson when I ordered decals from Revell for the Cutty Sark, now many moons ago. even though the decal sheet looked new, it had micro cracking, suggesting that their stock of the decals were as old as the kit. I'm not too concerned about the riveting........most model kits are exaggerated with this detail. on the Atlantis model, I actually sanded a lot of it off anyway.....would have been a total nightmare to put decals on a surface like that {unless you want to use a gallon of decal set}. another example, is the Hasegawa U.S.S. Missouri I have. some of the raised detail on it {especially the float plane} will need to be sanded off so it don't look so gaudy.
-
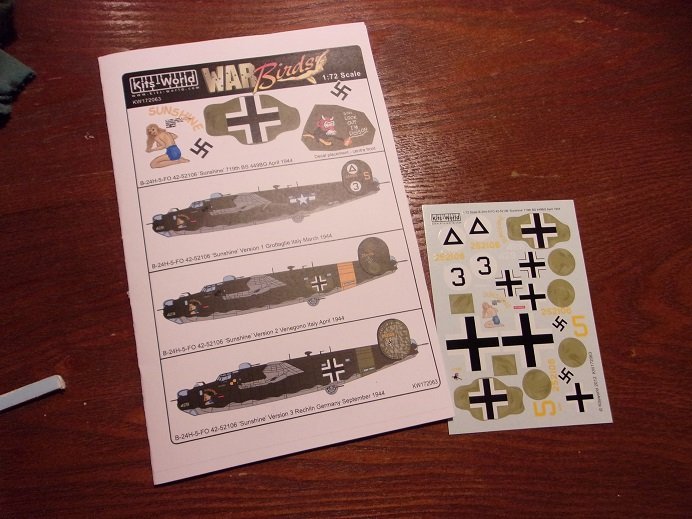
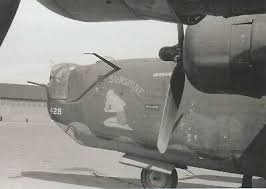
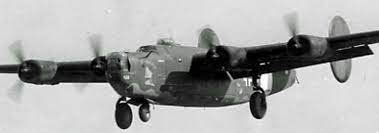
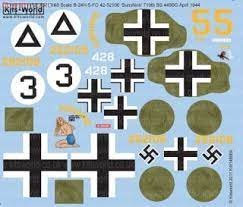
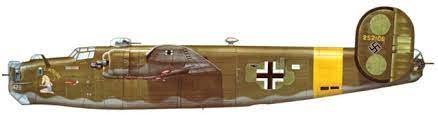
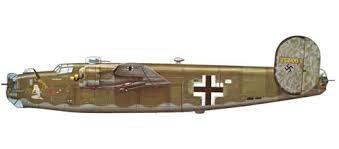
finding the decals for this model would be impossible. given the age, no matter where I got them, they would likely be too old. if not yellowed, micro cracking would have taken over rendering them useless. so far.......none of the aftermarket sites list them..........but I smiled ear from ear with what I did come up with. as with the B 17 Wulfe Hound, the first B 24 to have gotten captured, was called 'Sunshine'..B 24H-5-FO #42-52106 here's where the realization hit me.........the model of the Blue Streak is a B 24D........not an 'H'. I'm going to have to see if I can modify the nose {at least}, if I'm going to be able to pull this off. I just took a little time to look up a nose conversion kit, but I fear that it's going to be a tough nut to crack I do hope I didn't get this kit for nothing.......that would get me the hangman's noose for sure 💩 well........I'll show ya what I have so far. I ordered the decals........that was a feat. Mega Hobby didn't stock 1:72 decals for Sunshine.......only 1:48. so I found the Kits World site and contacted them. they do have them, so I ordered them......they are on their way! I will wait to compare the drab, so the paint blotches in the decaling shows up. I also found the story on Sunshine The Saga of Sunshine's Forced Landing the decaling again is going to make the model........it will go from this: to this: or even this: when the markings changed, I haven't found out yet......but I like the banded one better. keen to note that she kept her belly color, as well as most of her markings. I have a little more to show........and then it's back to my search fingers crossed.

-
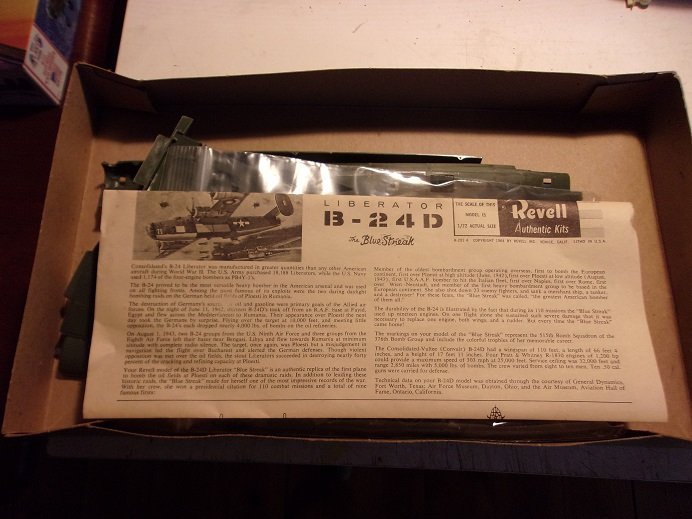
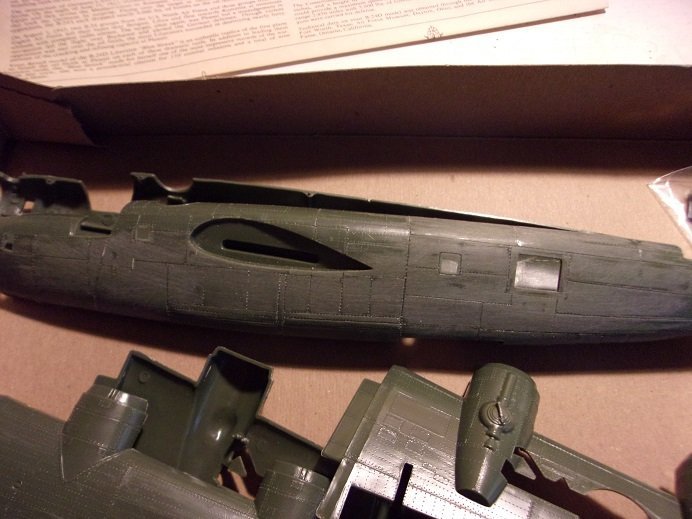
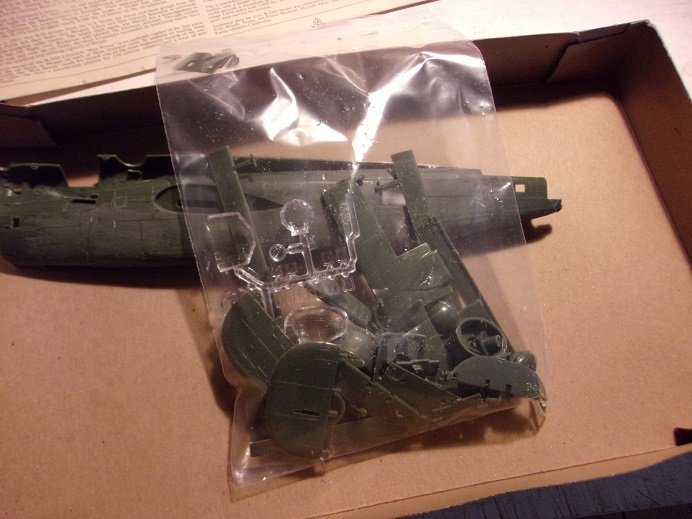
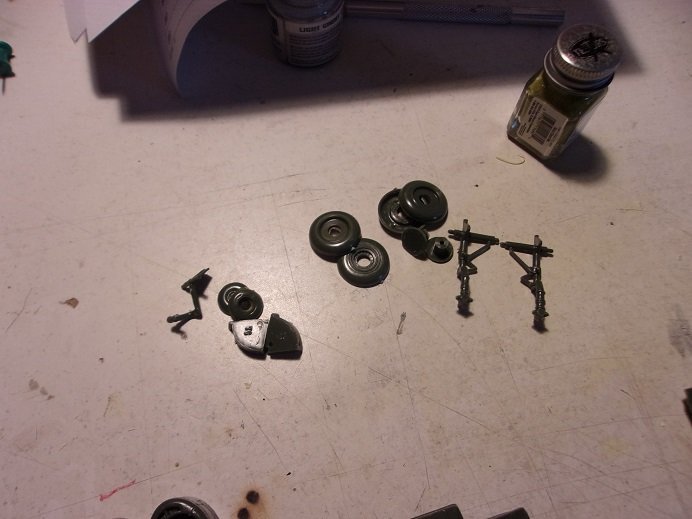
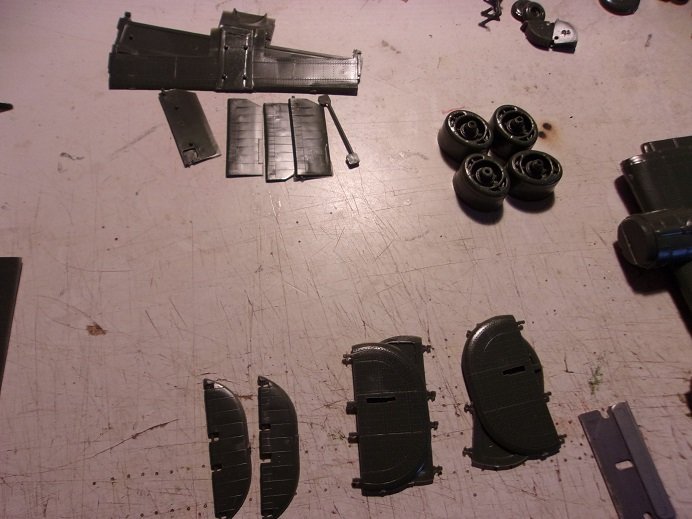
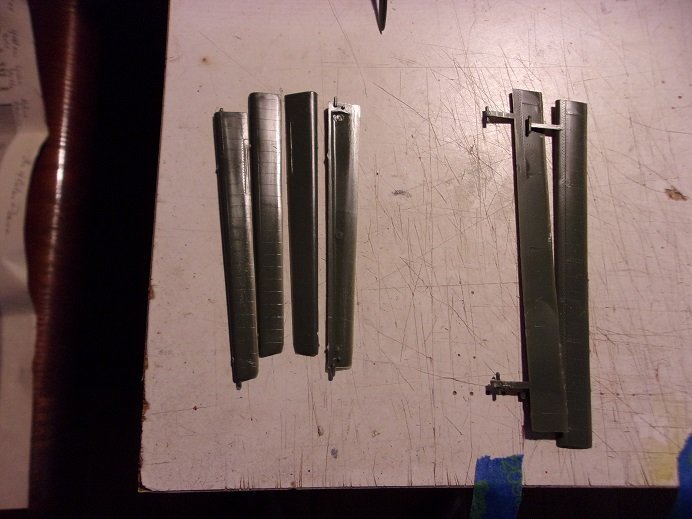
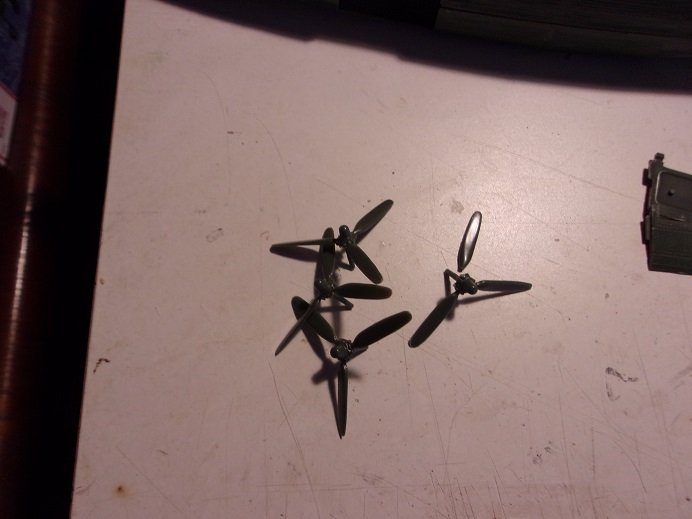
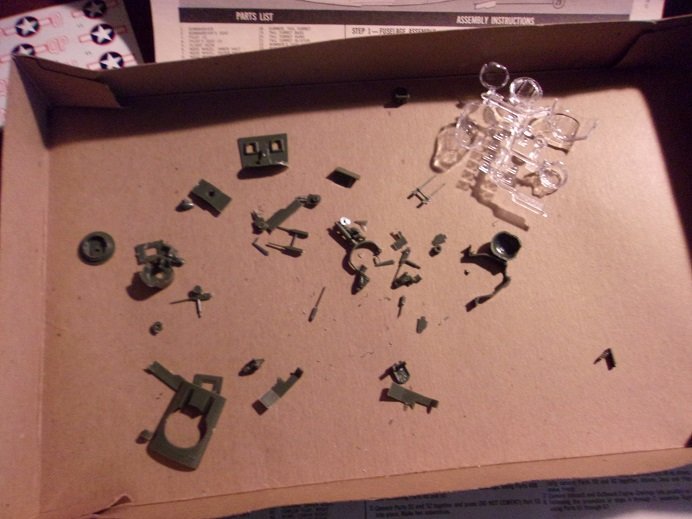
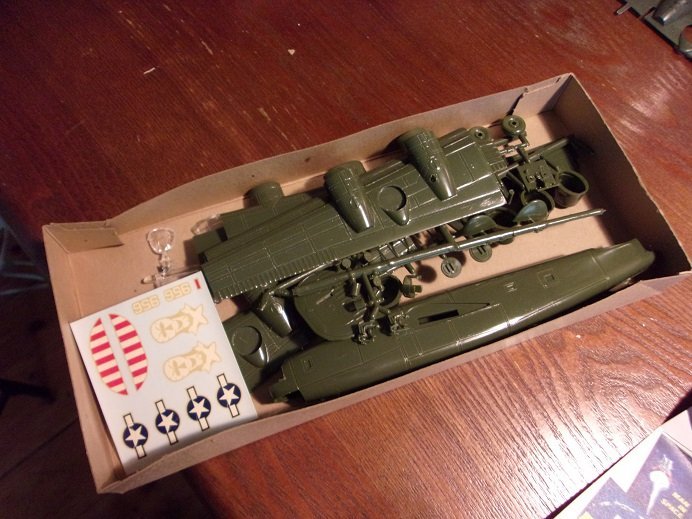
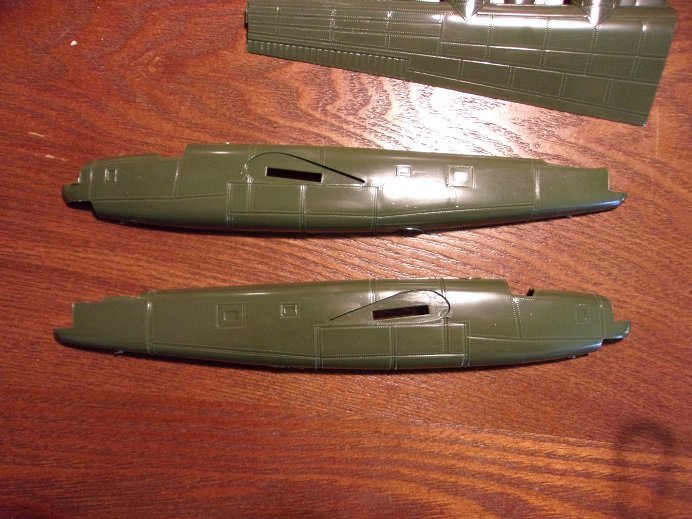
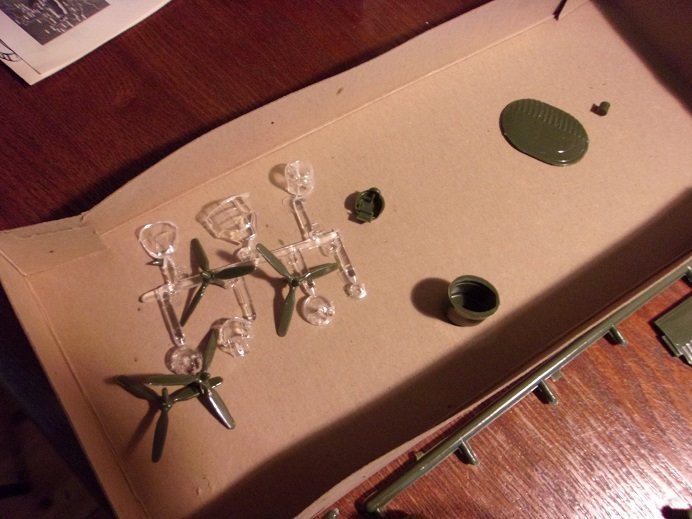
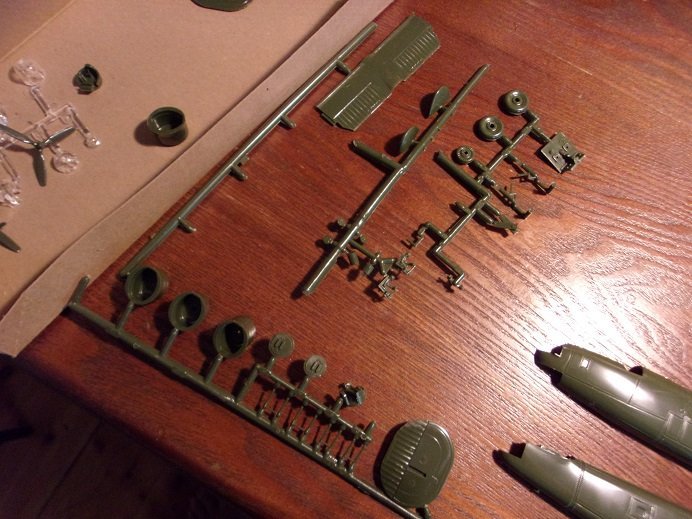
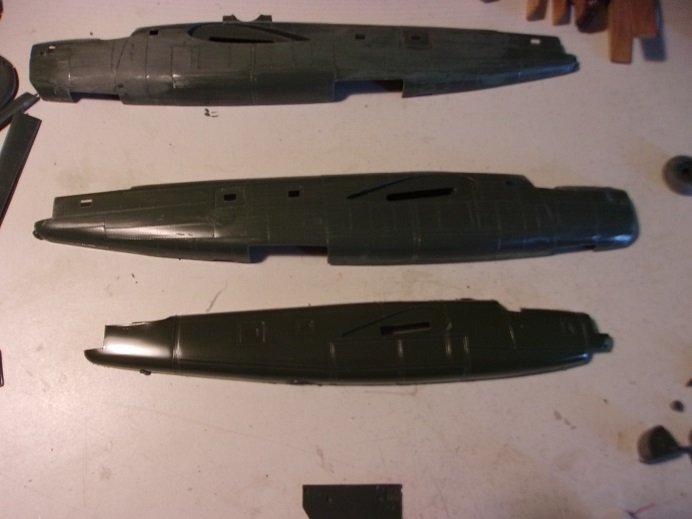
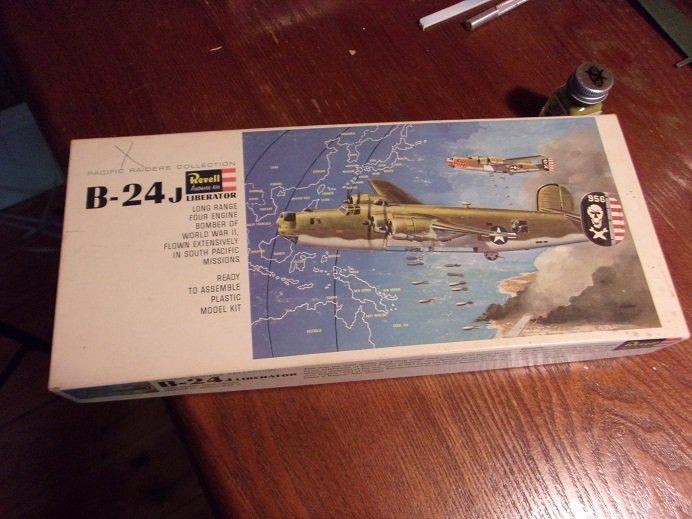
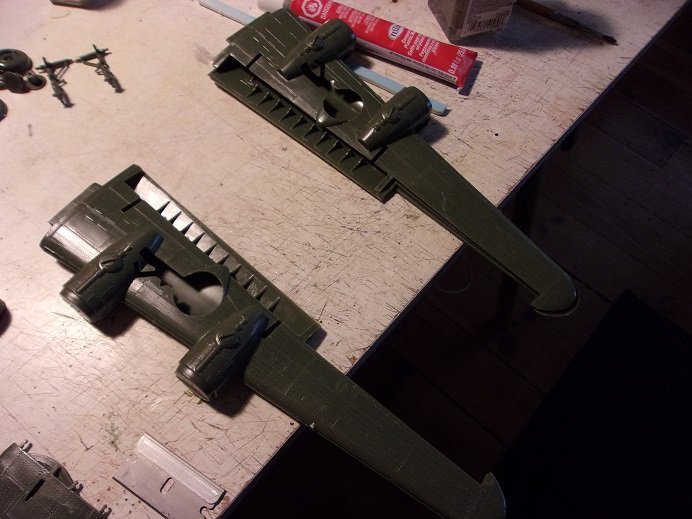
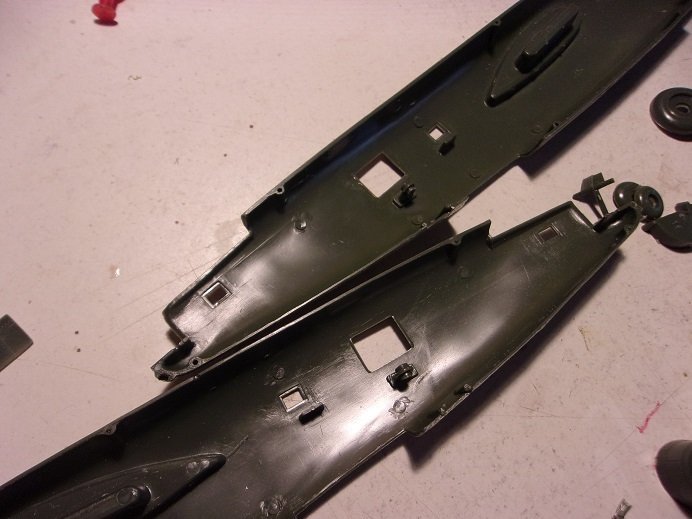
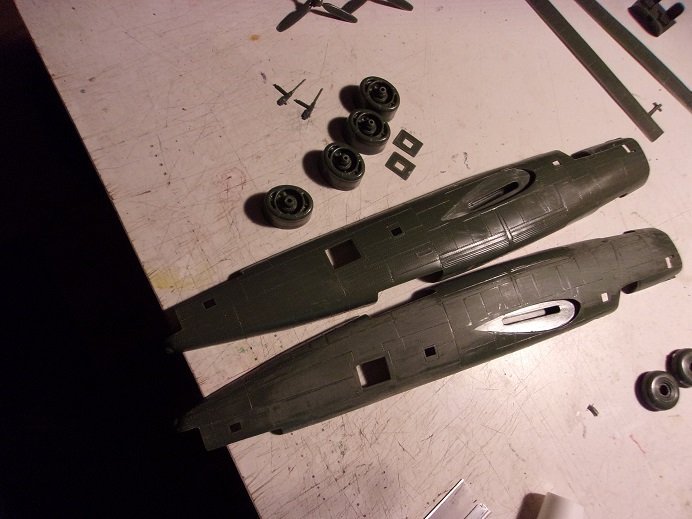
here we go again.........this time I think I can come up with a captured American B 24 I'm still gonna finish the Atlantis model, but I'll keep it as a no named generic bomber....there were plenty of them out there. finding out the futility in acquiring the suitable decals for that model, I flirted with the idea of getting a model of normal scale. that proved to be an easy task......this one came up on the radar within minutes...... it was on evil bay listed @ &9.99.....I ordered it! thinking that it might take a while to get here........I was surprised to have it in my hands within a week! the model depicts a plane called the Blue Streak. I soon found that it is an actual plane, with an amazing history...... 41-11613 Blue Streak opening the box was a bit of a shock.......... the kit was produced according to the box and instructions, in 1964......the color of the instruction sheet, as well as the texture of the paper, was a dead give away. the first thing I noticed, was that the decal sheet was missing.....I would need to source out for decals......second is that one half of the fuselage had been marred by sanding I have no idea why this was done.......some of the riveting is still there, so I guess I can count myself lucky with that. I can scribe out the panel lines and call it repaired. the next thing is something I tell any new modeler NOT to do.........NEVER take the parts off the sprues until your ready to use them! I can only guess that the parts were bagged by the modeler....but then again, if that were so, the decals might still have been in here. the condition of the box is fair, but in this state, unbagged would have stood a good chance of lost parts! I took an inventory of what was in the bag...........it looks like it is all here. landing gear parts......... wing parts....... rudder, stabilizer, and cowl parts........ aileron, and flaps....... and props...........I saw one of them was broken the gear doors, turrets, and associated parts seem to be all there as well. all of the clear parts are present too. having been removed from the sprues presents it's own problems.........were the parts damaged in the removal process? the parts need to be cleaned up of minor flash and edgings, but I'll know more when I get into doing it. hopefully, I won't see any craters or damage left by the sprue points. all of the main parts are here........this is good! I can deal with the minor stuff.........and if anything is missing, I should be able to cobble something together without much hassle. I was going to dry fit as much as I could, and then show a comparison of these two planes, but I'm sure you know....... there is a big difference between 1:72 and 1:92 more soon!