


popeye the sailor
-
Posts
16,007 -
Joined
-
Last visited
Content Type
Profiles
Forums
Gallery
Events
Everything posted by popeye the sailor
-
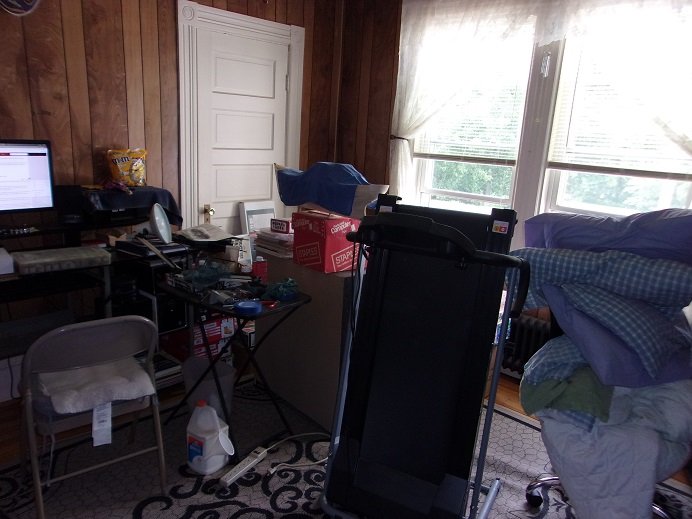
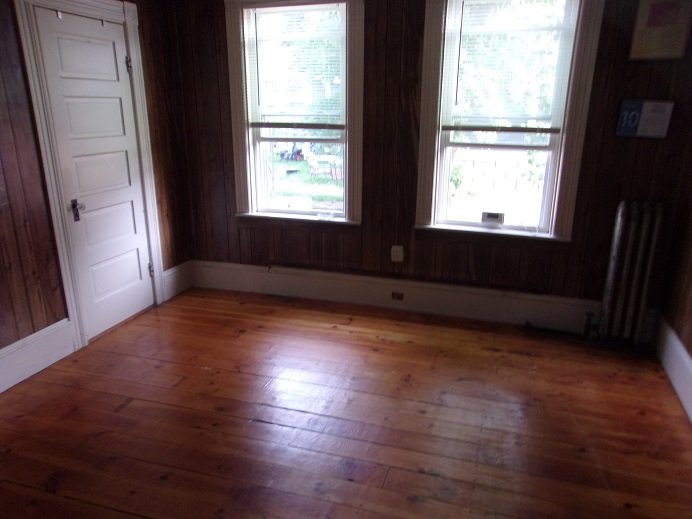
 I was equally concerned with the dust collecting........if you looks at the picture of the dining room, you will see two white boxes..........those are boxes I made to house the Nordkap and the Mary Ann. I wanted to buy cases........love to have found a suitable cabinet, but I didn't want them to collect dust either...so I packed them away. the admiral caught on to what I had done and convinced me {rather sternly, I might add} to unbox them........I hung onto the boxes in the event that we moved. I'm still looking for that case { or to build one}, but time is a terrible advocate thanks Craig.......that's the Nordkap, the first {actually, the second} wood ship model I built. there's quite a story with the model....something I never though that I could do. in the beginning, I meant to give her back to Harold, the gent that gave me the kit.......but since he left WalMart, I've not been in contact with him. the kit was old........about 30 or so years old when I got it.....a Billing Boats kit. I joked to the admiral that I wanted to buy a more modern kit, since this one wasn't laser cut.....I wanted to experience what a laser cut kit was like. a few years ago for Christmas, she got me another old kit of the model......that kit was even older than the one I got from Harold! very early Billing Boat kit dealt more with woods like mahogany and basswood. in today's kits, you can get woods like basswood and Obechi....they have cheaper, softer woods. the mahogany I used to plank the PT boat came from the second kit........even most of the thinner parts panels were of mahogany. Peter V. is building a Cutty Sark that is as old as this second kit I'm building the Progress from.......he had quite a bit of mahogany in his kit too. working with kits like these will introduce you to scratch building, which comes in handy for future models. I got hooked, needless to say
 -
really nice progress......the figure and cockpit looks great! I'm sure your going to have a coaming surrounding your pilot
- 55 replies
-
- 1
-

-
- hydroplane
- Slo-mo-shun IV
- (and 1 more)
-
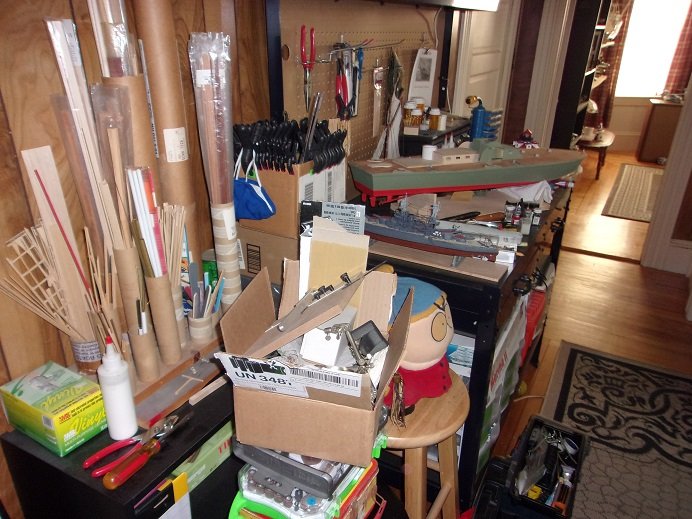
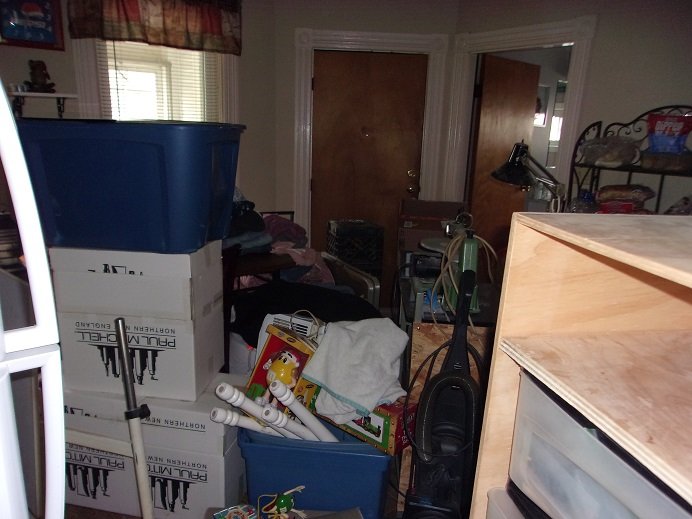
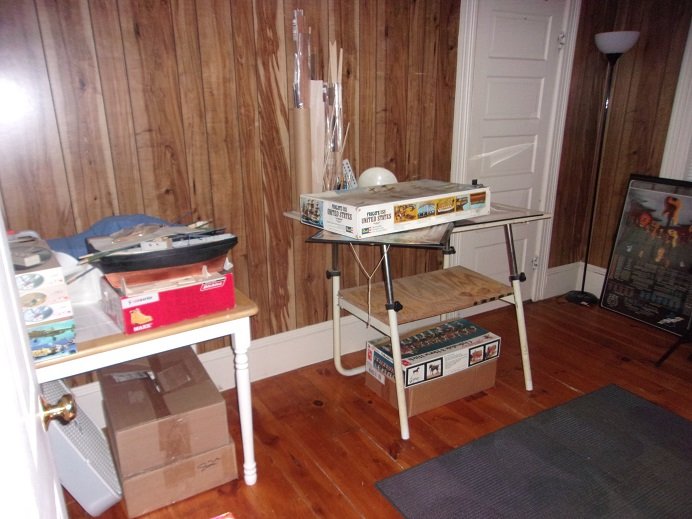
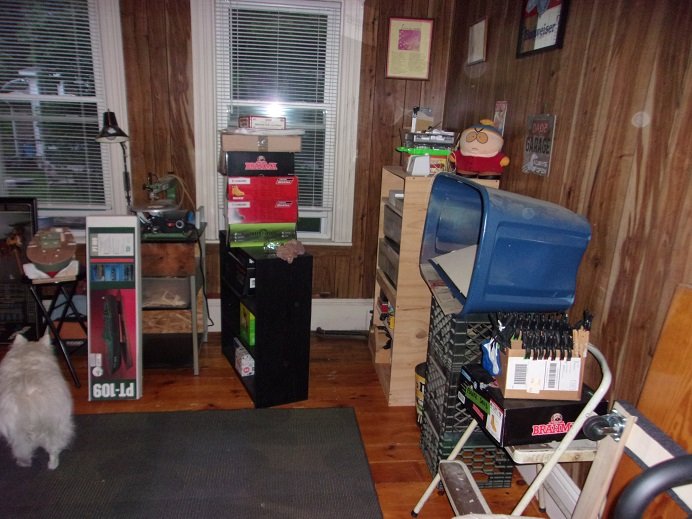
I thought you did something like this a while ago .......thankfully what we did wasn't that drastic. although......it did lead to a lot of chaos in the apartment....... this is what table black looked like..... even the dining room looked like a hoarder's den..... the room that was our bedroom, used to be our computer room when we first moved in here. I finished the Nordkap in this very room...... I didn't take any pictures of the bedroom.......totally aqualung but here's the beginning palette for the new shipyard the room is smaller.......the admiral's computer was on the wall beside the heat register...mine was on the wall next to the door. I know I have a picture of me standing next to my computer, but I can't find it. I was also building the Cux 87 at the time......that model was built when we lived on Spruce St. I was waiting on the fittings for 'ole Nordie. I ordered them from Tom's shop in Wisconsin......Harold {the model's original owner} found the fittings kit that he had, so I ended up with two sets. anyway.......I thought it fitting to put table white back where she belongs. she was rather new back then, in looking at the above picture......she has a few battle scars now. the five plane kits, the four boxes under the tables, the progress and the two steingraber boats....and times the United states by two {the Connie kit}, and this is some of the active and stash kits I have. there's more in the closet.......and even more in the closet by my computer. I think I have enough to play with for the time being I plan to do some thing with this wall......a sort of 'berth' for models that I'm not working on at a given time. so this is where I'm at .......the bedroom is totally done, with the exception of the closet. the shipyard is still in the molting stage....things are still falling into place. won't take me too long, and then I can get back to work
- 221 replies
-
- 12
-
-
hey there Radman.......so good to see your getting back on the Connie! belated congratz on the birth of your son........about several years to be exact during the time of your absence, I bought another U.S.S. United States, and bought {for real cheap money} another Connie kit. I am well aware of the problem with these deck sections, so I made wooden decks for the United States....there is a log for it in the archives somewhere. with the Connie kit, I plan to do something a bit different....no major news since I haven't started it yet so WOW>........good to hear from you again and hope you continue to to progress on this super model your building
- 79 replies
-
- 1
-
-
- constitution
- revell
- (and 1 more)
-
thanks gents.....there might be a silver lining here .......>rockus maniacal laughter here< I very well COULD get that 'wrap around' table I've been dreaming about in any event, you'll get to see a new work station......sad that I will lose the natural light. I have been enjoying taking most of my pictures without the use of a light, but the other room is a bit darker, so lighting will be required. I did put in my requisitions for new crane lights, and since we need to go to Wally World for a new shredder {we burned the one we had up yesterday}, I can see what they have. I don't know where to start really.......first thing I guess, is to get the Christmas stuff situated. then clear the tables. the .......closet can be last
-
Kevin.....I feel your pain....if your admiral knew how many projects I have on the go, she wouldn't say much in fact.....looking over the spare room this afternoon {more on this later}, she was very perplexed with how many kits I have in the closet. believe me.....it was an "ah...ha" moment just in that room alone, I have five projects, counting the 'skeleton' of what I've scratch built as the Danmark. I'll explain more later. yes Big Dad........S4 is the frame work for the deck where the structures go. they are part of the thought I had concerning building the structures...if your planning to do R/C, after you assemble the hull frame, you may want to cut them out and base the structures off them. then when you have all the electronics in the hull, you can already have them as a removable section to access everything. I didn't do that.......considering the deck sheer platform and the fact that I already started to assemble the structures...I left things as they were. do be careful about trimming them as the instructions suggest, since the instructions are misleading being an American visionary is far worse Yves.......the admiral {I believe} is catching on to just how many projects I have.........I'm not only censored......I'm shackled! { she knows I can scratch build , so she's watching that too!} several projects Kevin.......I wouldn't be in hot water if I had that many.......I think mine's up around 15. with my last purchase of a wooden deck { I won't get into specifics}, the iron bank has folded her arms and won't give audience to any of my ideas. thank you John.......I seem to be stymied for the moment, but if I can make any progress, I will post it and now for the reason why I say stymied........ I came home last evening, to the admiral making points that the spare room is bigger than our bedroom. she wants to switch rooms one thing I did tell her, is that the Christmas stuff is not going into that room if we do. I came home this evening to find the dinner table stacked with old paperwork.......tax stuff, and assorted mumbo jumbo! she was shredding whatever was too old to keep. I had mentioned that we could use the hallway to store some of the stuff I don't want involved in the move.....she was in the process of making room. that's when we were taking stock of what I would have to move out of the spare room, and she saw the closet { she still doesn't have a clue what I have in the closet next to my computer / desk I'd be banned for life if she did that! this has also spurred the idea of getting a recycling bin, because a lot of stuff can go that route {if you catch my drift}. so.......just to let you folks know that there might not be an update this week. I'll be up to my eyeballs in moving rooms around. I'll try and do something..............but no promises.
-
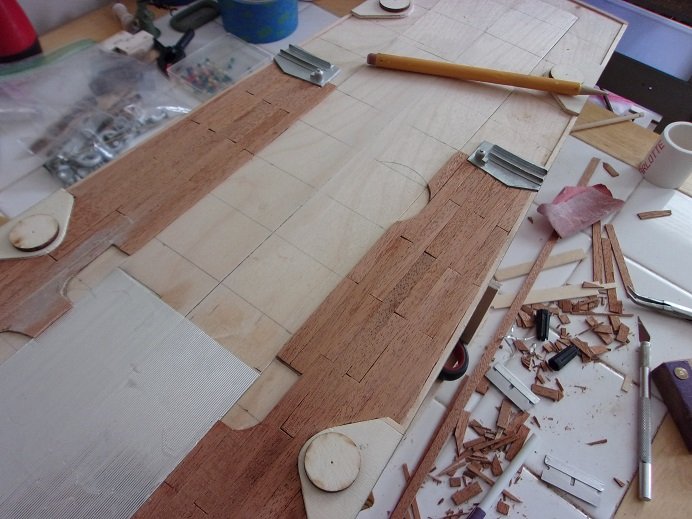
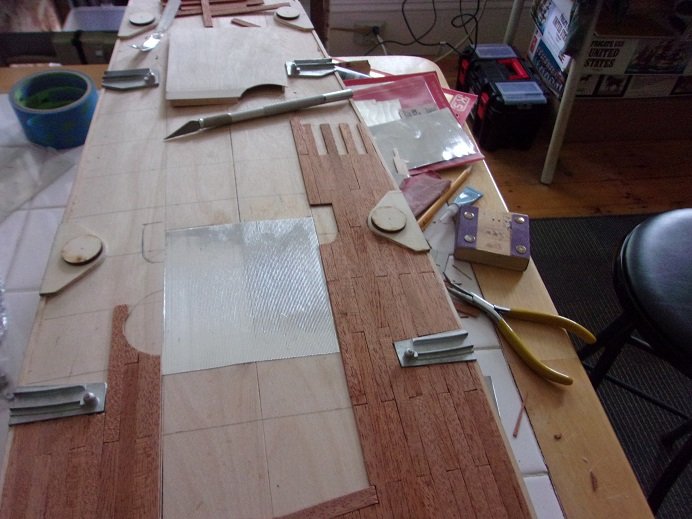
...a HUGE thanks to all who have looked in! the table I did this at is not a good fit........it's lower than the other two tables. I think I'll repurpose it to do plastic modeling and leave the higher tables for my wood projects. slumped over like that wasn't good for me, although I'm much better now. it's funny how I tend to sit with a plastic model, but prefer to stand for wood ones. that will be happening out of the 43 strips of {ironwood} mahogany, I only used 20 of them.....I had very little waste. I still have enough for 1 more deck.......likely for the Progress I would say. another project I should get back to eventually it's gonna be like pull'in teeth to do another order for aftermarket parts, so I'll be forced to scratch build what I need. my two aspects to focus on are the dead lights and the windows. once the windows are dealt with, along with the deck finish, I'll be able to put all this together and go from there. thanks for the kind comment OC........and welcome to you John. I hope you find the log as entertaining as other folks say they are
-
one suggestion is to sand the bottom edge of the sides where the bottom panels are to join. when cemented in place, it will be flush and perhaps easier to trim off the excess where the two quadrants meet.
- 51 replies
-
- 3
-
-
- laughing whale
- maine lobster boat
- (and 1 more)
-
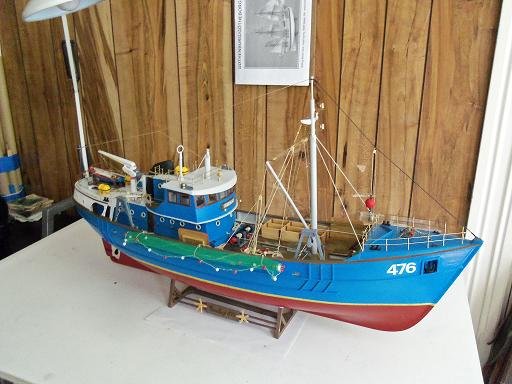
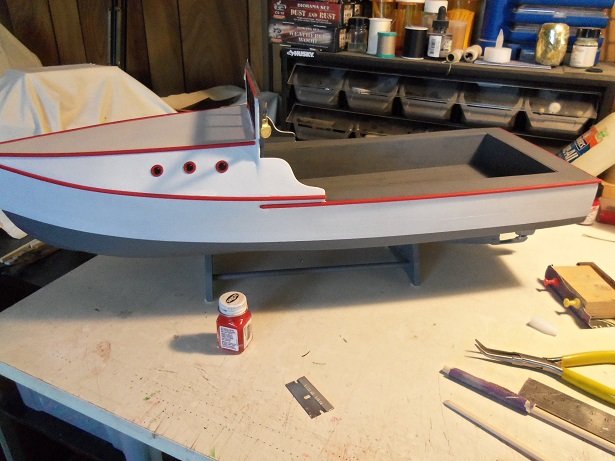
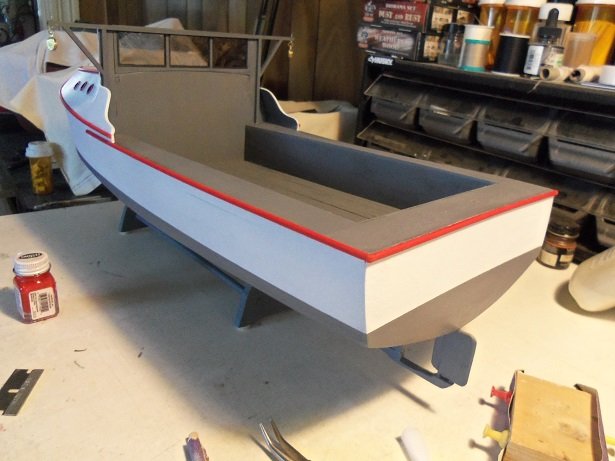
that's what I ran into as well......really didn't care for it. now to trim and sand the excess and keep it from looking obvious. I did something different with the PT boat.......I did all the fitting on the model, and did it in sections to better retain the contours. it looks like basswood your using.......I like working with it too you did it better than I did......I'm a bit on the green side right now the Whaleboat looks very nice.......lots of intricate detail. good eye to scale.... thank you.......I have a few friends {members} that live in Maine. I live on the outskirts of a big city......would rather live in a small town { a lot less attitude} back in my early days of modeling, I never gave a thought to the history of our state. but since I've been building boats, turned to wood, and joined this site, it kinda woke me up. I did a scratch build of a Gundalow from the early 1900's. Portsmouth, Strawberry Banks are two interesting places to visit for all things nautical. this is a more modern vessel....... the Gundalow company built a replica of the Edward H. Adams in 1982. he piloted a Gundalow called the Fanny M and would move supplies and goods inland from the banks.......1886 - 1900. they've been used since the 1600's. the log I did on it might still be here, if it didn't get lost in the last crash. you've got Kennybunkport.......so we're even. speaking of which........most of my ideas { believe it or not} came from drivers at the Walmart DC where I work. the Gundalow was given to me in the form of a copy of the Weirs Beach times. another driver is the grandson of the Arnold family, who hailed from Gloucester Mass and Kennybunkport. the boat was called the Phyllis A and piloted by Albert Arnold. he was one of the 'Michigan Bears' that migrated to our neck 'o the woods and brought Gillnetting to New England. he gave me some information to work with, but I wanted some more pictures of the vessel. sadly, I've lost contact with him......I fear he has left the company. now, the story I have is that the boat was built in Kennybunkport at Warner Shipyard and spent most of her service in Gloucester. the boat was named after his daughter Phyllis, who was 4 at the time of her launch. he partnered with another Gloucester company, scant how long it lasted, but he bought sole ownership in 1950.......the same year that Bernie Warner {of Warner Shipyards} died. Albert Arnold died in 1967. the Phyllis A remained in service for a while, run by relatives Alvin and Richard. in 1967, it left Gloucester for the last time, bound for her birth place, Kennybunkport. me research trailed off from here......so did my contact with the driver, Kevin Arnold. now I did learn that Kennybunkport { the Marine Heritage association} couldn't afford her upkeep any more, and was to be taken back to Gloucester.......haven't heard anything since and haven't had the time to delve into it. guess you can say I like fishing boats.........and ramble super job sheeting your hull

- 51 replies
-
- 3
-

-
-
- laughing whale
- maine lobster boat
- (and 1 more)
-
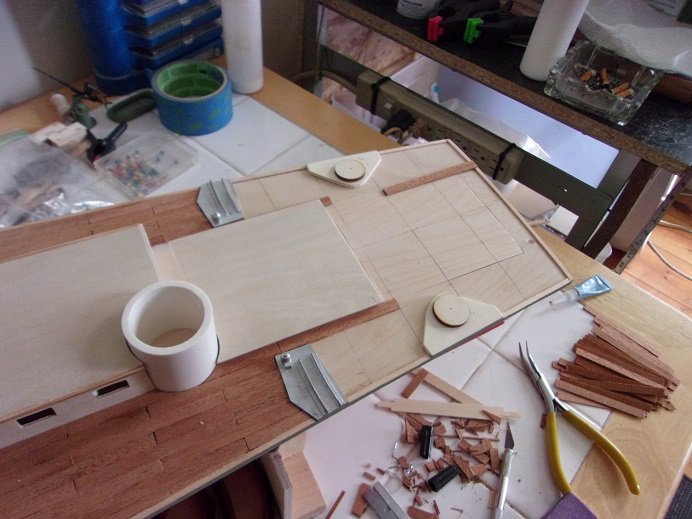
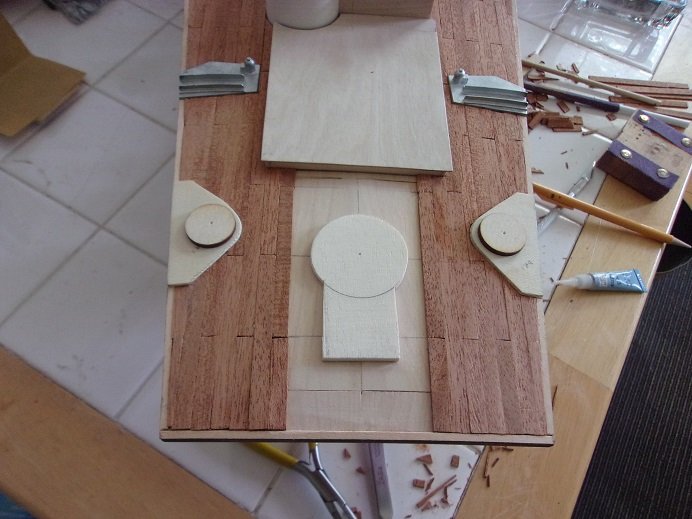
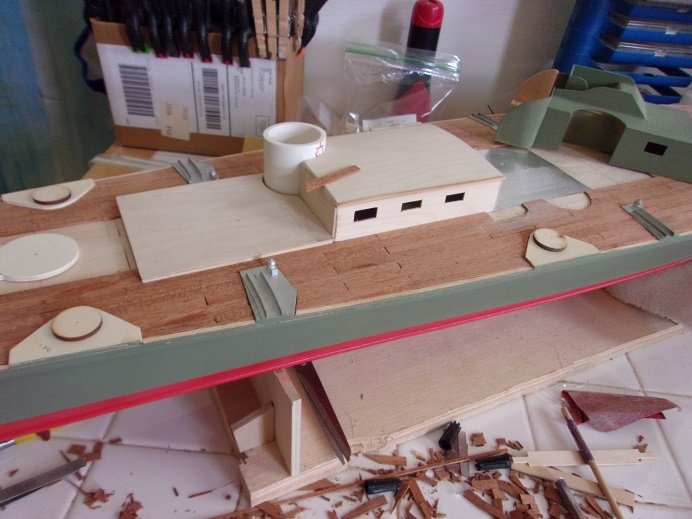
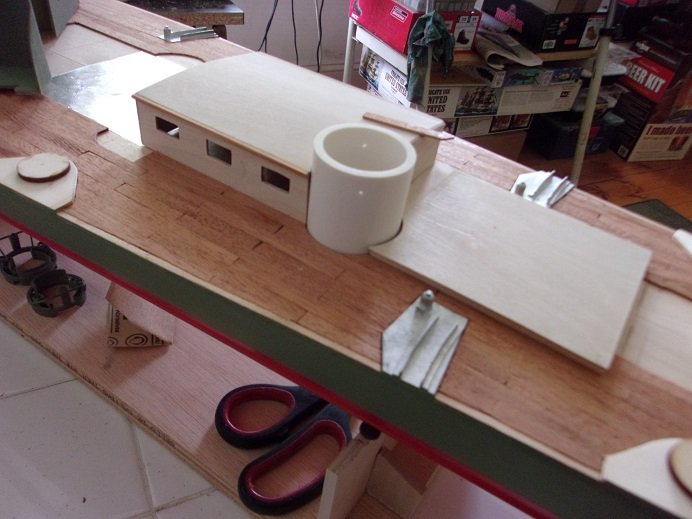
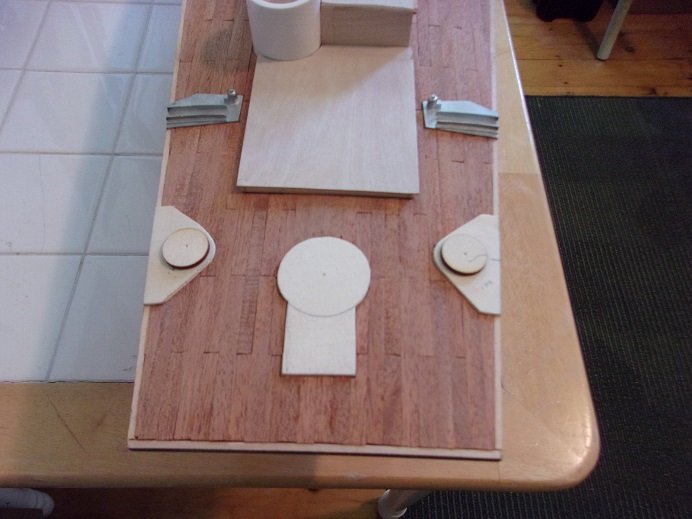
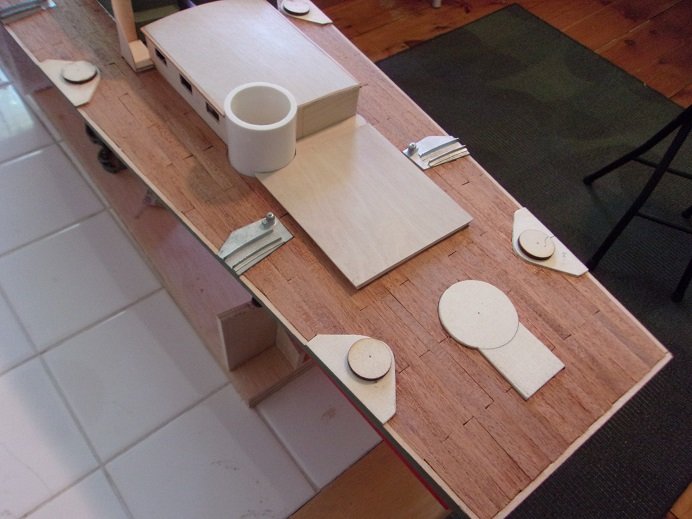
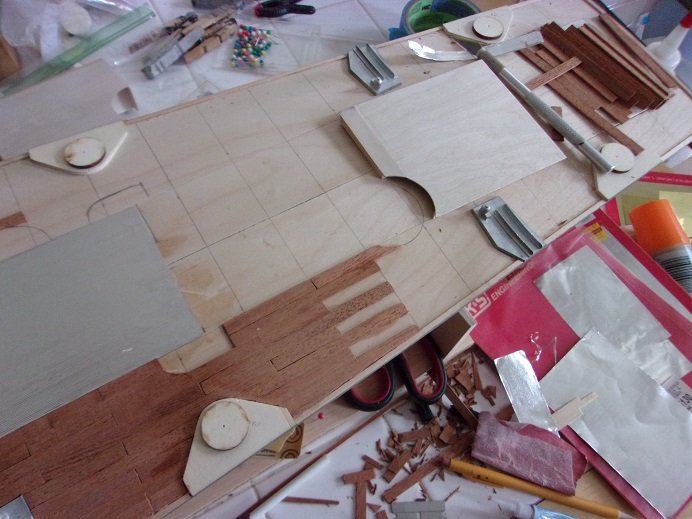
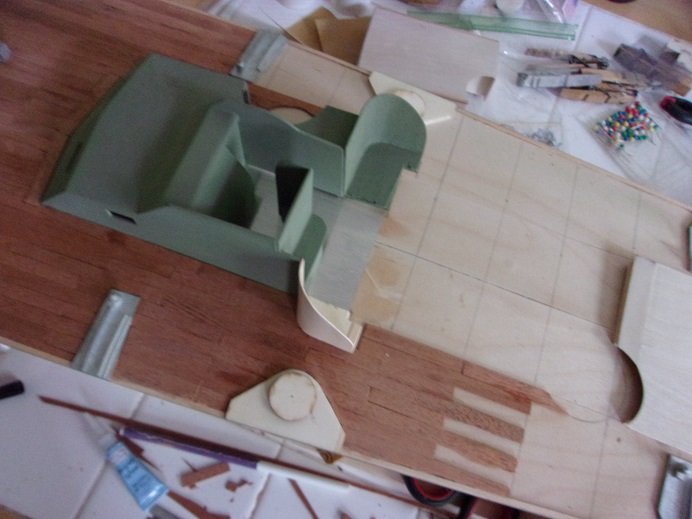
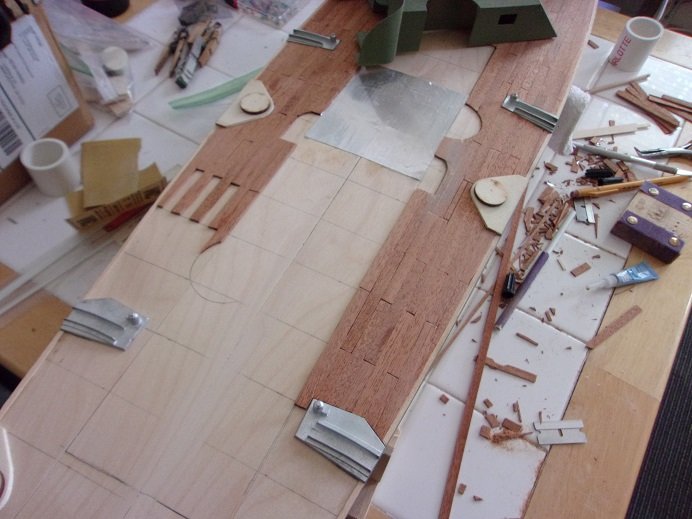
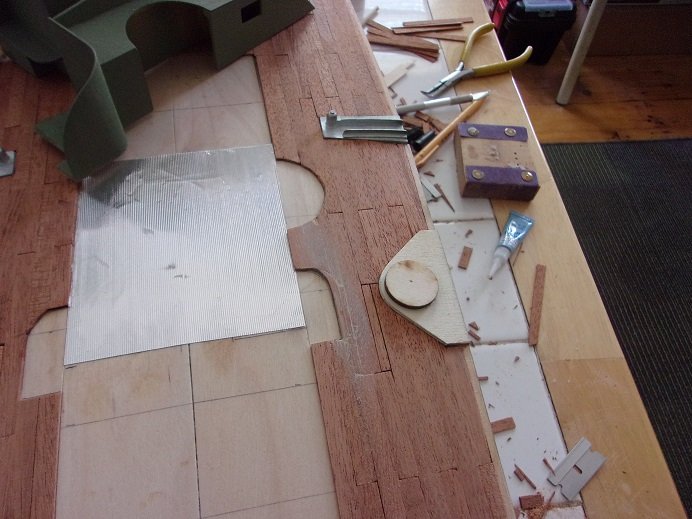
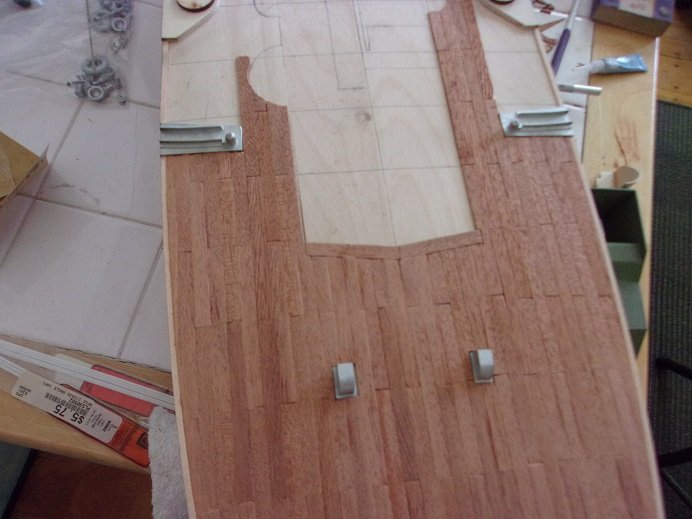
this was a weird day........1st off.......I found an innuendo in the Rice Krispy jingle.........it occurs when they get to the Crackle verse. I looked it up on You Tube, because the admiral couldn't remember it........I found the original one from the 50's. Crackle sings his verse, till he gets to the last line: 🎶 butt Crack {le}, makes the world go 'round 🎶 the things I think of while planking......... secondly, if anyone tells you that an x actor isn't balanced........ there are very few times, that it has fallen off the table, and hasn't stuck blade first into the floor or carpet. I tossed it on the table one time, and it bounced....and stuck into a box I had on the table. yep.......it rolled off the table today.........and stuck me in the first joint of my big toe! I had to pull the darn thing out!!! fresh blade too........ .......and it's really annoying when someone asks to do something, you know they are NOT supposed to do. I have a simple solution. during the day today, the admiral asked me to go out and start the lawn mower for her I had a simple one word answer.........no! enough tomfoolery........Mark Twain must have though of that word / phrase........I shouldn't be mess'in 'round...this last bit is big! so the mid ship section is done. I used the day cabin to guide me through most of it......now the engine cover is involved. the second turret is cased in as well.......the start of the second torpedo brackets has begun. the center joint of the deck panels was flattened so the engine cover sat in place without wobbling. I marked off it's placement and ran a plank, casing it on both sides. then, it was just cut and fill. filling in along the margins wasn't too bad...... cutting around the aft torpedo brackets was interesting......they had to stay full plank. there are no more obstacles, except 'round the backside of the brackets. it got me thinking......was there a platform for the 20 mm gun? there is one shown in the full layout diagram, but there are no parts associated with it. the platform should be as thick as the torpedo bracket bases, so I went into the PT box and got out the cast off fillers for the bulkheads. the turret and a {somewhat} square piece of wood was used to trace out the part. the dimensions should be a bit bigger, but this will do the trick. it was cut out on the scroll saw and sanded to shape. the planking on both side meet the stern margin now. the day cabin and the engine cover, along with the aft turret, sit in place quite well. I will need to make adjustments to the shields, because of a gap with the helm flooring......I just moved it up 1/16........minor stuff. my back was killing me, but I made the push to get the planking done. happy time! it's a shame I can't get the shields to sit flush, or this would look better than it does. next will be sanding and painting.......
- 221 replies
-
- 17
-
-
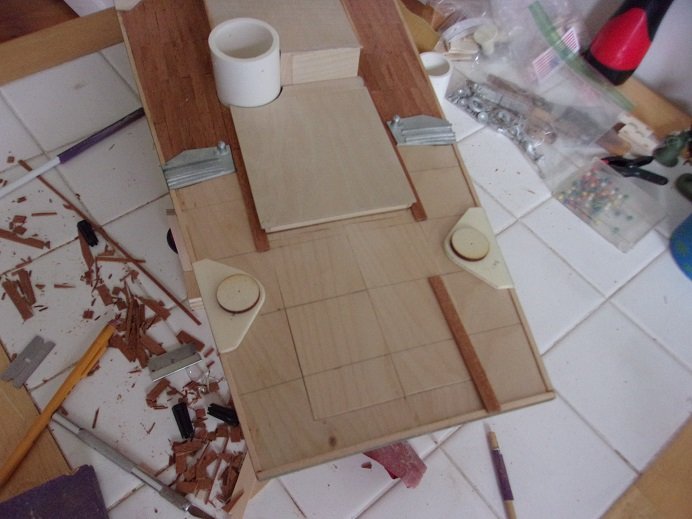
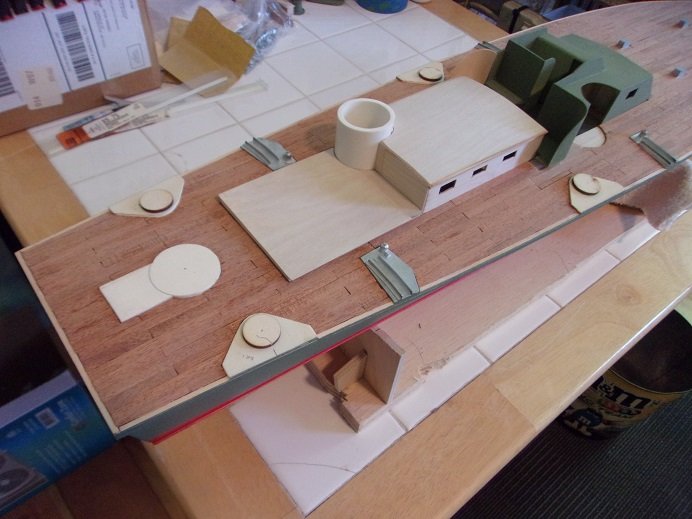
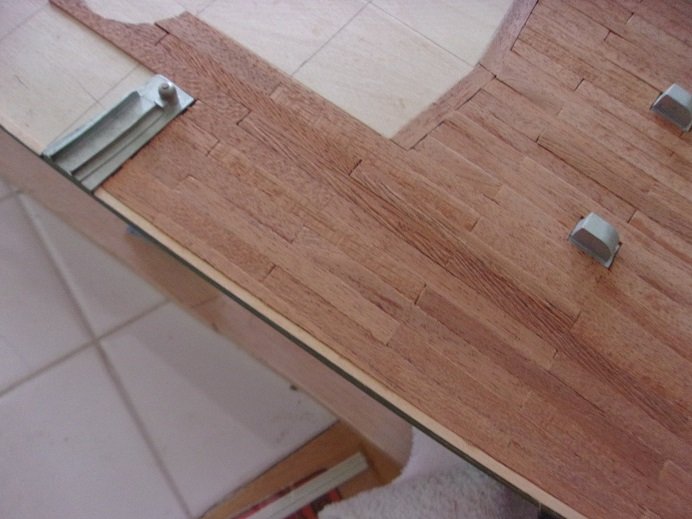
the port side shield worked out well.......it sits in the deck "well" pretty good. with the deck planked on both sides of the helm, I thought it was time to lay the floor in the helm area. I have some of that corrugated siding used in model railroading....painted flat black, it should look rather good. the lines go straight........they don't look like that I had forgotten about the second turret......so I drew the lines for that one. the starboard side shield however......got a little messed up. in one of the dry fits, I saw that it fanned out further than what I marked off, so I drew the new lines to follow......not a good thing to do as a double whammy, I seem to have lost track of the butt stagger....that was bad..........what was worse. was I somehow was off on the planking, resulting in a 3/16 gap...... I left the gap repair visible so you can see. later I'll fill it in with filler and render it invisible. I already filled in the small piece that I fitted in the shield well, to correct that mistake. the torpedo tube will hide some of it......and as we all know......paint hides sin 🚫 {so does filler}. it gets better.........no more surprises.........thankfully! I'll cue up the big finish
- 221 replies
-
- 13
-
-
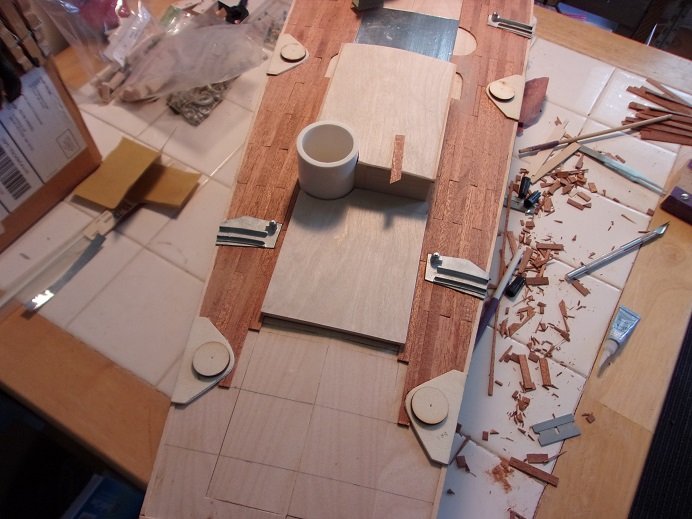
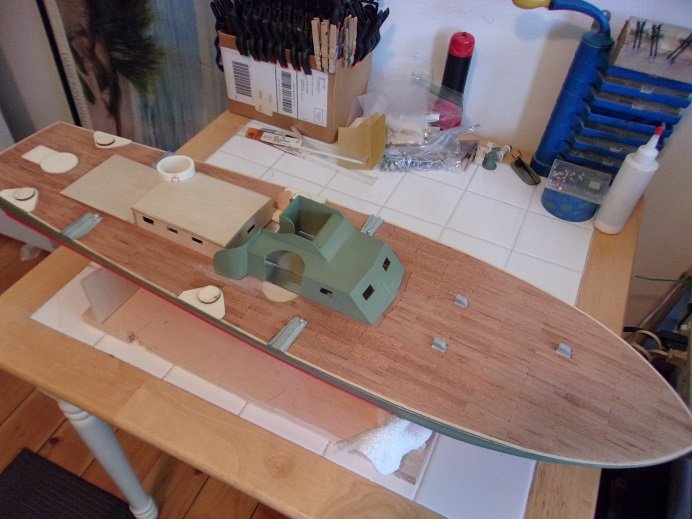
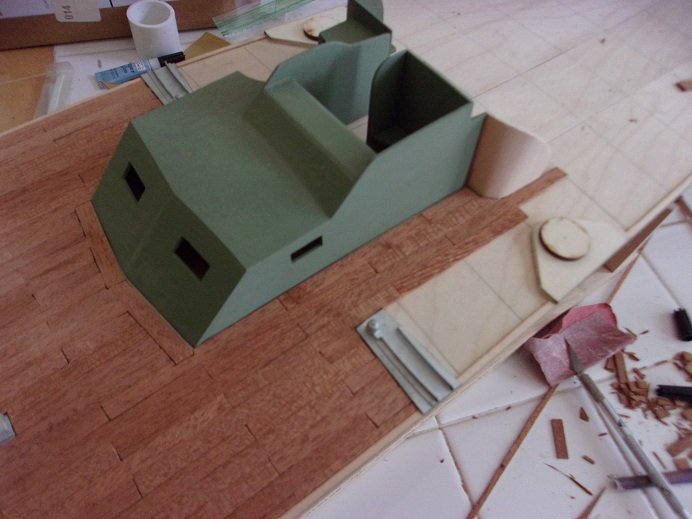
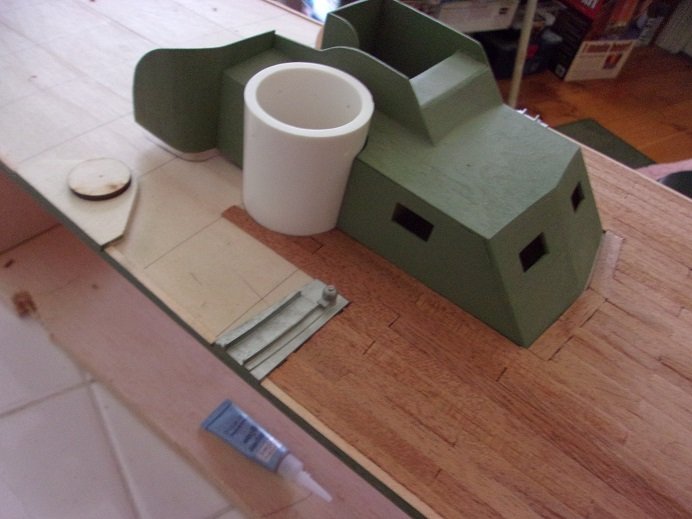
OK........I'm back ........still a bit out of joint, but a few more Advil and moving around, I should be fine. my thumb is throbbing too......a result of giving up on the chopper, cutting and trimming by hand. primitive I know.......but it works anyway......once I got both sides of the bow covered, I could then move back towards the stern. there was a lot of obstacles to work around....a product of my own doing. I made it back to the first torpedo brackets. now to fill in on both sides of the mid ship, and work around the first .50 cal turret and the shields. haven't decided if I'm going to fill in around the brackets and stuff. some of the butt joints show and some don't......I don't want them to be totally obvious, but after the paint, have them just noticeable. when I sand, I'll have to wipe the hull......and not blow on it {it will clean out the gaps if I do}. I mentioned that I would show the structure in place. you'll see plenty of dry fits....I promise
- 221 replies
-
- 10
-
-
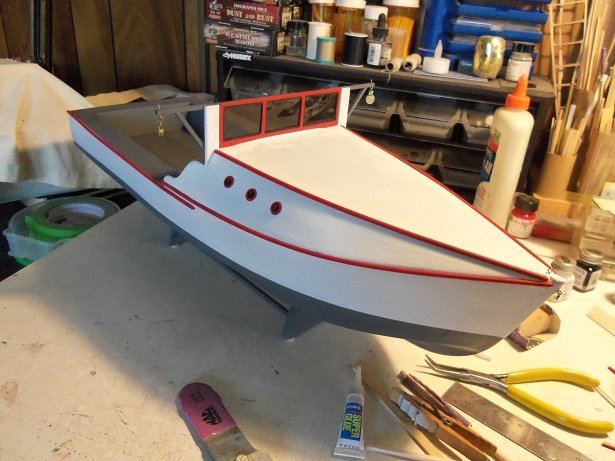
that's what happens when I scratch build........I didn't do a good job {I think} when I did the Phylly C. , or at least that's what she turned out to be yea, I found that you can't go too crazy when build'in a work boat.....ya have to make her look like a work boat. doing the sheeting didn't work out well for me.....that's why I resorted to planking.......go with what cha know {or at least the principles of it} I did much better though this time around with the PT boat, but they wanted me to do it in plastic sheet. I did it in basswood. with those plans, it's very easy to clone another hull. there are many configurations of this boat, and one can go nutz fitting them out I must have missed it, or did you have to cut out all the parts you needed? the Midwest kits are die cut.....but for the scratch built Denny zen, I used the parts panel to trace out the parts {just the hull parts}. anyway, it's good to meet other folks who love to tinker with these older models......I've had a couple that weren't even laser cut. I look forward in seeing more.......you do some really detailed work. have you looked in on the second scratch built hull? here's what she looks like........I have pictures of the real boat.......she looks very close to her I still need to do more to get 'er ship shape. if you like to see more, just browse the scratch build forum for the Holiday Harbor Fleet. there's a fishing boat too {that didn't make the cut}.........the Andrea Gail spawned from this log. look'in forward to see more........all thing Maine L.B.
- 51 replies
-
- 2
-
-
- laughing whale
- maine lobster boat
- (and 1 more)
-
well........I nearly put my back out of whack.......but the deck is planked! I'll have at least one day to rest up before having to go back to work. these days off thing is too damn short.........MAN!..........I can't wait! I'll have pictures and a break down in just a few.........gotta take Gibbs out and probably grill up the burgers........I'm like starv'in Marvin!
-
some mighty fine work there this looks to be about the same assembly process as the Midwest Maine Lobster boat. I built the kit and scratch built two others using the plans. I didn't go to the lengths your going though.........very nice !
- 51 replies
-
- 2
-
-
-
- laughing whale
- maine lobster boat
- (and 1 more)
-
read through your log D, and I can sympathize..........at the moment, I'm working on my second non laser cut Billing's kit. one good thing about it, one learns to scratch build pretty much right away she looked a bit worn from storage and age, but you brought her back to life in fine shape! she looks great. congratz on a very fine job!
-
I have both models of the Waverly life boat.......seems to have the same hull assembly sequence, although I don't recall either one having any sort of frame work. really doesn't make me warm and fuzzy concerning their sturdiness. perhaps one of these days your Archer will make it out of the closet I really wouldn't be too concerned about the warpage.......I'm sure there are stringers that still need to be added
-
hey there Mark just caught up with your log and very impressed with the progress. the planking looks really good and will look even better when fully planked! good to see your doing well.
-
3 was the magic number..........the model is 33 inches long. divided by three gave me eleven sections, which I later marked off the halfway in the middle. thanks I can't wait to see it with a coat of paint
-
Hi Kevin the shift is every other plank........to go with a three or four butt shift, I would have had to quarter the spacings. I'm just keeping it simple

