


Adrieke
-
Posts
1,625 -
Joined
-
Last visited
Content Type
Profiles
Forums
Gallery
Events
Posts posted by Adrieke
-
-
well Sjors looks like I don't need to do it

after checking tonight I found that the problem wasn't where the deck parts join but the bulkhead before that.
with some effort I ripped of the whole part sanded off the glue and after a bit of fitting its now sitting better
used my smaller clamps and the little notch in the bulkheads to keep the deck securely down
meanwhile I did finish planking the forward deck
- Piet and popeye the sailor
-
 2
2
-
2 options i can think off : you deepend the slot in either keel or bulkhead 4 till the bottom sits at the sam height as number 3 then add some strips on top of the bulkhead to get it leve again.
or add some strips on the edges of the bulkhead at the bottom
-
-
thank you Popeye
Sjors i had a check this morning and the deck is sittign better now . there is still a slight difference so i might have to do some sanding there which probably means i have to rip off some of the planking
thanks Wayne and Mick
-
looks good to me Randy
an give each visitor a bottle of rum and they l be seeing 4 deadeyes instead of 2

-
haha Sjors soon it will start to slow down especially if I am making big mistakes like I already did
and we don't have an upstairs

I only had an hour of free time today as I need to do some work from home (move a few virtual servers around )
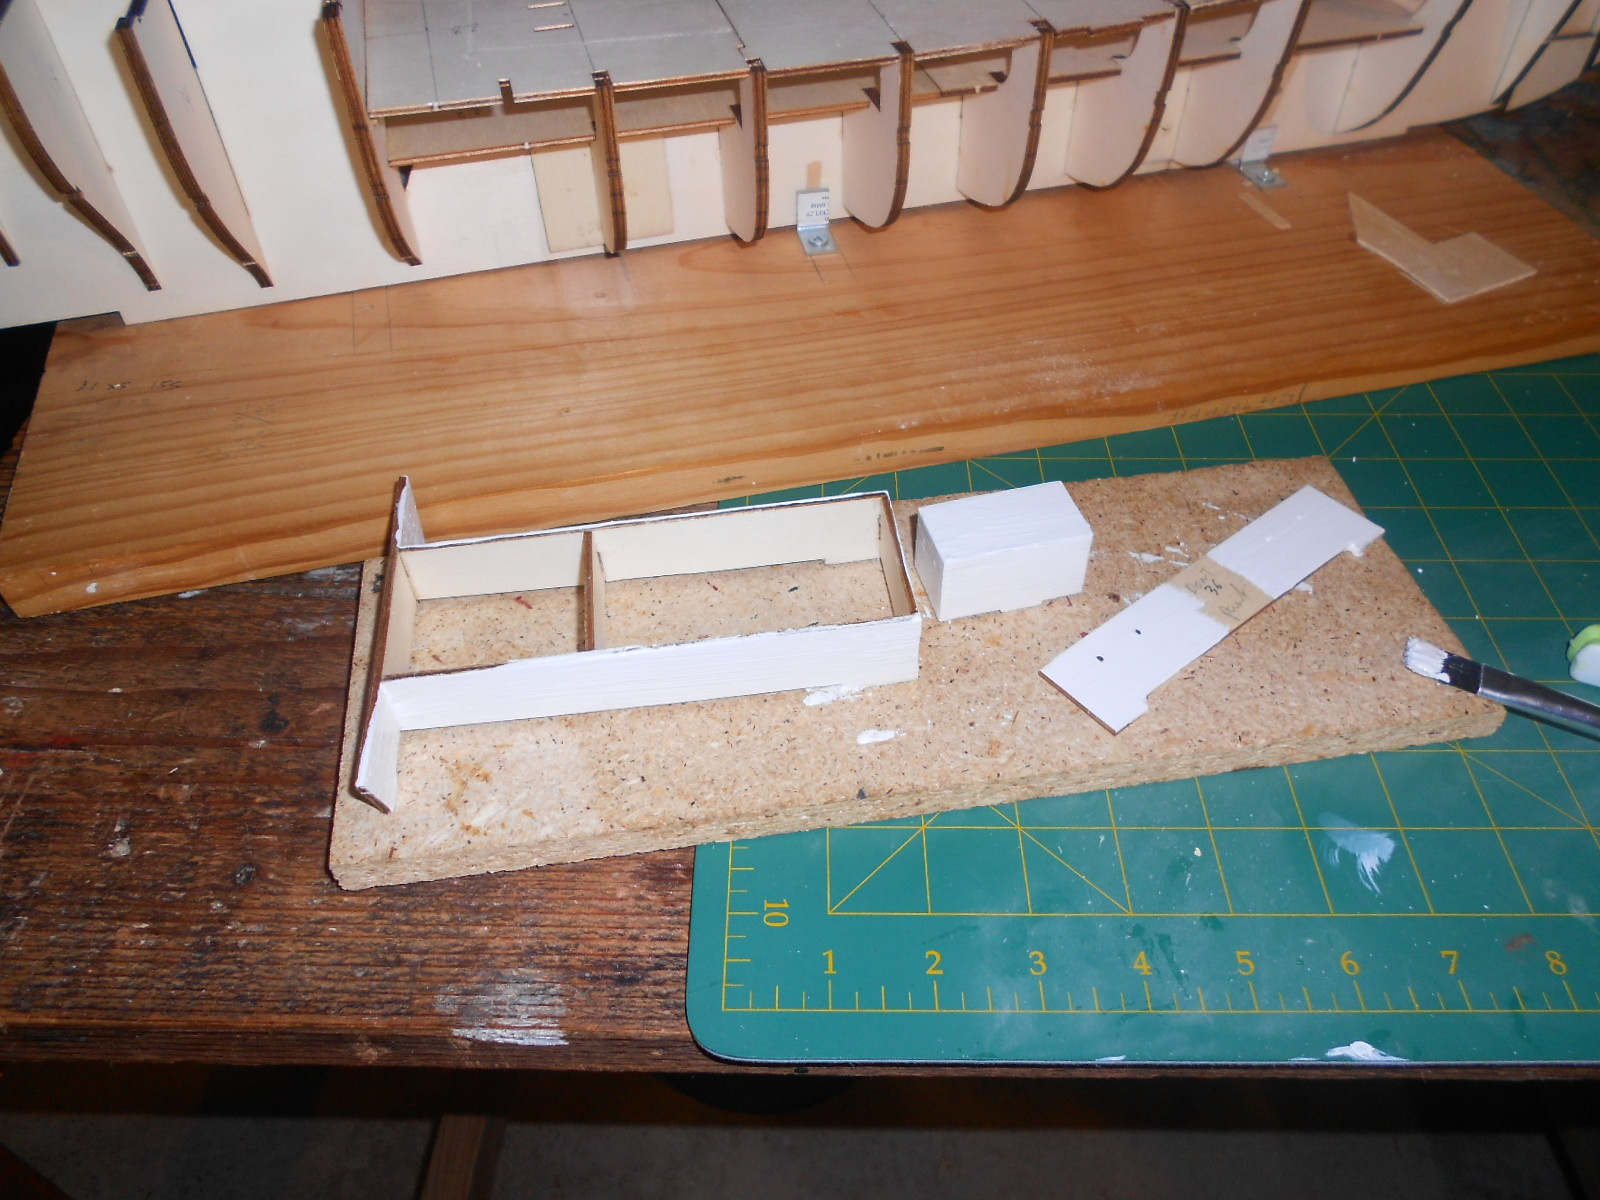
so I sanded down the filler and put a base coat on the 2 structures

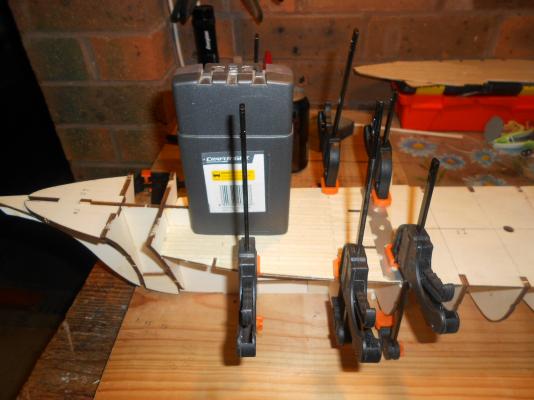
when I was preparing to do some planking on the ship I saw that one of the 3 false decks was not glued down completely.
I cant believe I didn't notice that before. fortunately that also meant it was not glued down much and with a bit of work I had it loose enough so I could re glue it. I didn't use clamps the first time instead used some heavy objects on top
this time I wanted to make sure it was done properly so I brought tout the big guns (clamps)

- popeye the sailor, augie, mobbsie and 2 others
-
5
-
the workbench will do Mick but I am concerned on where I am going to display all these ships
apart from the decks and the masts and stuff everything will be painted
-
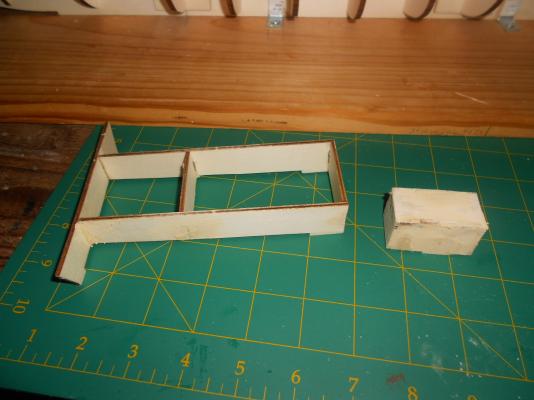
finished the forward structure . it needed some sanding to make it sit nicely on the deck
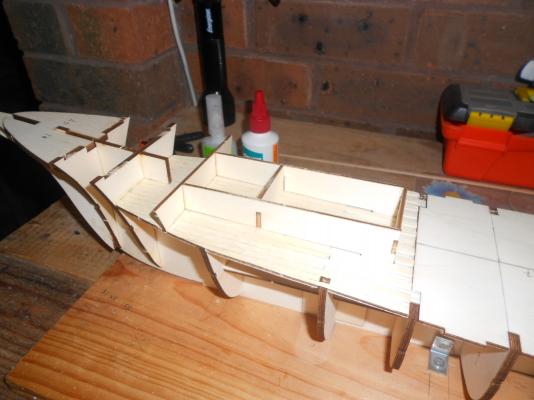
overview showing the half planked forward deck and the 2 finished structures .
some filler was needed to make sure there are no gaps for the painting later on
more reinforcements installed
I was going to install some more till I realised that I needed to install the other decks first
next few days will be spend planking the decks ( think about 1/4 of the way done )
- Ferit, popeye the sailor and trippwj
-
3
-
thanks Popeye . we are still in the easy stage of the build so progress is going well
hello Pygothian. yes unfortunately its a common thing but I guess with a kit that includes a few thousand pieces its difficult. fortunately OcCre's customer service is excellent
hello Edwin . I was unlucky with my kit that there where so many parts missing. I have read through the instructions many times now and although its going to be lots of work I feel like this is a very enjoyable kit
I am sure Sjors will behave now he is promoted and I got some good beer to keep him quiet 
thanks for visiting Ferit
. I finally got round to looking at your fabulous build be prepared for many more likes as I am about half way in it - augie, DCIronfist and Ferit
-
3
-
-
if the stick on rivets dont work maybe creating a brass or other metal template with drilled holes where the rivets go so you can easily put the paint drops on ??
-
first let me say how good it is looking Auggie and she looks so big on thta little workbench
second Wayne if you let Sjors teach you dutch dont be surprised if some day in the future you are in in the Netherlands and you think you are ordering a drink from the waitress yuo get a slap in your face

- popeye the sailor, augie, SkerryAmp and 2 others
-
5
-
-
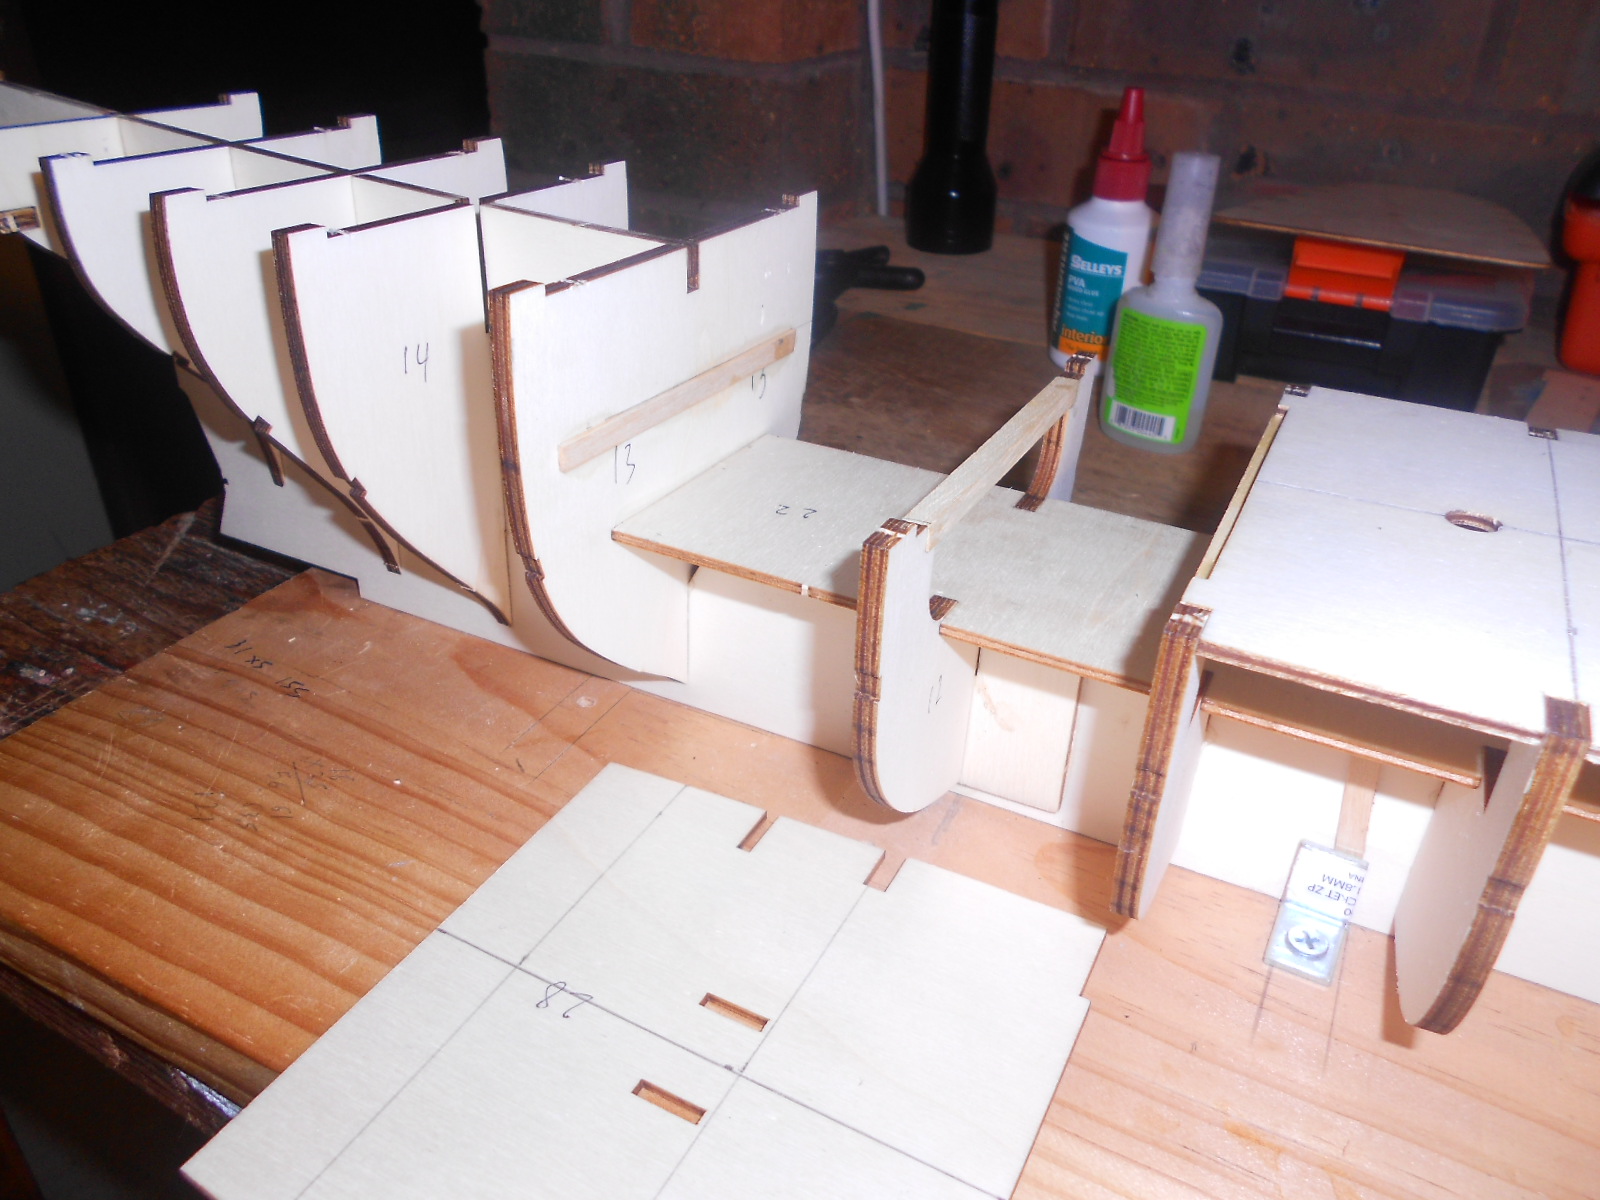
it surprised me that the last part of the deck did not have any support where it sits against the bulkhead
would have been easy to have 2 slots cut out to slide the deck in
I added a strip of wood against the bulkhead so the deck could lie on top
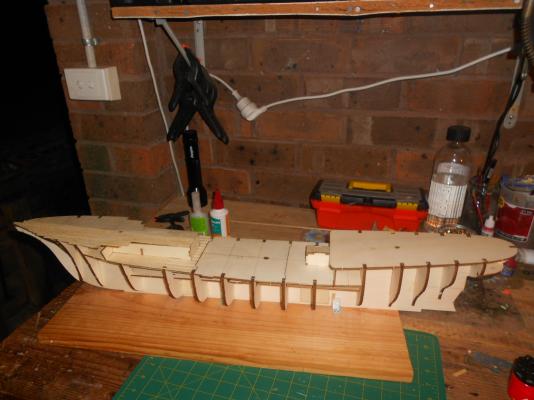
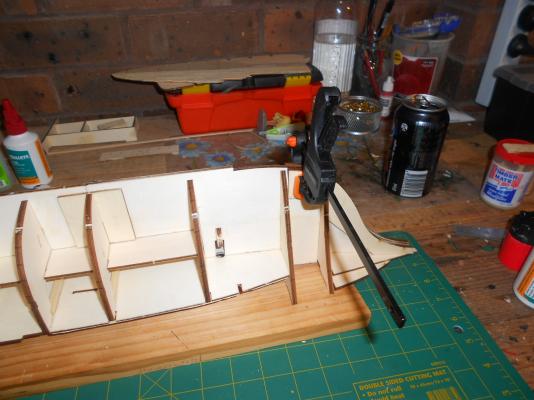
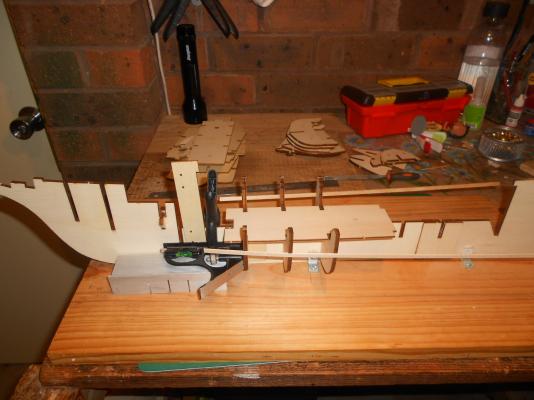
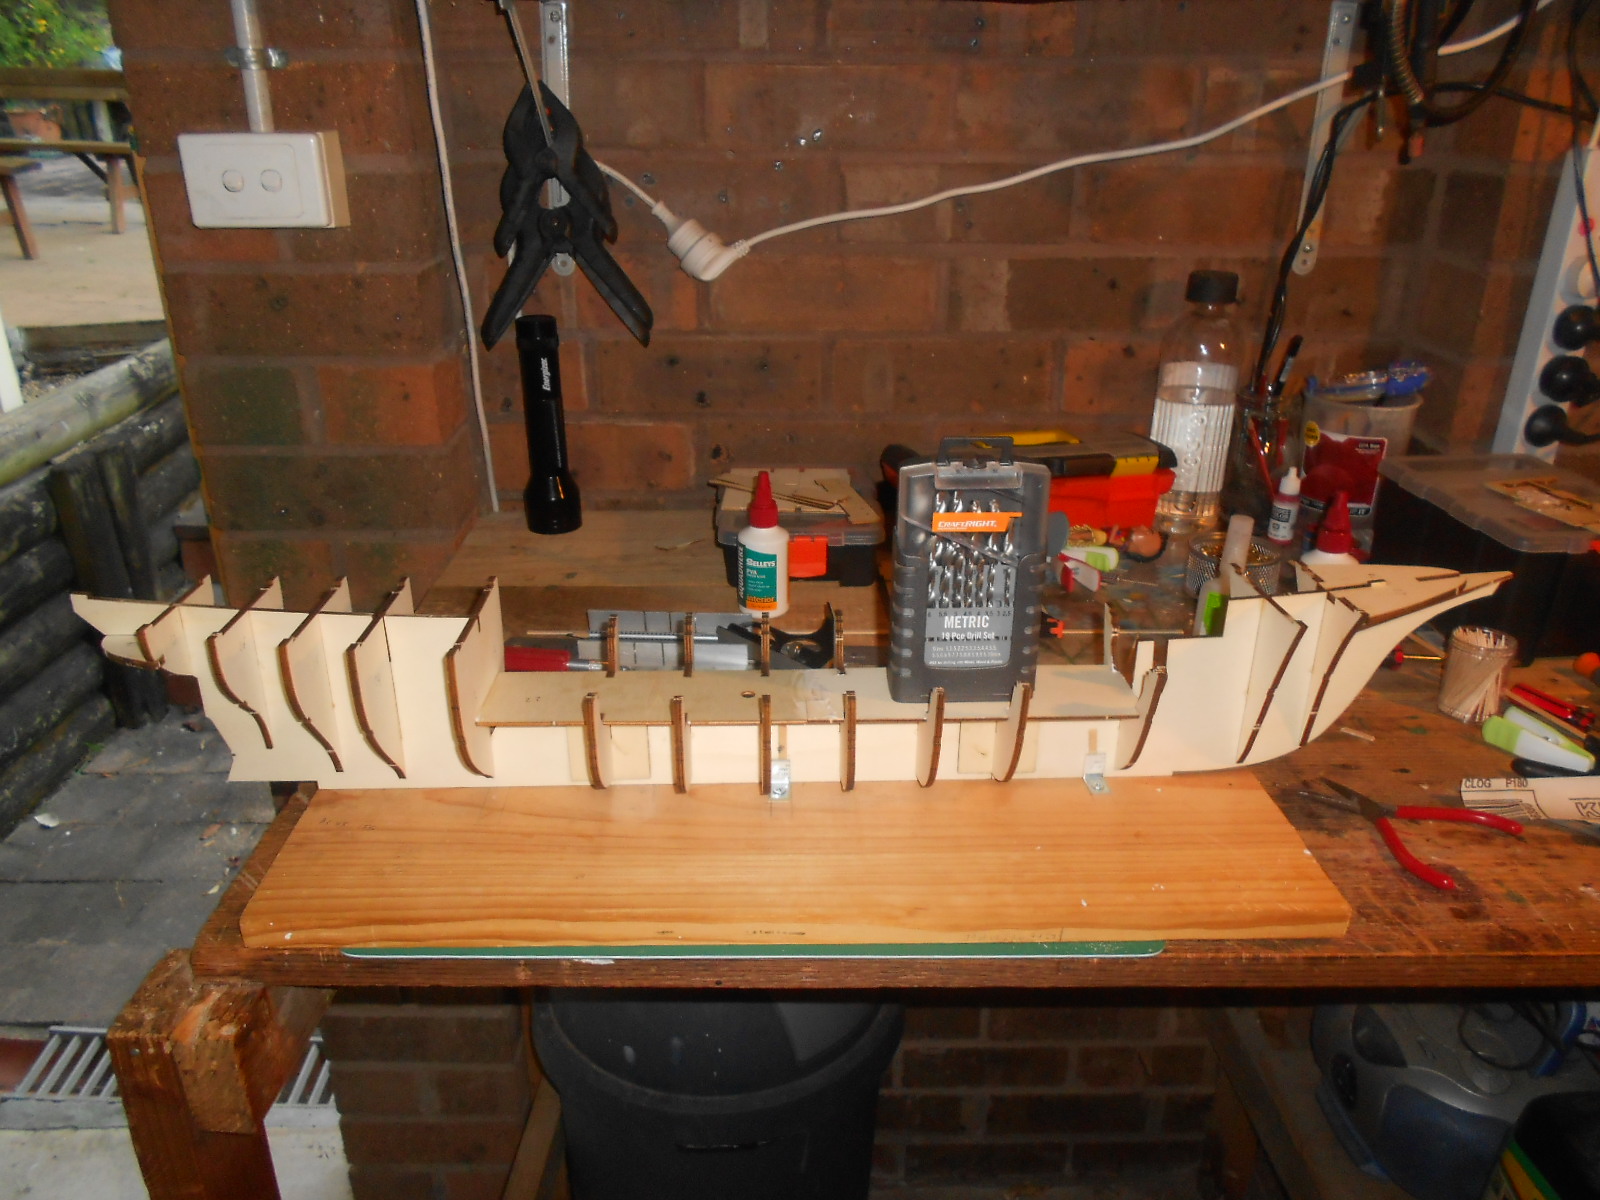
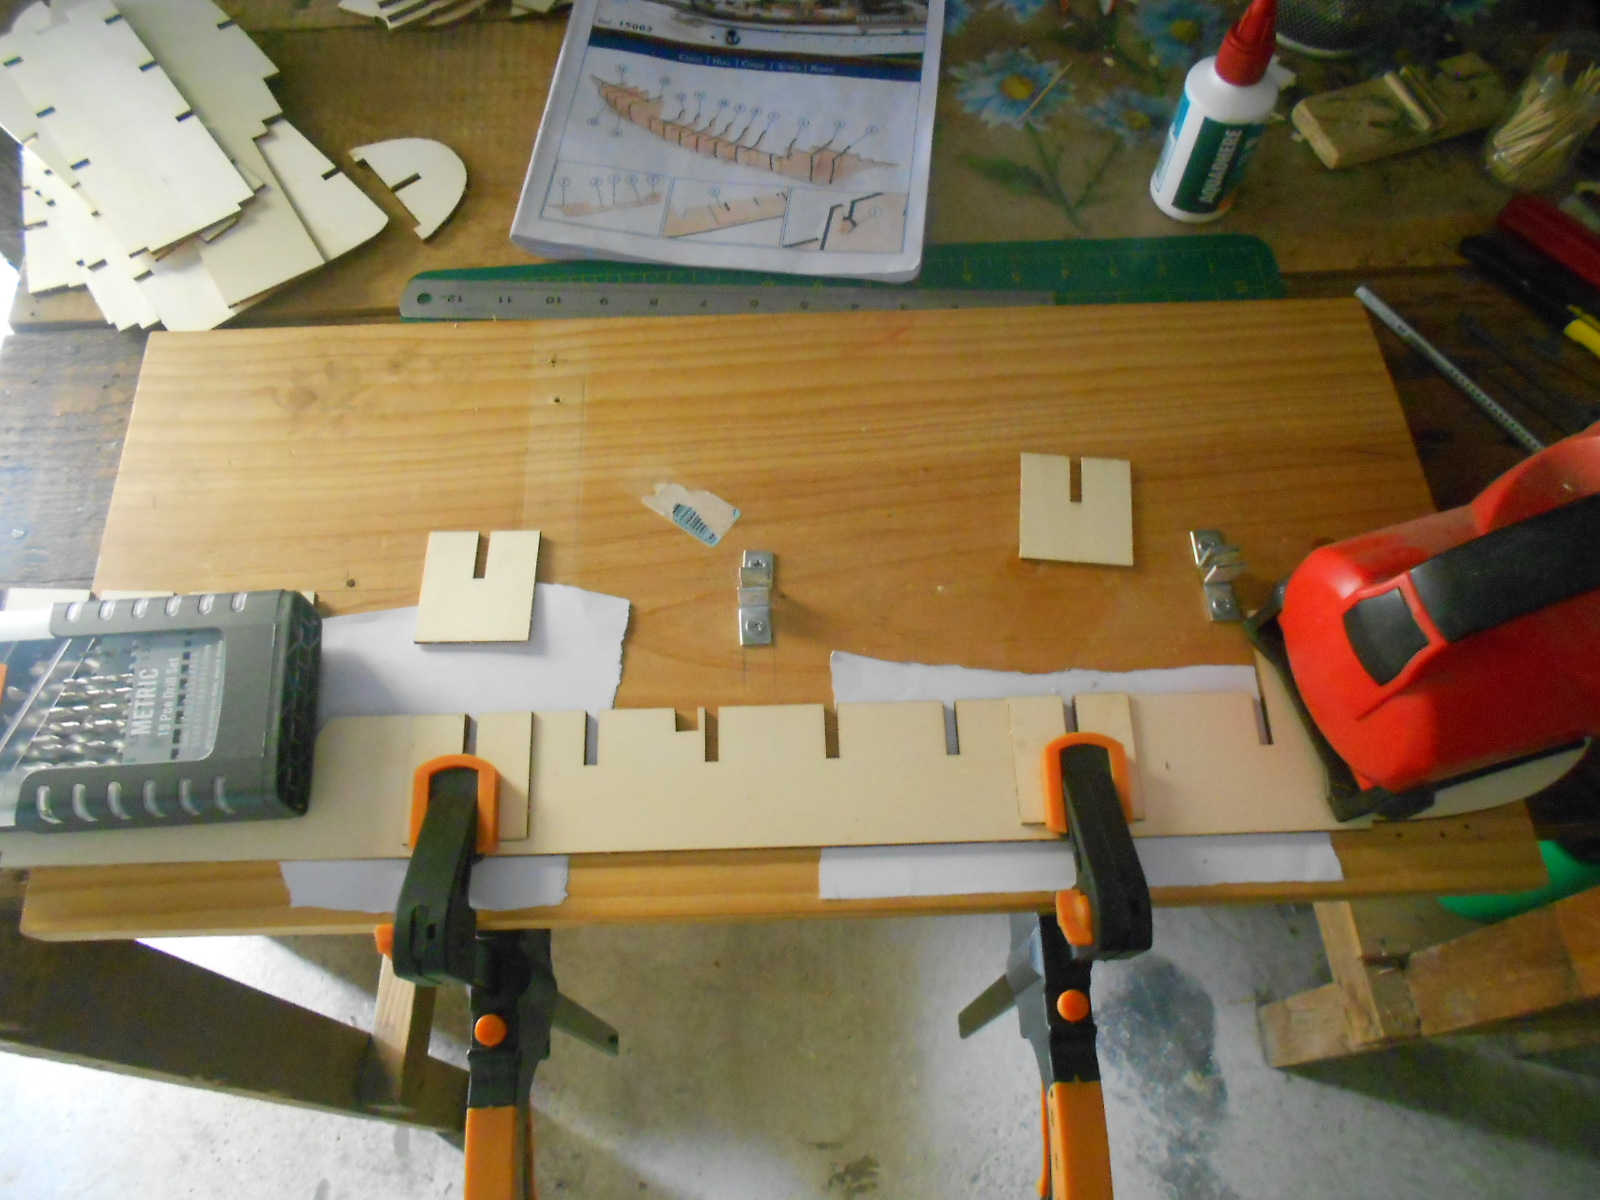
adding the bow reinforcements . as you can see she is taking up the whole length of my working area
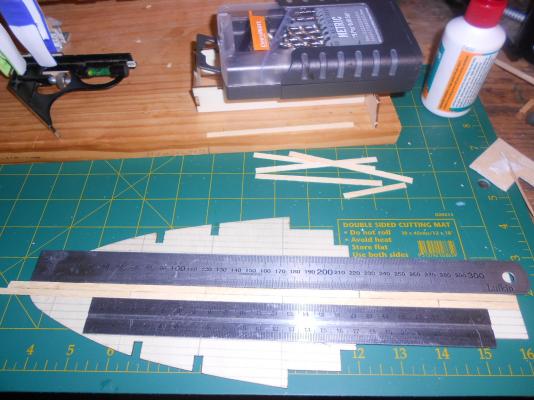
started on planking the front deck. i use my two metal rulers to make sure its all aligned properly
- Script, Piet, robert1965 and 2 others
-
5
-
-
after an AL build with lots of instructions mistakes i am a veteran in spooting them
i have decided to not similate trenailing : first reason is that after doing the first part i like how it looks now without them. second reason is that i would use the same method (toothpicks) and drilling over a 1000 holes then adding the toothpicks is not apealing to me for this build
-
looking nice with all the deck stuff going on
good decision to paint th ewindows black . because of the blue of the hull it makes it seem like is just stuck on
-
thanks Sjors
and yup had plenty of deck planking on the king so I am as good at it as you are with ratlines thanks Randy . we ll see .
I am on step 12 out of 261 (that is without masts and rigging) and have found one inconsistency :
the deck planking was supposed to be strip of 65 mm length . after I cut the first few I tried them out on the deck and noticed it didn't look the same as th e picture. after some measuring I think the planks in the picture are 100mm. so had to make my first decision.
a bit more measuring and the lengths of the 3 deck parts (200 mm, 150mm and 120mm) suggests to use 100mm planks so that's what I did
- Sjors and popeye the sailor
-
2
-
Popeye I am deliberately not looking at photos of her (there are many on the web) so I cant be tempted. and yes it feels good to be back especially today . I spend morning and afternoon working on a fold up table out side (nice weather here) and it felt so relaxing
don't worry David I am being careful. bush fire season already started early

yup just in time Mark because I have been doing plenty
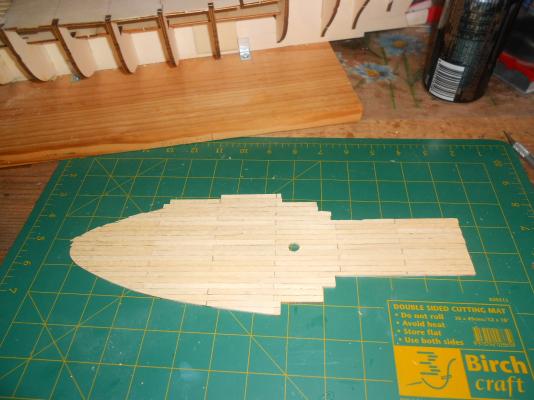
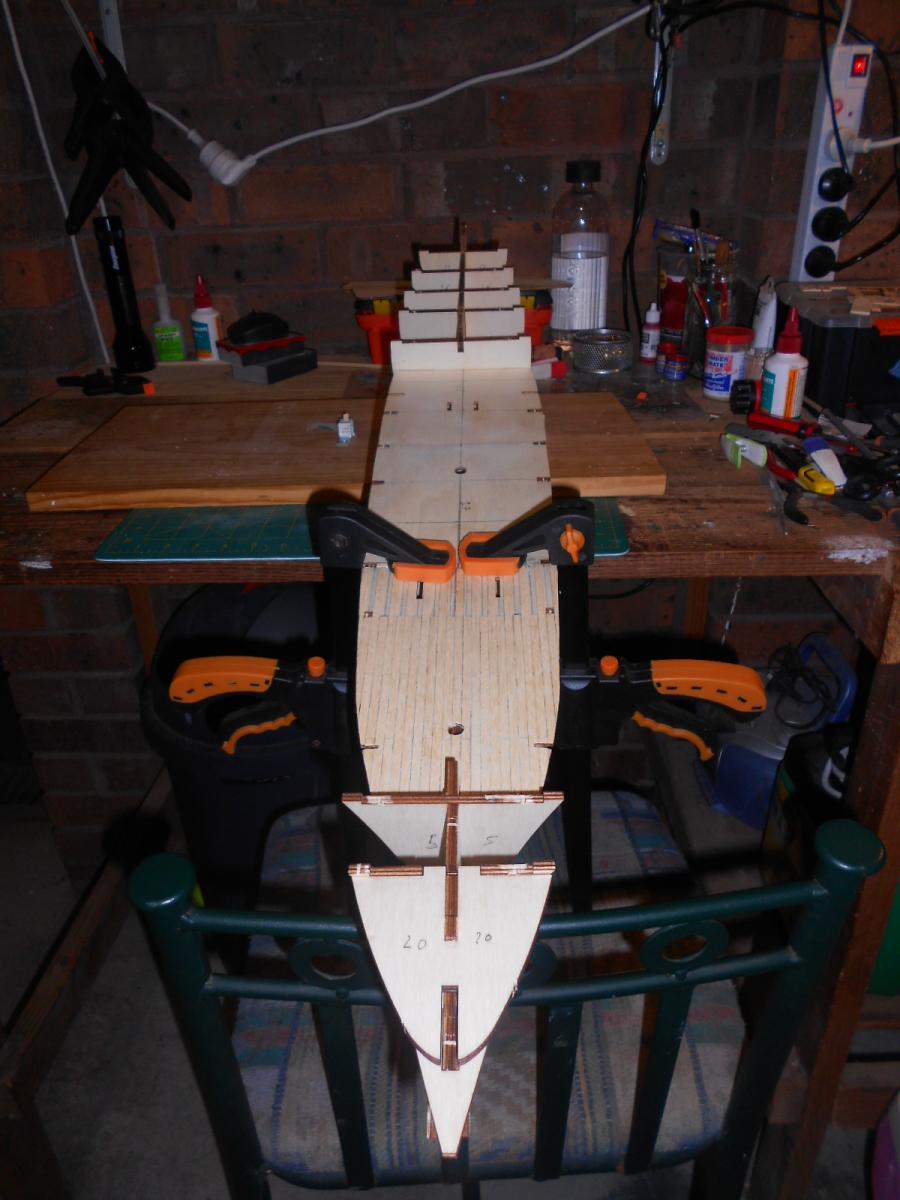
while adding the bulkheads and glue is drying on the workbench inside I sat outside (watched by our cat and pet mouse) working on the deck planking.
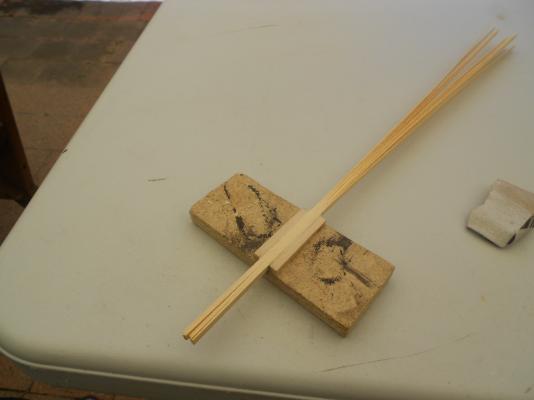
both the deck and hull planks (second layer) are of poor quality and have lots of fuzz on the edges so I started with sanding them a bit using the jig I made for caulking
over 200 planks later and a few hours I finished the first part of the middle deck
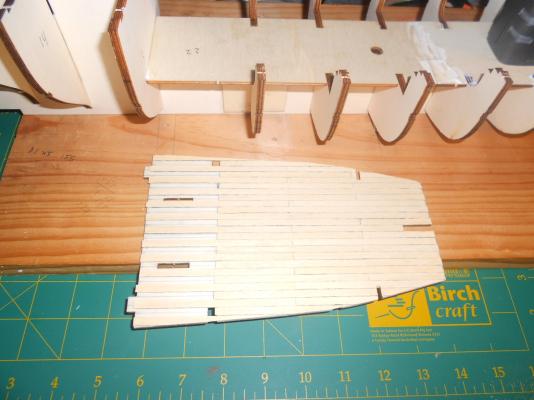
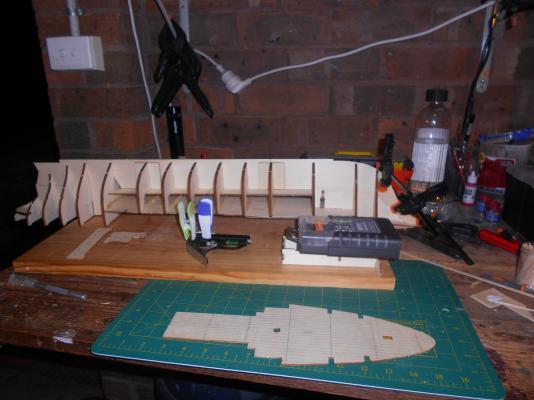
the keel and bulkheads are all in place including the plywood in the middle to ensure bulkheads are lined up properly (makes it so much more easier)

-
hello dragzz
no worries
if you decide to make the room longer you ll see that the slots of the deck on top wont fit so either way you go you need to do some adjusting
-
hi Sjors
I pondered about it and only could think of one way to secure the deck without visible signs . I have made whole build so that I can reopen her up and repair any problems with the wiring. now after fixing the previous deck with the screws and how difficult it was I don't think I could get it off without damaging all the stuff that still needs to go around it. so its going to be very unlikely I will ever open her up even if the lights stop working. but my OCD forces me to finish her off this way
-
hello Dragzz
look at the 5th and 6 picture of the first post in this log
I did notice that in Roberts build it seems the back rooms also don't fit. as far as I can remember that wasn't the case on my build
-
welcome Randy, Sjors, Keith Augie and Anja
and thanks for the good wishes
after some thoughts last night I have decided to build this kit as is without any additions or changes.
I think that's why I was getting bogged down with the Endeavour : too much thinking of how things need to be and together with the KOM that was getting too much for me. I want this to be a fun and relaxing build. and hoping with the bit of experience I have now I can make her look like the pictures on the box
- augie, lamarvalley and mtaylor
-
3
-
as I was getting nowhere with the Endeavour and even broke some parts while installing, I have decided to store her away for awhile. as I am intending to make her look like the replica I will go and visit the replica and take lots of pictures so I can come back to her later
so while I am still working on finishing the King of the Mississippi I decided to start on the Gorch Fock
First I transferred all the little parts in to 3 of my standard storage containers
then the 3 parts of the keel needed to be glued together

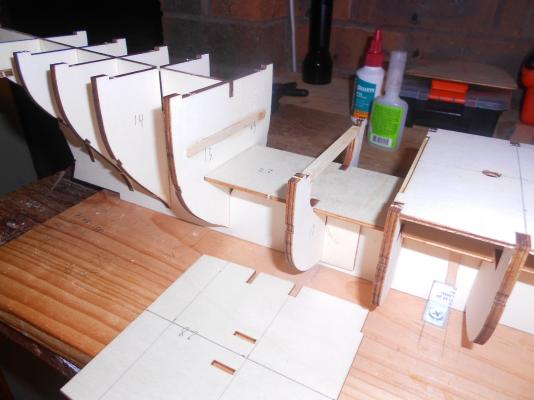
I had checked the fitting of the bulkheads awhile ago so I could go ahead with glueing them in . to get them perpendicular to the keel I used the part that will be glued on top of them later on.
the slots that make the bulkheads fit in to the decks makes it easy to line them up.
each bulkheads also has a notch where 1 plank fits on. I think this is to make it easy to plank straight later on and also to see that the bulkheads line up


Gorch Fock by Adrieke - OcCre - 1:95
in - Kit build logs for subjects built from 1901 - Present Day
Posted
Wayne its a box of drill bits
and thank you . I am hoping this time I have done it right so I can work on the planking again