Adrieke
-
Posts
1,625 -
Joined
-
Last visited
Content Type
Profiles
Forums
Gallery
Events
Everything posted by Adrieke
-
 hi John i am figuring it out as i go along i have a clear view now on how the wiring for lower 2 decks will run only thing i am stil working on is what kind of connectors i wil use to hook all the parts up they need to be small and easy to disconnect
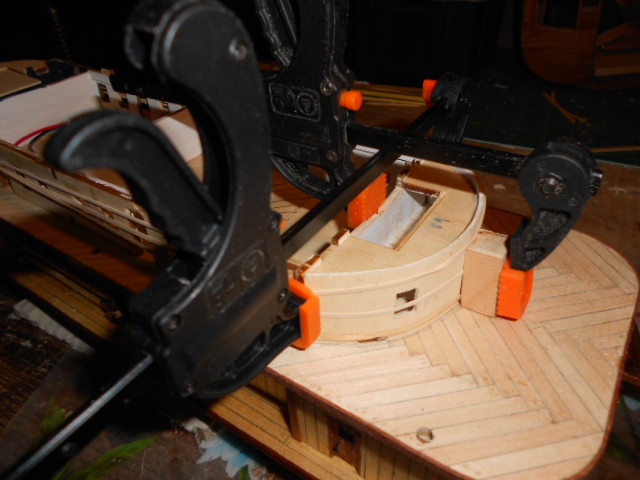
-
nice progress Greg i am hoping to visit the replica and take some pictures of my own
-
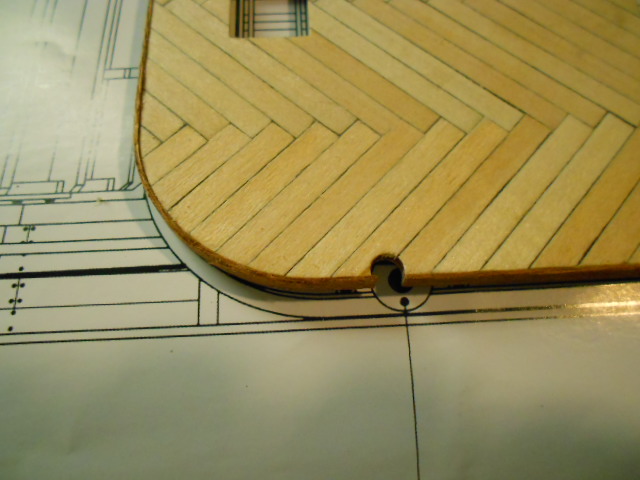
after reading that i am glad i didnt rely on just the square but used the callipers to measure too i glued in some filler blocks at the back. when its dried it wil be sanding time again . yaaay
-
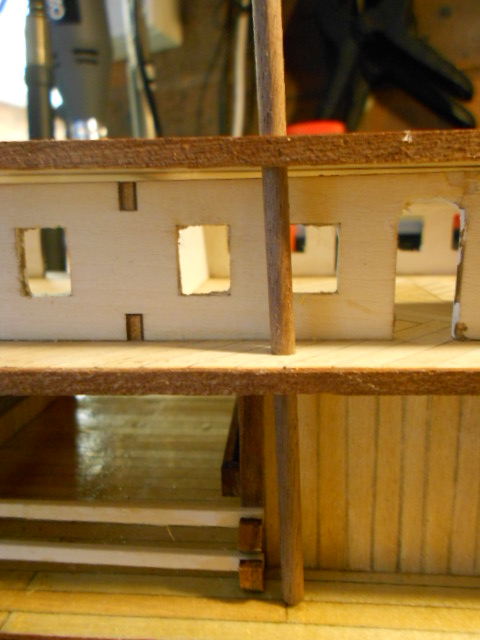
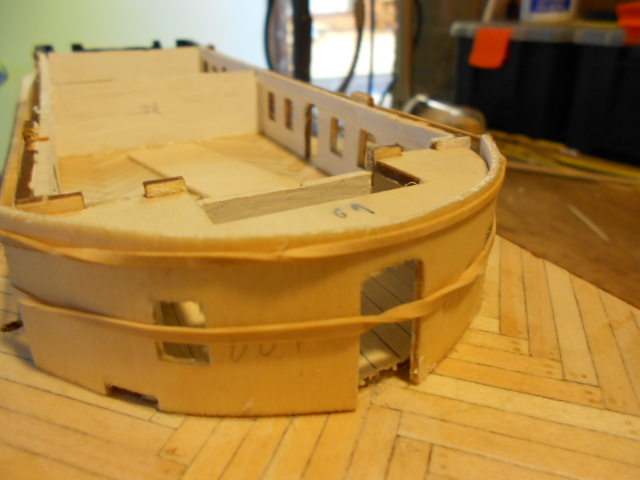
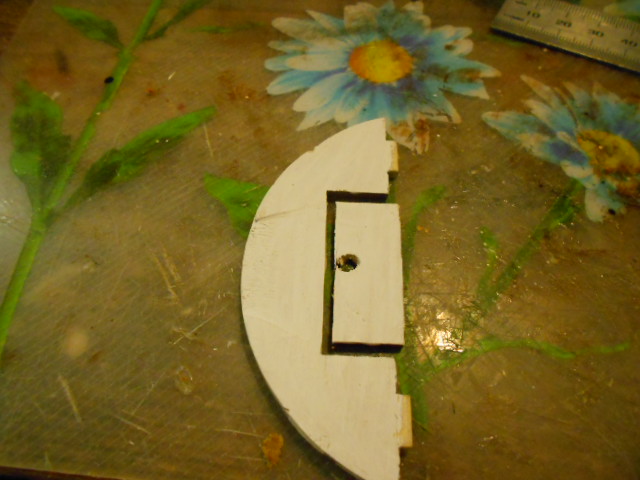
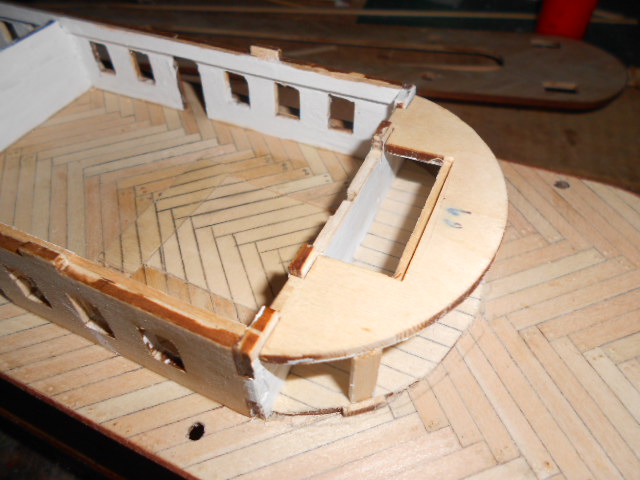
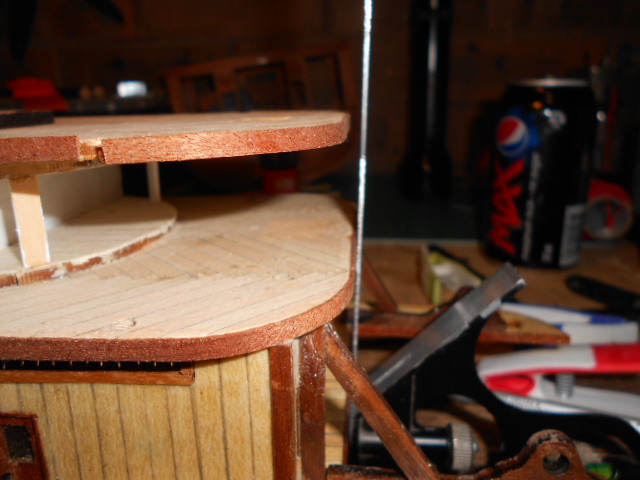
John yes it was not too difficult fixing up the 3rd deck. i did notice that the aft 2 smaller steam stacks are slightly off compared to the plan. soaked and fitted the first curved wall. i also worked on preparing the other half circle room for the led : cutting out the ceiling make a little ledge to slide the part on then test fitted it the last picture shows the inner walls behind the steam stacks that will cover up the wiring inside and the ceiling bit in place
-
thanks for looking in Randy hmm maybe like a small travel iron if they have that as normal irons feel too bulky for the job its the same as the other electric plankbenders which are just soldering irons with a difernt tip unfortunately here in oz lots of things are way more expensive then they should be
-
i think it could come in handy for my build (bluff bow) but i l have to think about forking out $55 for it and you are doing a great job on your ship
-
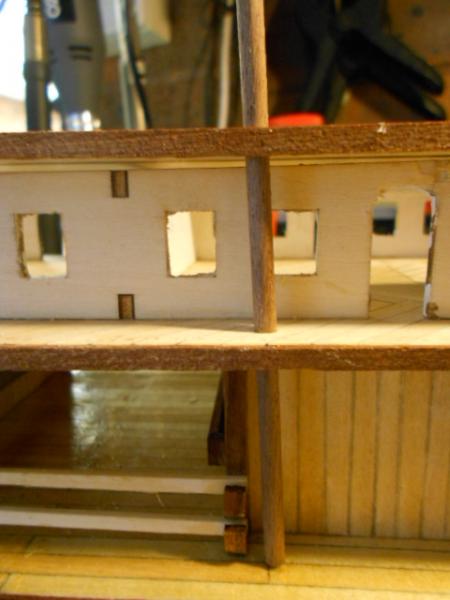
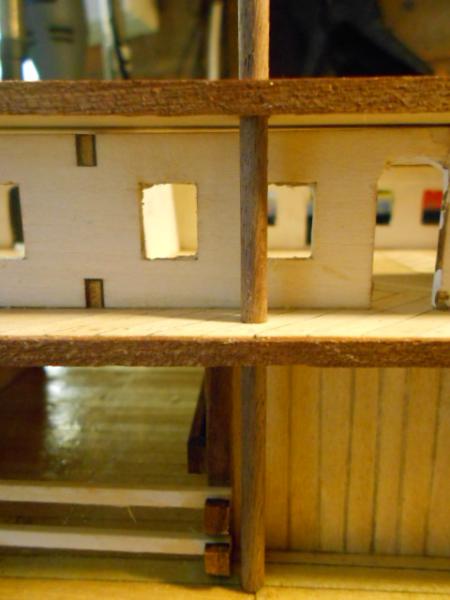
progressing with the second level stateroom the back room is ready to have the outside wall fixed again the square part i cut out at the ceiling is for the part with the led light in. as mentioned before the idea is that i can repair any faults in th elighting after the model is finished. for that i wil need to make sure the parts that fit on top of the 3rd deck (see second last picture) are bended corectly so that it wil fit together without gaps and without glue as feared after reading Johns build log on how he solved the lining up of the holes for the smoke stacks the 3rd deck doesnt line up with the 2nd deck and it wil need to be moved 3 mm to the back
-
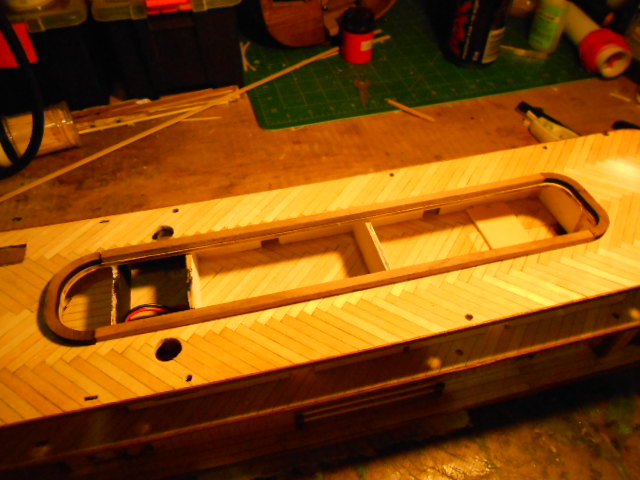
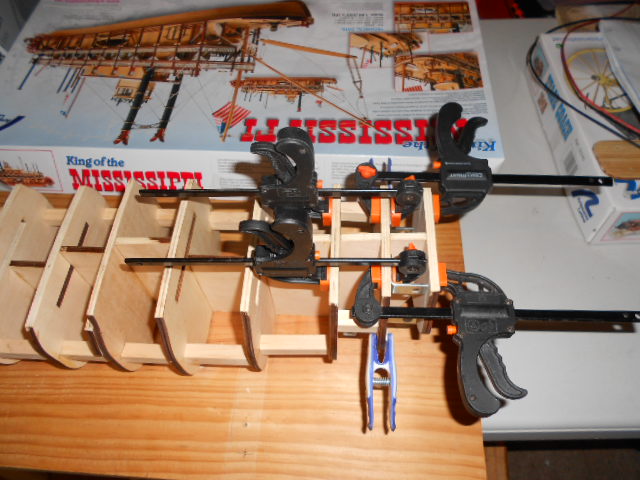
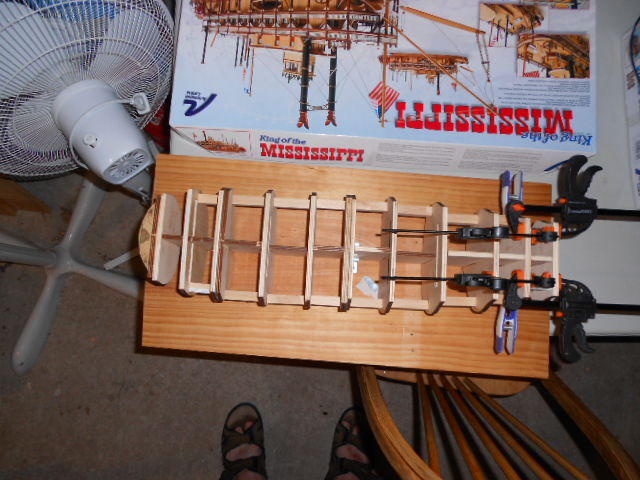
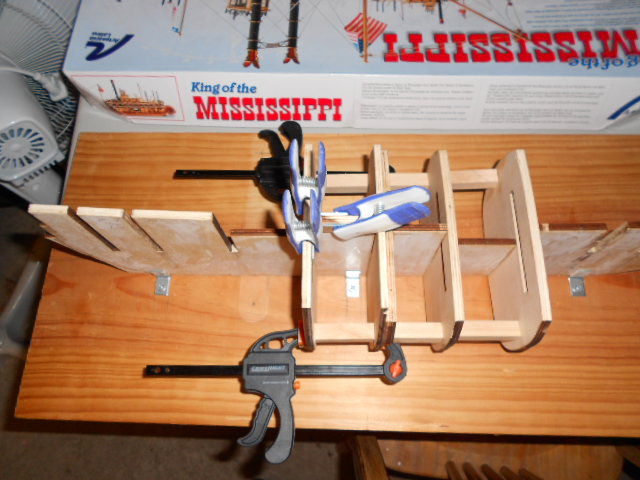
almost done just the front 3 parts (they are already glued together) and the back part. i ran out of dowel . fortunately the angel brackets where just the right lenght to fit in between th eboulkheads to keep them straight and i will put some balsa blocks in between afterwards not sure how i am going to glue that back bit on as it has nothing to glue against at the top shot from above shows that everything looks square
-
that looks liek a very handy tool. do you steam bend the planks with it when they are on the ship ?
-
you are doing some excelent changes to the kit i always love all these specialy made tools and jigs that are invented to make the model come together
-
yes Pat that is exactly the one. did you peek in on my workbench yup John she certainly is a step up from the virginia i am going to take it slow as i stil have plenty of work on the king and i want to finish her the best i can tonight i added 3 more bulkheads . 1 more at the front and then i wil need to think on making some balsa filler blocks for the last ones
-
HI Ron i truely enjoyed catching up with your build as the detailed explanation and pictures gives a good idea on how much time and work you have put into making sure everythings fits and it shows in your model which is really beautiful
-
not sure what is called bit its a metal rules 25 mm long with a device that you can slide and lock and meaasures 90 degrees and 45 degrees angles i slid the ruler out to use it also using angle brackets to keep it inline while glueing last i use a digital calipers i measure at the false keel then lock it in i use this to cut the dowels to the right length and then when they are dryfitted (clamped) i go round the whole outside of the bulkhead to make sure its all the same
-
no worries John
-
hi John you make me rethink what i did to line up the stakcs which was move the holes on the 2 nd deck maybe i better check so i can redo the changes before it gets too much work also John make sure to draw the lines on the part that is seperated by the hole otherwise you could end up like me with the pattern not lining up at the other end
-
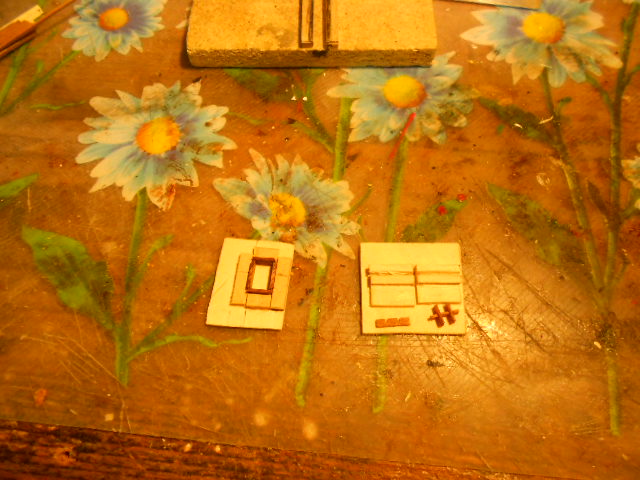
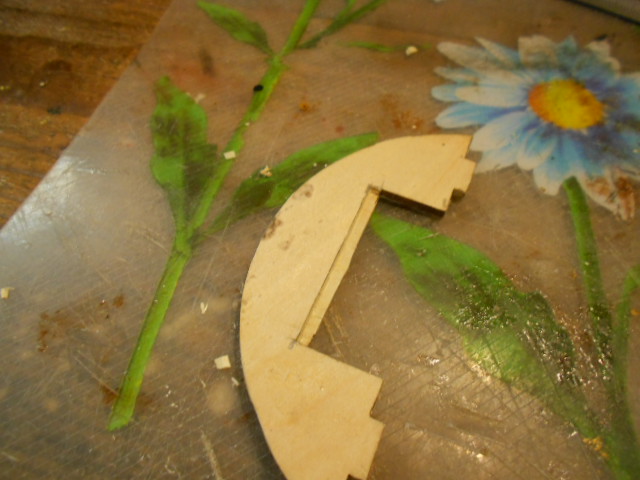
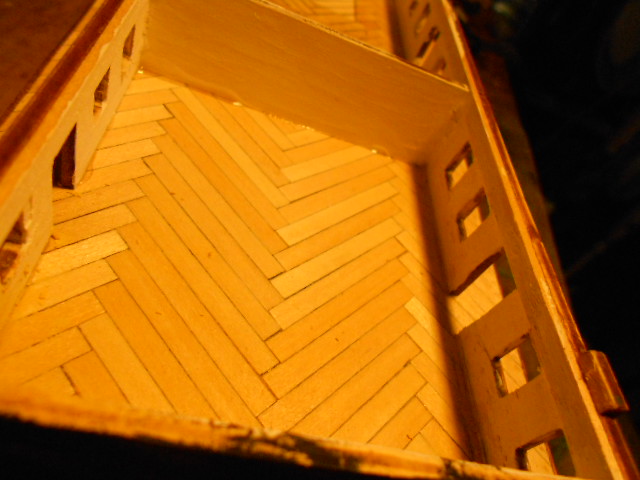
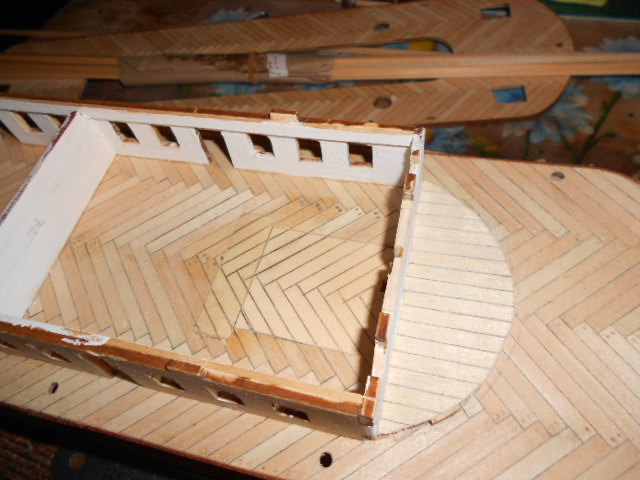
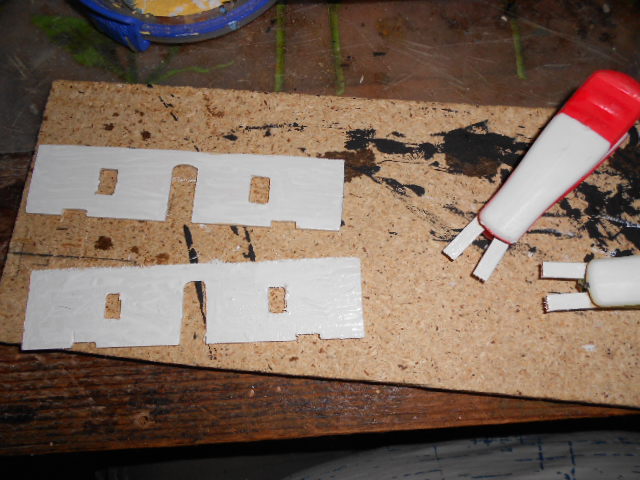
can you tell that the curved walls are also scratch made when taking the stateroom apart to refit for lighting they broke up in several pieces. first i was just going to join them up again but the ones for the 3rd deck stateroom are smaller and they ended up being a total mess with one bit missing somehow i bought some 1.5mm plywood to remake them. the holes for doors and windows are only roughly cut
-
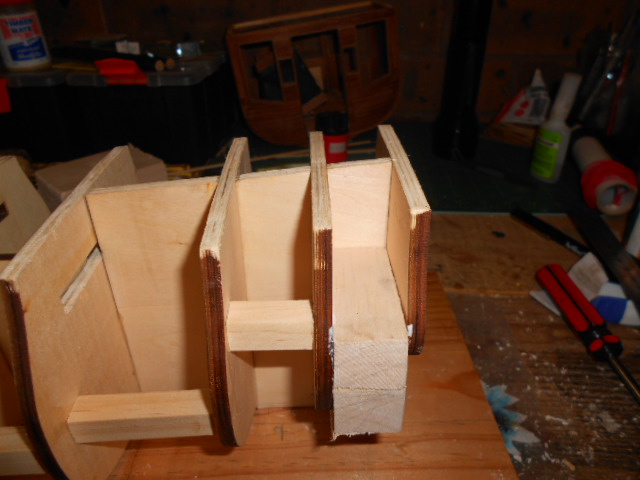
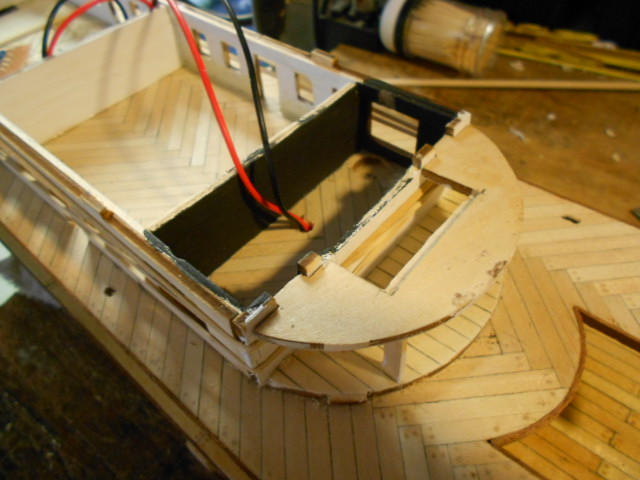
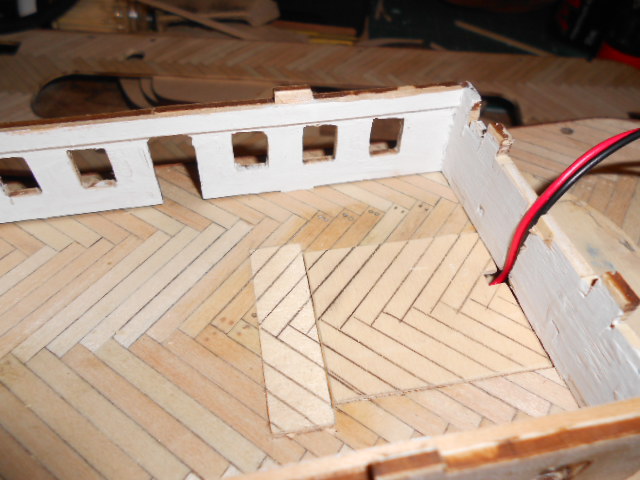
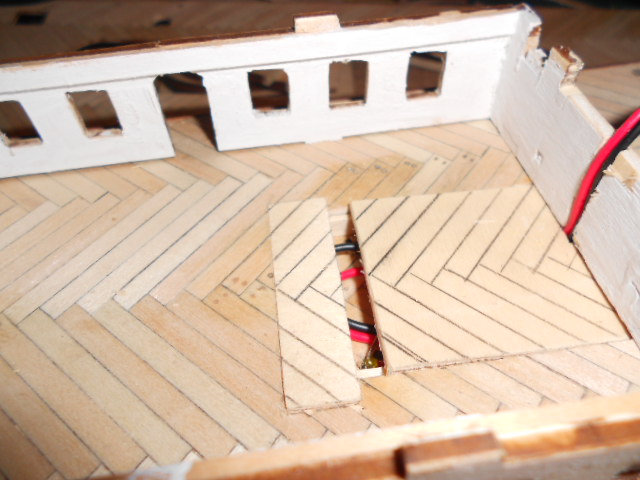
since the inside of the front and back half circle staterooms wil be visible i had already decided to take out the pieces of plywood that hold the construction together i painted the walls white and planked the floor the 4 bits of wood strip will be used to hold the ceiling up until the other walls are bended and glued they are also painted white so that they wil not be noticeble
-
thank you 2 more bulkheads fitted at first i tought that fitting the wooden bits was a waste of time but bulkhead 11 resisted lining up properly until i put them in place
-
thanks John and Sjors i am just hoping it turns out the way i want it because i have never done this before Carlosys was the one that inspired me to try it i think this build is perfect to put lighting in
- 1,038 replies
-
- 1
-

-
- King of the Mississippi
- Artesania Latina
- (and 1 more)
-
it sure is Sjors after a few weeks measuring and planning the furst bulkhead glued in feels good
-
i have noticed that before that those stairs can look all twisted in pictures. probably because a picture is not 3D
-
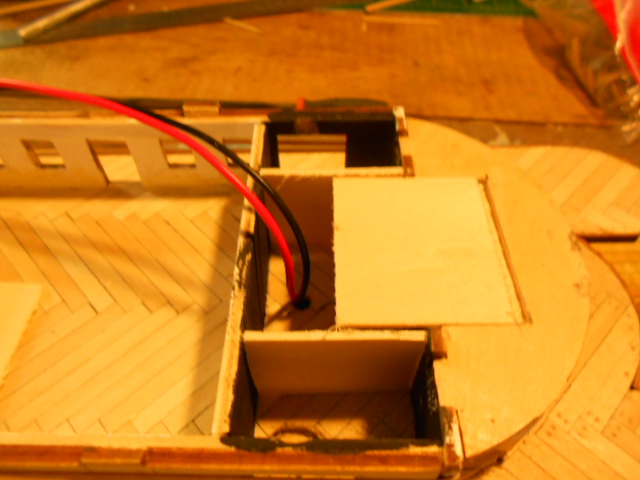
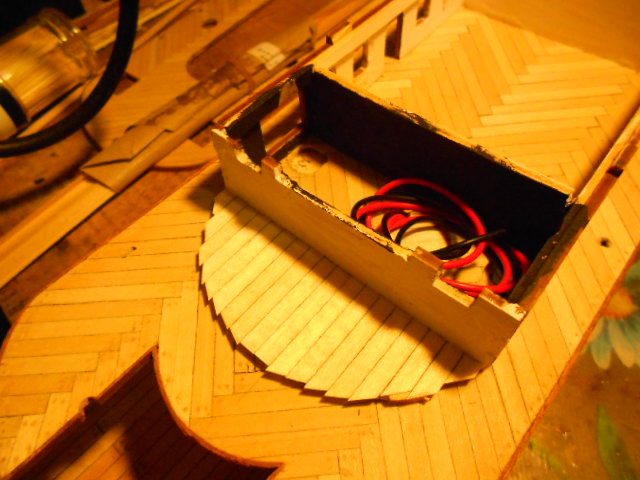
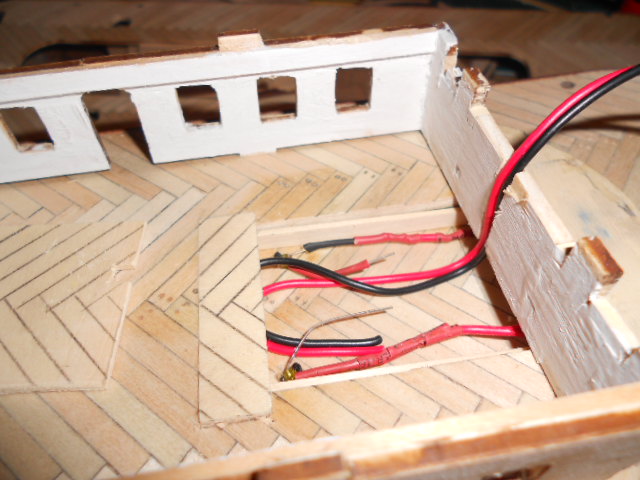
i finished working on the little box wiht the lighting for the first deck it fits nicely in the deck and can be opened to pull it out now i need to find some small connectors. to hook it up wiht that out of the way i could now glue the stateroom onto the deck i did not plank the outside yet as i will fill any gaps up first and then plank over it i wil now also be able to fit the piece of breadboard with the resistors in teh compartment at the front between the 2 smokestacks (will put 2 walls in painted black so it wil be invisible from the outside
-
well i didnt too well with the rabet line and all should be able to fix it all up though so not too worried and yay i finaly starting on glueing the bulkheads on
-
very nice Wim you do seem to go for these special kits . they do seem to have lots of fun parts for building in it
-
ROYAL CAROLINE 1749 by Doris - 1:40 - CARD
Adrieke replied to DORIS's topic in - Build logs for subjects built 1501 - 1750
wow Doris you are a sculptur, painter and modelbuilder all in one. what you create is amazing and you work so quickly . in the time i can only do a bit of sanding you created Pegasus.- 883 replies
-
- 1
-
-
- royal caroline
- ship of the line
- (and 1 more)