HOLIDAY DONATION DRIVE - SUPPORT MSW - DO YOUR PART TO KEEP THIS GREAT FORUM GOING! (Only 75 donations so far out of 49,000 members - C'mon guys!)
×


DelF
-
Posts
1,409 -
Joined
-
Last visited
Content Type
Profiles
Forums
Gallery
Events
Everything posted by DelF
-
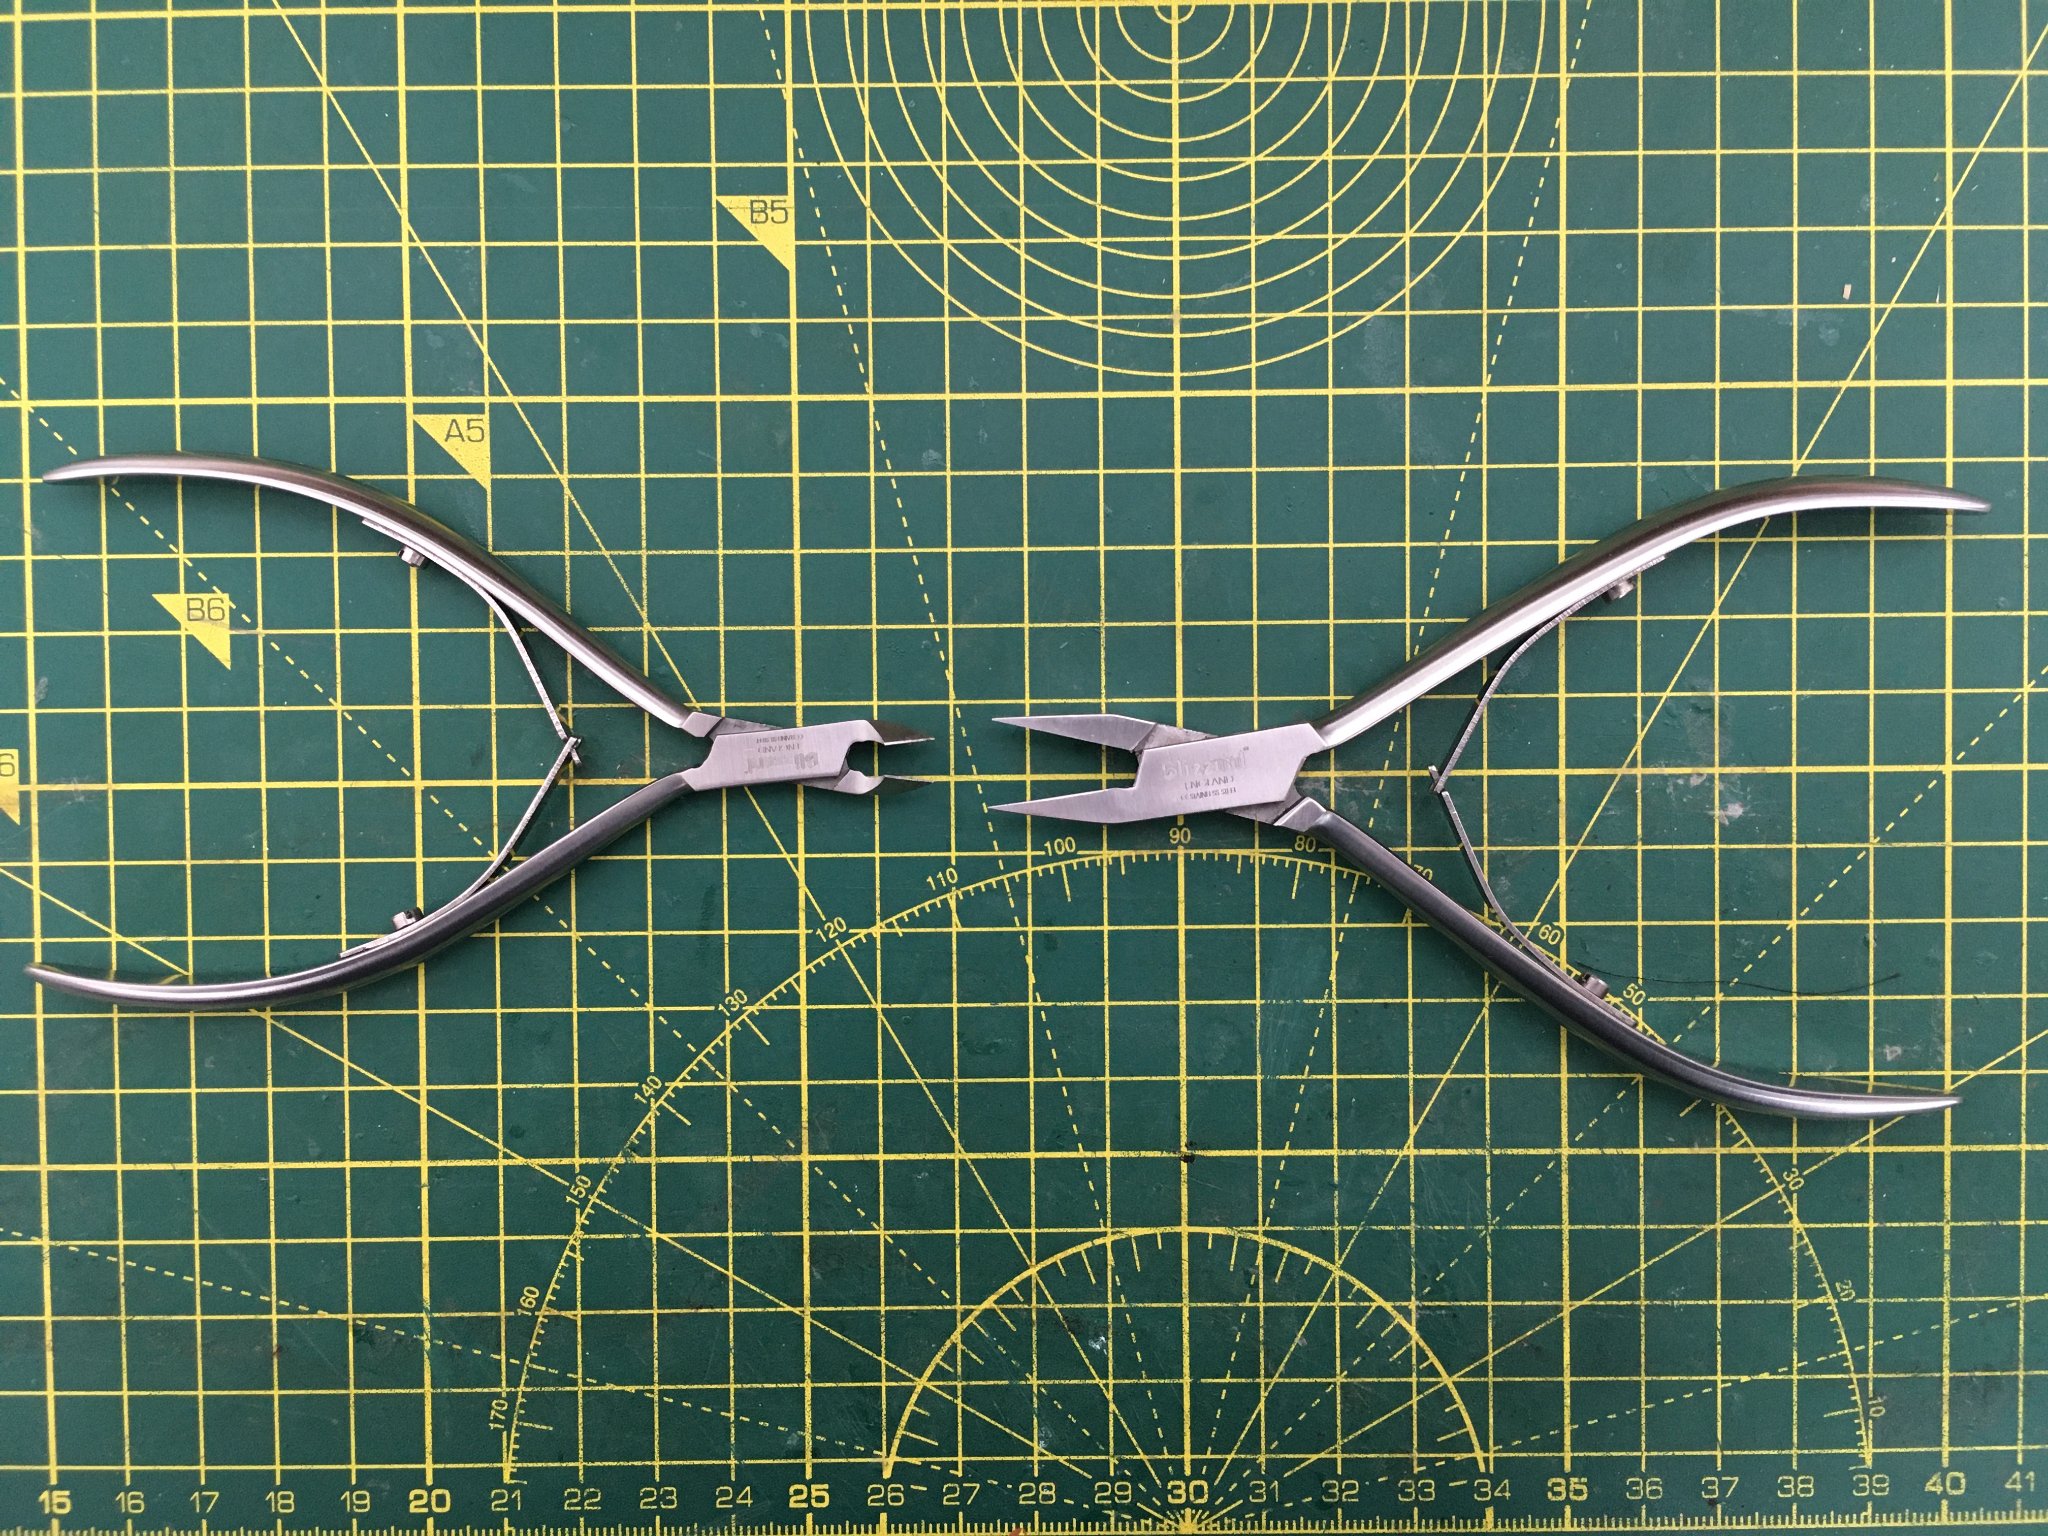
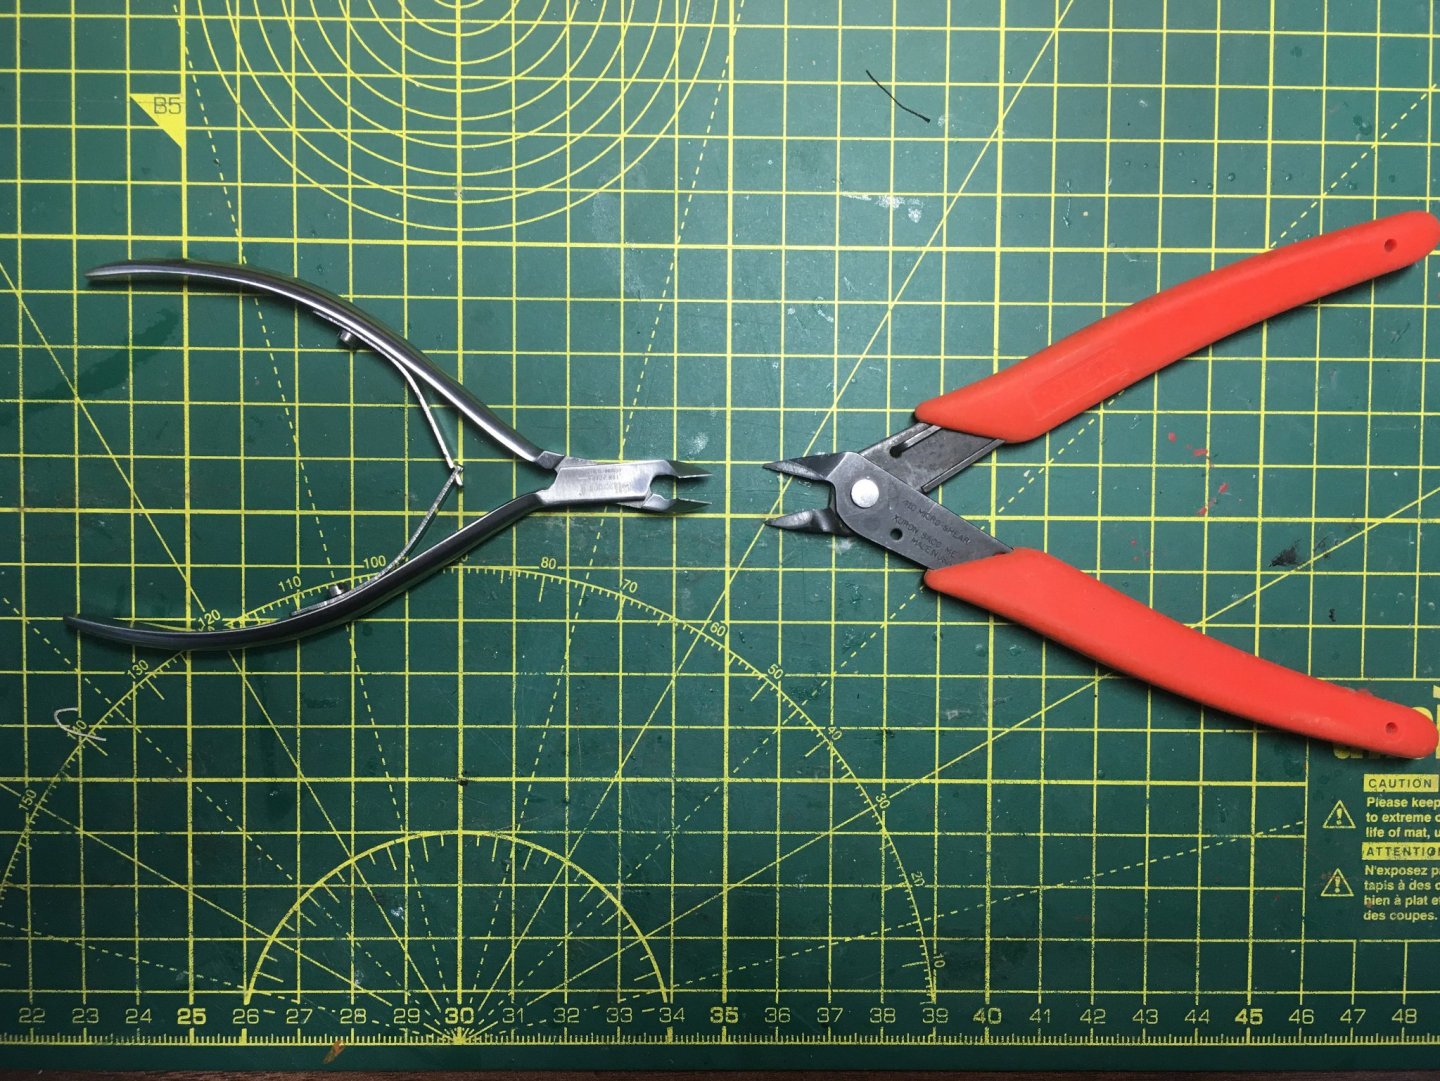
 Clipper Wars (a brief intermission) No, this isn't about Cutty Sark and the 19th century tea trade. It started when cuticle clippers and toenail clippers were recommended on the forum by Glenn & Ryland respectively (@glbarlow& @Ryland Craze). I got the cuticle ones first on Glenn's recommendation, mistakenly thinking the original tip came from Ryland. Ryland put me straight, and sent me some helpful photos and links to the toenail clippers. The latter were outrageously expensive in the UK due to shipping and duty, but I found a similar-looking pair made by the same British firm that makes my cuticle clippers. The toenail clippers arrived today so I've tried them both out on Speedy and will share my initial impressions. First, the only real negative. My wife thinks I'm going through a midlife crisis buying all these personal grooming products and I'm having trouble convincing her they're just for ship modelling! I just hope none of you guys come up with a must-have use for eyelash curlers or hair dye😬. Seriously though, both tools are well made from stainless steel: The cuticle tool's cutting surface is just 7mm long, compared to 16mm for the bigger version. Possibly slightly easier to get into tight spaces. Having said that, the toenail jaws are more sharply pointed which gives it a slight edge in really tight spots. One slightly awkward feature I've found with the cuticle clippers is the angle of the jaws. When I first used it I held it at the angle I'm used to and cut through something I didn't want to. I've learned to change my 'angle of attack' but I still have to be extra careful to avoid collateral damage. The toenail clippers on the other hand have a flat base on the cutting side which feels much more like the flush cutters I'm used to. In operation, both clippers cut much better than other cutters I've used - they really do cut flush. Both tools cut effortlessly through thread down to a very small size. The only difference I found today on Speedy was when I came to trim fly tying thread. The cuticle cutters snipped it off as cleanly as any other line, but the toenail clippers didn't get through first time and I felt I had to chew the thread a bit to get through it. That may just be this brand or this tool so I can't draw any general conclusions. In summary, both these tools are excellent and much better than alternatives I've used. I shall keep both of them on my workbench and I'm grateful to Glenn and Ryland for their recommendations. Derek
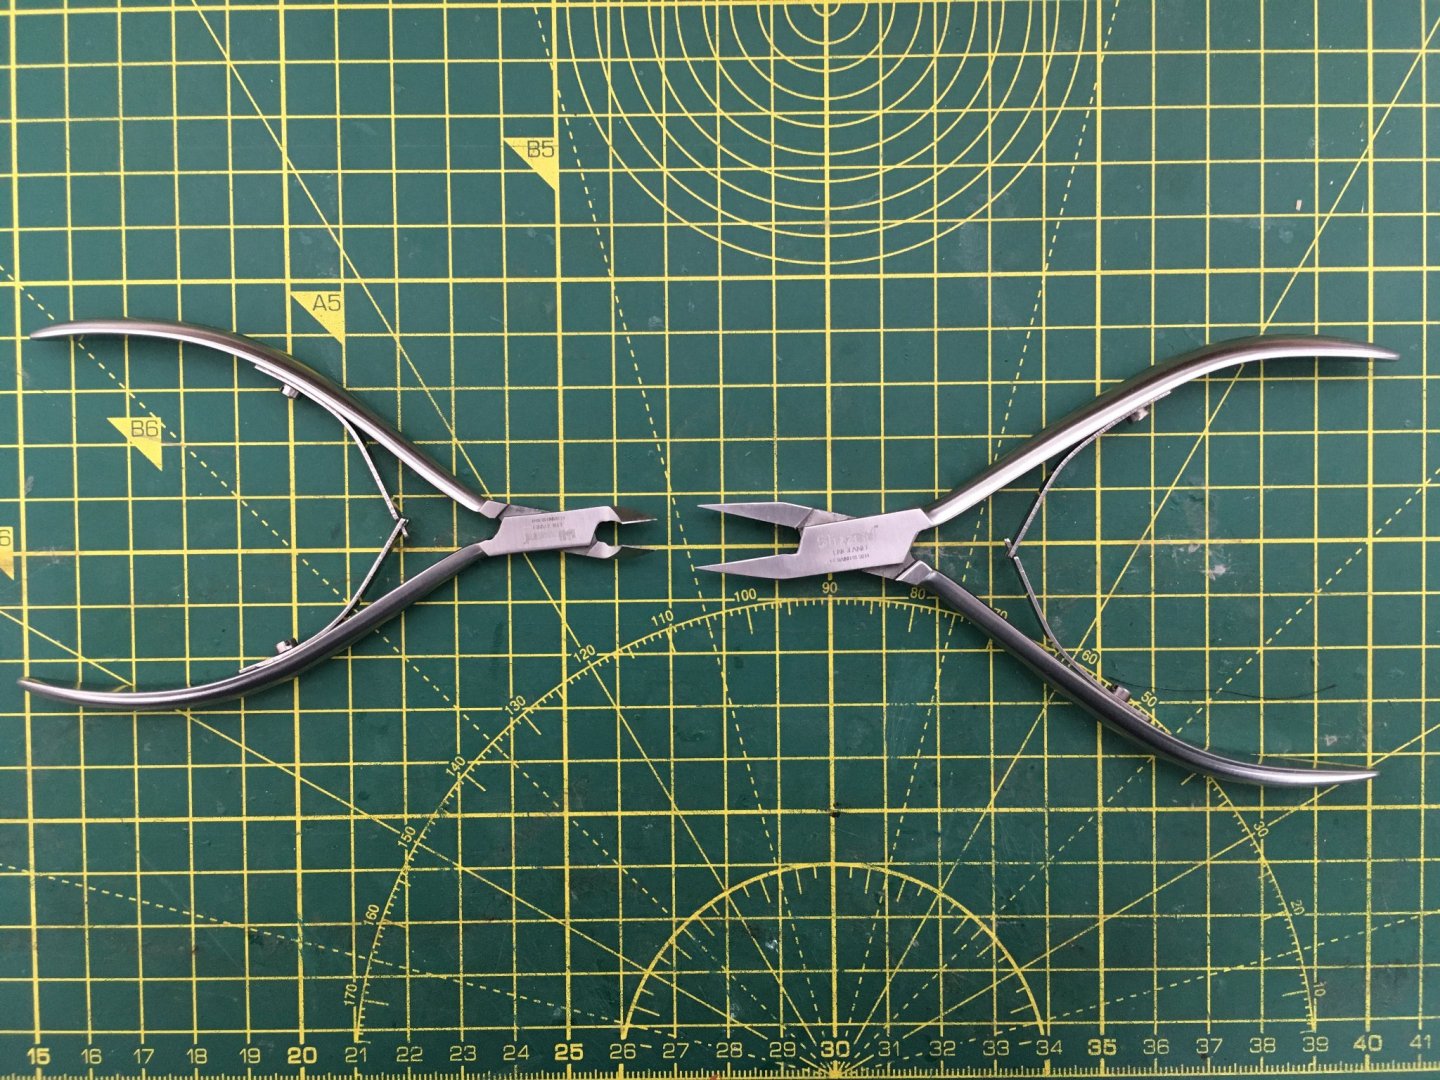
- 725 replies
-
- 4
-

-

-
- vanguard models
- speedy
- (and 1 more)
-
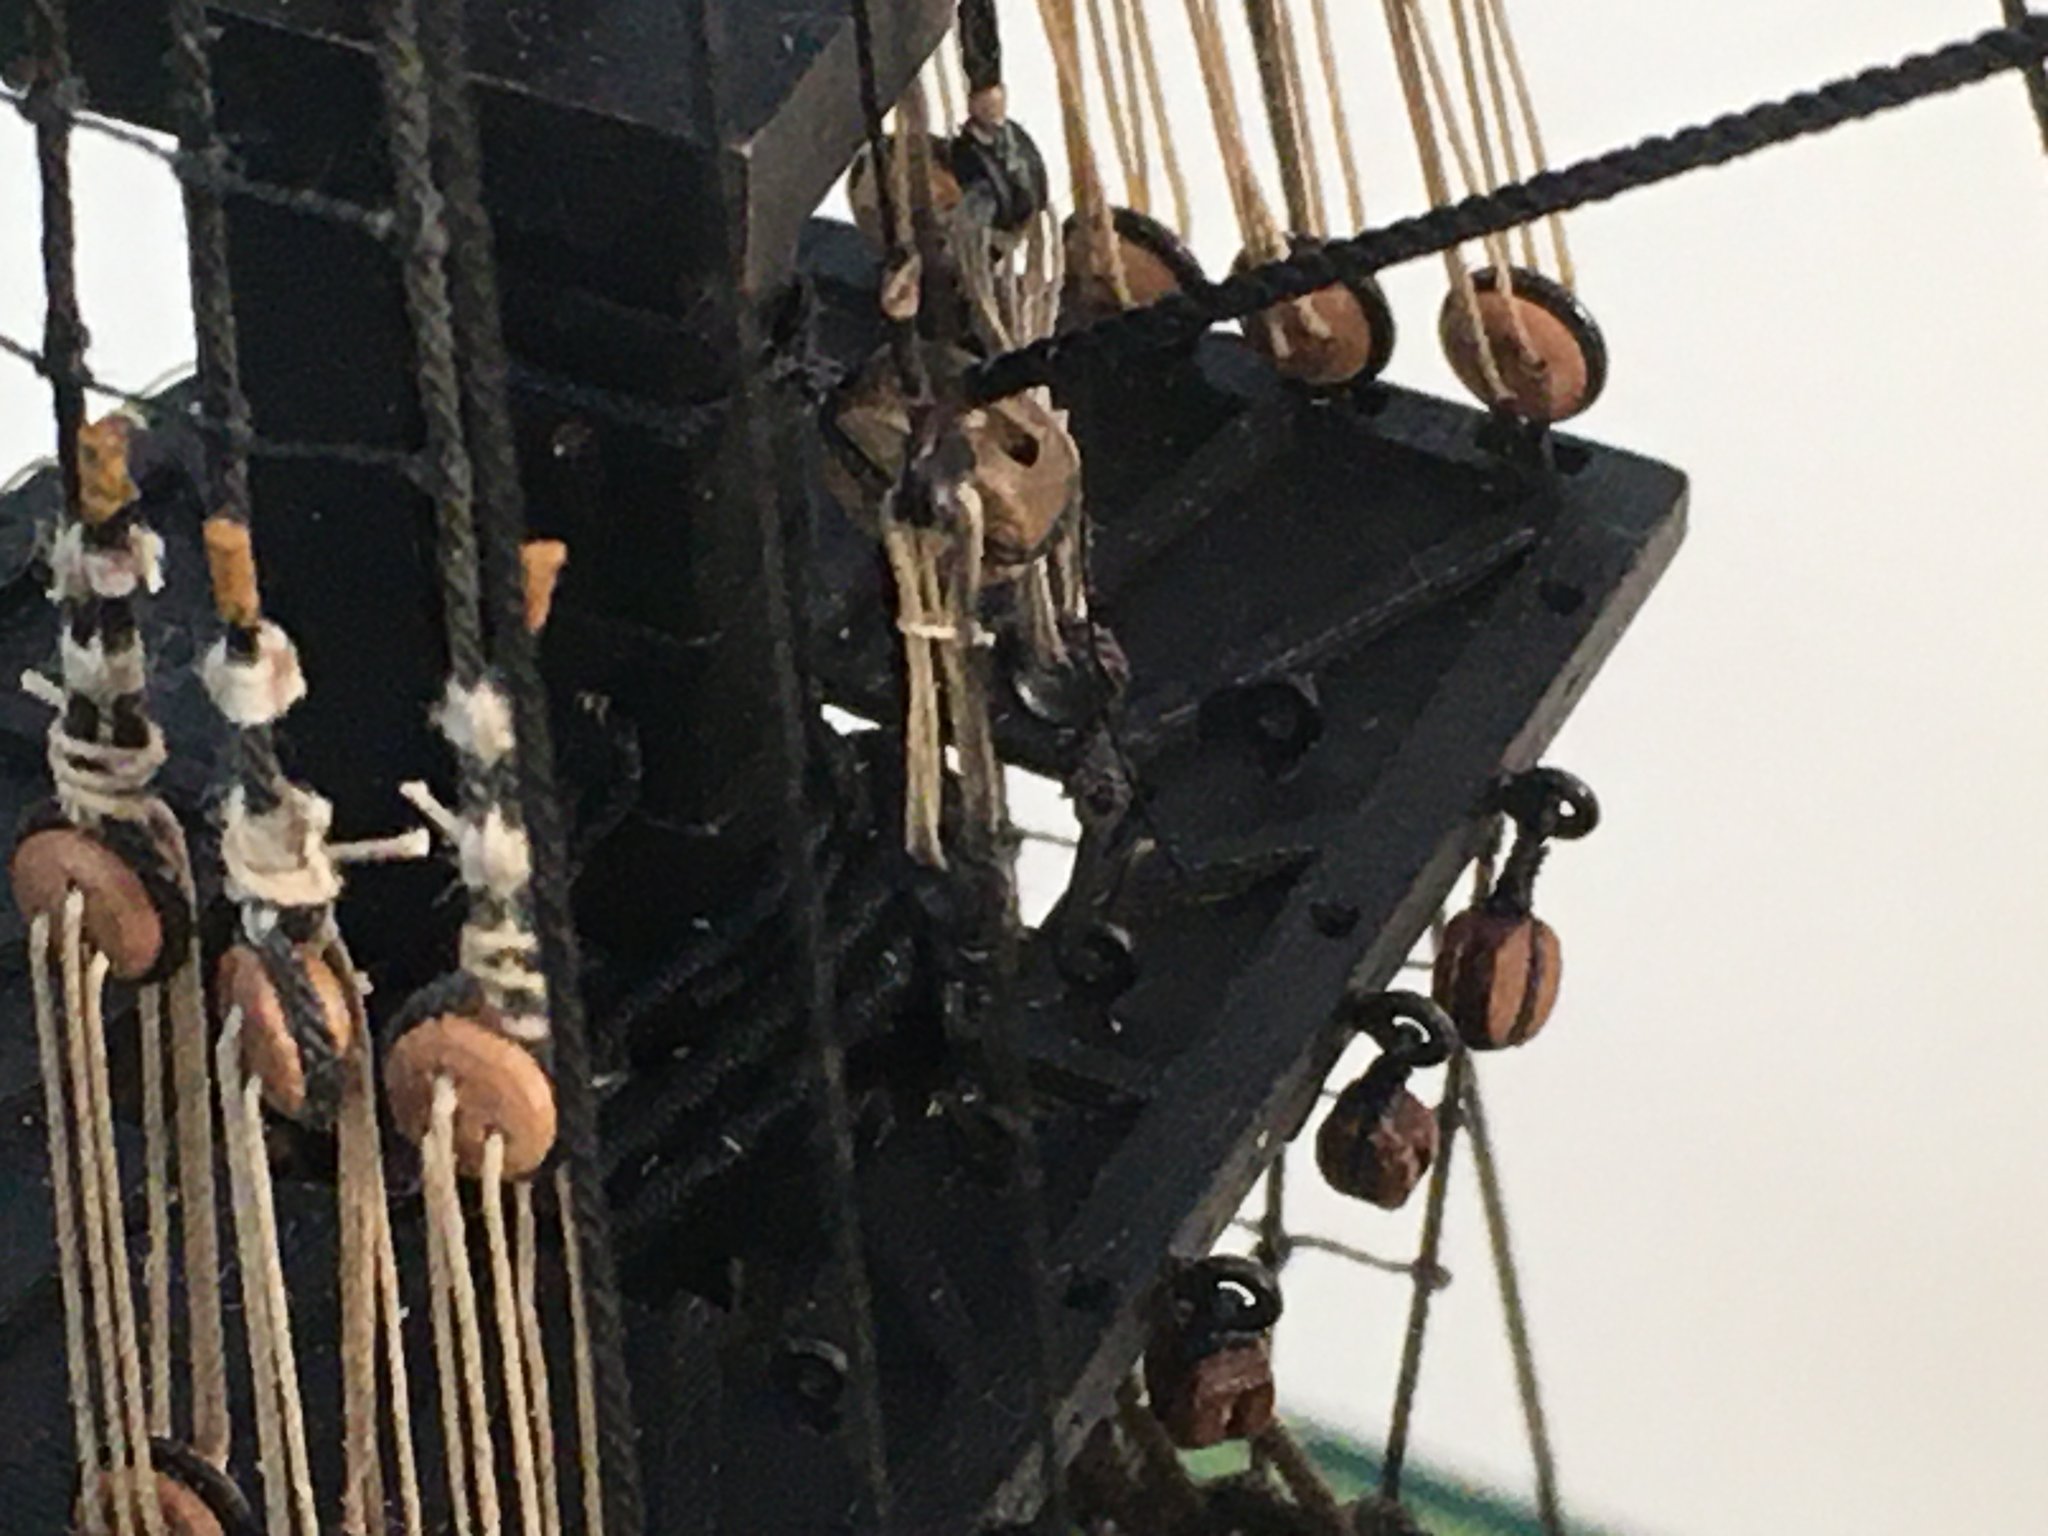
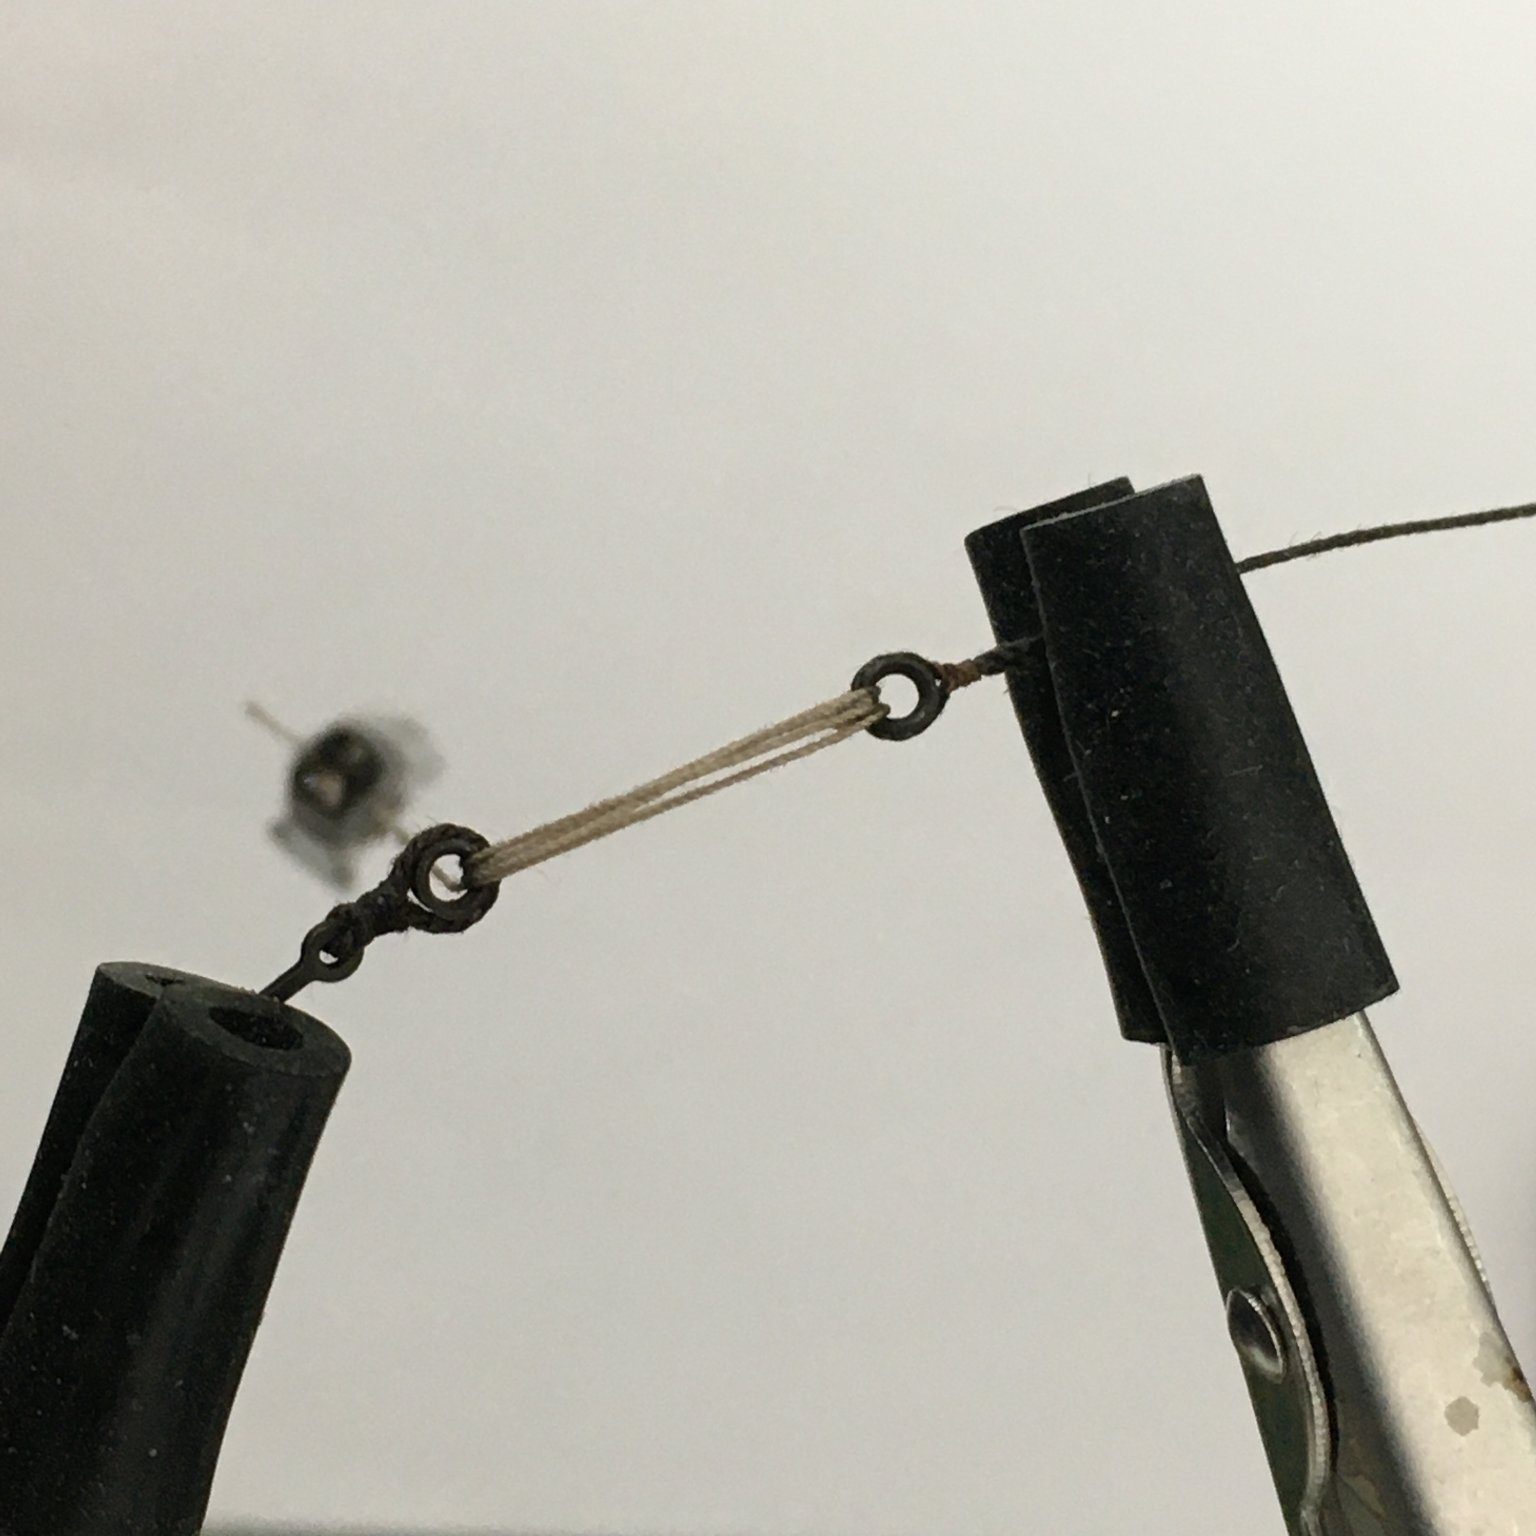
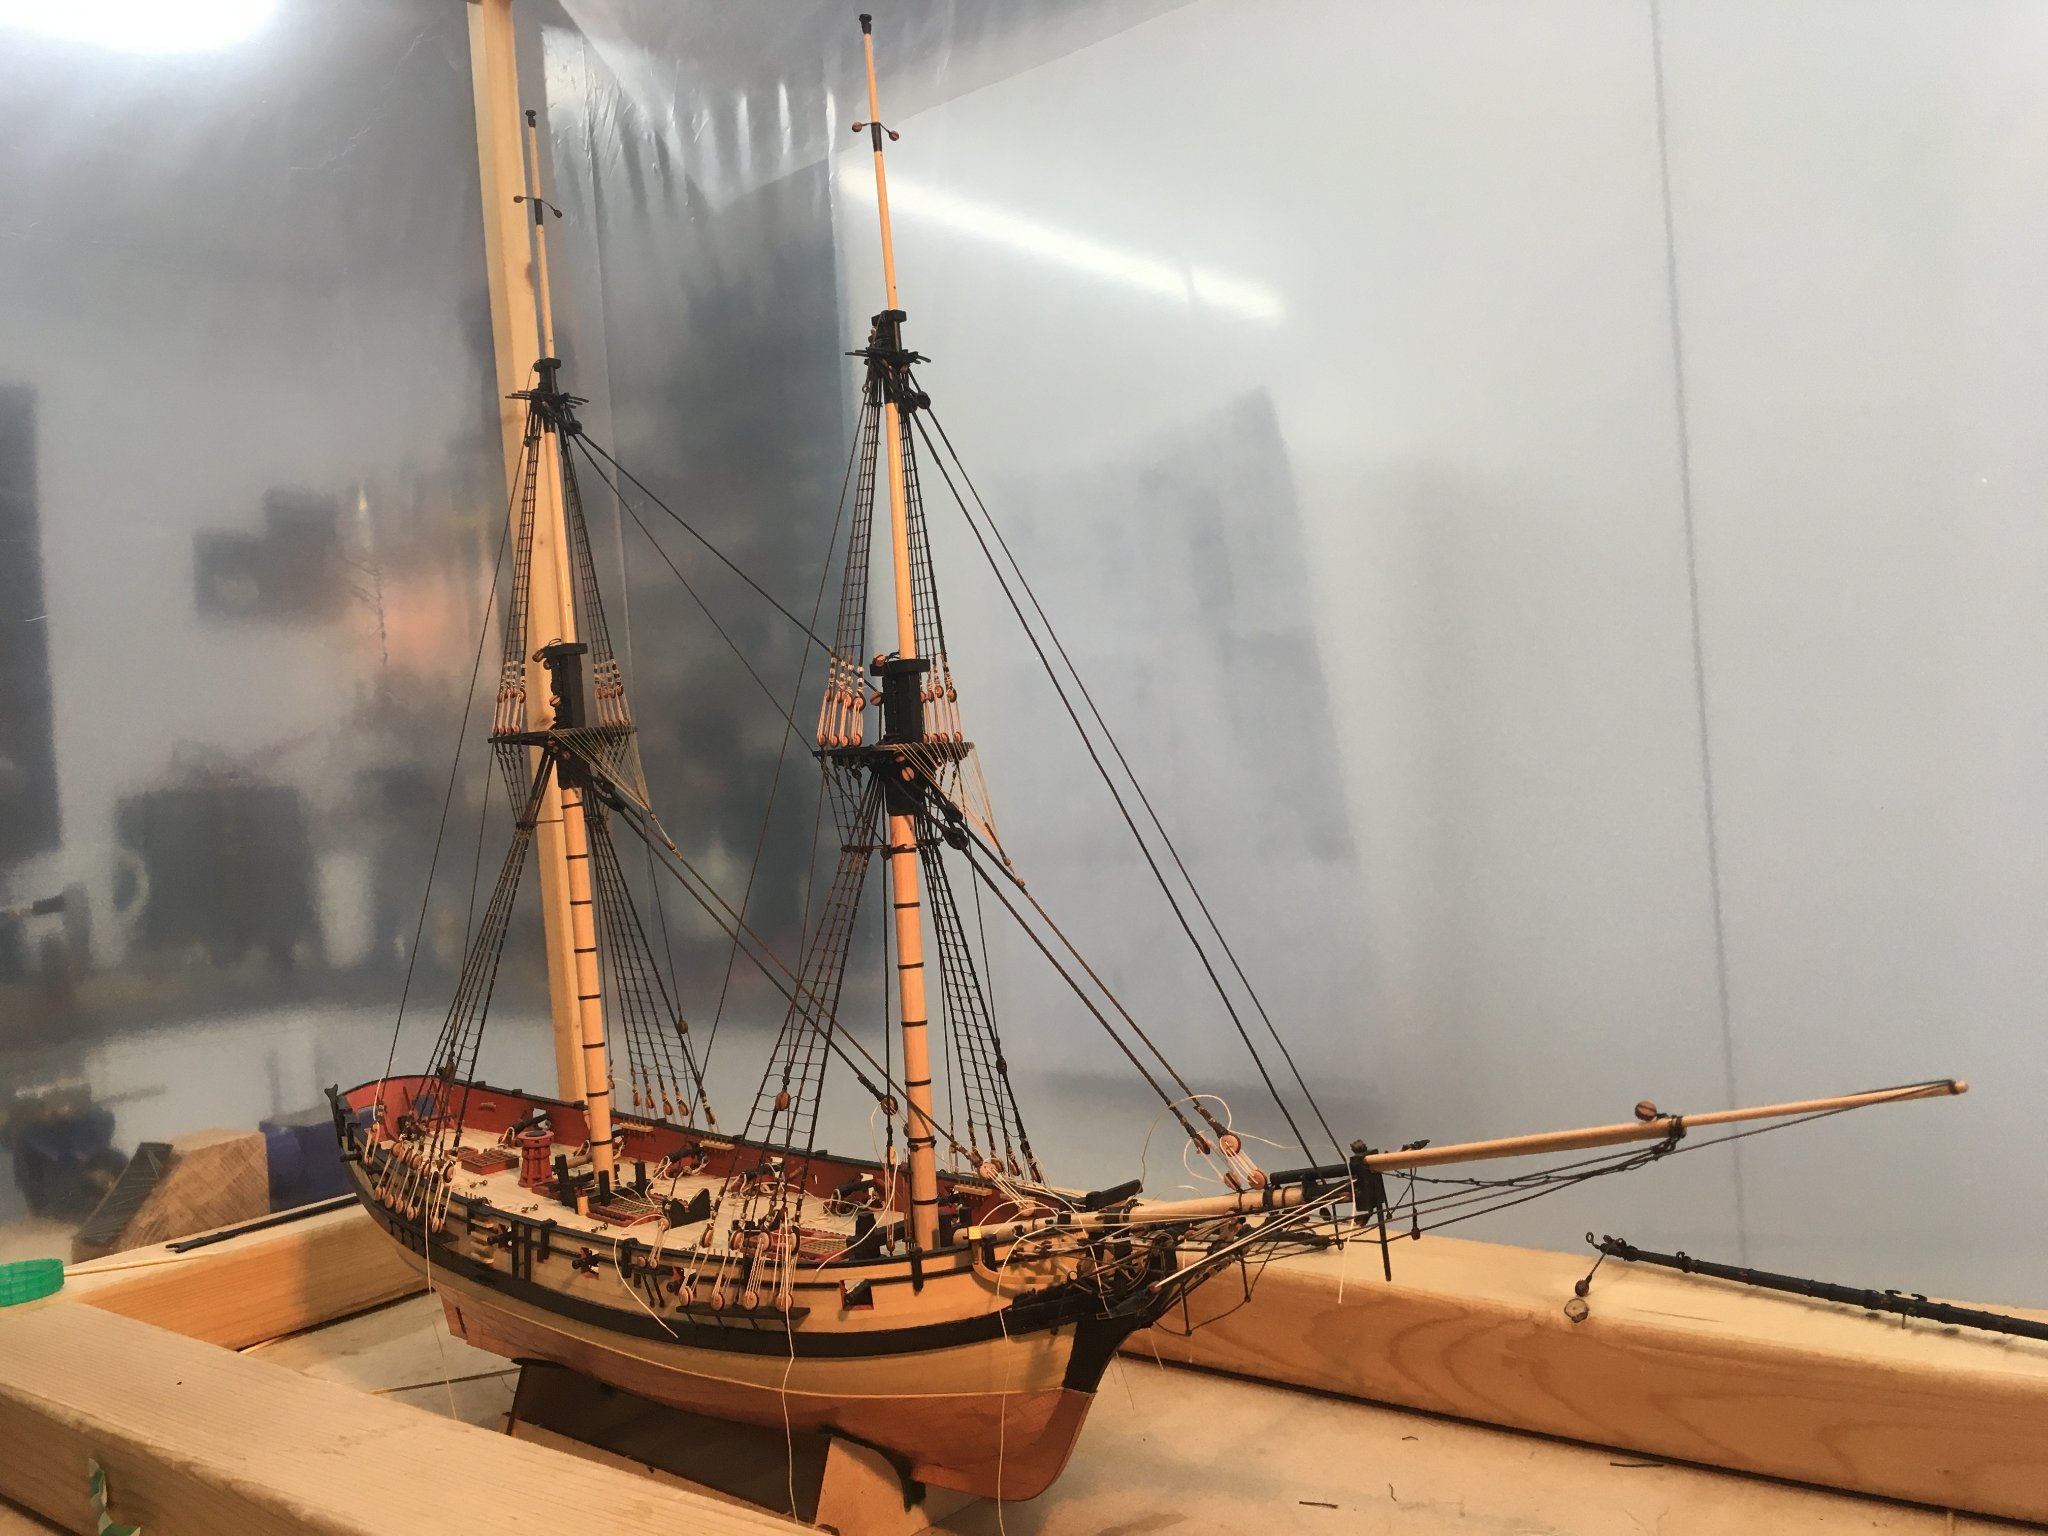
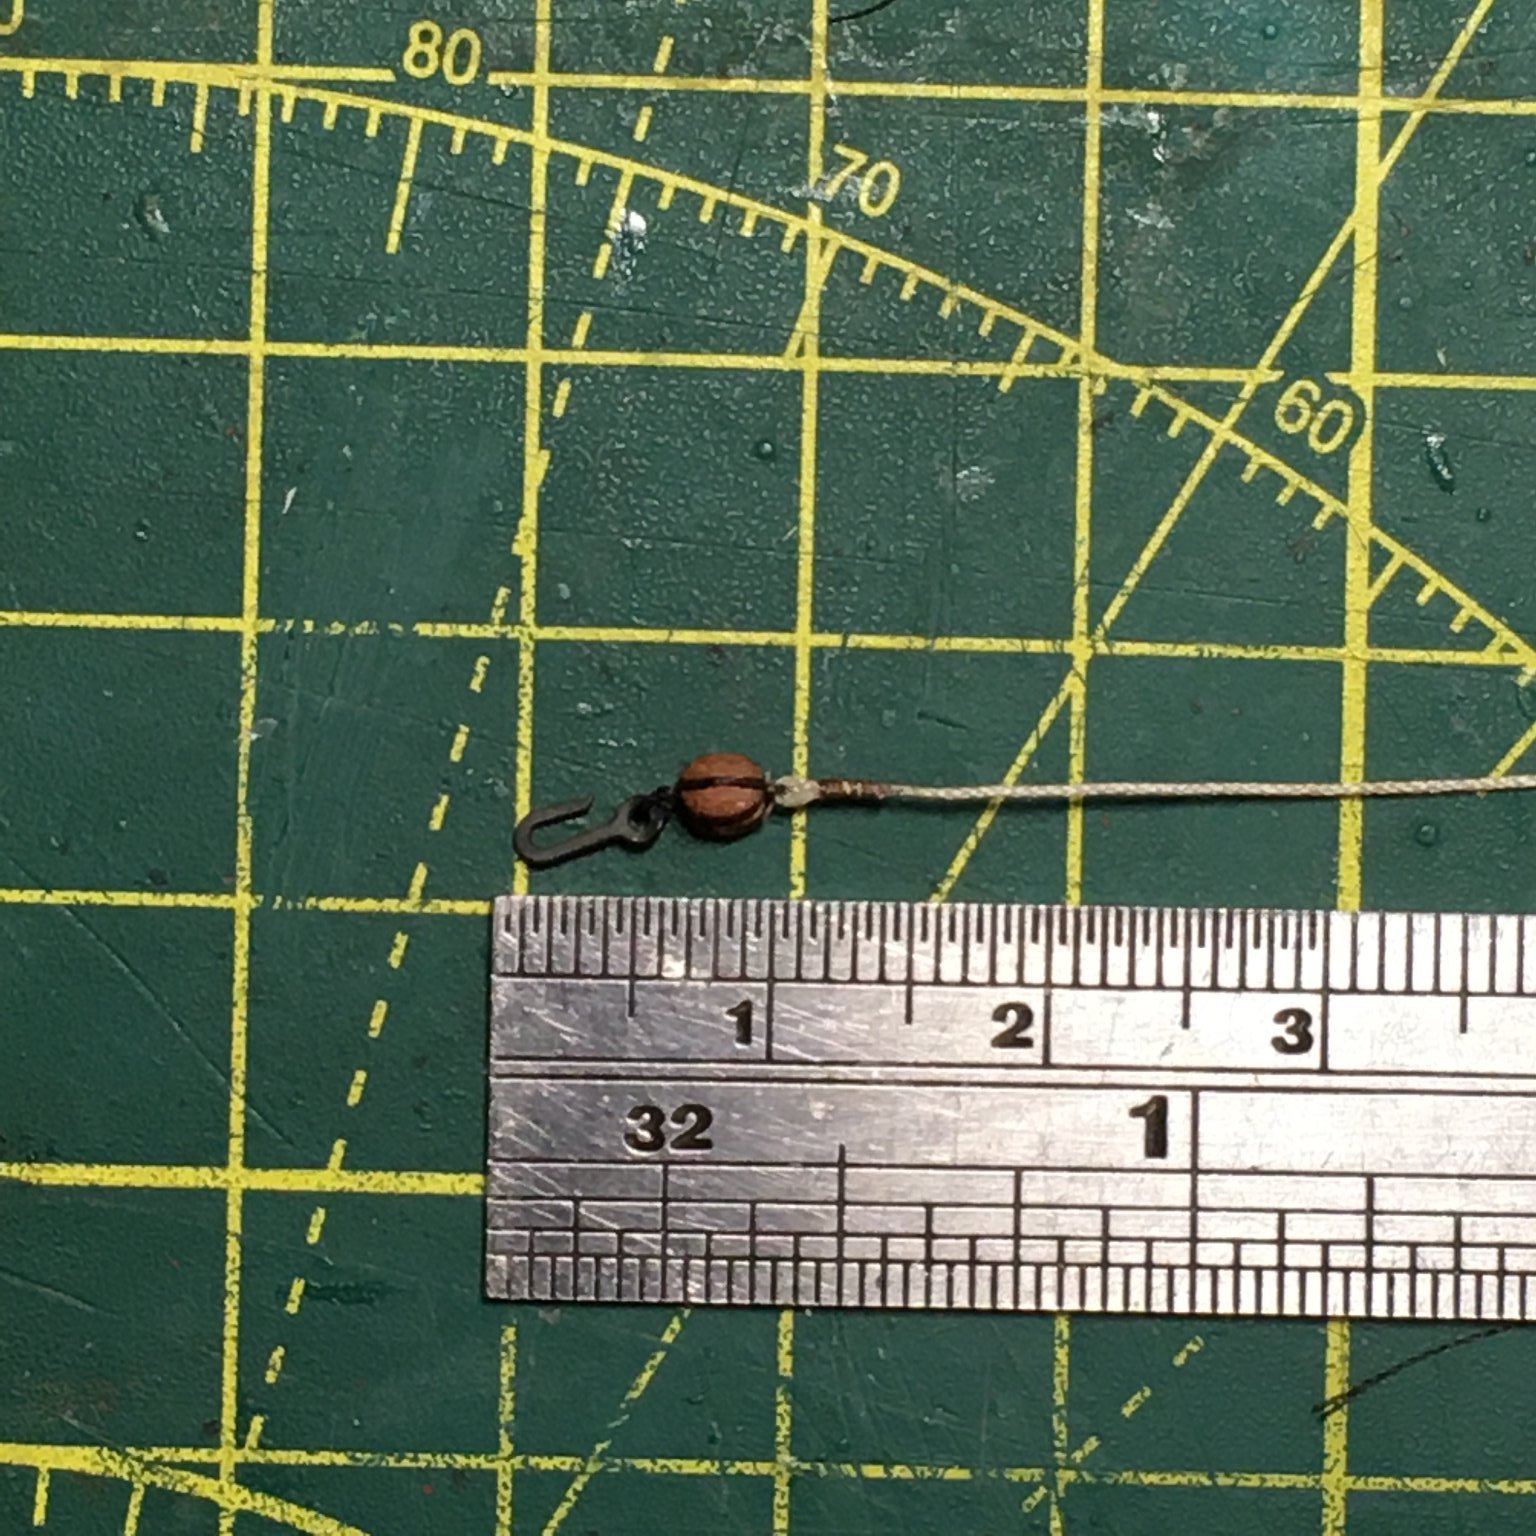
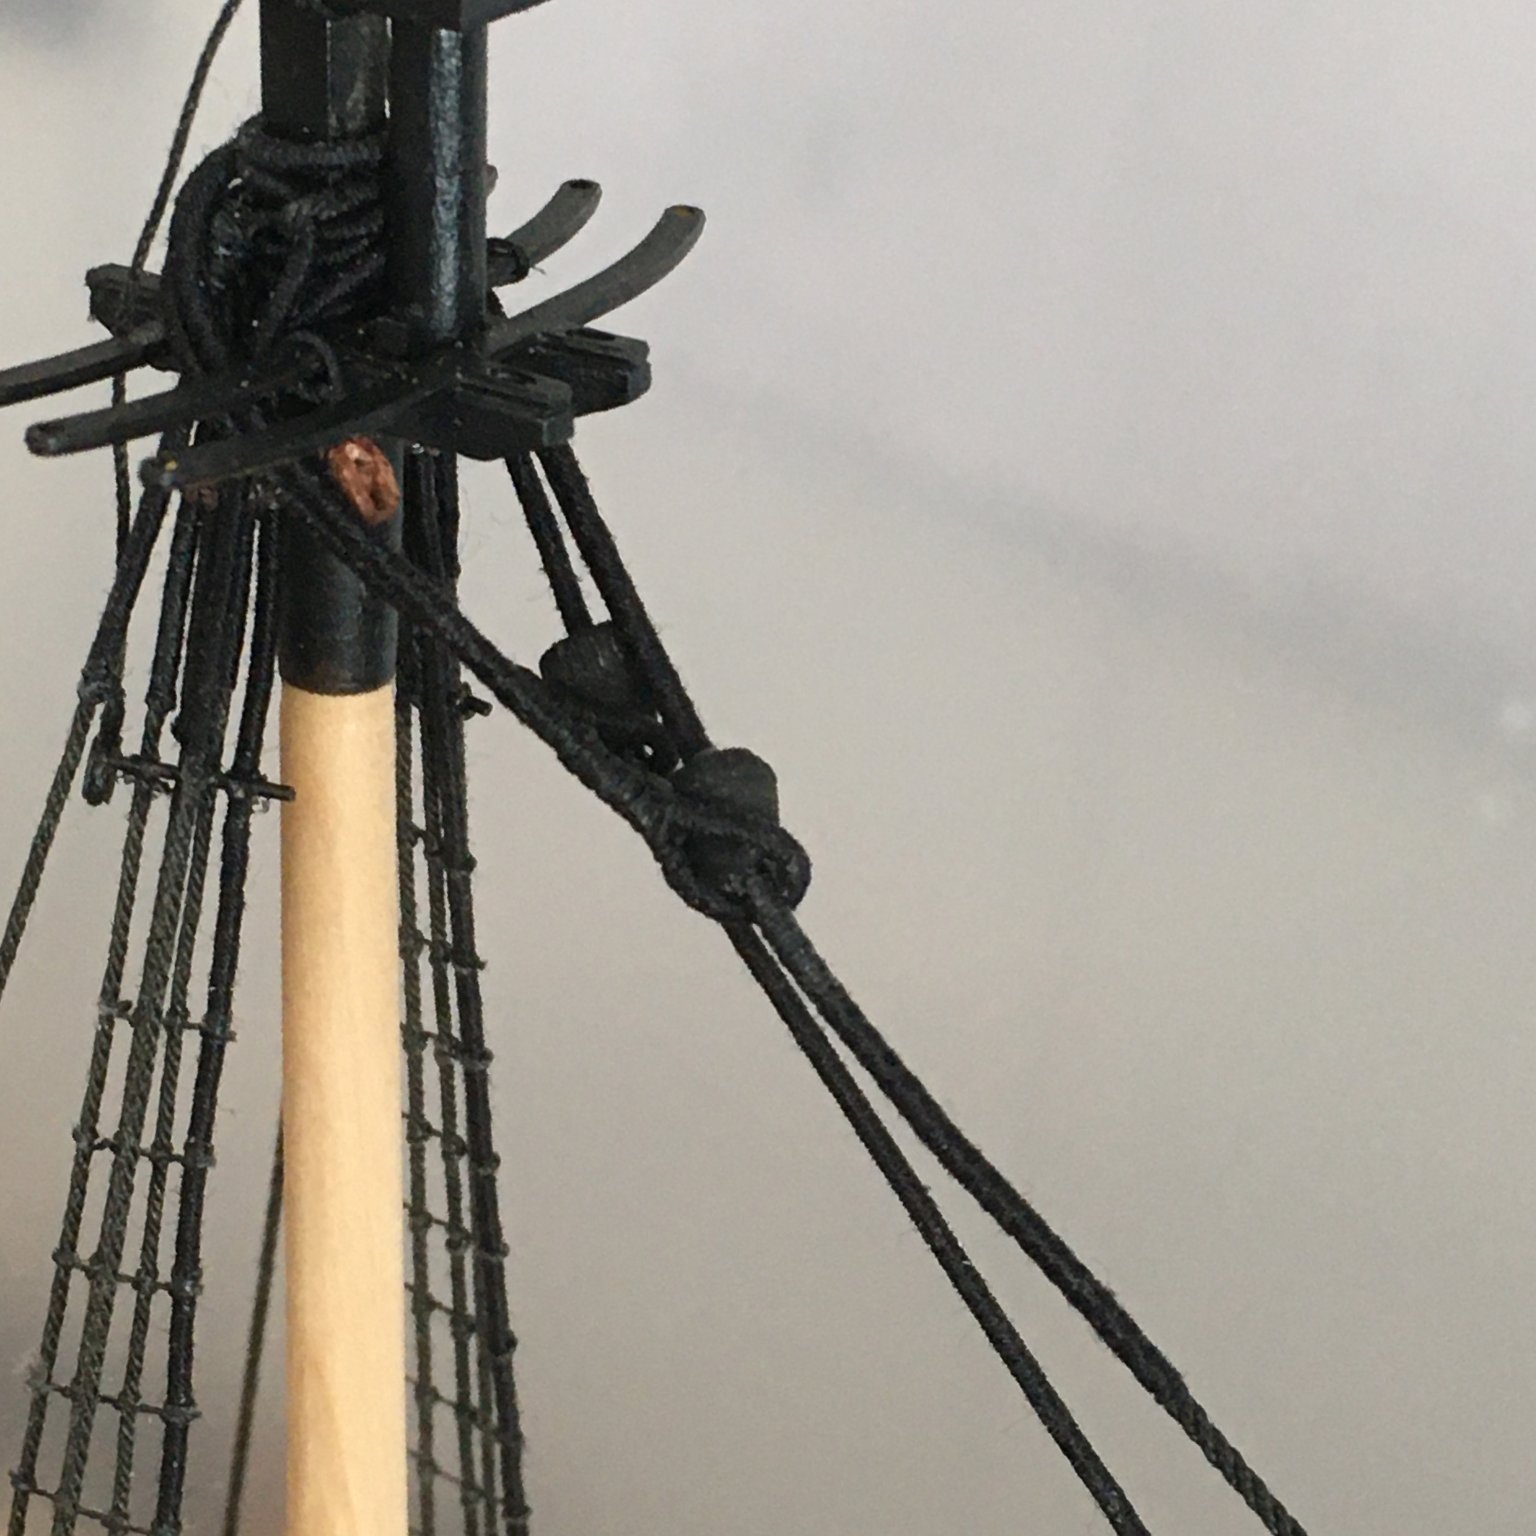
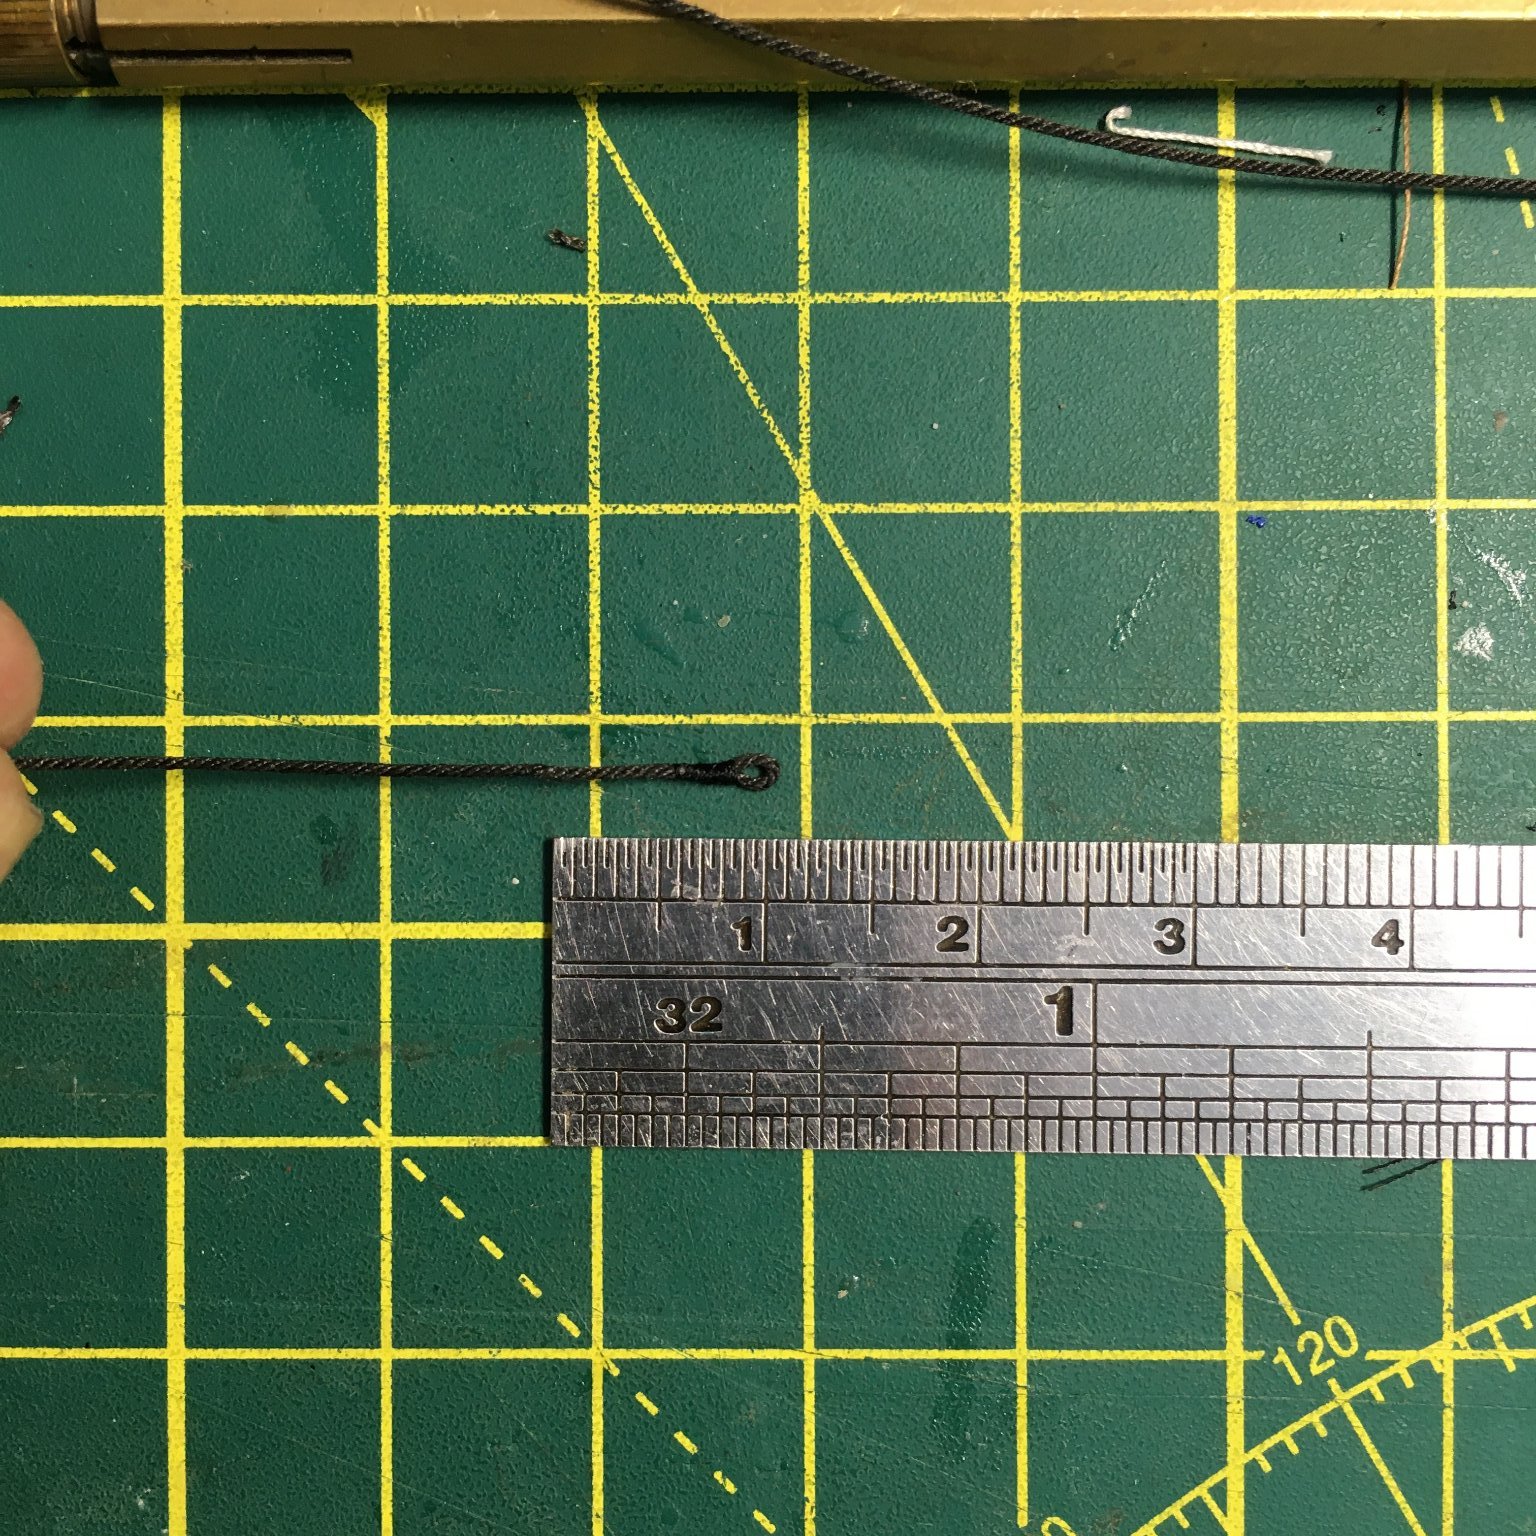
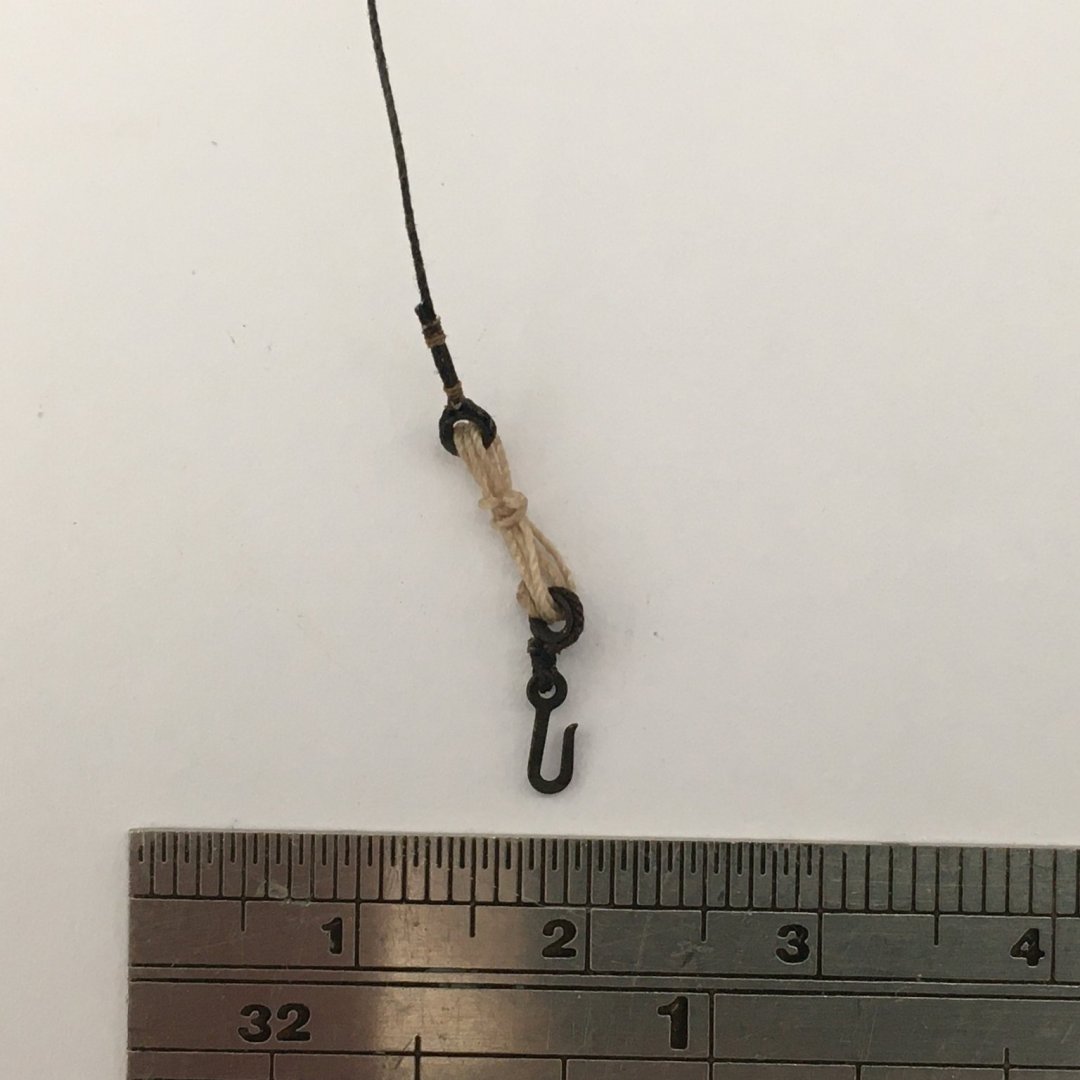
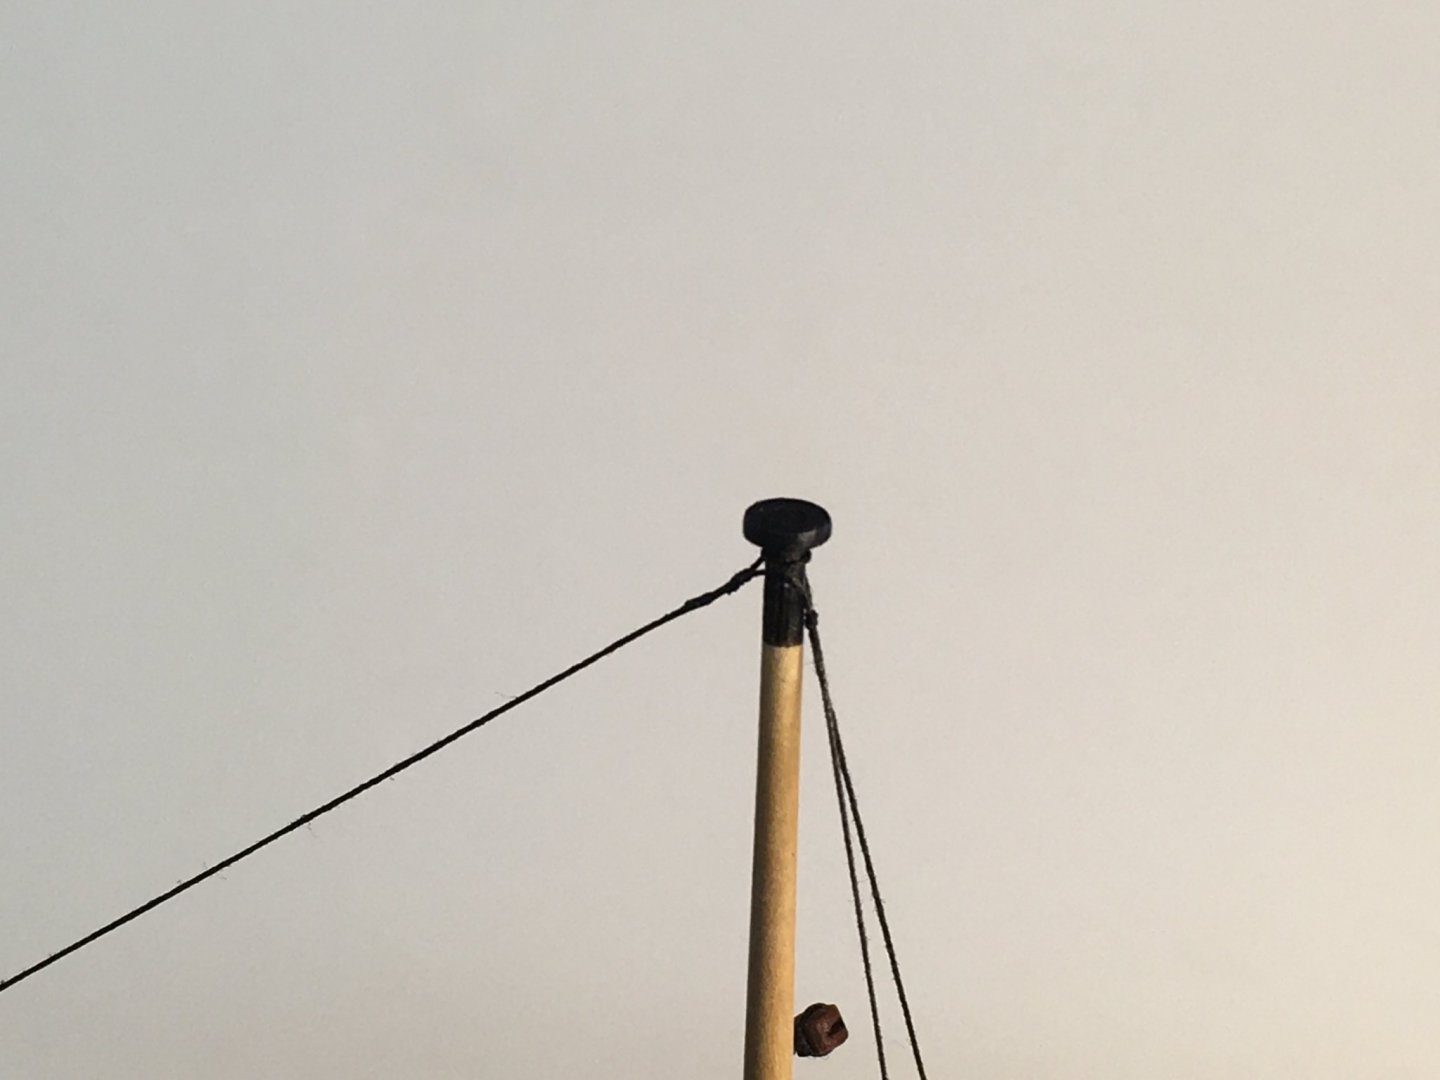
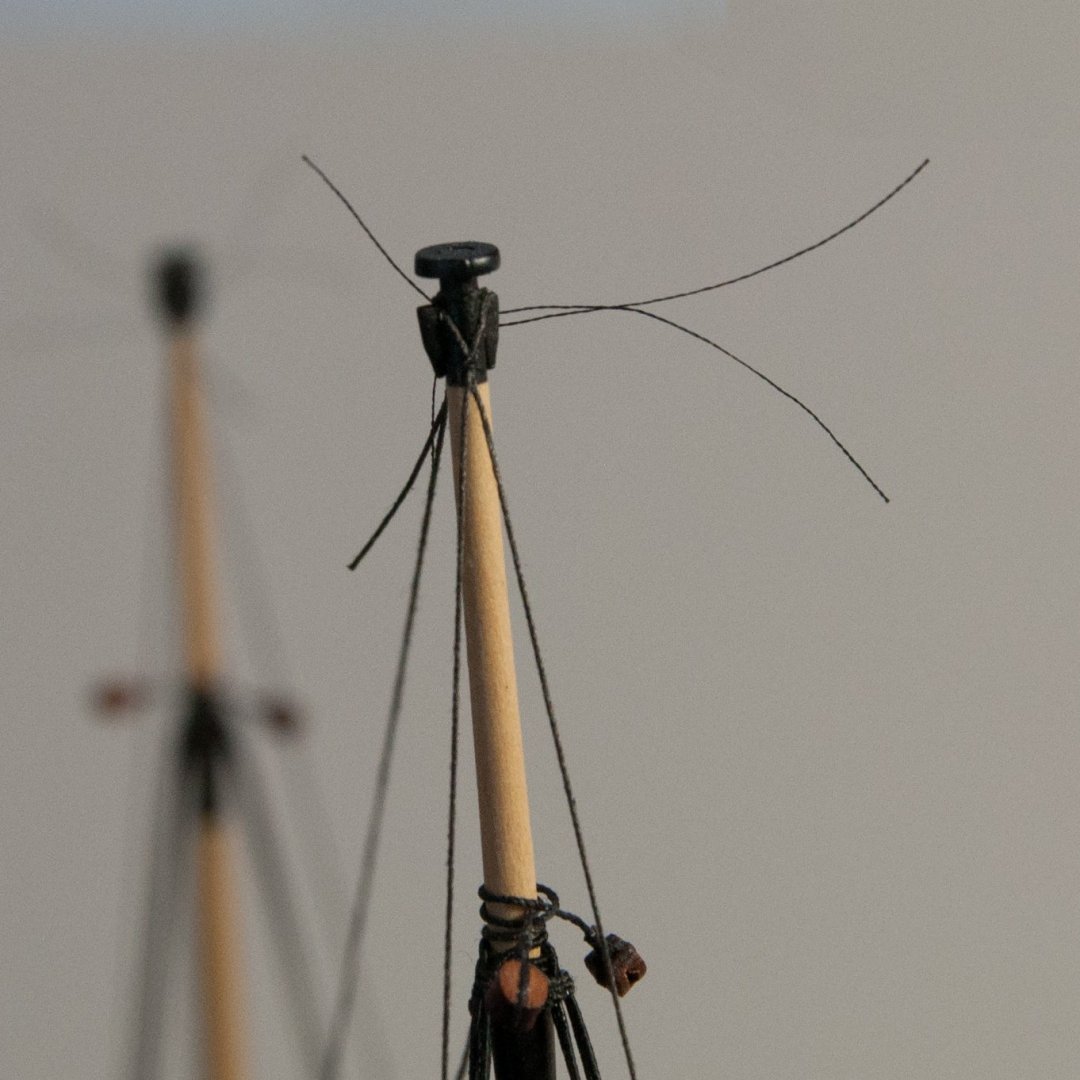
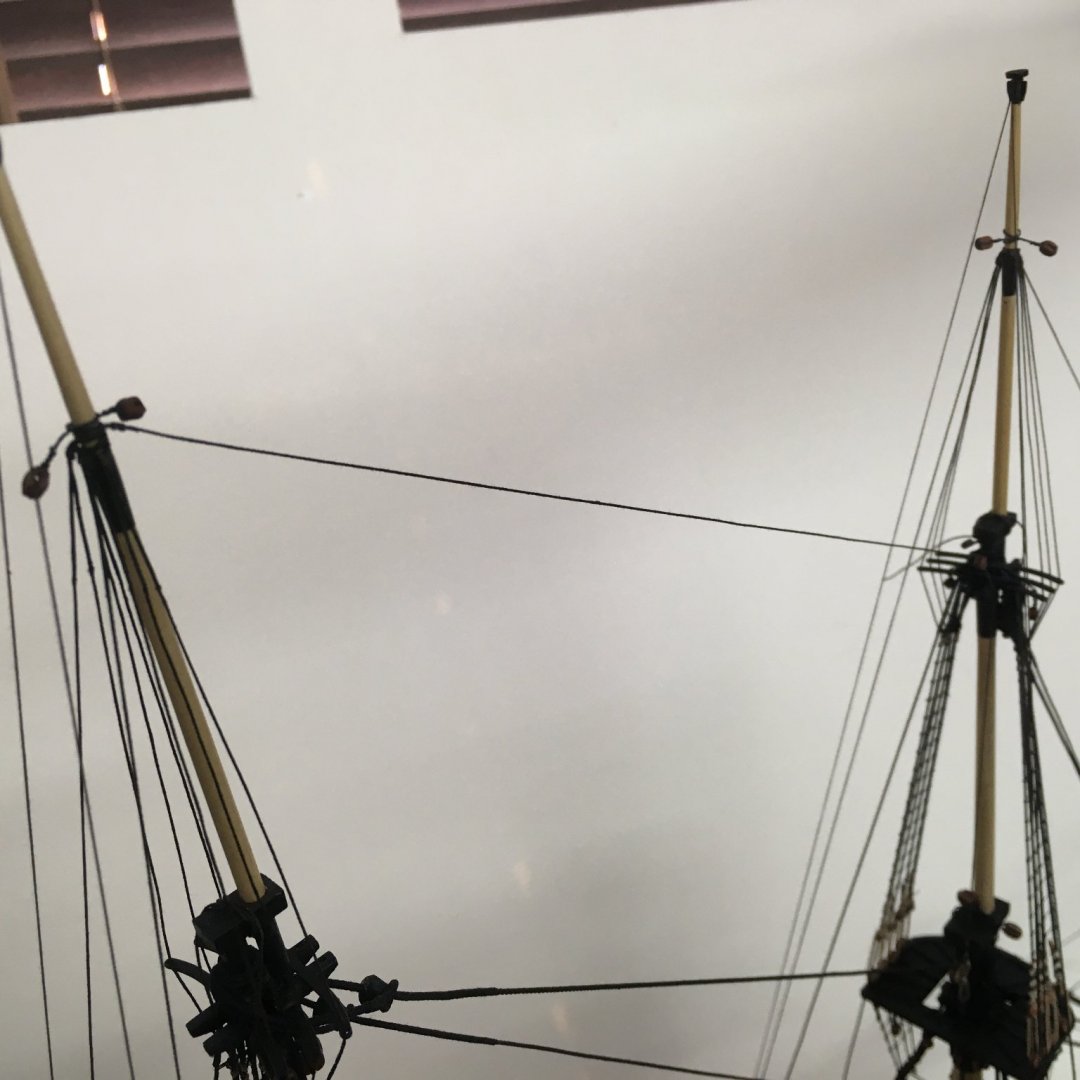
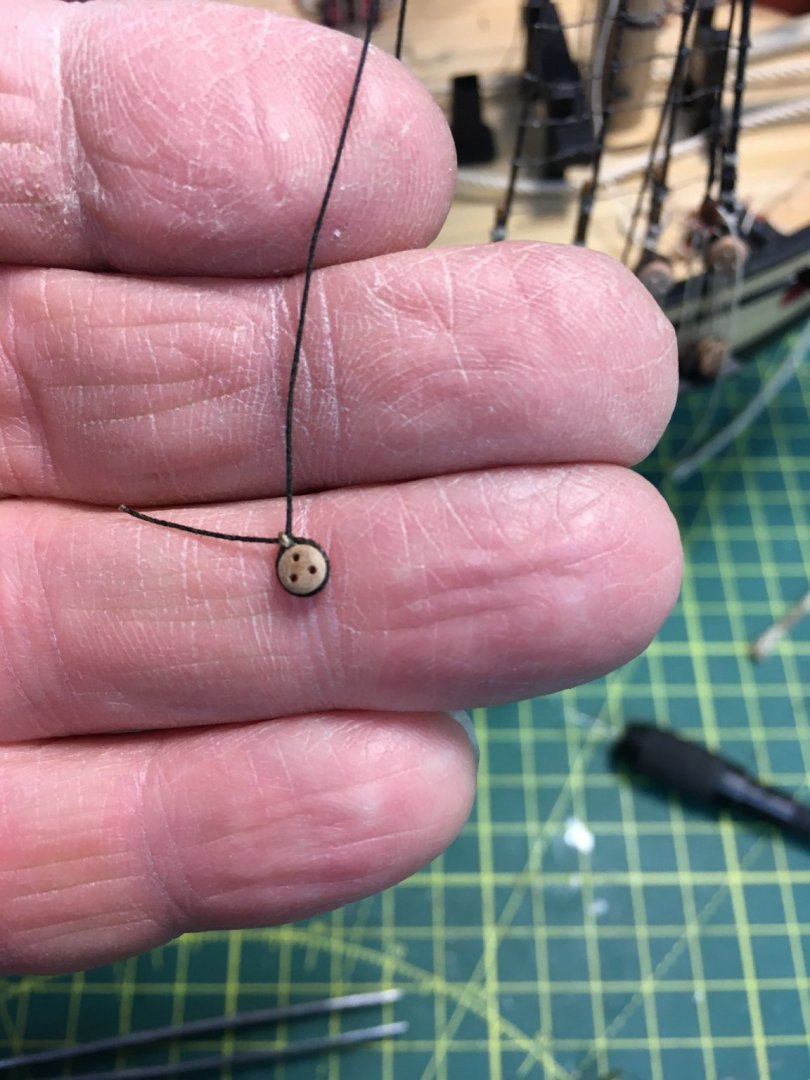
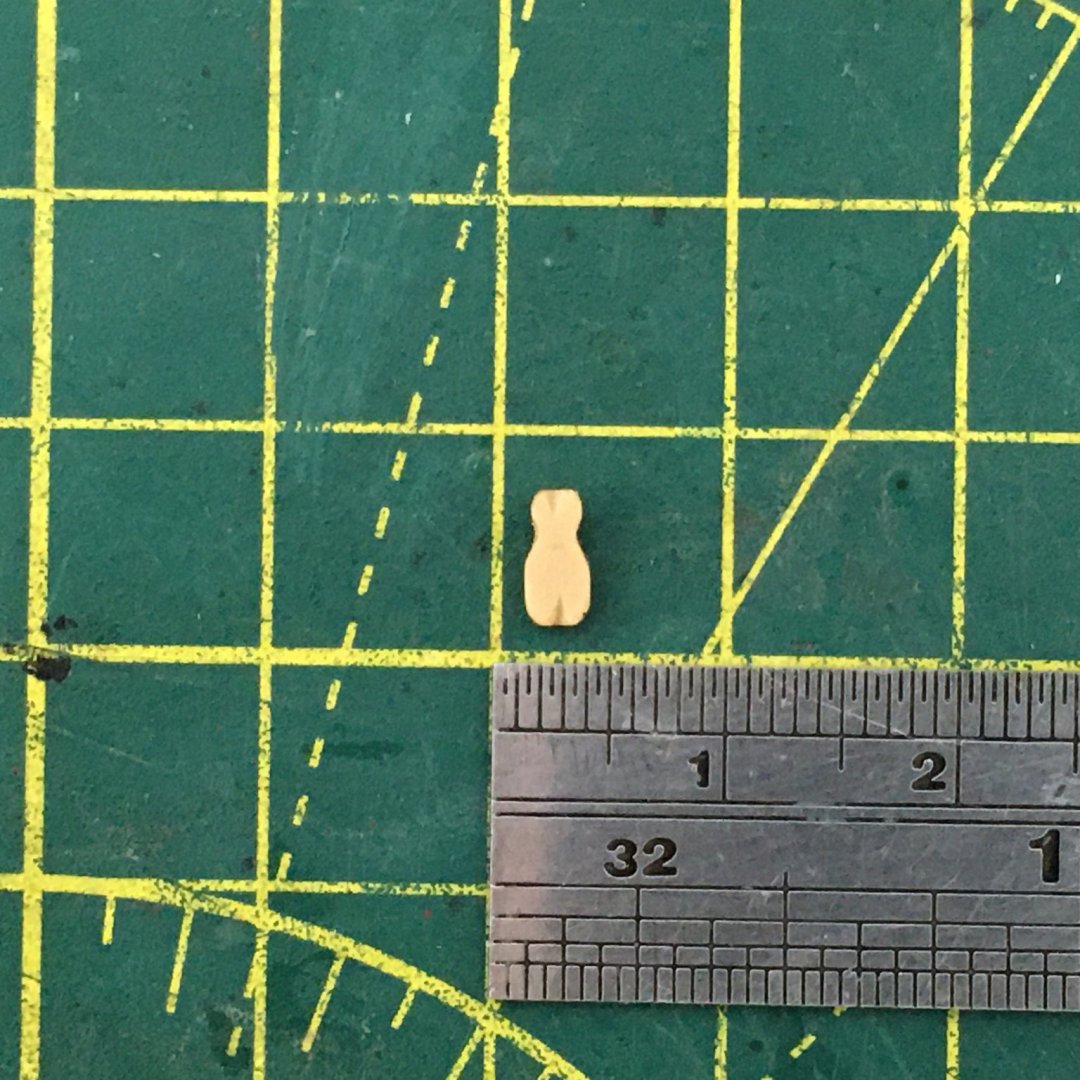
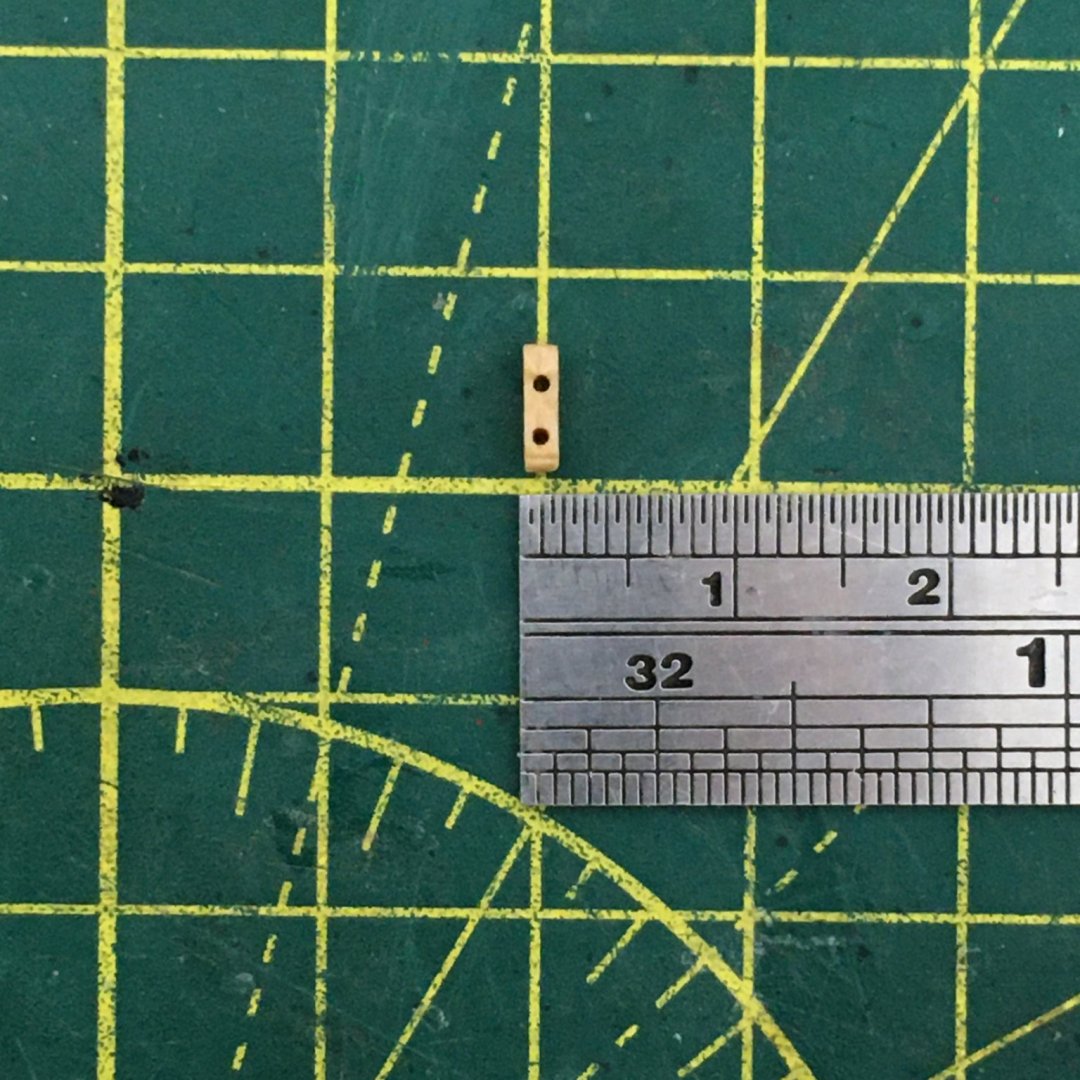
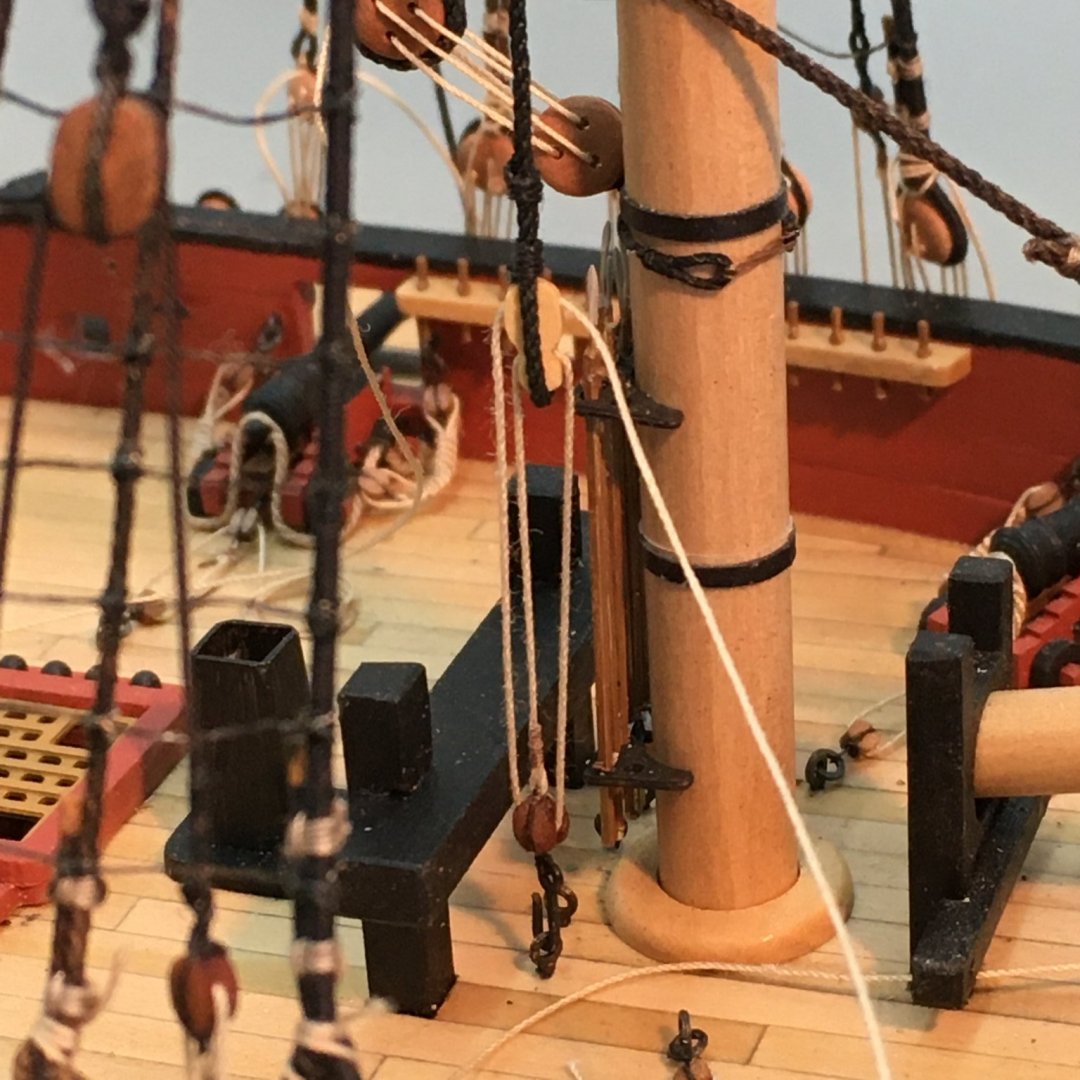
Royal Stays These final elements of the standing rigging are similar to the topgallant stays in the way they are set up, and as with the latter I found it easier to start rigging them at the thimble end then work up to the top of the royal poles. For both masts I used 0.25mm dark line. Main Mast I started setting up a pair of thimbles on one end of the stay, just as I did for the t'gallant stay: This time, the lower thimble hooks onto the first portside eyebolt on the foretop: The stay then leads through a thimble lashed to the fore topmast head then across to the main royal pole: Foremast This starts with an identical set up, this time with the pair of thimbles hooked to the first portside eyebolt in the bows: Incidentally, in terms of scale it's worth pointing out that the blocks in this shot are just 3mm, with one 4mm double. I'm glad I went for the pear block option in this kit - the quality is excellent. Again similar to the t'gallant stay, the royal version now reeves through a 3mm block on the bowsprit, down through the lowest hole in the dolphin striker, up through a sheave (ie hole) in the end of the flying jibboom then up to the fore royal pole: I'll do some more photos tomorrow to show the overall state of play now the standing rigging's finished and before I move on to crossing the yards and getting on with the running rigging. Thanks again for the likes and kind comments. Derek

- 725 replies
-
- 5
-
-
- vanguard models
- speedy
- (and 1 more)
-
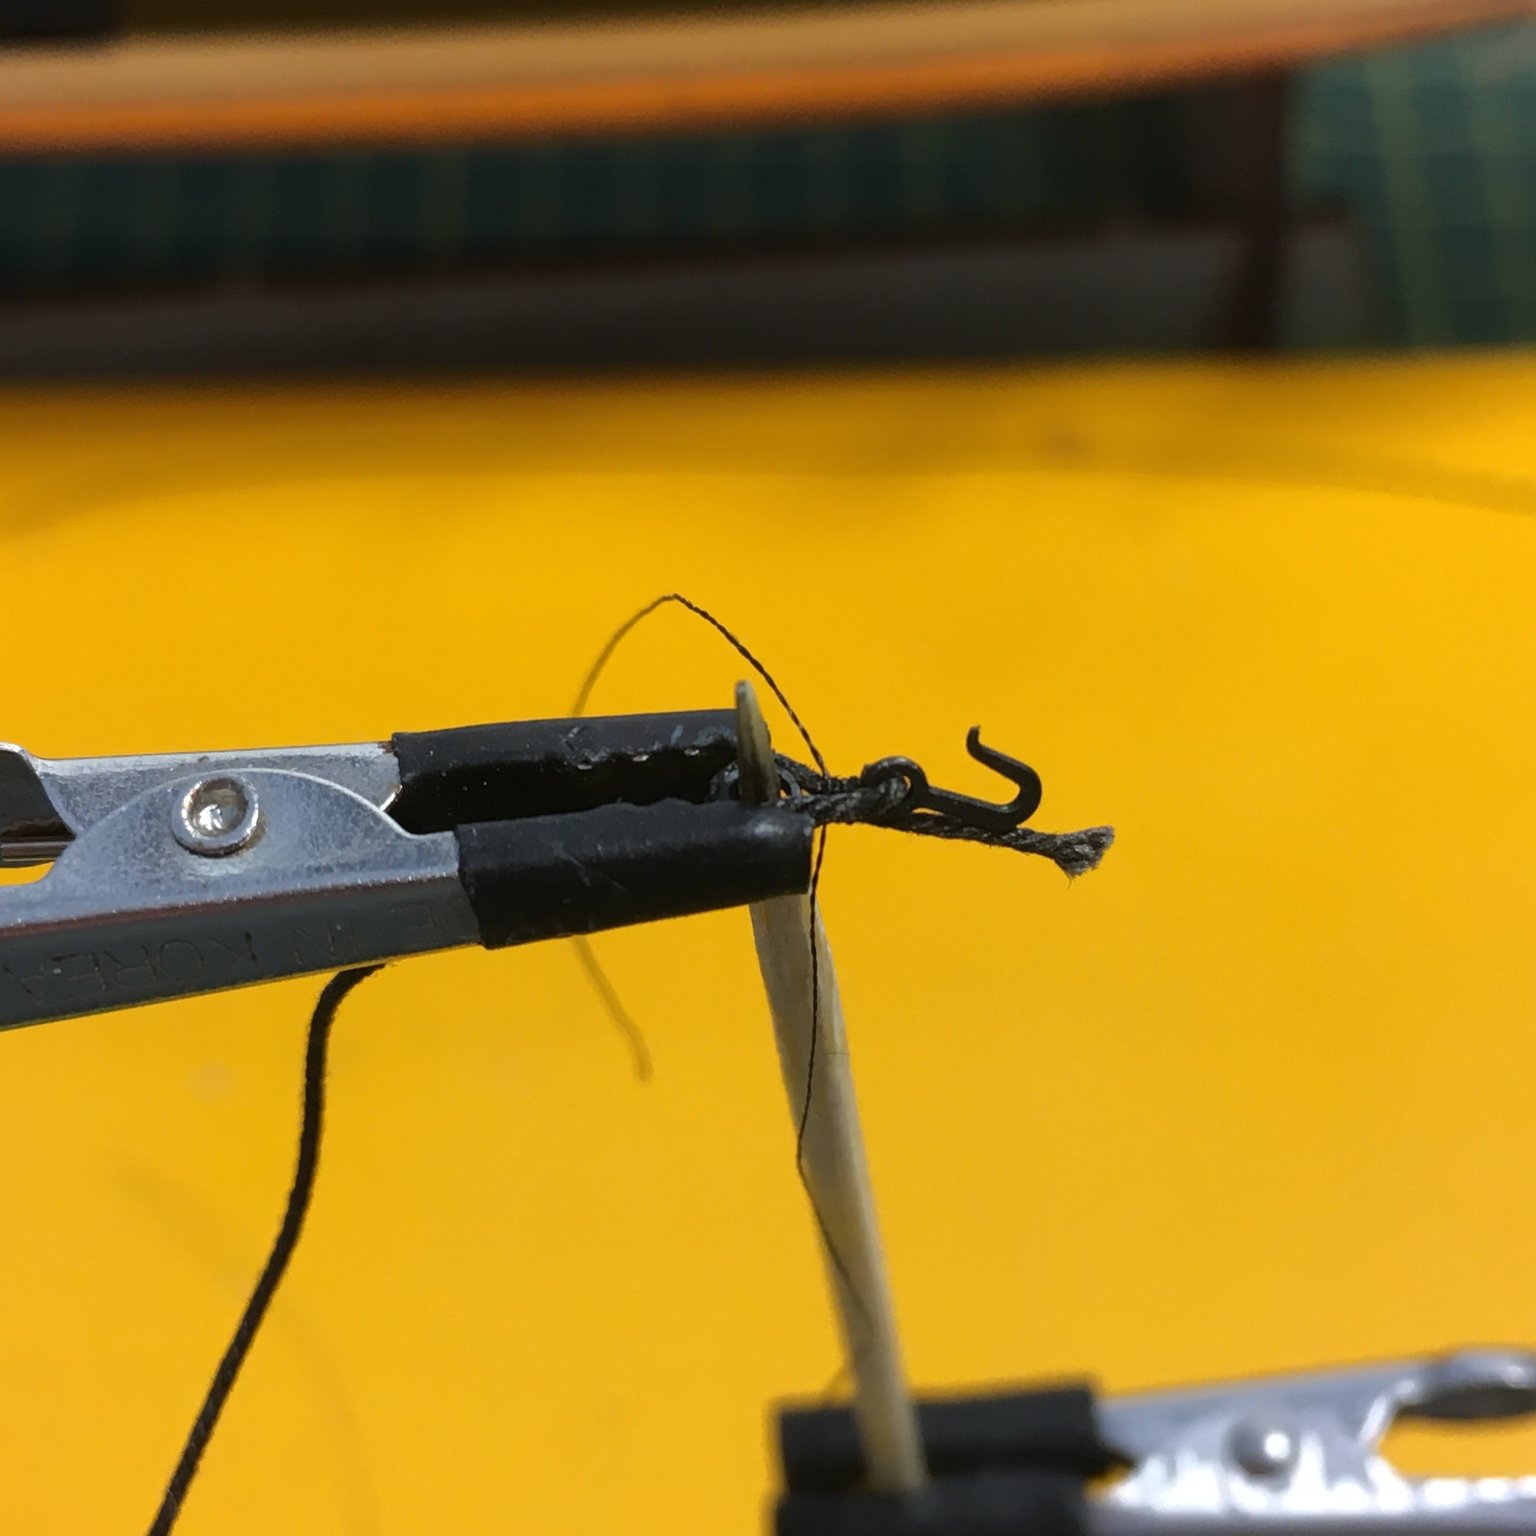
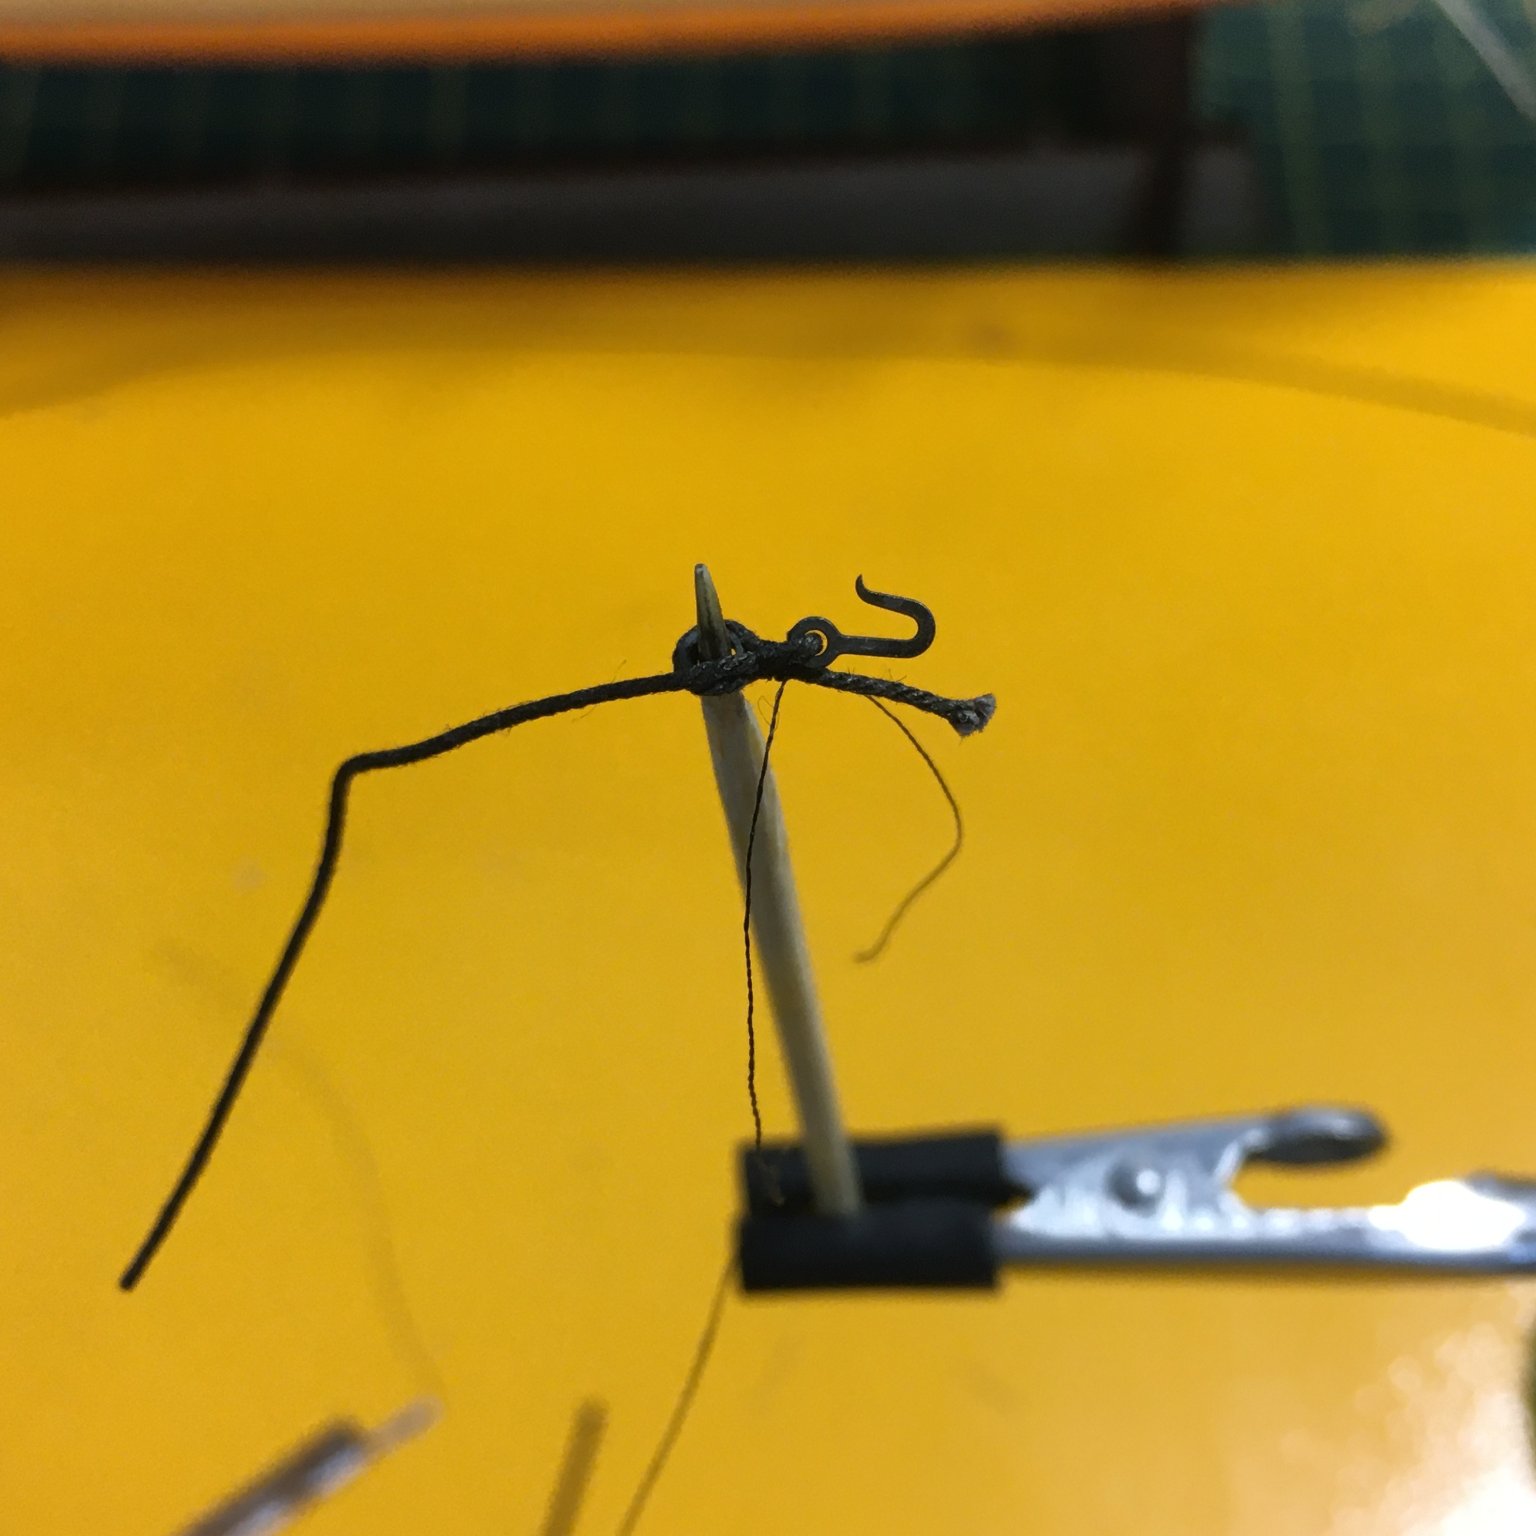
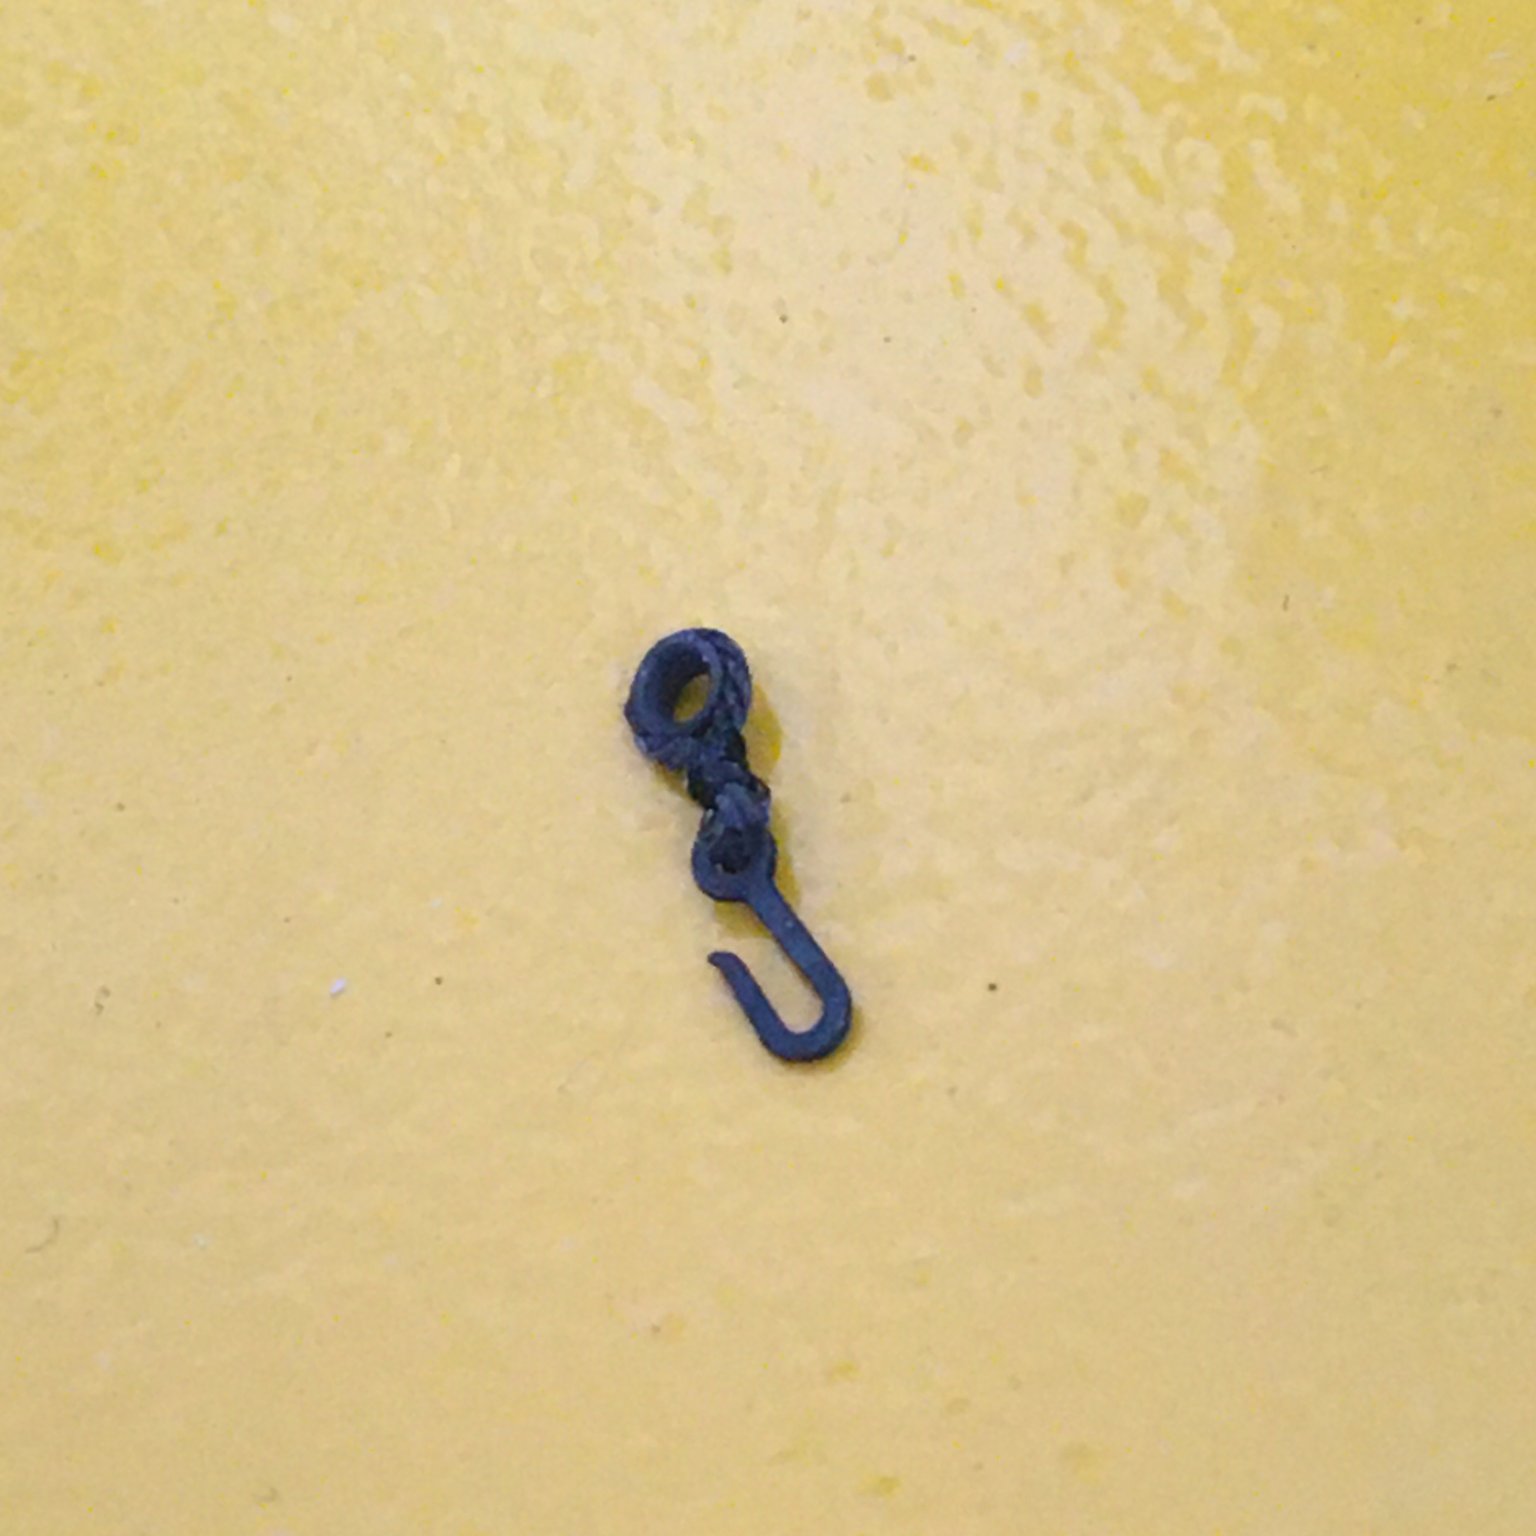
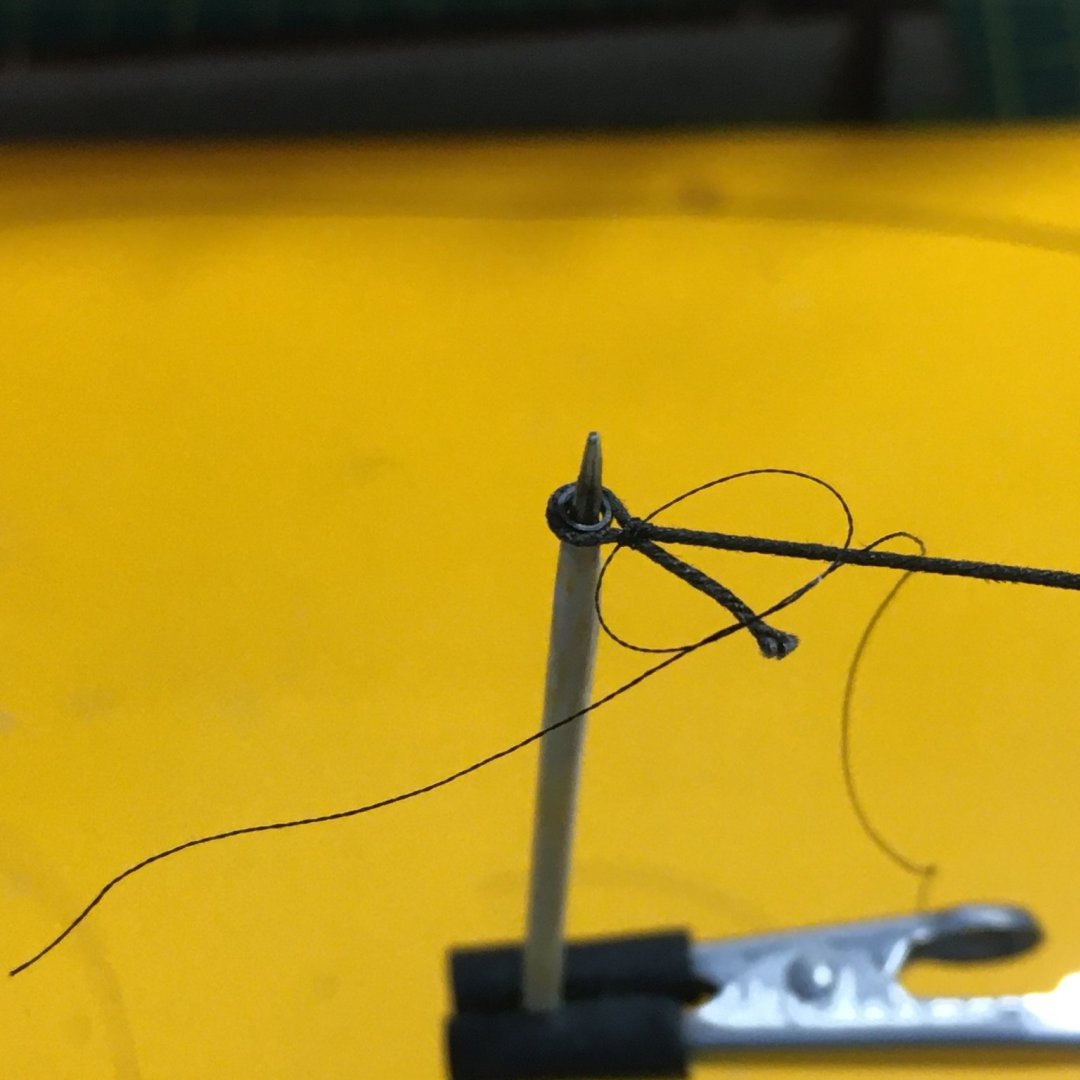
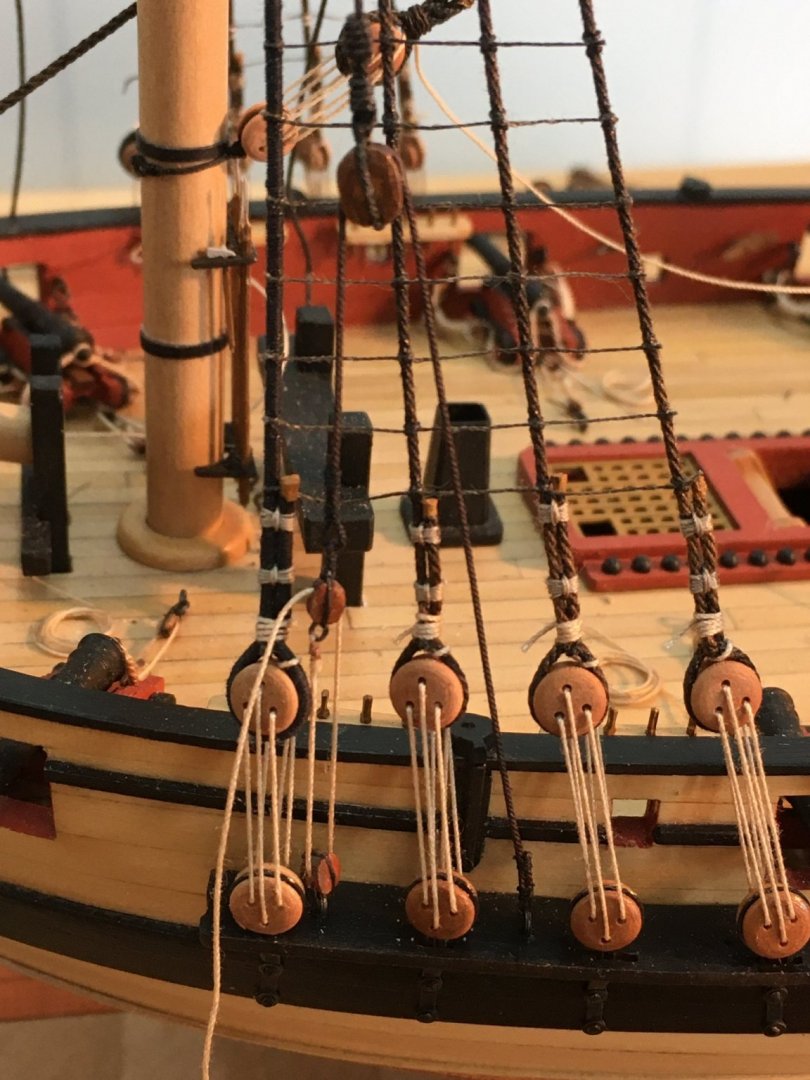
Royal Backstays I was initially dubious about fitting royal stays and backstays, thinking too much top hamper on a small vessel wouldn't look right. In the end I decided to go with the plans, making sure the lines were to scale and that seizings were done with fly tying thread to avoid bulky knots. I think I made the right decision as the standing rigging overall looks well-balanced. The backstays are set up with a pair to each mast, with the plans showing them lashed to eyebolts on the stools. Full scale practice had royal backstays rigged with deadeyes for tension adjustment on larger ships, and probably with thimbles and lanyards on ships of Speedy's size. The eyebolts are just behind the deadeyes on the stools, and I suspect Chris wanted to save modellers the hassle of trying to rig anything fancy in such a confined space. Being a glutton for punishment I decided to go for thimbles. I won't repeat my thimble method, but it may be worth a bit more detail on how I rigged strop round the thimbles with hooks. I think this is similar to the figure-of-eight method many modellers use, but I find that technique difficult with small fiddly components, hence the variation. I started with a tiny dab of CA on a thimble to hold the rope (0.5mm here) in place: Then, I applied a short seizing with18/0 fly tying thread, tying simple overhand knots alternately above and below the line: I worked towards the thimble in order to make sure it was held tight in the strop. Next, I threaded a hook on the long end of the strop, then bent the long end round so that it passed back alongside the thimble - hopefully the picture explains that better: Then, using the same piece of fly tying thread I worked the seizing back towards the hook, this time capturing the long leg of the strop as well: After a generous application of thin CA and trimming with the new cuticle cutters (did I say how much I like them?😁) For the stays themselves I used 0.25mm dark line, with a single length for each mast seized in the middle round the top of the royal pole. I neglected to photograph this step before I started rigging the stays, hence the odd lines in the picture. Hopefully the picture shows the tiny seizing on the backstay, which is nearly invisible to the naked eye: To decide where to set the thimble in each end of the stay I hooked the first thimble on the eyebolt, having first unreeved the lanyards on the t'gallant and topmast backstays to ease access: With a thimble turned into the end of the stay it was then relatively easy to rig the lanyard and re-reeve the deadeyes: The rigging on each side and on each mast was identical. Looking at these lanyards I think I might need to use smaller line on the smaller deadeyes and thimbles. Plenty of scope for that as nothing is finally rigged yet. Next job the royal stays, and that'll be the standing rigging finished. Derek


- 725 replies
-
- 10
-
-
- vanguard models
- speedy
- (and 1 more)
-
Really coming to life now! I hope you'll come back to Speedy at some stage.
-
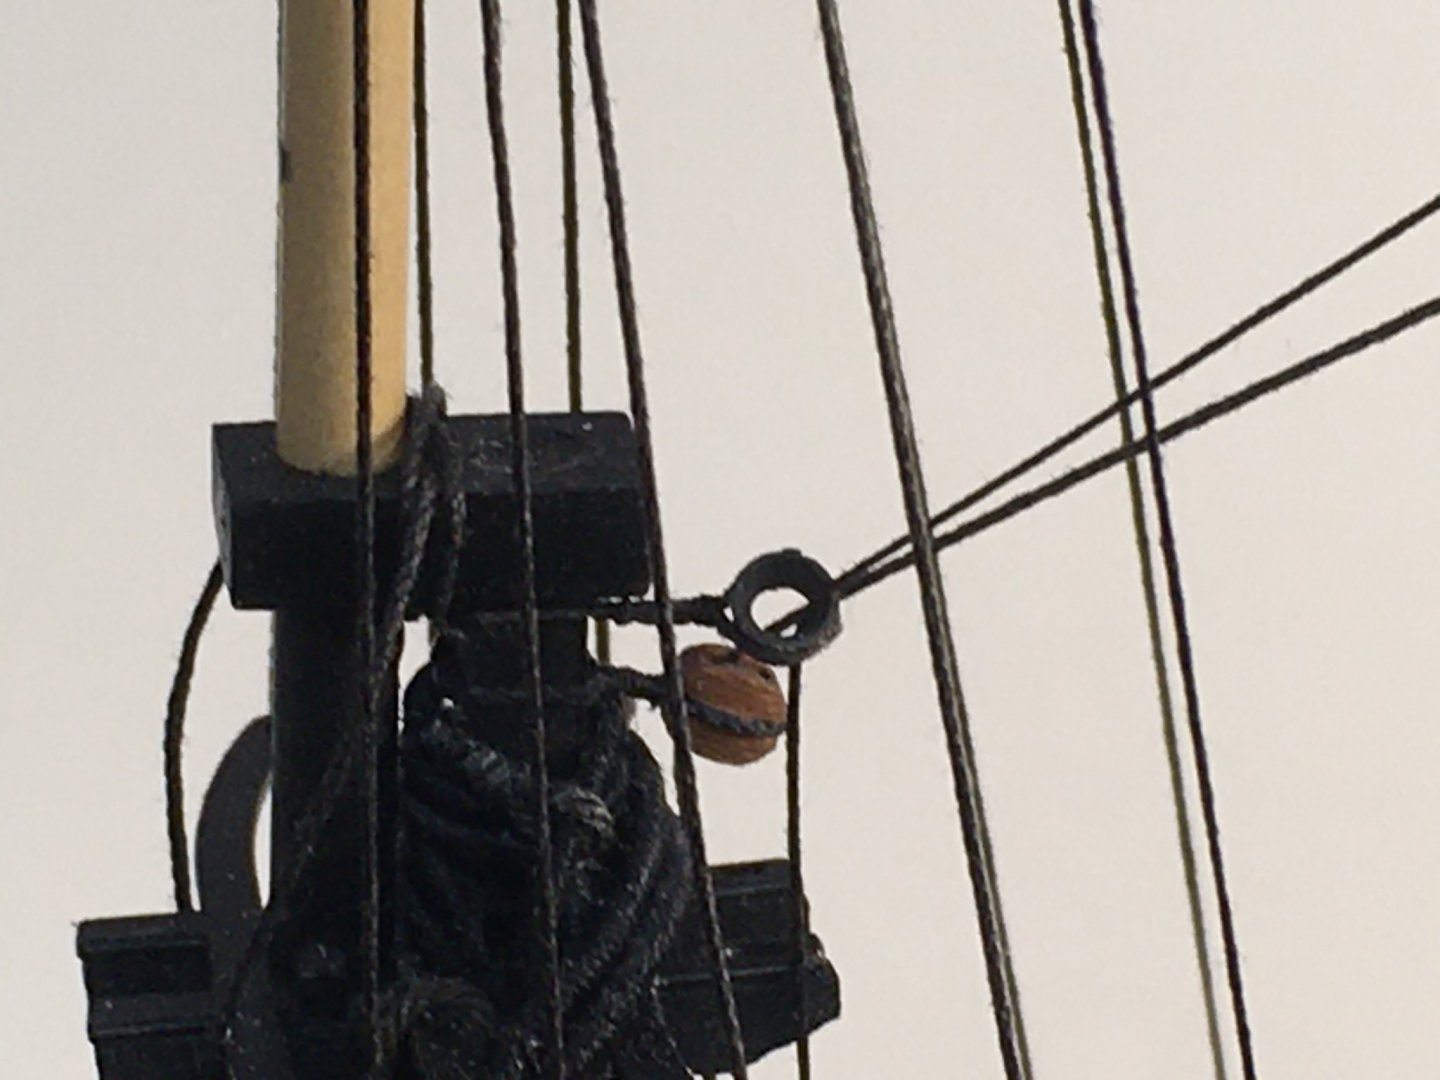
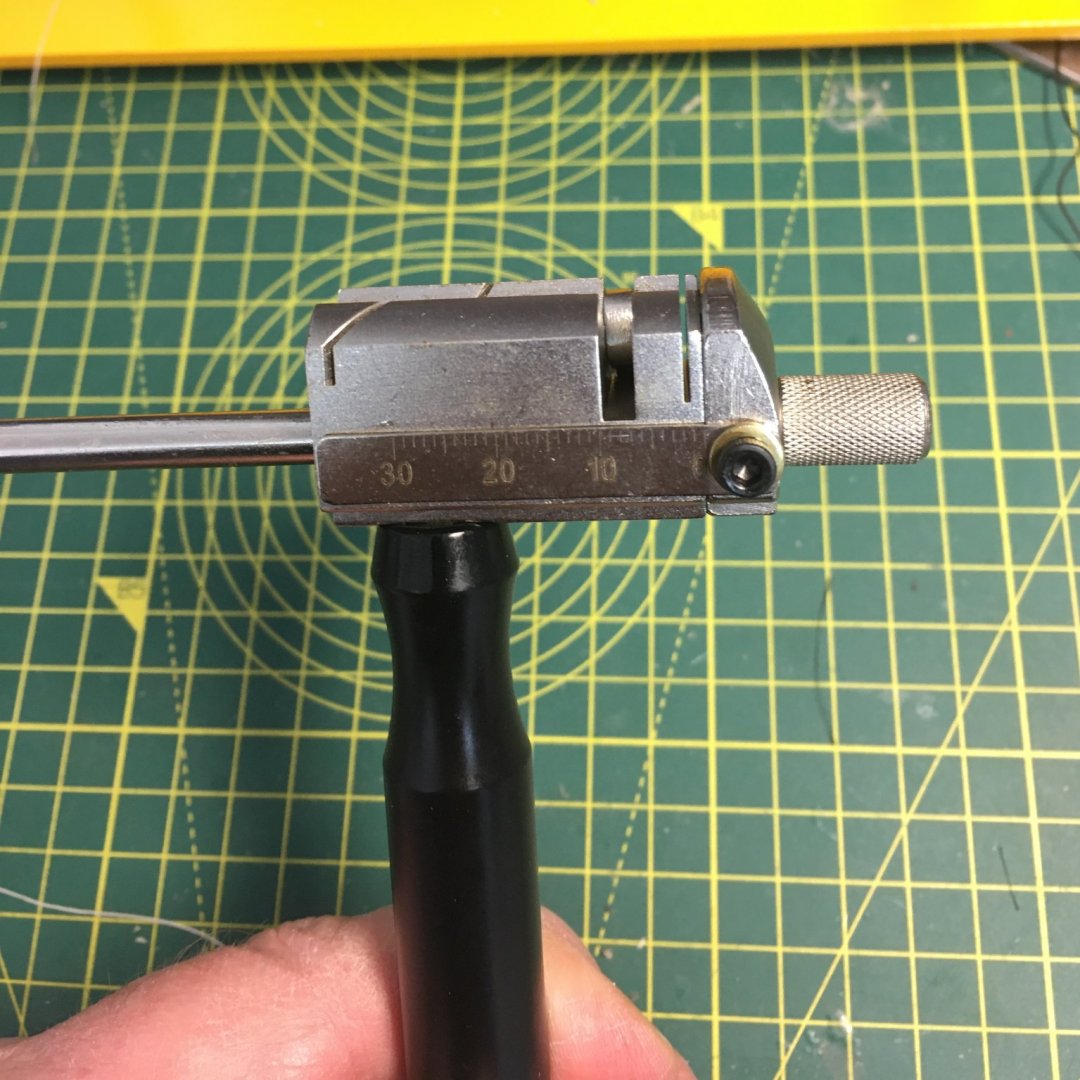
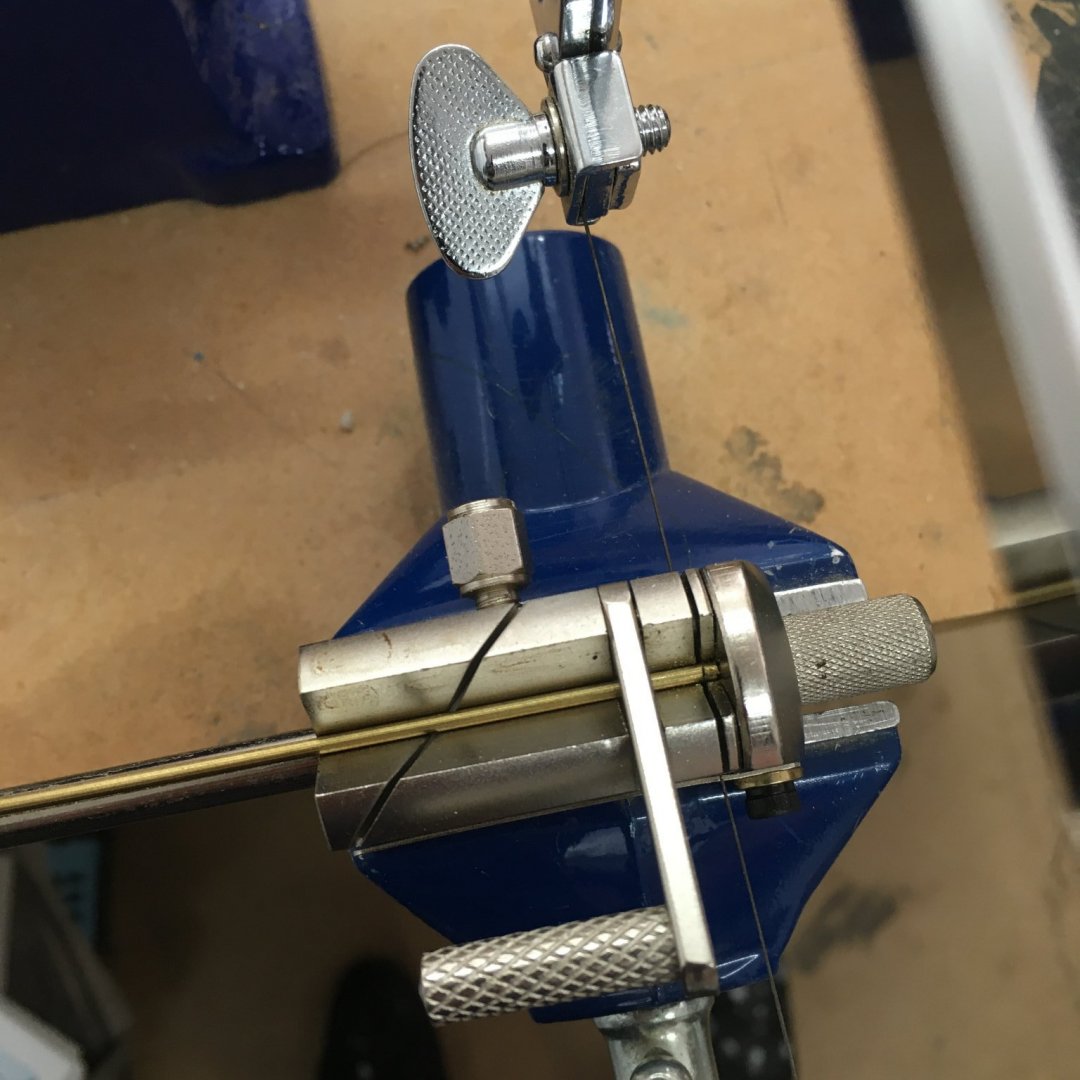
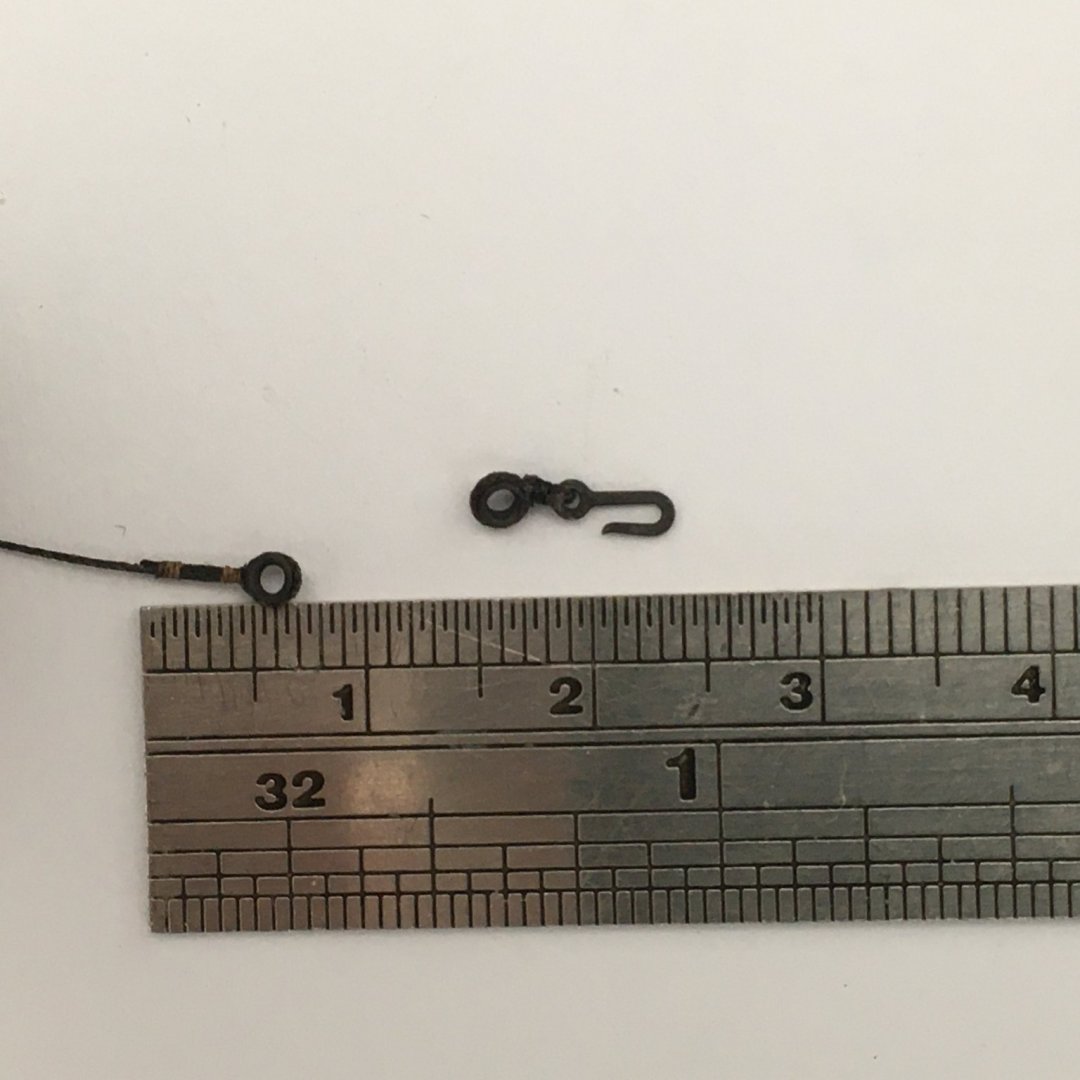
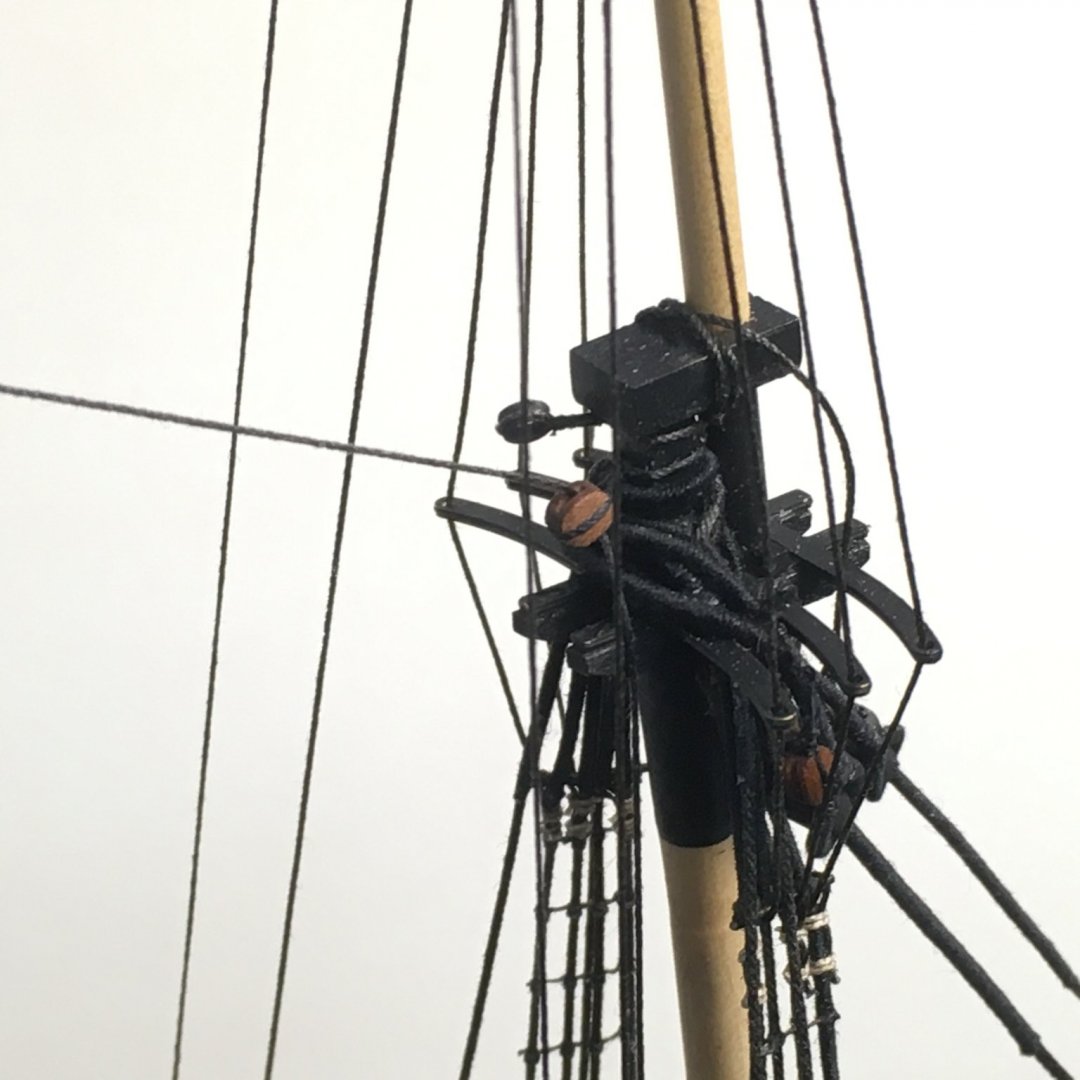
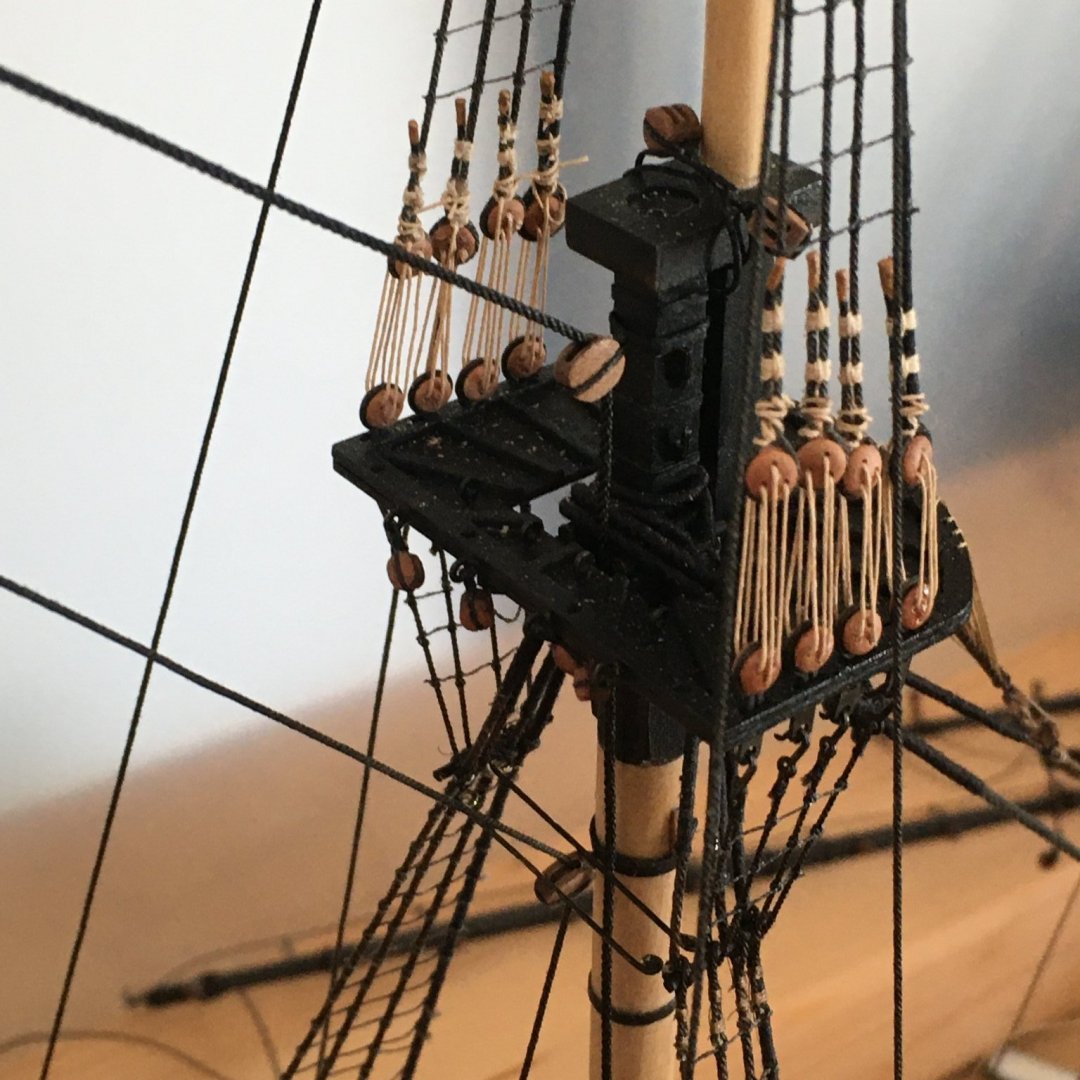
Topgallant stays Like the t'gallant shrouds and backstays, these were rigged using DMC Cordonnet #50 thread (c. 0.32mm), dyed dark. Main mast The stay is seized round the top of the t'gallant mast, tight enough so it doesn't slip down over the shoulder. I suspect it would have been spliced in real life but at this scale it's hard to tell the difference, especially when fly tying line is used for the seizing. The stay leads down through a 3mm single block lashed to the fore topmast head then ends in a thimble near the foretop. This thimble is rigged to another hooked to the foretop, to allow the stay to be tensioned. I didn't relish rigging the thimbles in the foretop with all the clutter already in the way, so I decided to rig the stay in reverse - i.e. starting with the thimbles off the model: The next two shots show the two thimbles being lashed together, then the line tied off with a half hitch: I decided to make my own thimbles from brass tube as described earlier in the log, but this time I was able to use the new tool Glenn (@glbarlow) recommended - or at least the nearest I could find in the UK. This tube cutter (here) impressed me when it arrived, being surprisingly weighty and well made. Here it is with the handle attached ... ...and with the handle removed and the tool clamped in a bench vice, as Glenn suggested. Here it is cutting a 1.5mm length of 1.6mm o.d. tube for a thimble: The fold-over lever held the tube securely whilst my finest jewelry blade went through it easily and neatly. The hardest part was picking up the cut piece (I used a needle). The whole process was much less stress-inducing than using the Preac saw, and not much slower. The picture shows you can do 45 degree cuts as well, and the tool can obviously handle a range of different sizes of tube and solid rods, and various lengths down to 1.5mm (or less with a bit of ingenuity). A very good buy. Back on the model, the rigged thimbles hooked on to the first starboard eyebolt in the foretop, aft of the mast: It was then a quick job to lead the stay up through the block at the foremast head then seize it to the main t'gallant masthead: I forgot to take these photos until after I'd started rigging the royal backstays, but in reality I did the rigging in the correct order (honest!). Foremast Speaking of correct order, I soon wished I'd left off rigging the spritsail yard until later, as I struggled to weave the thimbles through a cat's cradle of lines to hook them on an eyebolt in the bows. As with the main t'gallant, I started at the thimble end and worked backwards. Here are the thimbles in place: From here the stay reeves through a 3mm block lashed to the bowsprit near the heel of the jibboom, through a hole in the dolphin striker, up through a sheave (i.e. a drilled hole) in the end of the jibboom, then up to be lashed to the head of the fore t'gallant mast. Next, on to the royal backstays and stays. Derek


- 725 replies
-
- 7
-
-
- vanguard models
- speedy
- (and 1 more)
-
Royal Navy masting and rigging was subject to very detailed and exhaustive standards, most based on various ratios and formulae related to dimensions such as the beam of the ship. As Bob says, individual captains and their bosuns would have had a degree of leeway, but these official standards are as good a source as any if you're modelling ships of the period - especially British ships. A quick and easy source is the spreadsheet created by Dan Vardas which you can access through the Articles Database on the 'More' button. A good written source is The Masting & Rigging of English Ships of War 1625 - 1860 by James Lees. ...oh, Allan just beat me to it. Still, great minds think alike, and all that.
- 19 replies
-
- 3
-
-
- running rigging
- standing rigging
- (and 1 more)
-
Beautiful work on the masts Glenn. What I really want to know, is how do you keep Cheerful so free of dust?? Despite keeping my model in a home-made cabinet between sessions it still acts as a very efficient magnet for dust - which close up photos just highlight.
- 778 replies
-
- 1
-
-
- cheerful
- Syren Ship Model Company
- (and 1 more)
-
Well done Glenn! She's looking fine with all the masts and standing rigging in place.
-
Useful tip Glenn, I'll try that. Thanks Gregory - I might try unreeving the lanyard on a particularly bad example and rotating the deadeye one complete turn against the twist to see if that'll help. Thanks Glenn. When I've finished the standing rigging I'll post a few general shots to show progress to date. Thanks to all the likes as well - much appreciated.
- 725 replies
-
- 1
-
-
- vanguard models
- speedy
- (and 1 more)
-
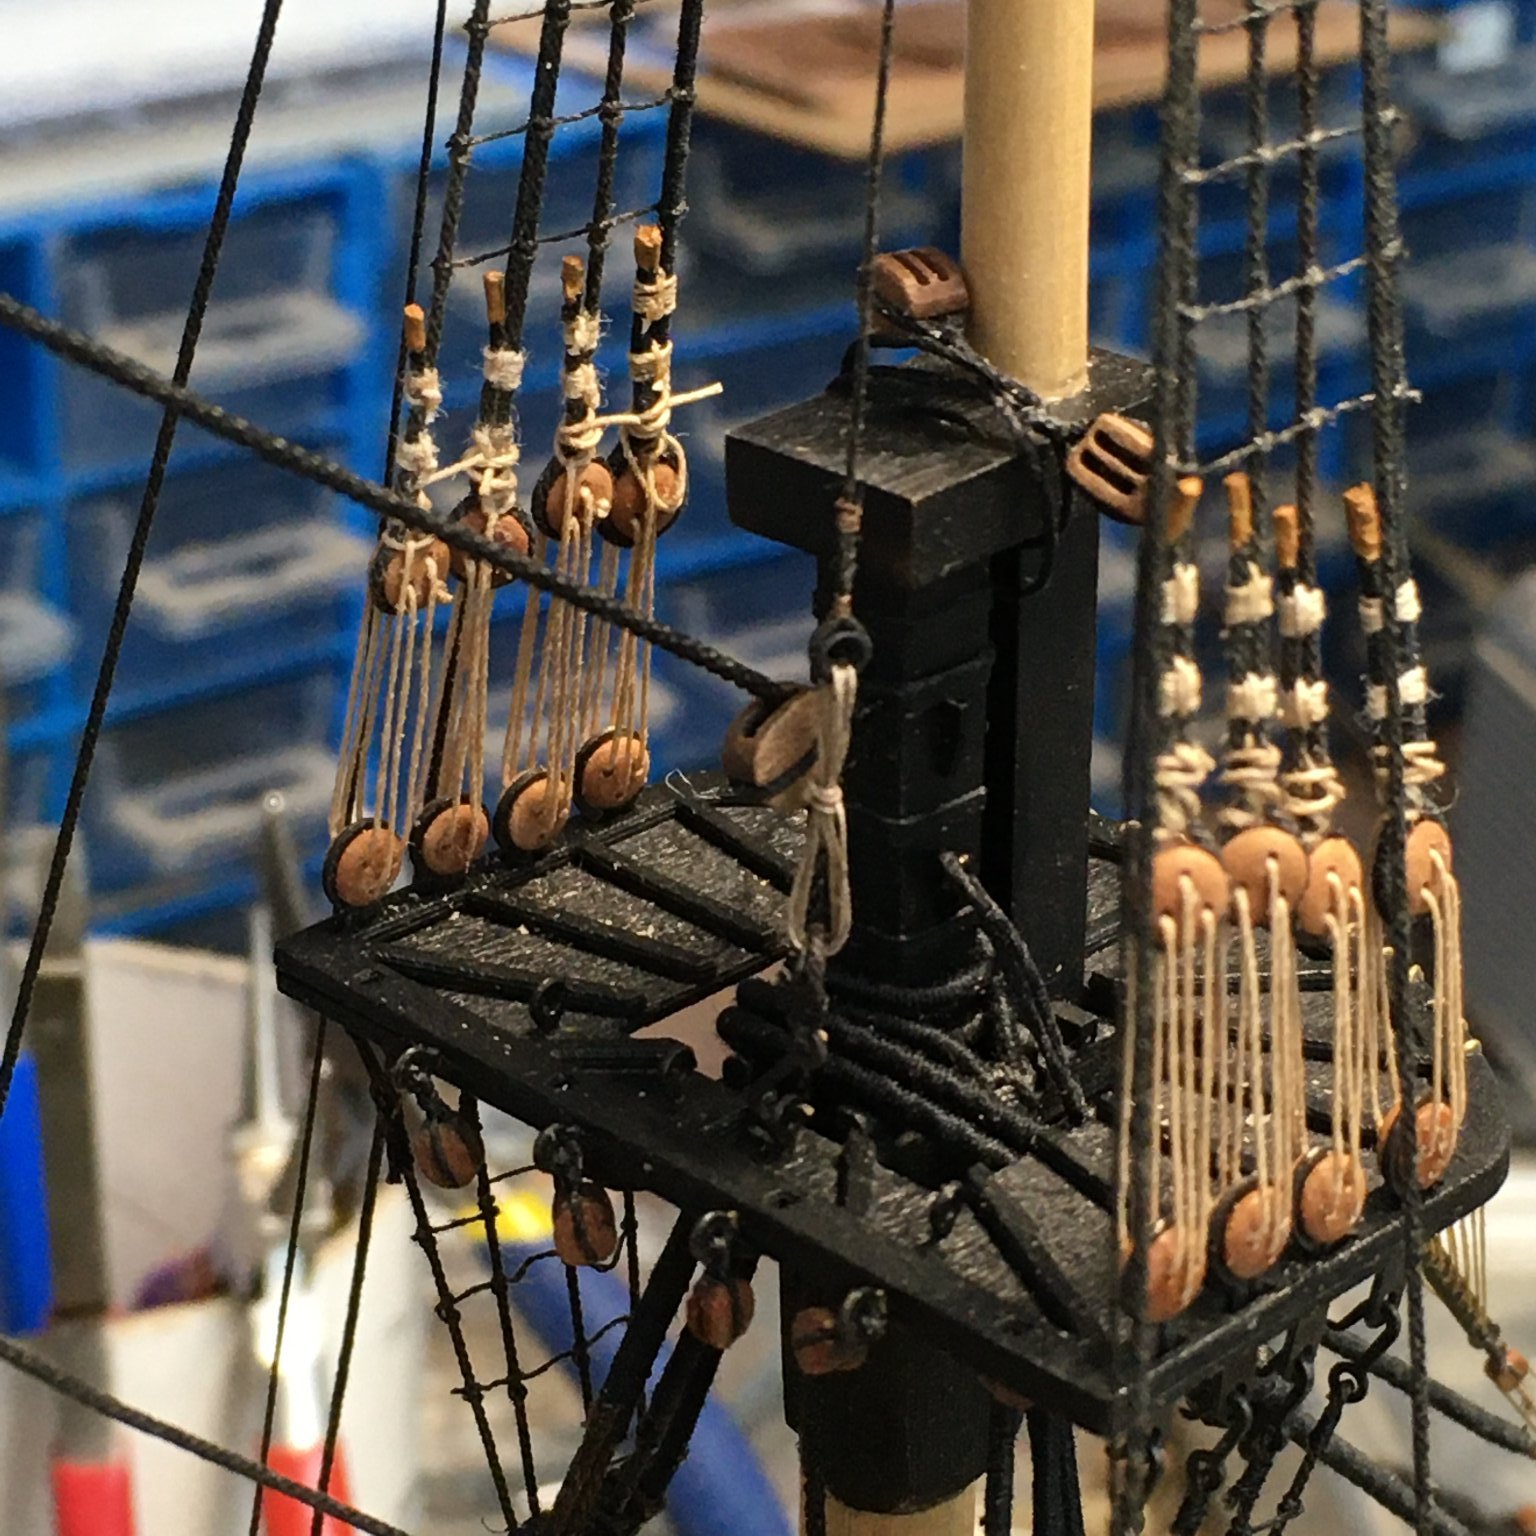
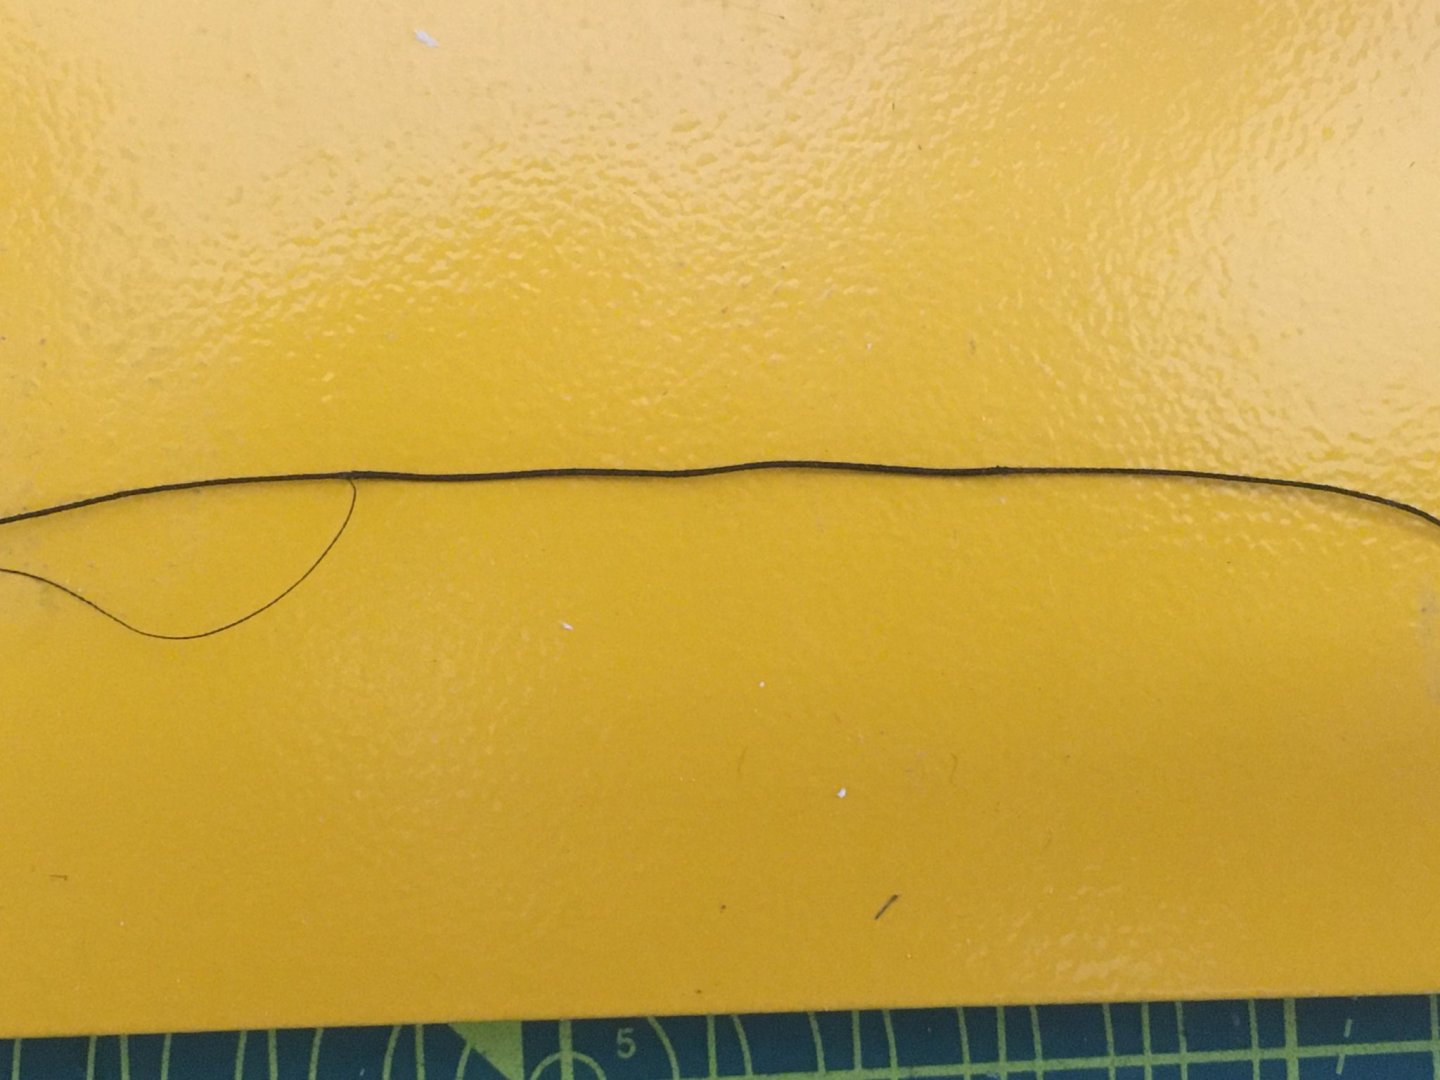
Topgallant shrouds & Backstays Fairly straightforward parts of the standing rigging here, with one particular point of interest. Although there is an odd number of shrouds - three - on both sides of both masts, the shrouds are still set up in pairs - two each side. That's because the aftmost leg of each pair becomes the topgallant backstay. You just have to remember that this leg needs to be considerably longer than its companion. I'm not sure this practice is recognised in the kit instructions where the topgallant backstays seem to feature as separate items, but my understanding is that this was the way it was done at the time. Straightforward or not, there were still a couple of decisions to make. First, I chose thinner line than the kit-recommended 0.5mm. The shrouds on a ship Speedy's size would have been about 2.5" circumference, which equates to around 0.32mm diameter. I used DMC Cordonnet #50 thread which is around this size, and dyed dark looks in scale to me. As always, if in doubt I always prefer to go a size down rather than a size up. Second decision was around serving. The middle few feet of each shroud pair would have been served, but I knew my normal seizing thread (Guterman) would be far too bulky so as an experiment I tried18/0 fly tying thread. It worked, in the sense that I was able to make a perfectly neat serving, but I questioned whether it was worth the effort on such small ropes, with the difference between served and unserved rope virtually invisible to the naked eye: In the end I concluded it wasn't, but there may be situations in future where I'll decide to use the fly tying thread to avoid bulking up a rope. But not a long length of rope - it takes ages to serve, given the tiny diameter of the thread. Before seizing the shrouds to the topmast shrouds, I realised I needed to sort out several blocks under the crosstrees. First, I mentioned earlier that I couldn't make satisfactory sister blocks to sit between the tops of the first and second topmast shrouds. I decided instead to go with an alternative sometimes used at the period, which was to suspend blocks to hang just beneath the crosstrees. These would normally be lashed to the masthead, but as my masthead was getting very 'full' I cheated by seizing the strop of the block to the stays, the strop being long enough to let the block hang about its own length below the crosstrees. At the same time I changed the tie blocks which, in the instructions, were shown as 3mm singles tied to the middle crosstree on each side. I felt these were too small for the 0.5mm rope to reeve through, and that they were too tight up against the crosstrees. I therefore set up 5mm blocks with long strops that would allow them to sit more comfortably between the stays: This shot shows the 5mm tie blocks and the 3mm blocks tied to the stays at either side. The shot also shows the topgallant shrouds seized to the topmast shrouds. I nearly had kittens trimming these with my new super-sharp cuticle cutters - I had visions of inadvertently cutting through the wrong line with disastrous consequences 😬. Fortunately I didn't. The last job was turning a 3mm deadeye into the ends of the backstays and rigging them to the remaining deadeyes on the stools. This was standard stuff, but I'll just mention one variation. Despite all the care and measurement I invest in getting deadeyes to sit level I never quite manage it. The wilful little critters have a mind of their own and seem to delight in ending up all over the place. Anyway, I decided I'd been over-thinking the problem in trying to solve it so I went back to basics. I started with a simple throat seizing: Before fixing it with CA, I held the deadeye in place then just moved the rope through the seizing in the direction needed to get the deadeye to the required height. At that point I CA'd the throat seizing and then added the two round seizings. Luck or not, it seemed to work as the deadeye came level with the topmast backstay deadeye next to it: I can imagine dozens of people reading this and thinking "but isn't that the obvious way to do it?" As I say, I sometimes tend to over-think and over-complicate things. All I need to do now is figure out how to stop the deadeyes twisting when I rig the lanyards. Other people seem to get all their deadeyes to sit nice and parallel to the hull; with me it's more random. Next, on to the topgallant stays. Derek


- 725 replies
-
- 7
-
-
- vanguard models
- speedy
- (and 1 more)
-
A month?!! I reckon you must be like Santa, with an army of little elves on hand to help🤣😂 Seriously though, thanks for a great log and superb photos. Another stunning model that will need to go on this year's Christmas list (if I ever get round to finishing Speedy and starting the Duchess!).
- 355 replies
-
- 6
-
-
- vanguard models
- Sphinx
- (and 1 more)
-
John, the original link I used was in Glenn's Cheerful log (here). I just searched Amazon UK for a similar product. Derek
-
They certainly are great value and thanks again to Glenn and Ryland for recommending them. They're so much better than my old ones that I've been going back over some of my rigging and re-trimming annoying little bits of line. They really do cut perfectly flush but you have to be super careful - I've just spoilt 10 minutes work by cutting through a topgallant shroud as well as the seizing I was trying to trim!
- 725 replies
-
- 1
-
-
- vanguard models
- speedy
- (and 1 more)
-
Oops! Not for the first time I’ve mixed up the two Glenns. Log duly edited.
- 725 replies
-
- 1
-

-
- vanguard models
- speedy
- (and 1 more)
-
They're PE from the kit, but proper scale and when painted they look round and realistic, not flat. Much better than the usual kit offerings. Me too (although 'need' is stretching it a bit!) My lips are sealed😬🤐 .
- 725 replies
-
- 2
-
-
-
- vanguard models
- speedy
- (and 1 more)
-
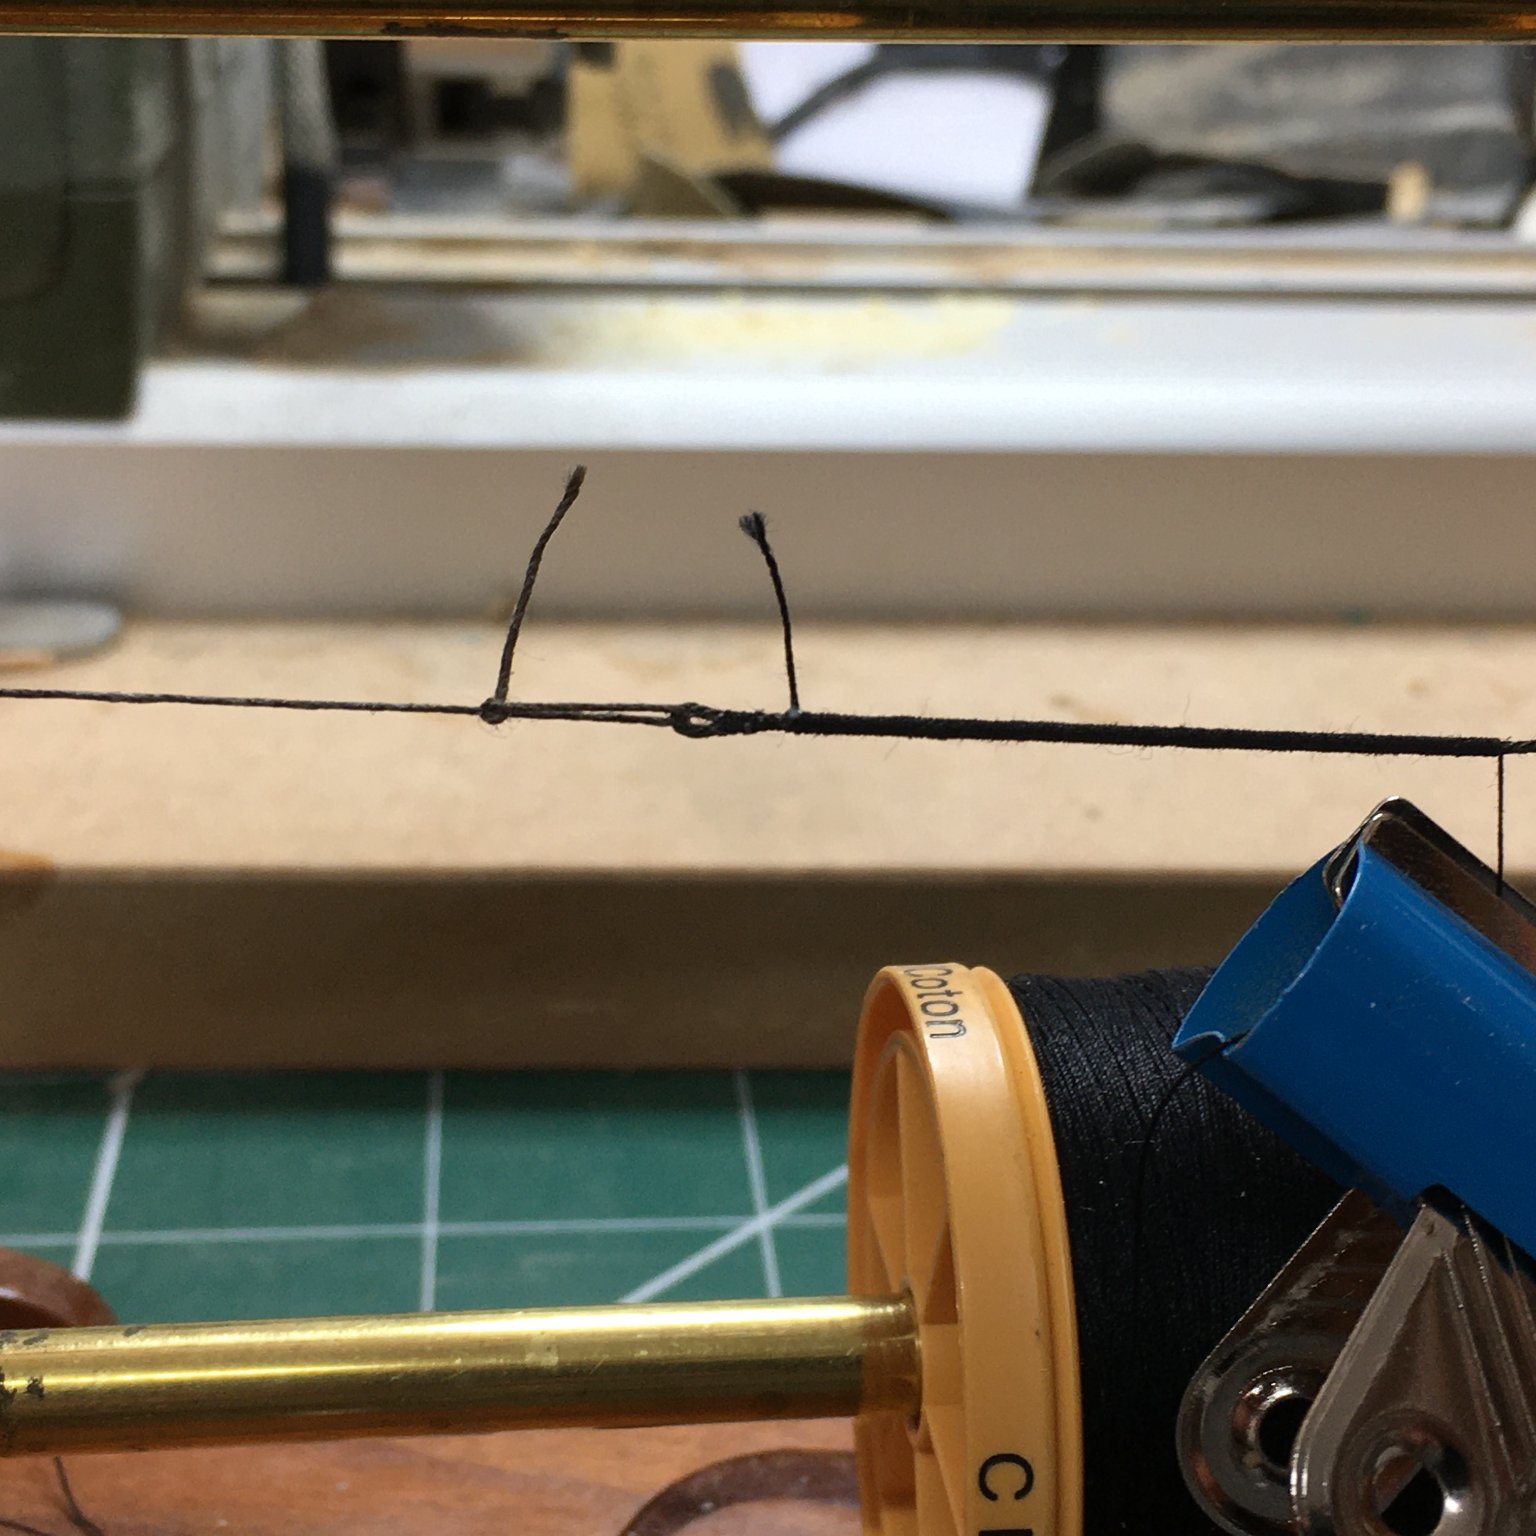
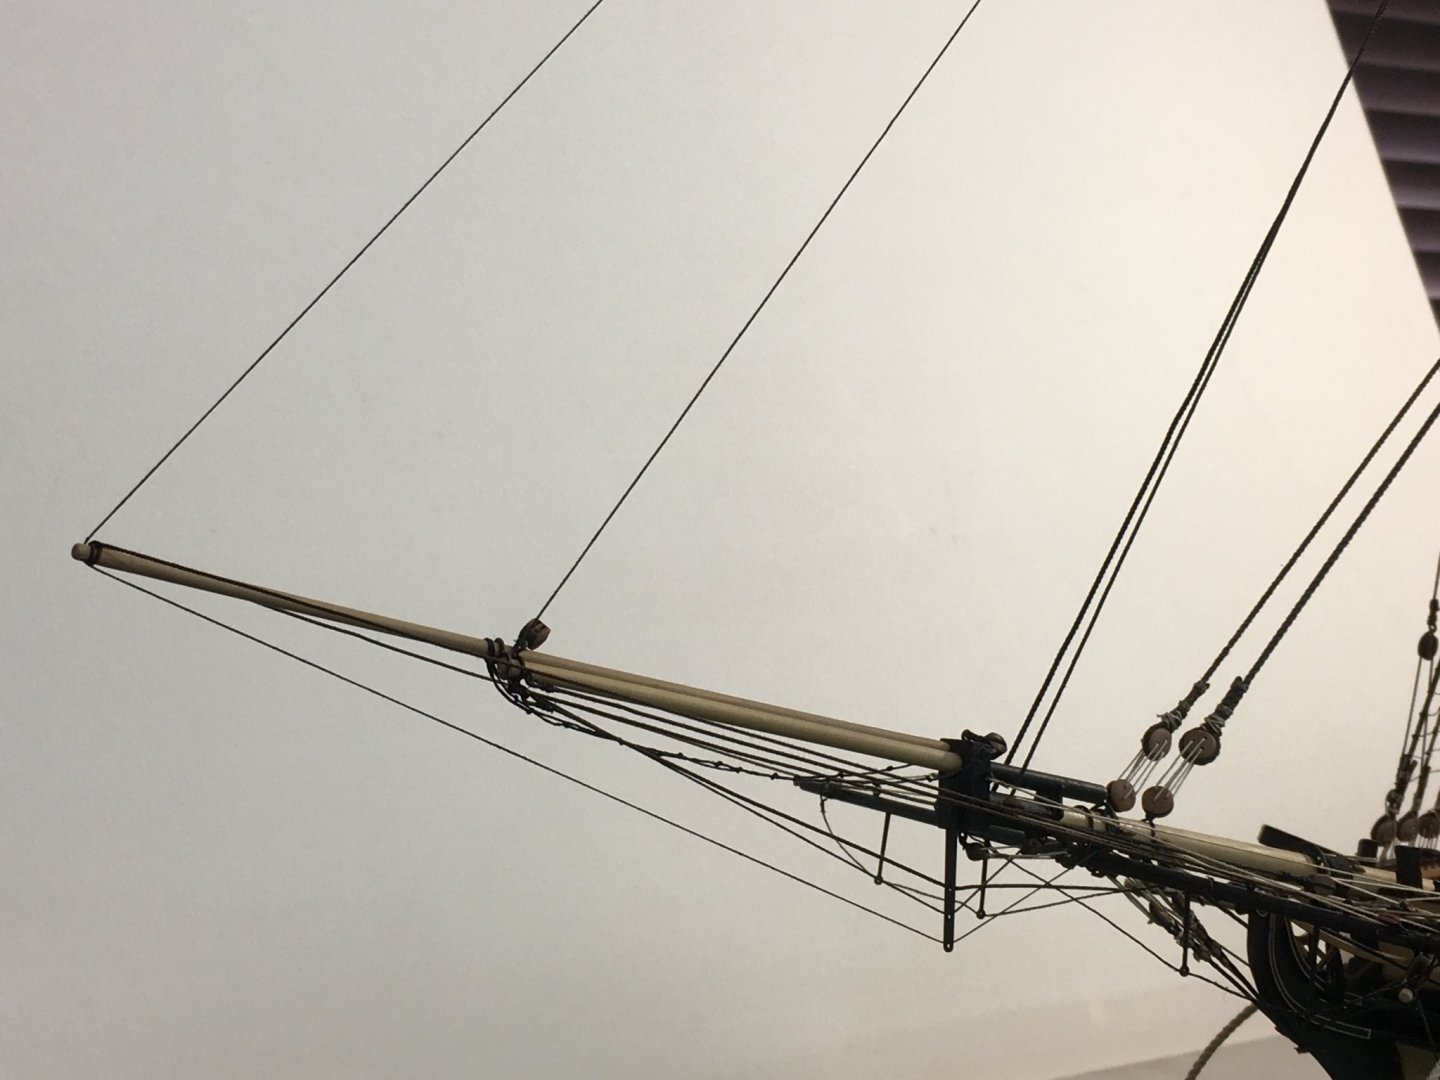
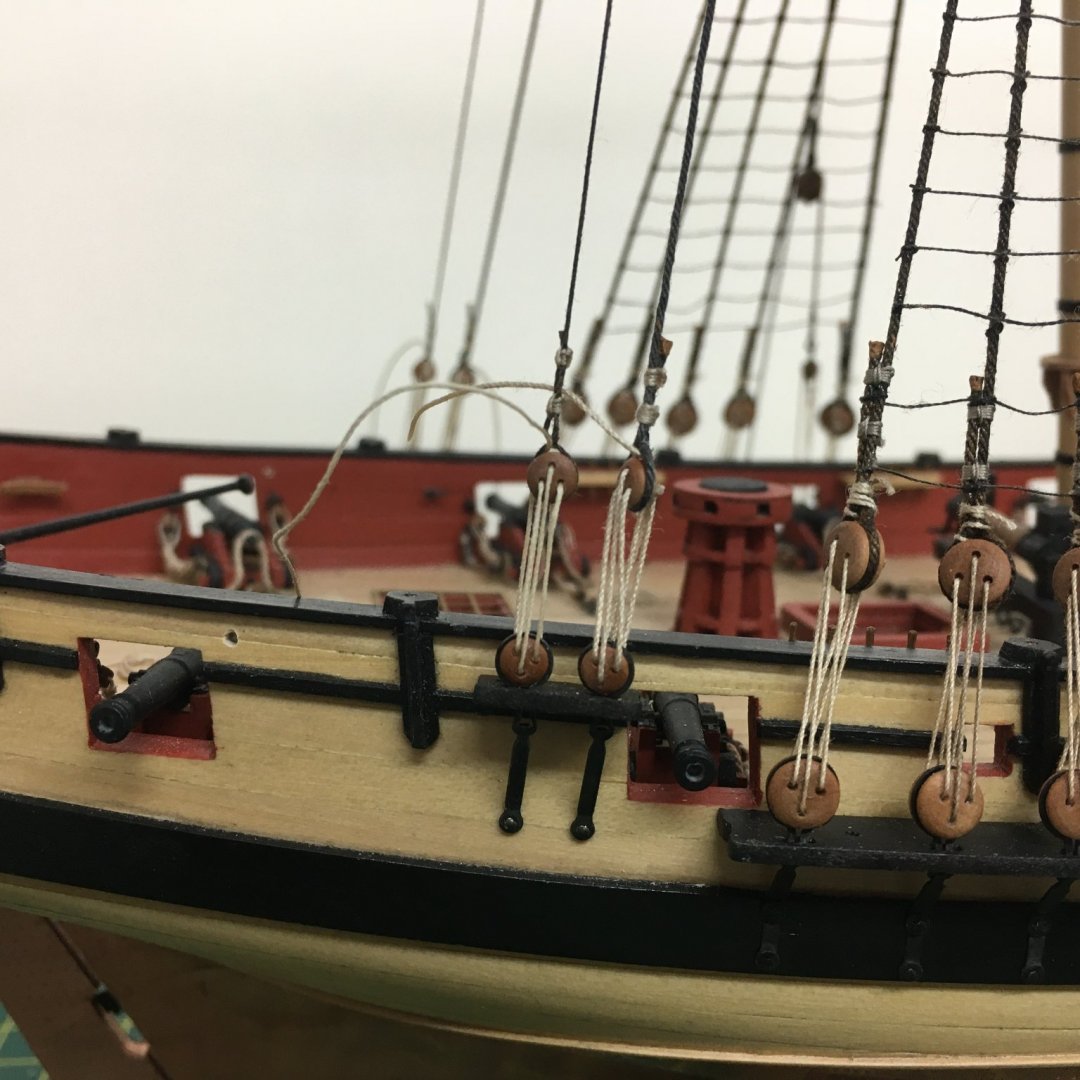
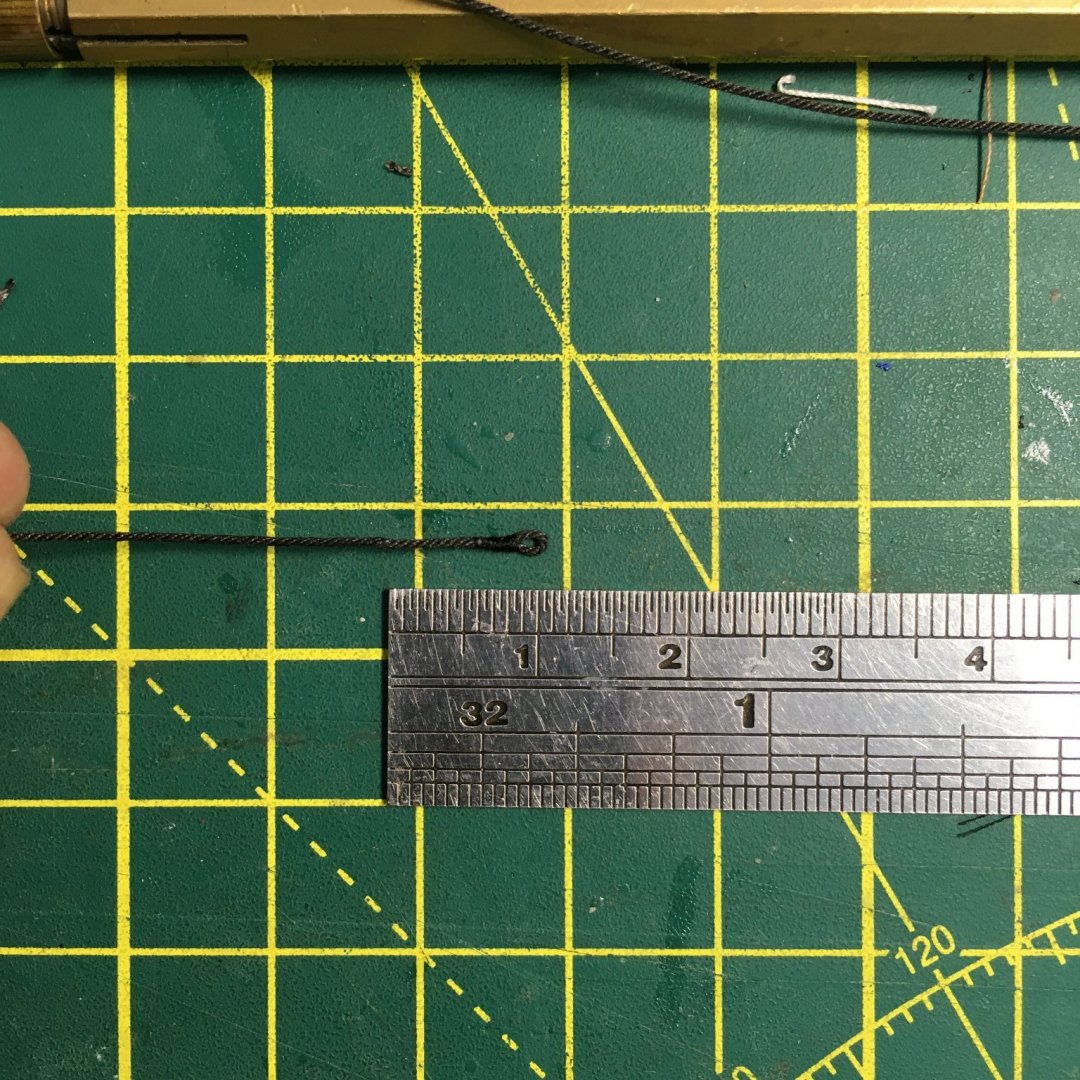
Fore topmast stays Thanks as always for the likes and kind comments - they are very much appreciated. I finished rigging the fore topmast stay and preventer stay today - I'm enjoying this stage of the build and it feels like the end of the standing rigging is in sight. There were no new features or techniques in rigging these stays so I won't go into much detail. The served mouse and eye arrangement at the masthead was standard, as was the lead through the bees. I've seen different ways of rigging the other end of these stays, for example with deadeyes and lanyards or with fiddle blocks, but I was happy to go with the kit plans which showed a 4mm double block seized in the end of the stay and a 3mm single block hooked to an eyebolt in the bows. Here's how Speedy looks with all the topmast stays and backstays rigged: With most of the standing rigging in place I'll tension all the stays which should tidy up all those lanyards and other lines. One thing worth noting is yet another tool to add to the collection. Glenn (@glbarlow) pointed me to some cuticle cutters that Ryland Craze had recommended for trimming rigging. I ordered them yesterday from Amazon (here), they arrived today and they're superb. Previously I'd used Xuron micro-shears which I thought were the best flush cutters I could get- here they are alongside the new pair: The main advantage of the new cutter is that it cuts totally flush, even in the tightest of spots. As Glenn says in his Cheerful log, they're so sharp you can cut through wooden blocks if you're not careful. Whilst on tools, I ordered the tube cutter Glenn recommended earlier in this log and it's also a considerable improvement over using the table saw. I'll show it in more detail shortly when I need to make some more thimbles. Topgallant and royal stays next. Derek

- 725 replies
-
- 6
-
-
- vanguard models
- speedy
- (and 1 more)
-
Oops! With apologies to Chris, I've just spotted a very clear diagram on the plans showing exactly how the stays should be rigged. The same method I used, with two minor variations - the use of a double block rather than a fiddle block, and the running end of the tackle belayed to the bitts rather than hitching round the tackle (my preferred method). I'll edit the log accordingly. Derek
-
Beautiful, neat work as always Glenn. Btw, I’ve now got the tube cutter you recommended on my Speedy log and it’s a game changer. Thanks! Now to look for a cuticle cutter...
- 778 replies
-
- 1
-
-
- cheerful
- Syren Ship Model Company
- (and 1 more)
-
Thanks Glenn. On the nautical knowledge front, I'm still learning! 🙂
-
I seem to have started some hares running with this comment. Perhaps I should have said 'not fixed' rather than 'not permanent', as evidenced by them being set up with blocks and tackle rather than deadeyes and lanyards? They were 'shifted' to meet the needs of the ship by hauling alternate sides tight as the ship tacked. At the same time, it's important to recognise that usage and terminology change across time and across navies - I suspect modern yachts differ considerably from 18th century warships in that regard. For the 18th Century English Navy James Lees is one of the foremost experts, and in The Masting & Rigging of English Ships of War 1625-1860 he says "Shifting backstay size is given in the rigging tables, but this would not be seen generally as it was only used to give additional stay to the mast when sailing , and would be unrove in port or whenever it was thought fit" [my emphasis]. So are shifting backstays permanent or not? You pays your money and you takes your choice. Semantics aside, I'd be interested to know if I got my interpretation of 'clenched' right?
-
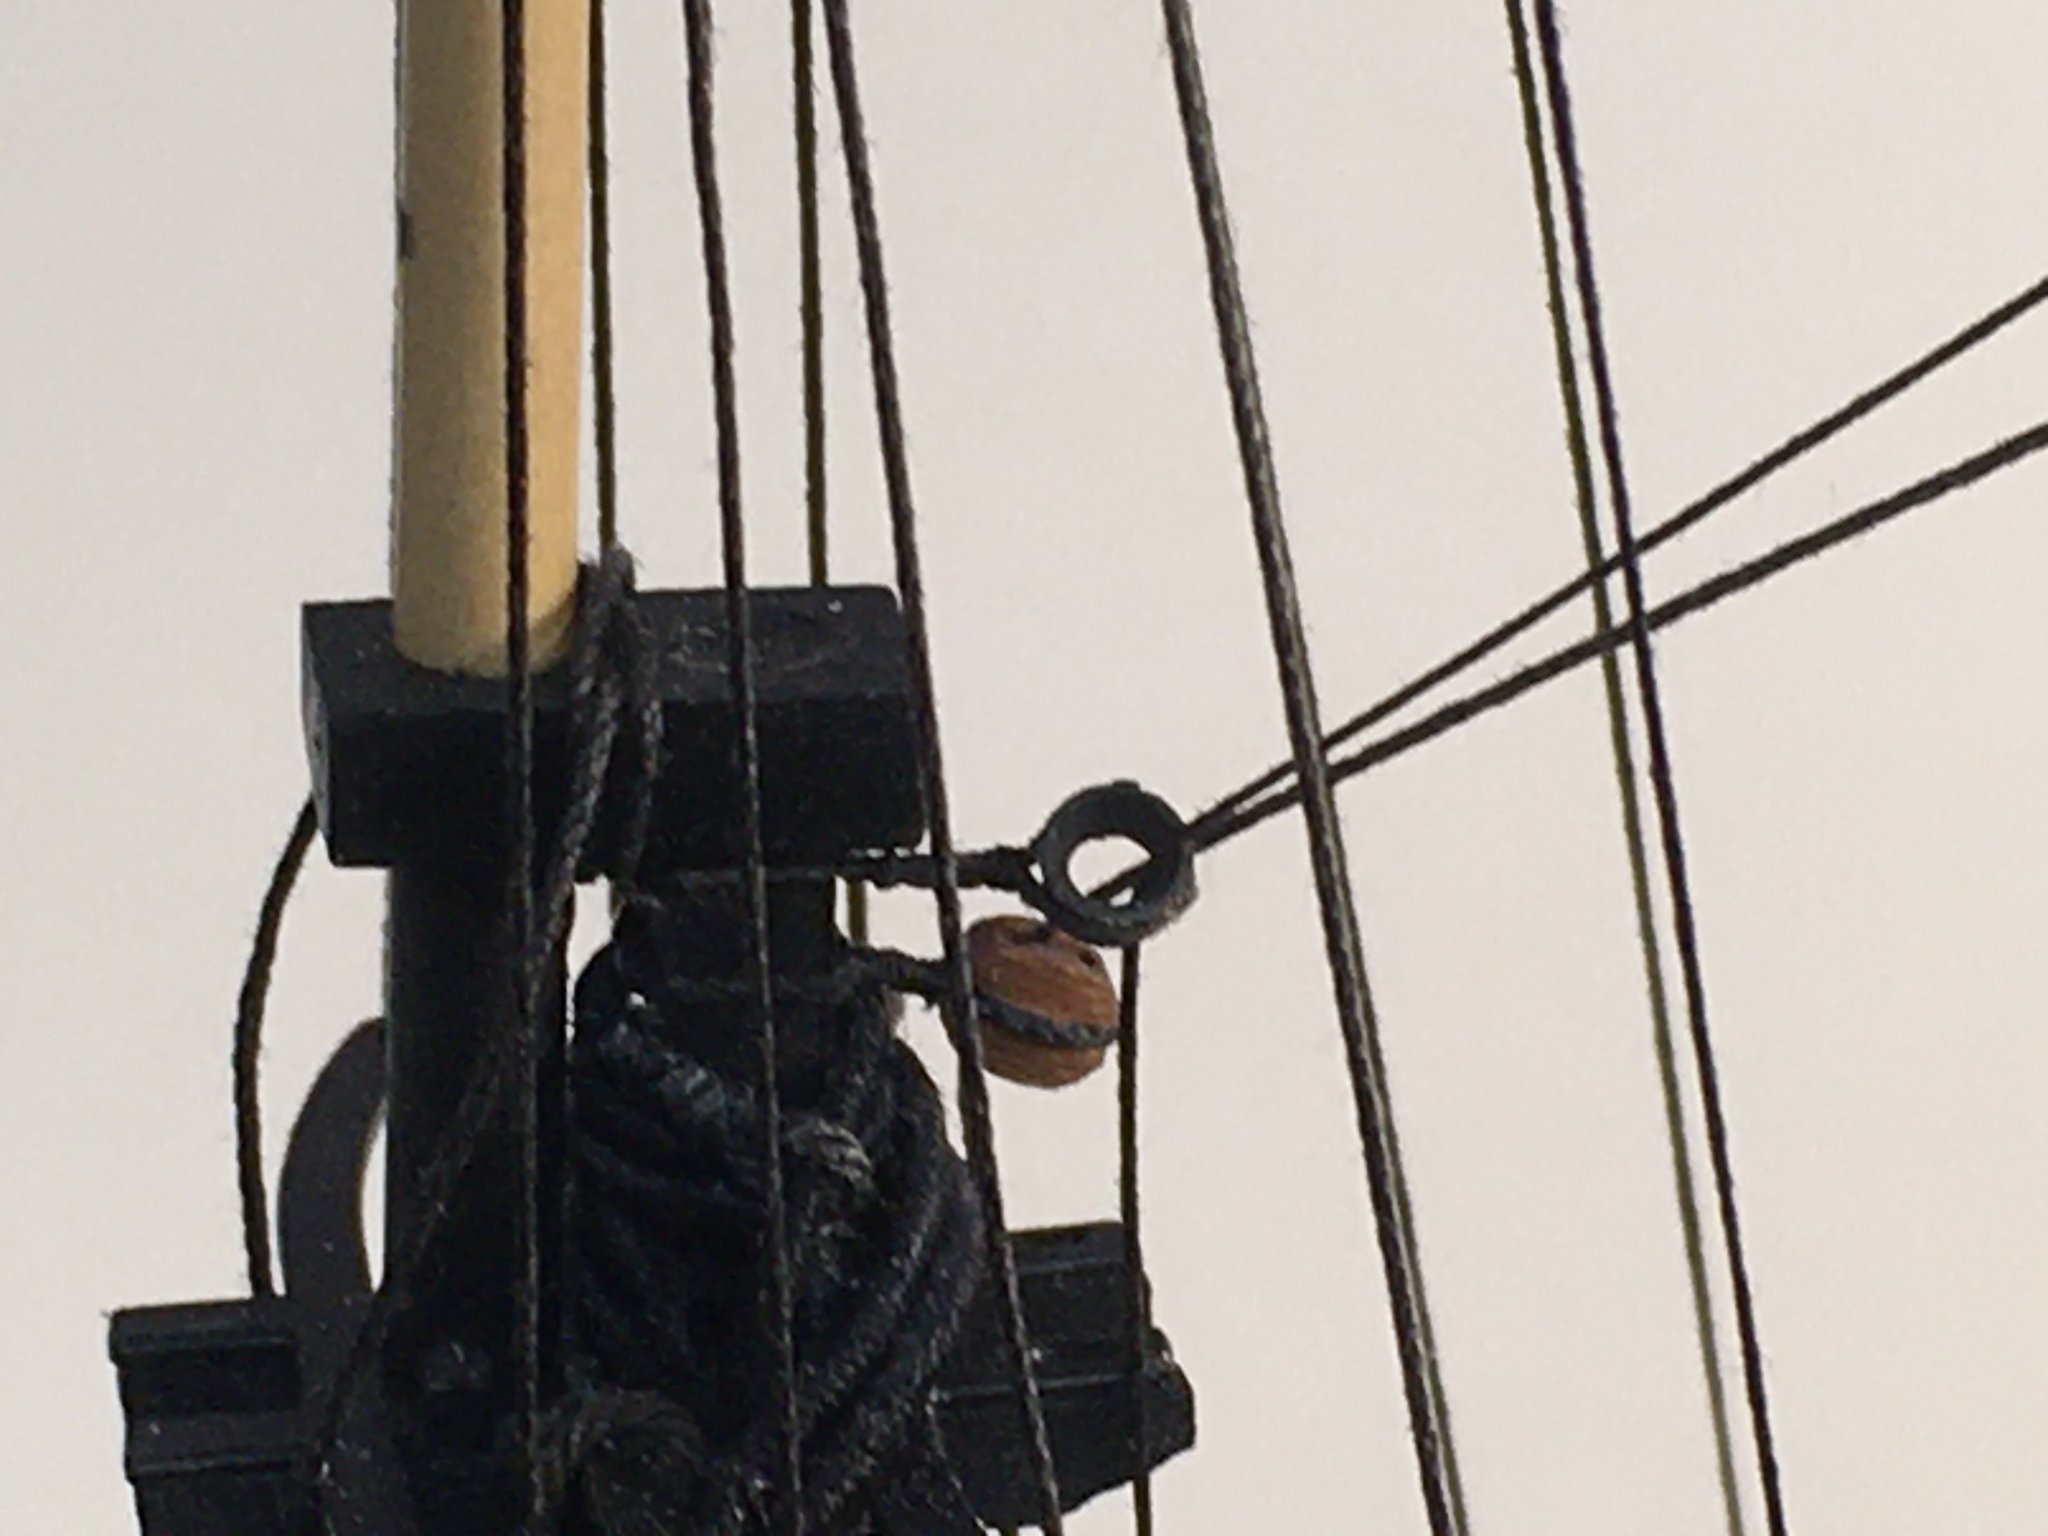
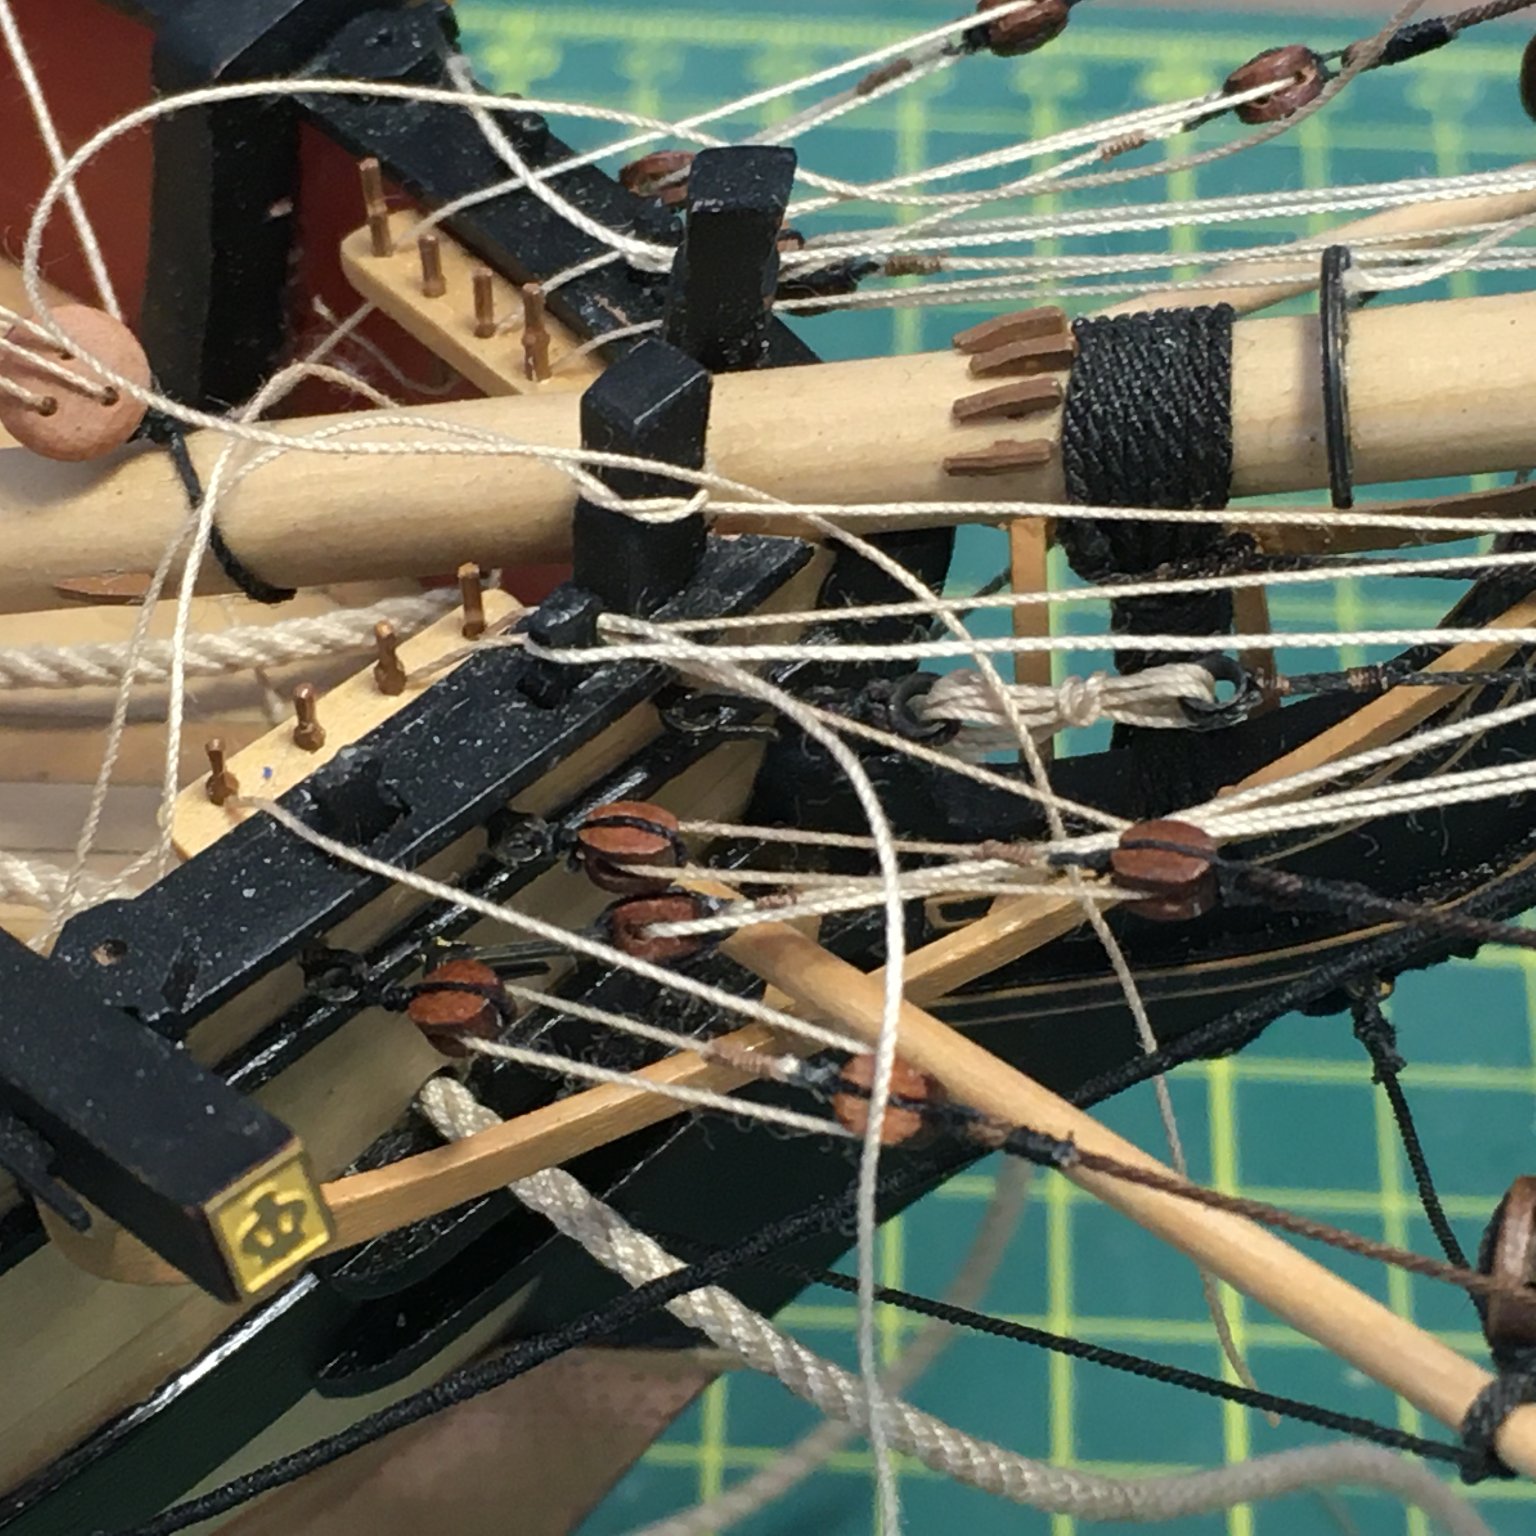
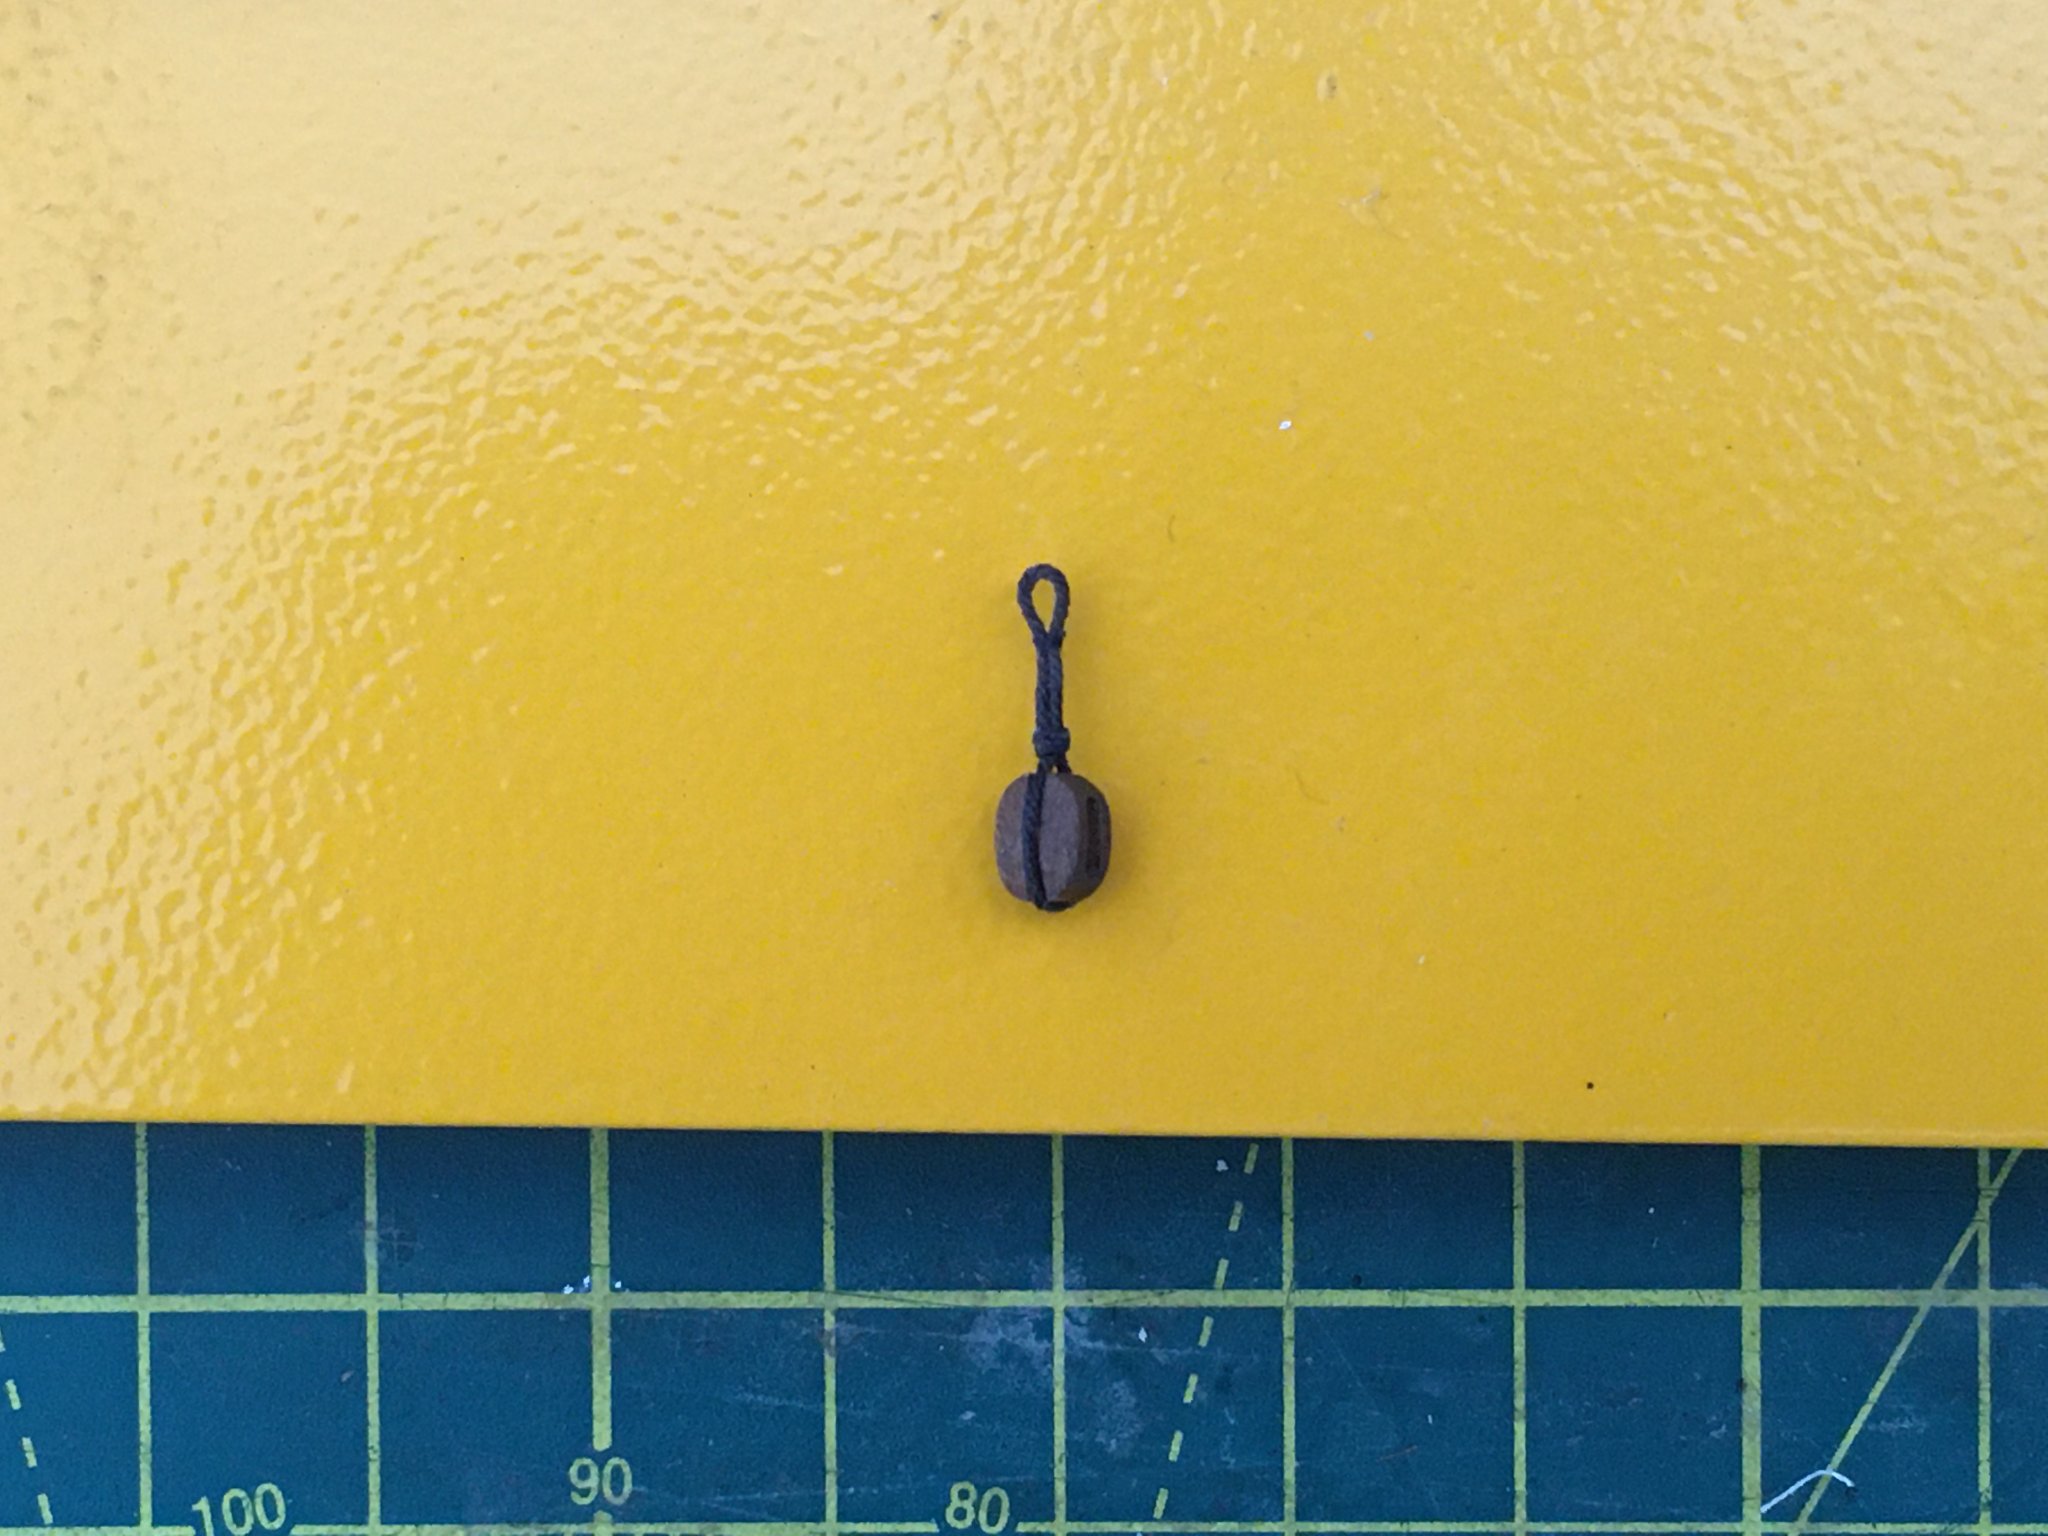
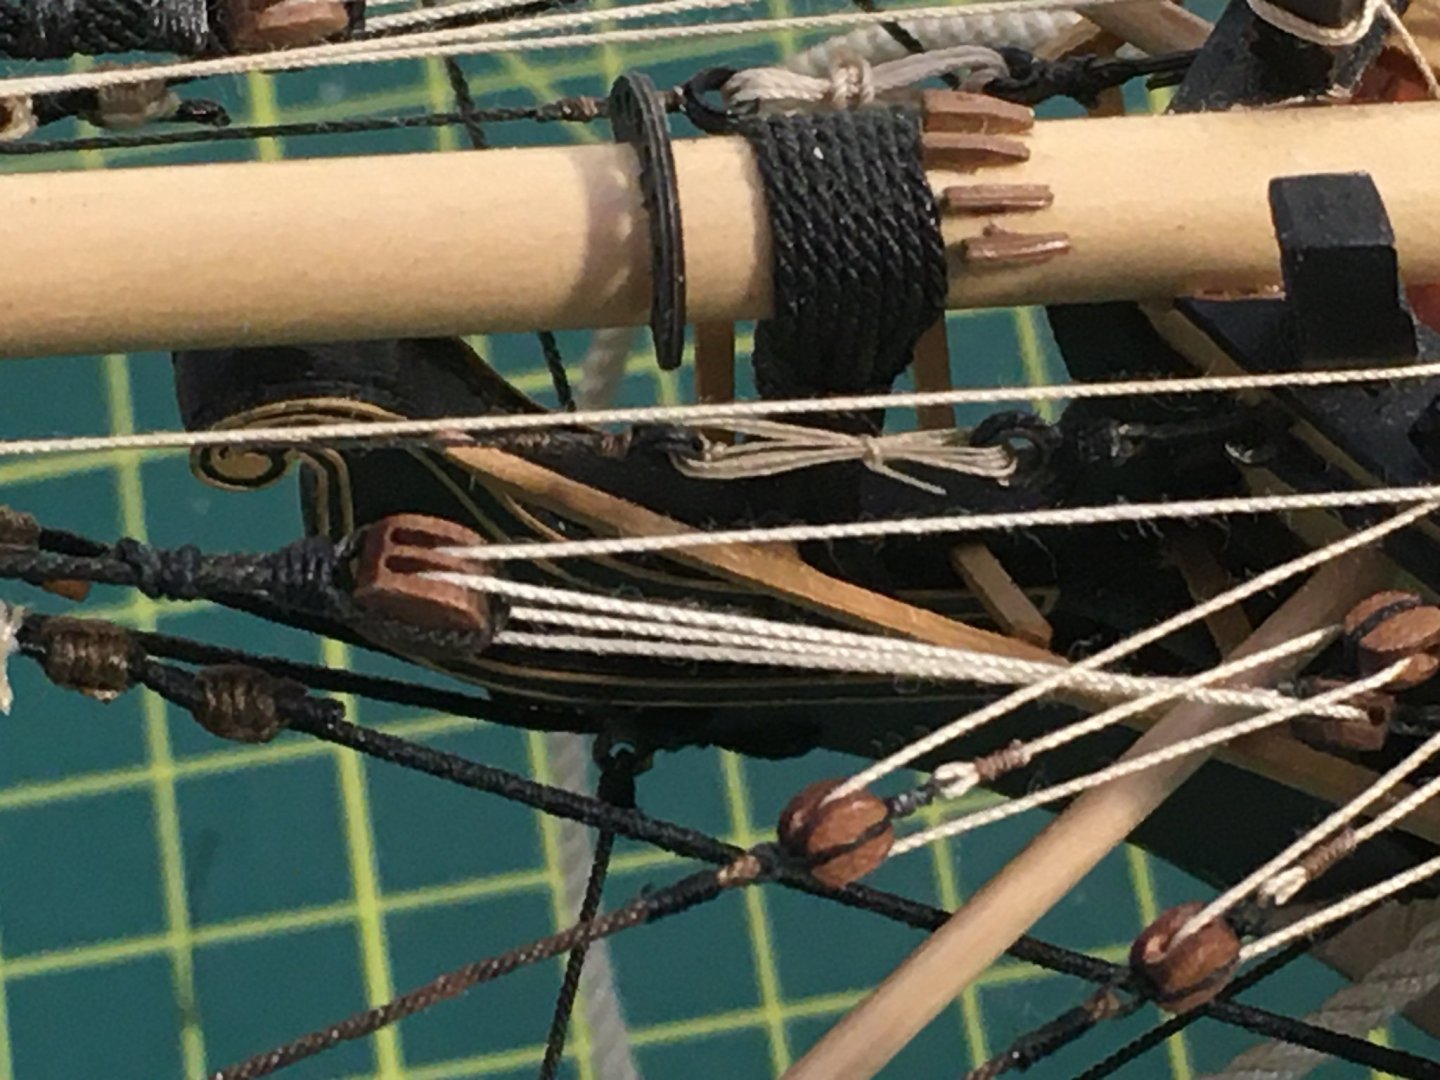
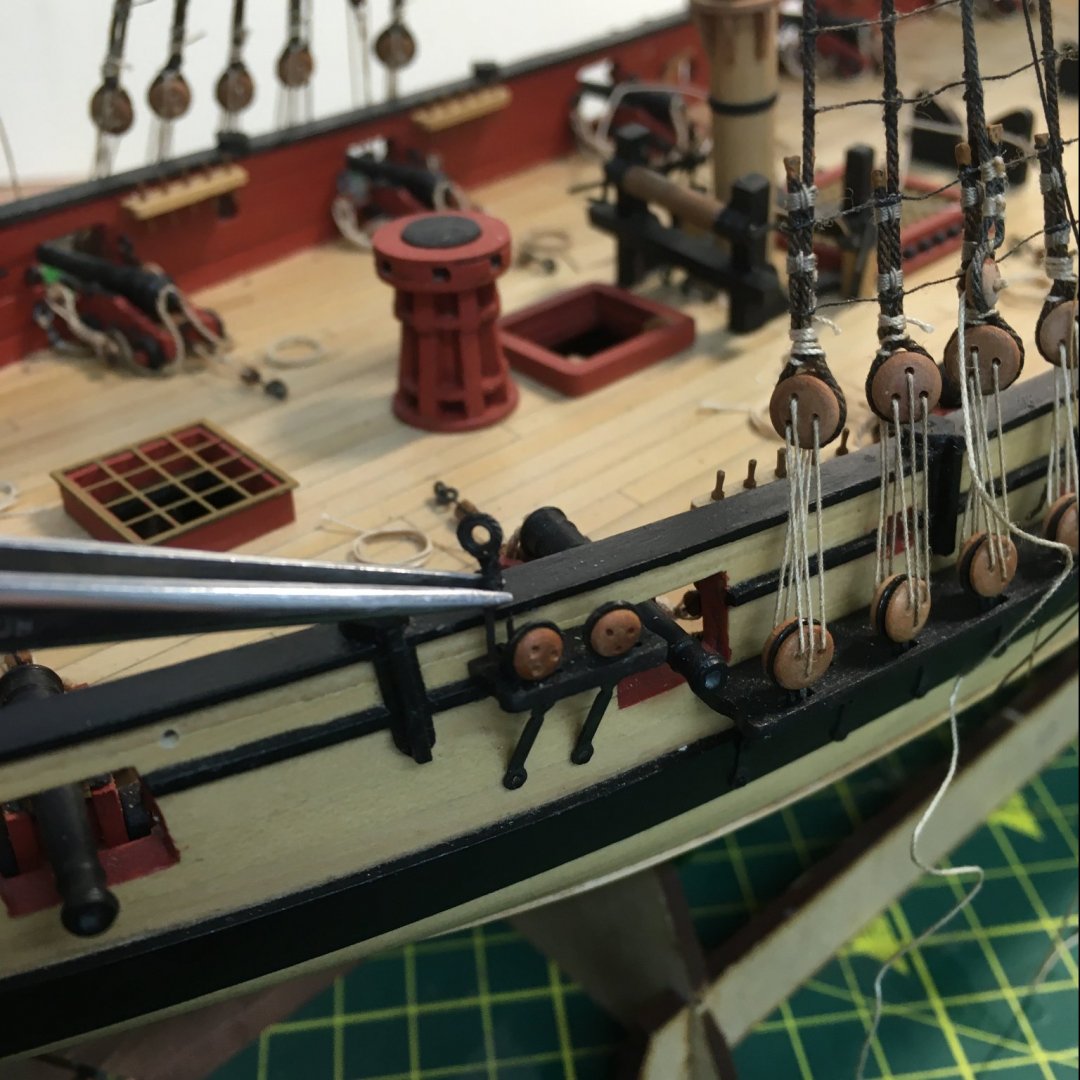
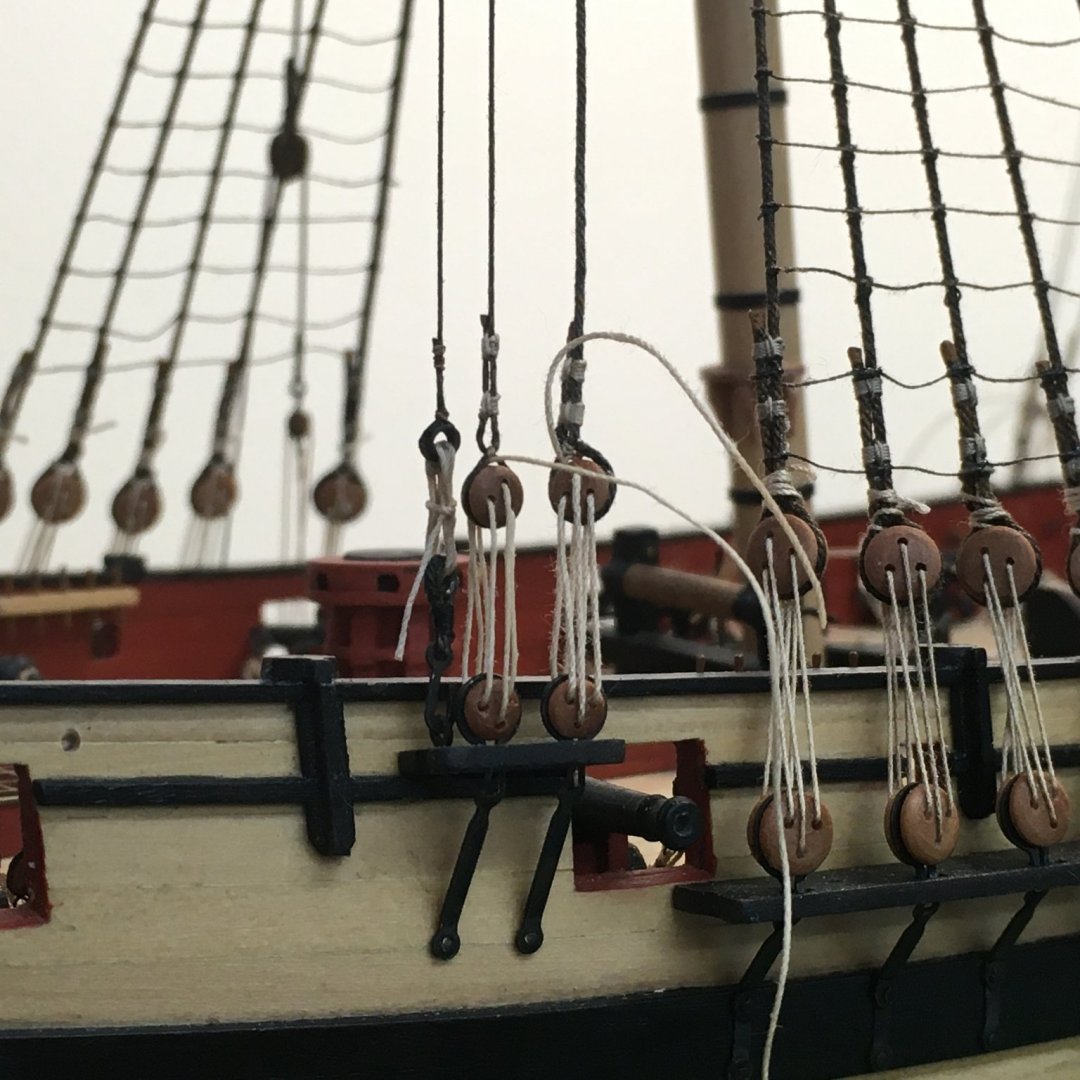
More stays Finishing rigging the four shifting backstays was quite straightforward, albeit quite a lengthy job with 12 blocks and eight eyes required. The picture shows the arrangement at the port side of the foremast, with the explanation following: A 5mm single block is seized into the end of the backstay - near the top middle of the shot. A runner (0.5mm tarred line) reeves through the block, with the aft end seized to an eyebolt in the channel between the second and third deadeyes. A 3mm single block is seized into the other end of the runner, with a second block seized to an eyebolt just aft of the first deadeye. I formed a ring on lower end of the upper 3mm block in the manner I've previously described, to which the fall (0.25mm running rigging) is seized. The fall reeves through the lower 3mm block, back up through the upper block then down again. In the words of one reference (Longridge) "the fall is expended round its own parts". A lovely and concise way of saying the spare end wraps around the tackle. I'll probably finish it with a hitch round the tackle when I finally tension all the rigging. Topmast stays & preventer stays These stays are normally half the diameter of their lower mast counterparts, which suggests 0.65mm & 0.5mm for Speedy. I chose to go with 0.75 and 0.5mm line which I felt was close enough. Each stay was served and set up with an eye and mouse in exactly the same way as before (here), just with correspondingly smaller mice. Starting at the main mast I differed slightly from the kit plans by putting the preventer stay over the masthead first. This seems in line with reference sources such as Lees. The preventer stay reeves through a 5mm single block seized to the foremast just below the catharpins, and the stay through a similar block seized round the foremast head above the shrouds. NB I should have drilled the blocks out to accommodate these large diameter stays before fitting them - doing so in situ was tricky and curse-inducing 😡. I departed very slightly from the plans when it came to rigging the main topmast stays at deck level. The plans show each mainmast stay ending in a 4mm double block rigged to a single block hooked to an eyebolt abaft the foremast - the preventer stay on the port side and the stay on the starboard. The running ends of the tackle then belay to the bitts. I decided to use a long-tackle ("fiddle") block rather than a standard double, and to hitch the running end round the tackle. I felt that both these minor variations were more in keeping with the sources I've read (and I fancied having a go at making my own fiddle blocks!). There was nothing fancy about making the fiddle blocks. Each block had to be 6mm long, so I started with a strip of box, 1.2mm by 3mm, drilled holes for the rigging line, shaped the block with swiss files then cut it to length. The result doesn't pass very close scrutiny, but once it's seized into the stay it doesn't look too bad. I used one of the PE hooks for the 3mm block - it looks slightly out of scale in the first picture but again, when it's on the model I think it's acceptable. I really must get some wax on that line - the fuzziness in close-up looks horrifying! And I must start dusting the model more. Fore topmast stays next. Derek

- 725 replies
-
- 11
-
-
- vanguard models
- speedy
- (and 1 more)
-
I'll follow this with interest Glenn - another kit on my potential list for the future. Have you found yet another use for the quadhands here? Certainly looks like the base!
-
Thanks Theodosius. I’m glad you’re finding my log useful, and hope you’re enjoying building Speedy as much as I am. Derek
-
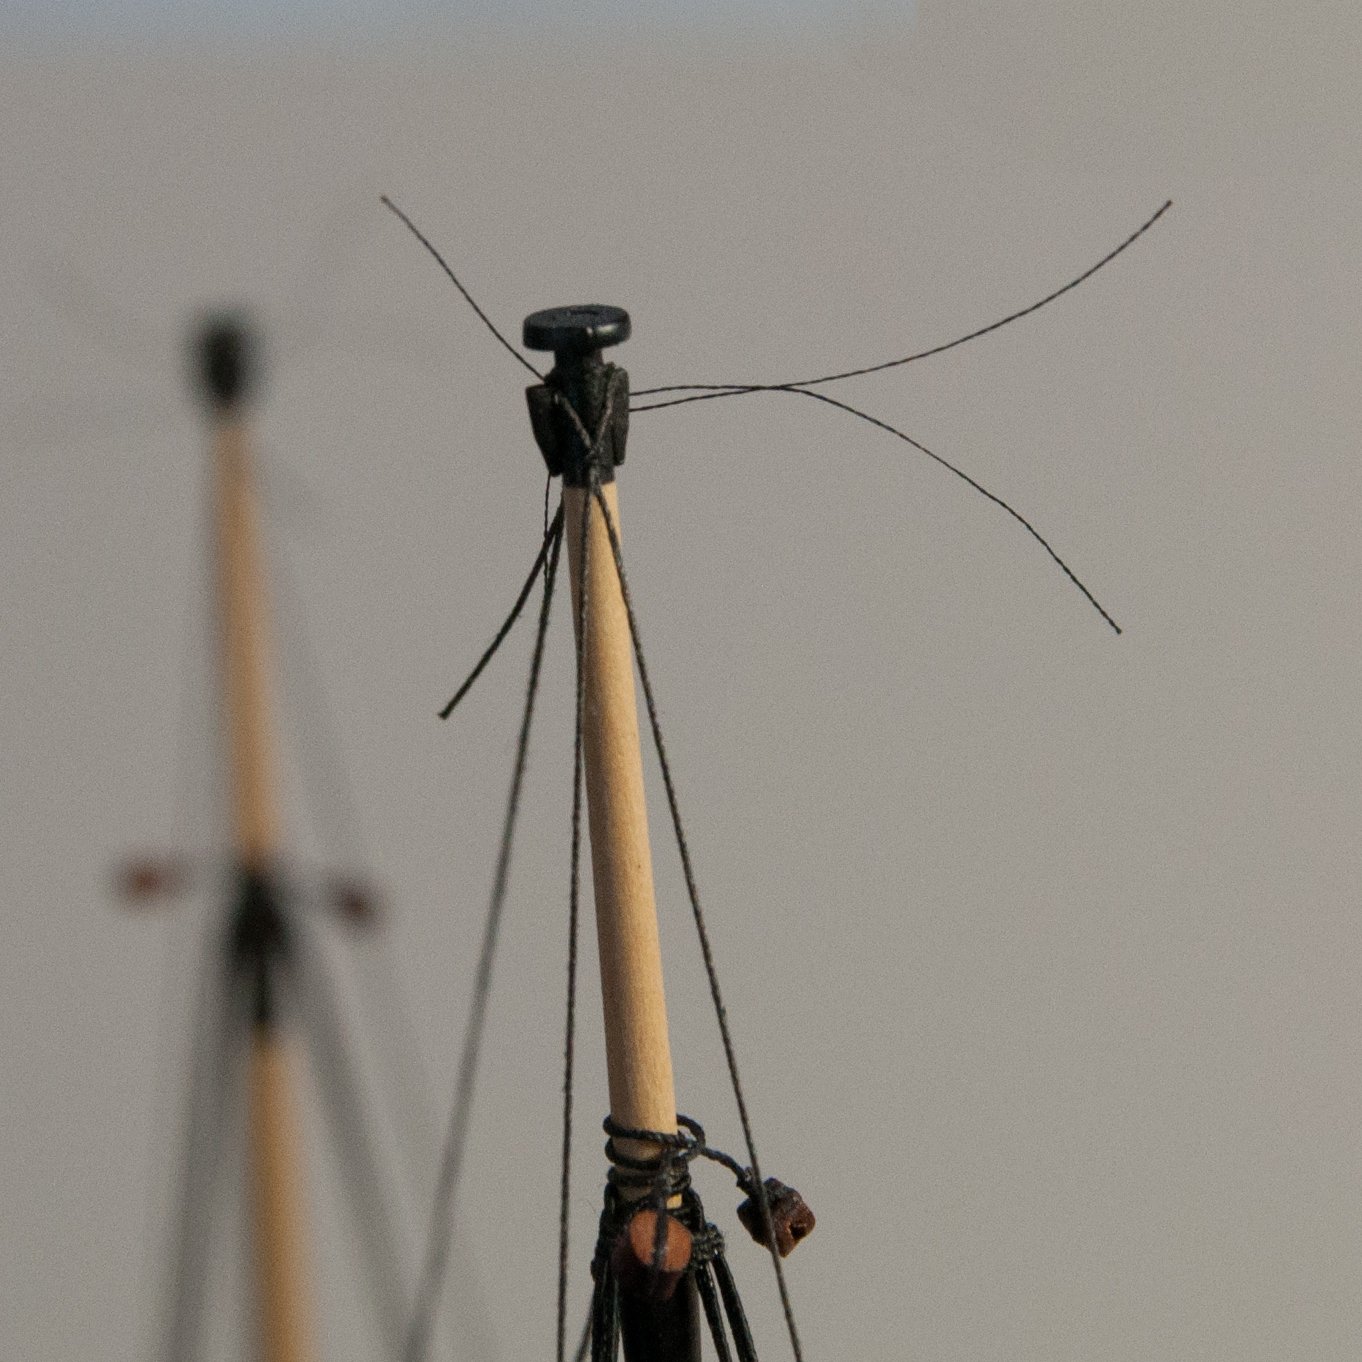
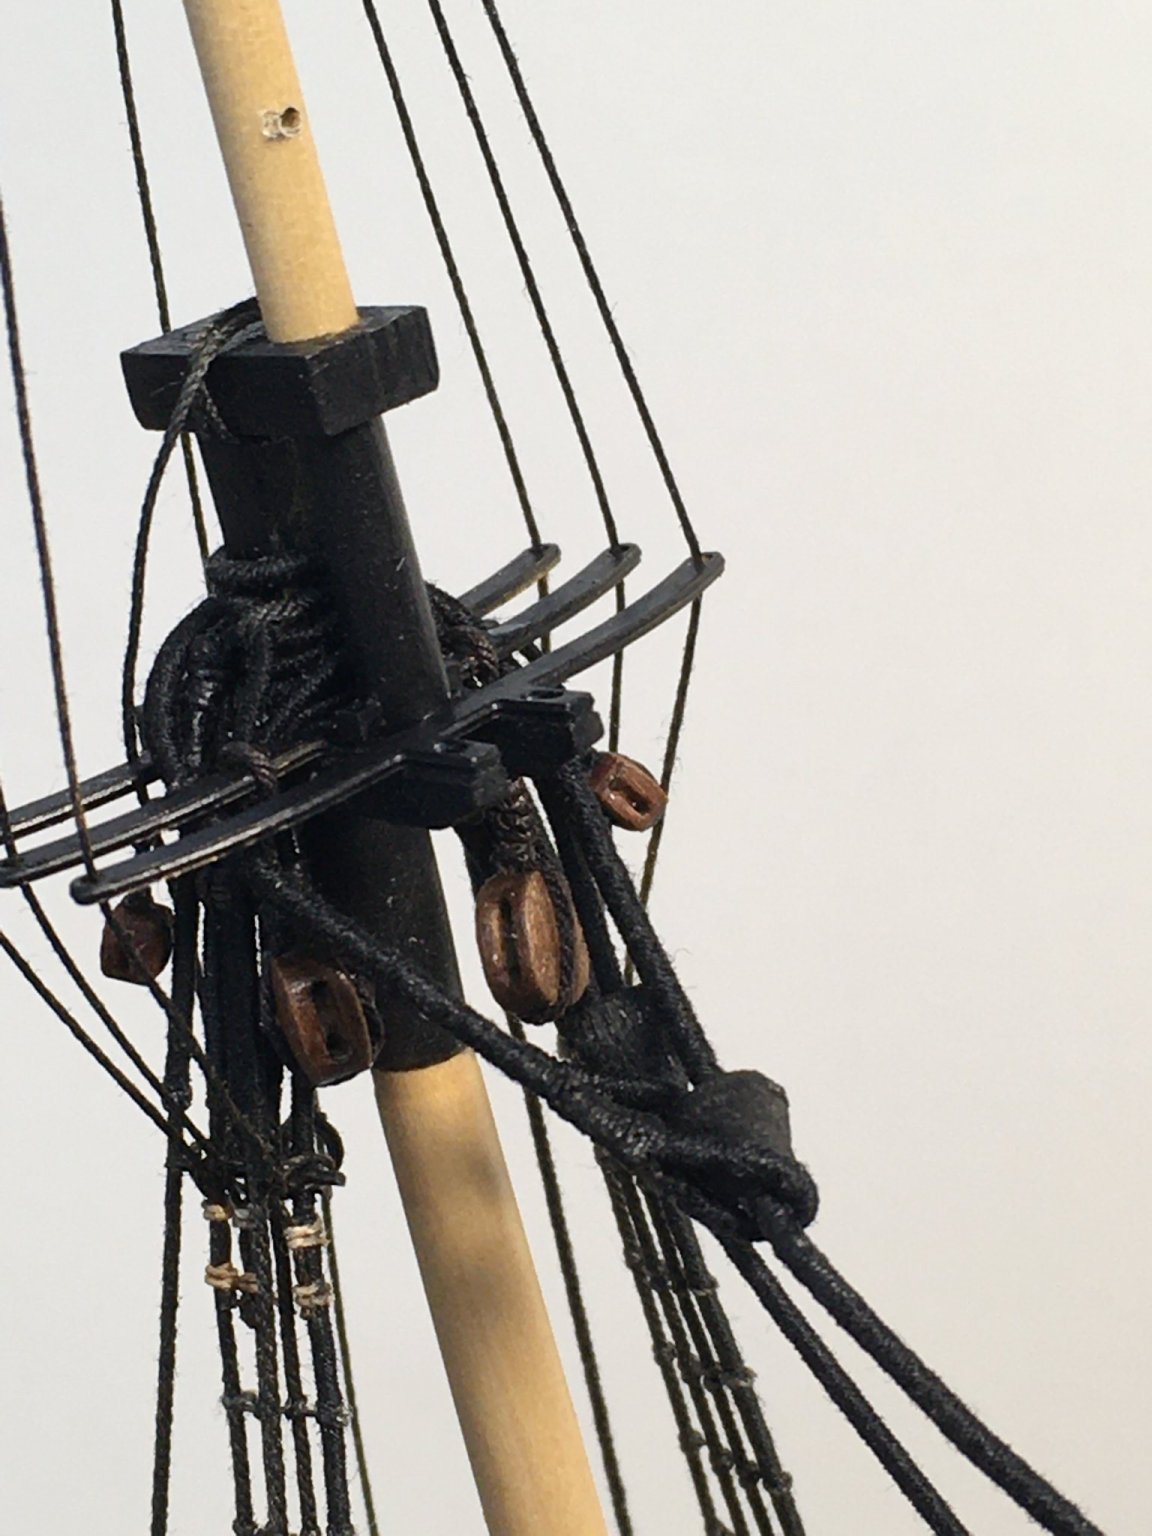
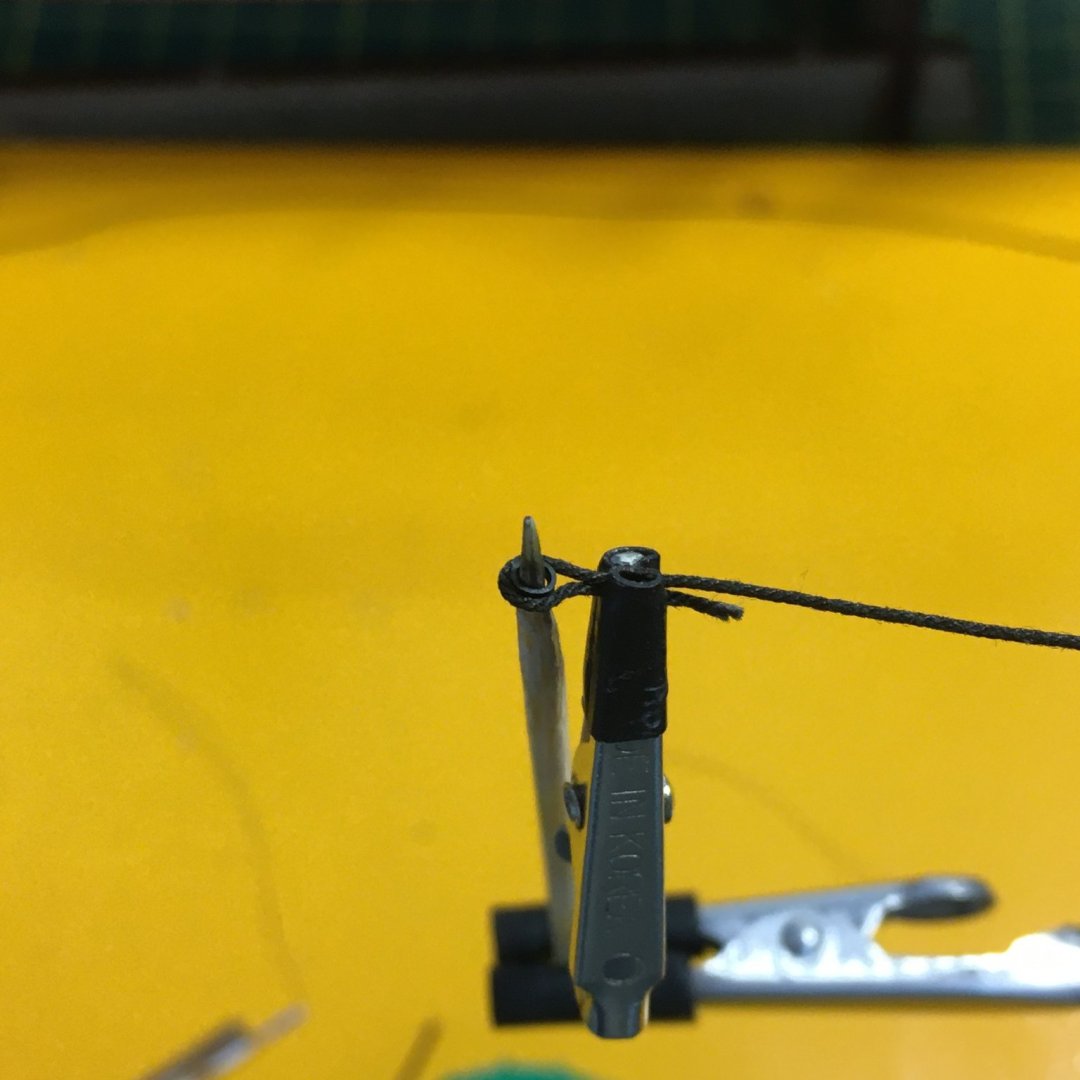
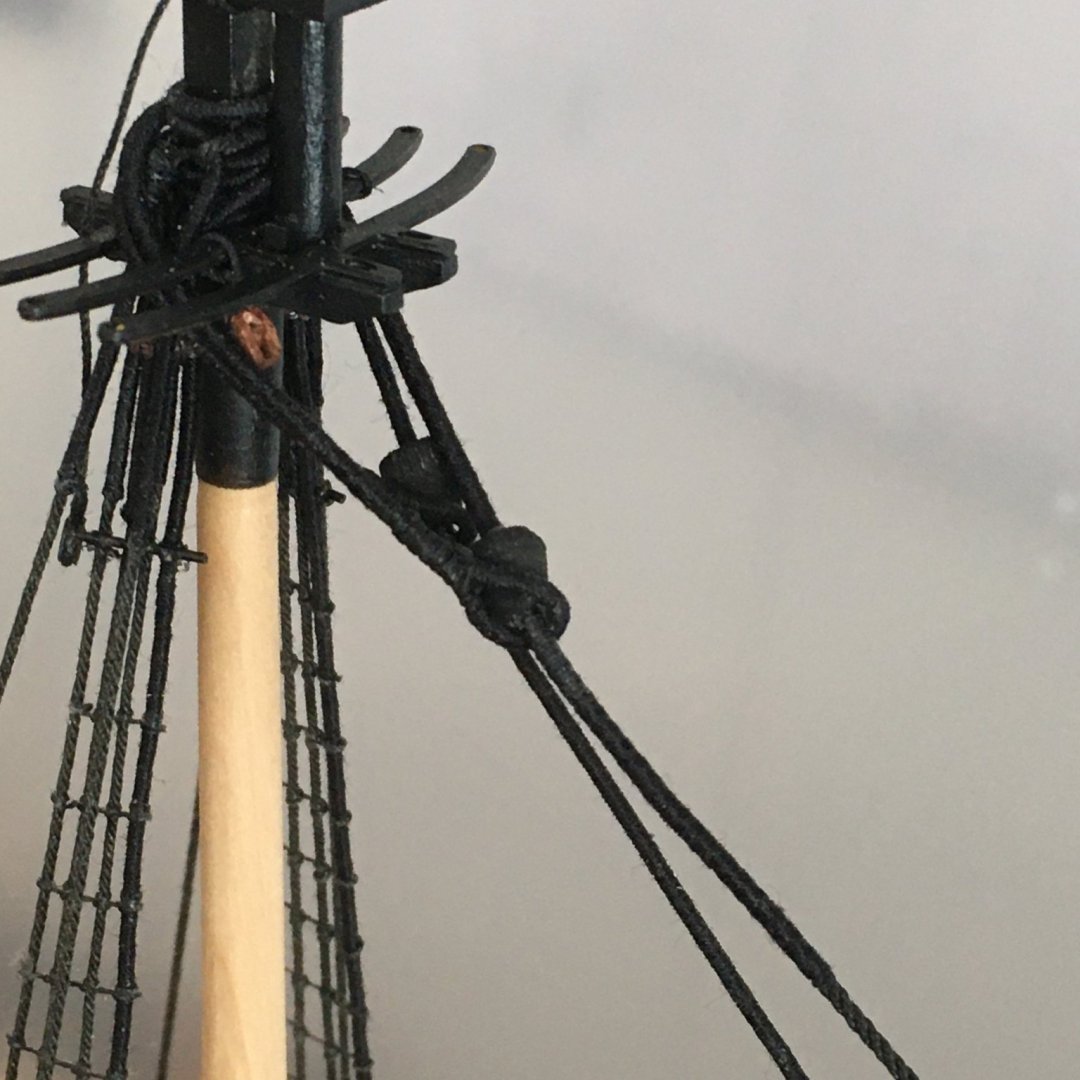
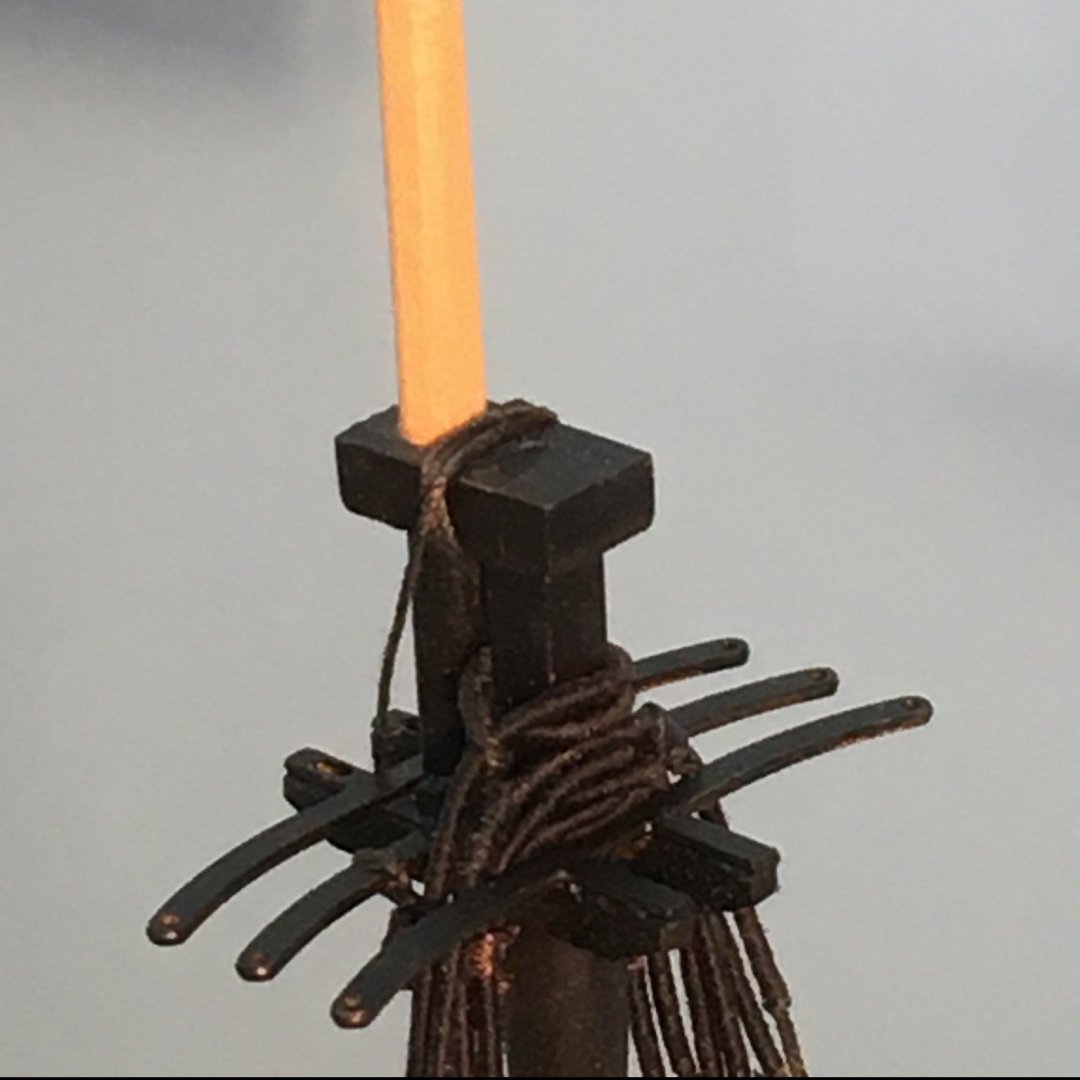
Shifting backstays Speedy carried shifting backstays on both masts, fitted after the standing versions. According to Longridge's The Anatomy of Nelson's Ships, shifting backstays were clenched individually to the topmast heads. I'm not 100% sure from the references I've found, but I think 'clenched' in this context this means fastening the backstay round the masthead in such a way as to facilitate removal (as the name suggests, shifting backstays were not permanent parts of the rigging). I started by forming a fake eye-splice in the end of a length of 0.5mm line using fly tying thread in the usual way, cutting the end at an angle to ensure a neat finish. As with standing backstays, the shifters were served to about two feet (9.5mm) below the crosstrees. Starting with on the starboard side I test fitted the stay to mark where the serving should finish, then it was on to the Serv-o-matic: The eye proved handy as the photo above shows, and all went well on the main starboard backstay. However, I must have put too much tension on the line when I did the port side as the eye pulled loose 😲. Fortunately I'd just finished serving so it was a comparatively easy job to unpick the fly silk and redo the splice. Here's both shifting backstays fitted to the main topmast head: Now I've got into the swing of it it shouldn't take long to finish rigging the backstays and then it's on to the stays and preventer stays. Derek

- 725 replies
-
- 6
-
-
- vanguard models
- speedy
- (and 1 more)