HOLIDAY DONATION DRIVE - SUPPORT MSW - DO YOUR PART TO KEEP THIS GREAT FORUM GOING! (Only 20 donations so far - C'mon guys!)
×


DelF
-
Posts
1,409 -
Joined
-
Last visited
Content Type
Profiles
Forums
Gallery
Events
Everything posted by DelF
-
 Great to see you've started Flirt Glenn. The boxwood will make a beautiful model, and I'll be following along. Thanks for the kind comments about my Speedy log. Like you, I decided that my next log wouldn't be a blow-by-blow account, but instead would focus on key steps and out-of-the-ordinary techniques. Not least because I wanted to avoid endless repetition and duplication of stuff in previous builds. However, as your first log entry demonstrates, it is not easy to be casual and brief when you are passionate about something. Your logs are so well written and illustrated, and enjoyed by so many, that I think you may just have to accept that keeping a good log is an inescapable part of an enjoyable build, and should be part of the enjoyment. Of course, I may stick to my guns and keep the Duchess of Kingston more casual 🤣. Love your granddaughter's build, btw. Derek
 -
You're right about the name Allan, but I felt that 'The Royal Yacht built for the Duchess of Kingston' was a bit of a mouthful for a log title, so I'm using Duchess of Kingston as shorthand. Interesting point about the drawings.
-
Just downloaded and skim-read the manual
-
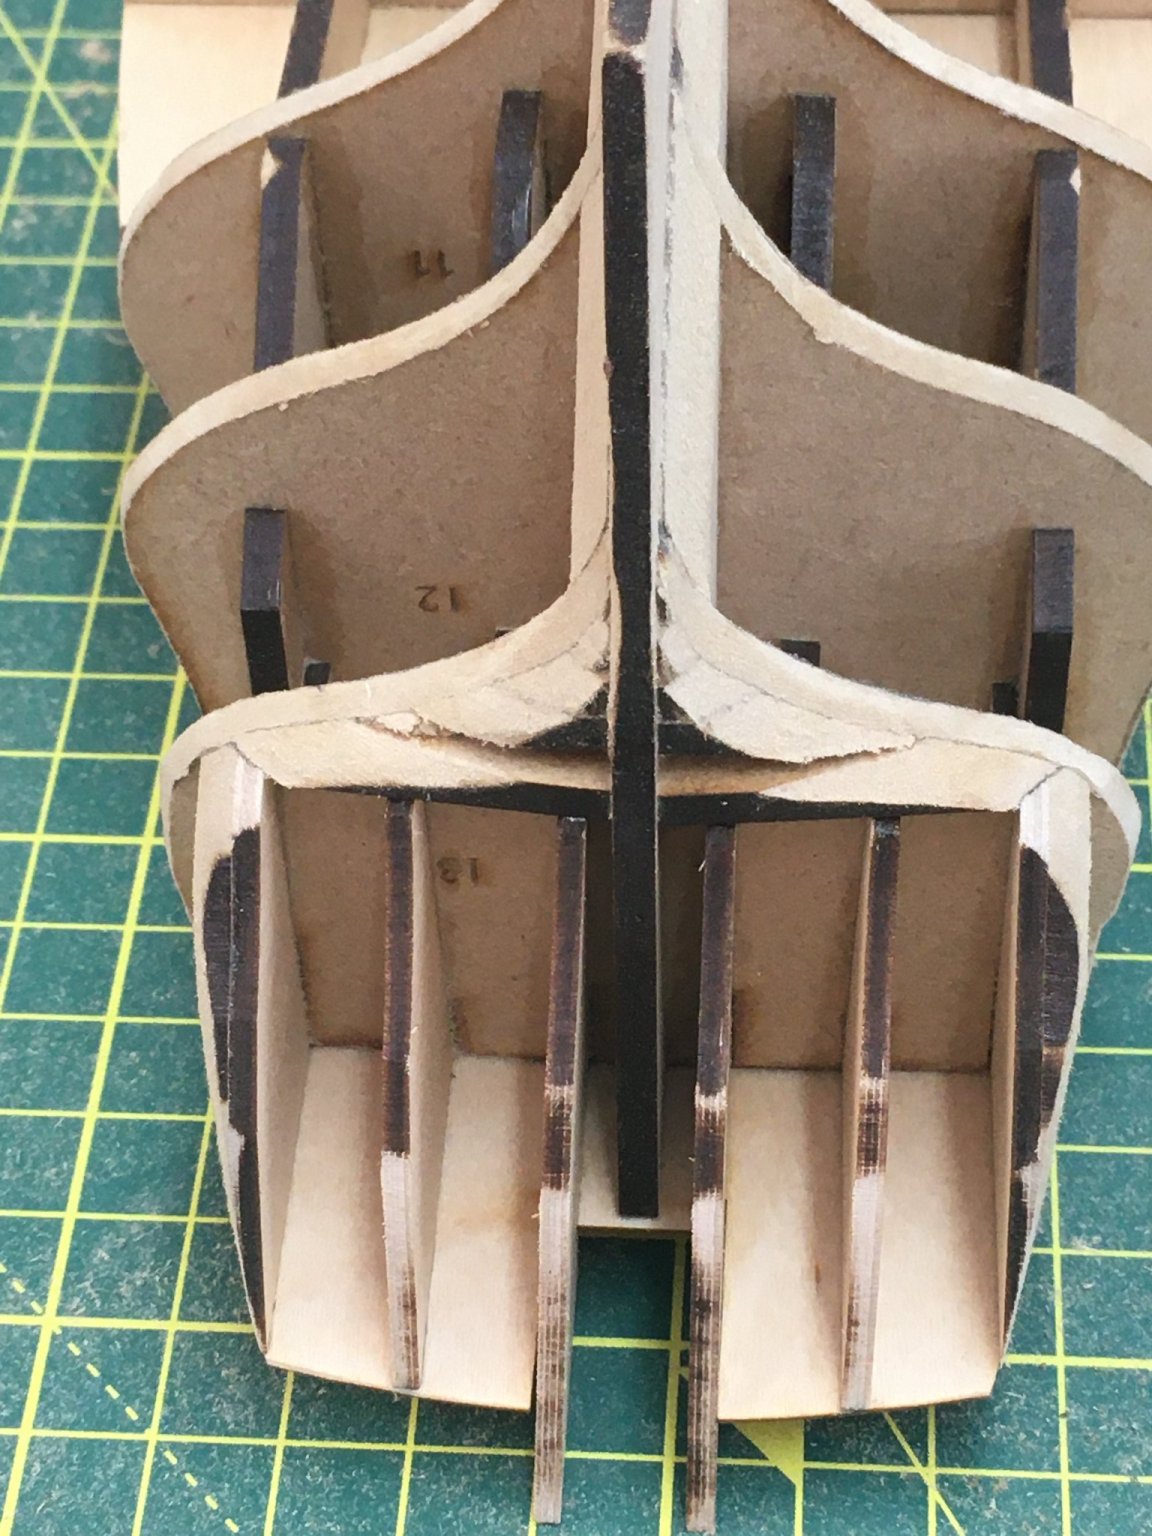
Hi Dave, and welcome to my new log. Good question! The first few bulkheads in the bow, and to a lesser extent the stern, always require a lot of sanding as the angles are so severe in those areas, which is why Chris recommends fairing them off the model initially. I took off what seemed like a conservative amount - enough to make the final fairing on the model easier but not too much. I used the photos in the manual as a guide. Nothing too scientific, and I knew that if I got it wrong and took too much off I could always add a thin shim of wood to the offending bulkhead to make it right. Once all are assembled the job becomes easier as you can run your sanding stick along the hull across the bulkheads and rub down the high spots until all is smooth, using a length of hull plank to check it is making full contact with each bulkhead. The laser char acts as a good guide to where you've been and where you need to go.
- 345 replies
-
- 5
-

-
- Duchess Of Kingston
- Vanguard Models
- (and 1 more)
-
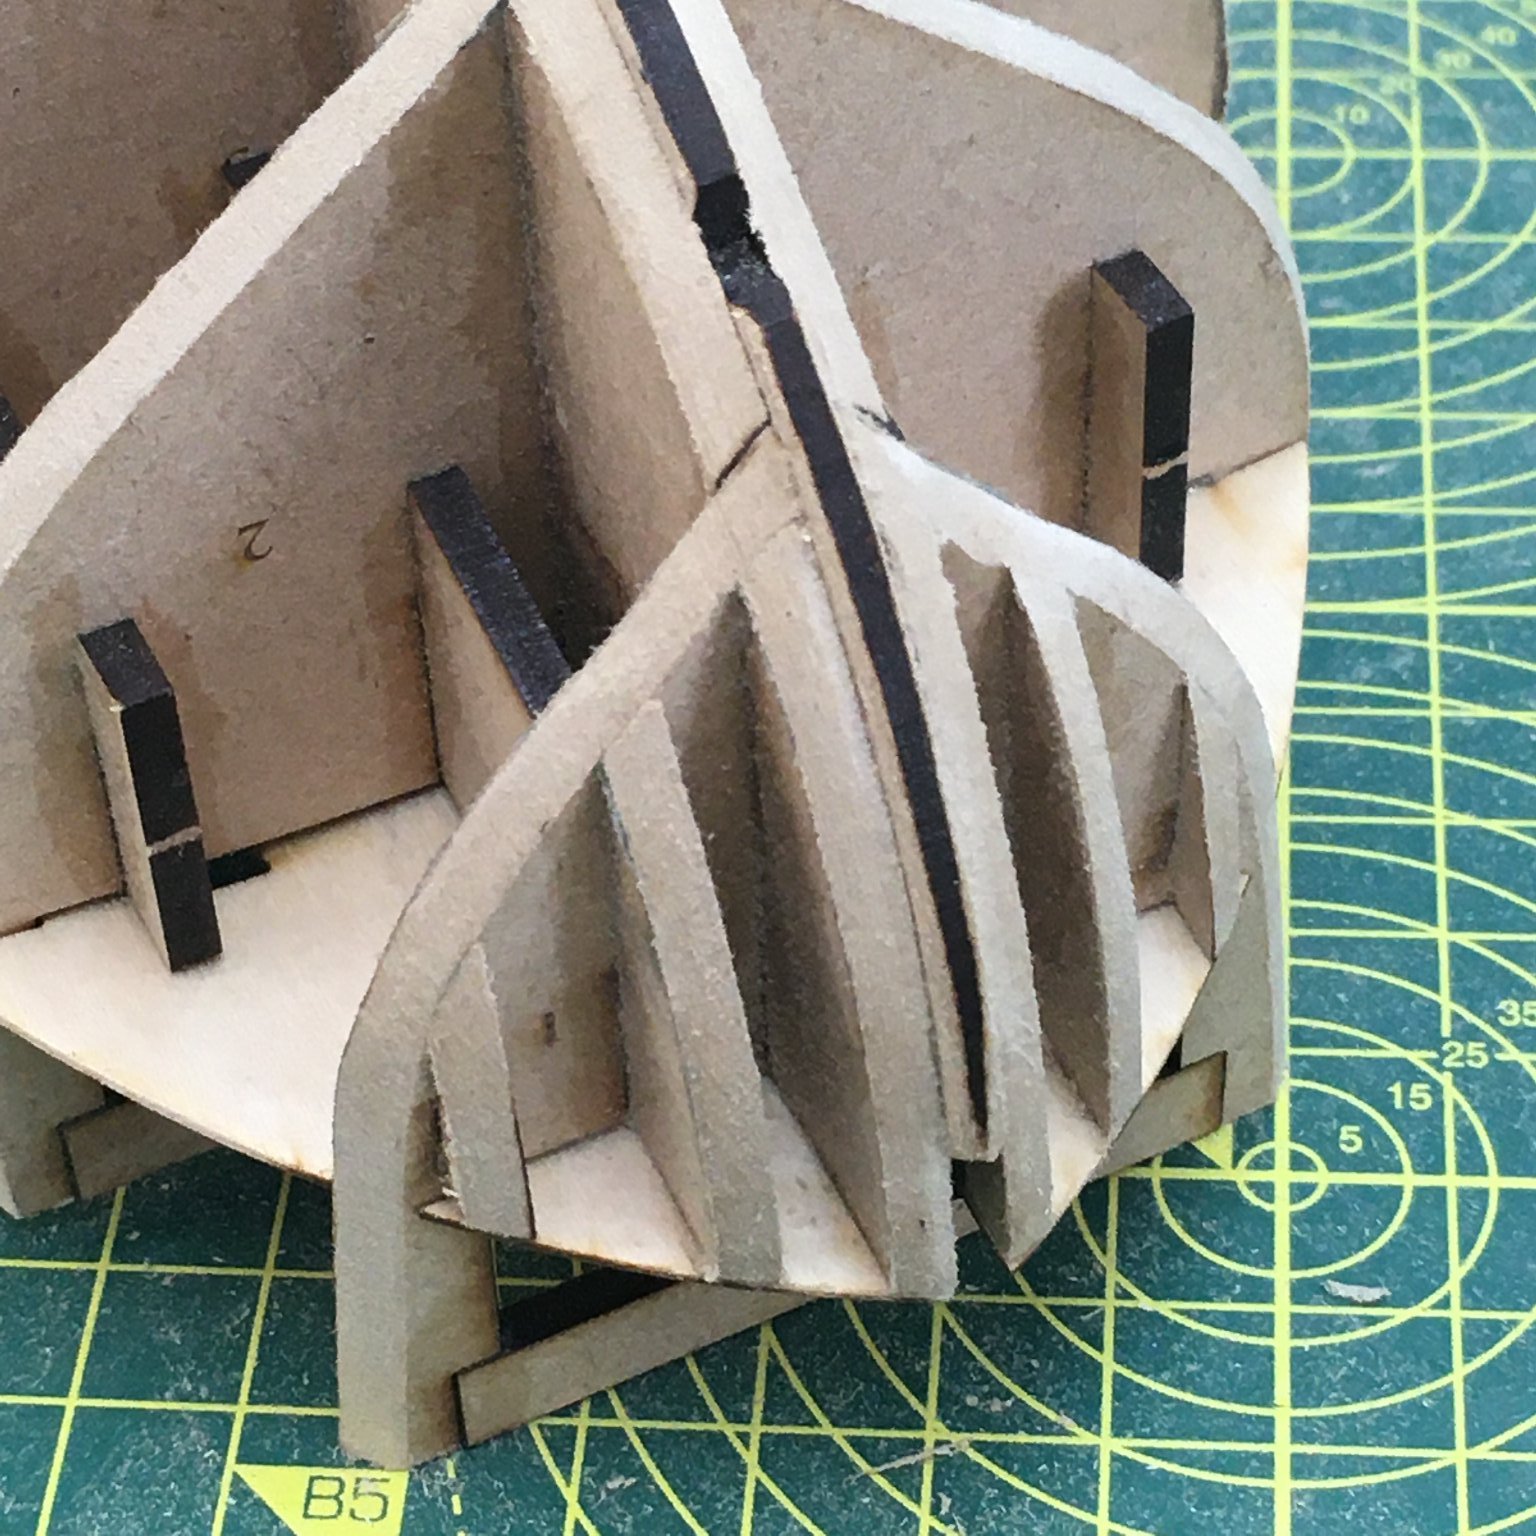
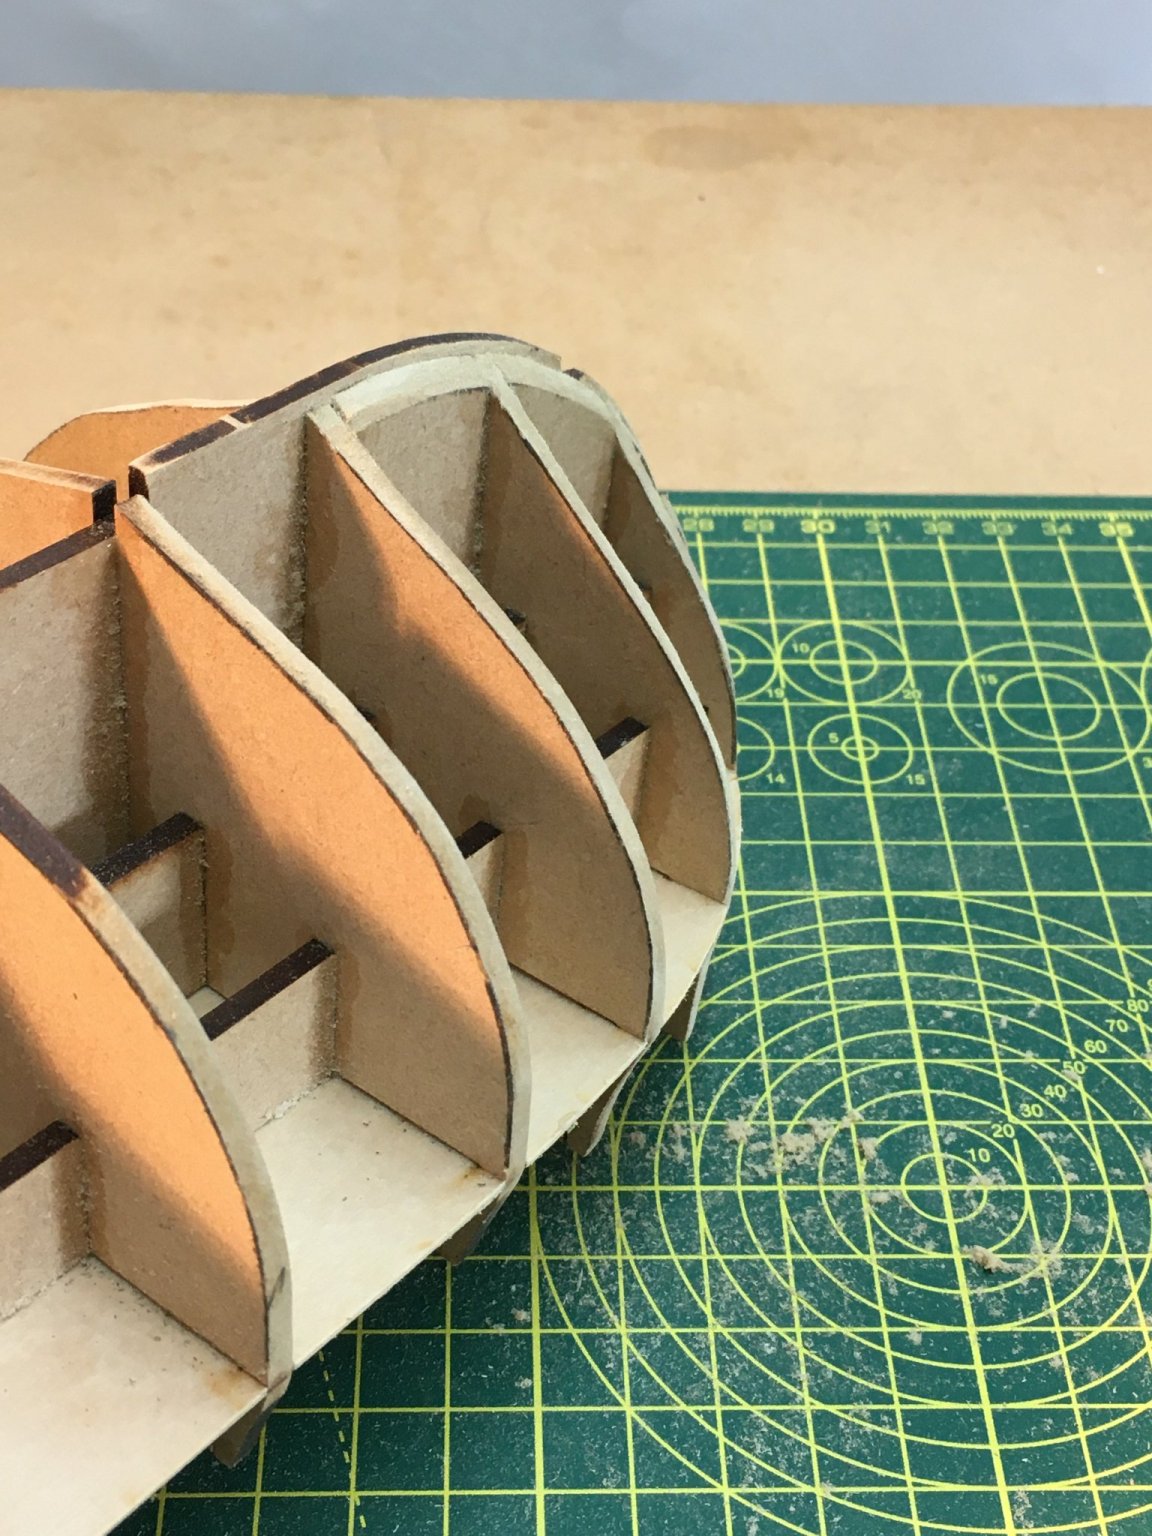
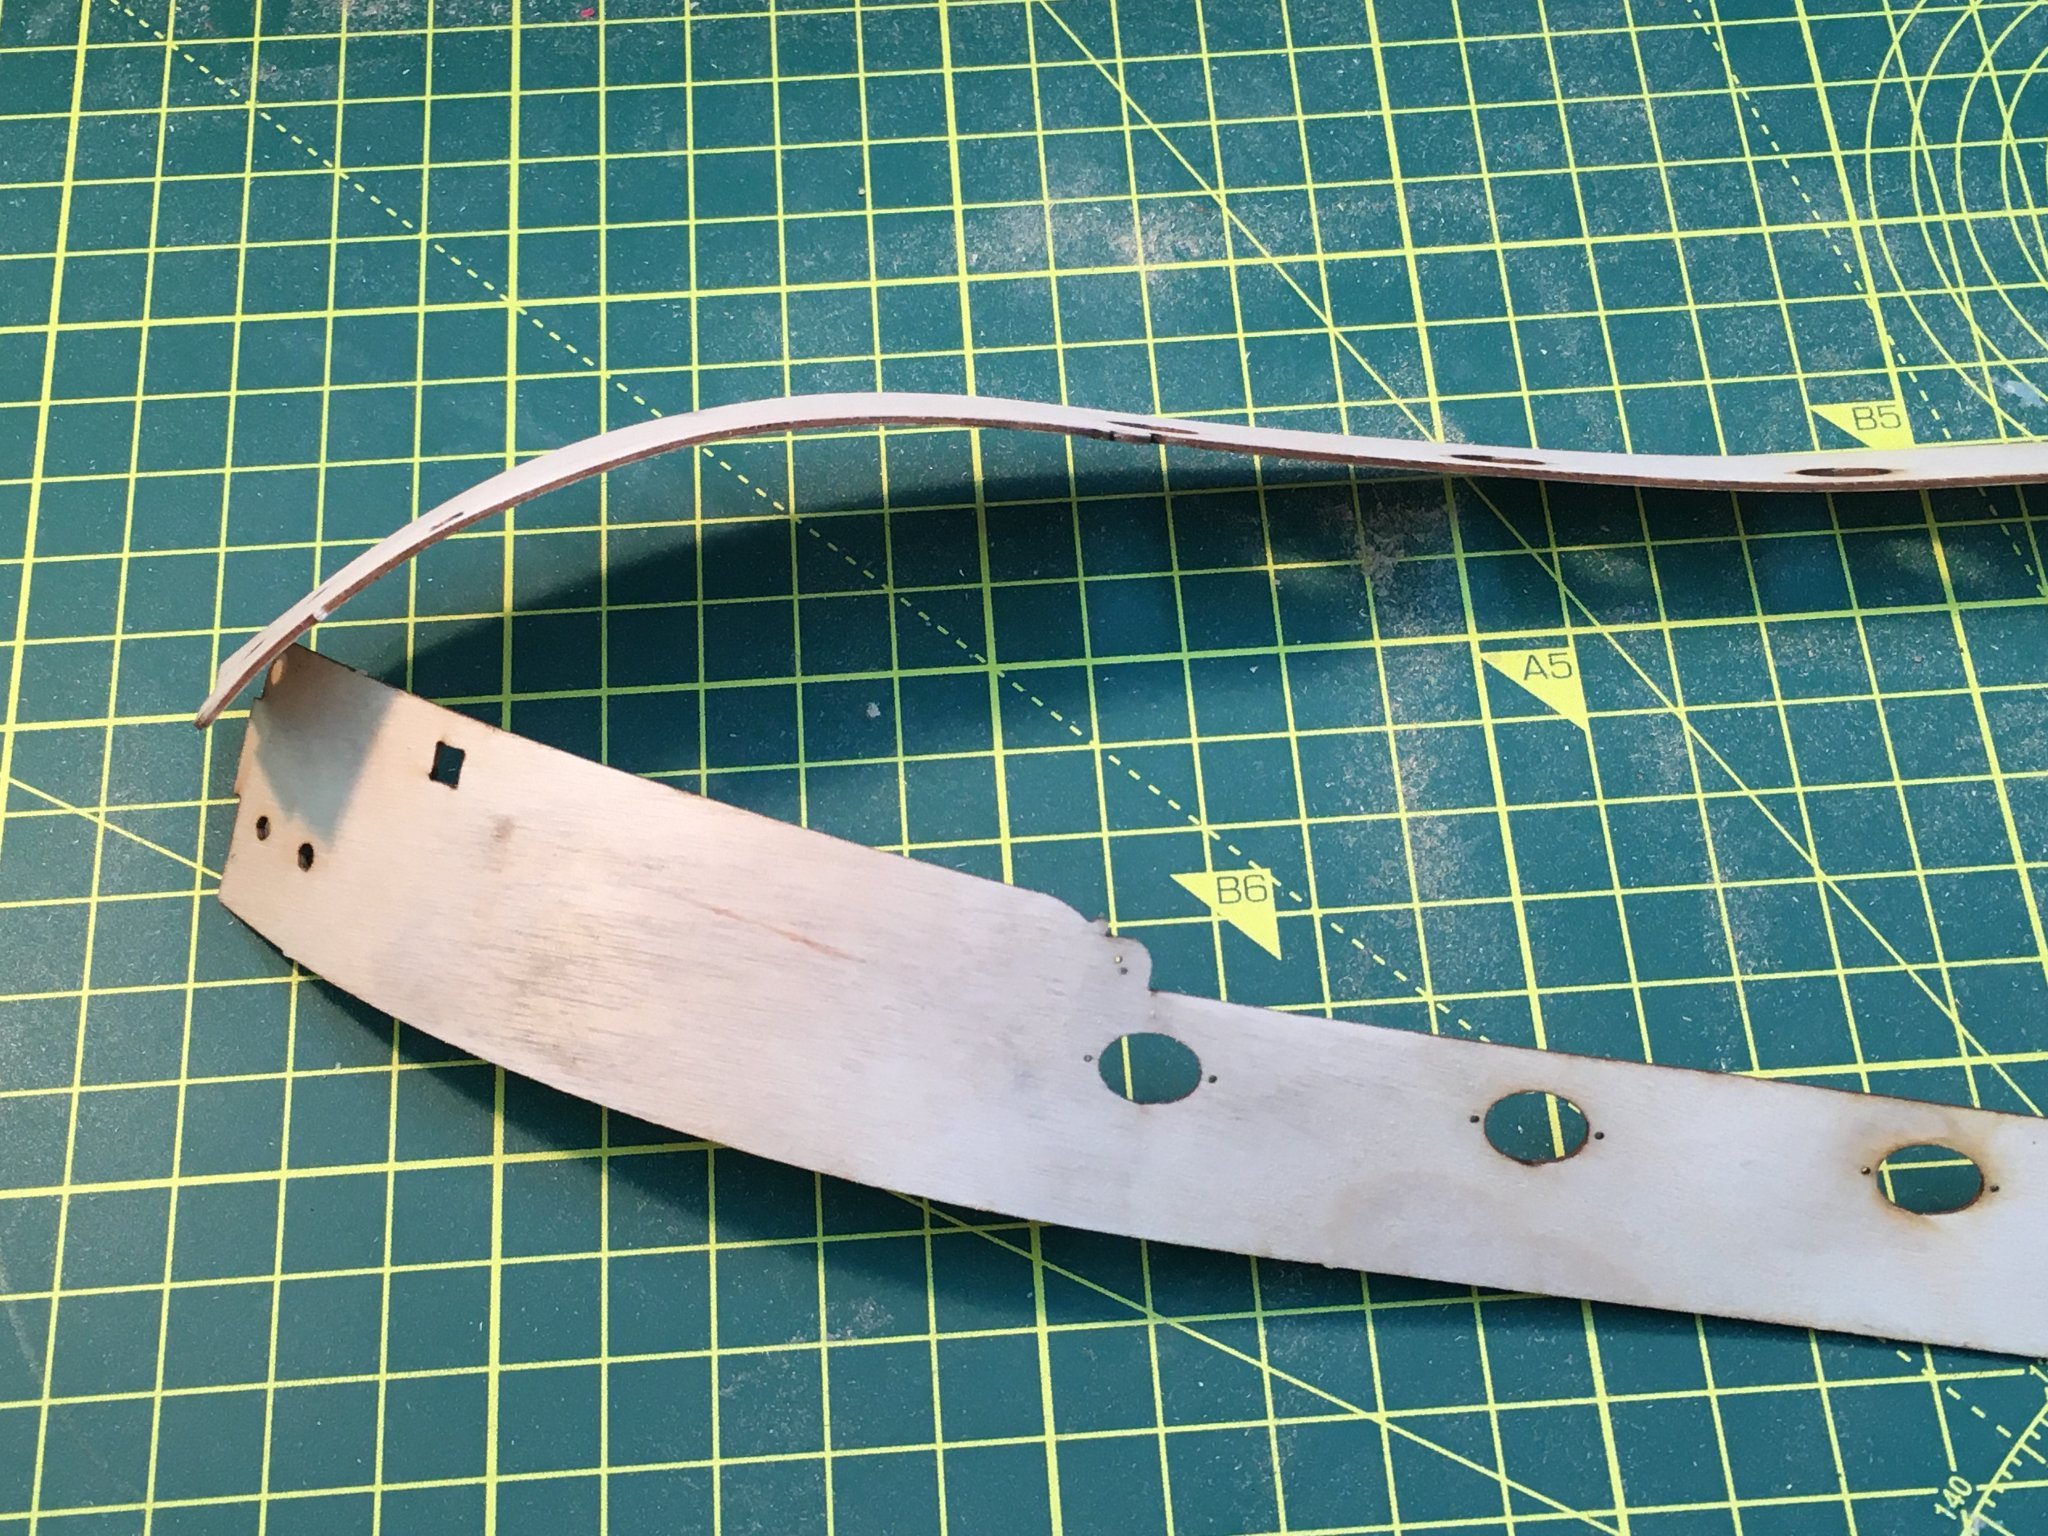
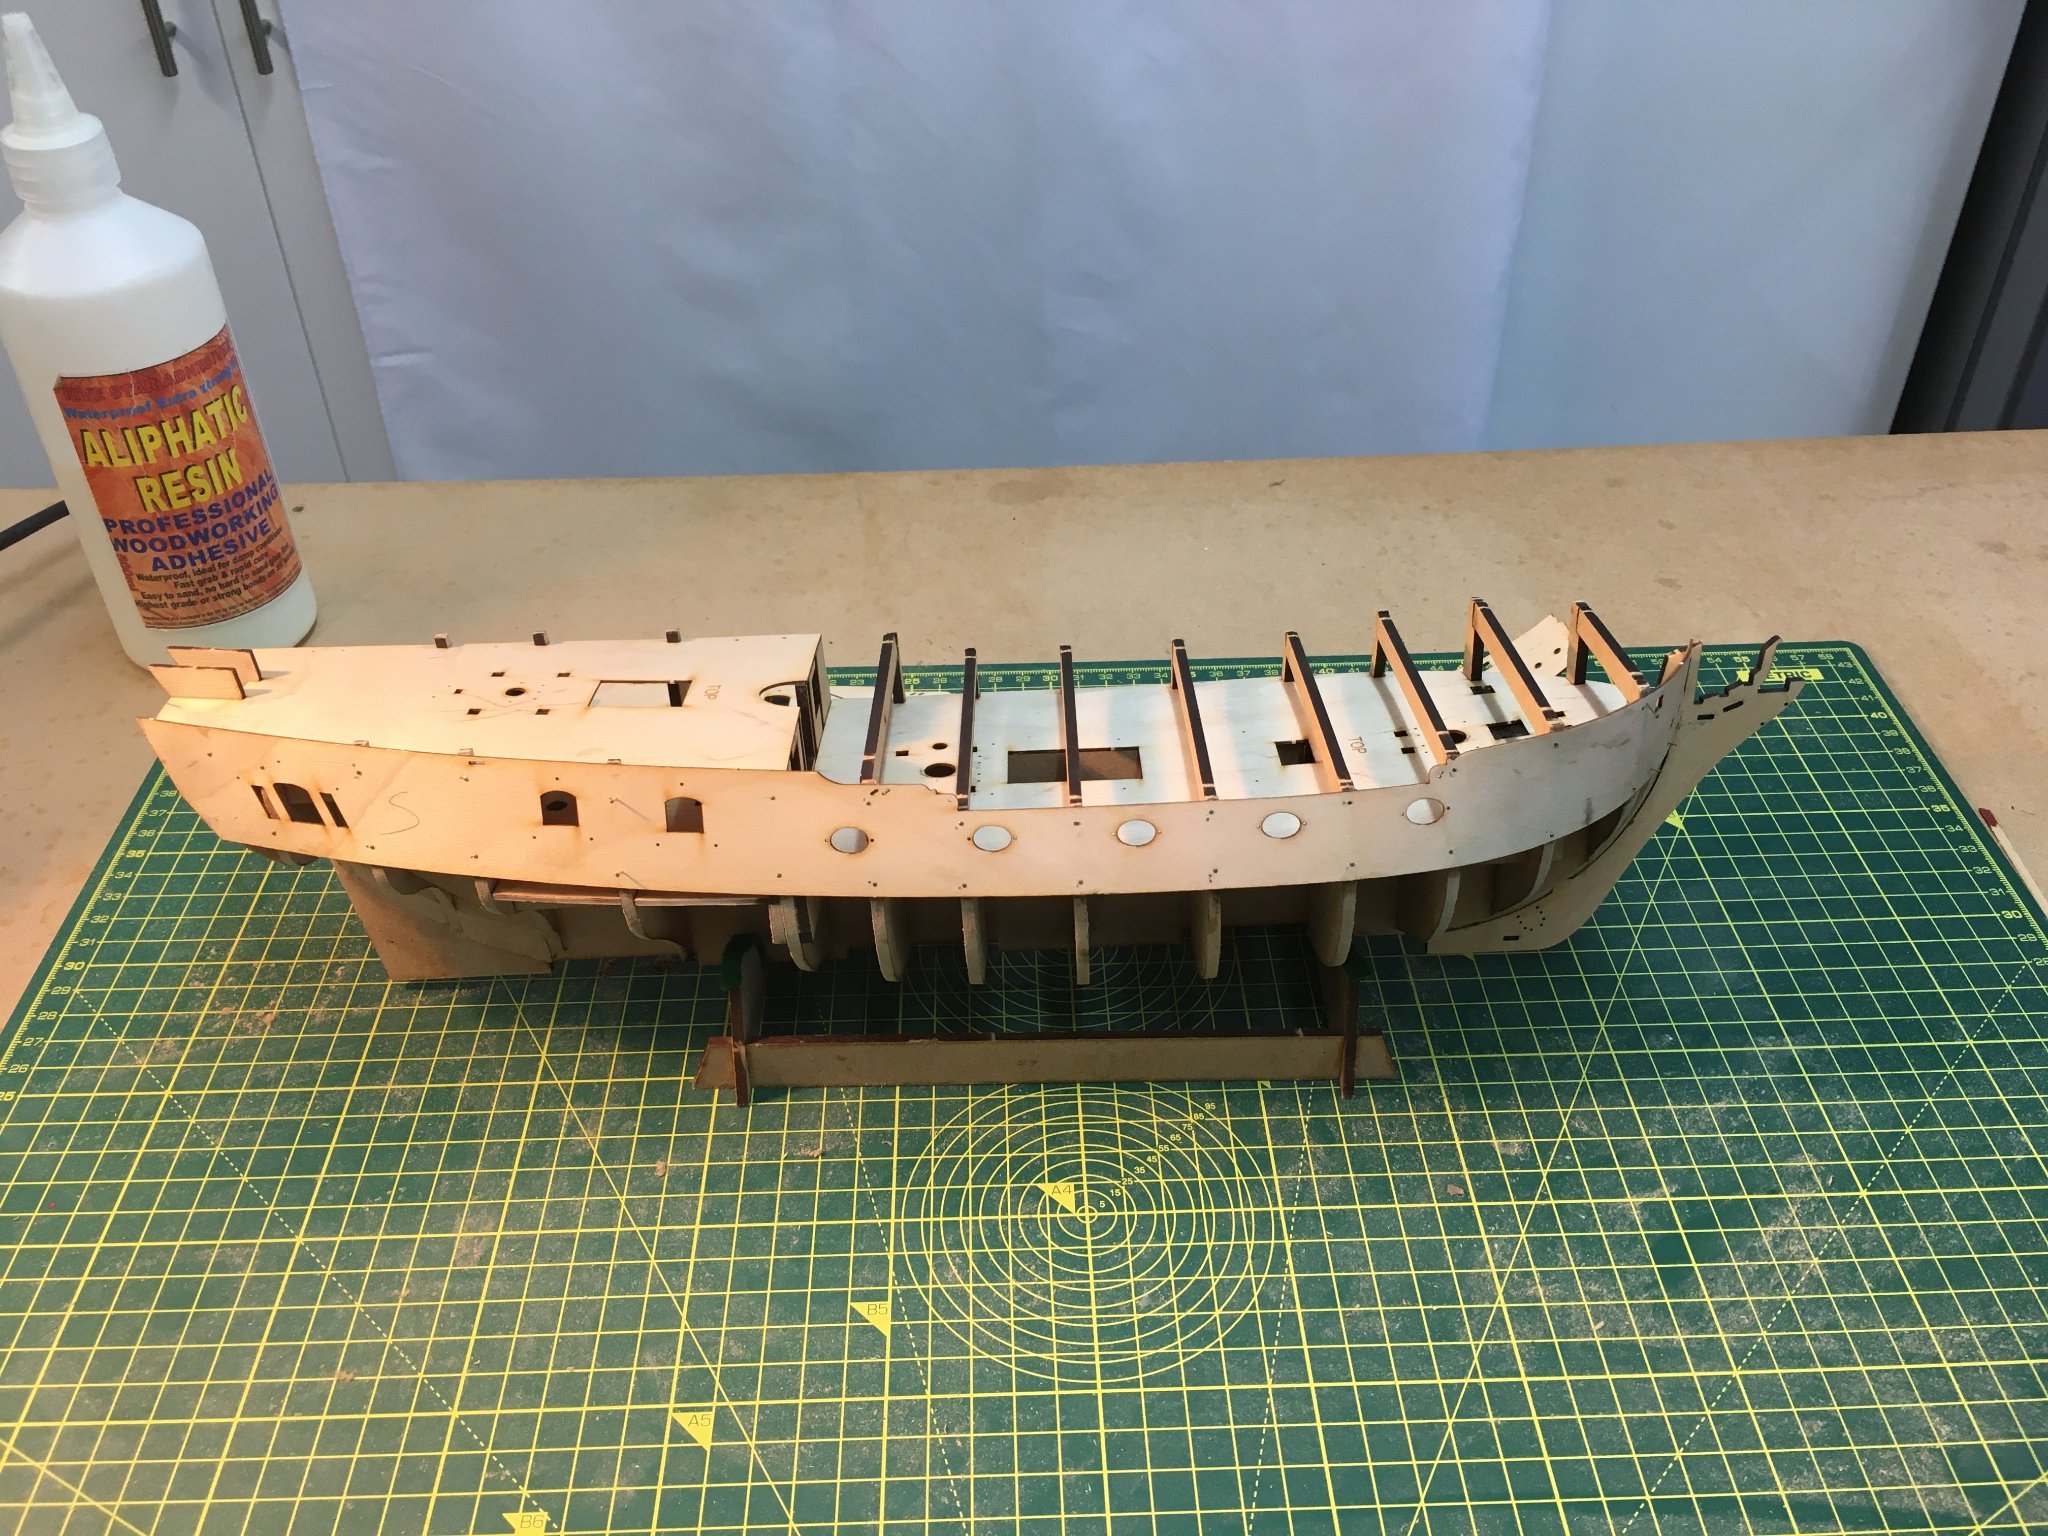
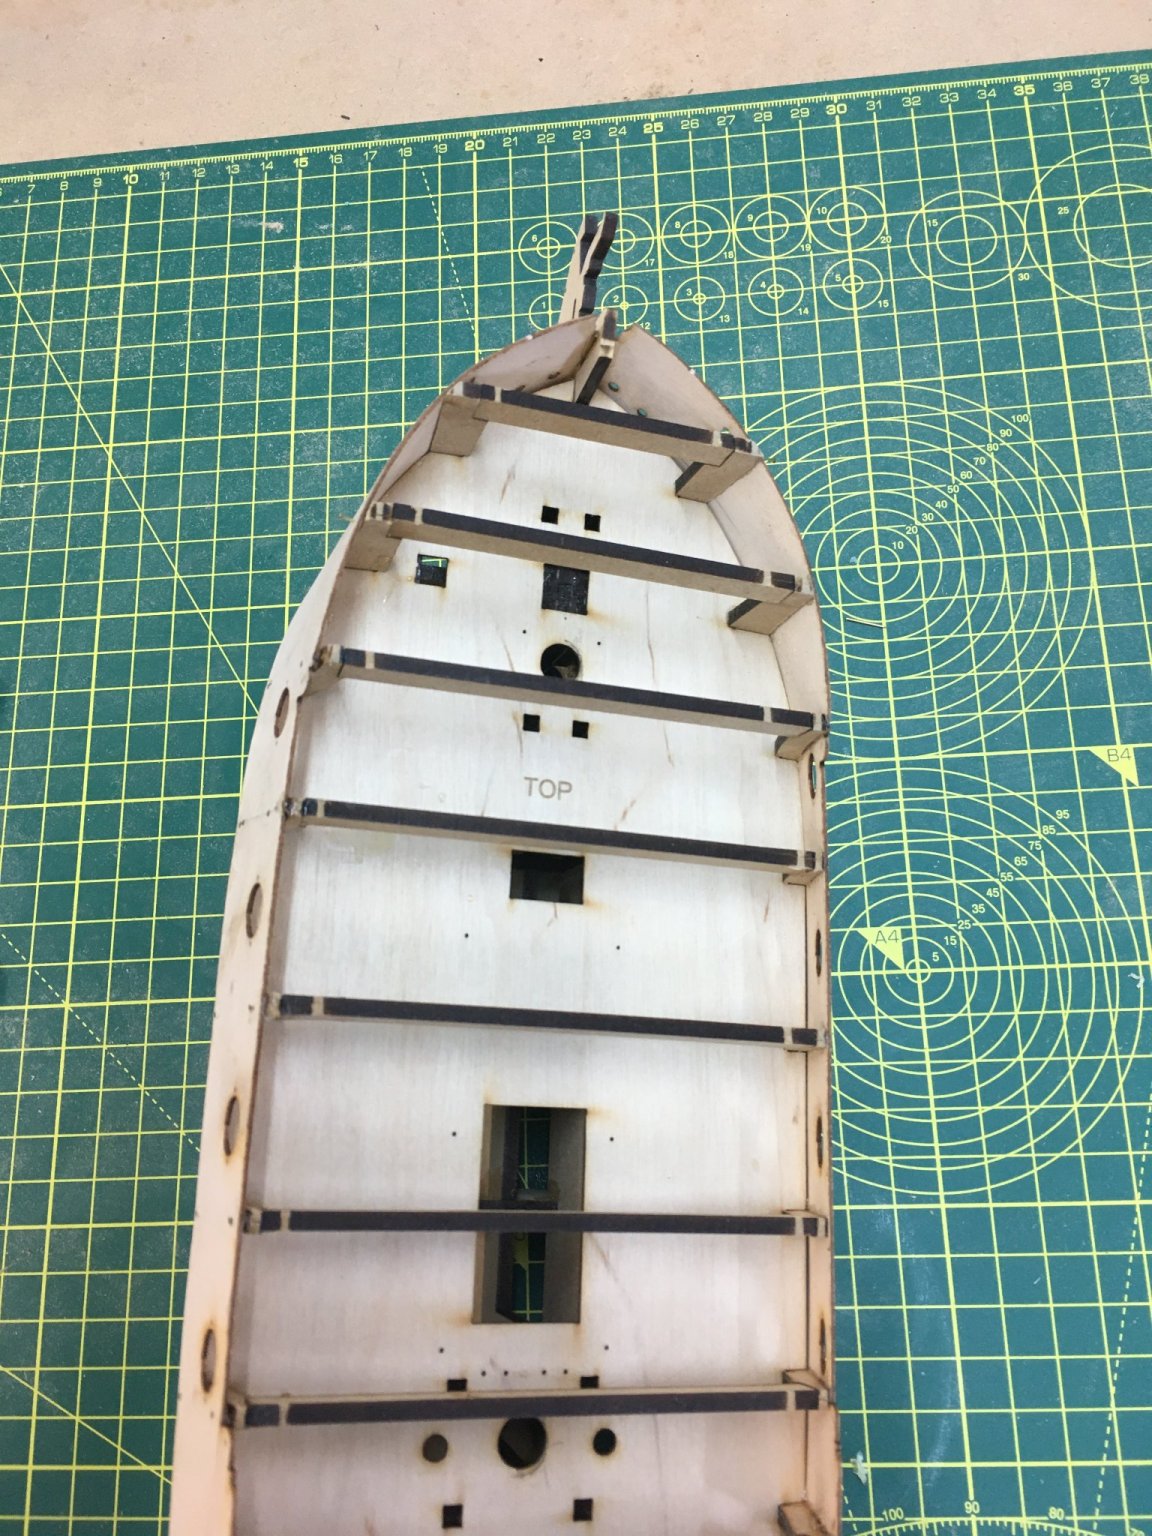
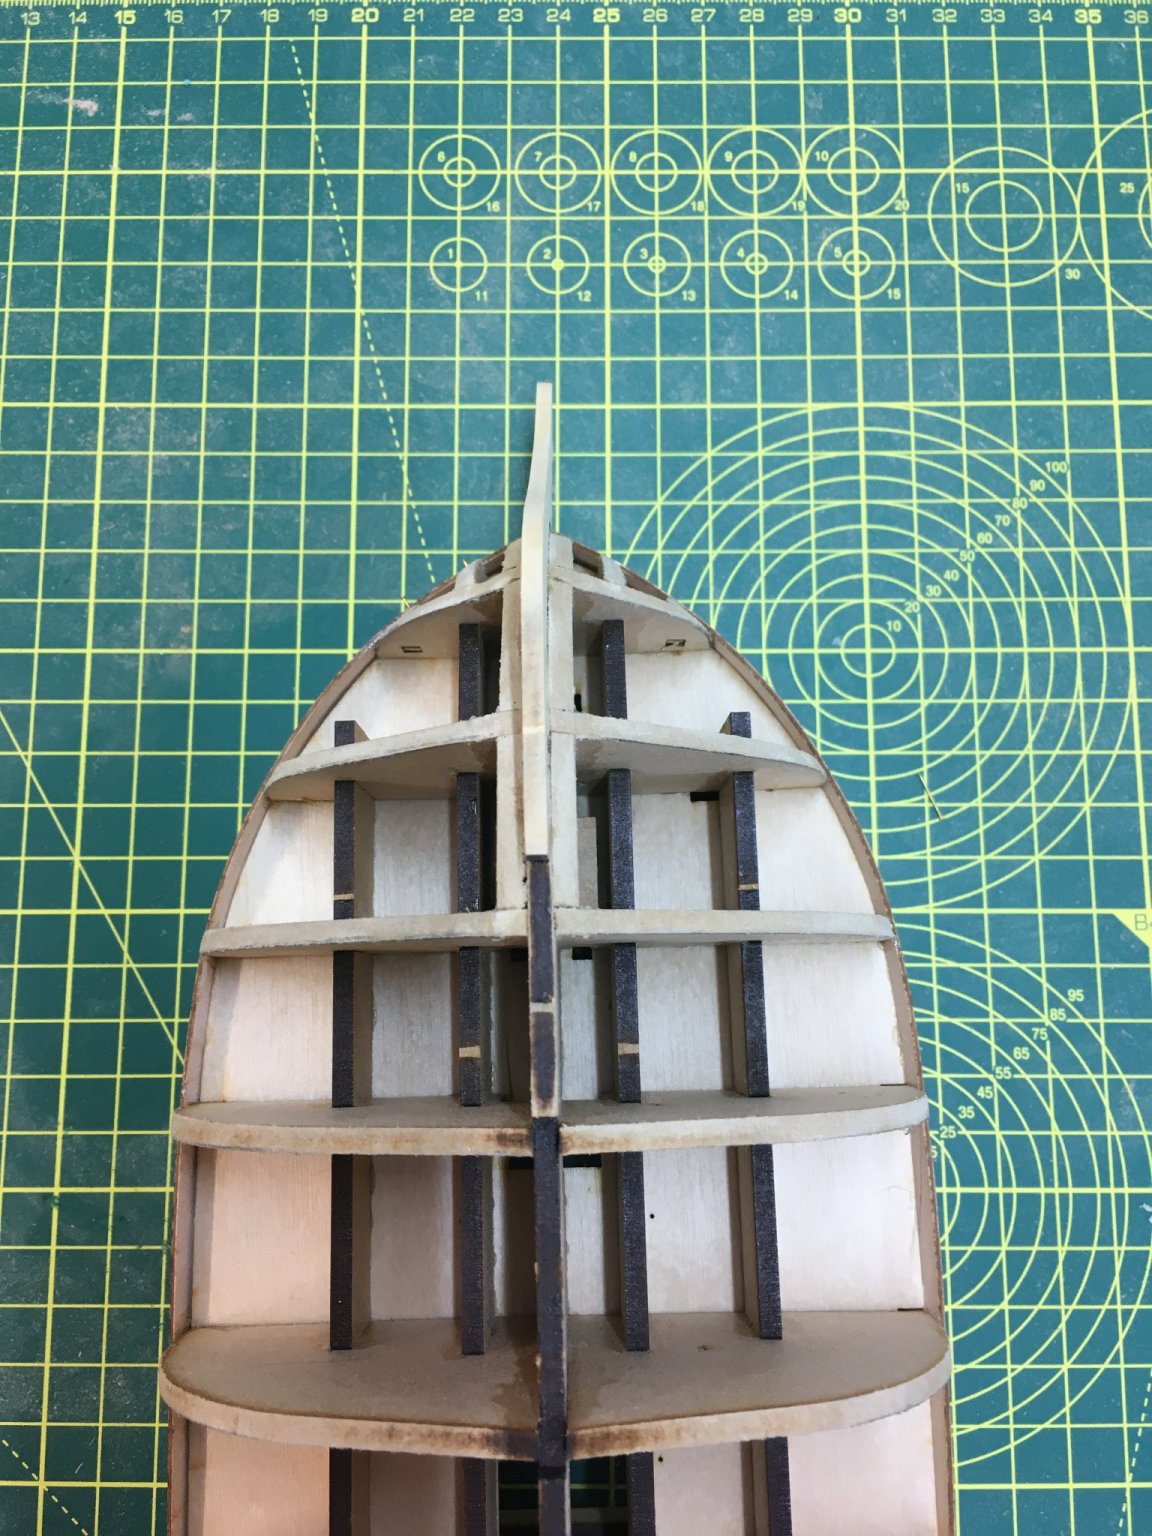
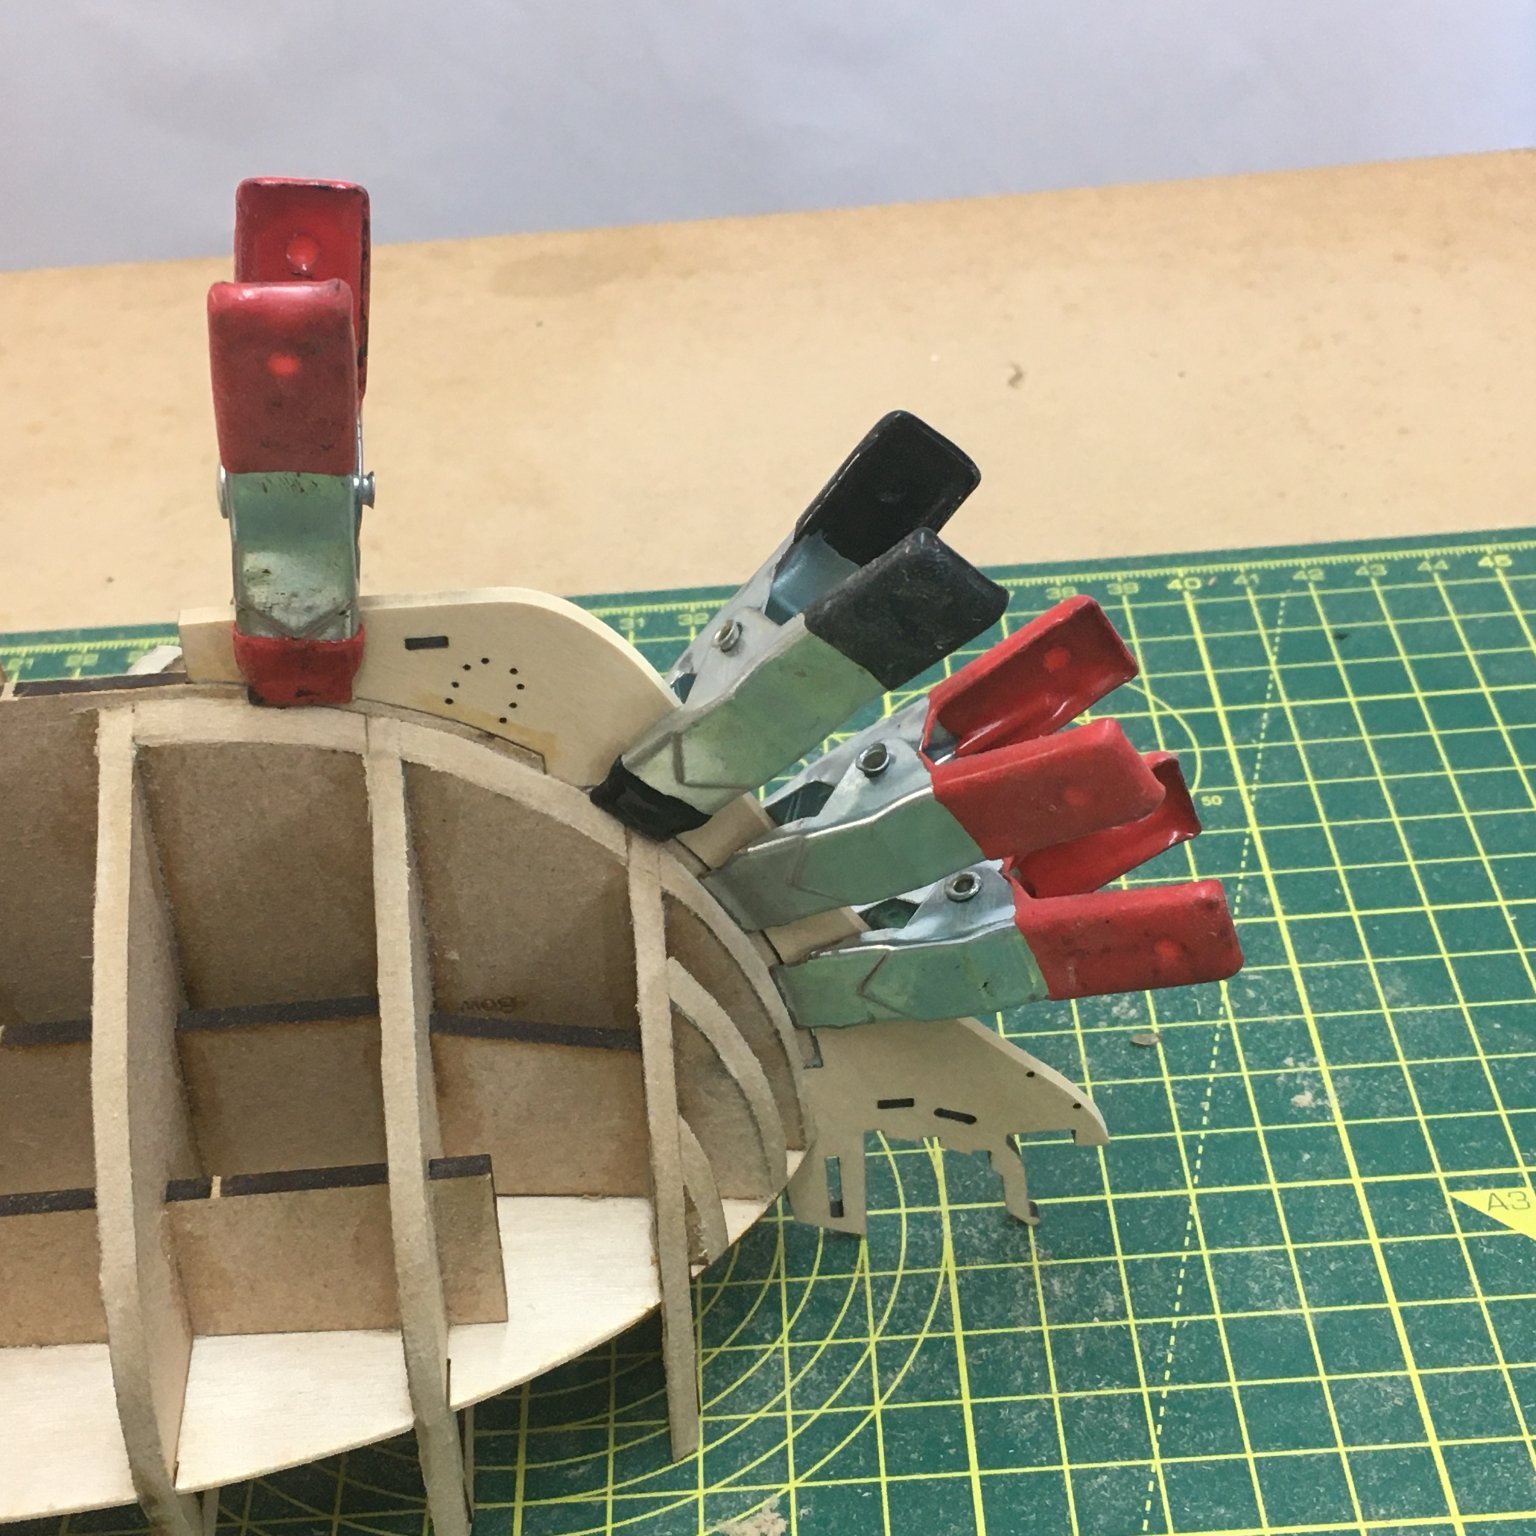
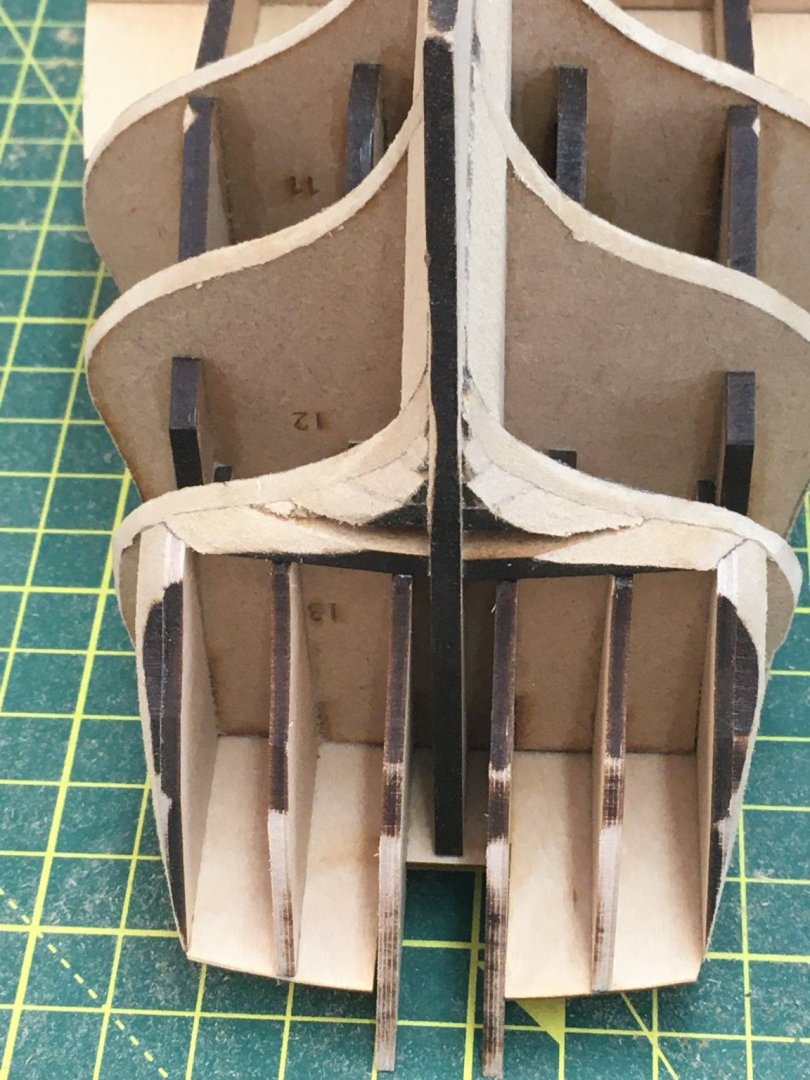
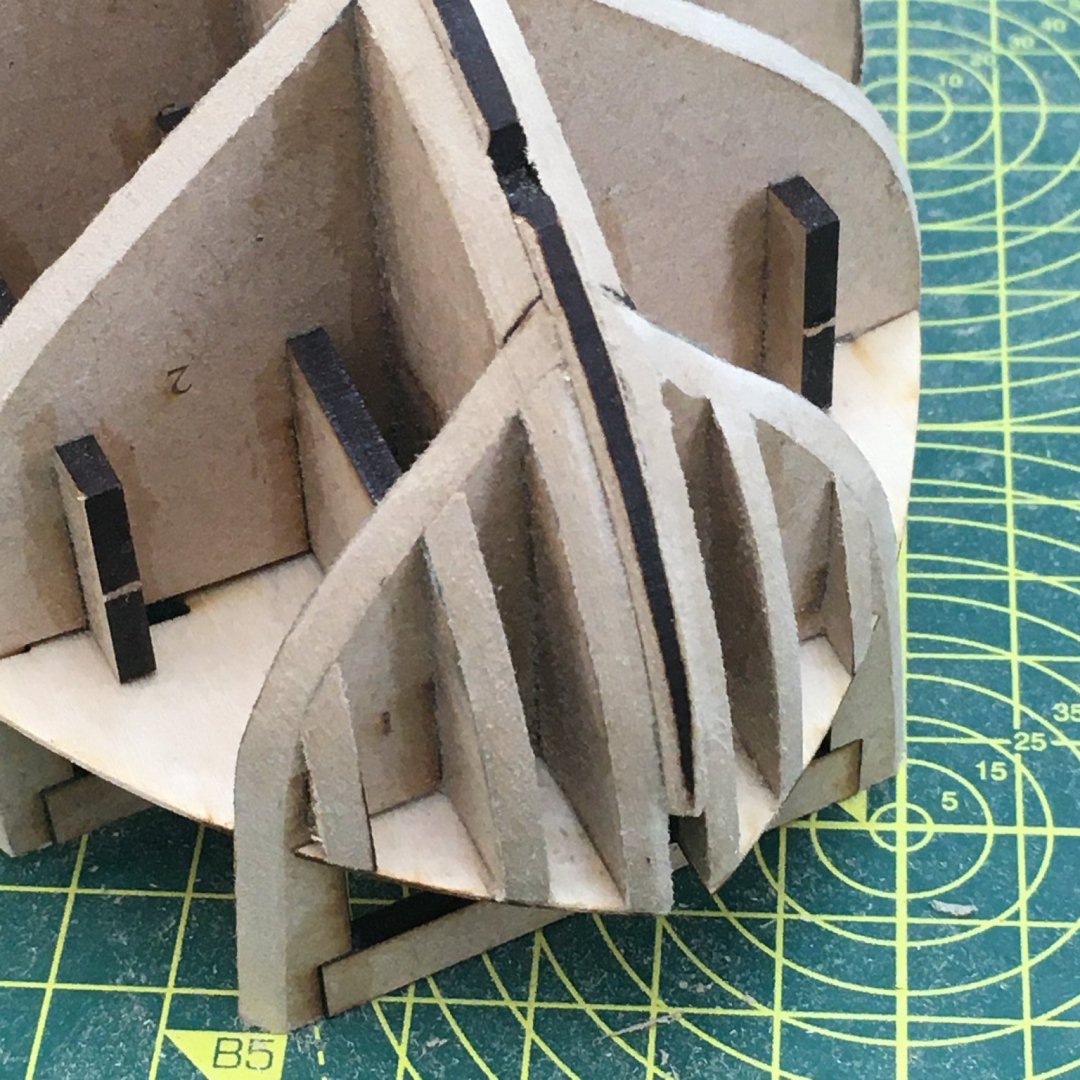
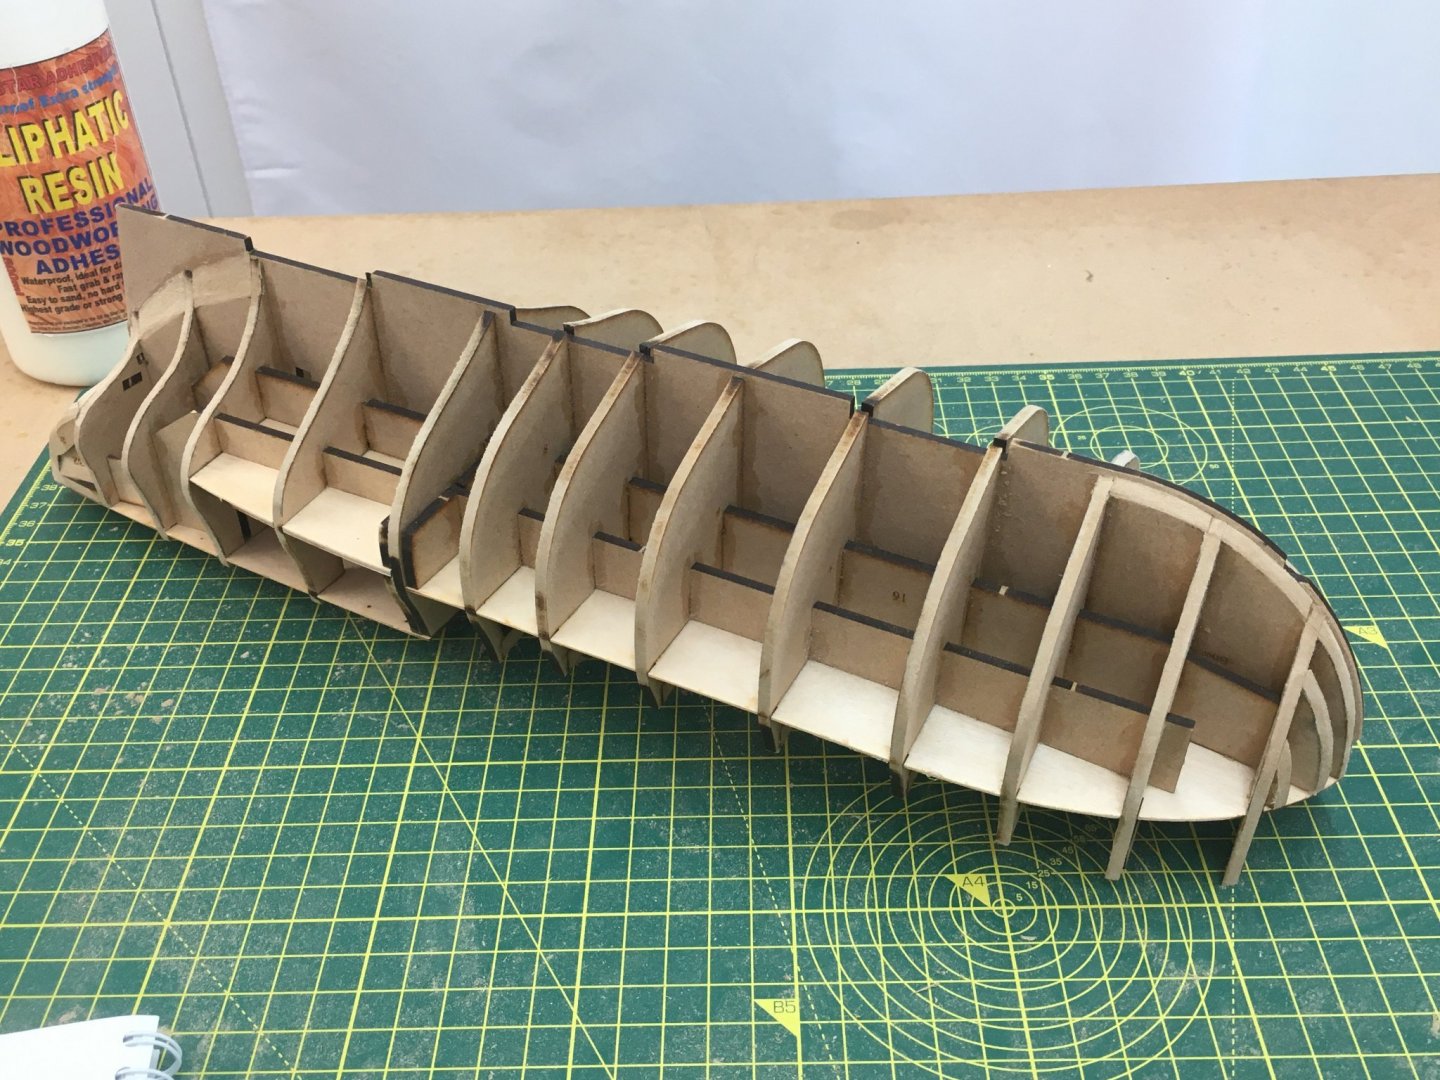
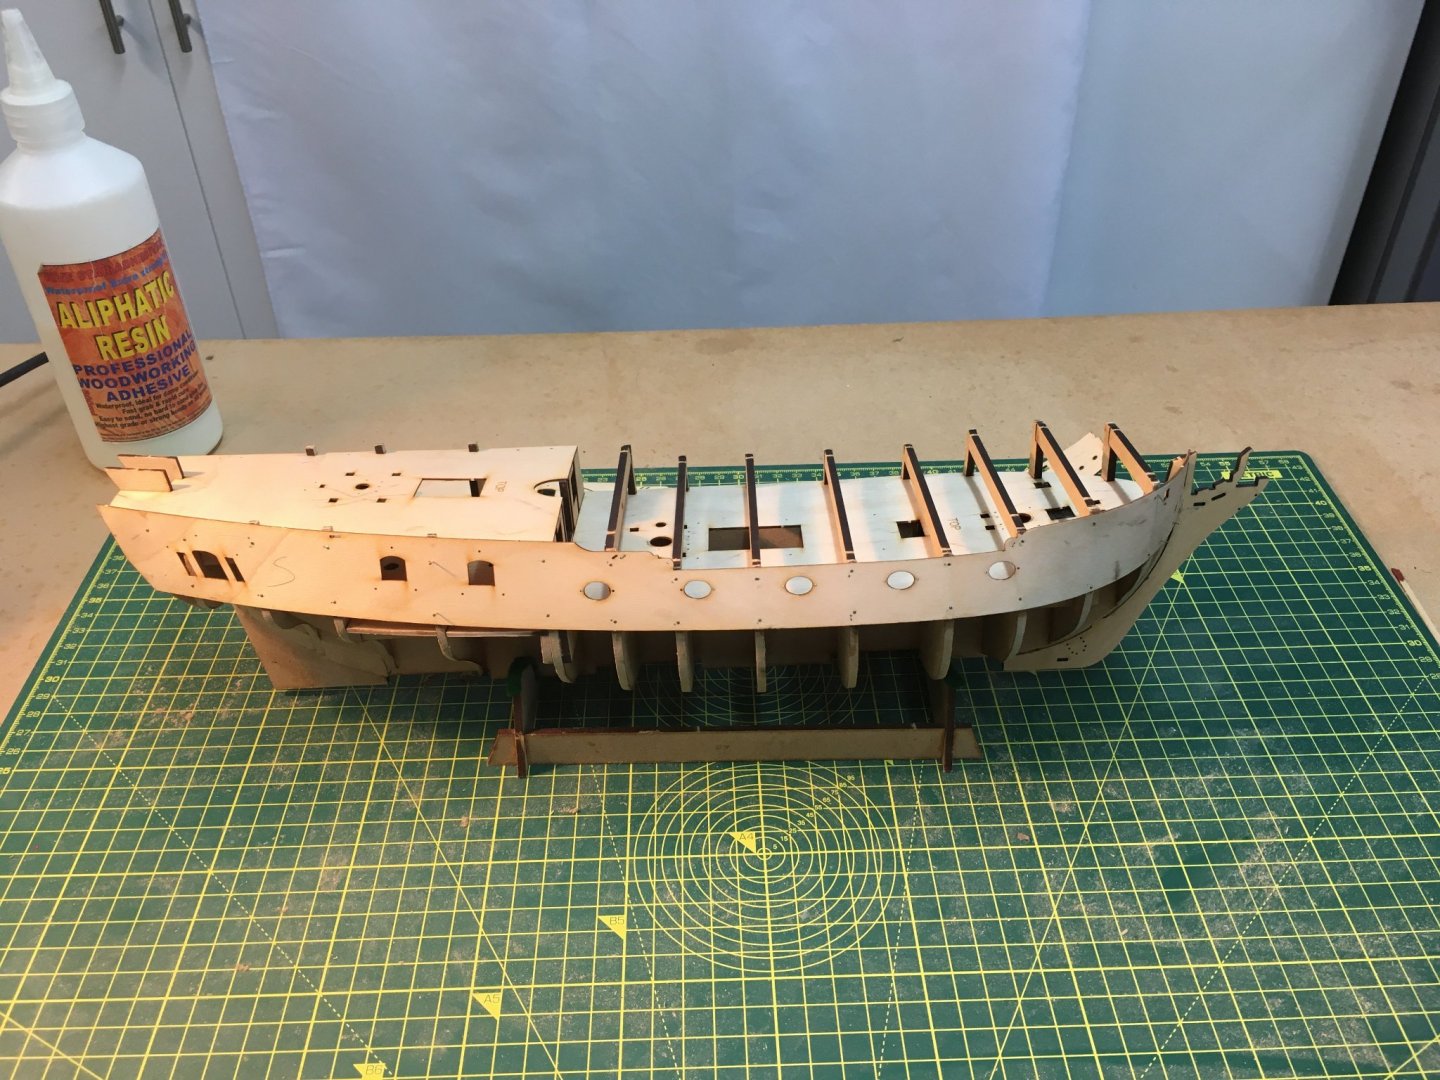
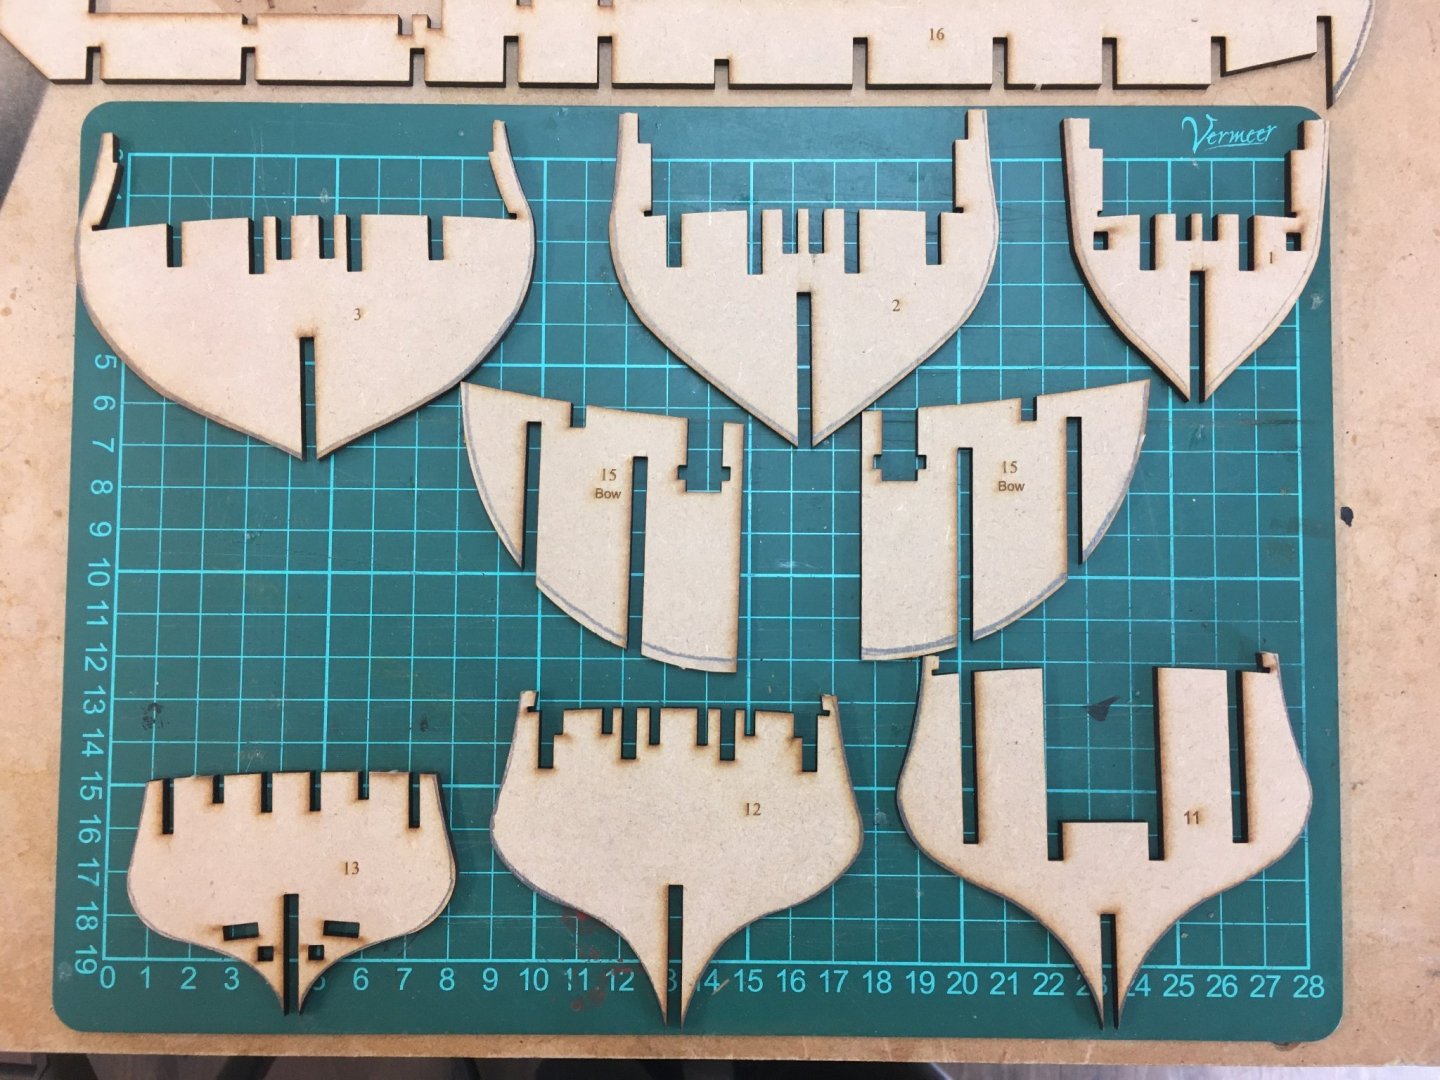
Fairing & Bulwark Patterns After fitting the aft deck, temporary support beams and various bow and stern filler pieces the basic hull structure was ready for fairing, which I started with 120 grit paper wrapped round a strip of wood: I used 120 grit for the whole job, wrapped round a piece of dowel for concave sections and freehand for particularly tight parts. The laser char helps initially in judging how much you're taking off, but as a fail safe to avoid going too far I ran a pencil along the back edge of each frame: The MDF sands easily and the filler pieces in the bow and stern help in visualising the lines you need to take: The pictures in the manual are helpful in that regard, but I also constantly referred to the very useful photos in logs by @glennard2523, @Rustyj, @rafine and @desalgu . Thanks guys! Gluing the bow pattern was straightforward: Next, I followed the kit instructions and soaked the bulwark patterns in hot water for 30 minutes then clamped them round a tin and left them to dry overnight. I wasn't happy with the result and decided I'd used too large a tin, so I tried again with one about 4.5 inches in diameter. This time the result was perfect: The next part went remarkably smoothly. I'd not been looking forward to this part of the build as I'd found the bulwark patterns on Speedy quite difficult, with a tendency to ripple rather than lay flat. DoK's went on like a dream, with pins and glue holding the patterns in place with no problems: The ease with which parts fit seems to be typical of this kit so far. I should note that during the construction of the MDF hull I didn't have to sand any parts or slots to get them to fit. Everything went together snuggly and securely. The whole structure feels extremely robust and strong. I'm looking forward to planking! Derek


- 345 replies
-
- 13
-
-
- Duchess Of Kingston
- Vanguard Models
- (and 1 more)
-
Kind of you to include me in this list Glenn, but as I said earlier in this topic I'm a real novice and the best tip I can give is to refer you to the advice I got from others on the forum, eg here. Having said that, you're definitely on the right lines with your new camera and lighting set-up. Digital makes it easy to try out different camera settings and lighting arrangements - I must have taken about 500 shots so far! Thanks again to Richard for the initial inspiration. Have fun! Derek
-
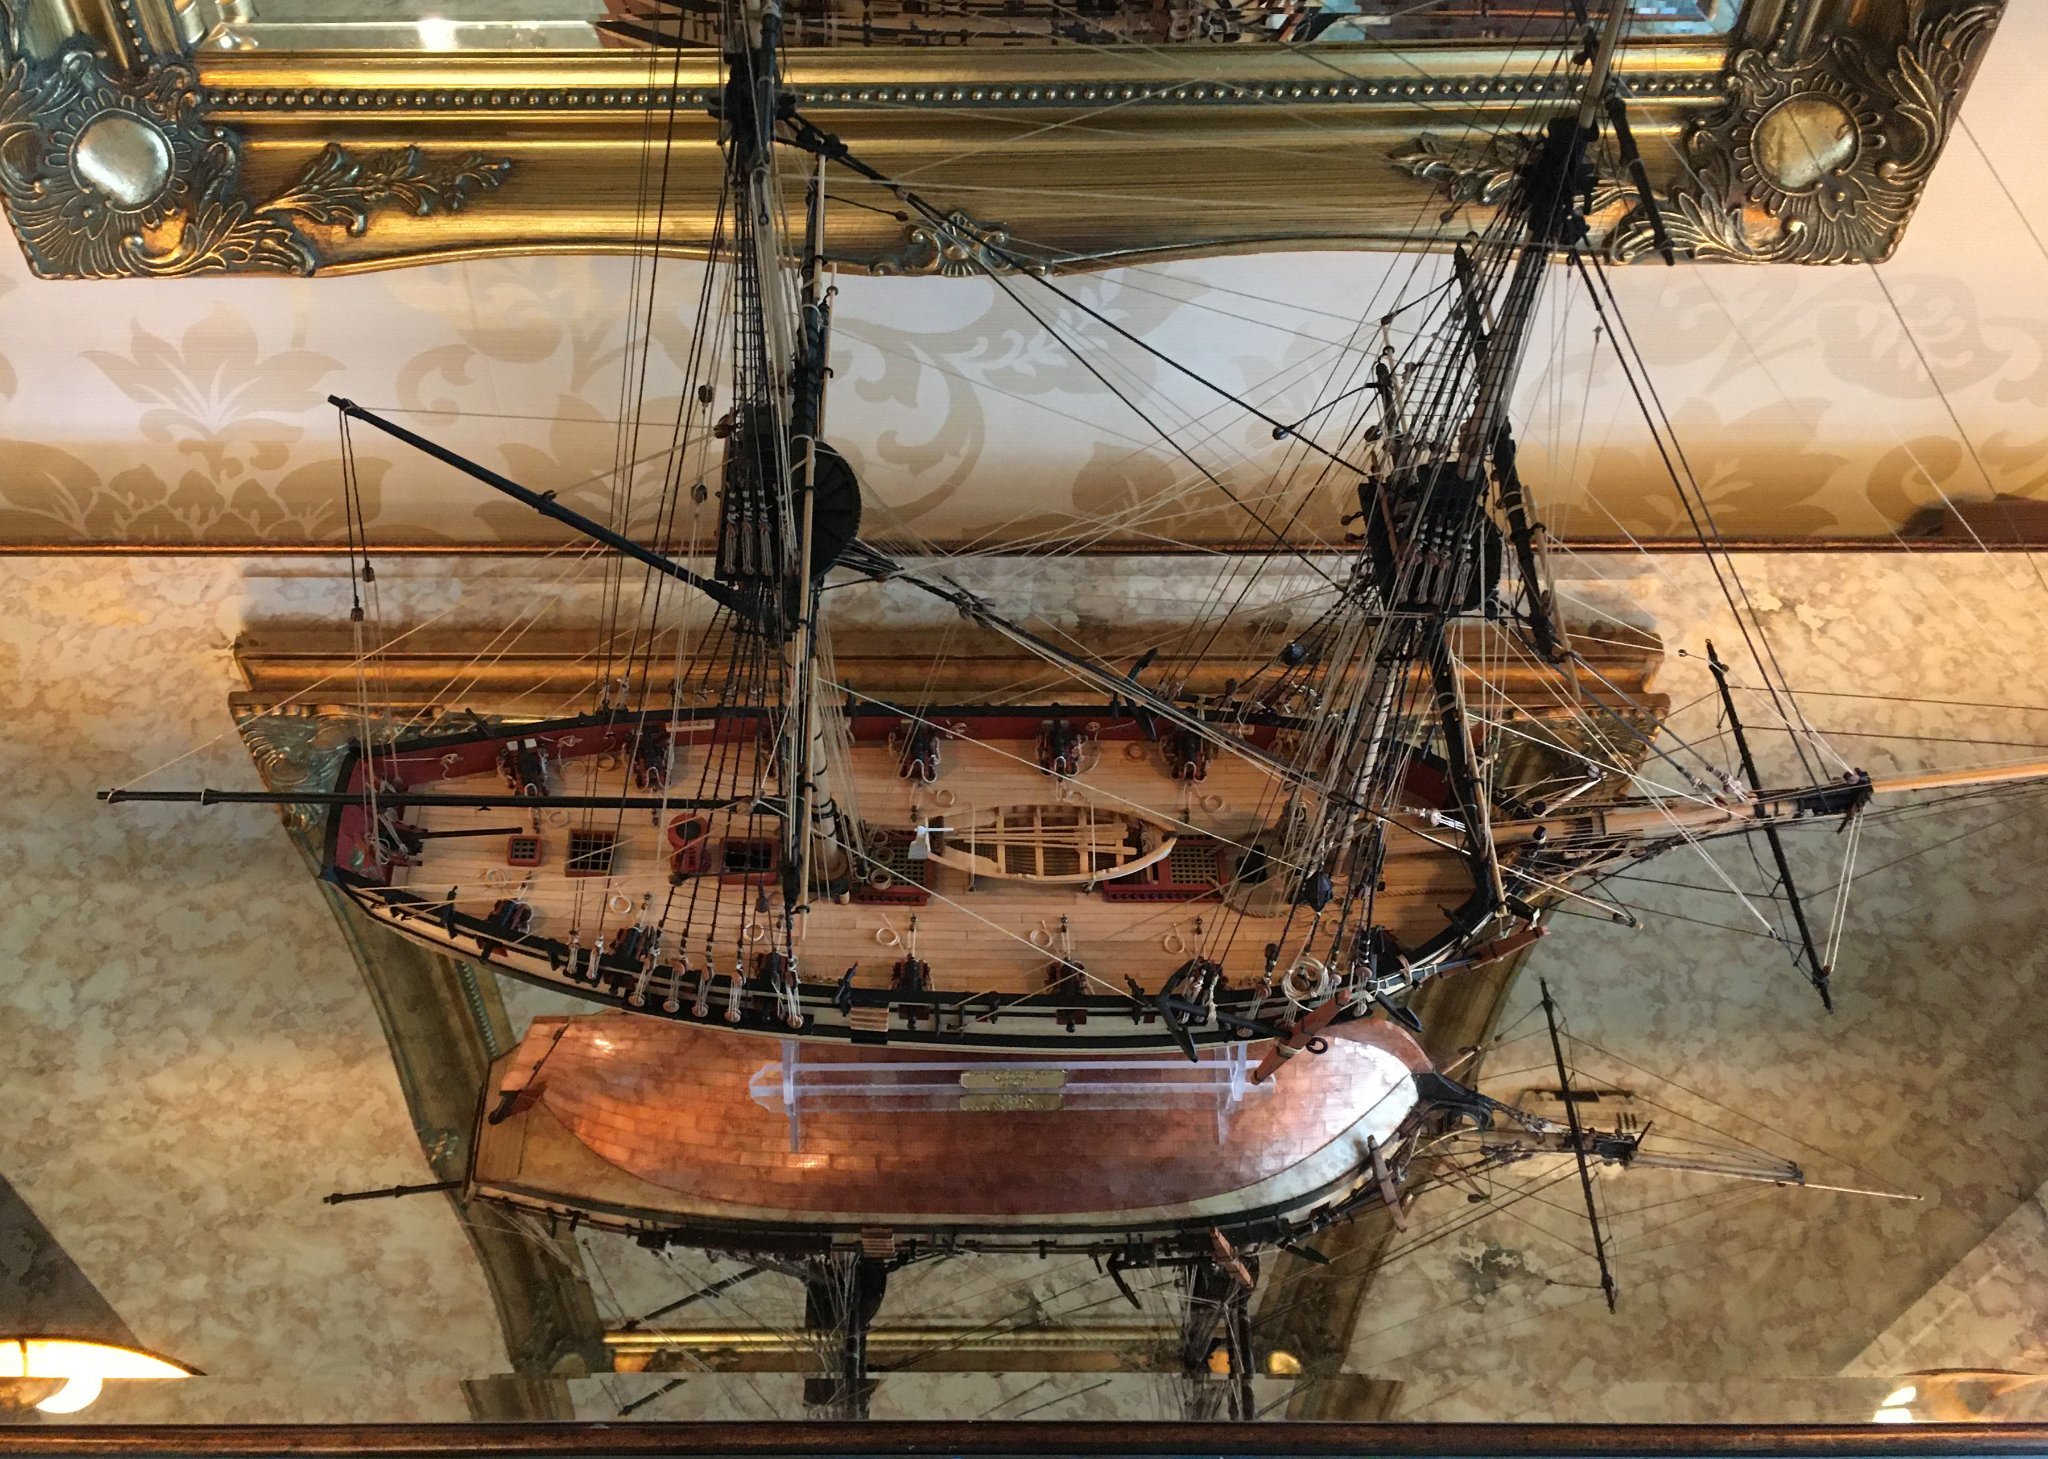
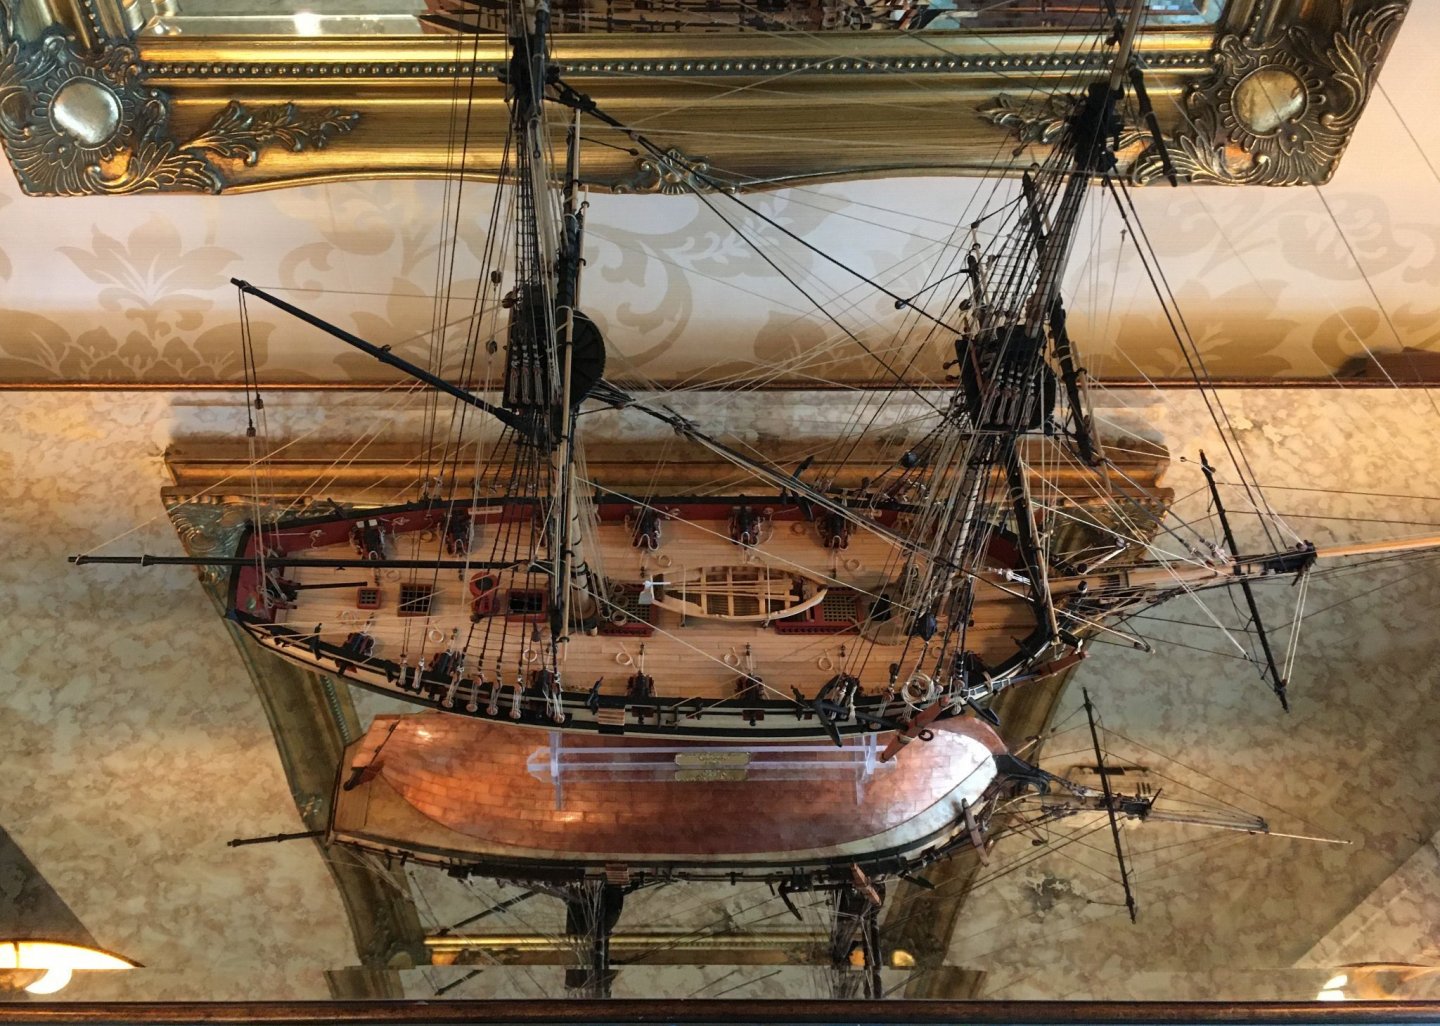
I agree. I wasn't sure about the acetate stand for Speedy, but I've been looking at display options and may decide to mount her on a mirror to show off the copper bottom. The clear stand is ideal for this. Here's a test shot I took on a mirrored table: The brass nameplate looks particularly good on the acetate.
-
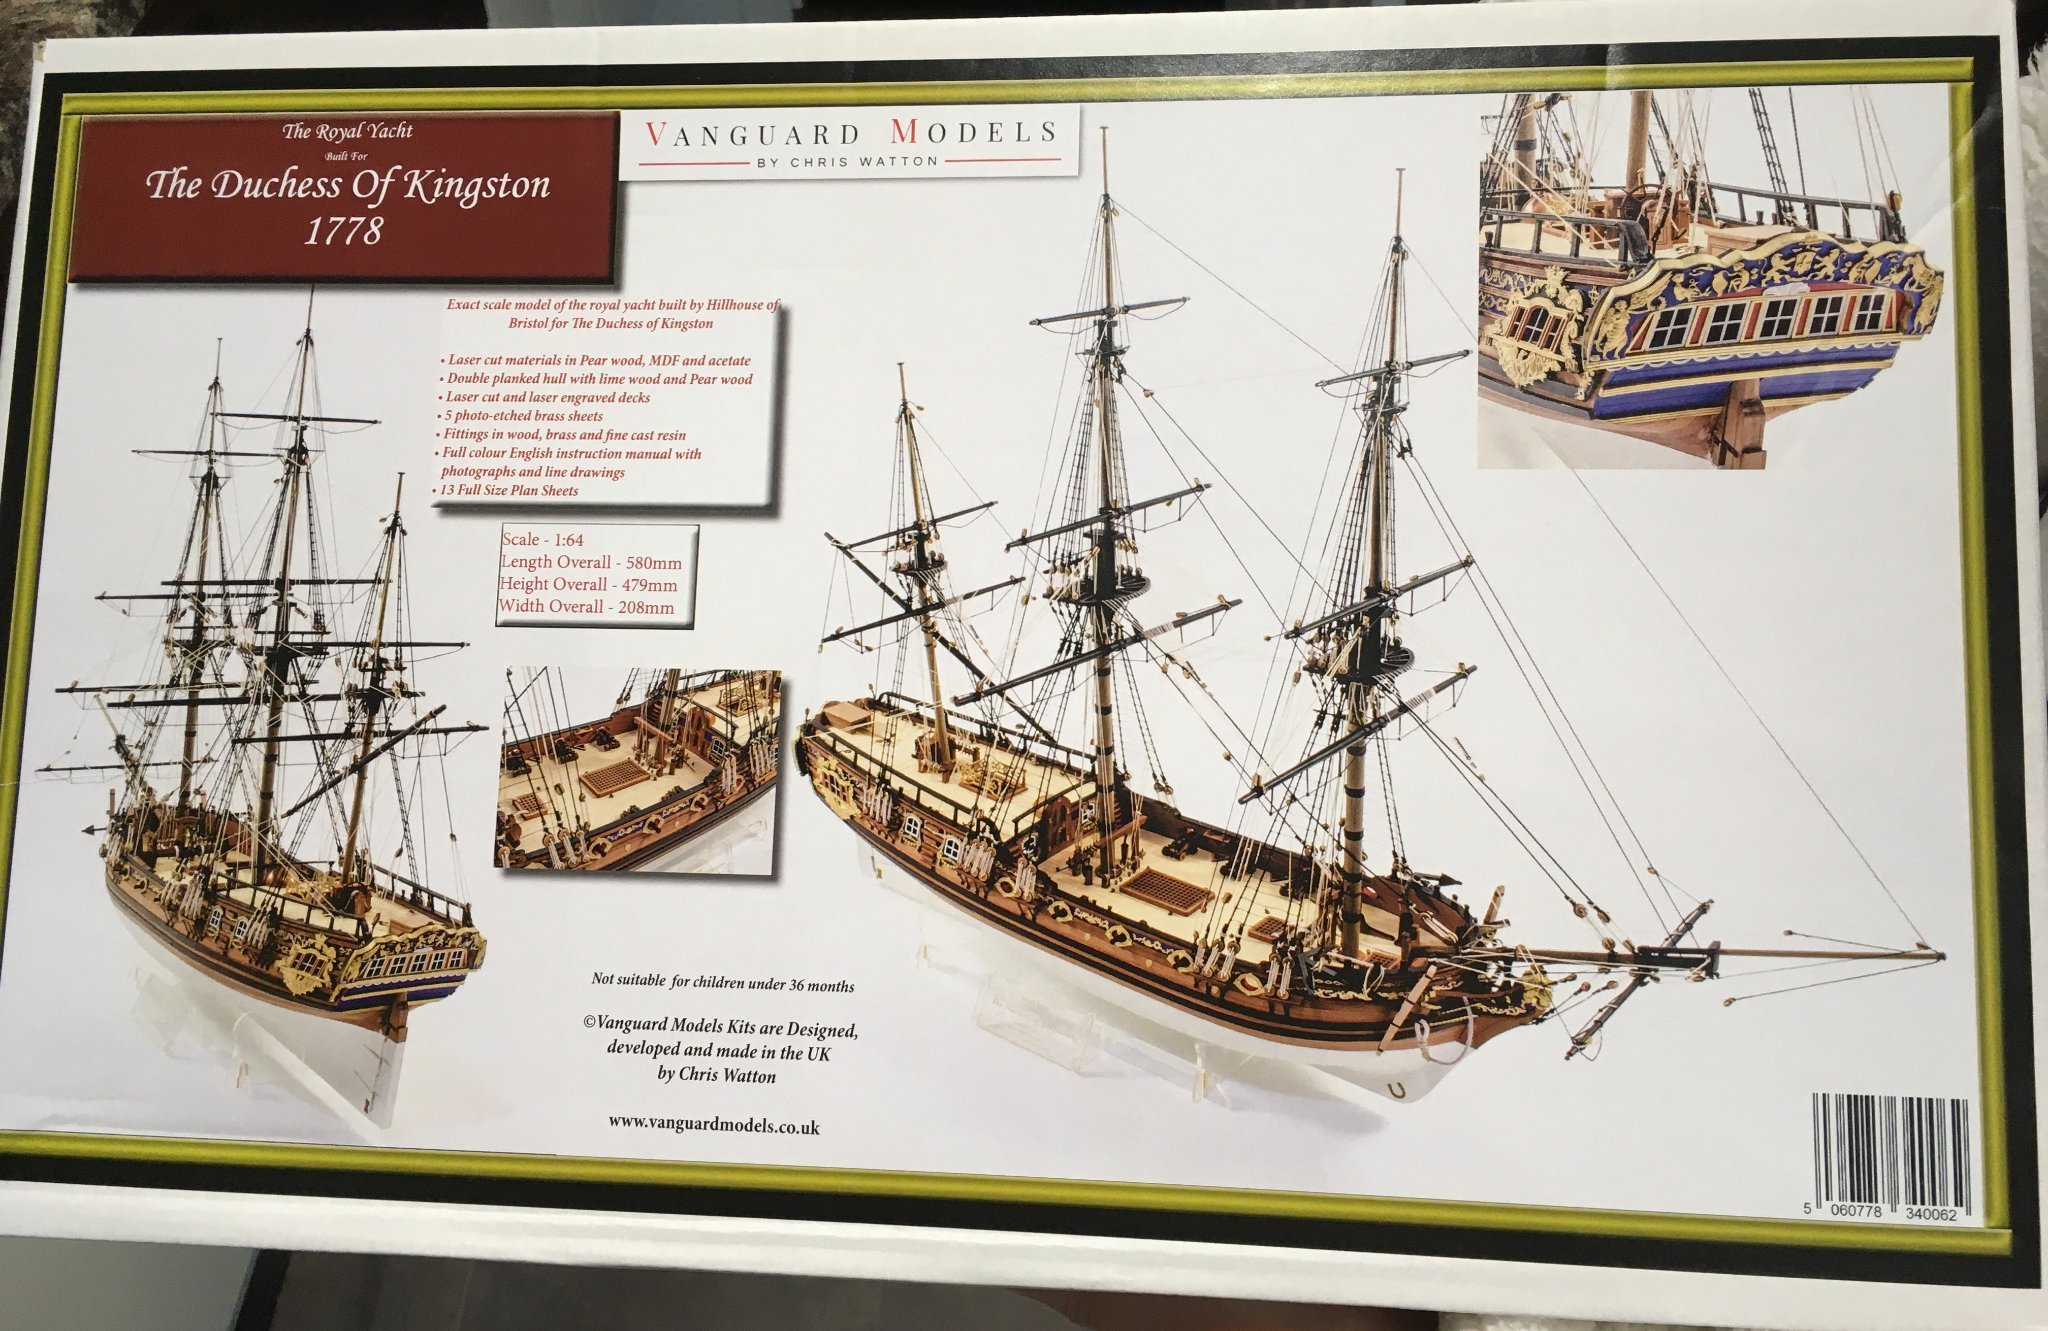
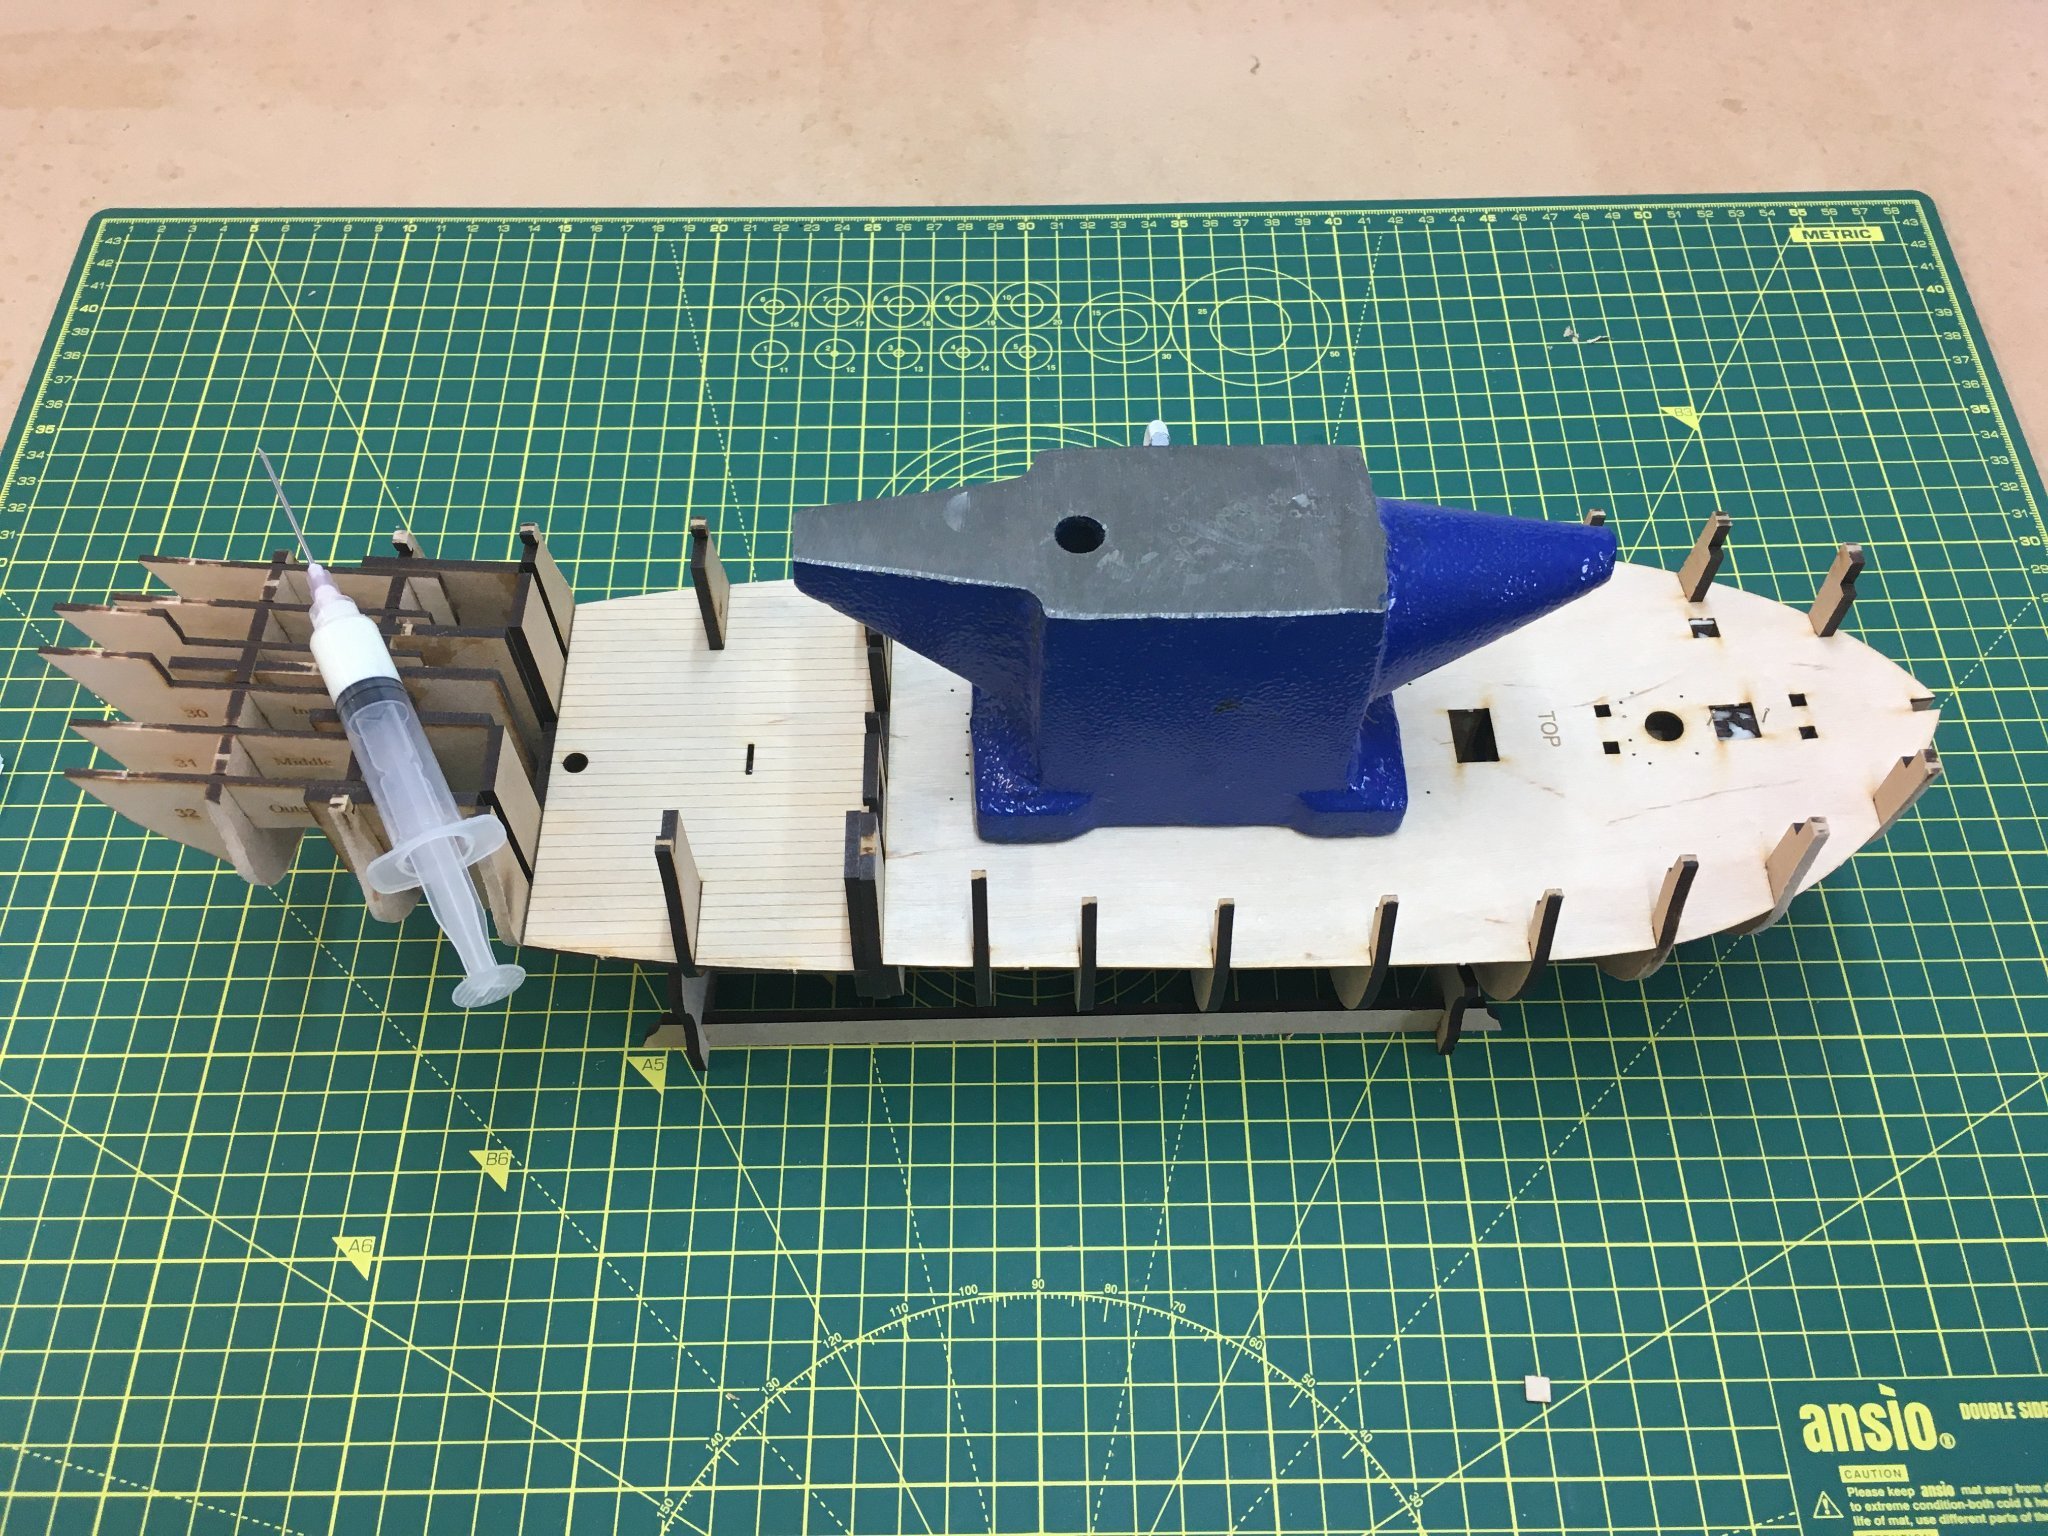
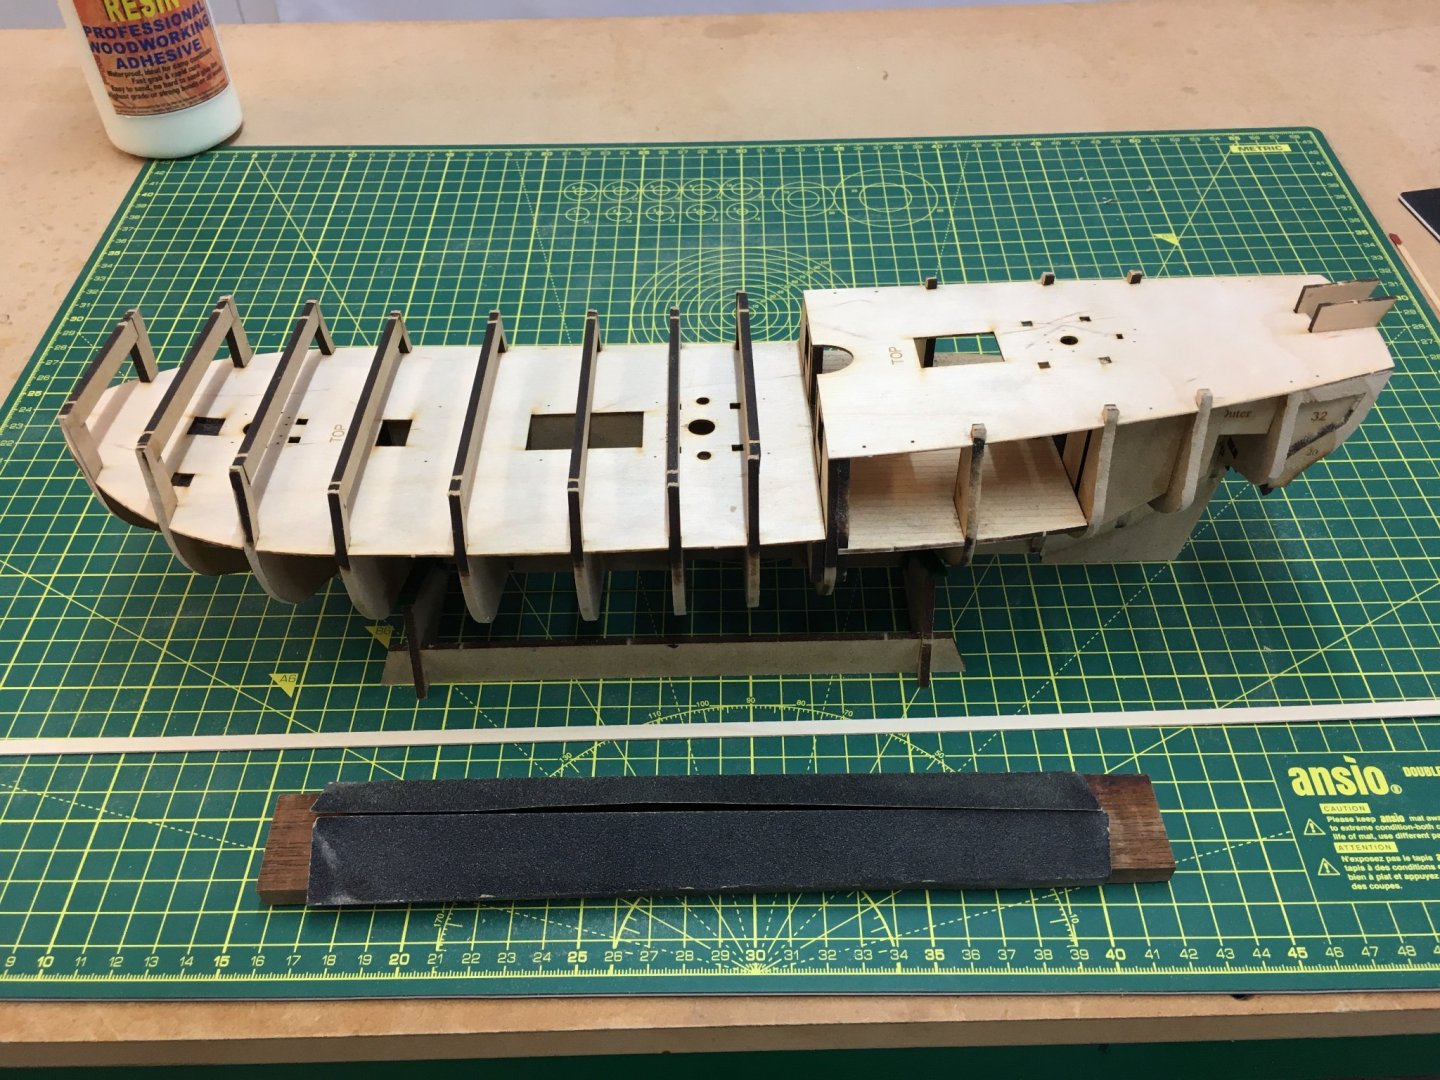
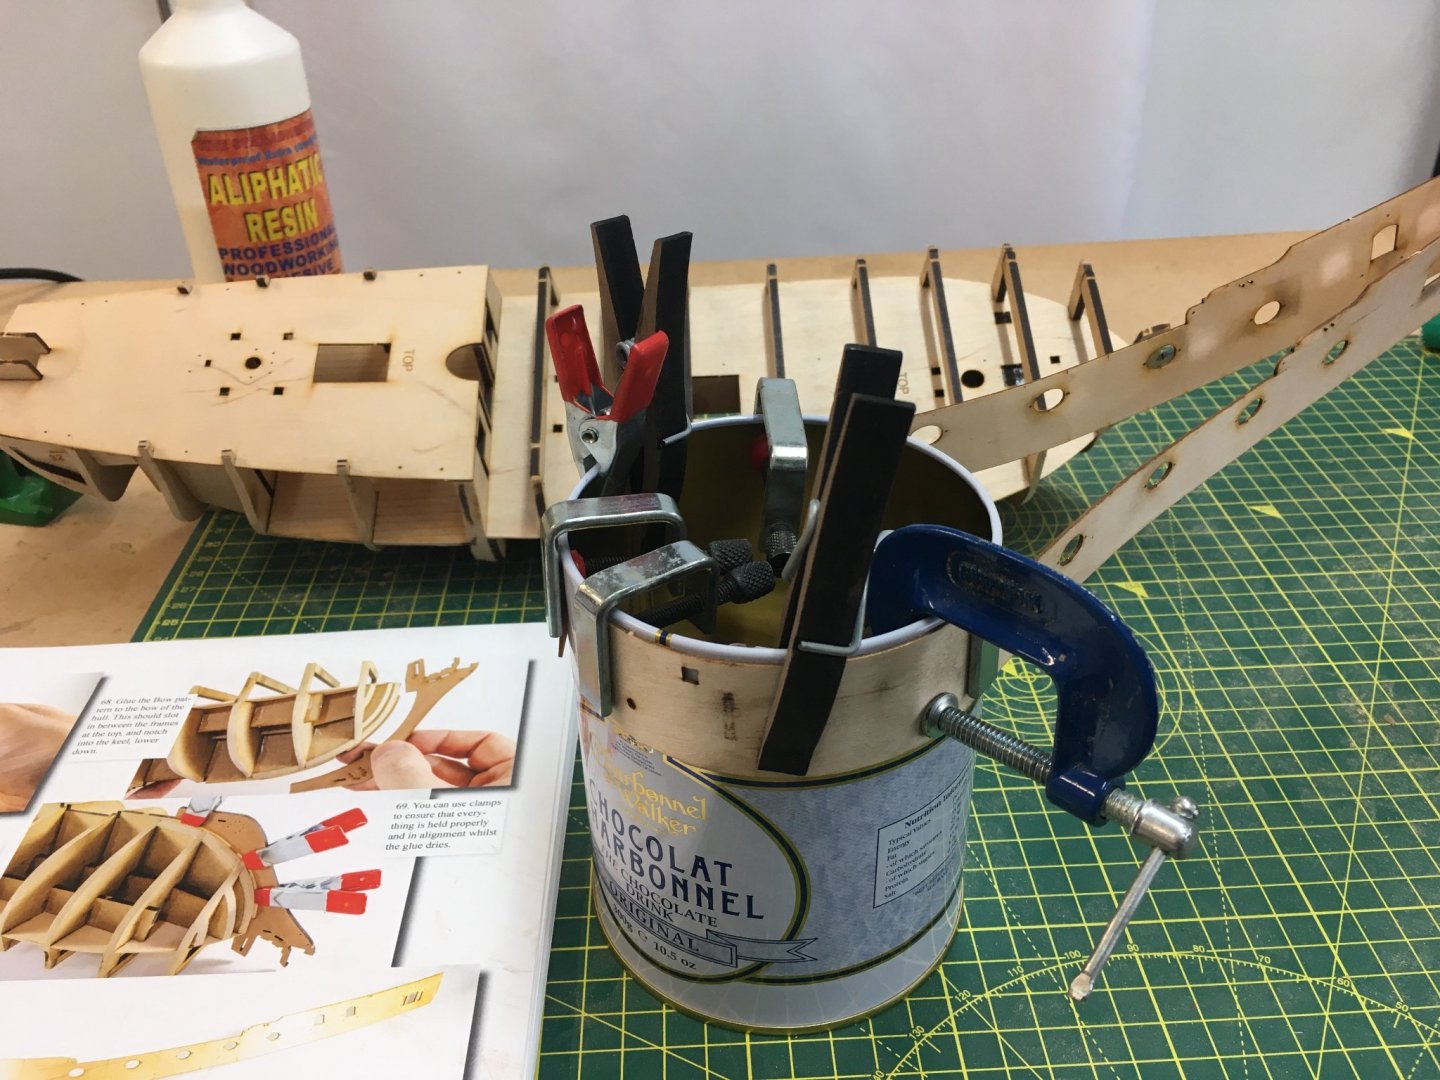
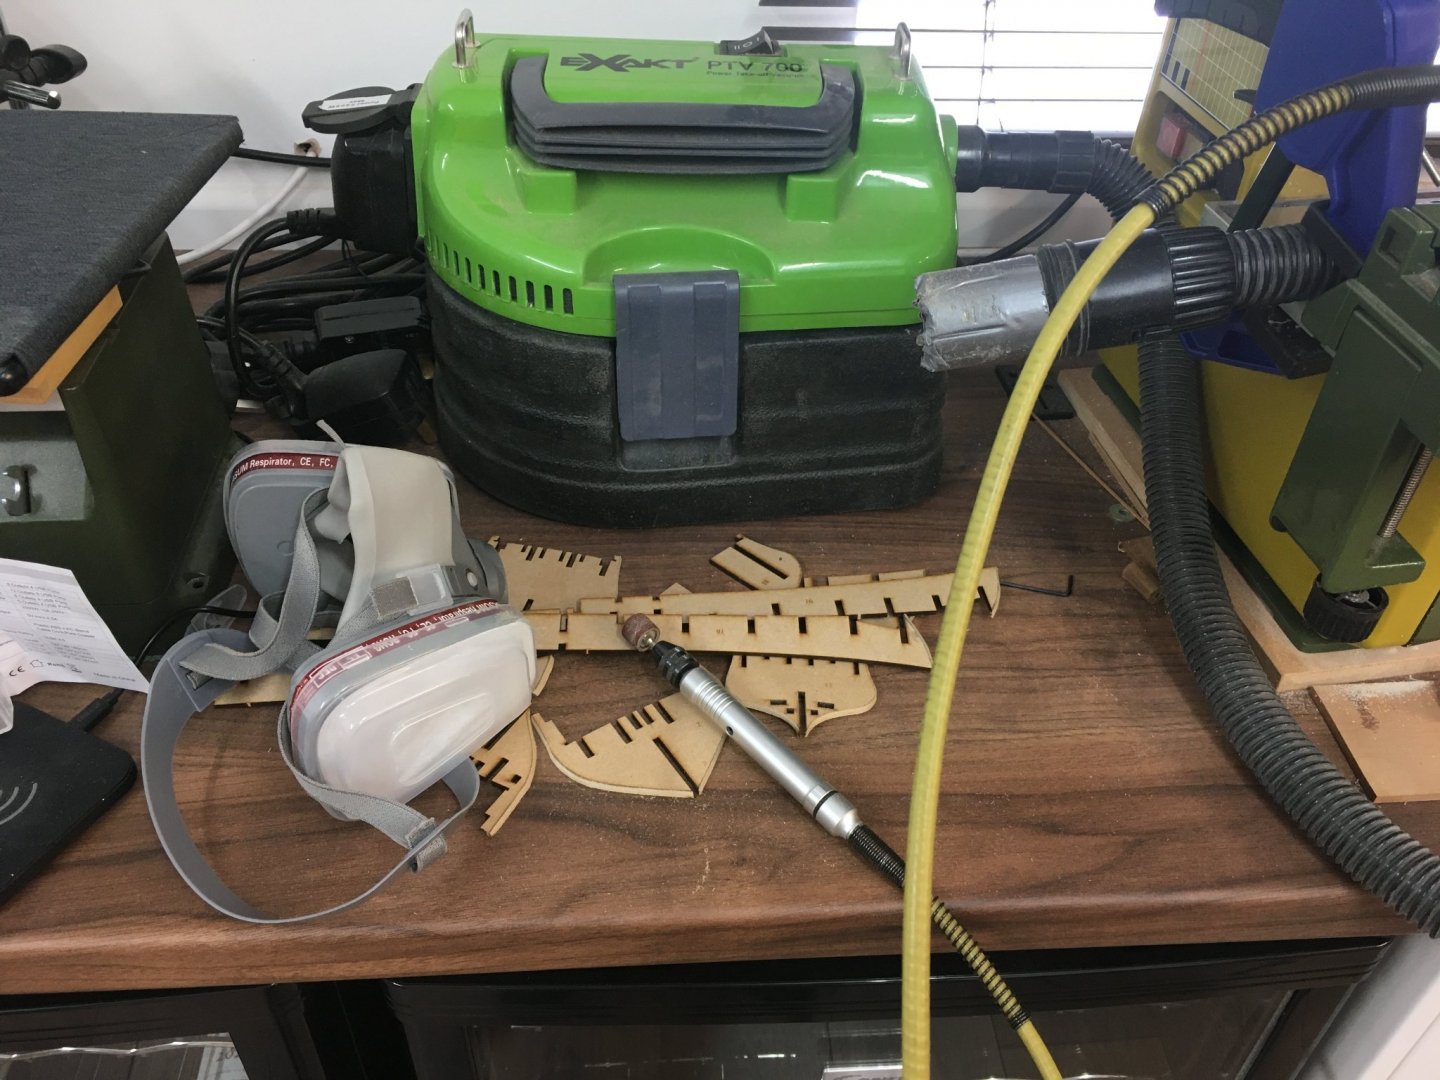
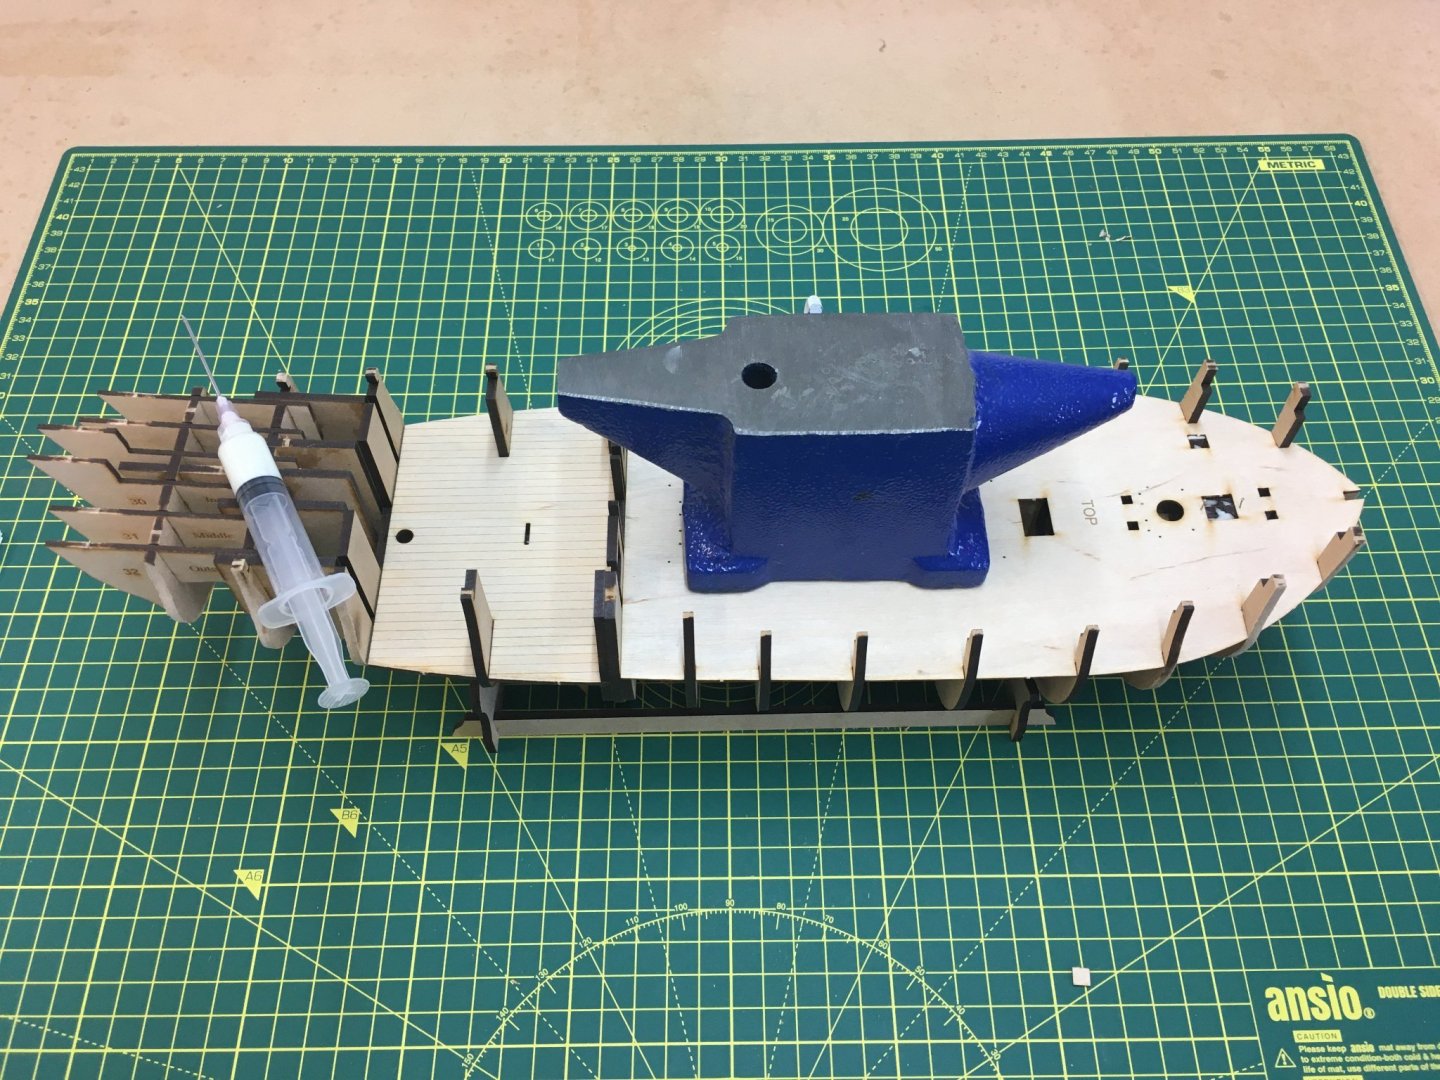
After a short break since finishing HMS Speedy I thought I'd better start DoK, not least because I've already pre-ordered HMS Sphynx! As with Speedy, I accepted Chris's offer to do a boxwood version and I also went for the pearwood blocks and deadeyes having been very impressed with them on Speedy. As with Speedy I'll probably make my own boxwood masts but I've yet to decide whether or not to plank the decks in boxwood. This worked well for Speedy, but the maple decks in this kit look really good and I might be tempted to retain them. However I really like making my own rope on my Syren rope rocket and I'm keen to try out the Gutermann Mara thread Chuck Pasarro recommends, so I'll probably spend a day or so spinning up all I need for this build in one go. I've also decided not to produce such a detailed log this time round. I'll still document the main stages and cover any new techniques in detail, but I see little point in repeating exhaustive descriptions of stuff I covered in the Speedy log. Instead, I'll include links where appropriate so if people are interested they won't have to go round the houses to find the information they need. Also, James (@James H) produced such a good log for the prototype with such fine photos that repetition on my part would be redundant. So, my first impression on opening the box was that this is another quality offering. All the components look good, but I was particularly impressed with the manual, the 13 sheets of plans, the photoetch and the laser cut sheets of MDF and timber. Now that Chris has his own laser cutter the results are even neater, with minimum tabs to cut through and numbers etched on each part to aid identification: The manual suggests bevelling the three foremost and three aftmost frames before fitting. I used the flexible shaft attachment on the Proxxon tool to sand the bevels. A dusty job, for which I wore a mask and set up a vacuum hose to pull in as much dust as possible: After bevelling these parts it took just a couple of hours to get to this stage: Following the kit instructions again, I dry fitted all the parts before brushing slightly diluted PVA into all the joins. I'd not tried this before but it worked really well. I found that every part fitted snuggly without any fettling, and the whole structure felt very solid. I initially used a brush to apply the glue but found it quite slow so I dug out an applicator I'd made some time ago out of a hypodermic syringe whose needle I'd blunted. I got the hypos in bulk from Amazon. The last job today was to fit the cabin deck and the foredeck base. The cabin deck will only just be visible on the completed model so I was happy to go with the maple in advance of a final decision on boxwood for the more prominent decks. The decks fitted well so the weights and pins are probably unnecessary but I tend to take a belt and braces approach on the key hull and deck structures. If I continue at this pace I'll be finished before the next Olympics! Derek


- 345 replies
-
- 13
-
-
- Duchess Of Kingston
- Vanguard Models
- (and 1 more)
-
Thanks Phill. Glad you found it useful, and good luck with your future builds.
-
For the first planking I think that looks fine. You'll be amazed how different it will look after you sand it.
-
Another superbly well executed and visually very attractive model. The figures really help to bring the barge to life. I just hope that man has a firm grip on his oar - regicide is still a capital offence! Derek
- 185 replies
-
- 2
-
-
- queen anne barge
- Syren Ship Model Company
- (and 1 more)
-
Thanks, that's good of you to say so, but please bear in mind that I like putting my own stamp on kits. I hope I haven't given the impression that you need lathes and milling machines and so forth to enjoy this hobby. With good suppliers like Vanguard you can produce excellent models straight out of the box without using expensive tools and special techniques and materials. Like many people, I started out following plans and instructions, and only started 'kit bashing' as my interest grew and I gradually built up my toolkit and knowledge. Anyway, in MSW you've found a great source of information and advice on all aspects of the hobby. Have fun - and consider starting your own build log. Derek
- 725 replies
-
- 2
-

-
-
- vanguard models
- speedy
- (and 1 more)
-
Thanks Eamonn! I might not be quite done yet as I'm seriously tempted to copy the display method you used on your splendid Ballahoo build. Showing her on the stocks like that really helps bring her to life.
- 725 replies
-
- 1
-
-
- vanguard models
- speedy
- (and 1 more)
-
Thanks Erik. You set a very high standard with your Lady Isabella build so I'm looking forward to your Flirt.
- 725 replies
-
- 1
-
-
- vanguard models
- speedy
- (and 1 more)
-
Thanks for the kind words James. There's no such thing as too slow in my book, at least as far as model building is concerned. Take your time and enjoy it!
-
Thanks Glenn. I've learned from your logs too so it's definitely a two way street. I use an elderly Nikon D90 with a 18 - 105mm lens, which seems to do OK for close-ups. Those lights look identical to the ones I've got. They're OK, especially for close-ups and small objects but if money was no object I'd go for something larger to fully illuminate something the size of a model ship.
- 725 replies
-
- 2
-
-
-
- vanguard models
- speedy
- (and 1 more)
-
Many thanks B.E. I've bookmarked your work since I joined MSW and I've taken the quality of your models and logs as the standard to aspire to, so I particularly appreciate your kind comments. Derek
- 725 replies
-
- 3
-
-
- vanguard models
- speedy
- (and 1 more)
-
Thanks John. I'll look out for your build log. Thanks Tim. I couldn't believe how many techniques I had to relearn/re-invent on this build, simply because I hadn't recorded them in the past. As I've said before, the log has been as much for my benefit as anything, but I'm really glad you and other folk have found it helpful too. Thanks Richard. I also need to thank you again for prompting me to get some lights and background material to improve my photography!
- 725 replies
-
- 3
-
-
- vanguard models
- speedy
- (and 1 more)
-
I appreciate your kind words Tom. Sharing information is one of the great things about this forum - I've probably learned ten times more from other people than I could ever hope to put back.
- 725 replies
-
- 3
-
-
- vanguard models
- speedy
- (and 1 more)
-
Thanks Druxey! Your books were always on my workbench as a constant source of information and inspiration, particularly during the rigging stage. Thanks Chris - I wanted to do your great kit justice.
- 725 replies
-
- 2
-
-
- vanguard models
- speedy
- (and 1 more)
-
Thanks Edward - glad you enjoyed it. How's your Cutter build going?
- 725 replies
-
- 2
-
-
- vanguard models
- speedy
- (and 1 more)
-
Thanks Ryland. I'm still tempted by the Medway Longboat whenever I see the beautiful pictures in your log, but I'm afraid it's going to have to wait in line behind Vanguard's Duchess of Kingston and HMS Sphynx.
- 725 replies
-
- 2
-
-
- vanguard models
- speedy
- (and 1 more)
-
Thanks for your kind comments Glenn - much appreciated. I've tried to follow your advice on lighting, backgrounds and camera settings so I'm glad you've seen some improvement. I still need better lights, and the cloth background isn't uniform enough - I might try paper.
- 725 replies
-
- 3
-
-
- vanguard models
- speedy
- (and 1 more)
-
Thanks Spyglass. I hope your build goes well - and I'm glad I'm only the second slowest builder on the planet!
- 725 replies
-
- 2
-
-
- vanguard models
- speedy
- (and 1 more)