HOLIDAY DONATION DRIVE - SUPPORT MSW - DO YOUR PART TO KEEP THIS GREAT FORUM GOING! (Only 20 donations so far - C'mon guys!)
×


DelF
-
Posts
1,409 -
Joined
-
Last visited
Content Type
Profiles
Forums
Gallery
Events
Everything posted by DelF
-
 Hi James You've made several references to varnish in your log, both poly and acrylic. Could you share what brands you use, and whether or not you dilute them at all? I'm still trying to find a combination I really like. Thanks Derek
- 355 replies
-
- 2
-

-
- vanguard models
- Sphinx
- (and 1 more)
-
Thanks Richard. I've said it before, but it's worth repeating - Speedy would build into a great model straight out of the box. I add detail because that's just what I enjoy doing. It's my first kit from Vanguard but it certainly won't be my last. I've already got Duchess of Kingston on the shelf and I can't wait for Sphinx to come out. Chris seems to be achieving a new level of innovation and quality with each successive design. Derek
- 725 replies
-
- 1
-
-
- vanguard models
- speedy
- (and 1 more)
-
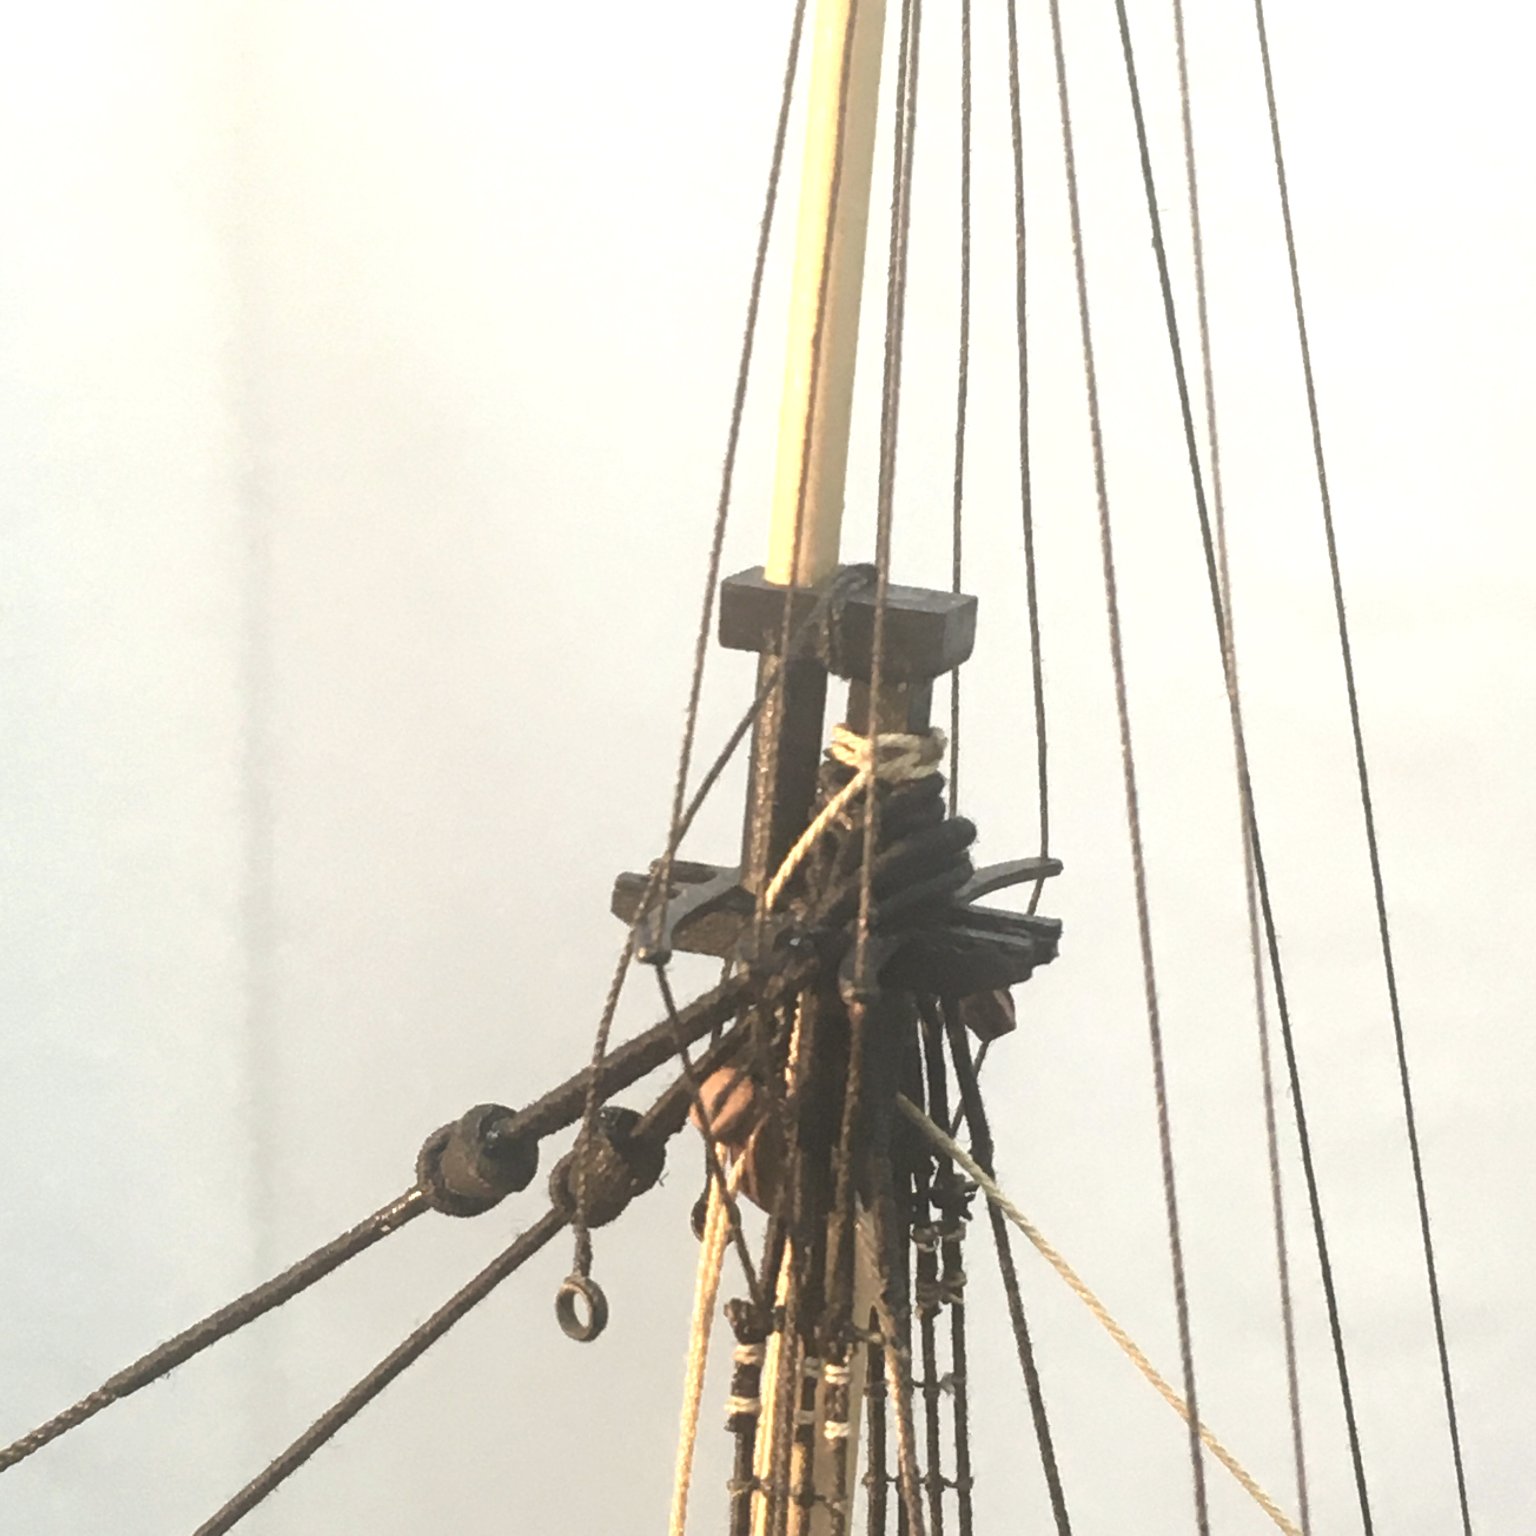
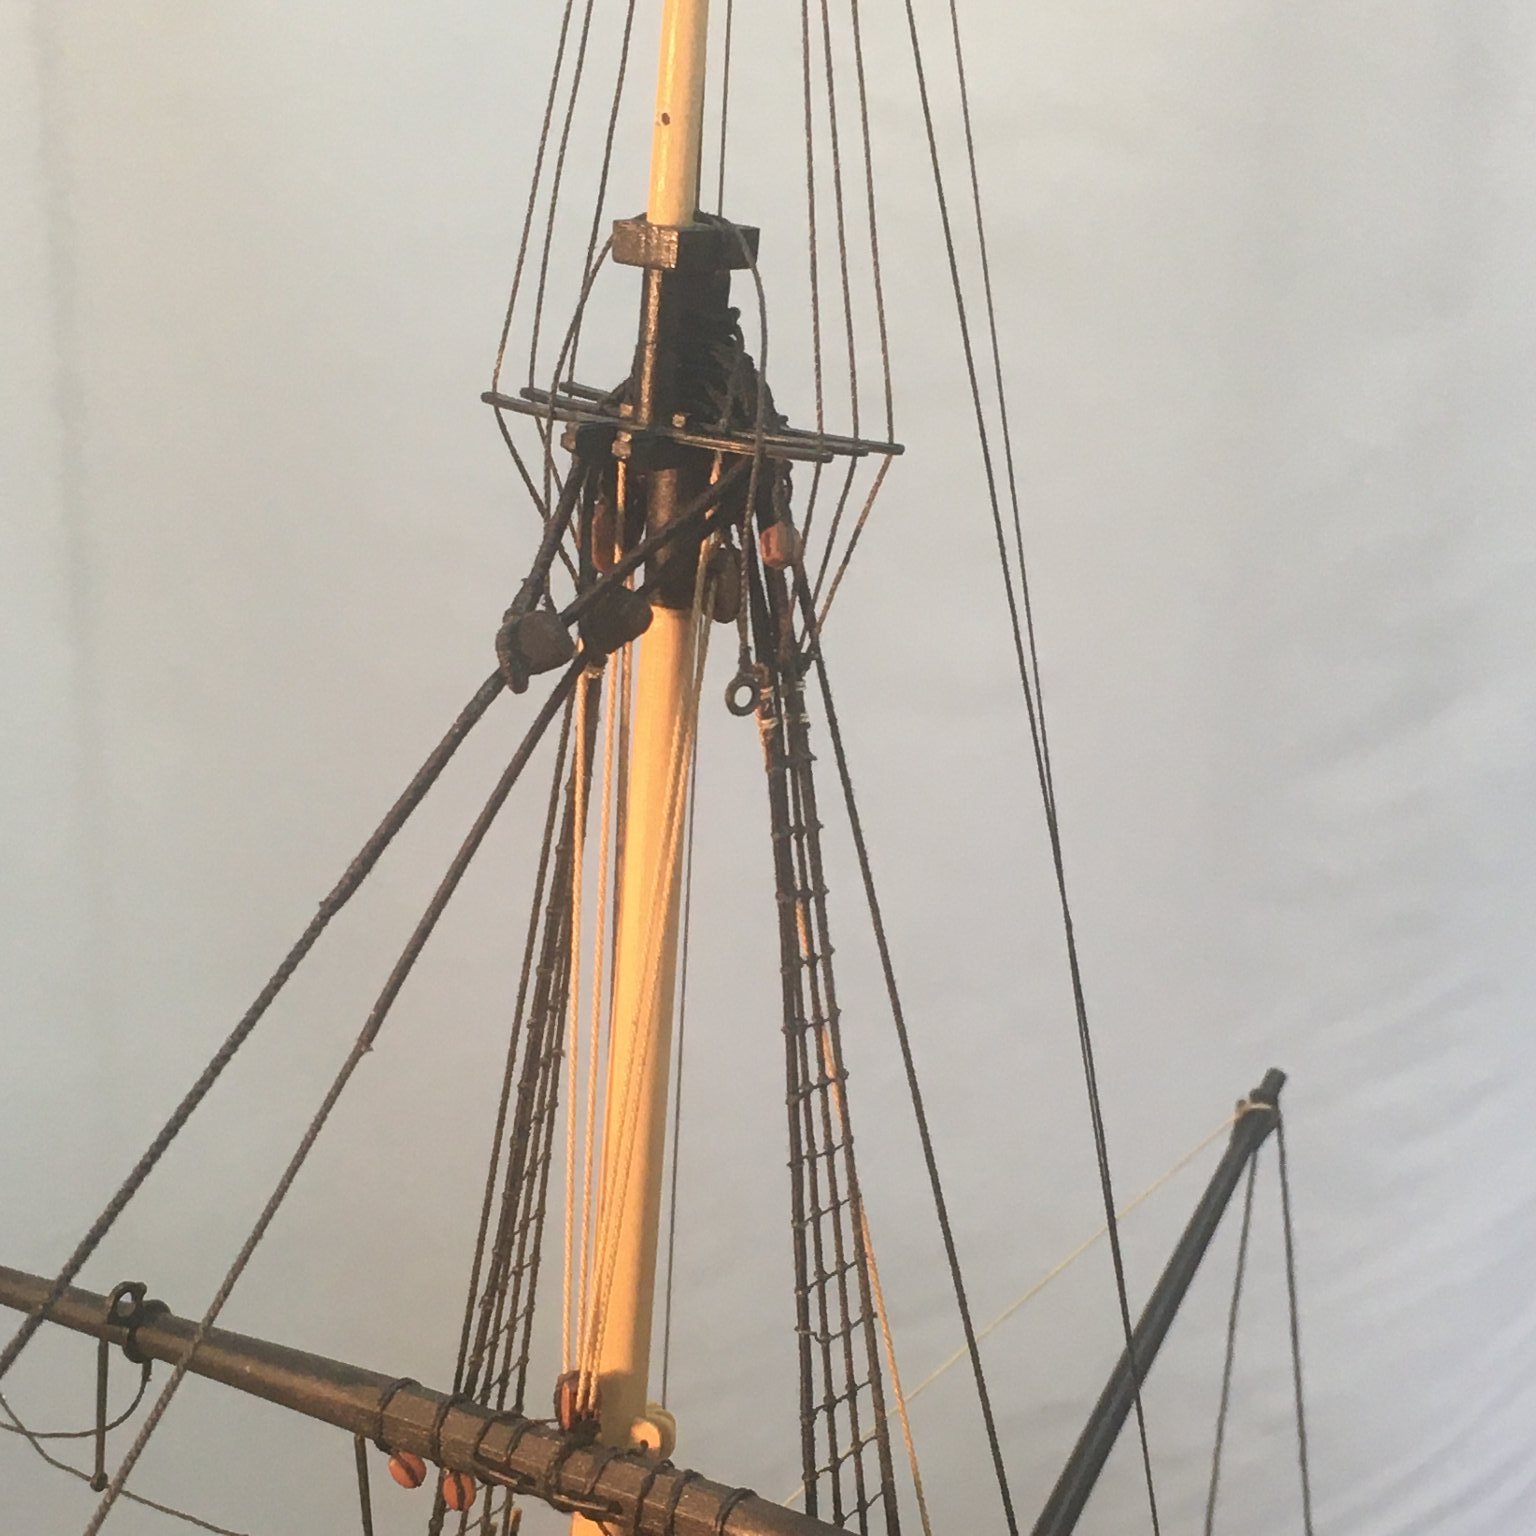
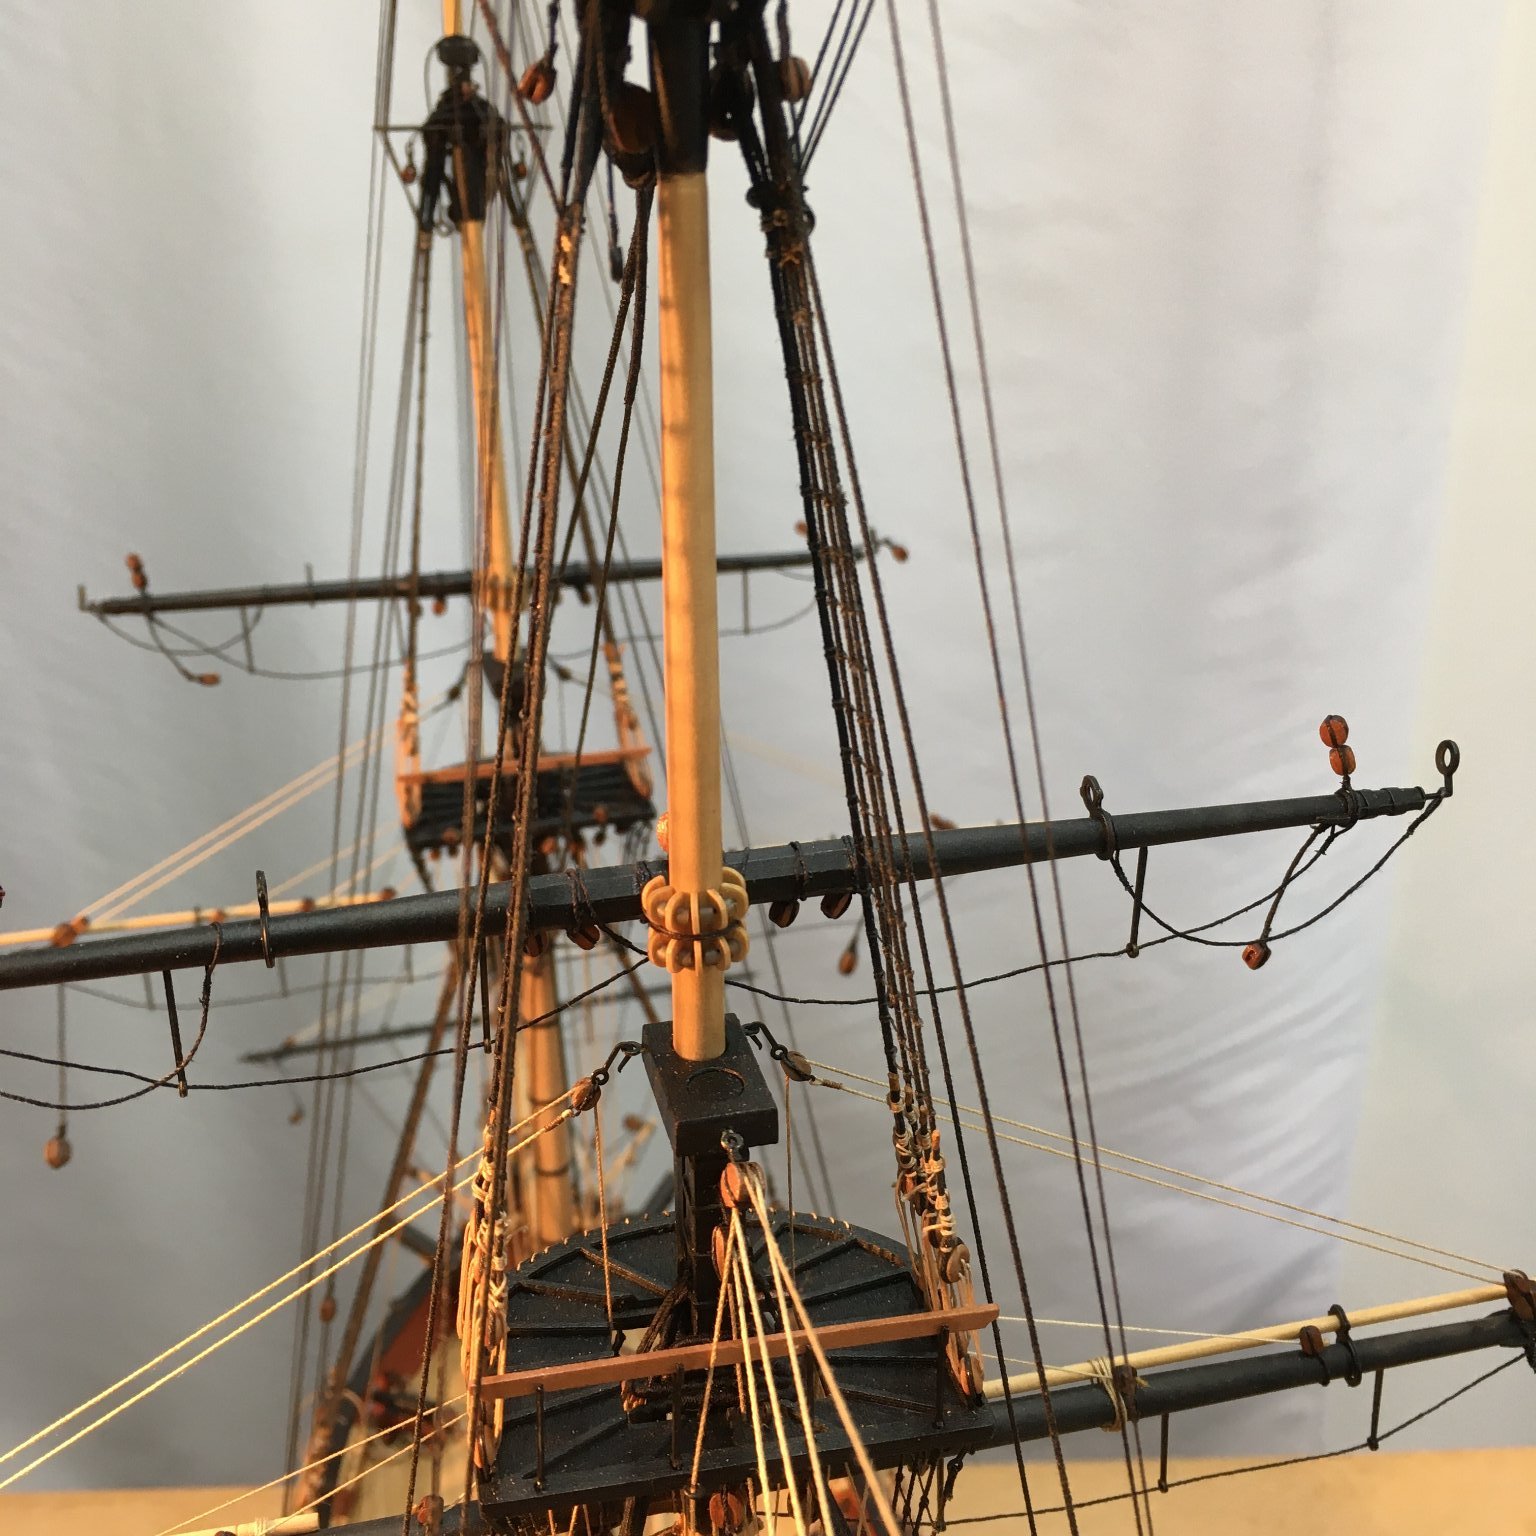
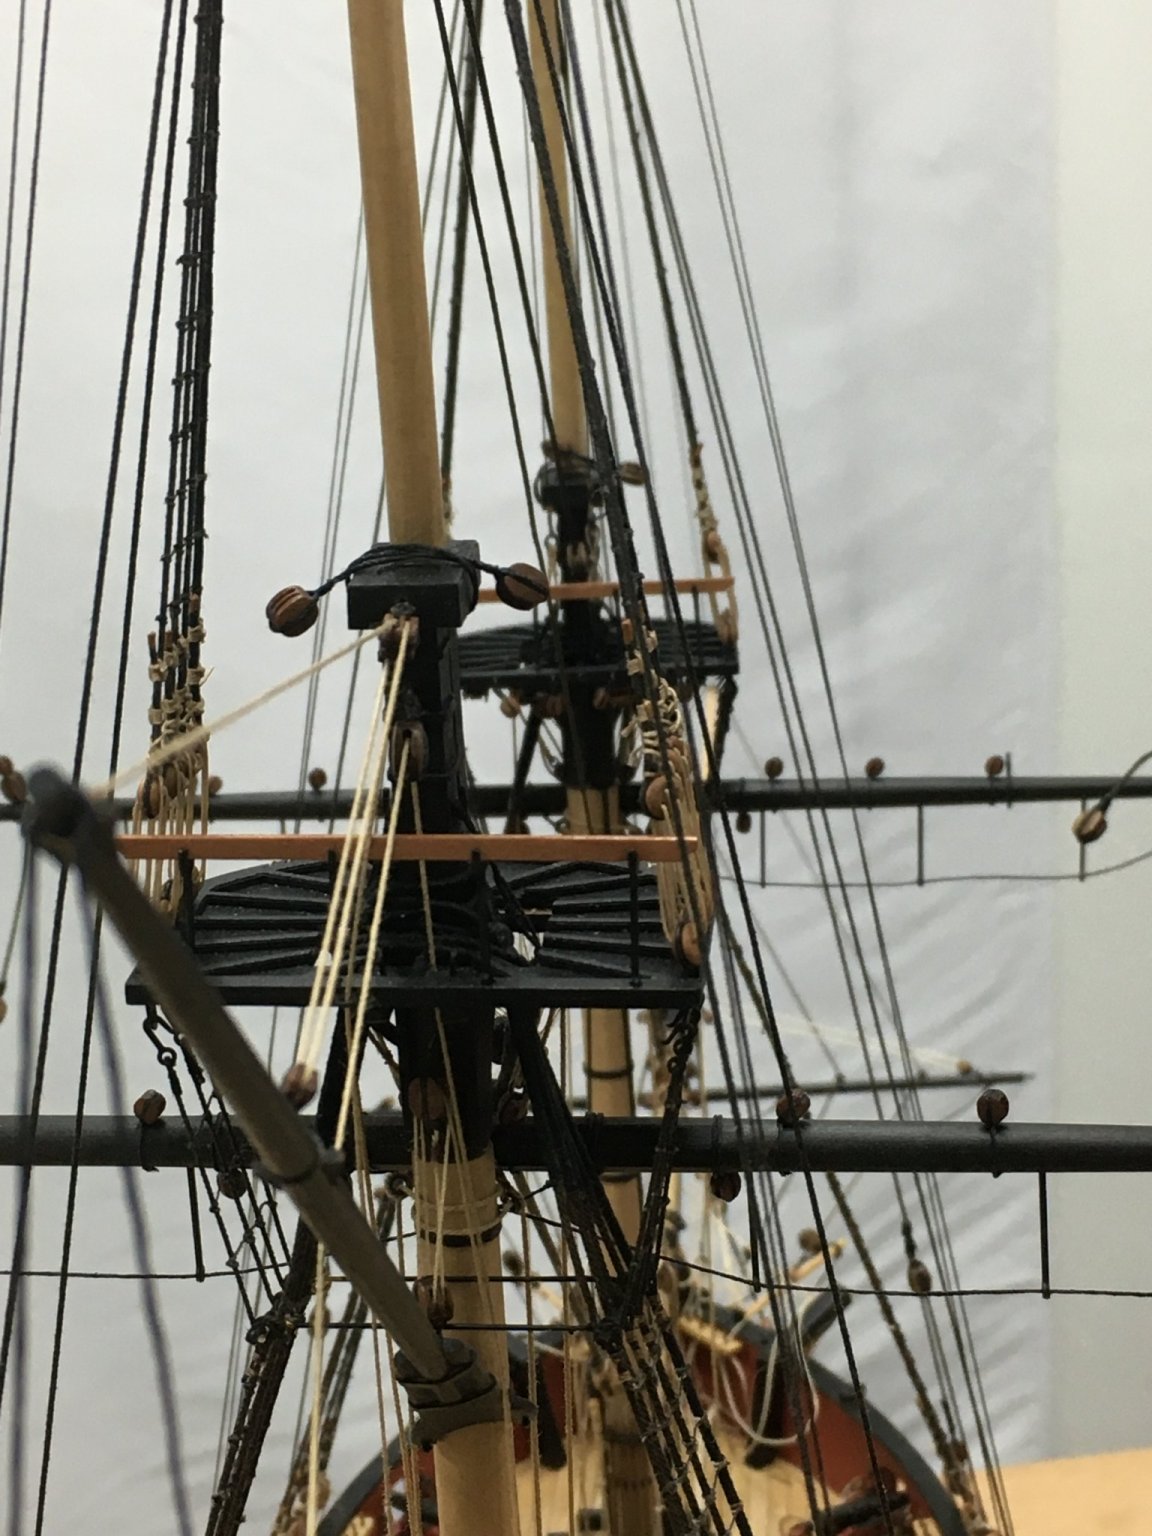
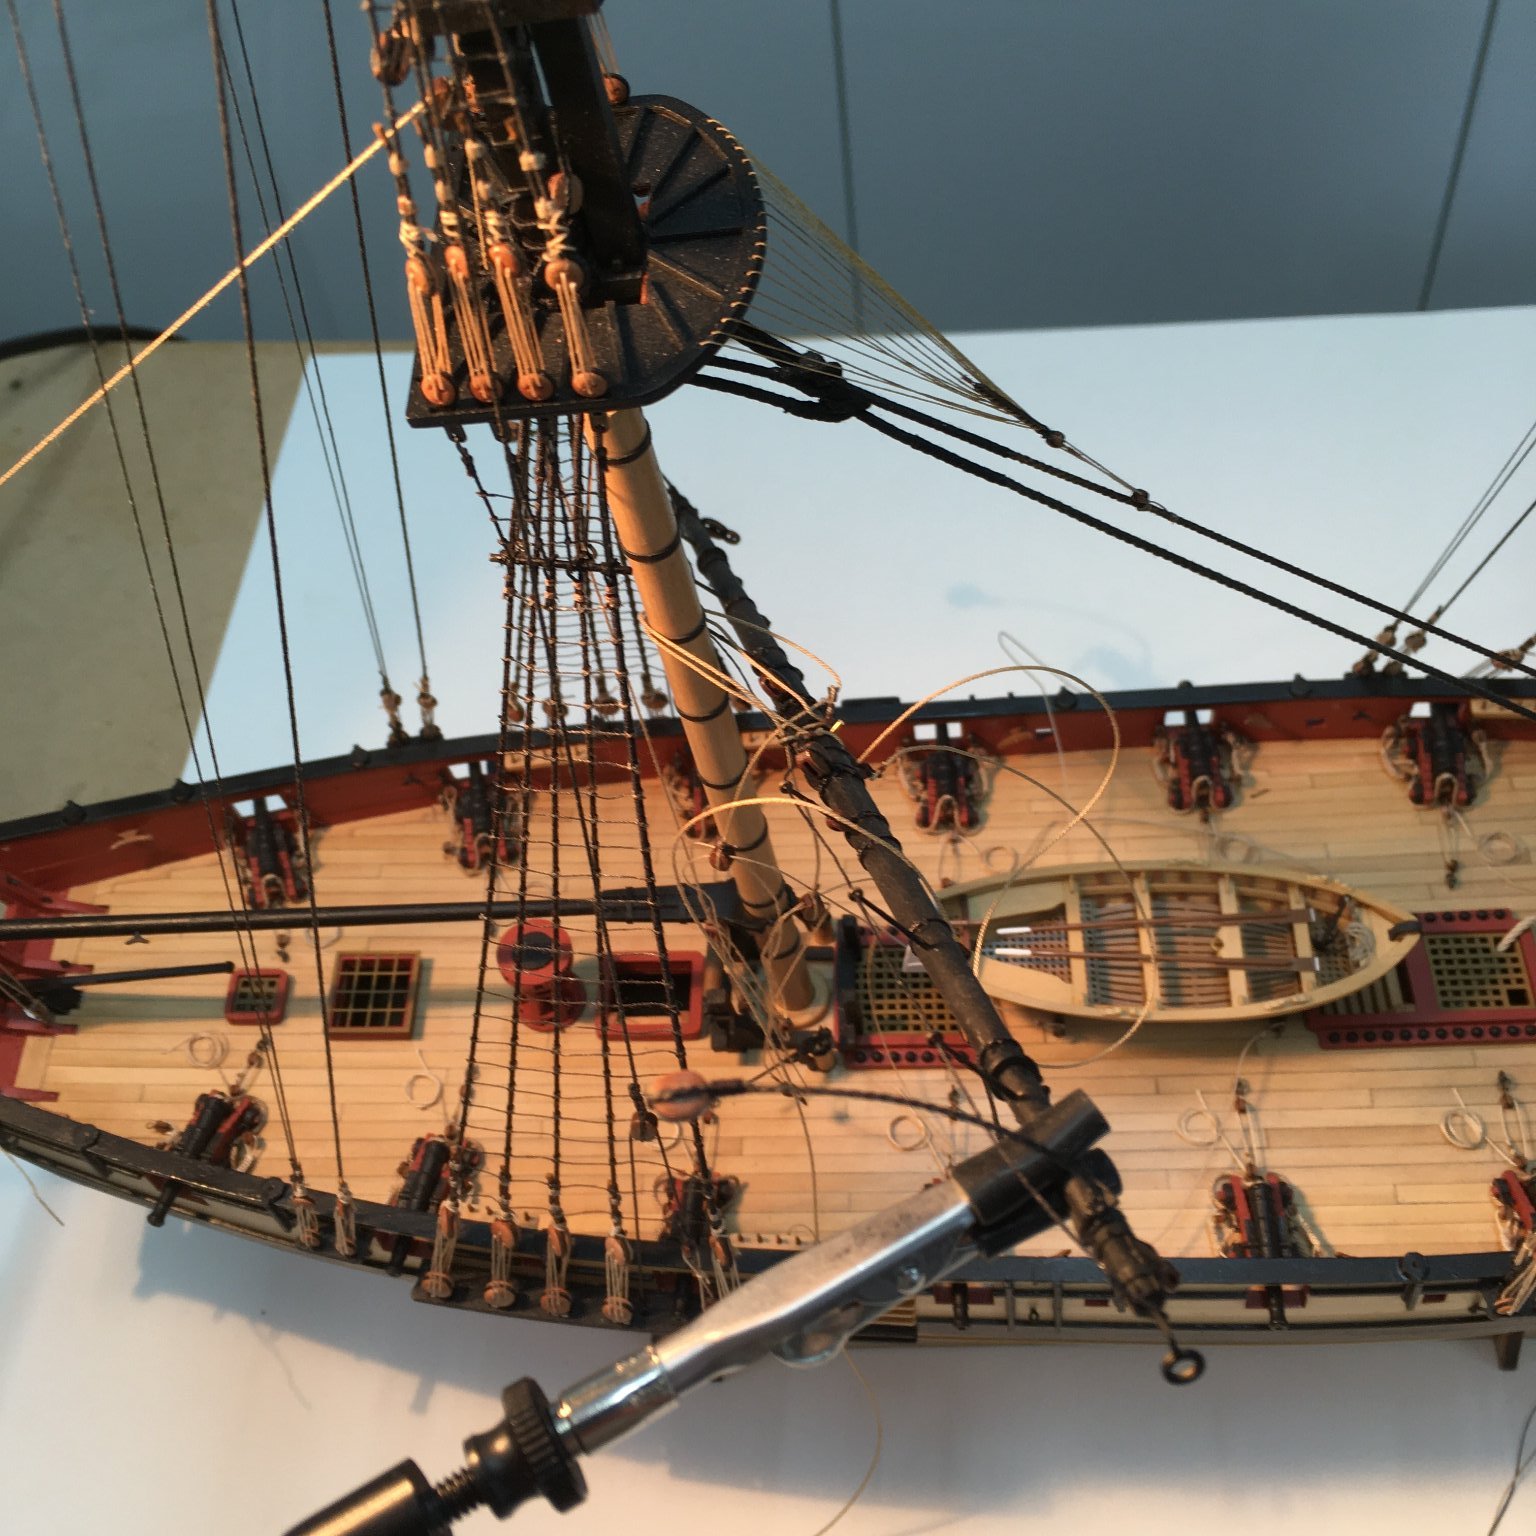
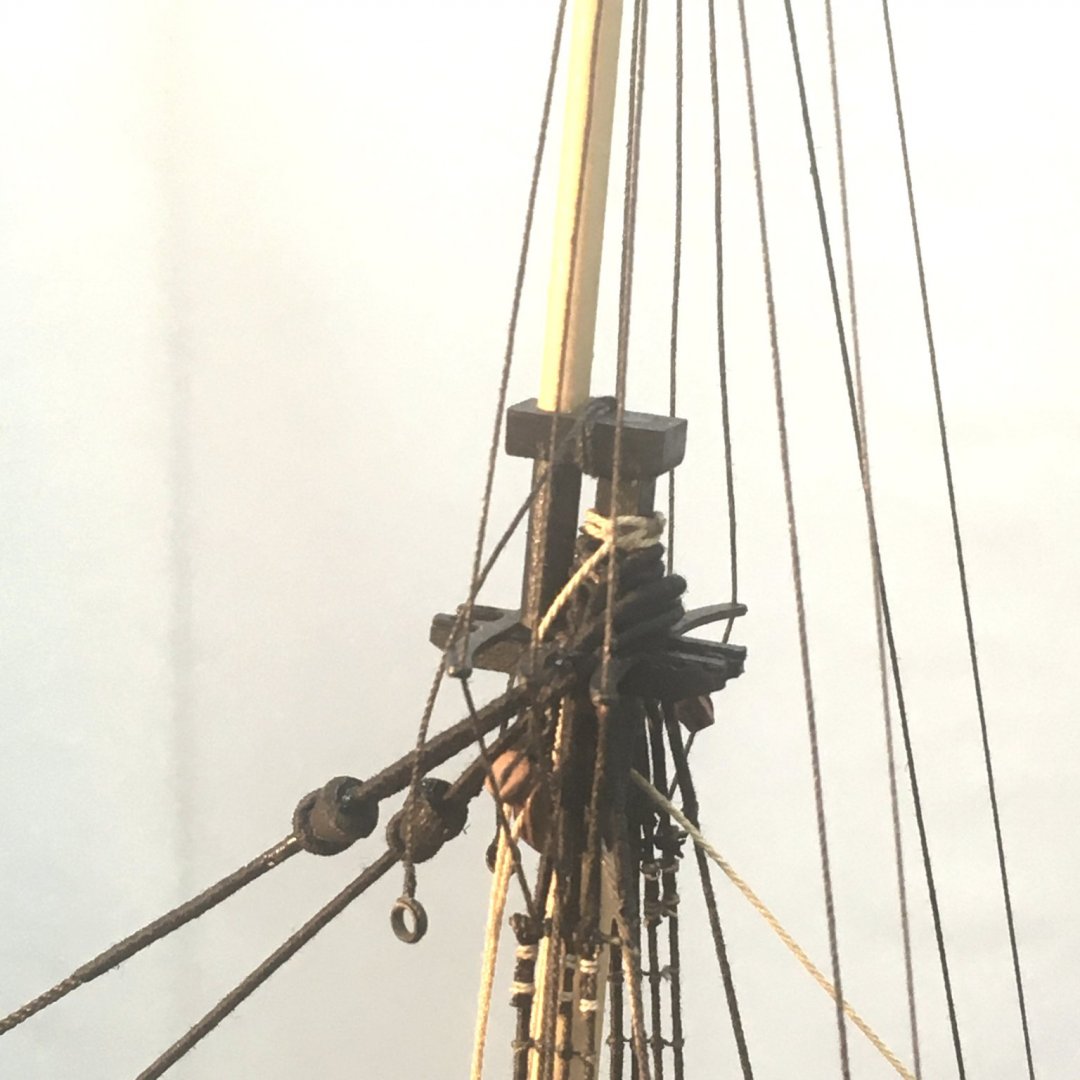
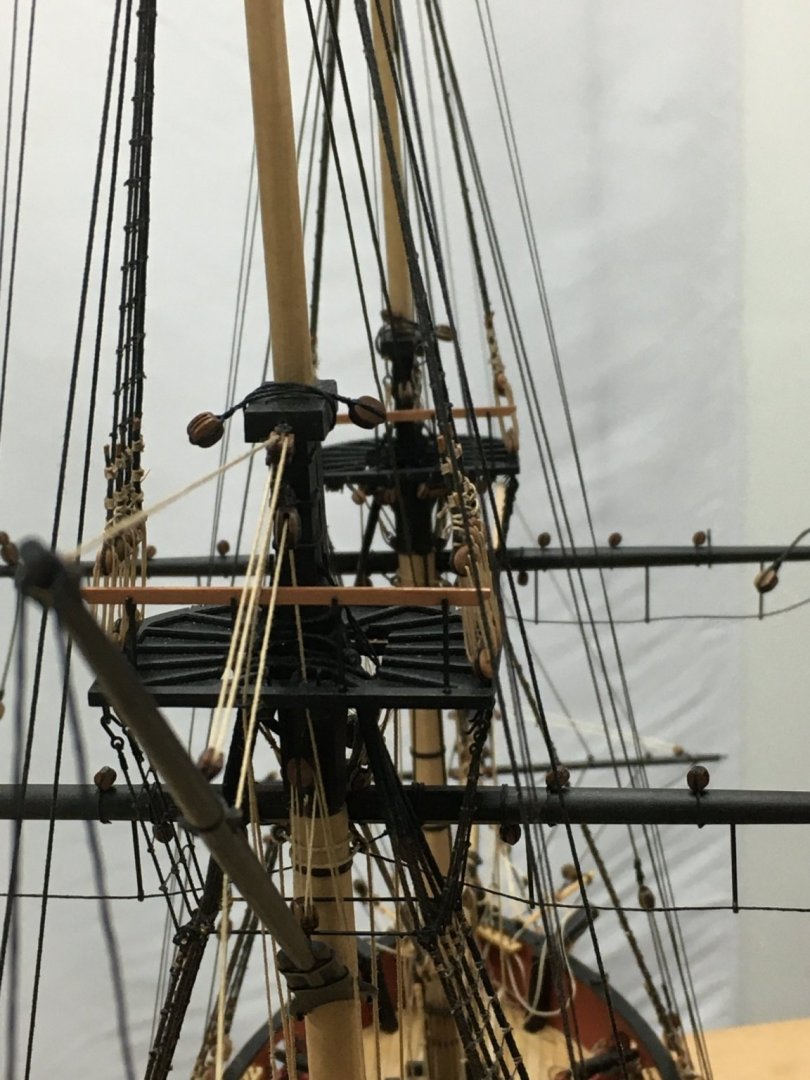
Topsail yard ties I just went slightly off plan with these. The kit instructions say the ties start off tied to the crosstrees, whereas I believe they were normally tied round the masthead. Starting with the port tie on each mast, I seized an eye in one end, passed it between the masthead and the topgallant mast and fed the free end of the tie through the eye on the starboard side. The starboard tie starts off on the port side in the same way: I subsequently blackened the parts of the ties showing above the crosstrees with india ink as they just didn't look right otherwise. Aesthetics trumps accuracy again (although I could pretend the ties were served😬). Back to the port tie. This passes down between the forward and middle crosstrees, inside the stays and down to reeve through the double block in the centre of the topsail yard, then back up to reeve through the 5mm block suspended under the port side of the crosstrees. The tie passes forward to aft through this block (NB I chose to use 5mm blocks here as I felt the 3mm ones shown in the plans were too small). This is the set up once both ties have reached this stage: Each tie ends in a 5mm block to which the falls attach: The fall links to another 5mm block hooked to the channels on a long strop, bringing the block well above the bulwarks. All this is very clearly set out in the rigging plans. I rushed ahead of myself at this point, rigging the topsail yard lifts then the topgallant yard ties and parrels. Unfortunately I didn't capture each stage on camera so I'll try to rectify that tomorrow so I can update the log properly. But in the meantime here's a quick (and badly focussed) shot of the current state of play: Derek


- 725 replies
-
- 14
-
-
- vanguard models
- speedy
- (and 1 more)
-
Best wishes, whichever way you decide to go. You've done more than most to advance our hobby and you deserve to succeed. Derek
-
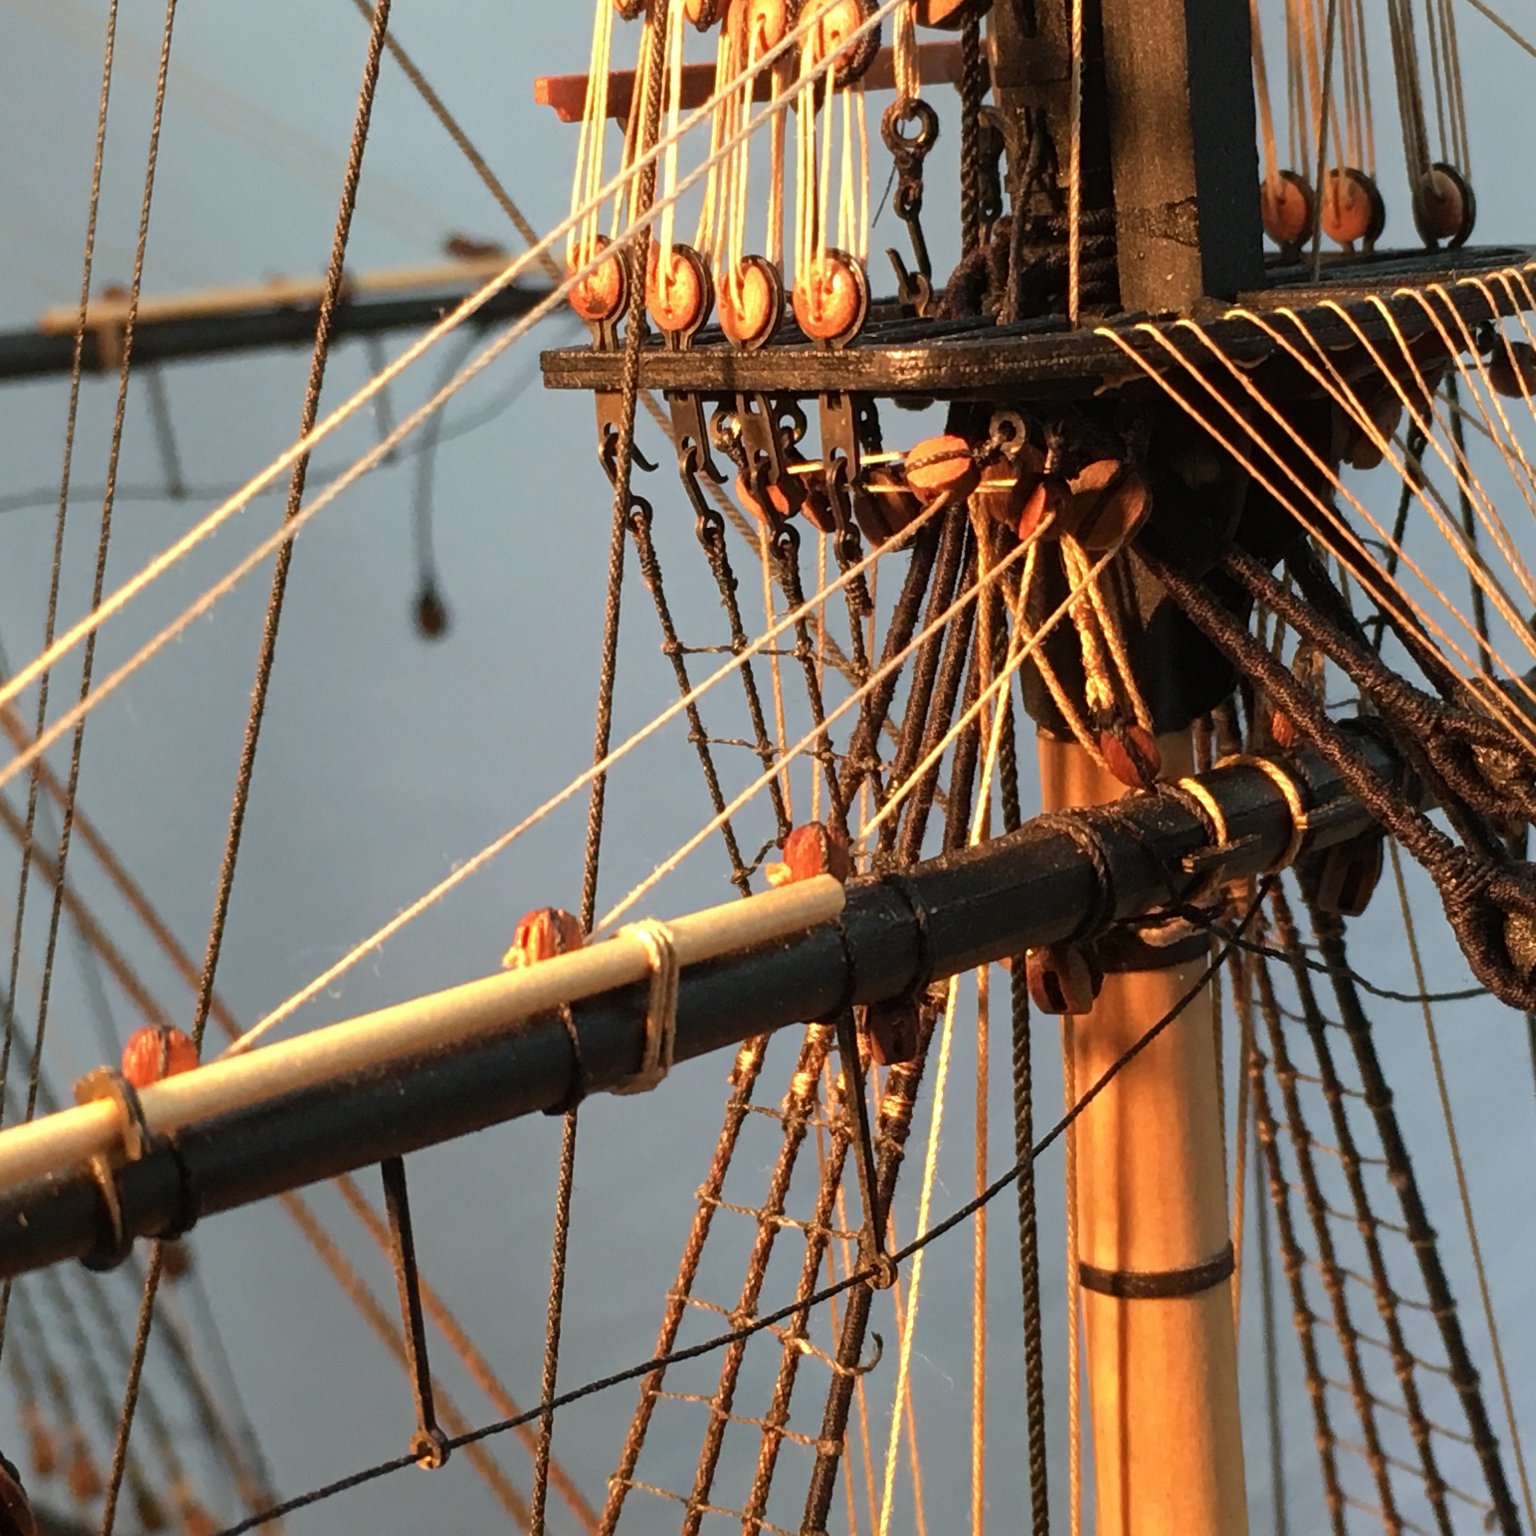
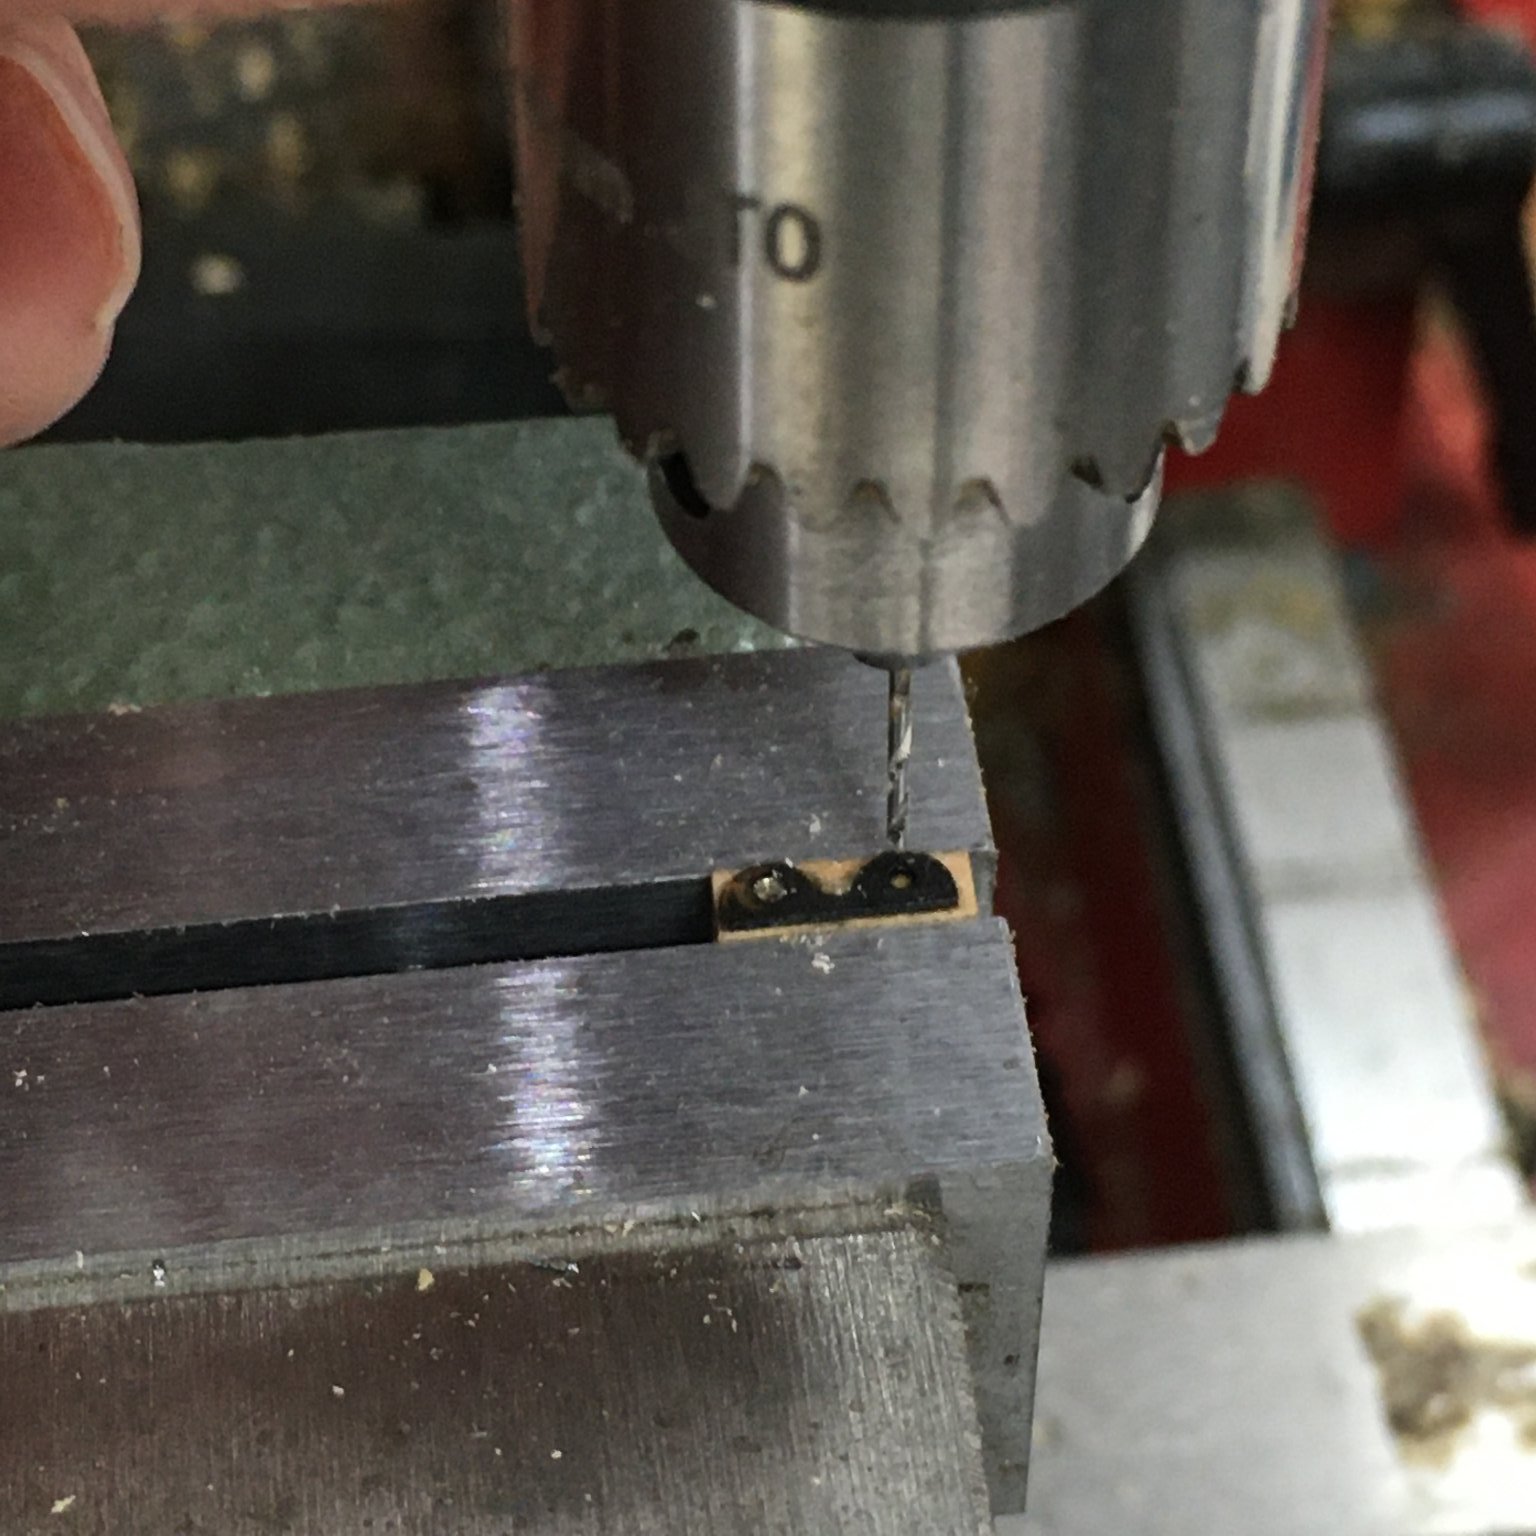
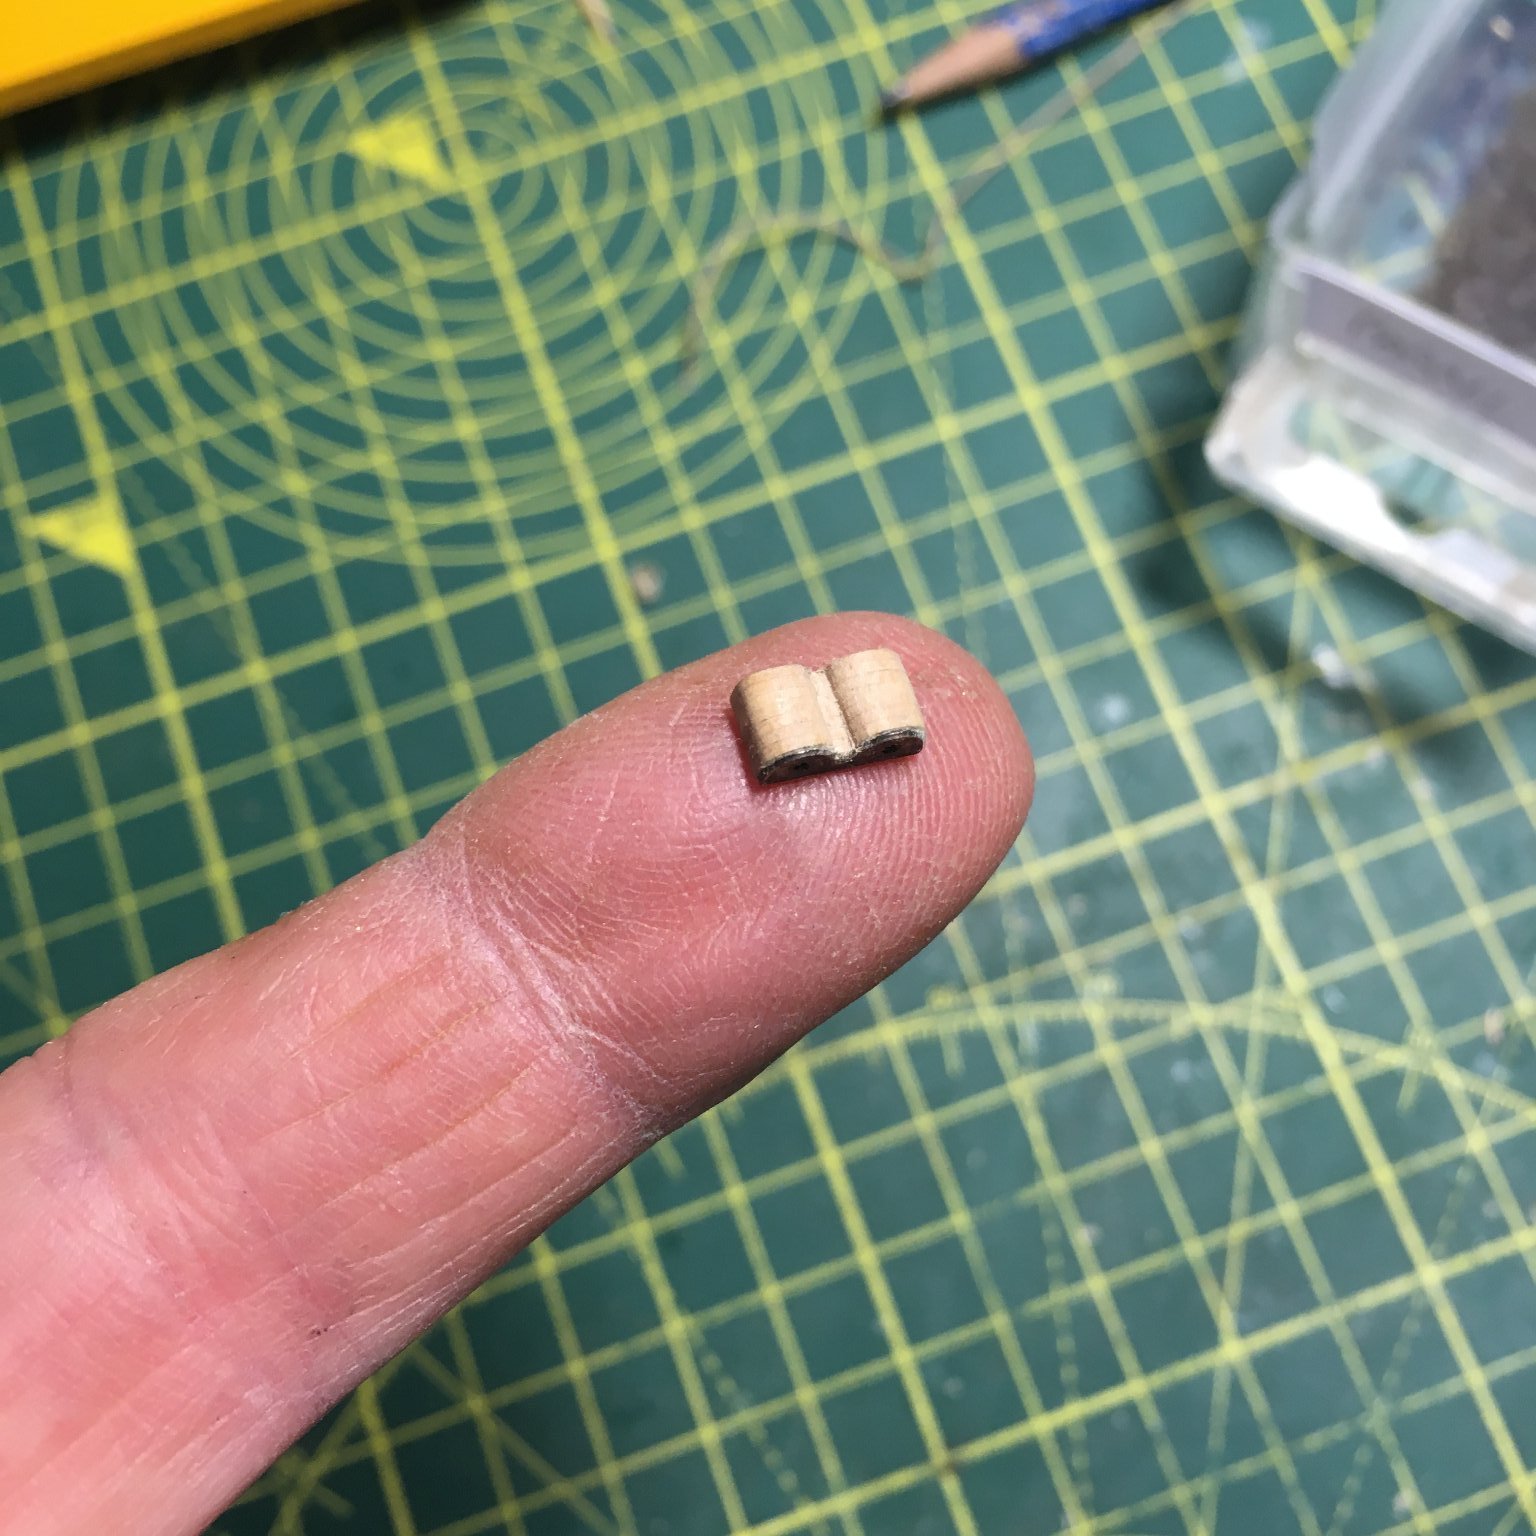
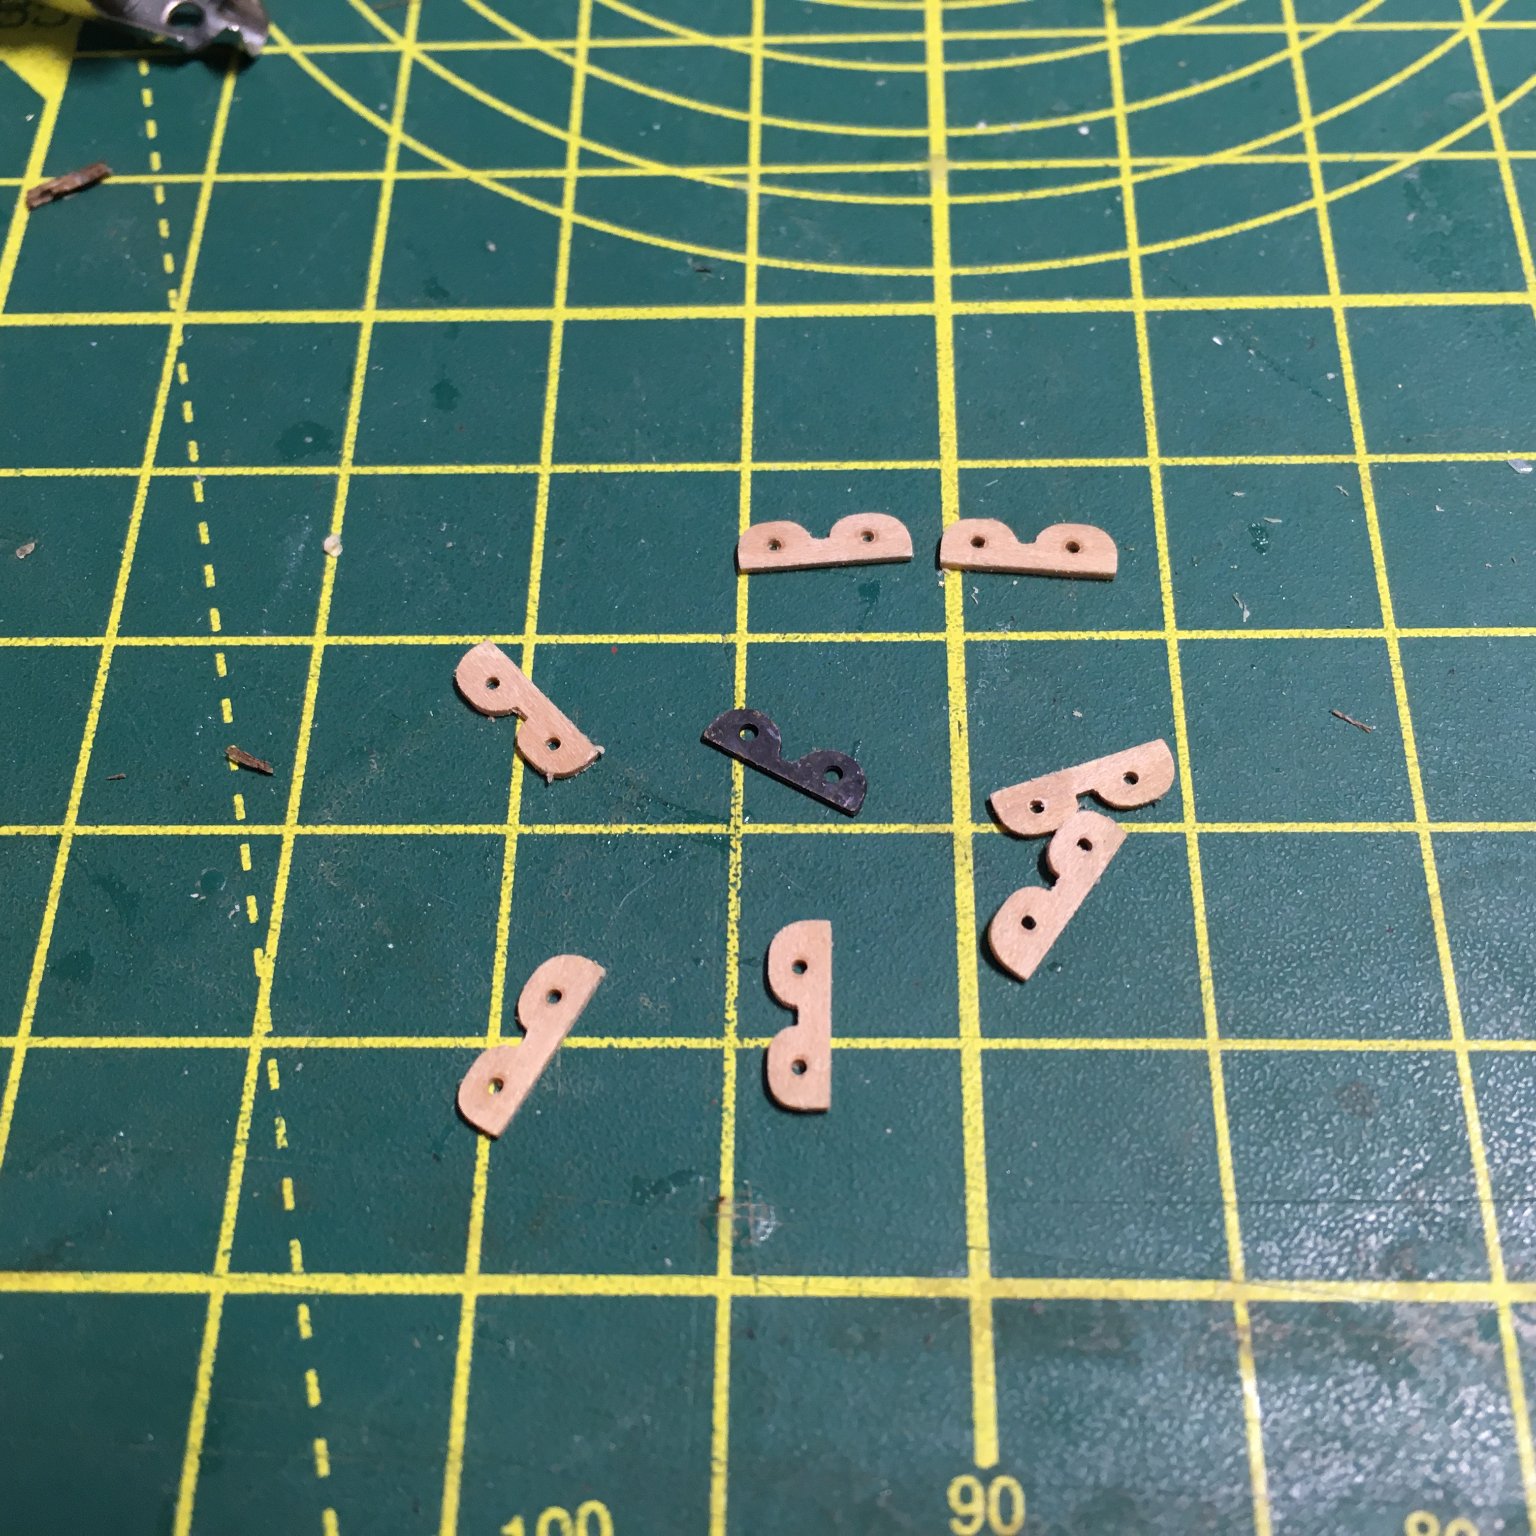
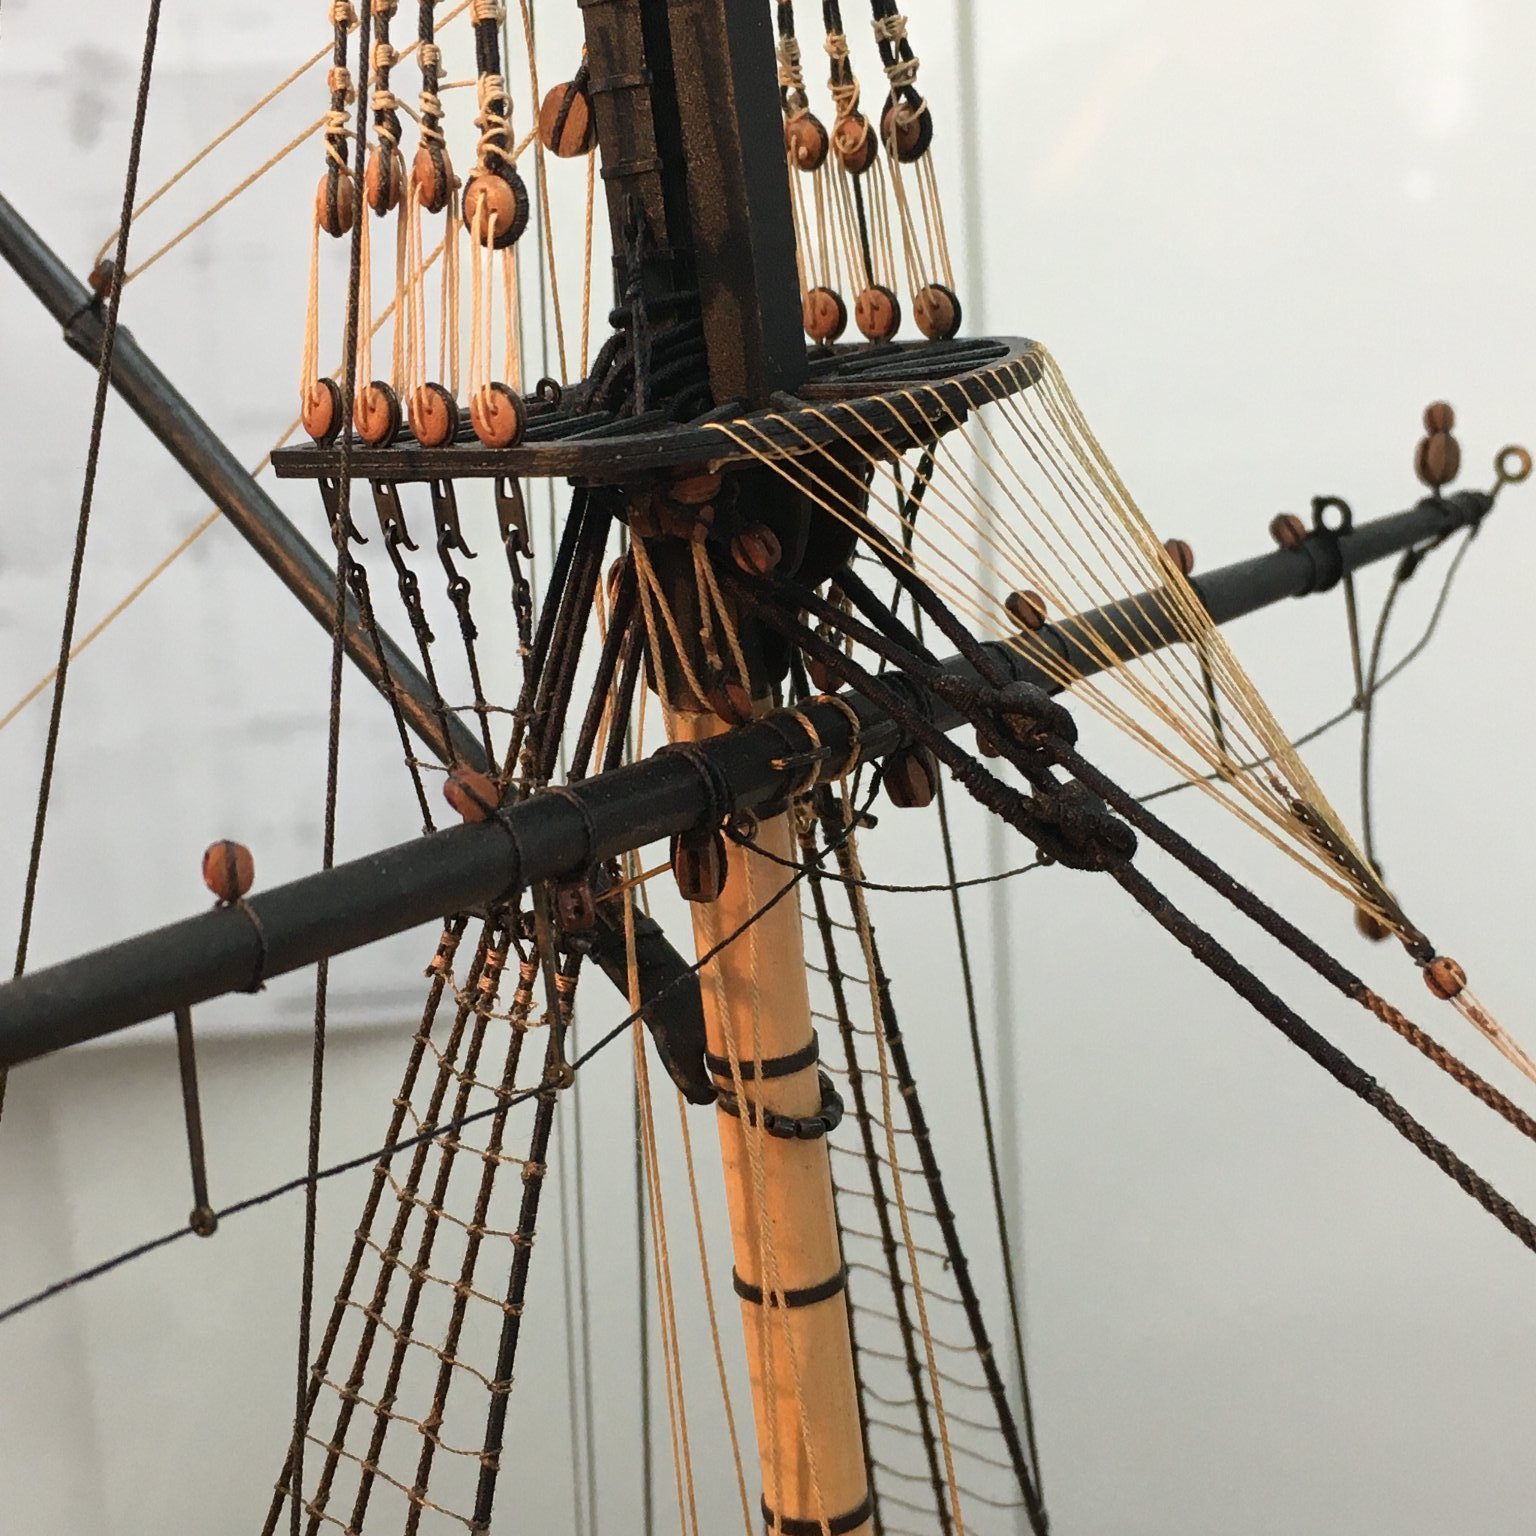
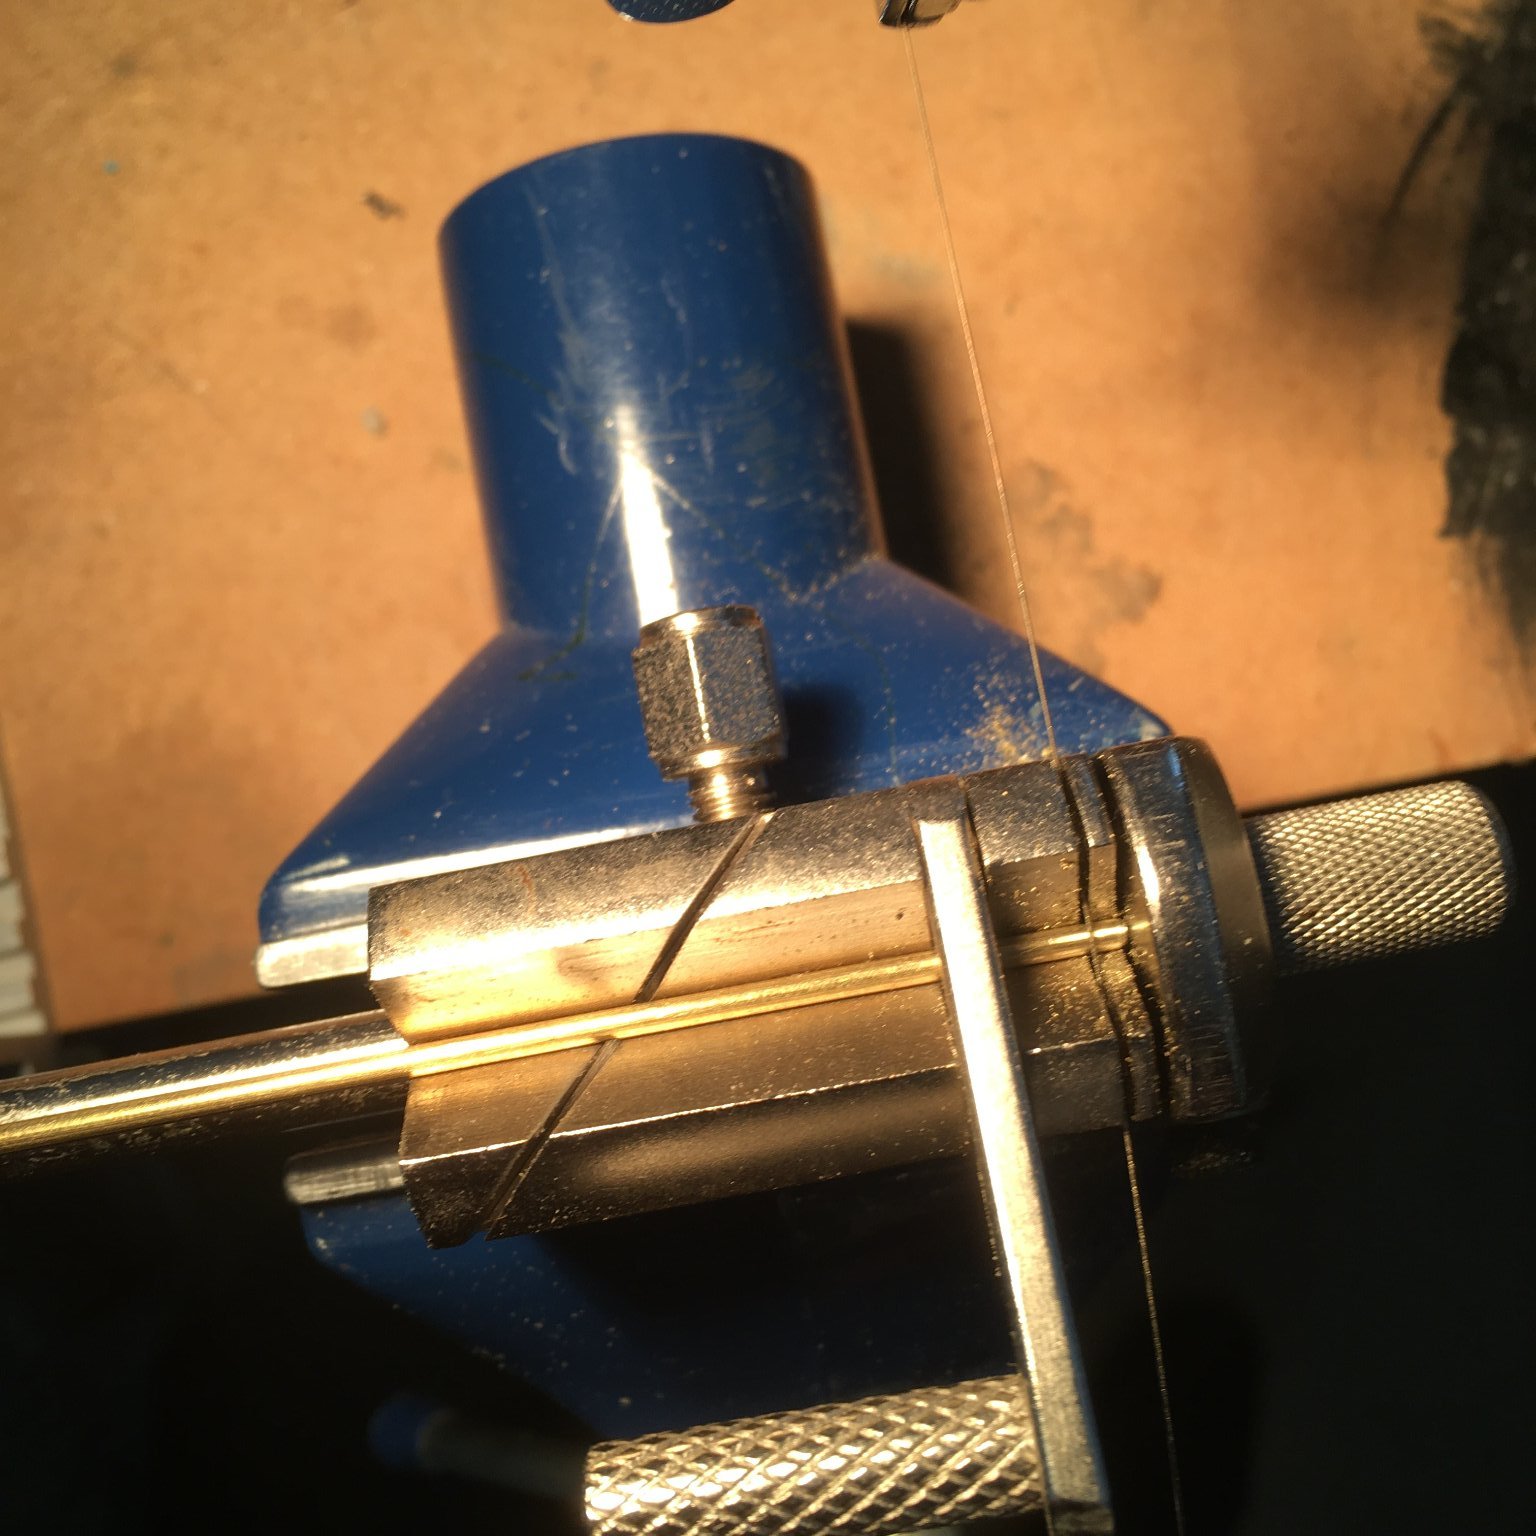
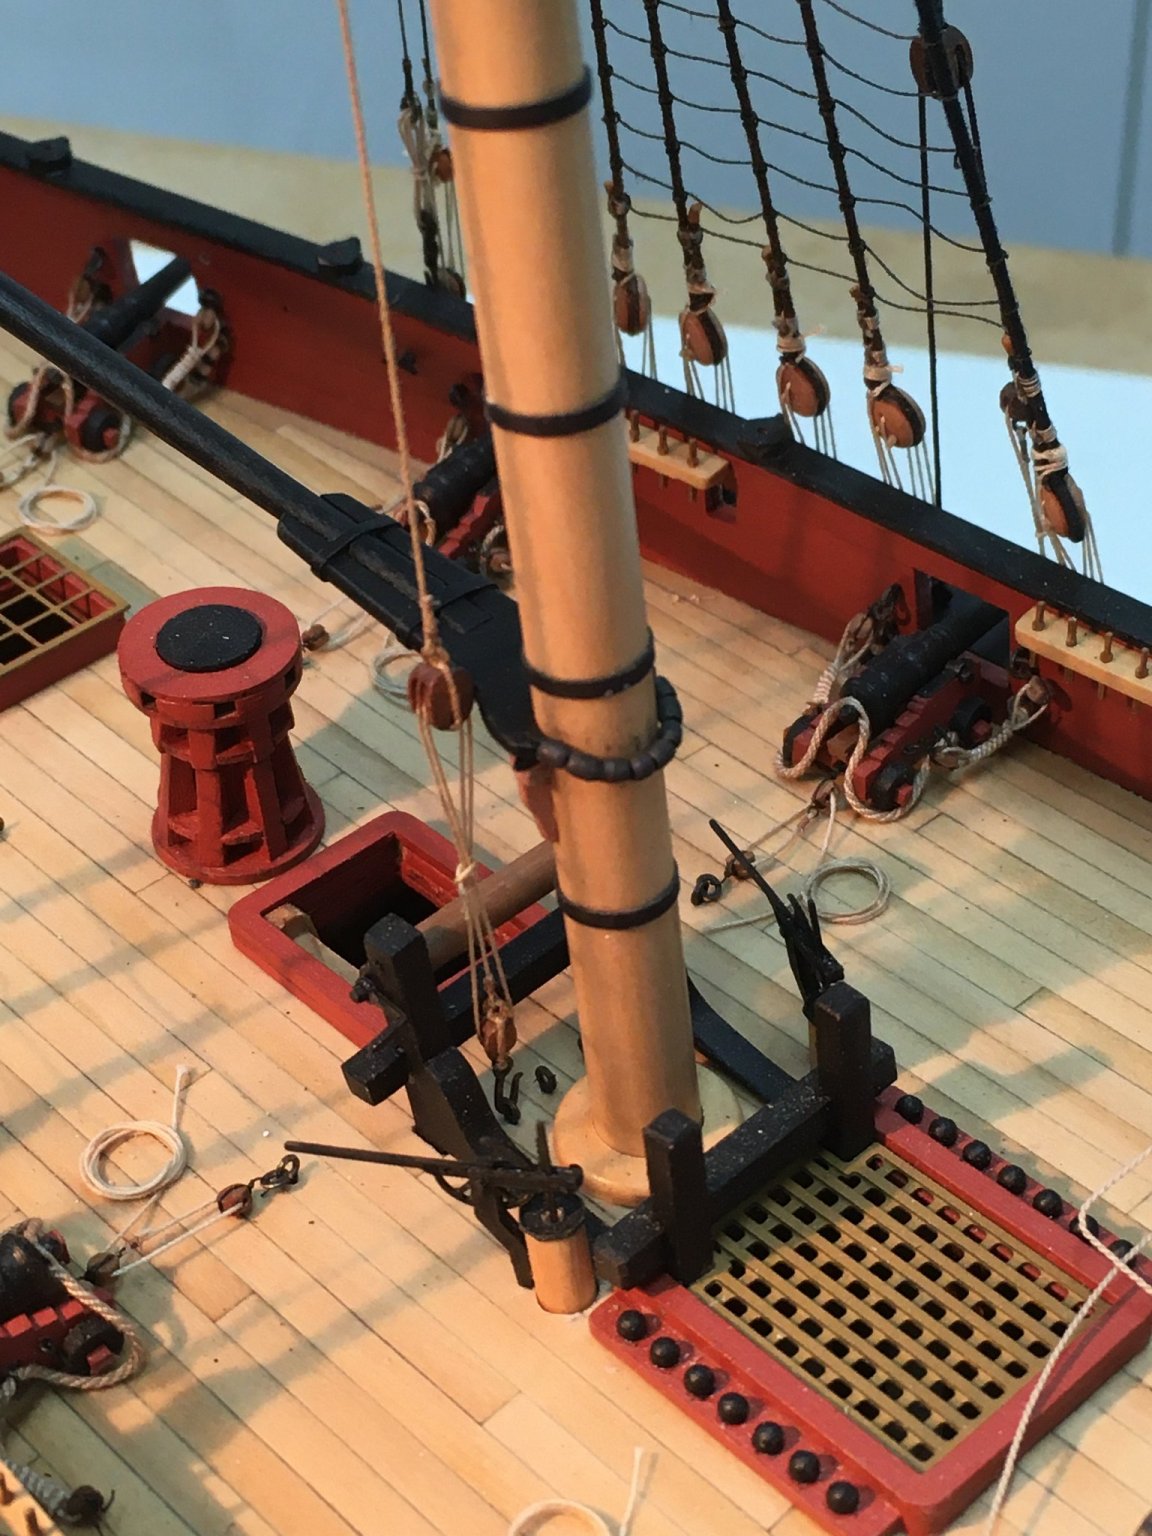
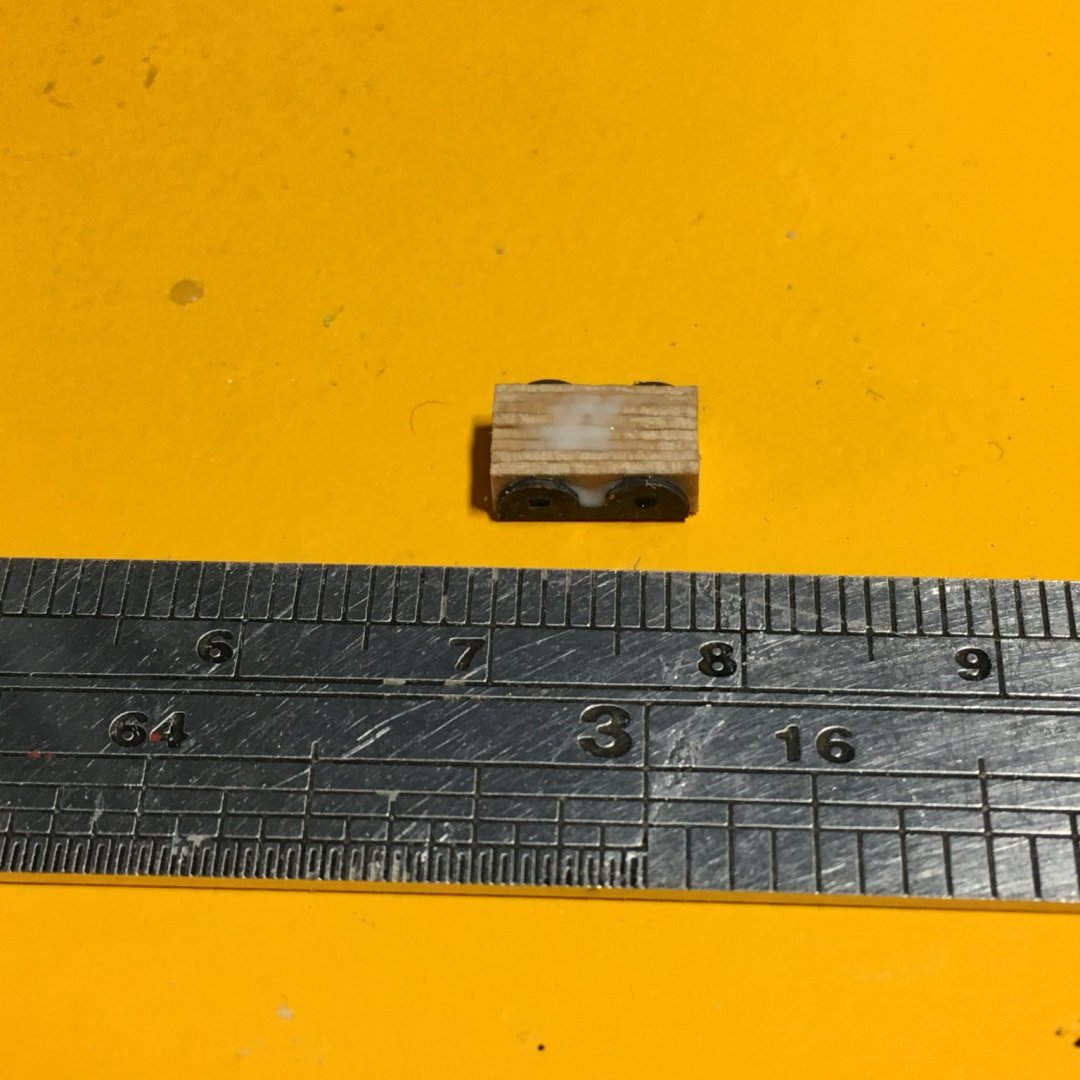
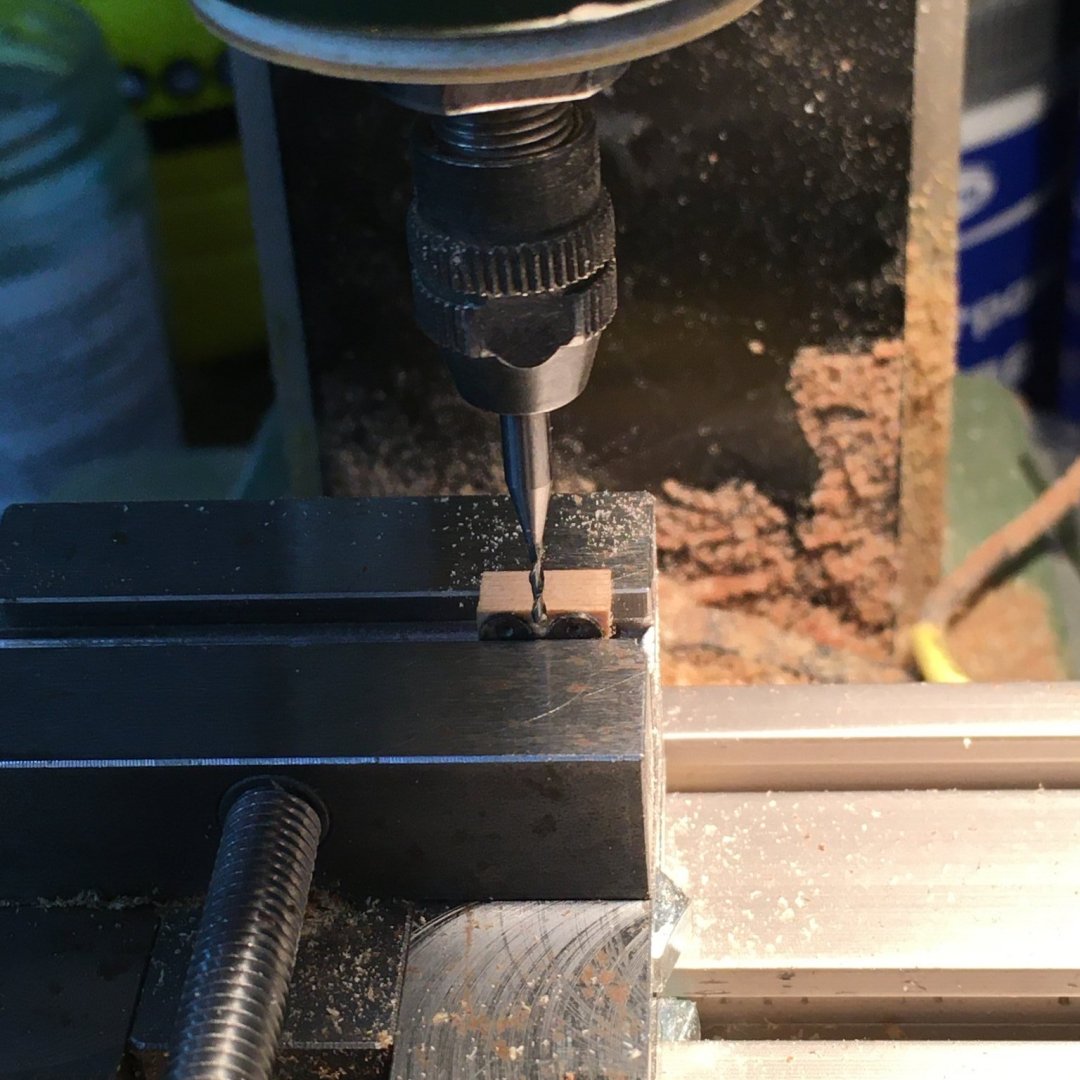
Sail handling lines on the lower yards Crossing the topsail yards Productive day today! As my previous models have been of ships with bare sticks I've not bothered with sail handling lines. On Royal Caroline I fitted all the necessary blocks but left the lines out. On Speedy however Chris has included these lines - they are shown on the plans as they would be left on a full size ship when the sails were taken down. In the case of the buntlines and leechlines, they were hauled through their respective blocks until brought short by stopper knots worked into their ends. That was the easy bit on the model. The hard bit was reeving the lines through the blocks under the tops. The main yard wasn't too bad, as each line just had to reeve through one block under the front edge of the top then down to belay on the bitts just forward of the mast. The fore yard was much harder, as each line had to reeve through two blocks under the foretop, one under the front edge then one under the back edge before belaying on bitts abaft the foremast. This photo shows the tight space under the top that the lines pass through. Getting a line to reeve through the second block required a lot of patience. Unfortunately I didn't have enough so I resorted to swearing 😡. Btw, one little job I remembered to do whilst I could still get at them was lashing the booms to the yard - visible in the photo above. After four buntlines and two leechlines on each yard it was on to the topsail yards. The kit supplies very good photoetch ribs for the parrels and I had got as far as blackening them when I remembered I had a spare set I'd made out of boxwood for Royal Caroline. I checked and they were exactly the right size for Speedy. I decided I liked the idea of boxwood so made a second set, using the same method that worked well for the first. I got the method from Volume 4 of The Fully Framed Model by David Antscherl, which covers the rigging of a sixth rate sloop of around the same period as Speedy. Even if you never intend to build a fully framed model it's worth getting Volume 4 on its own, as it includes a wealth of information and techniques that are relevant to many ships of the period. Thank goodness for standardisation! I started by preparing a strip of boxwood 0.4mm X 2.5mm, that being the thickness and depth of the ribs, then cut the strip into 8mm lengths: I used PVA diluted with 50% water to glue the strips into a block, with a PE rib on the front to act as a template: With the glue dried I drilled 0.7mm holes for the parrel rope. Not obvious from the picture, but I'm using the micro drill adapter (aka sensitive drill attachment) I've described before (here). Not essential, but it makes working with tiny drills in big drill presses or mills a lot easier. Next I started shaping the block with a 1mm bit on the Proxxon micro mill before finishing with swiss files: Then it was into IPA (IsoPropyl Alcohol not India Pale Ale) for a few minutes to loosen the glue. Using diluted glue makes this easier, and also makes it easier to clean off any glue residue: I find this method better than salami slicing, where you start off with one solid block of wood which you have to saw into slices once you've shaped it. There's obviously less wastage and I find I get more consistent results. It's a method that works well on other tasks where multiple identical components are called for, such as gun carriage sides. Once the ribs were cleaned off I threaded them on some black line together with spare trucks I had left over from Caroline. These were tiny tube shaped beads that look reasonably like polished wood (from a suitable distance!). When rigging the parrels to their yards I simplified full size practice. Instead of using two lines for each parrel I used one, tying it round the yard inside the slings before threading on the ribs and trucks: Then it was onto the mast, with the pin visible in the photo above holding the yard in place while I finished rigging the parrel. This entailed taking the free ends of the rope round the parrel to the starboard side then round the yard between the slings (one end over the yard, one end under), back round the parrel to the port side, round the yard again and finally tied off behind the yard. Technically I should have seized the lines to themselves but decided that would be next to impossible in the space available. Here's the end result: I'm off for some IPA (India Pale Ale 🍺). Derek


- 725 replies
-
- 11
-
-
- vanguard models
- speedy
- (and 1 more)
-
More superb work Glenn. Your rigging is exemplary.
- 778 replies
-
- 1
-
-
- cheerful
- Syren Ship Model Company
- (and 1 more)
-
Thanks Maurice. Not the first time you've inspired me to up my game.
- 725 replies
-
- 1
-
-
- vanguard models
- speedy
- (and 1 more)
-
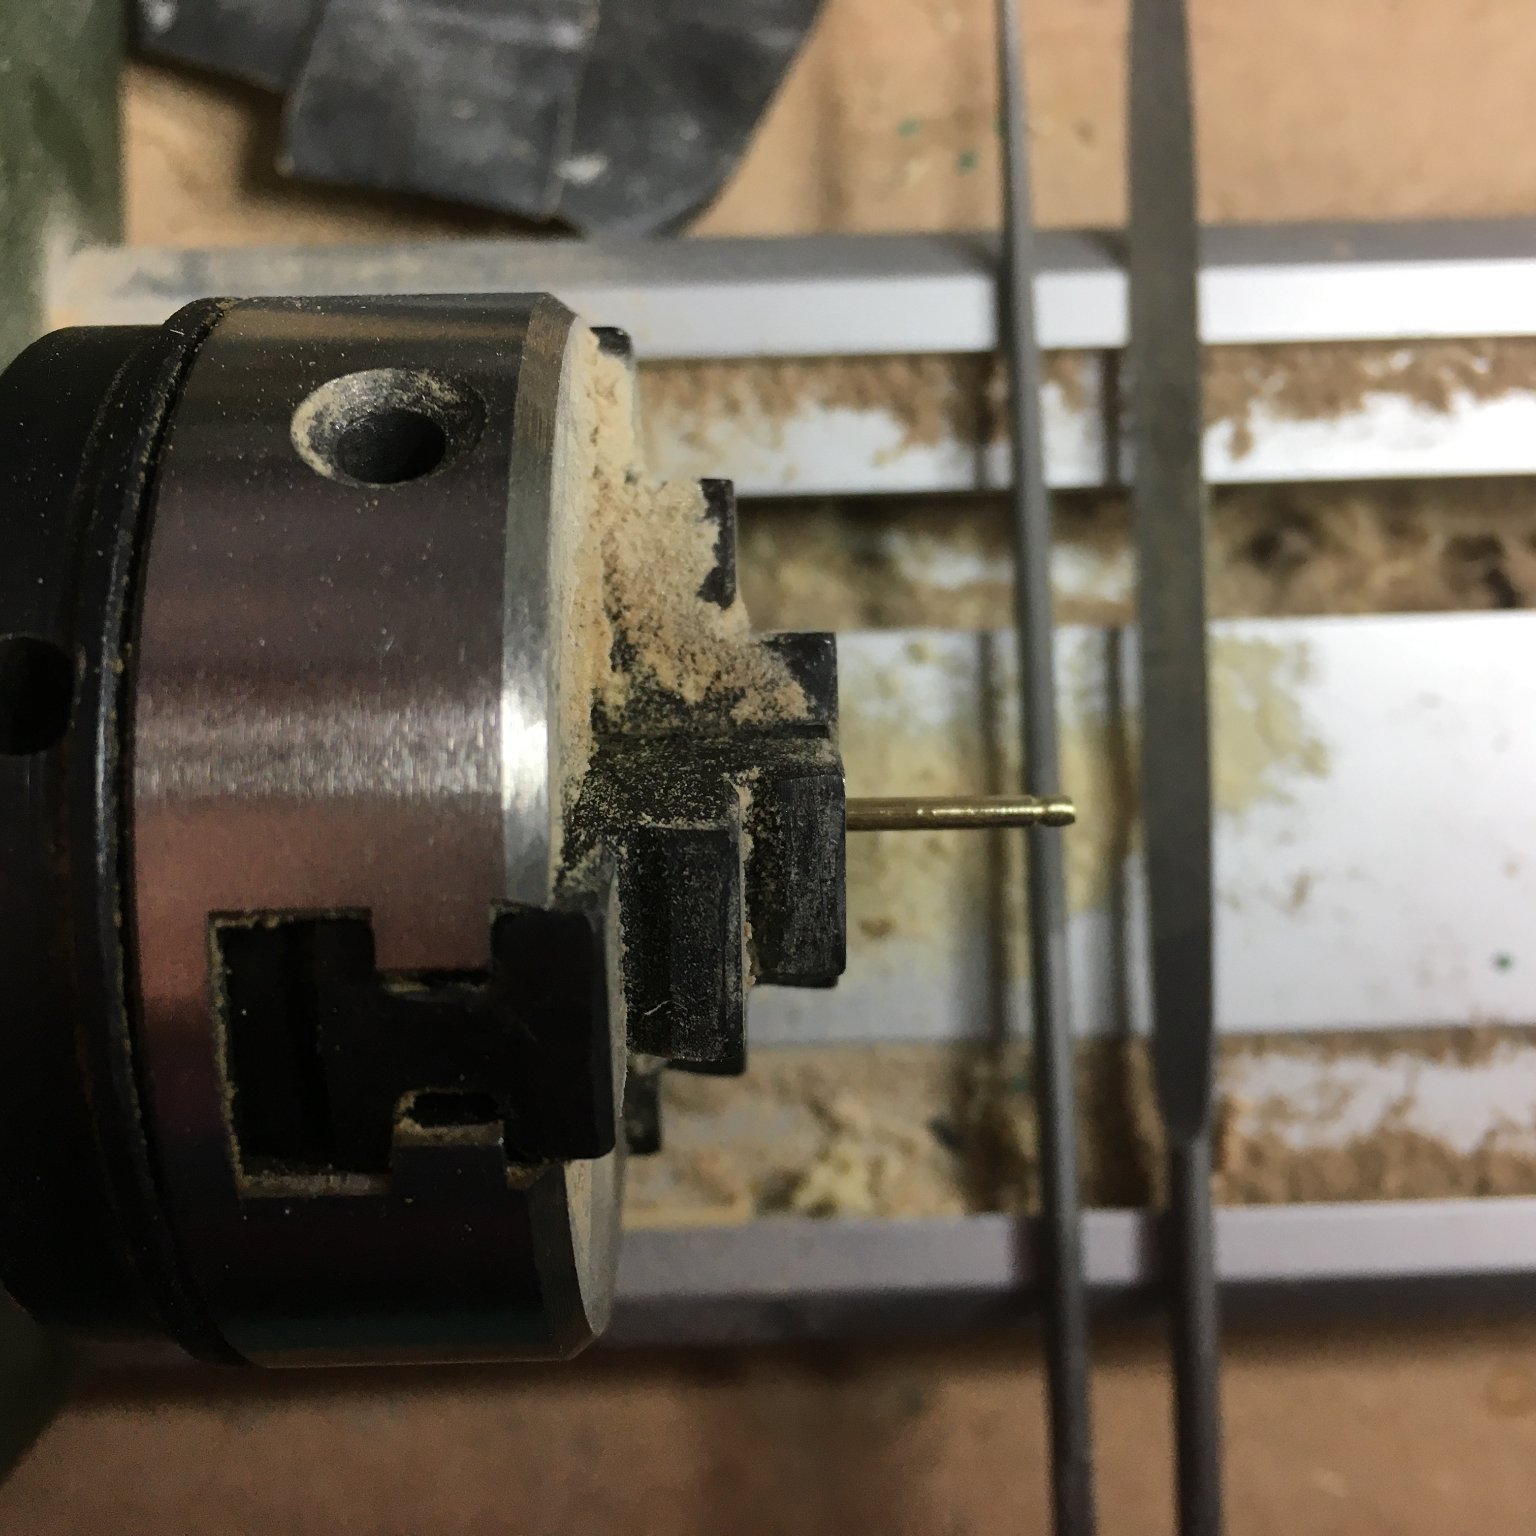
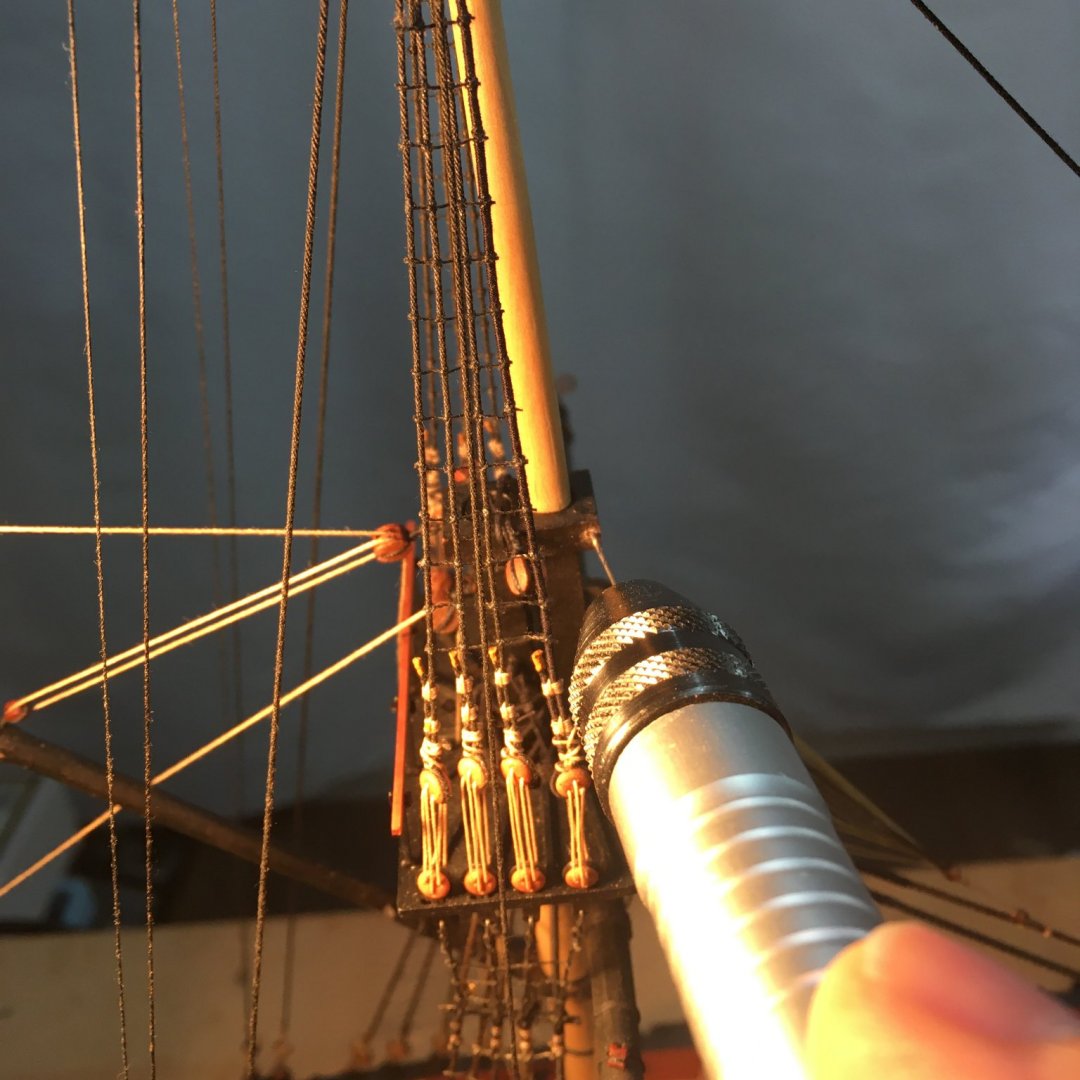
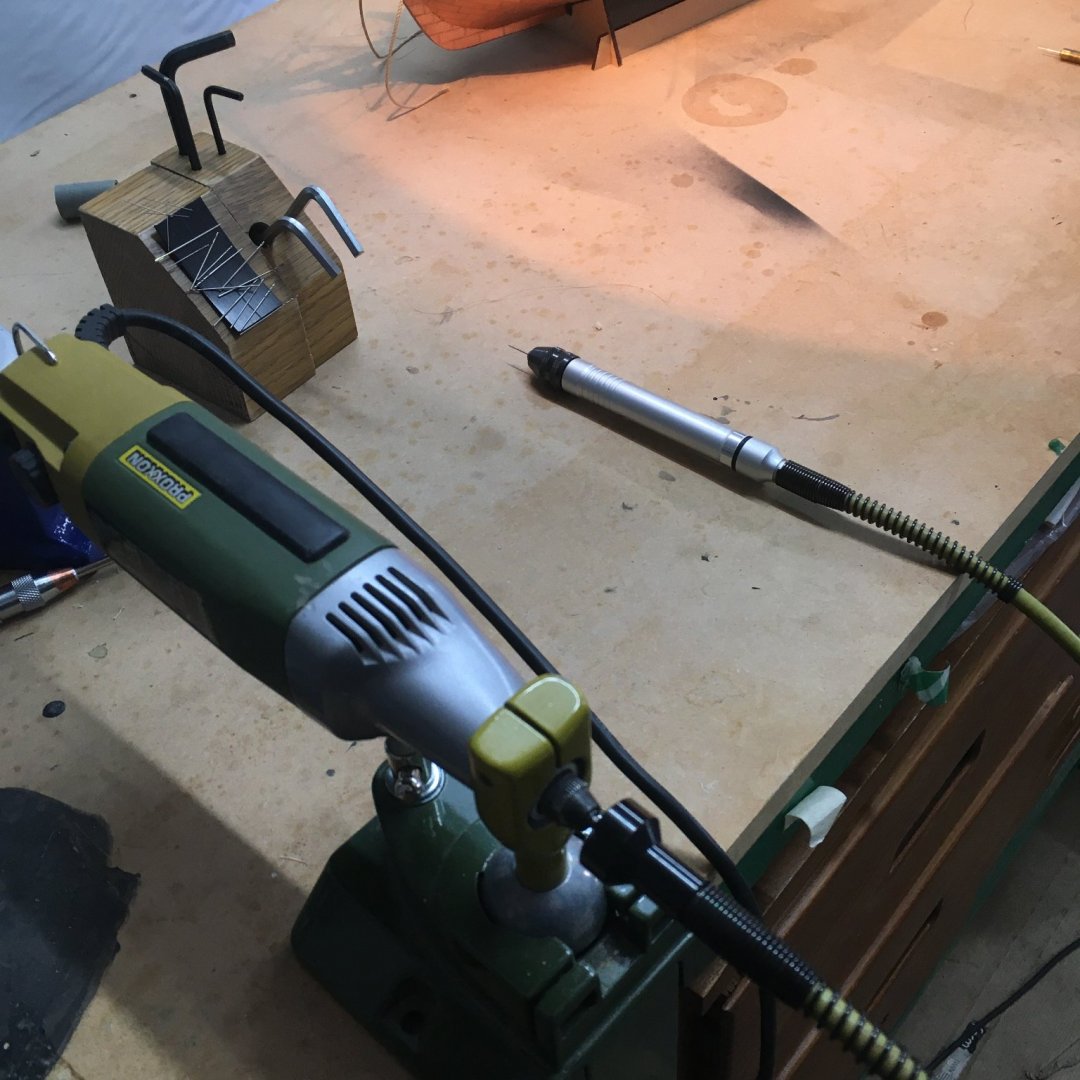
Lower yard lifts I knew I was going to have problems with the lifts as soon as I crossed the yards. As things stood, with the lifts running from the yard arm to a pair of blocks clove hitched round the mast cap, the lines would have fouled against the shrouds. The set up in the kit plans is correct according to Lees in Masting & Rigging, but TFFM points out that it only works without fouling the shrouds if the yard stands away from the mast on slings. If not, the blocks should be brought forward to hook on eyebolts set under the front face of the cap. Speedy's yards are held against the masts by trusses so I decided to go with the latter option. Drilling holes for eyebolts to sit under the mast caps wasn't practical at this stage so I compromised by setting them in the side faces near the front of the mast. Even then drilling the holes without destroying shrouds and other gear was tricky, and I was reluctant to apply the pressure required to hold a hand drill against the cap. In the end I decided to use a flexible shaft connected to my Proxxon drill. This tool is small enough to get to the job without damaging rigging, and fast enough to go through wood with minimum pressure. Here's the set up: I've fitted it with a chuck which makes changing drill bits and other tools a doddle. The Proxxon chuck as supplied doesn't fit which is weird - a known fault apparently - so I had to adapt it. I'll explain separately if anyone's interested. Here it is in action - still a bit nerve wracking! ...and the block hooked in place: Rigging the lifts after that was straightforward, the only point of note being that I remembered to fit the stuns'l booms first: I held the lifts taut by threading them through their designated belaying holes in the pin racks and then jamming the pins back in. A temporary measure until I get round to making some rope coils. At that stage I'll double-check the yards are level before making the belays permanent. Note to self - dust the model before taking close-ups! That top step looks broken too, and I hadn't noticed that before. No more macro photography for me 😬 I might start making some rope coils next. Derek


- 725 replies
-
- 11
-
-
- vanguard models
- speedy
- (and 1 more)
-
Not to me Phill - I went boz-eyed making four! Any more and I might keel over 😁
- 725 replies
-
- 1
-
-
- vanguard models
- speedy
- (and 1 more)
-
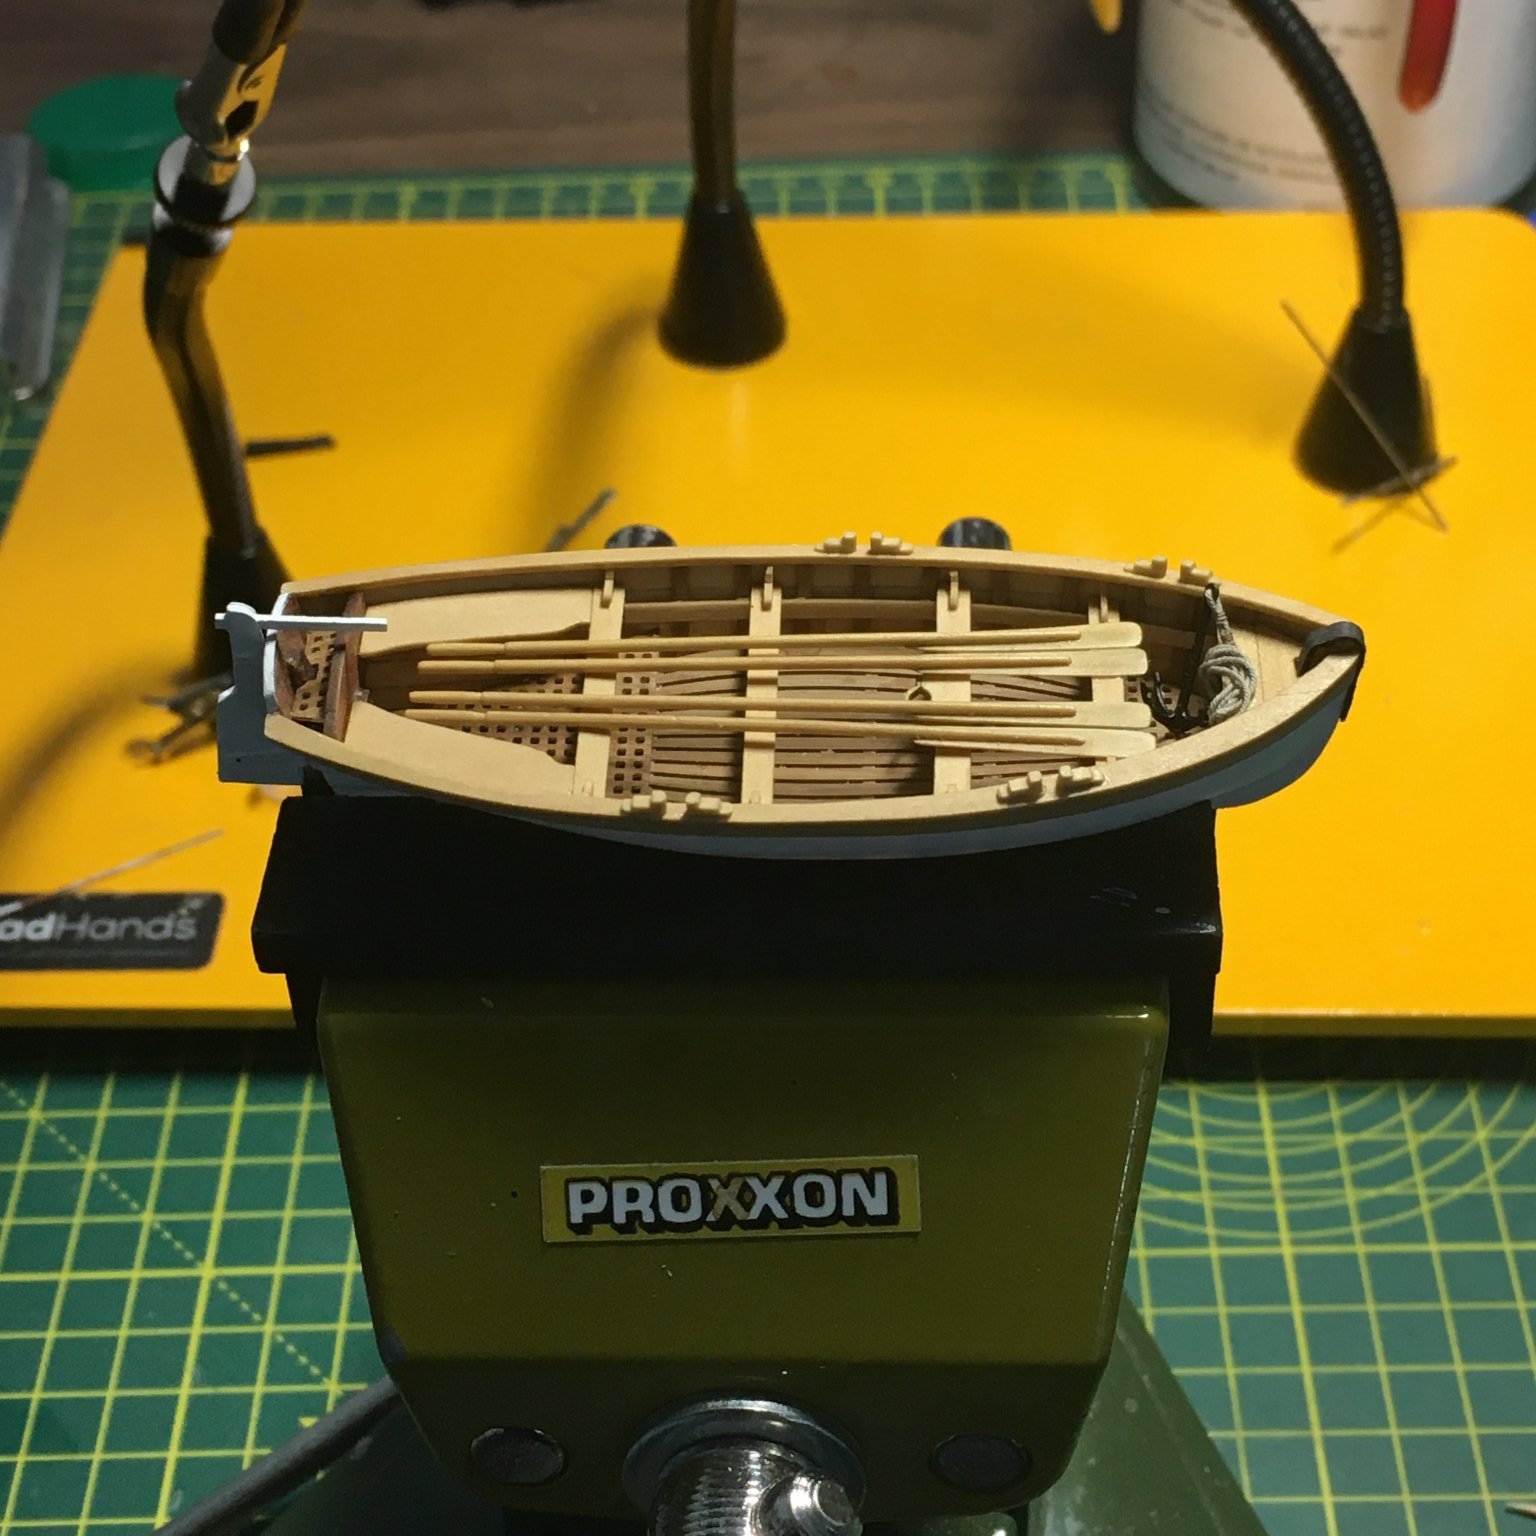
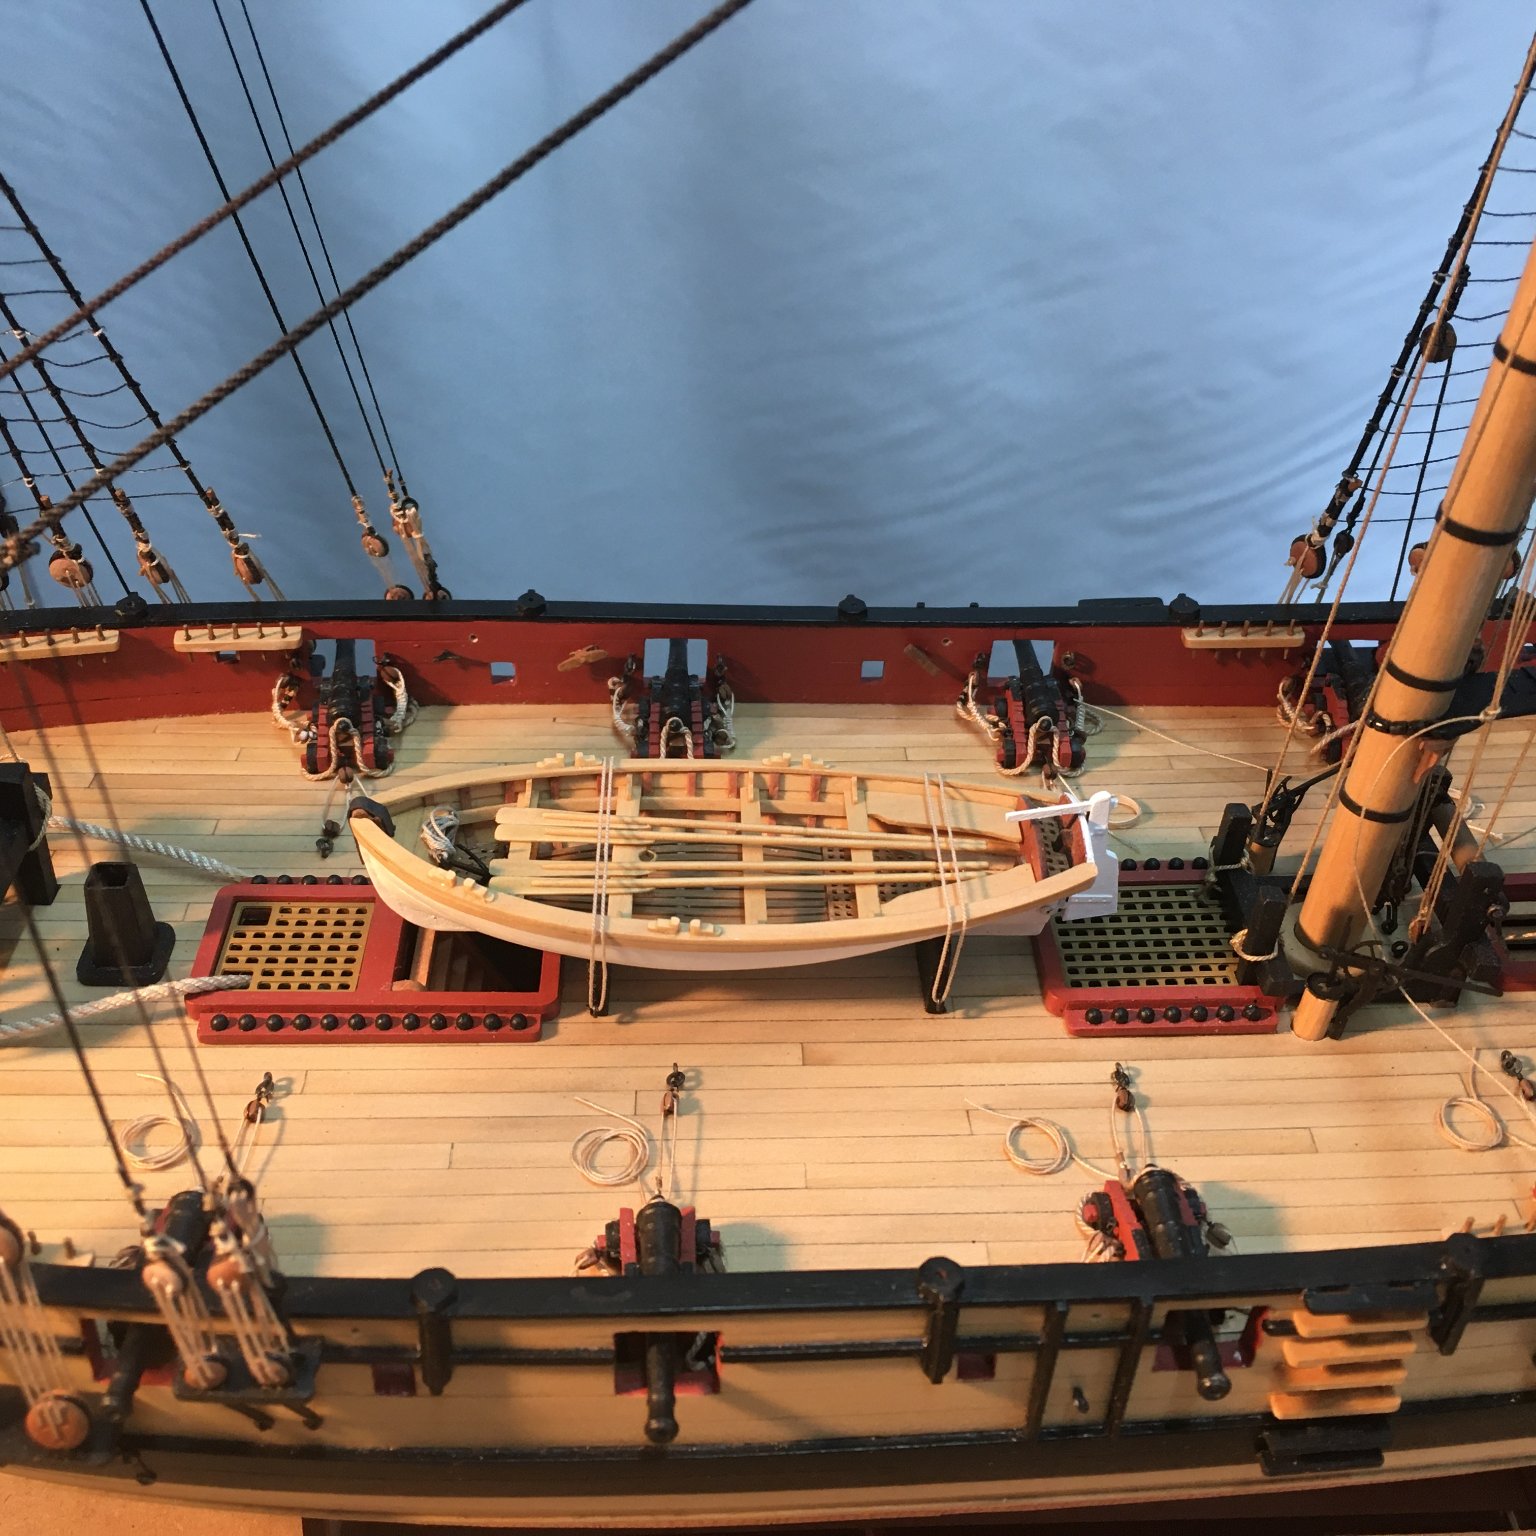
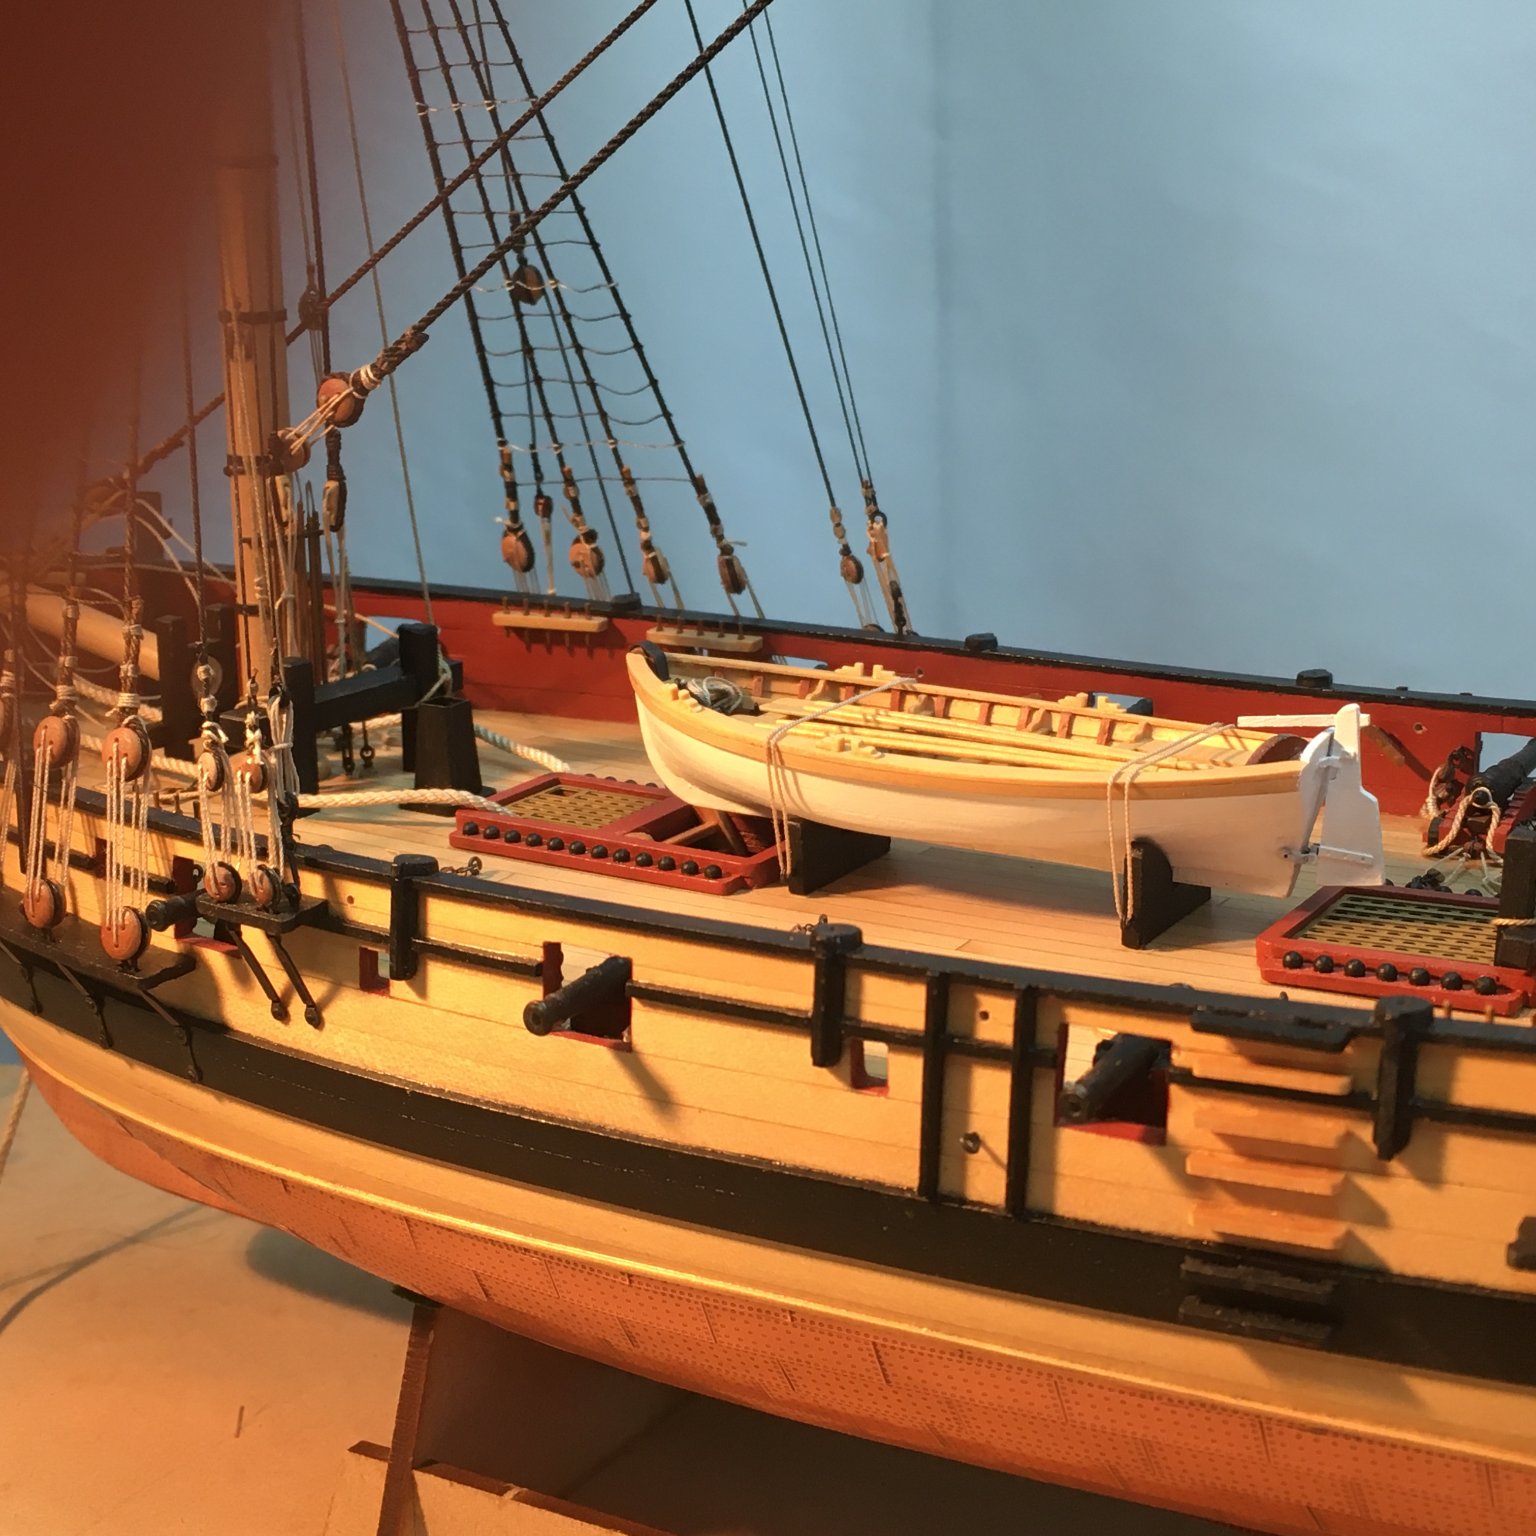
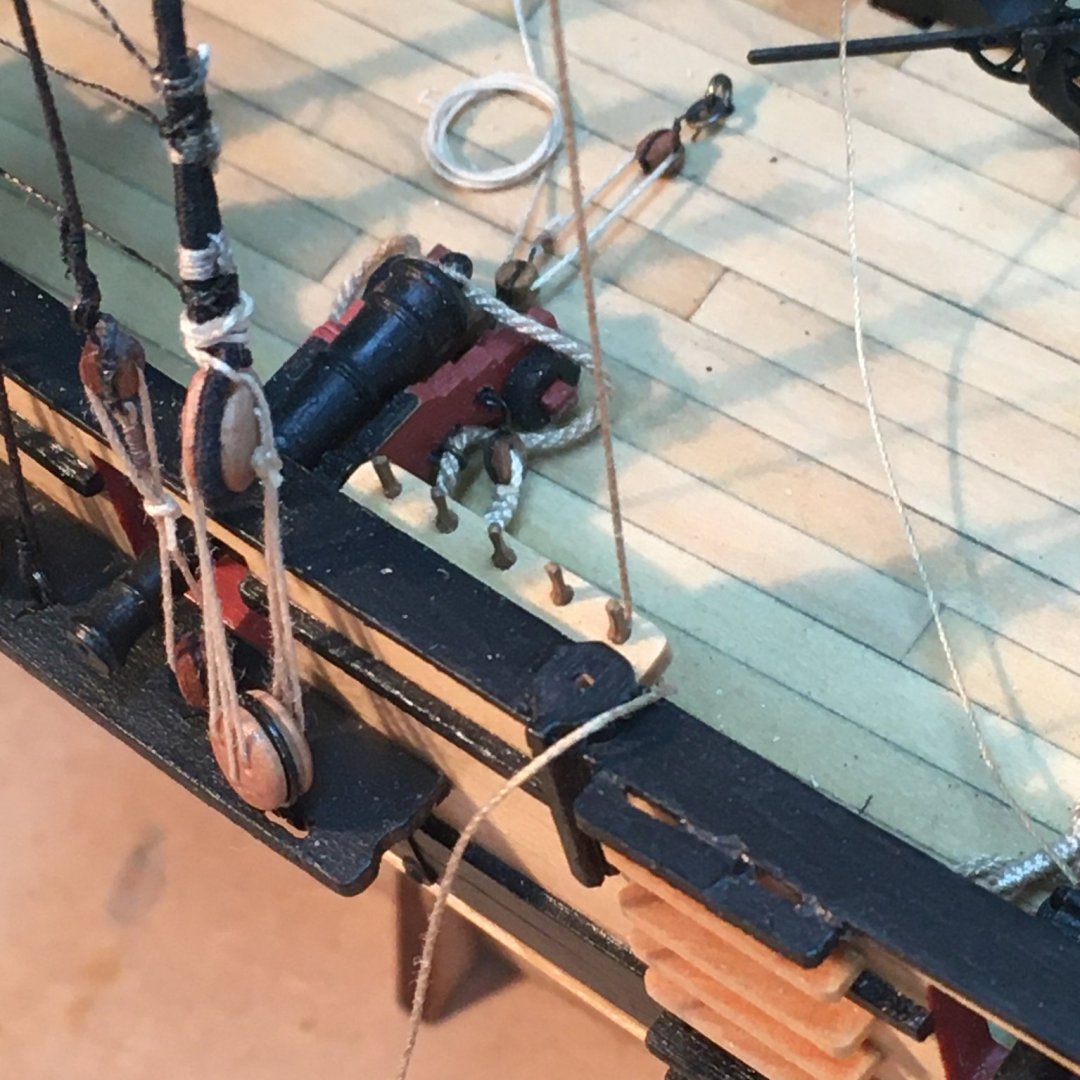
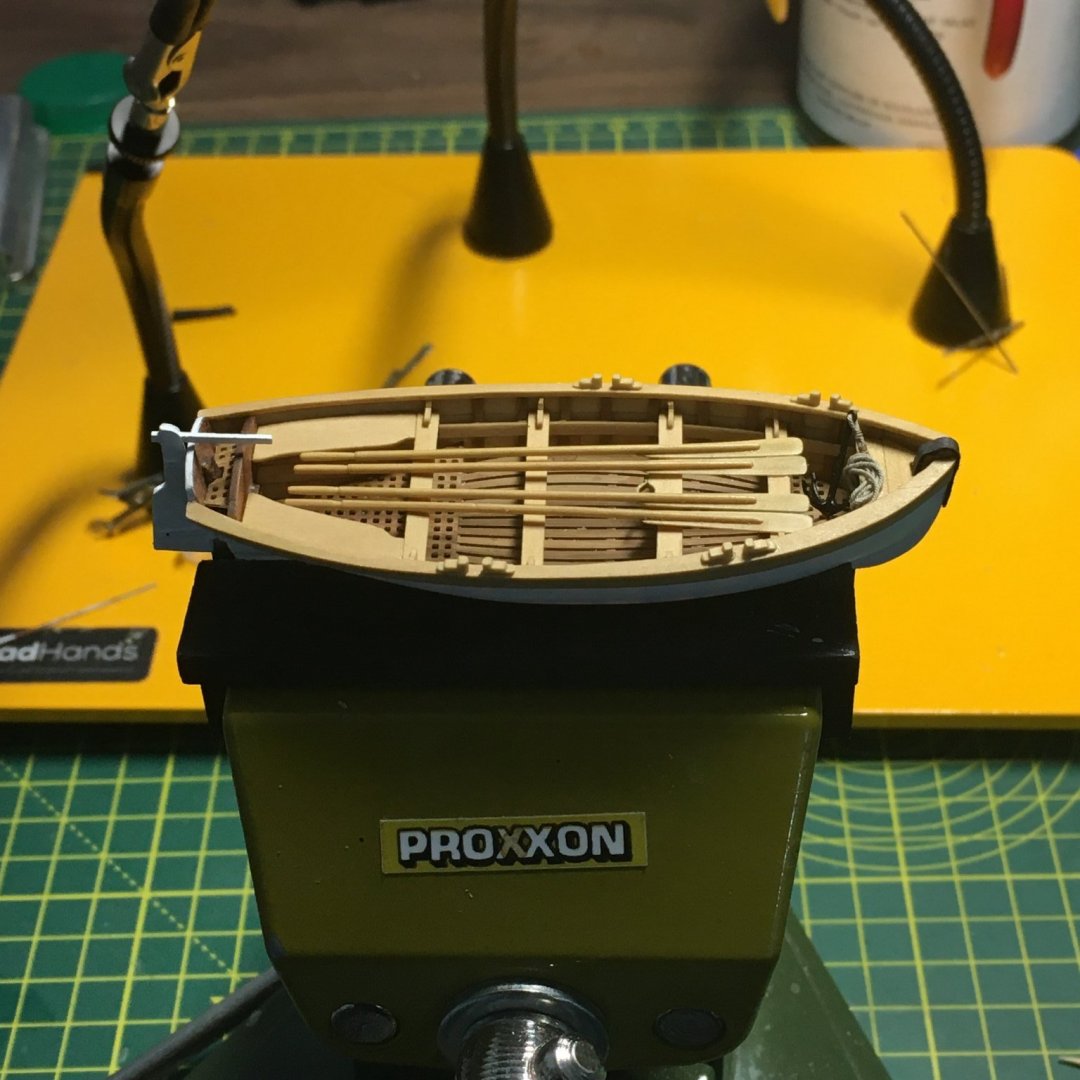
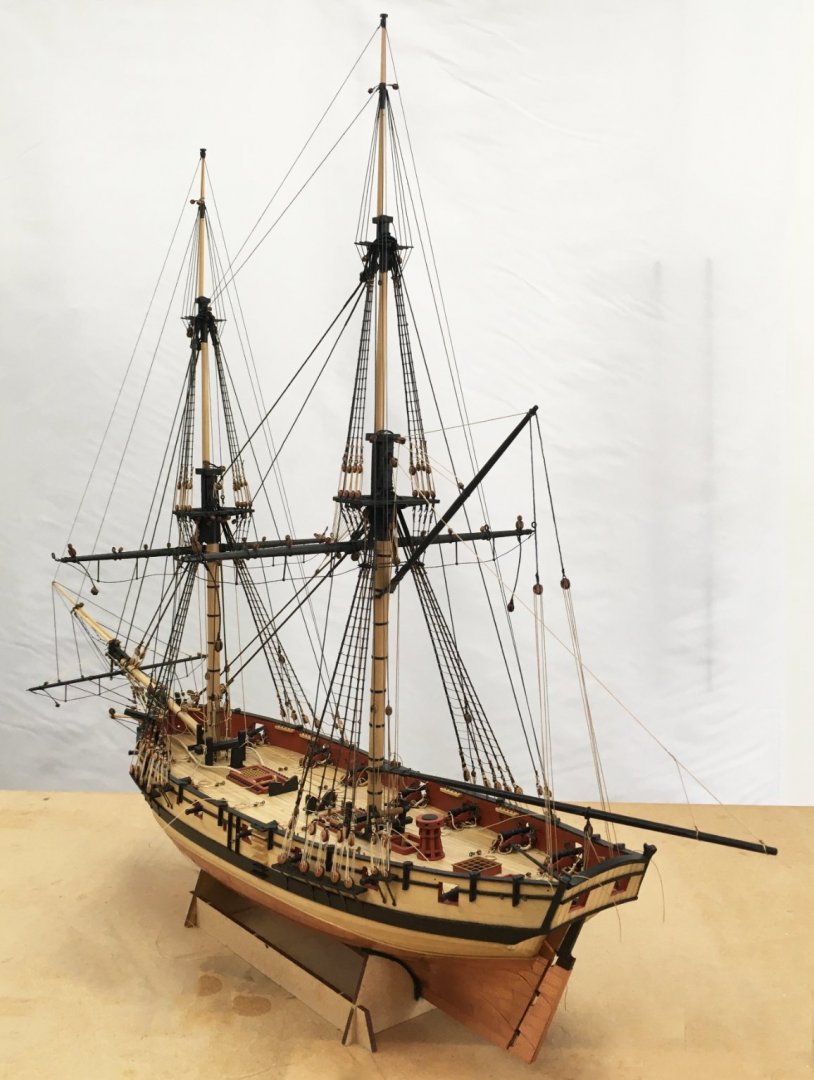
Boat & Top Rails I decided to get these fitted before any more rigging got in the way. I'd left the top rails off to avoid damaging them whilst tackling the standing rigging and left the boat off until I'd finished the oars. I was on a roll after the first trial oar and it didn't take long to finish the other three. The boat has turned out to be an enjoyable little project in its own right. I'm glad I went beyond the kit with embellishments like the cap rail, rowlocks and oars and I'm pleased with the result: Here's the boat lashed to the chocks: The top rails were fairly easy to add, as I'd previously blackened the brass stanchions and cleaned the laser char off the rails. All I had to do was glue them in place: I love it when you start to see a real forest of rigging lines when you look along the ship! Plenty more to go, starting with the lower yard lifts. Many thanks for all the likes and comments. Derek


- 725 replies
-
- 9
-
-
- vanguard models
- speedy
- (and 1 more)
-
I'm watching your use of PVA with interest here Glenn. I seemed to develop an adverse reaction to CA gel when I used it a lot on Speedy's copper plating. Now I can only use the thin odourless version which I don't think would work with planking. You seem to be getting on well with Titebond - would you recommend it?
- 160 replies
-
- 1
-
-
- Alert
- vanguard models
- (and 1 more)
-
At one stage I considered stowing my cannon below deck because that's apparently what Cochrane did on occasion. You were one of those instrumental in persuading me to rig them properly. I'll have you making proper oars yet! I just make some of them up as I go along; others I drop at random into the log, hoping there are no real experts around to pick me up (when is a jeer a tye?) 😬. I still have fond memories of the euphroe discussion. Amazing you can both produce such fine, accurate models when you don't know what you're doing Steady there Glenn, you're starting to sound like you do know what you're doing!
- 725 replies
-
- 4
-

-
- vanguard models
- speedy
- (and 1 more)
-
Much appreciated Eamonn. I've not had any luck finding really fine fly tying thread on Amazon. I use 18/0, sometimes called 30D(enier) which I get from a specialist angling shop (the Essential Fly in Yorkshire - they have a website). This post earlier in the log shows the brand I use, which is available in black and brown.
- 725 replies
-
- 1
-

-
- vanguard models
- speedy
- (and 1 more)
-
Don't worry, you did nothing wrong. The moderators removed a string of posts after someone started a topic that was felt inappropriate, and I think your post must have been in the middle and removed accidently. Anyway, thank you for your kind comments, I really appreciate them. I should point out that the kit comes with very good instructions and plans, it's just that I like adding my own embellishments.
- 725 replies
-
- 1
-
-
- vanguard models
- speedy
- (and 1 more)
-
Gaff Fitting the gaff was relatively straightforward and I followed the kit plans in most respects. As with the boom, I made the parrel trucks from blackened brass rod, although this time I gave them a coat of matt poly straight away - partly to protect the mast but also to impart a slight sheen as I'm sure the originals would have been oiled in some way to reduce friction. As I mentioned in the previous post, threading the parrel rope through the lines coming down from the main yard tested my dexterity and patience, and next time I think I'd fit the gaff first. Everything else went smoothly, although I did have to fit another eyebolt in the back edge of the main top to lead the topping lift slightly to port, otherwise it would have fouled on the gaff: Here's the gaff fully rigged with its lifts and vangs: Bit more like a ship. Hopefully the remaining yards will go quite quickly now. Derek

- 725 replies
-
- 14
-
-
- vanguard models
- speedy
- (and 1 more)
-
Thanks Tim. Don't blame me on the tools though - my tool collection has increased dramatically since I joined the forum. It's everyone else's fault 😬 I'm looking forward to your next log. I know you were taking a break after Alert but don't leave it too long! Derek
- 725 replies
-
- 5
-
-
- vanguard models
- speedy
- (and 1 more)
-
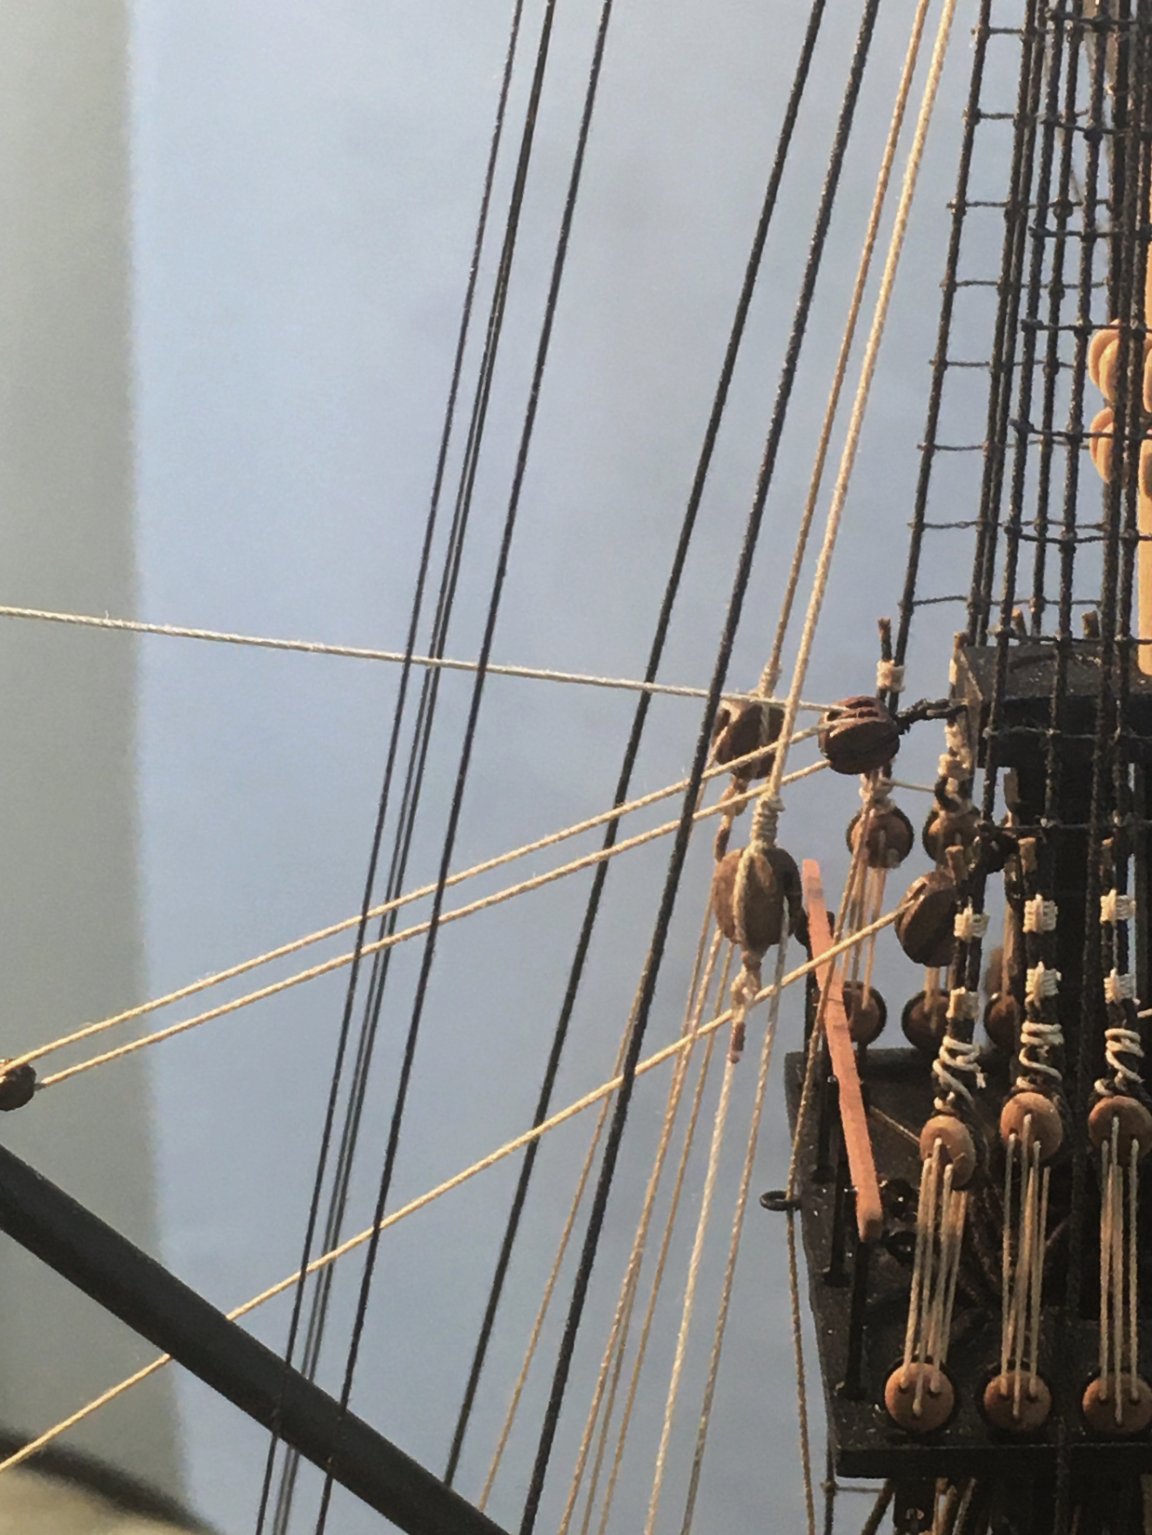
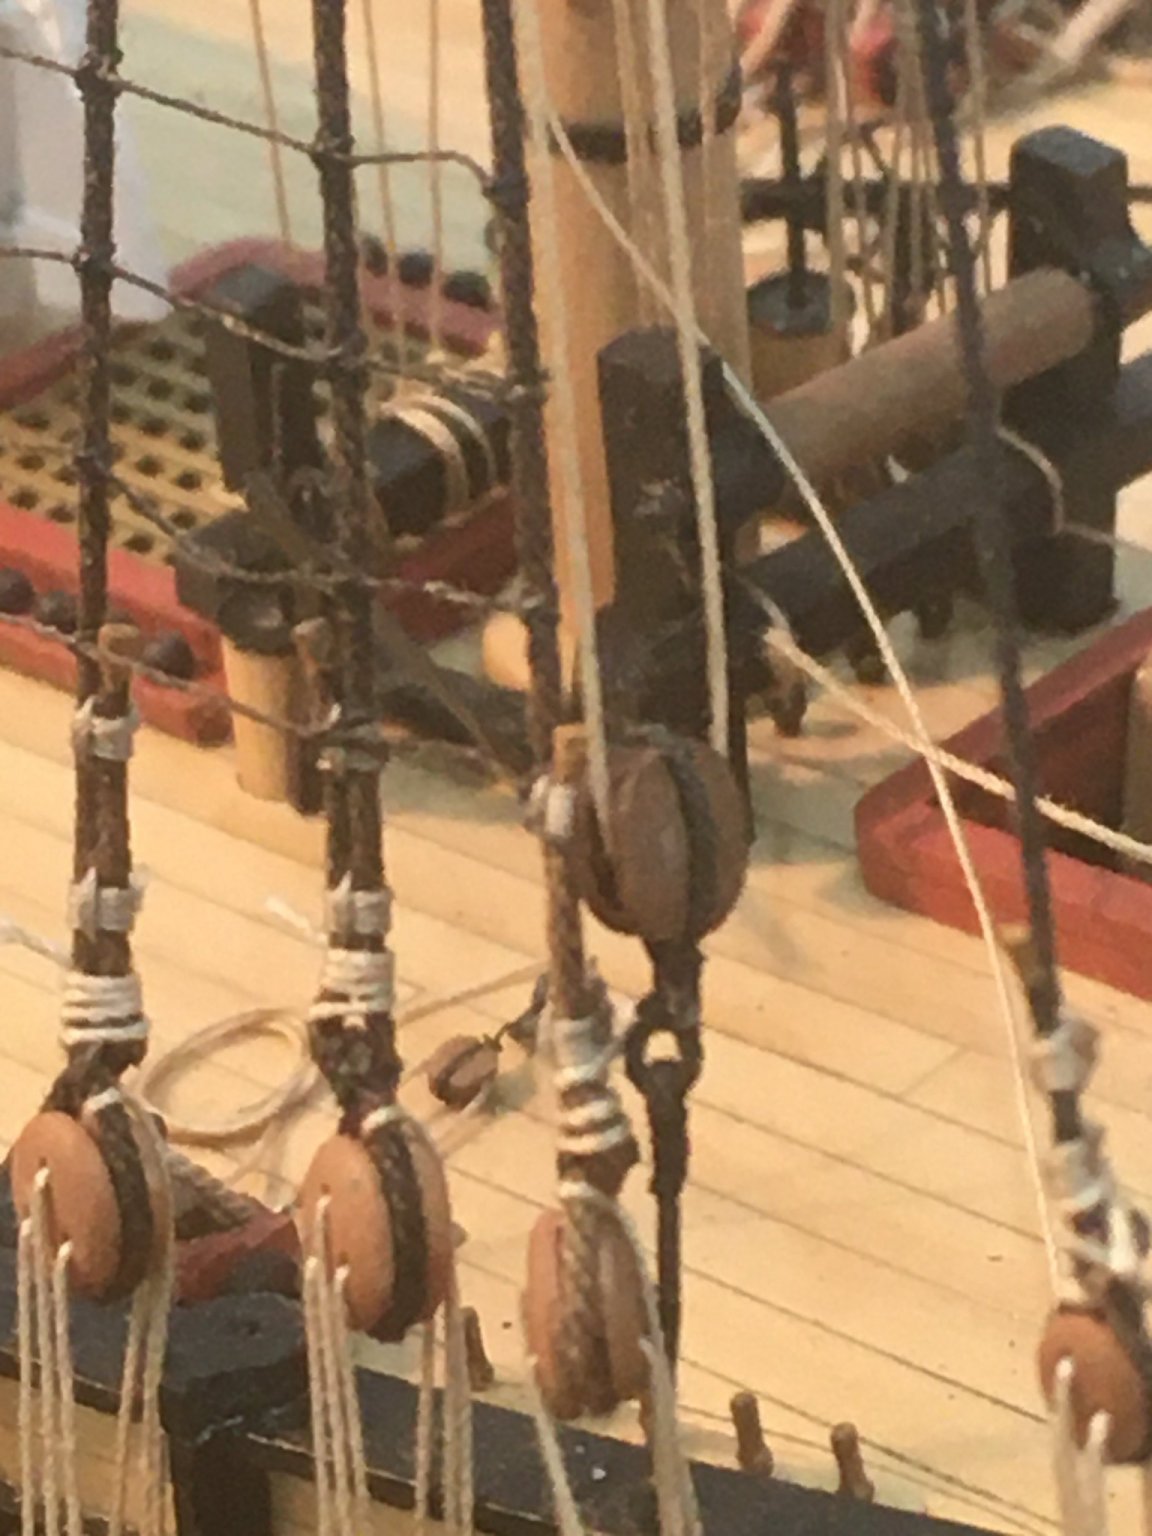
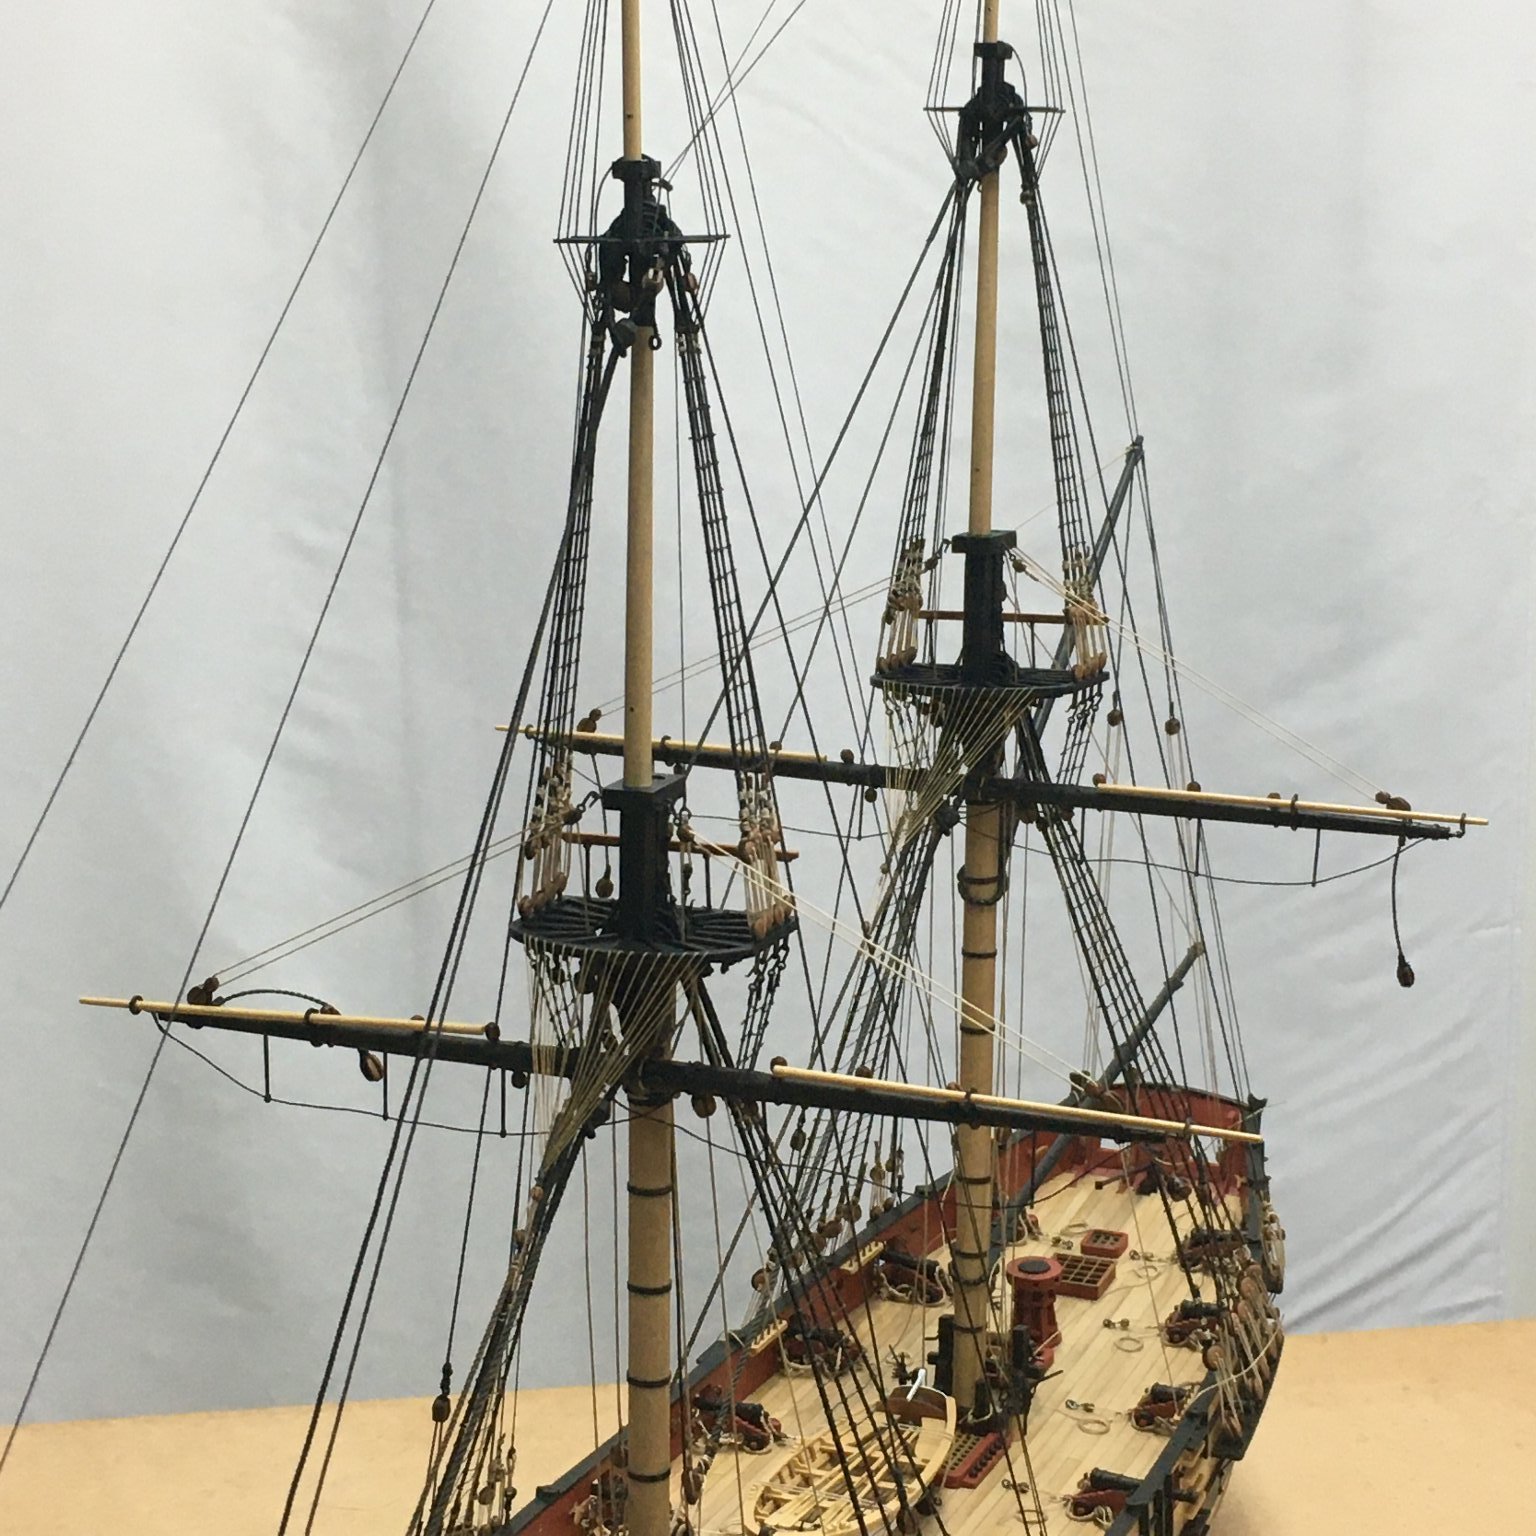
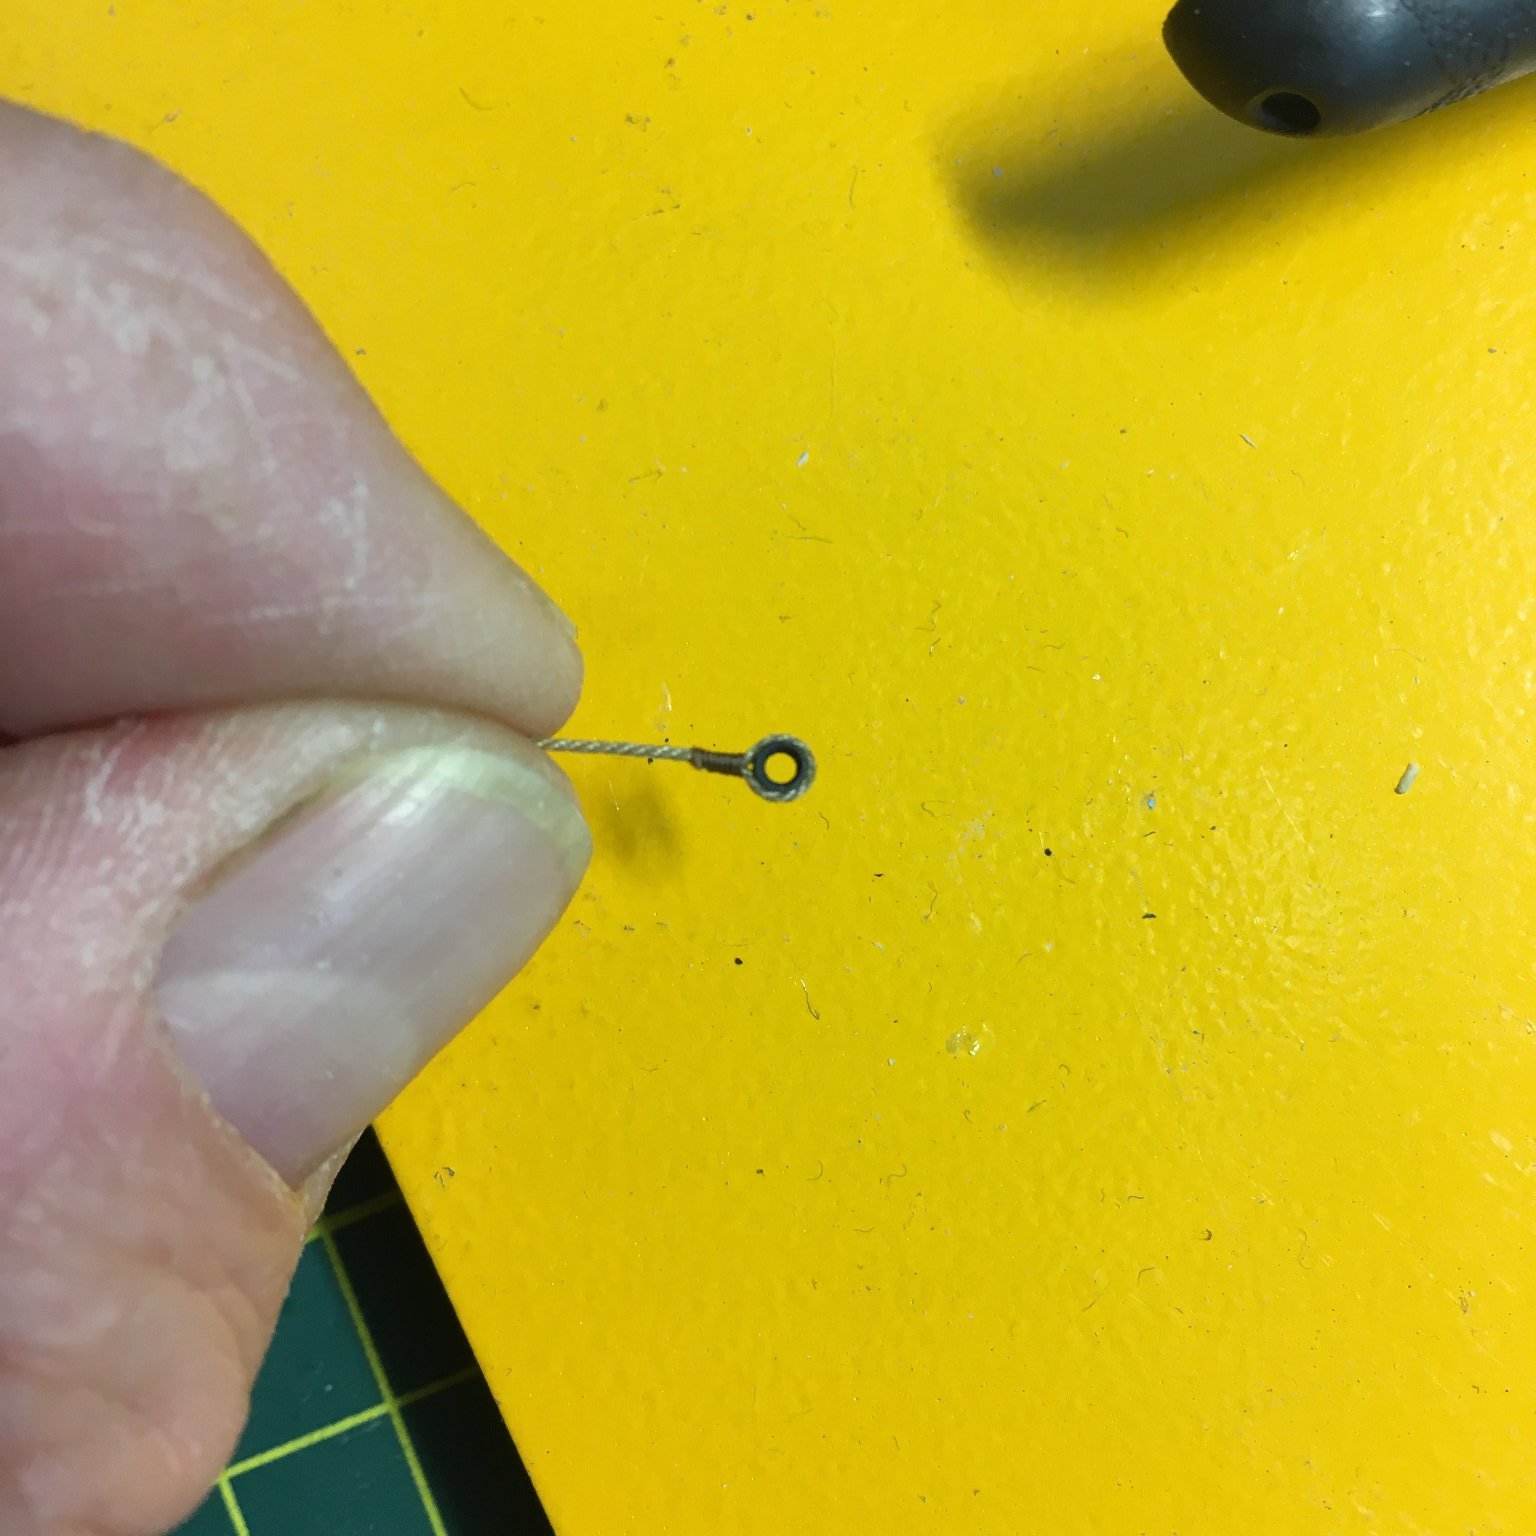
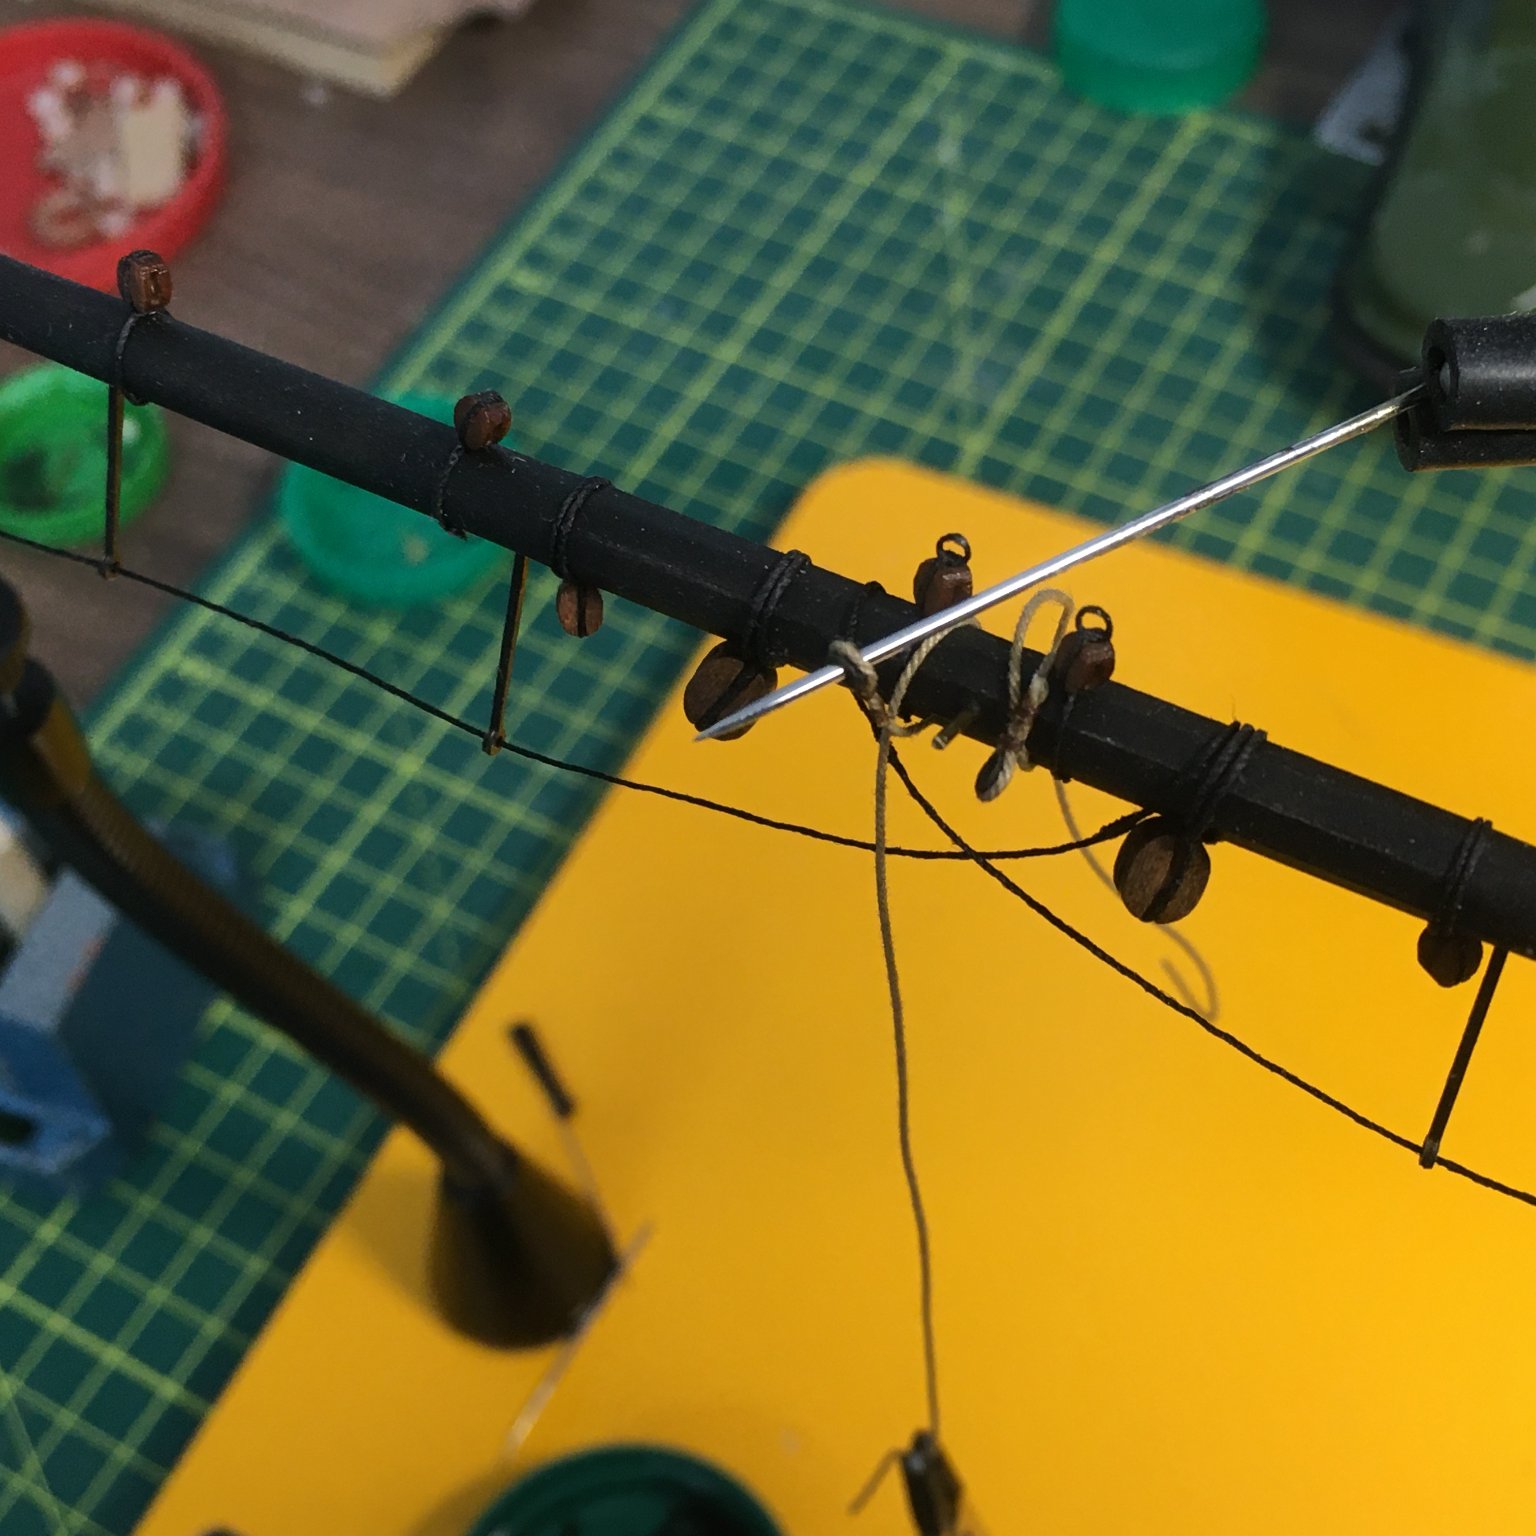
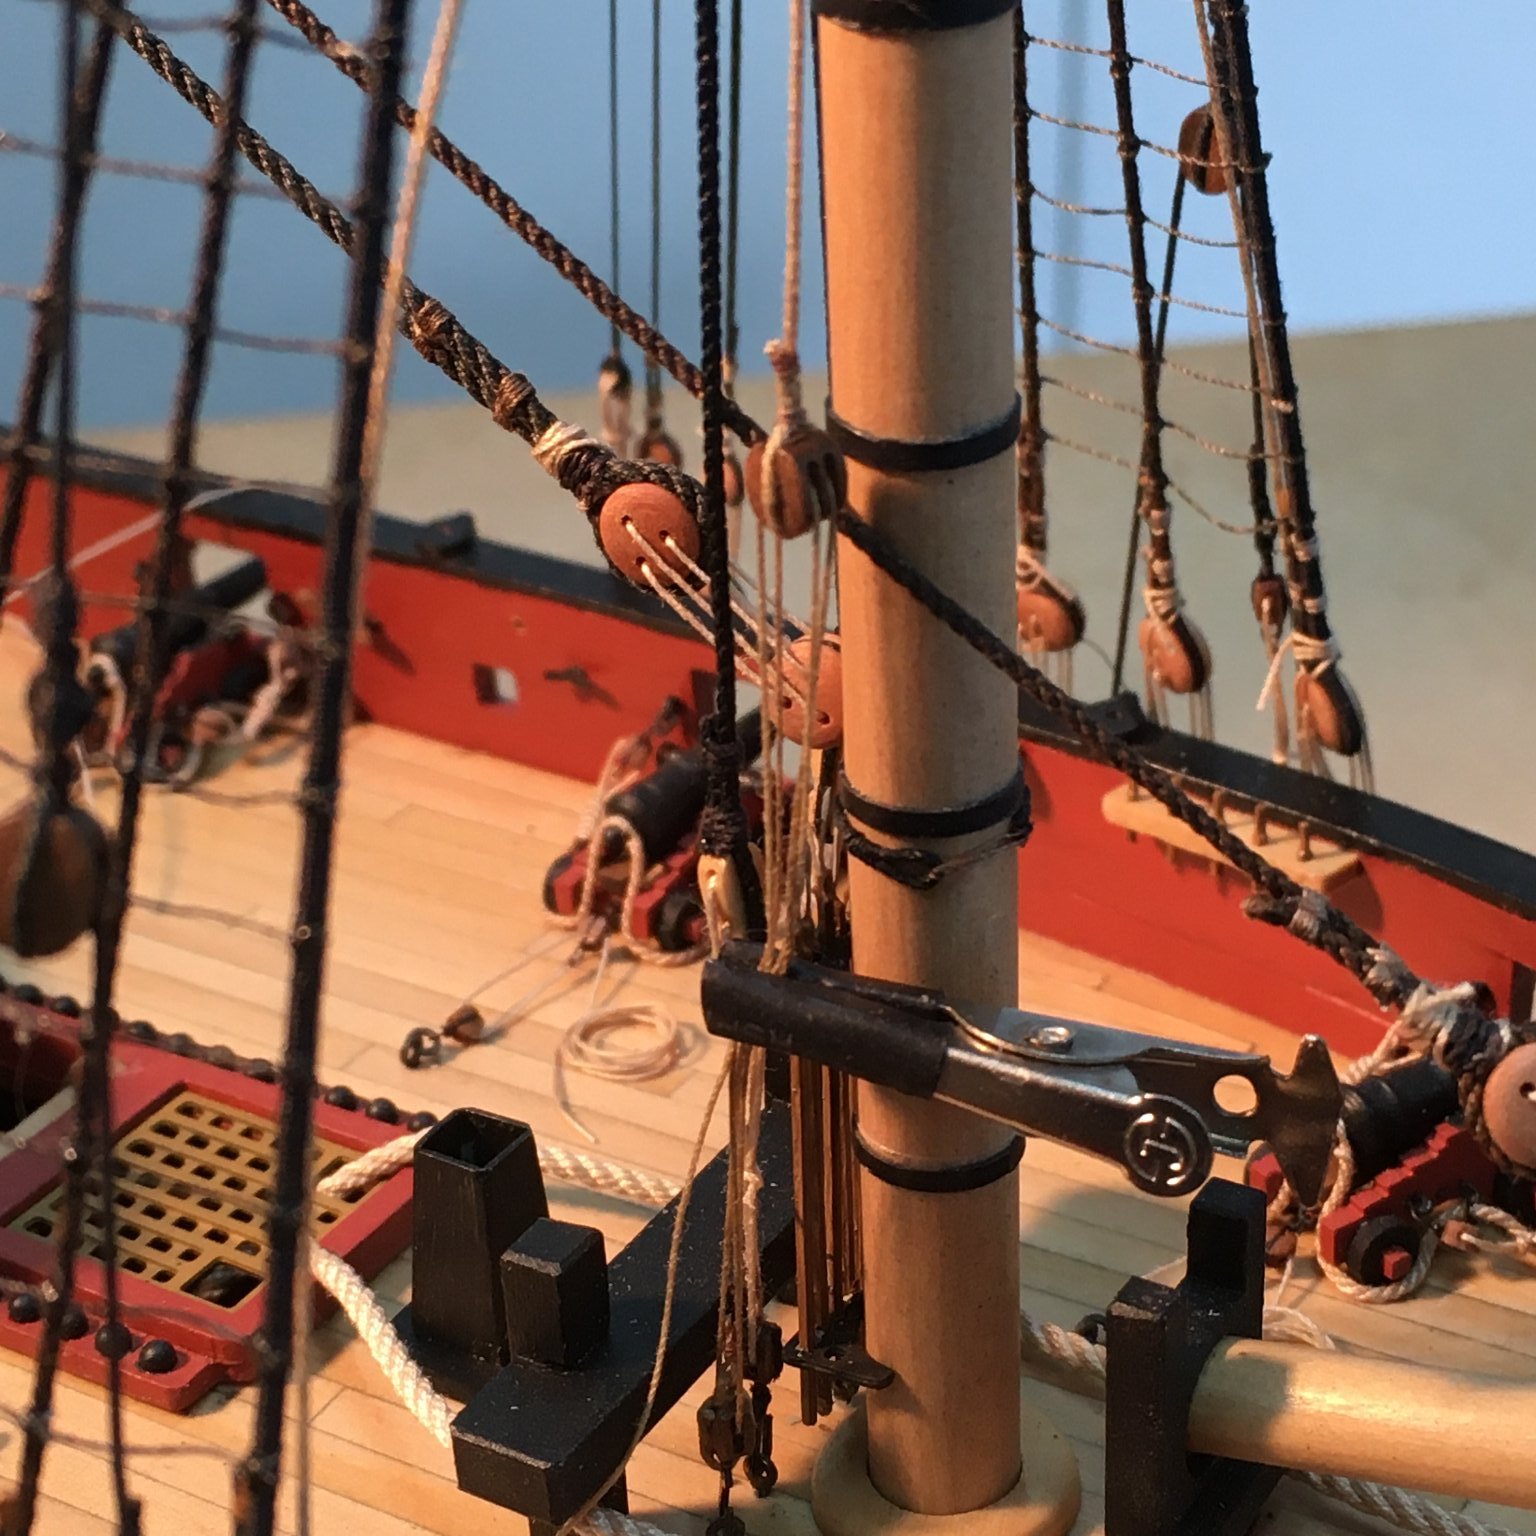
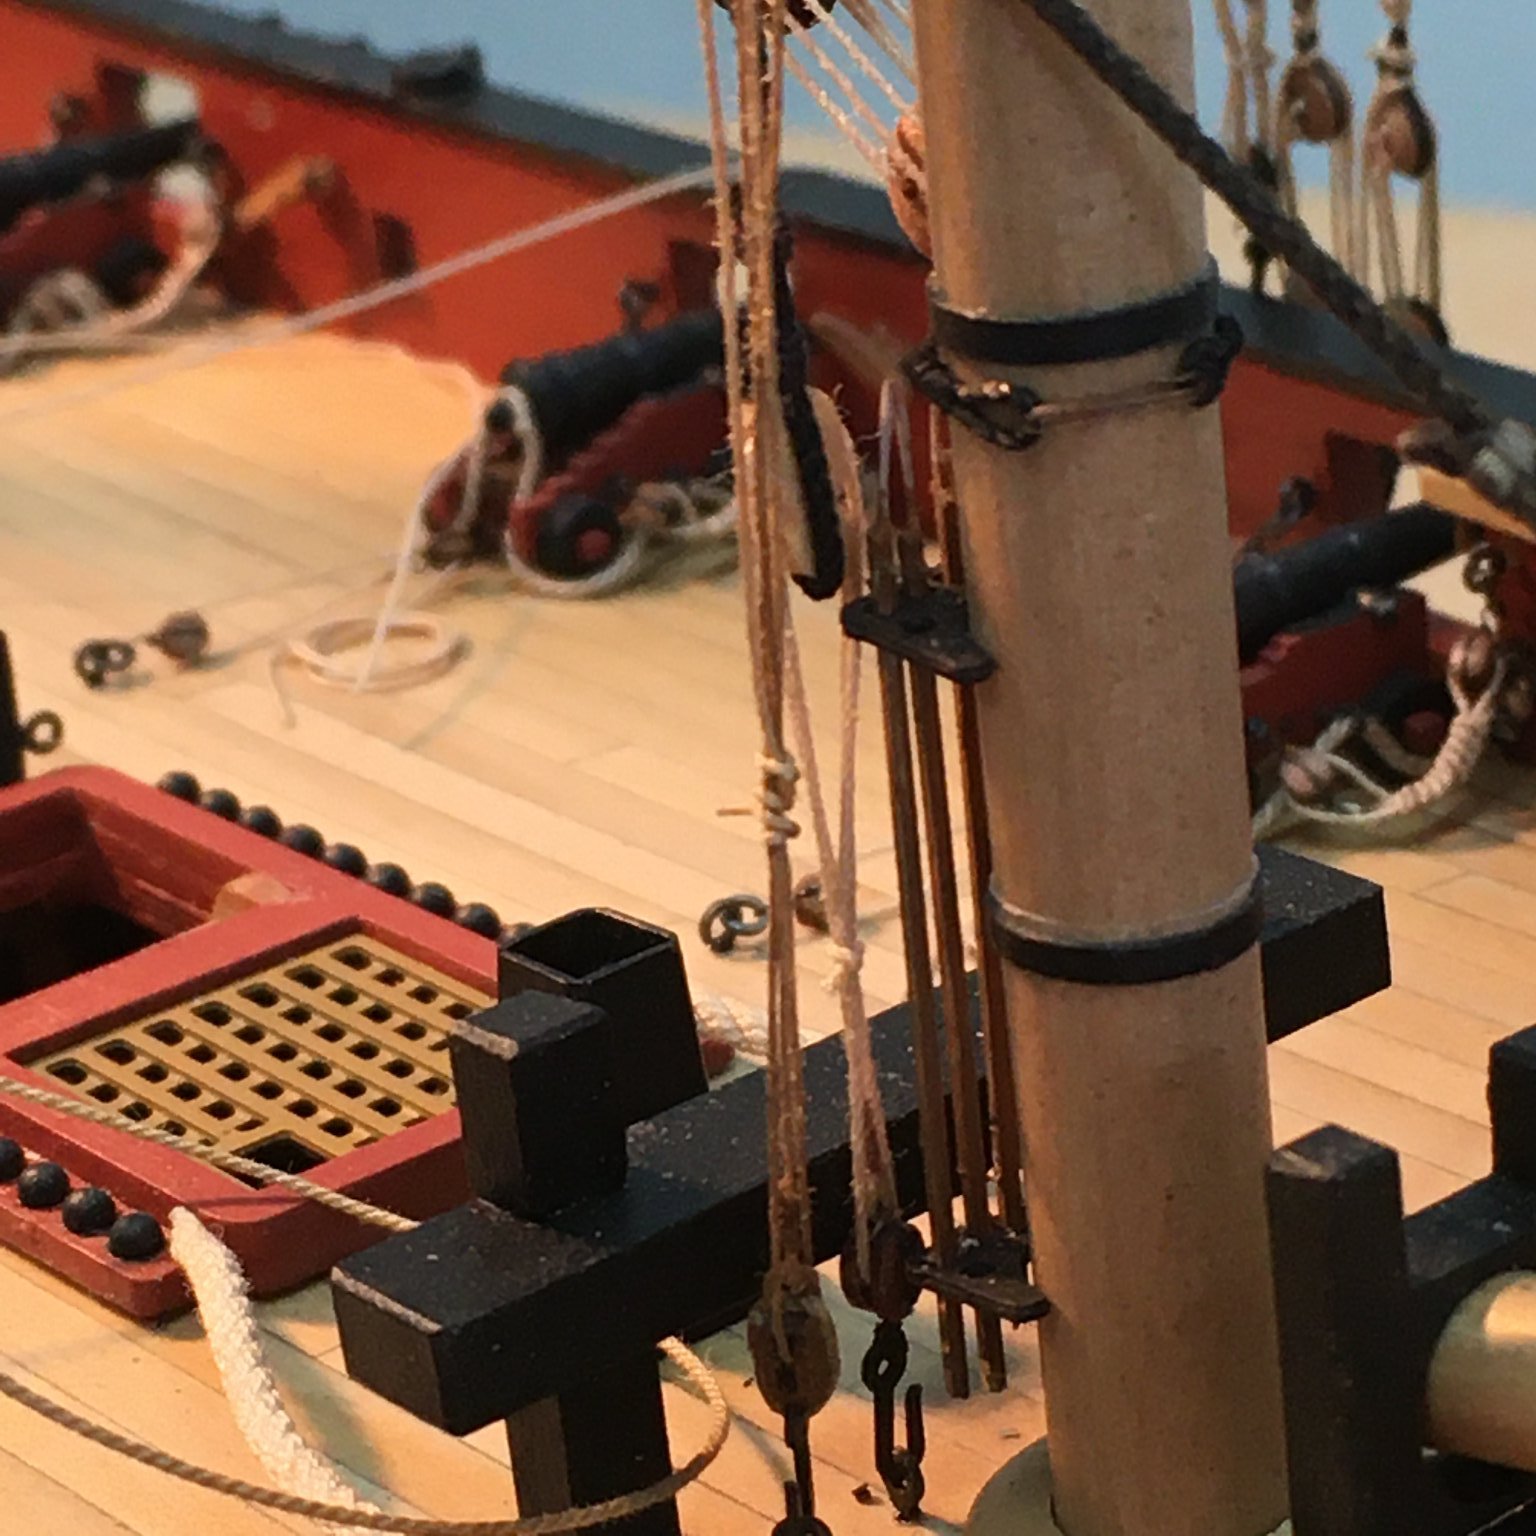
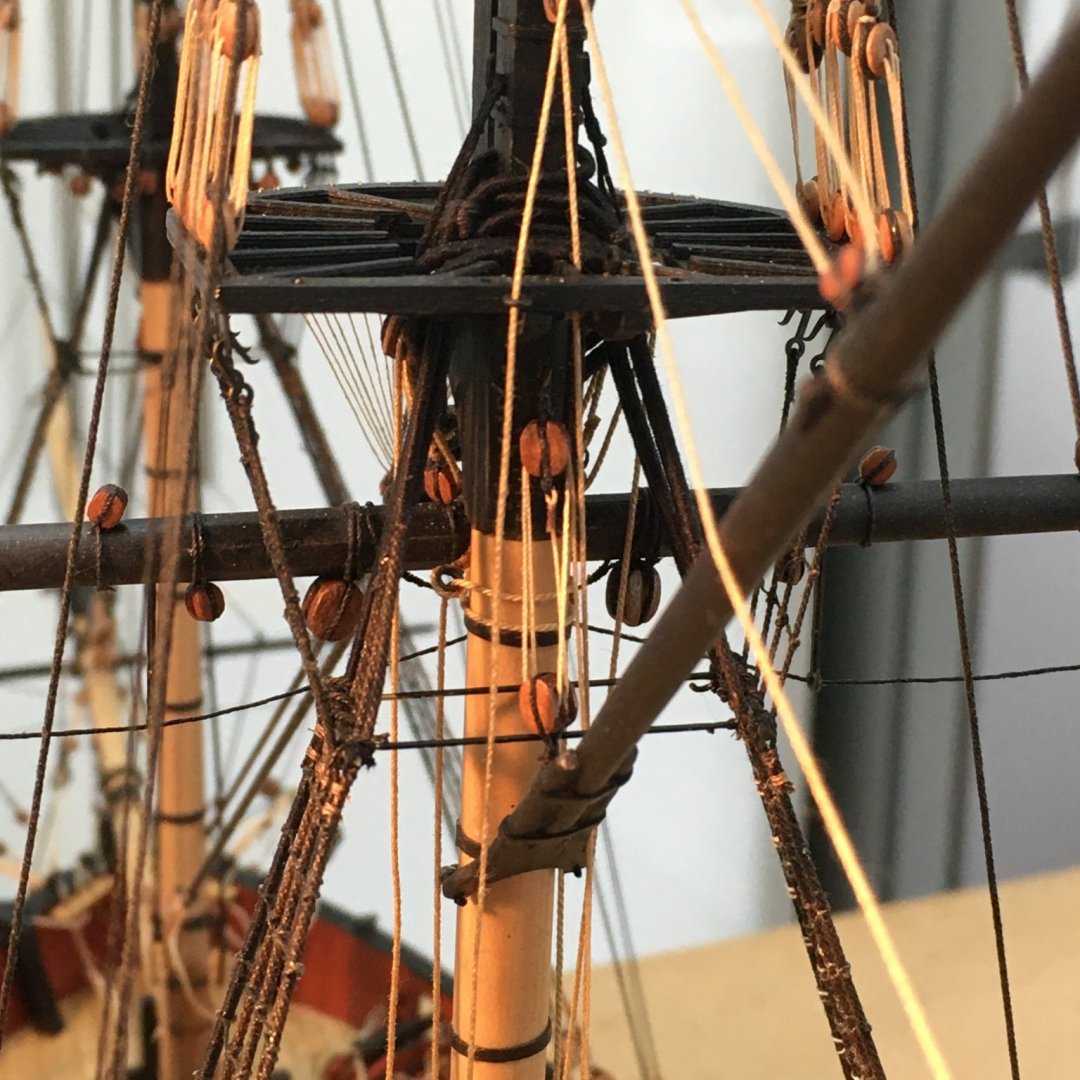
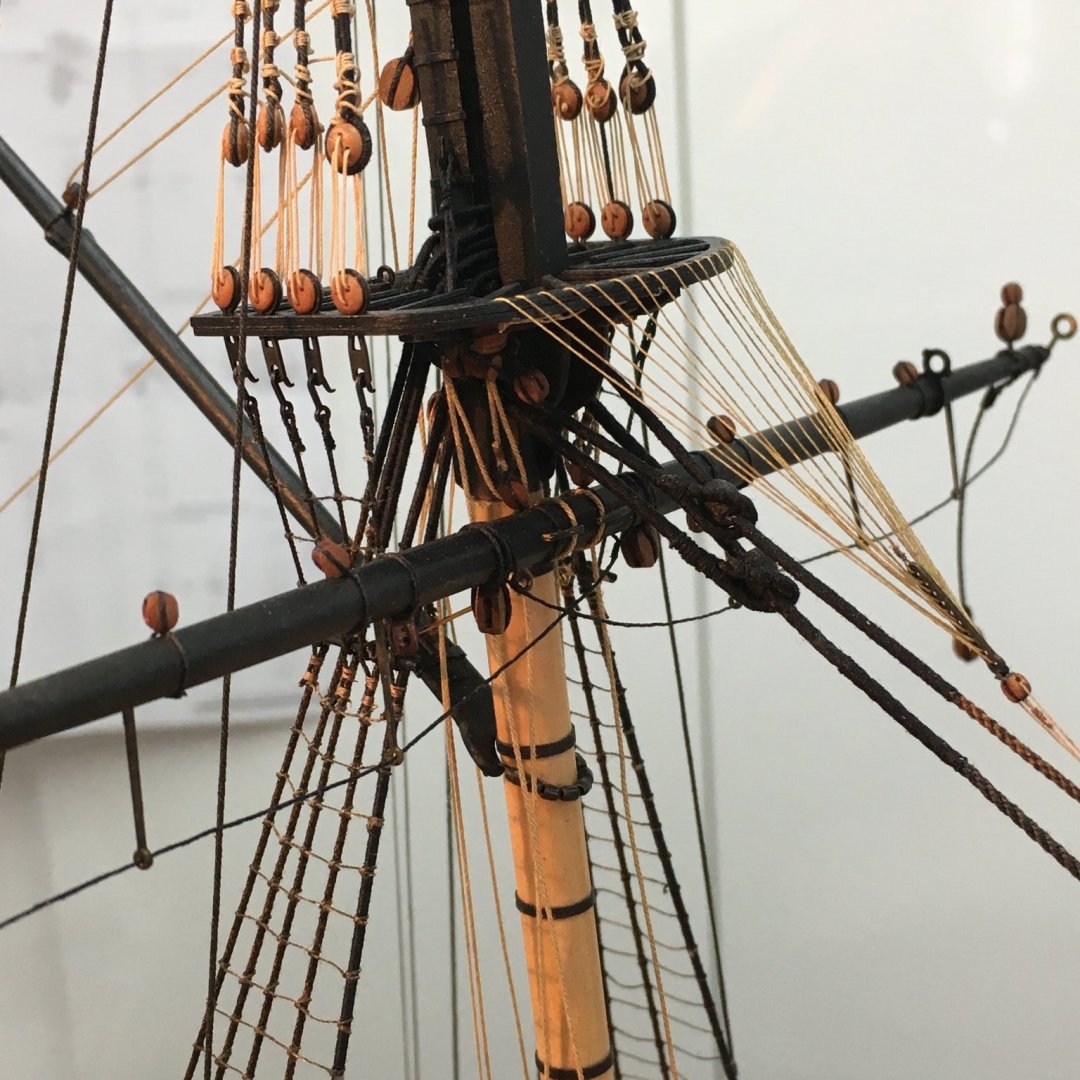
Lower yards Thanks as always for all the likes and supportive comments. Back to the rigging. I'd decided to fit the main yard before the gaff thinking it would be easier that way round. In retrospect I was probably wrong as it turned out tricky getting the gaff parrel past all the lines coming down from the yard but at least I managed it. On the yard, I started with the truss pendants which are designed to hold the yard against the mast. There are two pendants on the yard, each with a thimble spliced in one end. The plans show an eye splice, but I didn't rate my chances of being able to thread a line through a small eye splice once the yard was in position, hence the thimble. I used the same method described earlier to make the thimbles from 1.6mm/1/16" brass tube: I wasn't sure how long to make the pendants. The Fully Framed Model says 24 ft. for a vessel of comparable size (quoting Steel, I think) which equates to 114mm at scale. I wasn't sure if this was the total length including seizings and splices and when I did a rough check on the model the end of the pendant was a long way off the deck. It needs to be some way off the deck to keep it out of the way of other tackle round the mast, but I felt 114mm left it too short so I went for 150 mm which turned out well. The pendants were seized within the yard slings using throat seizings. I found it helped to jam the thimble on a needle held in the quadhands to keep everything in place whilst I made the seizing with fly tying thread: According to Longridge in The Anatomy of Nelson's Ships the pendants were seized so that the starboard thimble faced down and the port faced up - hopefully this is visible in the photo. This made sense when it came to passing the starboard pendant through the port thimble and vice versa, as it kept the two lines well apart as they passed round the mast as shown in the next photo, taken once the gaff was also in place: Crossing the yard was made much easier through the use of a pin in the yard and a hole drilled in the mast earlier in the build. The next job was to seize a double block into the end of each pendant, with the falls rigged to a single block hooked to an eyebolt abaft the mast. The kit instructions simply say to belay the end of the falls to the nearest convenient point. I believe it is neater and equally valid (according to TFFM and others) to wrap the spare end round the tackle and finish with a half hitch. I used a clip to hold the tackle in place while I did the hitching. I didn't film this for the main yard but the fore yard is identical: The eagle-eyed may have spotted in the earlier photo of the main yard that I'd forgotten to seize lines to the two jeer blocks sitting next to the truss pendants. My excuse is that this is an unfamiliar set-up for me - on my previous fully-rigged model the jeers consisted of a single block in the middle of the yard with two single blocks under the top. In that set-up a single line passes through all three blocks forming a letter "M" shape. Speedy's rig is right for vessels of her size and age, I just hadn't modelled it before. Anyway, by the time I realised I'd seized blocks into the ends of the pendants and didn't want to have to completely redo them. Fortunately I was able to slacken everything off to the extent that I could (just!) seize the lines on in situ. The photo doesn't give great detail but it shows the mess I was in. Not a mistake I repeated for the fore yard! I differed slightly from the kit by using 0.5mm line rather than 0.25mm as I felt the latter was a bit light for such a heavy yard. I should really have had bigger blocks on the yard to take the heavier line, but having made the decision too late I had to drill bigger holes through the 3mm tiddlers. It says a lot for the quality of the blocks that they were able to take such a large drill bit without splitting. Rigging the jeers was comparatively easy. Each line went from the 3mm block on the yard, through the first sheave in the double block under the top on same side, back through the single block, back up through the double then down to the deck. The double blocks have long strops that are suspended on hooks either side of the masthead, enabling them to sit just below the tops. I found it easiest to take the blocks off their hooks while I reeved the lines through them, then pass the strops up through the lubbers' hole and back on to their hooks. Chris has the jeers belaying directly to the bitts in front of the mast, a plan which I followed although an alternative would have been a tackle consisting a double block on the and of the line and a triple block hooked to the deck. Here's the set-up looking aft: I'll cover the gaff next. Derek


- 725 replies
-
- 7
-
-
- vanguard models
- speedy
- (and 1 more)
-
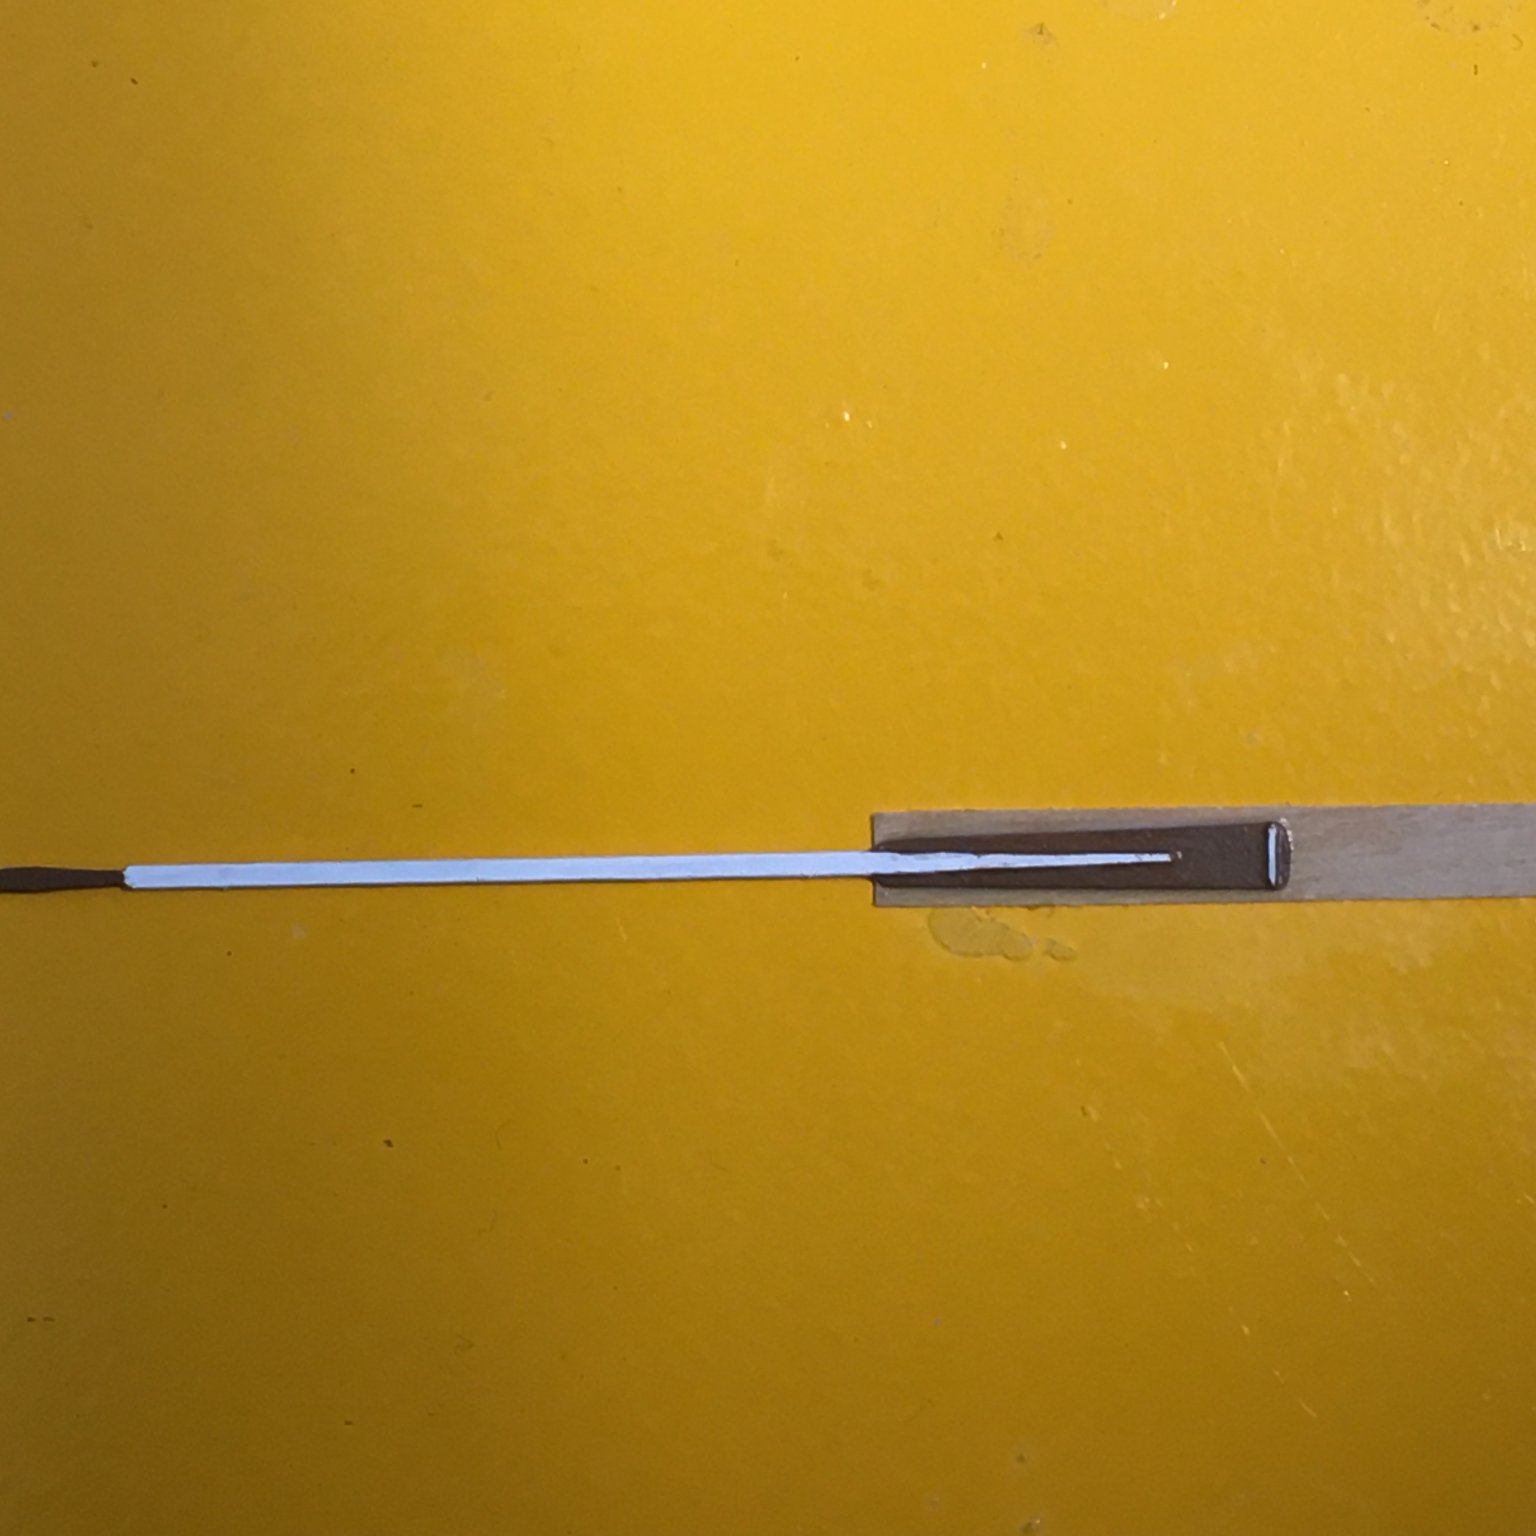
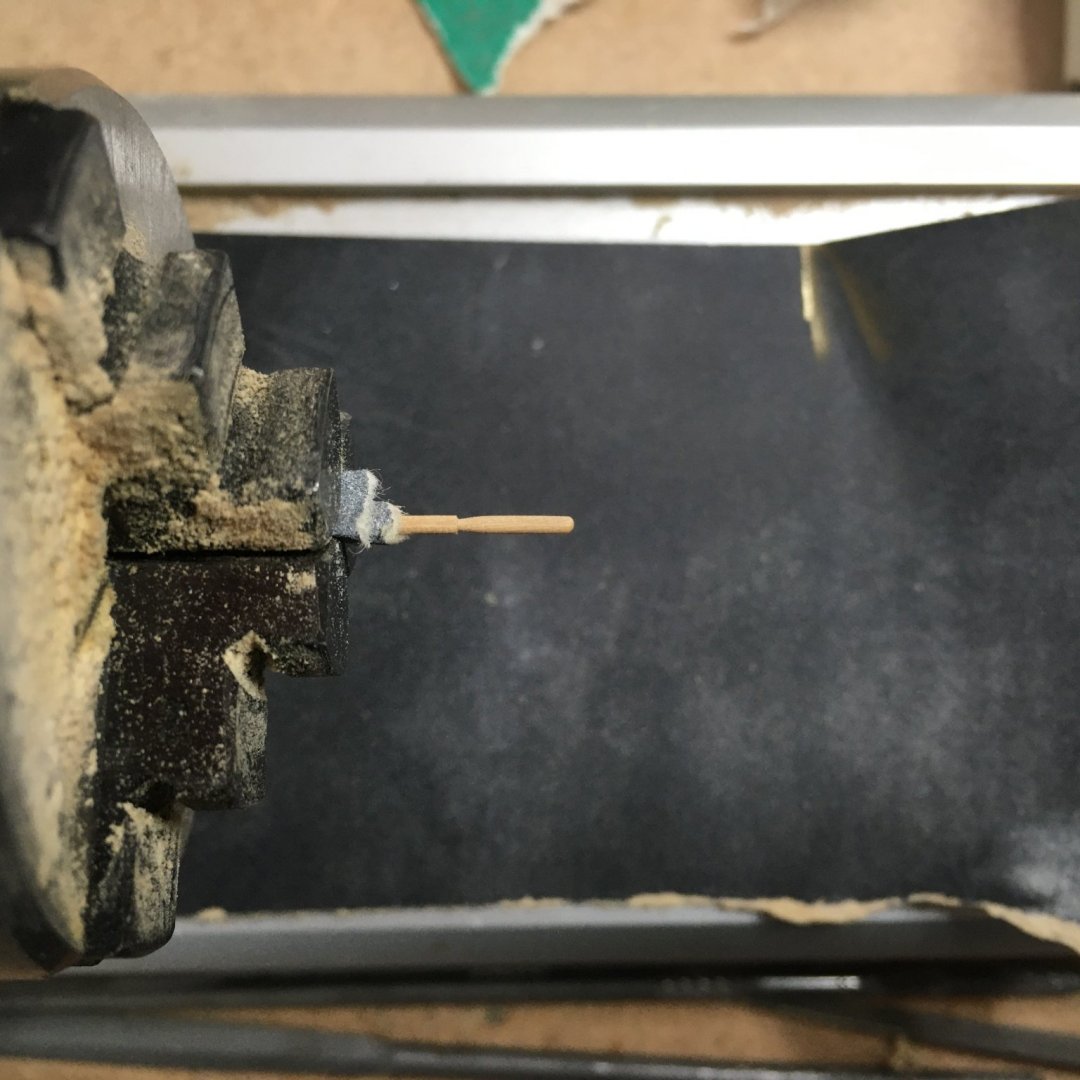
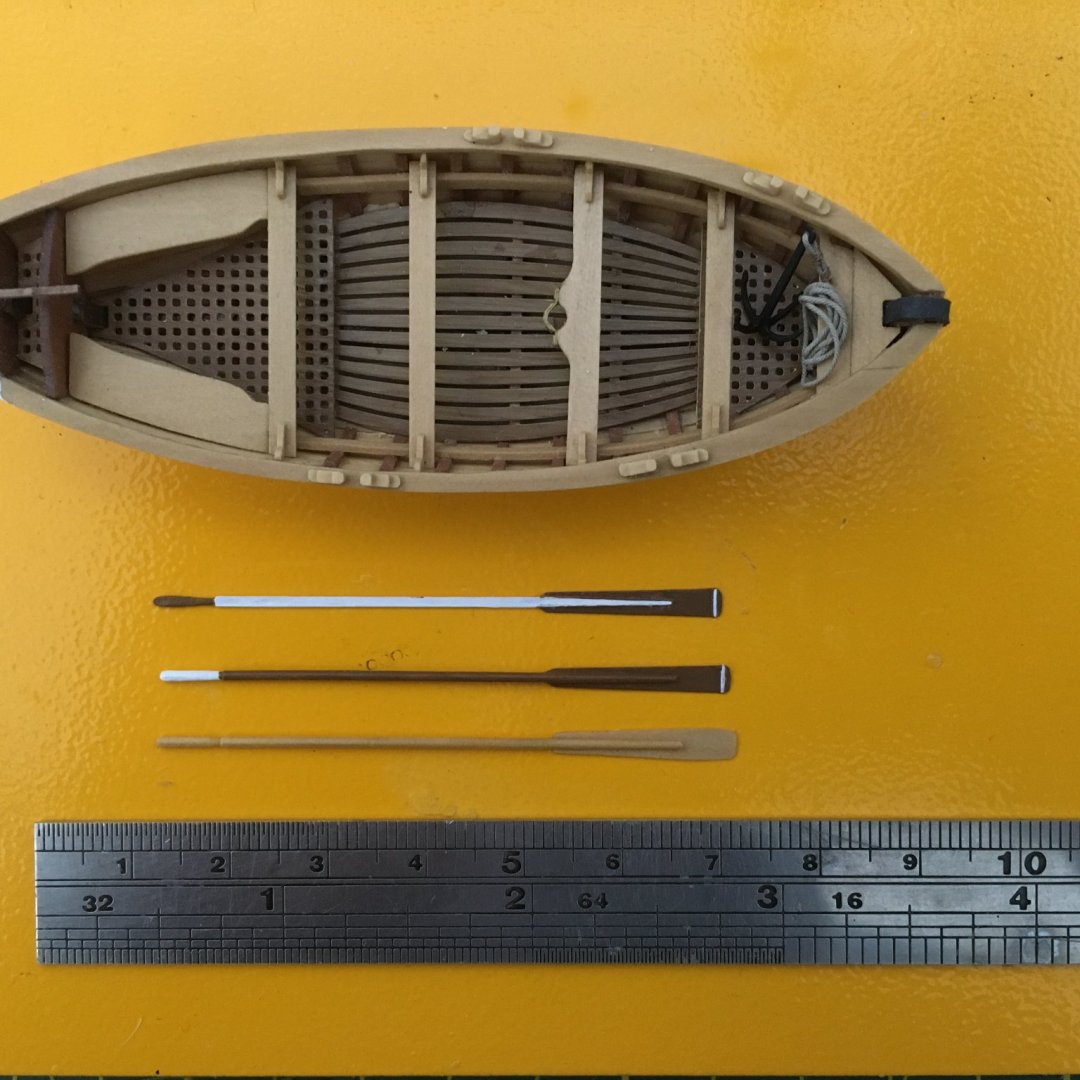
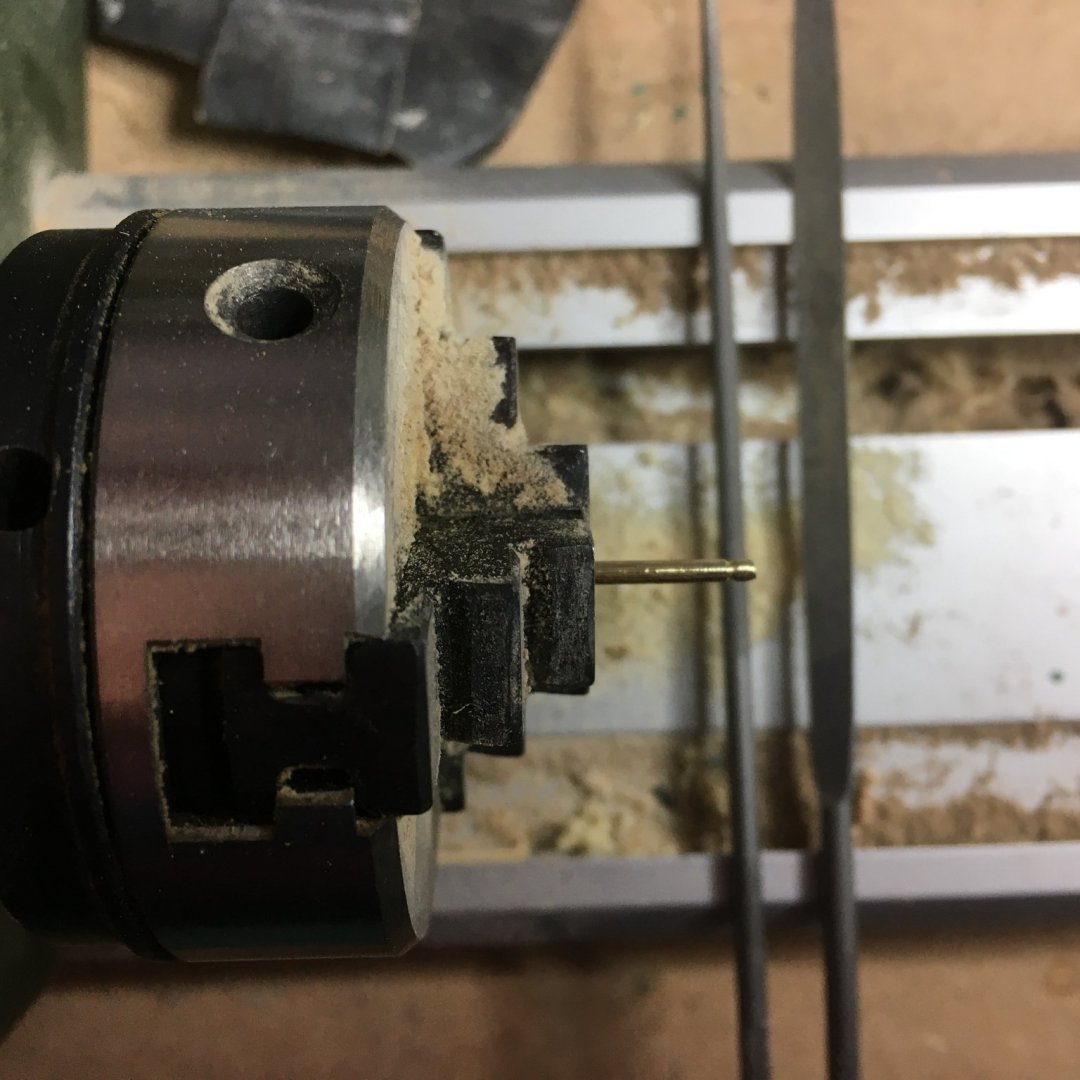
Boat's Oars Spurred on by @Blue Ensign I've had a quick go at making my own oars from scratch. Starting with a 1mm square strip of boxwood I reduced it to round with my homemade drawplate (see here) then shaped it in the same way I described earlier for the brass oar. I just had to wrap the dowel in paper to protect it from the chuck jaws: To make the blade I used the PE oar as a template, sticking it to a thin (0.3mm) strip of boxwood with PVA then carving and filing round it: After soaking in isopropyl alcohol for a few minutes the blade separated easily after which I glued it to the shaft with a tiny dab of ca. For comparison, here it is with the original PE version and my first attempt with brass rod for the shaft: Personally, I think the bare wood goes better with the boat, so now I know I can make a reasonable job of oars at this scale I'll knock out a few more in between rigging jobs. Derek


- 725 replies
-
- 9
-
-
- vanguard models
- speedy
- (and 1 more)
-
Me too - another idea I'll pinch! Derek
-
That's a really neat case Tim. You've tempted me to have a go at making my own for Speedy (when I eventually finish it!). Derek
- 436 replies
-
- 5
-
-
- vanguard models
- alert
- (and 1 more)
-
Your first planking looks really good Glenn - should be a sound foundation for the second layer.
-
Thanks, that's where I get my castello boxwood which is fine for most things. For the very finest grain I've got a small billet of english boxwood which I might try for the oars.
- 725 replies
-
- 1
-
-
- vanguard models
- speedy
- (and 1 more)
-
Thanks, you've persuaded me to have a go although you've set the bar high. Did you use castello or european boxwood?
-
Sounds like my barber, and with similar results😁 Seriously though, I've always admired your figures and will watch this transformation with interest.
- 185 replies
-
- 1
-
-
- queen anne barge
- Syren Ship Model Company
- (and 1 more)
-
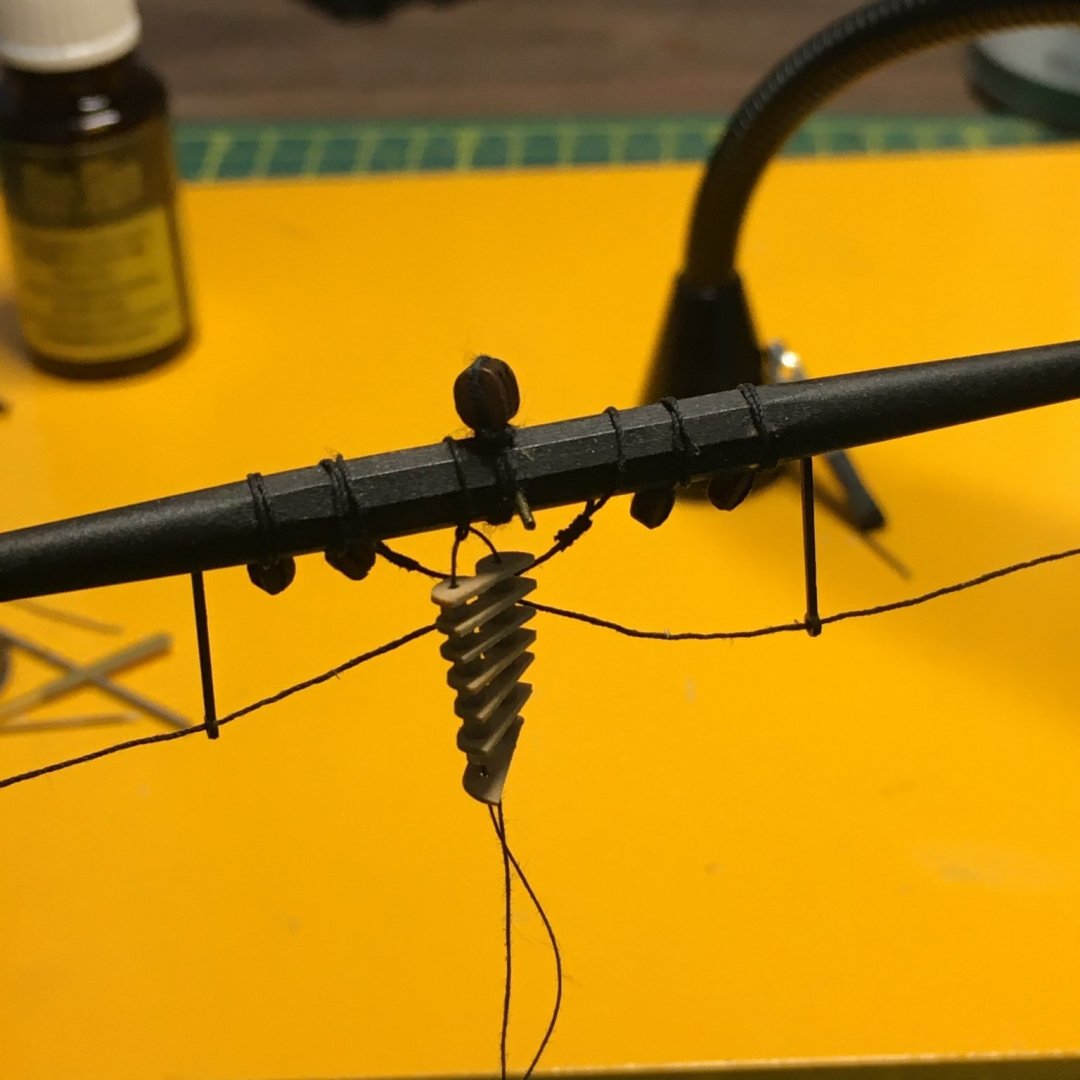
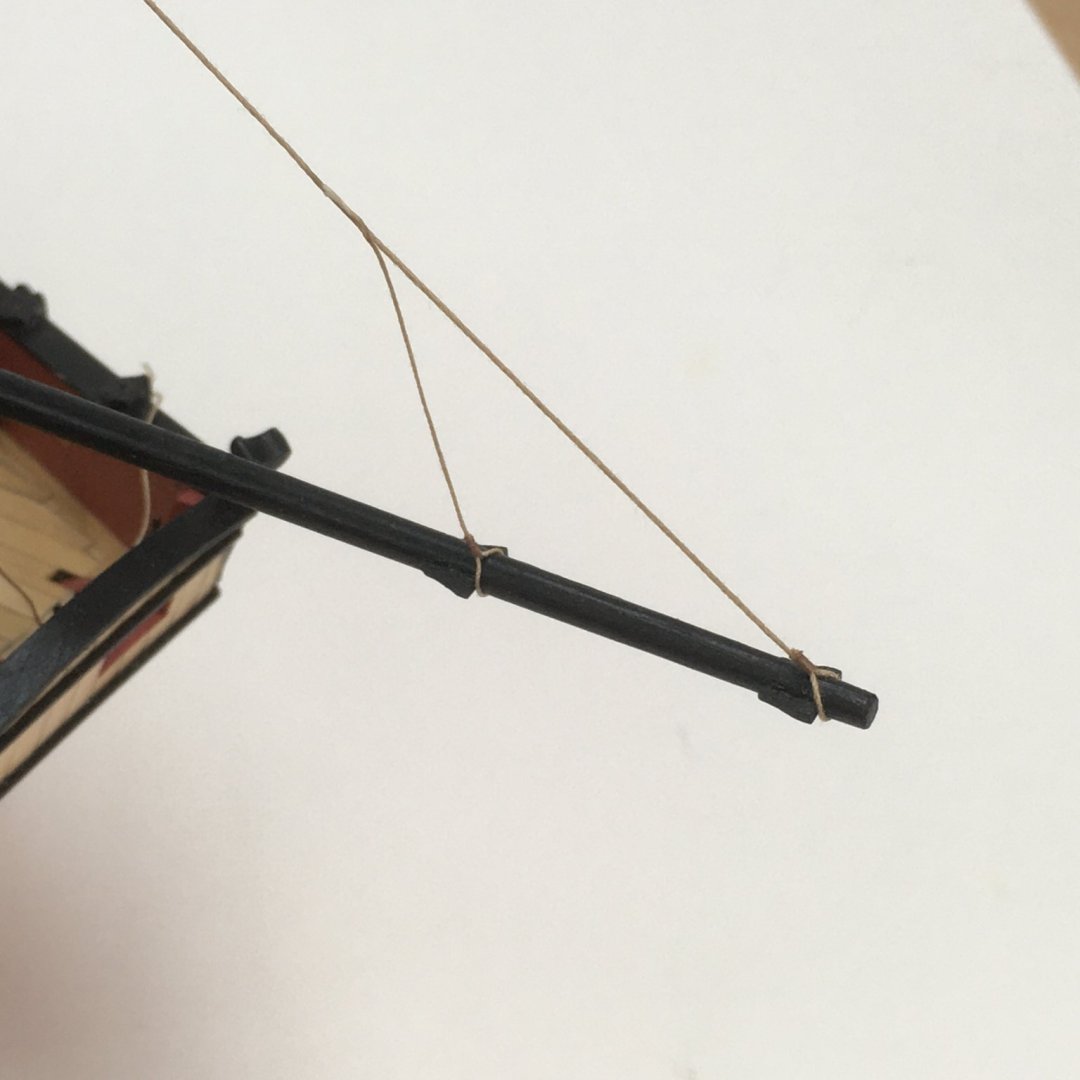
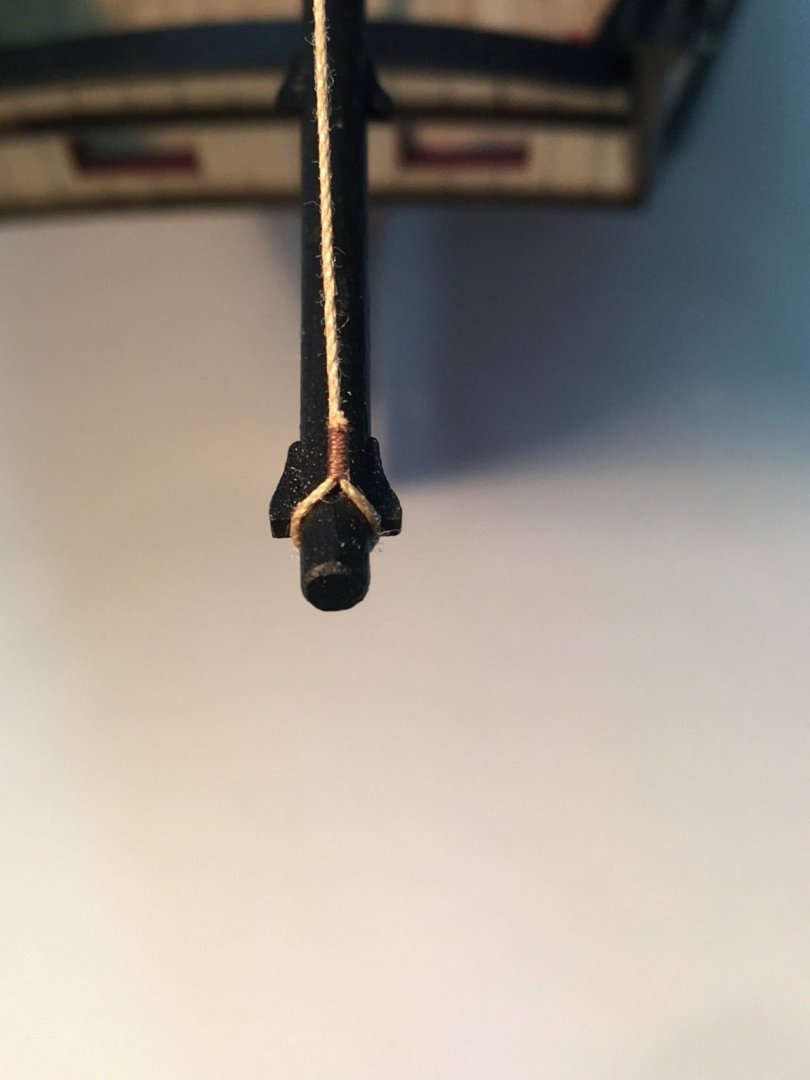
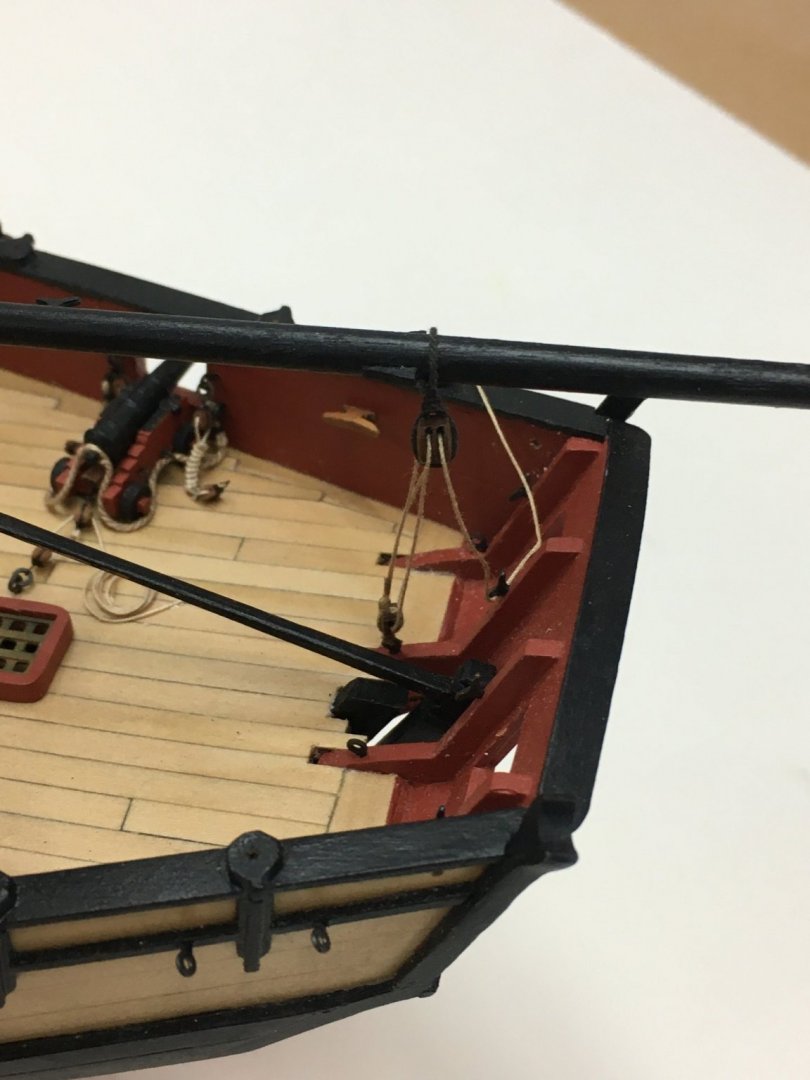
Boom (and more messing about with brass) I made all the spars some time ago and covered the various techniques in detail then so I won't repeat all that now. I'll just cover the additional steps as I cross the yards and other spars. Having enjoyed using brass to remake the oars I thought I'd use it to make more realistic parrel trucks. The kit supplies small round beads which, although about the right size, look a bit round and shiny. As I understand it, trucks were more barrel shaped, the length being slightly longer than the diameter. I decided 1/16"/1.6mm brass tube would be ideal. I started marking the tube with a light saw cut at 2mm, using my new tube cutter (thanks @glbarlow!): Then, on to the Proxxon lathe to shape the tube with swiss files. I didn't think it was worth going to the metal lathe - the little wood lathe is more than adequate for such a small job : I parted the truck off with a jewellers saw and once I had 16 (eight each for the gaff and boom) I blackened them with Casey's Brass Black. Here's the result: I started the rigging with the boom topping lift. I actually set up the falls and the sheet before I fixed the parrel round the mast, as I thought it would be more difficult to seize blocks and hooks in situ. This way, I was able to fix the parrel then seize the other end of the lift to the outer end of the boom: I can't believe how furry that line looks in close-up! At least the shot shows why I like fly tying thread for a neat seizing job. To rig the extra leg on the boom topping lift I seized a short length of 0.25mm line to the boom then used a fine needle to thread the other end through the lift. I made a fake splice by fraying the end of the line then using my fingers and a drop of dilute PVA to roll the frayed end round the lift. Once dried it looked reasonable: Next, I loosely rigged the sheet to the boom... ...then tightened the falls: One minor point here; the kit plan has the fall belaying to a pin rack on the starboard bulwarks. I tried this but the result looked awkward, with the line running over the deck and pulling the tackle askew. I therefore chose to hitch the tackle to itself. I also noticed after taking this shot that some of the blackening on the trucks had rubbed off on the mast. Fortunately it cleaned off easily. I may coat the trucks with matt poly. I was going to rig the gaff, but then thought that might make it difficult to cross the main yard so I've decided to do that next. Derek


- 725 replies
-
- 14
-
-
- vanguard models
- speedy
- (and 1 more)