HOLIDAY DONATION DRIVE - SUPPORT MSW - DO YOUR PART TO KEEP THIS GREAT FORUM GOING! (Only 20 donations so far - C'mon guys!)
×


DelF
-
Posts
1,409 -
Joined
-
Last visited
Content Type
Profiles
Forums
Gallery
Events
Everything posted by DelF
-
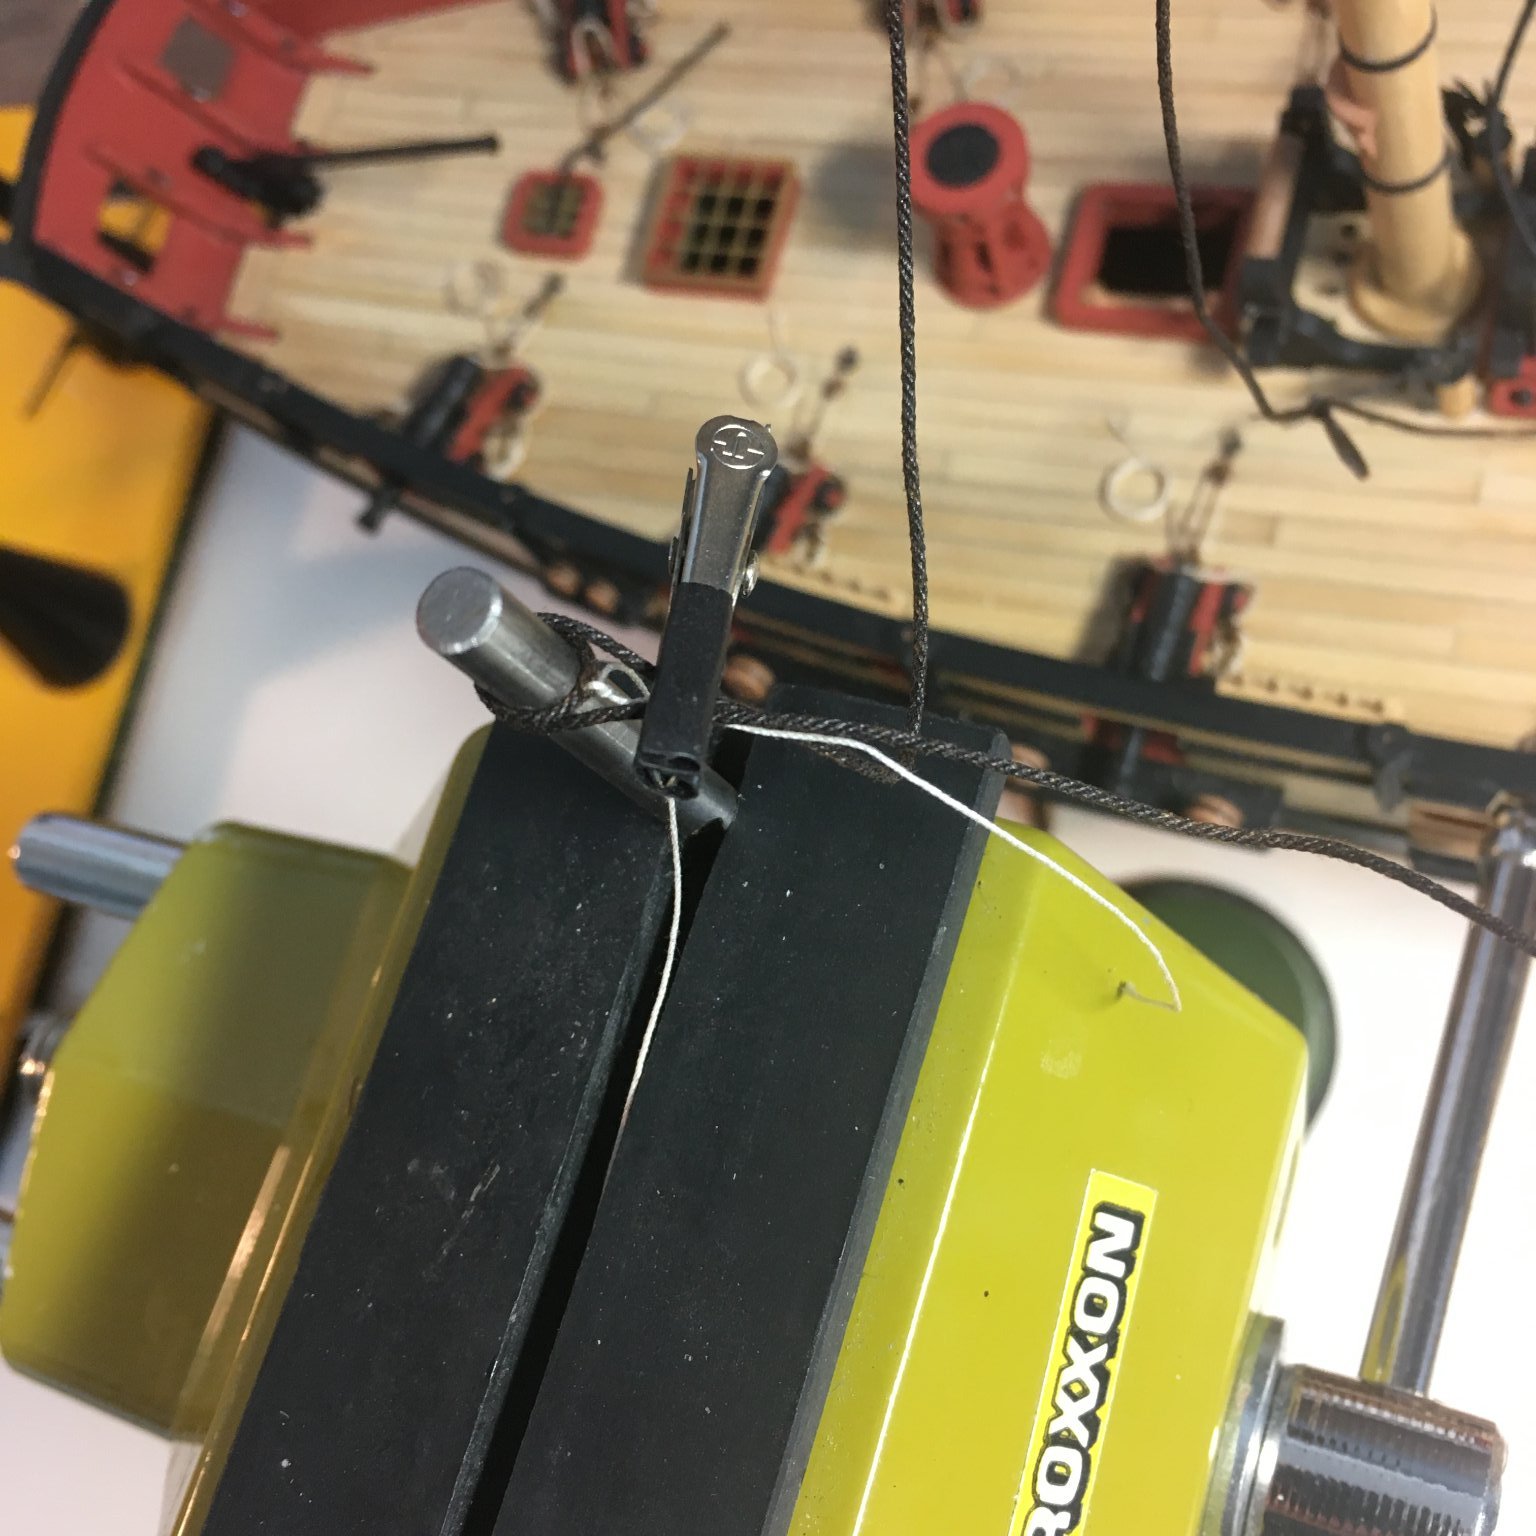
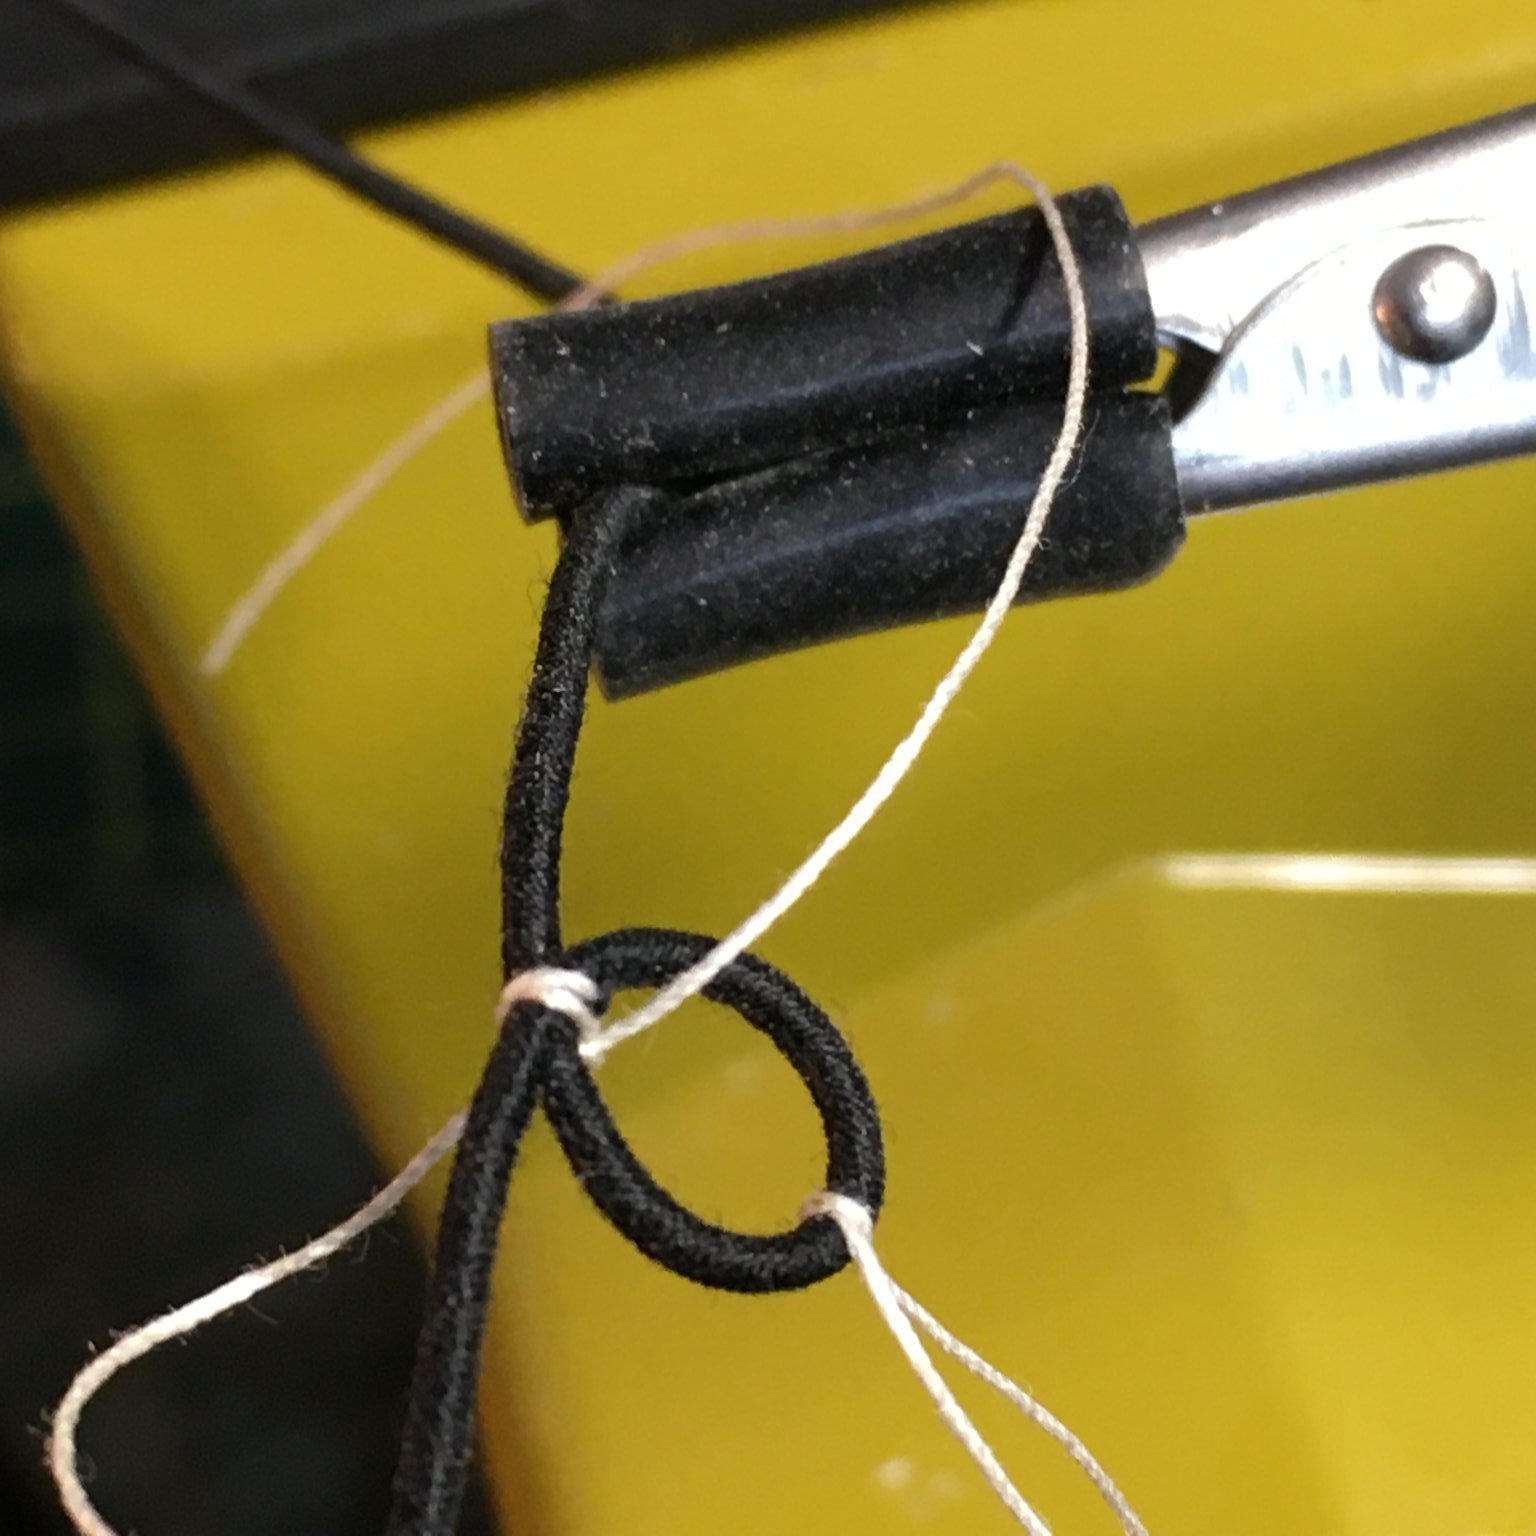
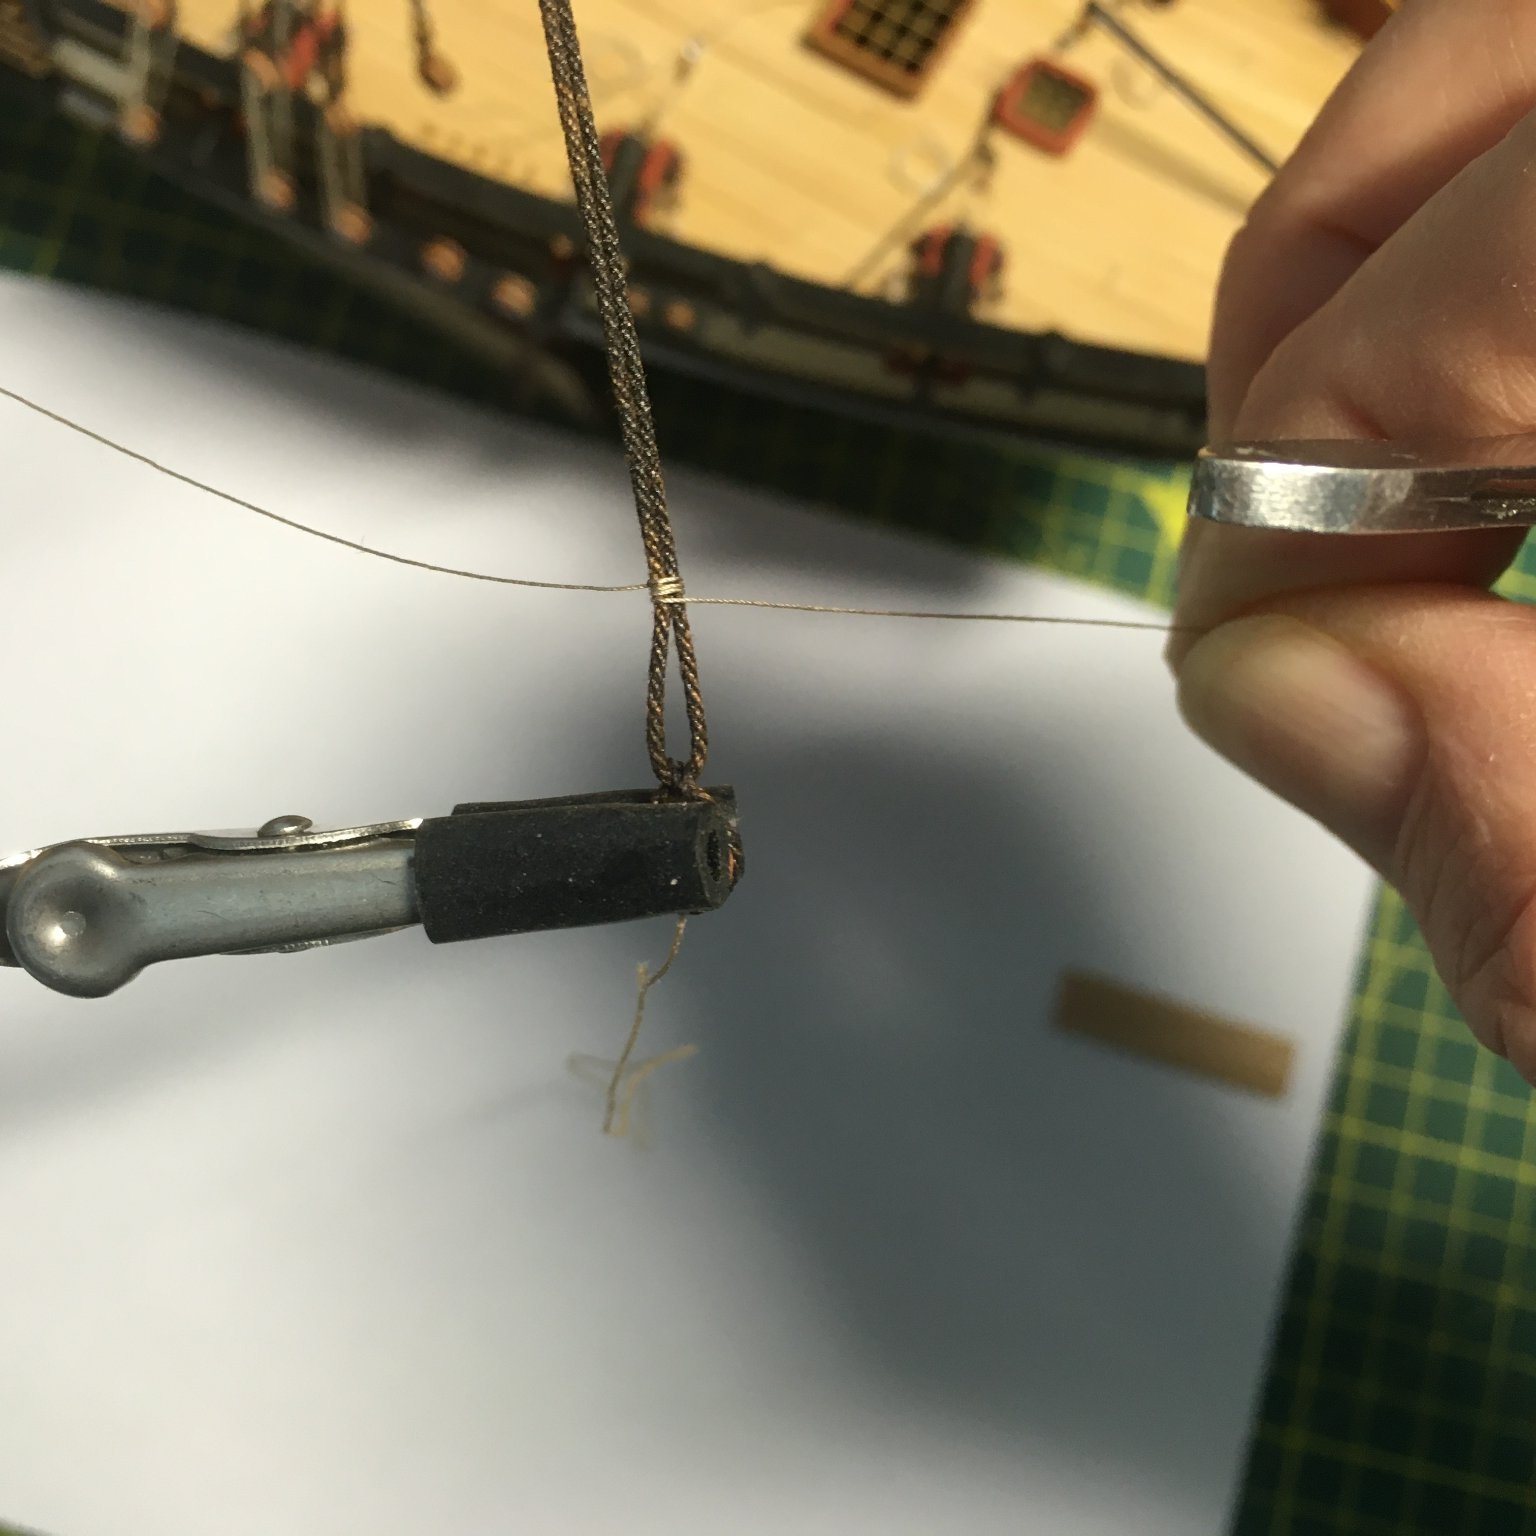
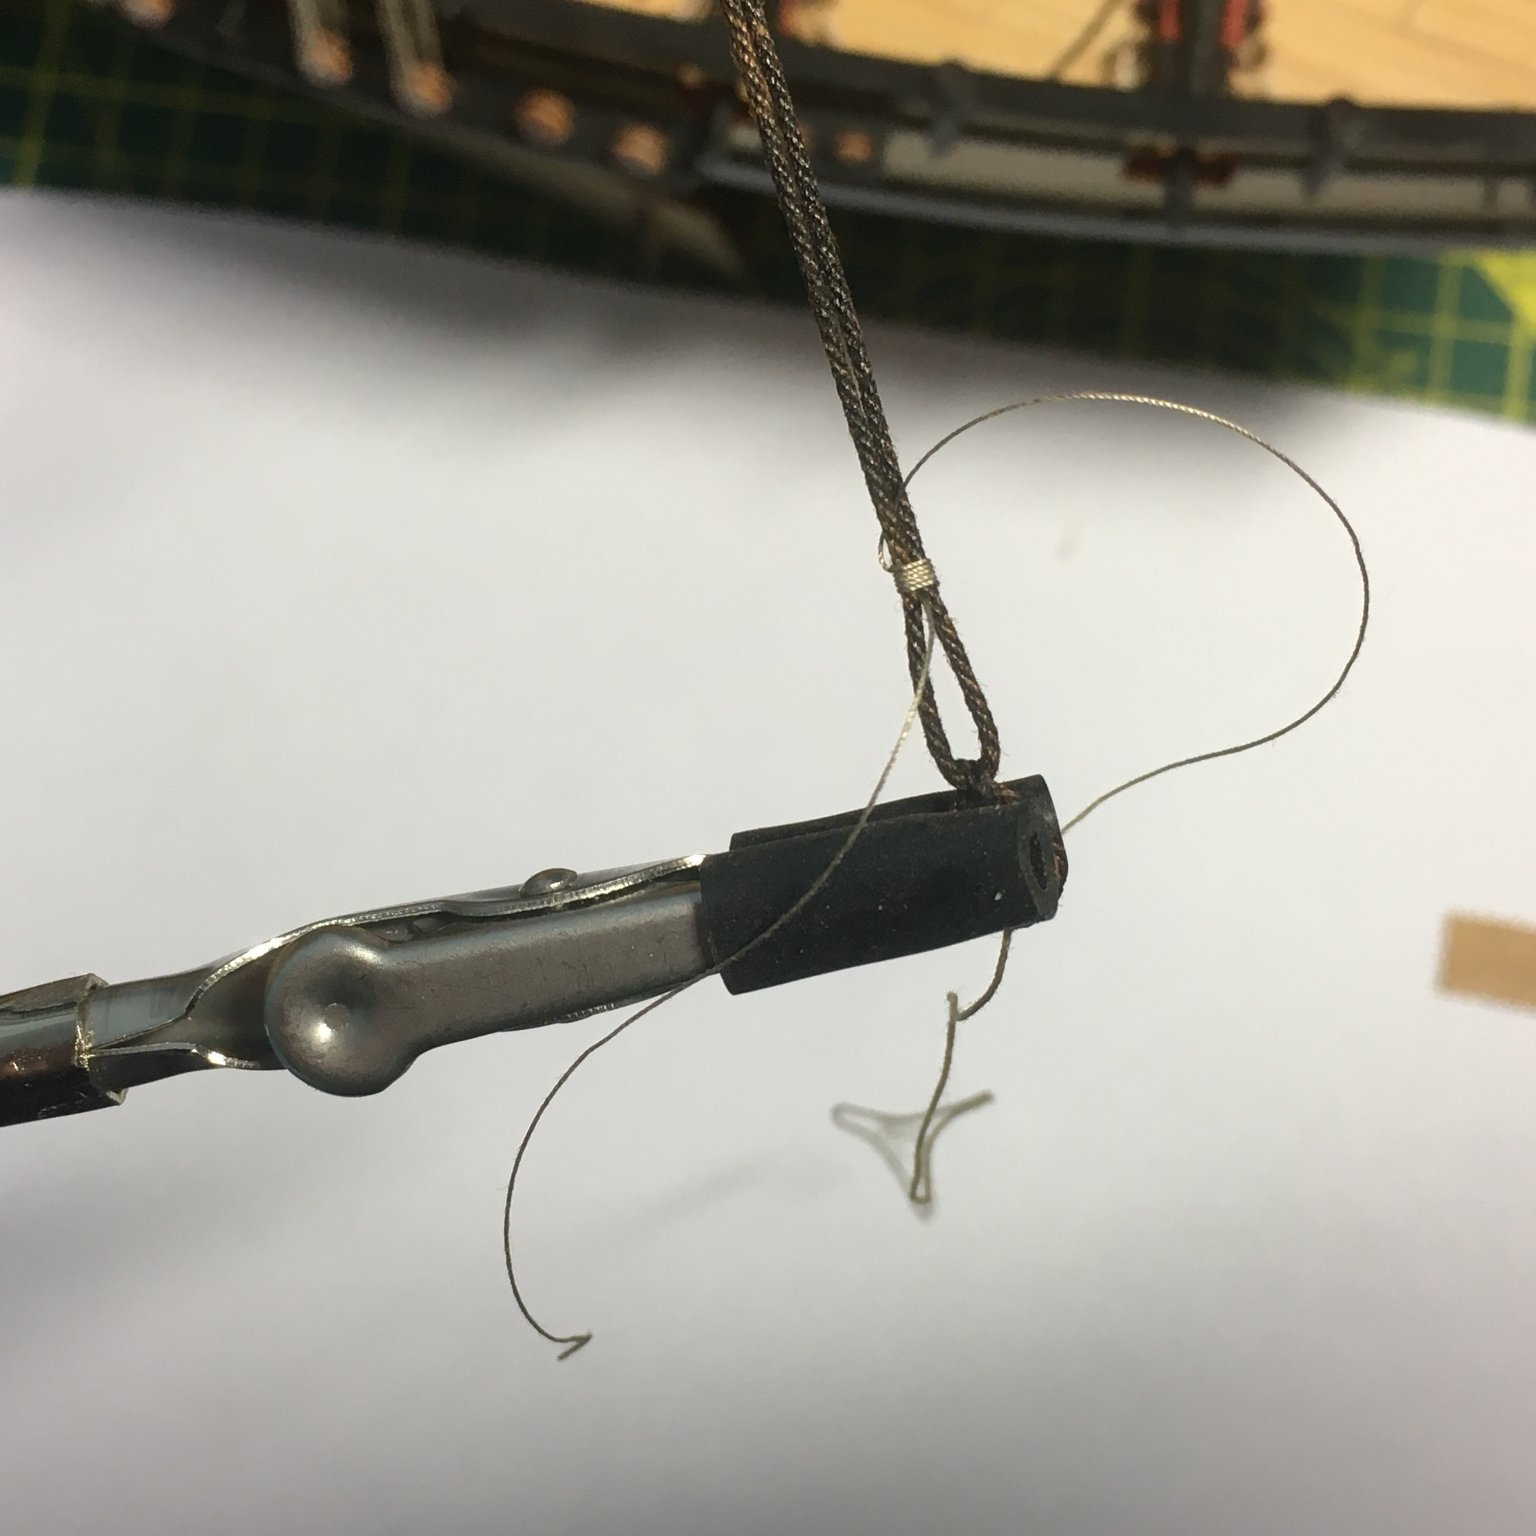
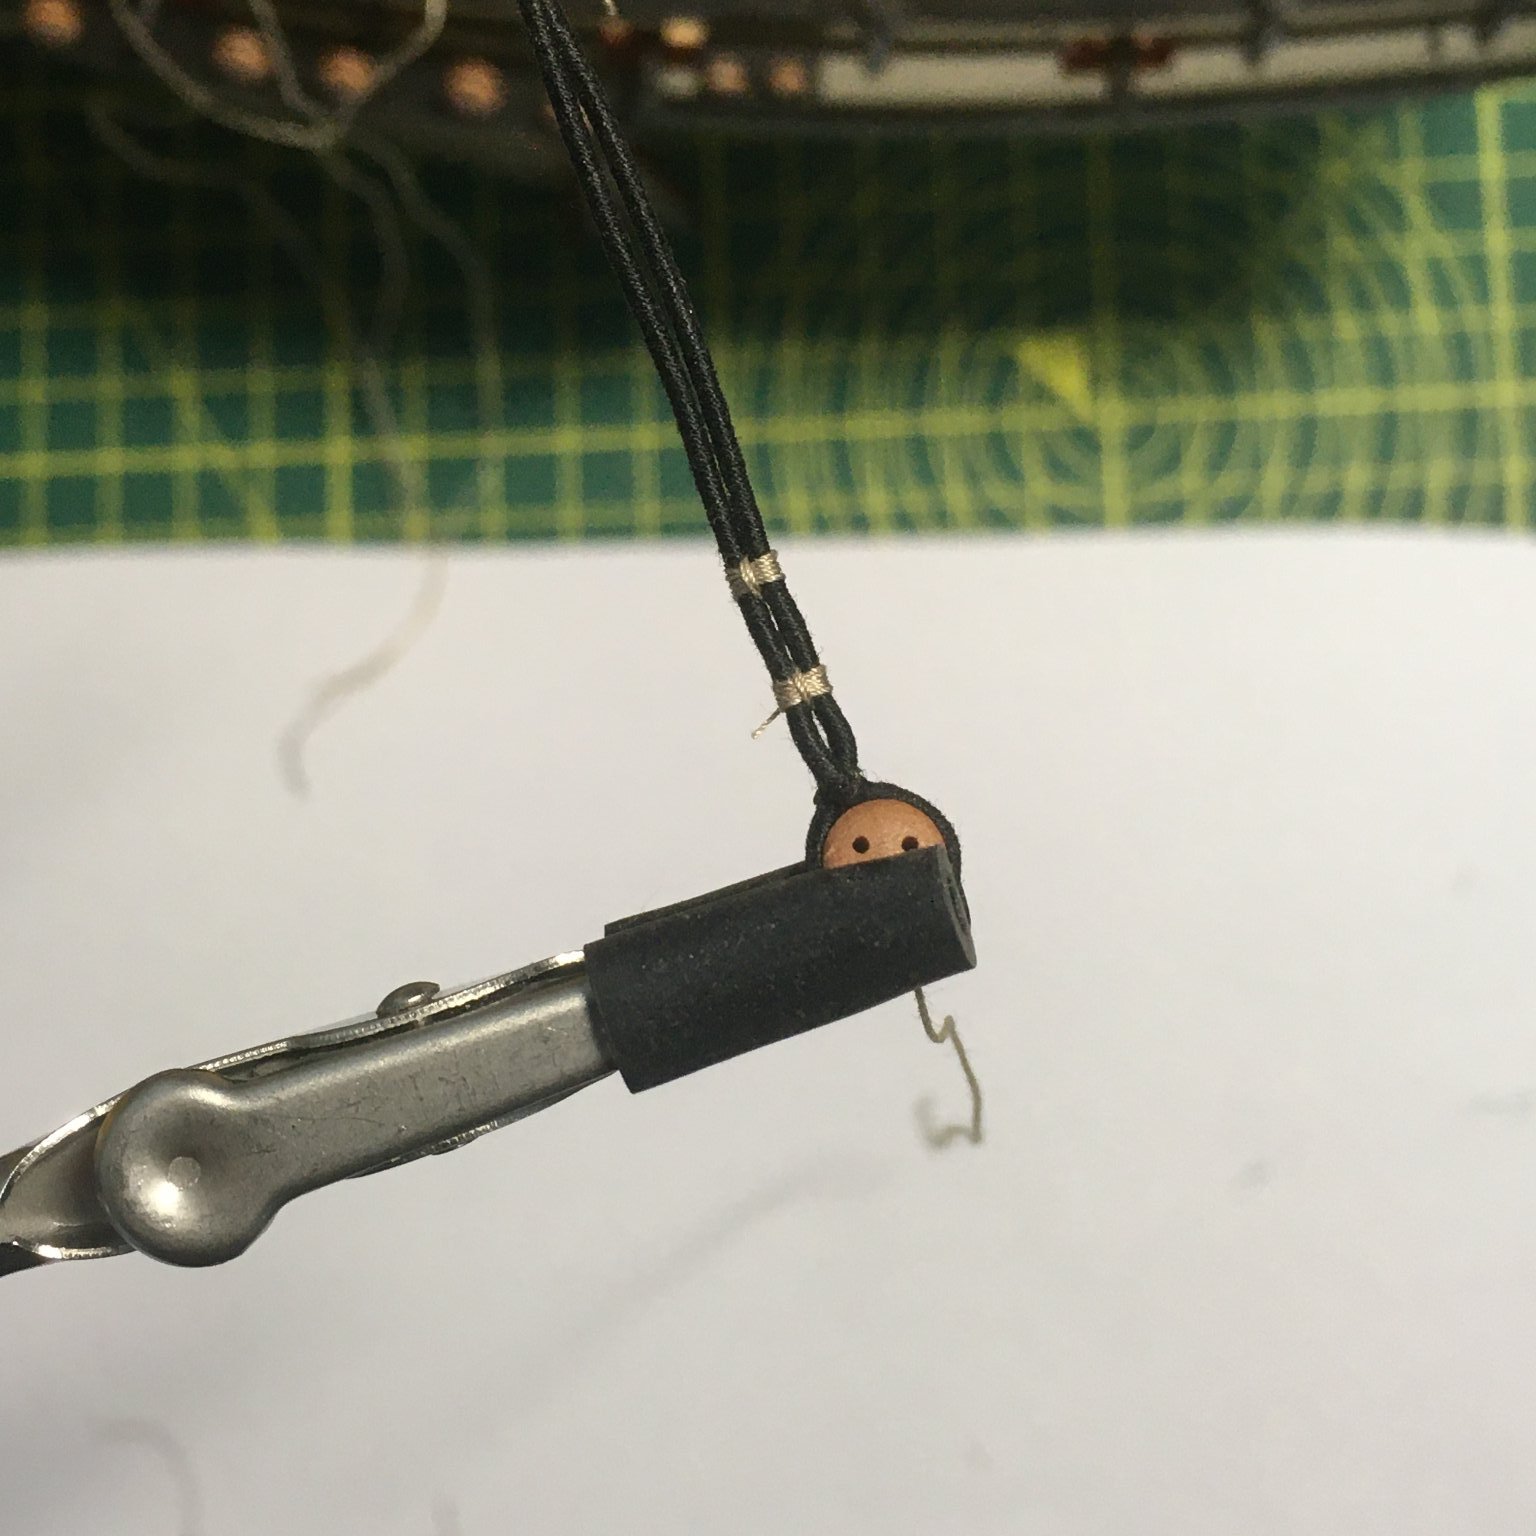
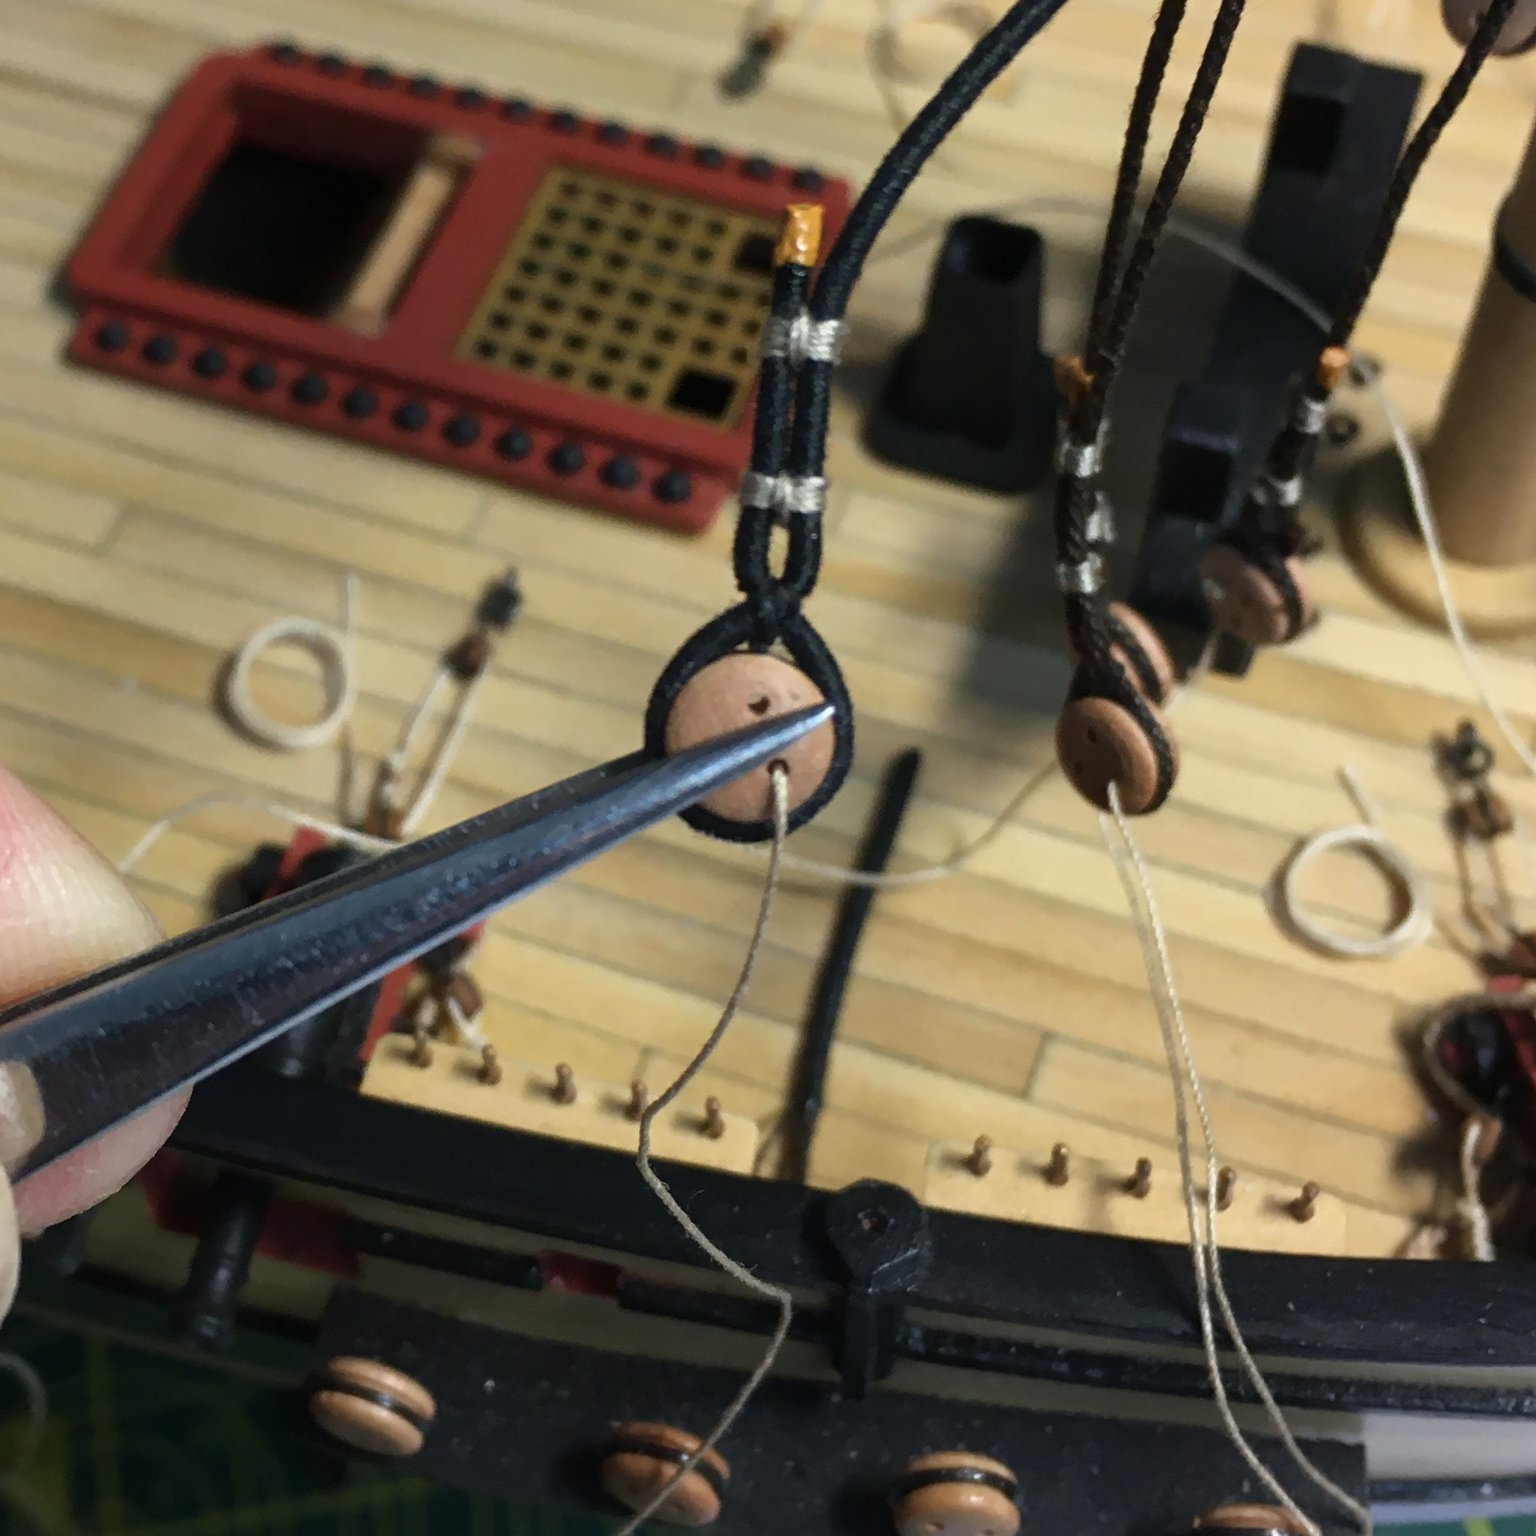
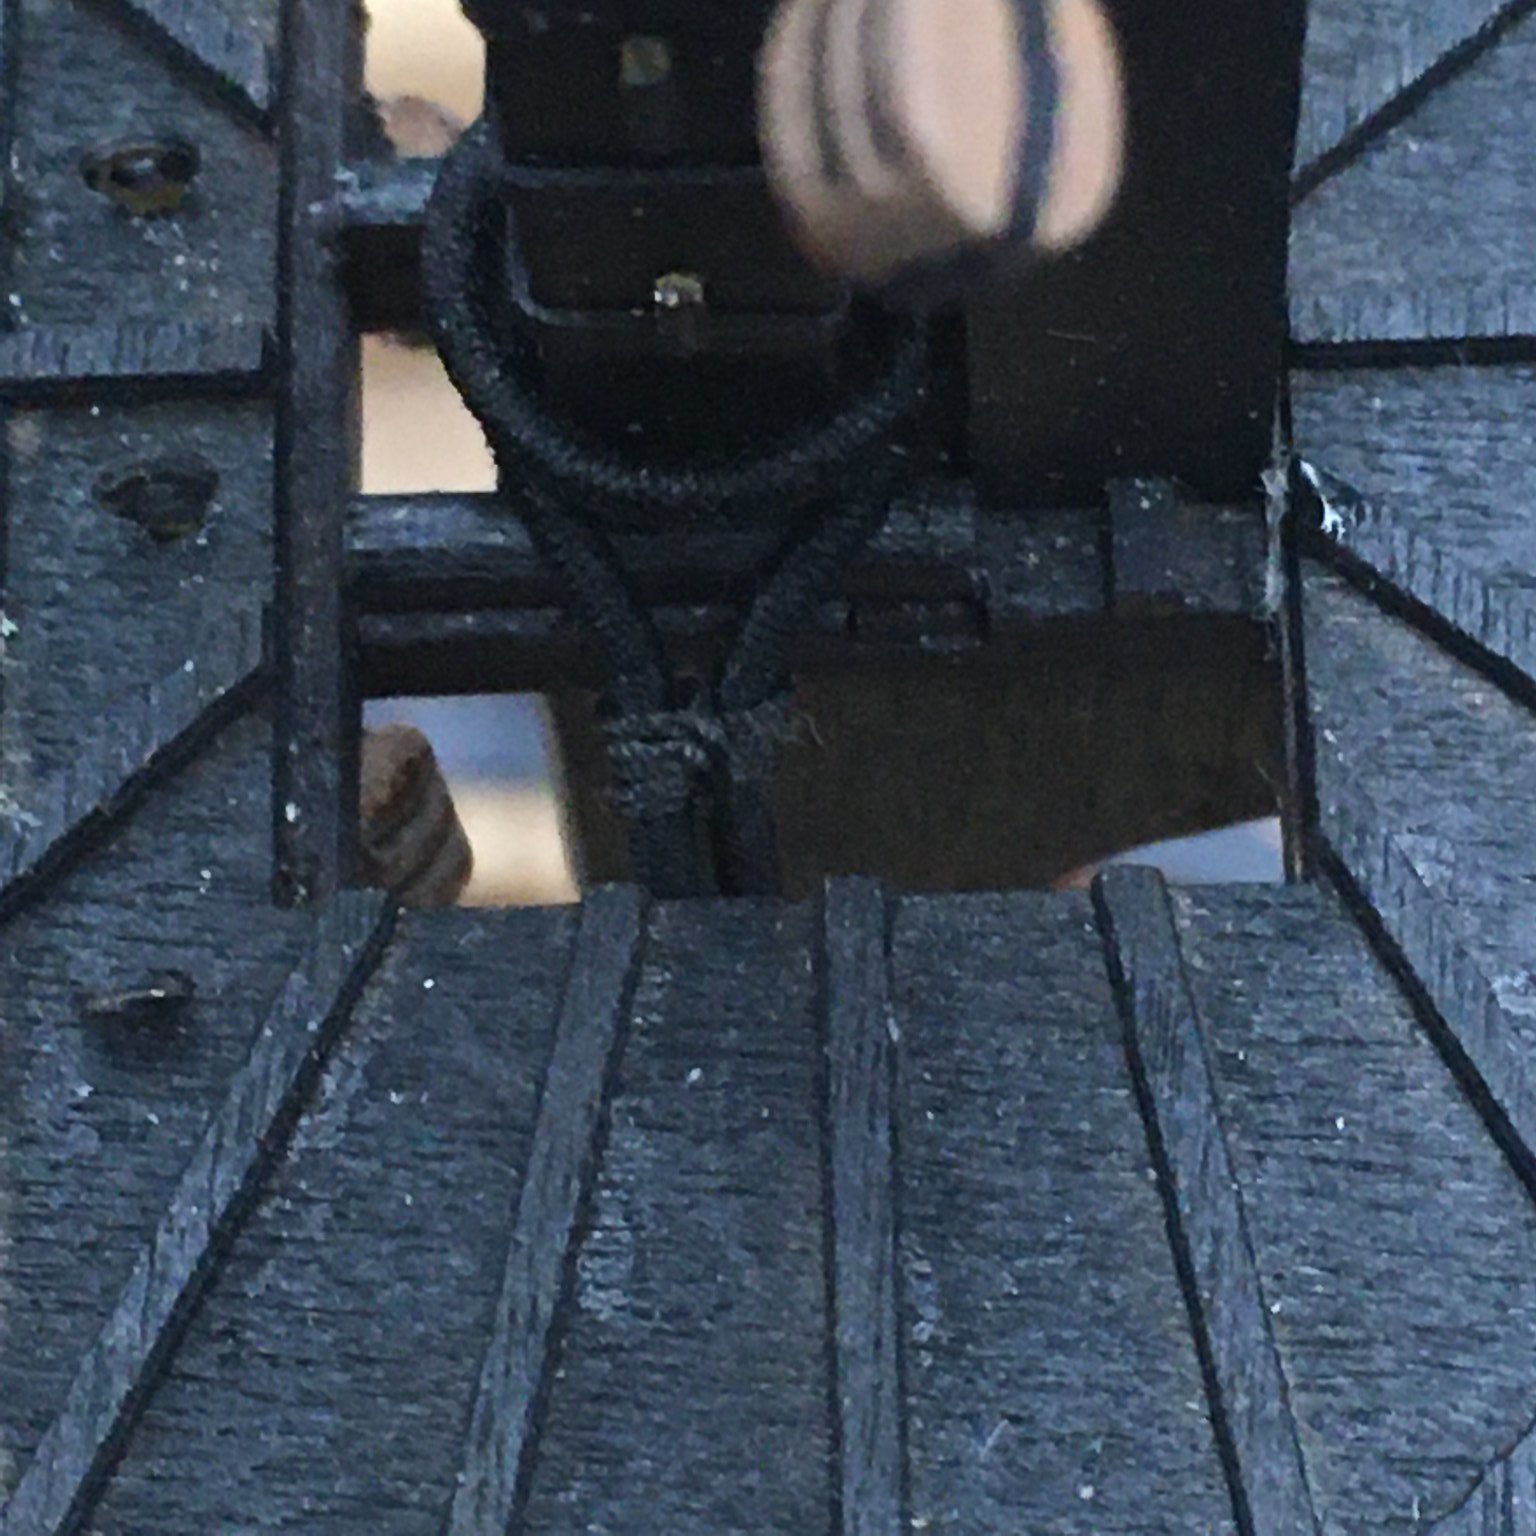
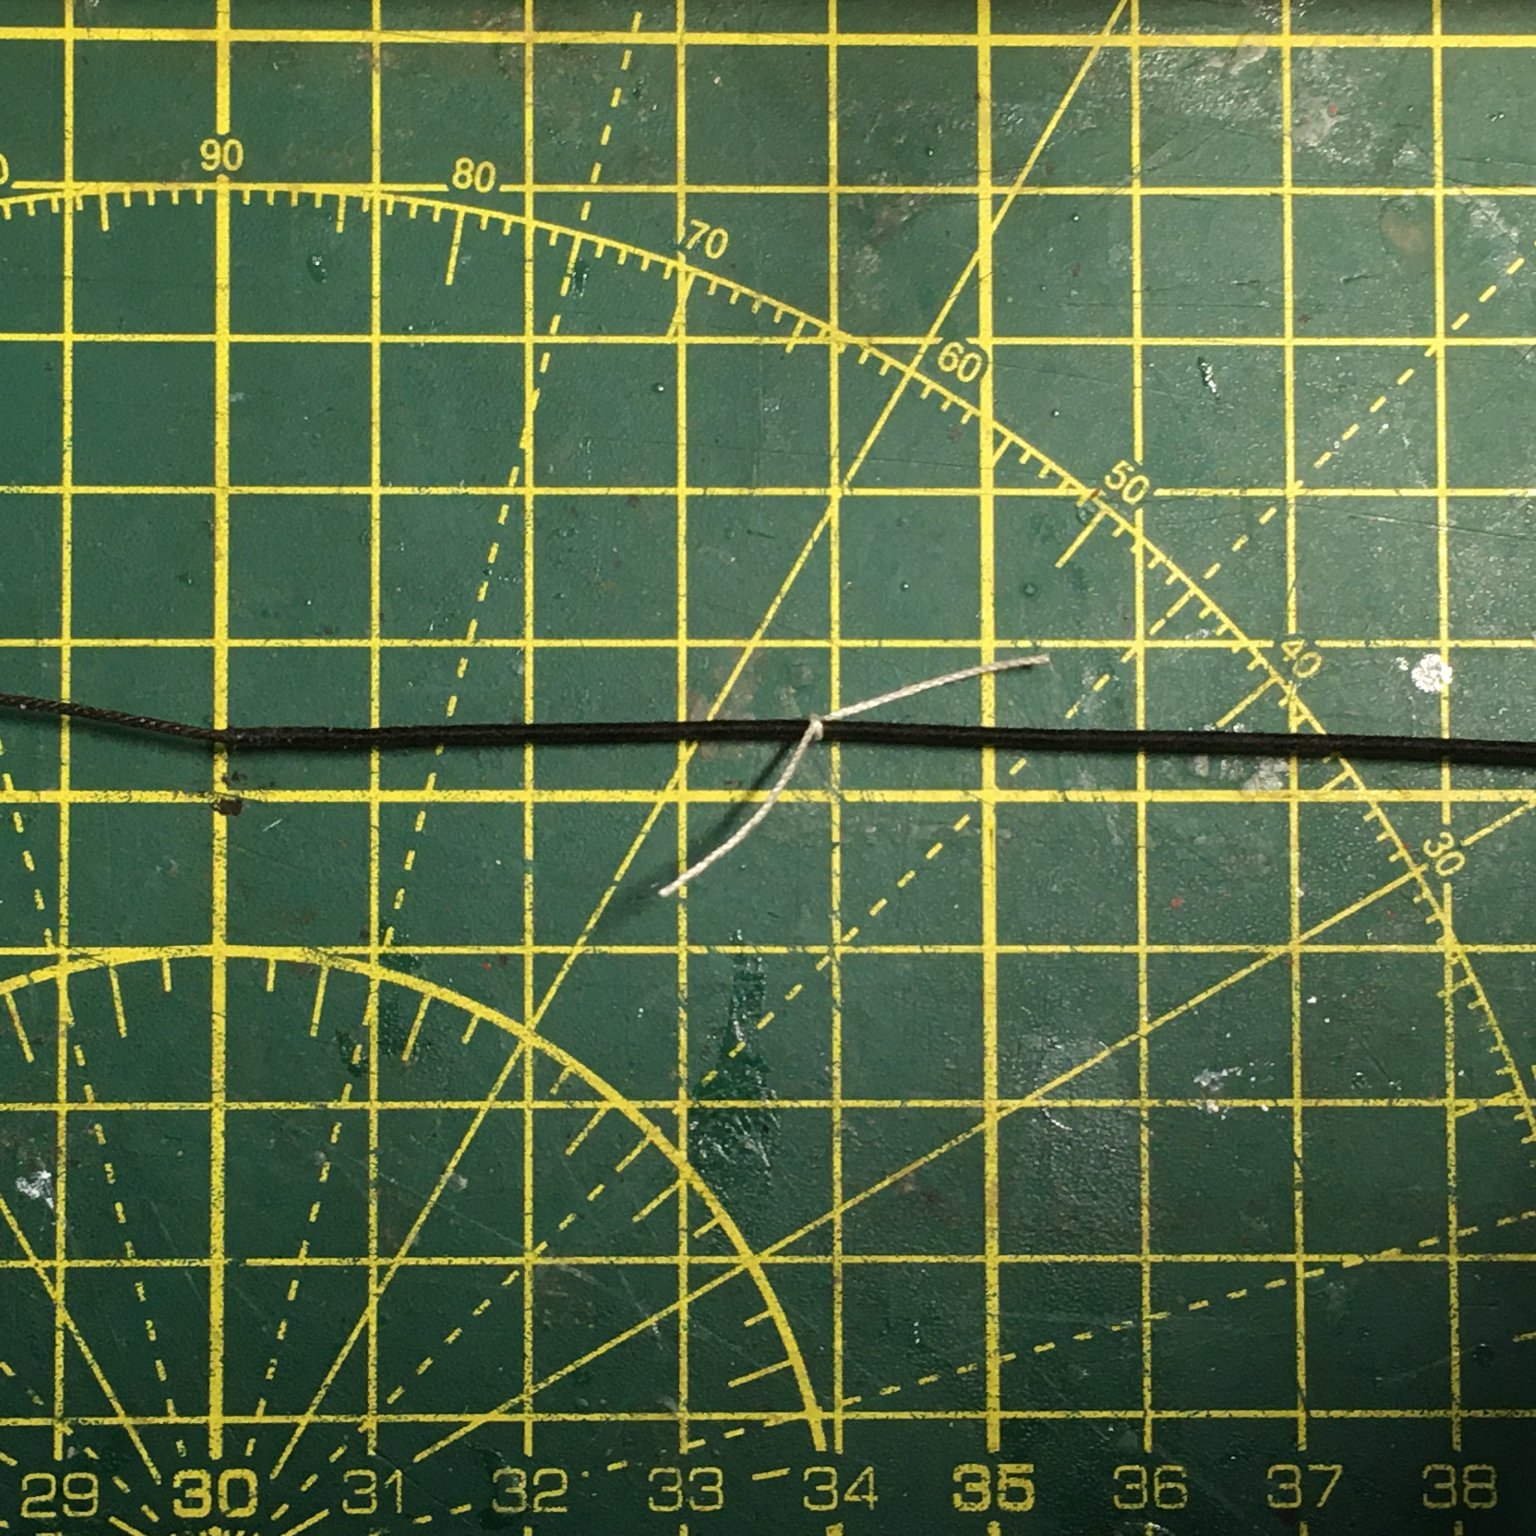
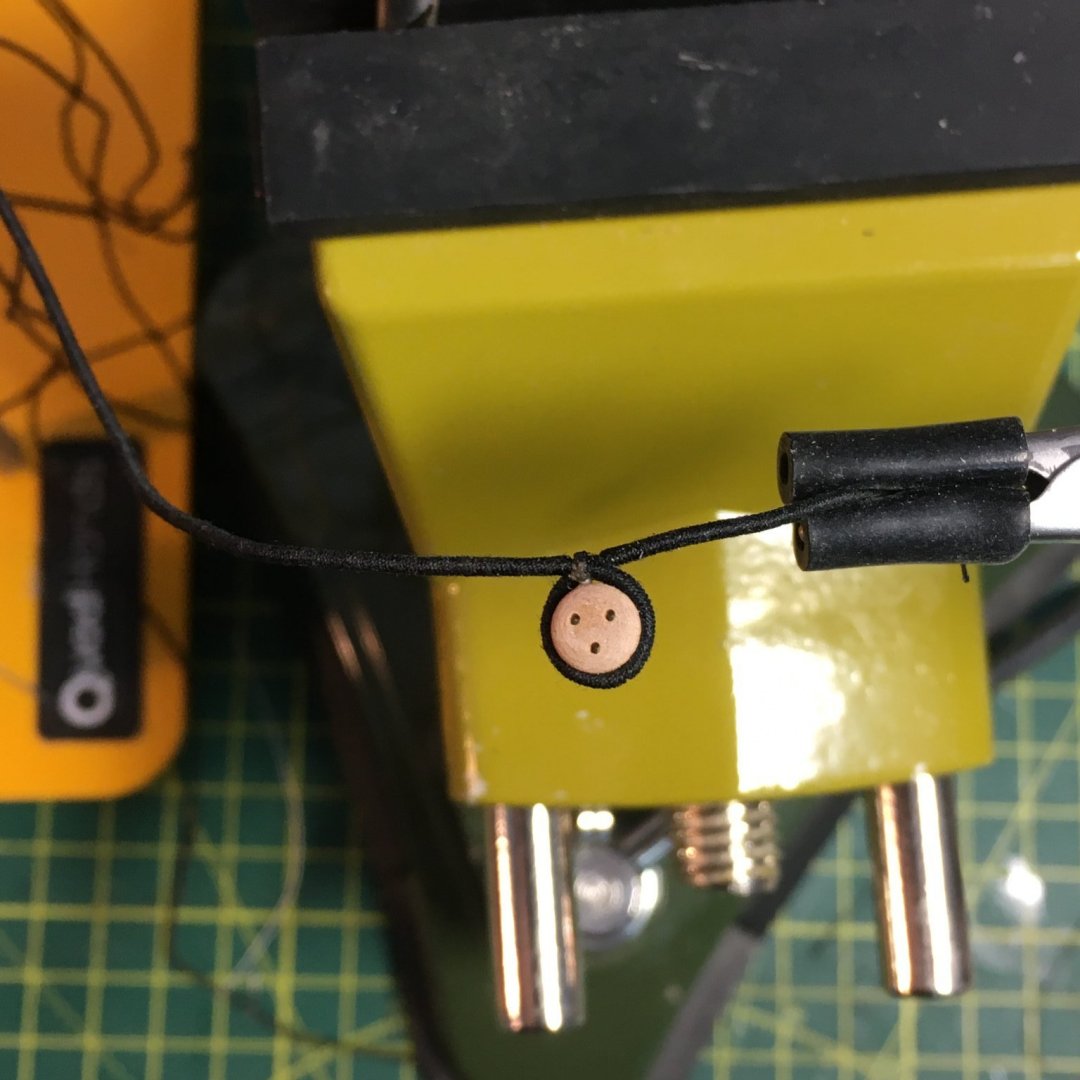
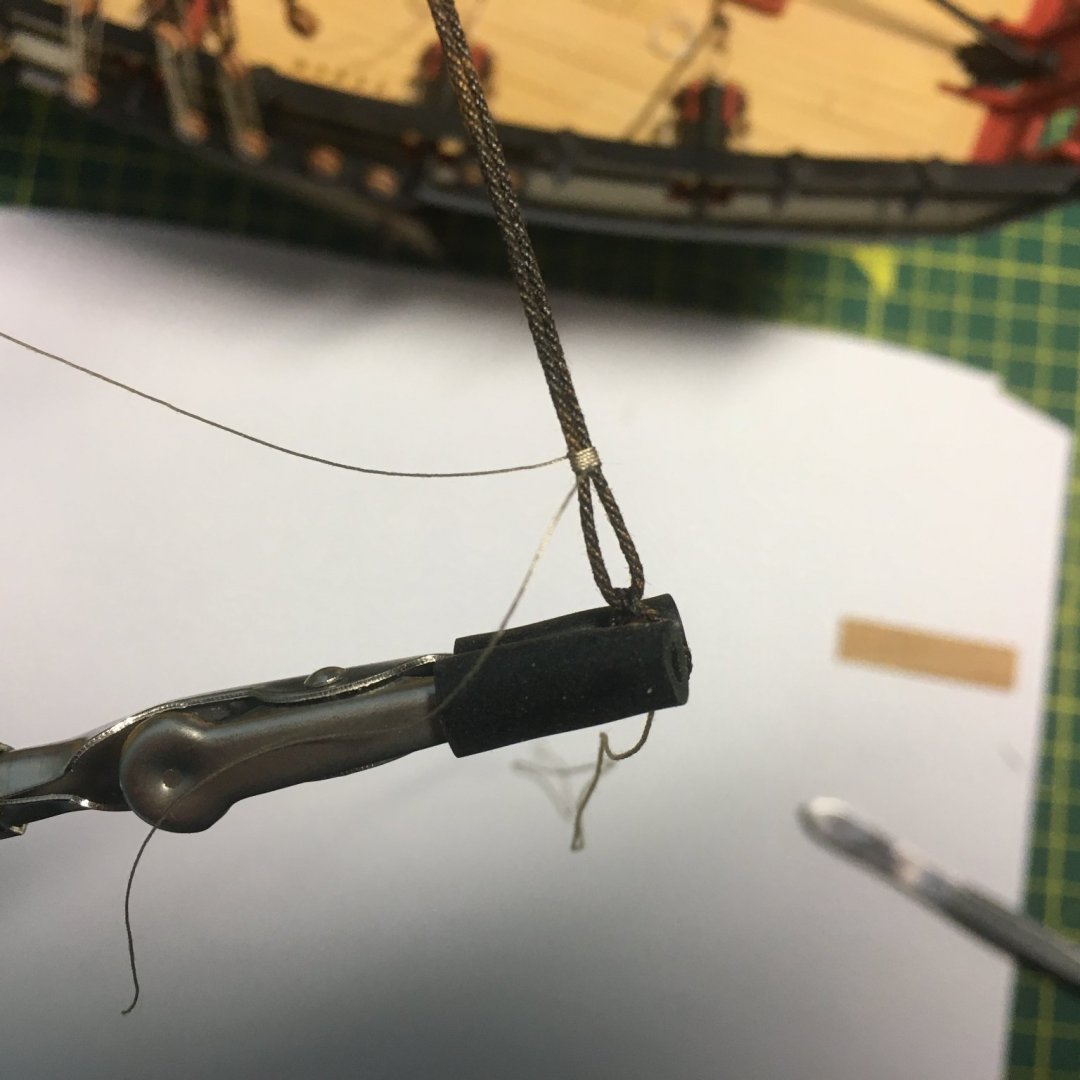
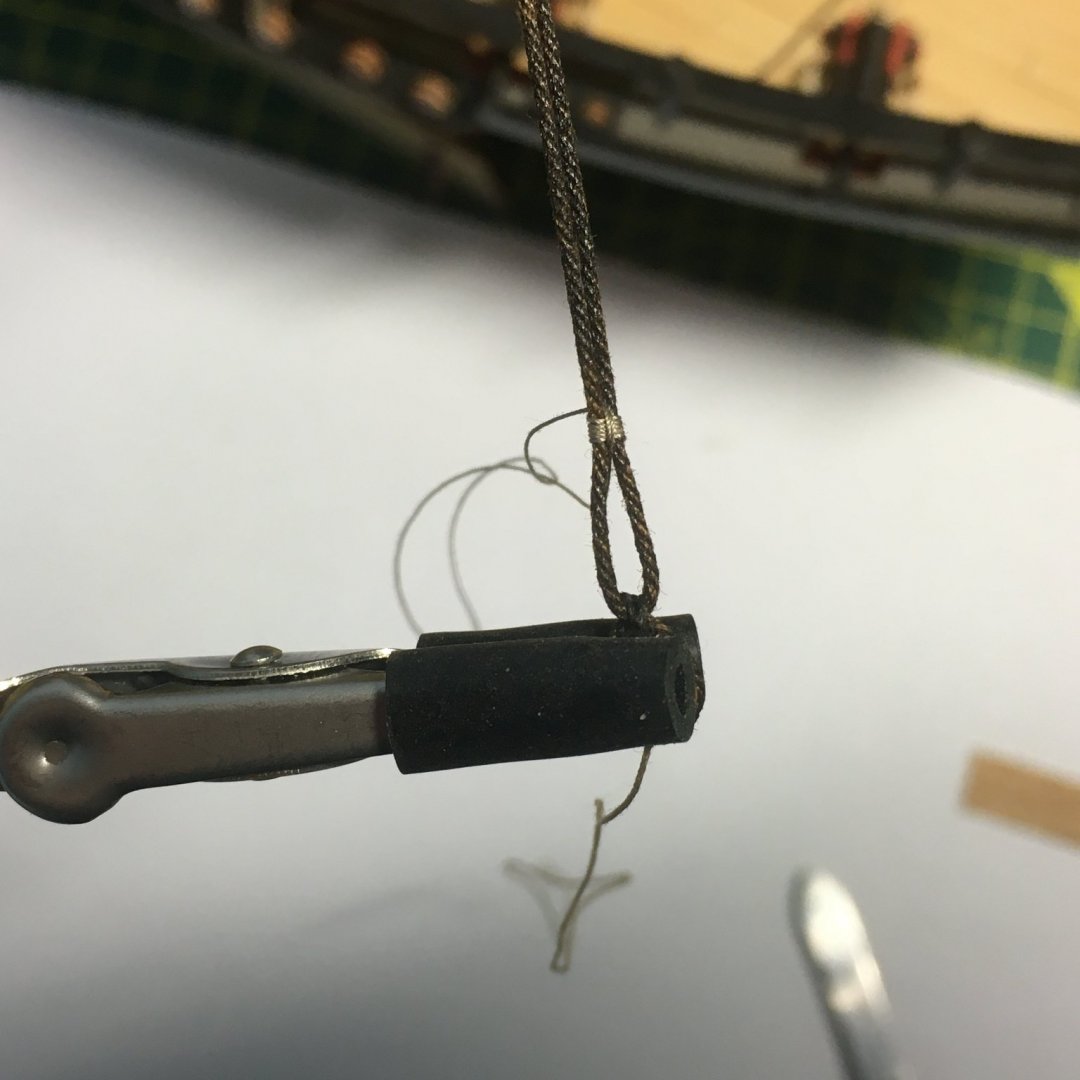
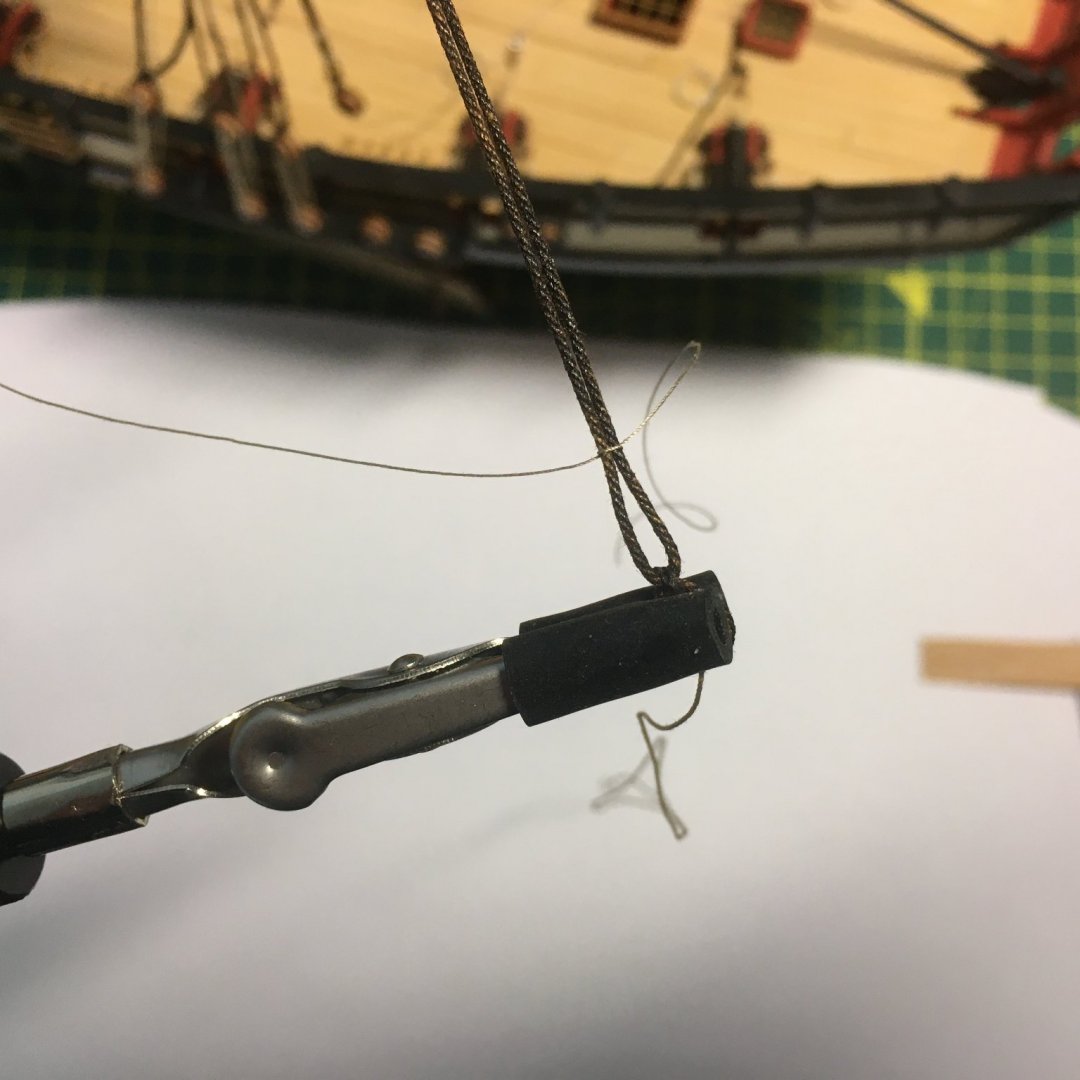
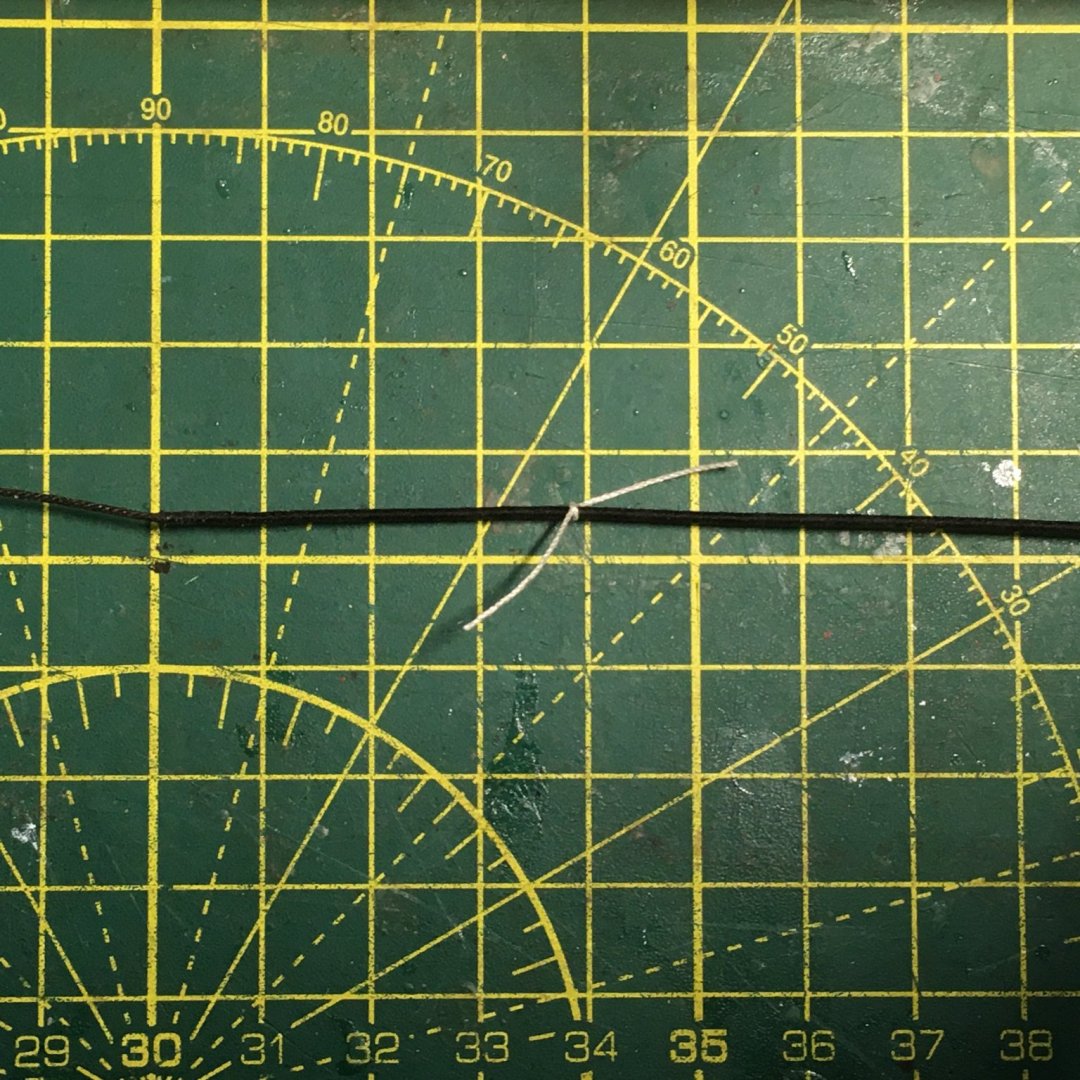
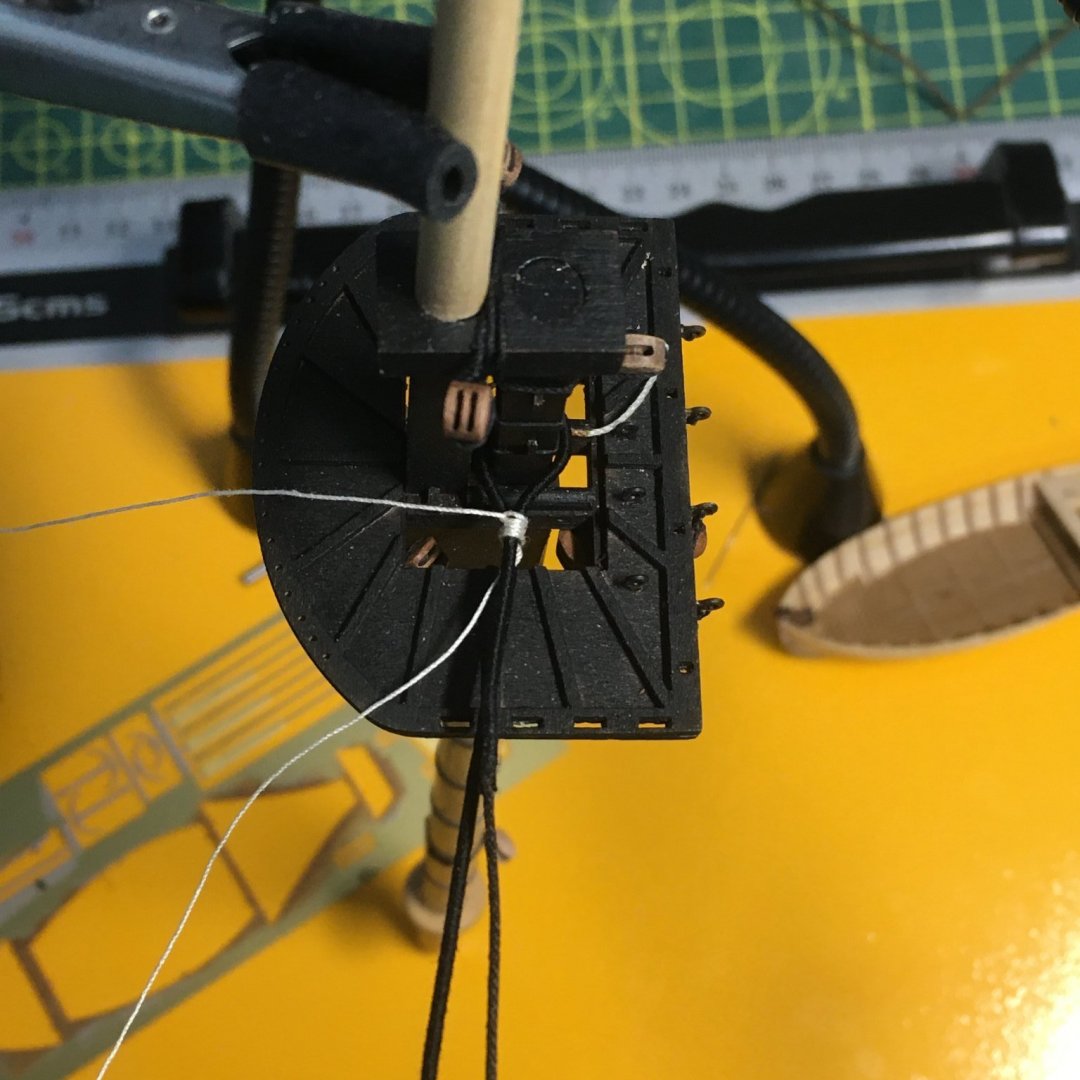
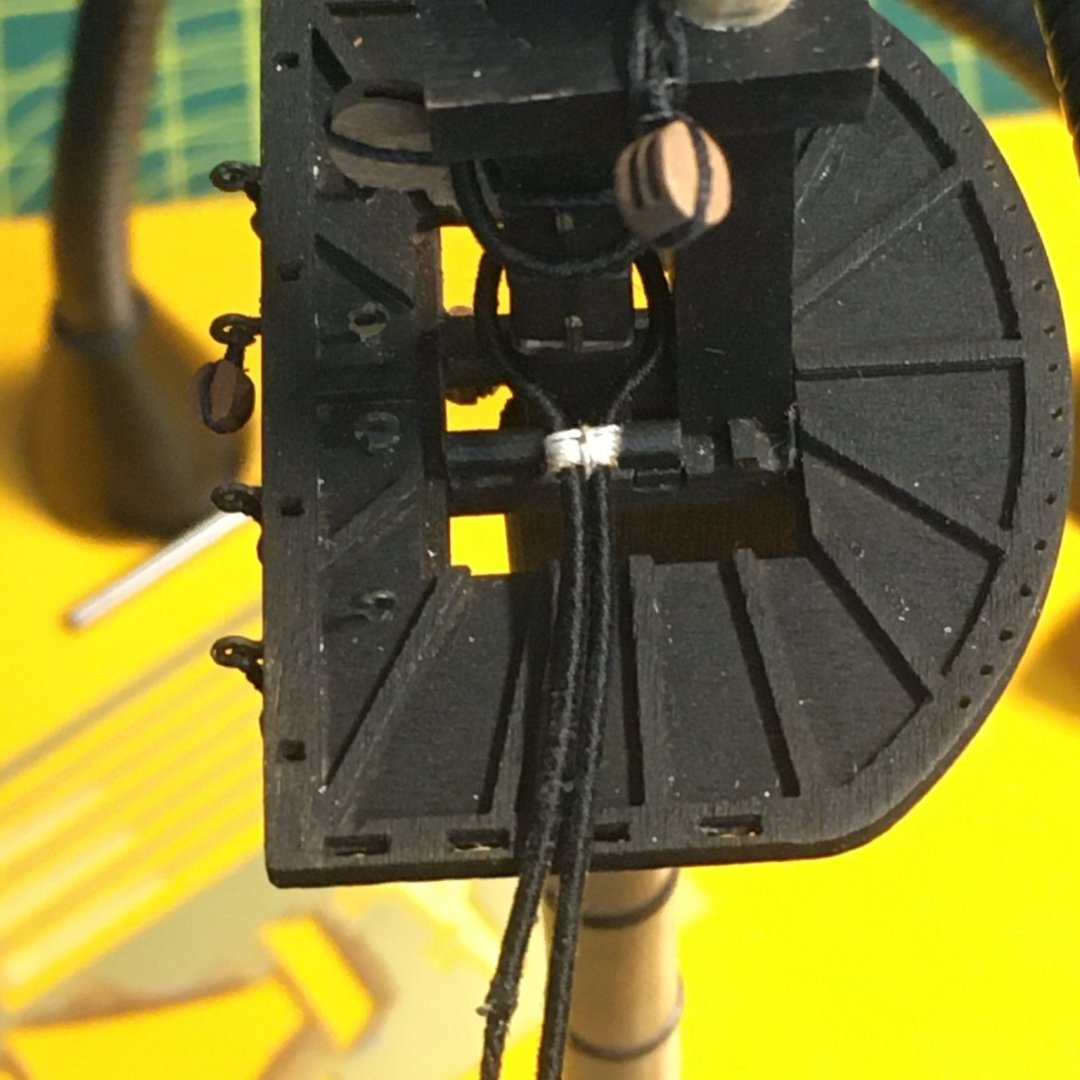
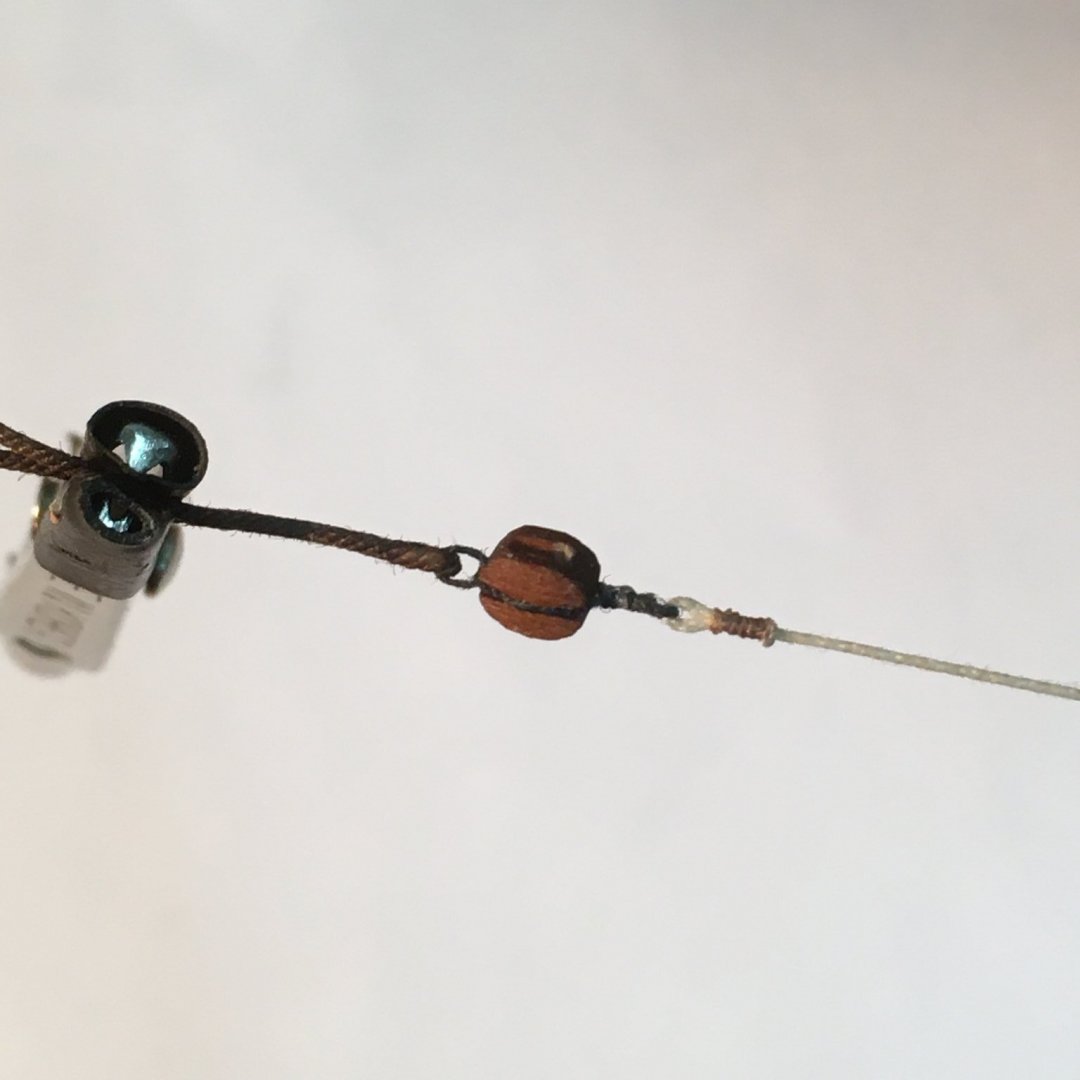
 Rigging deadeyes As promised, a quick note on deadeyes. I used the tried and tested pins-in-a-plank method to try to make sure the deadeyes were all at the same level: I tied a piece of white thread on the shroud to mark the bottom of the deadeye. This helped me to ensure that I formed the loop that will hold the deadeye in the right place. I formed the loop round a 4.7mm drill bit. As the deadeye is just over 5mm this means I had to squeeze quite hard to get it into the loop, but then the shroud sat snuggly in the deadeye groove. In the second photo I've pushed a threaded needle through both parts of the shroud where they cross to form the loop. It was then a simple job to take the thread round the crossing point a couple of times to form the cross seizing, tie it off, glue and trim. I repeated this with white thread just to show how this forms the loop, with the crossing point opposite the original marker thread: That's one of the fully served shrouds btw, and here it is with the proper thread and the deadeye fitted: Next job was to seize the free end of the shroud. For this I used fine Gutermann sewing thread to do modified round seizings. I decided proper round seizings would be too bulky so I left off the riding turns and also slightly modified the starting moves to make it easier to handle at this scale. The first step was to tie a short 6"/150mm length to the shroud with a simple overhand knot. I made the knot on the inboard side of the shroud and held the left hand end in a quadhands clip to keep it out of the way (out of shot): Then I took the right hand end of the line round the shroud... ...and after the fifth turn I brought the end up between the two parts of the shroud: I then took the left hand end and passed it up through the two parts of the shroud, at the opposite side of the loops to the RH end: Next, I crossed the two ends over and down between the two parts of the shroud: I finished the seizings by tying them off with a reef knot, then gluing and trimming in the usual way. This will be on the inboard side of the shroud and so virtually invisible. I repeated for the second seizing, but here I had to use a needle to thread the seizing as there was less room: That served shroud has snuck in again! I'm just not very good at organising my camera work . When I put a dab of glue on the seizing knots, I also put a drop of thin CA on shroud where it would be trimmed. This is especially important on the served shrouds to prevent the serving unravelling. Once trimmed, the final job before reeving the lanyards was put a dab of raw sienna acrylic paint on the trimmed end of the shroud to represent the leather cap: My wife and I have decided we're not stressed enough, so we've got the builders coming on Monday to remove an old conservatory and construct a new extension. Deep joy. Supervising that lot will probably further limit modelling time. Having said that I'm still really enjoying Speedy and any time I get to spend on her is a bonus. Derek
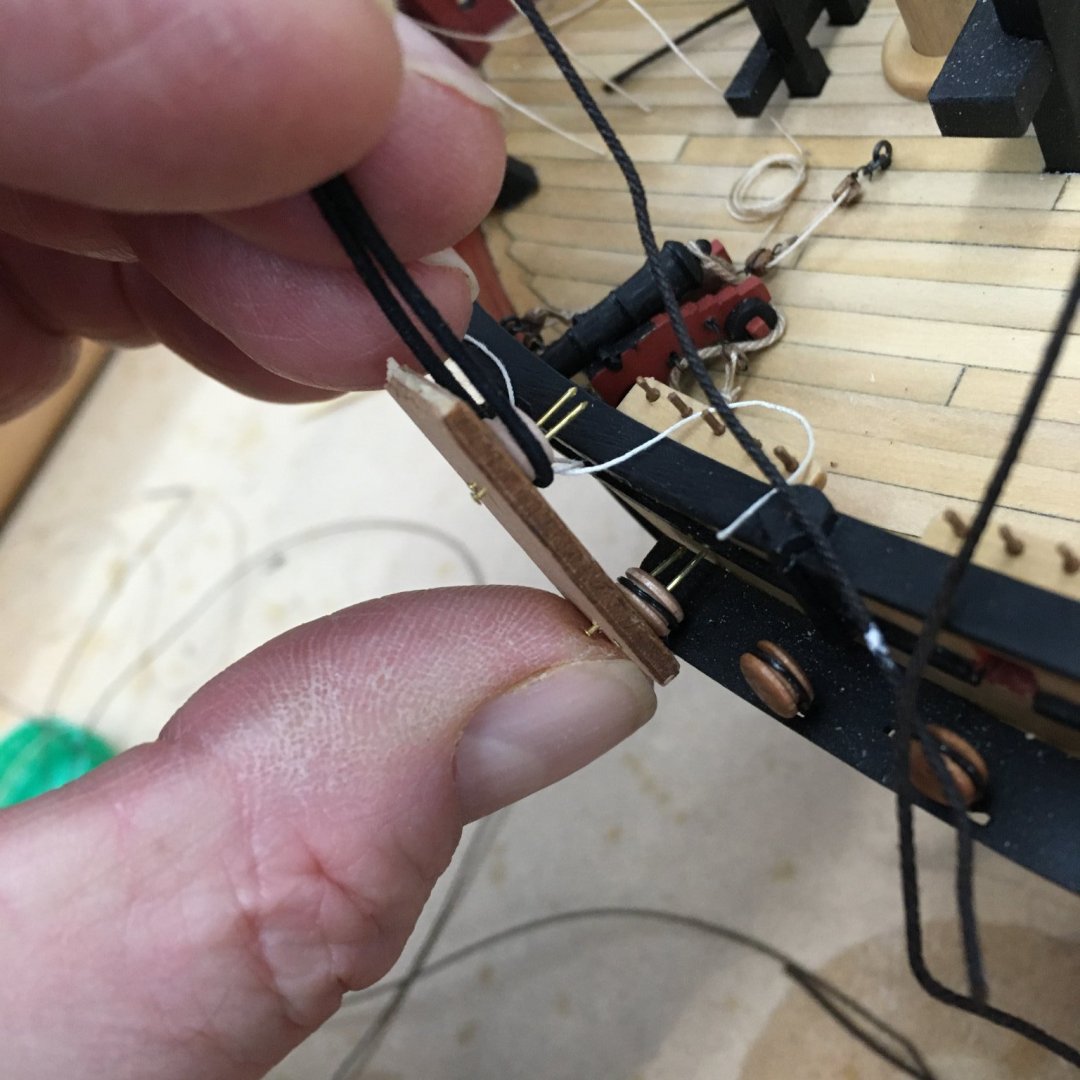


- 725 replies
-
- 12
-

-

-
- vanguard models
- speedy
- (and 1 more)
-
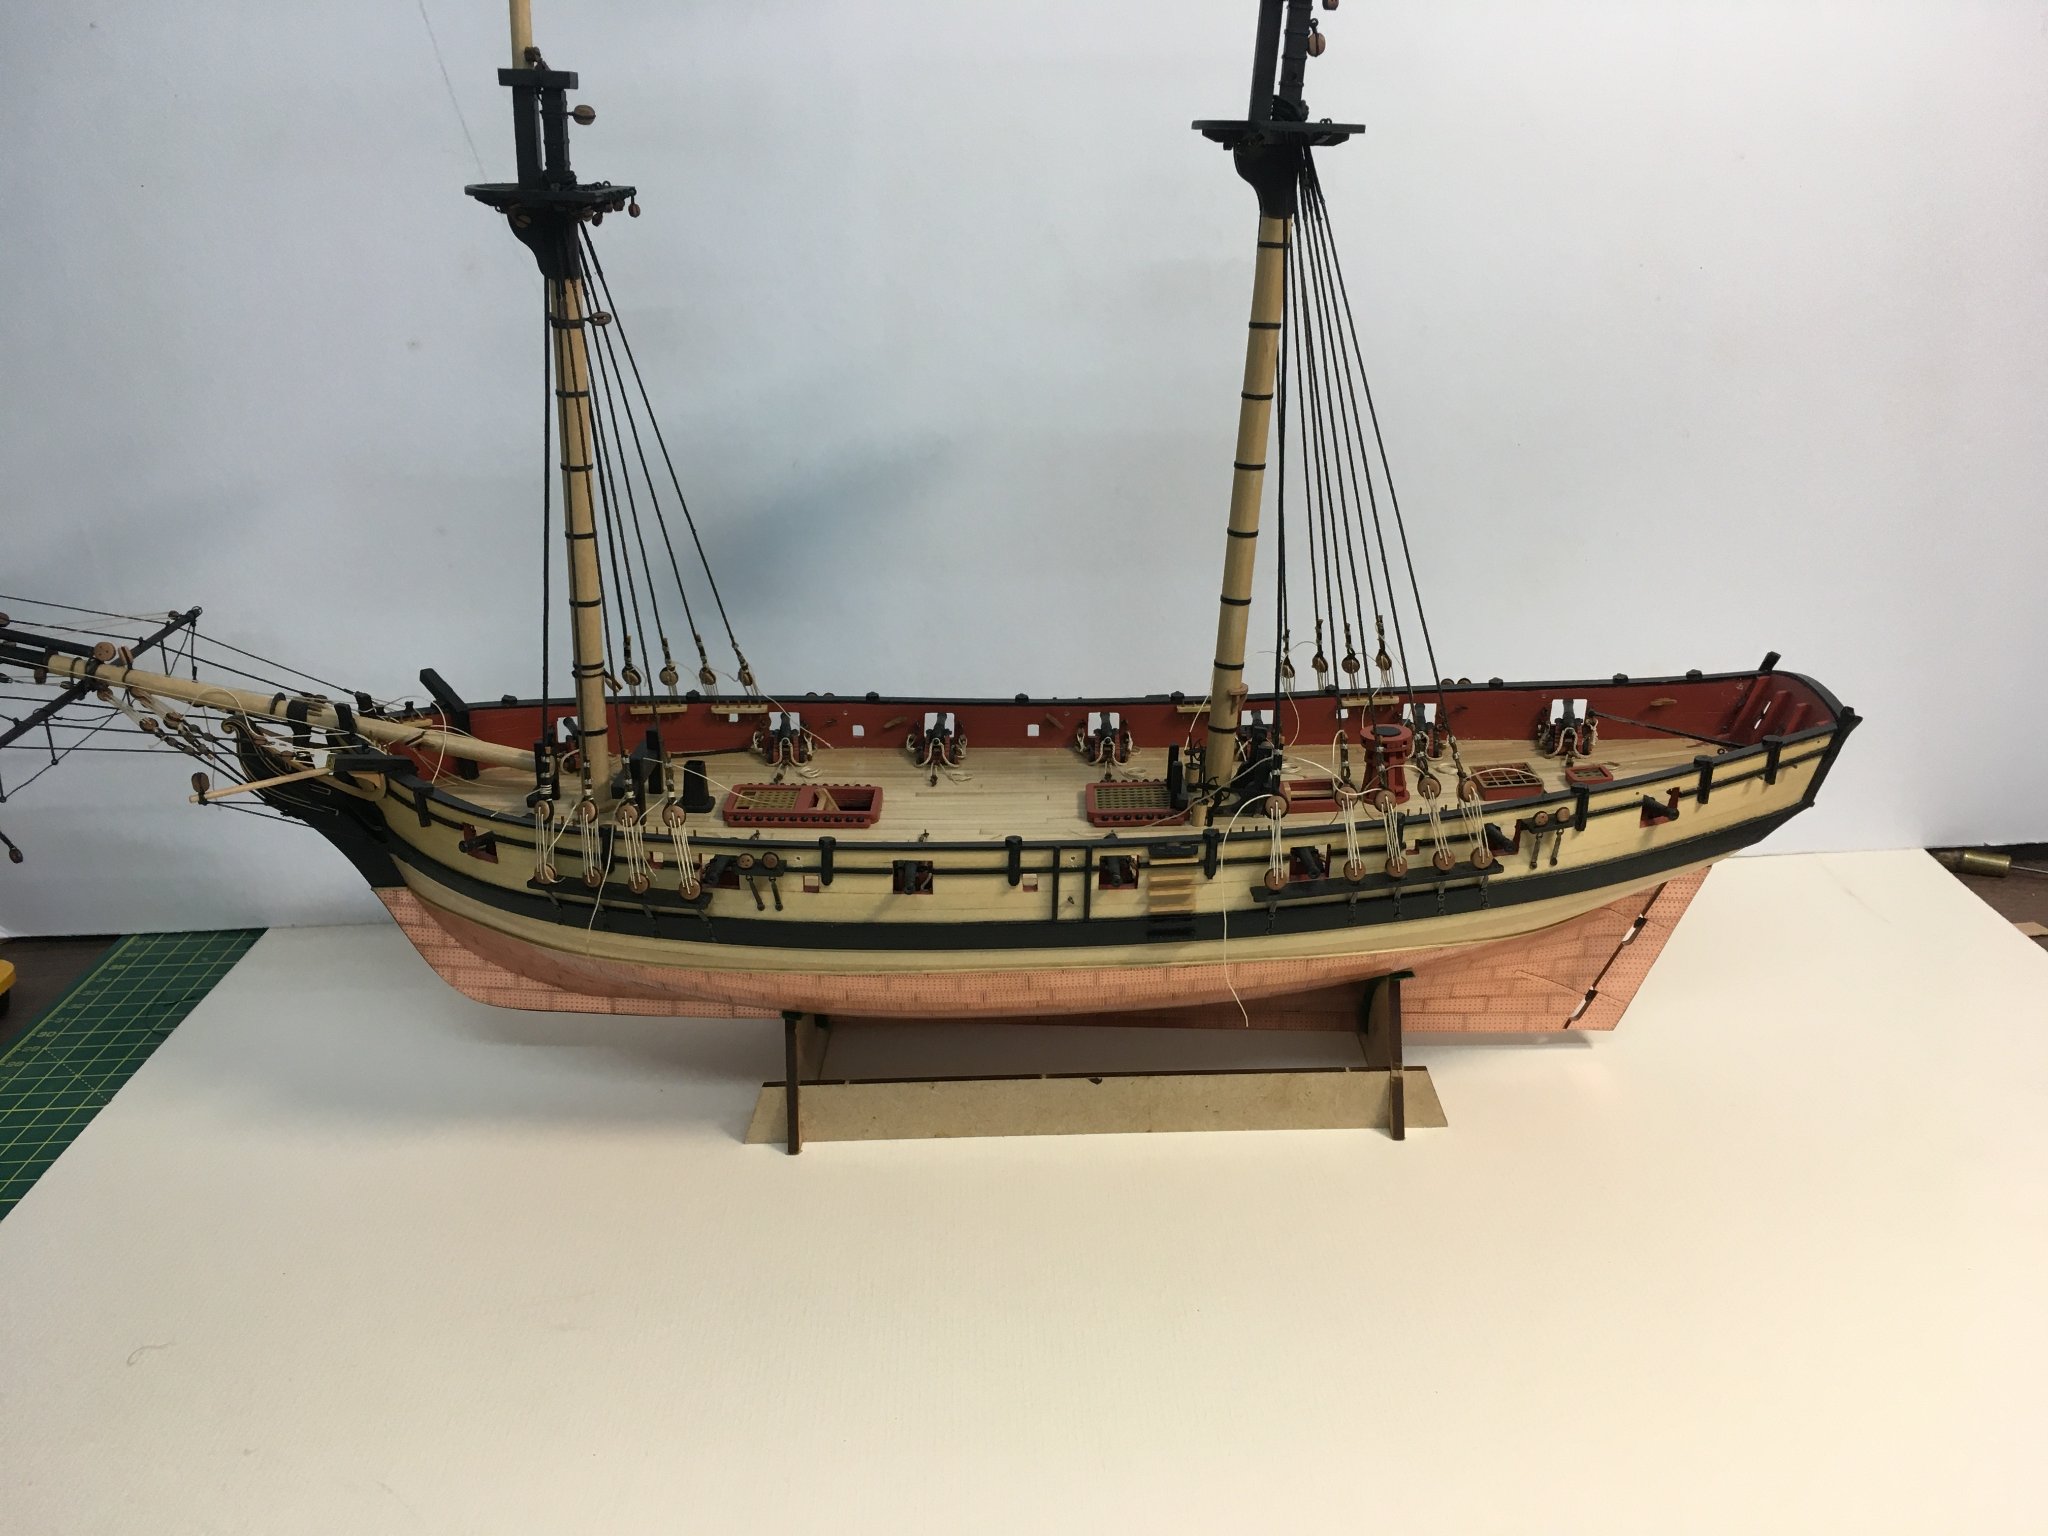
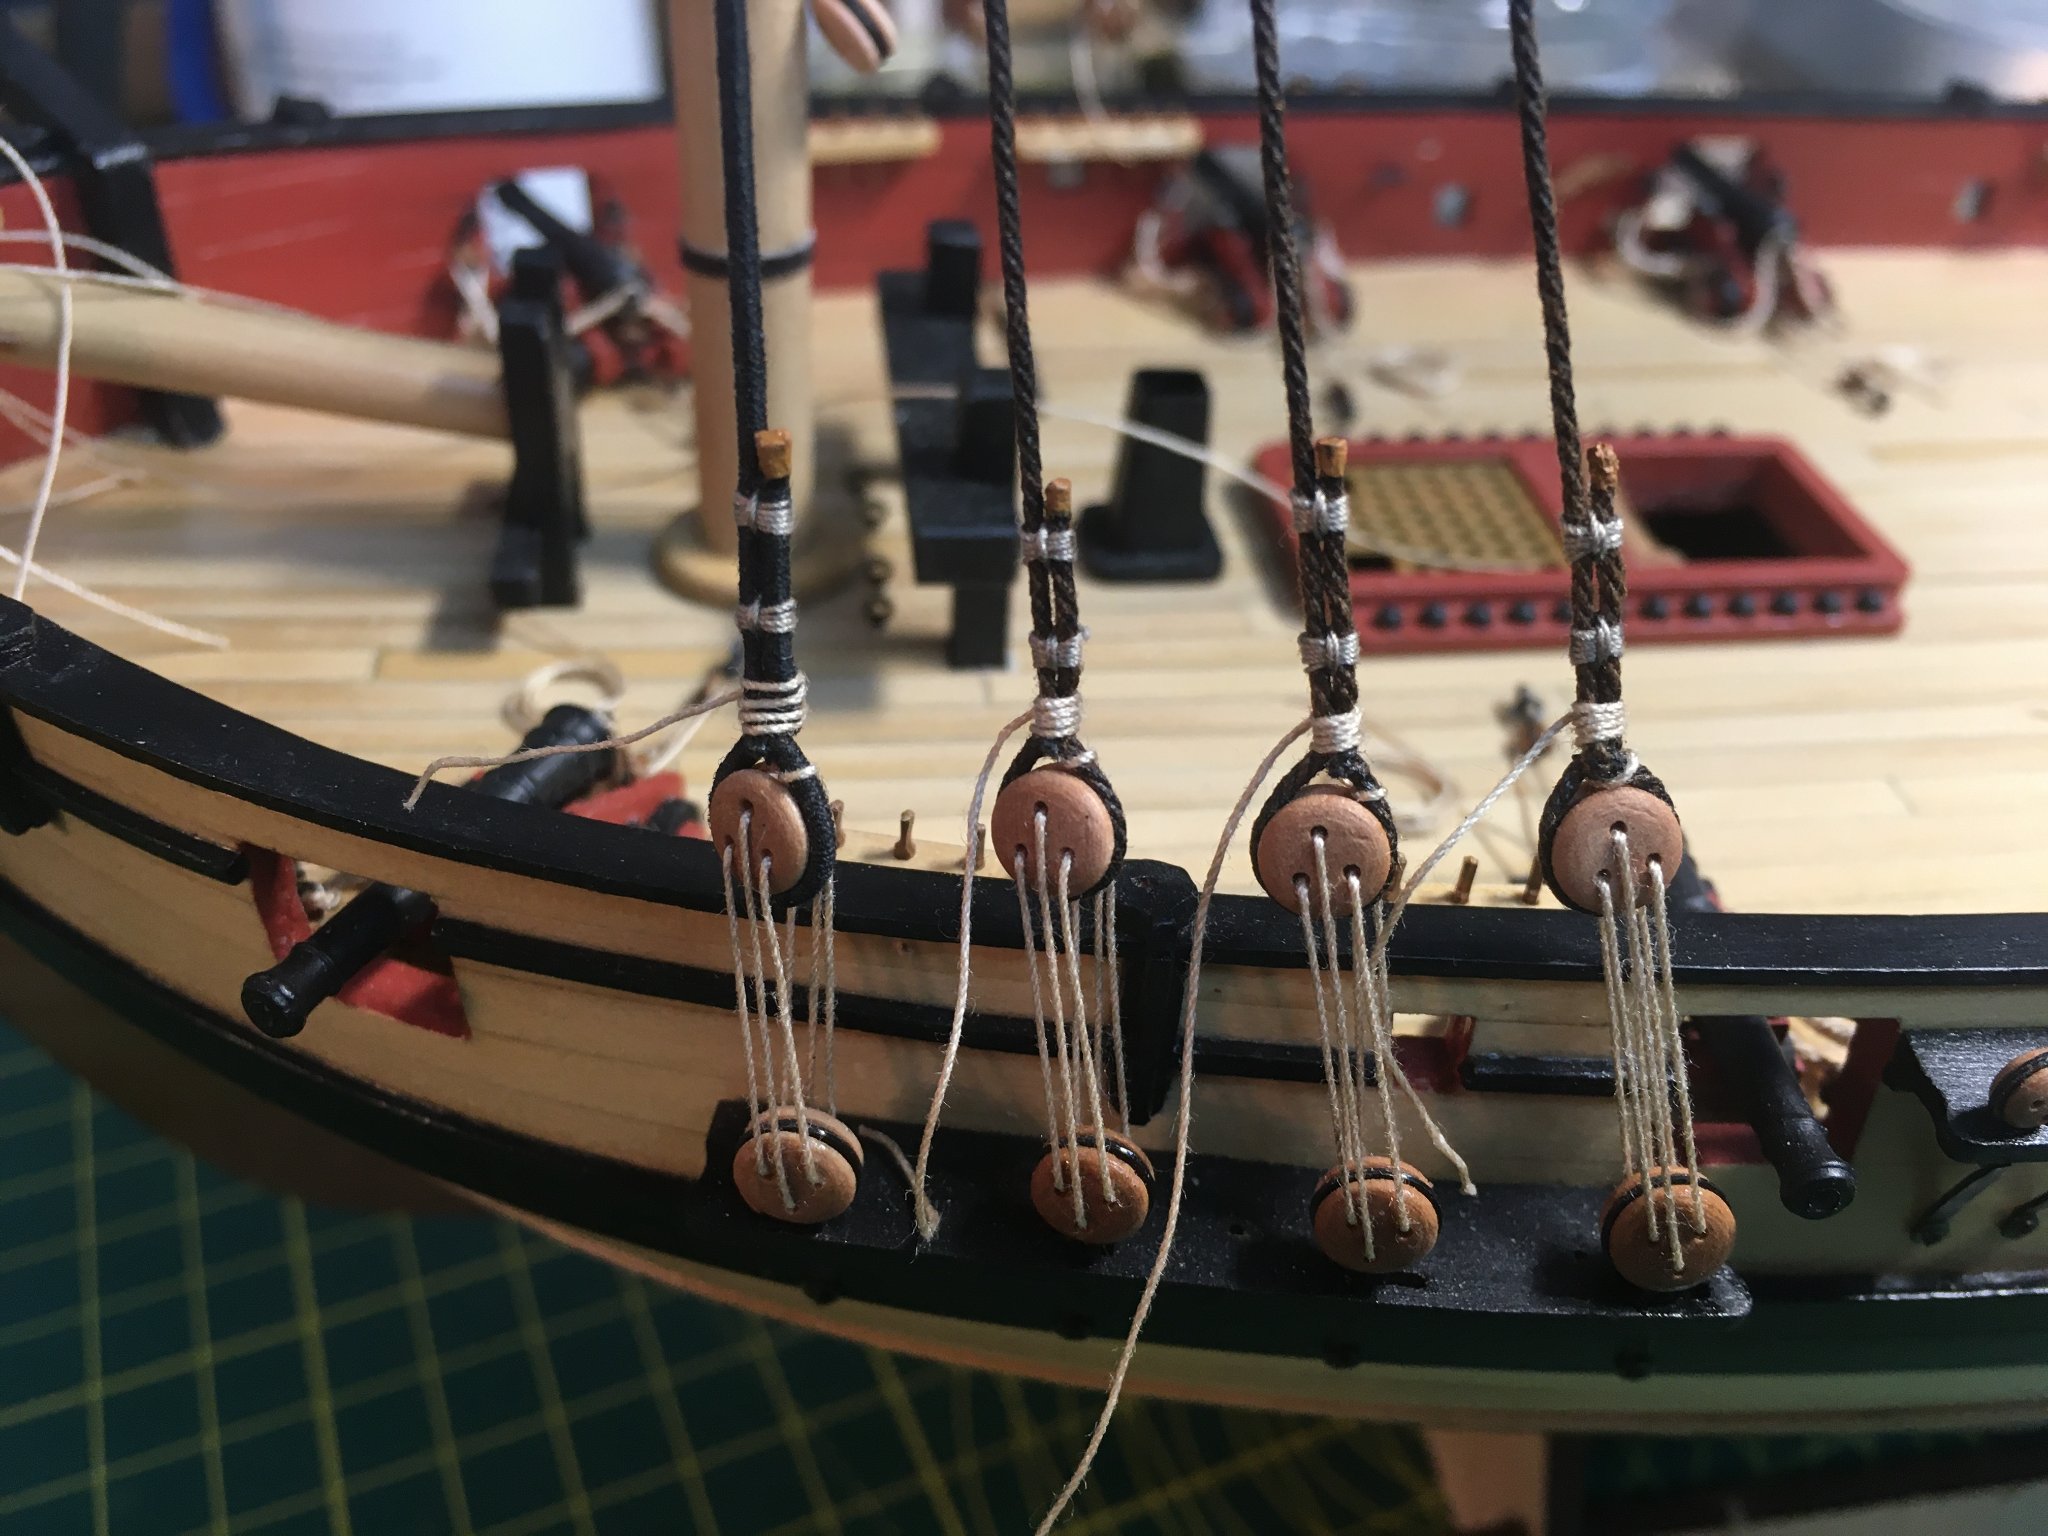
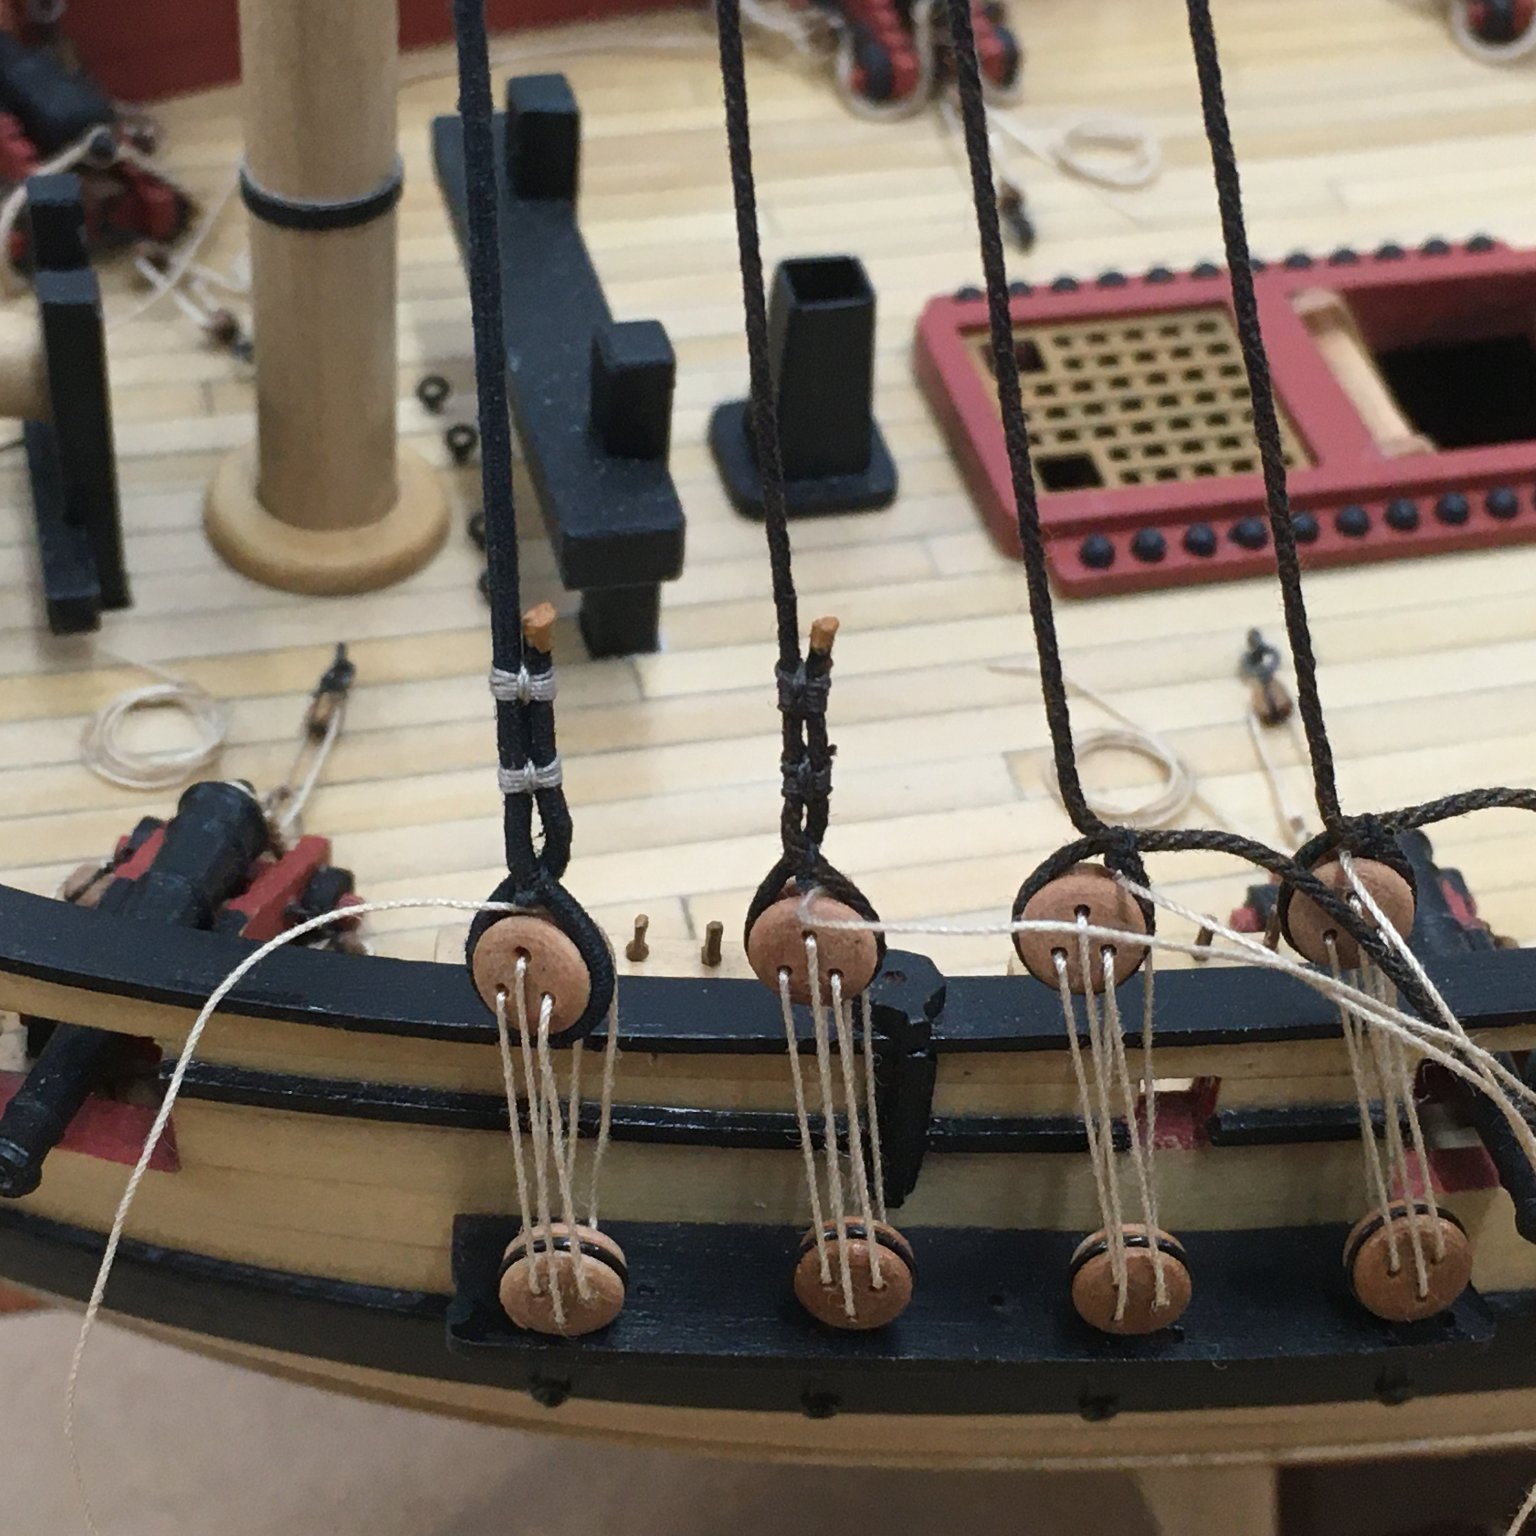
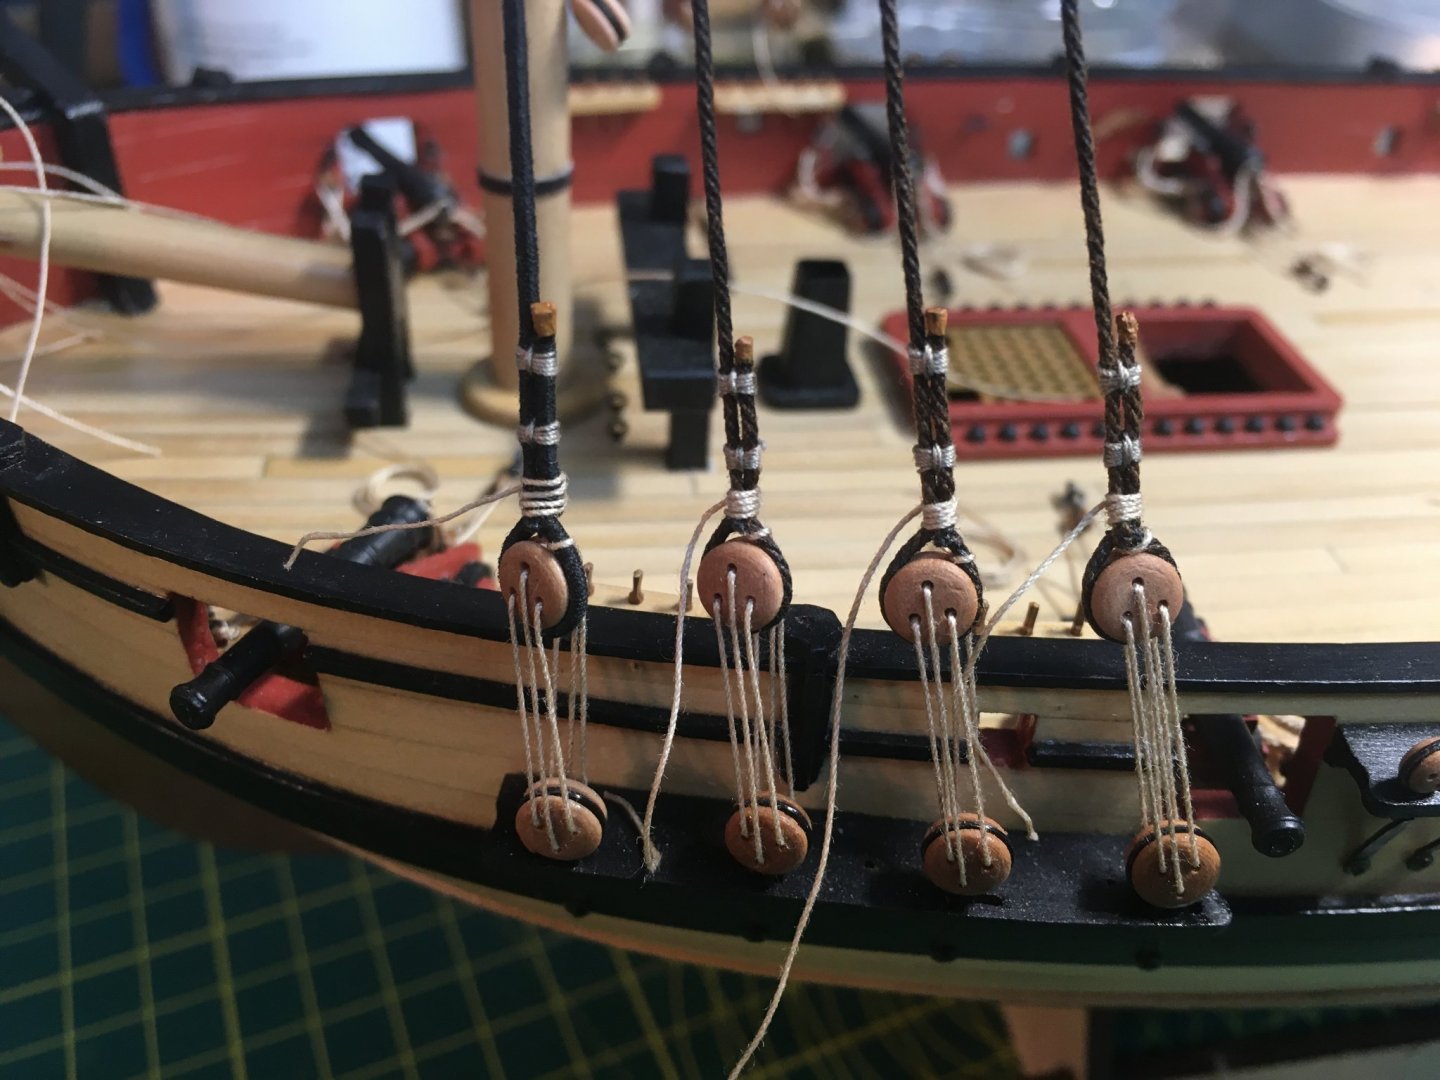
Lower shrouds rigged I've finally got all the lower shrouds set up with their deadeyes and lanyards, although not yet fully adjusted: I've not yet decided whether to darken the seizings (they don't look nearly as white as they do in this photo). I'm sure on real ships the seizings would have been tarred like the shrouds, but they took quite a lot of work so it seems a shame to hide them. I experimented with dark seizings and you lose the detail: I'd be interested in others' views. Btw, I didn't glue the masts in place as I prefer to set them up by getting the tension on shrouds and stays right. I'll follow on with a quick note on how I rigged the deadeyes. Derek


- 725 replies
-
- 10
-
-
- vanguard models
- speedy
- (and 1 more)
-
Wow! What a great result ... a superb winch and a very helpful description for others to follow. Derek
- 778 replies
-
- 1
-
-
- cheerful
- Syren Ship Model Company
- (and 1 more)
-
Hi Christos Your model is coming along very well - I particularly like your planking. I agree with everyone else, that painting the wood white is entirely a matter of personal taste. As you know from our previous correspondence, I painted my hull as I thought it tied in with the overall colour scheme. However there were some parts of the model I chose not to paint. Those were parts I scratch built out of boxwood, such as the tops and much of the deck furniture - I felt that it would be a shame to cover up such a beautiful wood. For me, aesthetic considerations are sometimes more important than historical accuracy! Keep up the good work. Derek
- 124 replies
-
- 2
-
-
- panart
- royal caroline
- (and 1 more)
-
Just catching up with your log Rusty, and like everyone else that's commented I'm very impressed with your work so far, especially your planking and paintwork. Like you, I enjoy planking decks and when I eventually get round to starting my Duchess I'll follow your lead and raid my stock of boxwood as I did with Speedy. I'm not so hot on hull planking though, and I wonder if that's because I try and complete each strake with a single planking strip? I've noticed that you and many other builders follow full size practice and use several planks in each strake. I'd always thought I'd have problems with the joints, but do you find that the convenience of dealing with shorter lengths outweighs any disadvantages? Now that I've found your log I'll follow on with interest. Derek
- 201 replies
-
- 4
-
-
- Duchess of Kingston
- Vanguard Models
- (and 1 more)
-
Great work on the deck furniture Glenn. Close-up photos usually magnify otherwise invisible defects - your pieces look flawless. I'll have to try that weathering powder - not something I've used before. Good to see you're getting to grips with your new workshop equipment. Incidentally, I think you've missed out a zero when you mention the Proxxon mill's accuracy. The smallest marks on the axes' scales are 0.05mm, but as they are a reasonable distance apart you can, with practice, get close to 0.01mm tolerance 🤓. Derek
- 778 replies
-
- 2
-
-
- cheerful
- Syren Ship Model Company
- (and 1 more)
-
I think that's a very creditable effort. The shape looks right to me, and with a darker stain will be fine. If I was being picky I'd suggest smoothing it slightly with a fine file or sanding stick (although close up photos are notorious for magnifying the slightest thing - I suspect the heart looks fine in real life). Although I'm reluctant to take sales from Syren, you can't beat the satisfaction you get from crafting your own parts. If I were you I'd stain the heart and pat myself on the back. Best wishes for the New Year Derek
- 436 replies
-
- 6
-
-
- vanguard models
- alert
- (and 1 more)
-
Excellent work on the hull Bob. On painting, I agree with the majority view. Although following the kit's colour scheme would cover some of your fine planking, I think the overall effect would be to enhance the pear that shows and produce a very attractive model. You and the other Duchess builders are making me itch to get started on my own kit, and you are weakening my resolve to finish Speedy first! Best wishes Derek
-
Another great build (and log). Well done, and Happy New Year! Derek
- 261 replies
-
- 5
-
-
- muirneag
- vanguard models
- (and 2 more)
-
Just catching up. Superb work Tim, a model to be very proud of!
- 436 replies
-
- 2
-
-
- vanguard models
- alert
- (and 1 more)
-
Wipe On Poly Techniques
DelF replied to Freebird's topic in Painting, finishing and weathering products and techniques
Making your own is the only sensible way to go on this side of the pond. There doesn't seem to be a local source of ready made wop, and imported brands like Minwax are ridiculously expensive - over £30 per pint. I still tend to prefer shellac. -
Superb work Glenn - very precise carpentry.
- 778 replies
-
- 2
-
-
- cheerful
- Syren Ship Model Company
- (and 1 more)
-
I just found out yesterday that I've got a thyroid cyst, although not large enough (yet?) to require removal, so I shall keep my fingers crossed for you and hope you have a swift recovery.
-
Hi Sjors This reminds me of the discussion you and I had in my Speedy log about the origin of the word euphroe, and how to spell it. All I know is, your English is a lot better than my Dutch! Derek
- 164 replies
-
- 2
-

-
-
- vanguard models
- flirt
- (and 1 more)
-
Glad to hear you've "only" got the flu! Get well soon. Derek
- 164 replies
-
- 2
-
-
- vanguard models
- flirt
- (and 1 more)
-
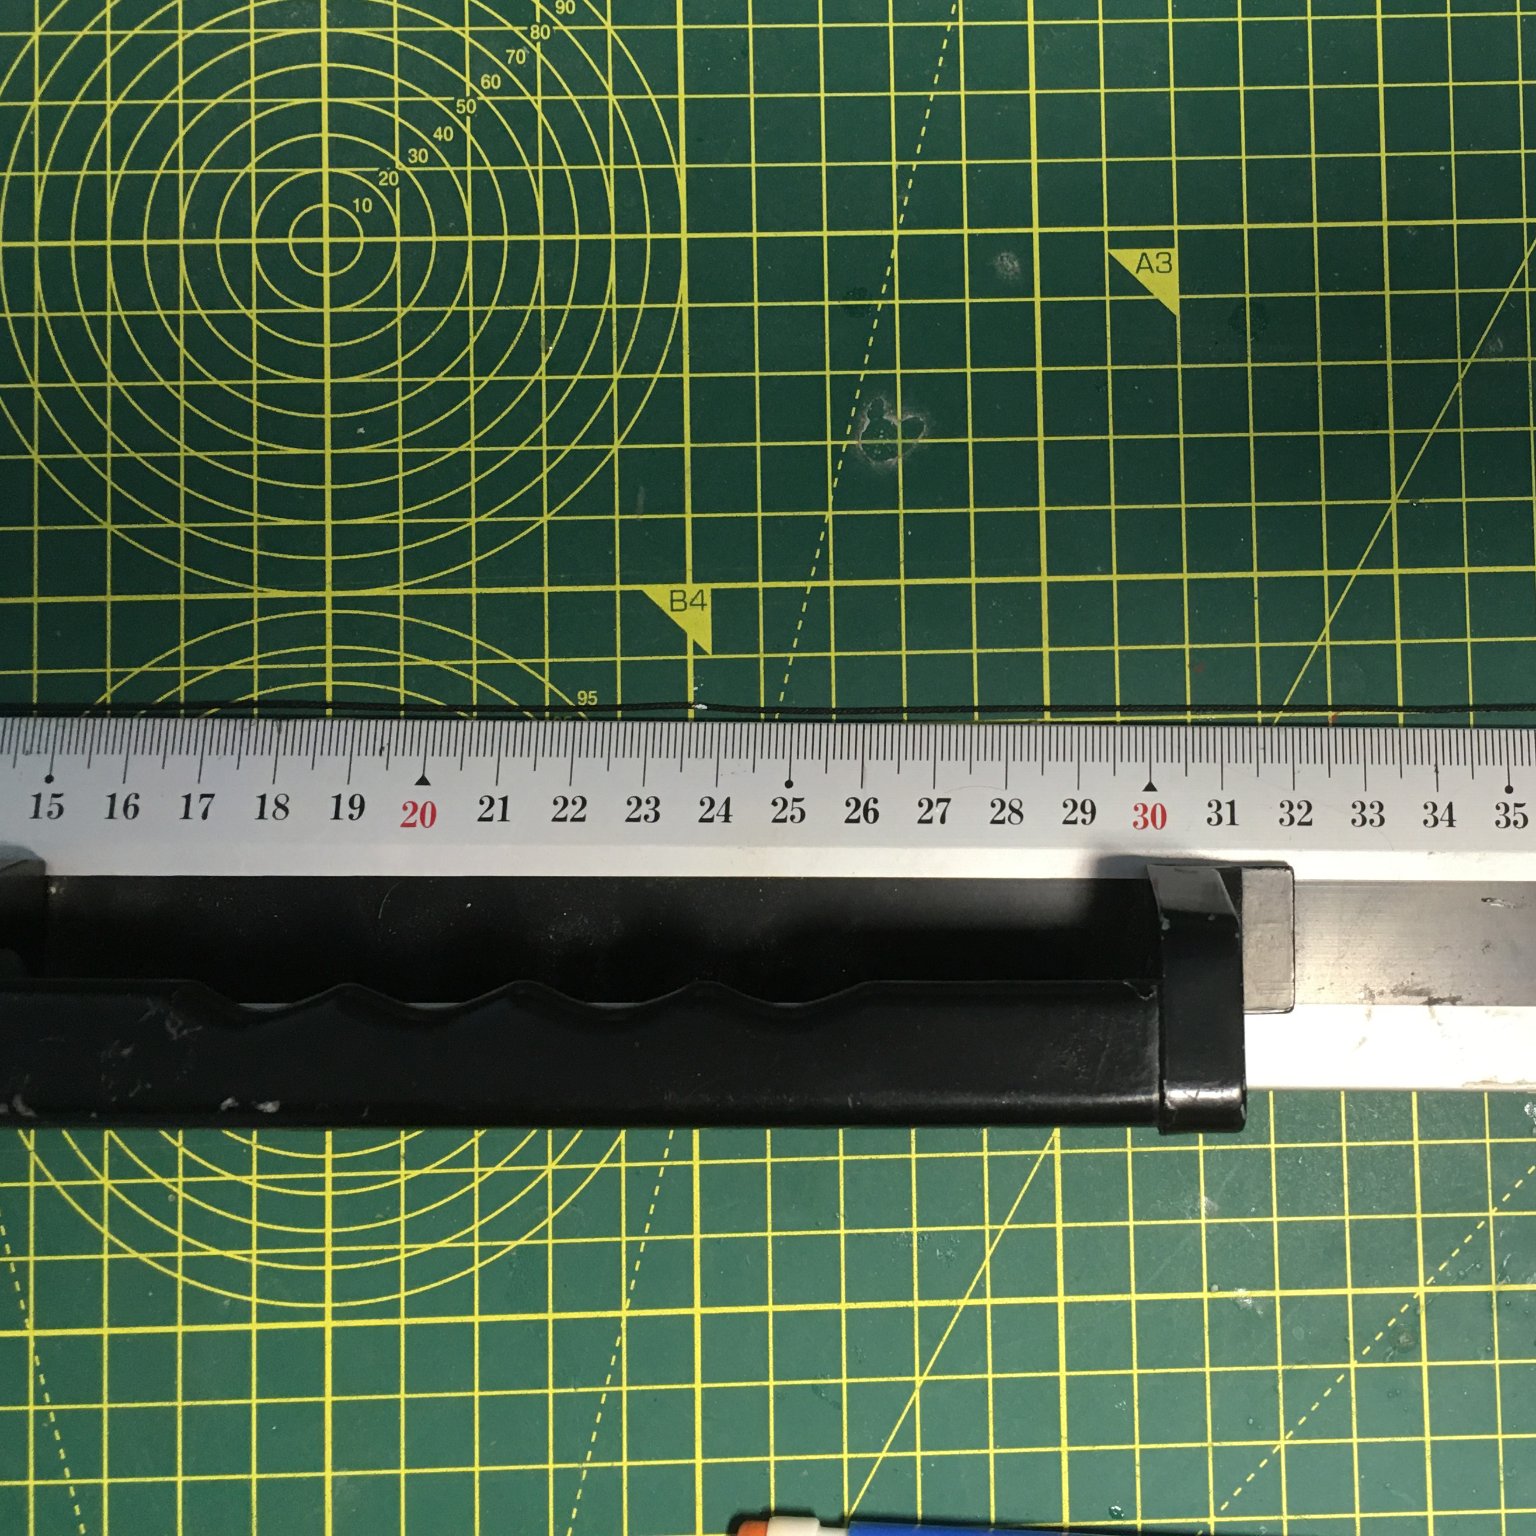
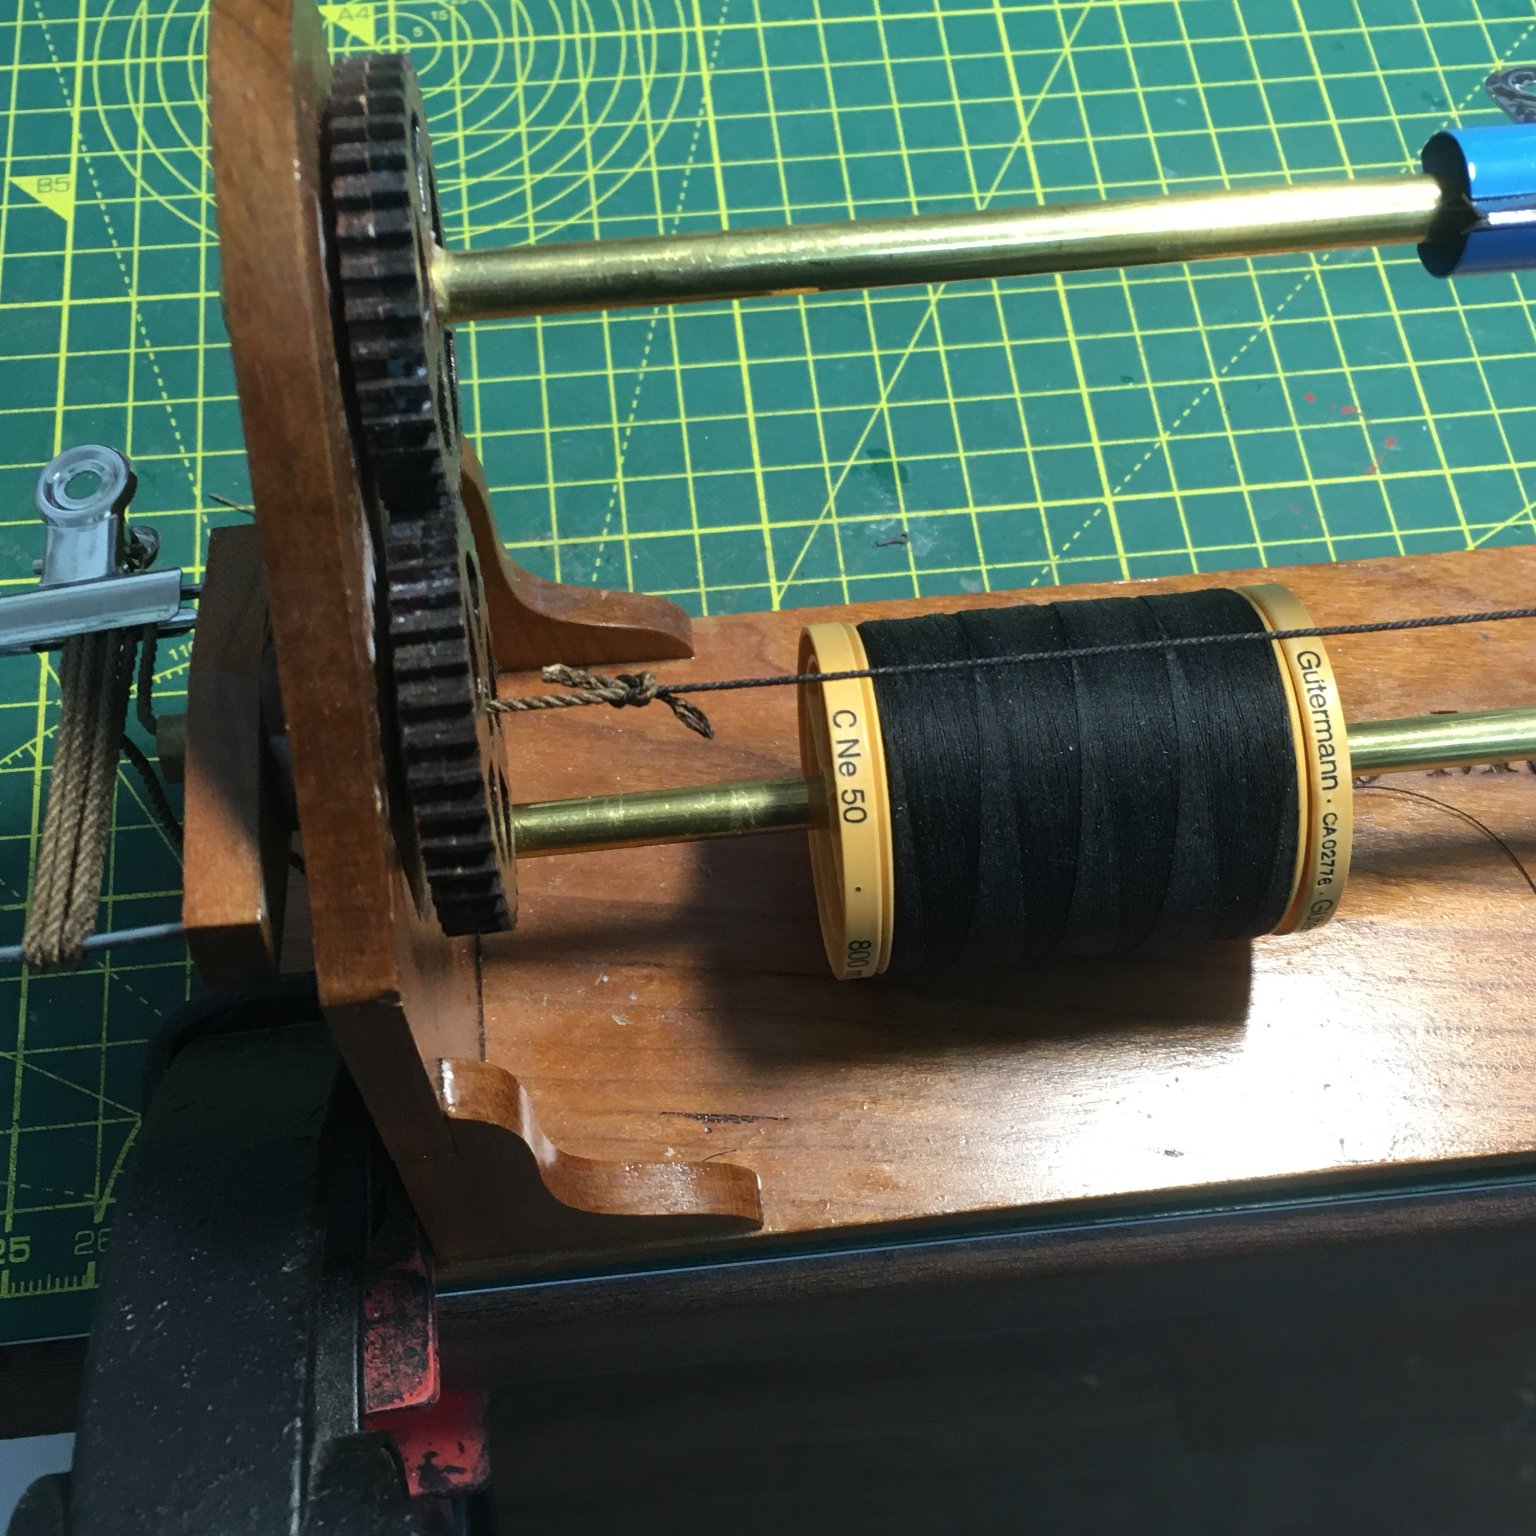
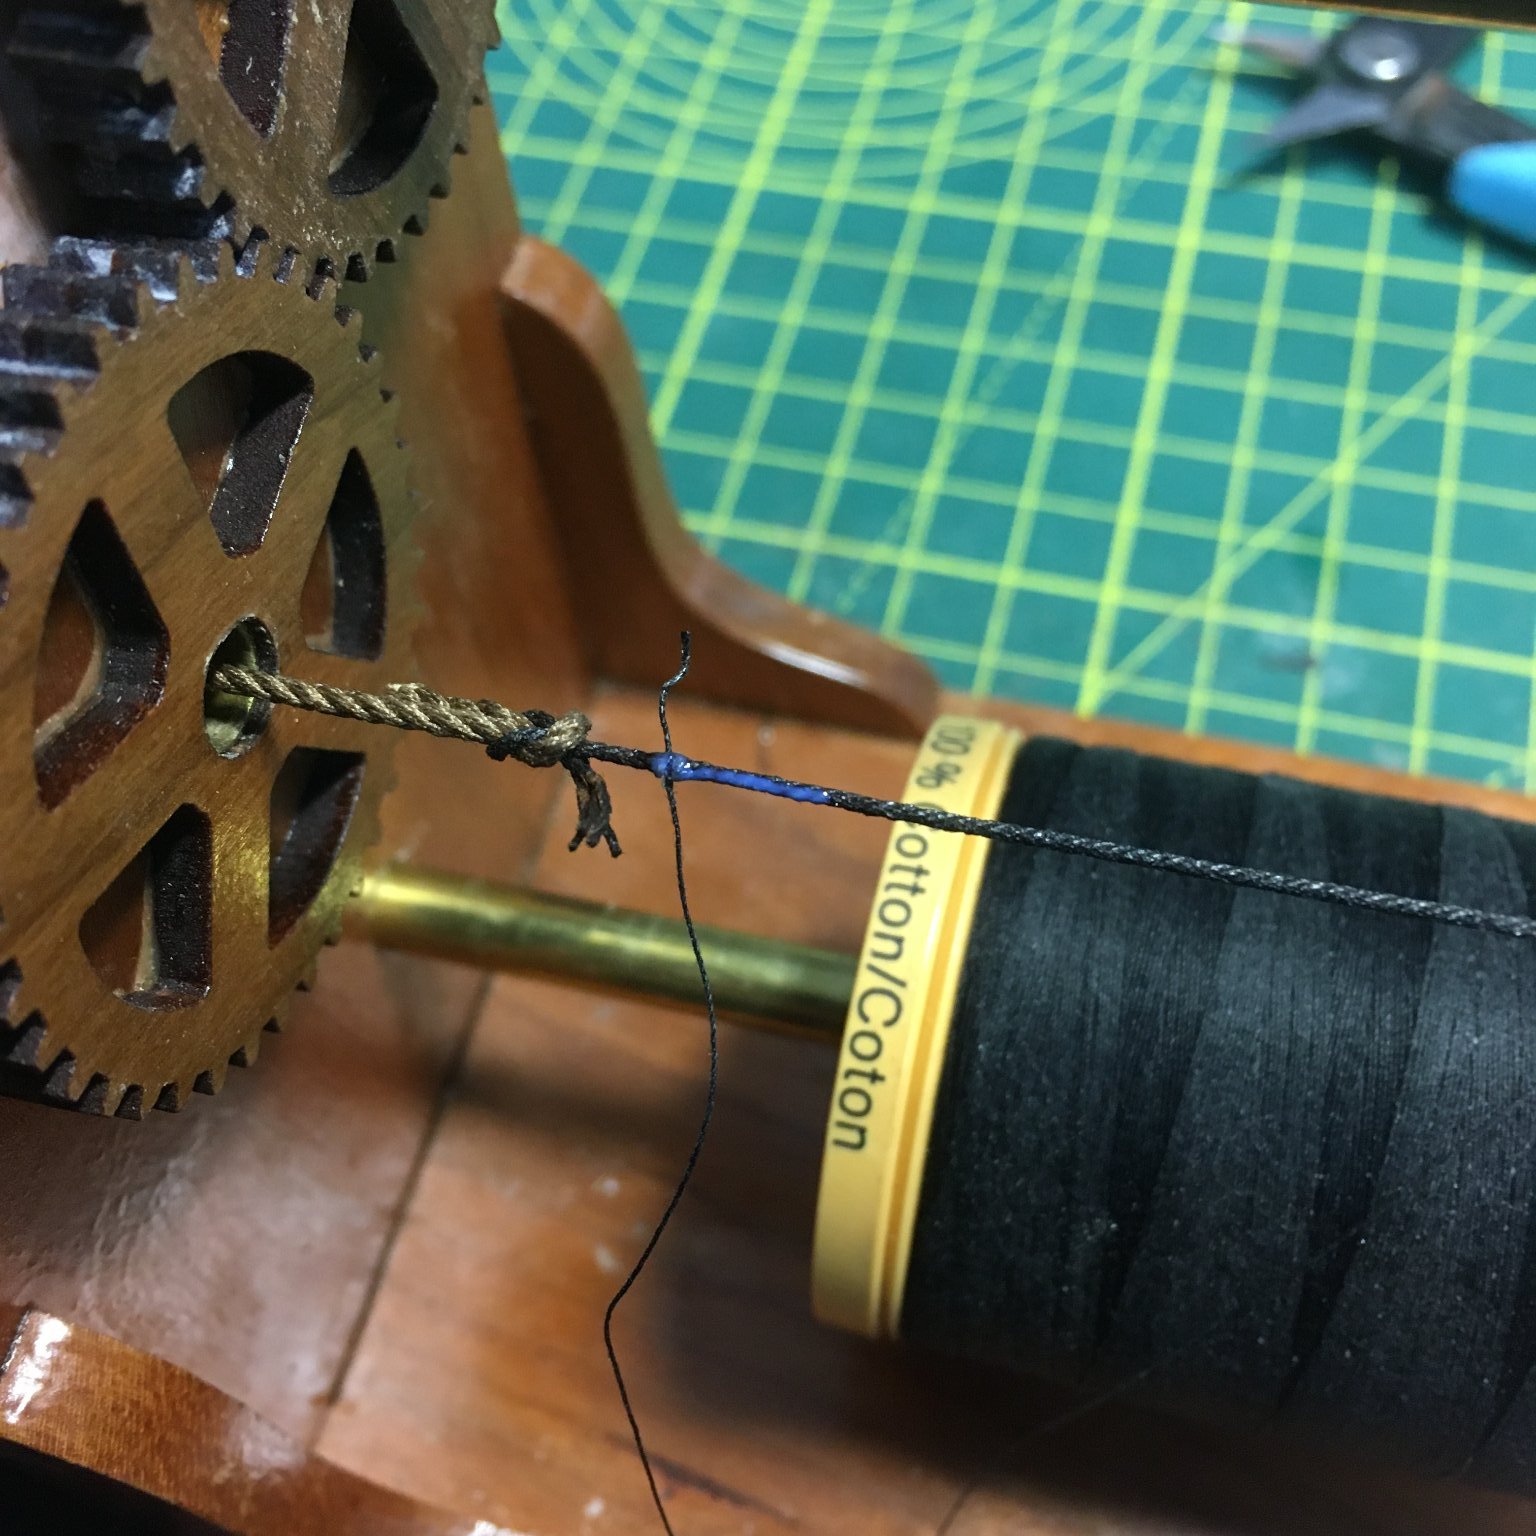
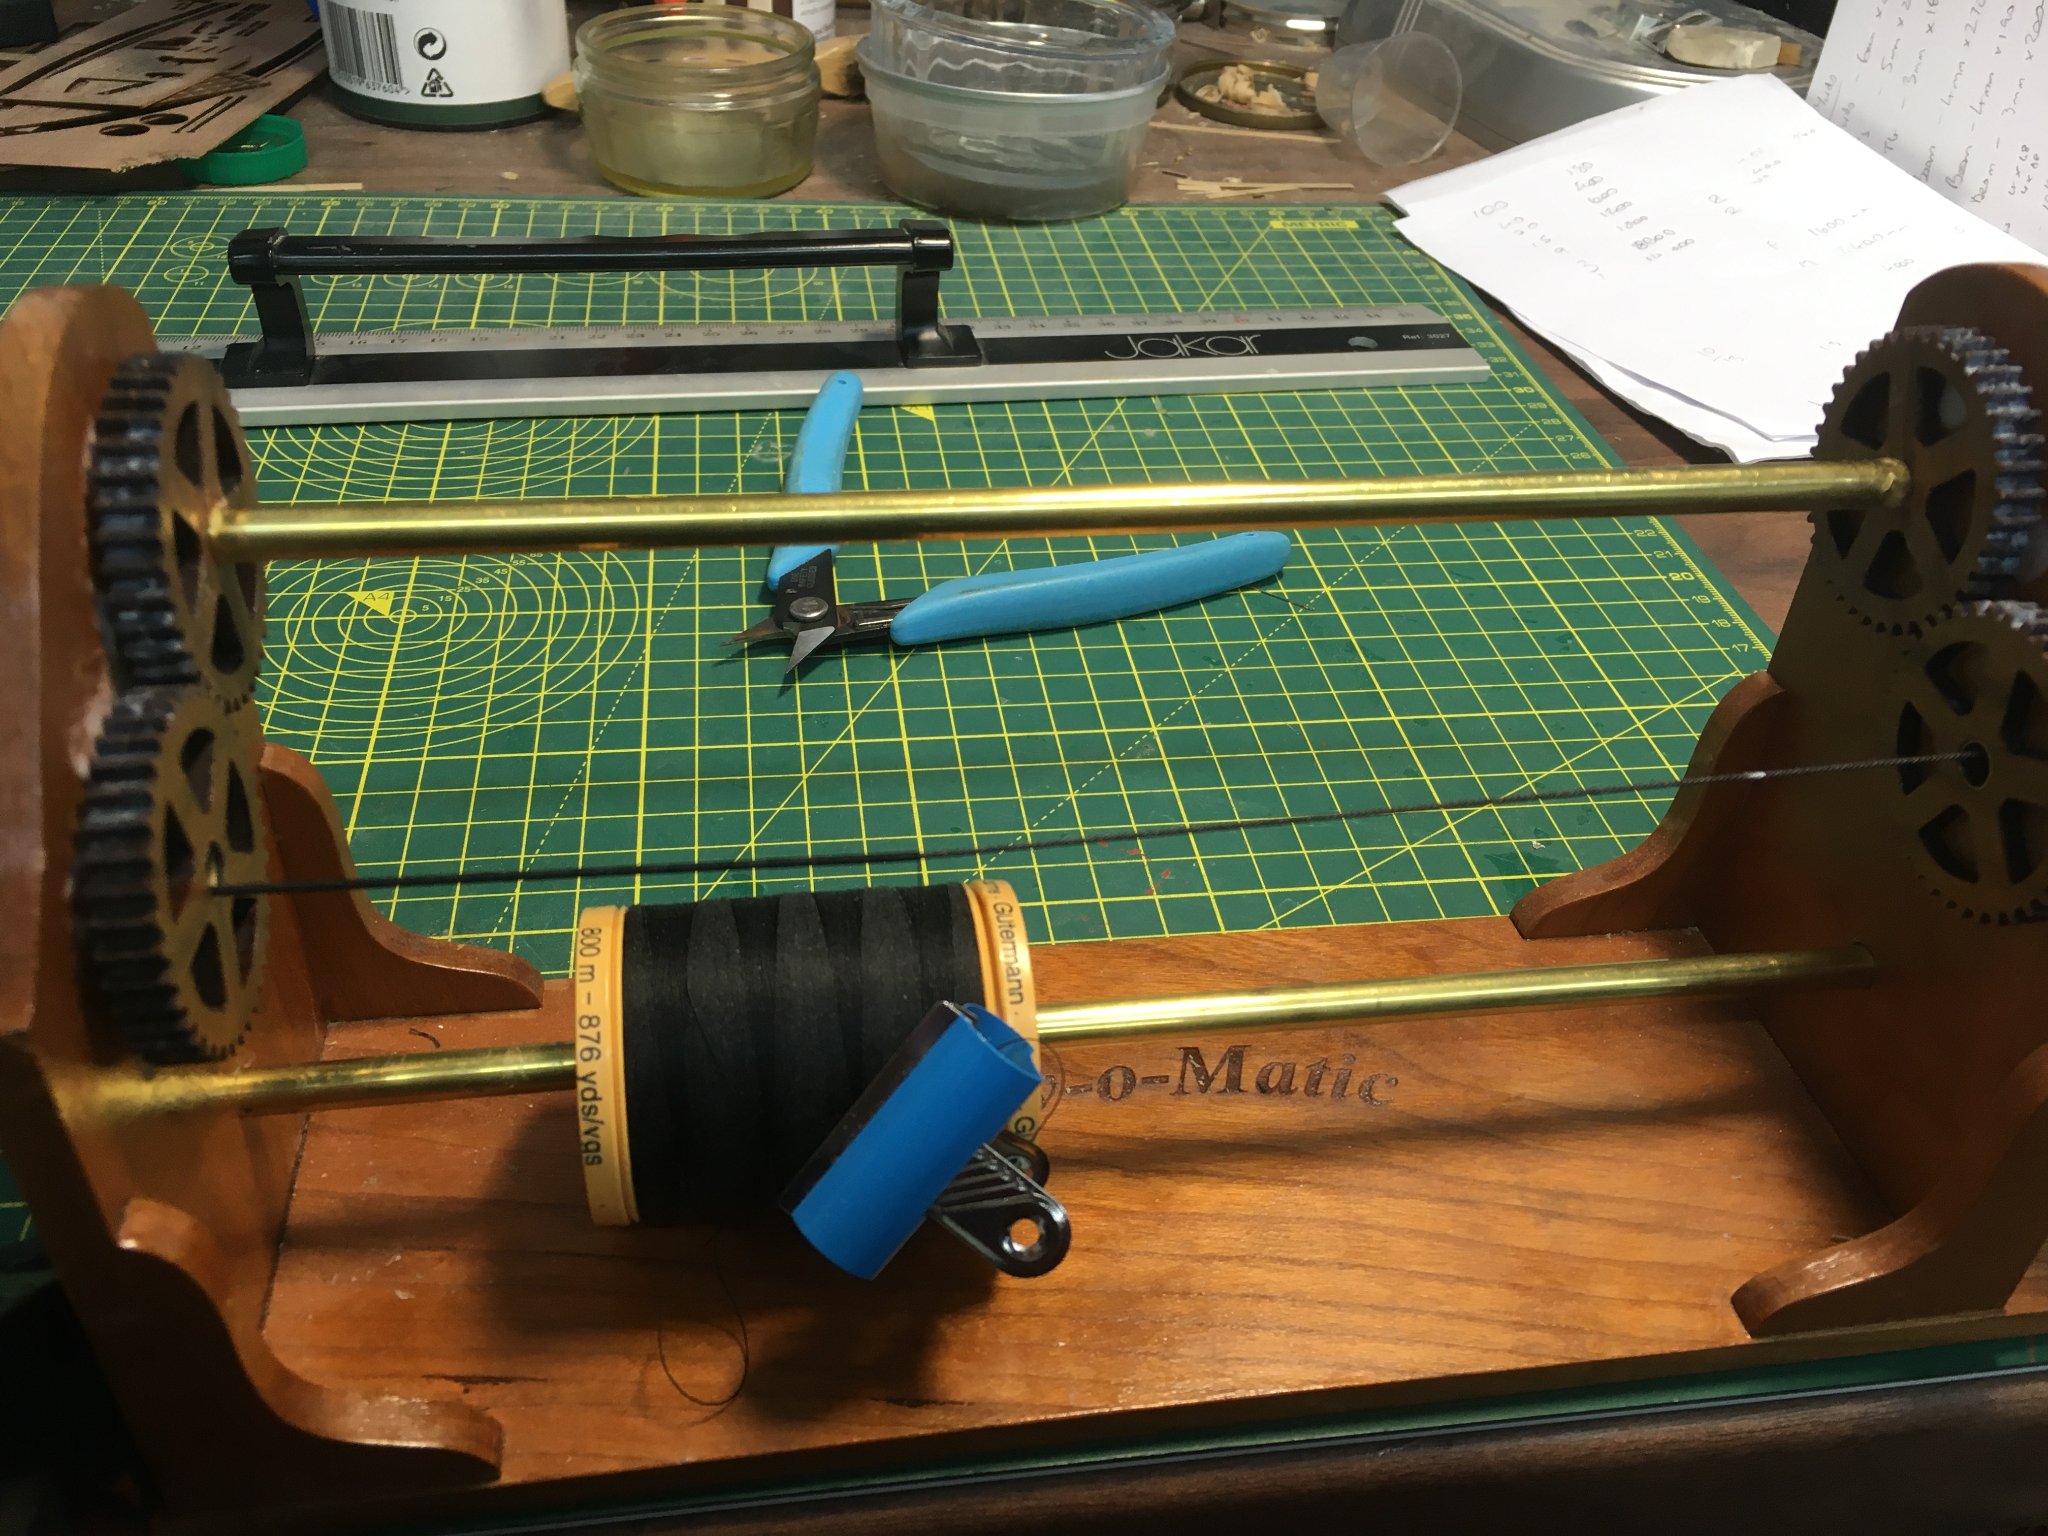
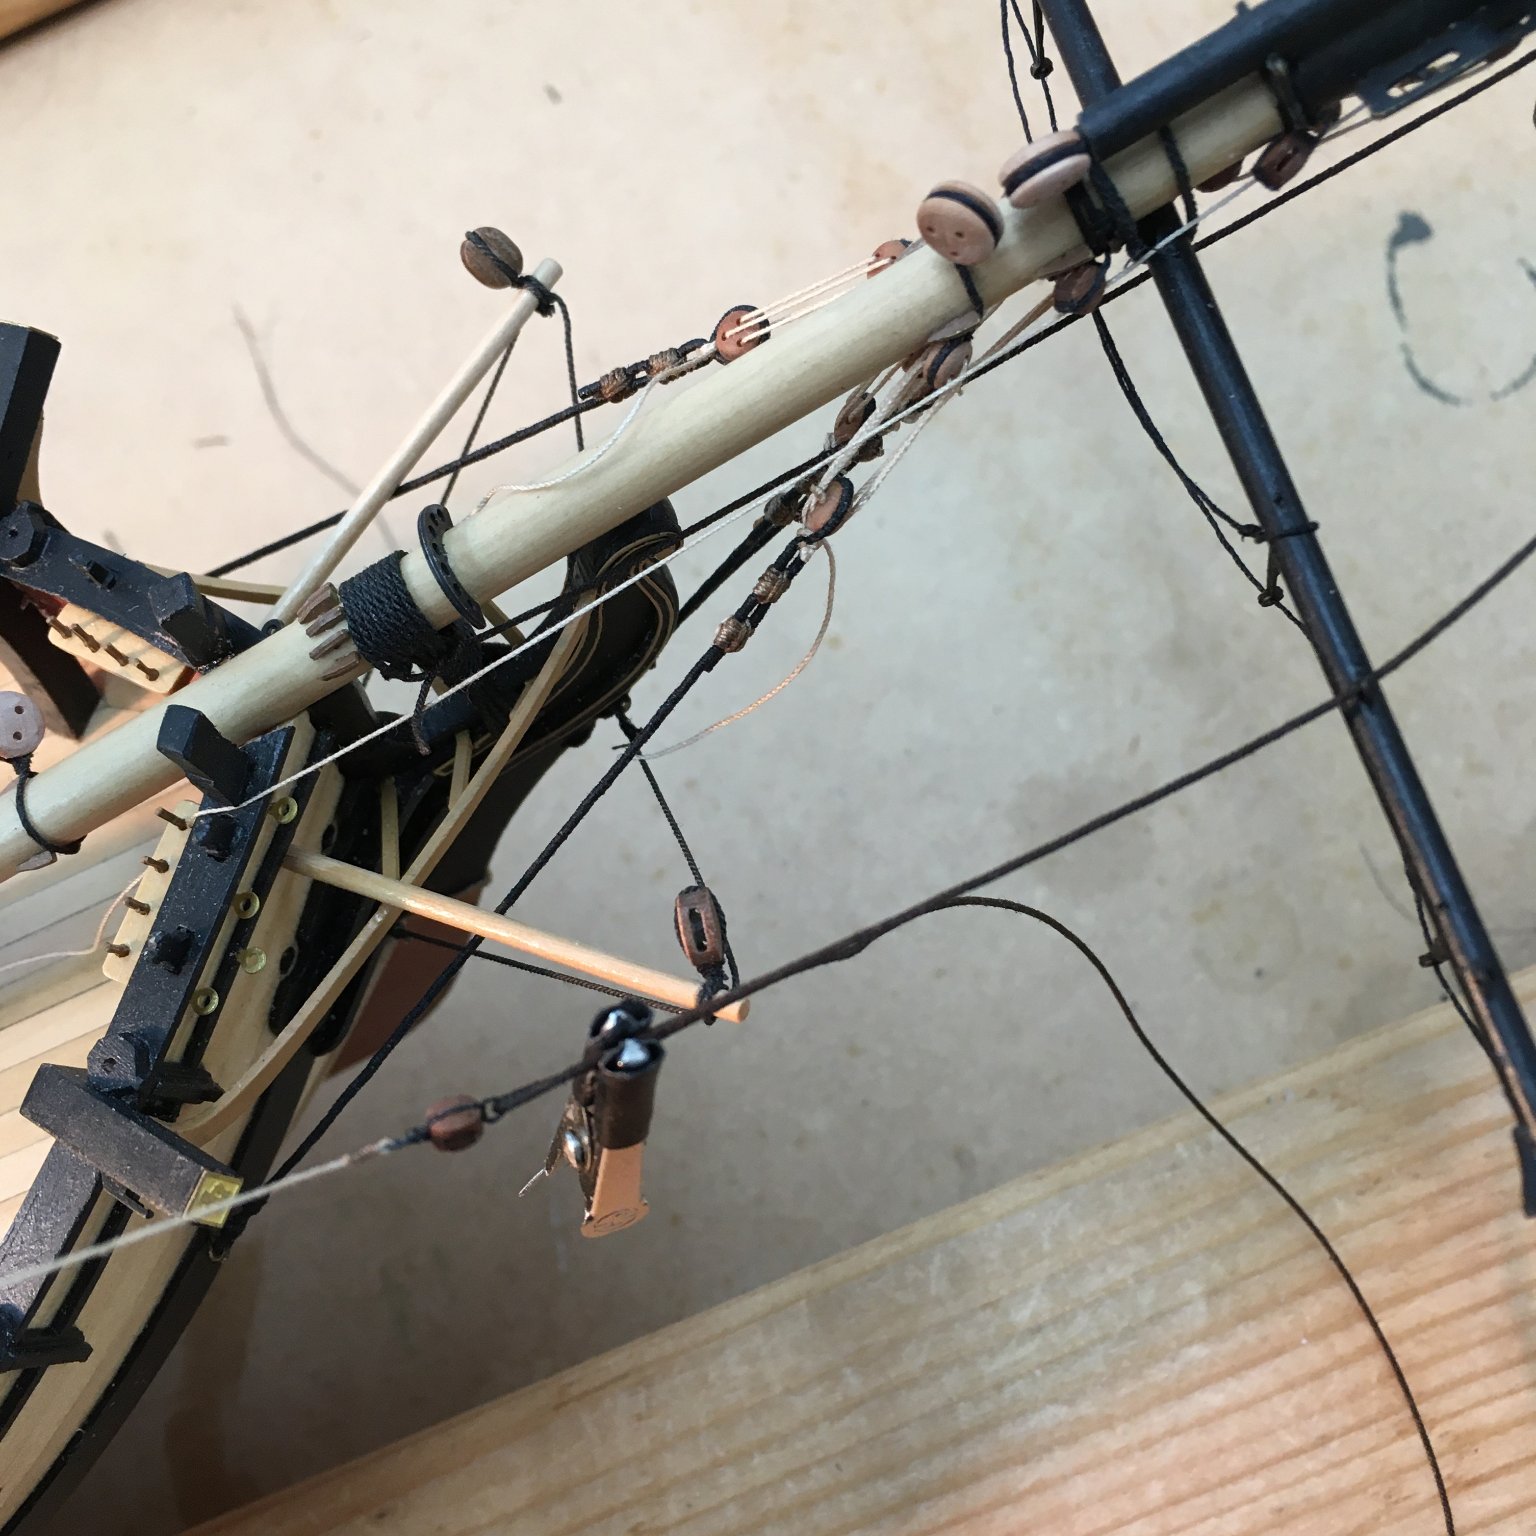
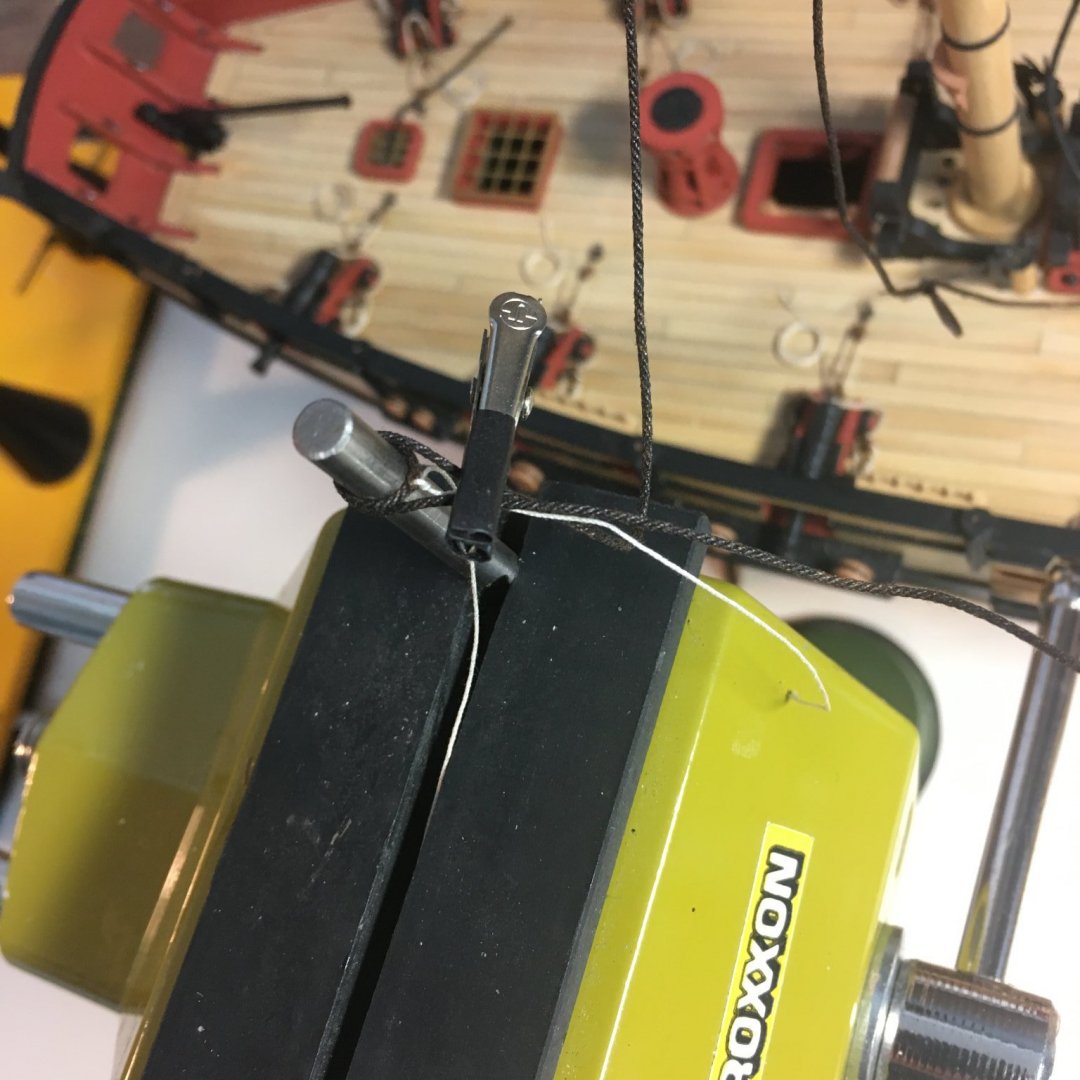
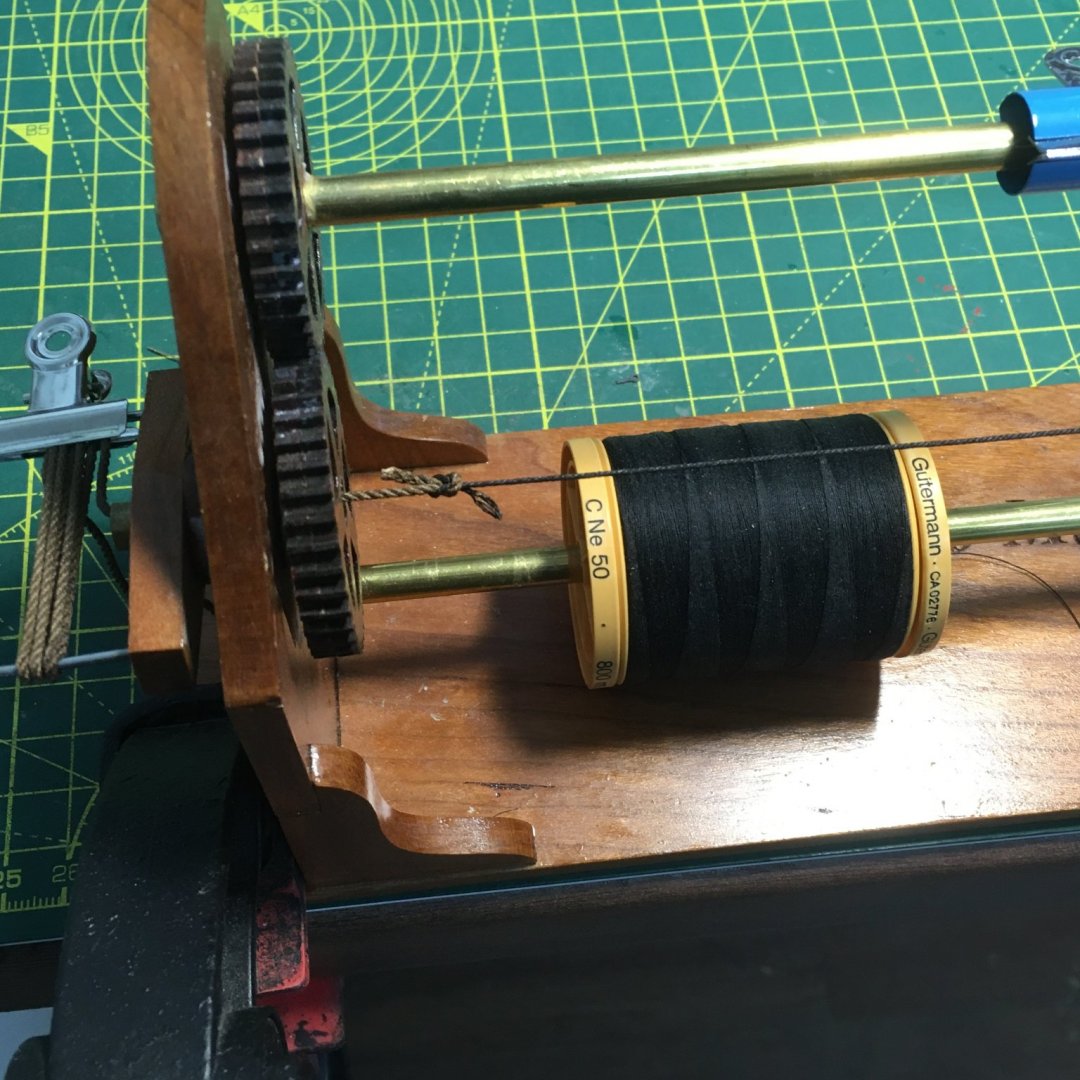
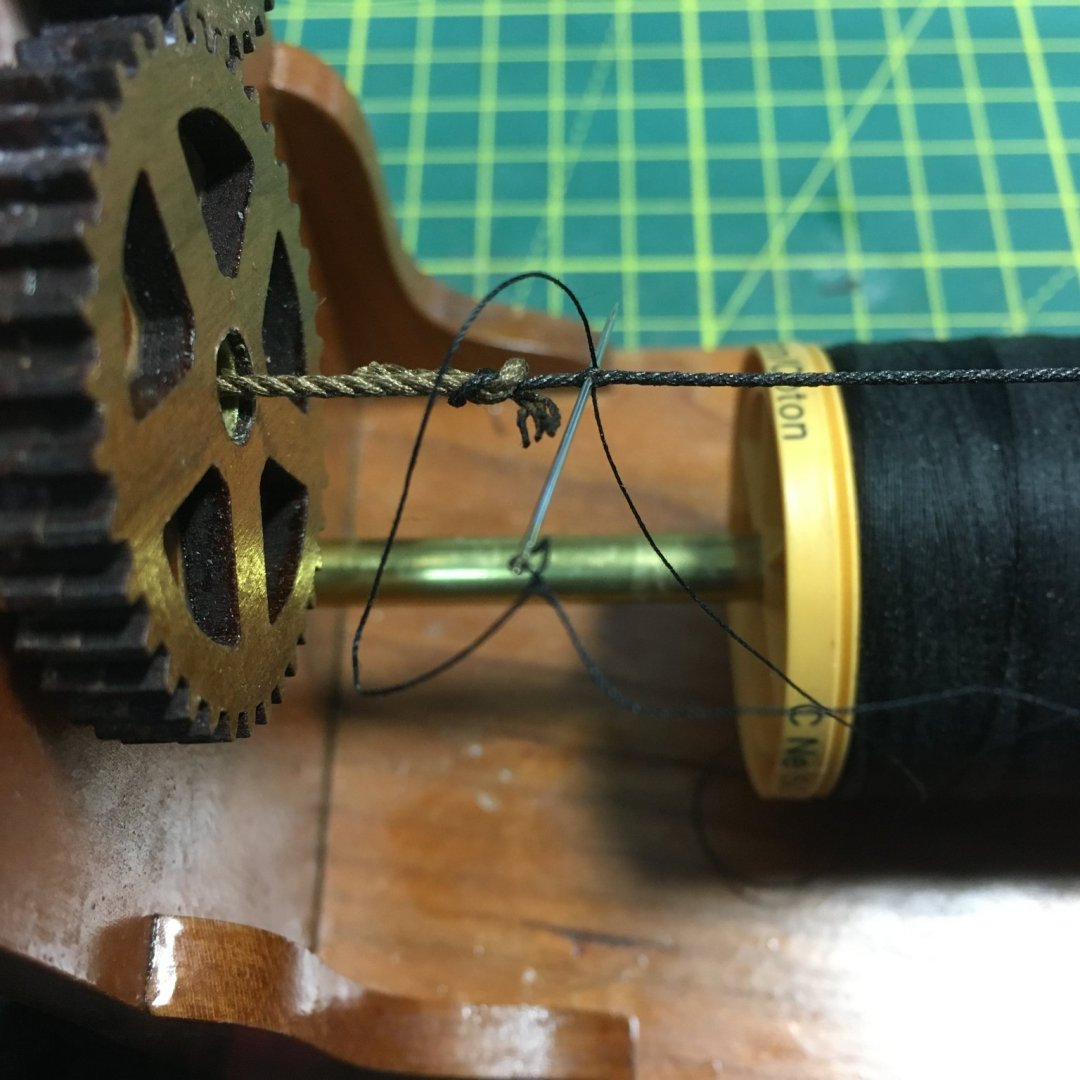
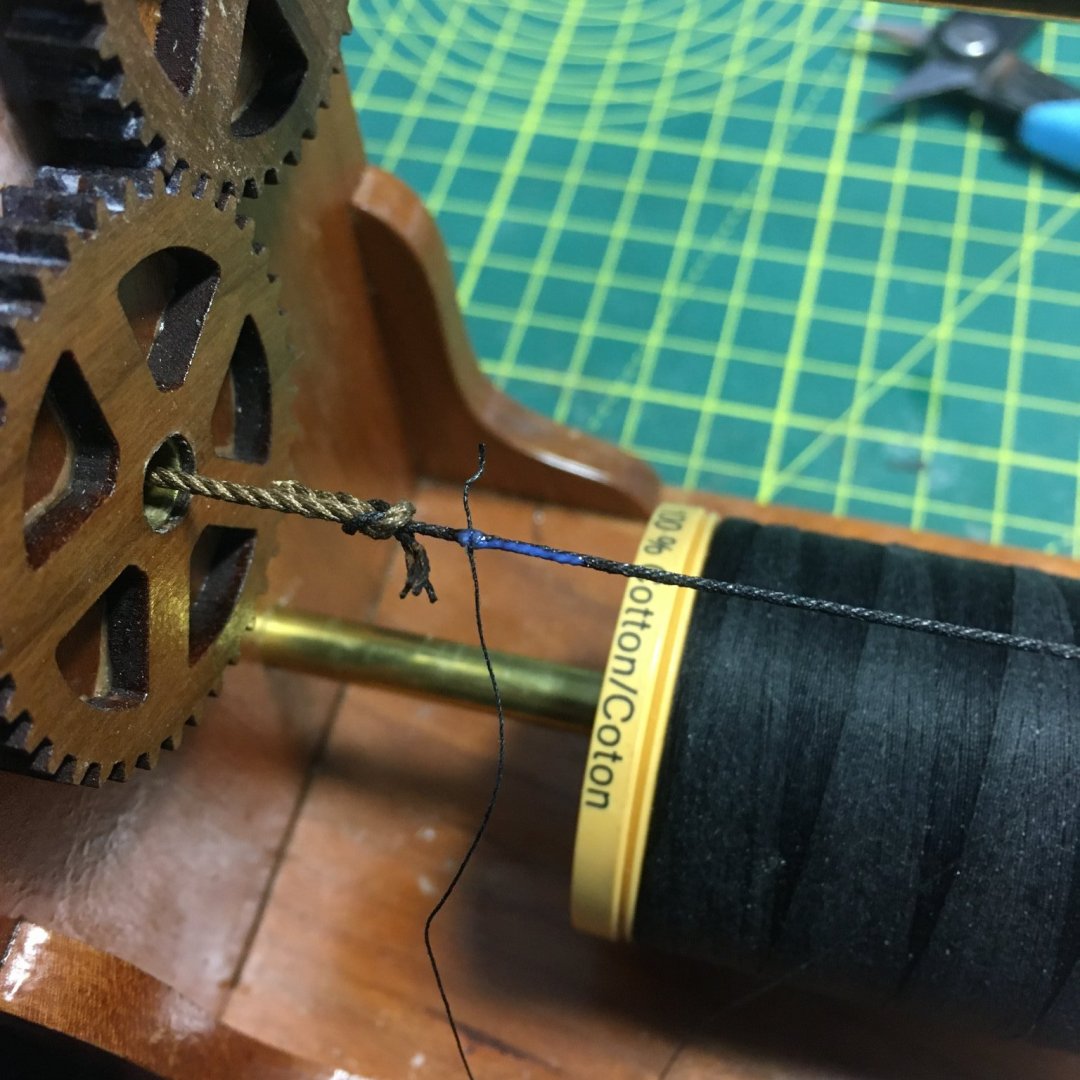
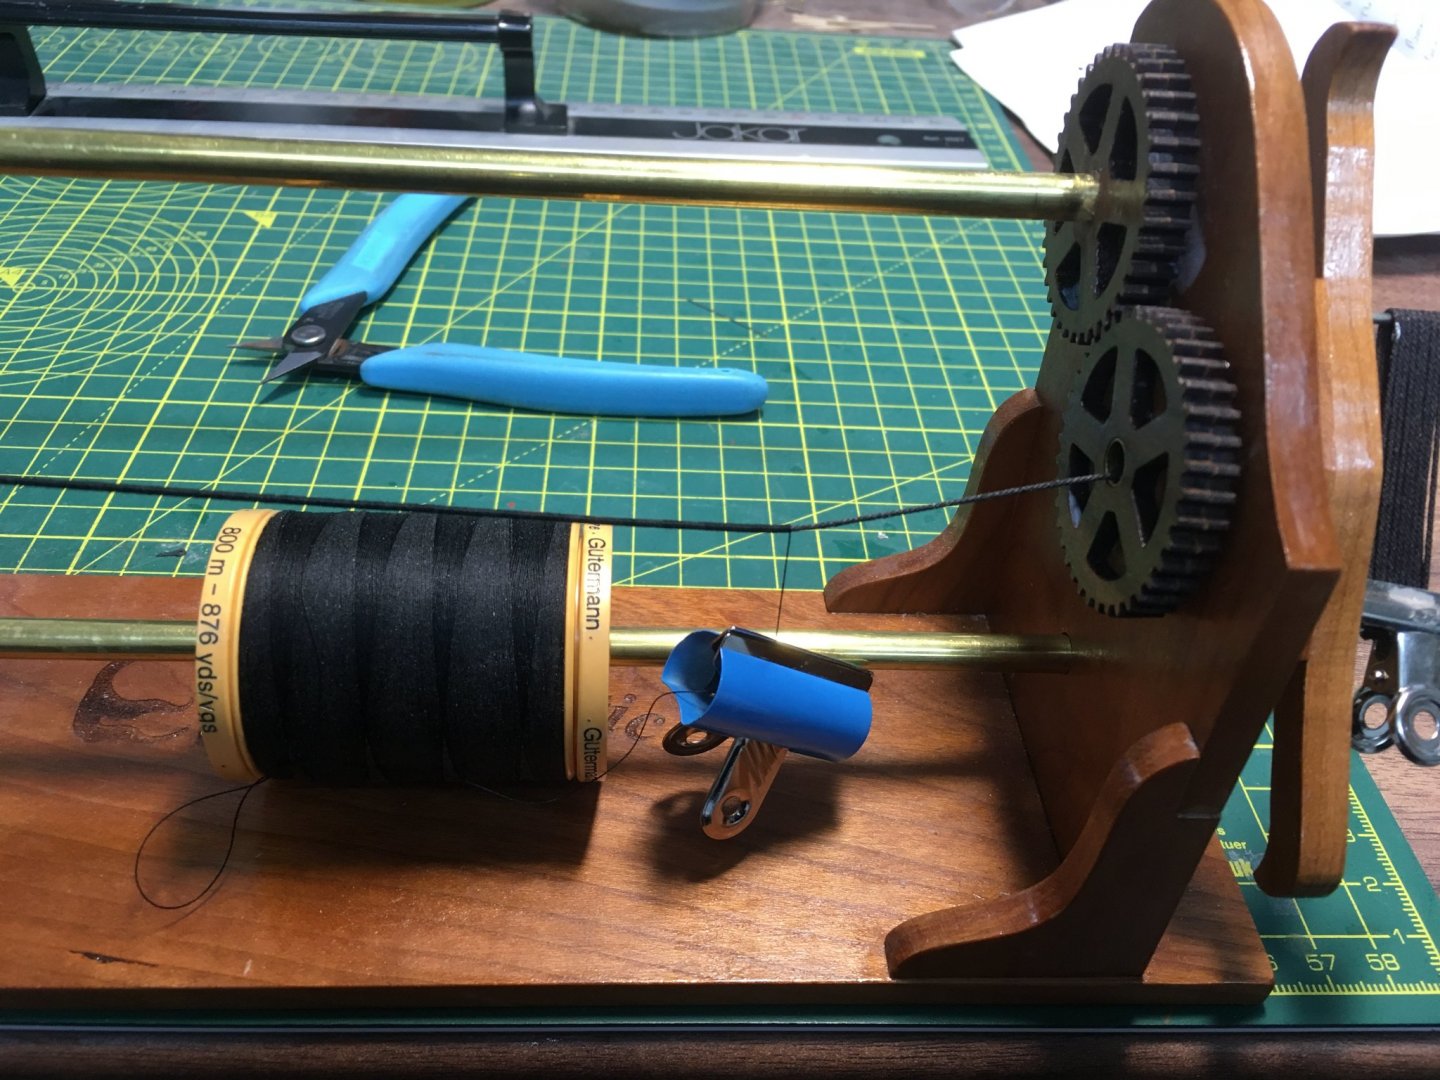
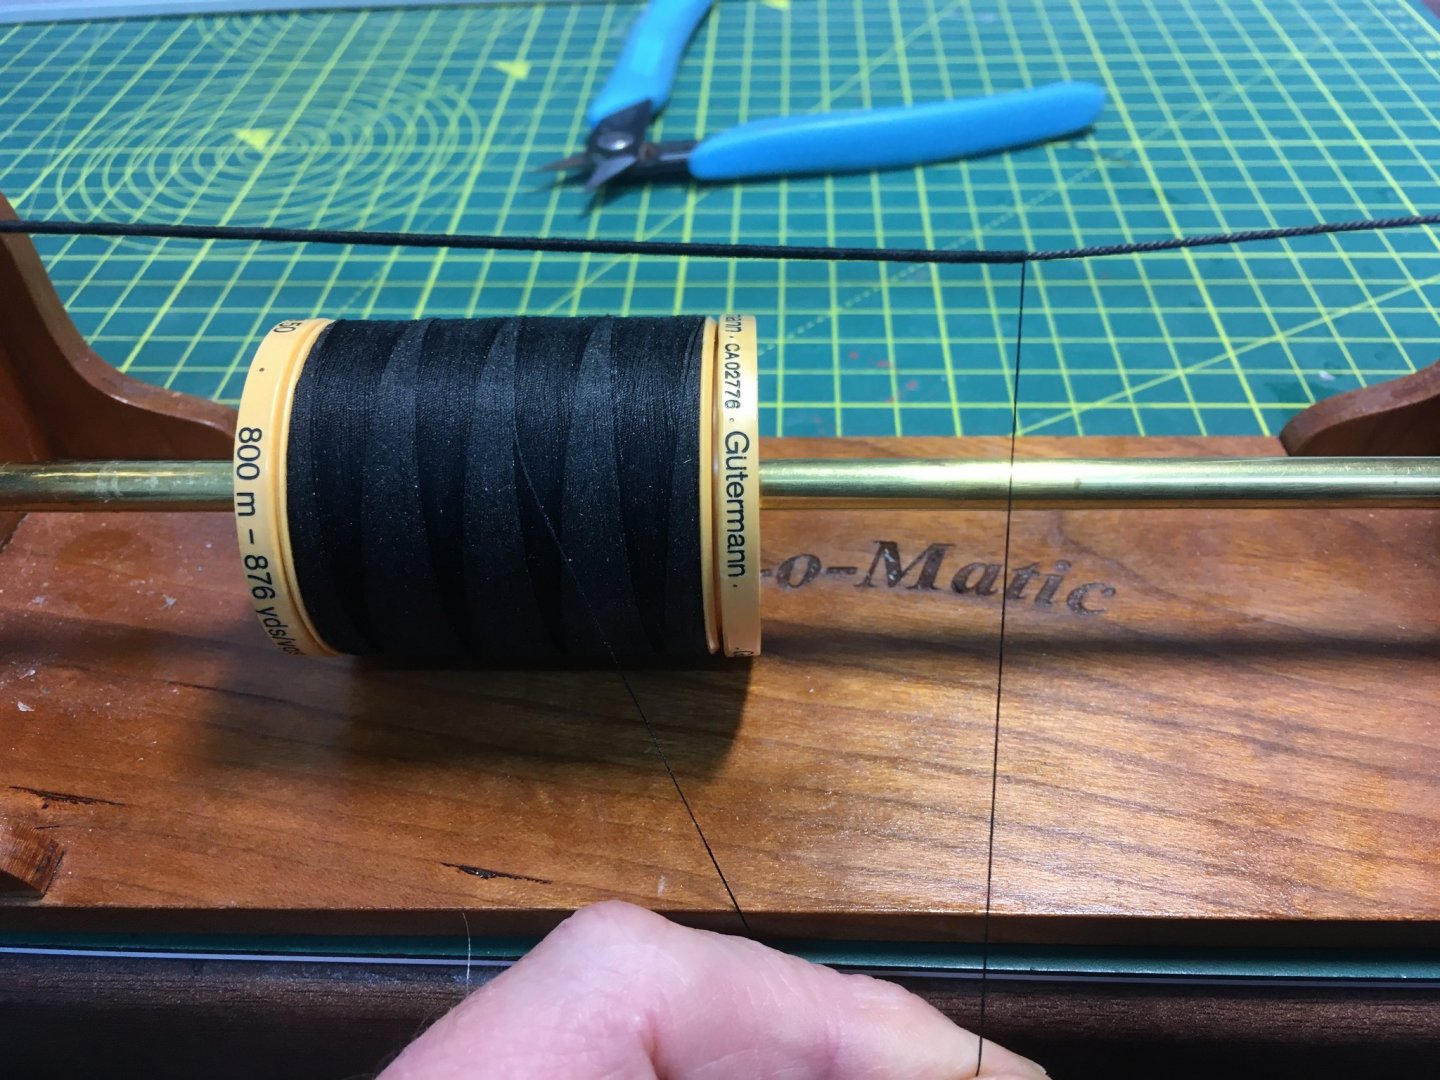
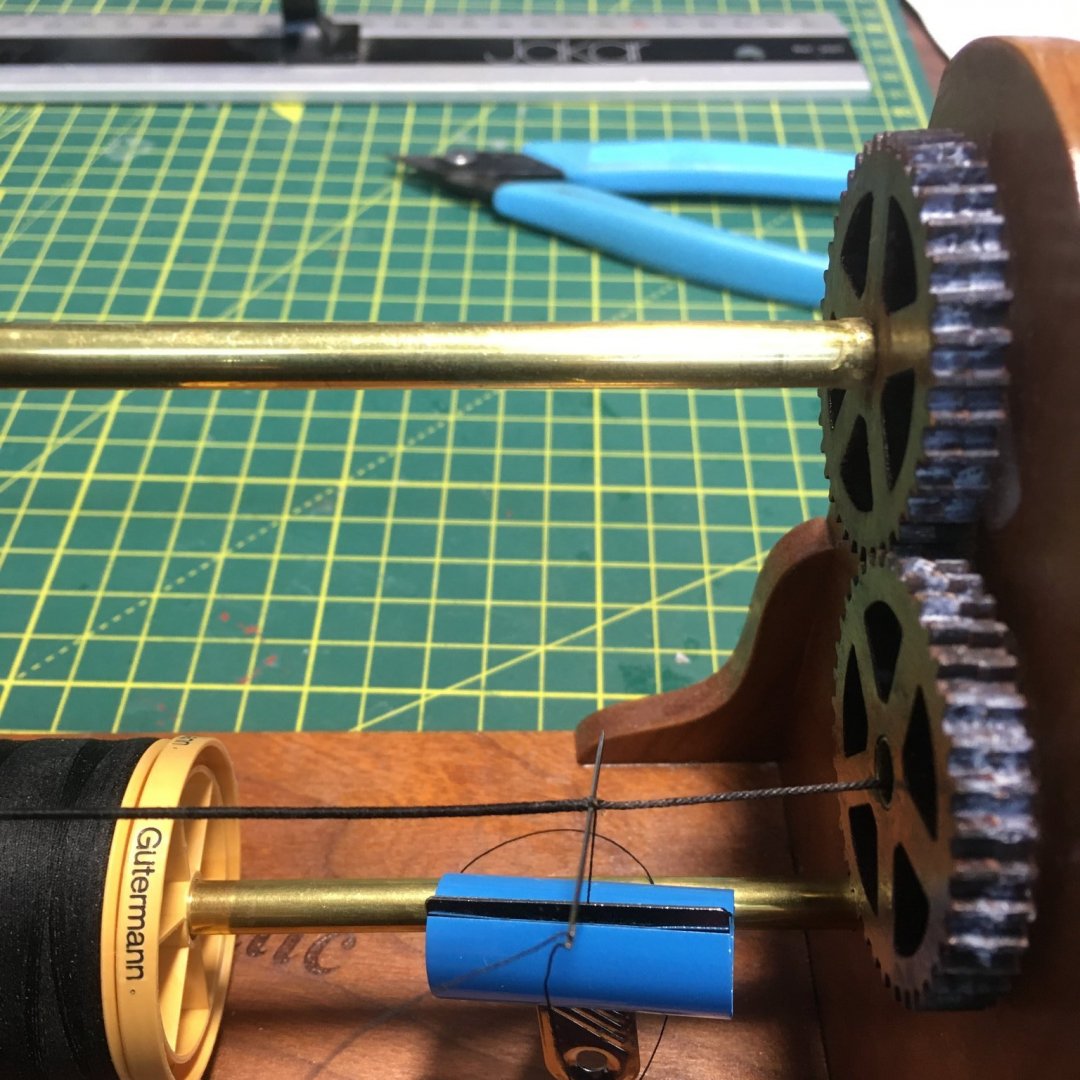
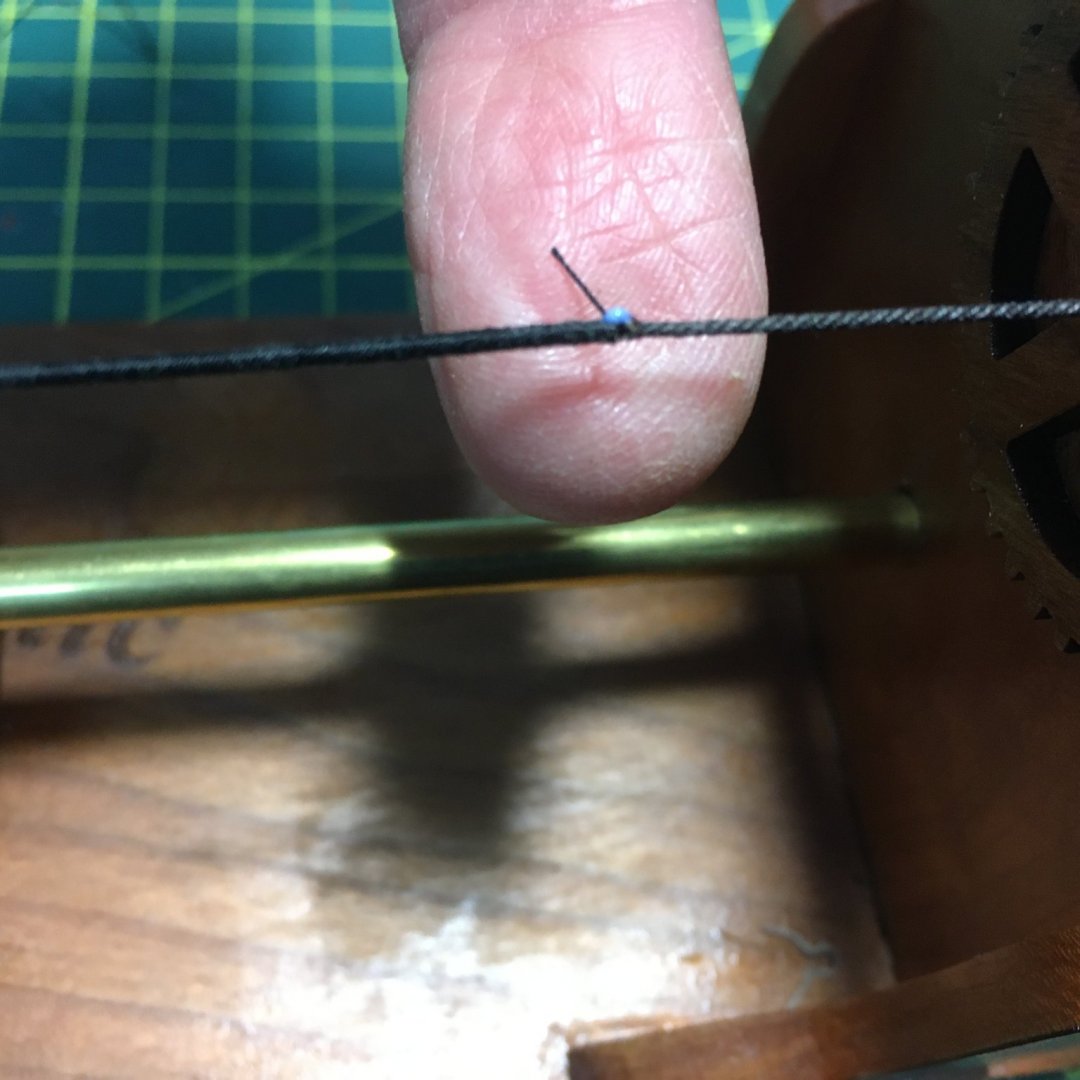
Thanks as always for the kind comments and likes - much appreciated 🙂. Starting the shrouds Moving on from the bowsprit I decided to make a start on the fore shrouds. As I've said before, I'm regretting my earlier decision to glue the complete masts together, which prevents me making up the shrouds off the model and just slipping them over the masthead. I'm following @VTHokiEE(Tim)'s advice and rigging the shrouds on the masts before fitting the masts to the ship. I've decided to serve the shrouds where appropriate and so dug out my trusty Serve-o-matic from Syren. The centre of each shroud pair would have been served for about eight feet either side of the centre point, ensuring that the bight round the masthead was well protected. In addition, the foremost shroud on each side of each mast would have been served along its whole length, to protect it from wear by the courses. At scale, I worked out that I would need 400mm of line for each shroud pair, with the centre 76mm served. For the first pair on each side, the serving would cover the whole of one half of the pair, as well as the centre section. Chris suggests using 1mm line for the lower mast shrouds. I felt that was too heavy, especially when served, and that 0.75mm would be more in scale. I started by using a chinagraph pencil to mark where the serving would end: In this case 238mm from the end - 200mm for the fully served first shroud of the pair and 38mm for the served top part of the second shroud. On to the serving machine, clamped firmly to the workbench and a couple of points to note. First, the end of the line has to feed through the left hand side and wind round the pins. I don't like wasting rope (OK, I'm tight 🤑!) so I tie a length of spare line to the stuff I'm serving to avoid losing the first six inches or so. Also, I'm using the finest Gutermann cotton thread which works well for serving. It comes on big bobbins with 800m of thread, which lasts forever. To start the thread off I sew it through the rope once, then back again at right angles. Before serving I rub PVA along the first few millimetres of rope. Probably overkill as I'm sure the sewing will prevent any chance of the thread unravelling, but it doesn't do any harm and it makes me feel better: The actual serving is a doddle once you get used to it, and with practice it doesn't take more than a few minutes to get from one end of the machine to the other. Keeping the hand guiding the thread angled slightly to the left ensures that the serving will be nice and tight. If you angle too much the thread will start winding back over the served portion, but it's easy to rectify by rewinding a few turns and starting again. On this shroud the serving can't be done all in one go, so it's necessary to shift the rope to the left until the chinagraph mark is visible. To stop the serving unravelling while I do this, I clamp a large clip on the thread and the weight keeps it in place. When not in use the clip clamps on the top brass bar to keep it handy. Once I've served close to the chinagraph mark it's a repeat of the starting procedure - glue the final few mils and sew through the rope: Next it's on to the mast, held in the trusty quadhands. Before threading the shroud around the masthead I tied a piece of white cotton round the midpoint so I knew exactly where to form the bight: To seize the bight I used the same method for creating round turns that I described in a previous post. Here, I've used light coloured thread so I could see what I was doing and then stained it when it was done: I've left off the handrail and stanchions on the foretop to avoid breakage. One slight hiccup - I was so engrossed in the seizing work that I neglected to check the order I was doing the shrouds in. The foremost starboard pair is supposed to go on first, but I fitted the port. Fortunately I realised before I did the starboard side, so I was able to lift the port pair out of the way and seize the first starboard shrouds underneath in their proper position. Not the first time I've not thought through the proper order of work on this build! I won't rig the deadeyes until all the lower shrouds are fitted. The serving and fitting will take some time so I'll avoid pointless repetition until I've finished all the lower shrouds. In the meantime I might do some more work on the ship's boat, which the eagle eyed might have spotted on the quadhands base. Derek


- 725 replies
-
- 12
-
-
- vanguard models
- speedy
- (and 1 more)
-
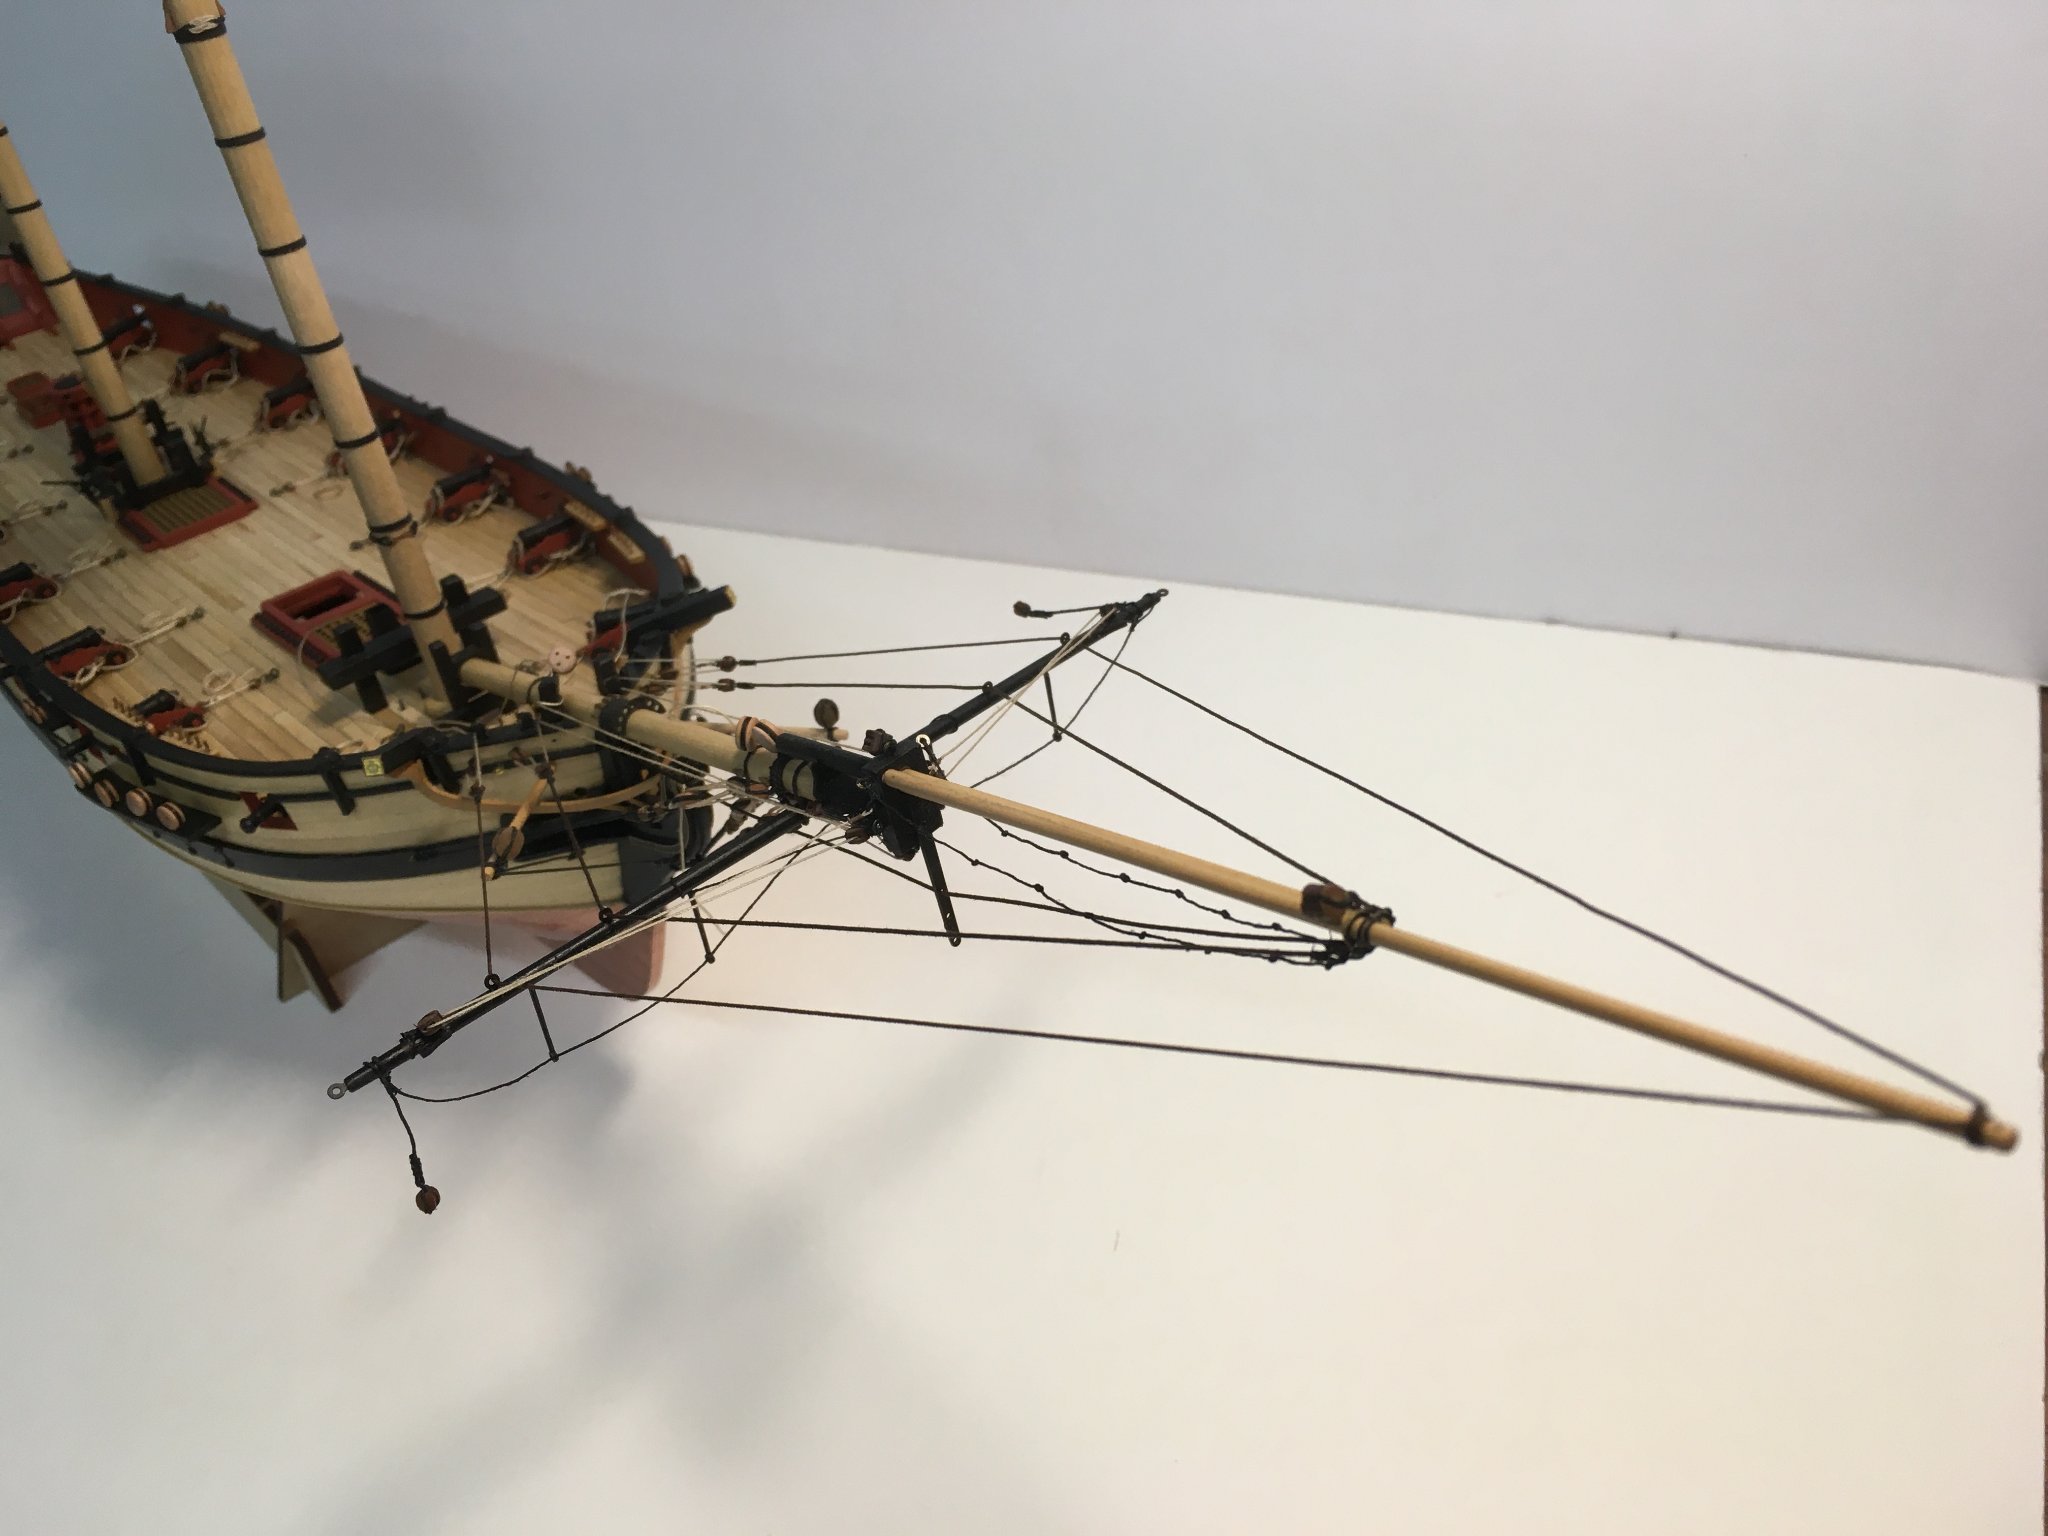
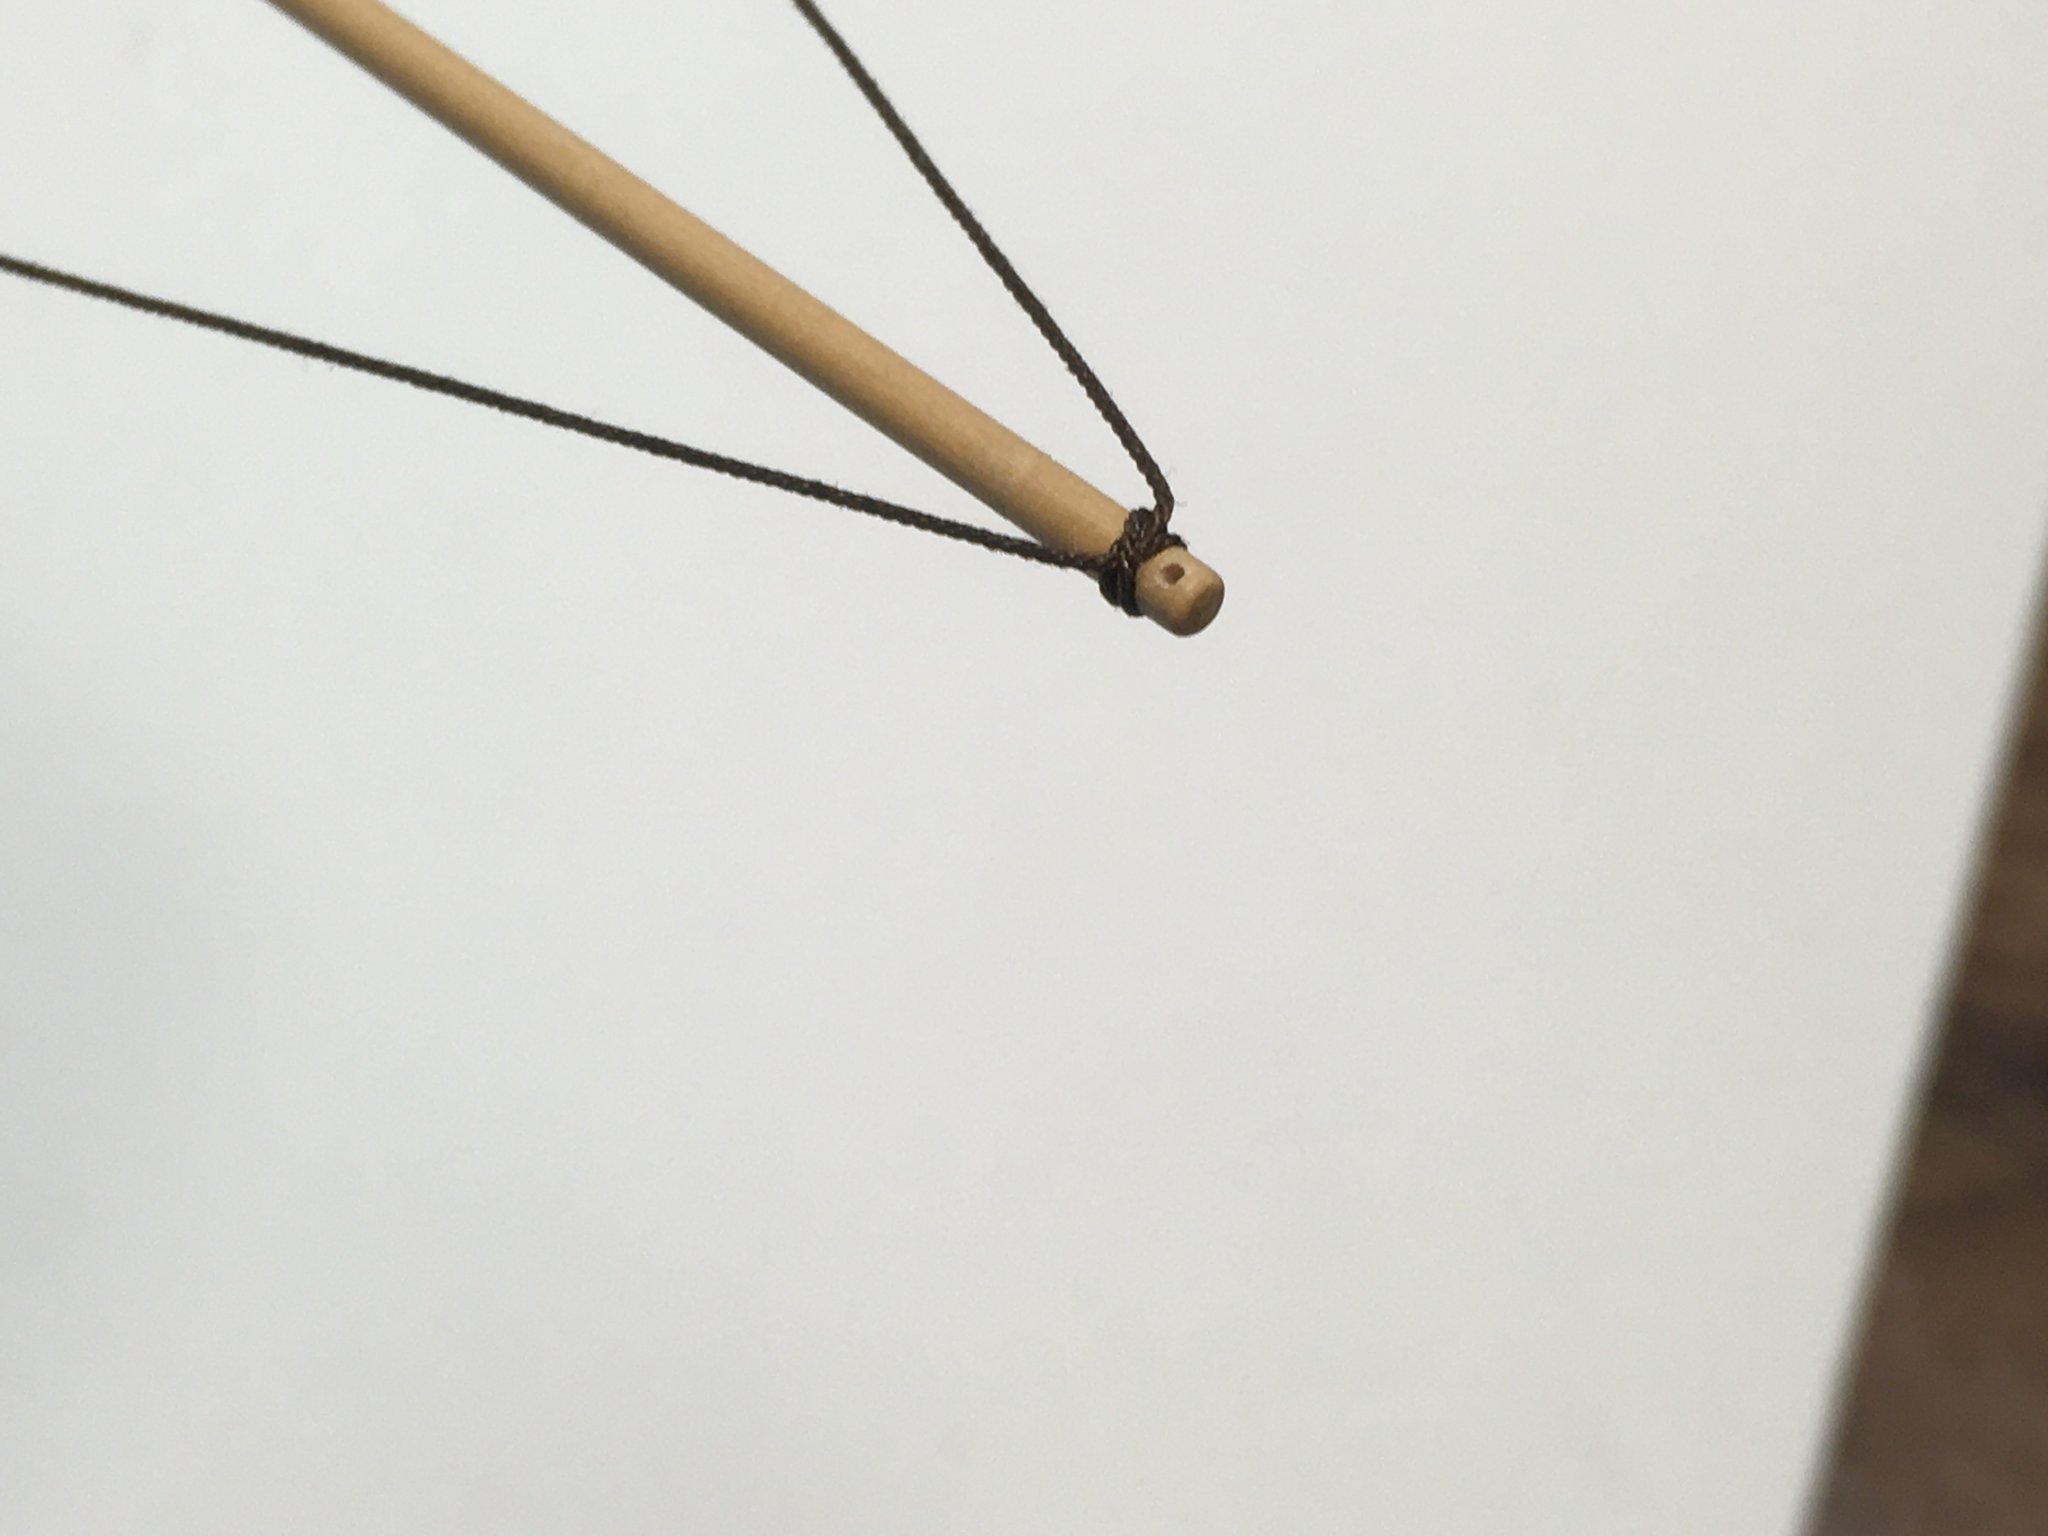
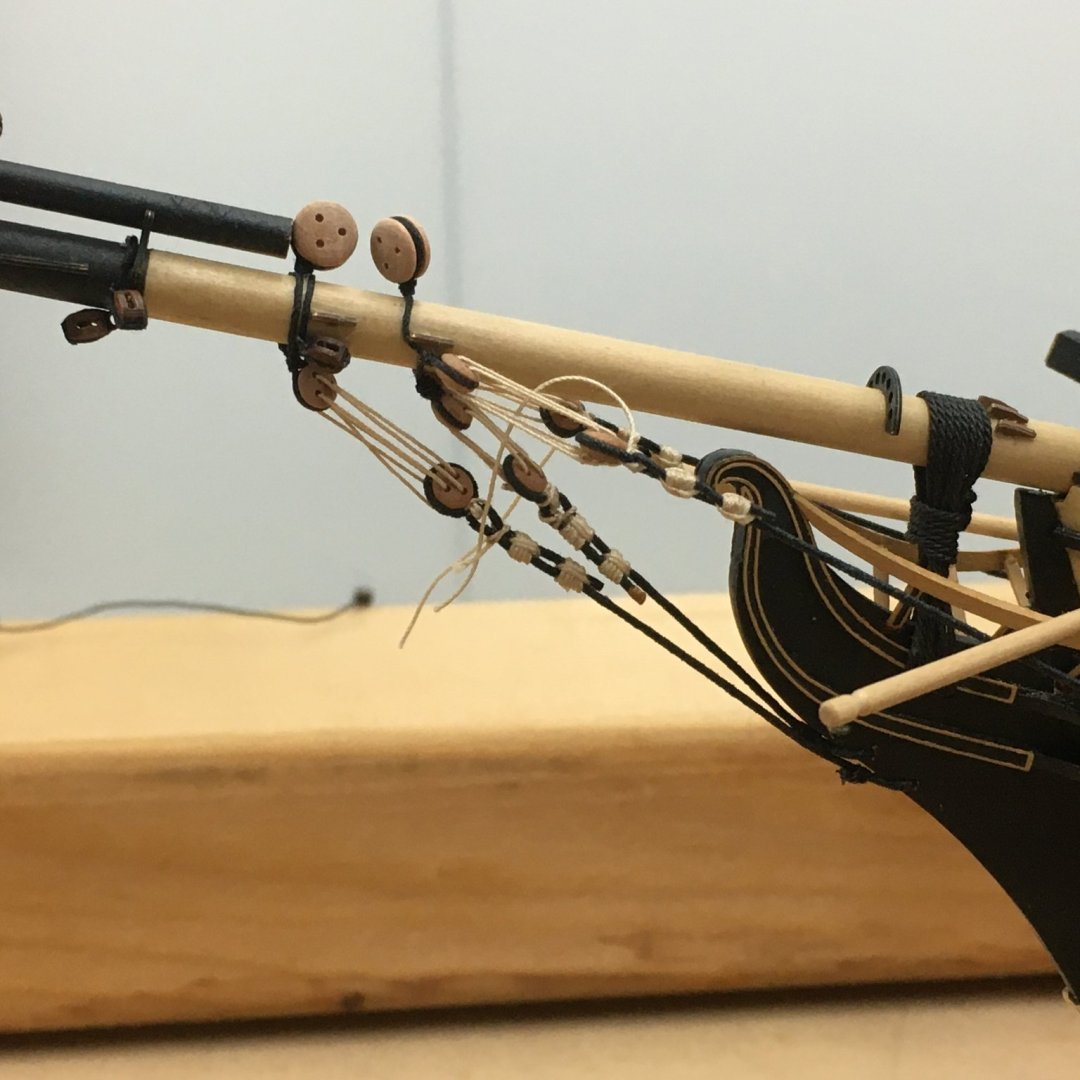
Bowsprit Rigging I've finished all the initial rigging to the bowsprit, bar tying off and belaying lanyards etc. I haven't kept up the log as well as I would have liked, although I believe I've already described all the techniques used. I'll just show the results, then mention one or two items that might be of interest to other Speedy builders. I didn't fit flemish horses to the spritsail yard. Although Chris shows them on the plans, they weren't fitted on ships of this period (at least according to Lees). Stirrups weren't fitted either but I didn't read that until after I'd fitted them, and I'm not sufficiently wedded to historical accuracy to remove them! One other point where I departed from the plans was at the end of the flying jibboom, where Chris suggests cutting a groove to accommodate the fore royal stay. I can't imagine that would ever have featured in a real ship, so I decided to drill a hole to simulate a sheave. Unfortunately I hadn't spotted this requirement when I was making the spar so it was with a fair degree of trepidation that I approached the 2mm timber with an 0.8mm drill bit. Fortunately I managed not to ruin it: Another point on that photo is the clove hitch to attach the guy pendants. This allowed me to use a single length of line to make both pendants, and to minimise the clutter on the end of the jibboom. I previously described using CA to create rings in the lines used to strop blocks - rings that wouldn't lose their shape under tension. I've been trying to cut down my use of CA - for health reasons - and found that fly tying cement works just as well: Given the small size of the blocks - mostly 3mm - I've used fly tying silk for most of the seizings. One exception was on the bowsprit stays where I used DMC thread. I covered this in post #471, where I also described darkening the seizing slightly. However once the stays were rigged on the model and the seizings had dried, it was clear they were still too bright. I toned them down further with some more dye made from van dyck crystals, applied with a small brush. Hopefully the difference is clear in these two shots: A final point to mention is the group of five ringbolts visible in the hull on the left hand edge of the second photo. These are unblackened, and are there purely as place markers so I don't forget how the holes are arranged. I find it much easier to seize lines to ringbolts off the model, then glue them in place. Derek


- 725 replies
-
- 17
-
-
- vanguard models
- speedy
- (and 1 more)
-
Good work on the ratlines Tim. You mention the tendency for tension in the ratlines to pull the shrouds in. One tip I read in The Fully Framed Model, and which works for me, is to carefully rig each fifth or sixth ratline first, making sure they don't pull the shrouds inwards. It then becomes much easier and quicker to rattle down the gaps. Derek
- 436 replies
-
- 7
-
-
- vanguard models
- alert
- (and 1 more)
-
Darrel, there's no such thing as too many build logs. Everyone has slightly different approaches and it's great to browse through all the logs on the model you're working on. And logs are as much for the writer's benefit as for the readers - at least as far as I'm concerned. If I didn't record my methods I'd probably forget them between builds! Derek
- 382 replies
-
- 5
-
-
- Vanguard Models
- Duchess of Kingston
- (and 1 more)
-
Superb workmanship Glenn. I think the rounded hatches look particularly good - much better than the flat hatches typically found in kits.
- 778 replies
-
- 3
-
-
- cheerful
- Syren Ship Model Company
- (and 1 more)
-
Glad to help James. Amazing what you can find on this forum! Derek
-
I agree with Gregory - very subtle, and probably finer and neater than you might achieve with the pencil technique. Derek
-
Useful information, thanks Glenn. I shall read through this carefully when I get to the same stage (some time next year!). Derek