HOLIDAY DONATION DRIVE - SUPPORT MSW - DO YOUR PART TO KEEP THIS GREAT FORUM GOING!
×


Some Idea
-
Posts
1,103 -
Joined
-
Last visited
Content Type
Profiles
Forums
Gallery
Events
Everything posted by Some Idea
-
 Hi clogger - wow mate your build looks amazing 🤩. Fantastic job and I hope my finished ship looks a good as yours. I should have said that I never intended to rig my ship purely down to its size. Yours is the first Le Rochefort that I’ve seen rigged as such and it really finishes it beautifully. Maybe I’ll change my mind if I can find a place big enough to keep it. Thanks for sharing your picture 👍
 -
Keel klamper alternative
Some Idea replied to zamboknee's topic in Modeling tools and Workshop Equipment
I'm with you on this Roger - I do have a panavice but my ship never goes into it. I prefer to have it on my lap or in a fixed cradle which is made up of scrap timber. -
That is awesome work marsalv - I don't actually know what the small blocks on the bowsprit are for but you have put them on so evenly and neatly. They must have taken ages to align like that.
- 589 replies
-
- 1
-

-
- le gros ventre
- cargo
- (and 1 more)
-
Wow that is beautiful work 👍
-
A little ripper from Veretas
Some Idea replied to PeteB's topic in Modeling tools and Workshop Equipment
These little planes are great I use mine every time I’m modelling. I put a small drop of thin oil on that piece of cardboard and so far I have no corrosion on mine. -
Check out Kevin Kenny's review and set up of the Foredom tool its very good. I love mine as it has so much torque at very low speed. The best on the market but they are also very expensive. I used a Dremel successfully for many years and although they do the same job the Foredom makes it easier with better control.
-
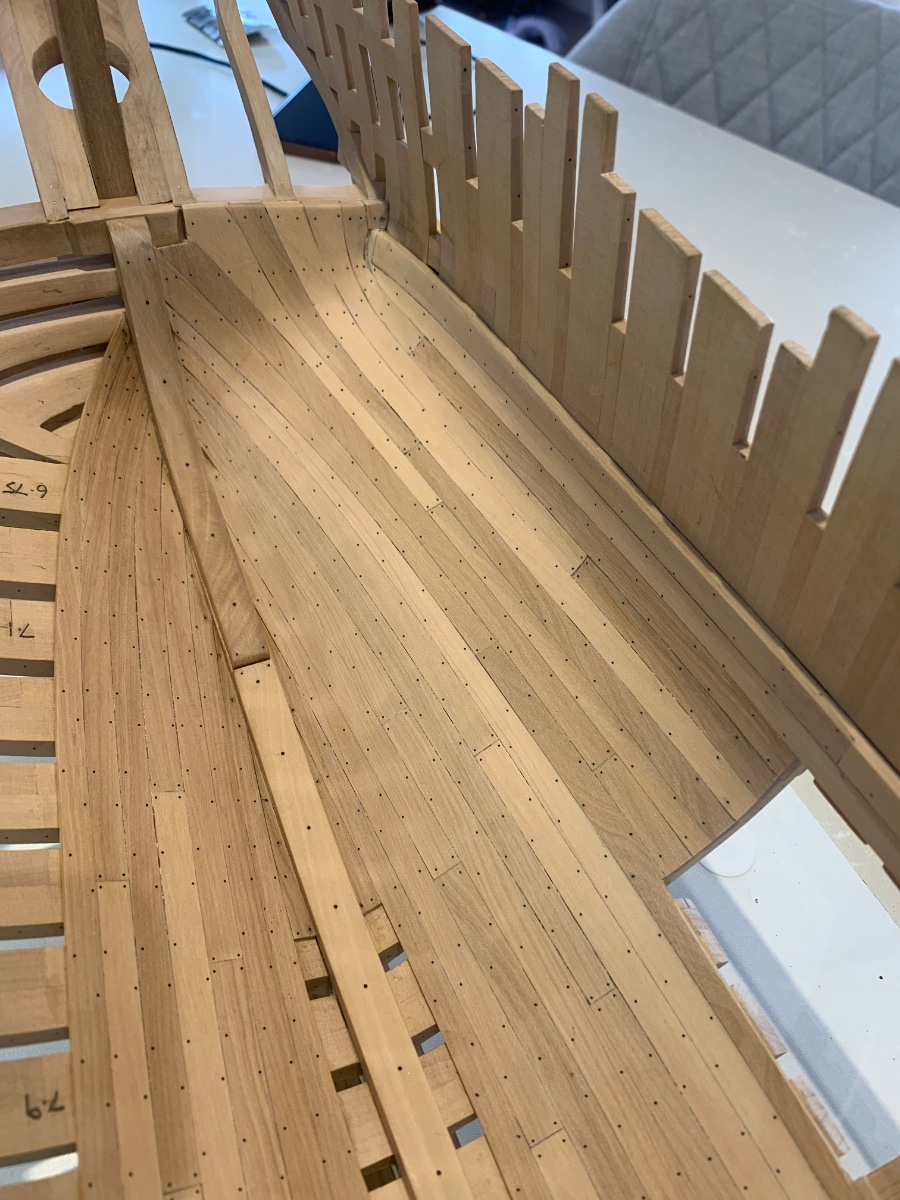
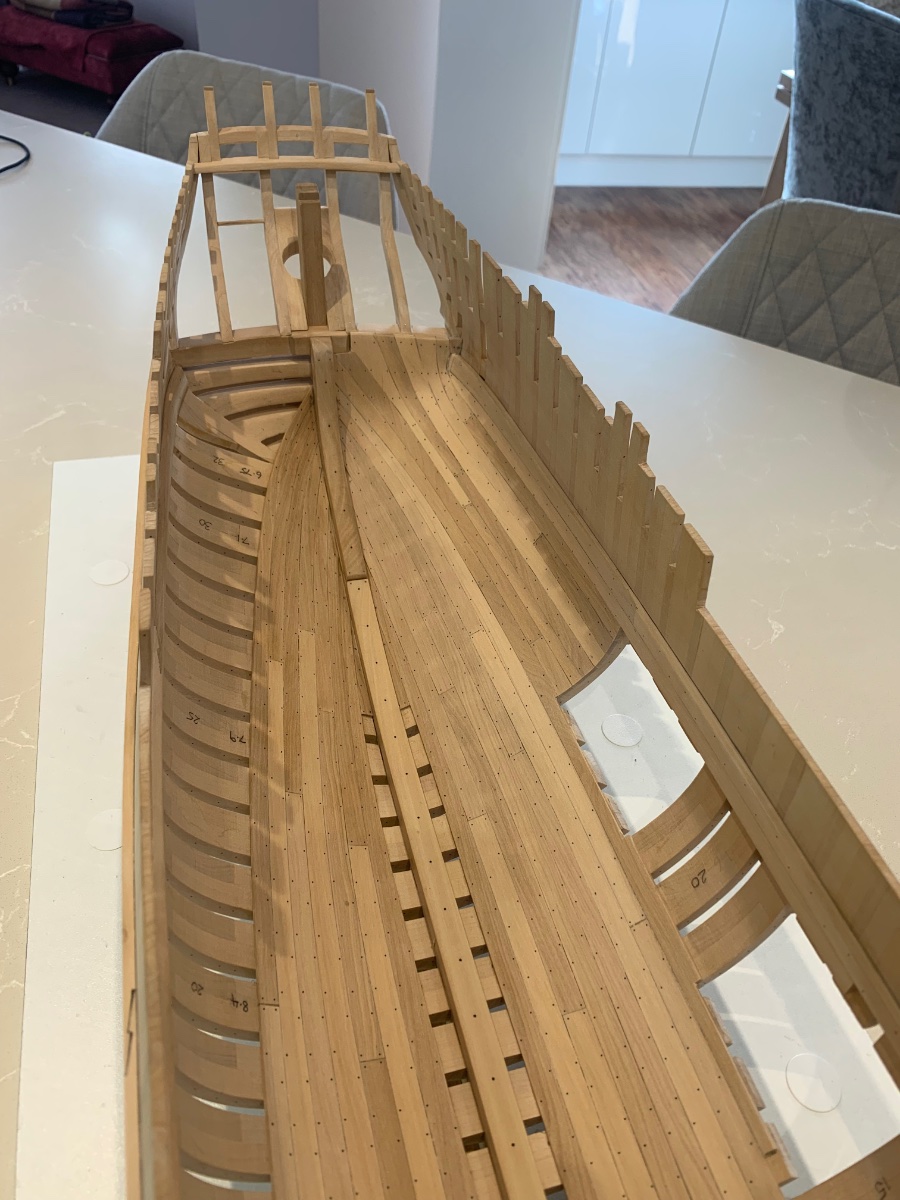
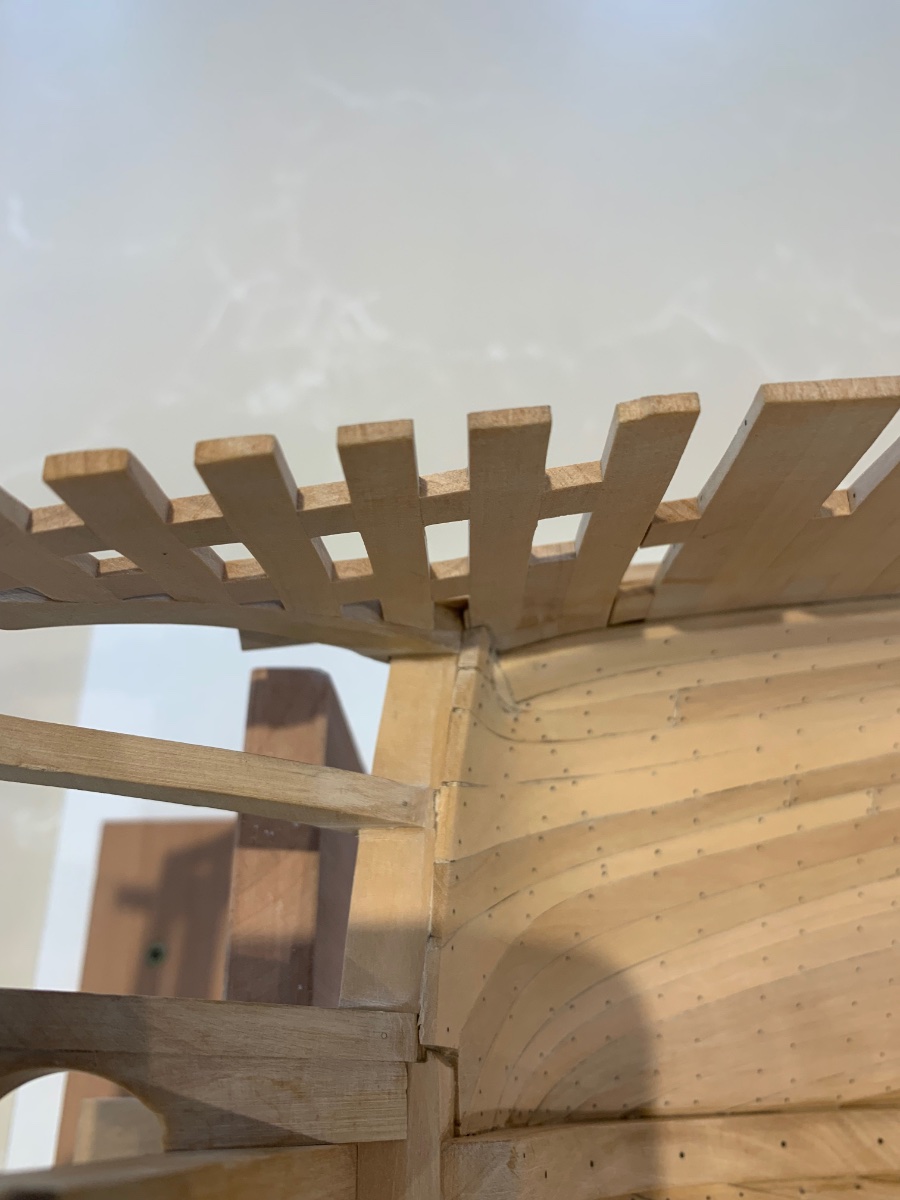
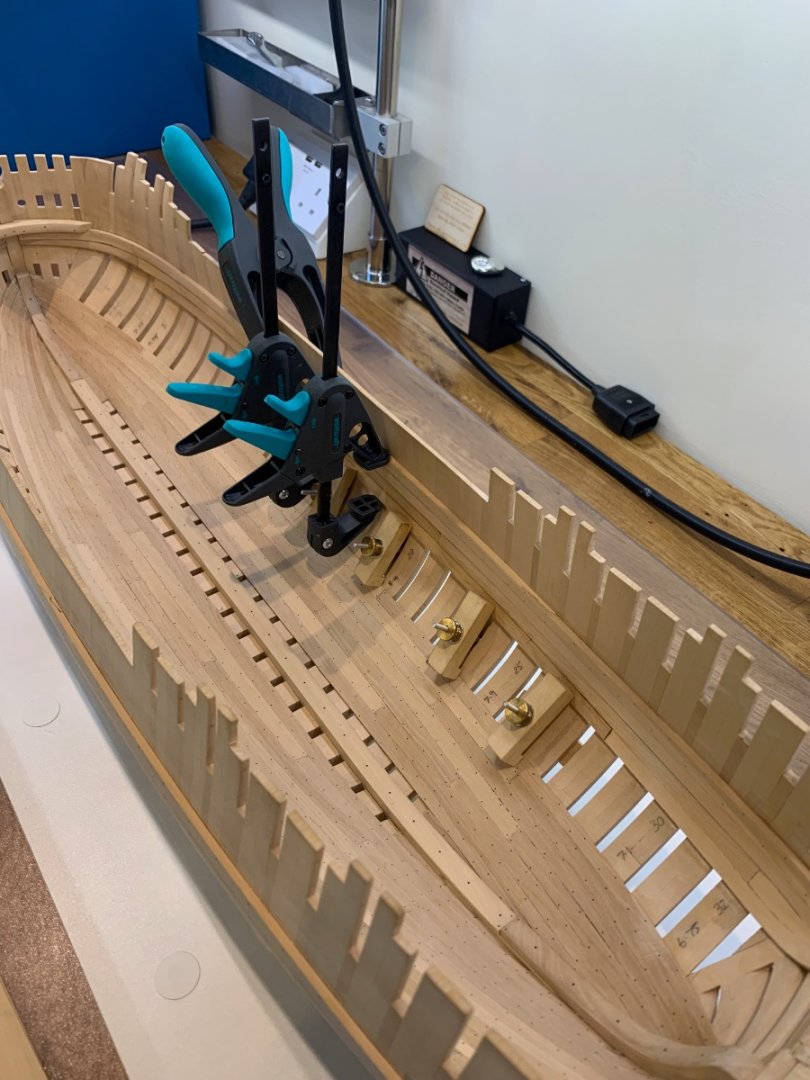
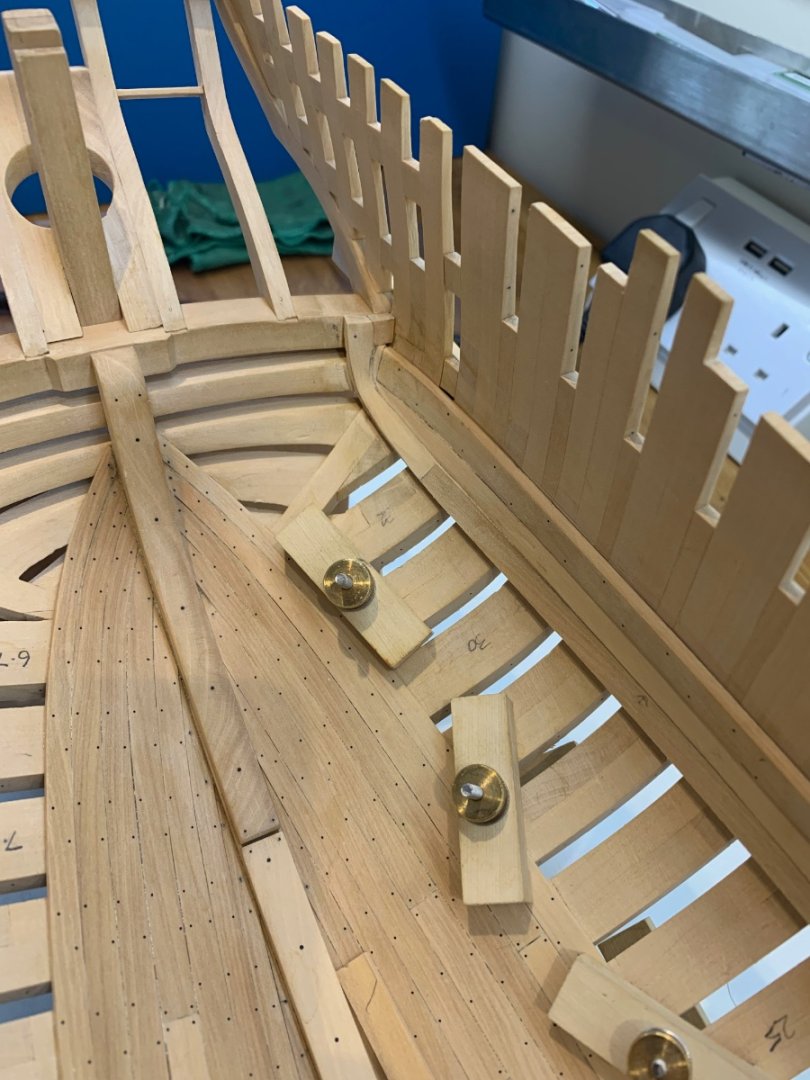
Tobias that is spot on mate 👍 Not really an update but just a few shots of how things are going. I'm working on the bow and stern at the same time to get things done. As I've discovered planking the inside of a hull takes the same amount of time as planking the outside. So a few pictures of spiled planks, clamps and unfinished fitted planks too! The planks look stepped as the thickness decreases as they go down towards the keel. Things are getting easier as I'm learning new skills everyday. Its coming along nicely but these things take time and a lot of measurements - Cheers Mark

-
That is beautiful work and looks like a proper mirror image from starboard to port.
- 72 replies
-
- 2
-
-

-
- Glad Tidings
- Model Shipways
- (and 1 more)
-
😂 I’m making good progress but it’s slow. It’s also getting more enjoyable as I get better at ceiling work. I’ll have an update in few weeks 👍
-
If you look at Chucks video the point that the plank touches his jig has a larger surface area. This would help spread the forces away from a very small focal area when bending. Using a pin would make the contact point tiny and therefore increase the forces in that tiny area. It’s got to go somewhere so the wood will start to lift instead of bend. l had this problem until I made a better jig to bend the planks on and allowed the plank to be bent with less pressure in a very small area. So try making a jig and also make the hold down the same gap as the plank is thick. Cheers Mark
-
Again so cleverly thought out using what you have at hand. I know I’ve said it before but your technique here is fantastic. I also like the way it wastes very little wood in the process. I think your finished result is beautiful. I also think that you don’t need to work on your woodworking skills. You’ve got them already 👍
-
I find this so fascinating as I'm just really getting into the history of ships and I have so many questions. But could someone do me a very simple diagram of why a square tuck would affect the rudder more than a rounded one. I'm sure that once I see a diagram it will all make far more sense to me.
-
This is a really clever technique and it certainly gives me some hope that I will be able to do this when the time comes on my build. Cheers for sharing BW as I would never have thought of using two pieces as you show so clearly above. The end result looks fantastic.
-
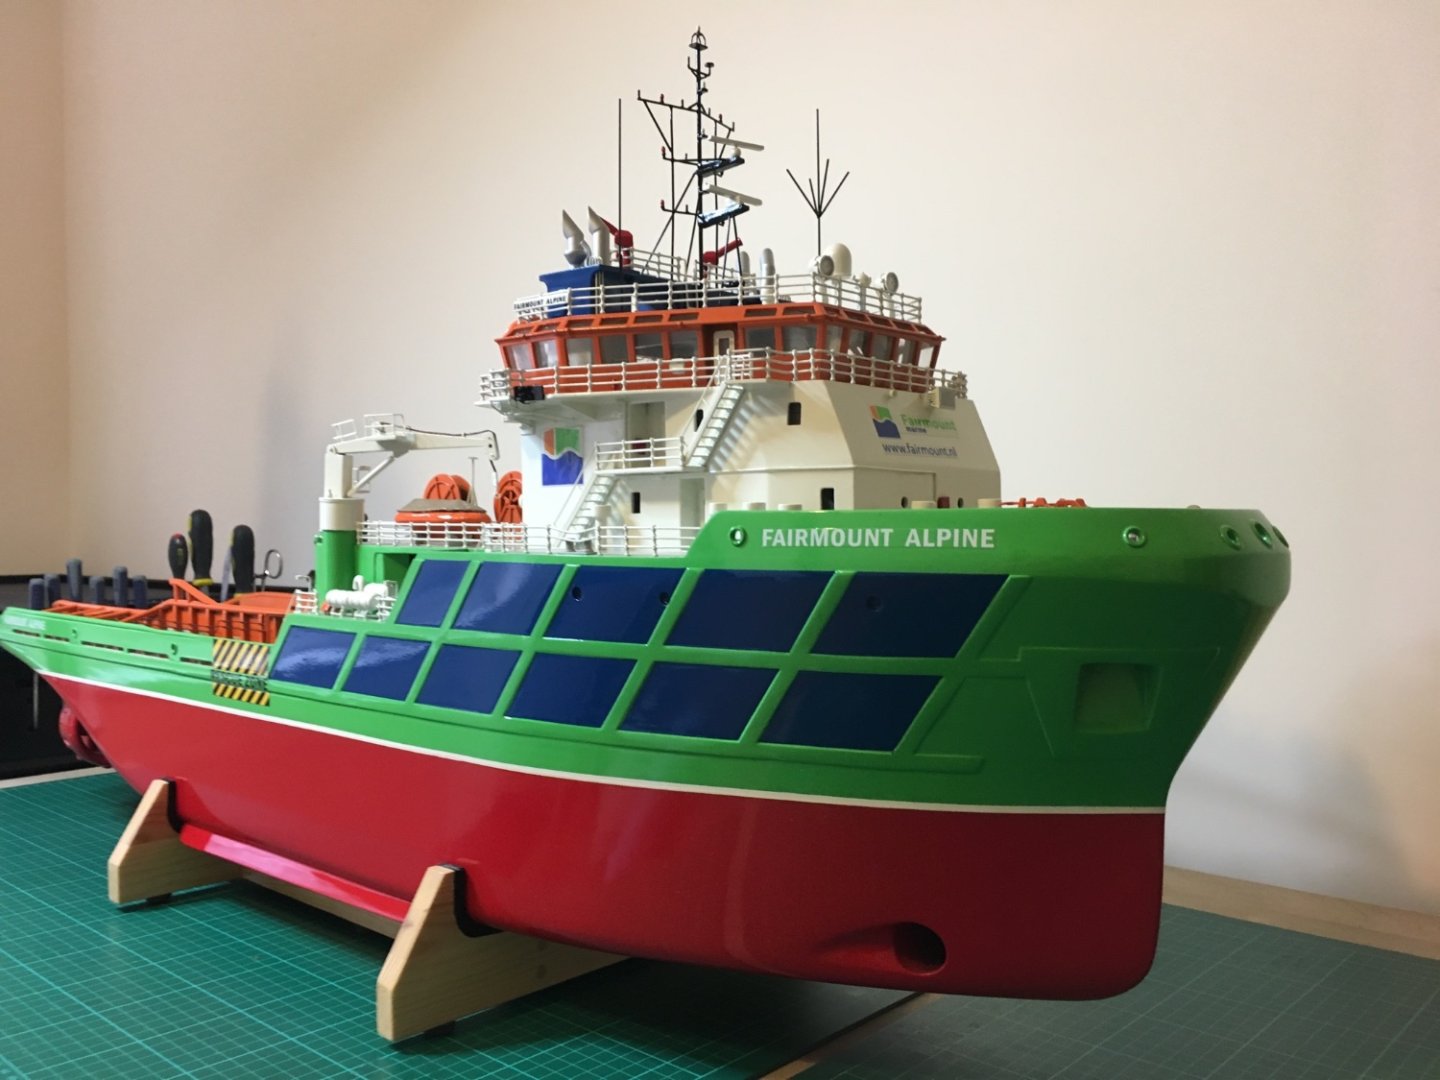
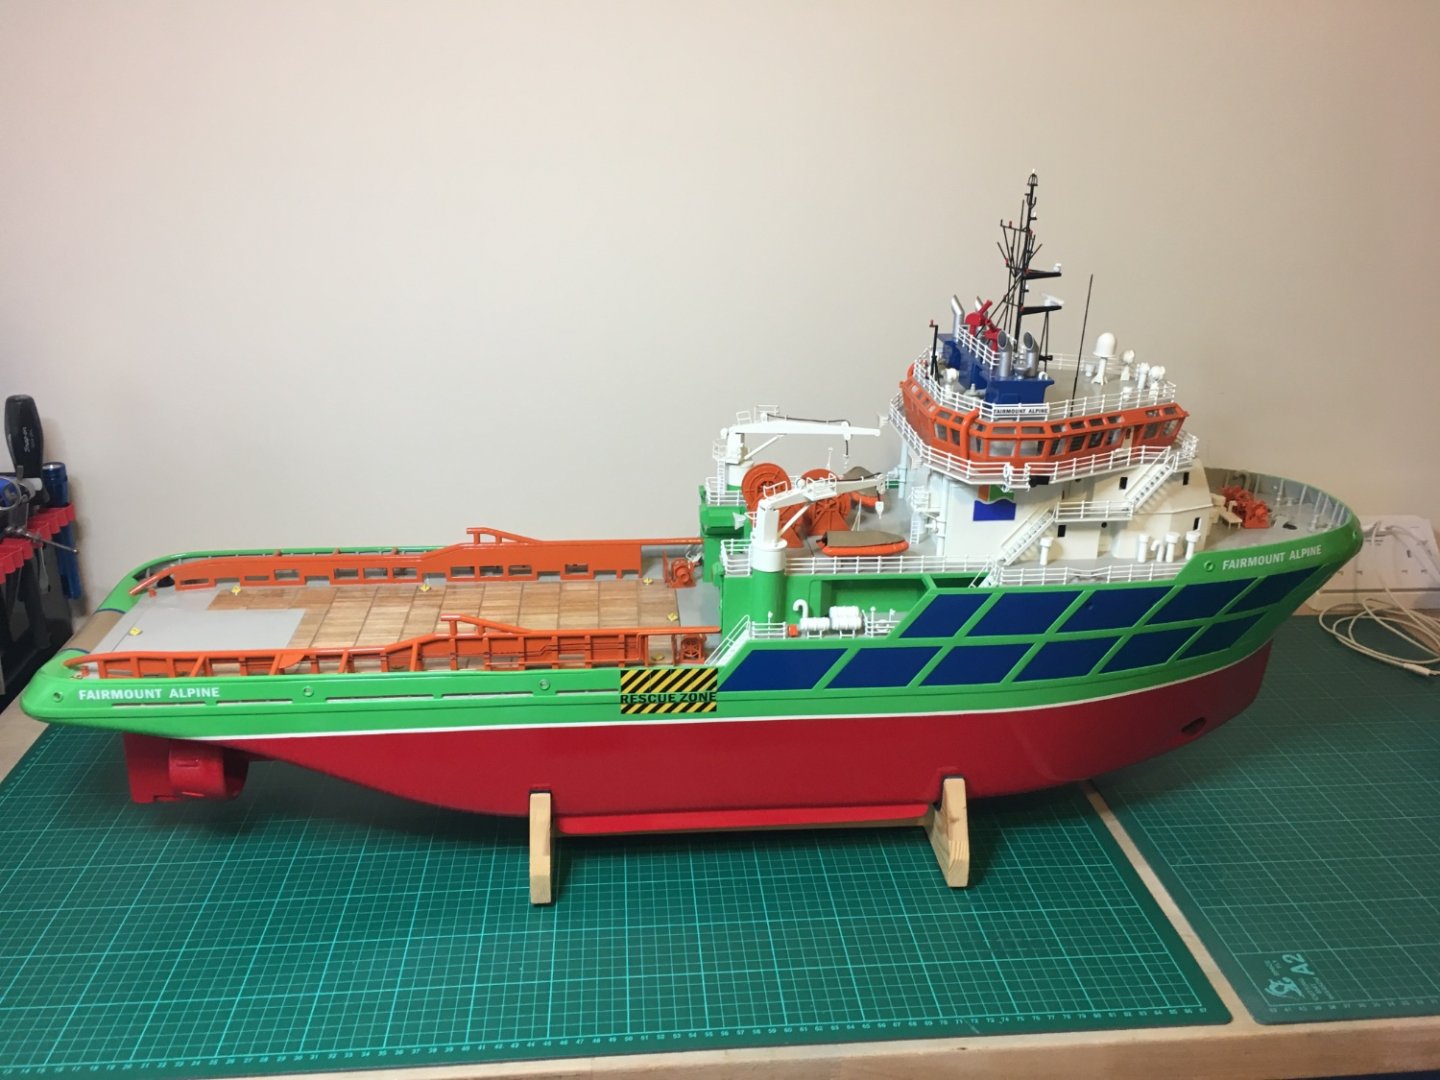
Some great advice but there is no short cut to getting a super smooth finish. I built Billings Fairmount Alpine using epoxy as a sealer and I too used Halfords Matt primer to see the imperfections. Any imperfections were filled using a fine two pack polyester car filler. It just takes hours of patience which you obviously have. The finish you have achieved is fantastic and a real credit to you. Here’s my effort after probably the same hours that you put in. Looks about the same I would say
-
ancre Le Gros Ventre by ChrisLBren - 1/36
Some Idea replied to ChrisLBren's topic in - Build logs for subjects built 1751 - 1800
That really is lovely work nice one Chris 👍 -
Fixing paint job
Some Idea replied to Sam A's topic in Painting, finishing and weathering products and techniques
Hi Sam and welcome to the forum. Thats an easy repair and you have answered your own question. Firstly let the paint already on fully dry and then sand out the marks that you made. As you have an airbrush mask off the areas along the length of the hull that you do want to spray grey. Then just spot spray the area that wants sorting out and your done! -
I echo what Mark has said above but I do mine very slightly differently. I mix very fine sawdust that I make with a Dremel sanding drum into the PVA and use as much sawdust as possible. It kind of turns into a very thick putty that I then push into the gap with a very flexible knife. Its exactly the same thing but it just has a greater content of wood which I would guess at 75% wood - 25% PVA. It does however make it quite hard to sand down as its very tough but the results are pretty good.
-
I've not seen this kit before but it looks very interesting and I like the way the frames are nice and chunky. That will give you plenty to go at when you do start fairing them. Good luck with your build and I'll be following along too.
-
Hang on I’m English maybe I could end them at the…….oh no maybe not just wishful thinking on my part 😂😂
-
giampeiroricci - thanks mate 👍 Tonphil1960 - building in 1/4 scale is nice but it also means that you have to manipulate 1/4 scale sections of wood. I’ve found this very difficult at times and sometimes think that the smaller scale may have been a better option. It just throws up challenges that I have to find solutions for such as the plank lamination in the post above.
-
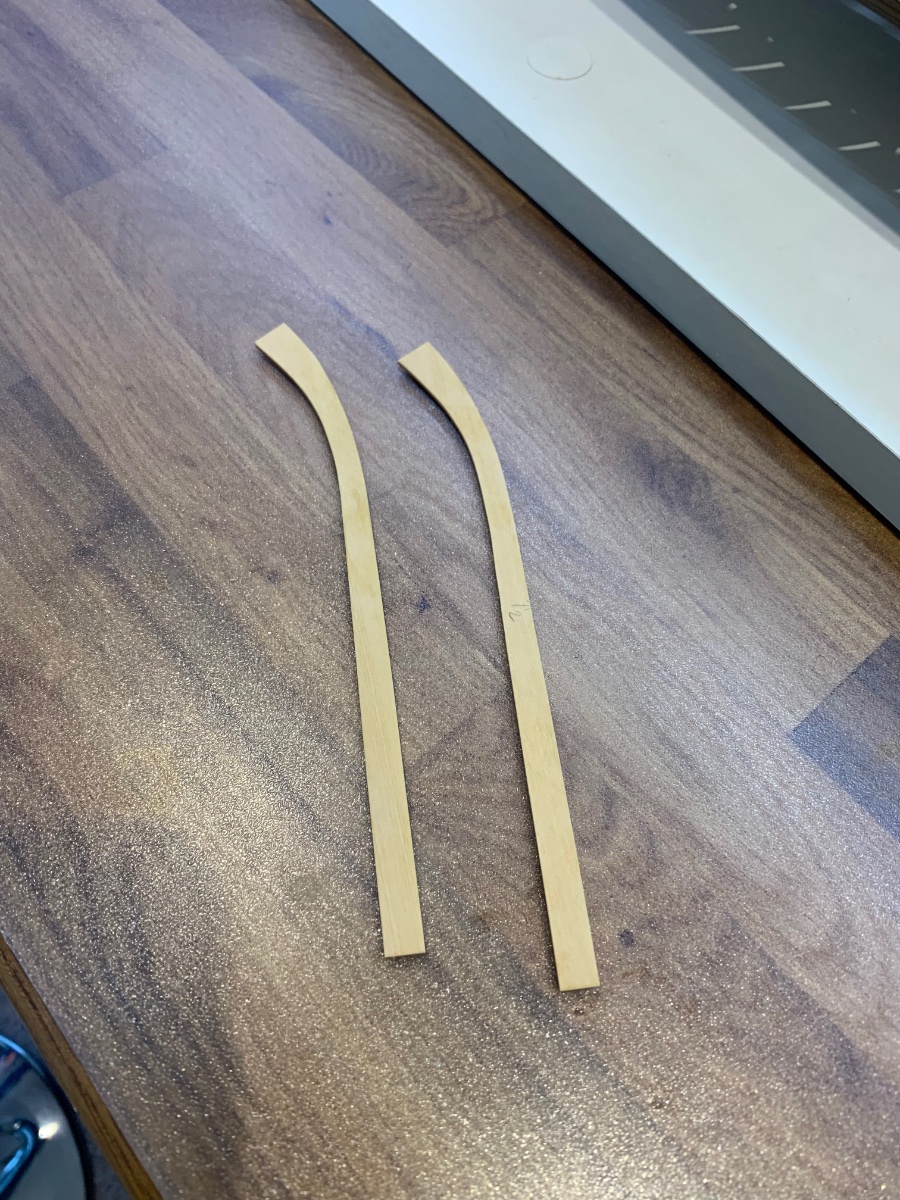
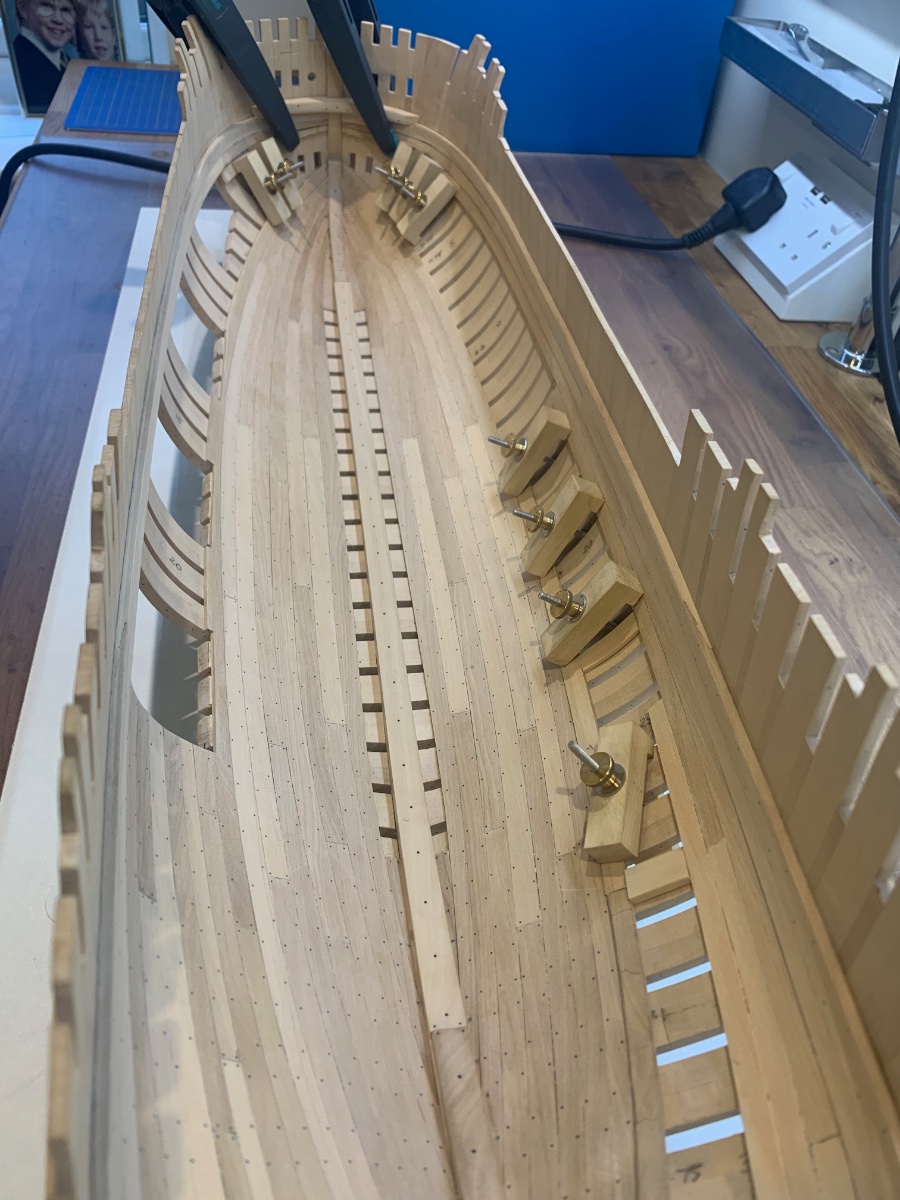
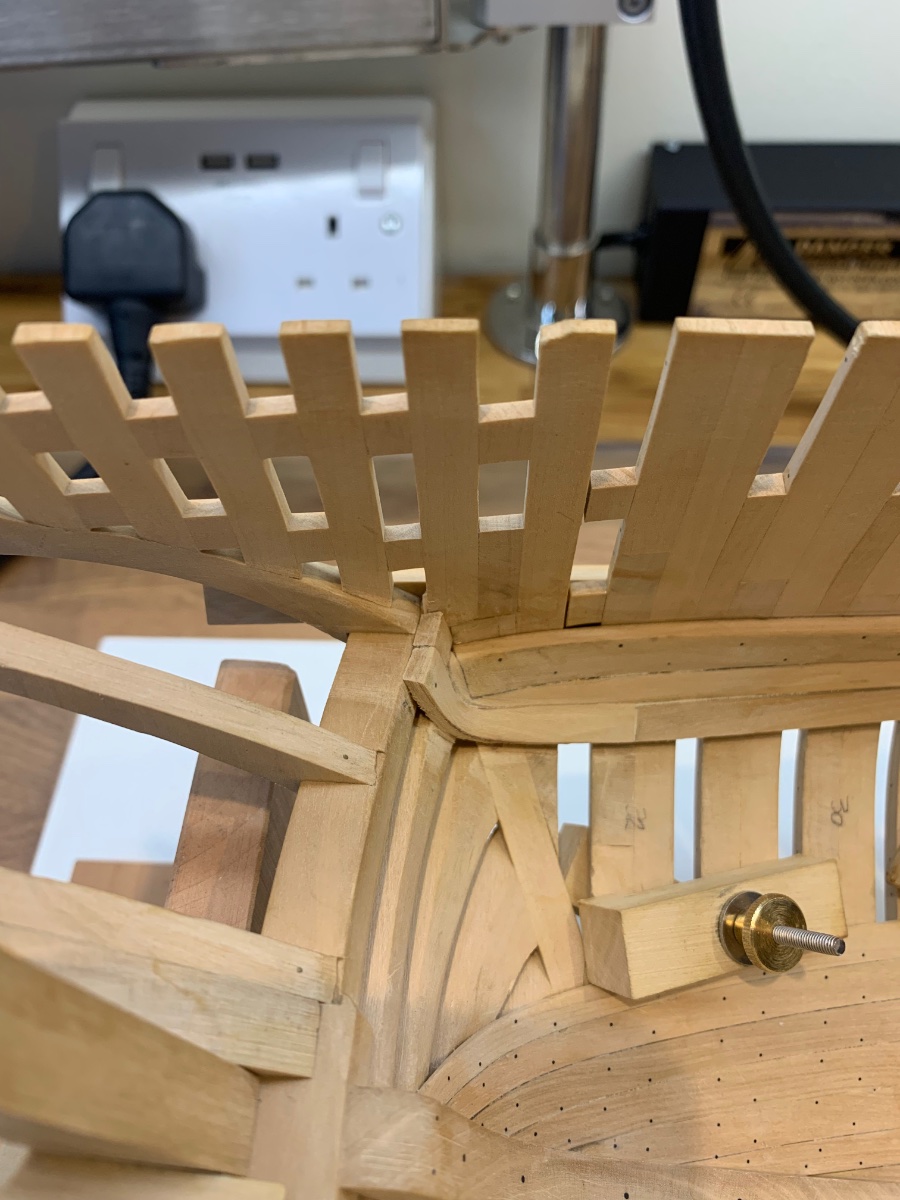
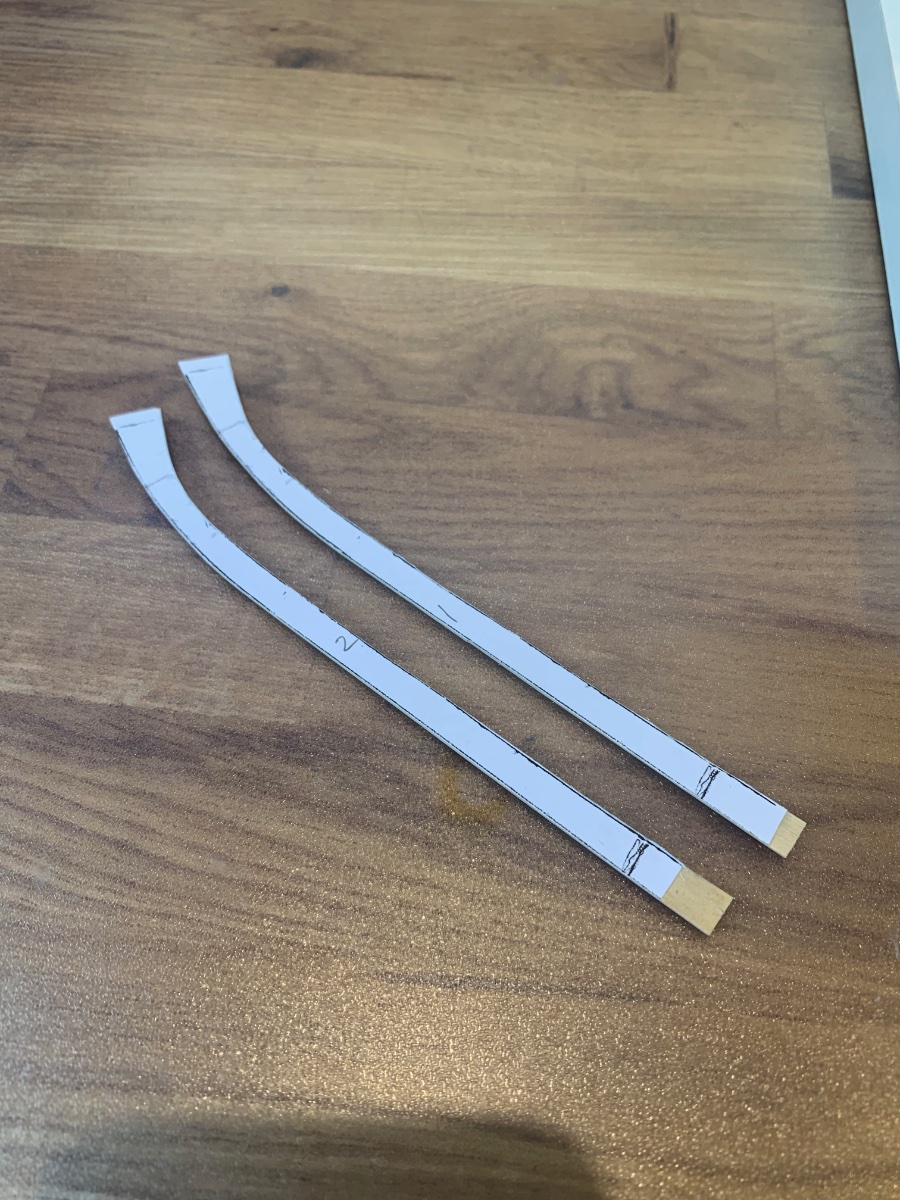
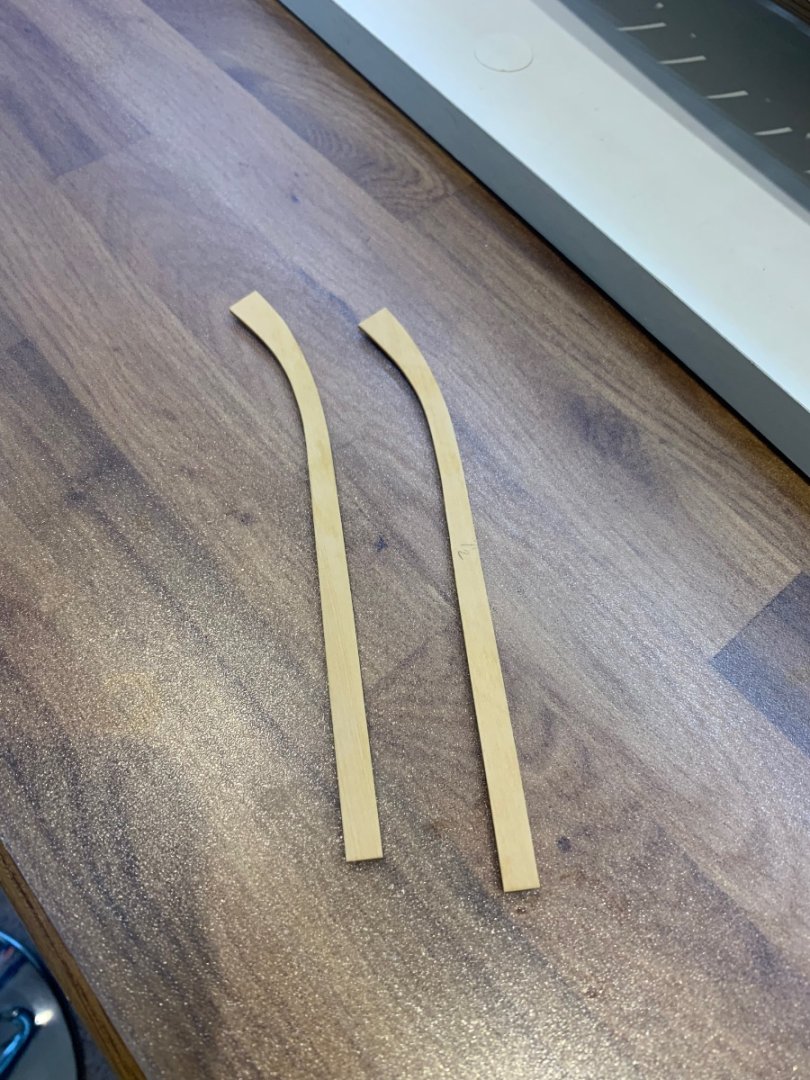
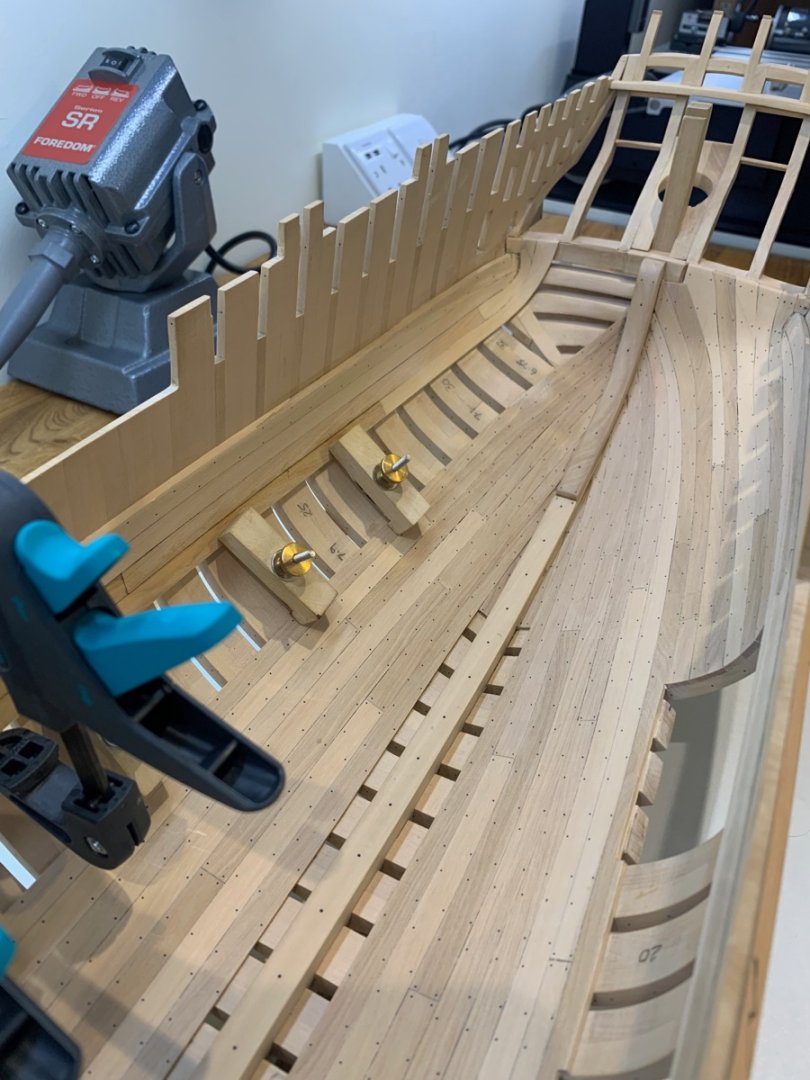
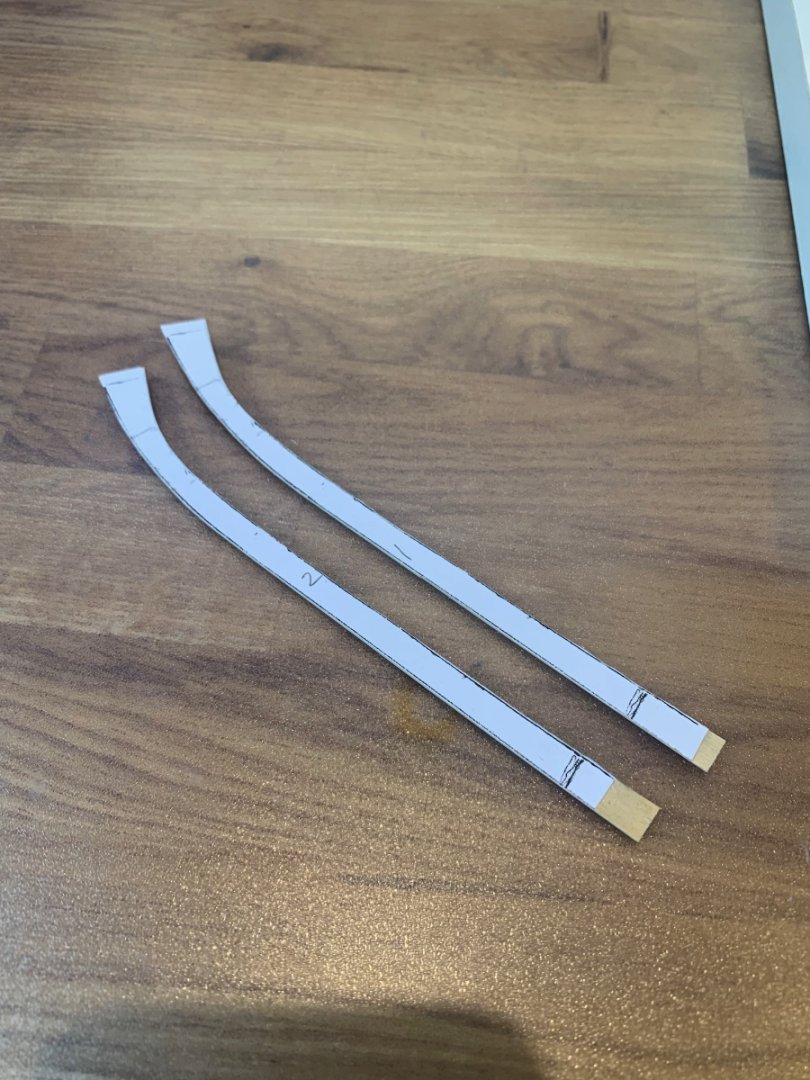
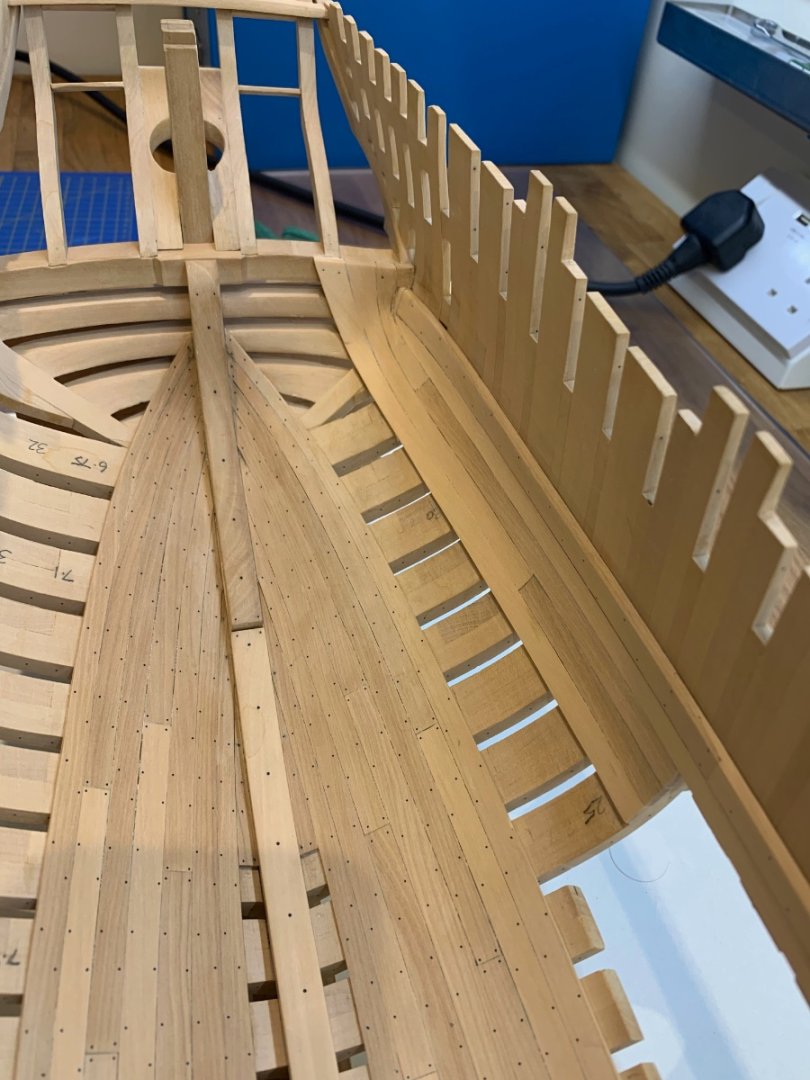
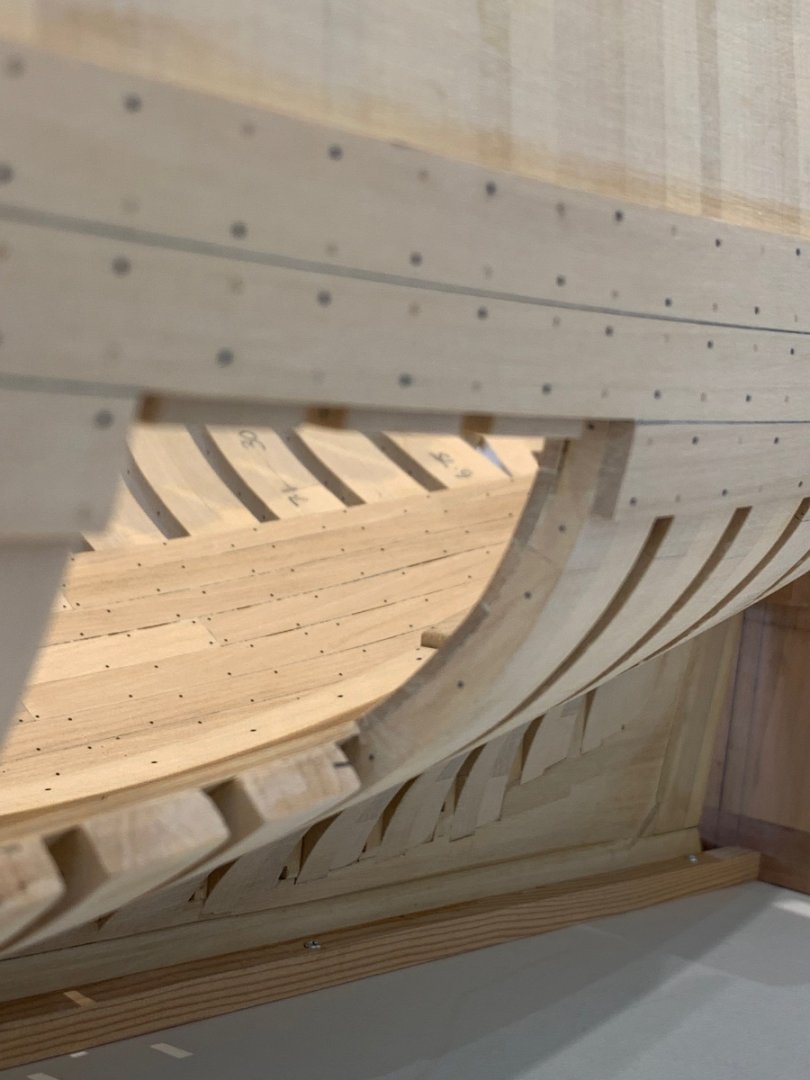
At last I have an update on my build! Thanks for all of the advice given as getting this right has proven to be quite a challenge for me. Firstly I tried carving a plank and it did not go too well and I find that using this method wastes quite a lot of wood. So in the end I used lamination to get around the tightest bends but I also had to spile the planks too. The first 3 strakes underneath the deck clamp had to be made this way before I could revert to solid wood. This plank was made up of 3 layers to get to the correct thickness of 2.8mm The next two planks were made up of 2 layers of lamination the first being 2.5mm thick and the second 2.8mm Now this is my first attempt at ceiling planking and I soon realised that I had made an error earlier in the build. The first lot of planks that I had placed coming away from the keelson had been tapered too much towards the stern. They did not go far enough up the sternson which meant that with my remaining planks I really had to make up some space between them and the new planking on the transom. I had a choice I could either fit a stealer to bridge the gap or exaggerate the flair of the planks on the transom. I decided on the latter and here's the result. Its been a really good learning curve for me and whilst the planking is hardly uniform it is very tight on the frames and transom. Next time I will look at this planking from a completely different angle and get it far more pleasing to the eye. I now need to replicate my mistakes on the starboard side so that it looks symmetrical but I think this will be ok for me to do. Lastly a couple of pictures hopefully showing the planking thickness decreasing from 3mm to 1.8mm as it moves down the frames and across the transom. Cheers Mark


-
The attention to detail is mind-blowing and the production of parts is so precise. Keep the updates coming mate 😎
- 2,696 replies
-
- 5
-
-
-
- heller
- soleil royal
- (and 9 more)
-
I know that others have said it but - wow that is incredible! If the background was removed from the photo I would say it's the real thing.
-
Tilting mount for Proxxon Vise for MF70
Some Idea replied to ChrisLBren's topic in Modeling tools and Workshop Equipment
wefalck thats a really nice solution too thanks for sharing mate!