HOLIDAY DONATION DRIVE - SUPPORT MSW - DO YOUR PART TO KEEP THIS GREAT FORUM GOING! (Only 36 donations so far out of 49,000 members - C'mon guys!)
×

John Maguire
-
Posts
157 -
Joined
-
Last visited
Content Type
Profiles
Forums
Gallery
Events
Everything posted by John Maguire
-
 Thank you Elijah. Thank you for the LIKES, folks. A pause of a couple of weeks for Raspberry Pi projects and a VPN setup between Seattle and Maine. Those events are under control and back to the shipyard. At my rate of advance, it continues slow and deliberate. The steam box is working well for my edge bending. I have redone the plank mapping fore 'n aft. Fifteen additional strakes to go. The bow area looks weird. I hope it'll become clear to me a I get closer. Dropped planks don't look apparent, but my eye is inexperienced. Aft, I believe a stealer is in store. The turn by the rudder post might be a logical place. Respectfully submitted, John
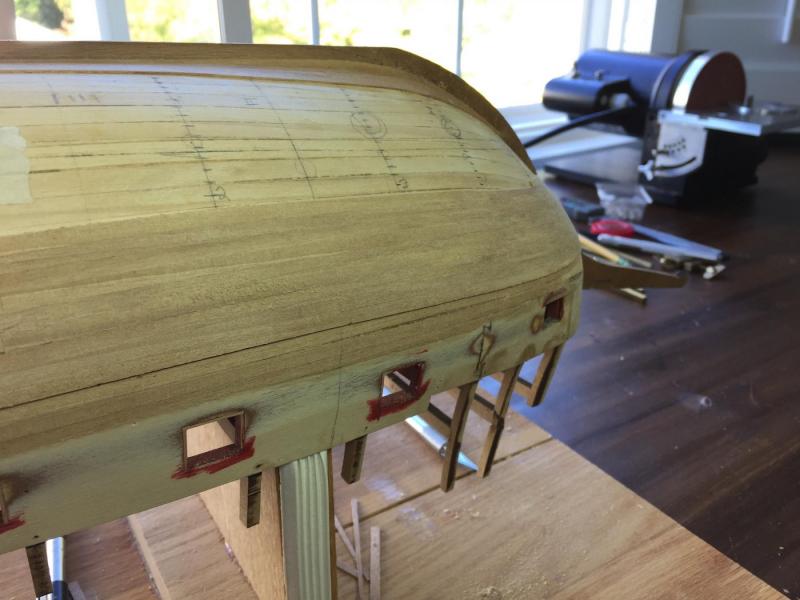
- 194 replies
-
- 11
-

-
Thank you Joe & Doc and the LIKEs . . . It is slow going but the edges are to my satisfaction and bending for the bow curvatures is no longer an issue. My initial edge bending was a serious contest to try to prevent or minimize wrinkling. The steam box makes it easy and a complete no brainer . . . Respectfully, John
-
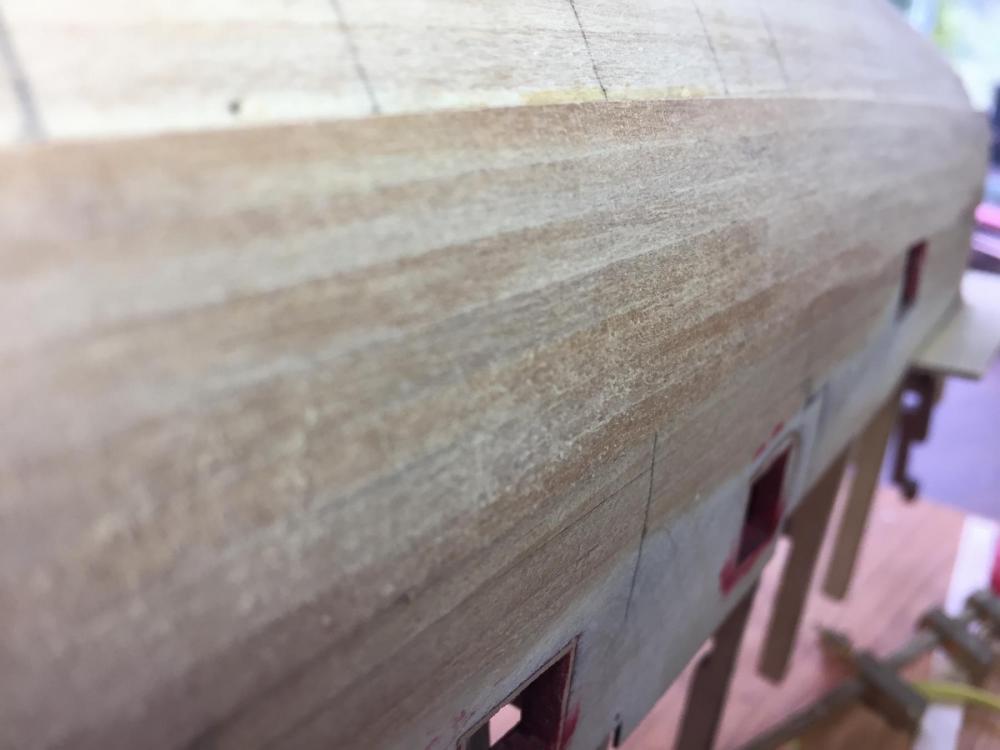
Thanks Doc, Joe and the many LIKES . . . . Just a quick update to show I haven't fallen asleep on this, doing a couple to three hours a day. With the number of clamps I have and the need to let the PVA set awhile makes for a slow rate of advance. I prefer the slower setting glue to allow working time with the planks. Of particular note is how well my steam box is working out. Edge bending to the required radius is now easy, quick and produces wrinkle free bends with no effort and near zero spring back. I have only done a little preliminary sanding in the bow where the bending is most acute. The seams are tight and only a small number of black lines. Perhaps finish sanding will help that. The hull sides beyond the bow are progressing better than the initial attempt that I tore off because of loose seams. At this point on both sides I have ten of the planned 28 strakes. Respectfully, John

-
Another museum piece in the making, Doc . . . Respectfully, John
-
Wow Elijah, you are looking GREAT . . . . Respectfully, John
- 701 replies
-
- 4
-
-
- phantom
- model shipways
- (and 1 more)
-
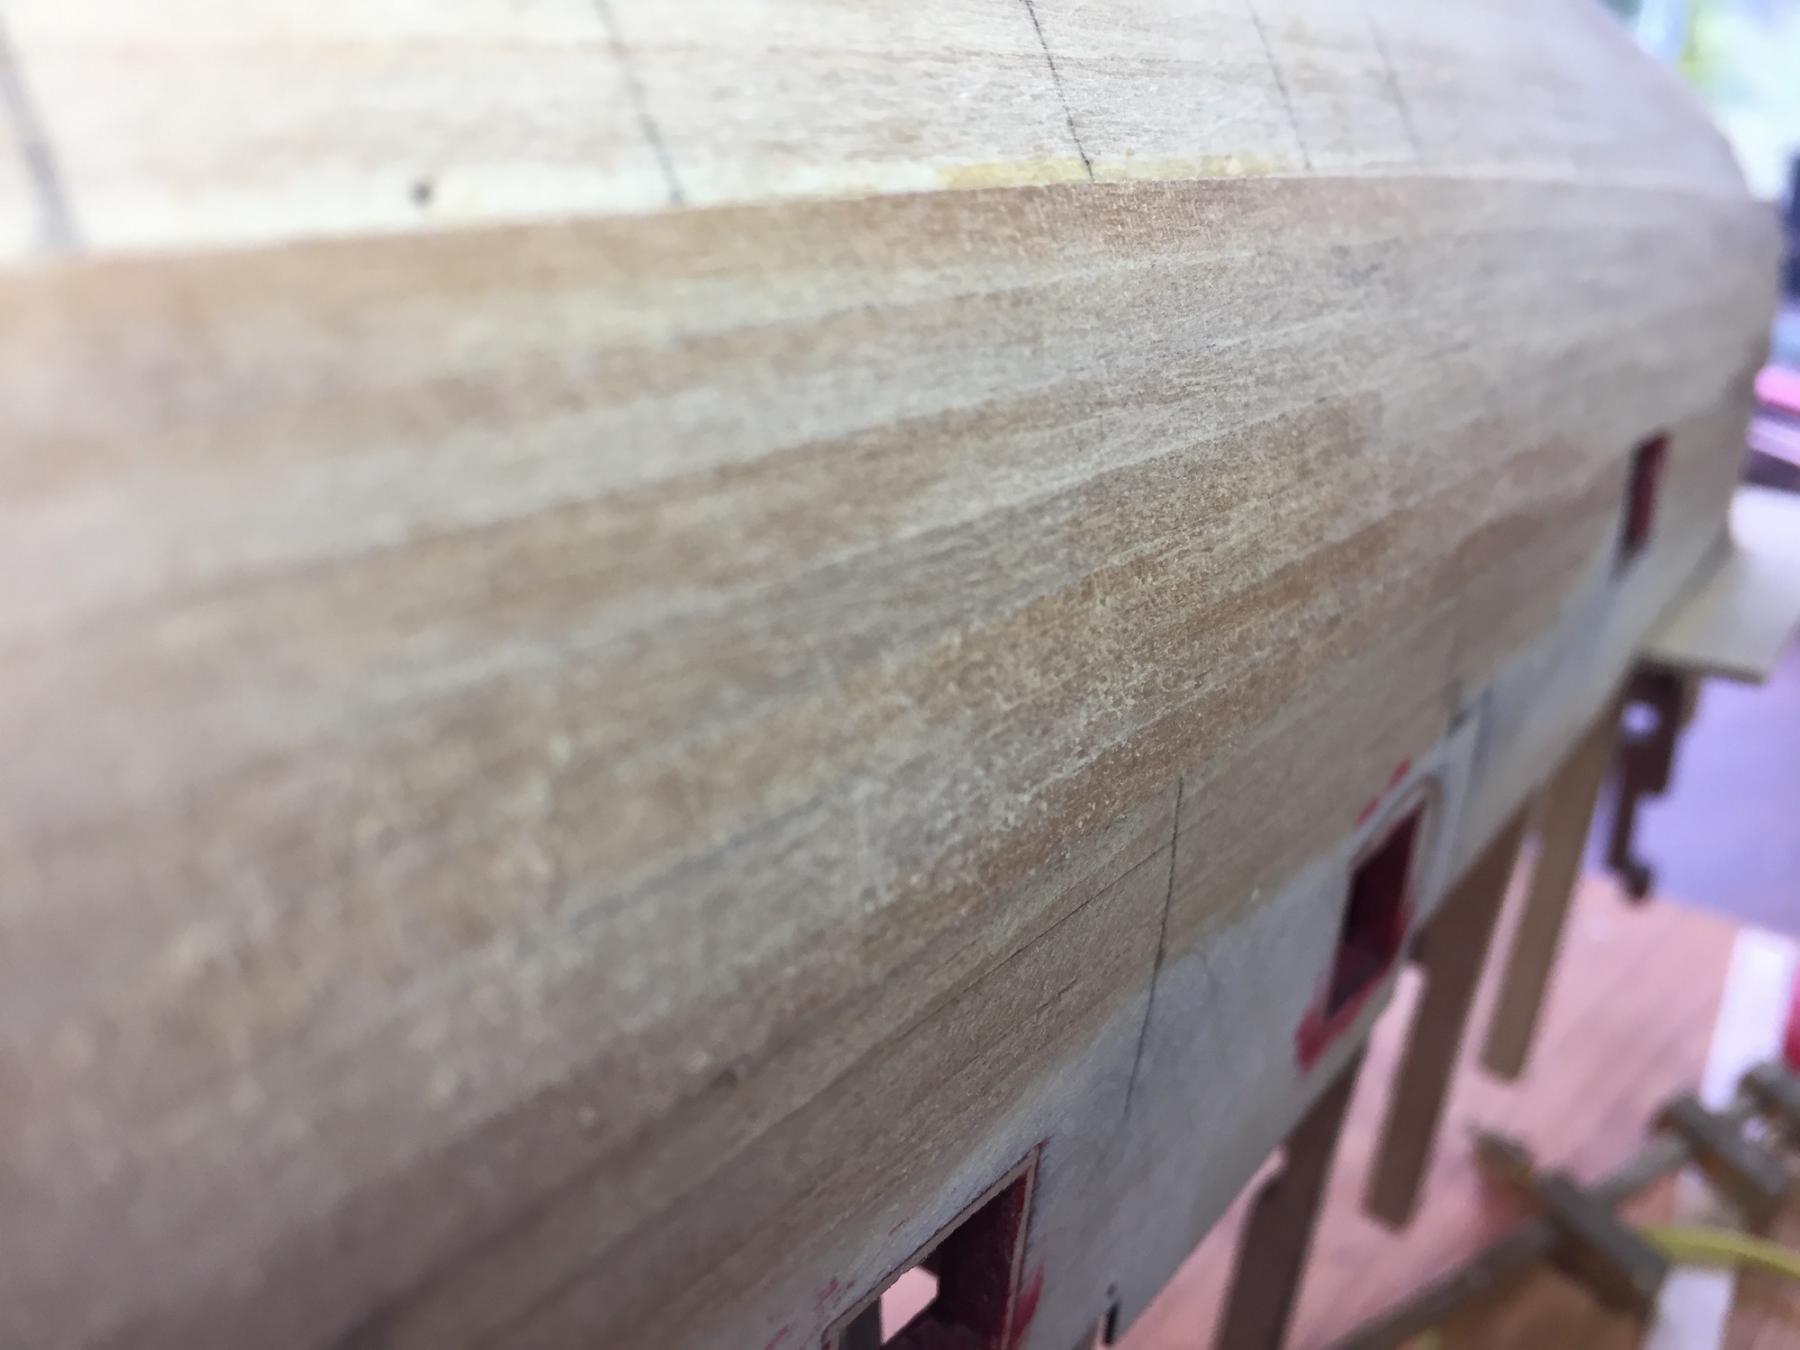
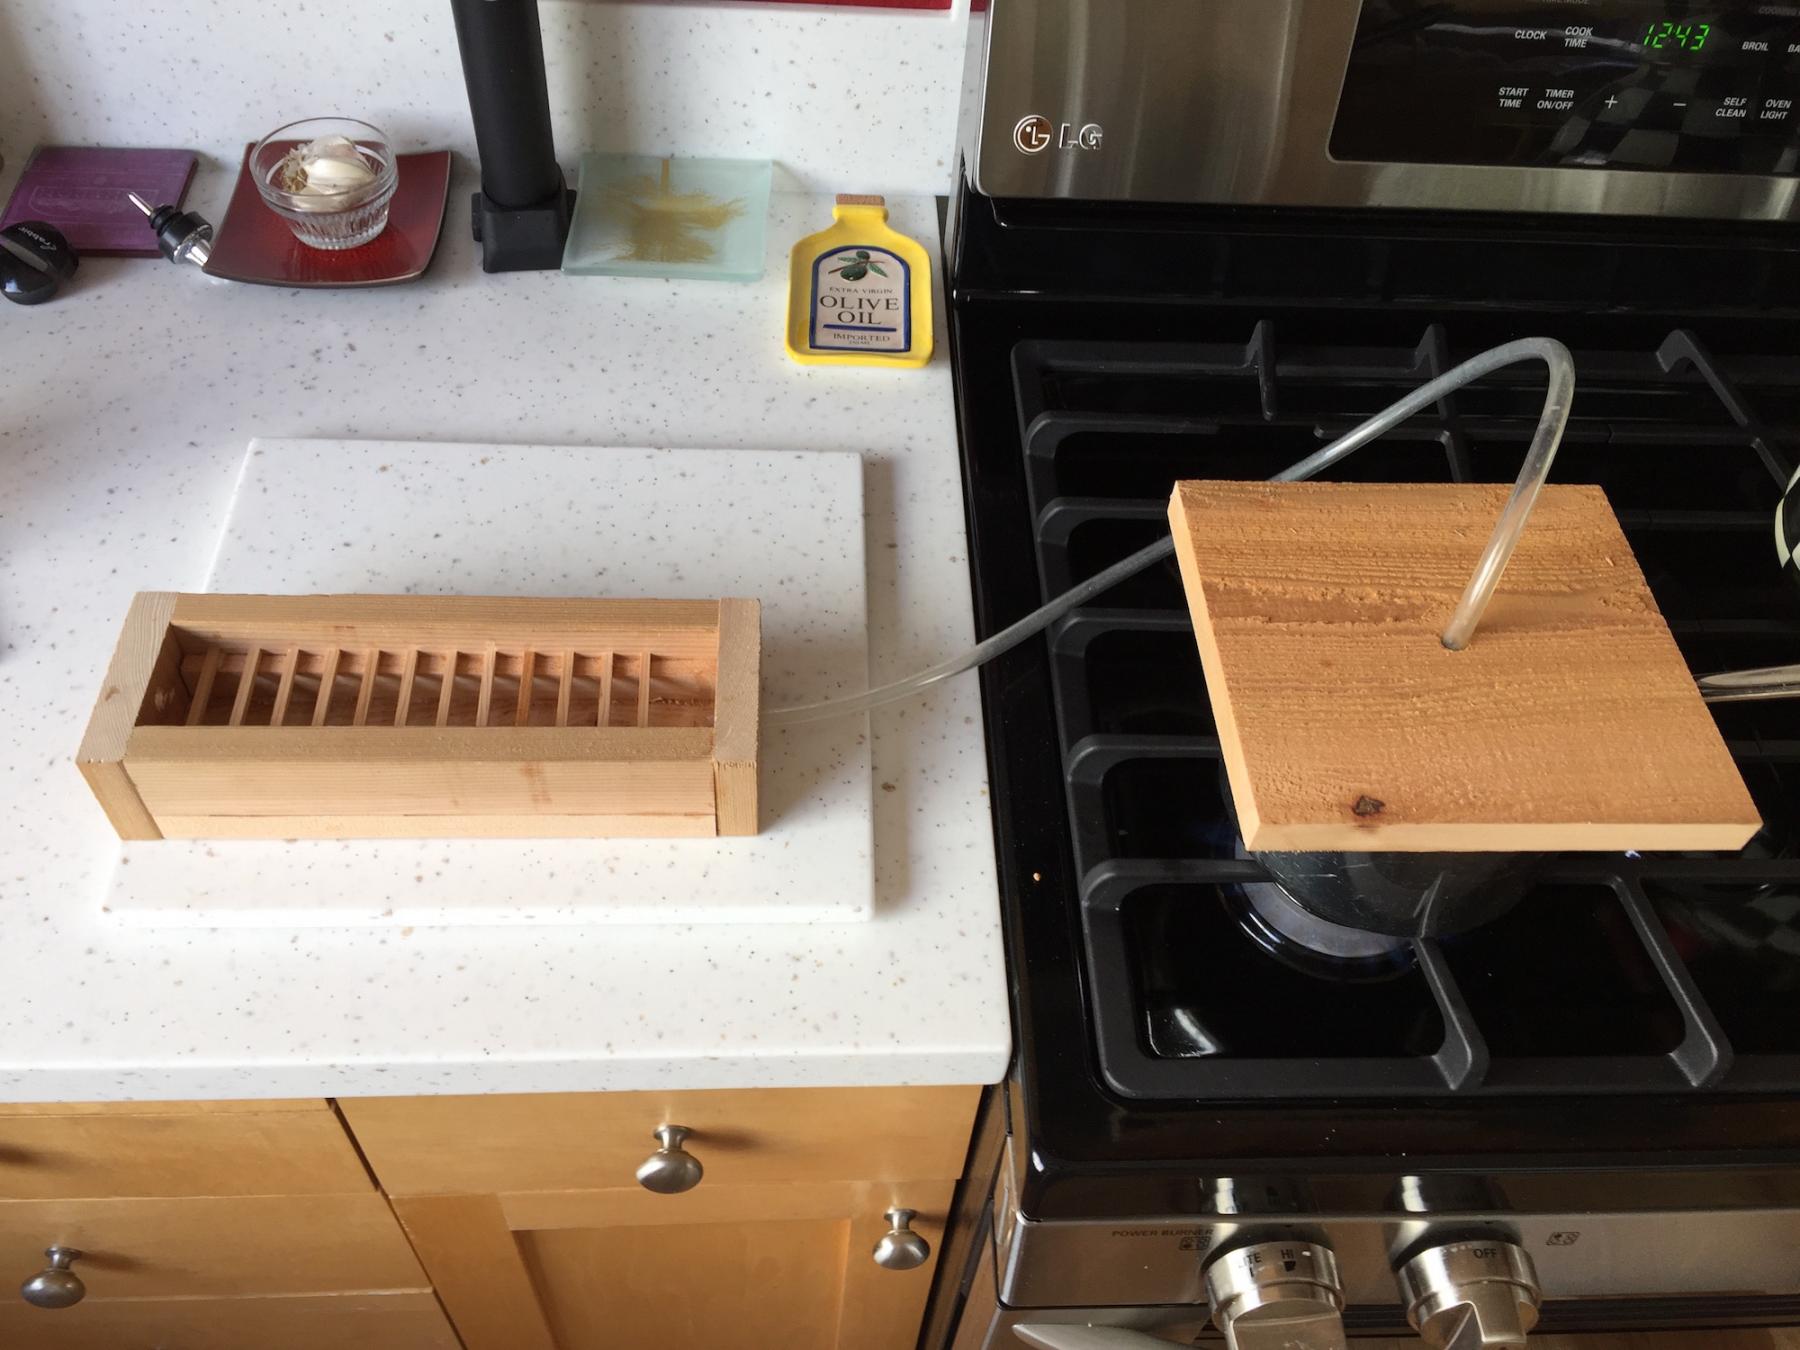
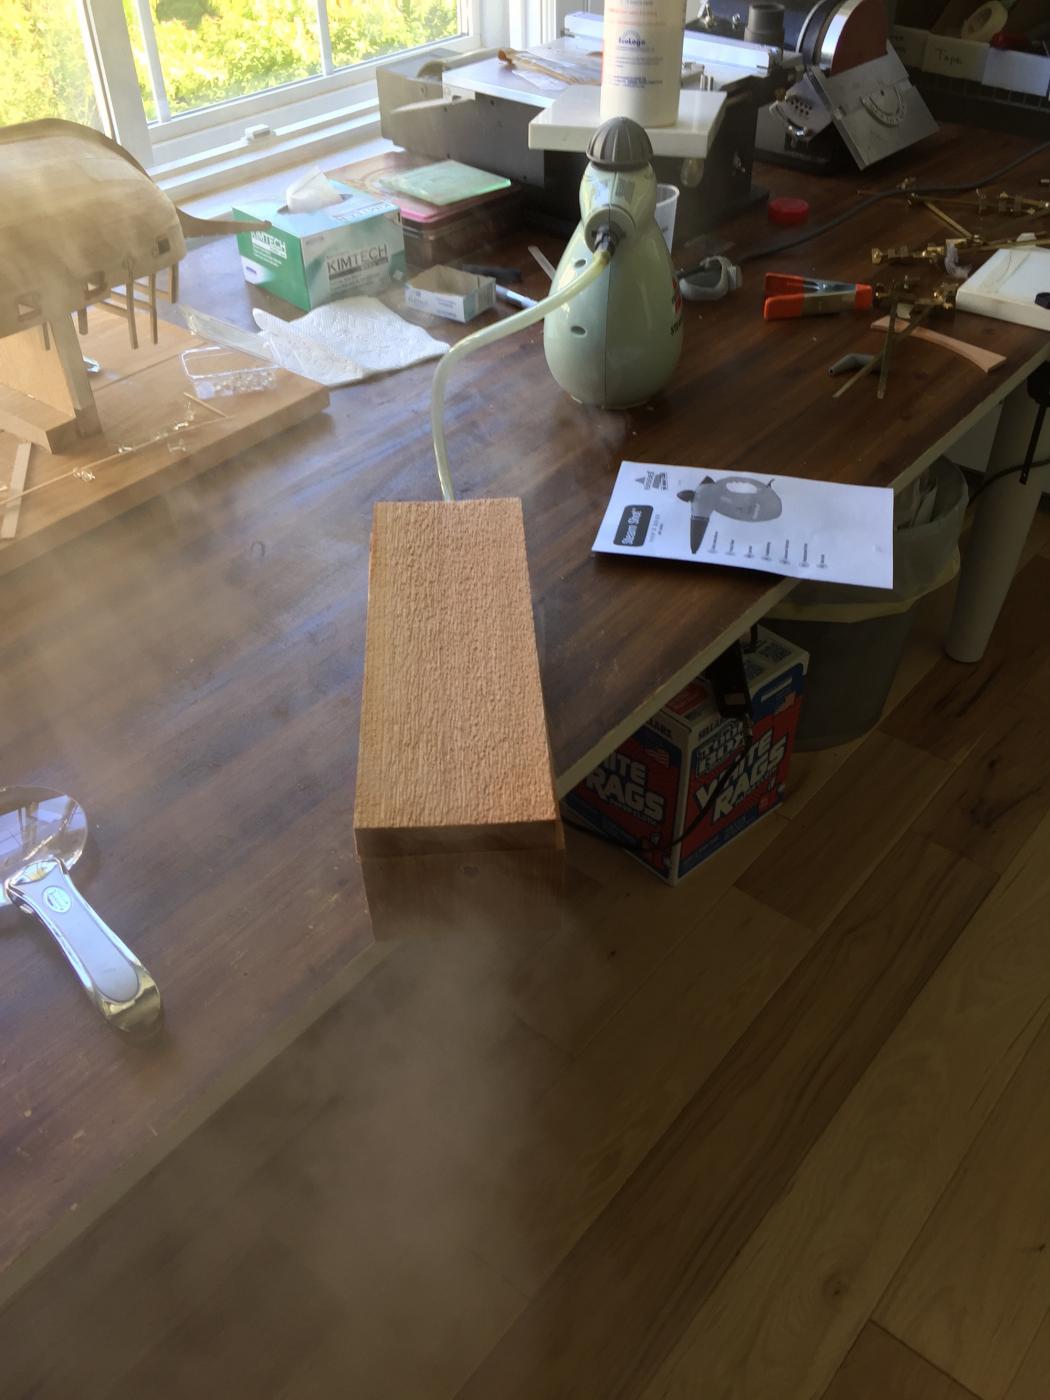
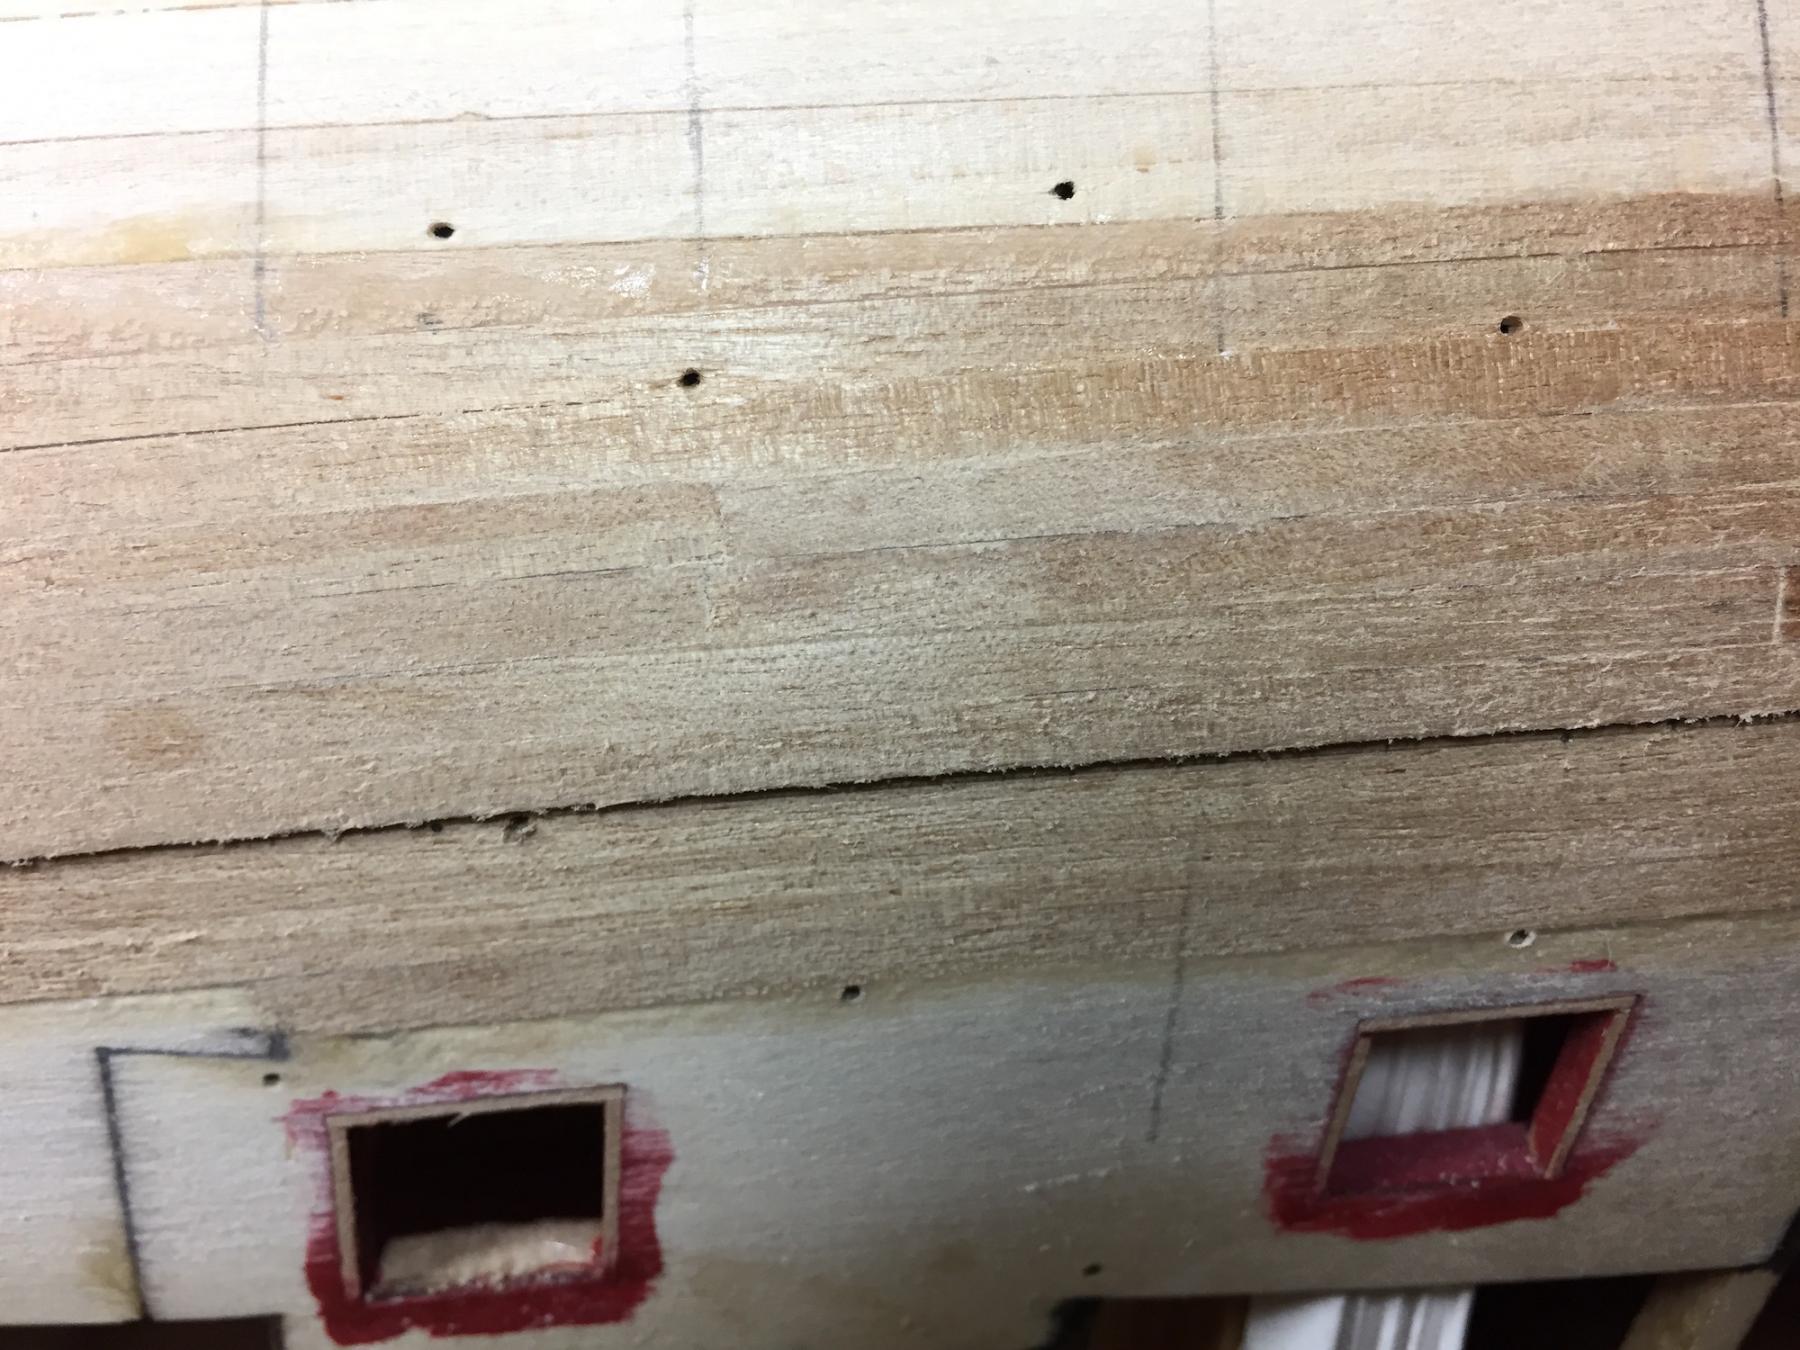
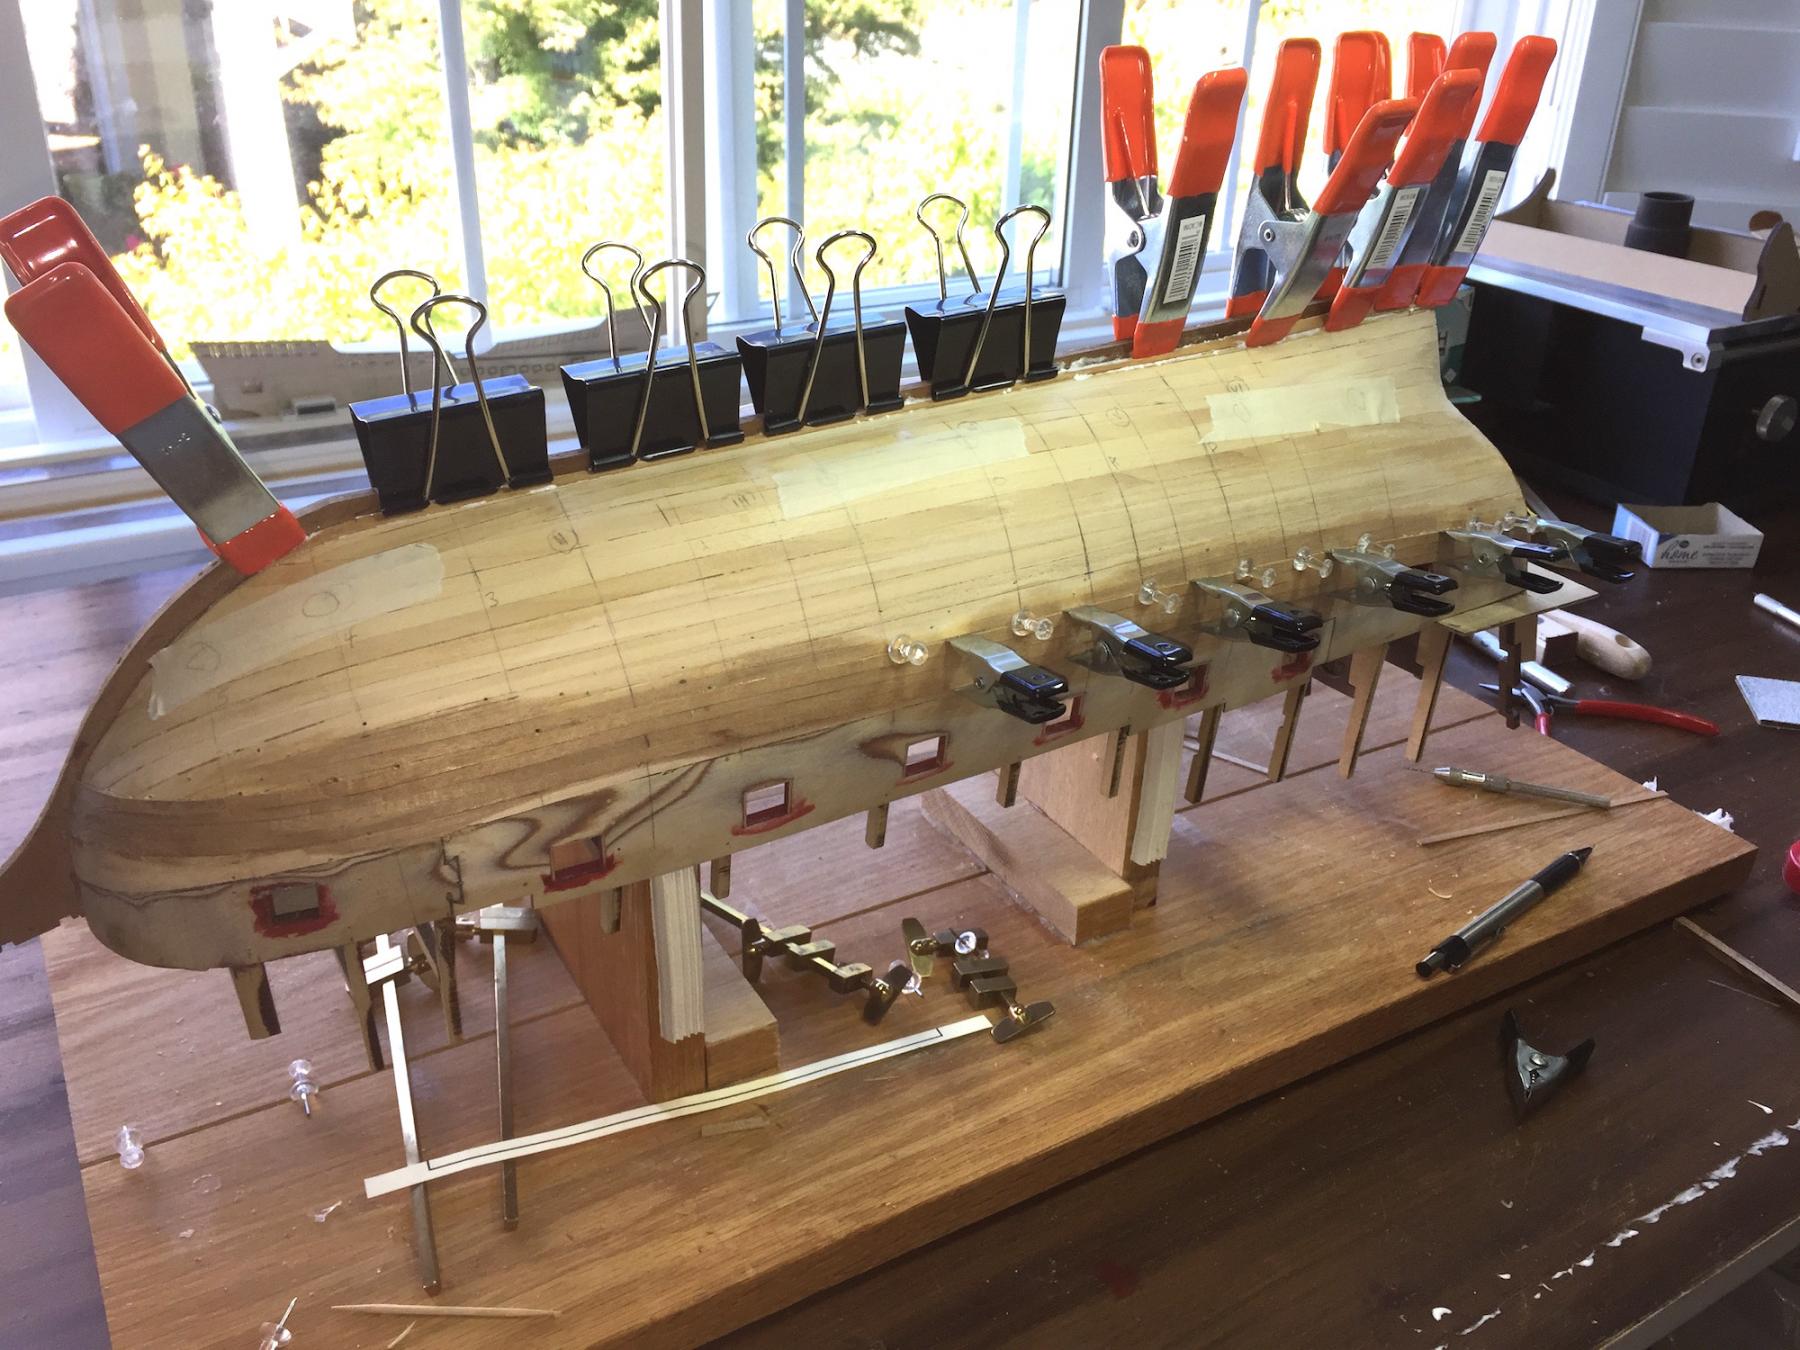
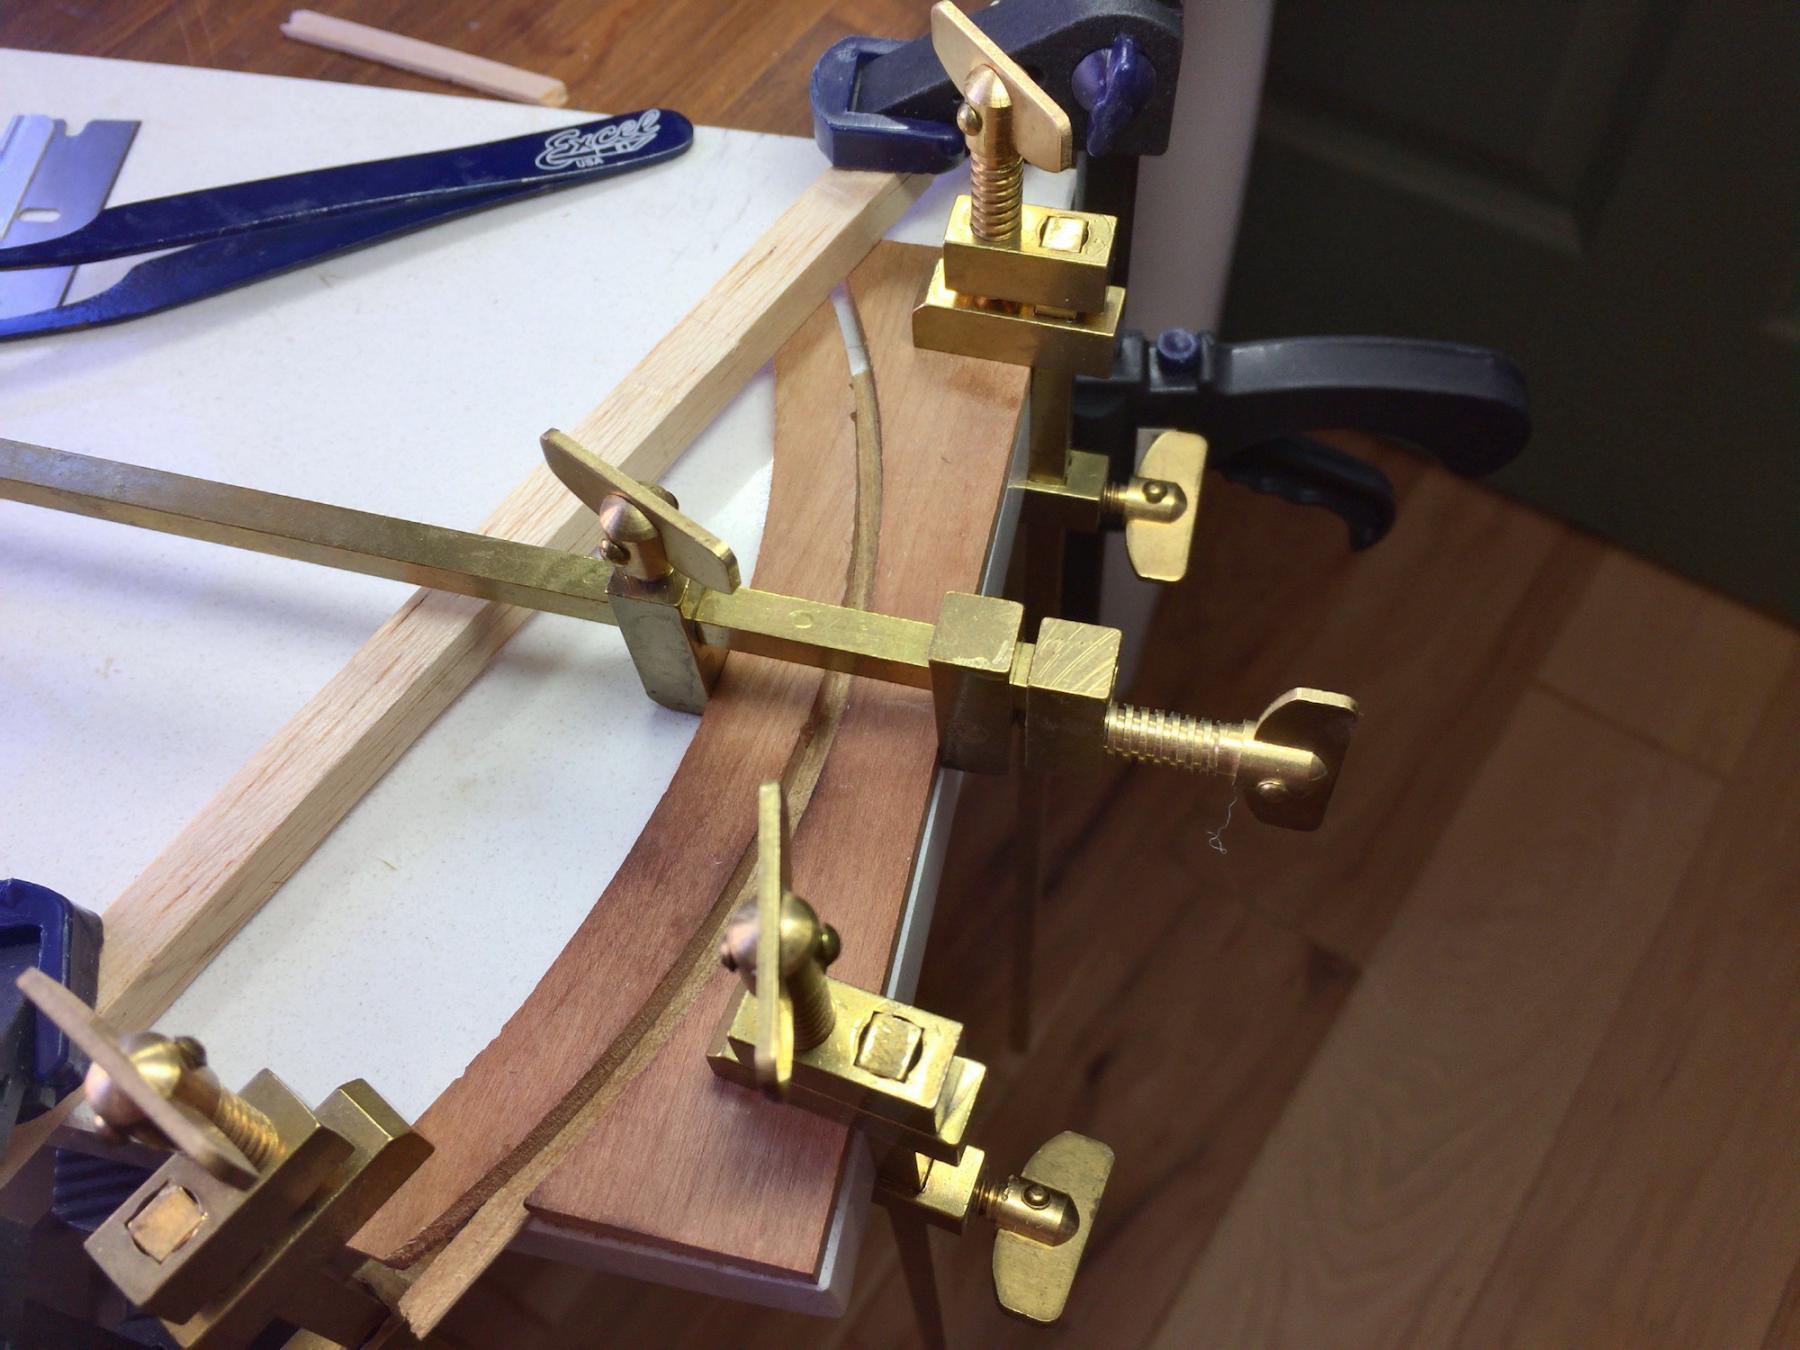
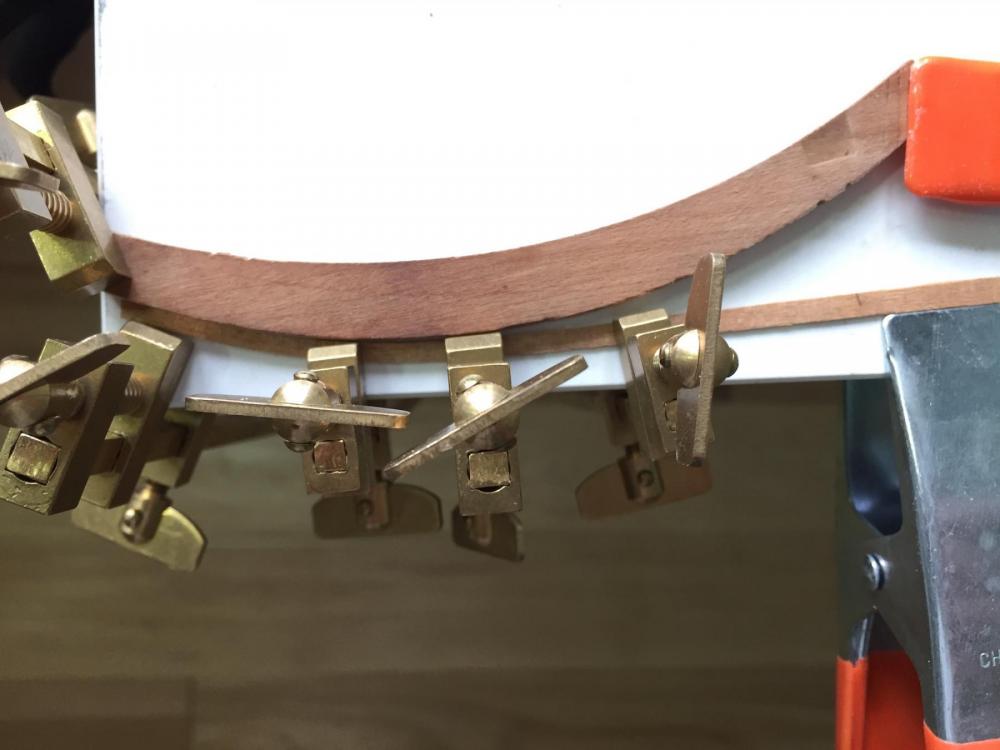
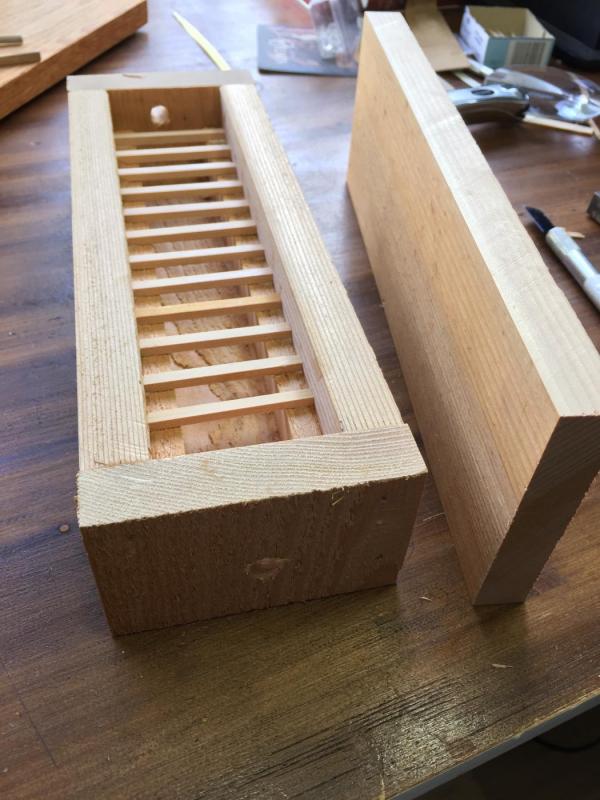
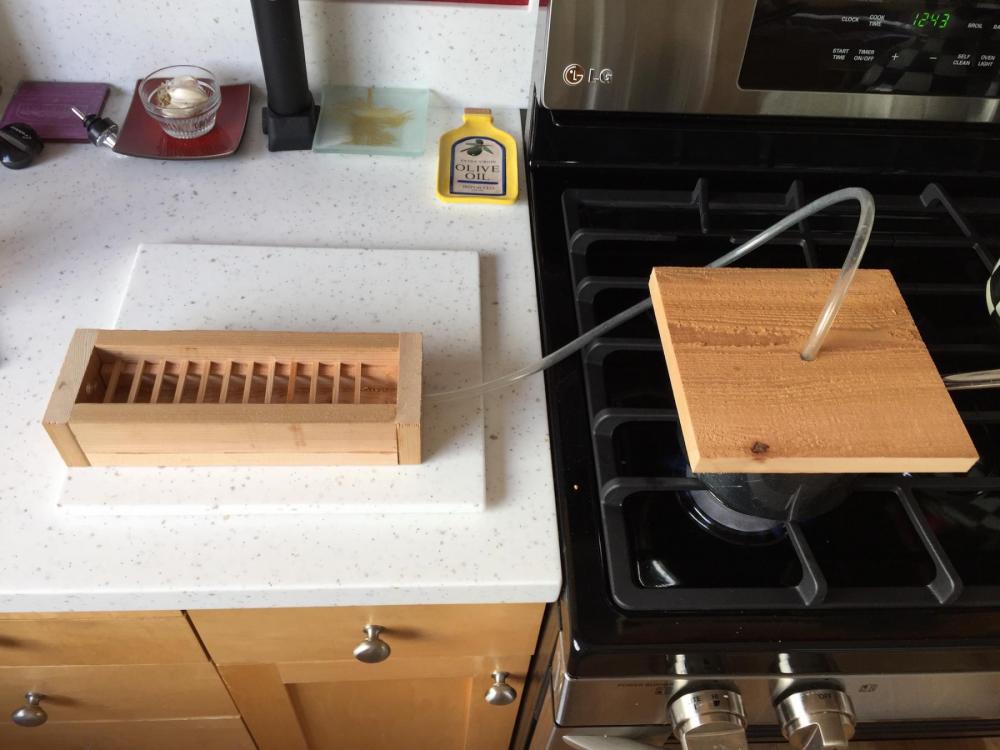
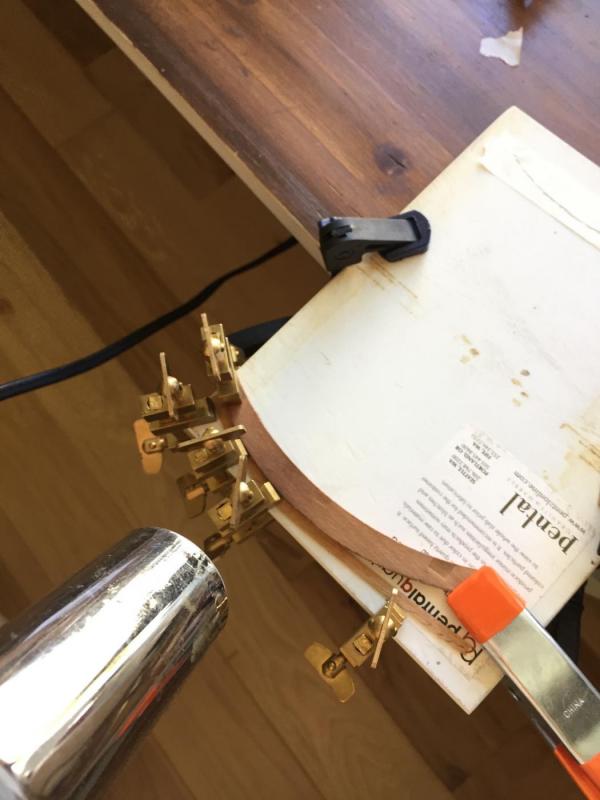
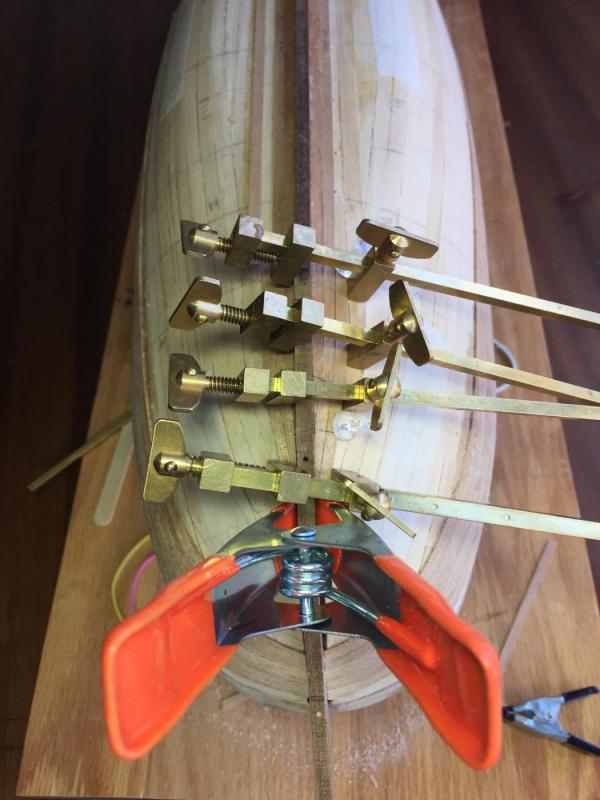
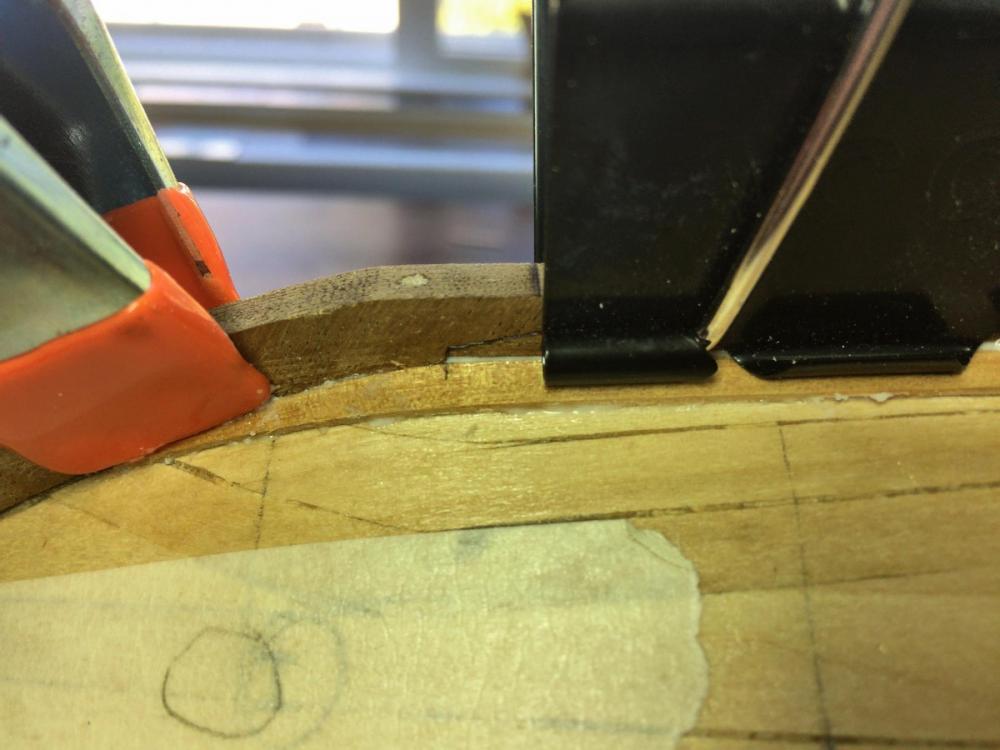
Thank you to the many folks whom have looked in and left LIKES. Denis, welcome back - I presume your household move is under control. Many of you have previously wondered out loud why I am having so much trouble with planking near the bow. When planks are run flat I can't come close to what either the manual or other builders have found. Believe me, I think about it often. Balsa blocks were added in that area and shaped to give the first planks an easy surface to make the bends. I think that when I shaped them they were made too cheeky and introduced a shape different from what the frames themselves would have produced. Lots of pictures this time. I became frustrated with the original edge bending scheme that I wrote about earlier. I spent time looking at what others have done and to a greater extent, 1:1 scale. As was always lurking in the background, steam has been the time honored method. It is uncertain why I didn't accept that to begin with. To that end I built a steam box of cedar. The inlet is at the bottom of one end and the outlet near the top of the opposite end. I made the following arrangement to collect steam from a pan of boiling water. The square lid sat on top of a stainless steel pan. That did not work out. There was simply not enough steam to see a visible amount exiting the box. Google and Amazon are always my friend, so I came up with the device seen below. My quality expectations were minimal so it was a pleasant surprise to be favorably impressed when it arrived. Steam generation is so voluminous that only the slightest depression of the trigger is necessary. I have done several pieces now by exposing them to something over ten minutes of steam. Look closely at the bottom of the photo to see steam exiting from the box. Though the box exterior becomes hot, the strake I am treating has been touchable with my unprotected fingers when I remove it. I prepare the bending form in advance along with a brass clamp to assure a snug fit at the left end of the form. After steaming the plank can easily be edge bent around the form with minimal desire to wrinkle. Once it is in position I use several brass clamps, lightly applied, to ensure it doesn't try to wrinkle when the steam effects wear off. All of this is clamped to a thick ceramic tile. The smooth surface enables friction free bending. Once in position, I use my heat gun for five or more minutes as per Chuck's advice to permanently set the shape. To that end I really like the tile because it maintains the heat for a long time. I also vigorously heat the bottom side of the tile. That combination subjects the wood to heat for perhaps a half hour until it is back close to room temperature. When I release the clamps there is zero spring back. Chuck's video sample edge bending was successfully done dry. He emphasizes no water. That does not work for the wood supplied in this kit. In reading accounts of others I have concluded there are as many bending characteristics as there are types of wood. I have destroyed enough wood on this build to believe mine can't be bent dry - by me .. .. .. .. Below can be seen attaching a strake segment. Using alternating butt locations I have split each plank into three pieces. I only have enough clamps to attach one and sometimes two sections at a time. If I do a pair, I'll do one on each side. Looking carefully, it can be seen I am still in the area where I removed my initial attempted planking. Here are a couple of overall views. I have the garboard and adjacent strakes under way as well. Slow going. I am trying to treat each section of plank as though it is the entire project. At this time, 7 of the 28 strakes on each side are in place. Respectfully submitted, John Maguire Seattle


-
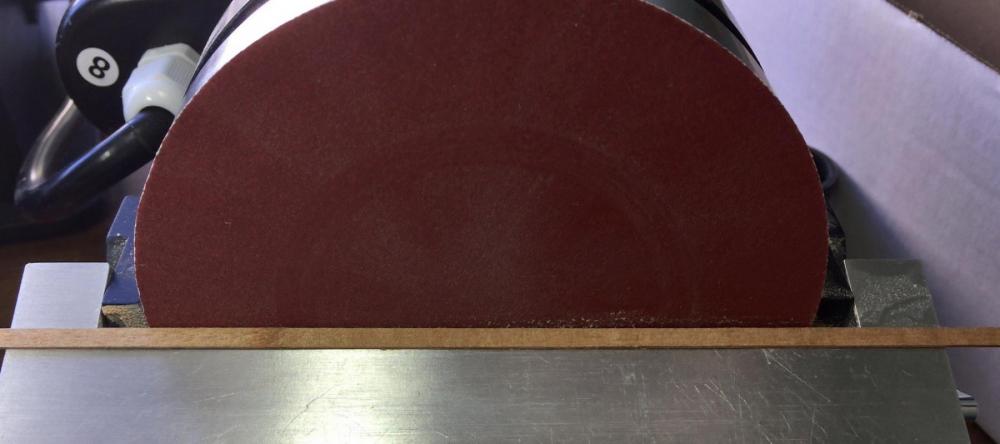
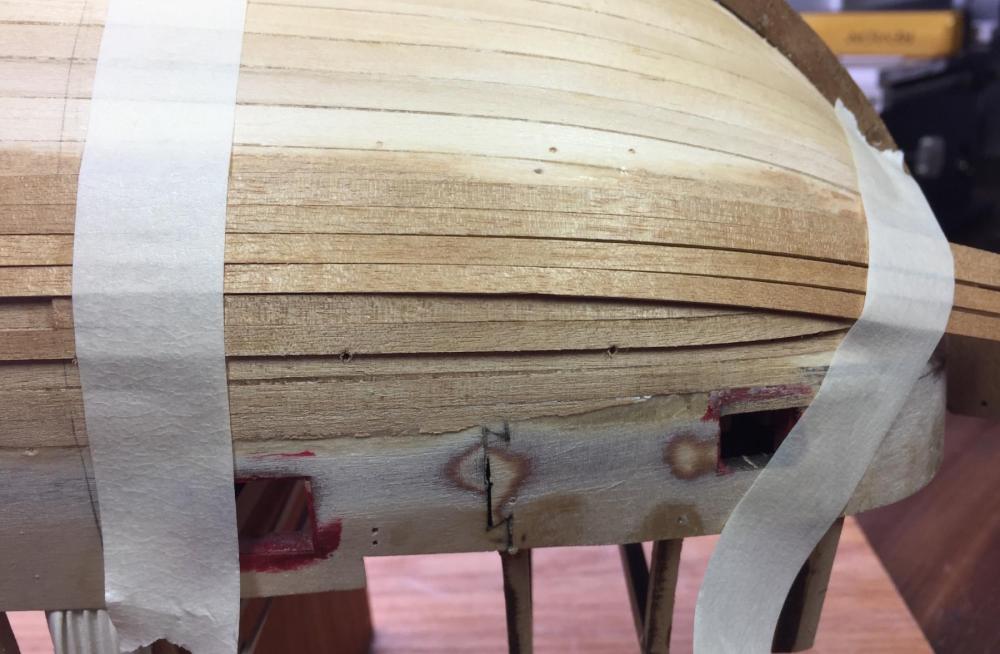
Thank you for the many likes and I'm pleased to see some new names looking in. Thank you. My planking is slow. There are generally three and in some instances four segments fore & aft in each strake. Each one is compression edge clamped because I am not edge glueing. I just finished the fourth upper level strake on each side. The multiple planks per "run" restricts how many sections can be attached each day. After making a pattern, both garboard planks were laid parallel and simultaneously shaped on the Byrnes sander. Each was well and evenly beveled in a calibrated manner by using the Byrnes sander table at a 75 degree angle. They were then marked with a small pencil tic that was used as a mark against the keel to assure symmetry on both sides of the keel. The stbd garboard was then attached today and will remain clamped for a full day to allow the glue to cure. Lots of glue is visible because I like the buff white color scheme and am comfortable that I'll be able to satisfactorily prep the area prior to paint. Putty & paint makes the devil a saint . . . . Easy glue application on the other strakes but heavy on the garboard. I suspect that a month of easy days is in store for this lower hull planking. Respectfully submitted, John Maguire Seattle

-
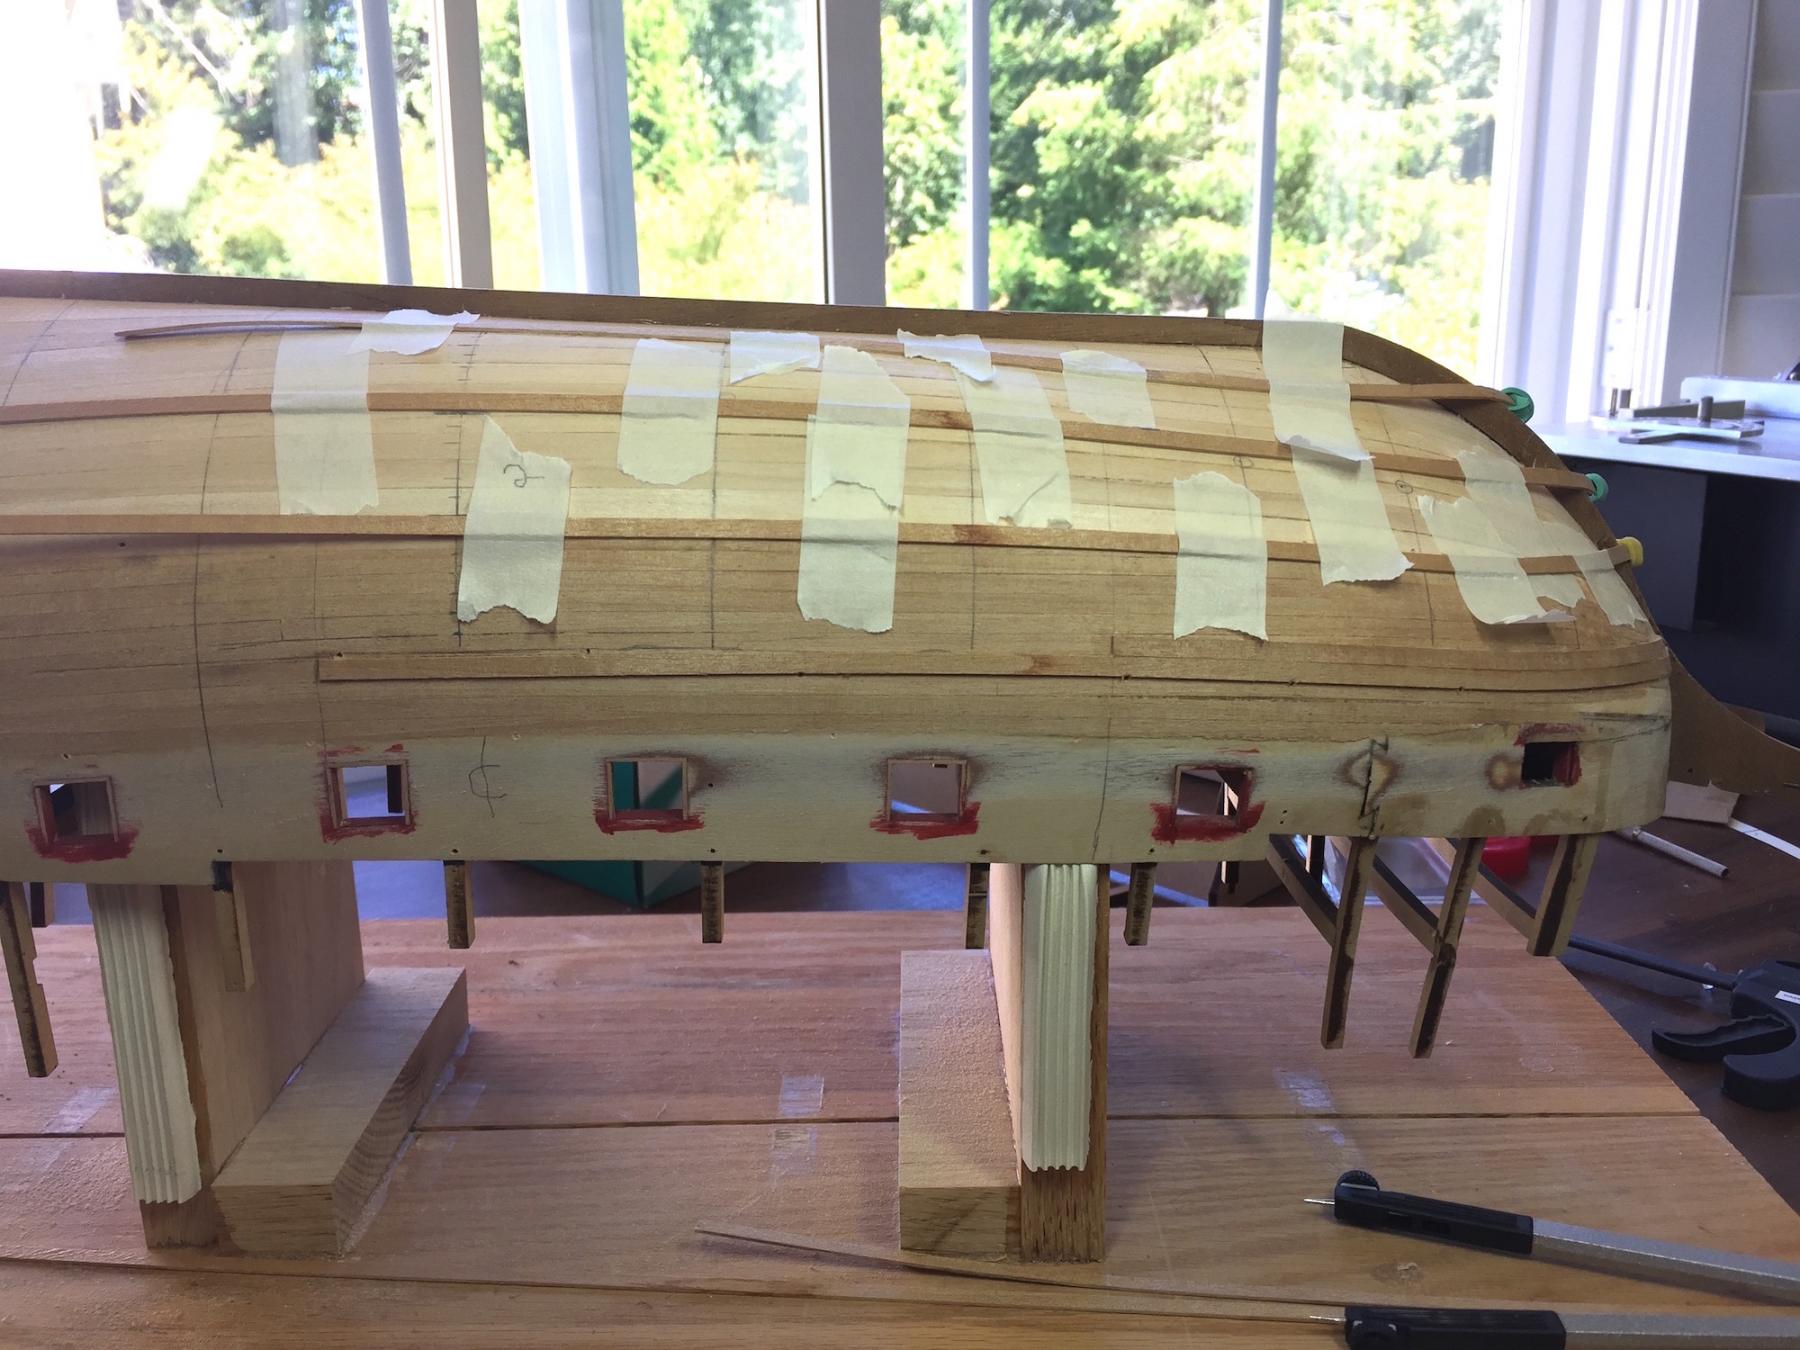
Wow, thank you for the LIKES and increasing number of viewers. Mike, an appreciation from you is meaningful - thank you. Joe, it is frustrating trying one thing after another and failing, isn't it ? <smile> Winning is easy - it's hard to be a good looser. Doc, Mark got it for you. I must have been misleading on the third video. I used the line out method and fan from the other section of the forum. I think it is clearly presented. I still have to expand my line out to include all areas of the hull. Doc, I hadn't thought about a diagonal grain. That is however, the culprit! All my failures are diagonal. The clues, though obvious, didn't rise to my level of consciousness until you asked. You've got it . . . Apropos of that, I did an additional bow area strake today. It is a long process so even one or two pieces is time consuming. First though, I experimented with the edge beveling process by setting the table on my Byrnes saw at 75 degrees and with the wheel stationary, I moved the plank back and forth trying to achieve a uniform edge. For me, edge bending remains a challenge. I wanted to bend over a slightly longer length than previously so I tried boiling the piece for about ten minutes then bringing the pan to my bench and rewetting a couple of times. Is ten minutes long enough? The wood mass is minimal . . . I bent only one bow piece today. It matches the other side that was installed a couple of days ago. Today, for some reason, bending was more difficult than previous pieces. Once bent,I used Chuck's heat gun for about ten minutes and because of the size of the bend I did it a second time. About an hour later I removed the piece and it had zero spring back. I've got to emphasize again, getting it bent was a challenge . . . . I sure wish someone could point me in a better direction. I don't have enough wood to spile. Am I negligent for not getting more? Chris managed readily, but he is smarter than me. By the way, to mitigate why I am having more issues than Chris, it is to a large extent due to my desire to have the strakes parallel the wales and keel rather than have an upsweep at the bow. Maybe that makes me a bad person . . . . smile. I continued the bow planking rearward in sections. I have separated the hull length into six sections so that I can have a staggered butt scenario resembling what Chuck did with CHEERFUL. Not much to show for two days of five or six hours each is it? The brown shadow shows the extent of my abandoned initial attempt and then sanded off. One of the things that displeased me the most was black seams and seams that were not quite tight. This time around I am spending significant time to prep where each plank is about to go on the hull, no edge glue and a uniform edge bevel on each one. I take heart with out mutual hero, Remco: "Treat each part as if it is a model on its own, you will finish more models in a day than others do in a lifetime." Respectfully presented, John Maguire Seattle


- 194 replies
-
- 11
-
-
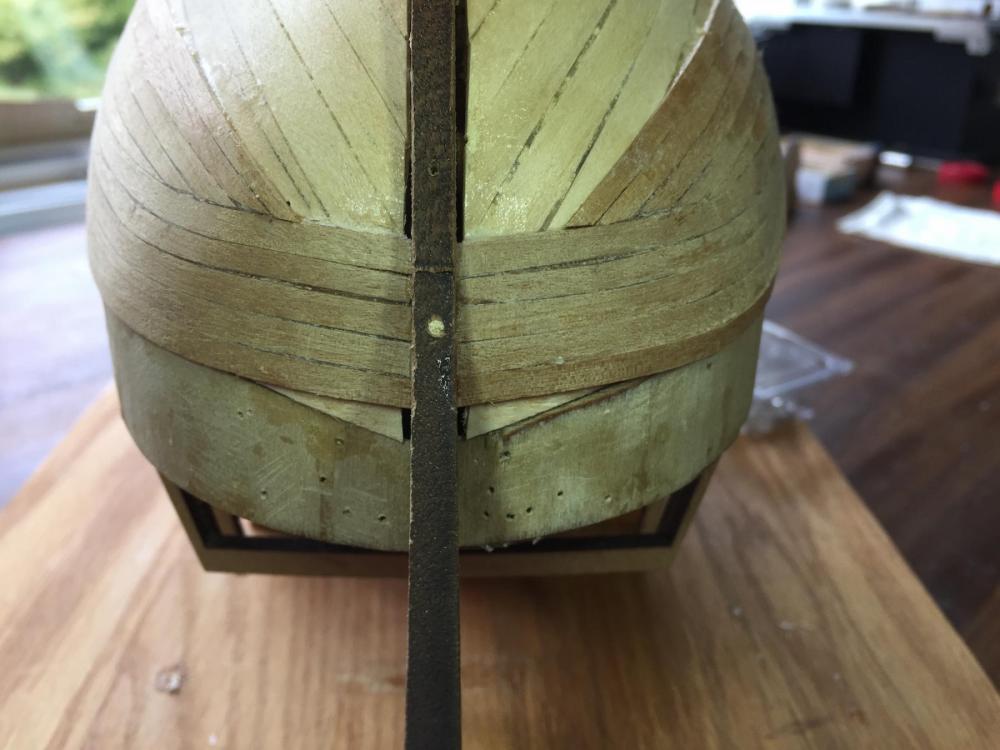
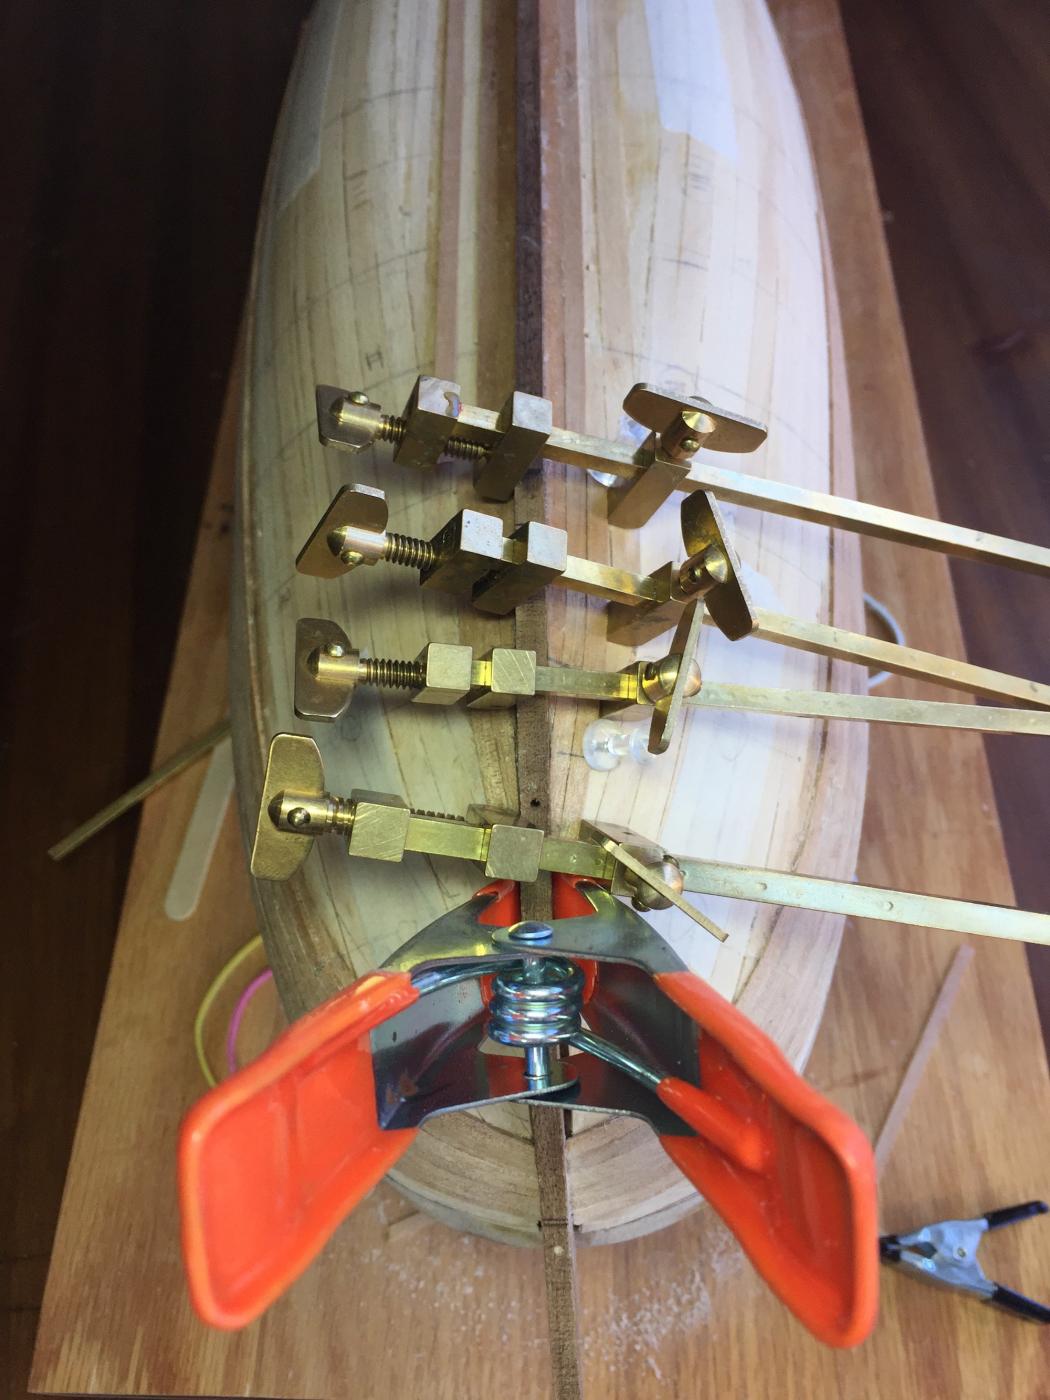
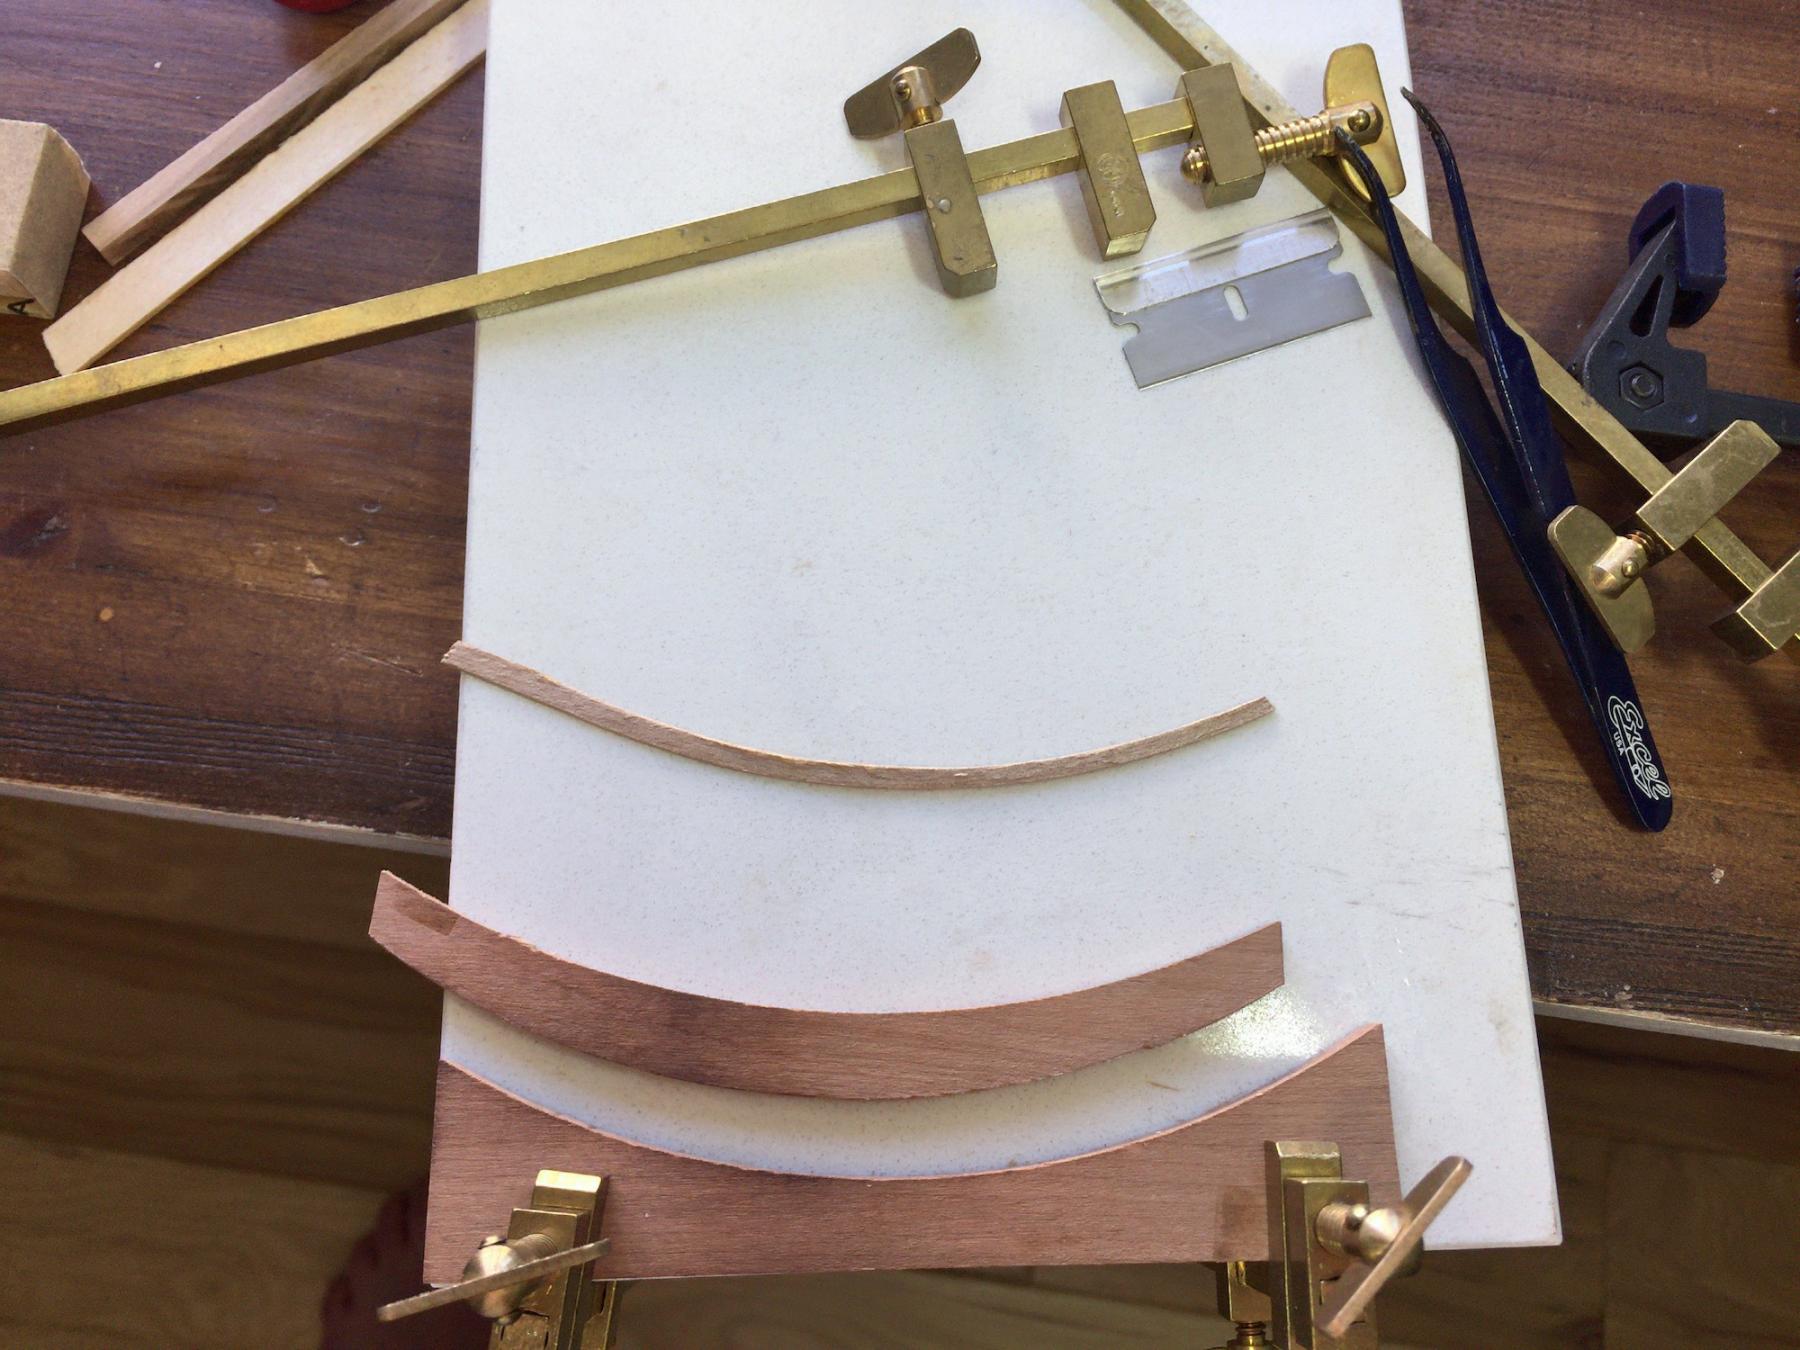
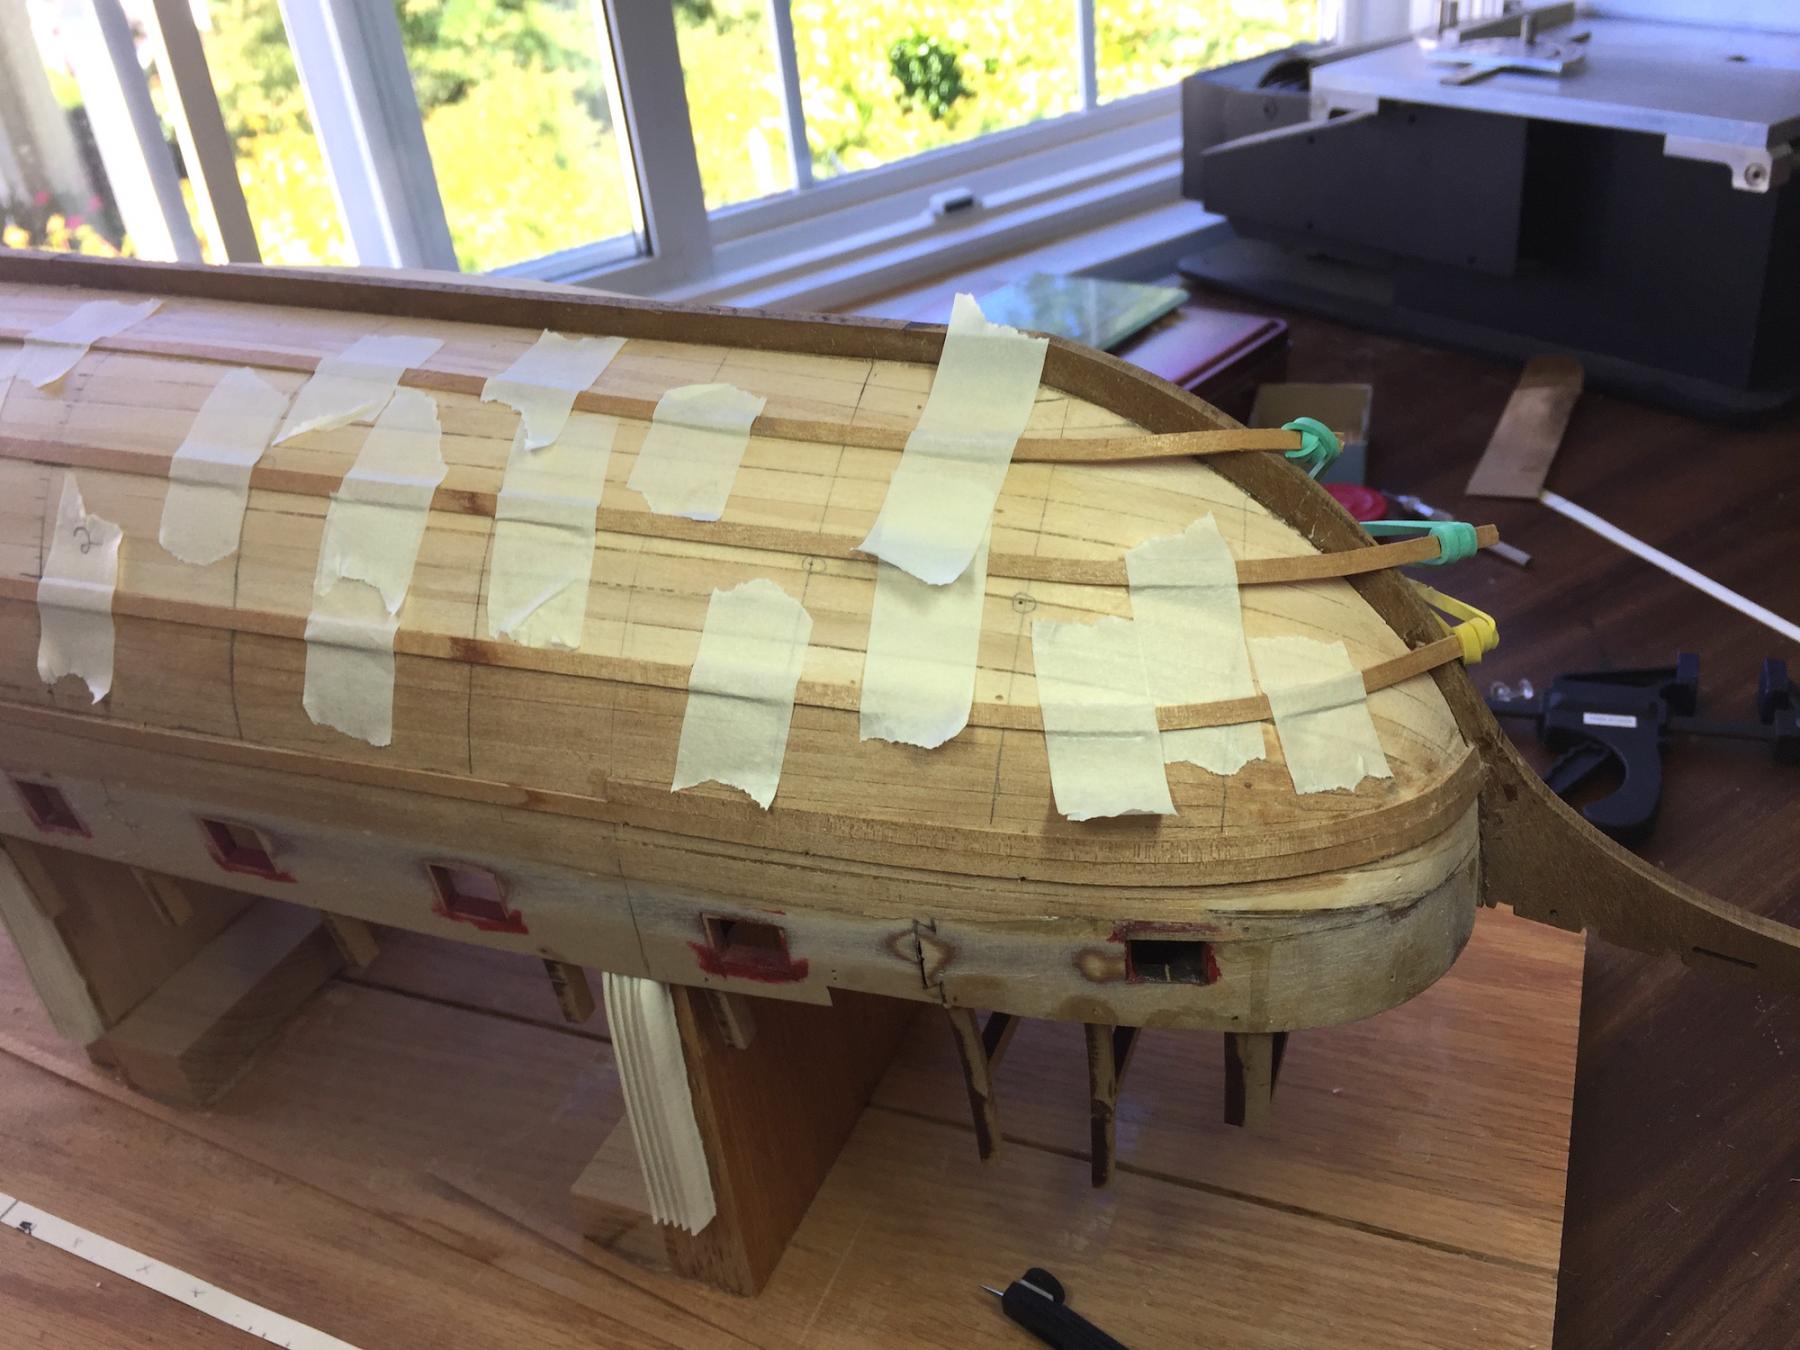
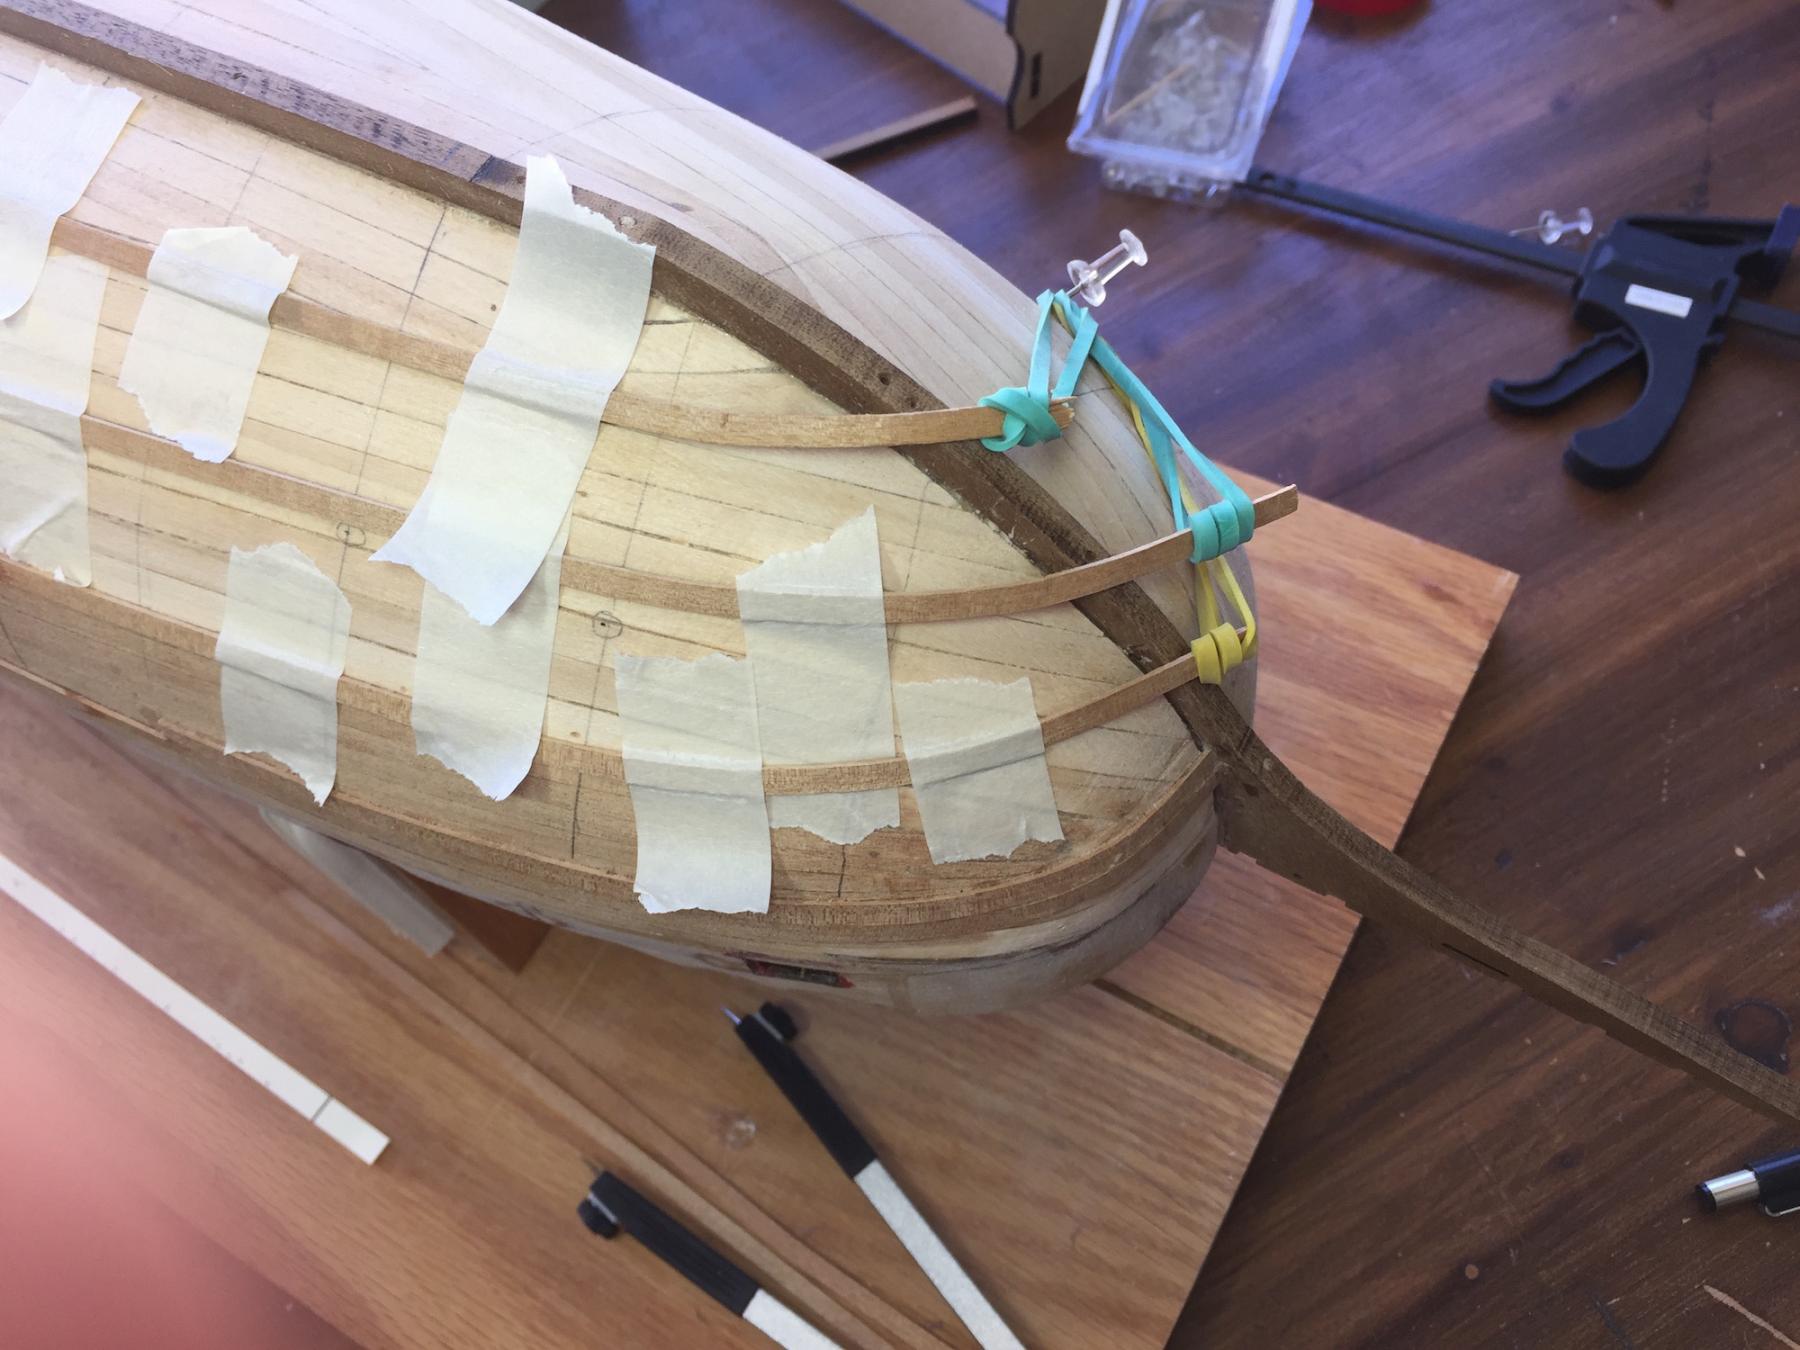
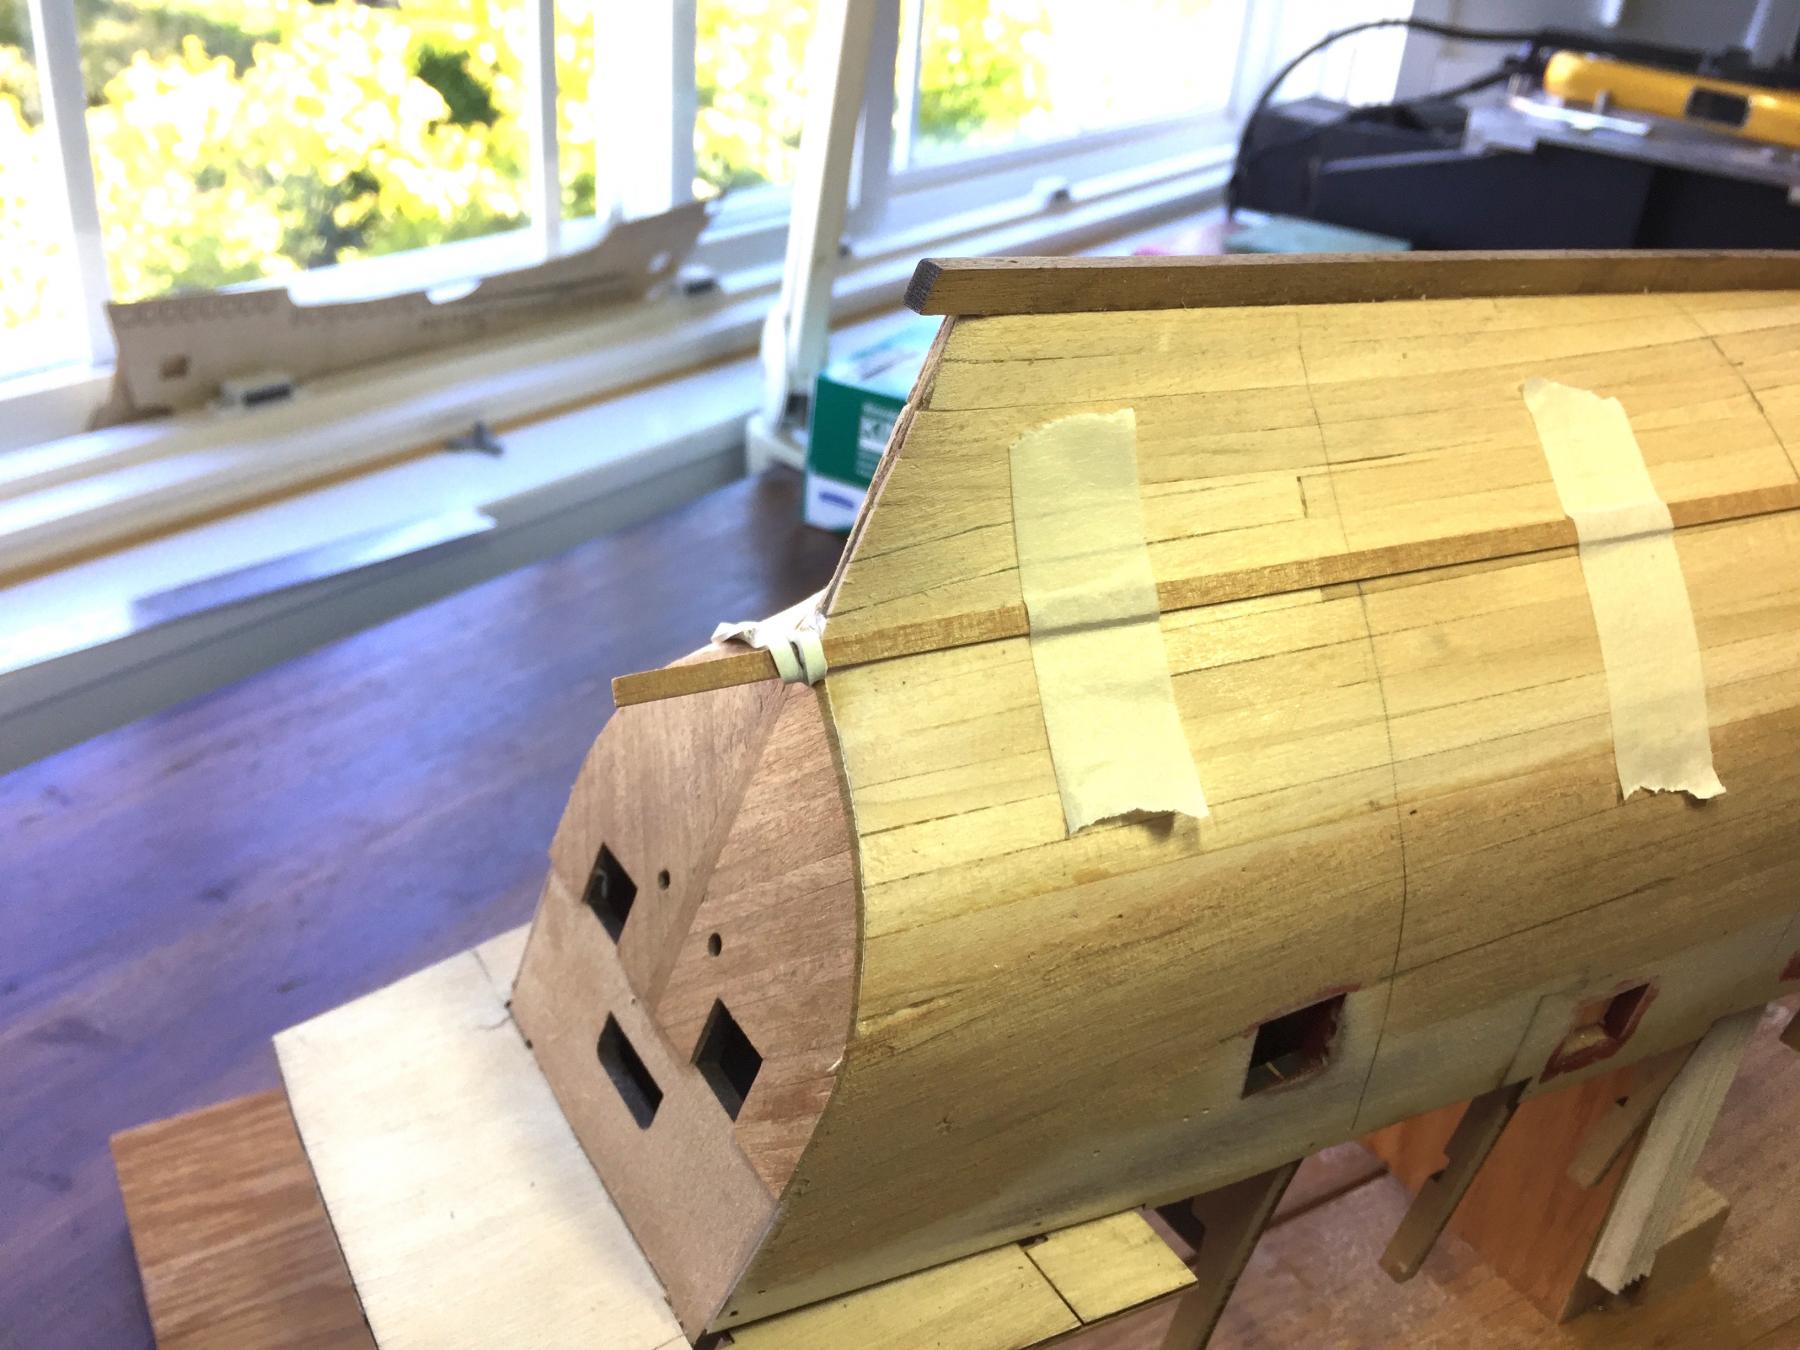
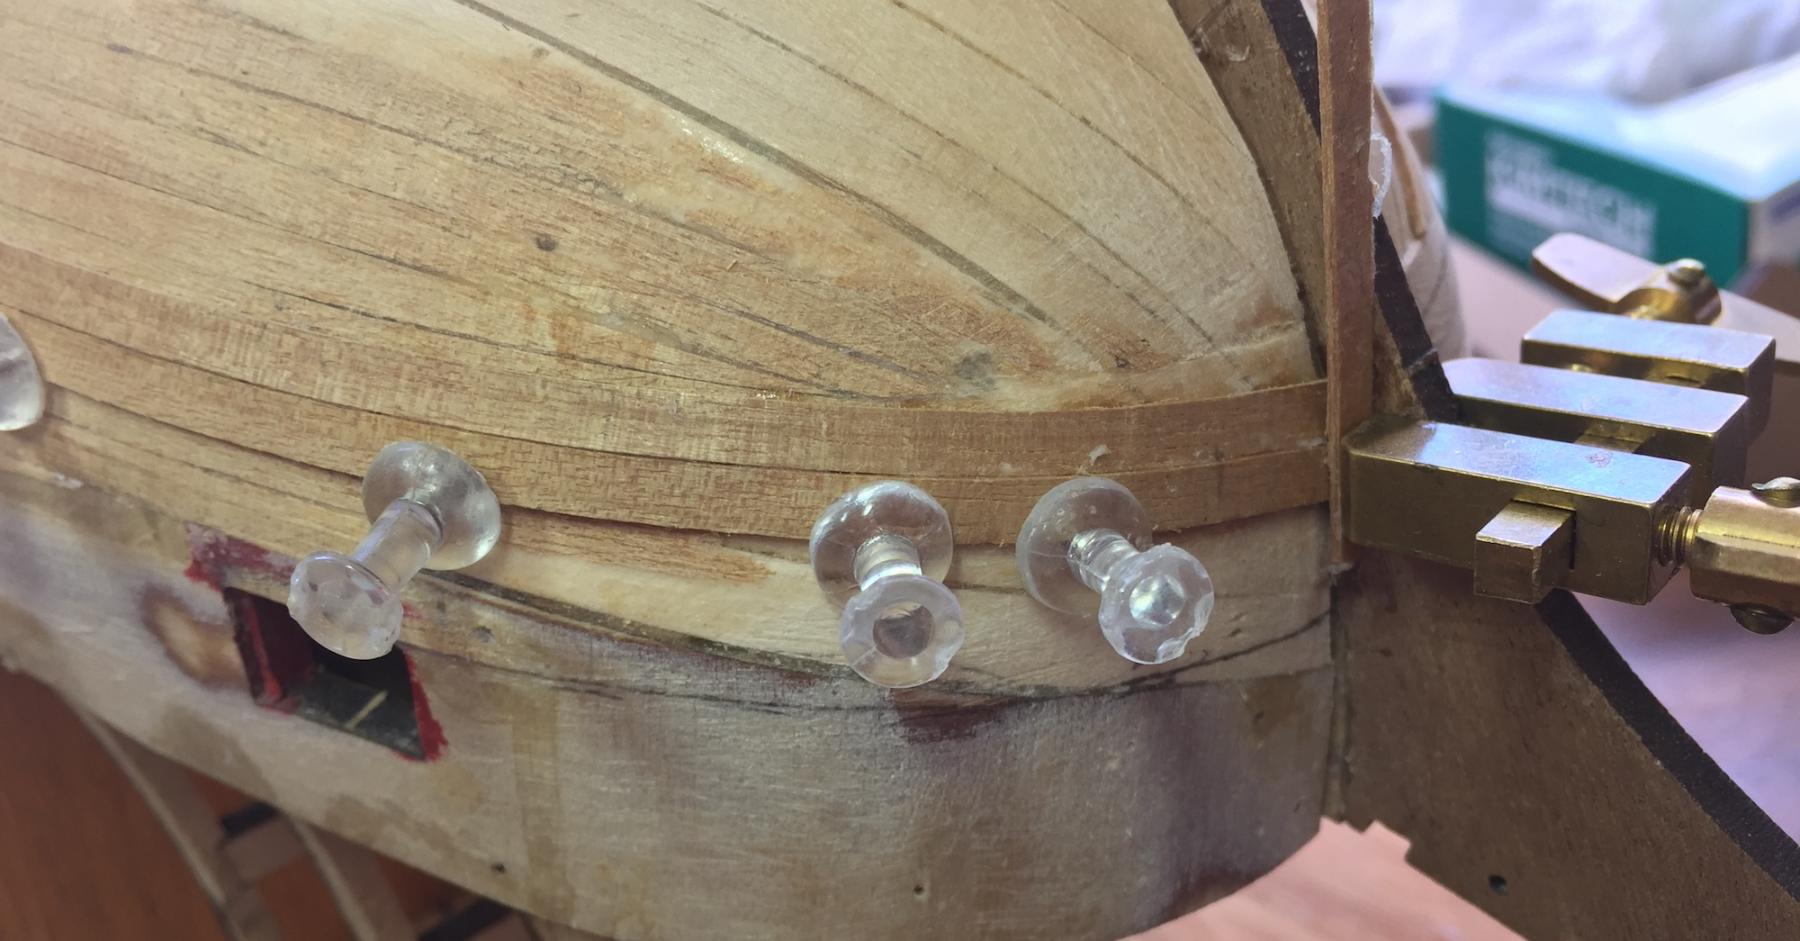
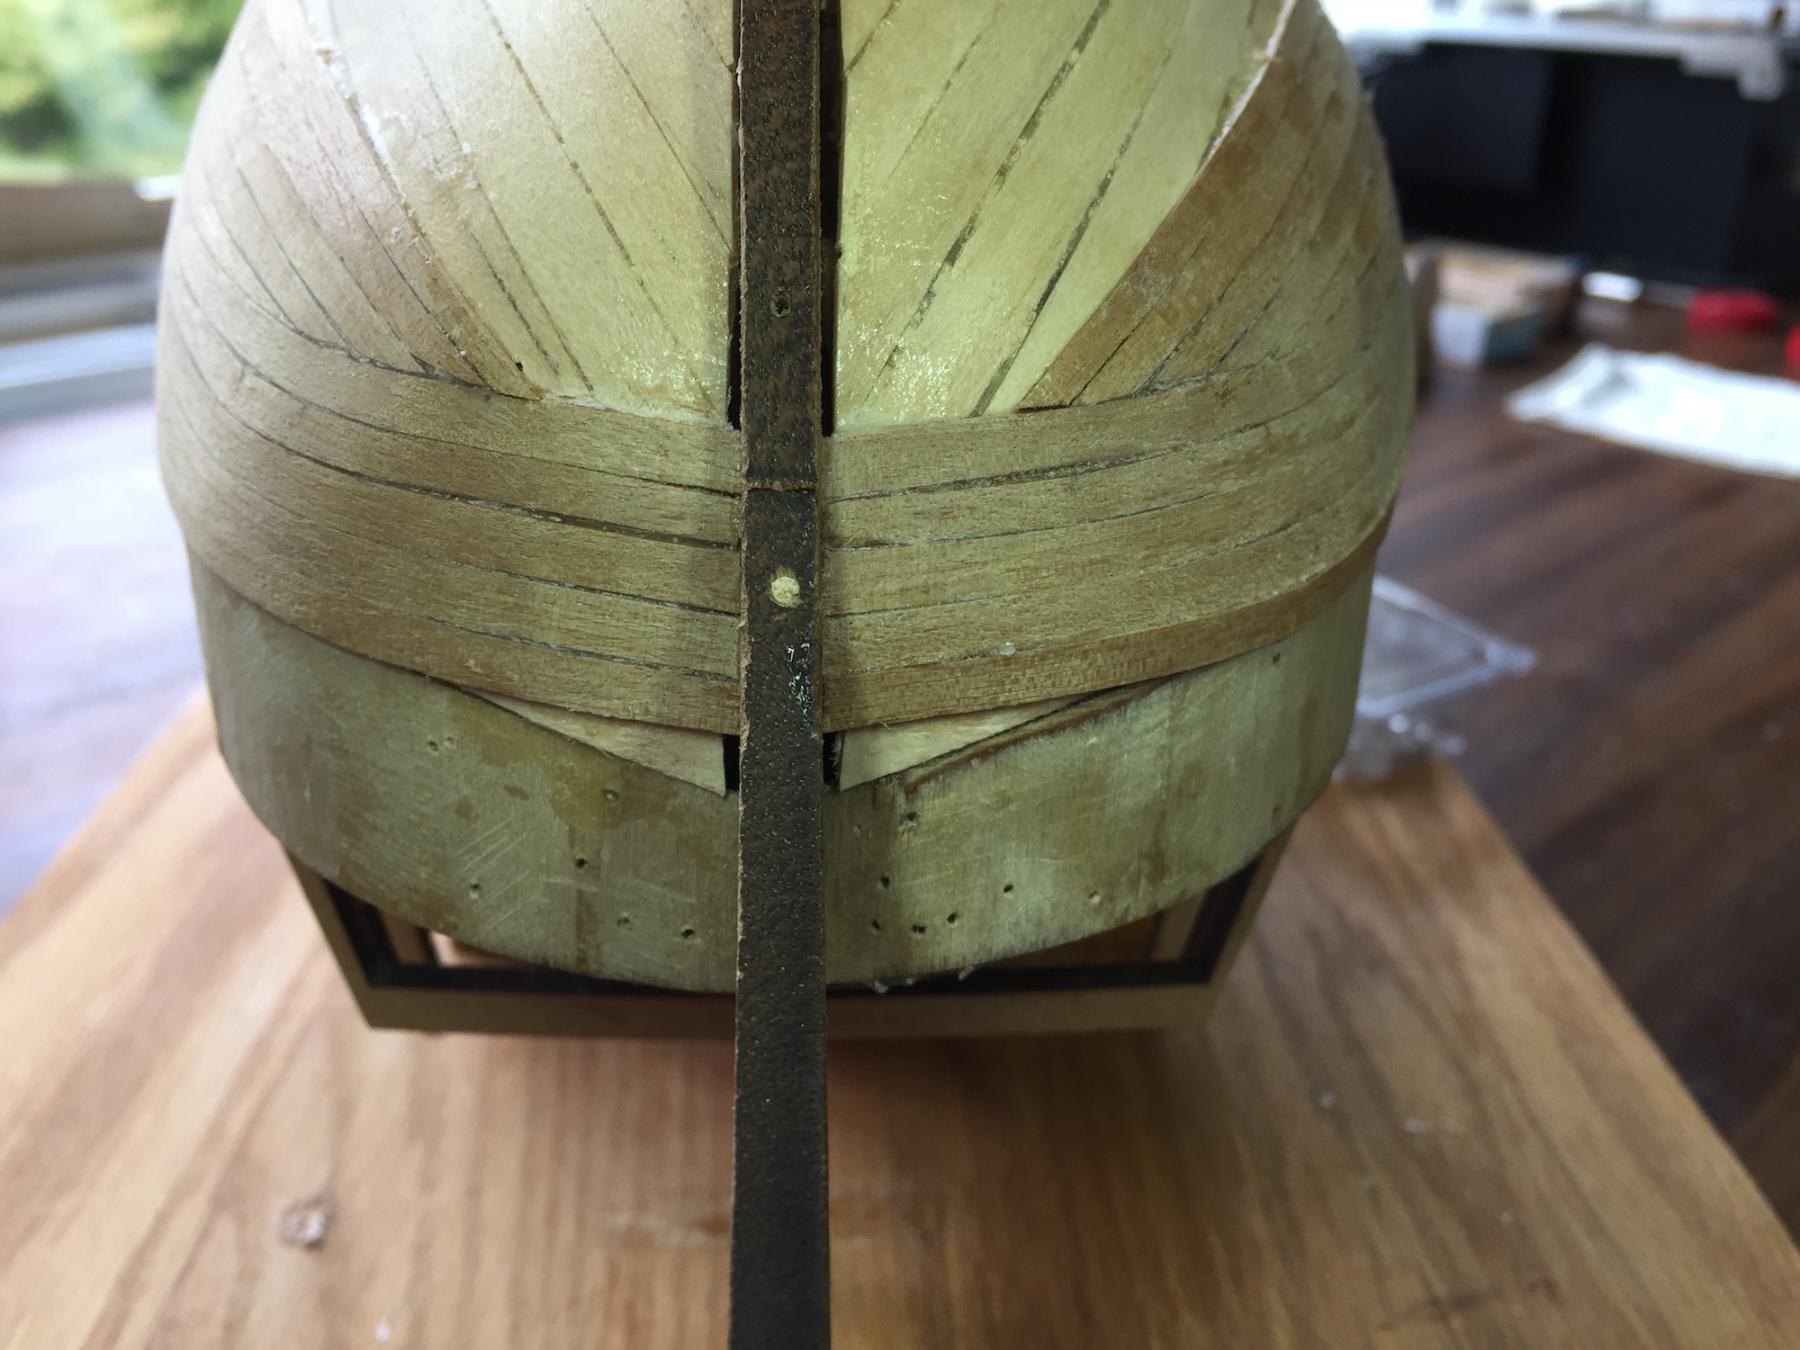
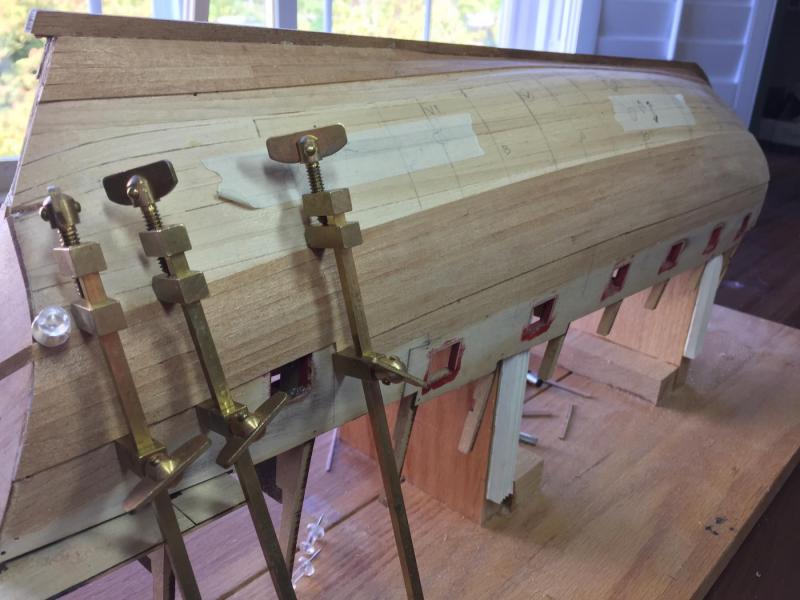
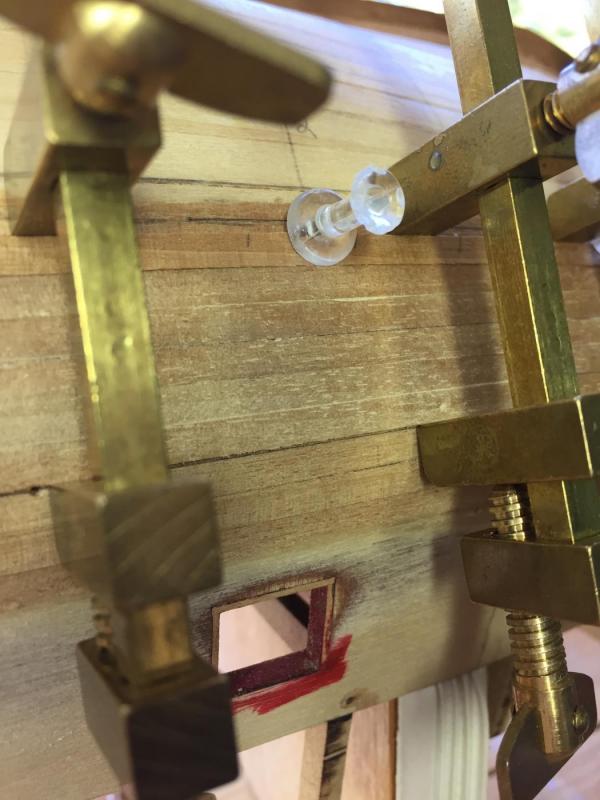
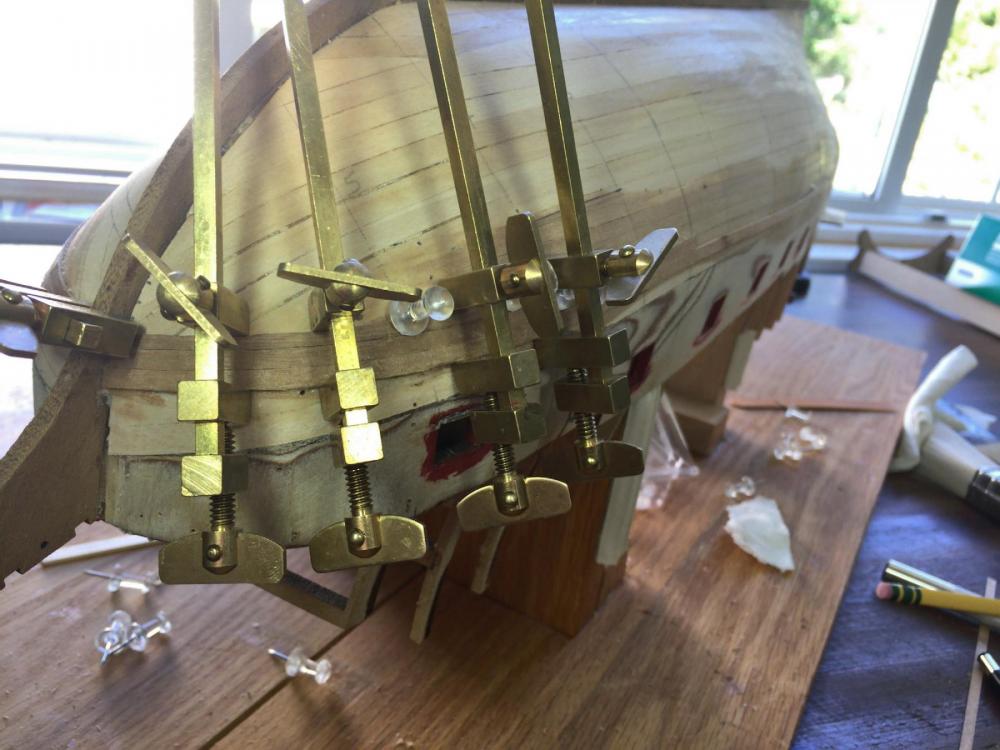
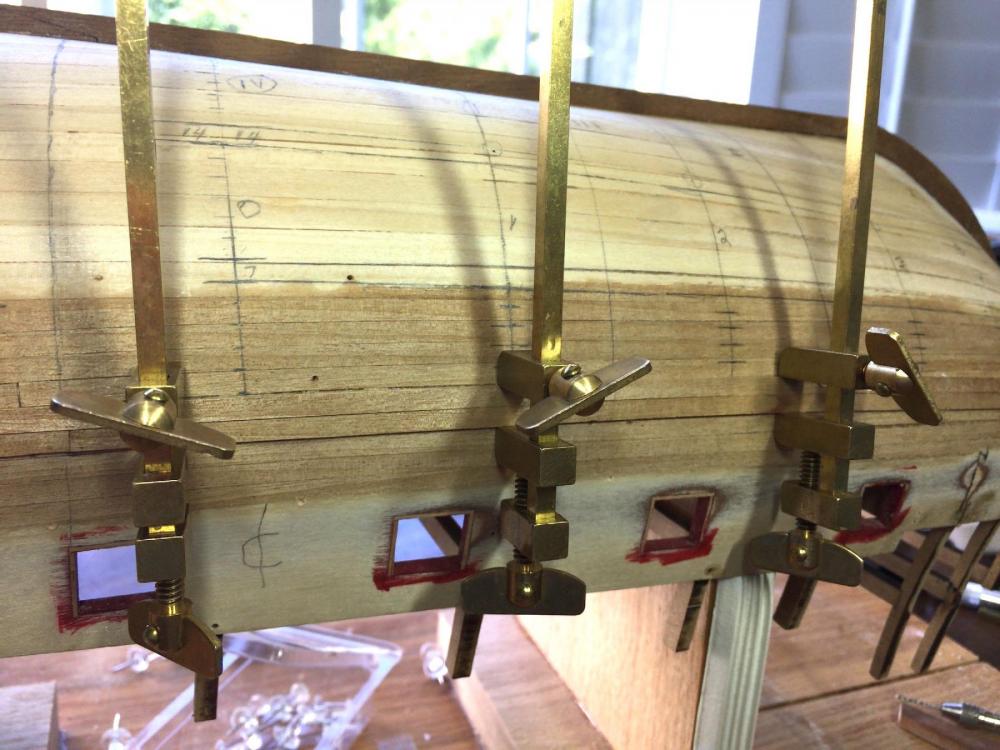
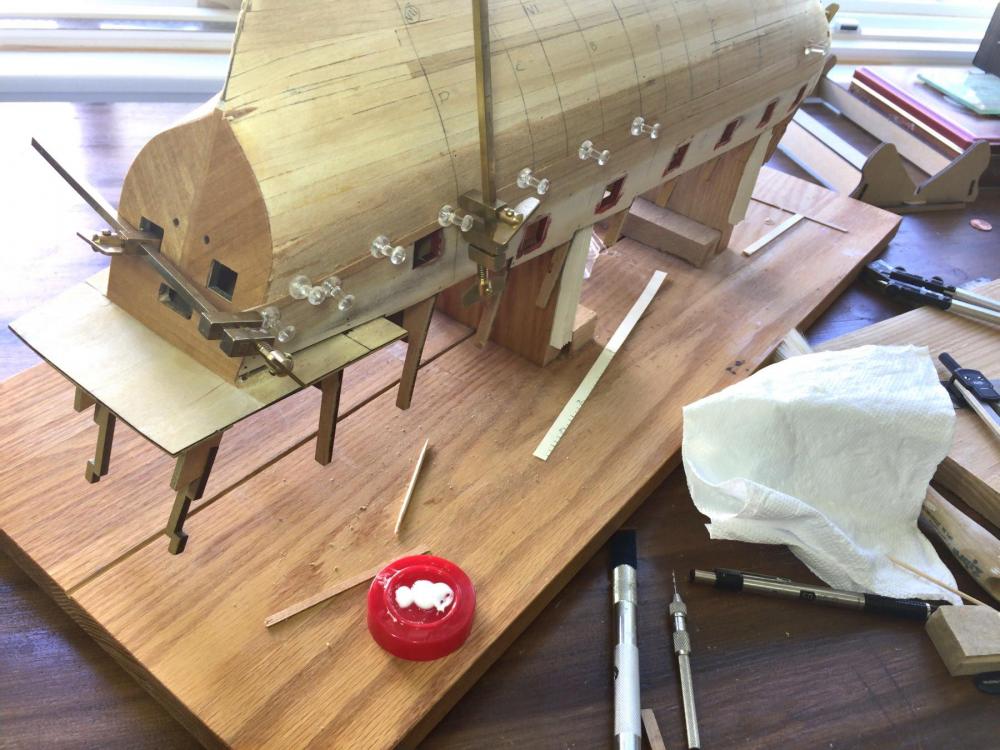
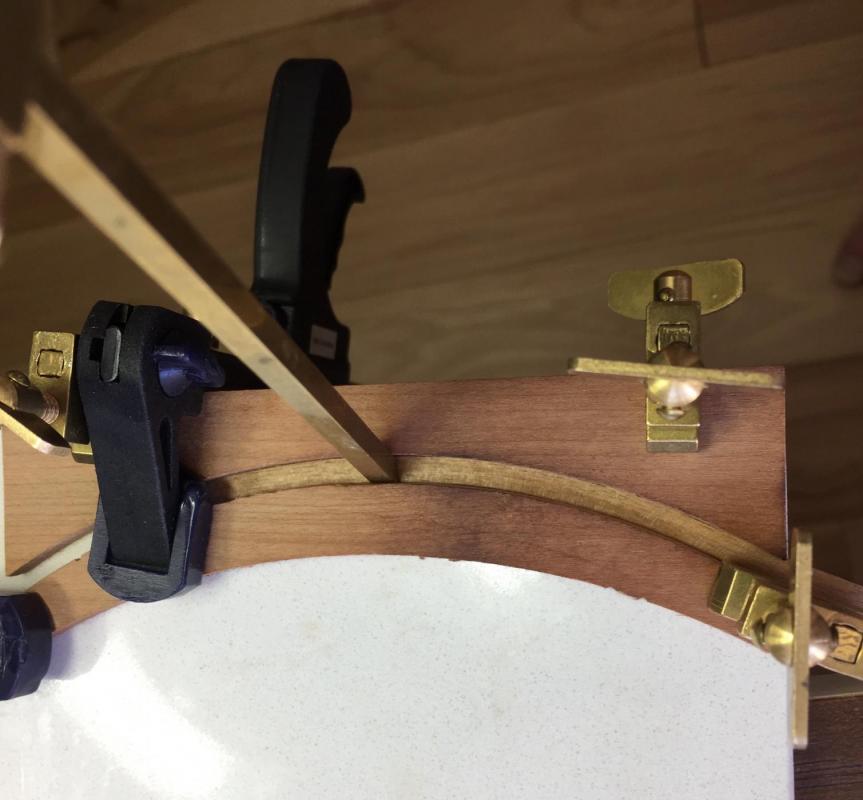
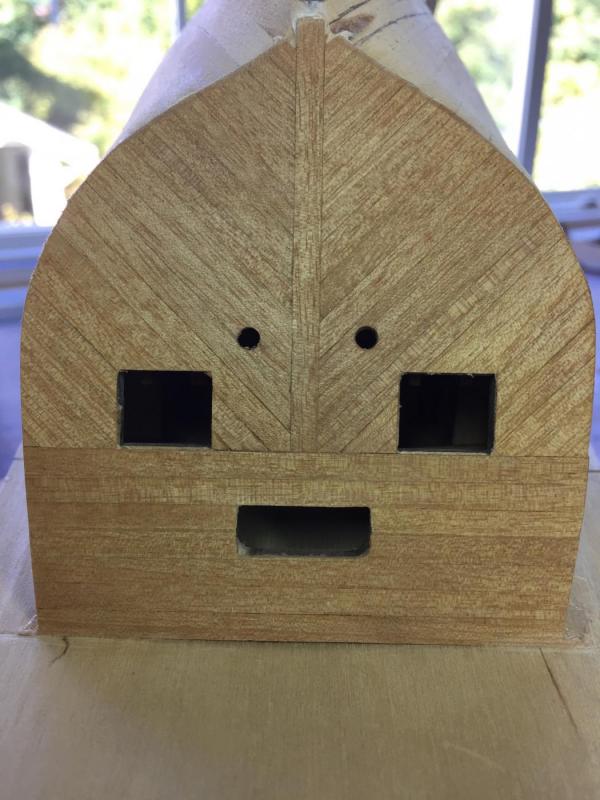
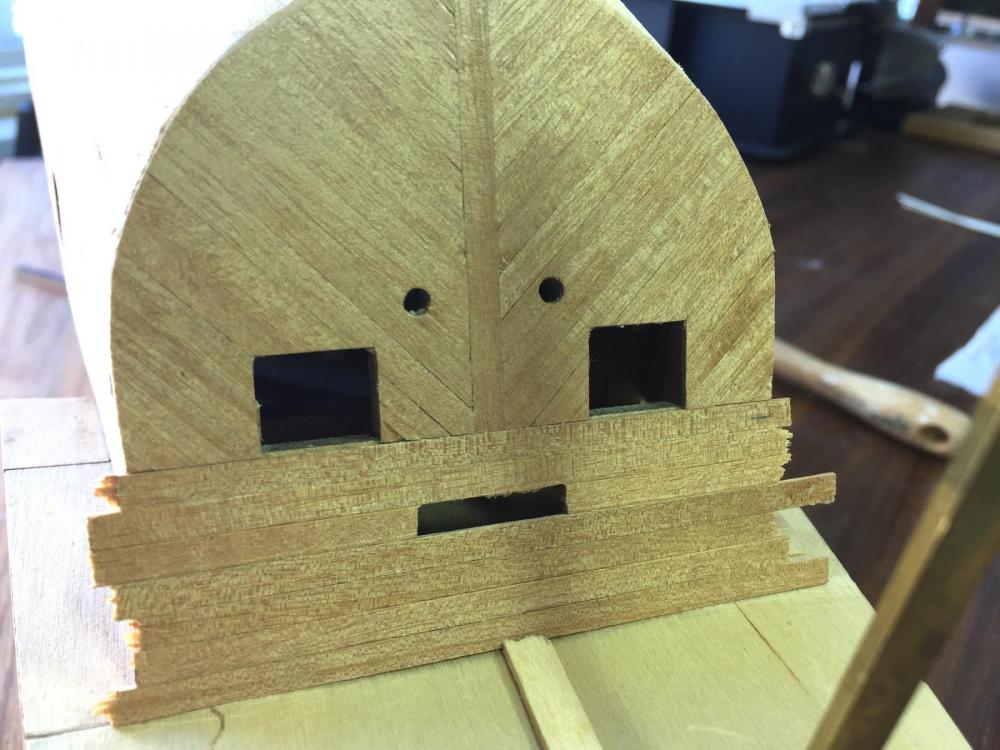
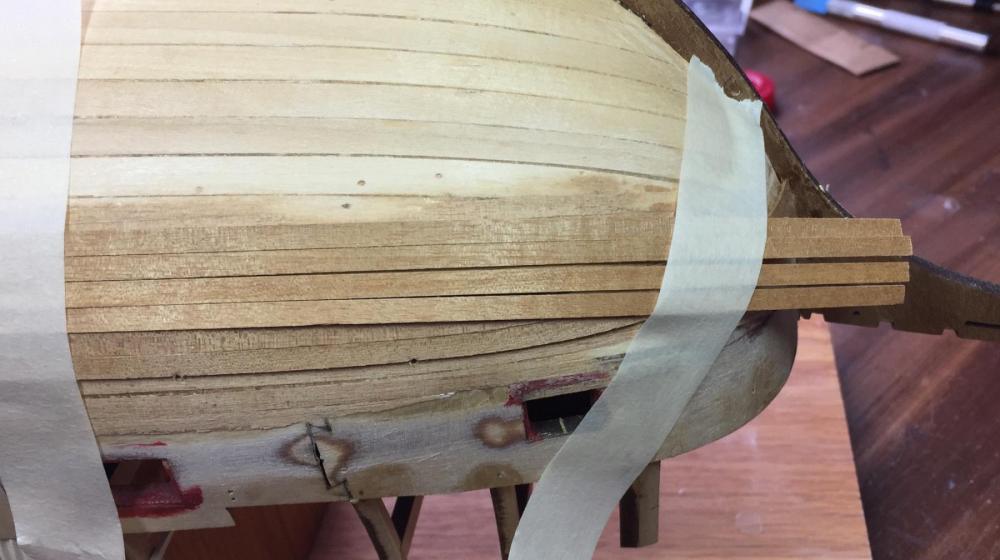
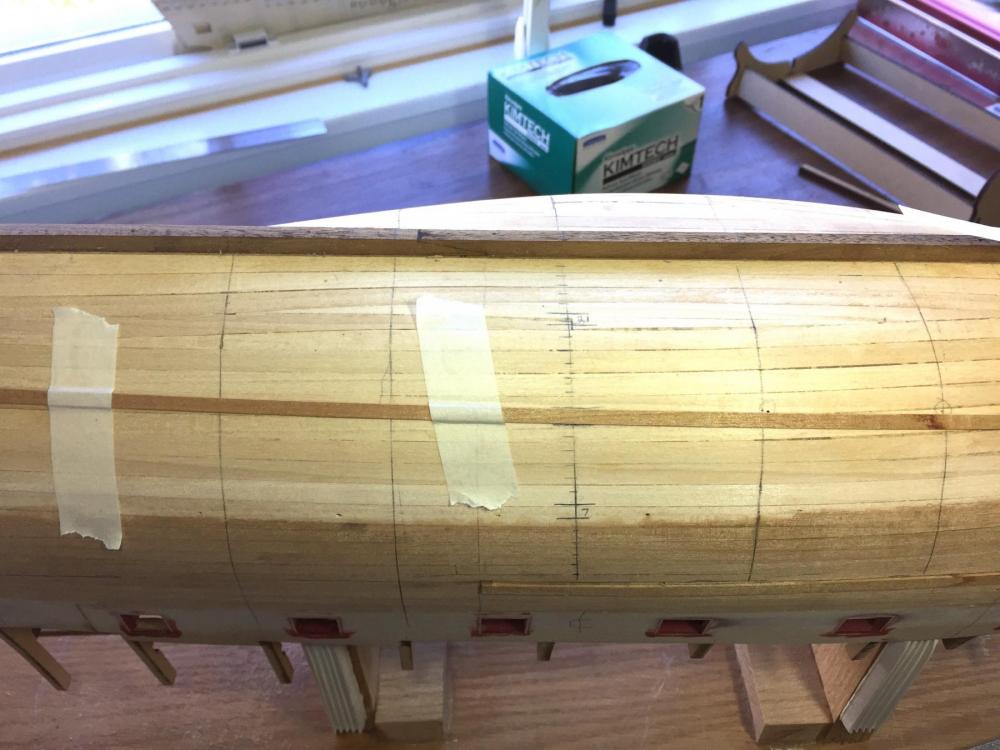
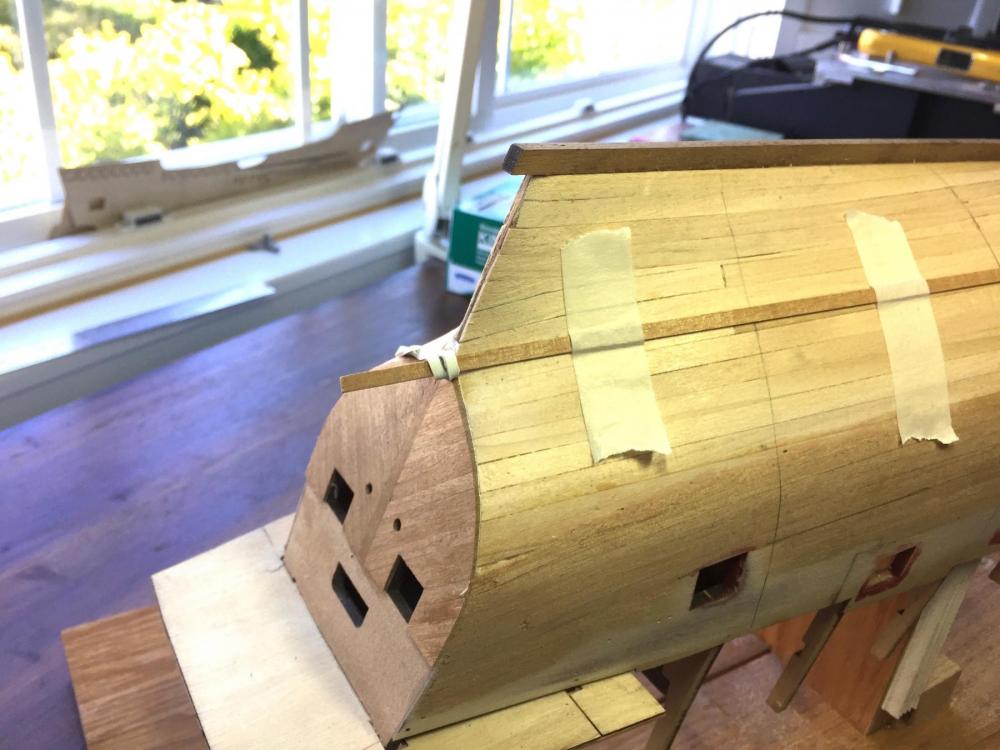
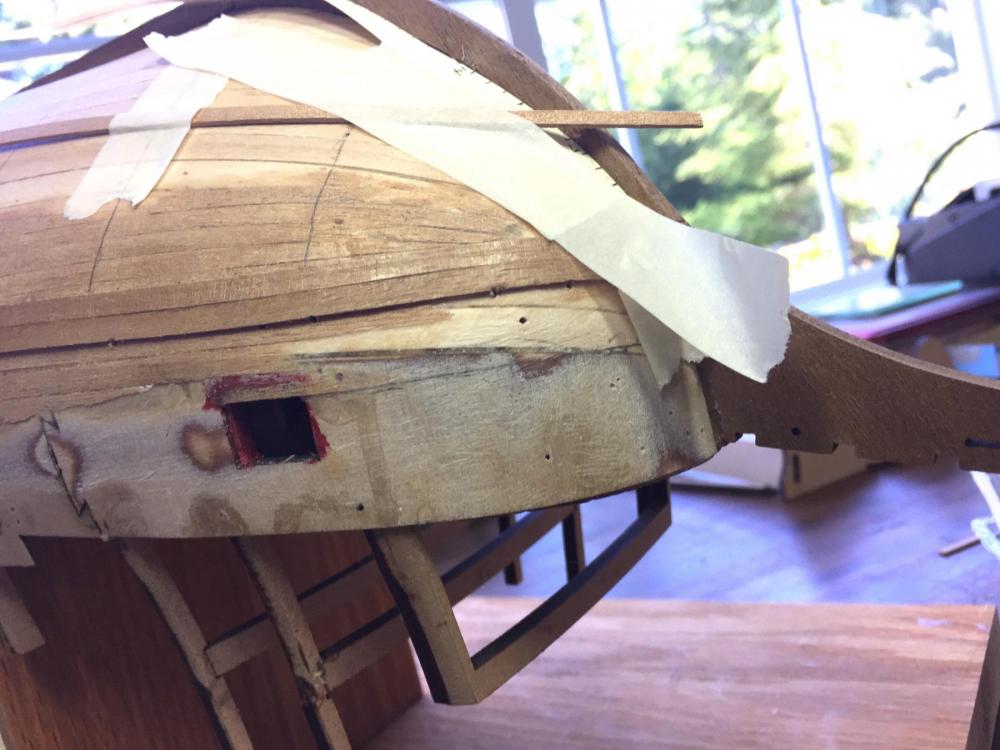
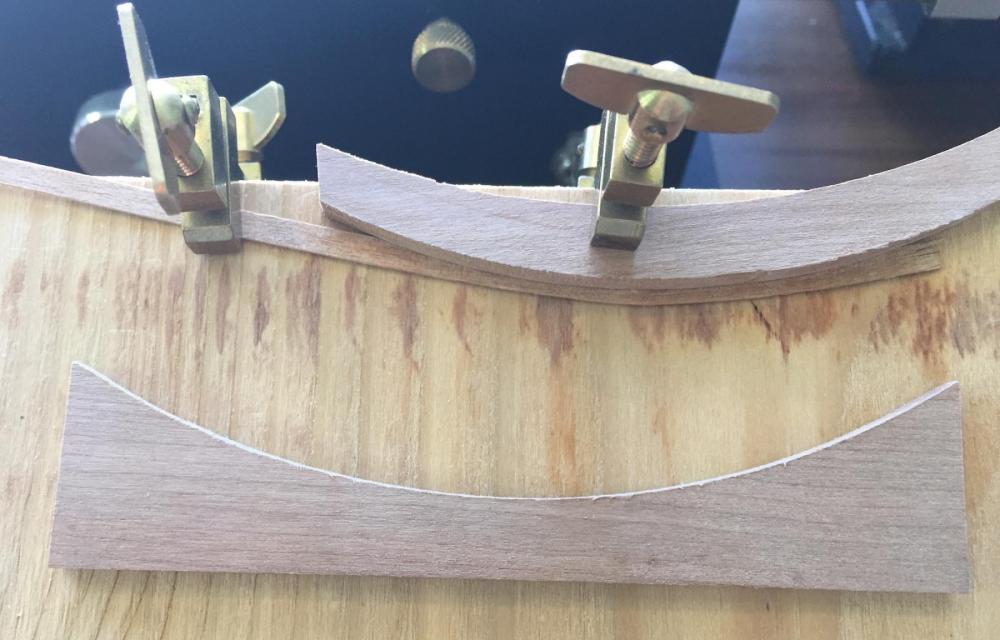
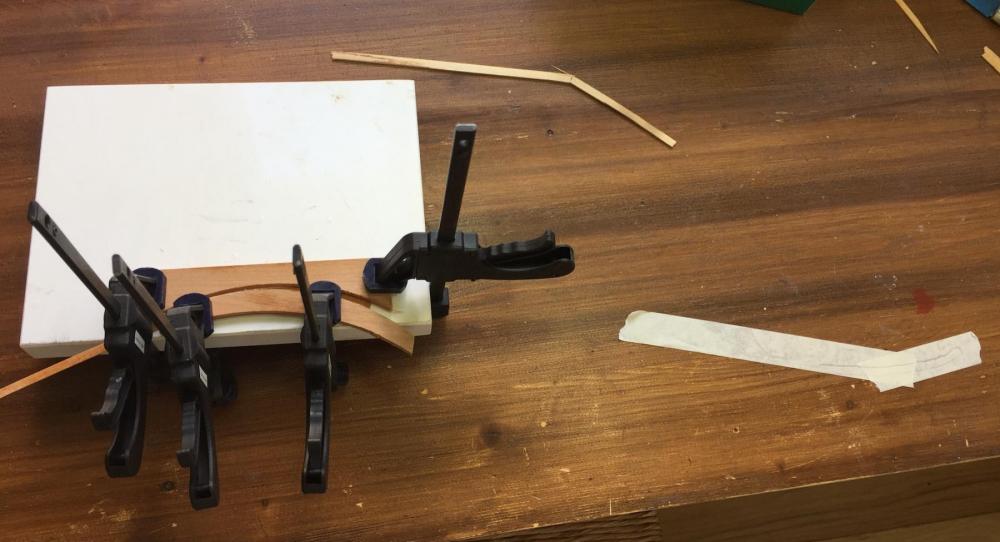
Thanks Doc. Thank you for the LIKES dear friends . . . . This post will set a record for the least work accomplished and reported proudly. I have at least two weeks of studying your collective posts and personal experimentation trying to successfully edge bend the type of wood supplied with this kit. Chuck's video set me on the right path but the dry edge bending he uses destroys my wood specie - whatever it is. I have tried wet, dry, alcohol, water, hot, cold, boiling, microwave, wrap around coins, free shape, clamps, etc, etc . . . . Over the last two days I have learned that if I wet my wood in warm water - alcohol is no good because it evaporates to fast - it can be coerced to the extent necessary. The wood I have shatters if I edge bend it dry. In order to be successful my specific kind of wood has to be wet. I need to begin with the moveable part of my jig on top of the strake to keep it from wrinkling as I initially push it into the concave side. Working on a tile is best because it is slippery and I can slide the strake. Whatever wrinkling that might want to occur is held in check because it is beneath the moveable part of my jig and as the wood is soft, wet and mushy the wrinkling gets absorbed, if that would be a good description. As I get it mostly into the concave piece I can then move the moveable part into position behind the strake and push it the rest of the way for the tight fit you see in the picture. As I am doing that final push I need to continuously tamp the top of the strake with the square brass piece seen in the photo to keep it from wrinkling. Having the wood wet gives me the ability to do that without breaking or wrinkling the wood. Once I have the strake fully shaped, I use Chuck's heat method for several minutes. Five to ten. When the strake is left in the jig overnight it is dimensionally stable in the morning with zero spring back. The next picture is the first section of the wale plank on the stbd side. As stated yesterday, I plan to plank in shorter, less than full hull lengths to allow glueing control that is more positive than my previous attempt. The repeatable plank butt pattern might also add a little visual interest. This wale plank on each side and the one above it are the most difficult on the ship to shape. I carefully used dividers to ensure this strake is in the same relative hull position as the other side. The bands and virtual frame positions are seen but I have not begun to tic this side because that will be relative to this strake. So, one small step but a major problem - for me - finally solved with a solution that is readily repeatable. And then the stern. The demarcation between the diagonals and the horizontal strakes is not as perfect as I'd wish but it is covered when the rear wrap around of the wale goes on. Another day in the Cougar Mtn Shipyard . . . Respectfully submitted, John Maguire Seattle

- 194 replies
-
- 12
-
-
Doc, Exquisite. I wish I had your imagination and creativity . . . Respectfully, John
-
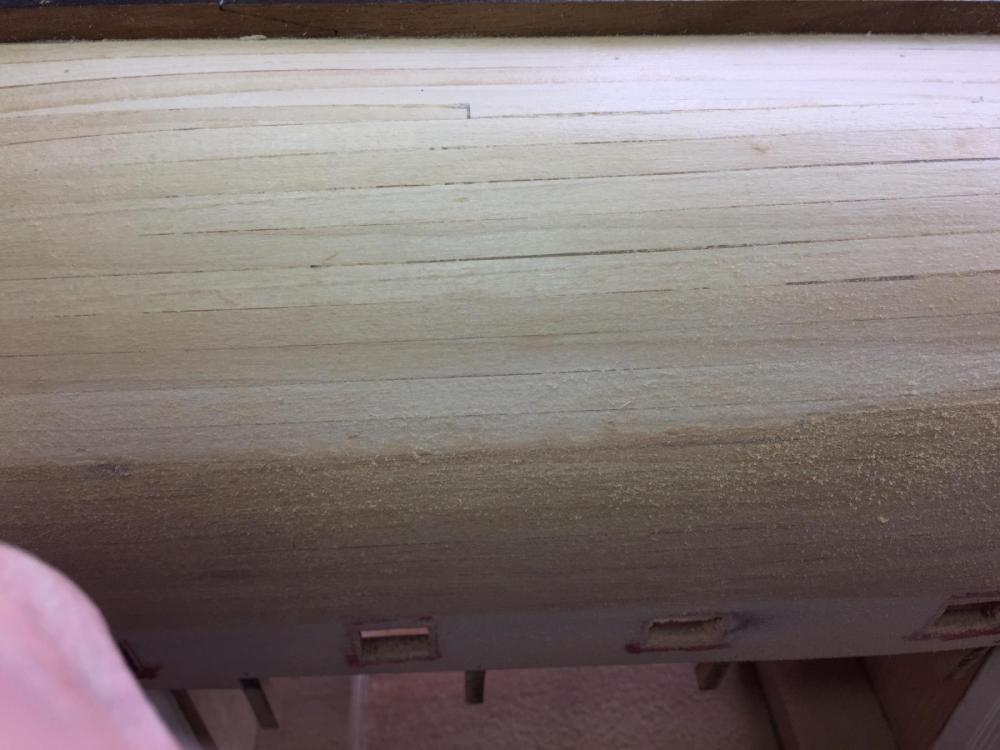
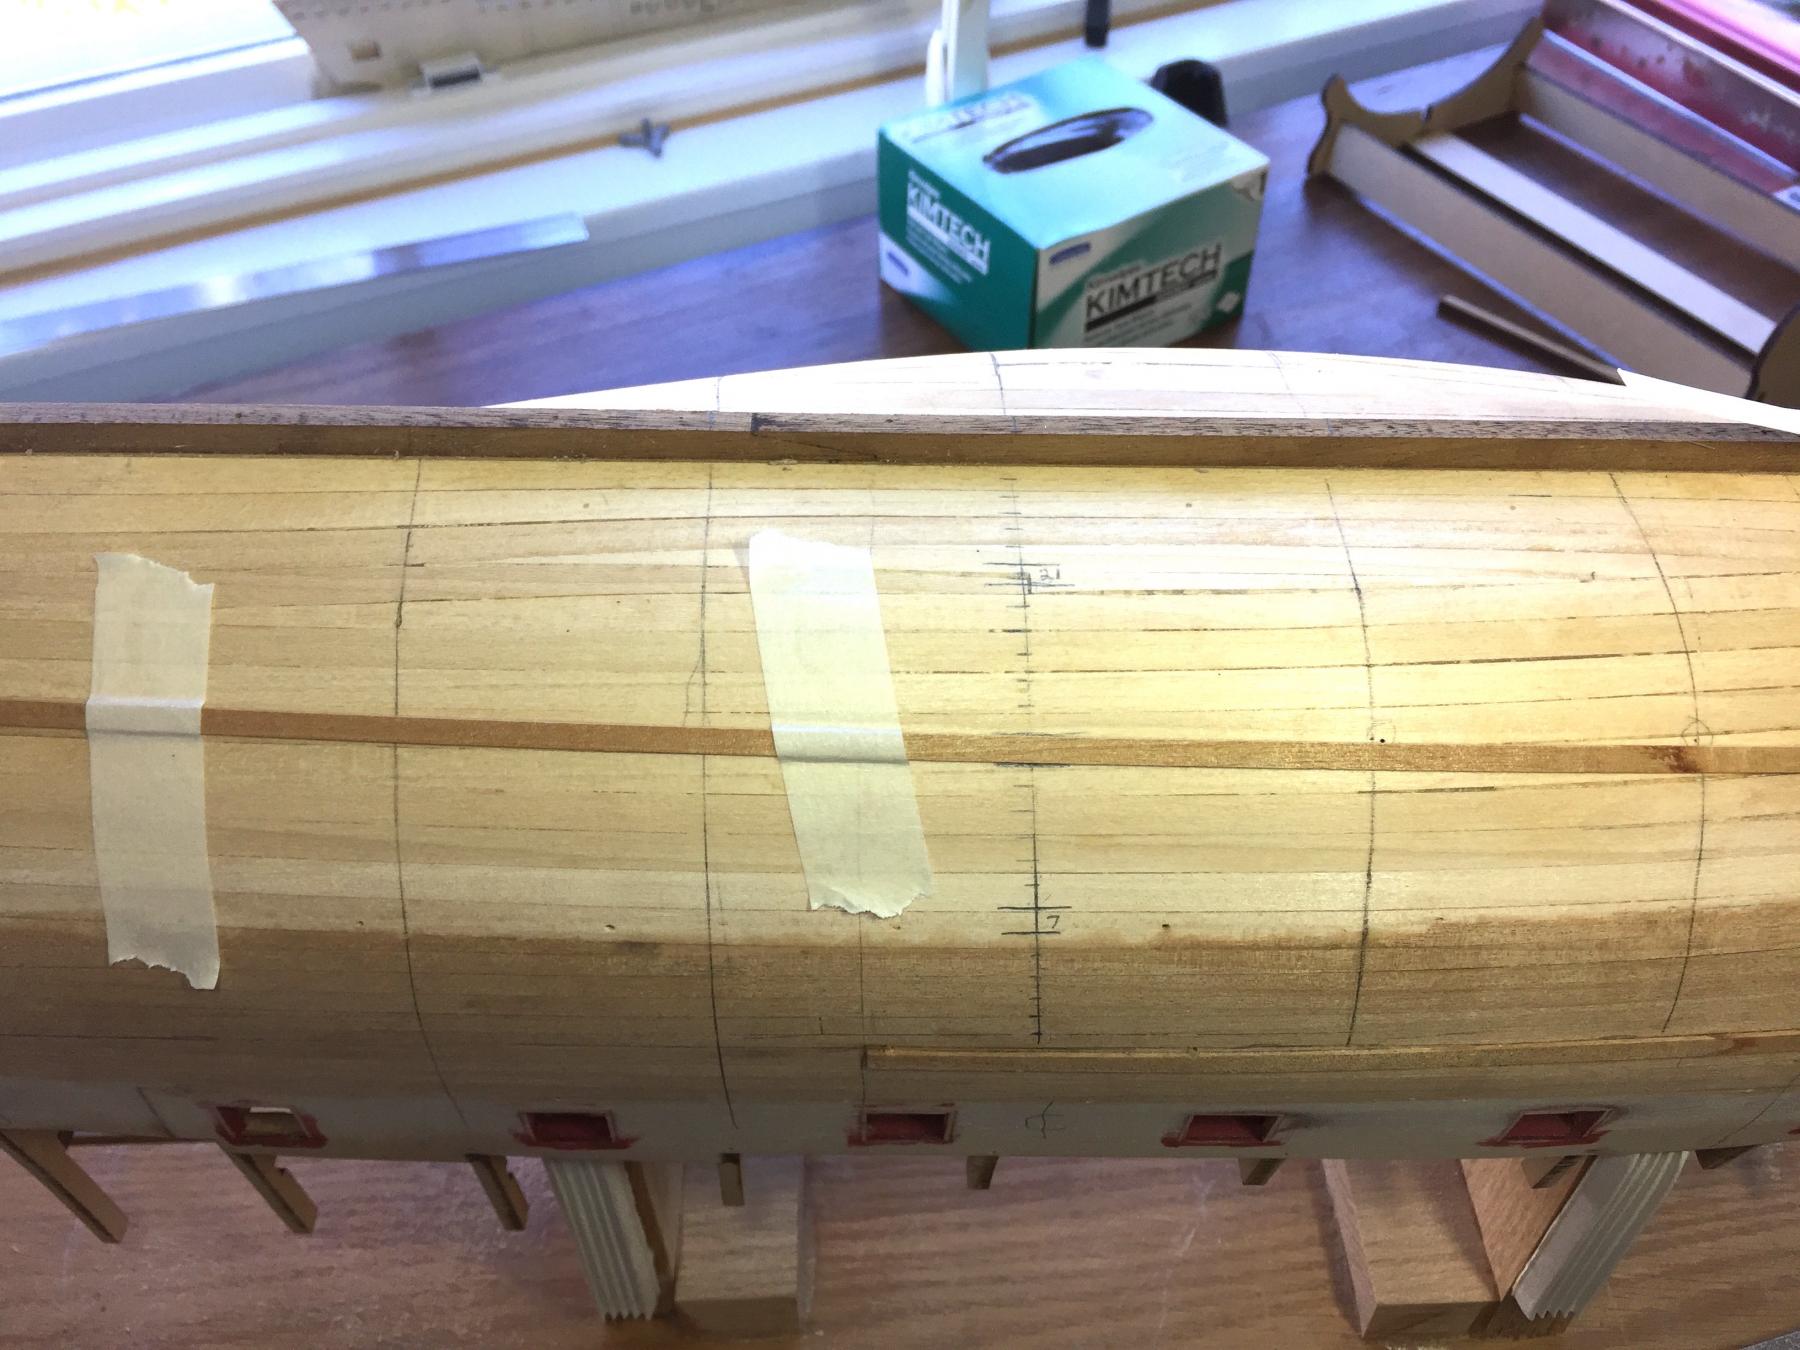
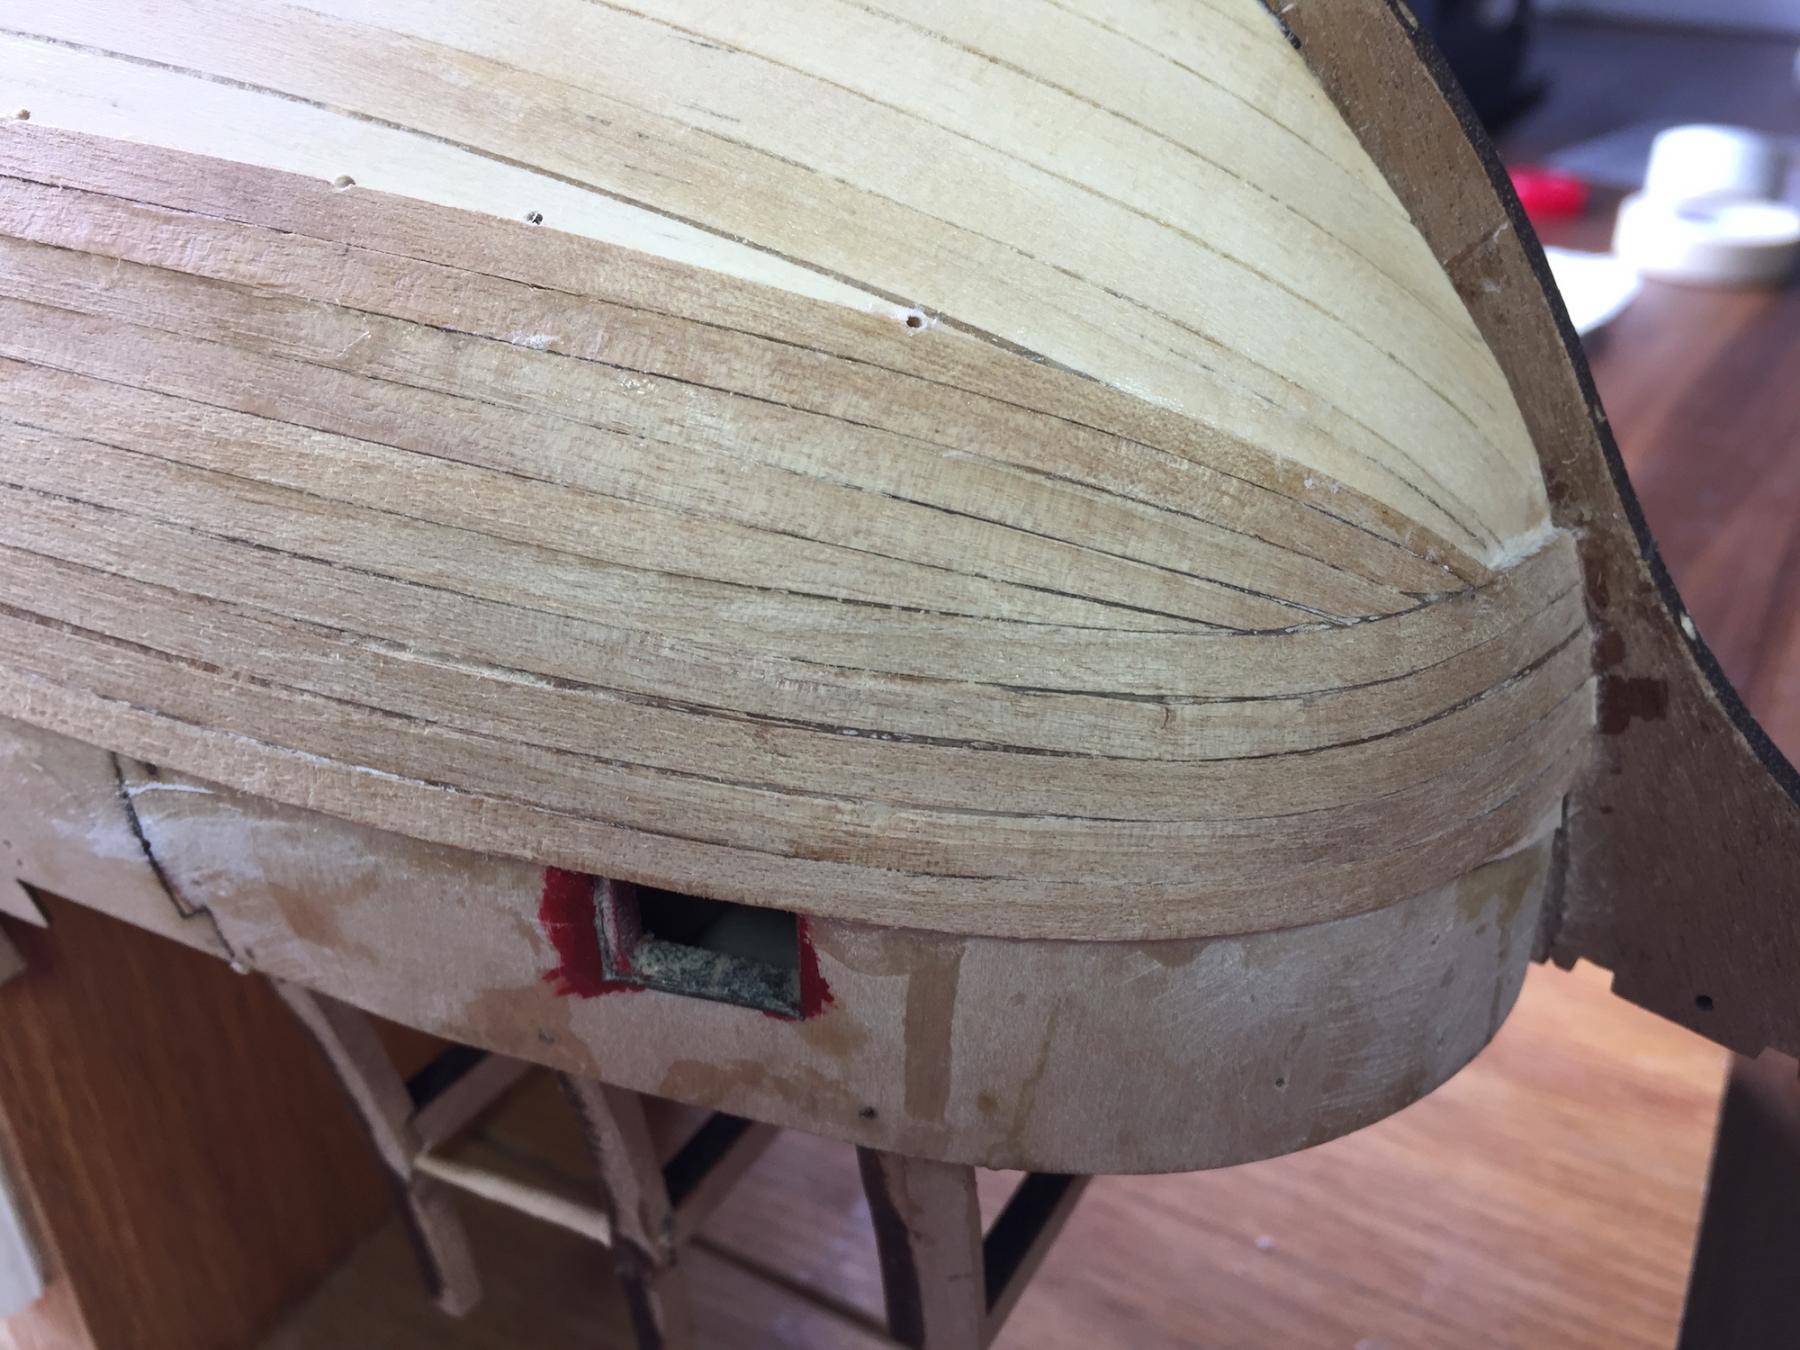
Thank you Brian, Mark, Doc & Joe. I am more verbose than most Joe because I am both slower and since I lack experience I am trying to show all the nitty gritty in hopes that one of you will catch me before I get way beyond my ability to reasonably recover. The pictures in the manual show walnut but the supplied wood is far from that quality. I do not know what it is other than soft. Edge bending to achieve a result similar to spiles took me a week of reading and finally Chuck's video to understand. Reading and doing are two different things . . . . The uppermost strake seen forward in the following photos is the wale plank. I extended it one more piece aft, leaving one section to go. Learning from your build Mark, when I joined the piece to the wale plank I laid another alongside temporarily to assure the transition would be straight and unnoticed. Slight bending downward will take place beyond. I also like the layout seen in the second group of pictures from the previous post. It seemed to embody the lessons so many have written, but I wanted to present it for opinions in case I was blind siding myself. Today, for future reference, I carefully traced both sides of all four banding planks onto the hull, then tic'd off the uppermost band from my arbitrary 0 frame to the stem. I will end up with approximately 3/4 plank width there. Here is another view further forward. Before extending the wale strake I needed to finish planking the transom because the finish planking should overlay the transom edge. I also had seam blackening for unknown reasons that I have seen others remark about. I am experimenting with an idea that I hope will prevent it. Chuck Passaro, in his CHEERFUL build makes a point of mentioning not using edge glue. He has as you know pencil blackened the edges to simulate tar. If he can get along without edge glue I plan to try it also. My two forward hull strakes and the entire transom are carefully fit with beveled edges and forced tight fits and so far they are clean. Fingers crossed. Respectfully, John
- 194 replies
-
- 11
-
-
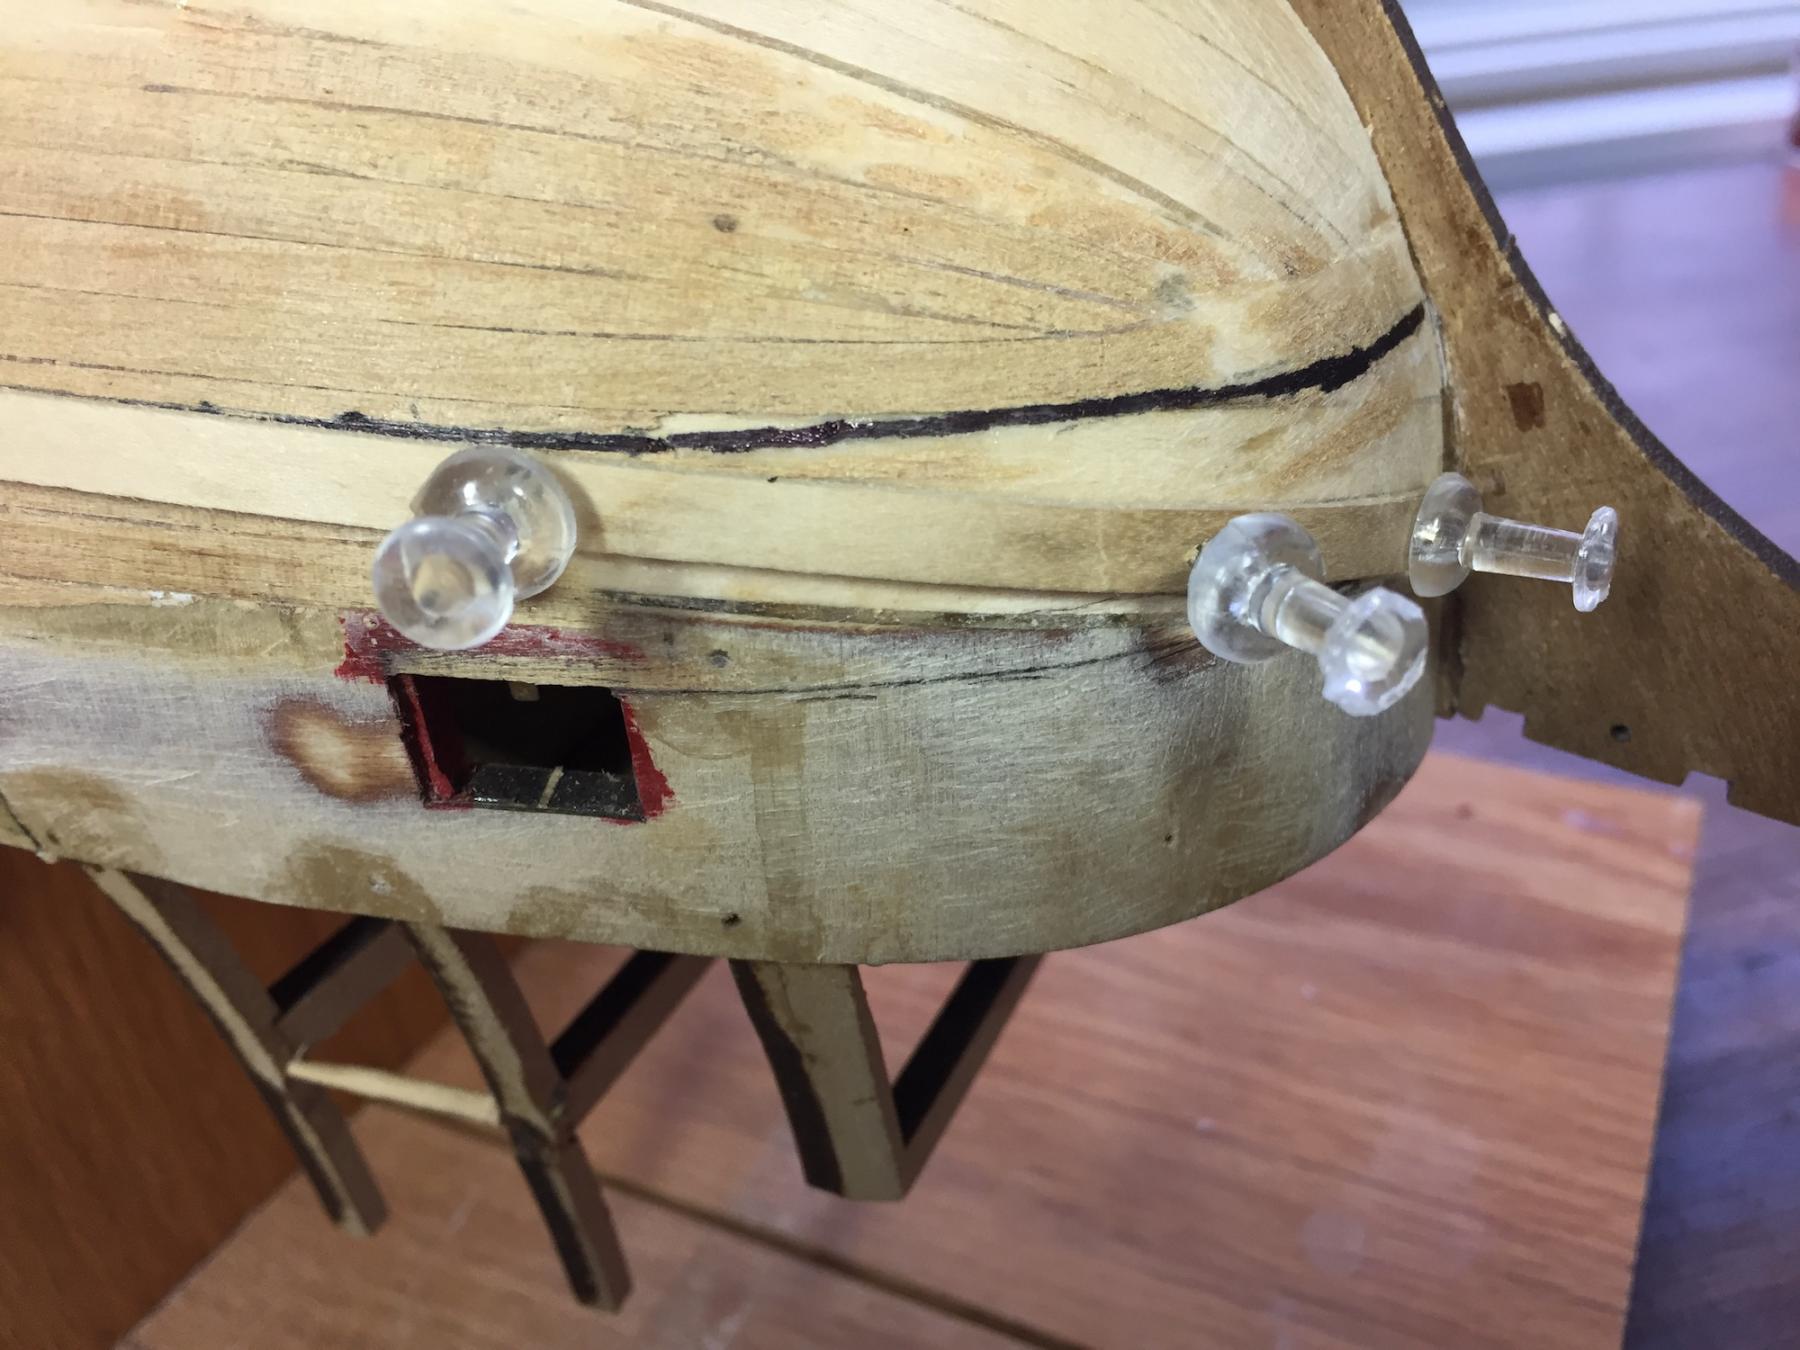
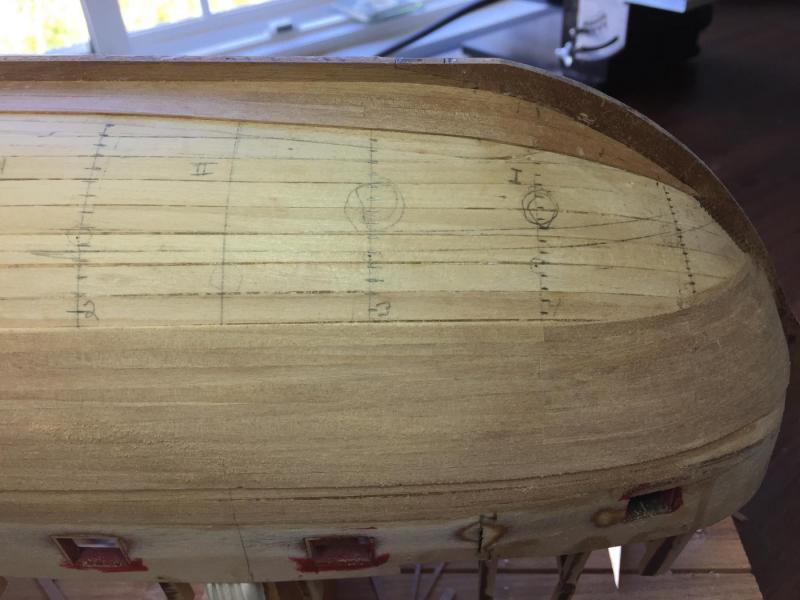
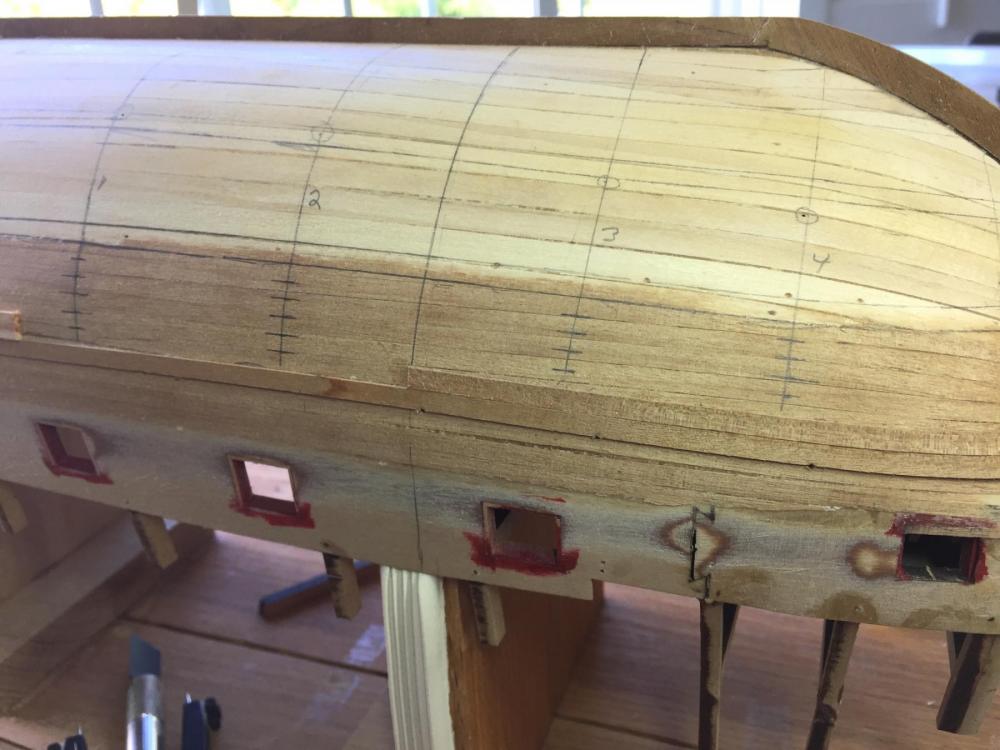
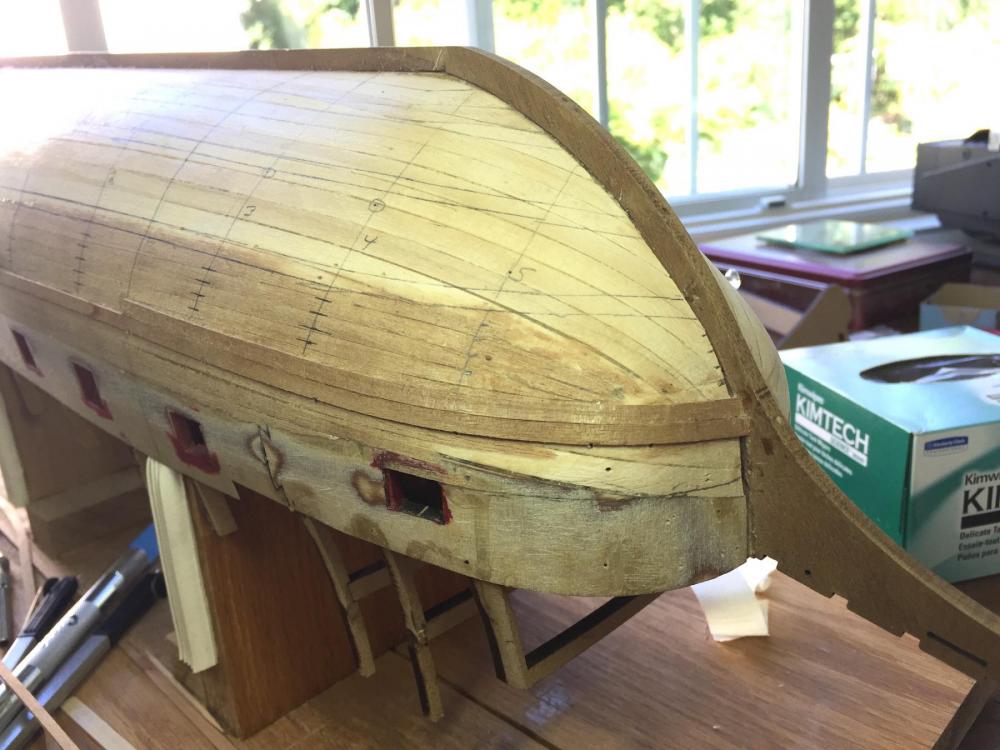
Continuing with the previous post, this line out scheme began with the mid strake positioned at plank 14, midway between the wale and keel, but rather than routing it forward at frame midpoints it was run strictly by eye, offered into what looked fair taking into account the wale and the keel. Strakes to define all four bands were run this time. Strakes in each band are always wider than half plank at the stem. I see no issues, so far, at the stern. I would appreciate as many opinions as possible. Respectfully, John


-
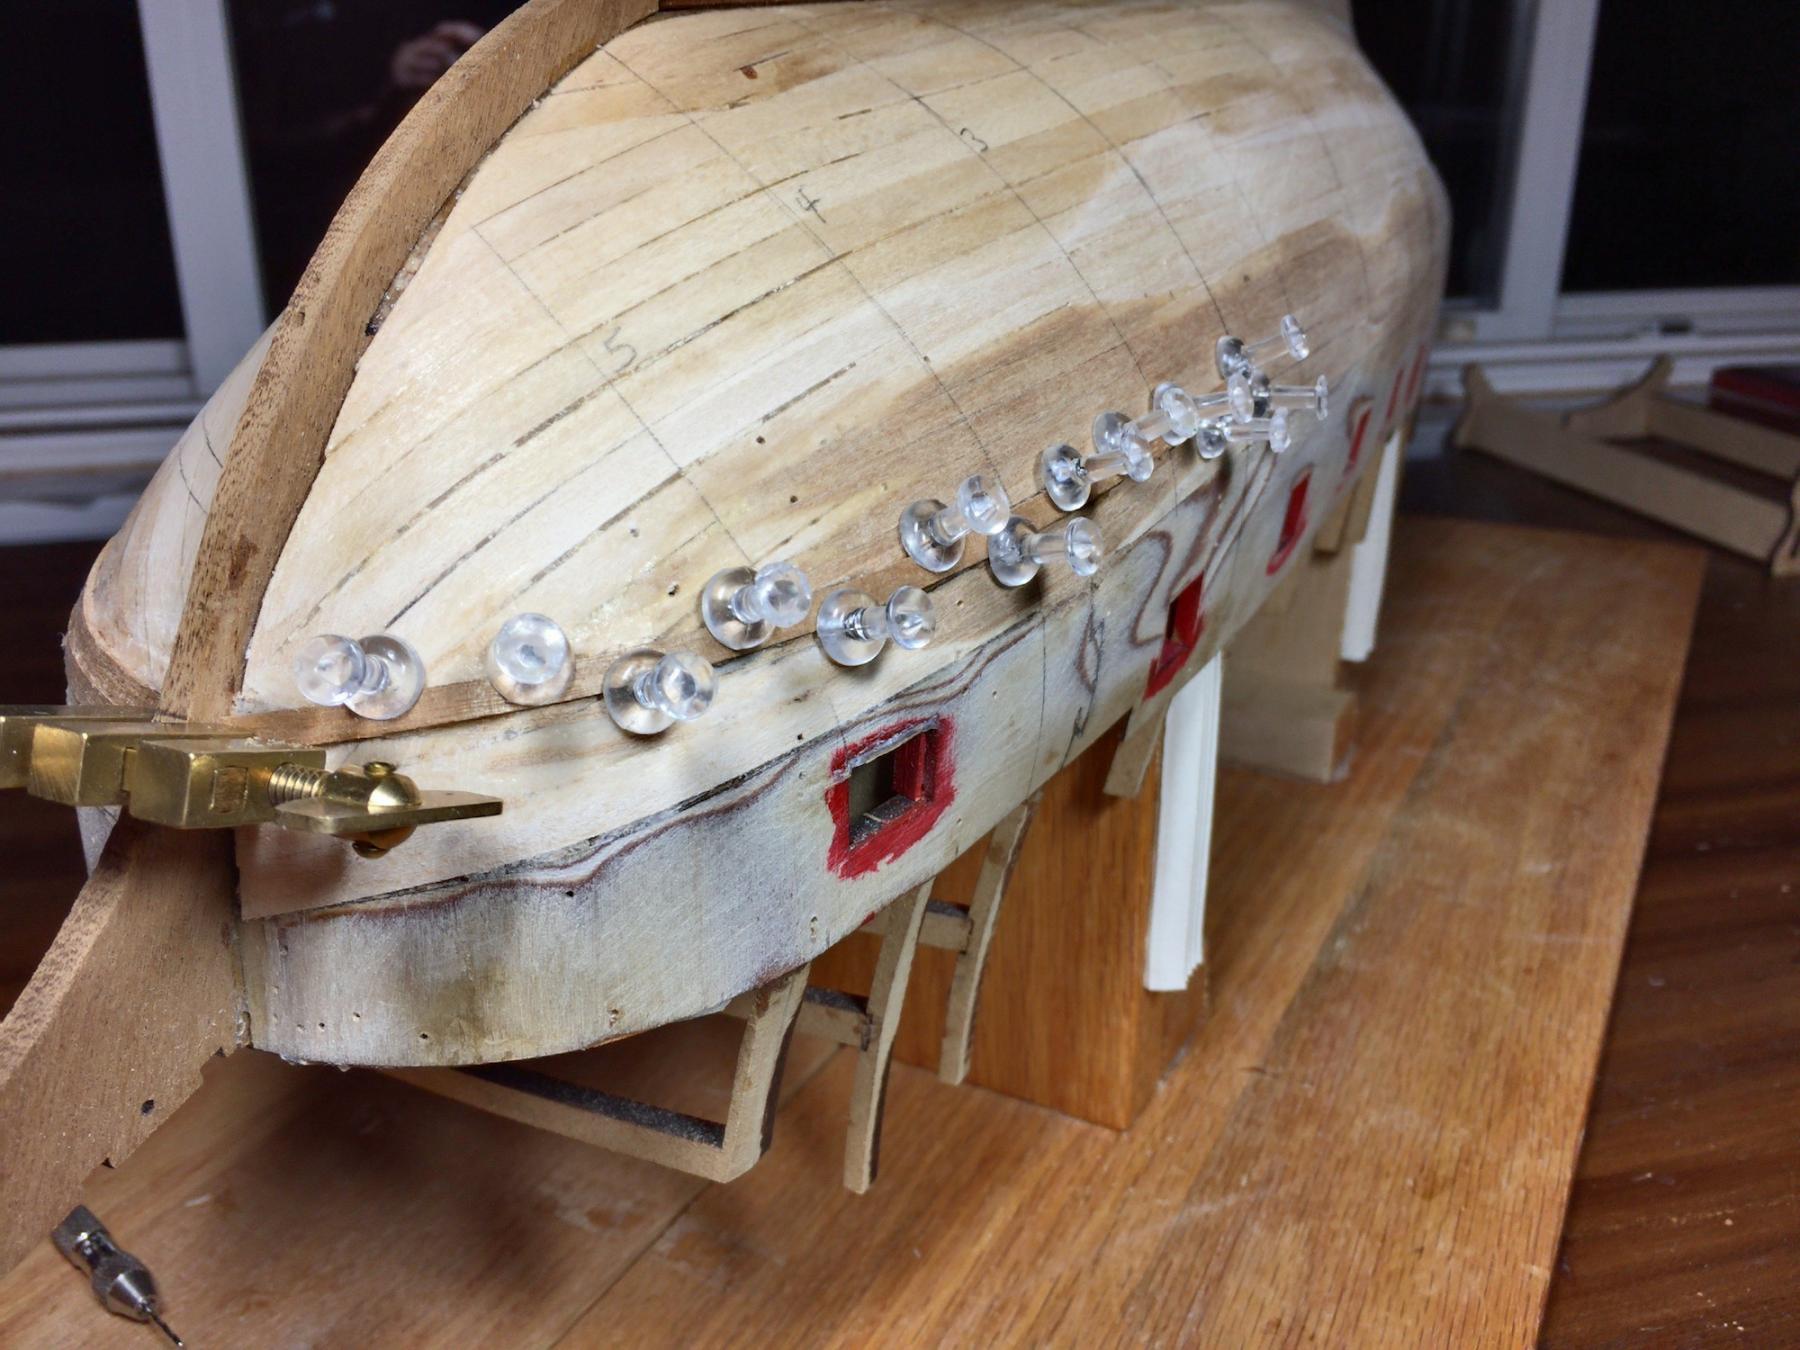
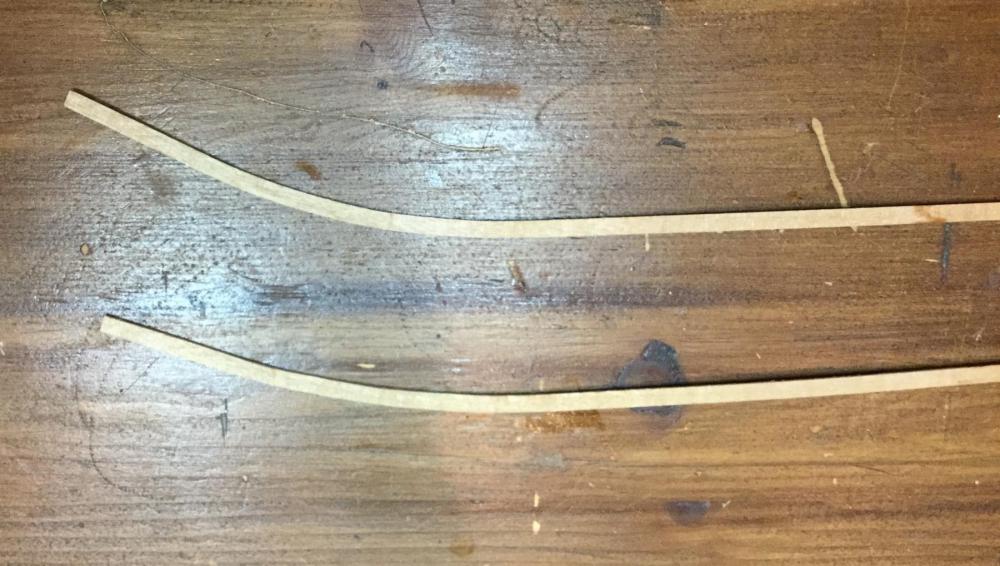
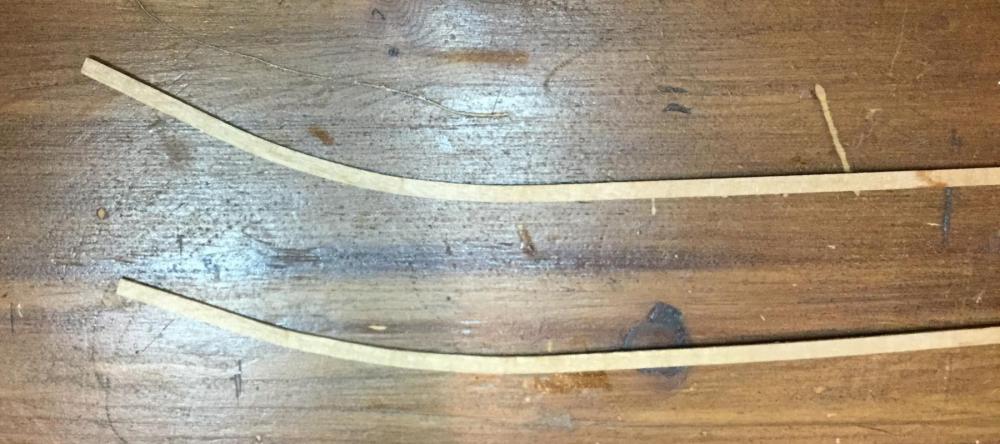
This is the first to two consecutive posts, each describing a planking possibility. Kindly give opinions. I am considering a different way than Chris's instruction on how to plank REVENGE. To do as he suggests begins with the wale plank, laid on approximately parallel to the deck sheer. Planks below the wale would then follow a path similar to this picture. Looking at Chuck Passaro's CHEERFUL and studying his edge bending technique invites the thought of edge bent spile like planks where aft and particularly forward they more nearly parallel the wale as well as the keel. I am bending the planks as seen below to prevent wrinkling. Though Chuck has bent his dry, I found my wood cracked. Wetting it for a couple of minutes in hot water prevented that. I plan to further explore with boiling water. Once bent, I put the jig in the freezer to hasten cooling. As I began to line out the hull, two possibilities presented themselves. I plan to post twice - once for each of the possibilities that I investigated. I used actual planks to define four bands. This enable me to more clearly visualize the actual fair lay and in particular what would happen at the stem. This is the FIRST of the two posts and shows one of the explored possibilities. I began by choosing the widest frame amidship. My 4mm planks will require 28 strakes to go from the lower edge of the wale (reference) plank to the keel. In the next photo the mid plank is shown. The strake is laying fair through the position for the 14th plank, half way between the wale and the keel. Looking at the two frame positions forward can be seen a pin hole at each representing the mid point between the wale and the keel. This mid band strake was positioned at the stern to be the last strake approaching the post that is in a rounded position. The next plank would parallel the vertical part of the stern. The mid point strake, already edge bent, continues forward half way between the wale and the keel. It can be seen converging with the wale in the next two pictures. At this point the plan to divide each frame into four equal widths began to look like the stem area was not going to work out well. The equal division of each frame into four equal width bands sounded reasonable but in reality I don't think it works. Should it if spiled? I went on to a modified proposal that can be seen in the next post. Respectfully, John

-
Thank you for the many LIKES, dear friends . . . Joe, I appreciate you taking the time to comment. At this point in time I have only edge bent two planks with Chuck's method. I bent to the point where I felt safe, then clamped and applied heat. There was very little spring back when I released the clamps after cooling. I found that I could further bend at that point and repeat the process. I just spent part of the last two days hand sanding the planks previously glued to the stbd side of the ship. Boring. The port side had been stripped earlier. The builders manual instructs the constructor to attach the wale plank as described a couple of days ago and then continue planking as seen in the photo below. Instead, I am going to line off the hull in standard fashion and use Chuck Passaro's edge bending technique to plank parallel to the lower run of the gun ports. That should produce an appearance similar to his ship CHEERFUL. I prefer that appearance. Edge bent planks similar to this, which he advocates in lieu of stealers and drop planks, seem to make that possible. Amati provides 4mm finish planking while specifying 5mm. That of course makes no difference, but I plan to mill 5mm wood and paint it black for the wales. The wales will to some degree not be parallel to the hull planking at the bow and stern, only midship. I believe I have seen that on other ship builds. The 5mm width ought to work well in contrast to the 4mm planking that it overlays. Now to study lining off . . . Respectfully submitted, John

-
Mark, Those two videos have the information I have been looking for all week. I was out of ideas on where else to look. I have begun both his and your builds but hadn't reached anything other than his mention of using a hair dryer. Without the video the information doesn't help someone as inexperienced as me. Your "tear aparts" motivated me to do my own. Thank you . . . My home made jig gave me two planks with difficulty but Chuck's method for edge bending was as simple and easy as one could ever hope to find. After putting the wale plank and the one above it with two planks made from my jig I used Chuck's method and more easily made two more as seen below. I even went so far as to order some clamps identical to what he used. The second and equally important thing was watching him illustrate implementation of his lining off. I did not do that the first time, even though I recognized its importance, I will definitely do it this time. Respectfully and thankfully, John Maguire Seattle
-
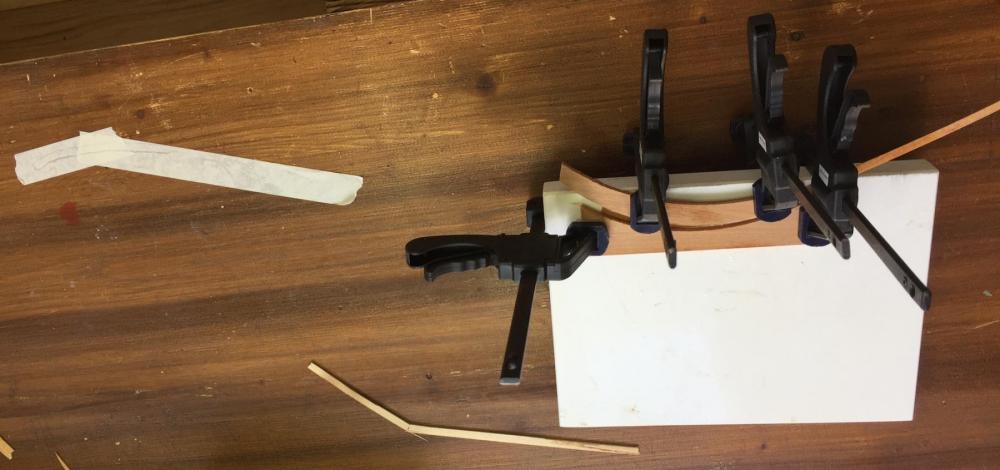
First of all, thank you for the many LIKES, dear friends . . . . Having said that, here I am back again - twice in the same day. Reason: problem solved! I see all of you with your clever home made tools and jigs so I decided to begin by following your lead and try one myself. The advantage I found with this jig was that after clamping the concave side to the tile I could lay the movable piece on top of my plank during the bending push and by so doing it kept the plank from wrinkling as it was forced into its unnatural edge direction. All the techniques with which I was unsuccessful seemed in my opinion to be tailored to normal bending and gave me no discernible relief when I used them for edge bending. I opted to follow the lead of Mark and Chuck with plank lengths that in my case are only somewhat scale. Importantly, by having shorter lengths to attach I'll have more control in glue amount, taper, bevel and plank to plank tightness. I did the first attempt, which was removed, with full hull length planks and always felt that I didn't have the control that I wished for. Below is the wale plank and the first plank above it. Those are the two most difficult. On my hull, they can only lay flat and fair if they are edge bent. Continuing to plank upward will only require slight edge bending. Planking downward will only require tapering. Again, thank you for your many advices. Also, I am going to look closely at Chuck's videos. Now back for an edit after getting into just the first few minutes of Chuck's video and I see the easy way to do it . . . . Wow! Respectfully, John


-
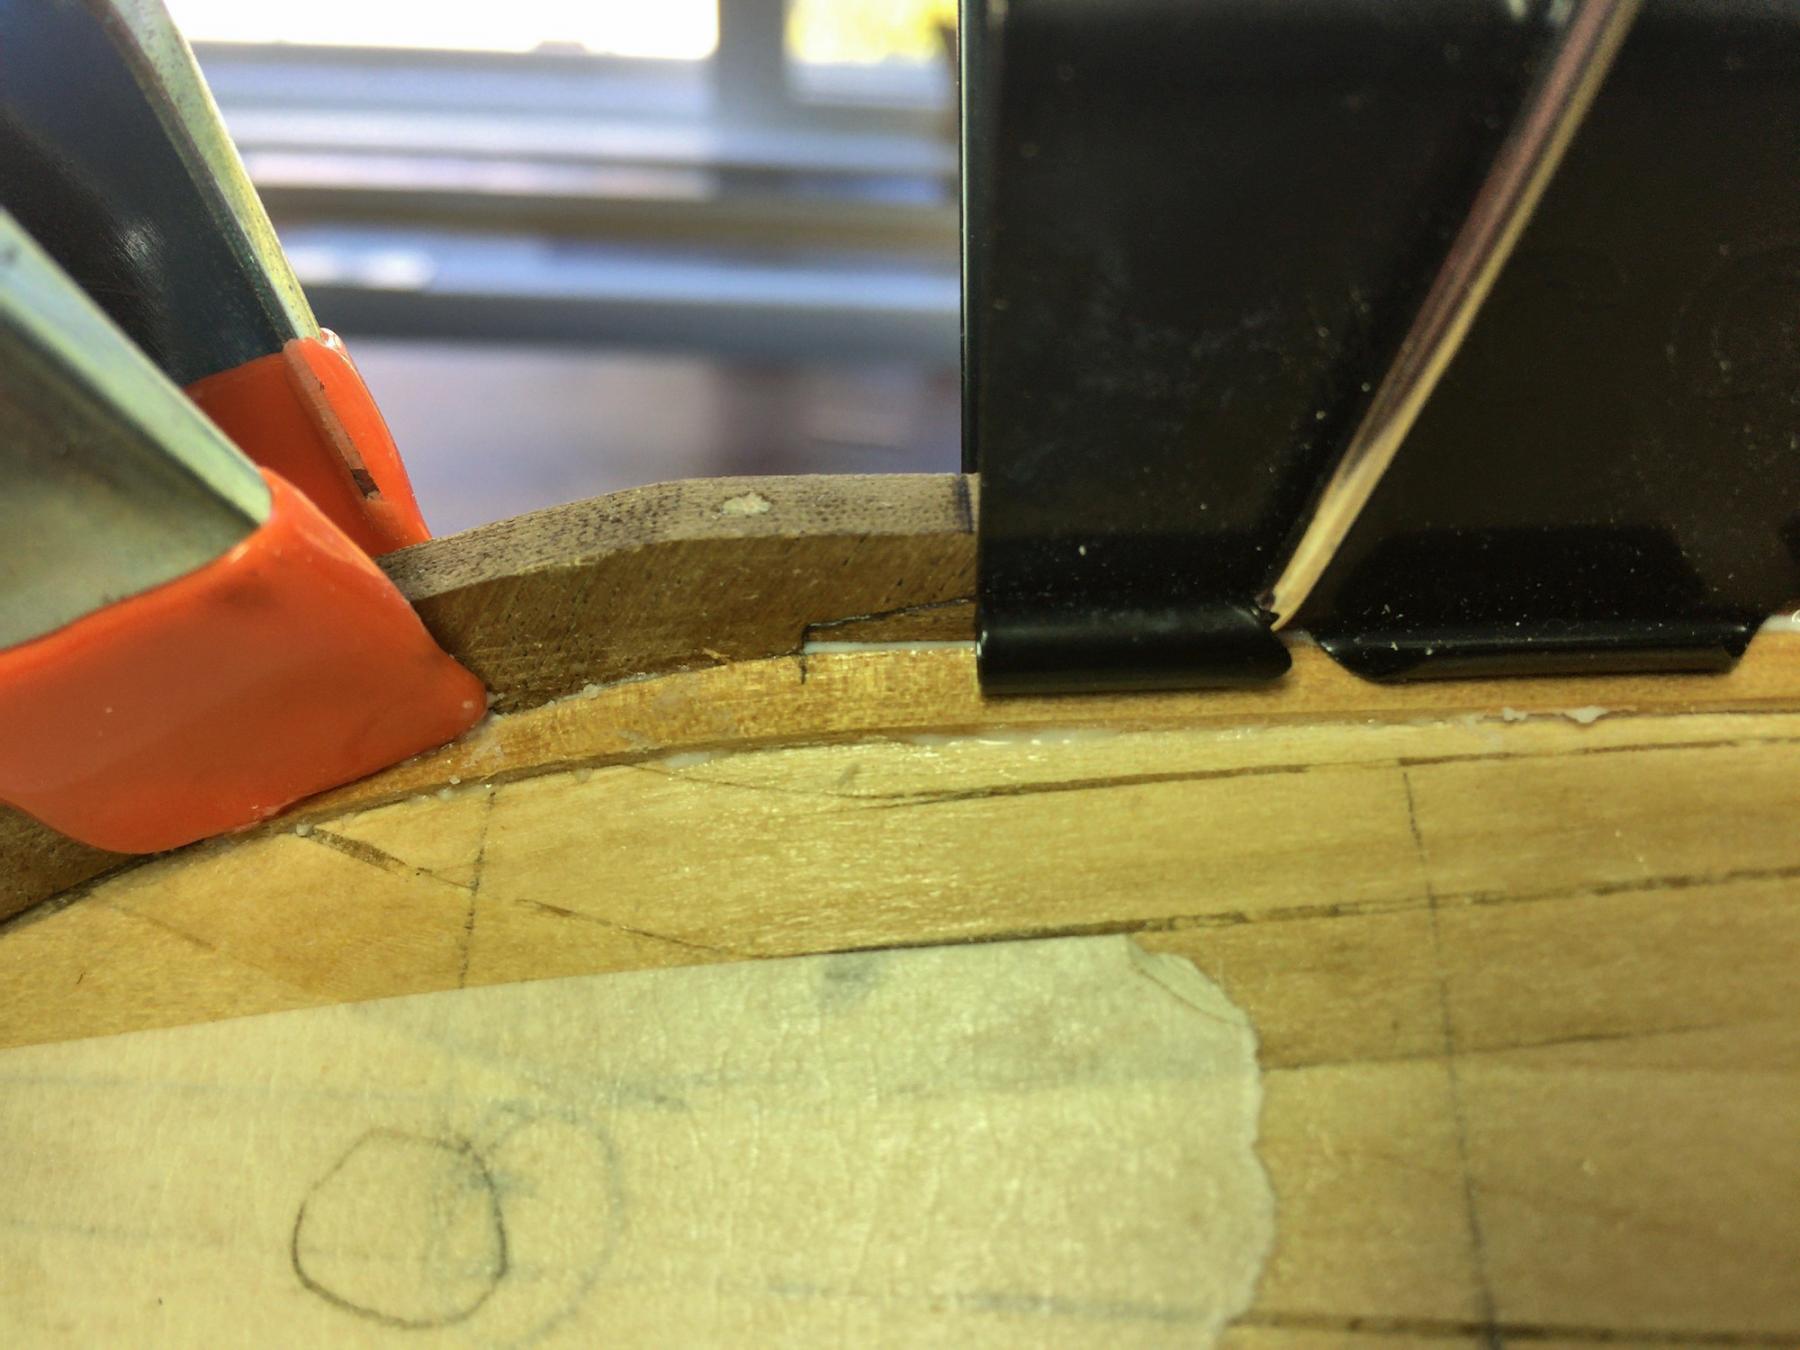
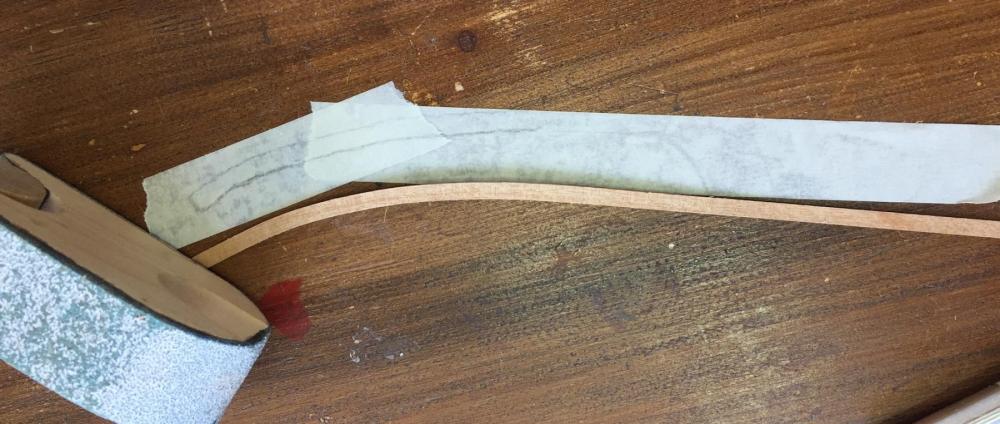
Brian, Joe, Don & Mark, Thank you for your thoughtful advices. Yes, I did the original "first" planking in this area but it was as much a hassle as I am having now and the seams are not finish quality. I could not achieve really finish grade seams. Pictures that I displayed a few posts ago show where I was headed this time with the final planking and the results were not suitable. With the first planking, glueing the couple of inches closest to the stem was done with medium viscosity super glue. It seems like every place I did that there were black seams. Probably a coincidence. Additionally, the seams were not furniture tight. I was fighting the wood. I have been scouring You Tube videos for the past two days to no avail. Thank you for the Chuck related videos. I just saw that post and will look. I soaked some planks in alcohol all night then wrapped one in a wet cloth and microwaved it, first for three minutes with no good results, then for five minutes. No help. I tried hot air and it did nothing on either of the two types of wood that I have. In the photo below you'll see a piece of the wood used for the first planking that I experimented on with hot air this morning and broke it. I made a jig with the approximate shape that I want and by putting the smaller part of the jig on top of my plank I was able to keep the planking from twisting as I forced it into the concave shape of the jig. I ran hot air over it later to try to dry out the wood. I'll leave it for awhile before releasing the clamps. Could it be that this wood is of so little mass that it does not retain interior heat after trying to steam it in a wet rag inside the microwave oven? I am thinking next of trying boiling water for an hour or longer. Here is what I just did. You can see the tape pattern beside it and to the side is the piece I broke when I tried hot air. Respectfully, John
-
Brian, I am enroute to checking out Chuck's edge bending right now - thank you. Don, you are very observant - because the ship is upside down I put the plank on the wrong side of the line to make photography better. Repositioning it will not make the kind of change necessary. Can you please look at your kit Don and identify the wood I am using? Respectfully, John
-
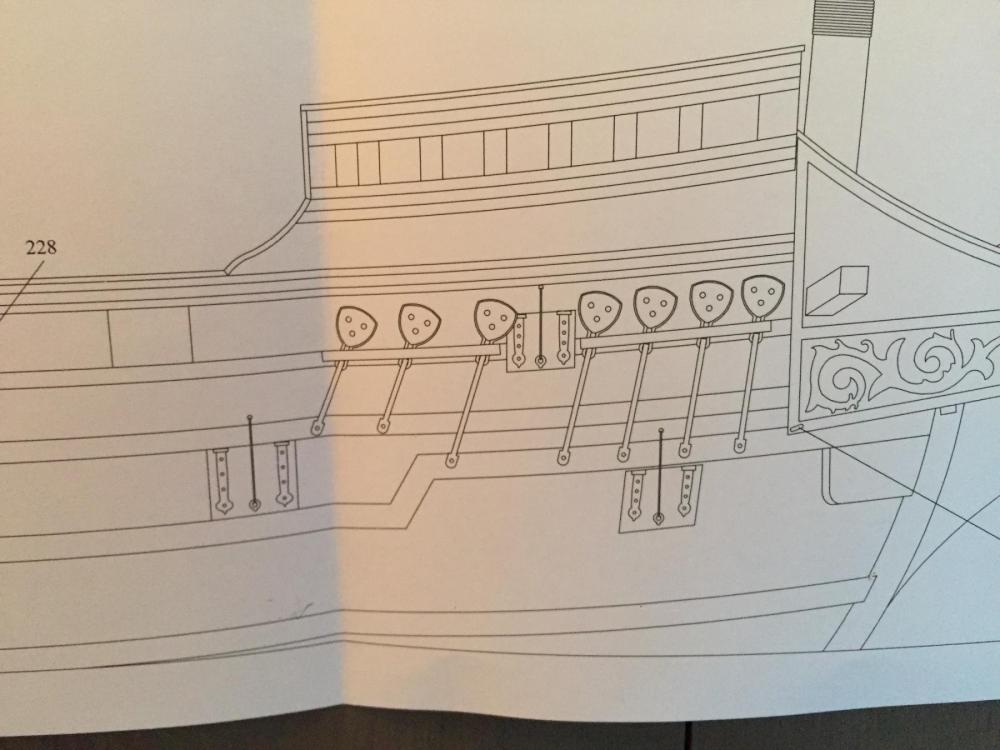
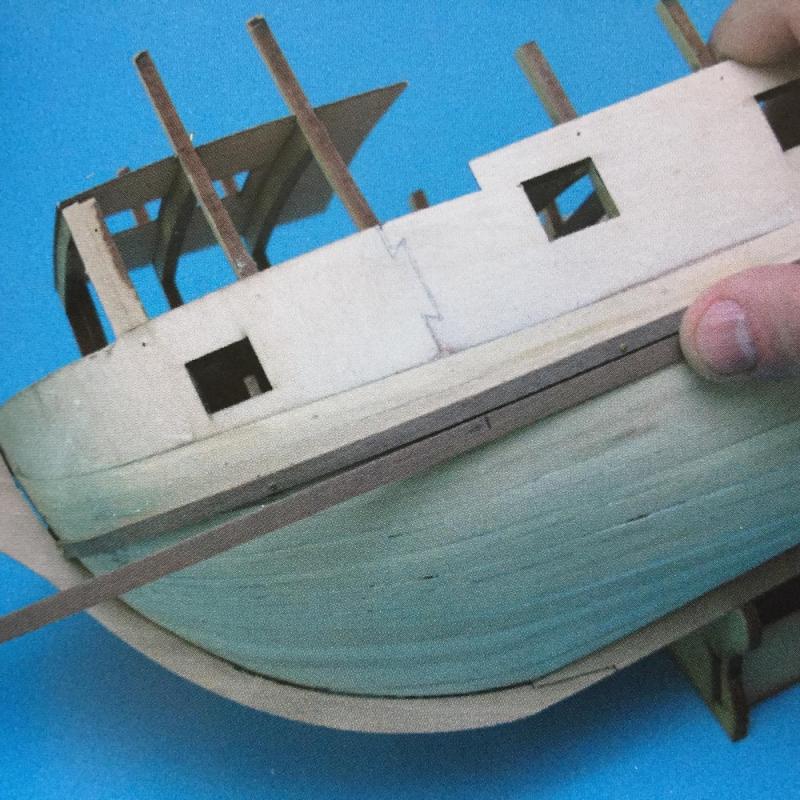
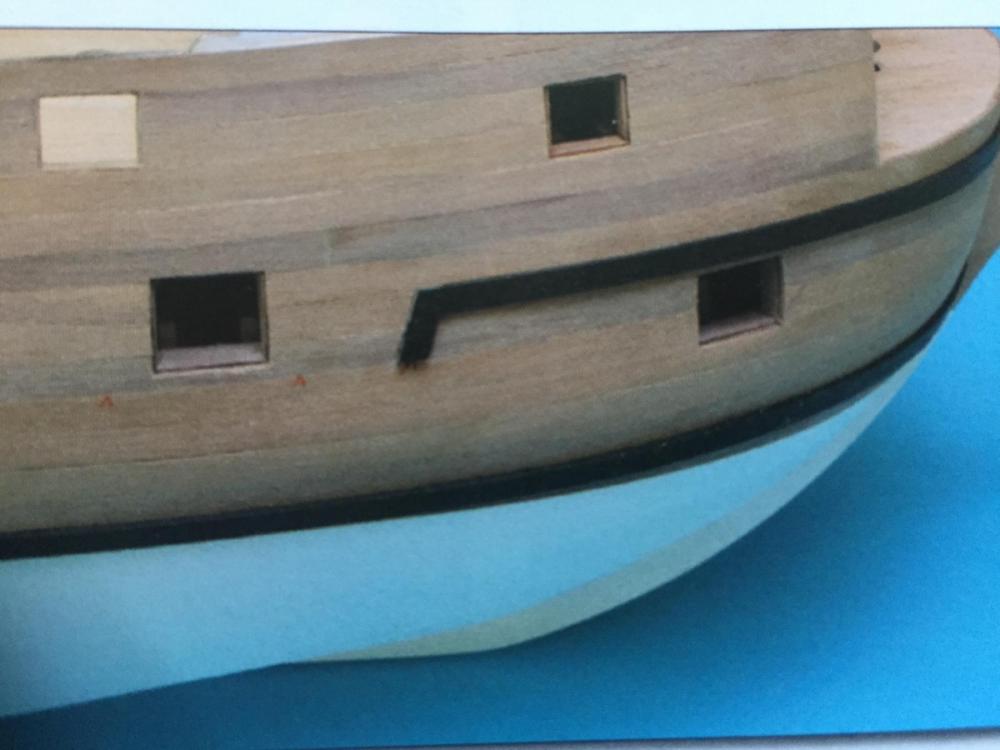
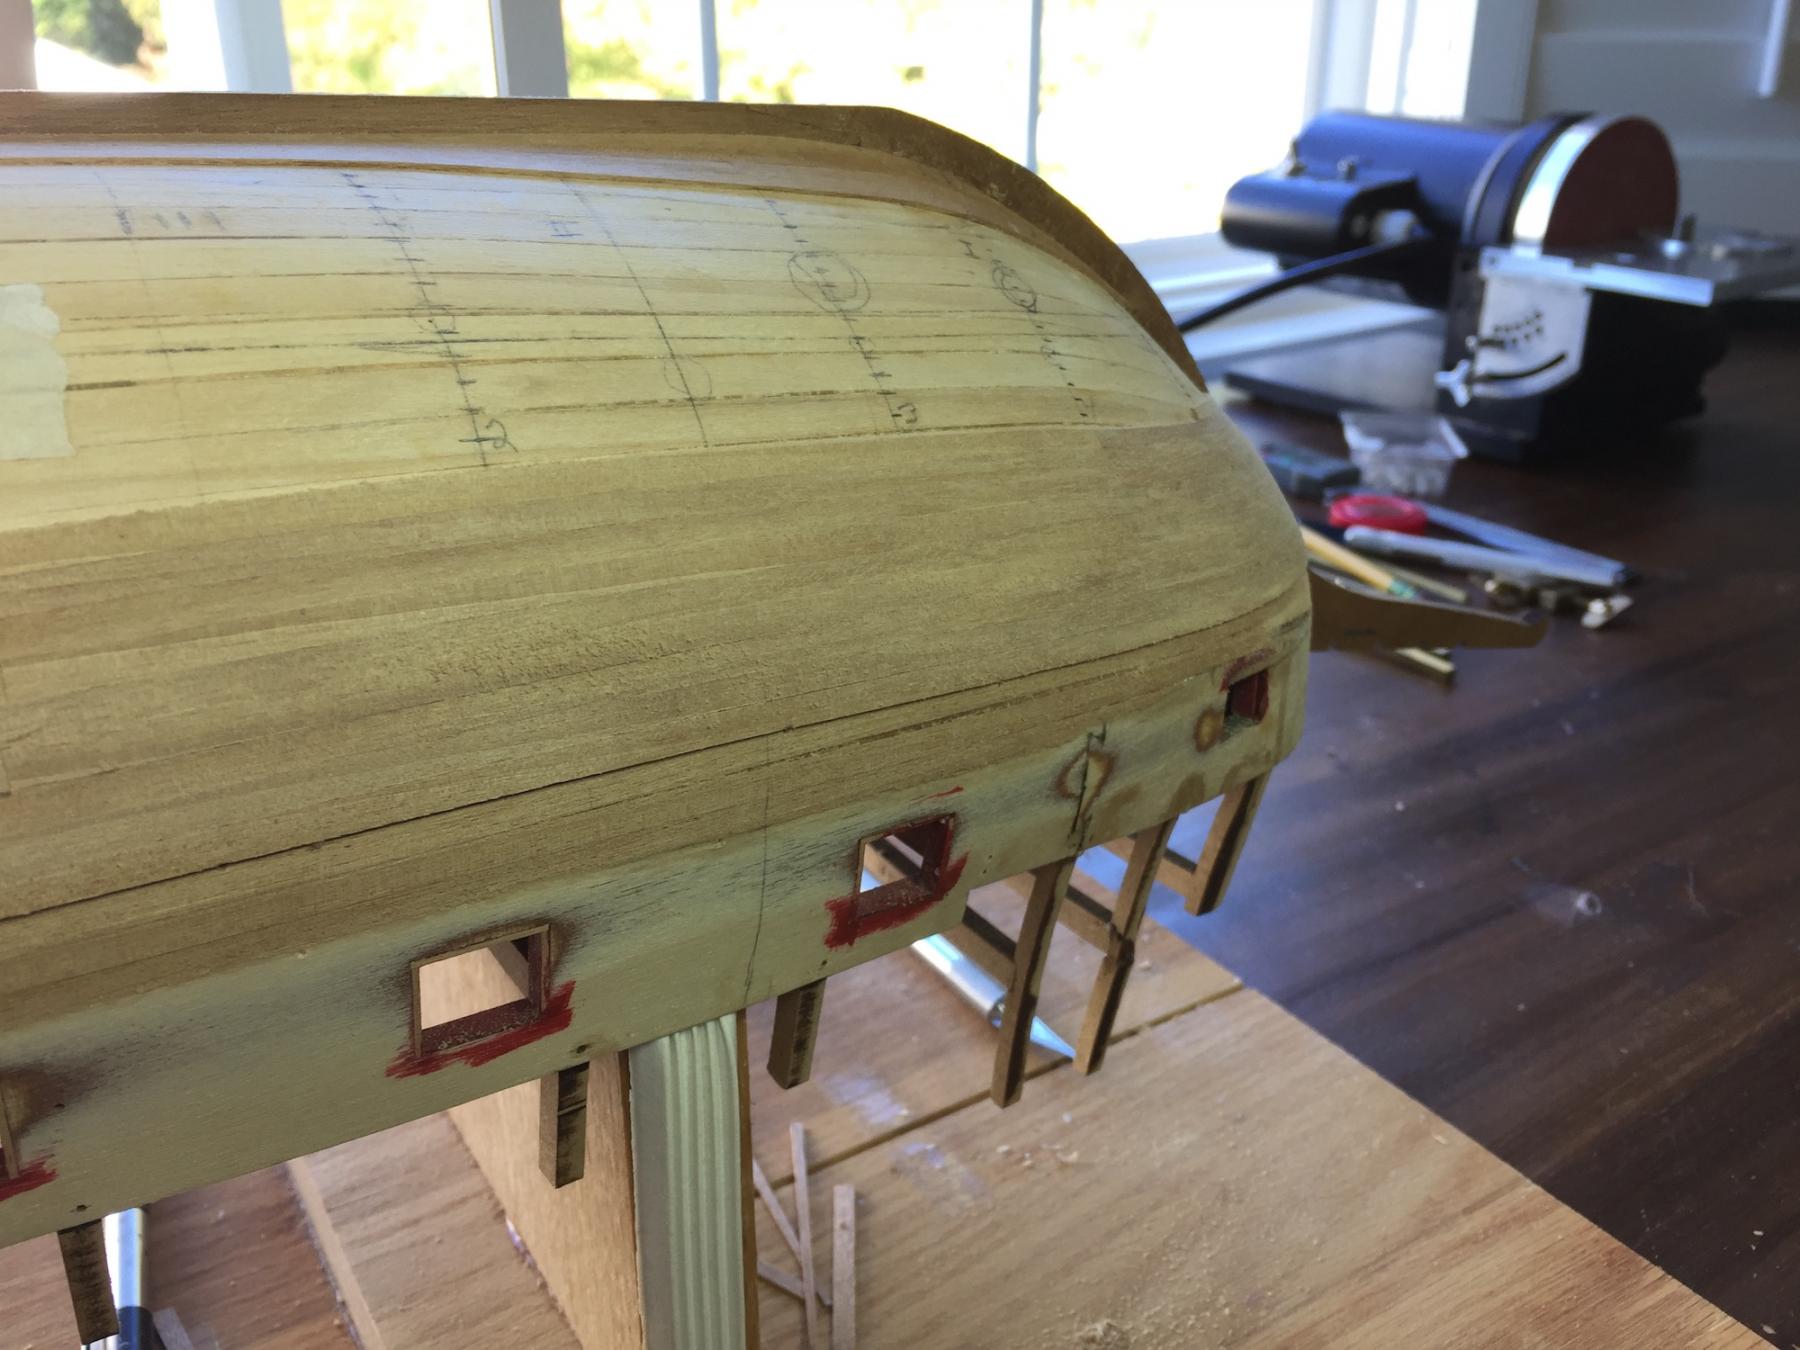
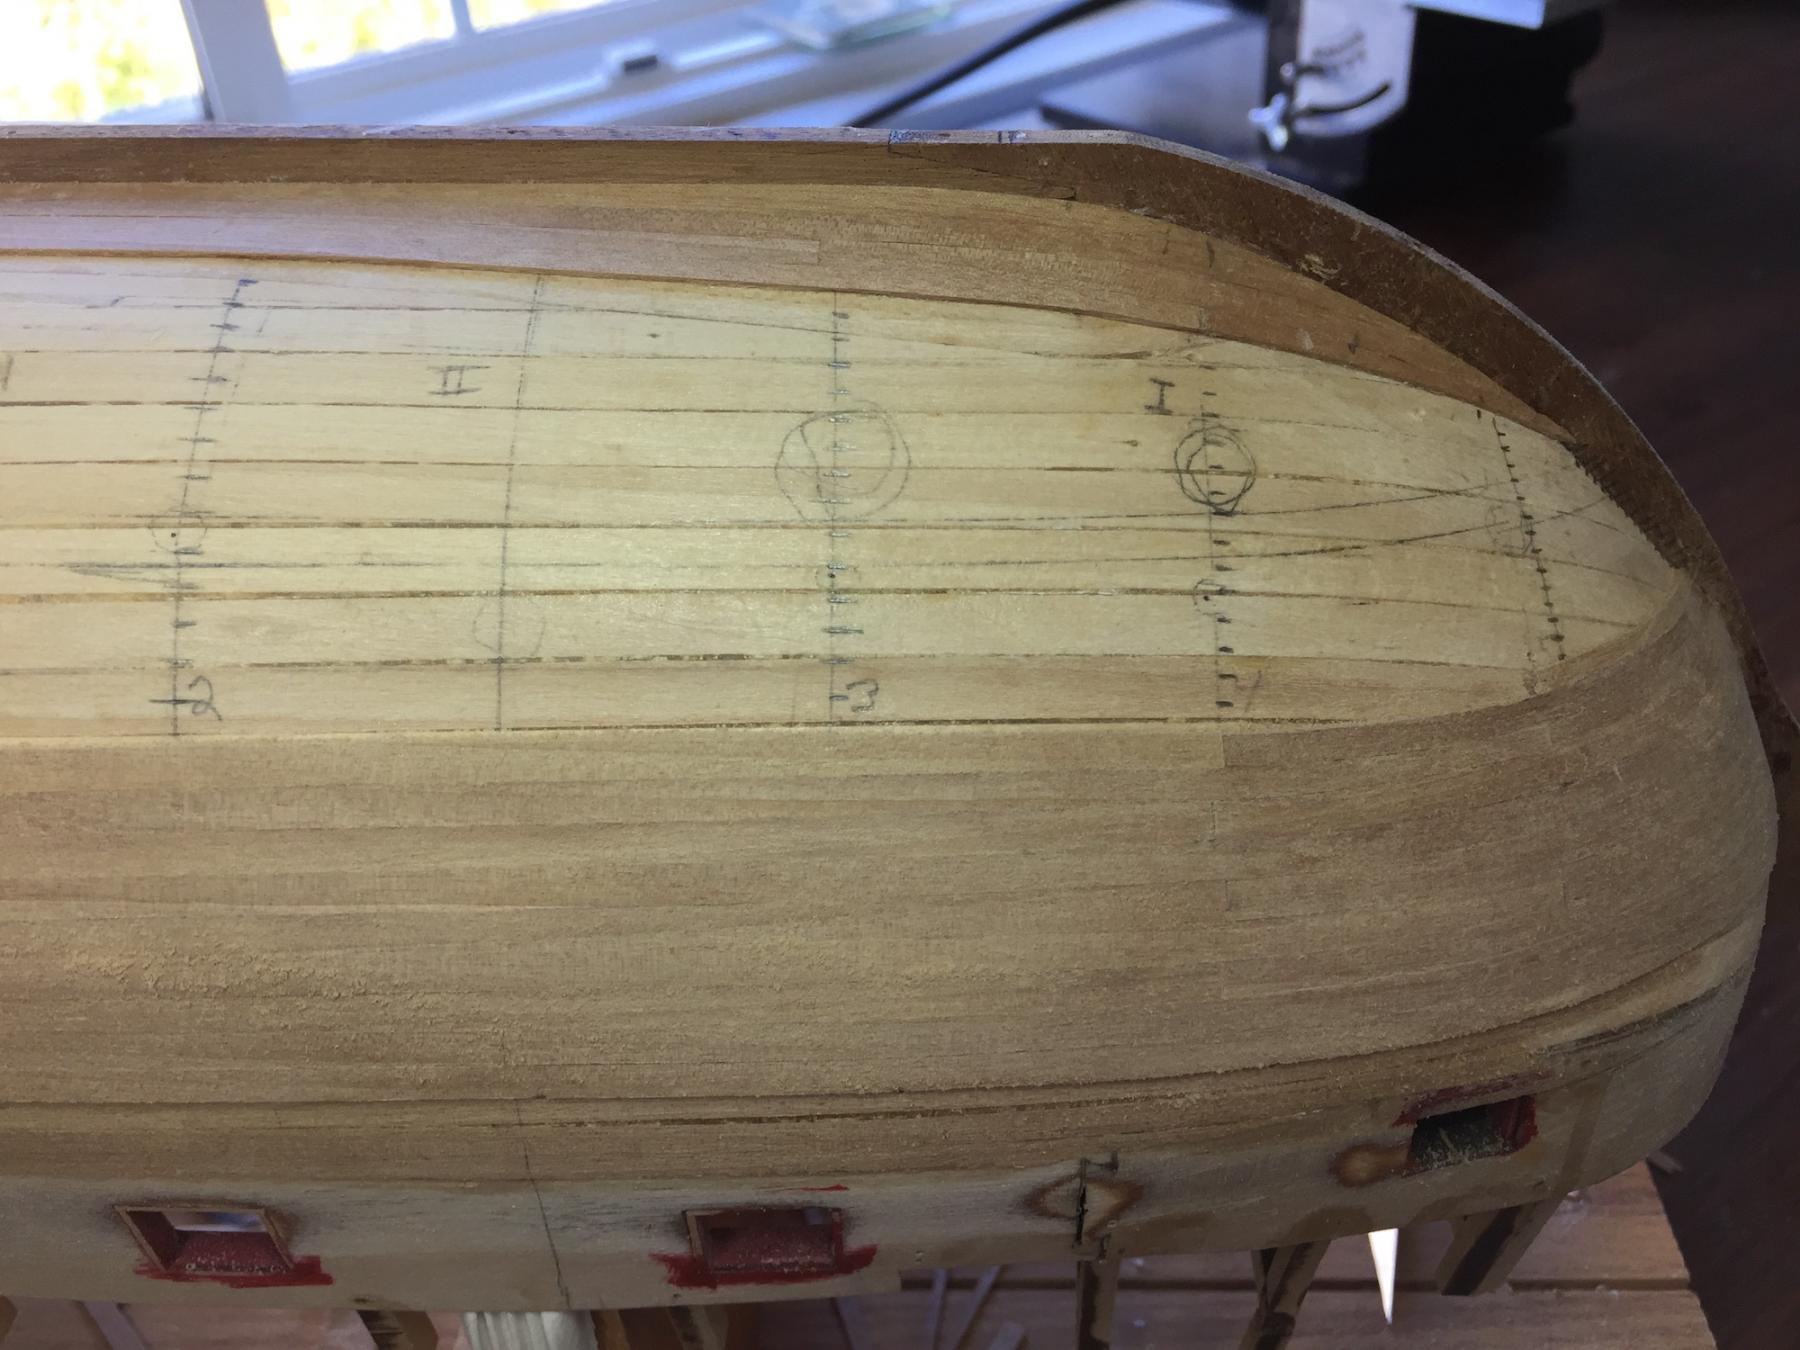
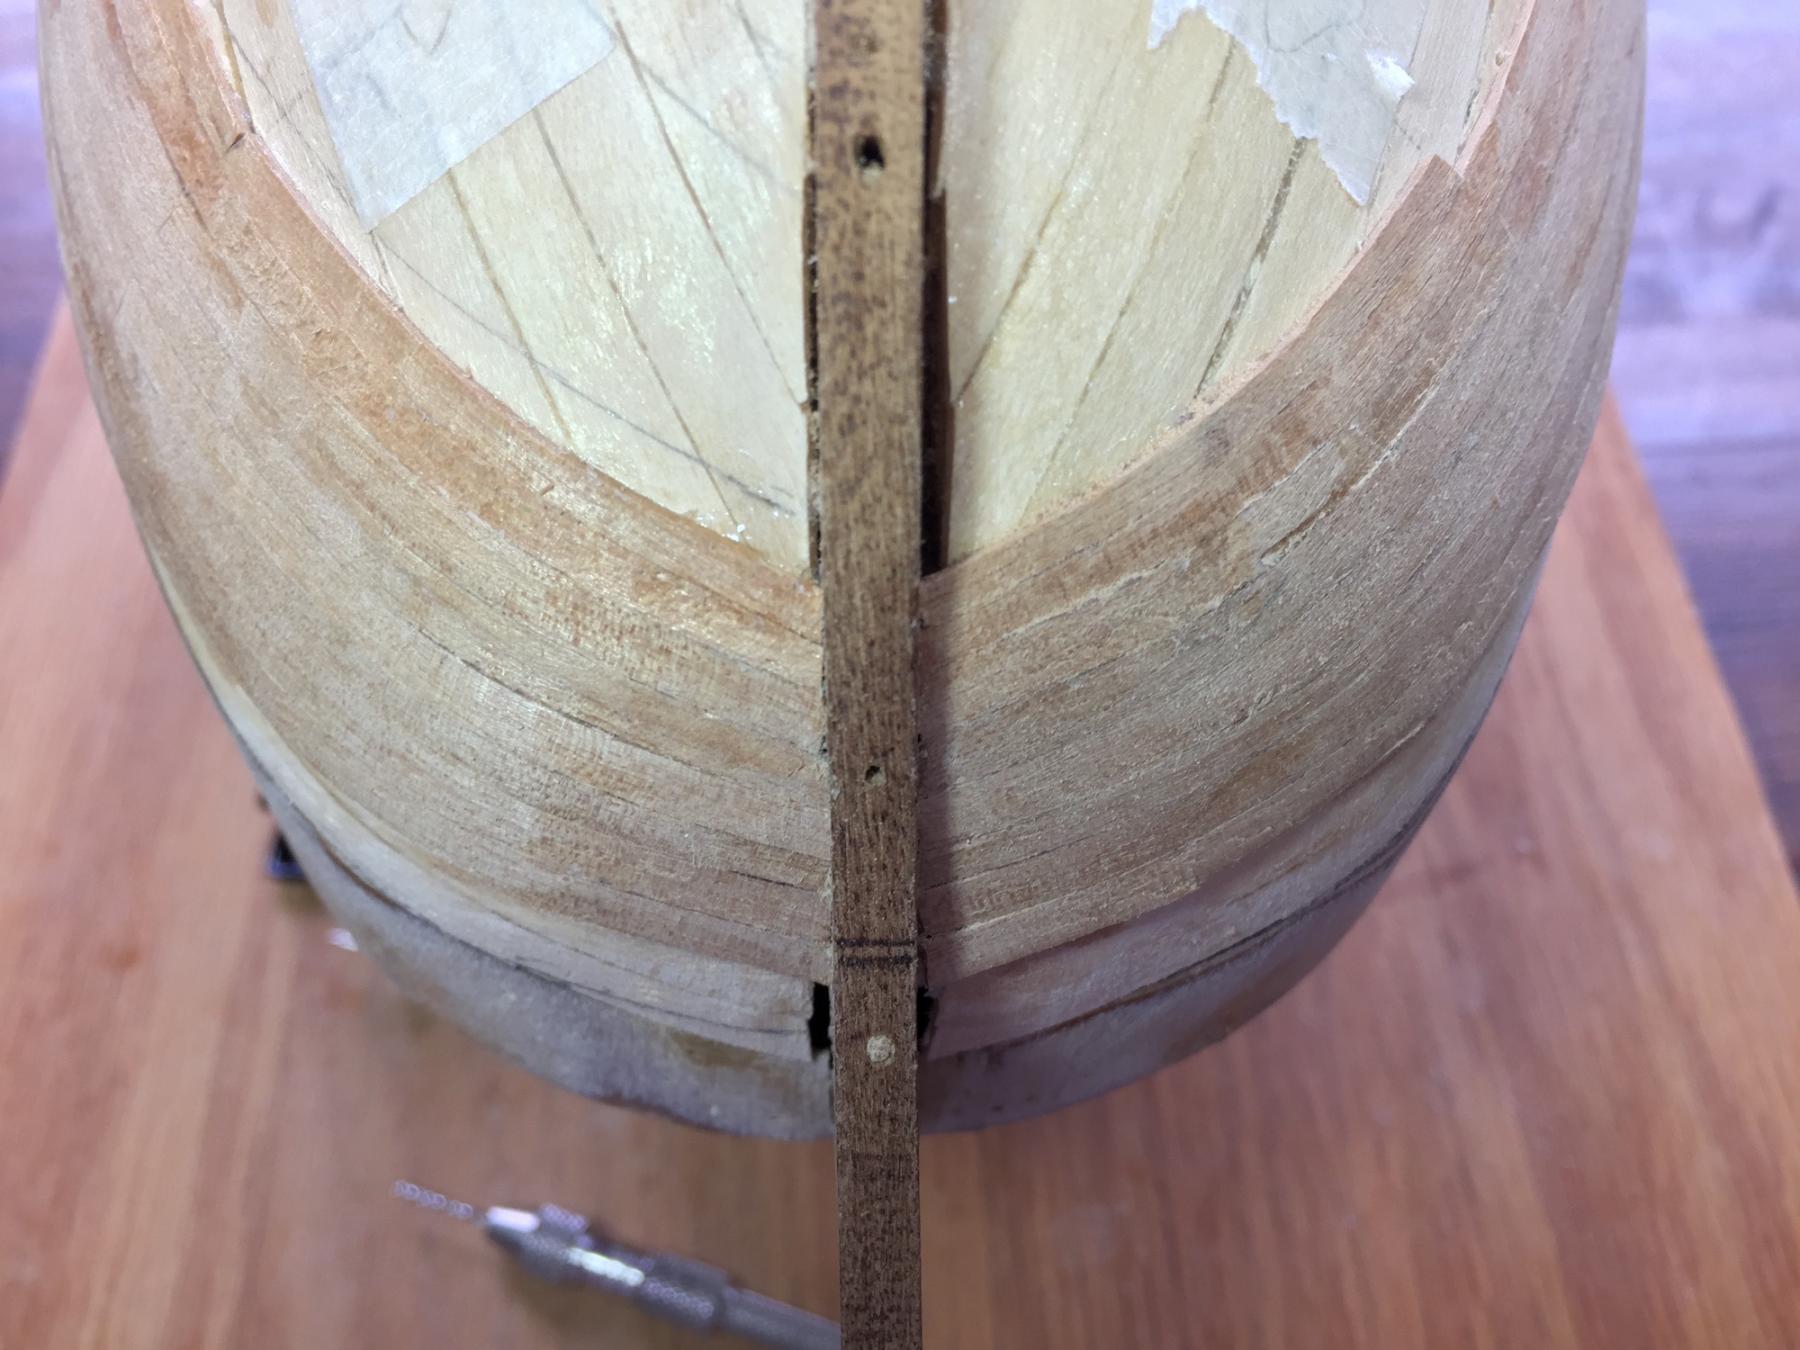
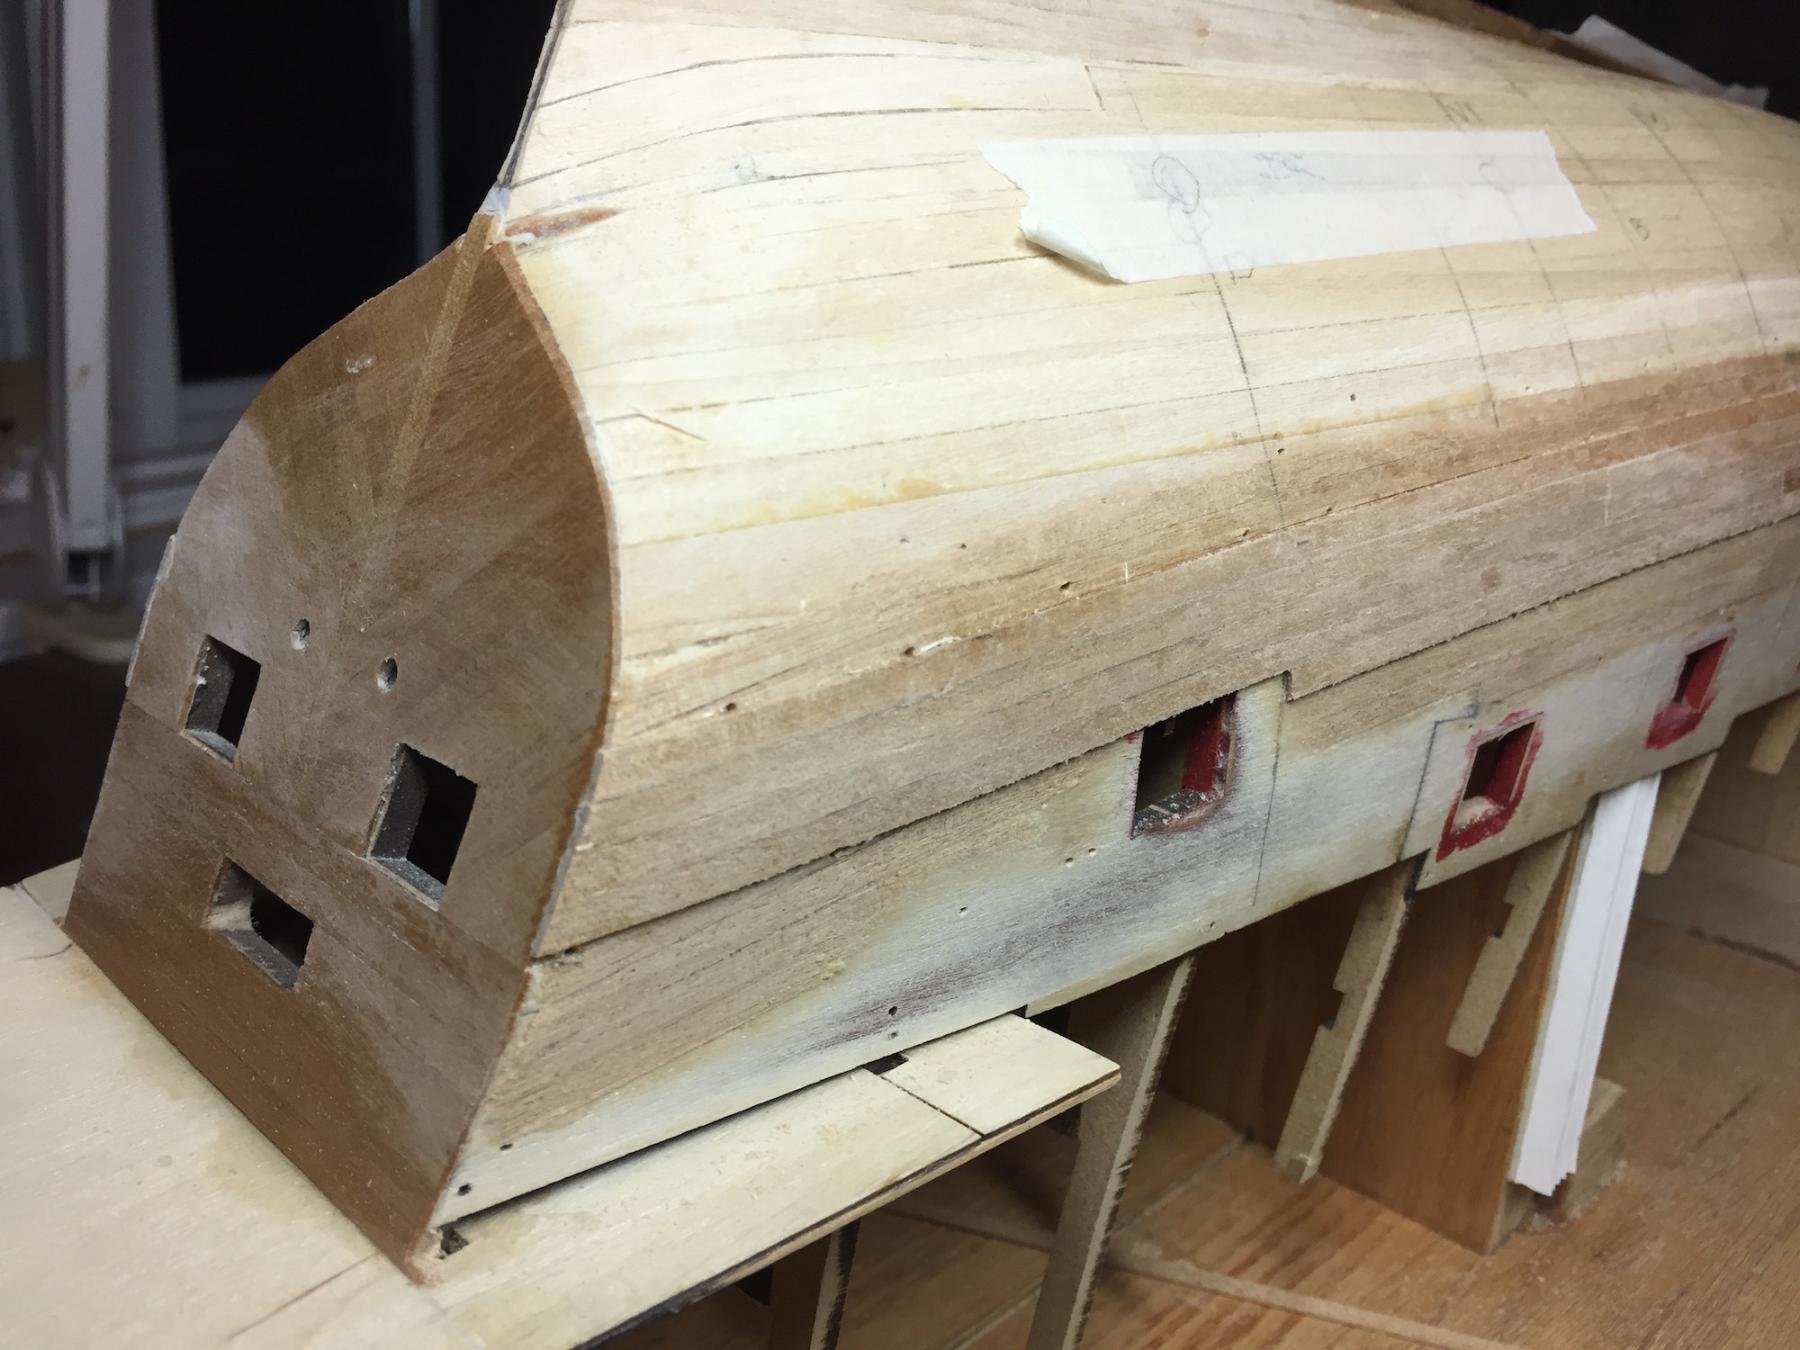
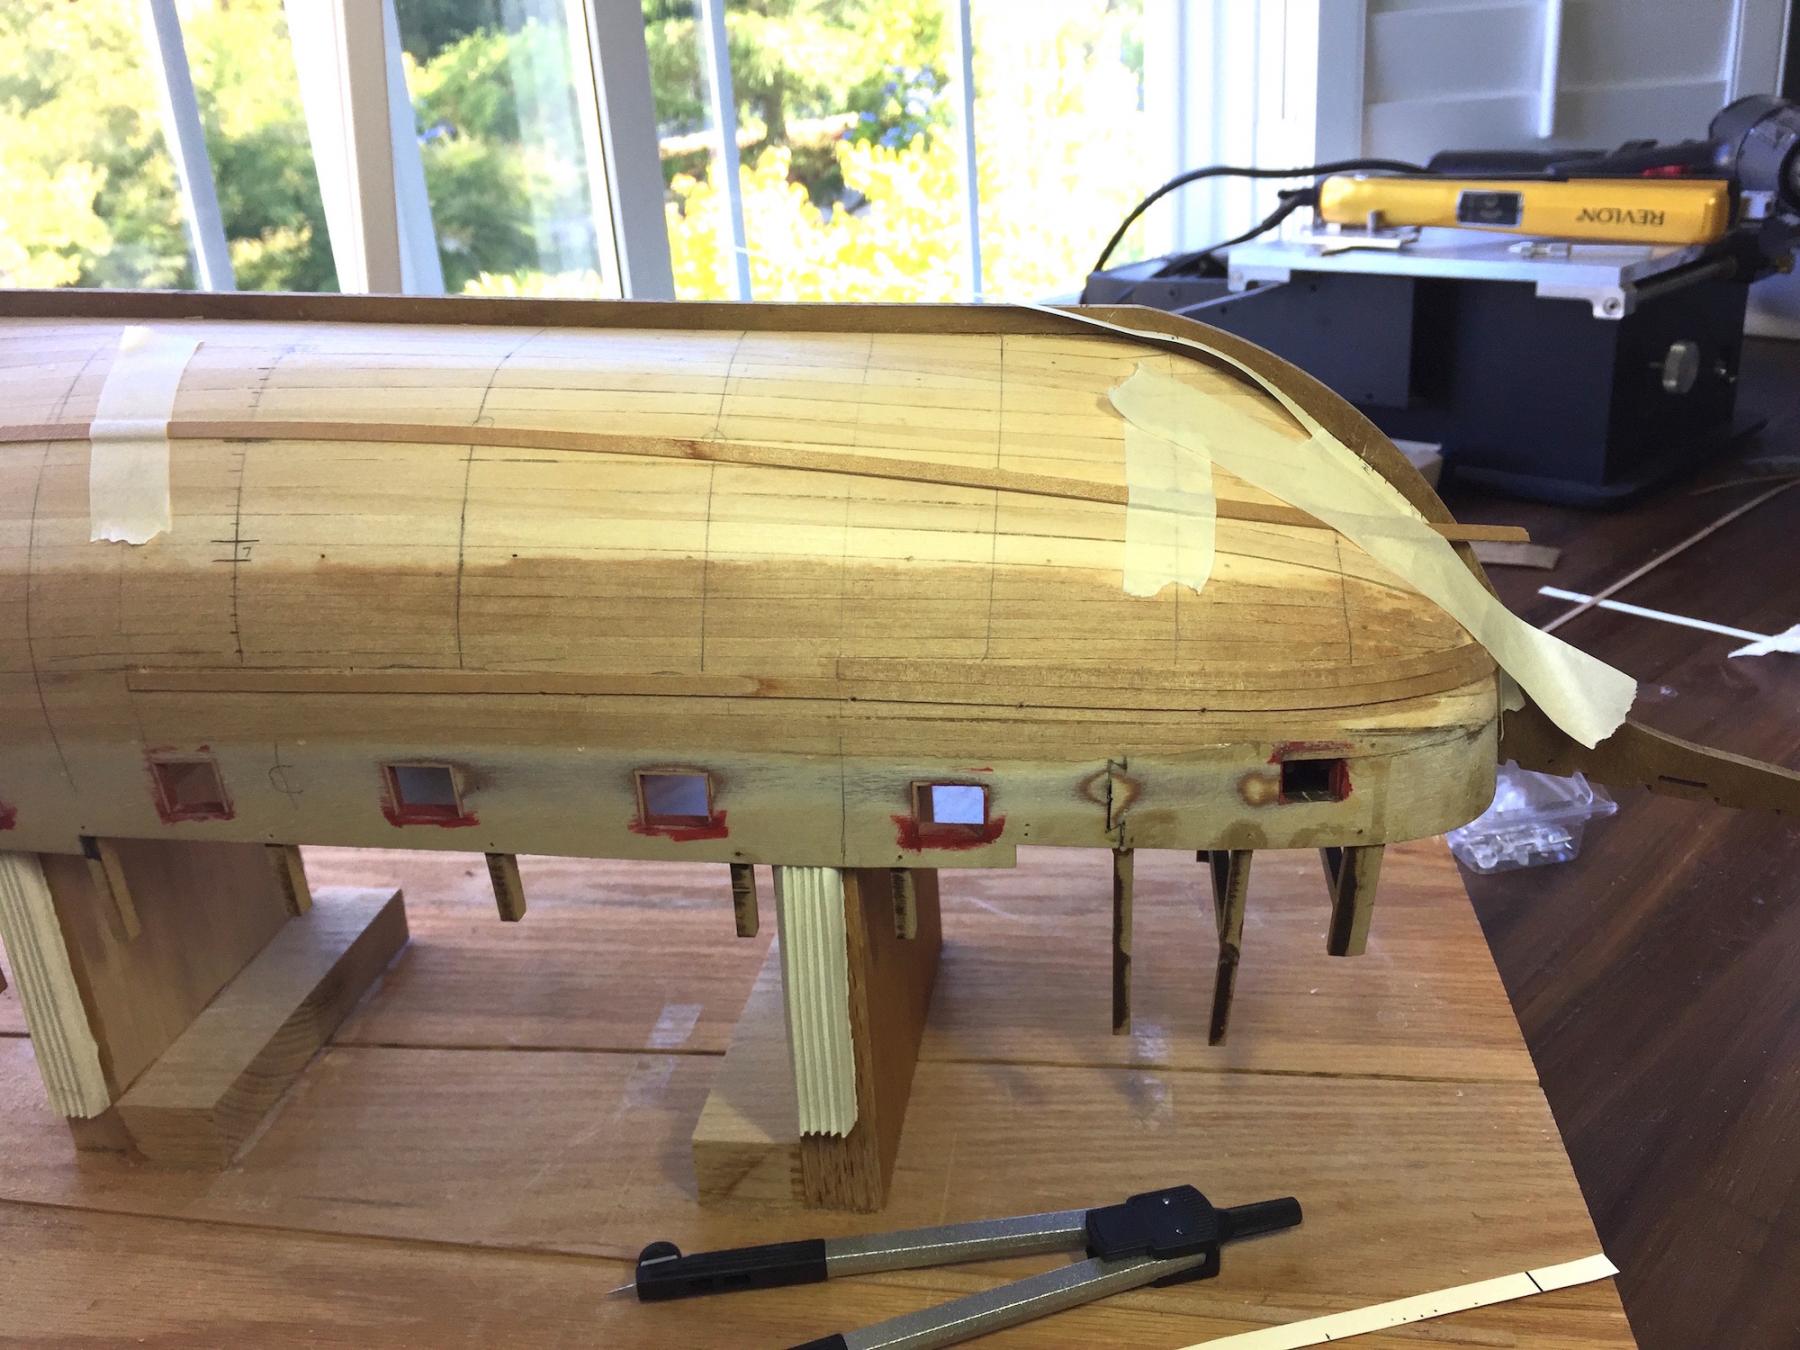
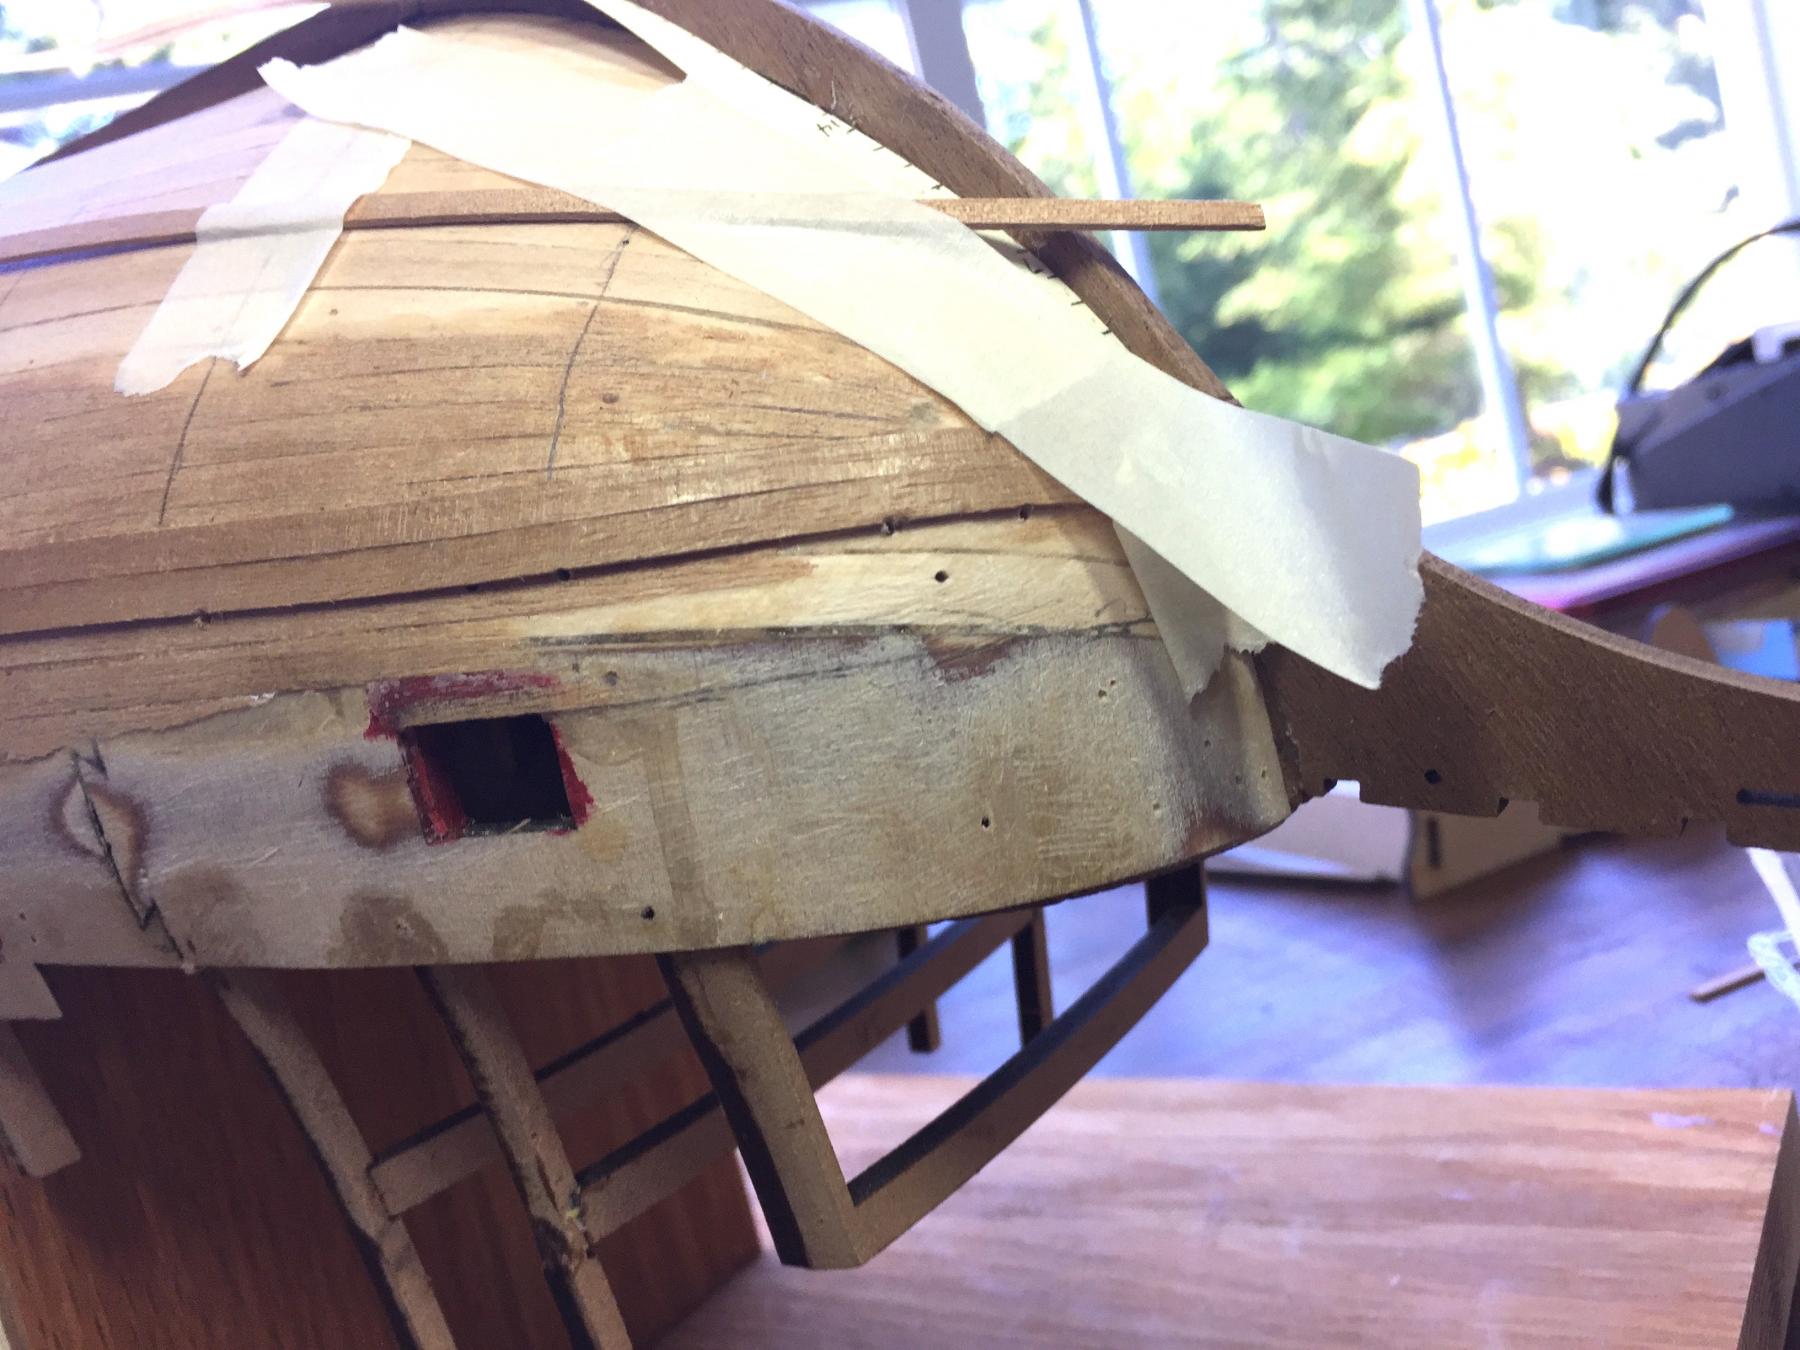
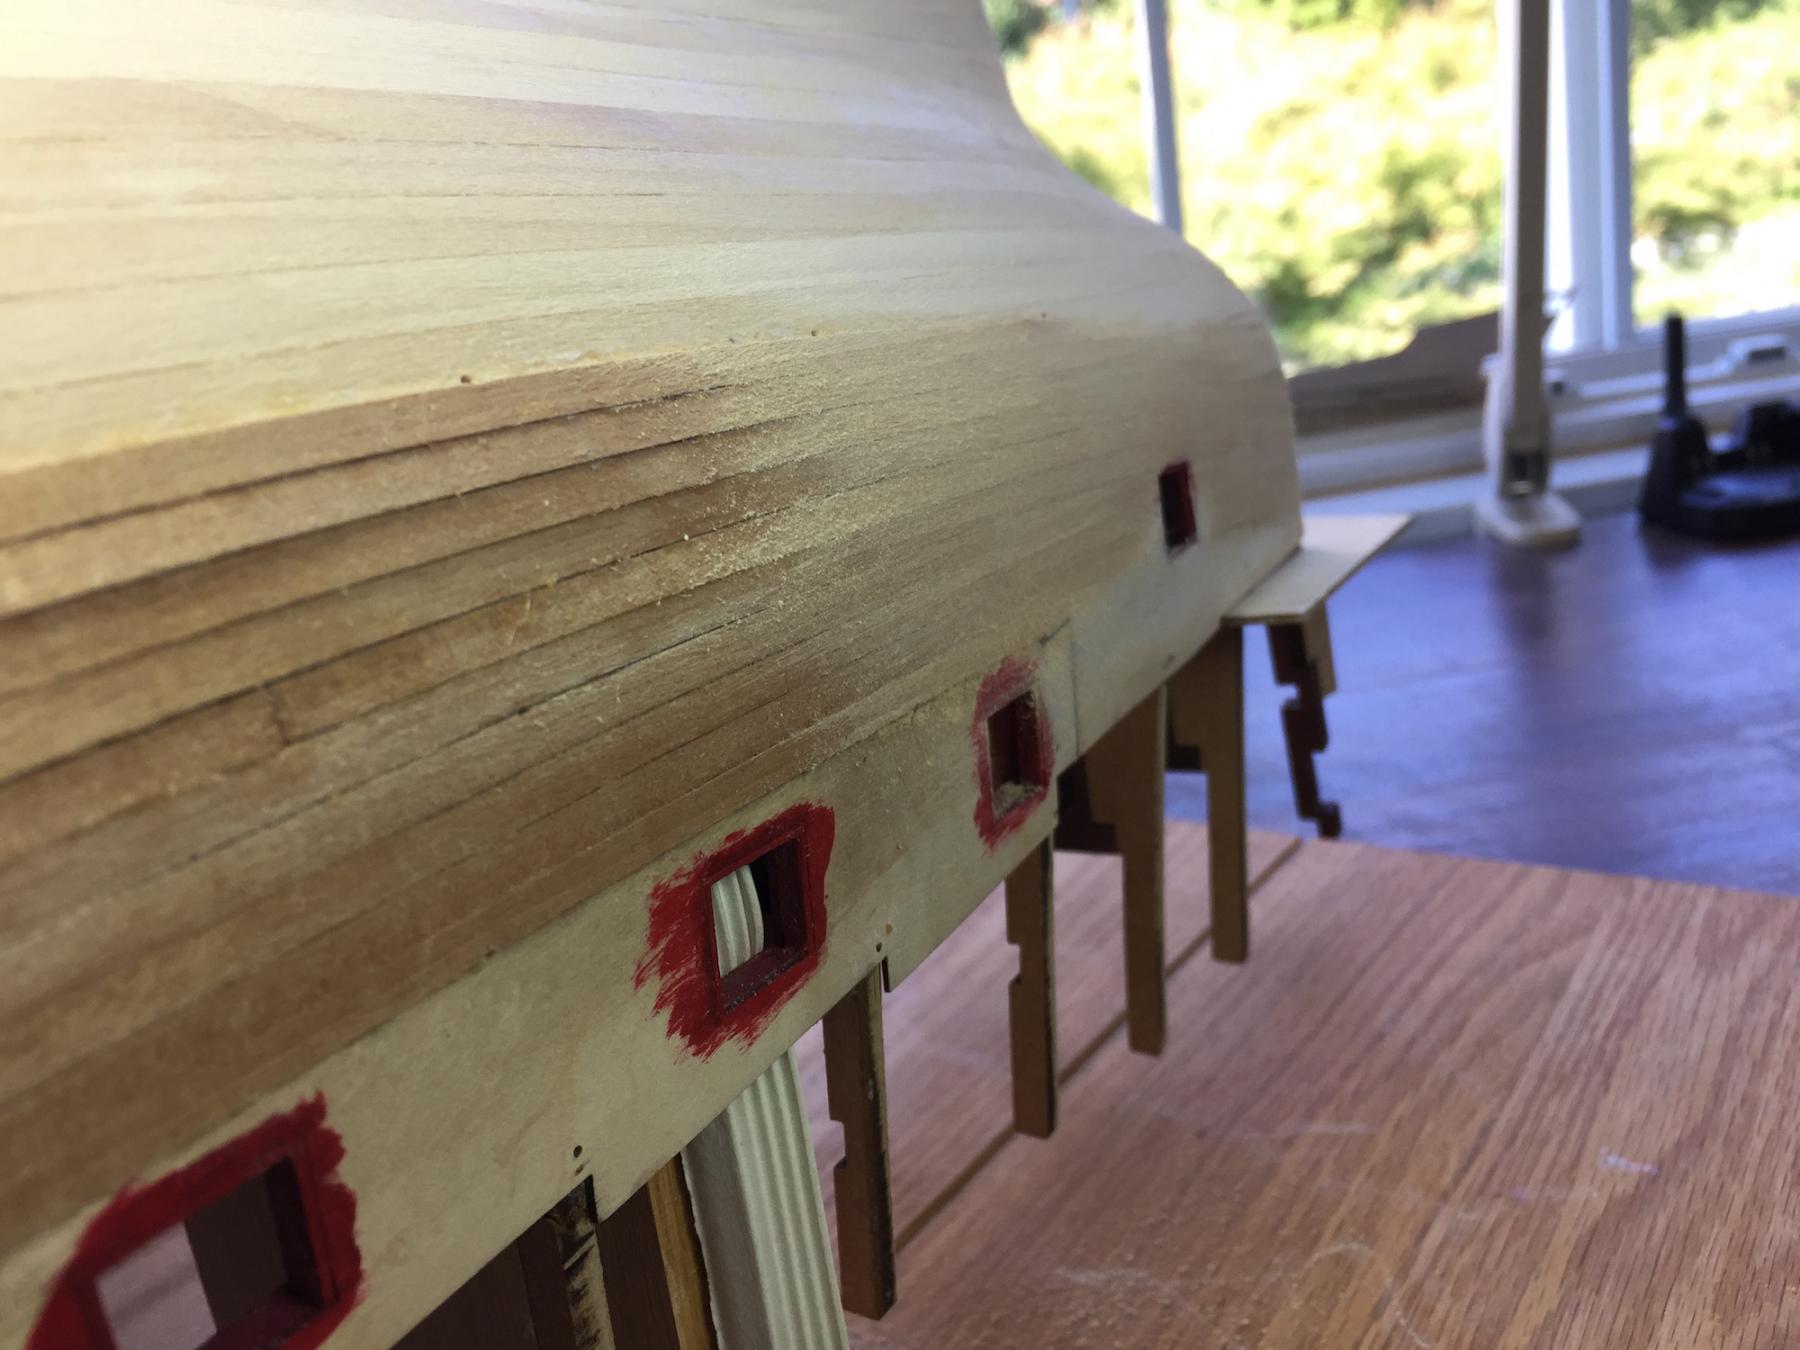
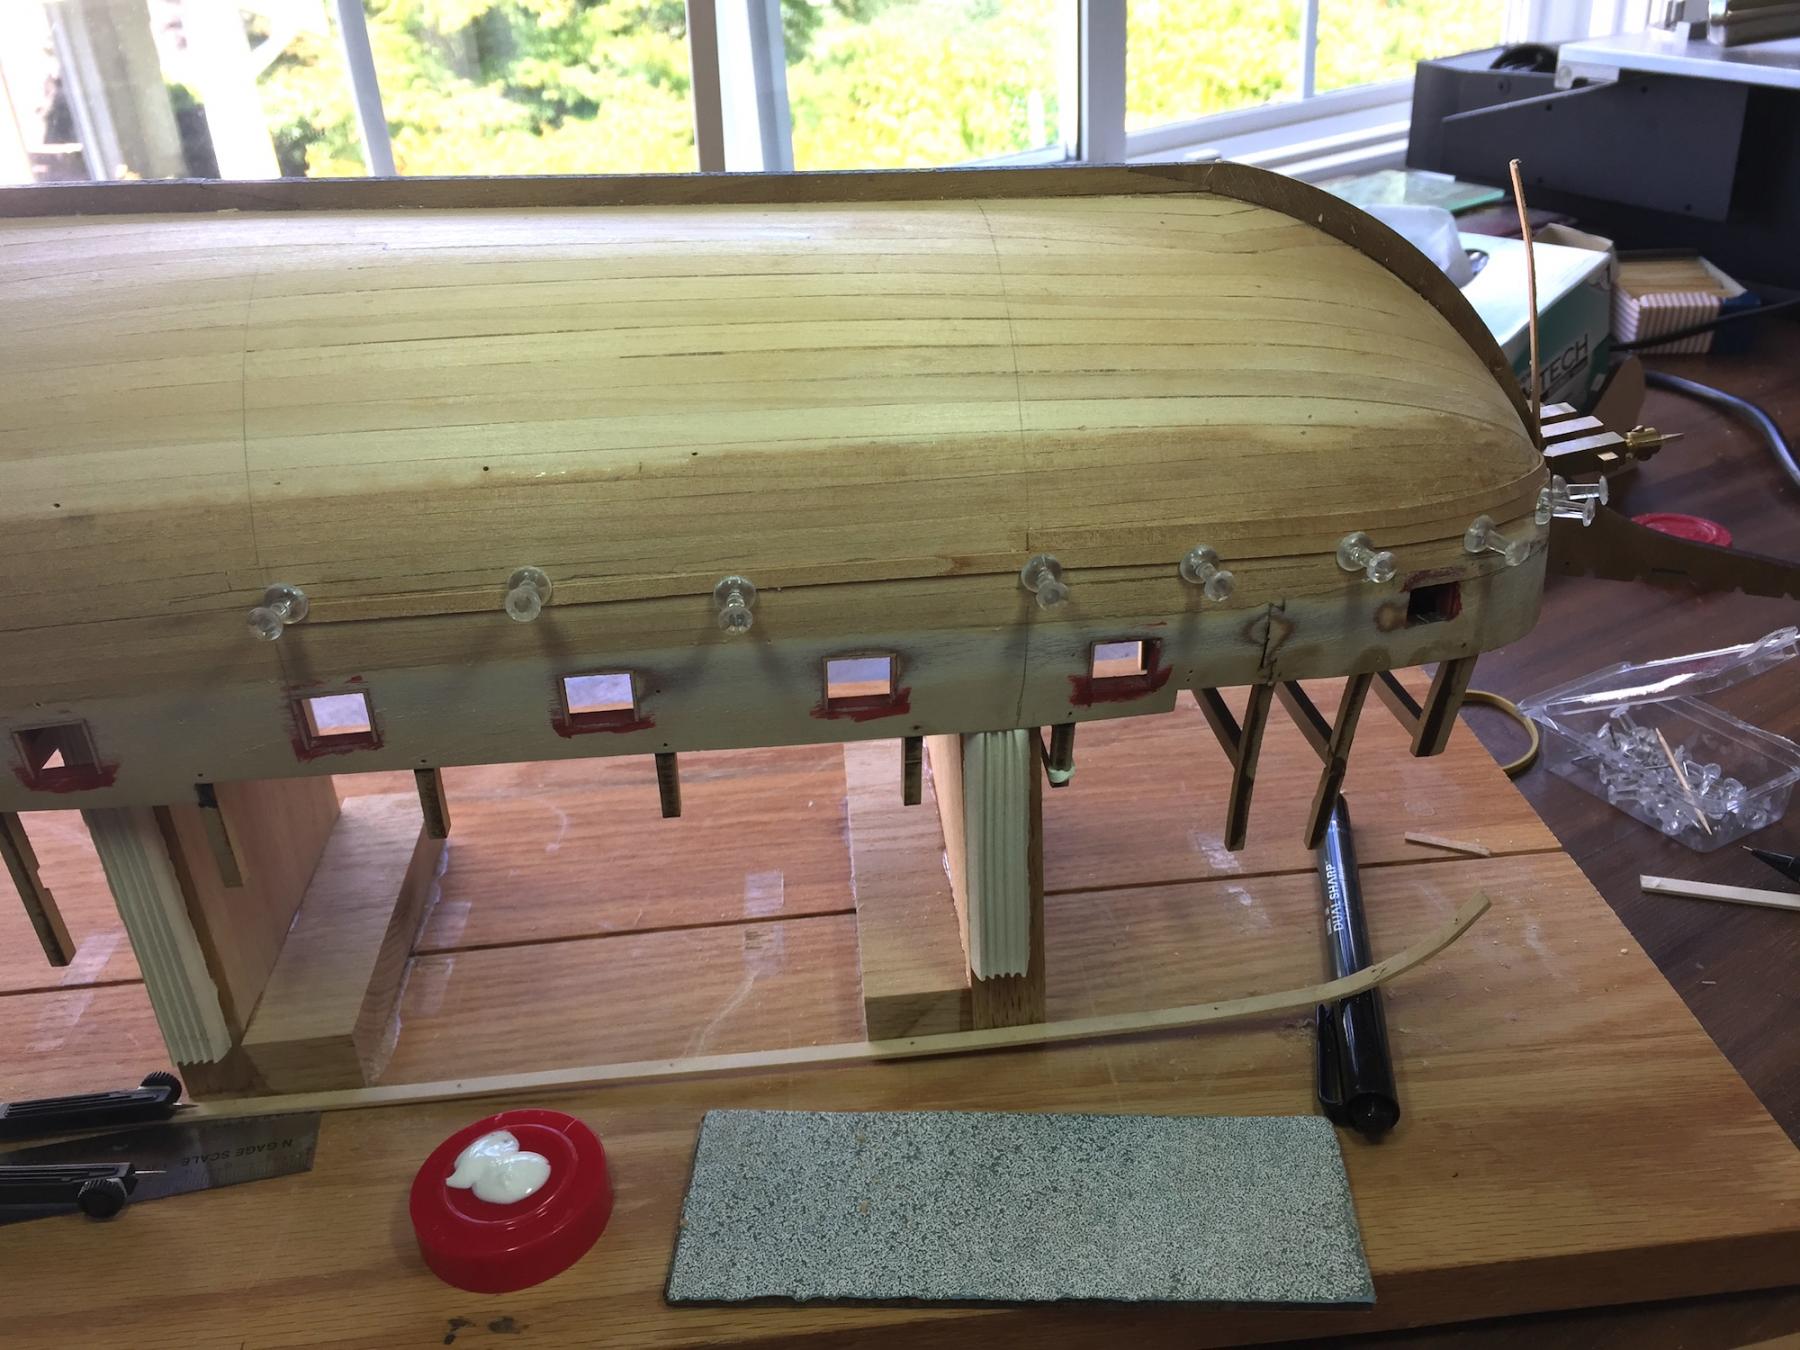
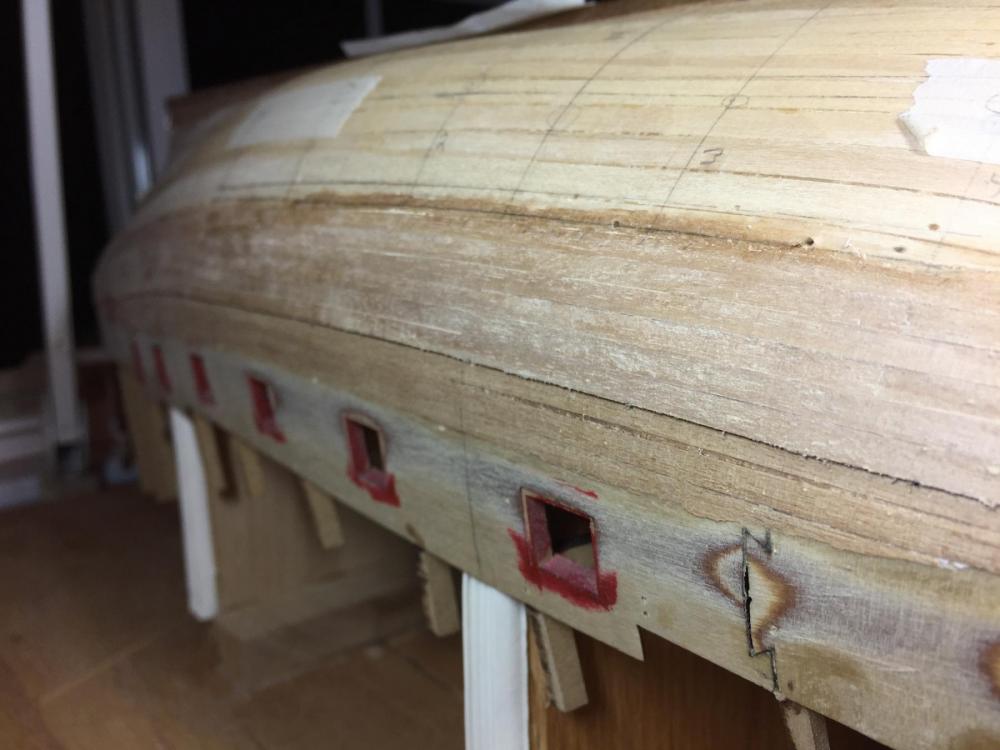
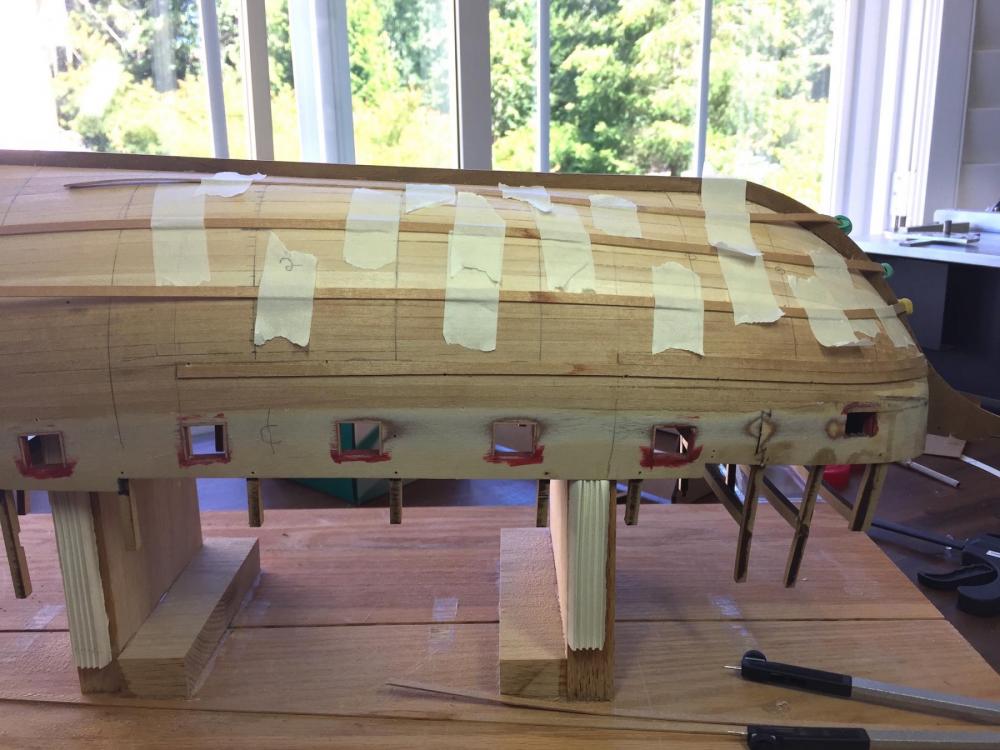
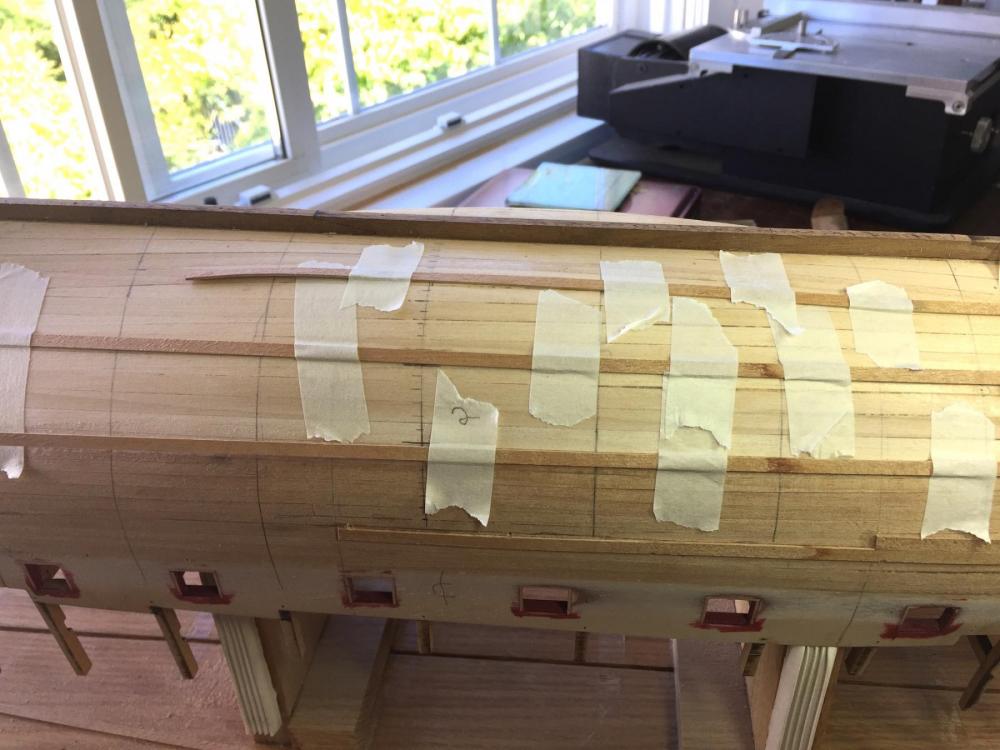
Thank you for the many LIKES and advices for staining. I am unable to identify the wood type. Don Robinson, Denis or Marten, could you please identify the specie? Well, today I decided my work was unsatisfactory. Look at this. And this . . . So, I spent the afternoon with #60 sandpaper and ground back down to the glue boundary. Now for reconstruction, here is a photo of the plan. Look to the relative position of the lower wale. The manual calls for a strake in the position of each wale and they call it a wale plank. Later in the build they instruct the builder to add a wale on top of the wale plank. So, to recap, the first task is to lay the wale plank. Please observe its position relative to other prominent features. In the next picture you'll see I have heavily marked the wale position so that I can use Dan's "cover it with tape" scheme and be able to see the line through my tape. I then took a long 5mm plank and correctly positioned it below the gun ports and let it run with its natural flat lay against the hull. Notice please how it travels upward approaching the stem, contrary to the plan. In the following picture you will see a completed REVENGE where the builder seems to have done exactly what is demonstrated in my prior photo. It is a beautiful model, by the way. Now, back to the Builders Manual. In this photo they attach the wale strake, then on the next strake below it they begin to taper. My problem is that I can't attach the initial wale plank the way Chris did because of compound curvatures. He is a magician. Here is another view of the correct position. And finally, the next picture is the best available that illustrates the compound nature of the plank. Do any of you have a technique to bend planks in unnatural directions? Not only the bend, but when you study this last picture it can be seen the plank needs to be longer on the top edge than on the bottom edge. I did this before, but not well and that is part of why I removed my last weeks work. Spile? When I lay out tape on the hull - flat - as per Dan's suggestion to Mark and then remove and study the tape trace laying flat on the table it looks to me to be a spile candidate because the shape is so irregular and represents the width of at least three planks. However, if the wood can be turned to wet spaghetti that would sure be easier. Please dear friends weigh in with your opinions. Respectfully, John