HOLIDAY DONATION DRIVE - SUPPORT MSW - DO YOUR PART TO KEEP THIS GREAT FORUM GOING! (Only 36 donations so far out of 49,000 members - C'mon guys!)
×

John Maguire
-
Posts
157 -
Joined
-
Last visited
Content Type
Profiles
Forums
Gallery
Events
Everything posted by John Maguire
-
 Nice, Doc . . .
 -
Thank you for all who have looked in and posted LIKES. Thanks Mark, yes, I see what you say. I am trying to tighten things up moving forward. The wood itself, even if perfectly fit, is in my opinion too light in color. It is not the walnut described in the manual. Overall, the planking so far as well as the first layer is sufficiently tight that it does not need sanding sealer to further tighten and bind it, although I have put it on, followed by sanding. At this point I think I want to use walnut stain to darken the wood. Should I plan to use Minwax "wood prep for staining"? Am I correct to think it enables the stain to color evenly? Do you think it will disguise my flaws? Should sanding sealer go on first or would it keep the Minwax wood prep from soaking into the wood? Too many questions - sorry . . . Respectfully, John
-
Seven strakes on each side now . . . Question please: some of the separations between planks, though very tight, have black lines for reasons that I don't understand. This supplied wood is light in color and not to my liking so I have been thinking I'd stain it, possibly dark walnut. In your experiences, do you think there is a reasonable expectation that the stain will neutralize that effect? Respectfully, John
-
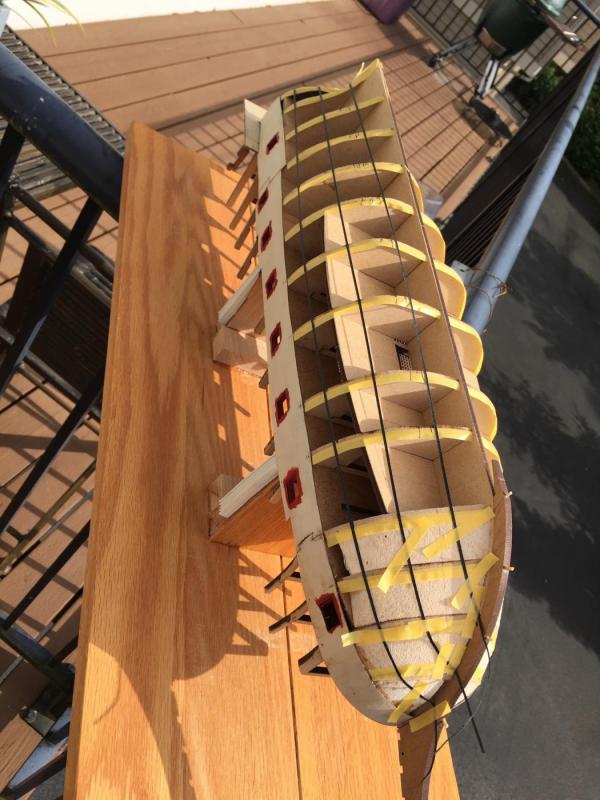
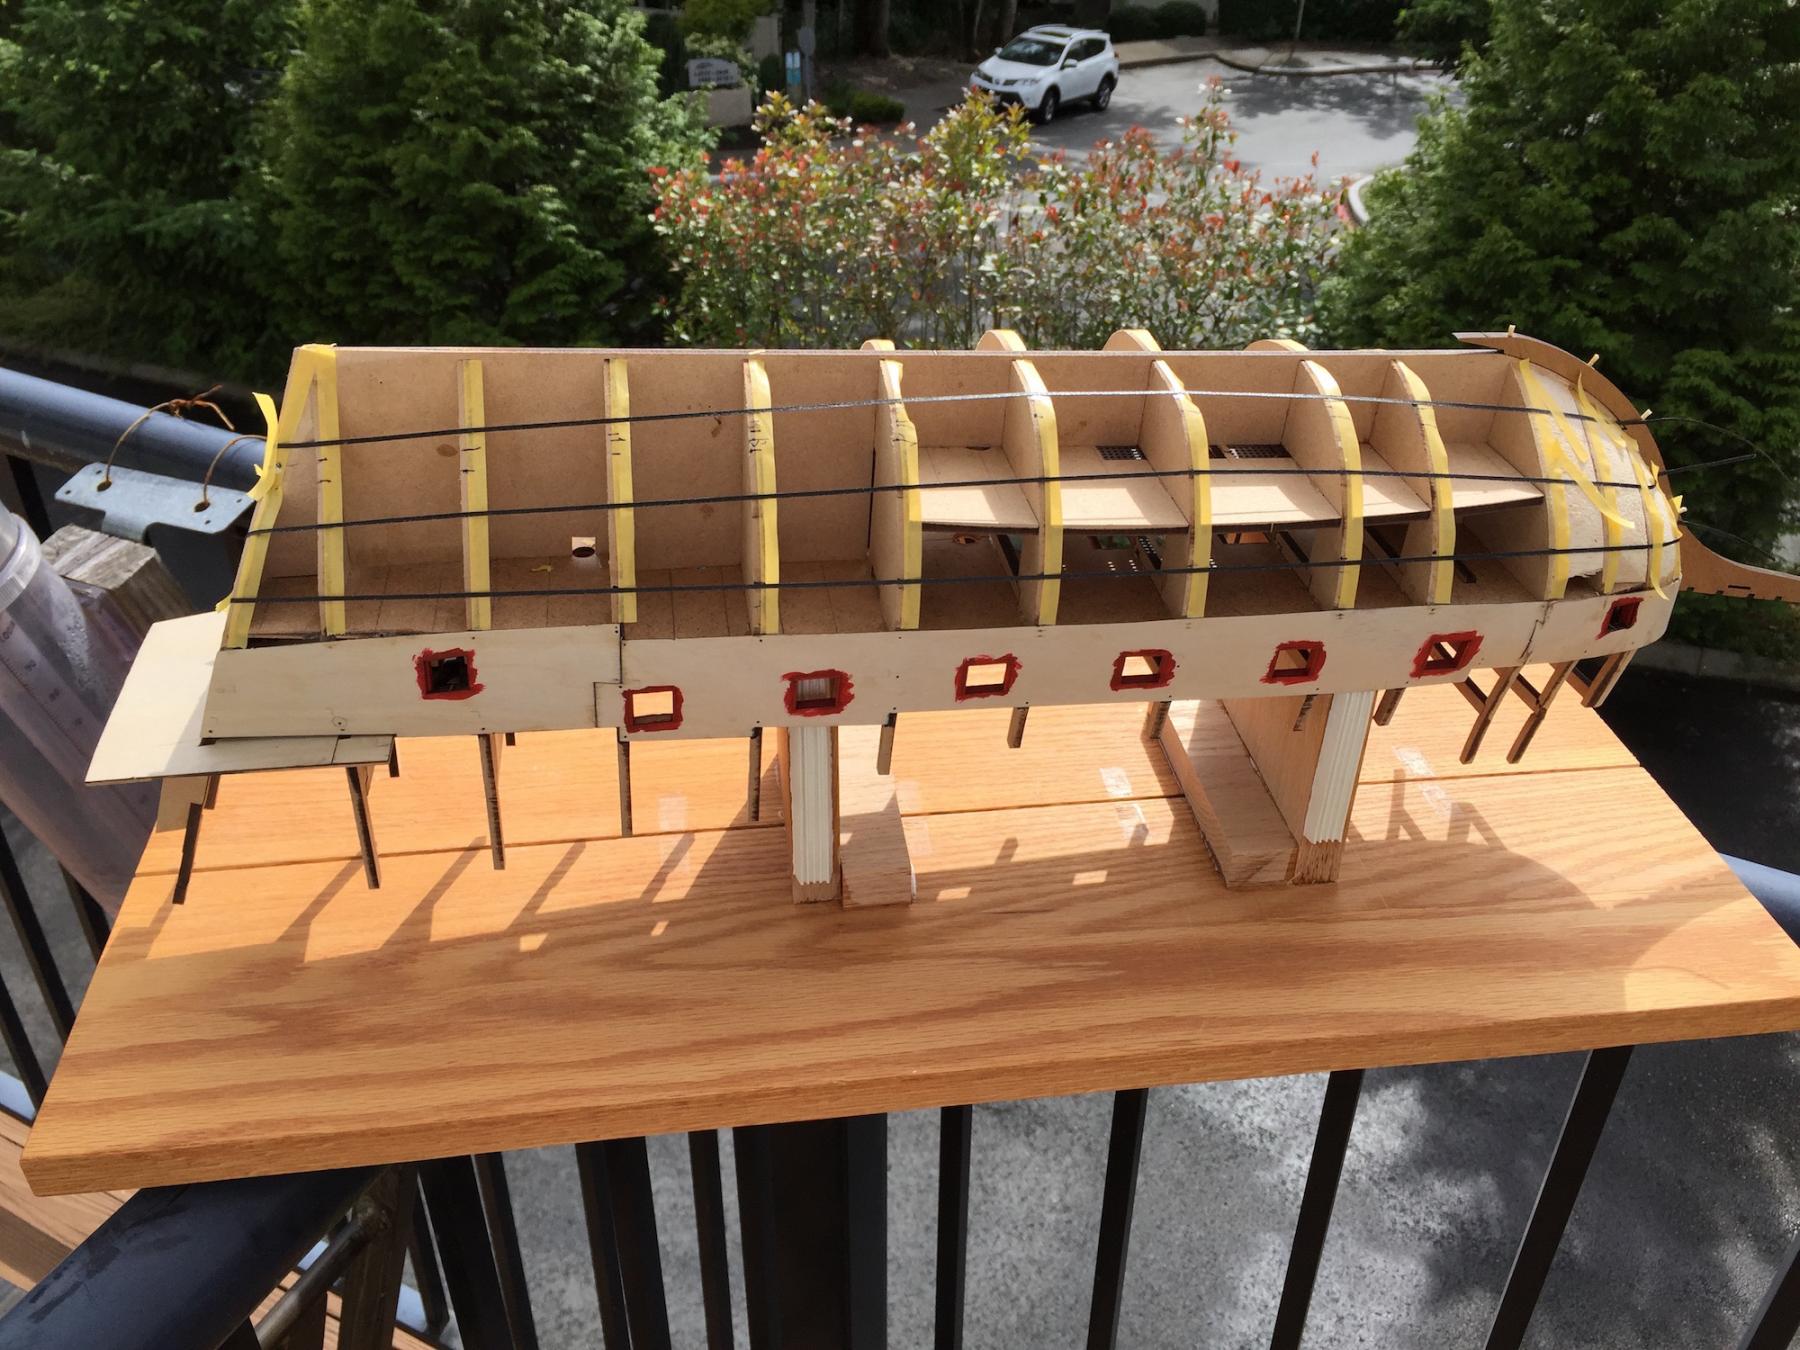
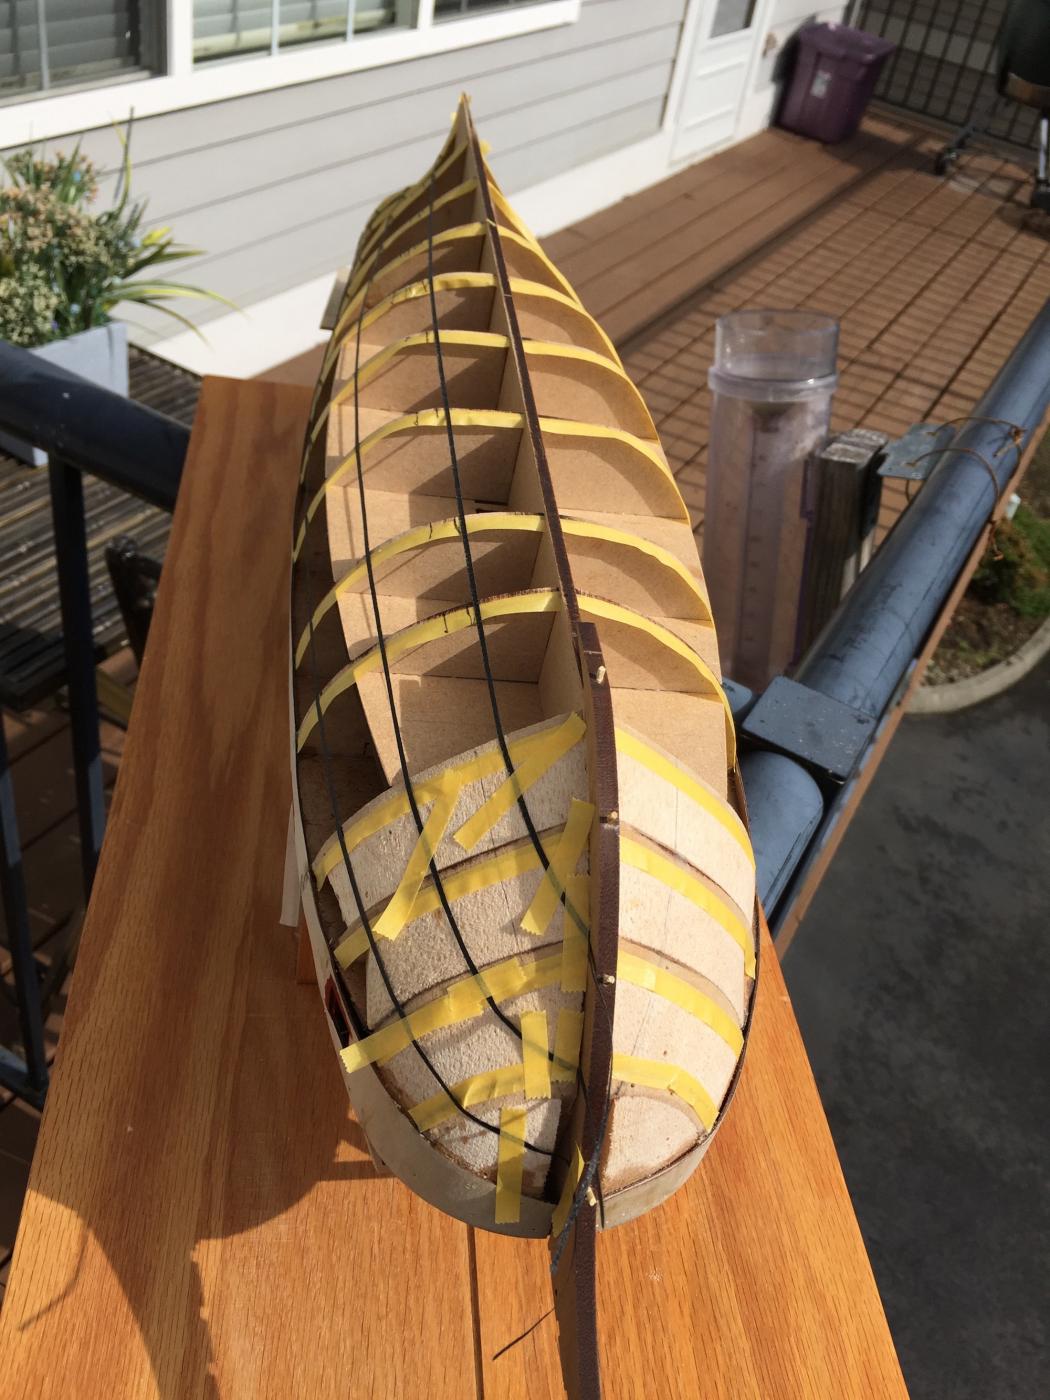
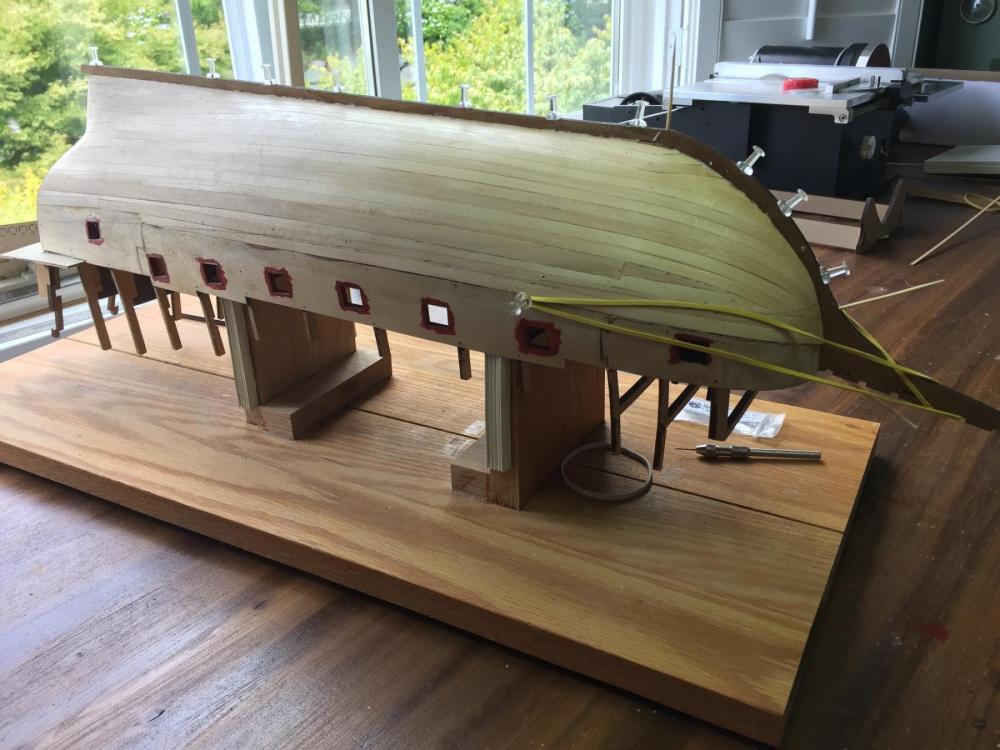
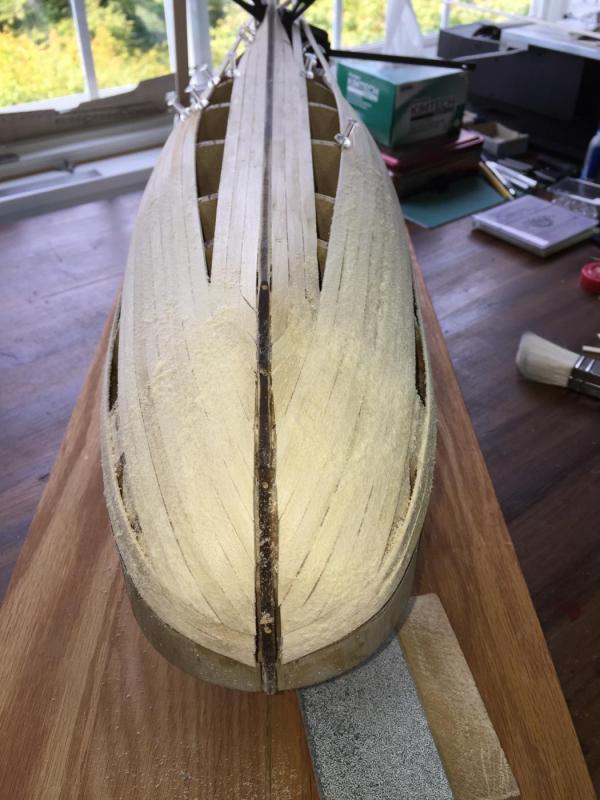
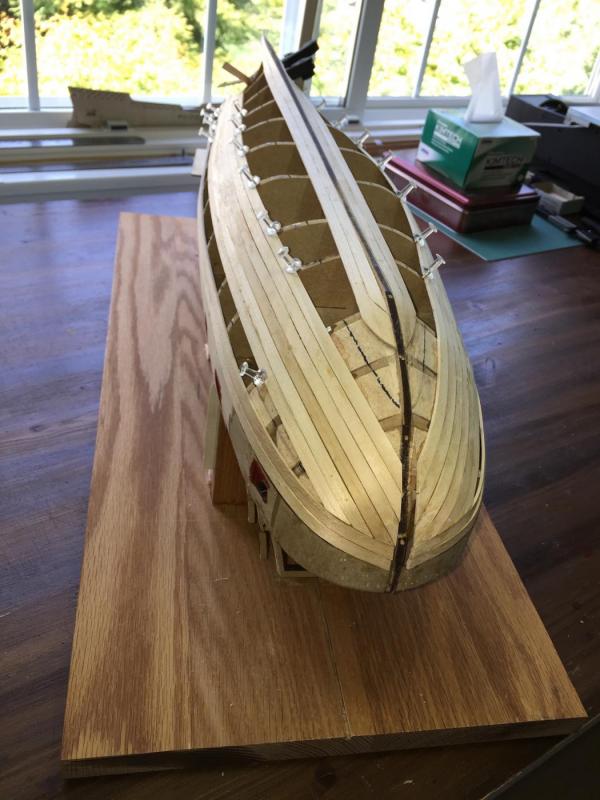
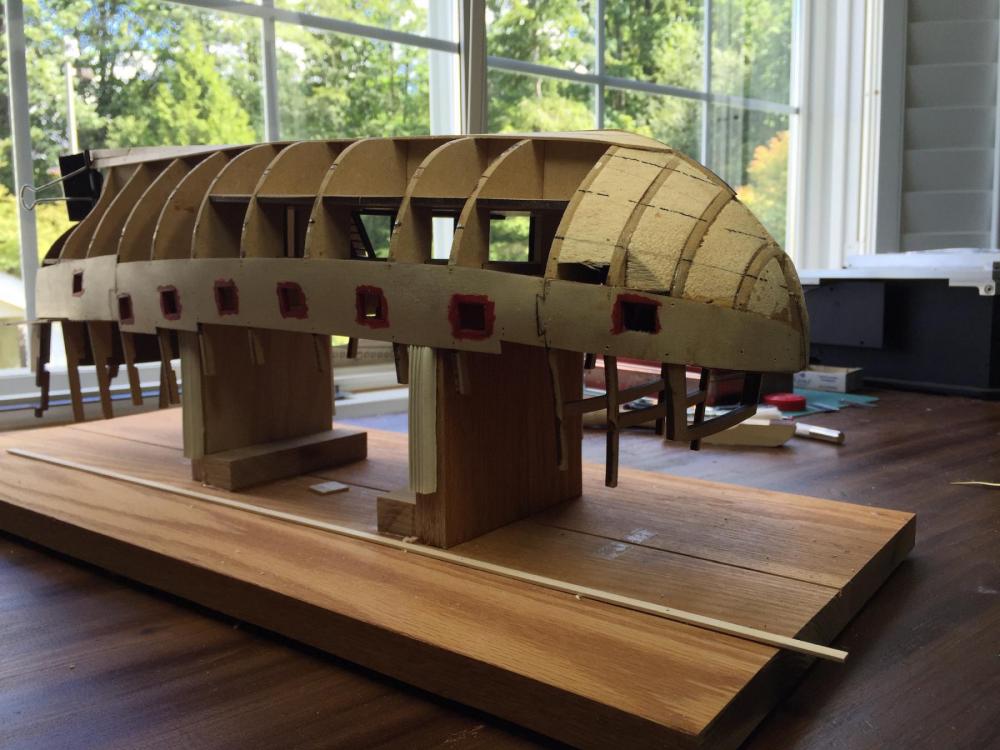
Thank you Capt. Steve, WW & Doc. Also thank you for the many "Likes". Another productive day at the Cougar Mtn. Shipyard. I think it was Martin who said planking between the Wales is a bit finicky - or something to the sort. Wrong dear friend - it is very finicky. The wood just doesn't want to bend that way. To do it otherwise would be to have the wales sharply swing upward approaching the stem and converge. The manual, box pictures and my sea eye wants to see the Wales run parallel to the deck and be evenly separated for their length. The only way to do that is to torture the wood. But, having said that the worst case is the so called wale plank that will be covered by the lower wale. In the photo, it is the lowest strake. Each plank above that becomes slightly less tortured. I have four in place on each side now, moving in the upward direction and the fifth and beyond look to be straight flat easy runs. I don't look forward to returning to bend a lower wale to shape, especially considering that it will need to have been tortured in the wrong direction and remain stable in shape so that it can be painted before glueing in position. Help. What is an effective way to bend wood the "wrong way"? Maybe a couple of minutes of steam isn't enough . . . Here is a quick peek at the stbd side before clean up. The port side, my learning side, was done first and does not have furniture quality seams between the planks. I have mixed some saw dust with watered down PVA and we'll see if I did a good job with the witches brew tomorrow when it gets a little sanding. Now it looks pretty messy. Moving upwards from these four planks looks straight forward. No weird bends or torture. In the downward direction I experimented by laying a plank adjacent to the lower wale plank and tracing a line with a pencil on the hull from bow to stern. I then moved the plank down to that line and did the same thing plank by plank moving towards the keel. They end up pretty much parallel to the keel, so hopefully the worst is over. Thank you for looking in. Respectfully, John
-
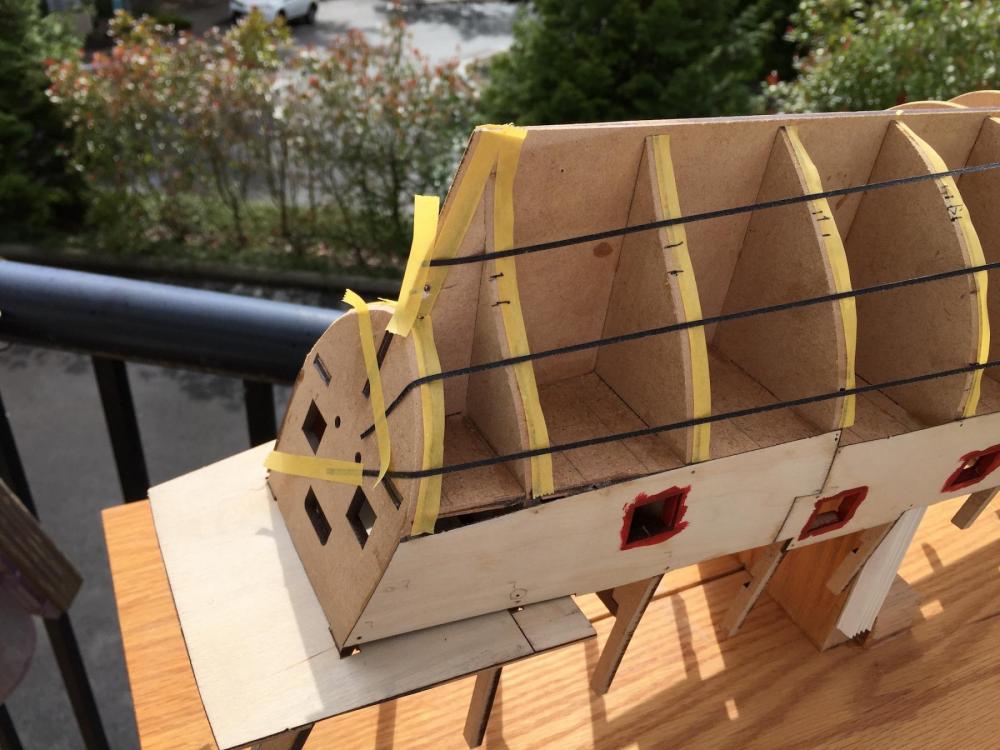
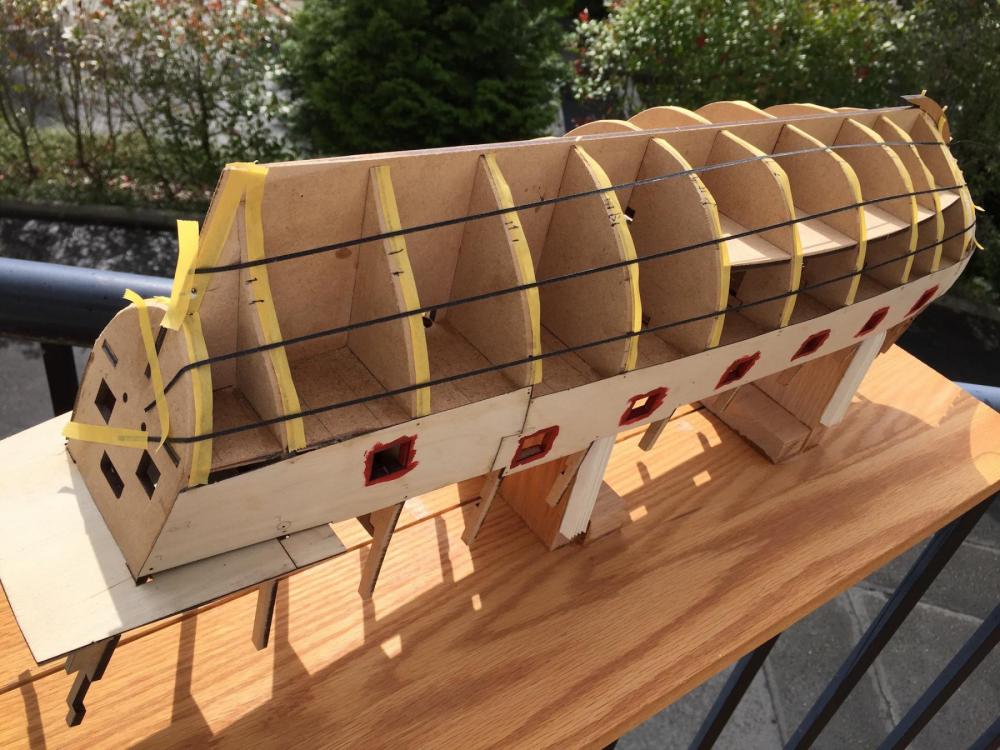
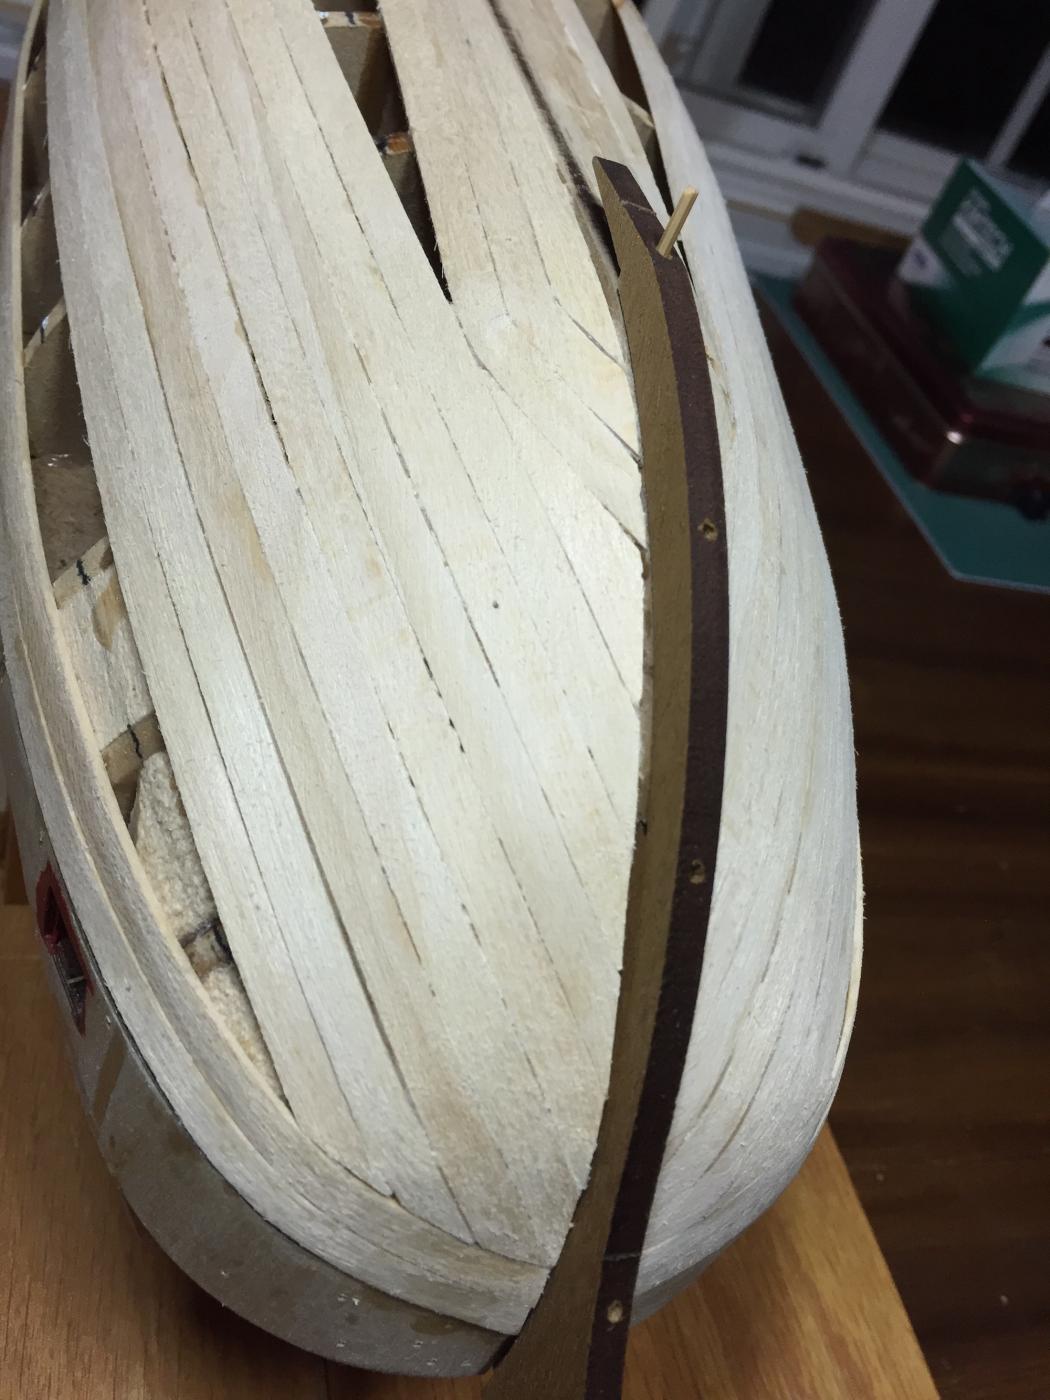
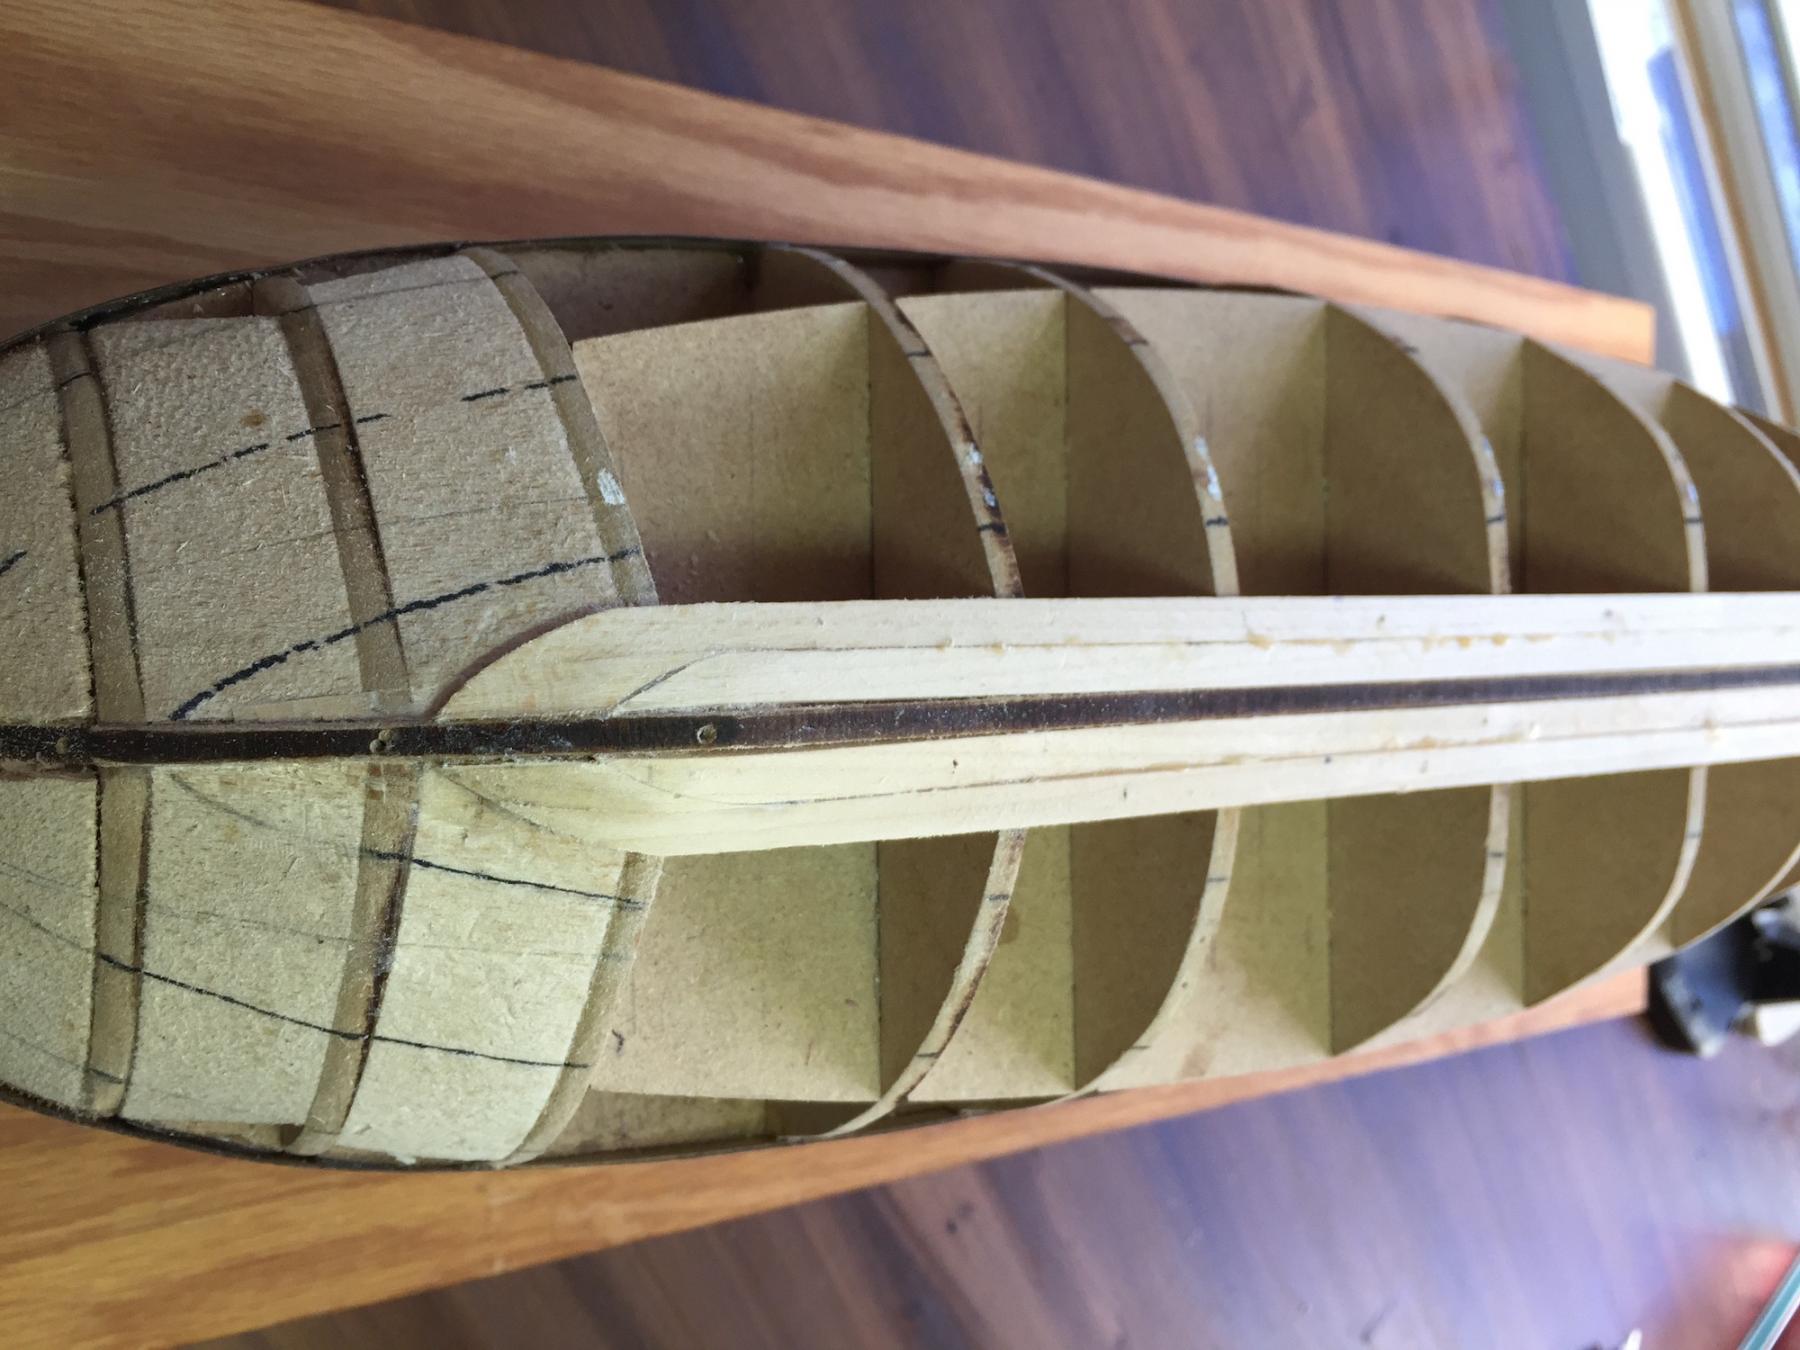
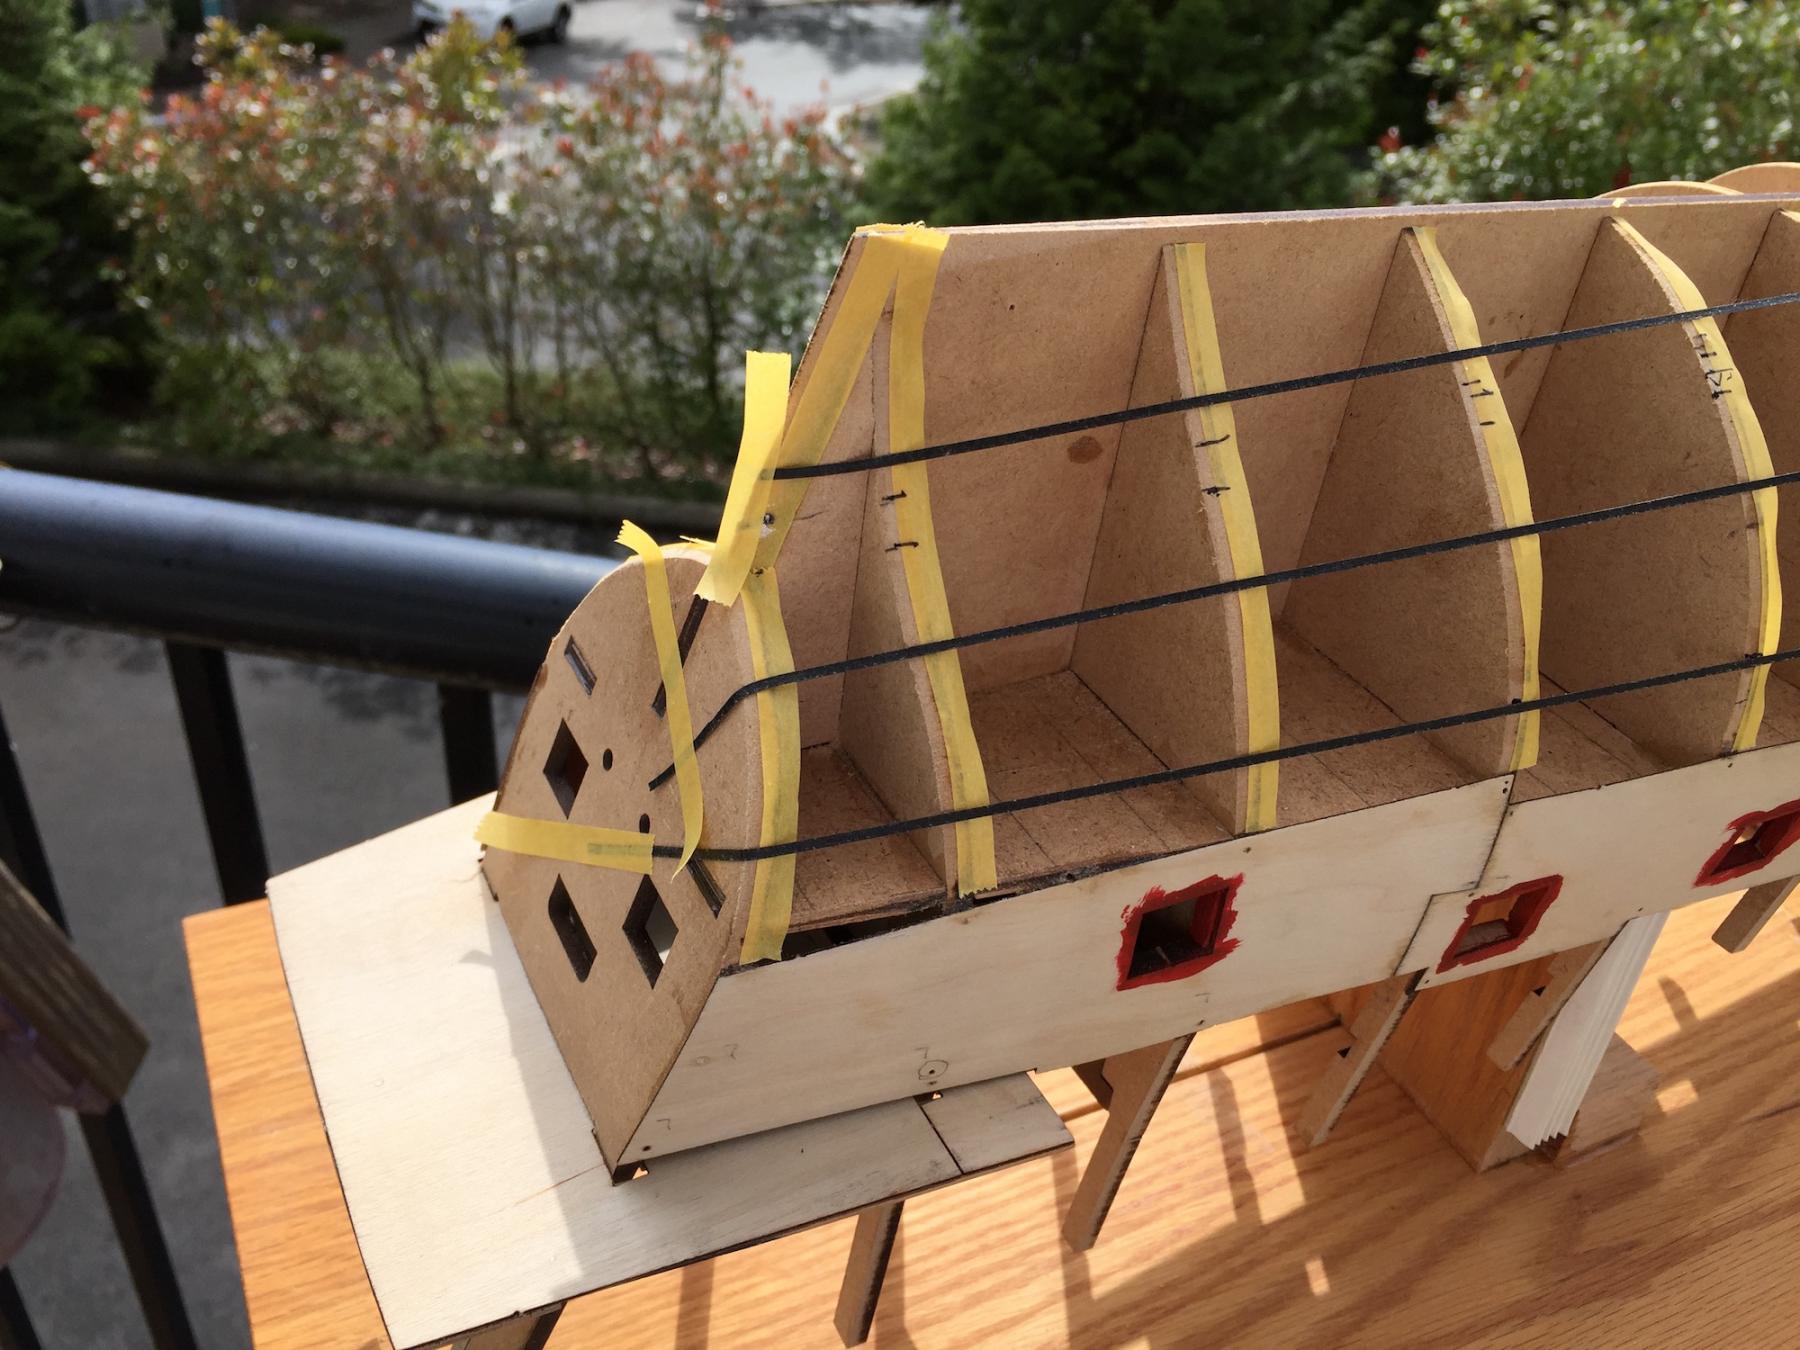
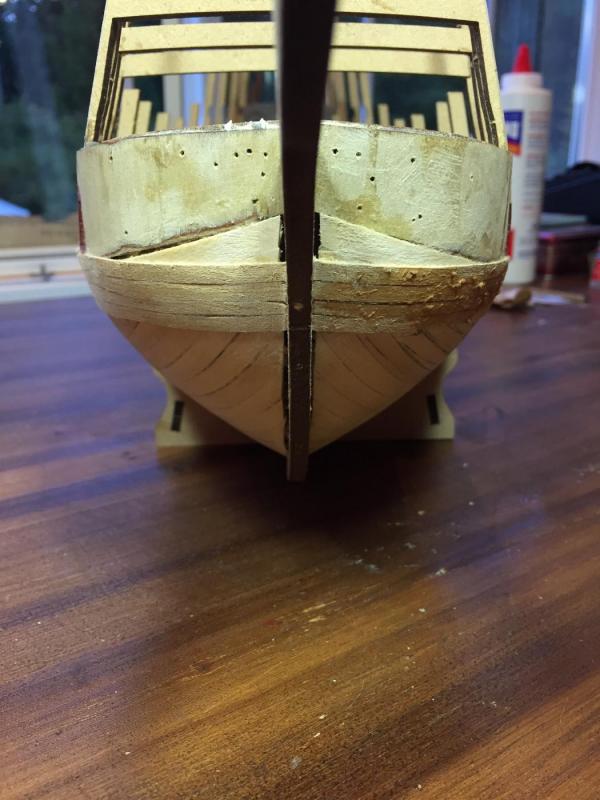
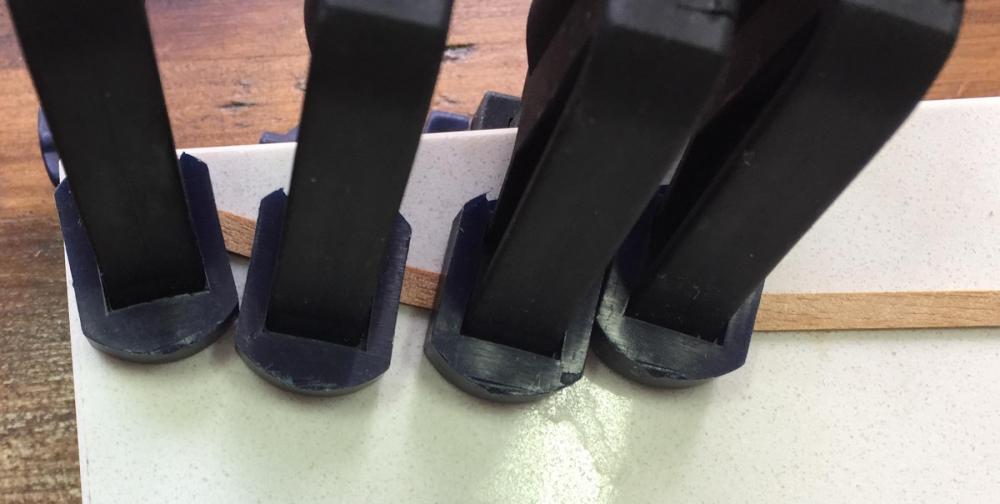
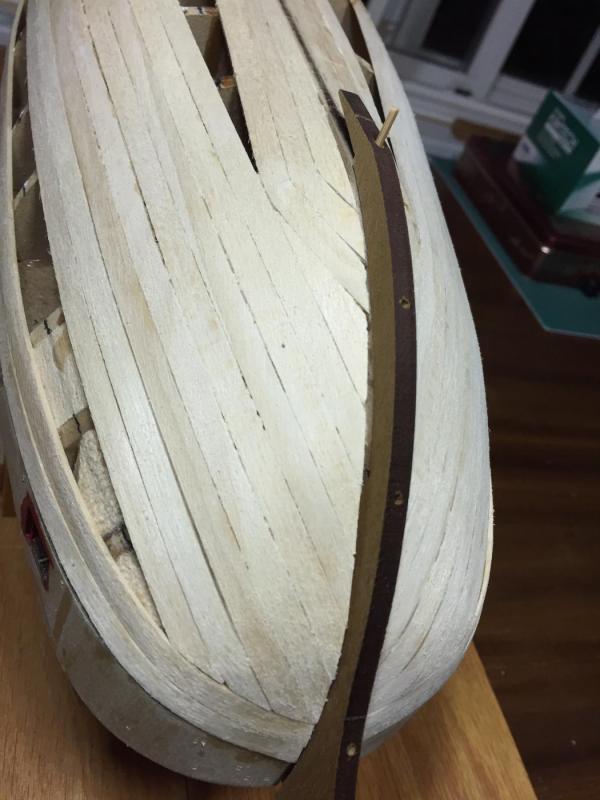
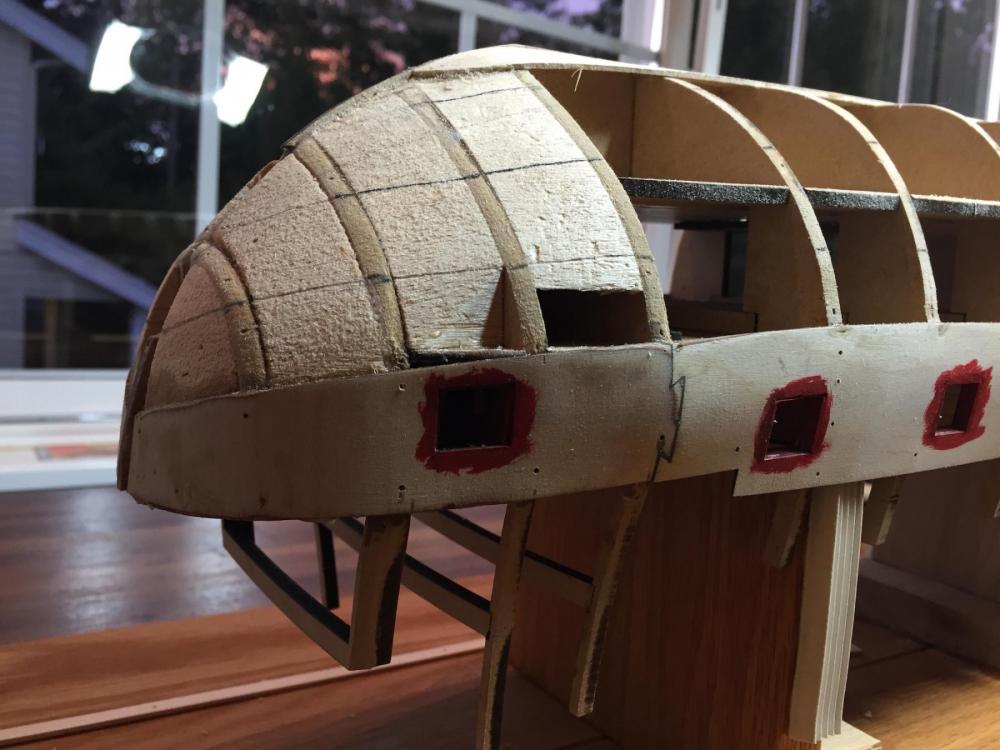
Thank you dear friends for looking in and posting "Likes". A great deal of nitty gritty detail because it takes me longer to do things than the rest of you experienced folks. Three weeks of my posts probably equates to what one of you would do in a single work session - but I'm learning and having fun trying to look ahead and get the basics correct. In this instance I want to be confident that I am putting the "wale plank" in the correct place. Chris uses that as the starting point for the entire planking task. The wale will go on top of it later. I have spent two days with my magnifying glass looking at the lower wale position in the manual, then checked the online photos of those of you ahead of me. Midships was easy to reconcile but the ends challenged me because he speaks about the natural lay of this first plank he refers to as the wale plank, not to be confused as I determined with the wale itself. The wale will go on top of and parallel to the wale plank. Is that normal or just specific to the instructions for this model? First, the stem. From a natural lay of the plank midships, to continue the run forward to the stem would position the lower wale too high on the stem and also it would seriously close in on the upper wale. Instruction photos show both Wales, in my opinion, parallel to each other and the deck line. The plans show the same. In order to keep the lower wale parallel to both the deck and eventually the upper wale requires unnatural bending - or whatever it is called. No matter what I did, I could not see any other solution so I laid the plank under a steam iron for several minutes then with four clamps bent it unnaturally while clamping it to a tile at close intervals to keep the plank flat. Adjacent planking will be tapered to half width as necessary and with each plank require less unnatural bend. Second, I have a similar but less drastic unnatural bend required to correctly route to the proper place on the edge of the transom. That seems to be doable without steam and still get a flat lay. Those planks will be attached tomorrow. The stem and keel are made up of three pieces. Today I glued and clamped them off the model and shaped a rabbet while the glue set. Later, the keel/stem group was attached to the ship. The rear of the stern was feathered. It looks irregular in this photo but is not - it was done with sandpaper glued to a flat piece of masonite. To ensure uniformity a couple of swipes was done on one side, then with muscle and visual memory the opposite side - back and forth. When the stern post is glued to the diagonally planked area of the transom it will leave a small gap (the thickness of the diagonal planks) between the forward face of the post and the aft face of the stern itself. That space combined with the feathering will create a suitable rabbet. Now to let the glue set for a day because the stem is pinned in a compression mode right now. Is it Happy Hour yet? . . . . .
-
Thanks, Don. Its good to know I'm not imagining things. I finished sanding the transom edges - they came out well - and now I have spent too much time trying to reconcile the manual photos, plans and my model to get the lower wale positioned correctly. Respectfully, John
-
Doc, Good to see some work again here. Its fun to see how quickly you experienced folks get through the first planking. I wish I had found the Gast Haus when I was building the Mequon site. Respectfully, John
-
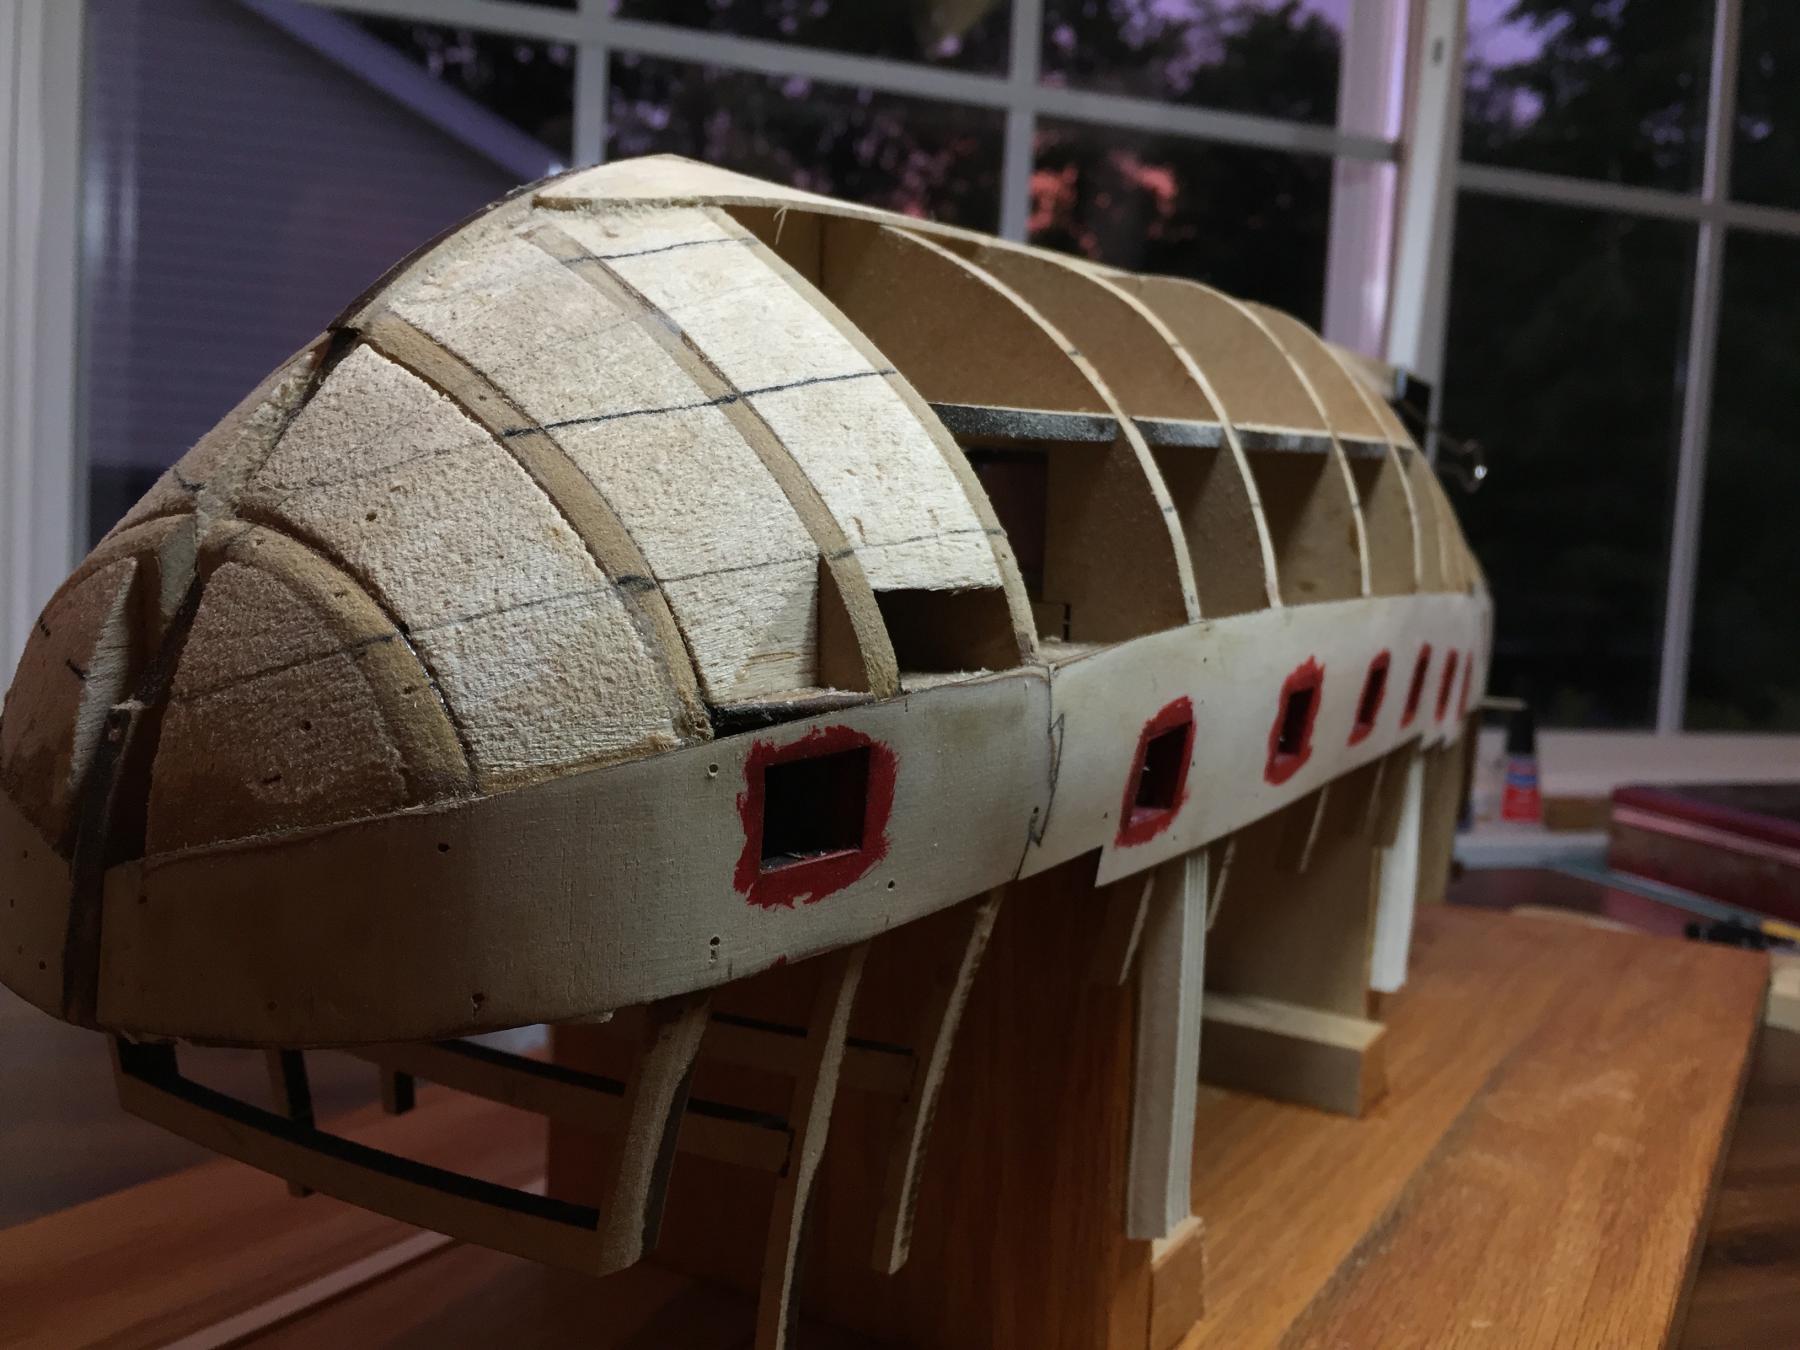
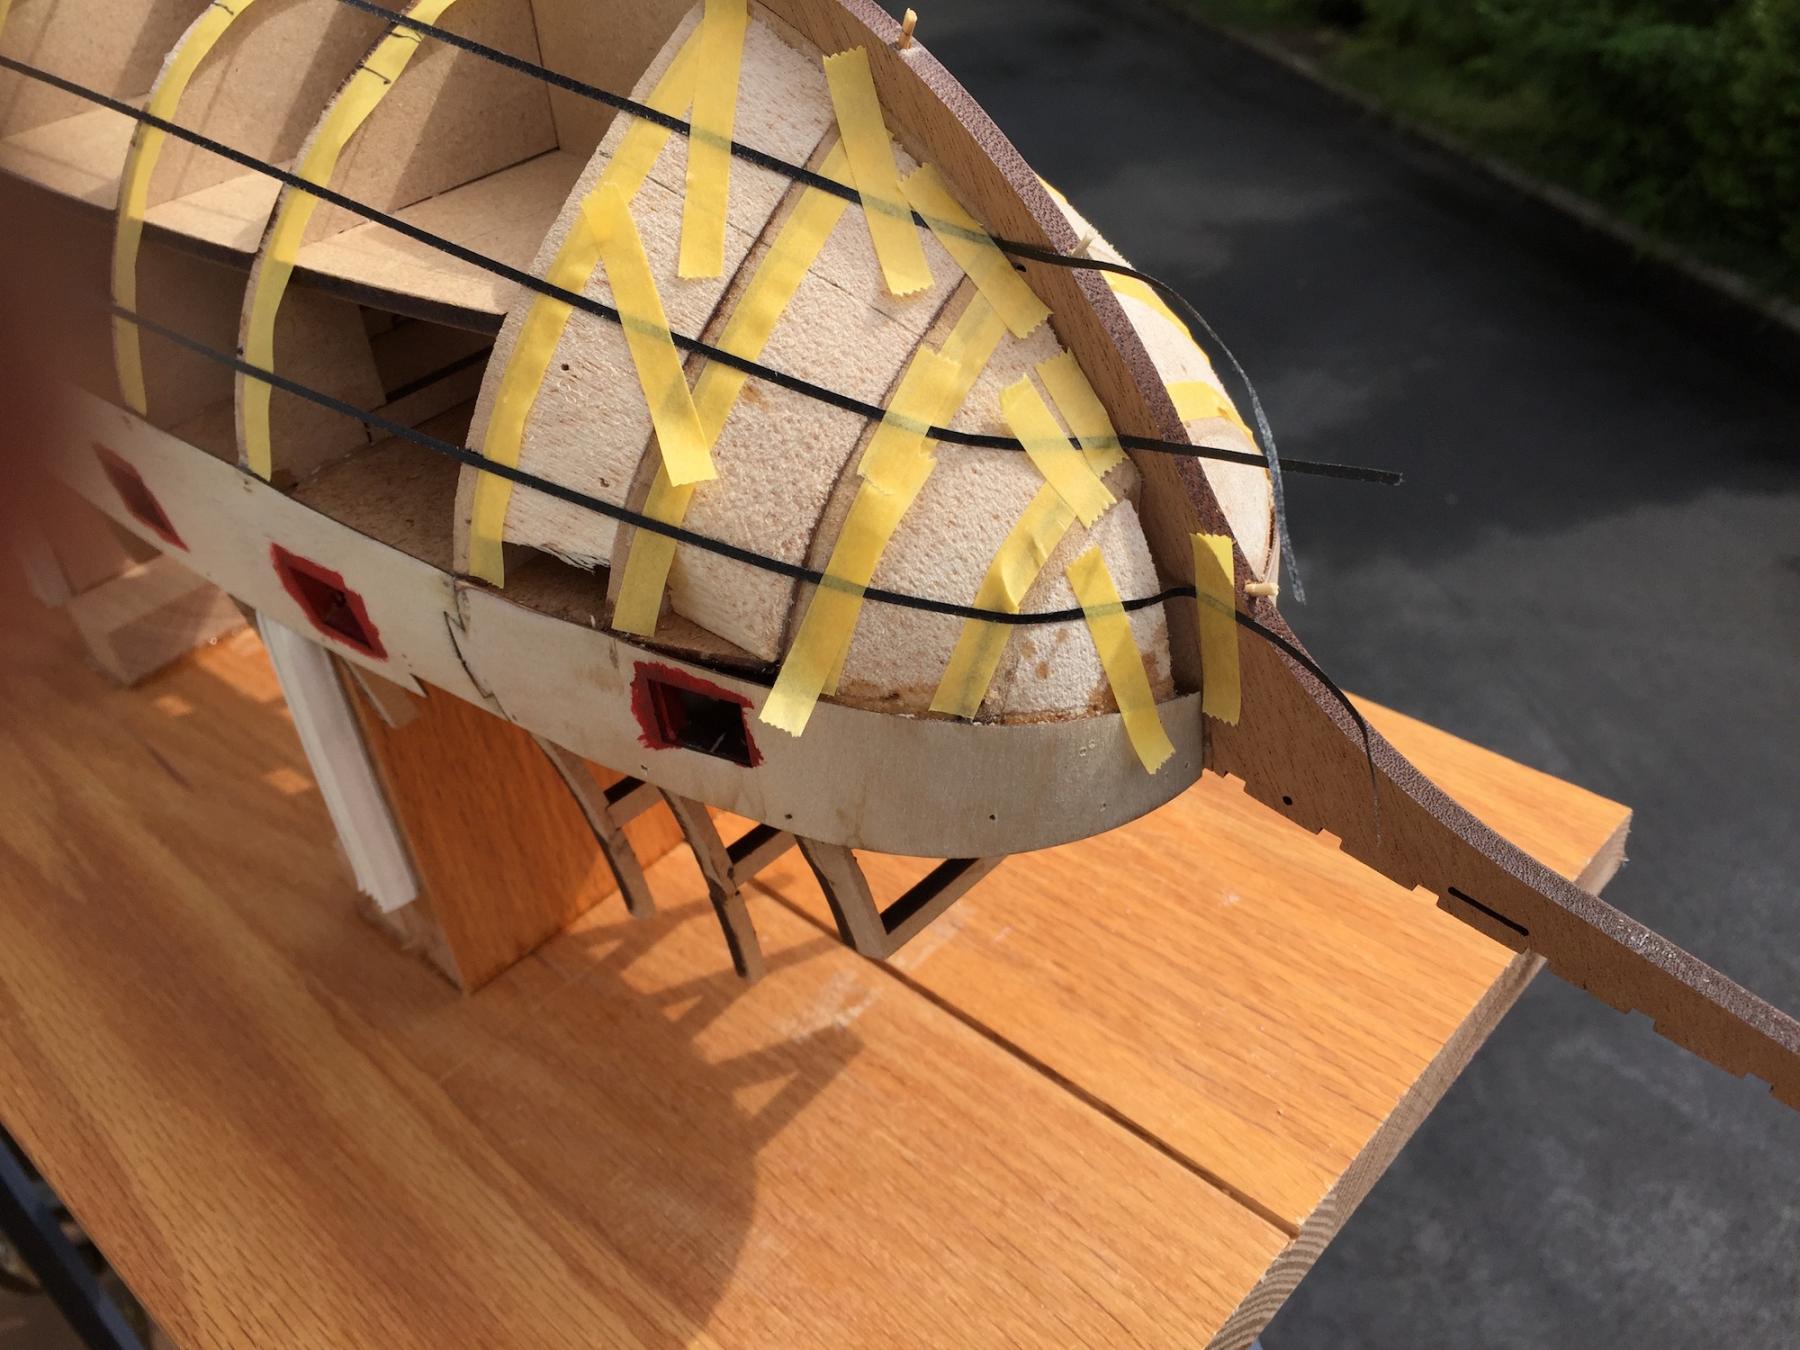
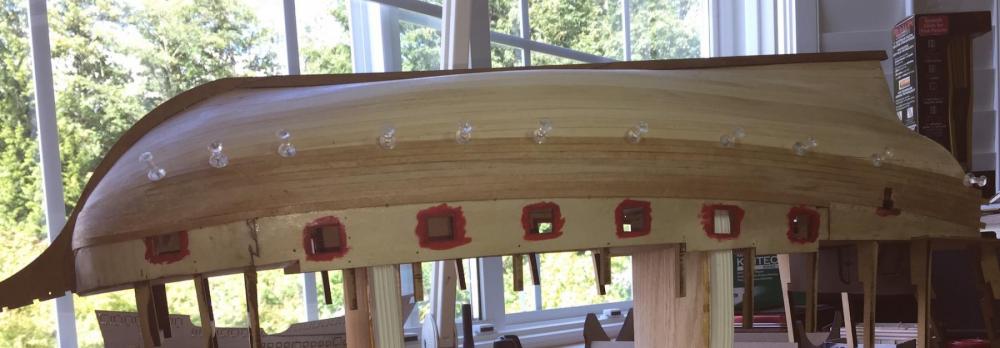
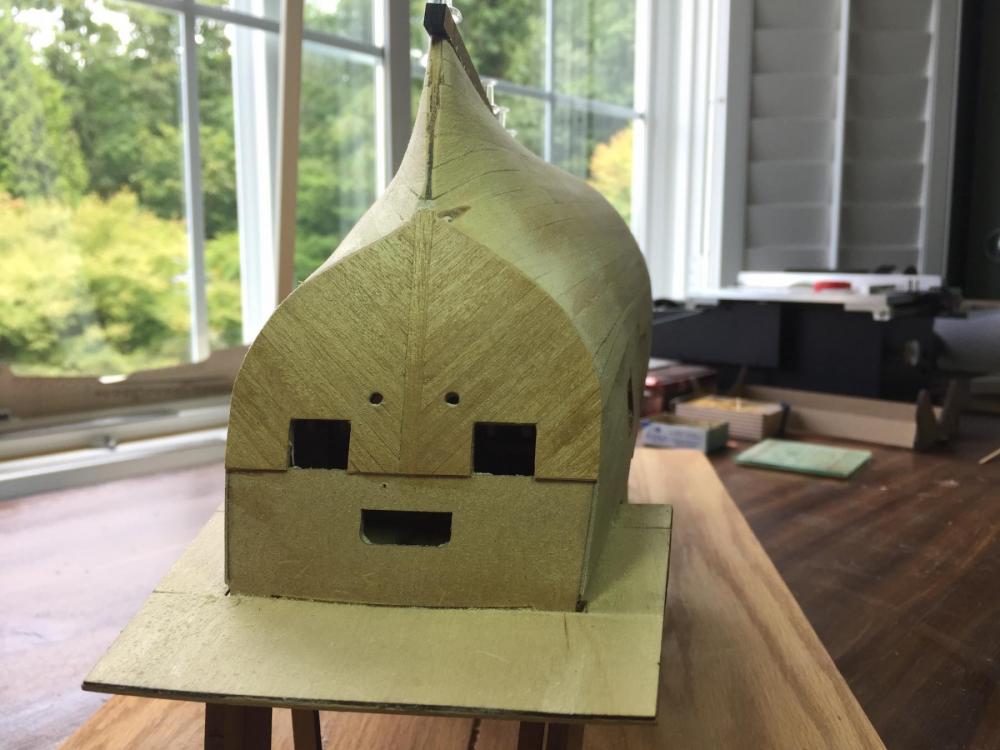
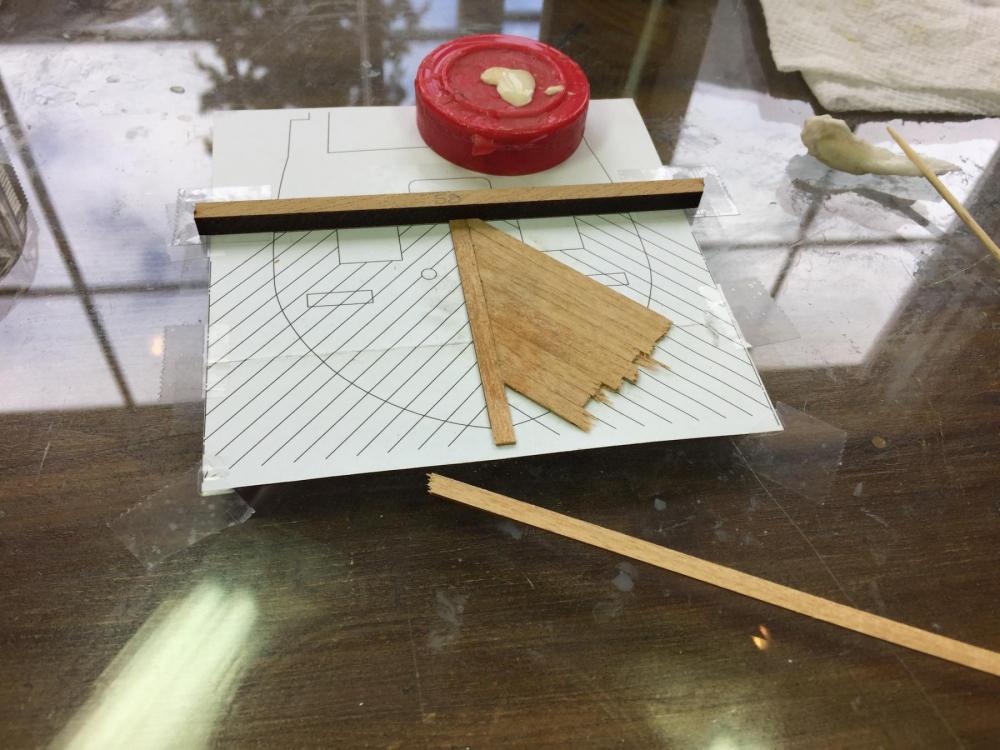
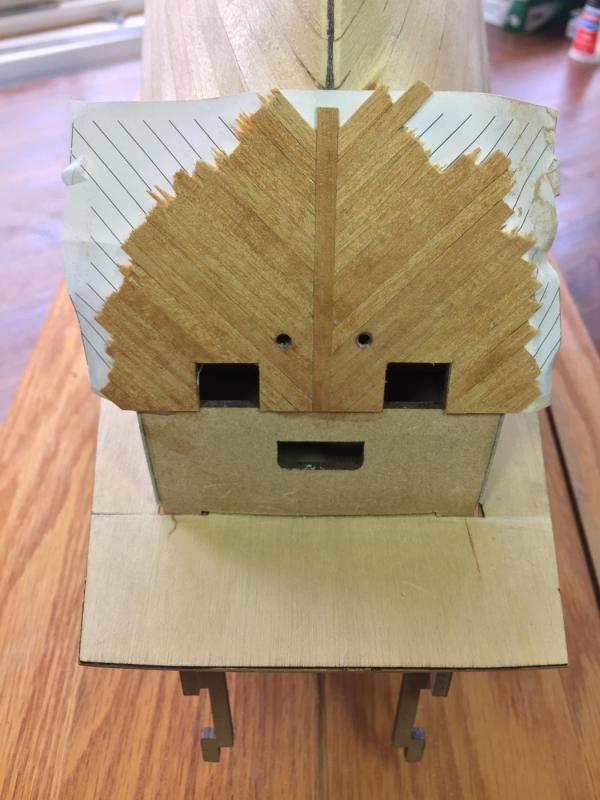
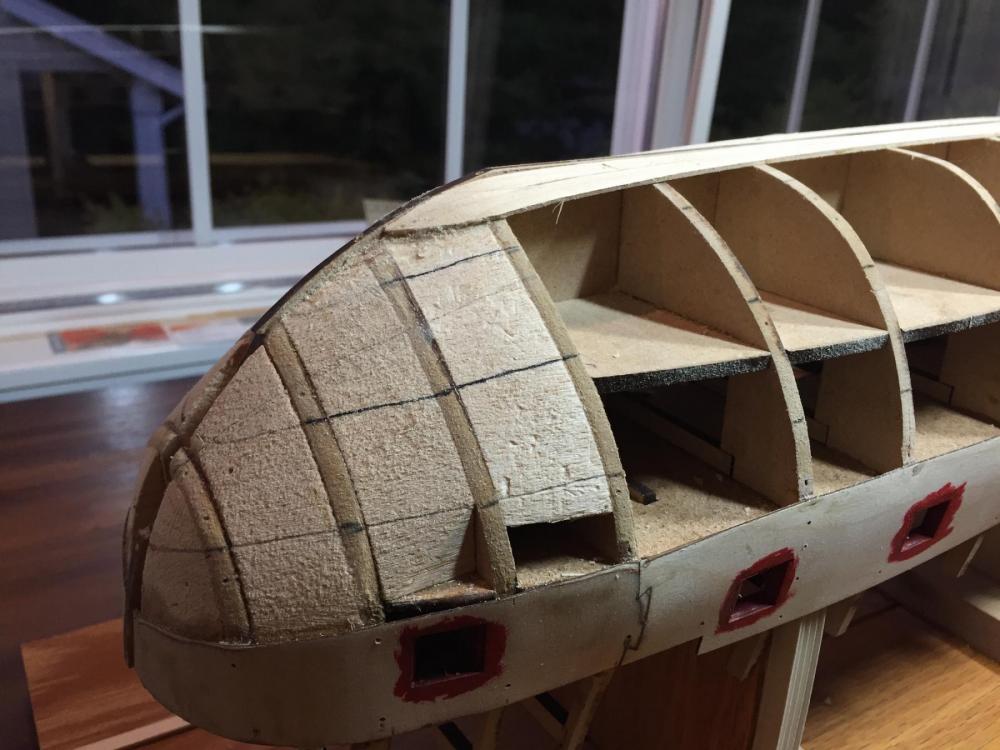
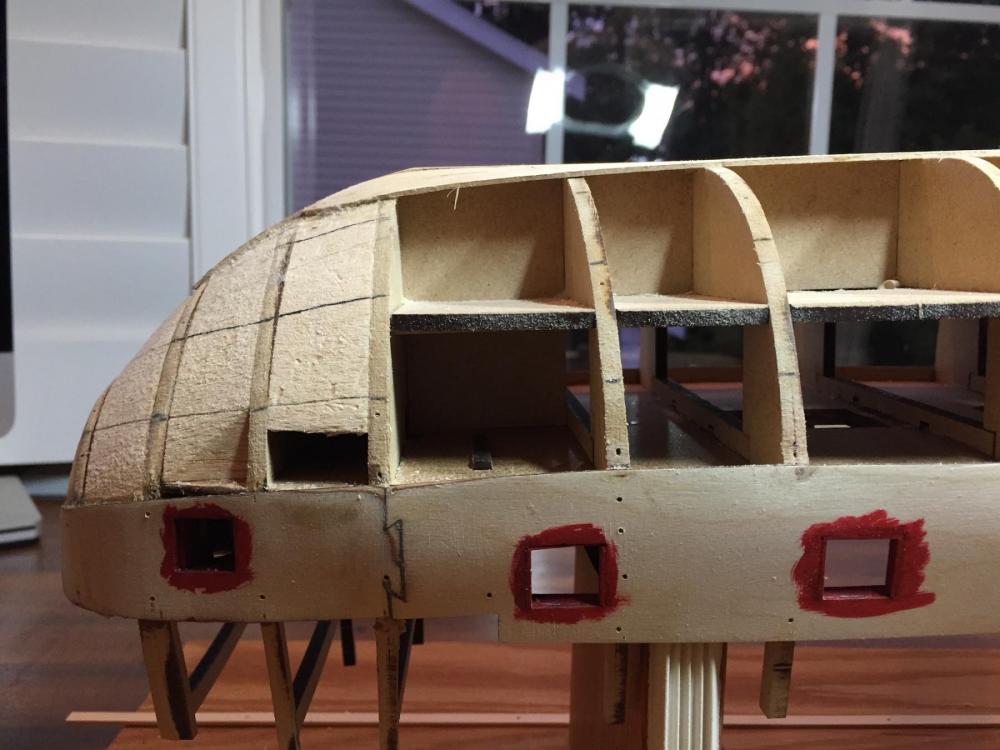
Thank you for the likes and comments . . . As per the manual, the lower wale location was defined today by using my micrometer as a caliper. Those marks are not shown in the two pictures seen below. Its position is significant because it wraps around and runs across the top of the transom as the upper border for the diagonal planking so proper positioning is essential for an attractive transom. The manual suggests constructing the "finish" diagonally planked transom off the model, then putting it in place, all the while being cognizant that the top of those planks have to fit smartly against the bottom of the wrap around wale. In the manual and on the box the finish wood for the hull and transom look to my inexperienced eye to be walnut but as others have noted in their build of this ship there is a discrepancy between what is supplied and what is described. I like the white underbody and painted black wale shown on the box and in the manual. Accordingly, with that color scheme I want the rest of the wood on the transom to be the same specie. That is what you see in the picture above after a single coat of sanding sealer. Visualize a black wale across the top of the transom and white at the bottom. Thank you for looking in . . . Respectfully, John Maguire Seattle
-
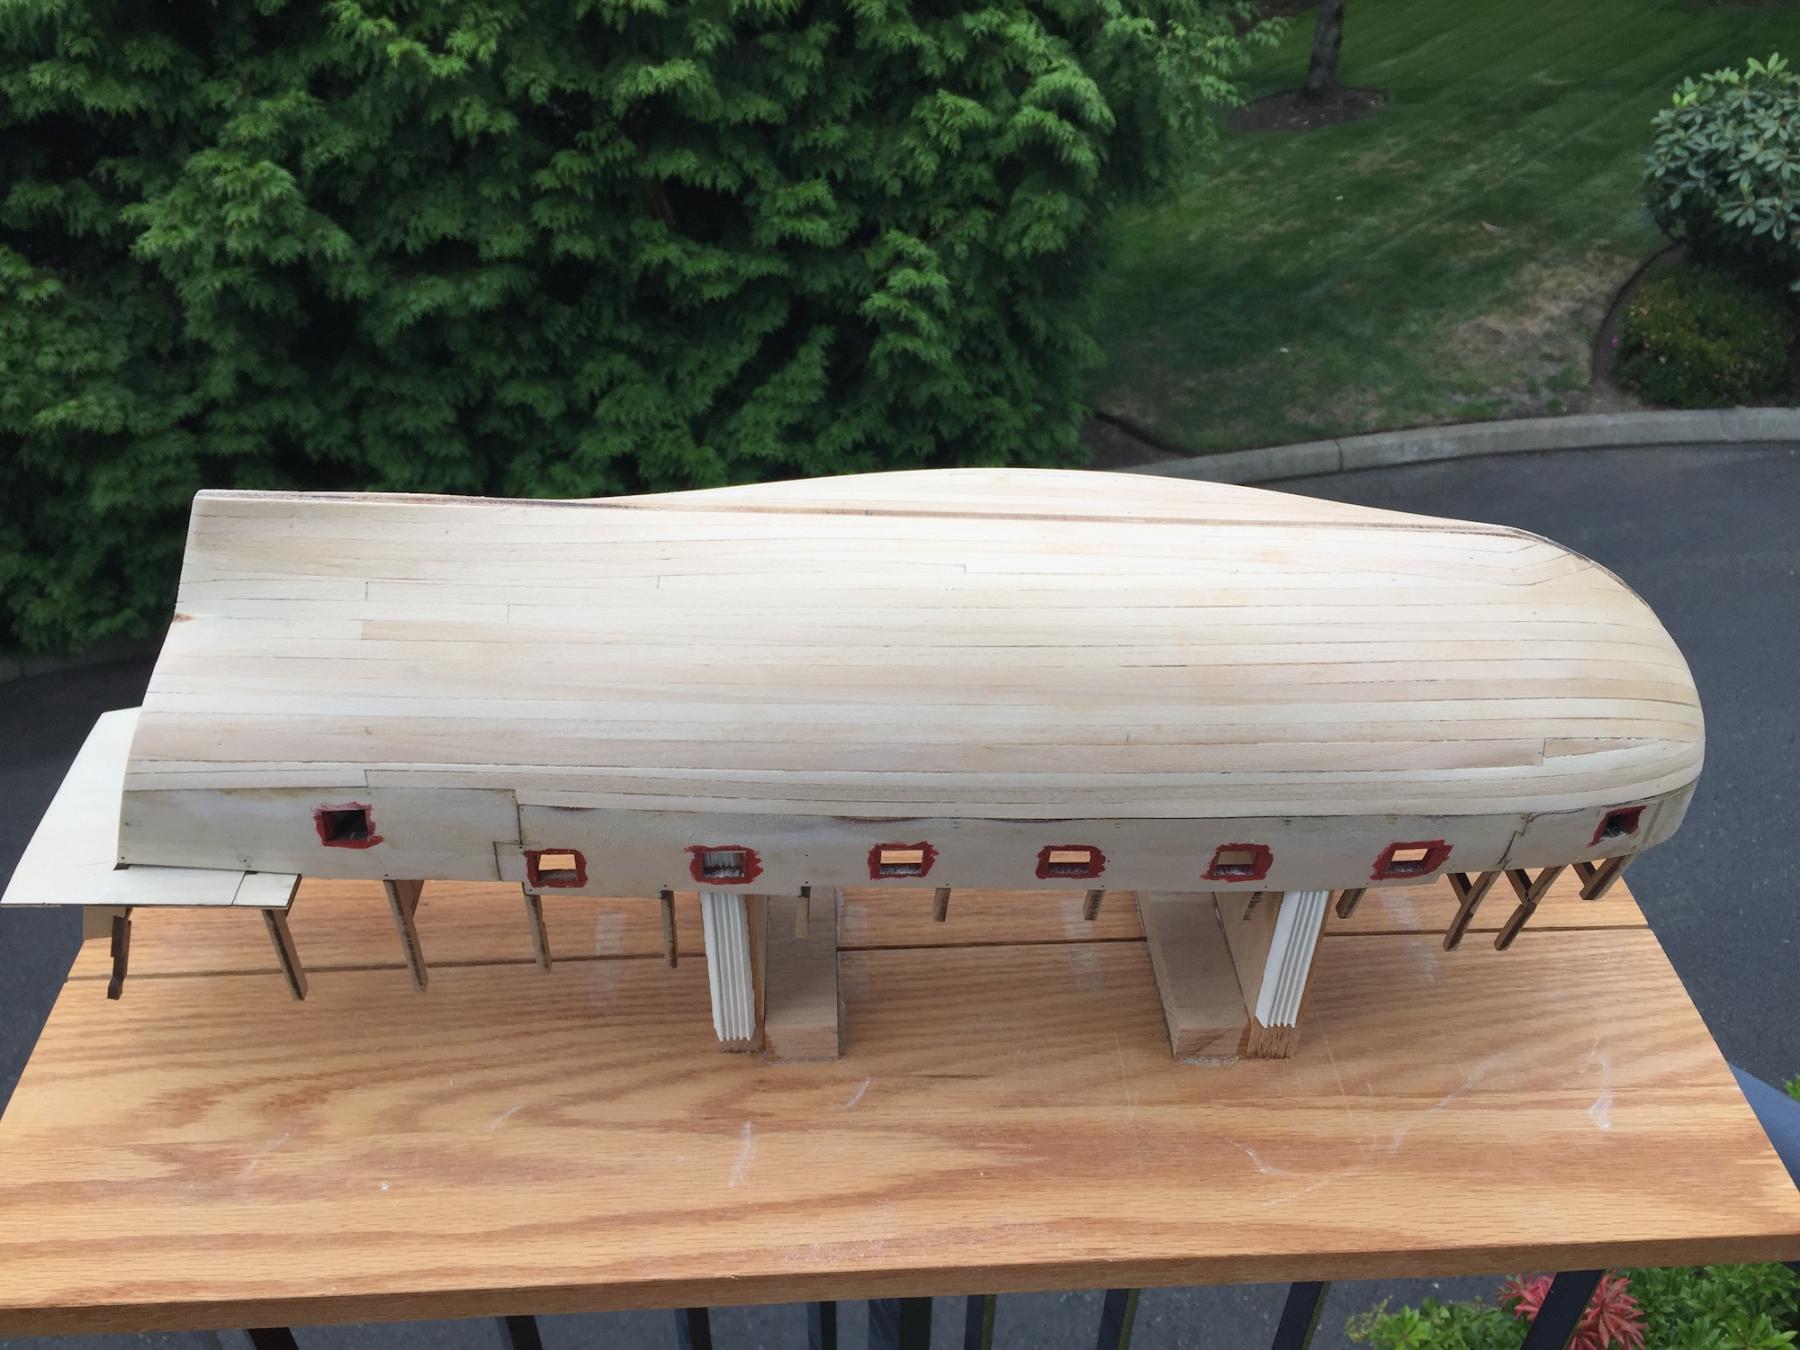
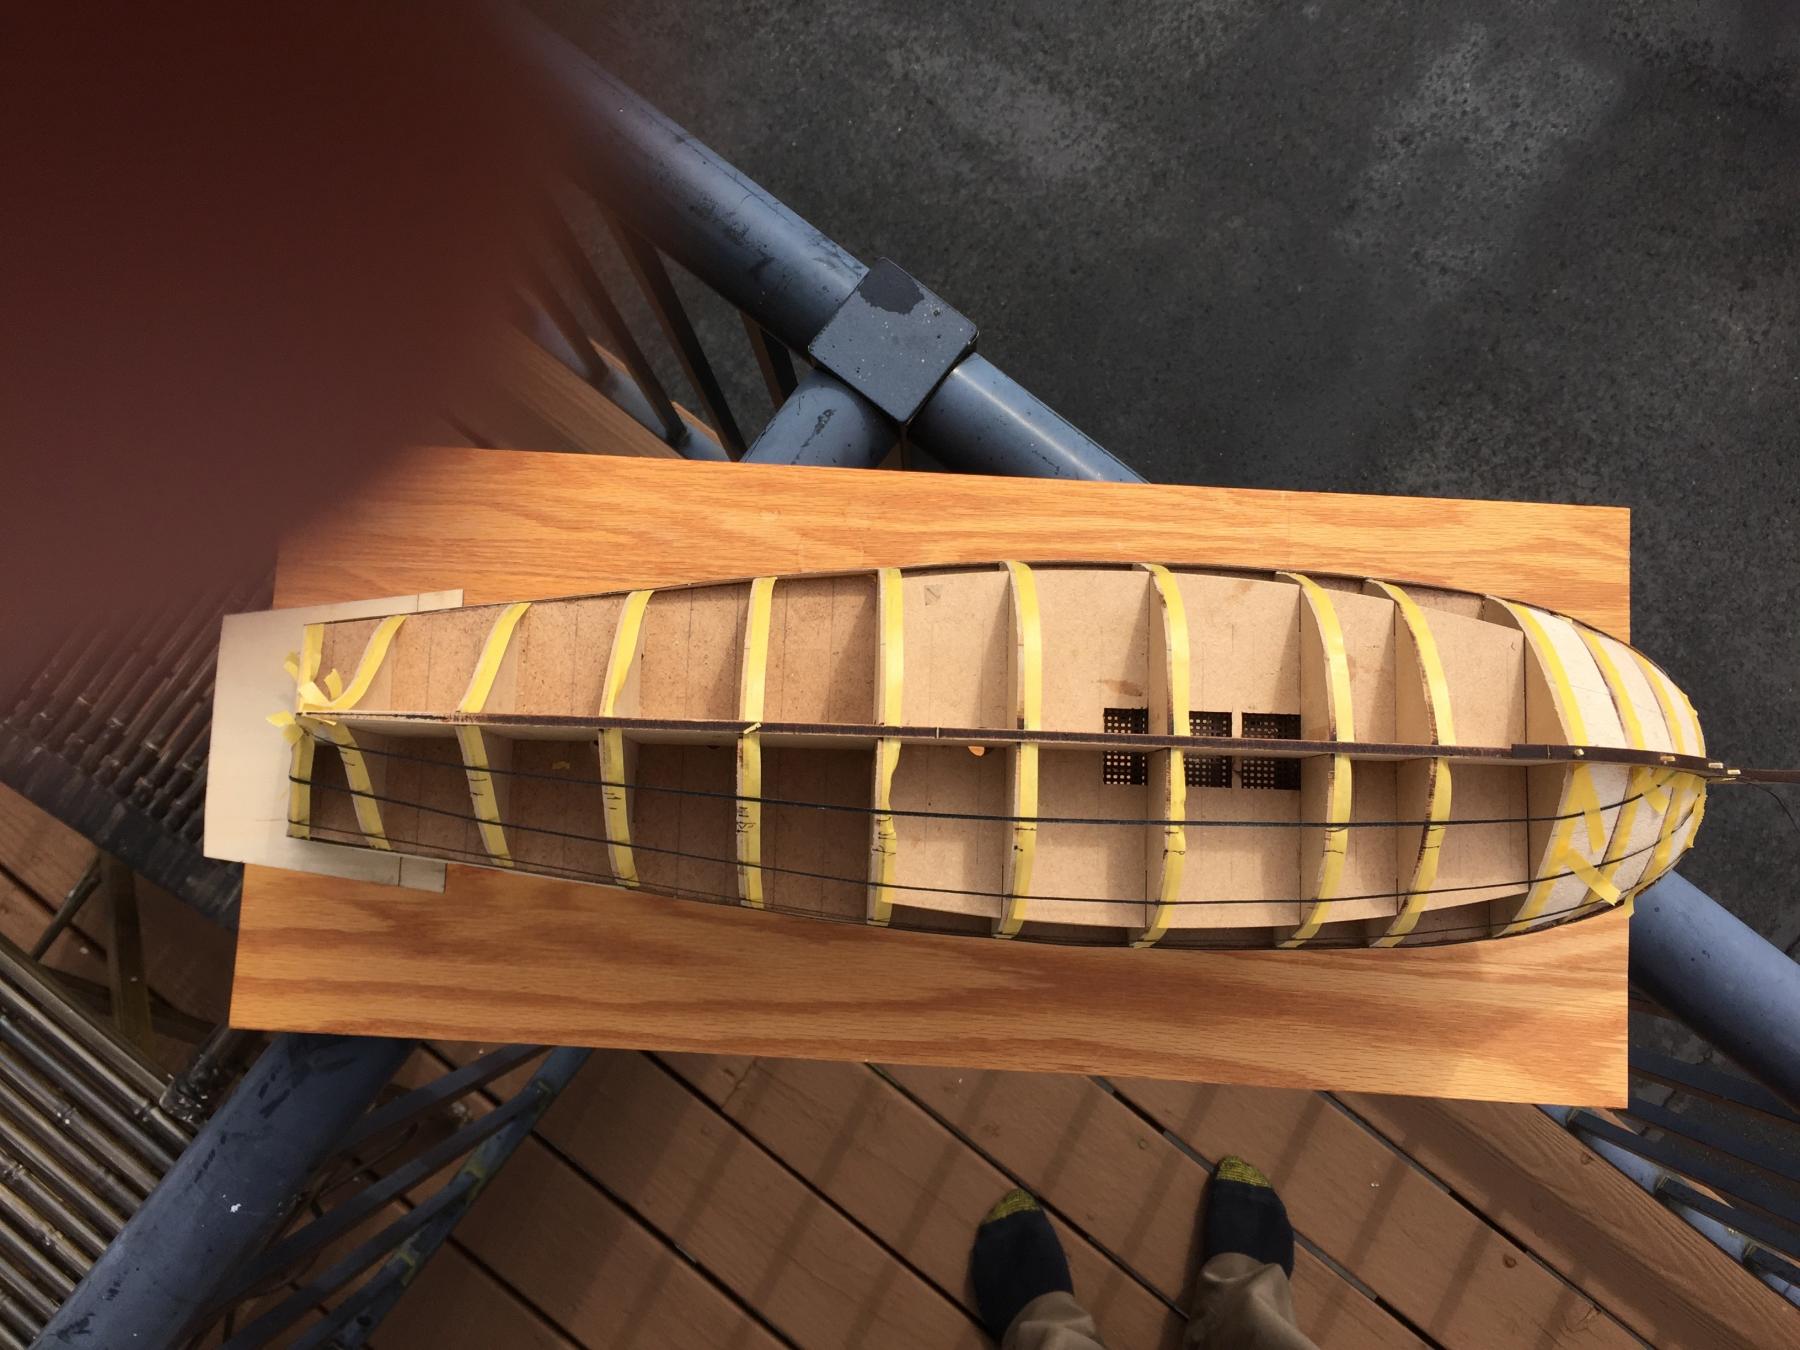
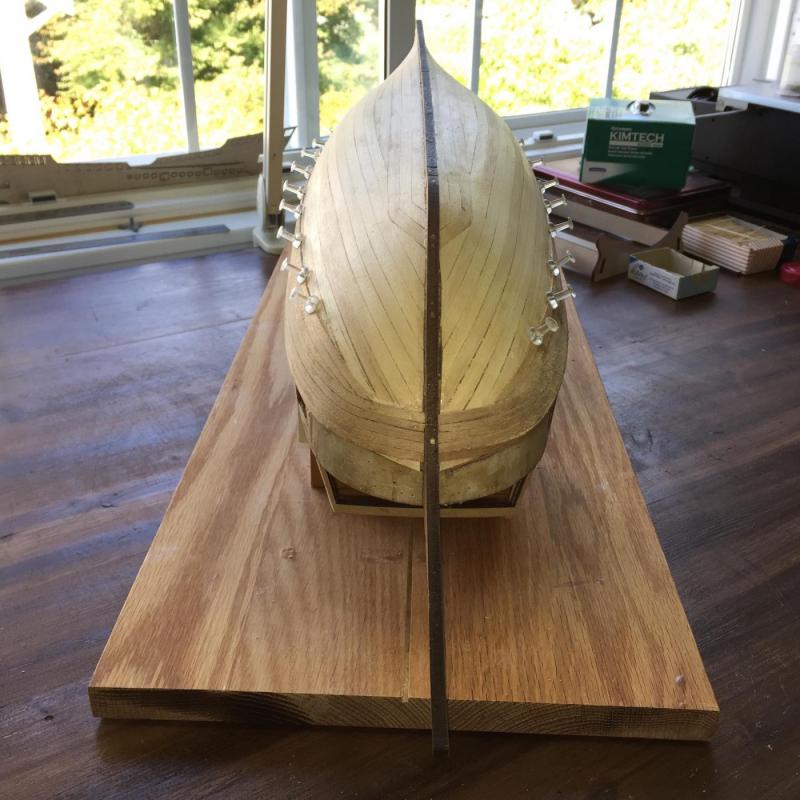
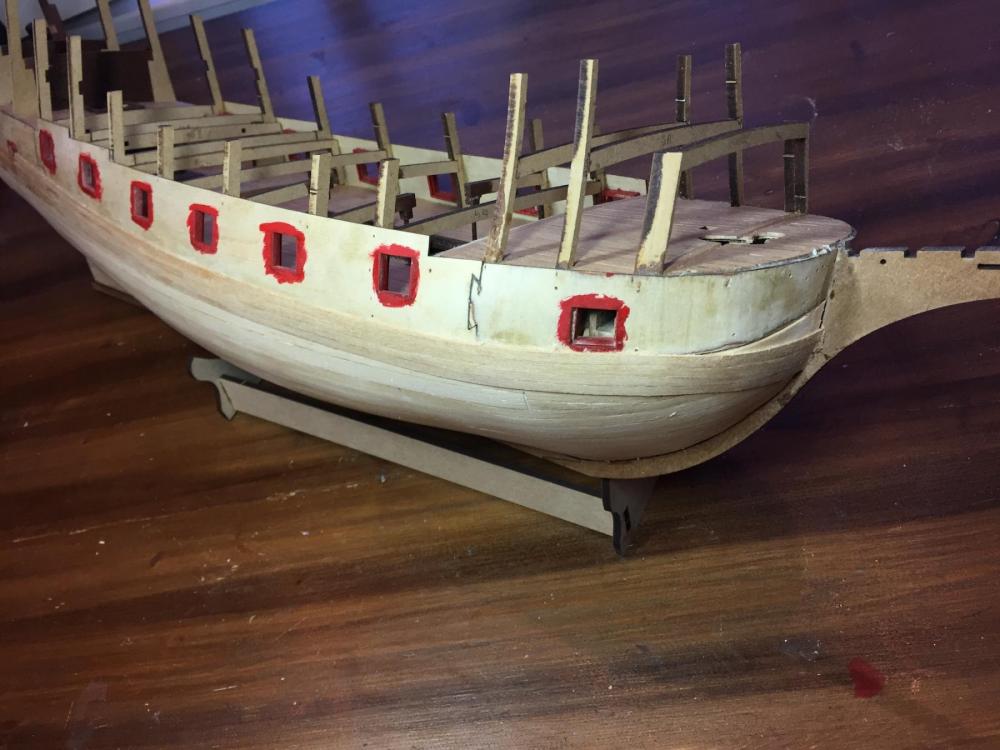
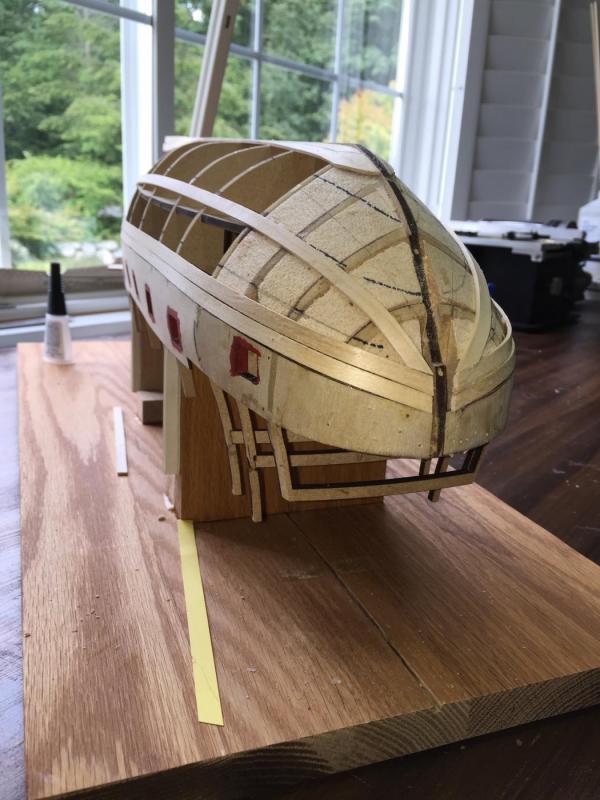
Brian, Doc & Don, Thank you for your helpful input on filling. I have been away for a week and spent several days after returning completing the first planking. The shutters went on yesterday and today. The plank runs look terrible but they are all edge glued and ran fair and tight over the frames. I have neither high nor low spots. The demarcation against the ply is all smooth. The stern post was feathered prior to planking and the planks were also feathered at the stern post when planking was complete. I have sanding sealer on the hull now and am preparing to build the "finish" transom. That is done over a paper pattern off the ship, then moved into place upon completion. Studying pictures in the builders manual with a magnifying glass shows clearly how Chris planked his prototype, so with that and pictures of those ahead of me it is possible I won't screw up the finish planking. Respectfully, John

-
Looking great Elijah. Looks like you have it wired . . . Respectfully, John
- 701 replies
-
- 3
-

-
- phantom
- model shipways
- (and 1 more)
-
Doc, Your deck calking is very uniform. Are you still doing them the same? How did you come by the edge layout? It is very attractive. respectfully, John
-
Thank you dear friends for the "Likes". I am very pleased that you take the time to read and to express your approval . . . . Doc & Mark, And, thank you for your input. By the way, remember when we all learned grammar (is it still taught?) starting a sentence with "and" was prohibited - I see it in literature and the press all the time now . . . . When I originally placed the strake above the garboard it was a natural fair run and ended up as you advocate. Doc, it was long, like yours. With this hull geometry, I was afraid it would cause the planks above to climb the stem in an unacceptable way and so, cut it back. In retrospect my failure was the artificial "line out" marks I drew on the frames and nose area balsa with the attempt to treat the lowest zone credibly - it wasn't. That band was unrealistic. Anyway, it is a good thing I experimented with this because I would not have wanted the finish planking to have ended up as haphazard as this one did. Early on I could see I was headed in an uncontrolled direction and yet pressed on. Shame on me . . . . So, the bow is essentially complete and the significant vertical to round spot on the stern is also planked now. A plank or so on the two open areas with a shutter will complete the first stage planking. It didn't end up nearly as organized as I intended but seriously puts me on notice to do better. At this stage I have good coverage with tight fits. When it is sanded I'll have a good foundation for the finish planking. The BIG question now . . . . When I finish sanding, should I still go ahead with a filler? I have no spaces, etc. between the planks - a tight fit with all strakes edge glued - so what does plastering it with filler accomplish? Other than something wet, like Bondo, I'd end up sanding it all off! What do you use for a filler that gets into the fine cracks yet is easy to sand? Exact specifics, please. I have experience with Bondo and like its characteristics - but - I never see any of you using it. Is there a negative for what we do? I have sanding sealer that I intend to use at the end. Is that correct? I understand these steps are so mundane that none of you ever report them. Please understand that while I spend hours and days reading your excellent build logs, this is my first time through and I am trying to report minor steps in hopes that you'll arrest any lethal steps I am taking. Respectfully, John Maguire Seattle
-
Mark, Yes, errors too numerous to talk about. Will do - thank you . . . Respectfully, John
-
Thank you dear friends for the "Likes". A long day of planking. Slightly more than half the strakes are in place. A bit of a routine developed that got the ball rolling at a moderate rate but then slowed down as I entered the section of the stern that transitions between the straight up and down vertical part and the rounded portion. Again, many thanks to those of you who answered my questions and got me to a point where I could move ahead. Respectfully submitted, John Maguire Seattle
-
Thank you Mark. I like your photo. Additionally, looking at Doc's INDEPENDENCE, he mentioned Clare Hess's work so I took a peek and found Clare had several pictures of his first level planking that were at an angle and clarity that was extremely helpful and it was accompanied by an explanation. As a result of all the aforementioned I began planking today. I put two strakes below the ply, then moved down hull several planks width and ran a strake from bow to stern allowing it to run flat and fair. The work will follow the suggestions of Mark and Clare. Respectfully, John
-
That's precisely what I wanted to see, Doc - many thanks . . .
- 306 replies
-
- 3
-
-
- armed virginia sloop
- Patrick Henry
- (and 2 more)
-
Doc, Looking gorgeous. Congratulations. I really like your trunnel solution. And . . . . I followed your link to Clare's build and voila, there was a perfect description with clear illustrative photos of the planking solution I have been seeking! I see you are similarly embarked. Respectfully, John
-
Mark, I have begun this interesting journey you are traveling but you know how long it is going to take to get myself up to speed. To fully appreciate the ambiance requires careful reading of the many postings along the way and looking backwards on each commenters history to fully understand what they are bringing to your table. Do you know how many mornings that will fill up at Starbucks? Thank you for so willingly sharing your excellent work . . . . Respectfully, John
-
Doc or Brian, Do you use the metal cleaner first? I have used JAX with mixed results and crusting. Is that because I did not use the chemical cleaner you mention first? Once clean, what are the ranges of time that you use for JAX application? Doc, your work continues to be stunning. I wish I had a sense of wood colors similar to yours. Are you able to produce a picture of your cannon axle pins to the deck? The axles and wheels are soooooo small . . . . Respectfully, John
- 306 replies
-
- 2
-
-
- armed virginia sloop
- Patrick Henry
- (and 2 more)
-
Mark & Doc, Thank you for your time. I initially laid out the garboard on this hull exactly as you just described Mark but after glueing it in position it was so far forward that I was afraid the ensuing bow planks would rise too much as you discuss. Accordingly, I cut it back shorter. My stated goal was to try to learn how to plank so that I would have done it once before using the good wood for a finished surface. This means I should be looking at how the finish planking is positioned relative to the cannon ports, which is clear in the instructions, then starting from that line, begin planking downwards. I would be using my present planks, not the finish layer wood. Pursuant to that, suppose I laid it out by putting vertical runs of tape on each frame, mark them for each plank the way you have marked on your frames and working from top to bottom see where I end up? As I approach the garboard I would begin to see the solution for spiling as well as the shutter. I 'll have to figure out a different way to line out. The way I did it the first time got me in this trouble. Does this sound like a reasonable plan? Respectfully, John
-
Mark, John & Doc, Thank you for continuing to look and comment. Mark & Doc, in the first photo and some of the others I begin to think my line out bands should be changed so that they are parallel with the keel. As now drawn, I made them essentially parallel to the lower edge of the ply. Look in particular at the first two pictures. My band closest to the keel is so narrow on the frame that I would need to have the end of the plank touching the stem to be unnaturally wide - that is what I have already done with the first plank above the garboard. With my bands as drawn I'd need to make the bow end of several planks very wide where they touch the stem. Actually, I see no way to fill up the first band but would only be able to get back on plan by the time I reach the second band's line. Here are additional pictures: In summary, I think the aft ends of the bands are satisfactory but ask if the bow ends need to be modified to be parallel with the keel, at least the two bands closest to the keel. Thank you for your time and effort. Respectfully, John


-
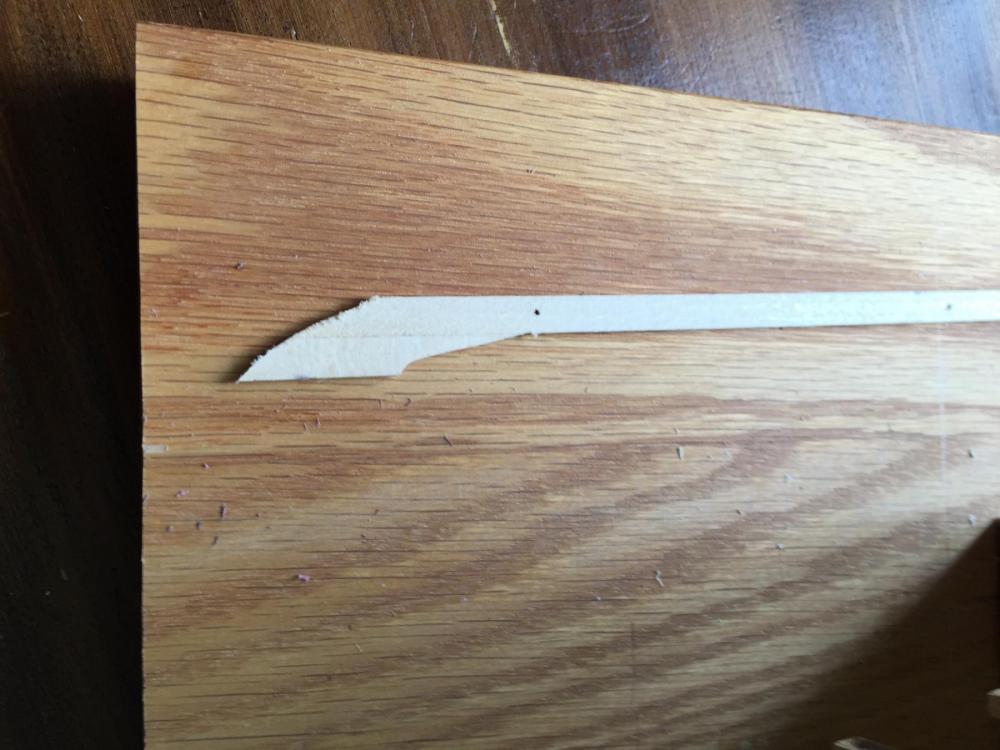
Dear friends, As a result of your comments and opinions I now have a clear impression of what the various types of PVA represent. So easy yet obscure for a novice - thank you very much. I have splined the first strake above the garboard and can without humility say that I am pleased with my "fit". If it continues to be logical, I'll continue to spline. In spite of how long I studied the line off technique I still failed to forecast what was going to happen. Look at the weird shape of the first strake above the garboard. As a result of that I "think" I'll merge the first two zones and go back to individual "zones" when I get above that. As I get higher up the hull it appears to me, if I am correct (?) that the splining may not be necessary. My hat is off to all of you to whom these things are second nature and you don't even have to think too long about it. My past several pages of posts represent less than a single post from experienced builders but I represent them as "the other side of the tracks". It gives me a way of requesting your opinions by showing you the minutia of where I am. This is one of my pair of stakes roughly cut before it was minutely shaped to fit against the garboard then "side glued" for additional width necessary for the spline. Below are the garboard and the next adjacent strake. Weird, in spite of my best attempt! This is what the first two stakes look like. As suggested, I used super glue gel on the frames and PVA on the seams.I beveled the strakes for a tight fit - not necessary on first planking but done for practice. Respectfully submitted, John Maguire Seattle

-
Wow, great comments dear friends - thank you VERY much. Googling doesn't enable me to tell the difference between weldbond, tight-bond, and who knows whatever else bond. I have been using one of them so far - which ever it is. Why? Home Depot & Lowes are pretty close to my morning visit to Starbucks. Why do you like a specific PVA? Which one would you use for the seams? Again, thank you for being patient with my numb-suckle questions about things you knew so long ago that you have forgotten when you learned . . . . I keep going back and enjoying the updates to your builds. Respectfully, John
-
Thank you - everyone - for your constructive comments. I appreciate the many "likes" as well. Your cumulative support is important. Accordingly, I continued to appraise it from all imaginable angles and this morning used card strips to transfer the lines to the other side, then removed superfluous markings and plainly marked both sides of the hull. Chuck Passero's CHEERFUL build has a nearly identical stern and though his bow is sharper than my bluff shape there is much to be gained by close inspection of his plank runs. Today I shaped the two garboards, mirroring them for uniformity and beveling as necessary approaching the stern where the planks twist. Looking at CHEERFUL gave me confidence in the shape of the bow end of my garboards. If any of you have time, please comment on your preferences for glue and the reasons why you like what you use. If it is super glue, what consistency and do you glue one frame at a time? Again, thank you for your time. Respectfully, John
-
Thank you Brian & Mark, I have lined out the hull again and am attaching a bunch of pictures to solicit critiques. After a couple of days I'll remove the pictures so that I'm not eating a lot of forum data storage with trash. This scheme probably won't need dropped planks at the bow or steelers at the stern though admittedly it will take a bunch of spiles. Is that a bad thing? I plan to edge glue planks to achieve enough width to enable spilling. I particularly like the somewhat flat angle that the planks are at approaching the stem. Please comment - I'll delete all the pictures in a couple of days. Respectfully, John