HOLIDAY DONATION DRIVE - SUPPORT MSW - DO YOUR PART TO KEEP THIS GREAT FORUM GOING! (Only 36 donations so far out of 49,000 members - C'mon guys!)
×

John Maguire
-
Posts
157 -
Joined
-
Last visited
Content Type
Profiles
Forums
Gallery
Events
Everything posted by John Maguire
-
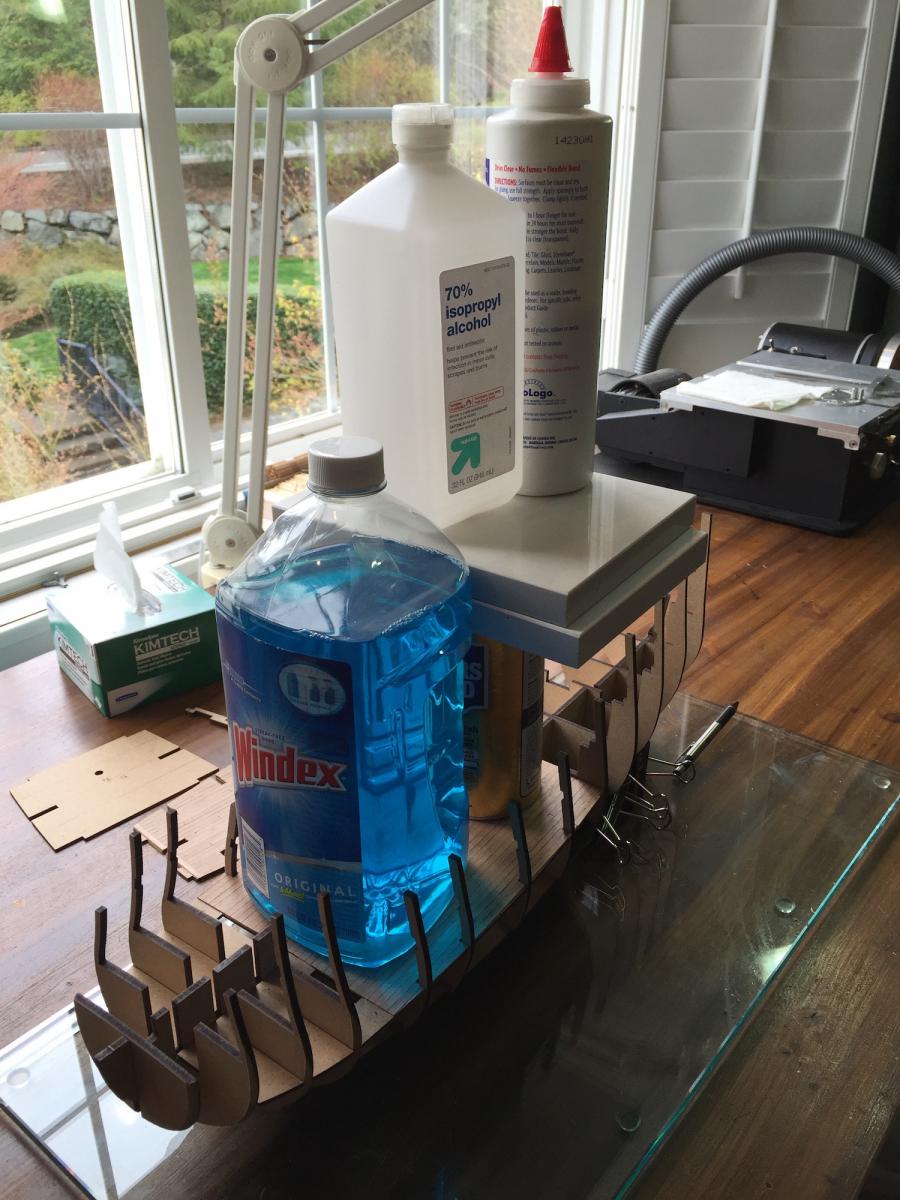
 Thank you for the many "Likes". It is nice to see you are all looking in. Mark, thank you for looking in and commenting. I have now planned out in my mind how to deal with this, grateful that it was revealed in a timely manner. Don, thank you for your effort on my behalf. What you describe is pretty much what I shall have to do. Also, repeated viewing of the plans uncovered the required detail. After qualifying the deck hole a couple of days ago it is a sufficiently snug fit that I can temporarily put the post in place then during rigging reach down through the grate in the deck above, do all that is necessary with the grate cover and post then put all in place as necessary. Yesterday was spent prepping and moving forward. I fabricated a vertical winch (forgot what it is called) and a ladder that the instructions dictate for installation at this point then got the paint booth out. Seen here is an overkill with the air brush - painting the stern post interior. Primarily I was using it for the smaller components mentioned above. Respectfully submitted John Maguire Total Time 122 hours
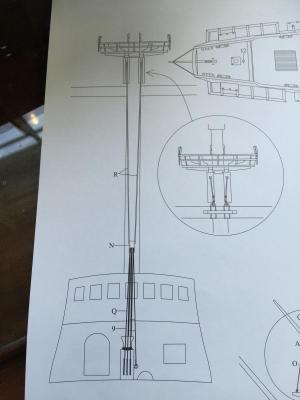

-
Nice, Doc. Looks like a days work. I am going to Google the saw you are using.
- 306 replies
-
- 2
-

-
- armed virginia sloop
- Patrick Henry
- (and 2 more)
-
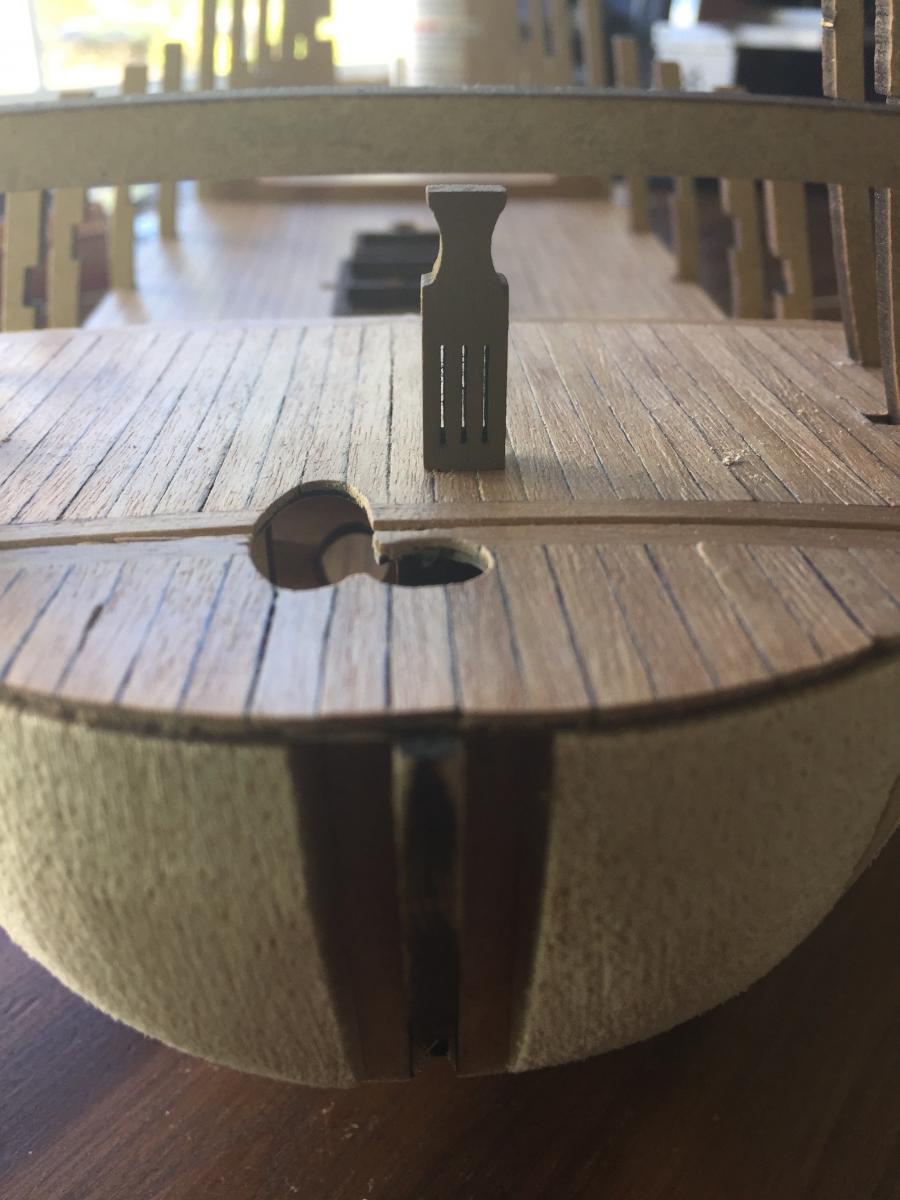
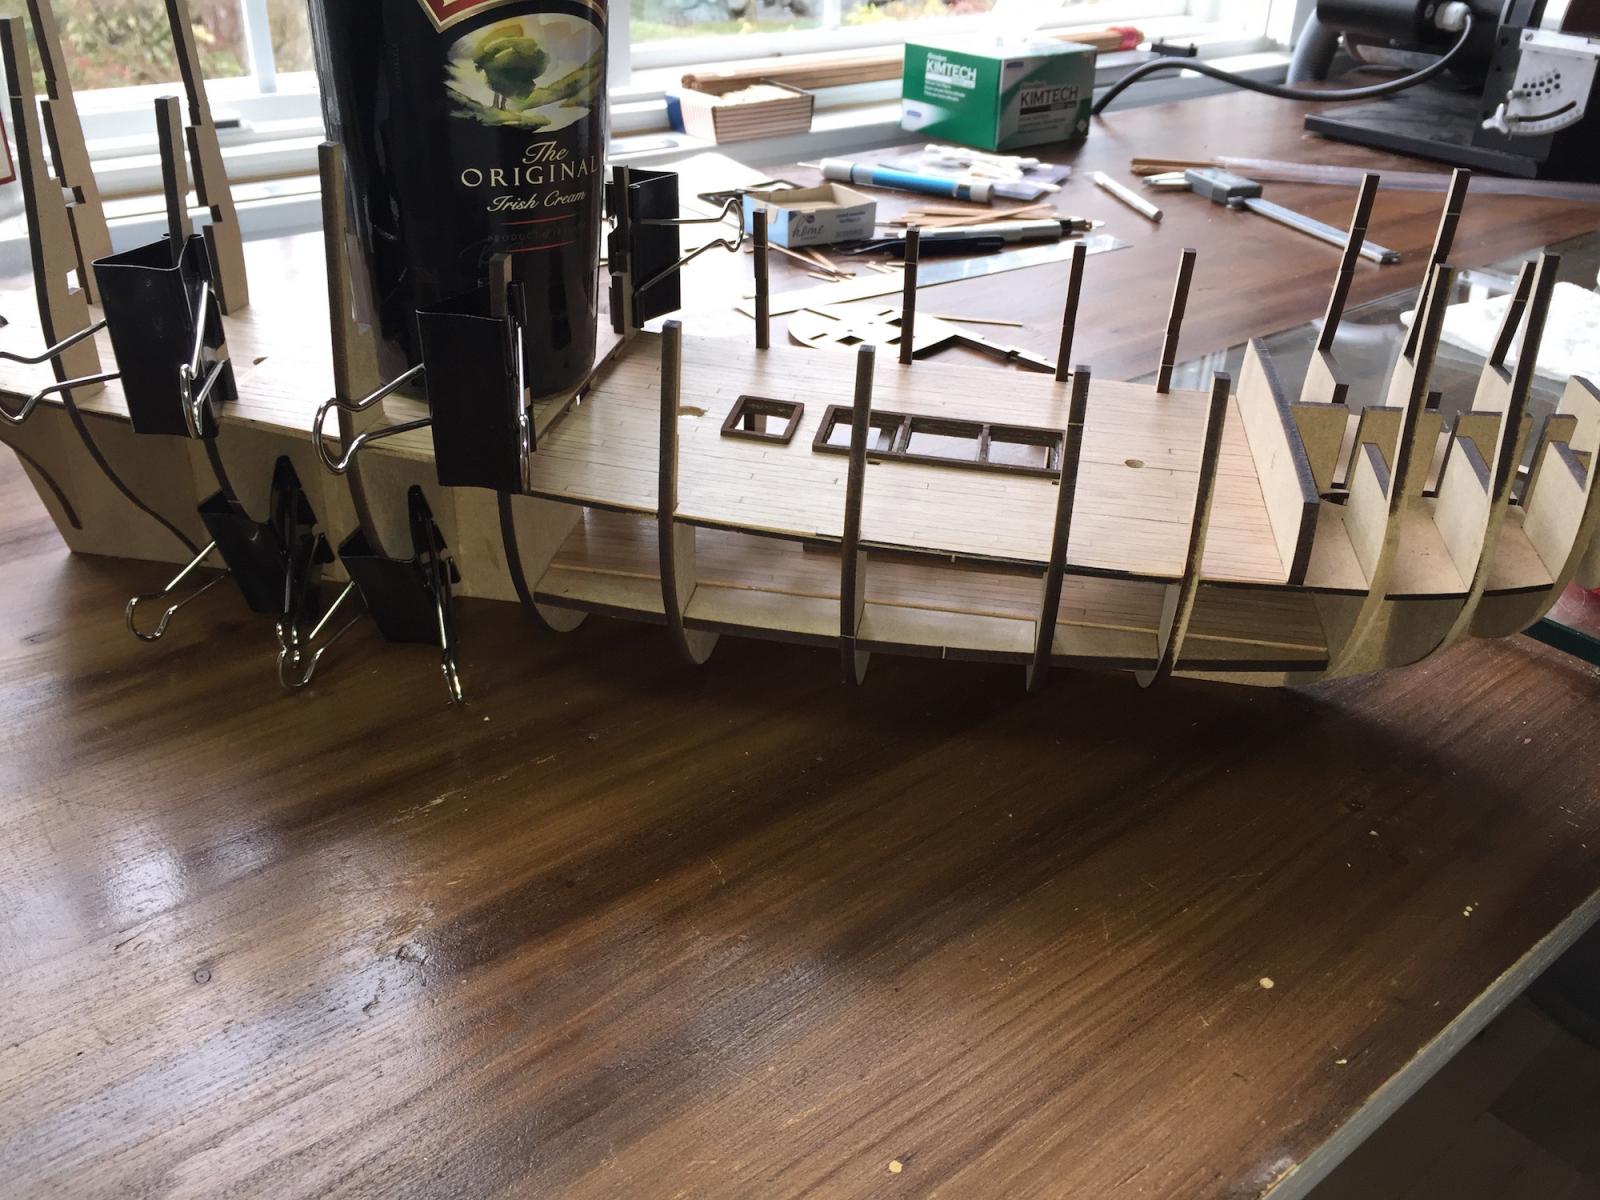
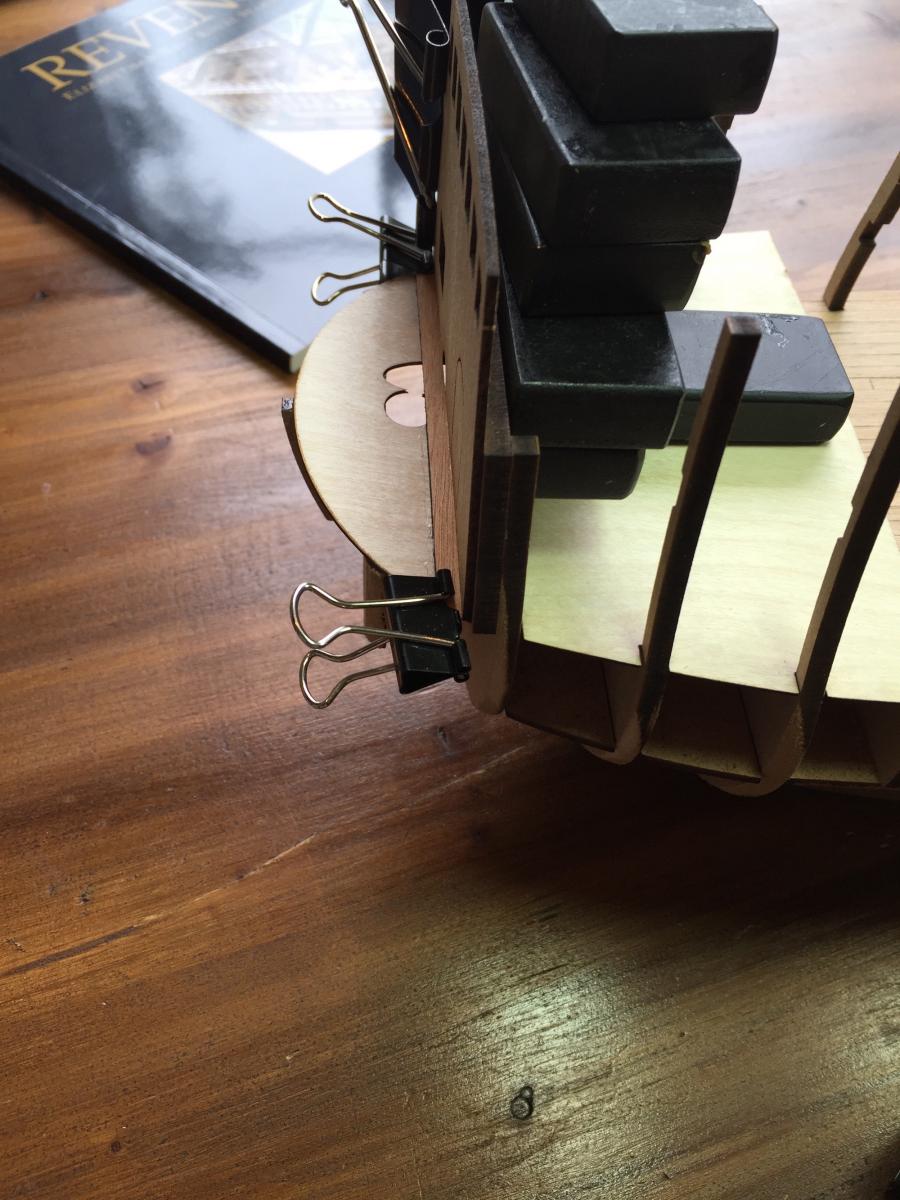
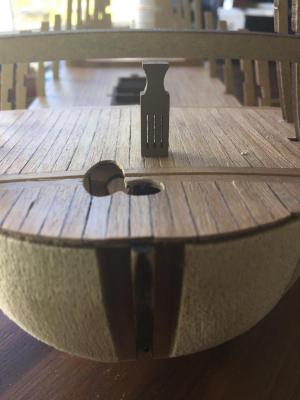
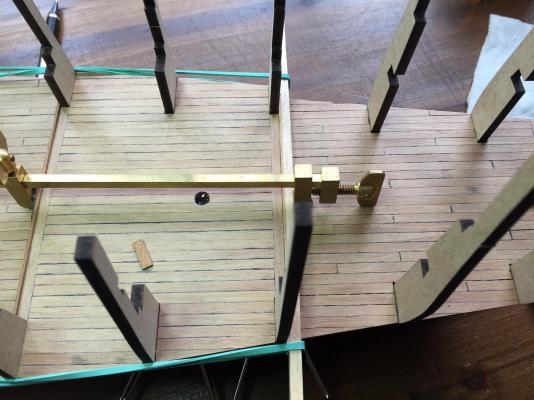
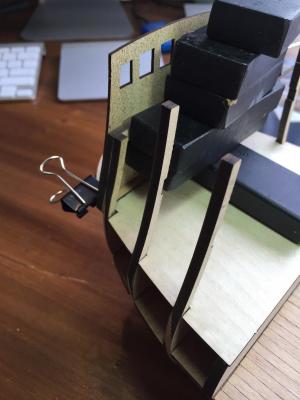
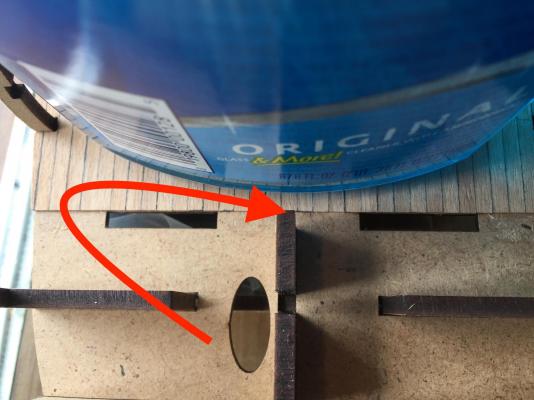
Doc, thanks . . . Request Help: One of you folks mentioned that you are working on REVENGE rigging, I don't recall who or in what thread you made the comment. If you find this post, would you please be kind enough to explain this square foredeck hole that I believe is intended for the jeering tackle post? Specifically, on page 77 of the manual, lower right corner there is a note that applies to the hole in the grate in the deck above the one I am showing here. It refers to the rigging plans. I find it on rigging plan page 15 as item 9. It appears that that the lines pass through the hole in the grate and terminate on what appears to be a post sticking out of the hole shown in my photo. Looking at page 75, bottom right corner I see a main yard jeer post part 60. Is this the piece seen in the photo below? If so, won't it be impossible to access it to reeve lines through the sheave slots with the upper deck in place and only the grate opening for access? Is what I have done in the photo below correct? Again I'll ask, during rigging is it possible to get the threads into this with the only access through the grate opening above? As shown, the paint color is only primer and the copper eyelet has not been inserted. I am concerned at this early stage because eventually this photographed deck will be covered and there will be no further access. Comments would be very much appreciated. Respectfully, John Maguire Total time 114 hours

-
Mark, I am late to your party but request permission to come aboard. I've been through the thread from start to present and it reads like a text book. Thank your for your thorough documentation. I can see many lessons that are going to be valuable to me. Respectfully, John Maguire
-
Elijah, Enough time away - get back to work . . . Respectfully, John
- 701 replies
-
- 2
-
-
- phantom
- model shipways
- (and 1 more)
-
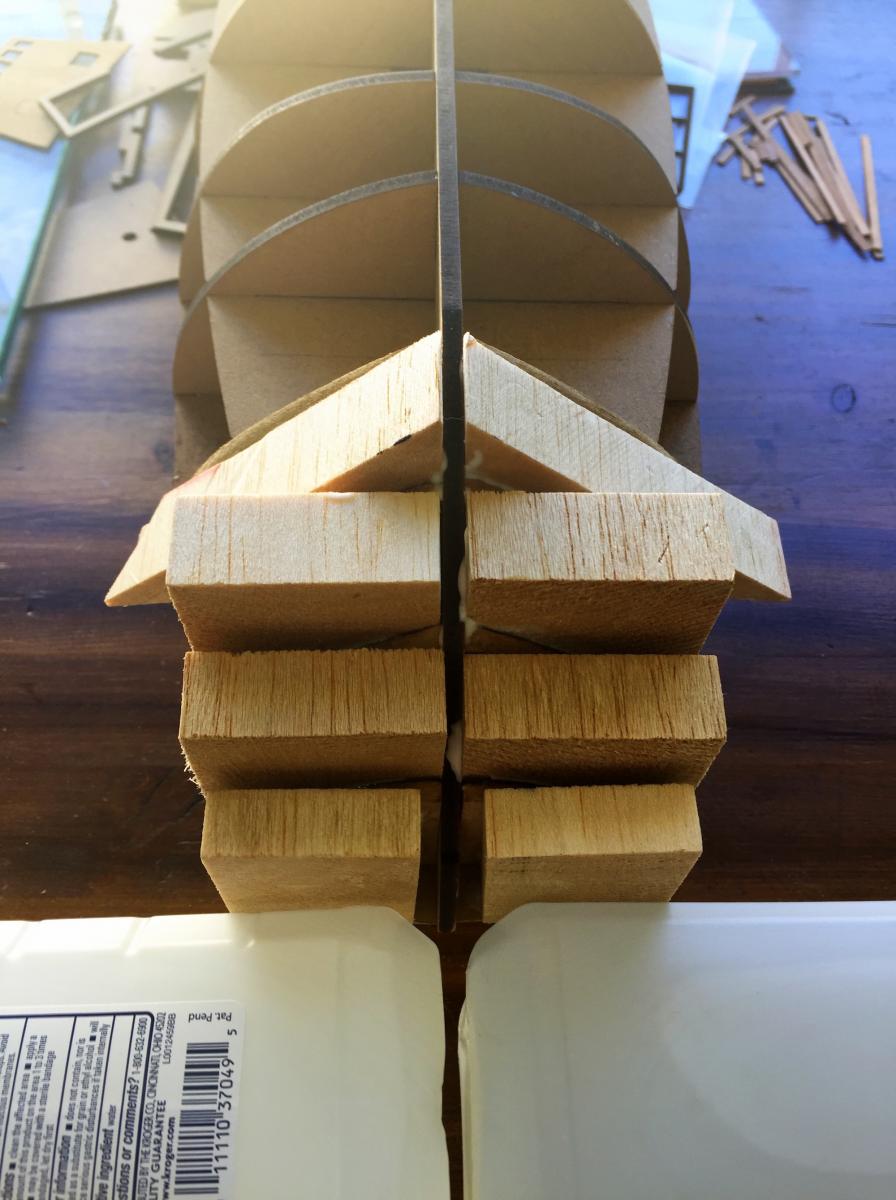
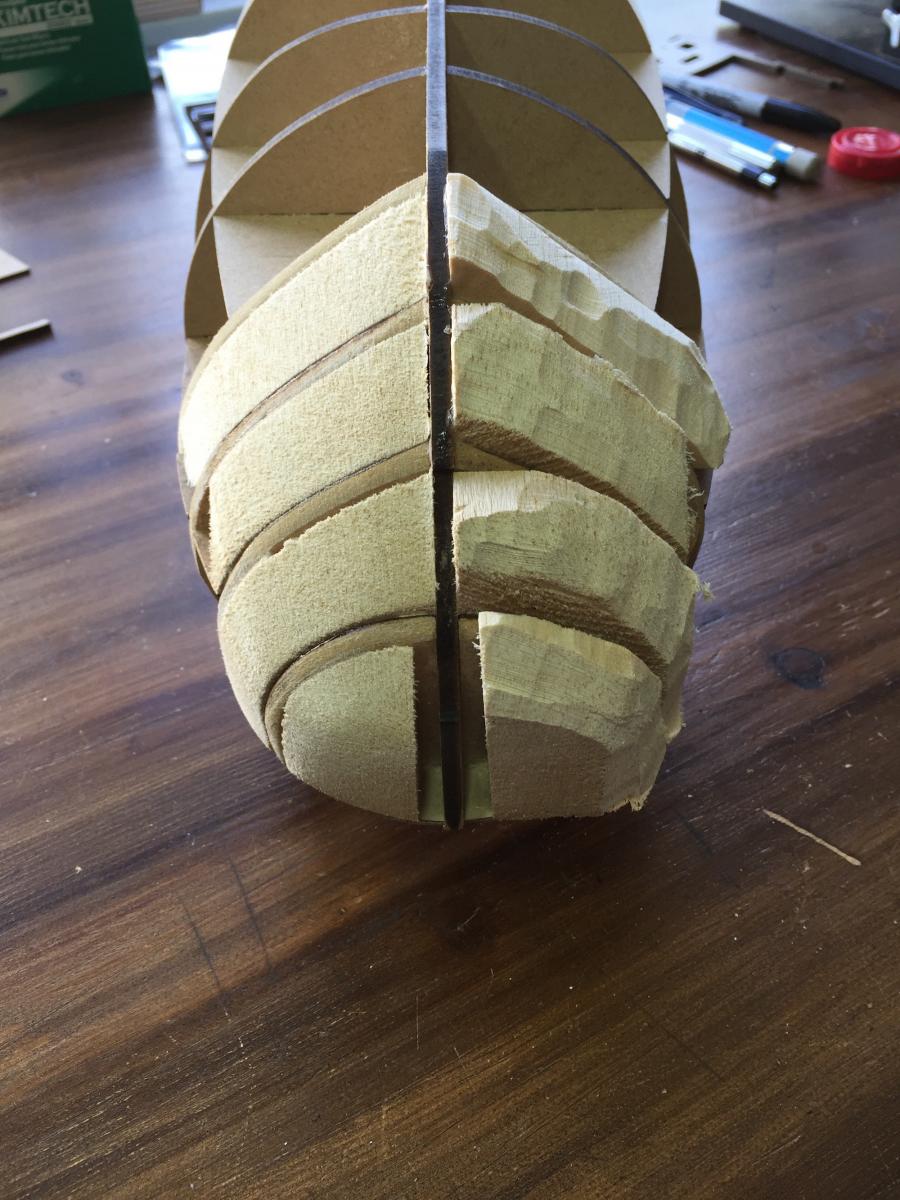
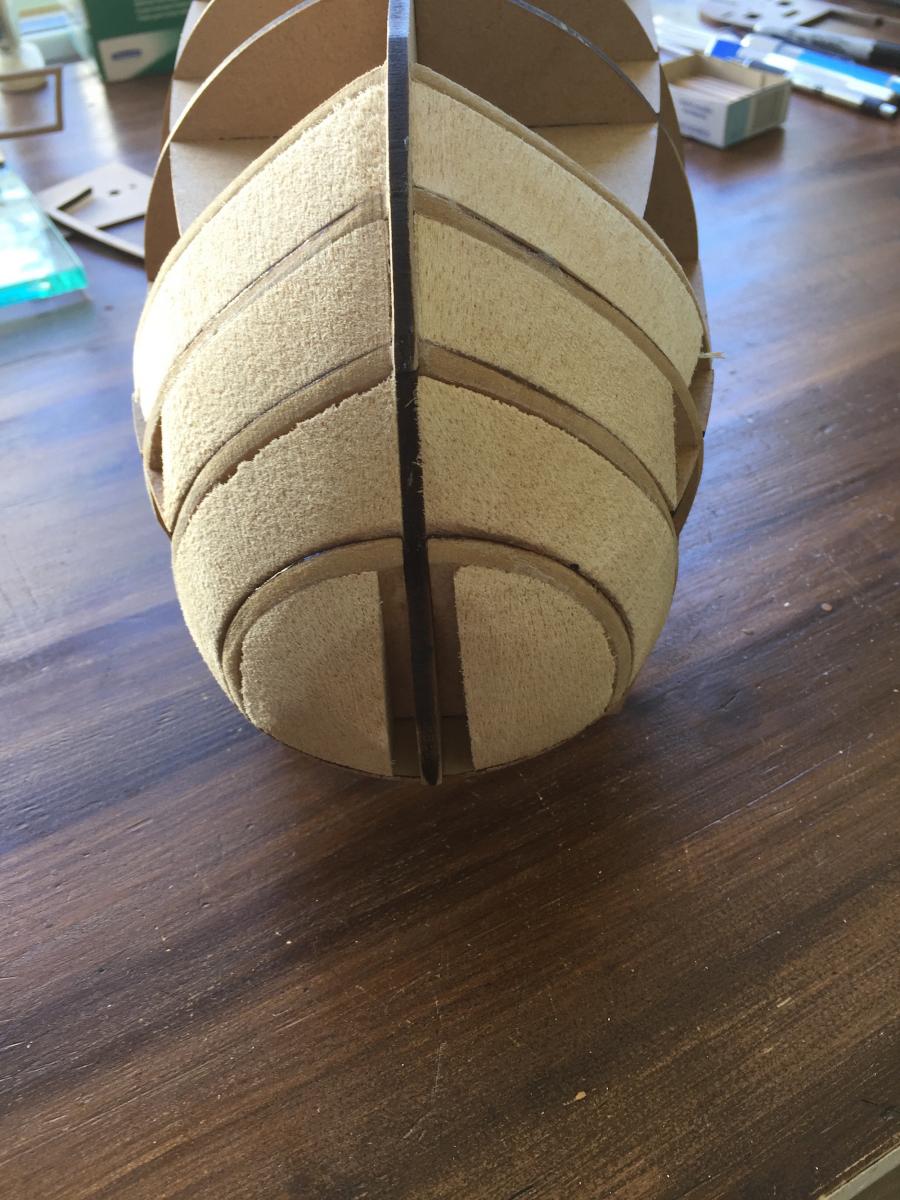
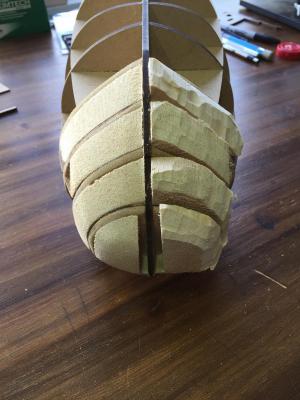
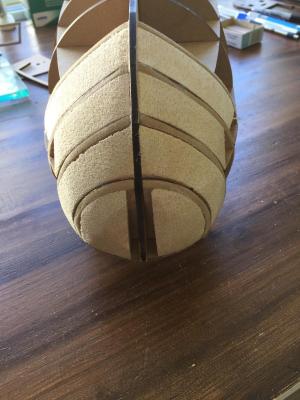
Thank you folks for the many LIKES . . . . Amati supplied small 4 mm pieces to go between the forward frames that would define the bearding line. In their construction manual it could be seen that planks making the extreme curve close to the bow had flat spots between the frames that were the result of them not following a rounded lay. I opted to use balsa fillers in lieu of the supplied components. Initially I tried to economize on the amount of balsa by cutting it cleverly but I wasn't clever enough so with version 2.0 ended up using full rectangular inserts. The following day I chewed up the overhang to the extent possible with a small grinder, then using a sanding block and 60 grit paper worked the port side down to shape. Another day and both sides are complete. Now I get a nice rounded fair lay with test planks. The balsa at the absolute front area will need tweaking where the planks would meet the stem but I'll deal with that at that time. I don't want to do it now and accidentally remove too much balsa. Respectfully submitted, John Maguire Total Time 108 hours (I am slow)

-
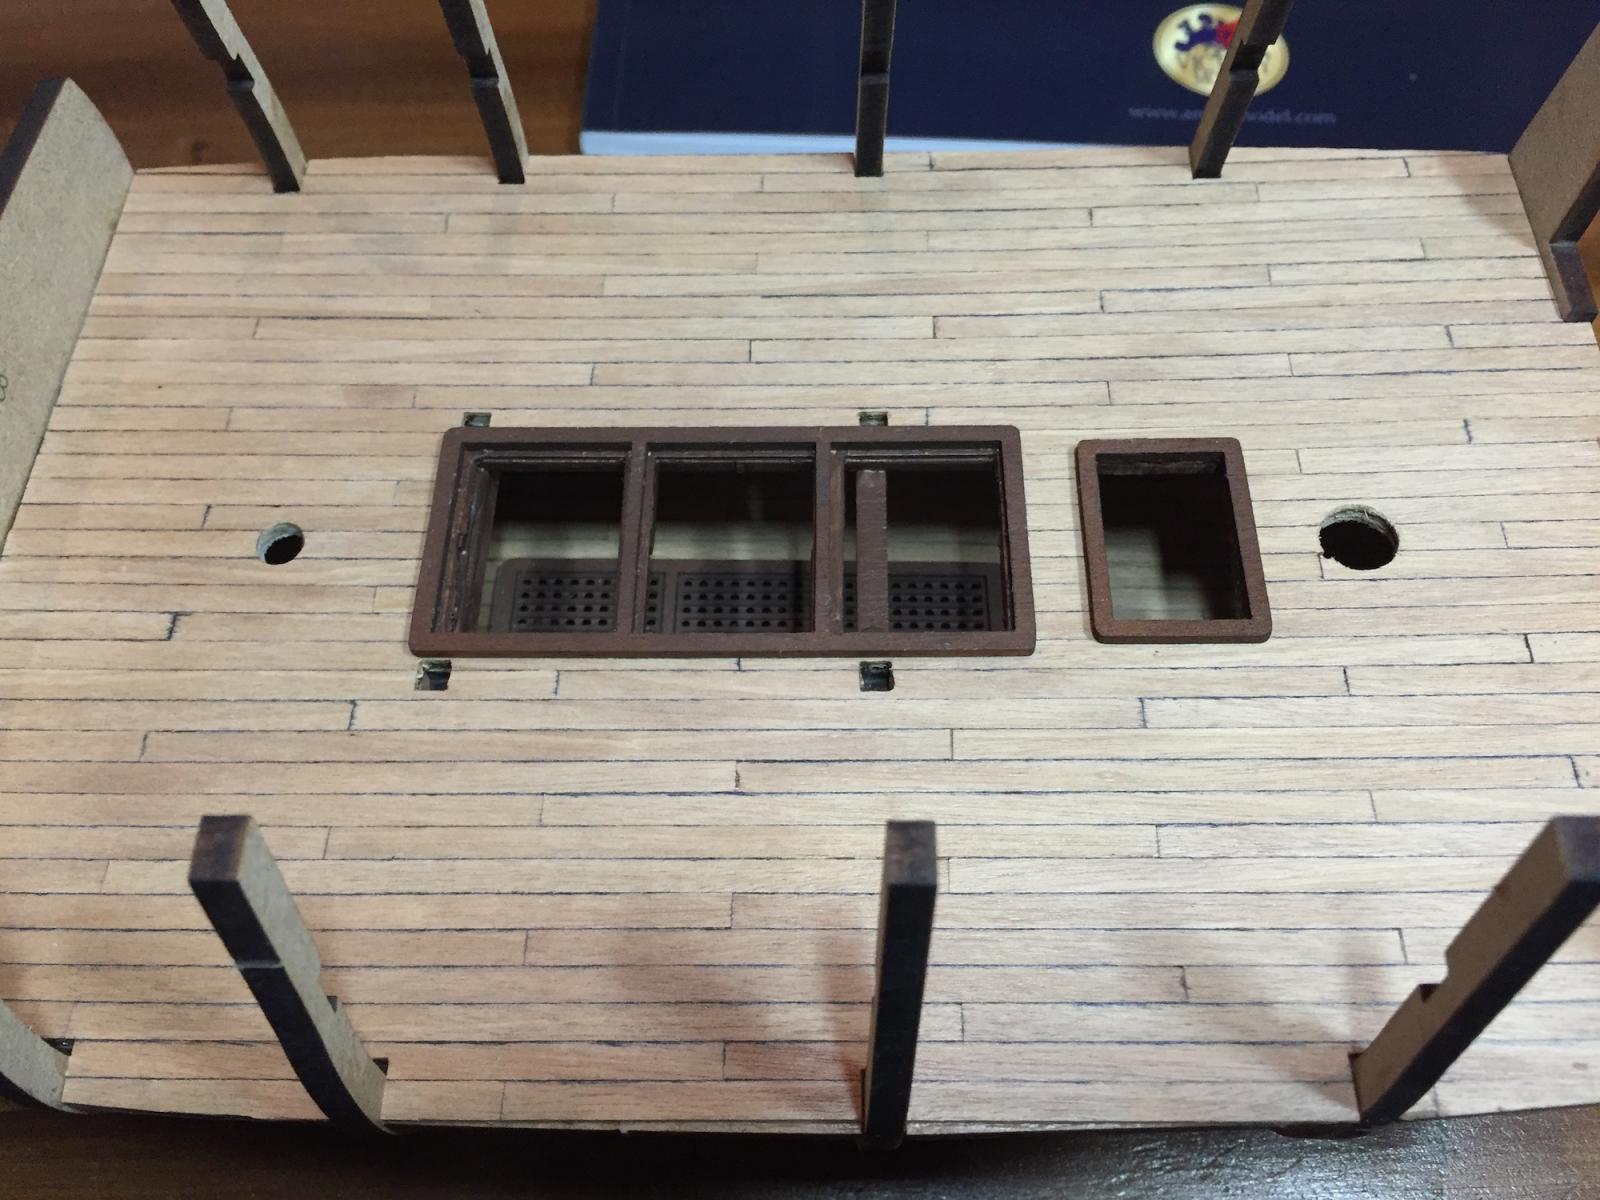
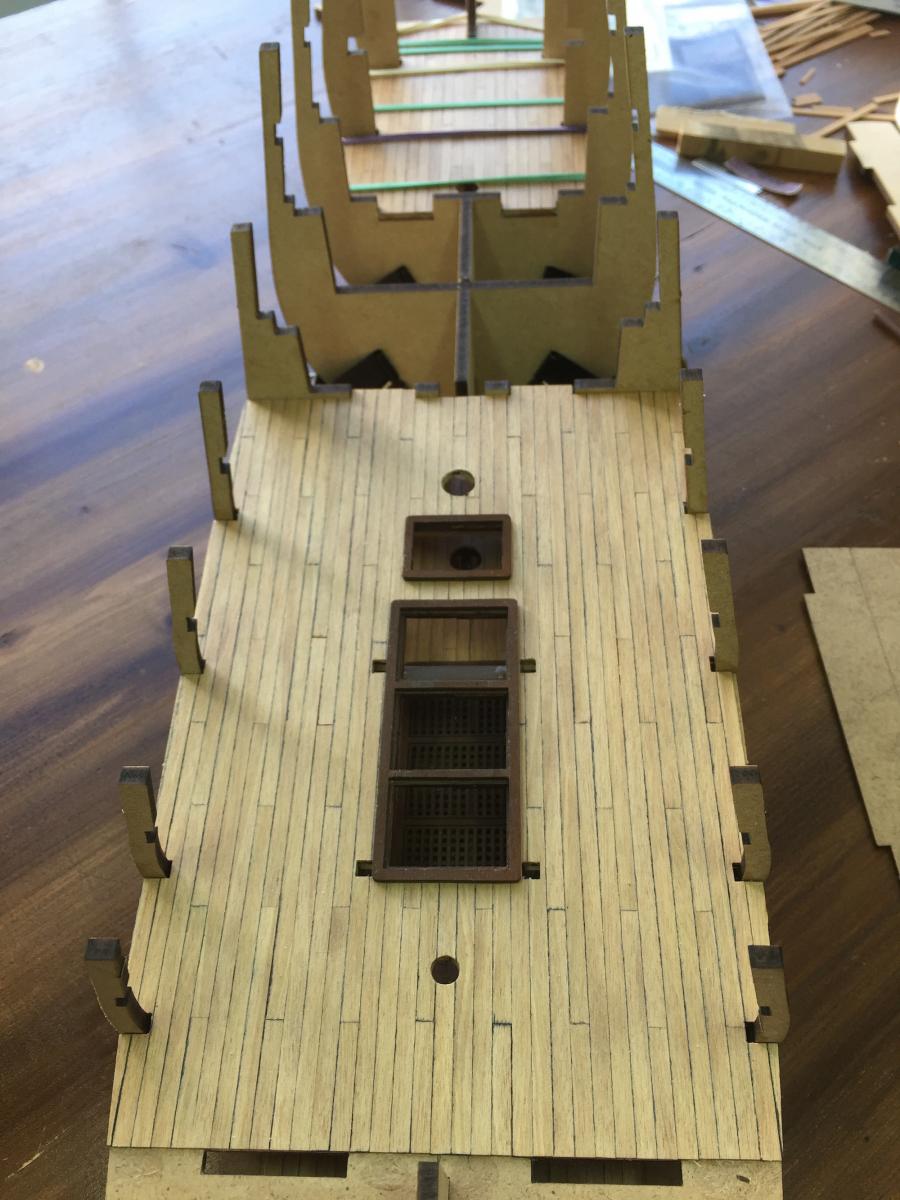
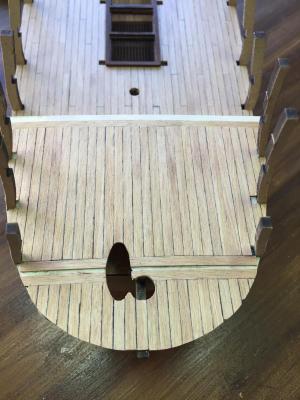
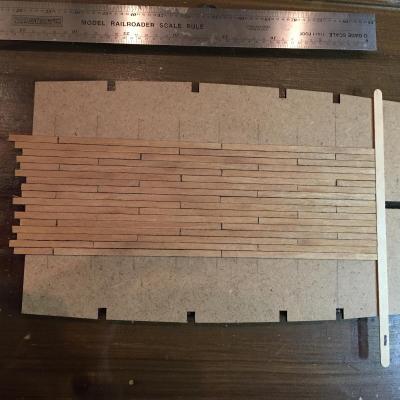
Thanks Don. Thank you to the many others who are responding with "Like". Yes, the round hole is for a mast and the eliptoid is for an off center bowsprit. Respectfully, John
-
Doc, Nice. I want to do the same. What tool did you use for initial rough shaping. Any hints? Did you try to make the area approaching the stern concave? Respectfully, John
-
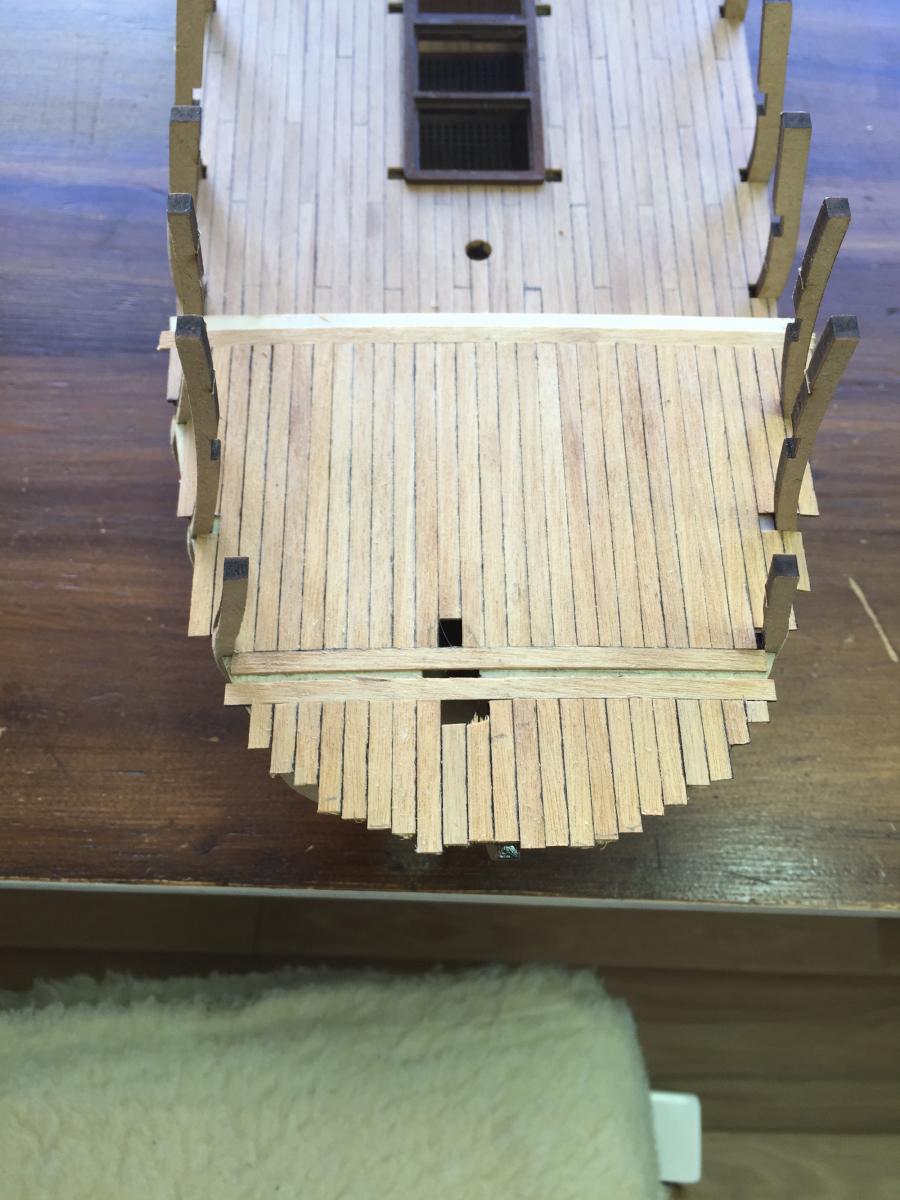
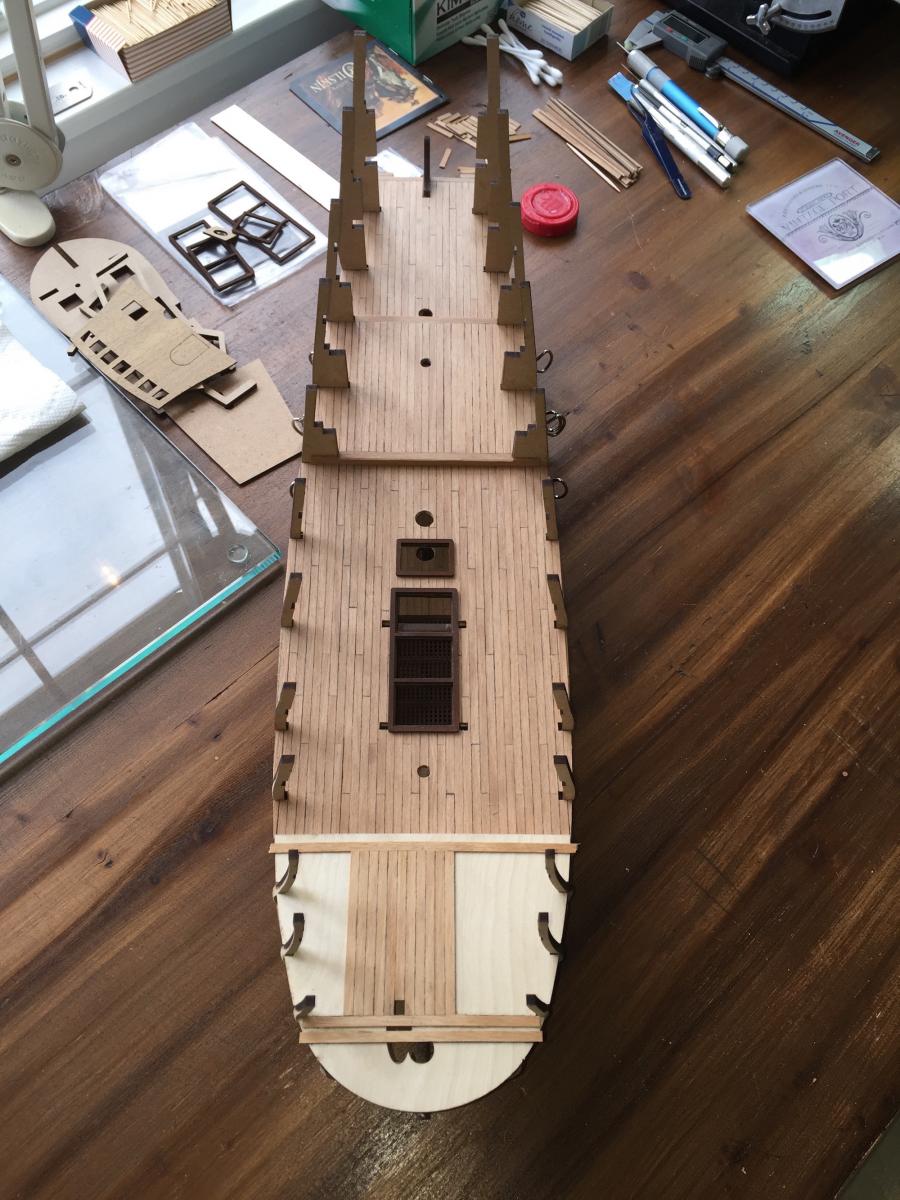
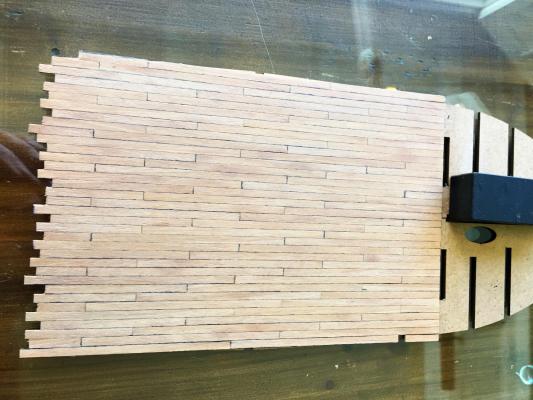
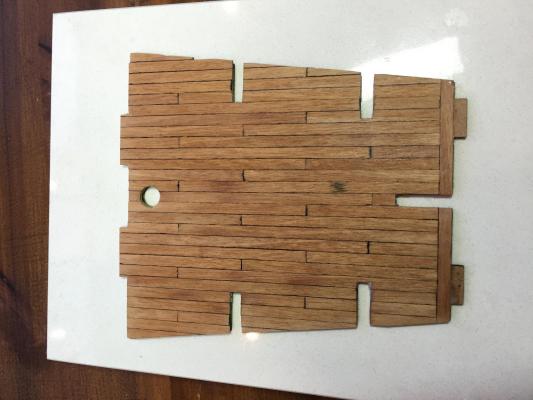
Thanks Doc . . . I opted to plank the foredeck in place. I had no easy way to duplicate the ships camber while working on my glass sheet and was concerned that I'd open the plank to plank seams by putting them in place on a flat sheet and then moving them onto the cambered ship frames. This is what the planking operation looks like. A mornings work to get all the foredeck planks in place. My hat is off to those ahead of me who shaped these two holes. It took me all afternoon with a diamond file. Respectfully Submitted, John Maguire Total Time 98hours


-
Doc, Those blocks came out perfect. You maintained a round shape between frames. I plan to do the same with REVENGE. Respectfully, John
-
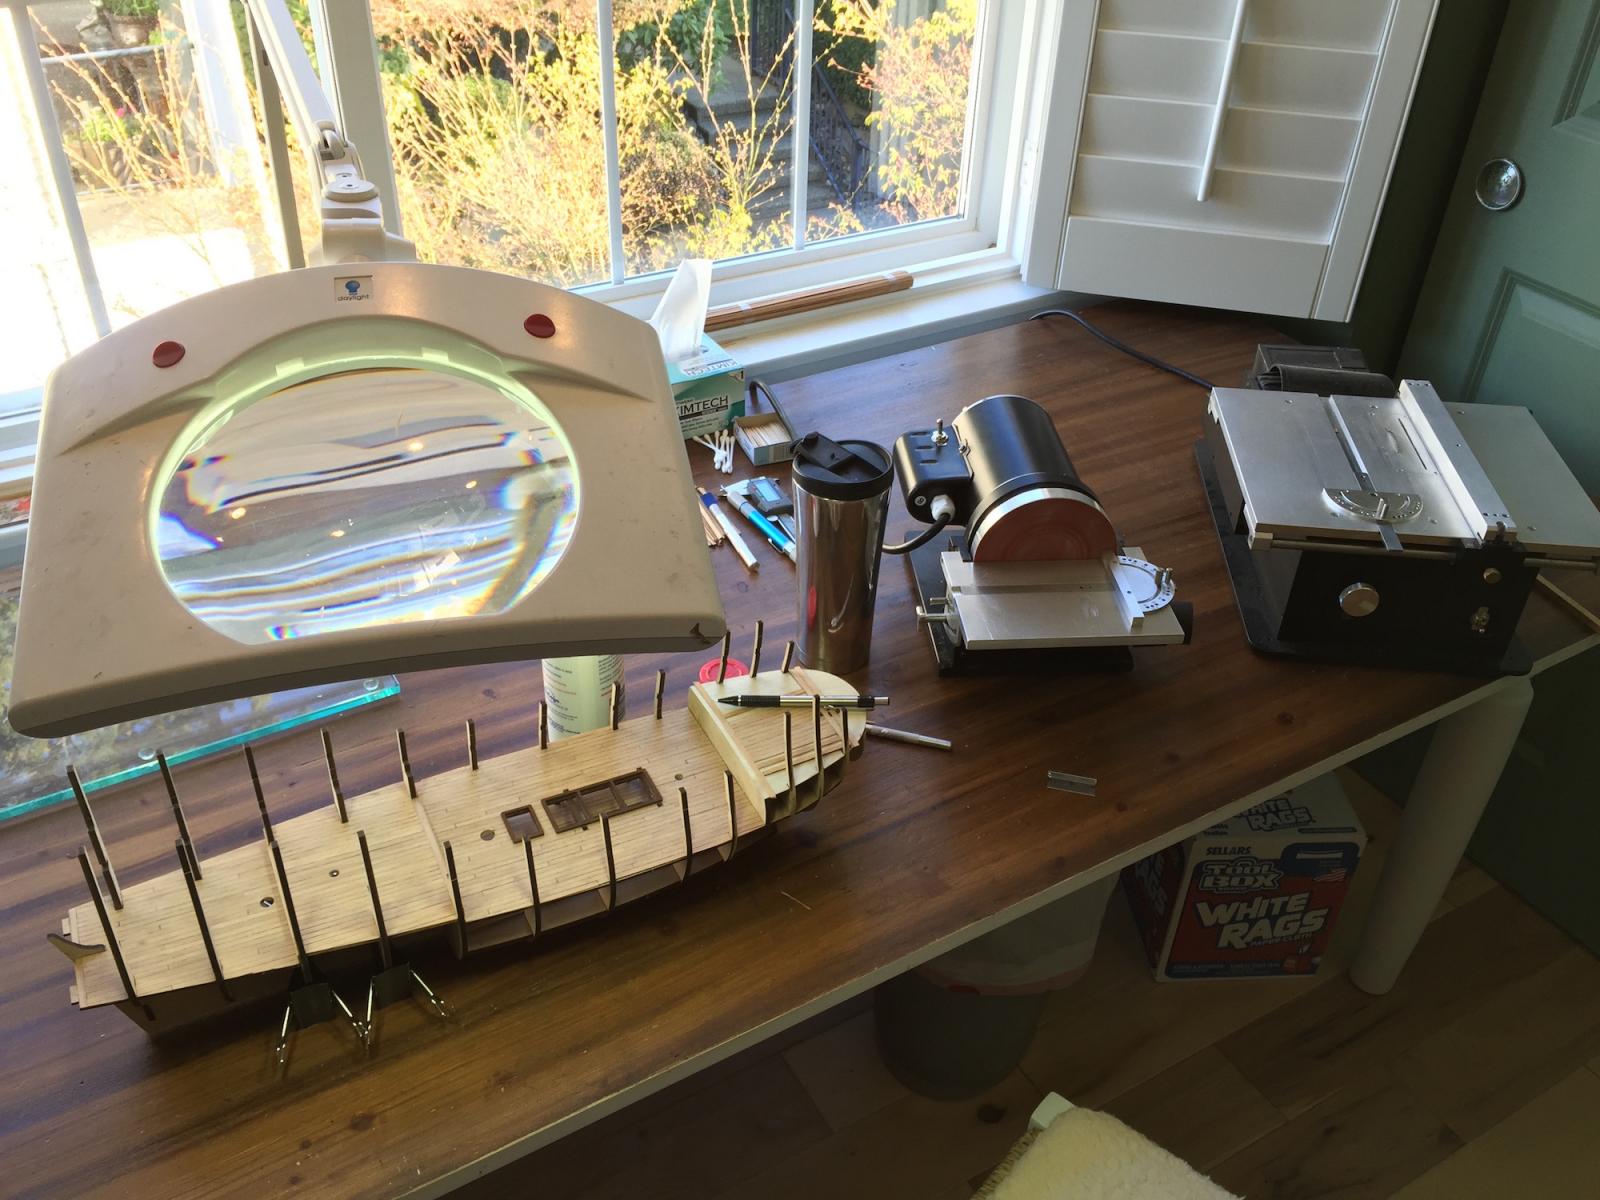
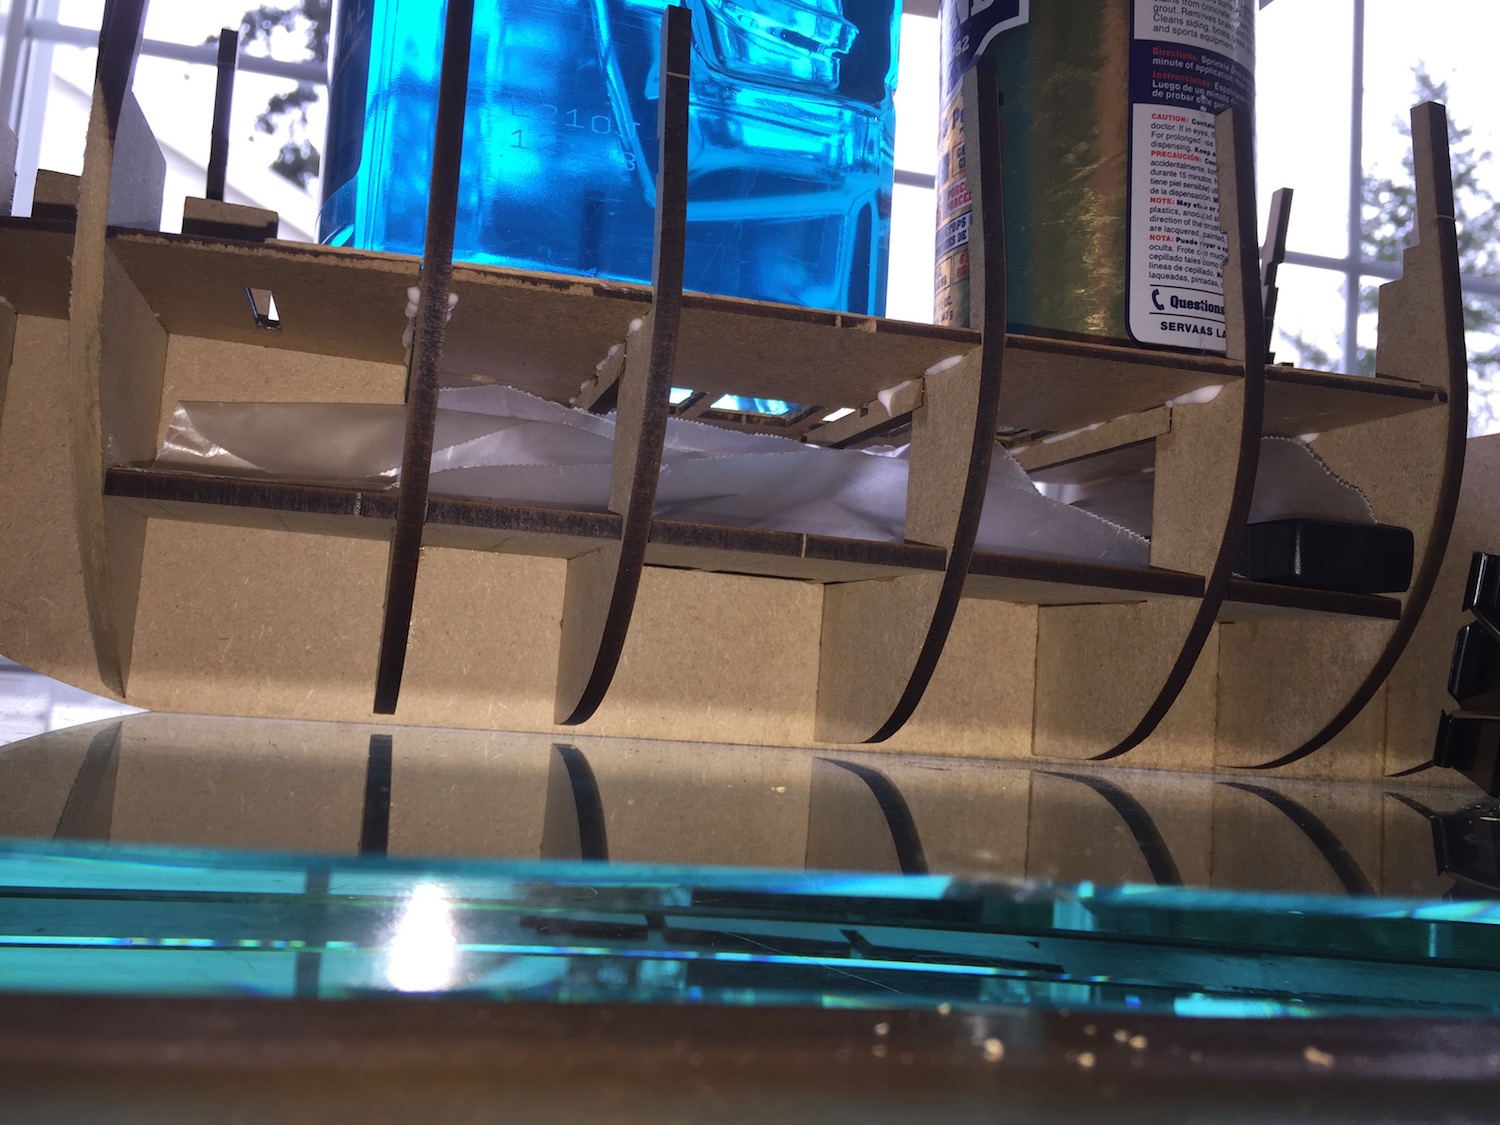
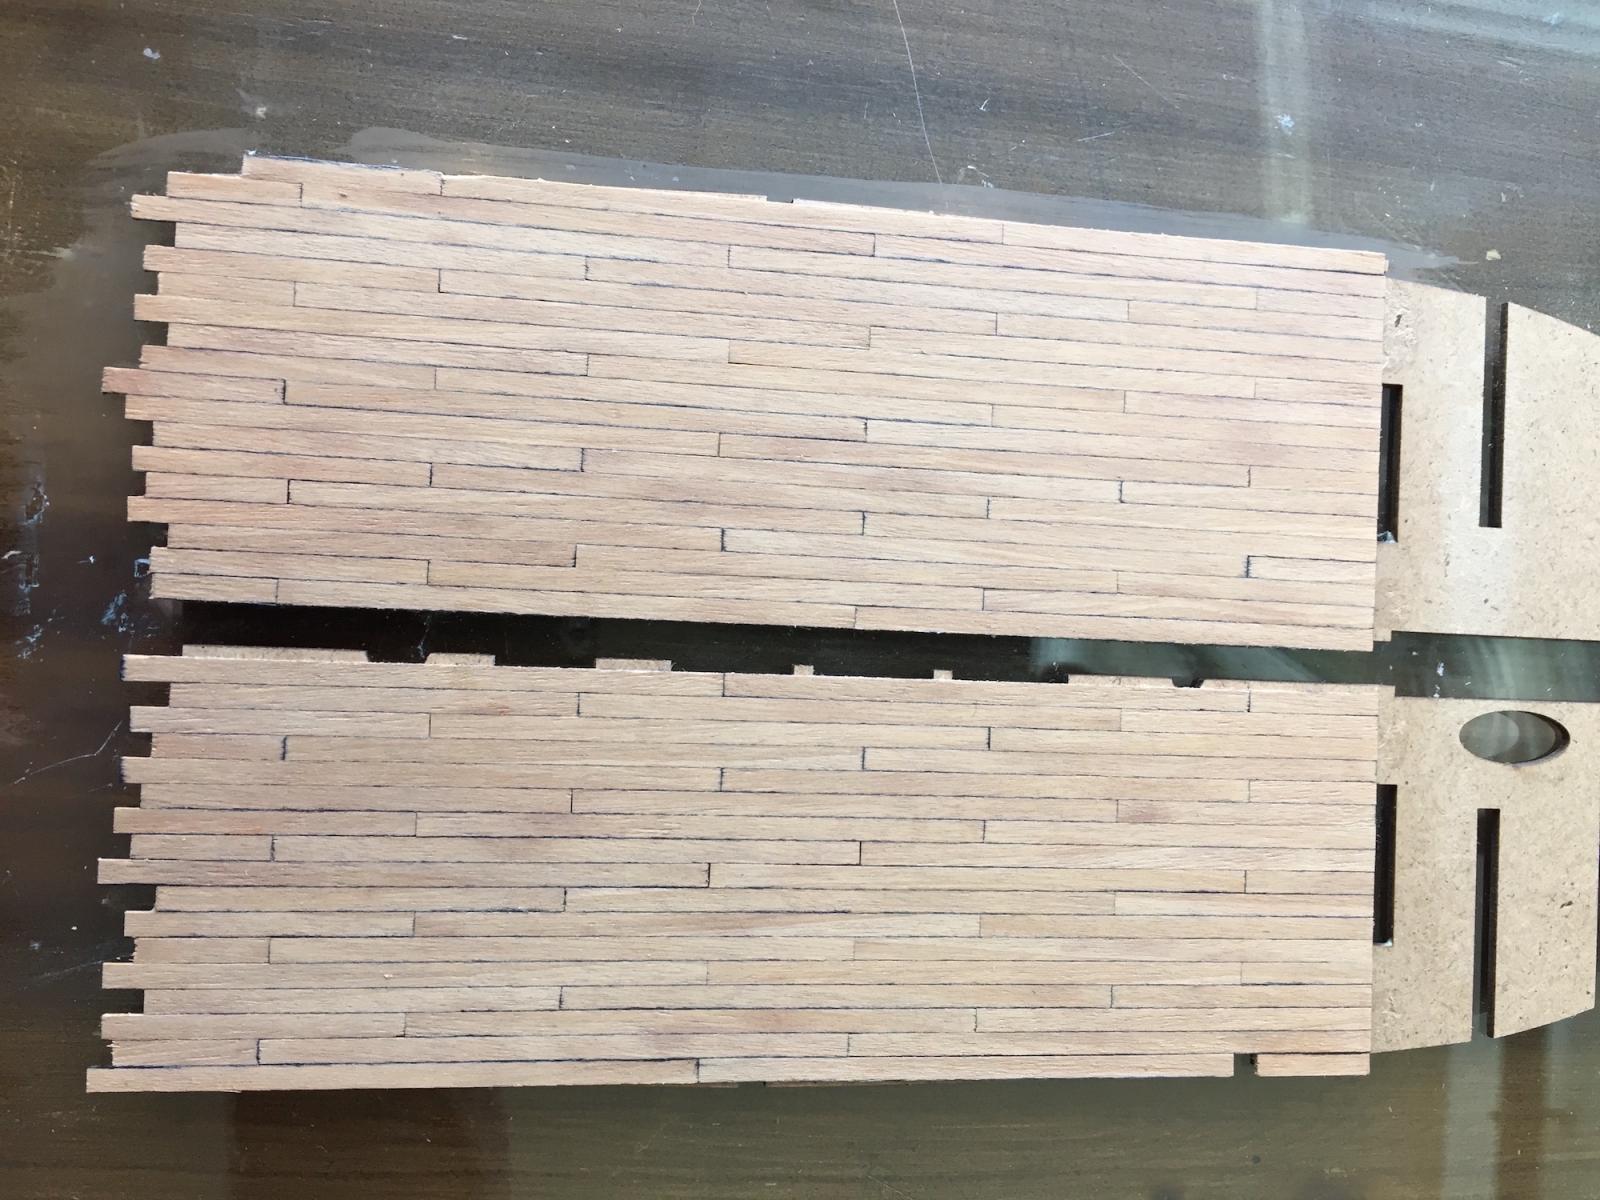
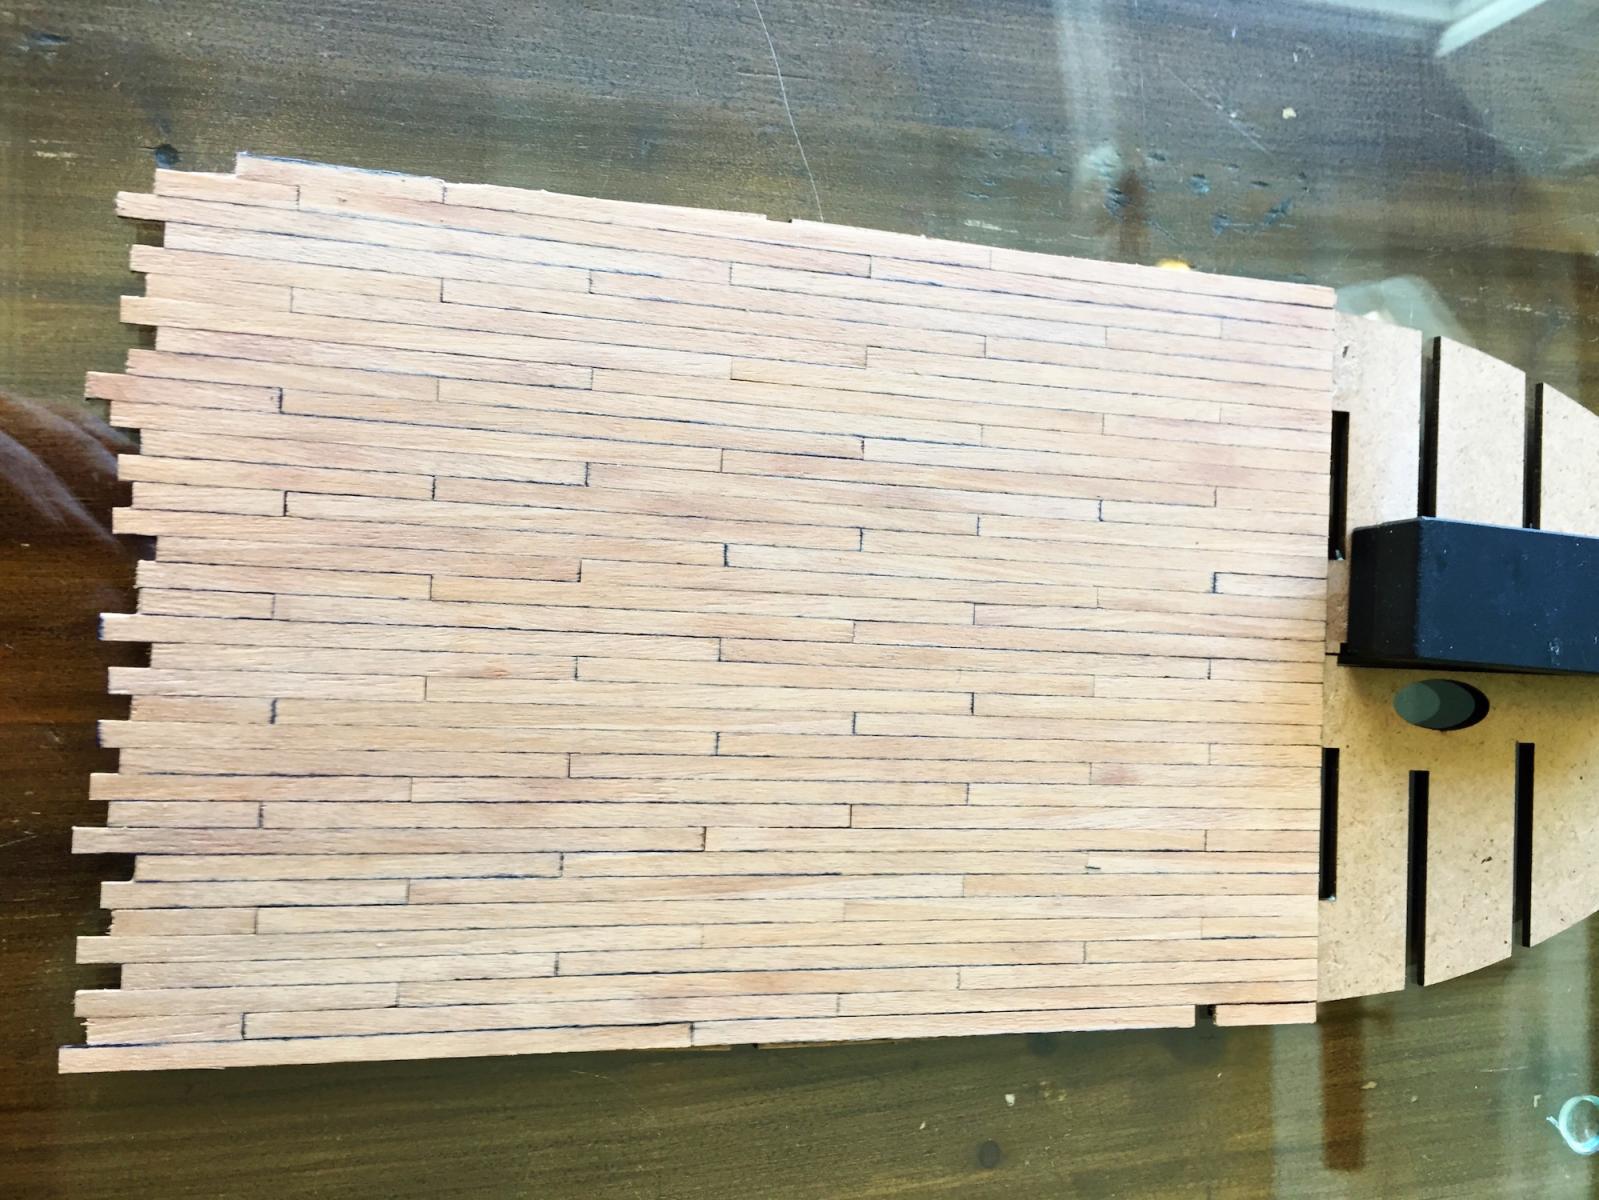
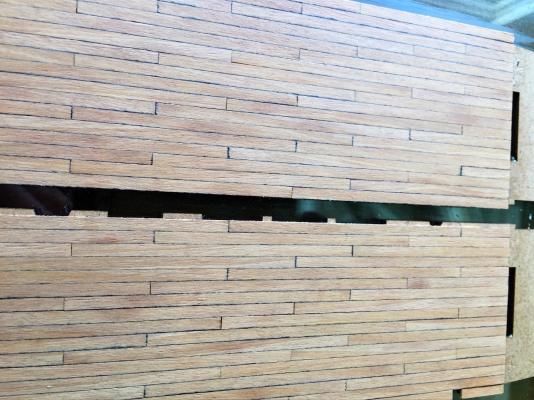
Thanks Denis for the heads up. I shall follow your advice. Doc, thank you for looking in. I have been so wrapped up with this that I've barely checked in on what the rest of you are doing - shame on me. I need to see what you're up to and by the way, your post card is probably in tomorrows mail because I haven't seen it yet . . . . . During the past couple of days I finished planking and permanently attached the slightly elevated deck aft of the gun deck. Between other tasks, I cut and attached the fascias at either end of this deck. Wood of the manual described width was not to be found so I milled what was necessary. The width of the forward facia had to be determined by temporarily prepositioning an upper deck support that straddles the ends of the piece. Since the picture was taken both facias have been trimmed down to deck height and varnished. The manual instructs temporarily placing some fore deck components in place and using their positions to draw planking guide lines on the deck. Instead, after positioning the pieces I used them as a guide to permanently glue cross ship pieces of deck planking - that way I was assured of the fit. There is too much interpretation of pencil line position/thickness to work well for me. In this picture you can see the deck plank glued to the forward side of the bulkhead. And here is the deck plank I glued on the aft side of the bulkhead. Doing it this way worked best for me and I was able to obtain a very flush fit by forcing the planks against the bulkhead and clamping them there while the glue dried. Later, when the glue set I began to plank the fore deck. My Byrnes sander is a miracle machine for fine tuning the length of the planks that are set between the cross ship pieces. I really like this kit and look forward to working on it each day. Some days, like today, are slow in visible progress because I need to wait for glue to dry. I do not use the down time to prepare future tasks but rather take the time to do other things - such as reading ahead - over and over. I further decided I don't like my former technique of using steel wool as a final finish for the decks. Today I added a couple of coats of matte to all the reachable decks and am very pleased with their overall appearance. Respectfully submitted, John Maguire Total time 90 hours


-
Doc & David, thank you for your comments. Thank you for the many look ins by others. The two part deck was prepped for installation in the ship. This is how it looked after removal from the thick glass plate to which it was attached for the planking process. Only one side of the centerline plank had been glued in place at that time so that I could separate the two halves to put into the ship. This brings the total number of installed decks to three overall and planking a fourth is underway. The join up appears to be satisfactory when looked at closely. The heads up from other builders was a great help in my choice of how to deal with this. I think I am beginning to look forward to a task that is different than planking decks, though there remain others yet to do. Respectfully, John Total Time 78 hours

-
Thanks Don & Elijah. The news is good and it did work. The two halves are presently under compression to keep the deck sections in firm contact with the frames below to which they are glued. No attempt was made to clean up below deck glue since that area is forever lost to sight. It can be seen here why so much weight was placed above until the glue cures. More glue was used than what I customarily apply. Here is the joint between both halves. It is not possible to see which side of the center plank was the open side. Additional coats of matte varnish will be added once the glue cures. I like a steel wool rubdown after the last varnish application for what to me gives a somewhat weathered appearance. Respectfully, John Total Time 71 hours


-
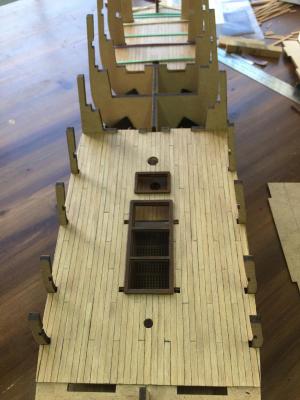
Many thanks for so many of you kind folks looking in and expressing your "likes". Between yesterday and today the planking was completed, sanded and given a couple of coats of matte varnish. The two deck sides that had been attached to a plate of glass with double sided tape were released without trauma. A steel edge was carefully laid on the glued side laying on the glass and the non glued side readily unhinged. Next, a test fit was done to see how well the two sides would go back together. The two sides rejoin well with only a very small amount of applied tension. The next event will be to open the frame slots, hatch openings, etc. At this point in time there is every reason to believe the two sides can be joined successfully when permanently installed on the ship - time will tell . . . . Respectfully, John Total Time 65 hours

-
Denis, I just looked at the photo you show a few posts above this one of the filler block 196. To be redundant, as an amateur I would like to respectfully ask if you might be willing to show in excruciating detail how you fair and how you plank at the junction between the rudder post and where the planks transition from the post into the curve of the transom. Have I described that clearly? It is hard to turn my visualization into words . . . . I am loving your descriptions. Thank you for being so explicit. Respectfully, John
-
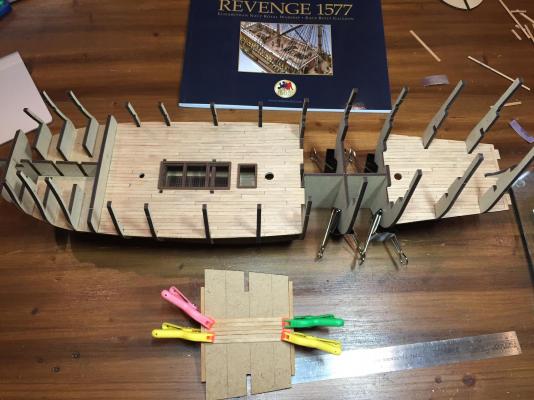
Thank you kind friends for looking in and posting "Thumbs Up" or whatever the accolade is . . . . . Doc, I know I am on your post card list - maybe it'll arrive tomorrow . . . . I love PHX. Today is the second day the Cougar Mountain Shipyard crew has been back at it - but with interruptions associated with startup after a shut down, so the days productivity was not something to really talk about . . . . Having said that, the main gun deck planking continued - but with a twist. Prudence has dictated the deck needs to be glued in place, then planked. That is understandable because it has to go in as two pieces to fit between the frames. You'll recall the quip that says to send the laziest man to do the most difficult job . . . . well, after testing the fit I determined the two deck halves fit tightly against one another when put in place on the ship. Having seen that, I used double sided tape to attach them that way to my large sheet of three quarter inch sheet glass and ran a deck plank -centered - down the length of the tight "crack" between the halves - however, I only glued the plank to one side. As of tonight I have planked a fair amount of the deck, both sides of center, having perhaps one or two days of additional work to complete it. Will it work when I disassemble it and move the two halves to the ship? I hope so! Take a careful magnified look. The seams are tight. If it doesn't go back together well, then shame on me . . . . but isn't being creative the American way? Respectfully, John
-
Get back to work here, Doc . . . Can you hire a larger crew?
-
Doc, you are a wizard . . . Respectfully, John
- 306 replies
-
- 2
-
-
- armed virginia sloop
- Patrick Henry
- (and 2 more)
-
Elijah, Gee, you bit off a mouth full. You are however dealing with the challenges with ingenuity. Keep the pictures coming. Respectfully, John
- 701 replies
-
- 2
-
-
- phantom
- model shipways
- (and 1 more)
-
Looking great, Denis. Please take extra photos of your stern area fairing. I'd also like to see details of how your planking transitions between the lower vertical part of the stern post then transitions into the curve of the transom. The couple of planks at that transition area are of interest to me. Respectfully, John
-
Thanks Mike, Doc and Elijah. Back in the shipyard on Sunday and got about half of the main deck planked. More when I can photograph it completed. Respectfully, John
-
Thanks Doc, Elijah and John. I used the new plank edging suggestion and liked it, particularly because it didn't damage the plank edge the way I was with a pencil. The completed job looks better. Thank you men. Two days of a few hours a day finished off one more deck. It has two coats of varnish now, more to follow. Presently in Montana for the week - the shipyard is shut down. Respectfully, John Maguire Total Time 52 hours
-
Beautiful, Doc . . . . I vote for black bands. Respectfully, John
- 306 replies
-
- 2
-
-
- armed virginia sloop
- Patrick Henry
- (and 2 more)
-
Doc, Beautiful. You are setting the gold standard .. .. .. .. Respectfully, John
- 306 replies
-
- 4
-
-
- armed virginia sloop
- Patrick Henry
- (and 2 more)