JesseLee
-
Posts
1,694 -
Joined
-
Last visited
Content Type
Profiles
Forums
Gallery
Events
Everything posted by JesseLee
-
 I haven't quit. Been slowly working on making the yards and rigging blocks on them a little at a time. It's taking me a very long time. Hopefully I can get some pictures up soon when things get back to normal around here. Hope everyone had a wonderful Christmas! Jesse
- 1,306 replies
-
- 12
-

-
- syren
- model shipways
- (and 1 more)
-
Gives it character! Jesse
-
No, there is nothing in this kit. Everybody has to come up with their own. Jesse
- 1,135 replies
-
- 1
-
-
- model shipways
- syren
- (and 2 more)
-
I finished all the staysail rigging before starting on the yards. My camera broke so I'm trying to use my phone. Having a lot of trouble with the phone and laptop communicating with each for some reason and it is about to make pull my hair out. The phone does seem to take better shots than the camera did, it's just a lot more trouble transferring them over. Jesse


- 1,306 replies
-
- 21
-
-
- syren
- model shipways
- (and 1 more)
-
Thanks Rich. I am beginning to feel a little better, hoping to get back to mine soon. It has been a rough year for me. As you have seen most of the wood supplied in this kit is not that good. You have done good remaking things with better wood. I just ordered some blocks from Chucks Syren Model Co. because they didn't give me enough in the kit. The quality difference is amazing.
- 1,135 replies
-
- 1
-
-
- model shipways
- syren
- (and 2 more)
-
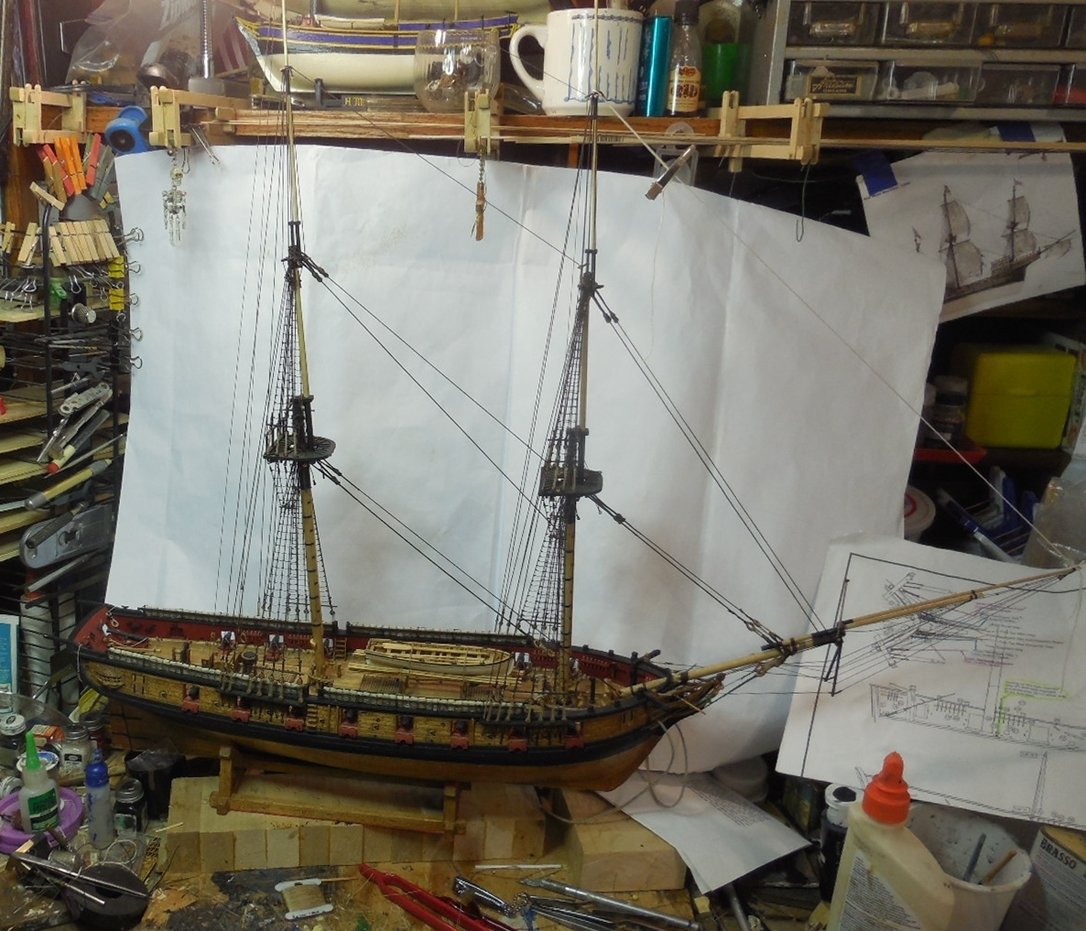
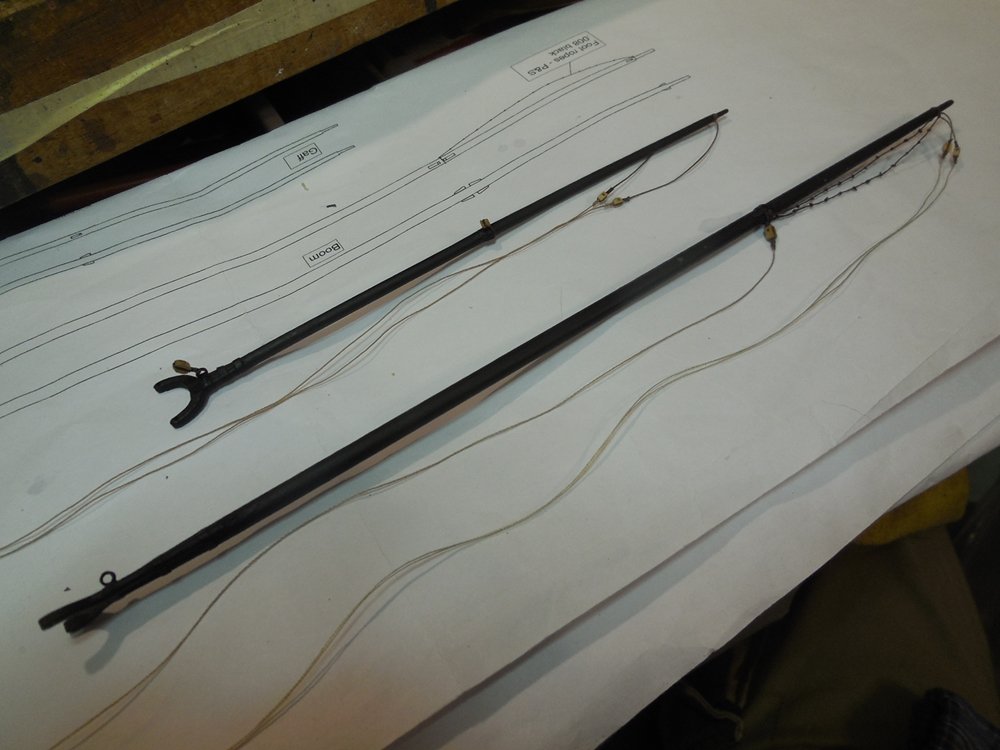
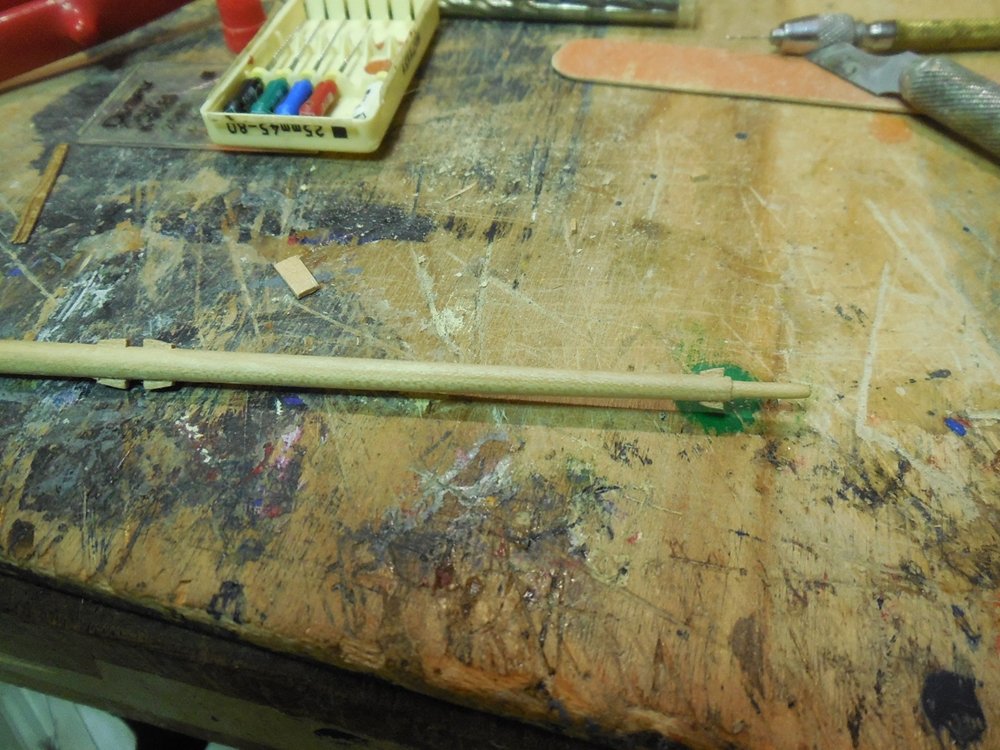
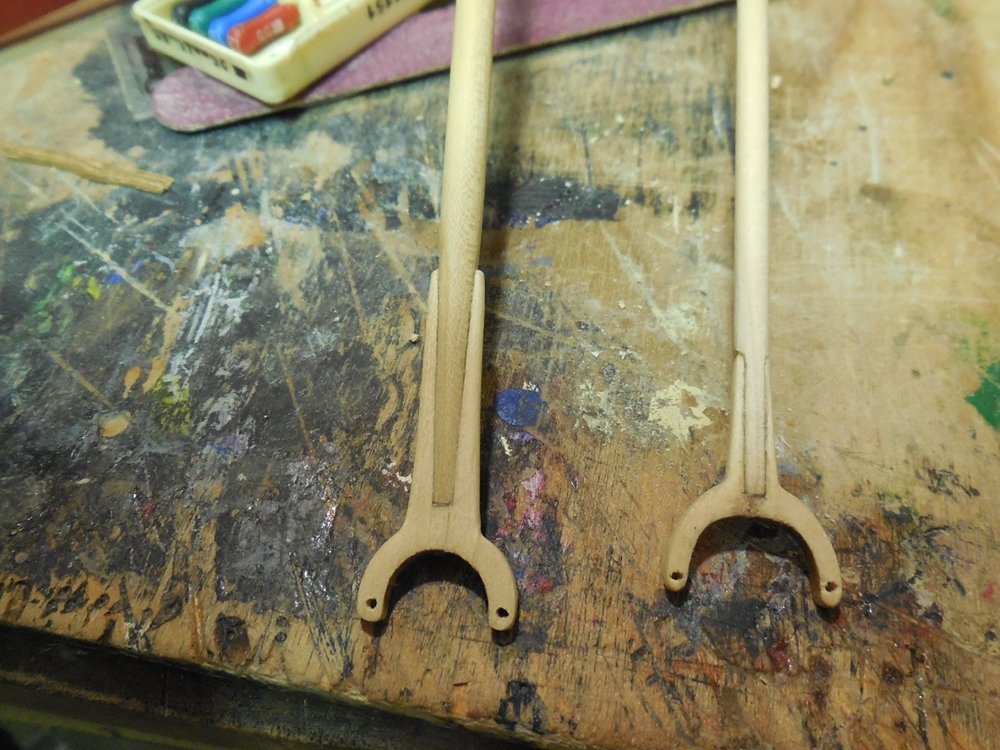
Fortunately we have not lost power even though a lot of people around me have. Good time to work in the shipyard. Hearing the driving rain and howling winds makes me imagine what it was like to be at sea on way back then in such a violent storm. Anyway, made the Gaff and the Boom. I have done as much pre-rigging as I can before they are attached. The instructions said you can paint them or not- your choice. I was going to leave them with a light golden oak stain but had to do some patch-up work on the Gaff where it got some wood marred and gouged from an accidental drop on the floor and got stepped on. At this point I saw that the paint would completely hide this so black they now are. This also hid where I had to re-glue both jaws because of the very poor wood supplied in the kit. I wish I had made them from better wood to start with. Completed all the rigging for these two. Found it much more difficult to get into the tight places to tie off to the belaying pins than it used to be for me. My kit was missing the beads for the parrels but I had plenty from earlier builds. Jesse


- 1,306 replies
-
- 27
-
-
- syren
- model shipways
- (and 1 more)
-
I used to be a bench jeweler when I could work. I used to use the stuff at work but realized how well it would work on tiny rigging knots.
- 1,306 replies
-
- 6
-
-
- syren
- model shipways
- (and 1 more)
-
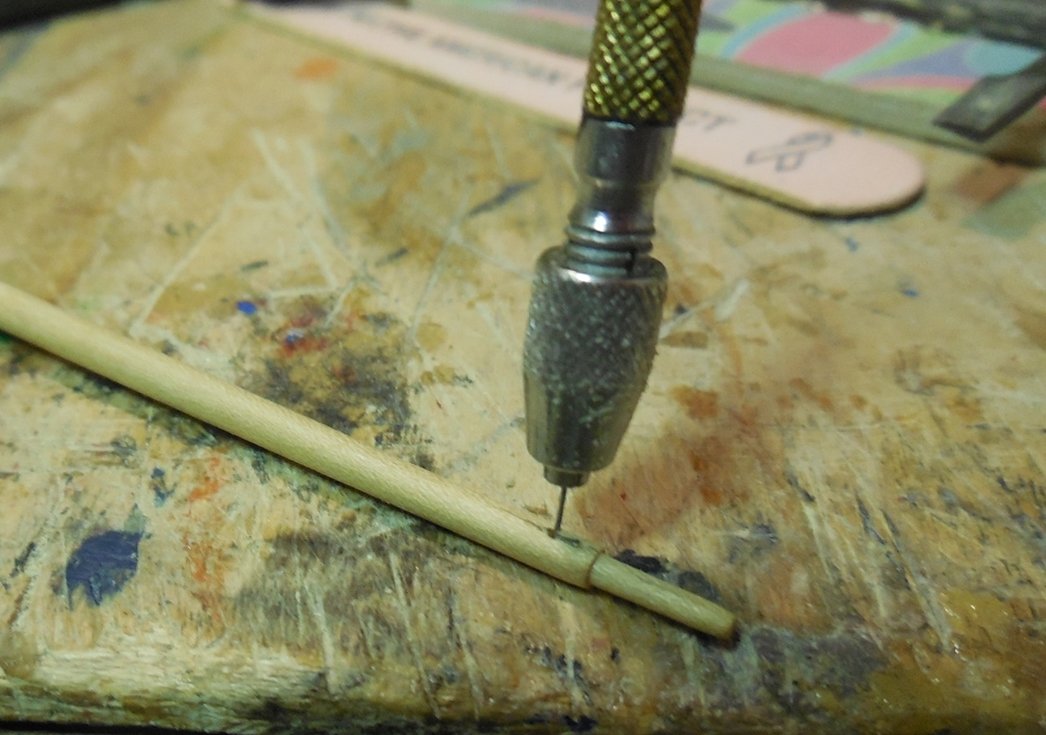
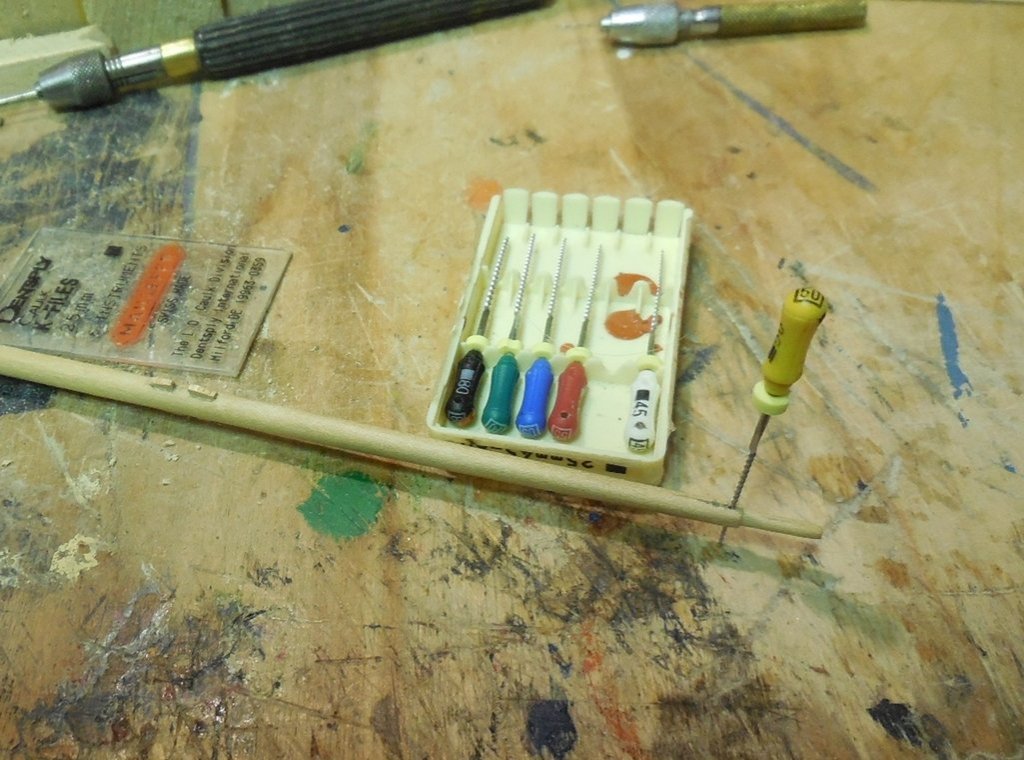
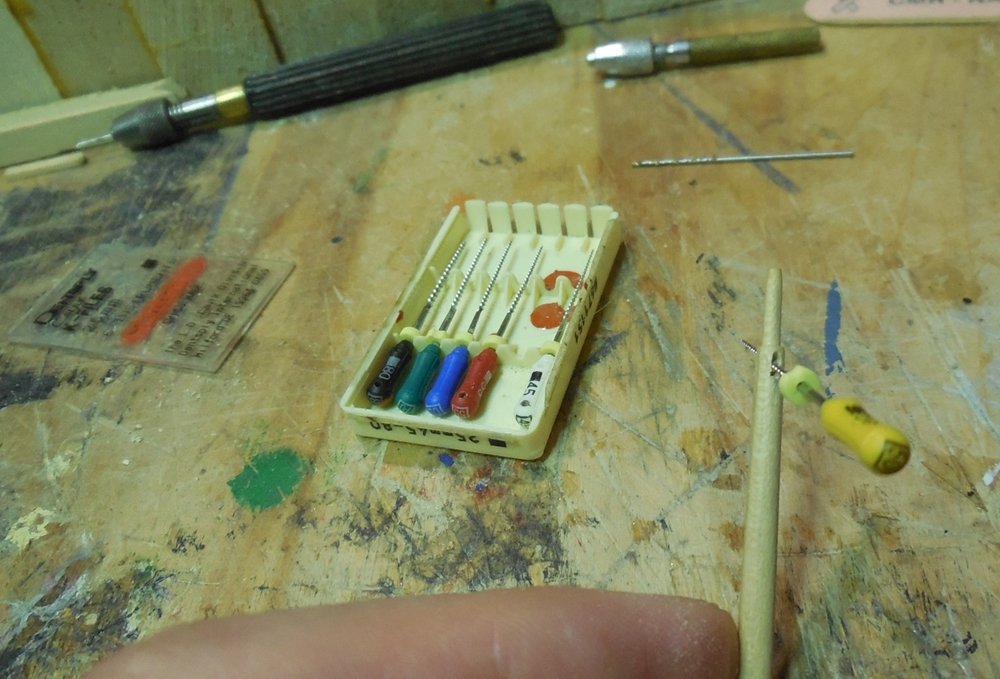
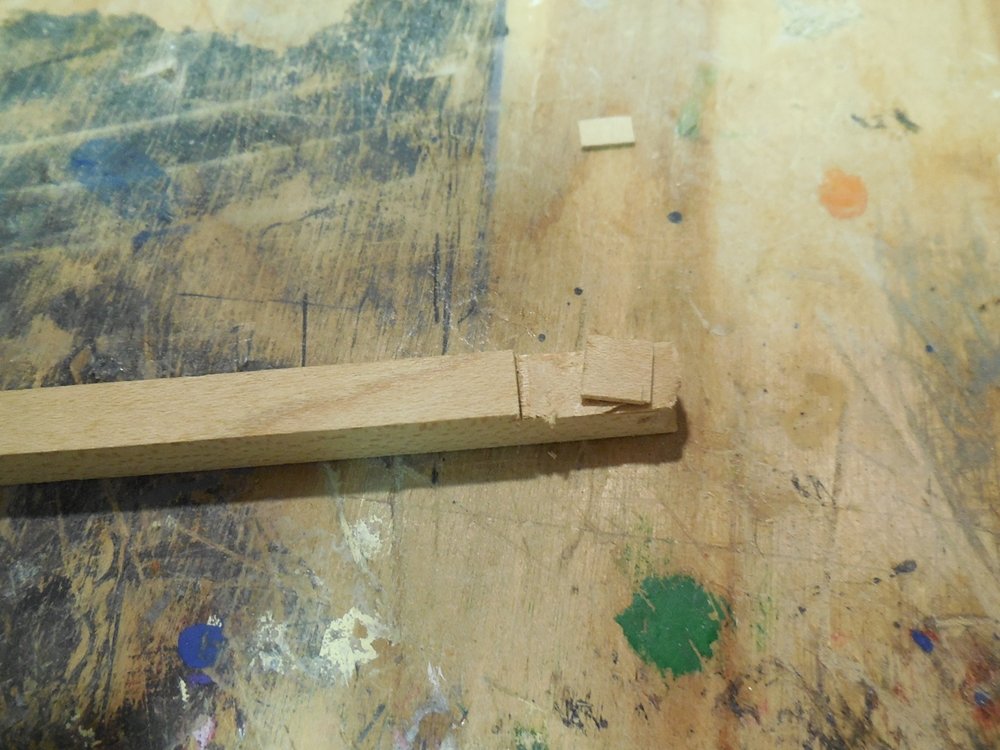
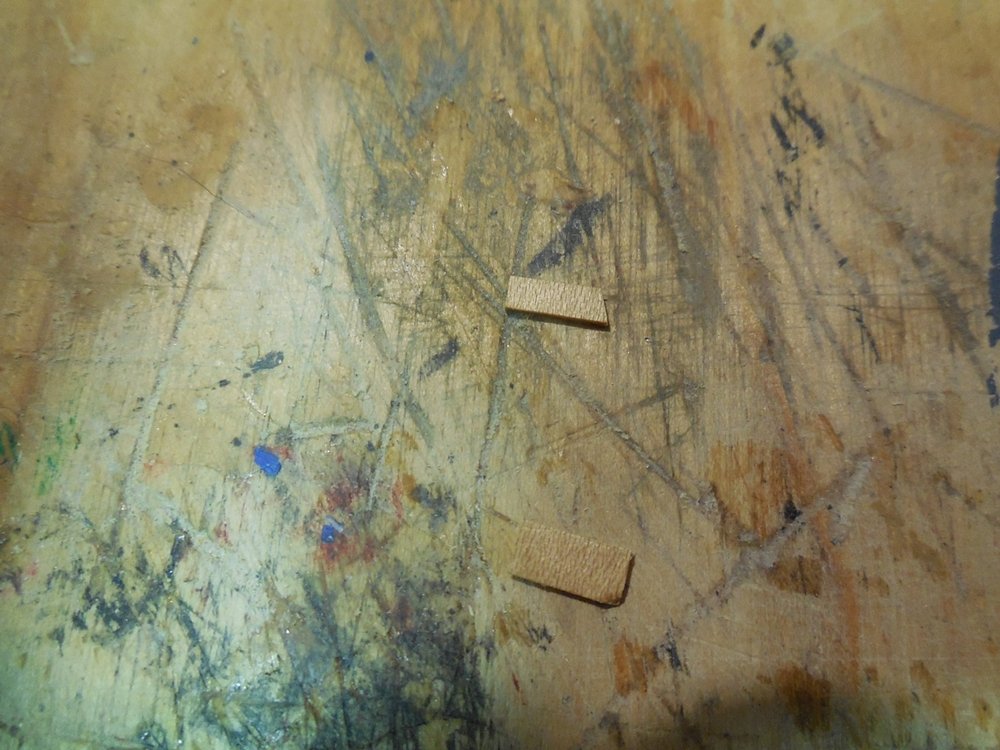
Did something a little different for the cleats. I have had glued on cleats come off in the past so I wanted them more secure. I measured and marked where they are and drilled small starter holes for them with a small twist drill. I then used these small drill/reamer tools I got many years ago. They twist i and open the hole. Then you can use them like a mini file or rasp to remove wood. I slowly did this form one hole to another to open up a slot through the boom and gaff. I pre-shaped the cleats out of scrap I have. When all is shaped and ready I put glue in the open slot and push the cleat all the way through so it is sticking out of both sides then shape them up down to proper size. Don't know when I will get back to the shipyard. One of my Aunts died and I will be going out of town for a few days, leaving there and going straight to a Dr. appointment. I will most likely be very sick from the travelling and my body will crash on me for a few days when I get back. Jesse


- 1,306 replies
-
- 20
-
-
- syren
- model shipways
- (and 1 more)
-
I have tapered shaped the boom and gaff. The laser cut jaws supplied have split several times in the process of gluing them. I'm going to try to see if CA glue will soak into them and strengthen them after they are lightly stained. Will probably have to tear them off and re-make them with better wood.
- 1,306 replies
-
- 18
-
-
- syren
- model shipways
- (and 1 more)
-
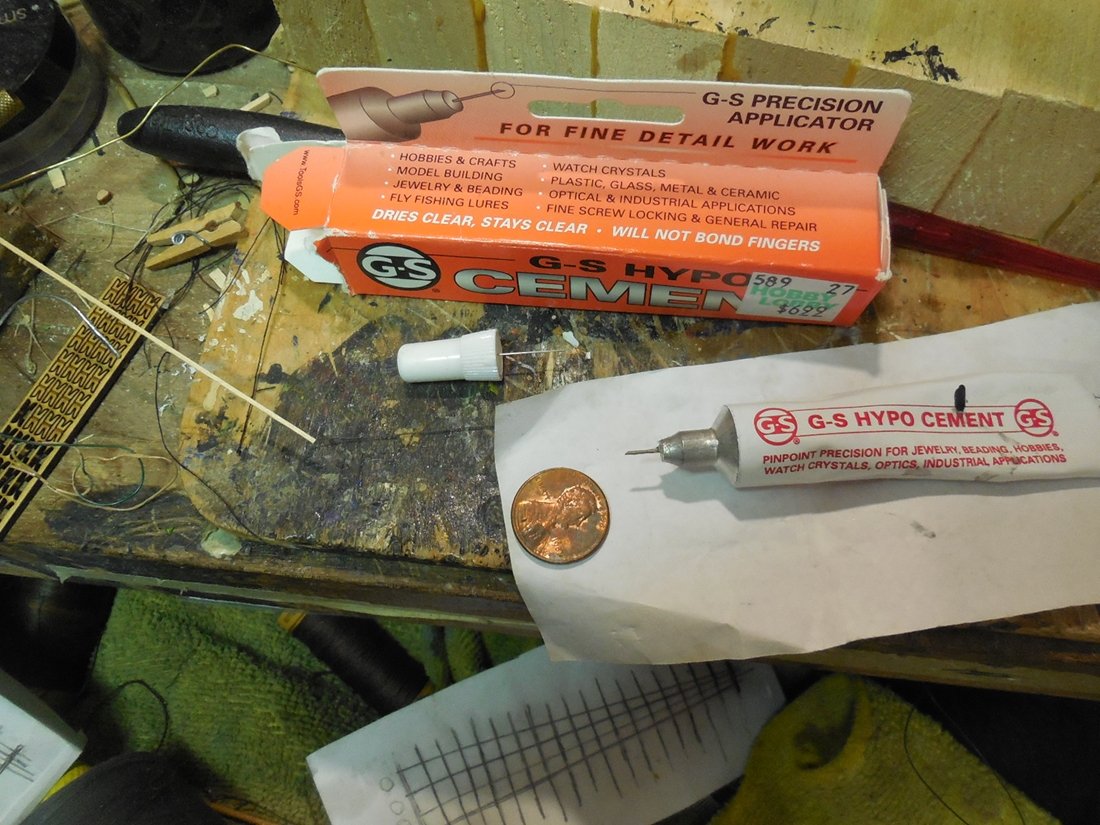
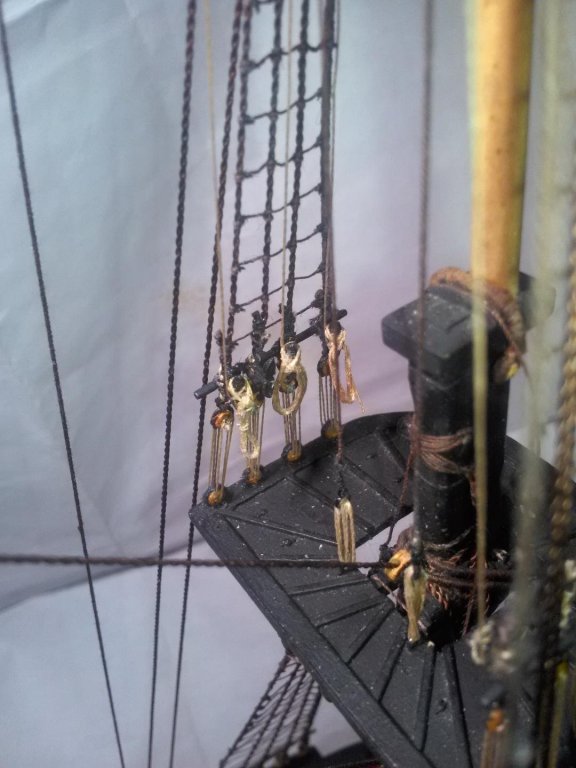
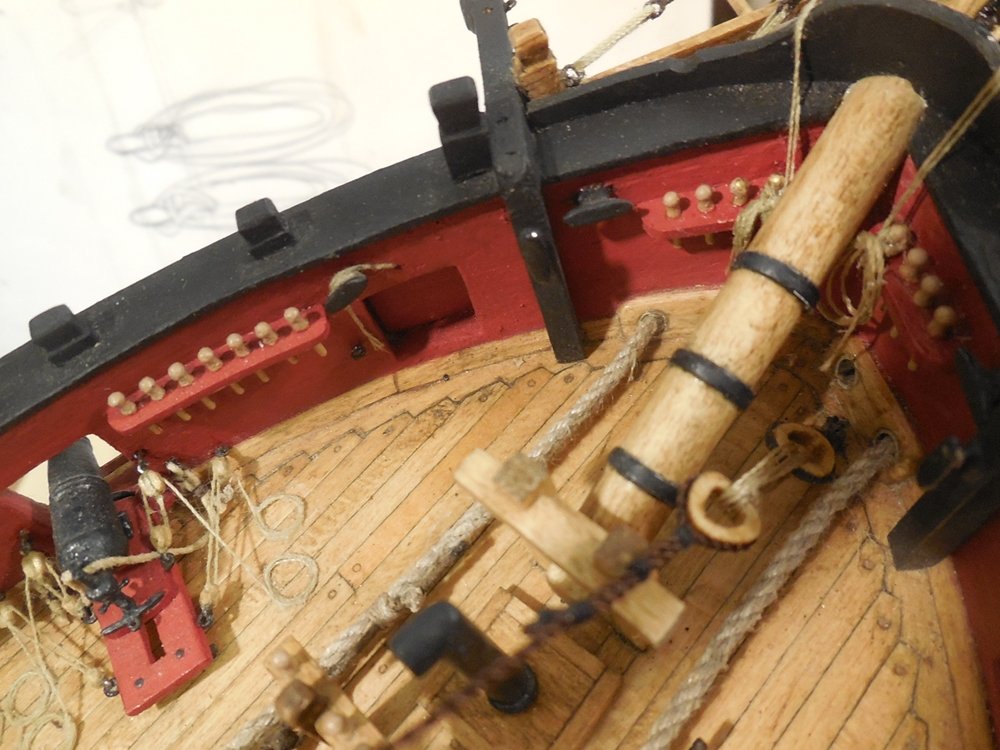
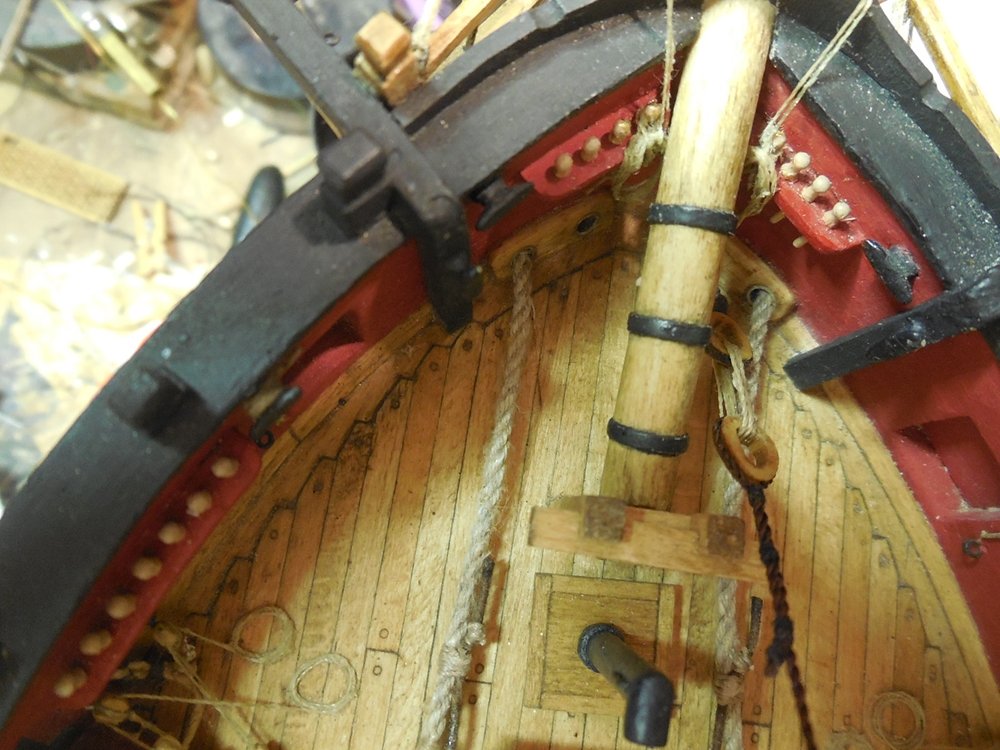
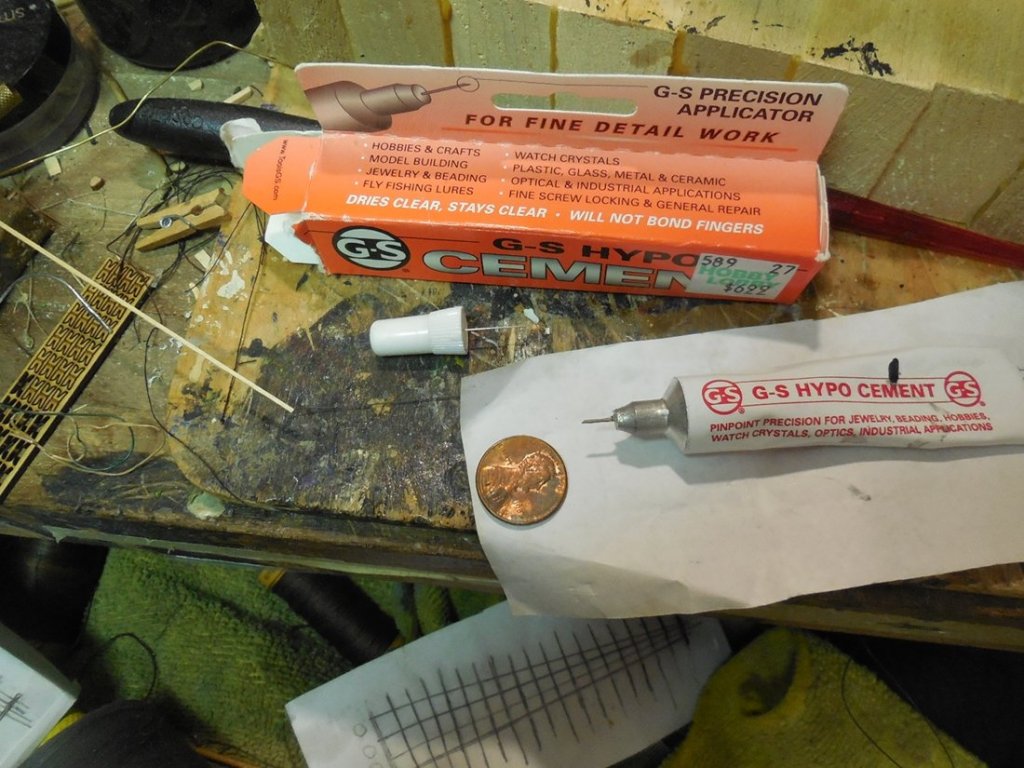
Here are the pics of the belaying pins area for the inhauls and the Hypo cement I promised.
- 1,306 replies
-
- 17
-
-
- syren
- model shipways
- (and 1 more)
-
How Realistic Can One Make Sails?
JesseLee replied to Julie Mo's topic in Masting, rigging and sails
I have been told that if you use baking soda with your tea washes it neutralizes the acids. Anyone know if this is true? I have used this process on a model or two. Jesse -
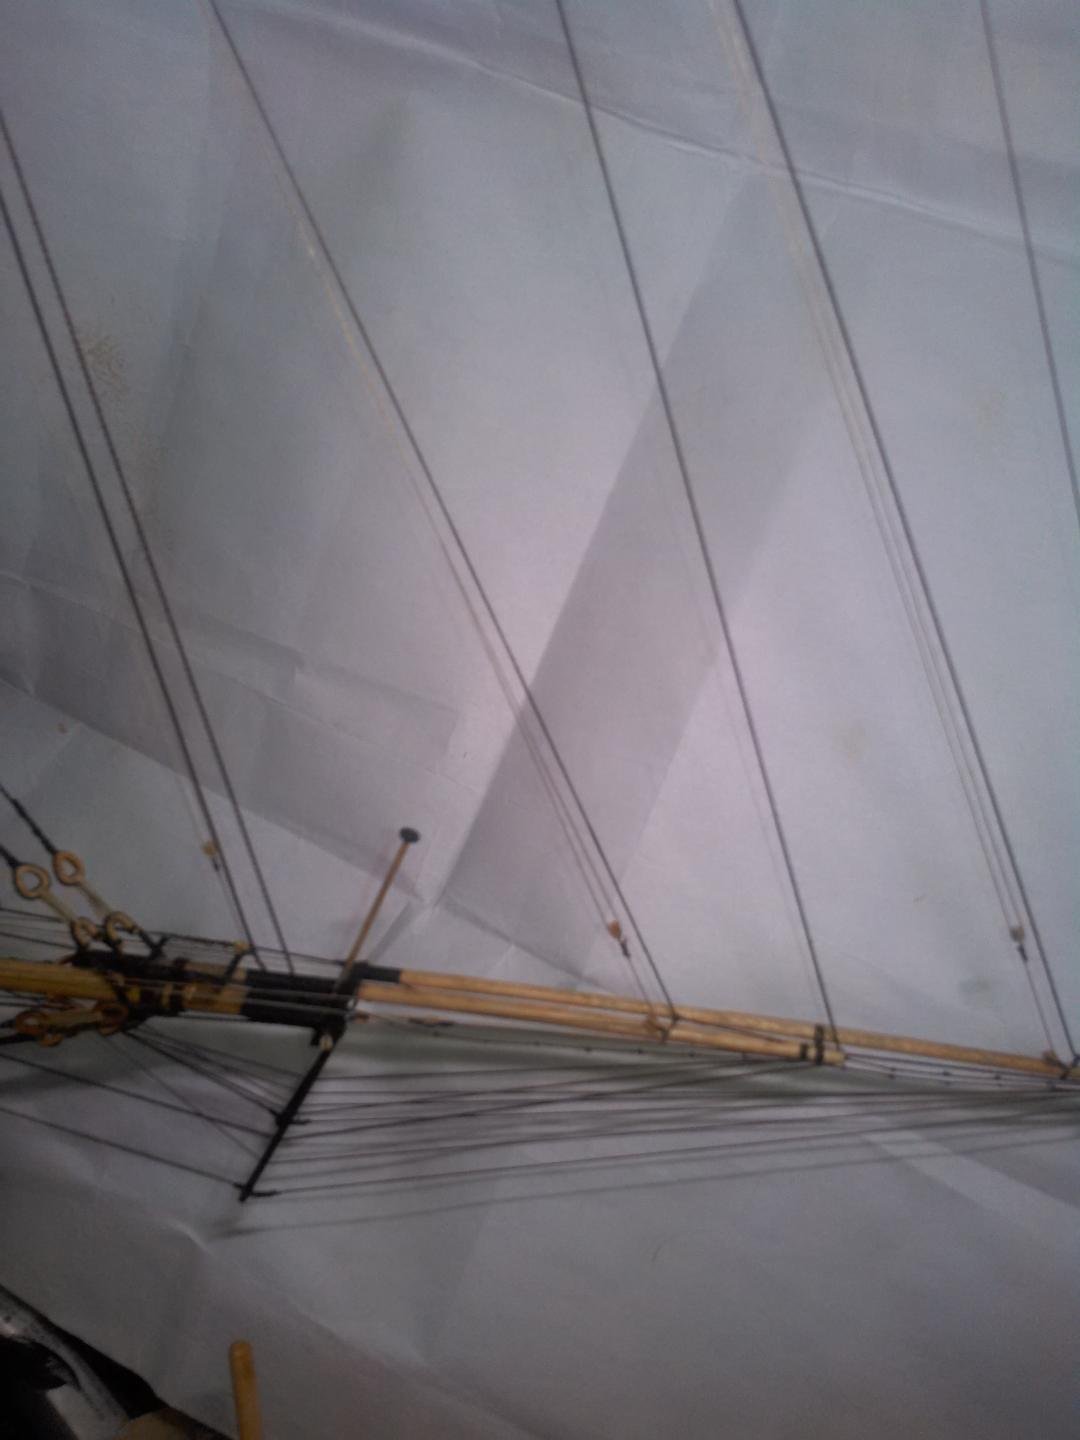
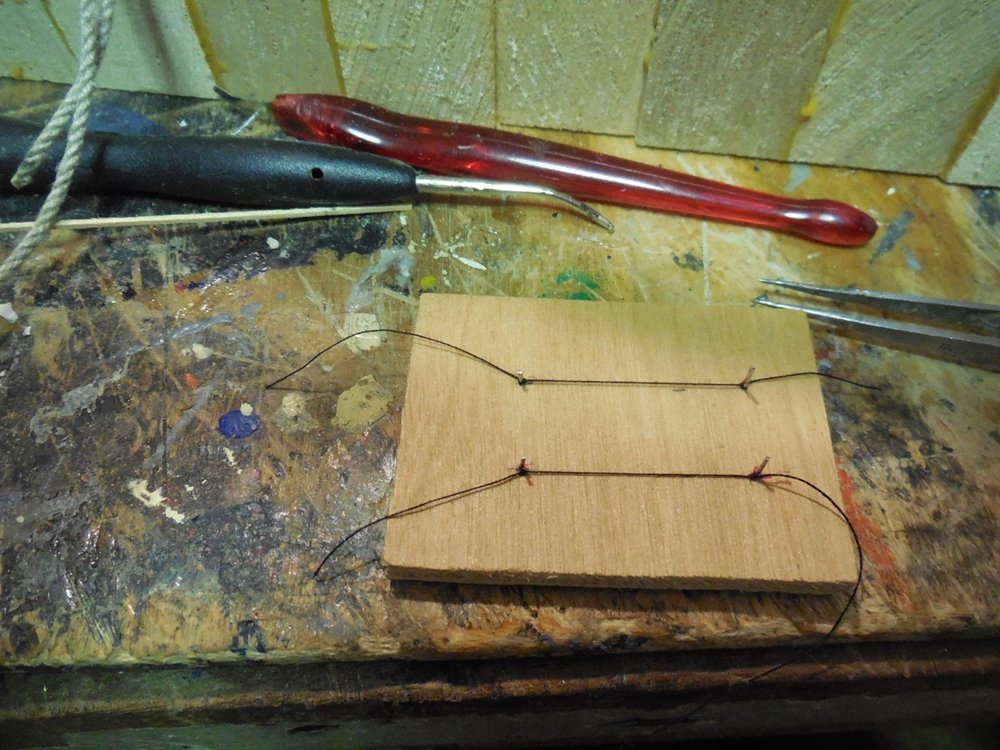
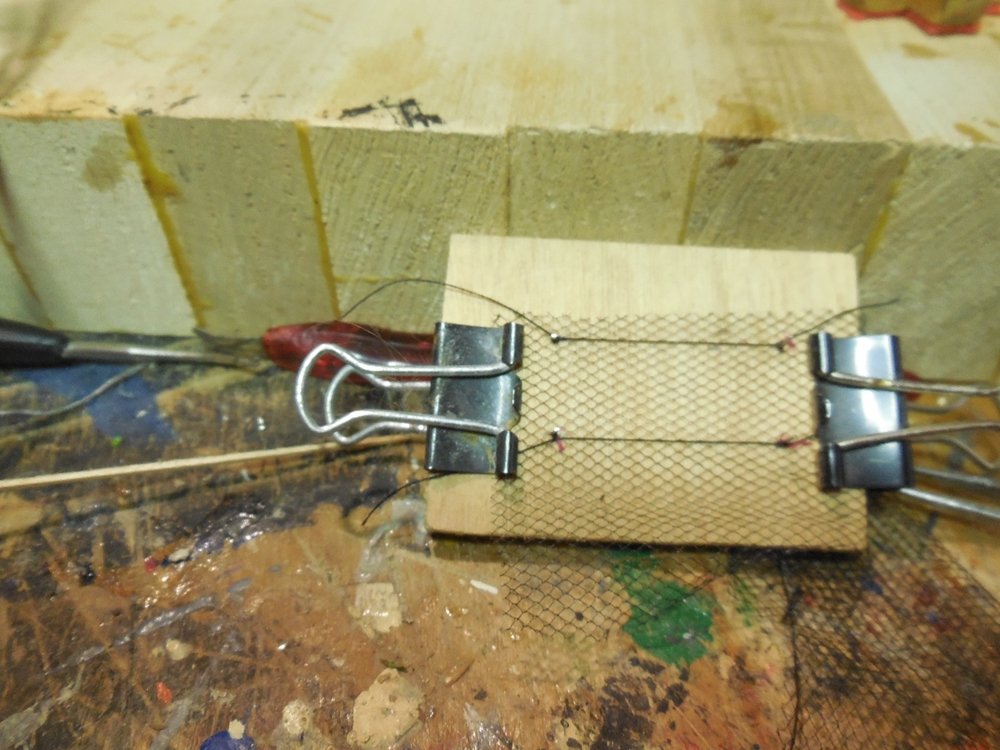
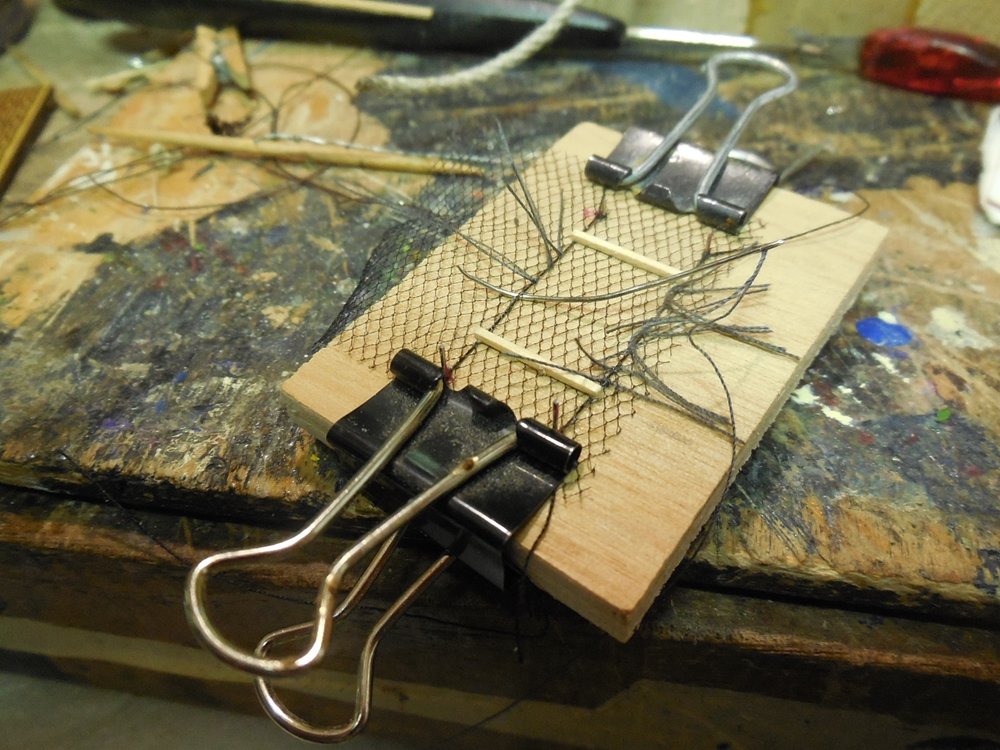
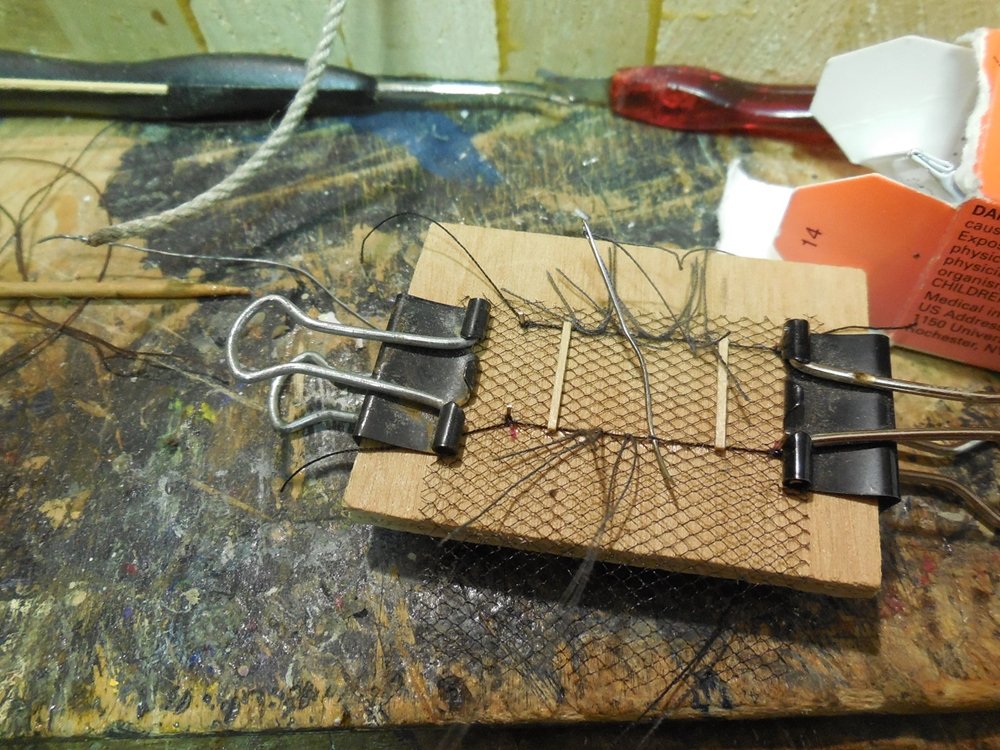
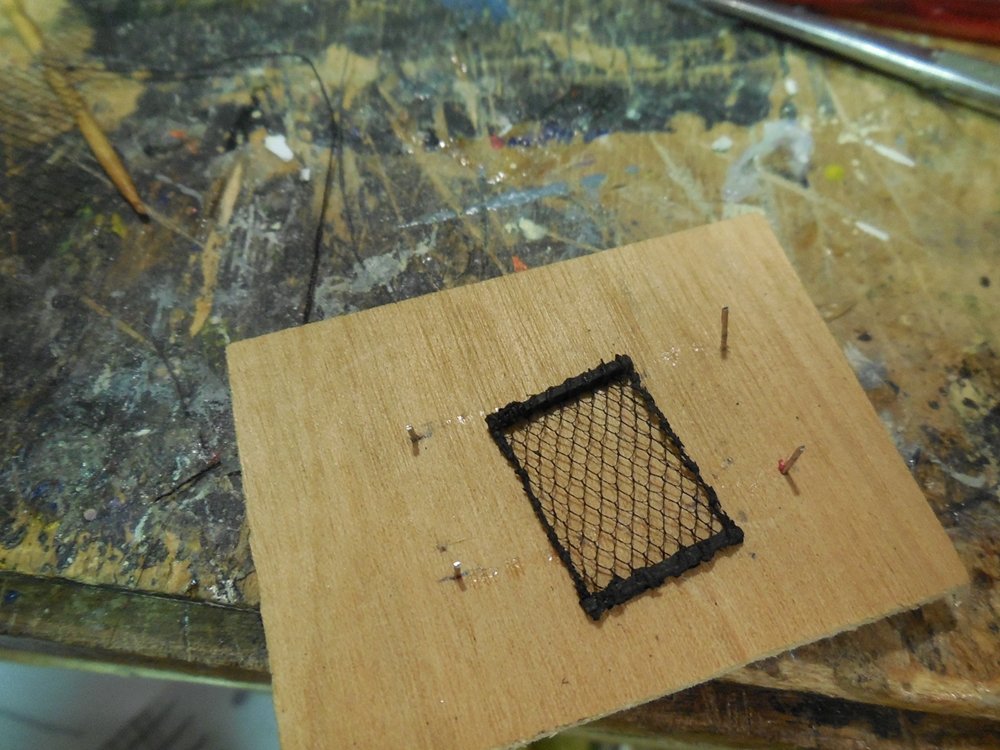
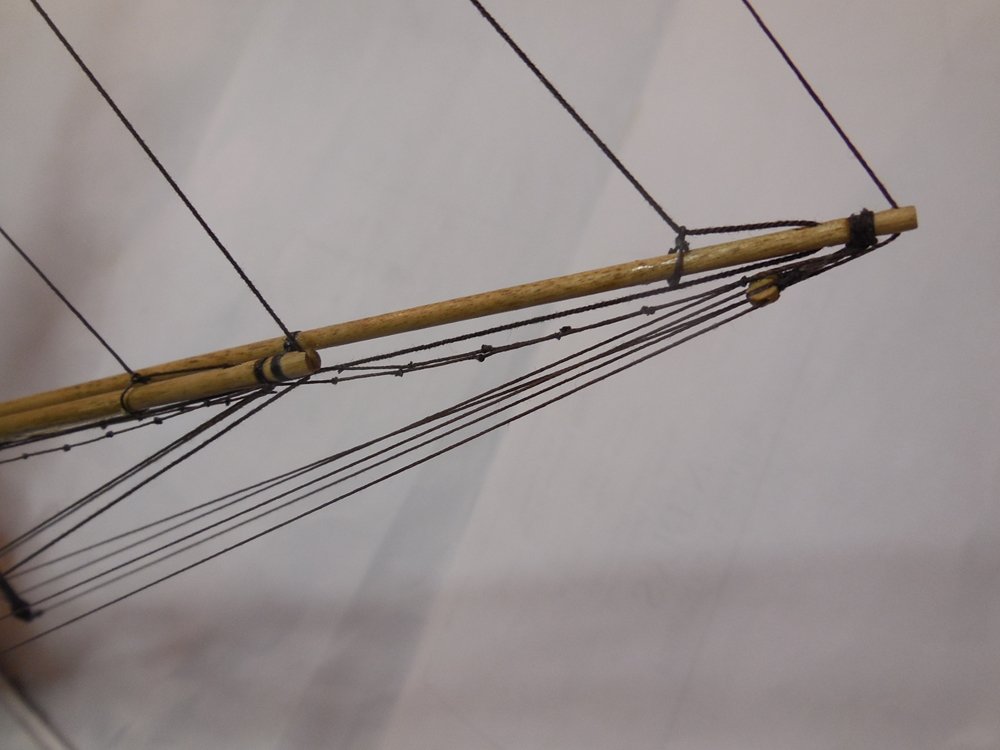
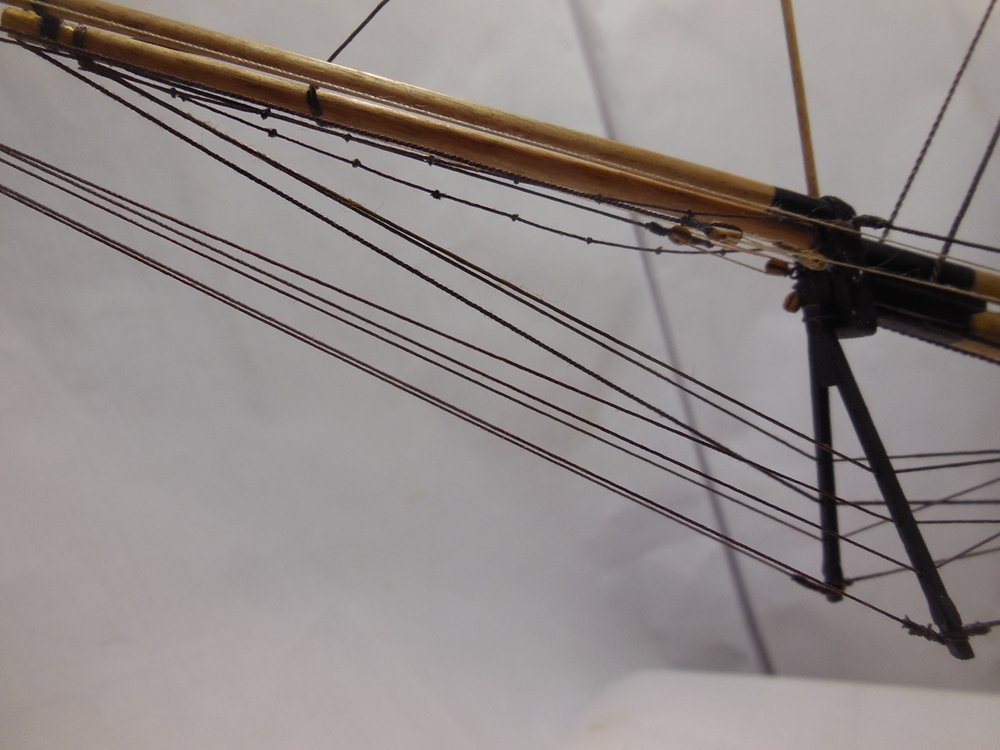
For the netting that goes on the Bowsprit horses and battens I decided to make a jig and pre-rig most of it off ship to make it easier to tie on after. I tied two threads to four wire pegs spaced the same as the Bowsprit horse lines. I laid a piece of netting down over them and carefully glued the it to the threads where the overlaid. I glued the battens down onto all of this (pre-measuring the spacing). When that dried I used a curved sewing needle to help me thread and tie the edges. Removed it all from the jig and trimmed the edges. This made it much easier to tie the netting to the horses. I used G-S Hypo Cement made for gluing watch crystals to glue these tiny spots. It has a very tiny needle applicator end that works very well for tiny rigging knots. (forgot to take a picture - will have to add one in later, my camera died and is recharging). Jesse

- 1,306 replies
-
- 27
-
-
- syren
- model shipways
- (and 1 more)
-
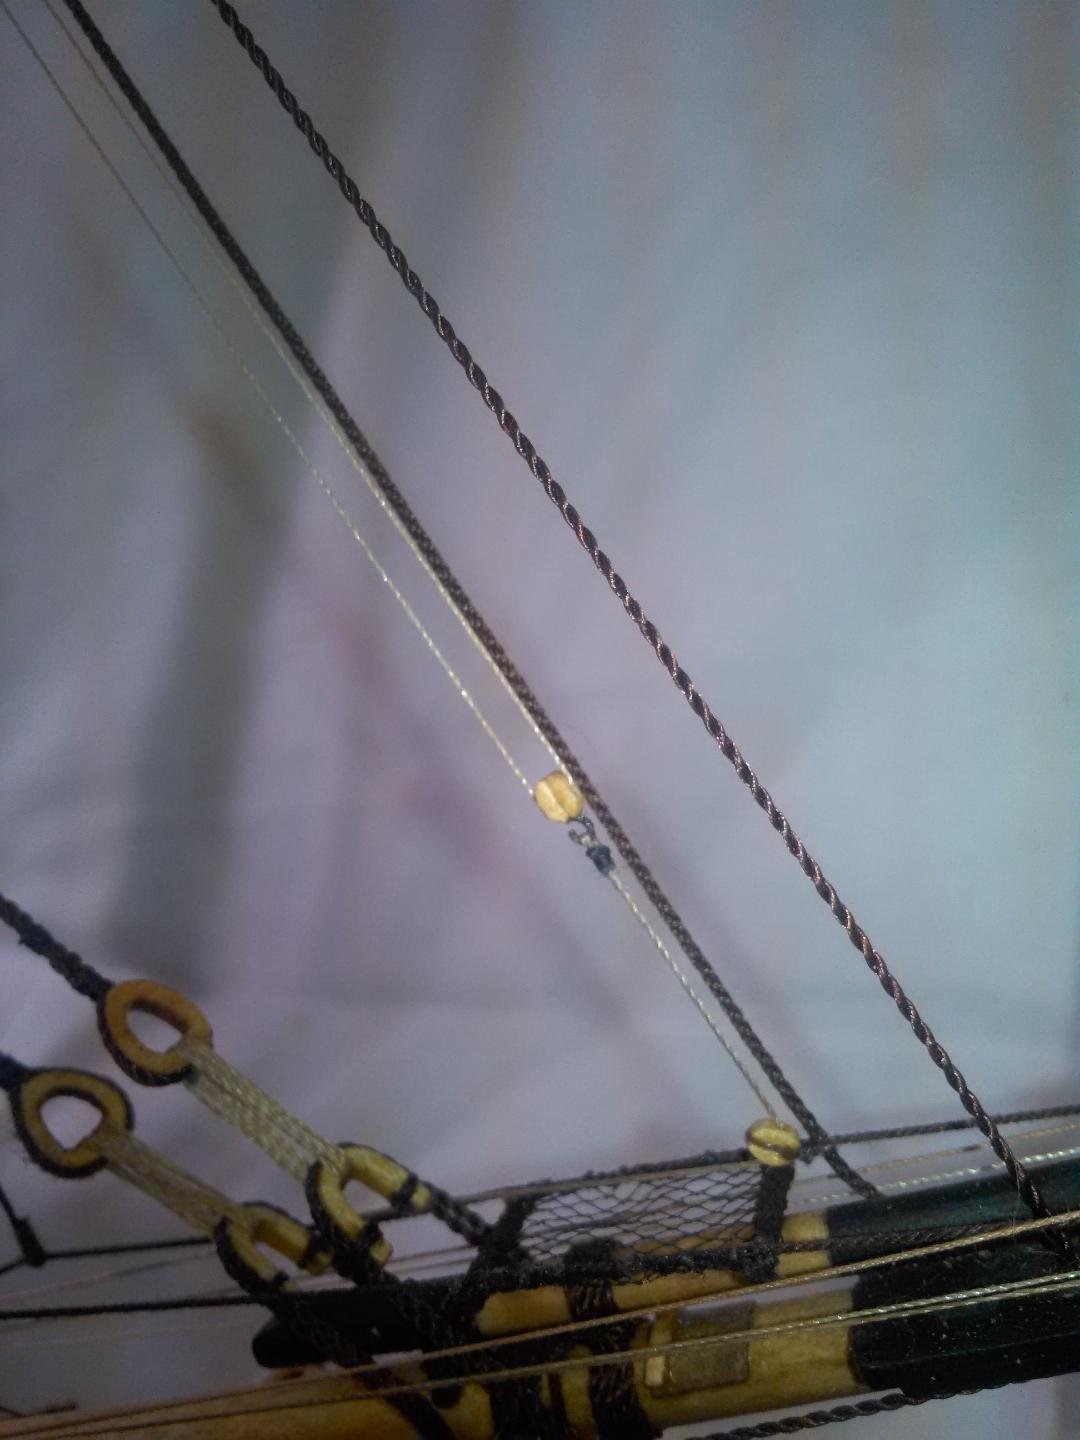
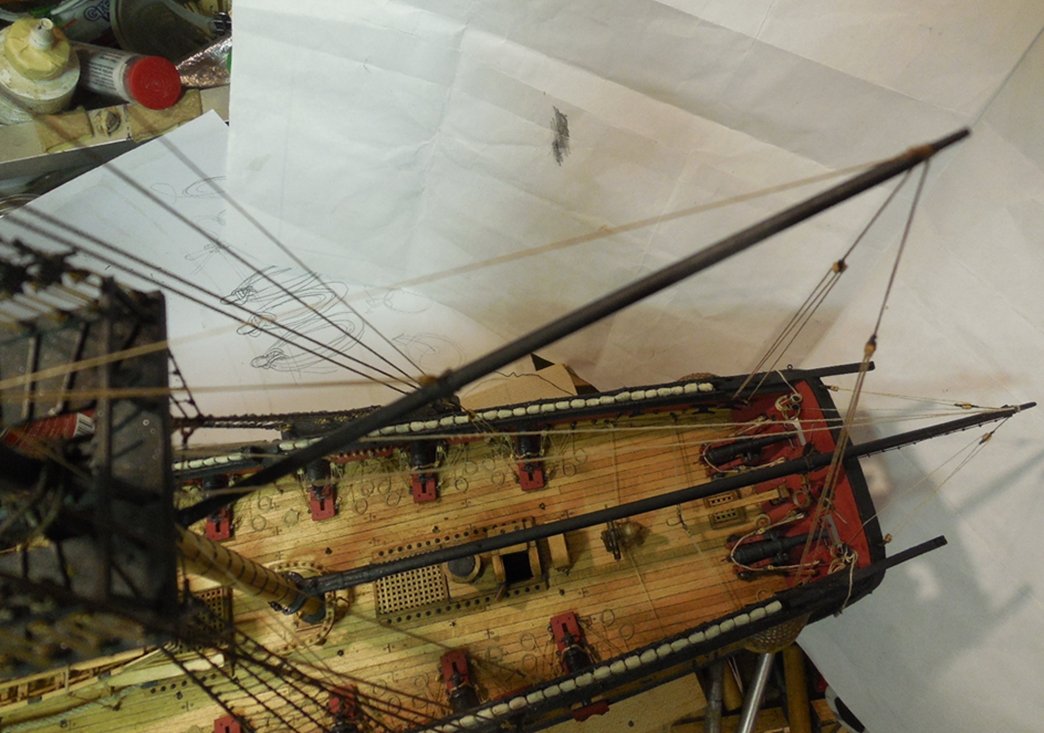
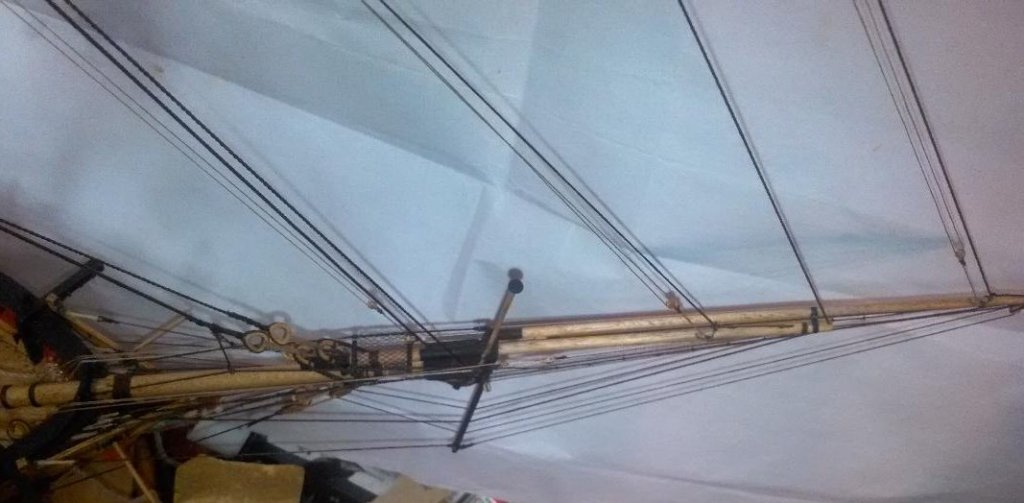
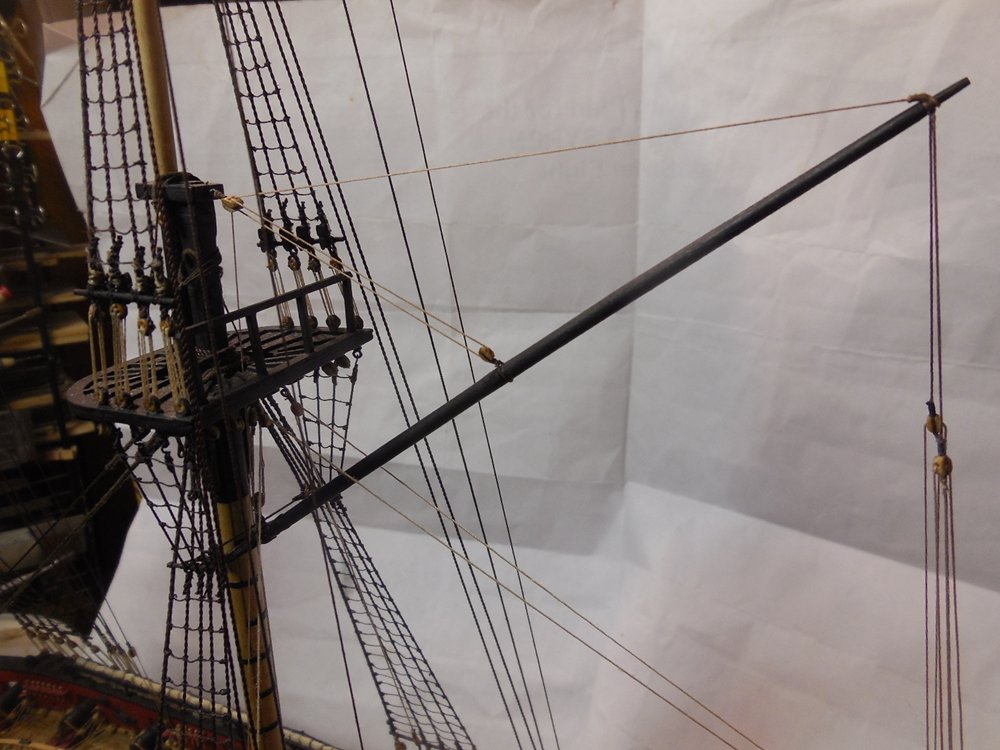
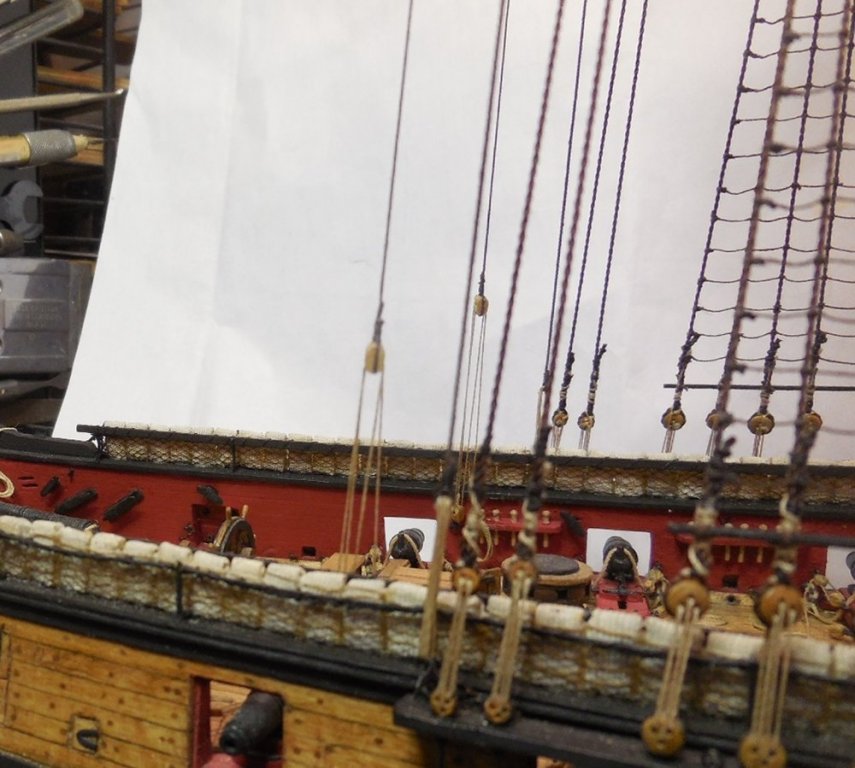
More progress on the Standing rigging. Have added the Main royal stay, Fore topgallant stay, Fore royal backstays, Fore royal stay, Jib stay, Jib stay traveler inhaul, Flying jib stay, Flying jib stay traveler inhaul and the Bowsprit horses. It is difficult to show each of these lines individually. I found it very difficult to rig the inhauls and tie to the belaying pins on each side of the Bowsprit. There is so little room to reach into in this area - I'm glad I'm past that now. Forgot to photograph this, will have to add a picture in on an upcoming posting. Jesse
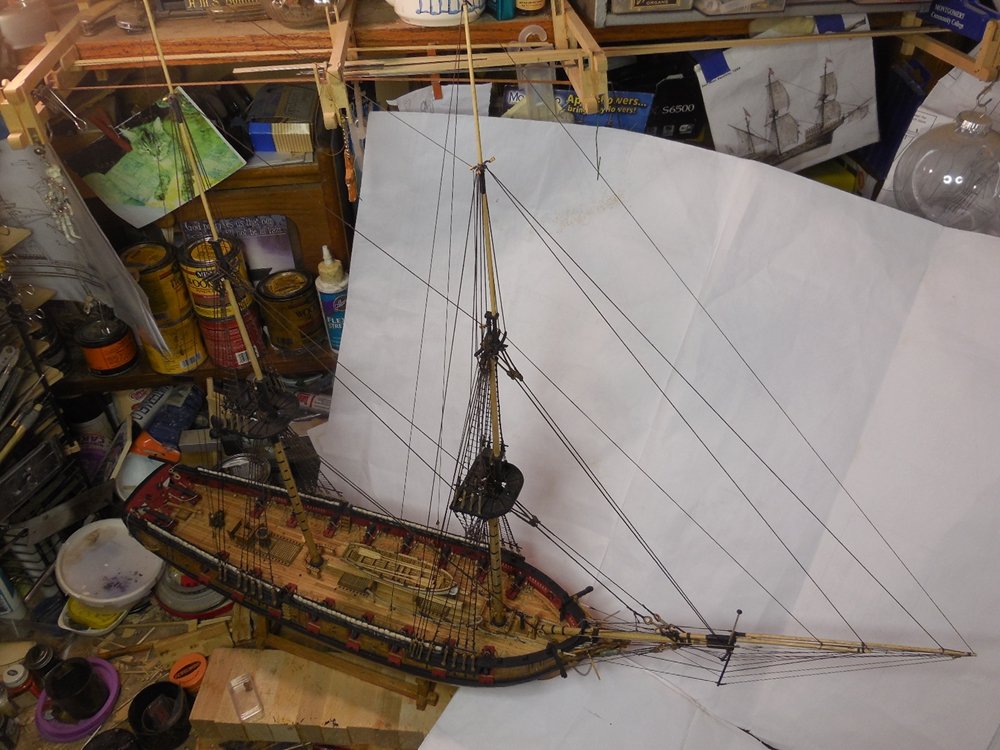


- 1,306 replies
-
- 19
-
-
- syren
- model shipways
- (and 1 more)
-
Quite a few of mine broke. Some glued back together, some I just recut out of better wood. Jesse
- 1,135 replies
-
- 2
-
-
- model shipways
- syren
- (and 2 more)
-
Dave, I stand but can't very long so I am up and down. I need to read that posting. I'd love to have anything that can help. thanks!
- 1,306 replies
-
- 4
-
-
- syren
- model shipways
- (and 1 more)
-
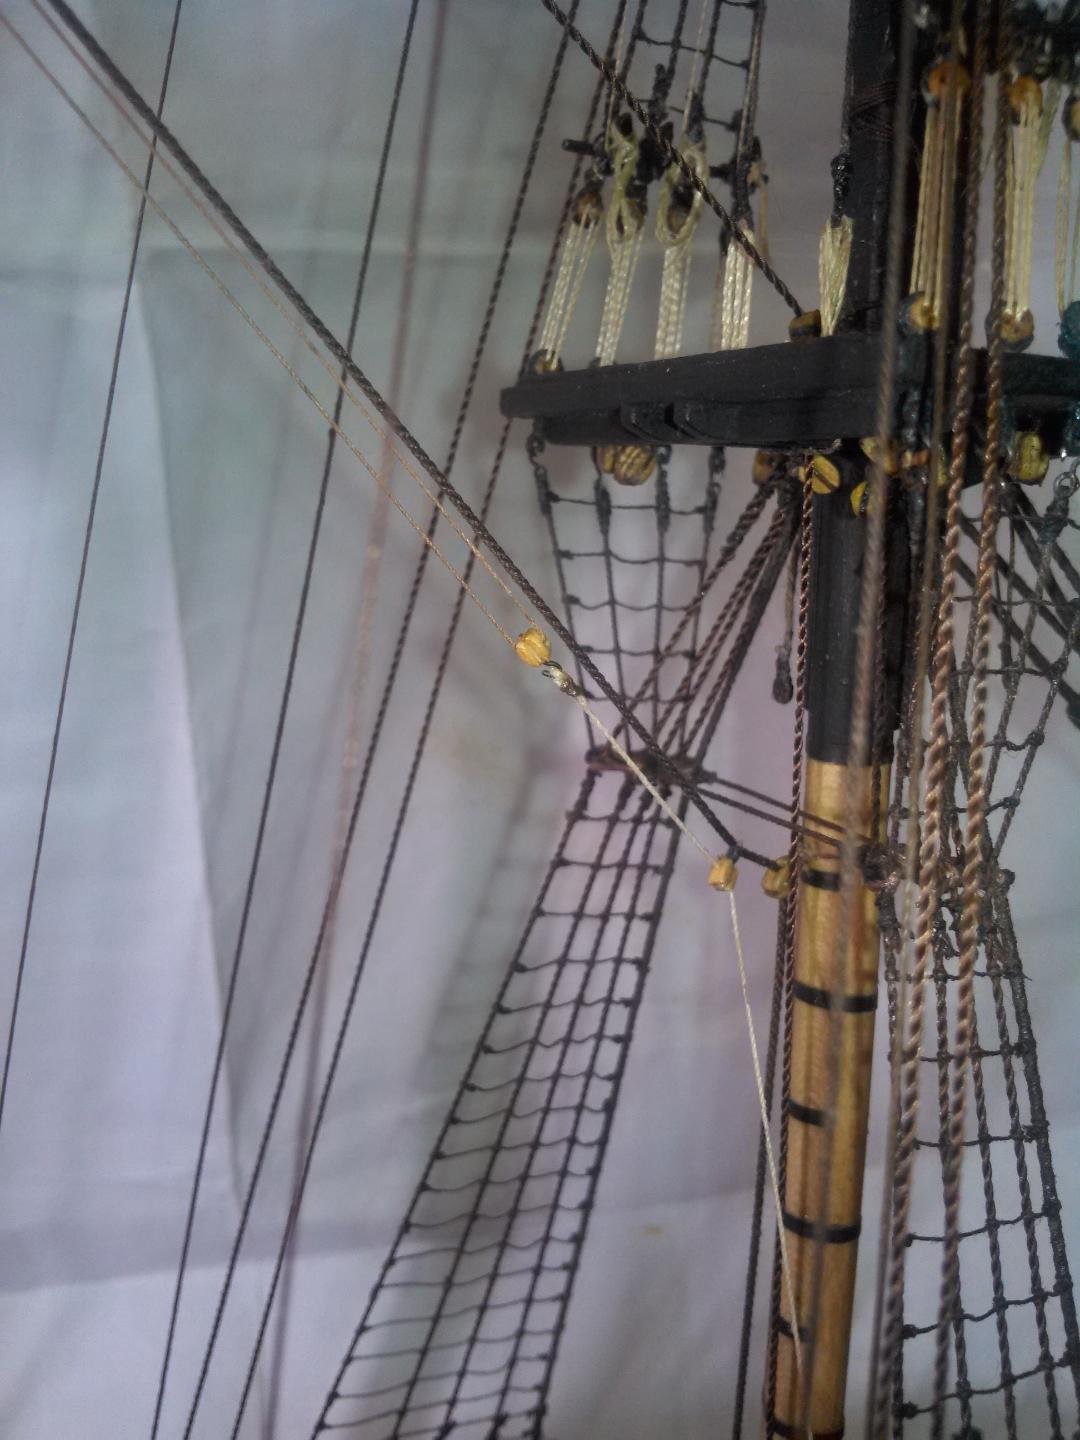
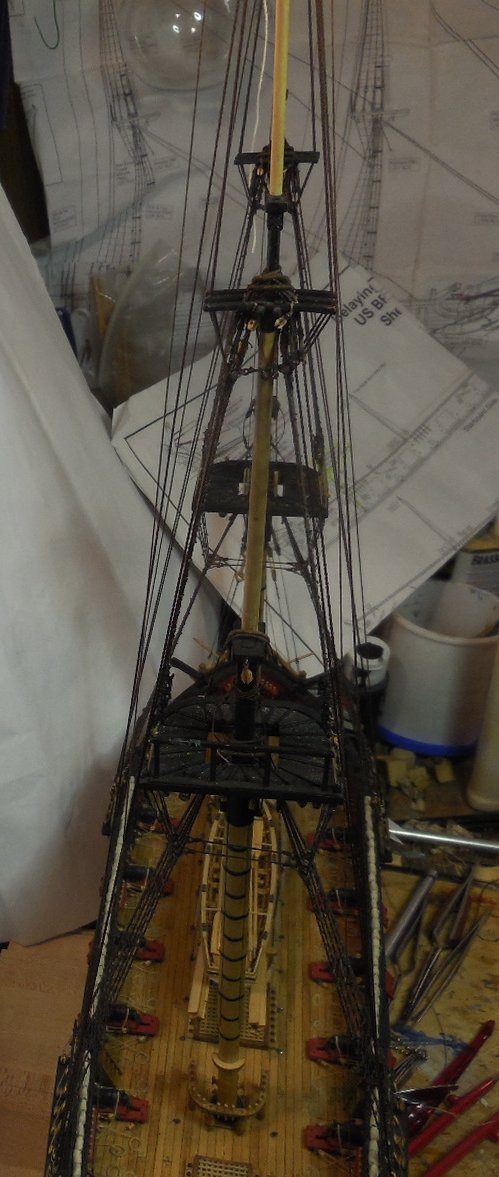
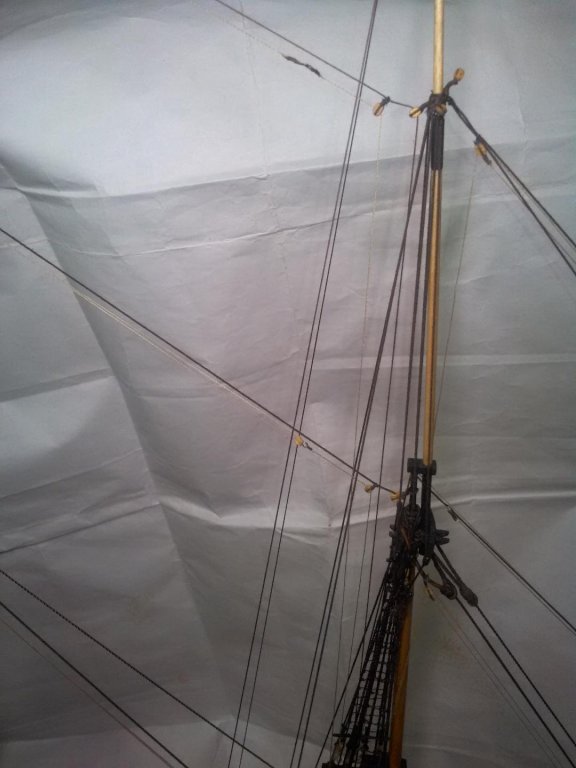
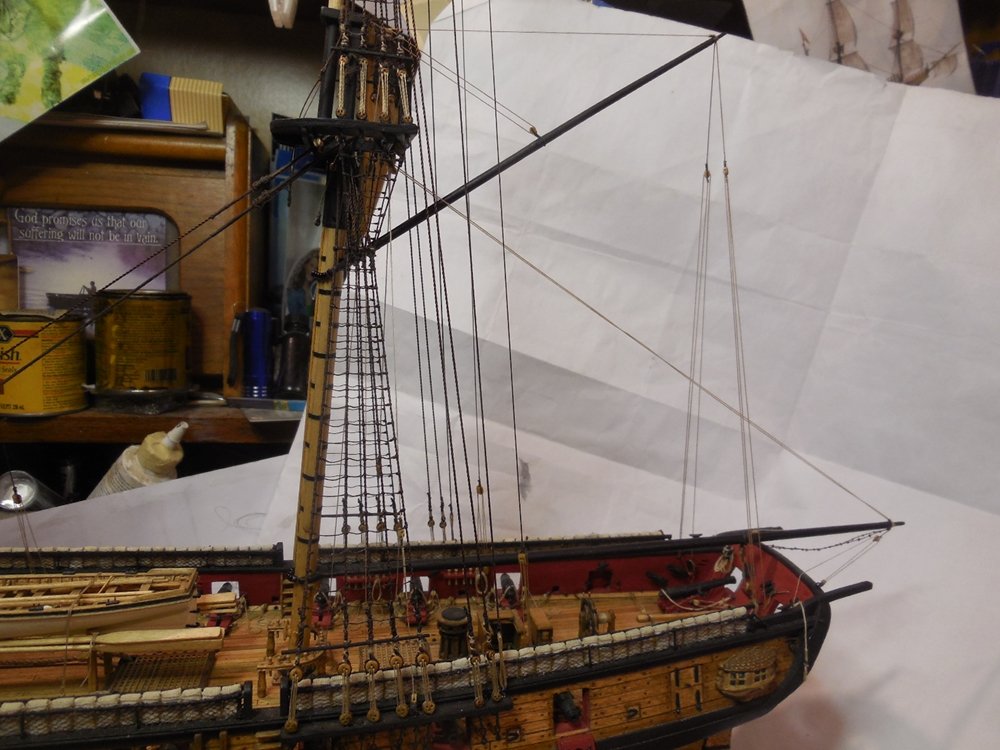
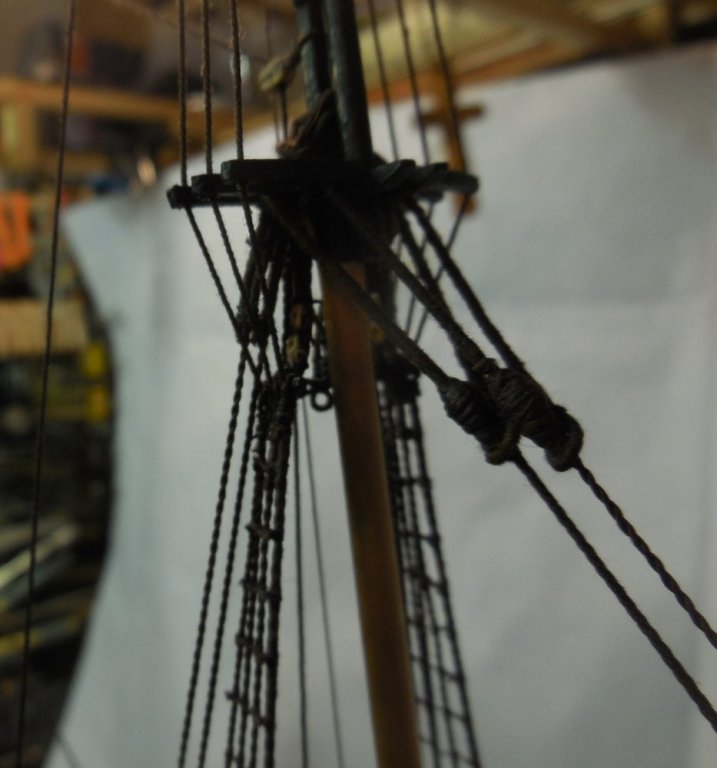
Been plugging along slowly. Haven't posted until now because there would be too little to show until I got a little more done. By the time I rig a line or two I am in so much pain I have to leave it and come back later so it takes a while. Since my last posting I have rigged the main & fore topmast backstays, main & fore topmast stays, main & fore topmast preventer stay, fore & main topgallant shrouds, main & fore topgallant backstays and the main royal backstays. It doesn't look like that much in the pictures. When trying to rig the block and rope coil for the main royal backstay I snagged the door to the companionway and snapped it off. It went right down the hole below so I have to make another. I have accidentally cut a line or two and have had to re-rig them. I found it very difficult to rig the lanyards for the fore topmast and fore topmast preventer stays. There is very little room to work with. I am still not satisfied with my mouse making but they are ok.
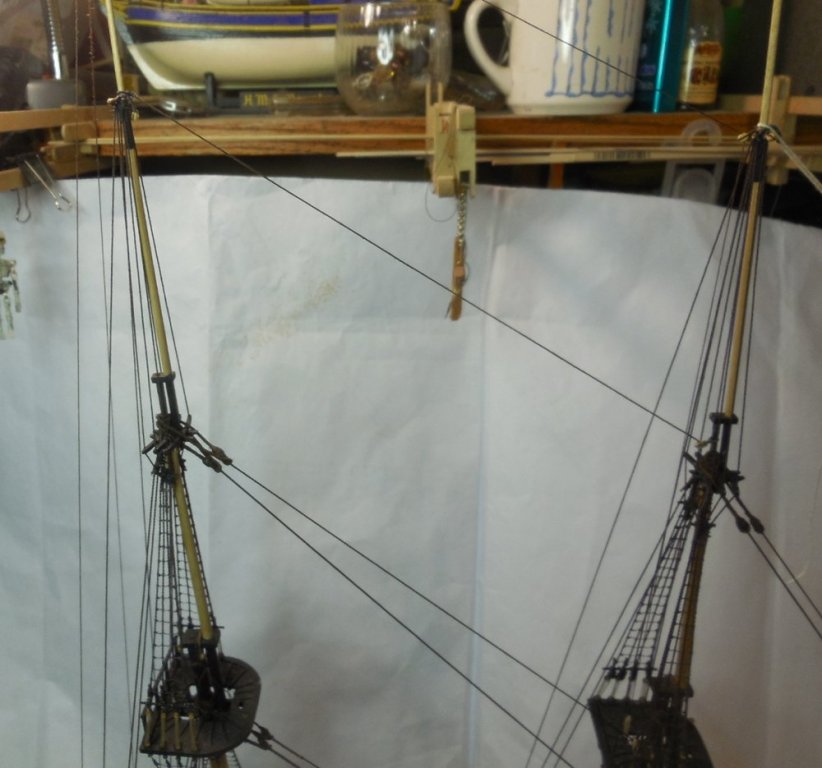


- 1,306 replies
-
- 20
-
-
- syren
- model shipways
- (and 1 more)
-
You might have to. After the glue dries the water will do no good, it will have to be the alcohol.
- 1,135 replies
-
- 2
-
-
- model shipways
- syren
- (and 2 more)
-
If you used wood or white glue you can use alcohol to loosen the glue to re-position it. I have had to do this a few times. In place like this you can use a paint brush to get it in there where you need it. It takes patience, might take several times of coating it in there as letting it soak in and doing it some more until you can move it. Jesse
- 1,135 replies
-
- 3
-
-
- model shipways
- syren
- (and 2 more)
-
Wow, you are really moving along Rich. Most of the wood supplied with this kit is basically no good (as you have already seen). It just teaches us how to fabricate the parts ourselves and increases our skills! Jesse
- 1,135 replies
-
- 4
-
-
- model shipways
- syren
- (and 2 more)