.jpg.f26acc9a74319261612561bfa7da1303.jpg)
vaddoc
-
Posts
1,520 -
Joined
-
Last visited
Content Type
Profiles
Forums
Gallery
Events
Everything posted by vaddoc
-
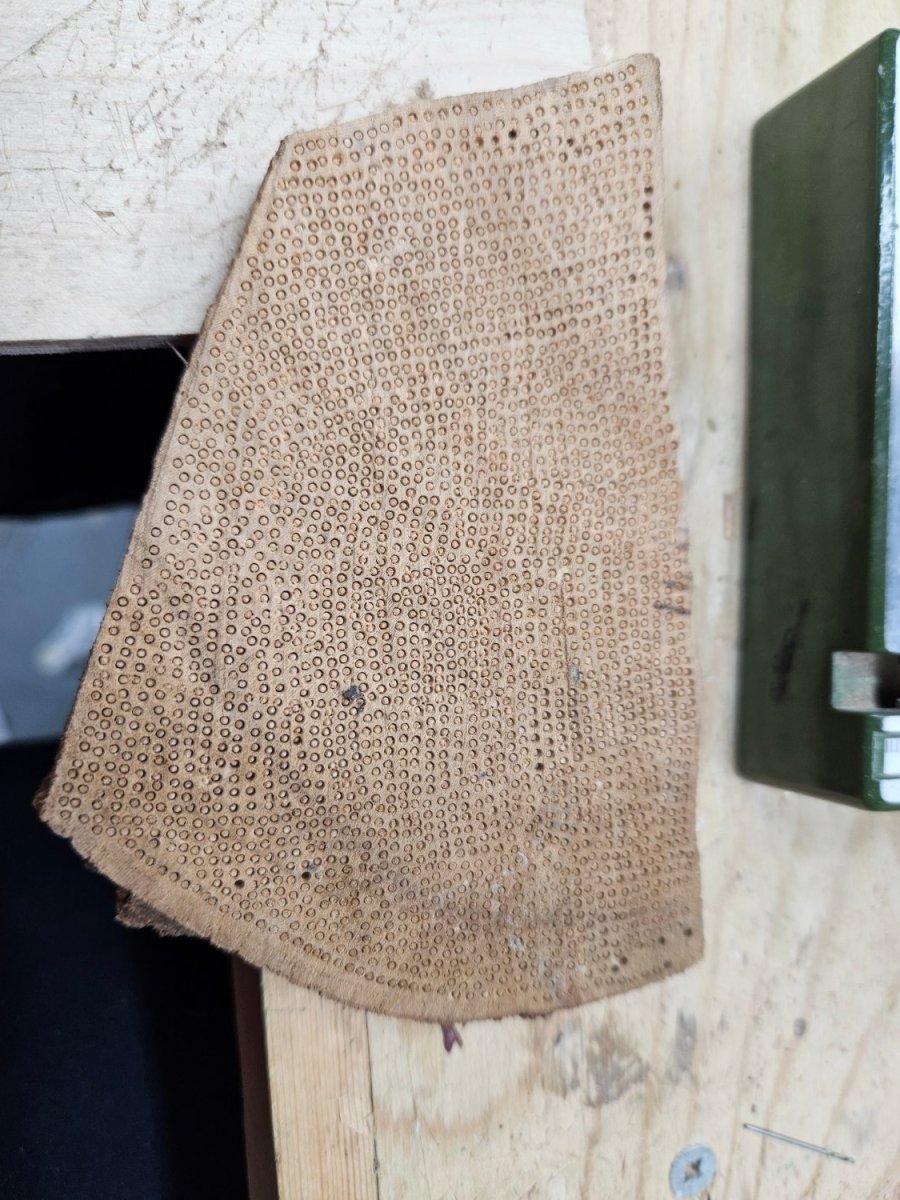
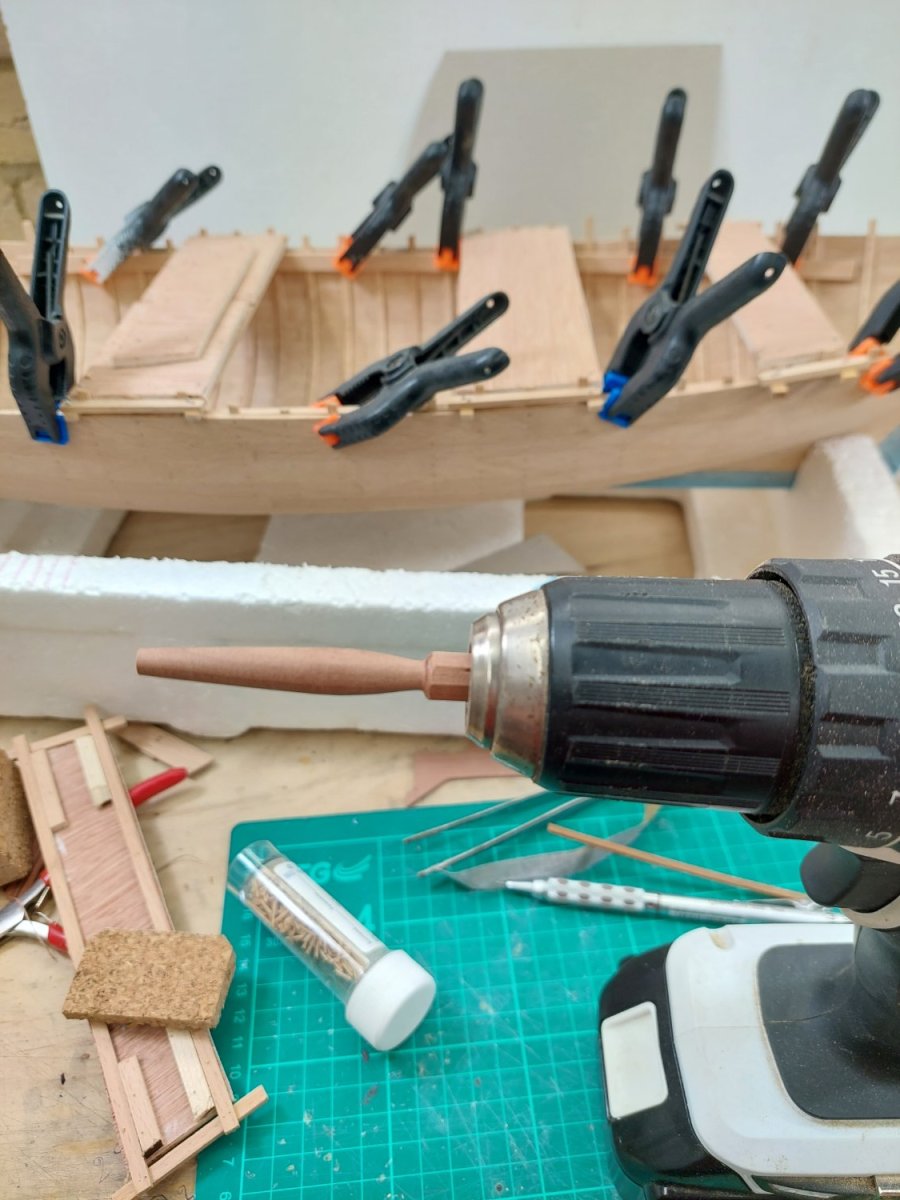
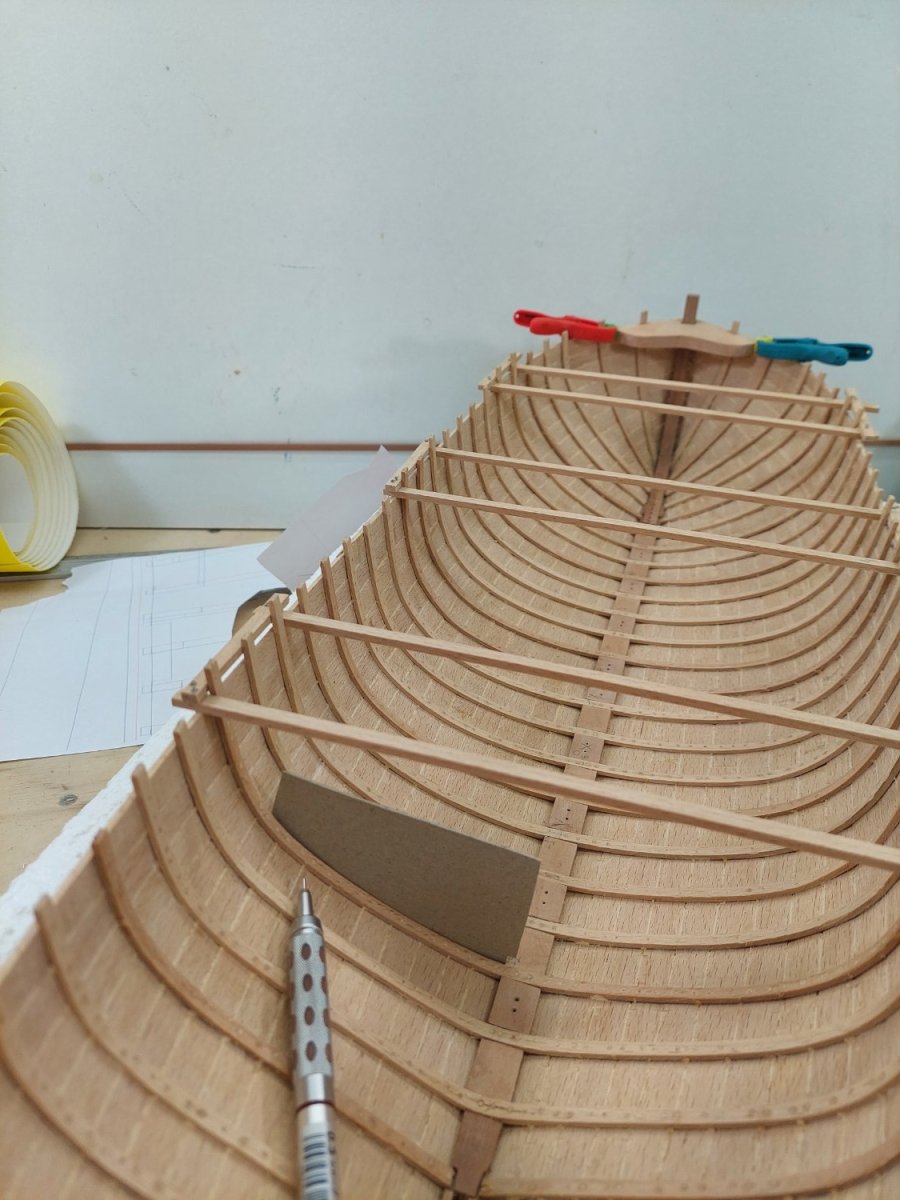
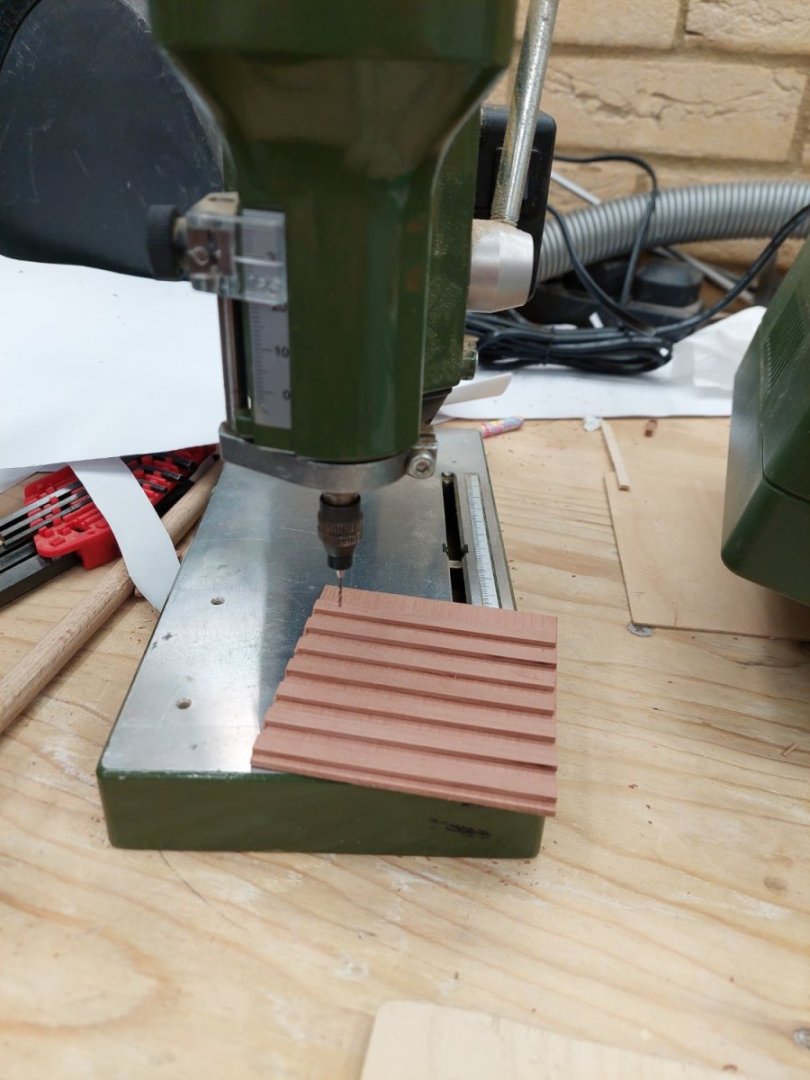
.thumb.jpg.6fd4c1b78768bb3efd745ab810936005.jpg) Ok, a quick update. At this time, I have no idea how to built the rest of the boat. Unfortunately it will not be historically accurate but at least I ll have fun building it! Now, today I sat to make a few thousand tree nails, I have to replace lots of screws and I ll need more as we go. It actually went very well, a short video follows showing how fast they can be made with the needle method. This tree nails are about 0.7-0.8 mm, maybe about 1 cm long. This wood is cherry - very hard. There must be about 1500 - 2000 nails there When the sleeves for my drum sander arrive, I ll sand the back and release the nails. But I will sit tomorrow and make more, my set up is working well and I should take advantage of it. Vaddoc
Ok, a quick update. At this time, I have no idea how to built the rest of the boat. Unfortunately it will not be historically accurate but at least I ll have fun building it! Now, today I sat to make a few thousand tree nails, I have to replace lots of screws and I ll need more as we go. It actually went very well, a short video follows showing how fast they can be made with the needle method. This tree nails are about 0.7-0.8 mm, maybe about 1 cm long. This wood is cherry - very hard. There must be about 1500 - 2000 nails there When the sleeves for my drum sander arrive, I ll sand the back and release the nails. But I will sit tomorrow and make more, my set up is working well and I should take advantage of it. Vaddoc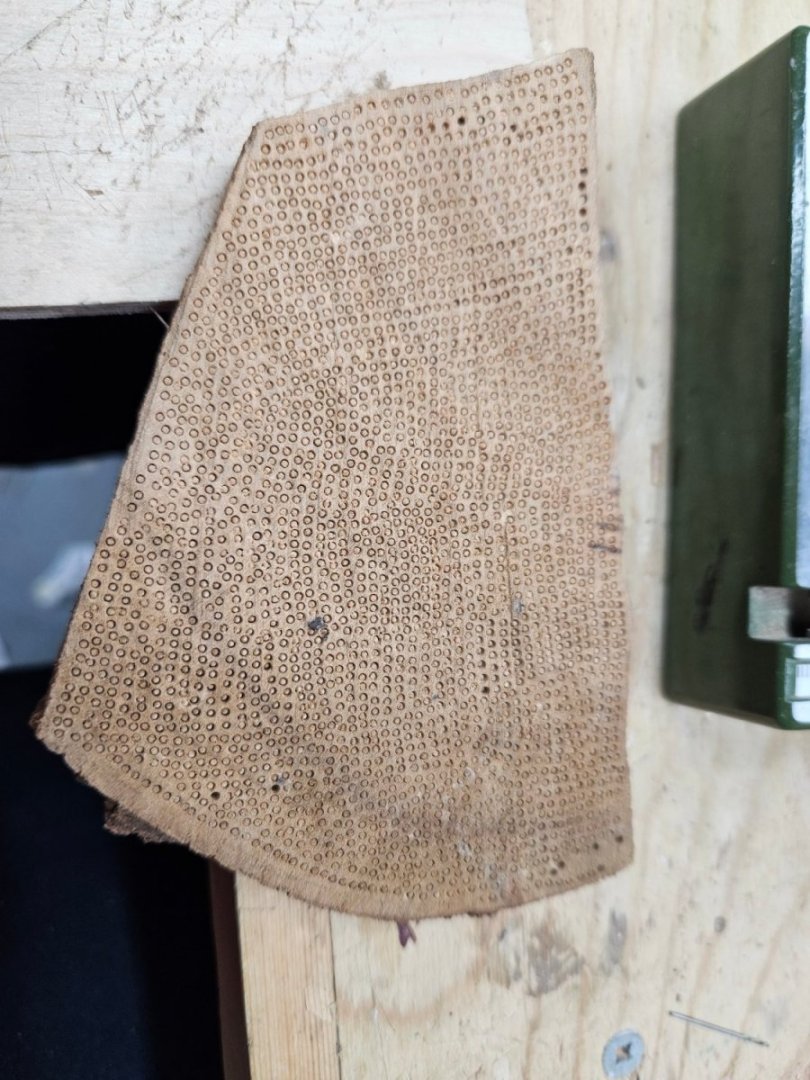
-
Many thanks to all for your likes and comments. @allanyed Allan, I simply can't remember how I set the distance between ribs. It my have been based on some data I had dug out or I may have just eyeballed it. But these boats had probably a hard life so they would have had ribs more closely spaced. But I do agree with you, it is easier to find accurate info for the pots in Victory's kitchen than construction info and plans for ships' boats.
-
Glad you are feeling better Hakan, hopefully no more bumpy roads. You are building a might nice model but indeed, enjoy yourself and leave things for later on. As Mark says, both the wood and us will be waiting patiently. All the best Vaddoc
-
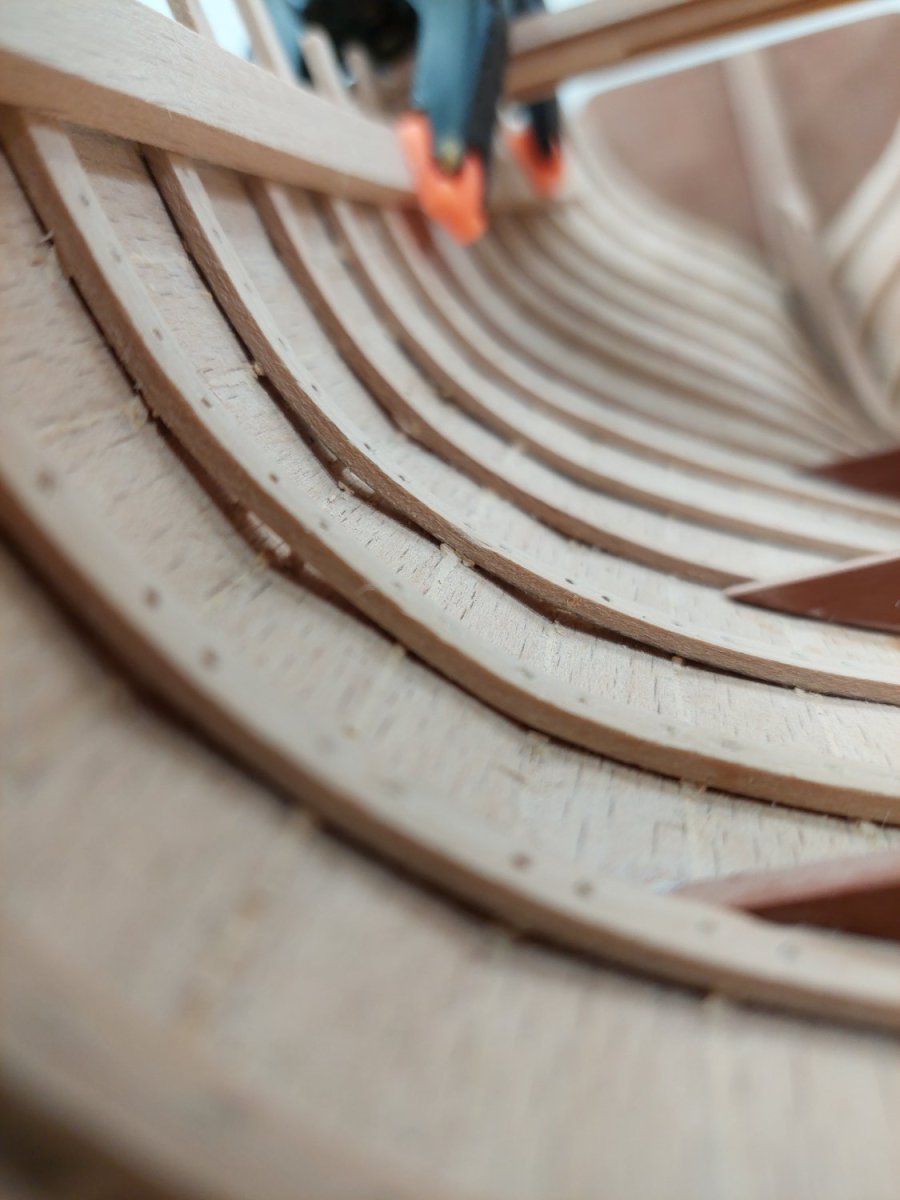
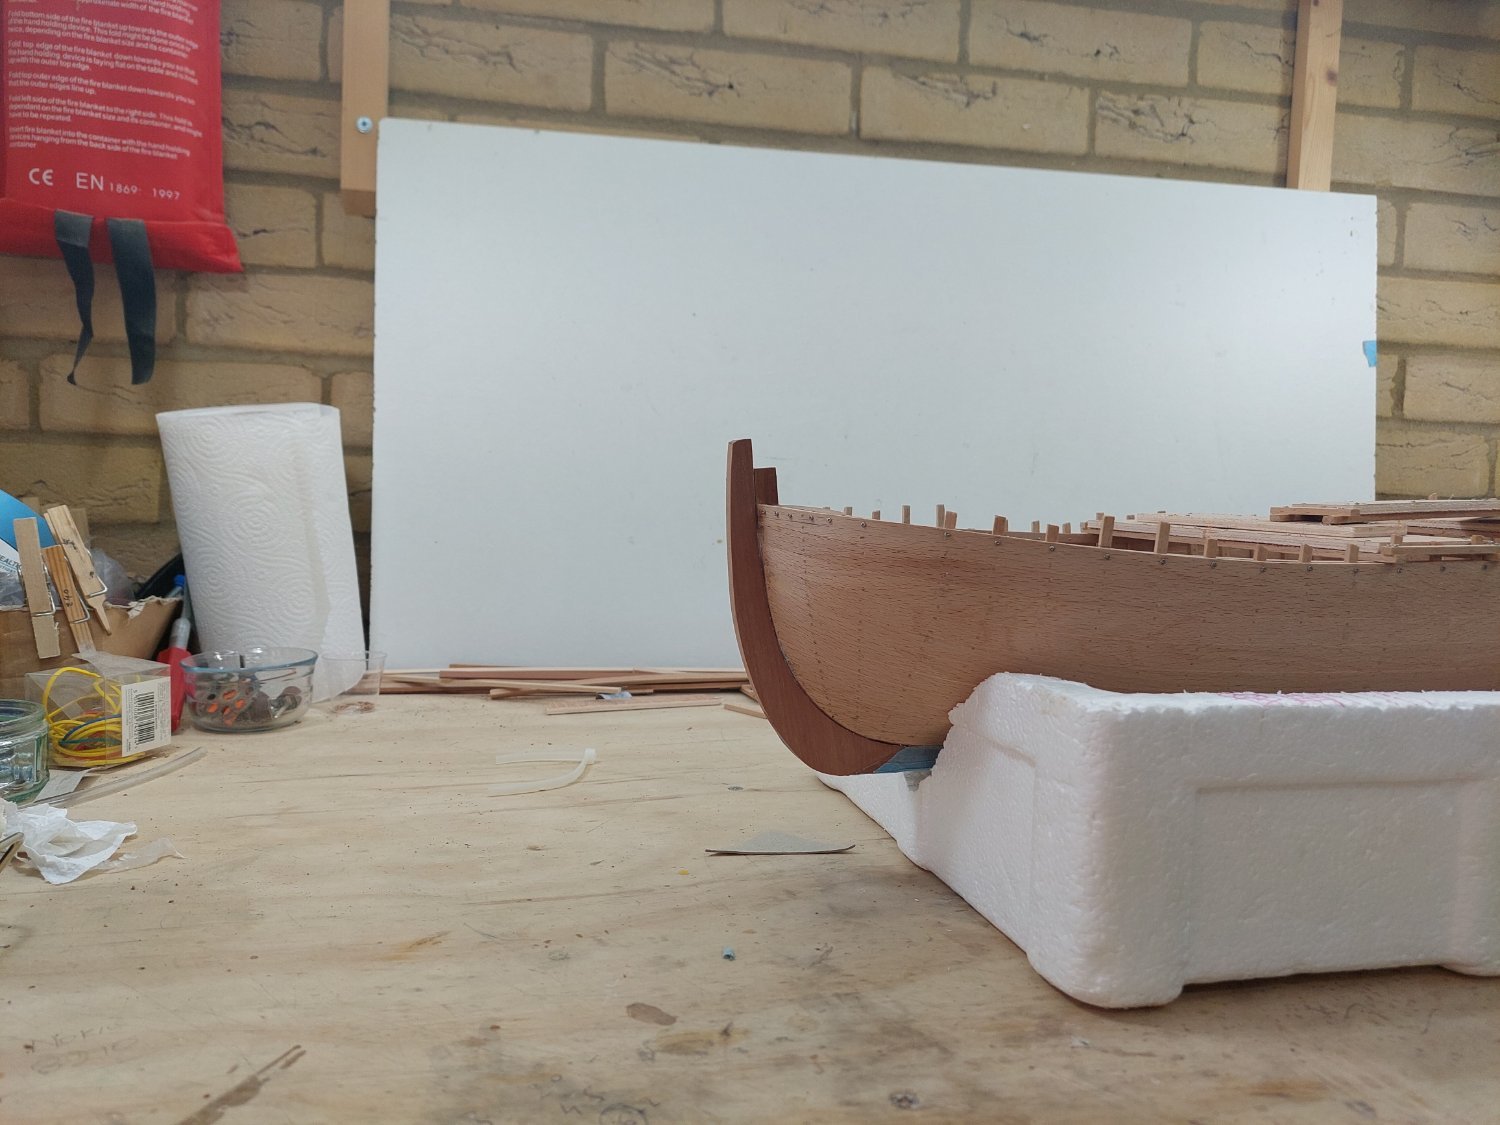
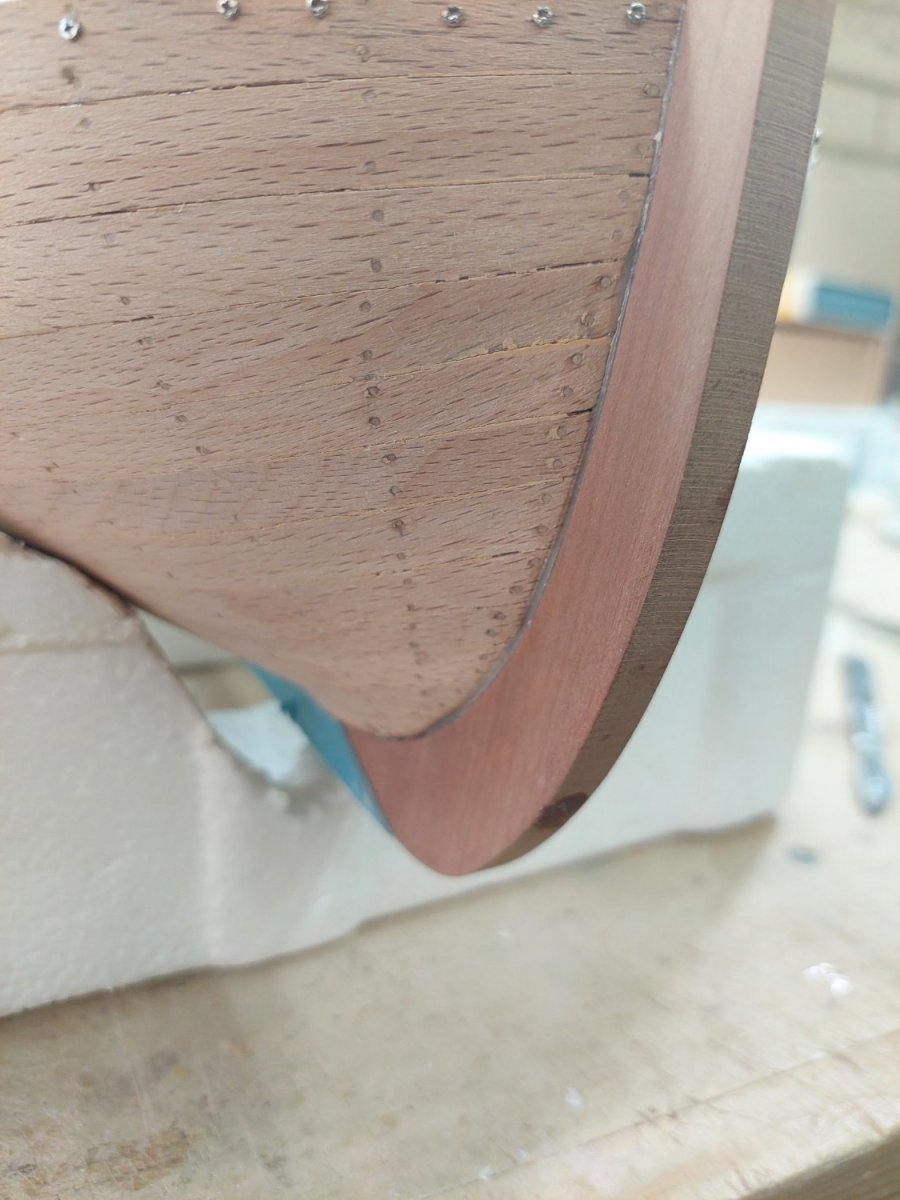
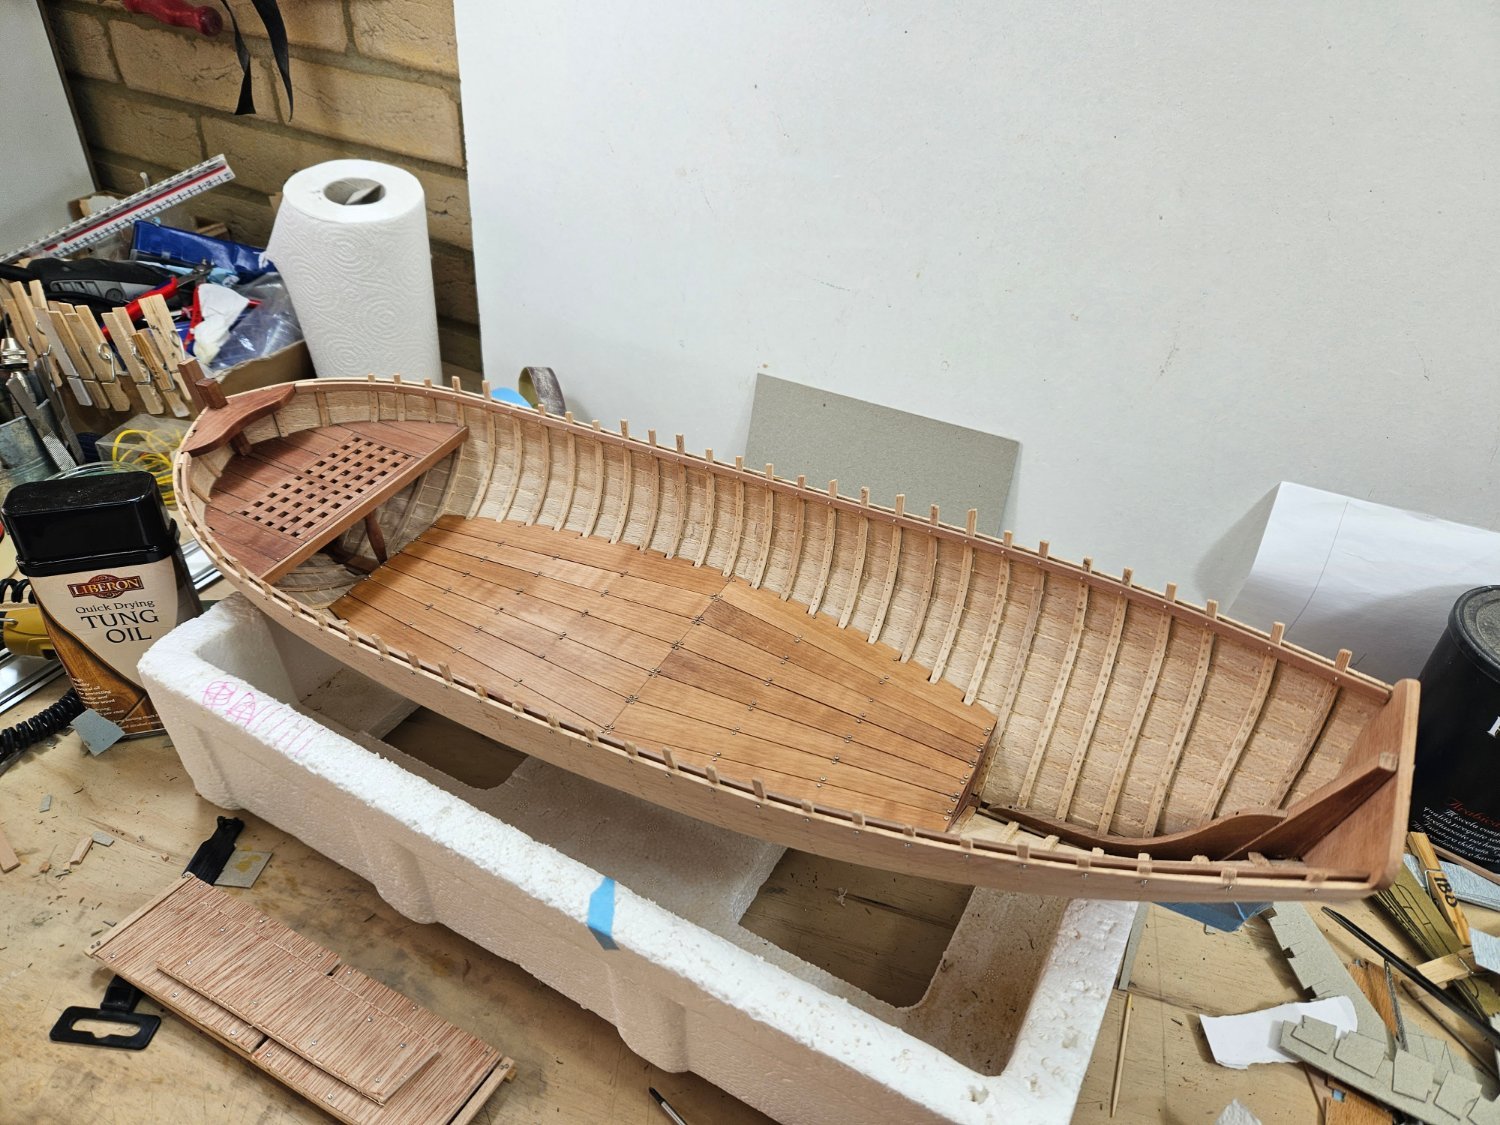
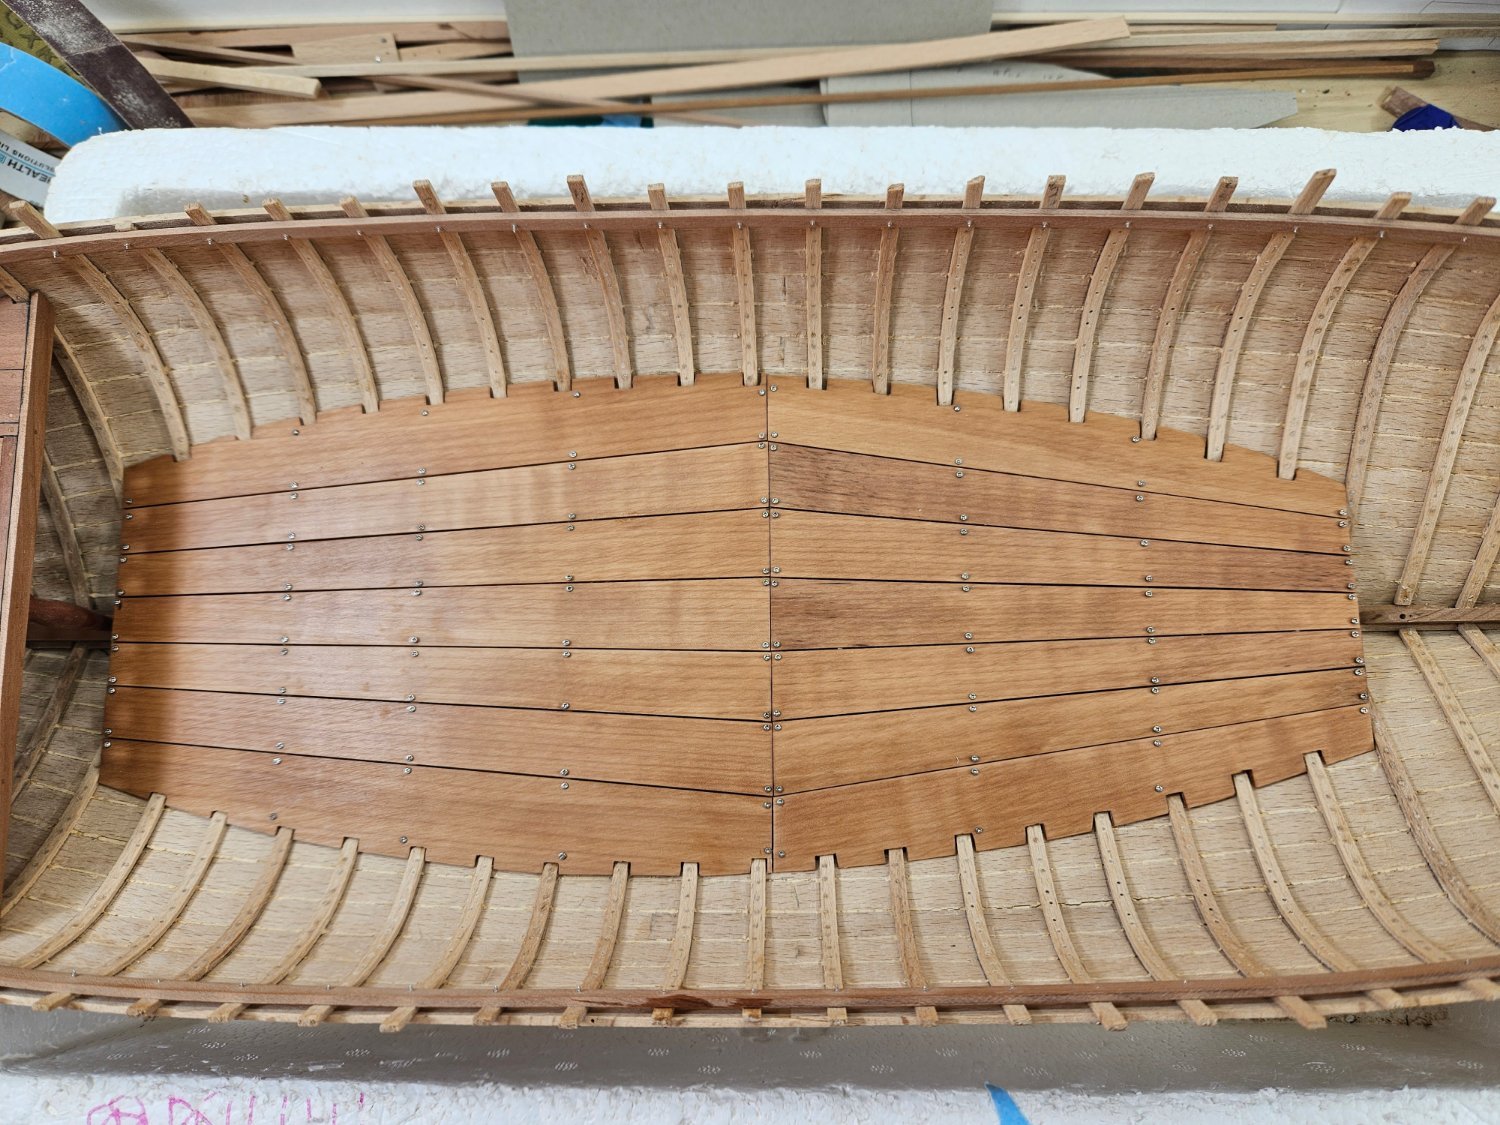
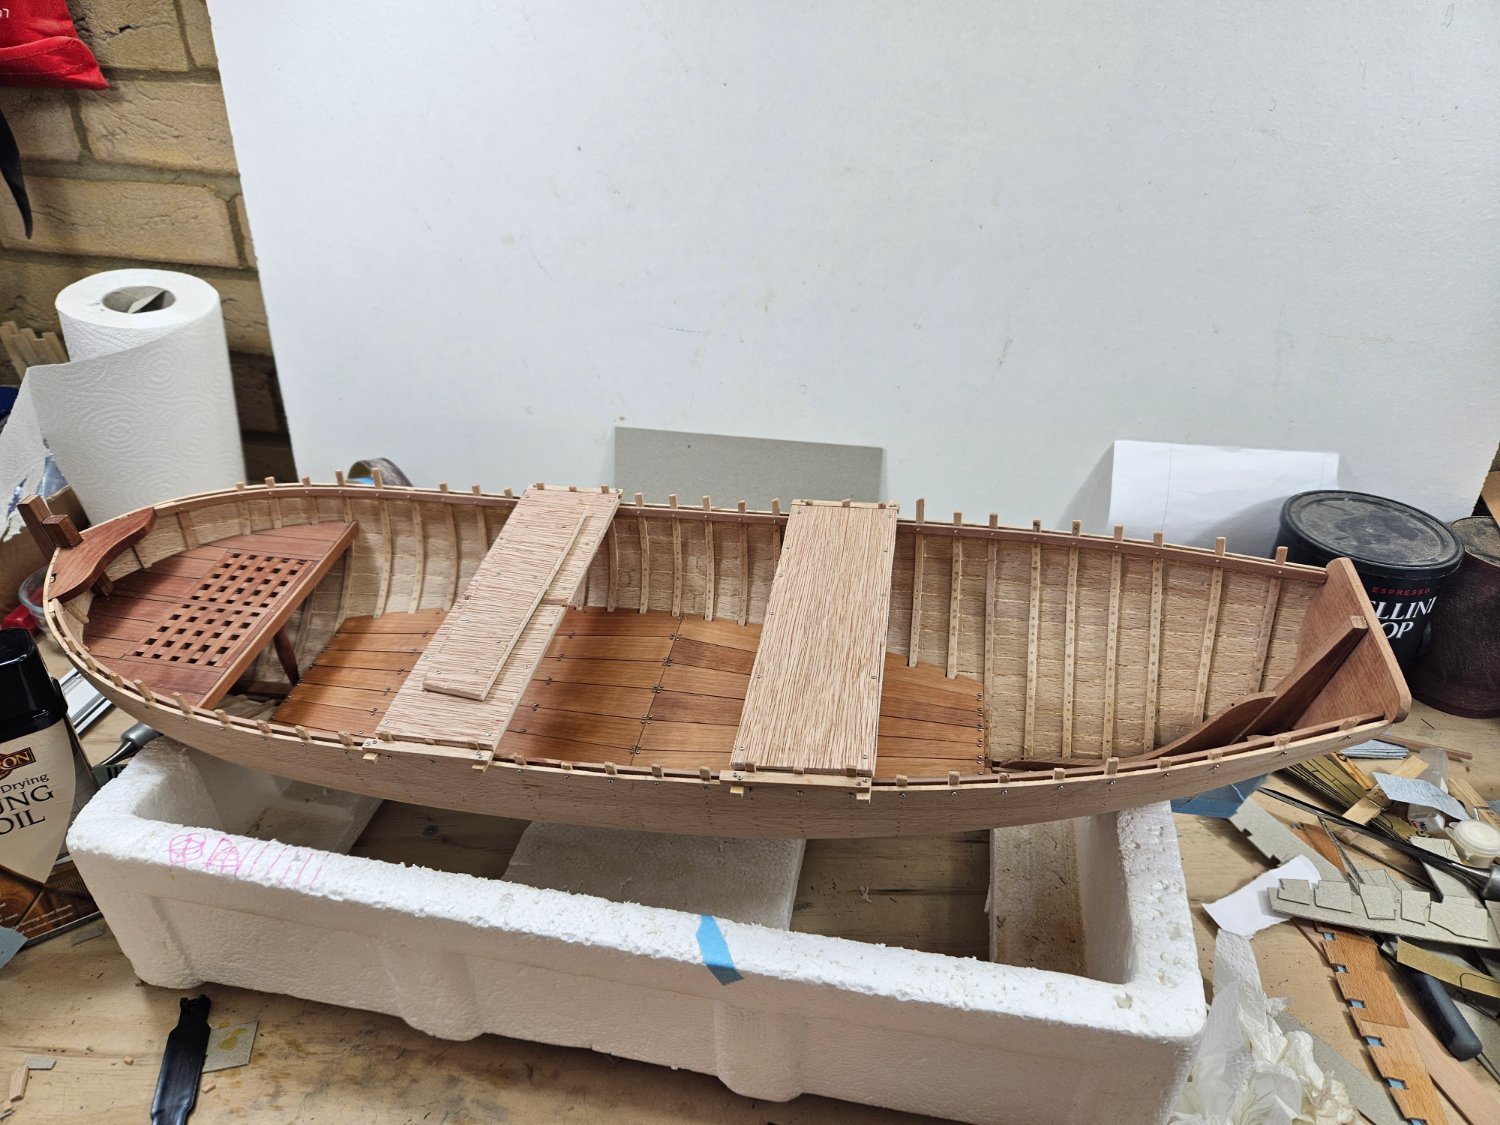
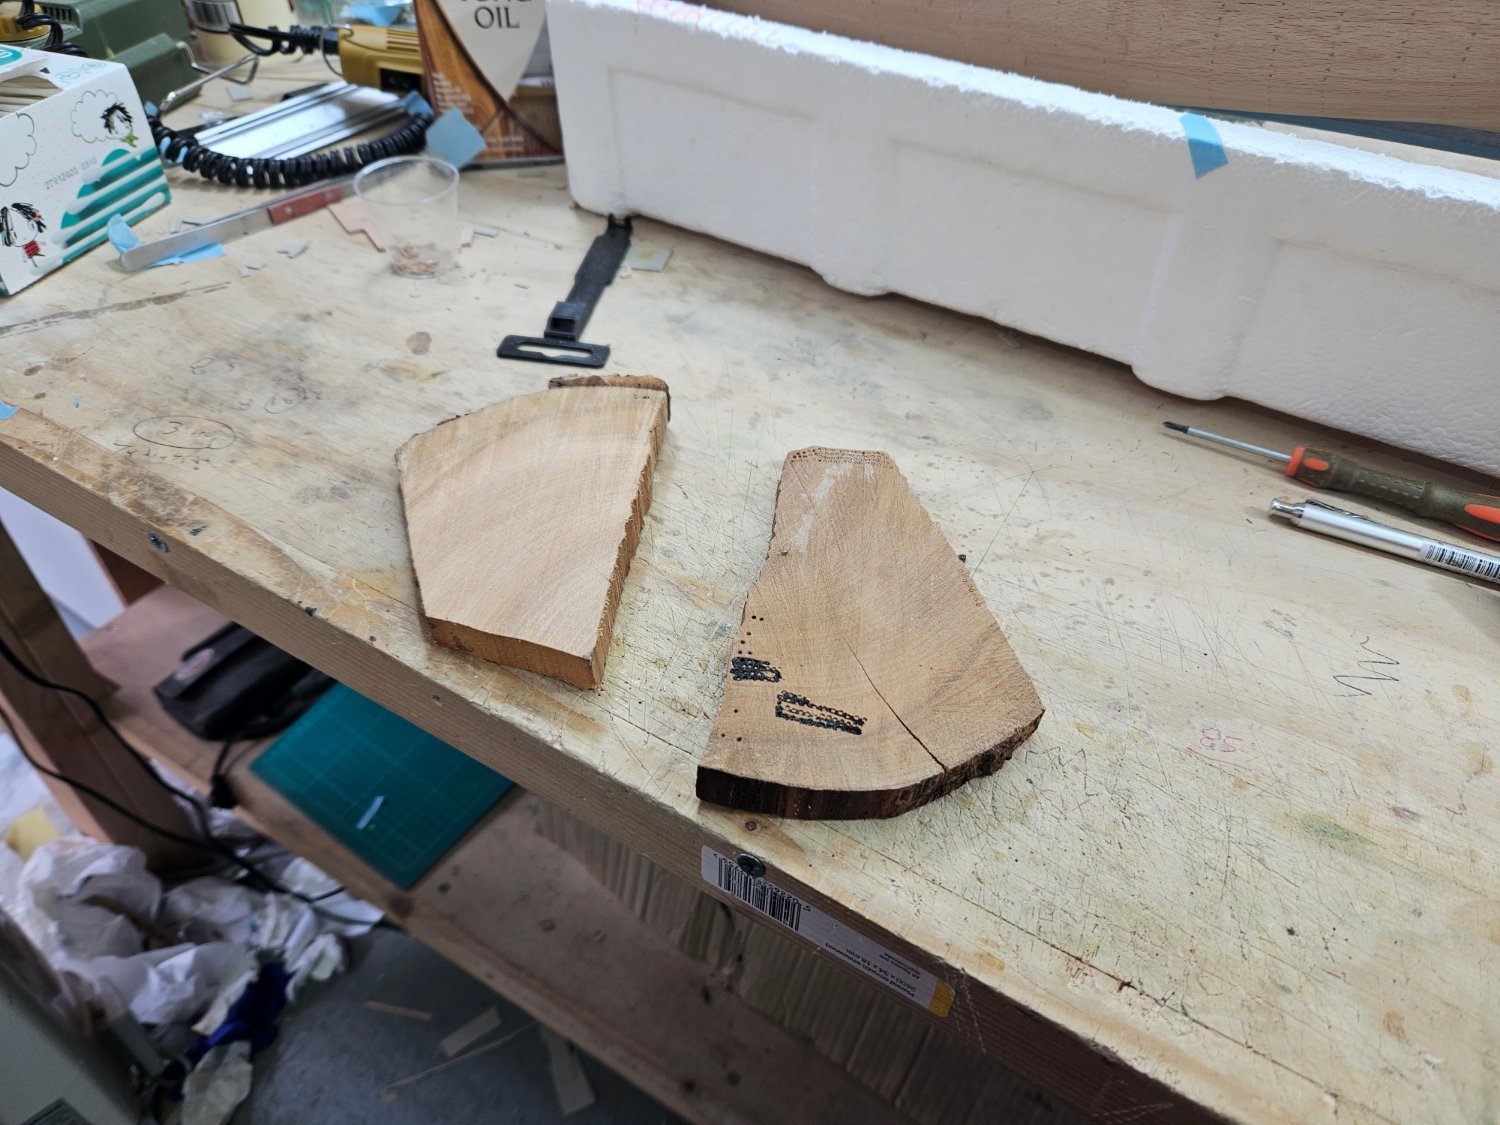
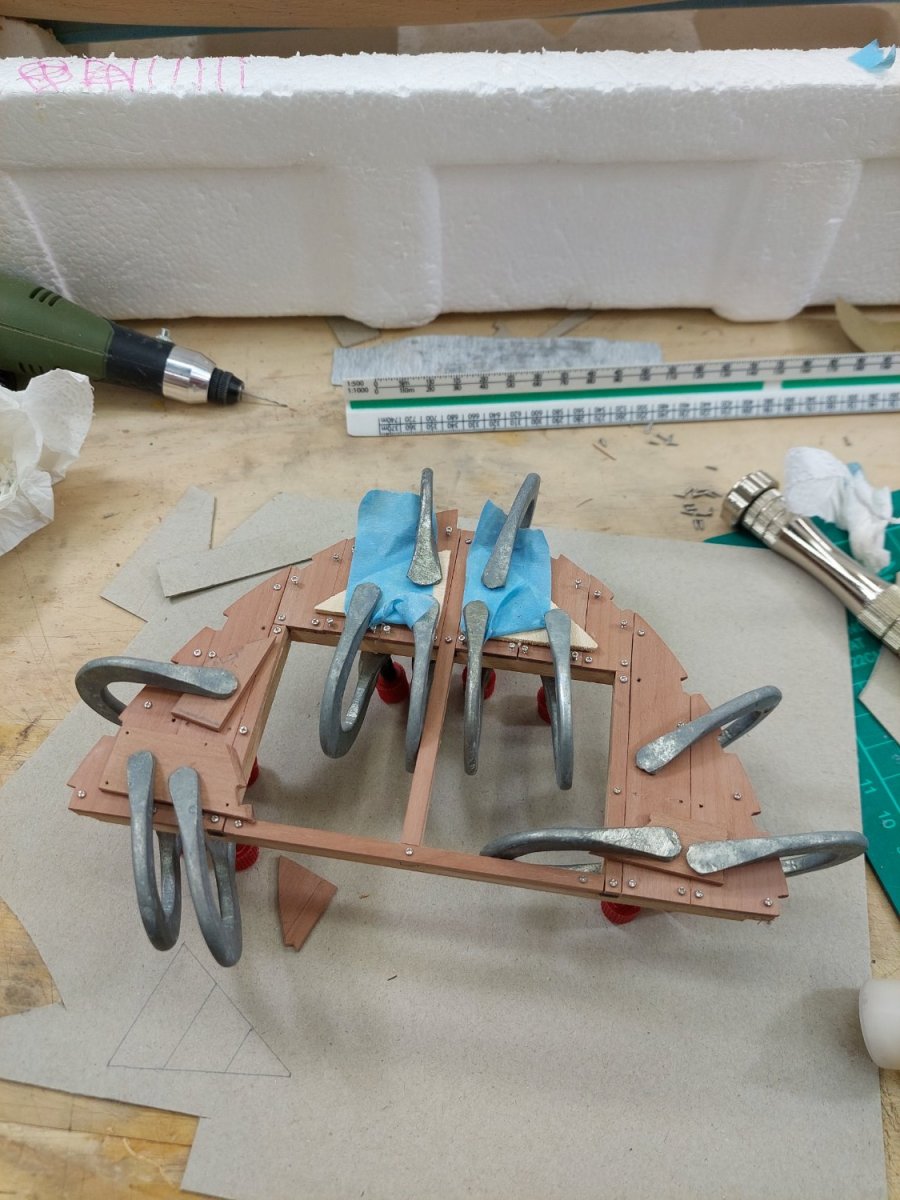
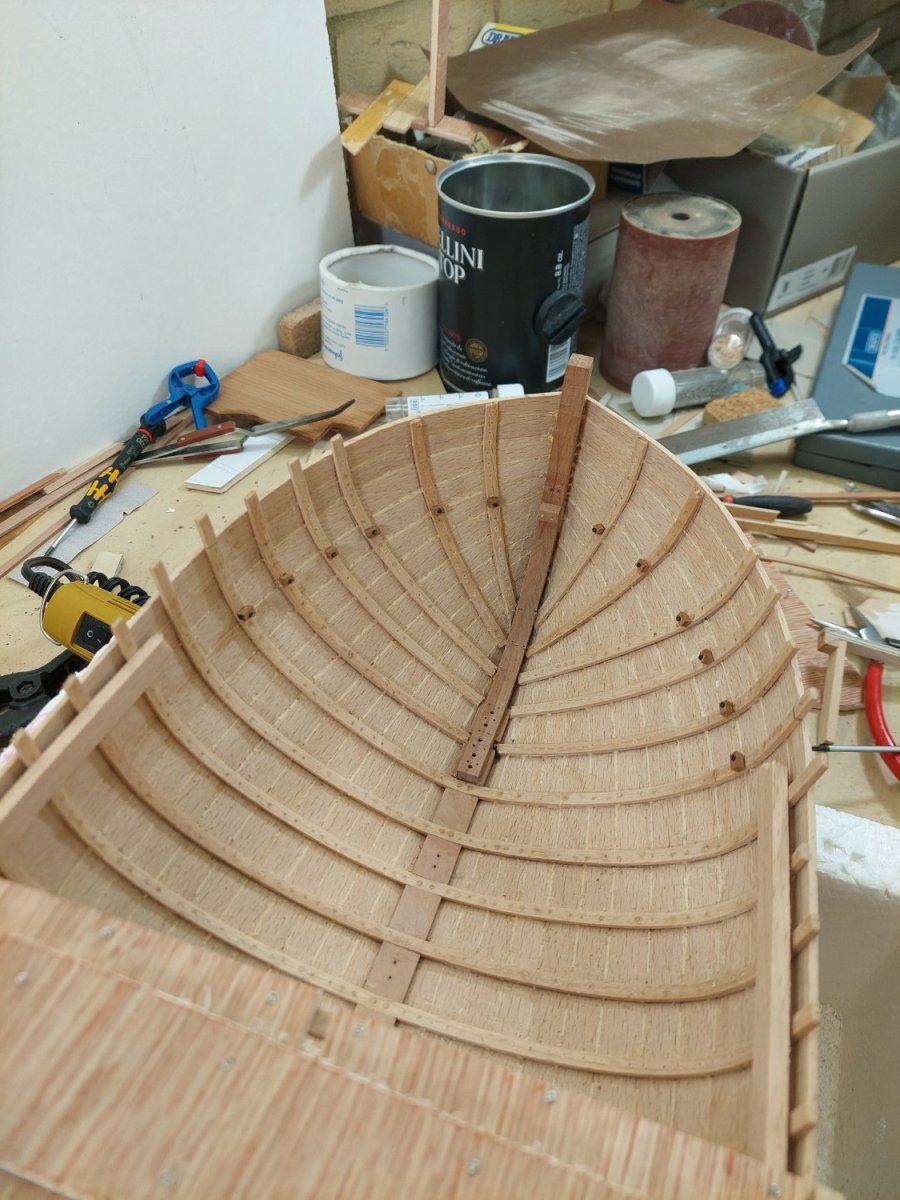
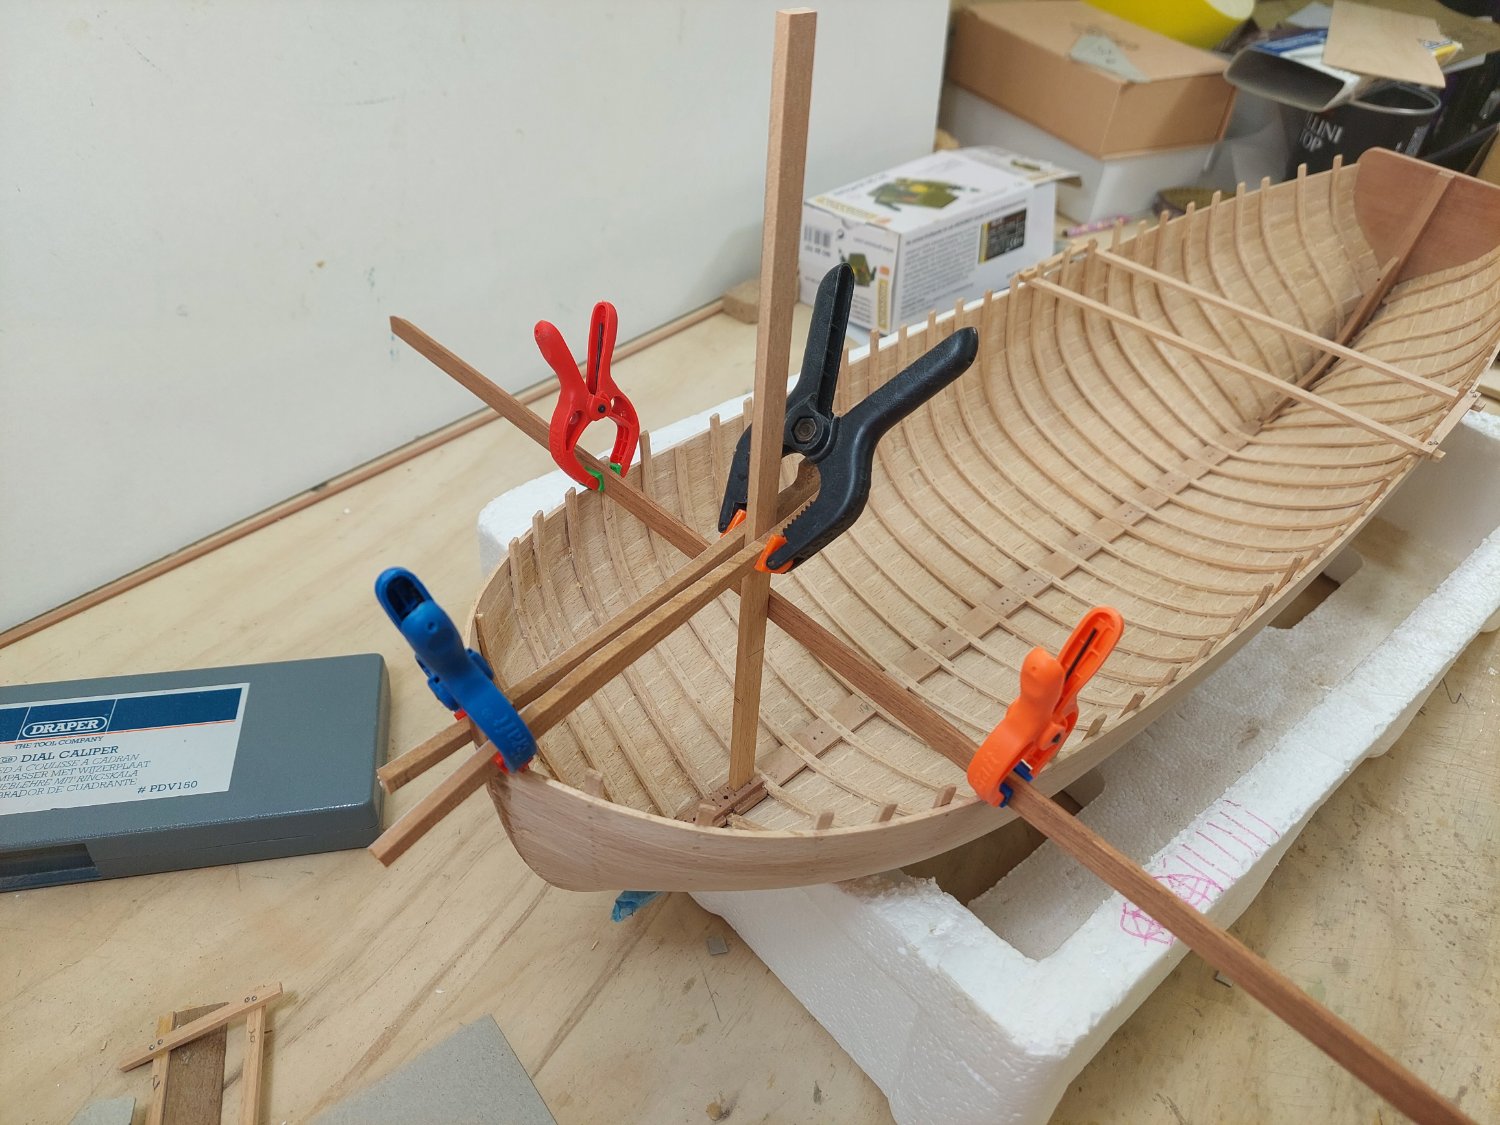
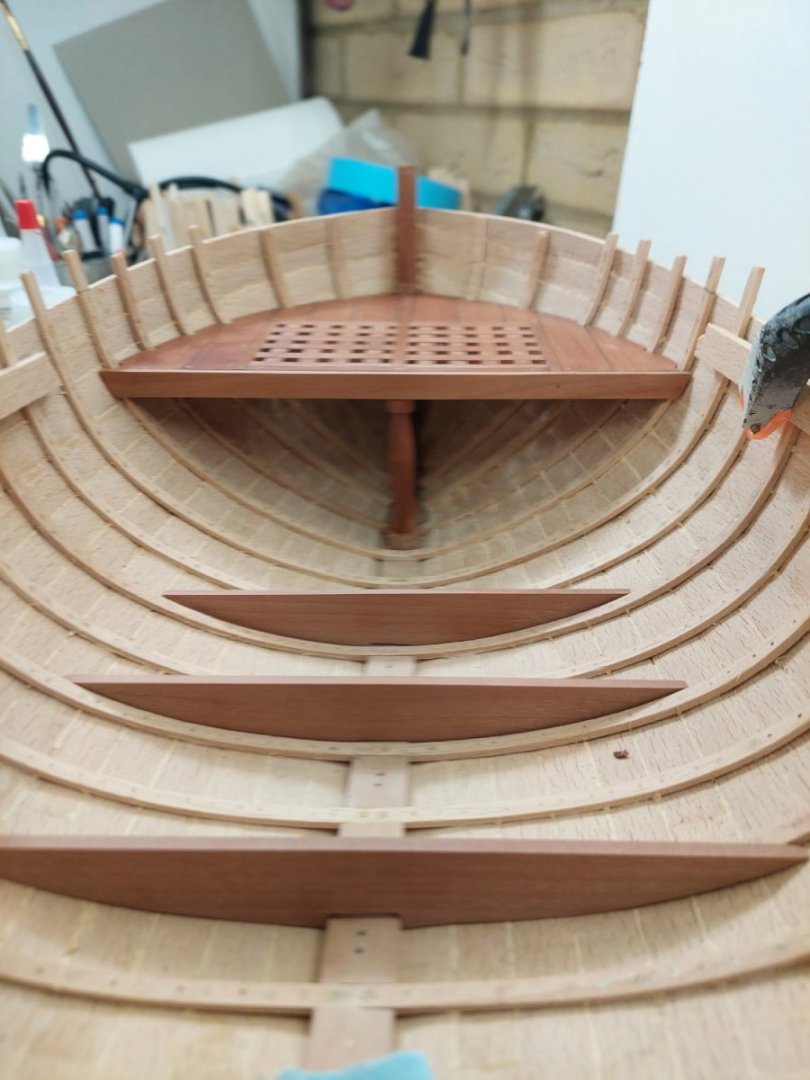
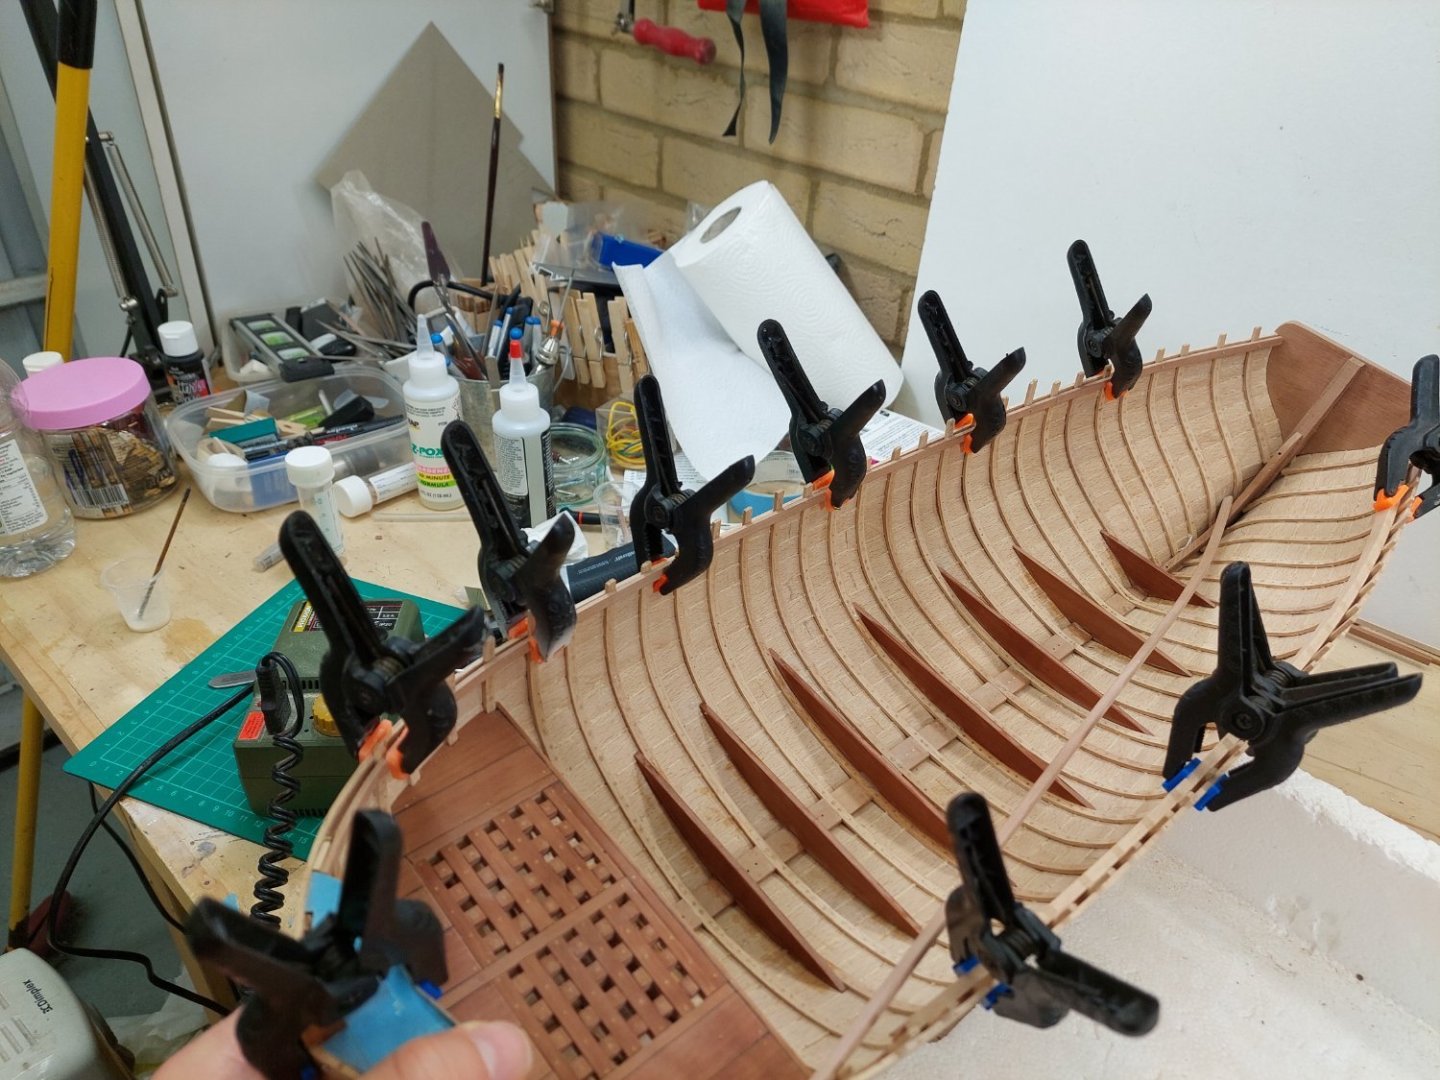
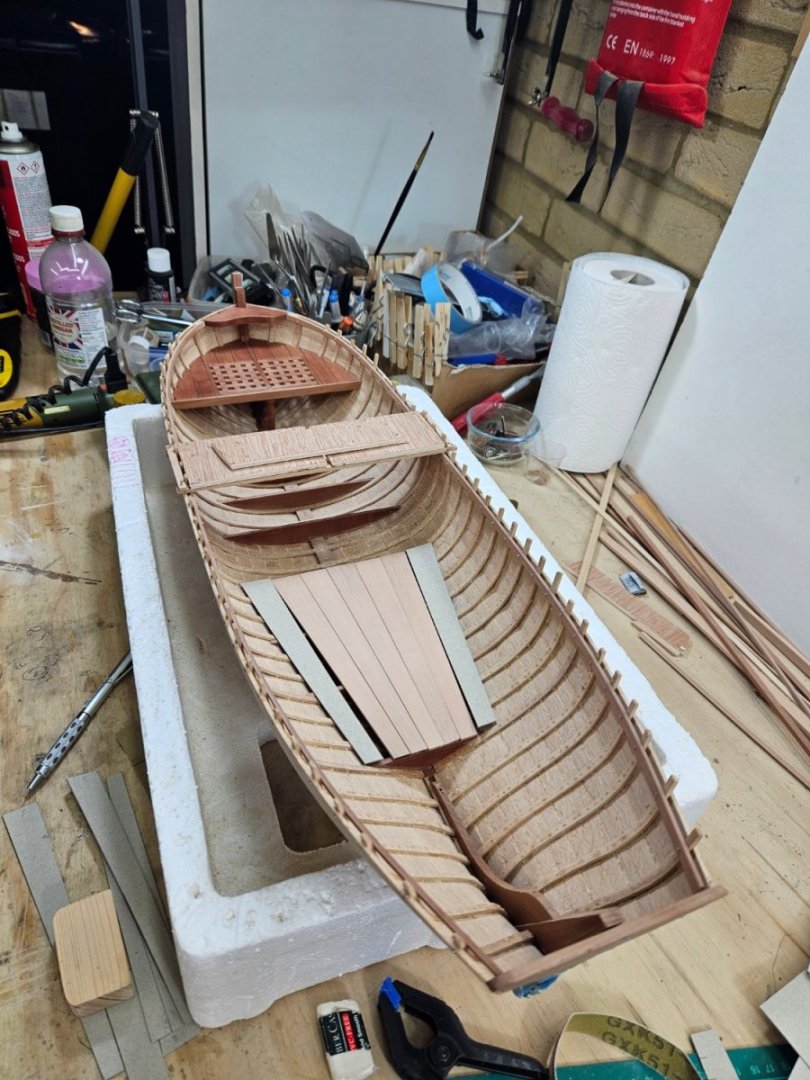
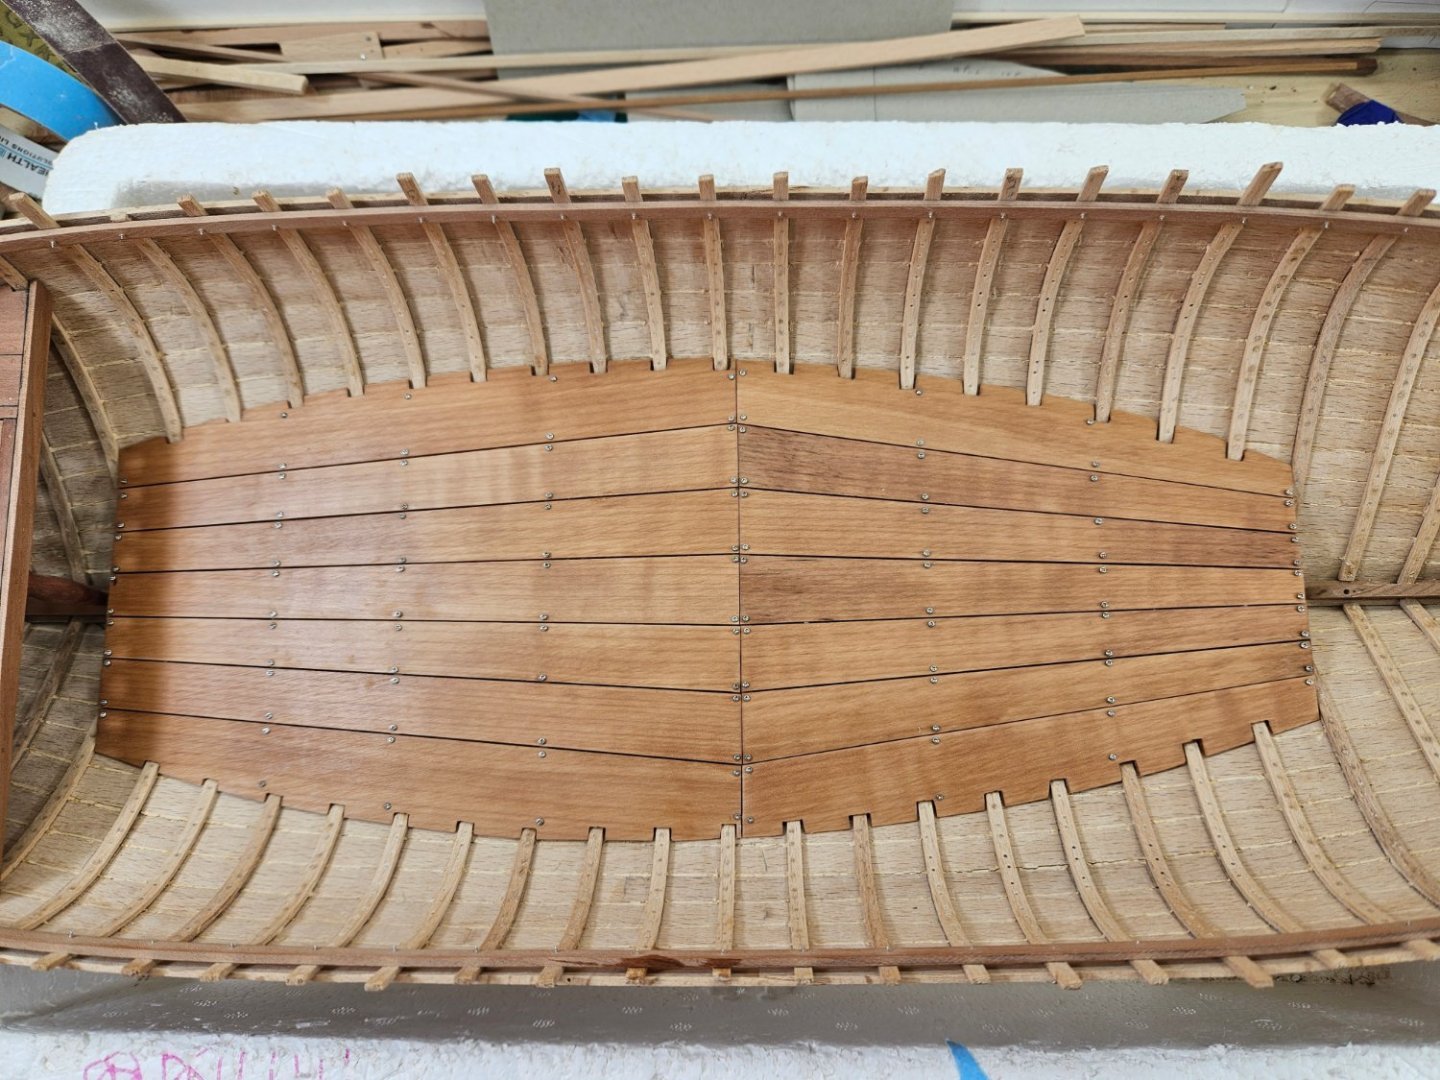
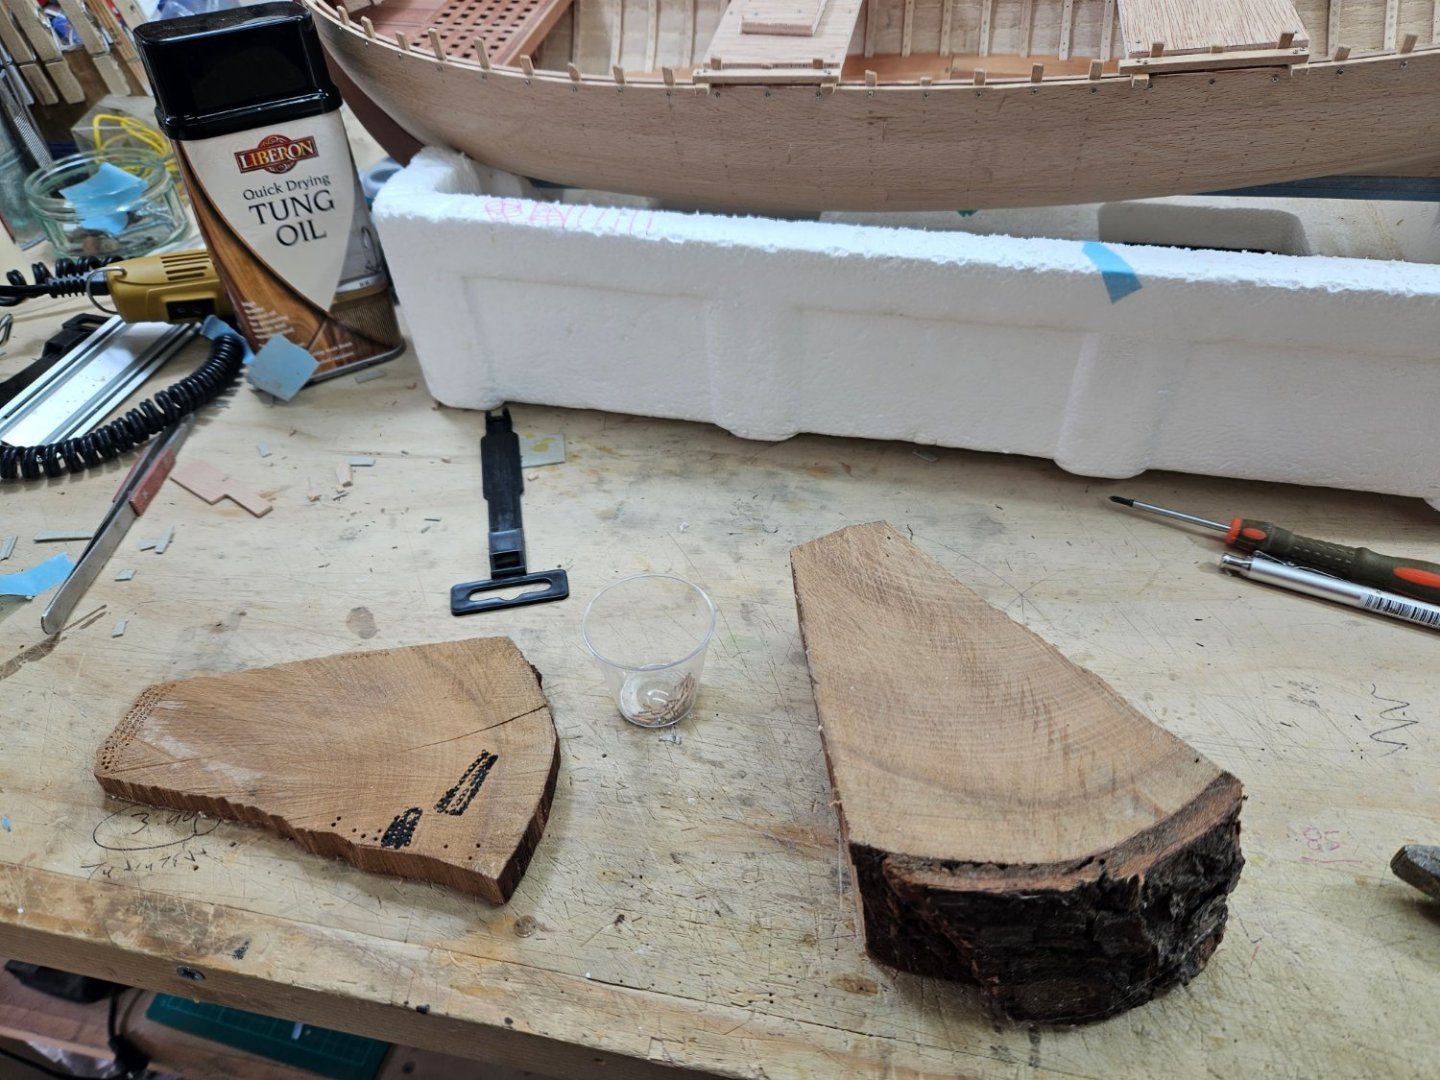
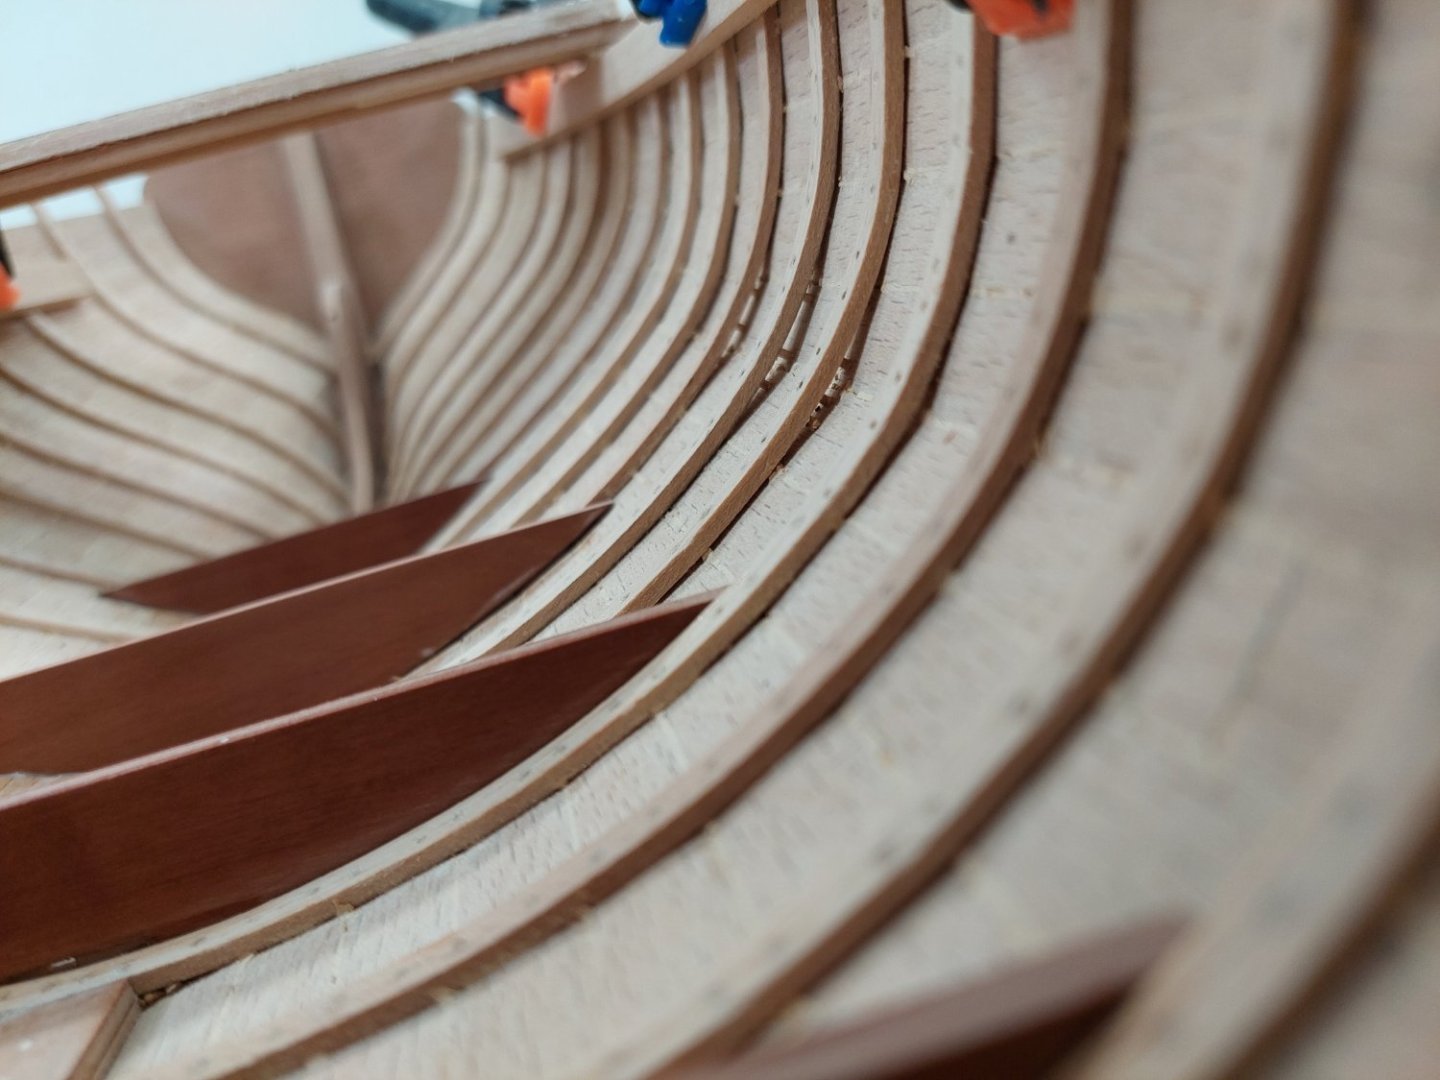
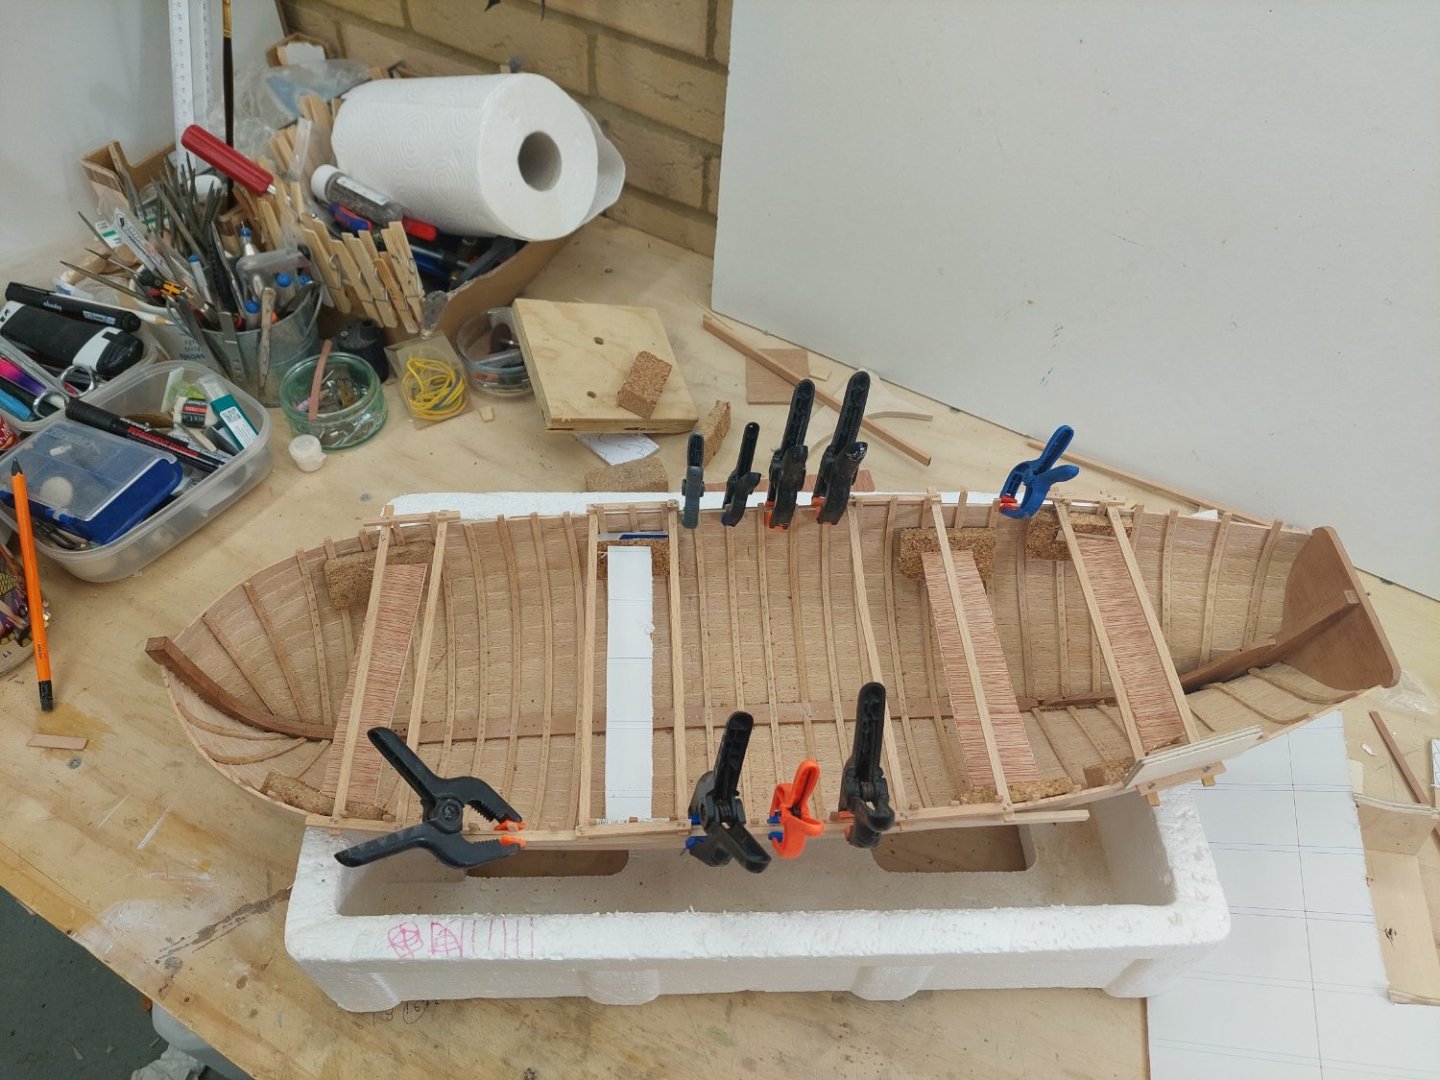
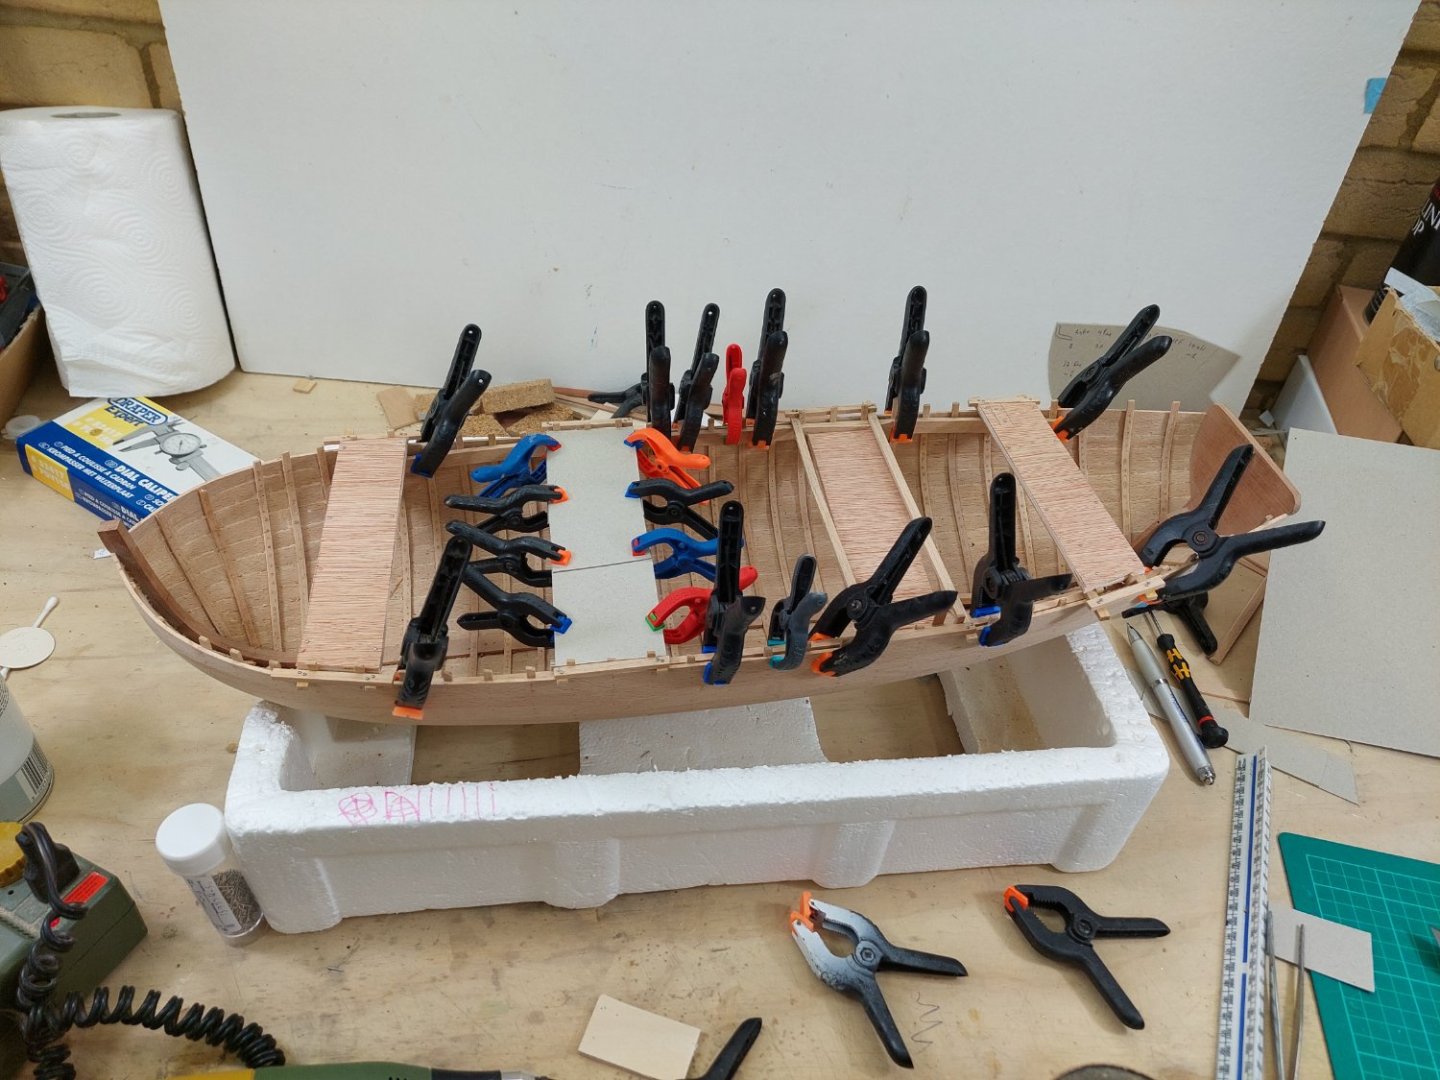
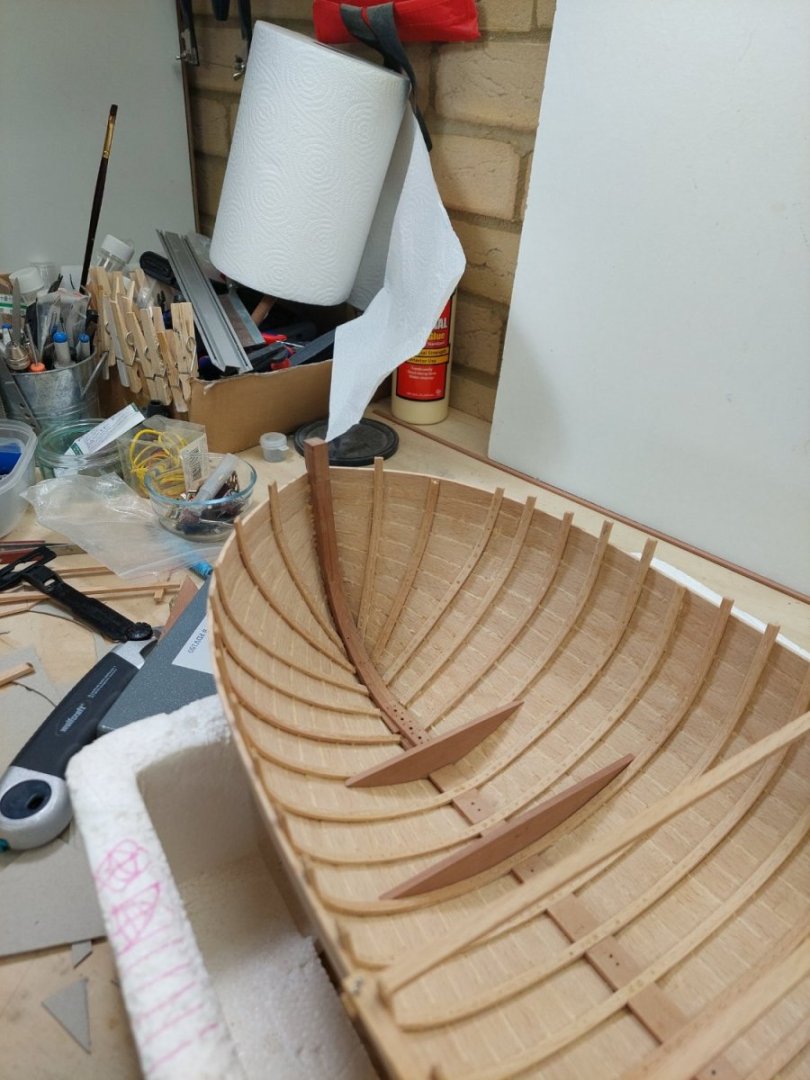
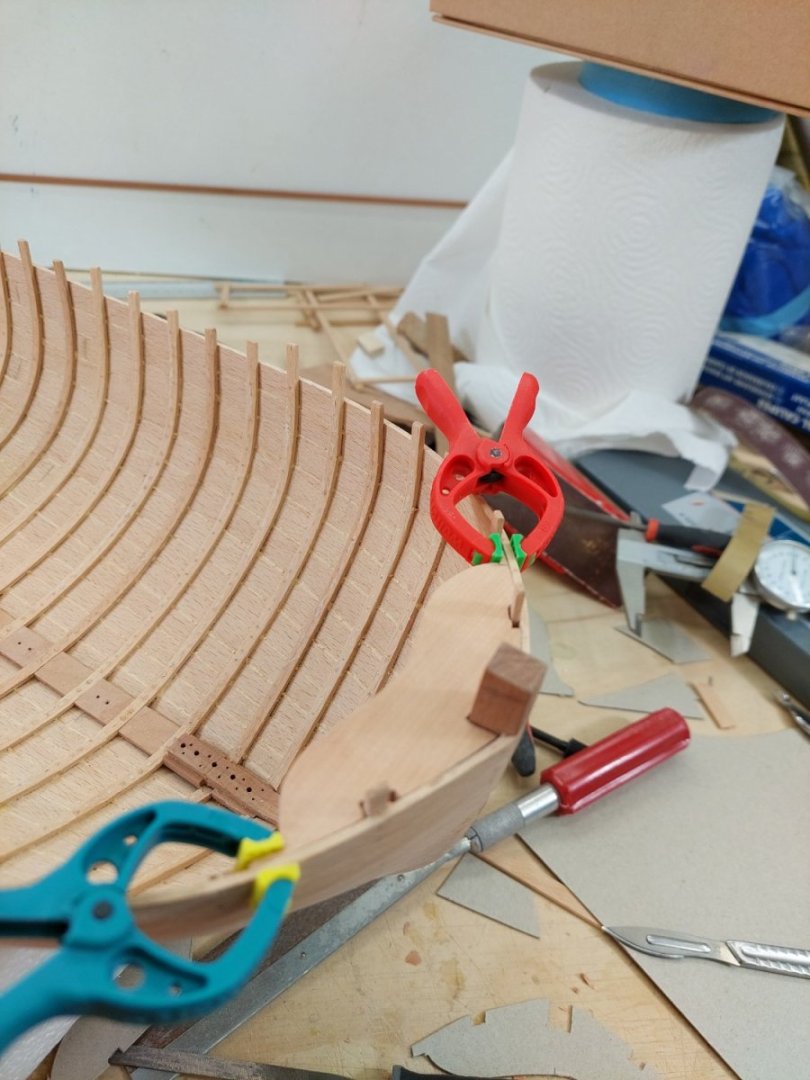
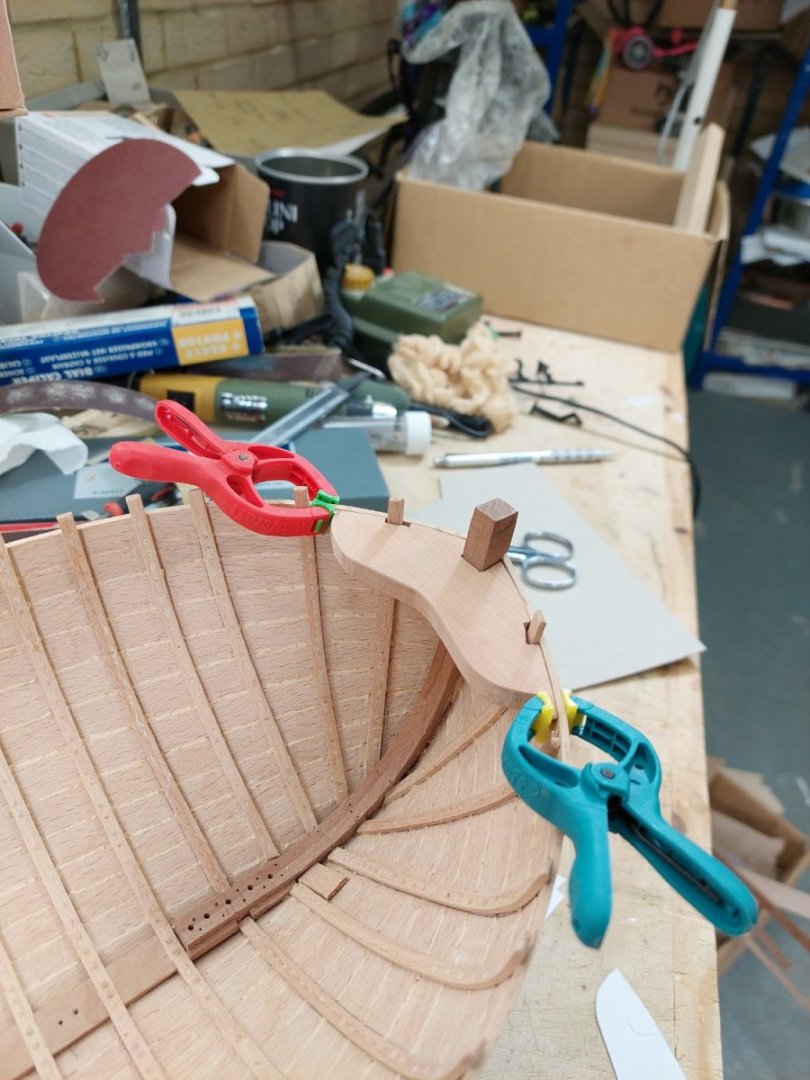
Dear friends Time for another post, some progress but also some unfortunate findings. Lets start. So, there is an urgent need for the boat to have some structural support but it needs to be built from the bottom up. So, the floor needs to be installed. I had previously cut the floor supports but I found some were off and needed adjustments or replacement. Finally they were epoxied in place and coated with Tung oil - for no reason at all really! However, It was then that I noticed a rather big issue. The planks have pulled away from the ribs, the glue in the tree nails failed - but also the pressure from the planks must have been pretty substantial. I do not think this can be fixed without disassembling the boat and in the end of the day, it does not bother me much. So on we go. Next, I did some work at the gunwales and attached the stringer and the breast hook. So far everything is screwed, later on will be replaced with tree nails. Next, it was time for the false stem to be installed. Again I had to make adjustments but I got a good fit. I used thickened epoxy and it came out pretty good. Especially the joint with the planking, which in the past had caused me headache, came out also fine. Ok, so far so good. Next it was the floor boards. This took a bit of work and some head scratching but actually came out better than I hoped. I am not sure if it is historically accurate but we do need a floor to walk on - so here it is. And with some Tung oil on All the screws need to be replaced with tree nails, so time to make a few hundred. I will be using the last of the cherry wood I saved from the fire wood pile 10 years ago. Cutting one more slice was difficult, this wood is very hard This wood is very dry and needs to get some moisture before we can drill the nails out. The slices are now submerged in water. Till next time Vaddoc


- 232 replies
-
- 18
-

-

-
Acrylic paint is easily damaged. Enamel paint is much harder but also can get damaged. I think the only part of the boat you should seriously think protecting is the hull. It will certainly get scratched during the rest of the build or during its life after. I use varnish, either water based or enamel. Water based is easier to use but enamel is overall harder and better - I think I ll go back to enamels for the boats I am currently building. I ve tried the Valejo polyurethane varnish previously, water based, seemed to be ok. Humbrol enamel varnishes are also very good, or at least this has been my experience. Couple of things to consider 1. Spray cans can be temperamental and spray inconsistent or thick coats. Be careful 2. Satin finishes need good stirring to evenly distribute the media within. Matt varnishes are more difficult, they need some care to avoid inconsistent results. 3. Basically practice and test your finish on scrap wood, NOT the model! Seriously, you do not want to be sanding the hull down if something goes wrong. I d definitely put something over the hull.
-
I d say just buy the thinner, same brand as your paint. The cost is insignificant all things considered and you know you get the correct product. If the paint job goes wrong it is usually a much bigger job to fix things. Certainly for brush painting with Valejo, I feel it is a must to buy their thinners and retarders.
-
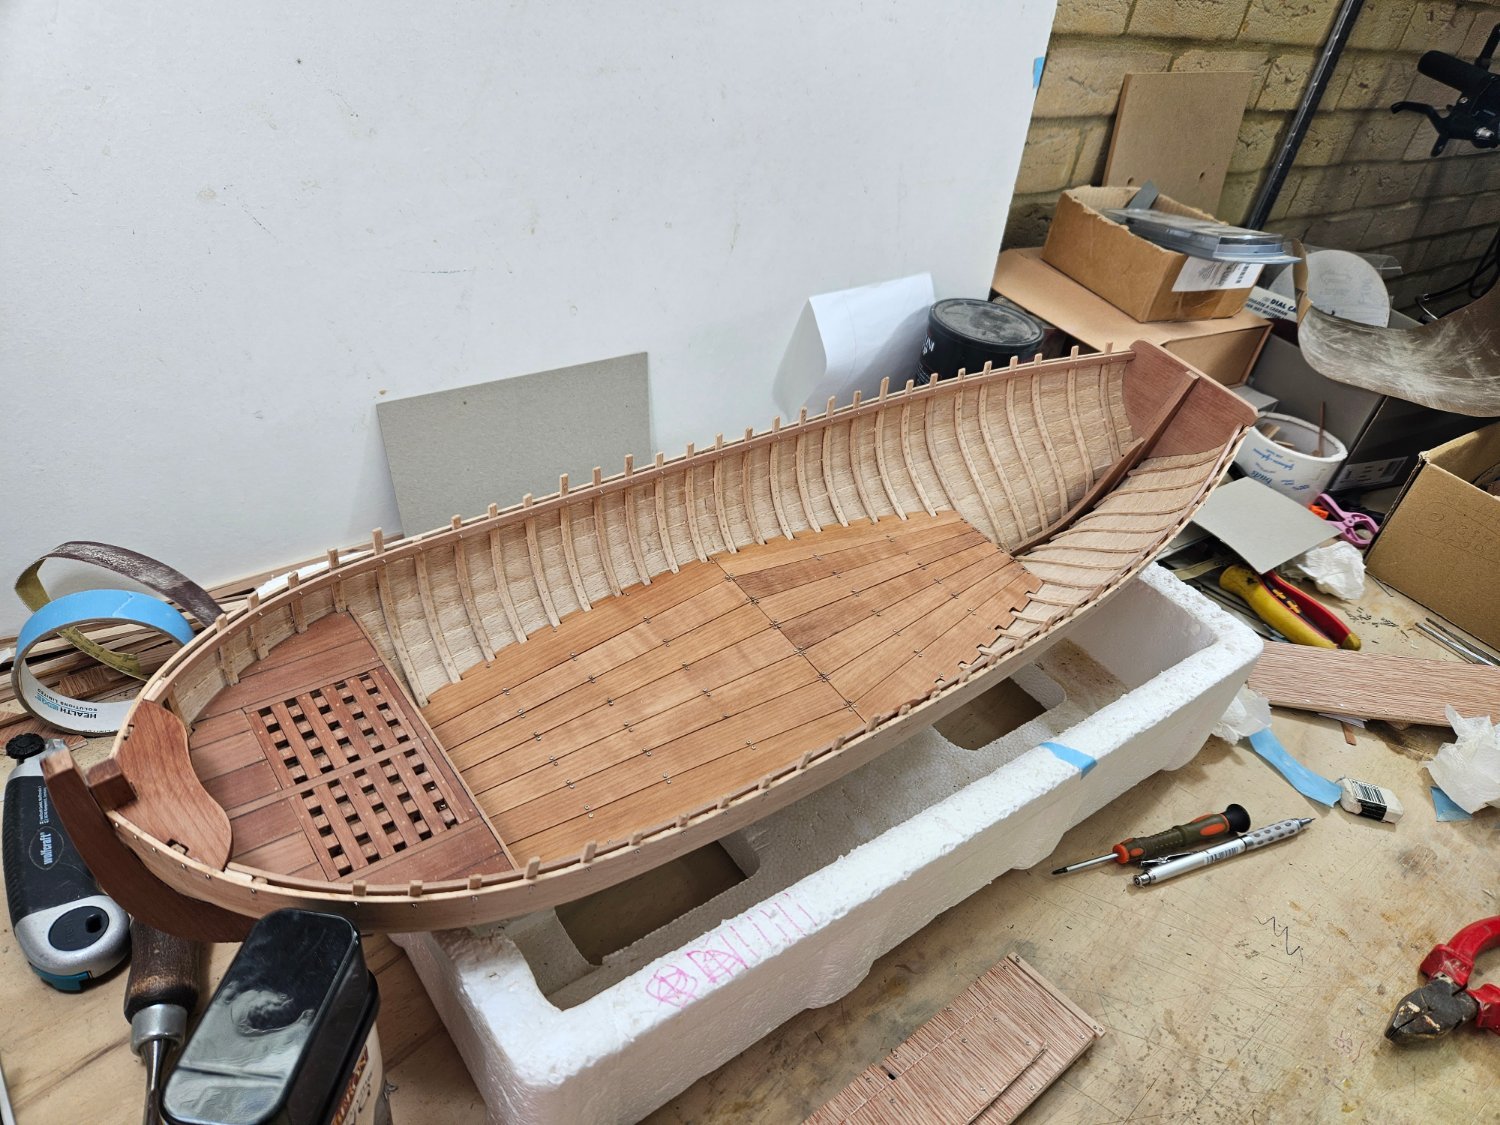
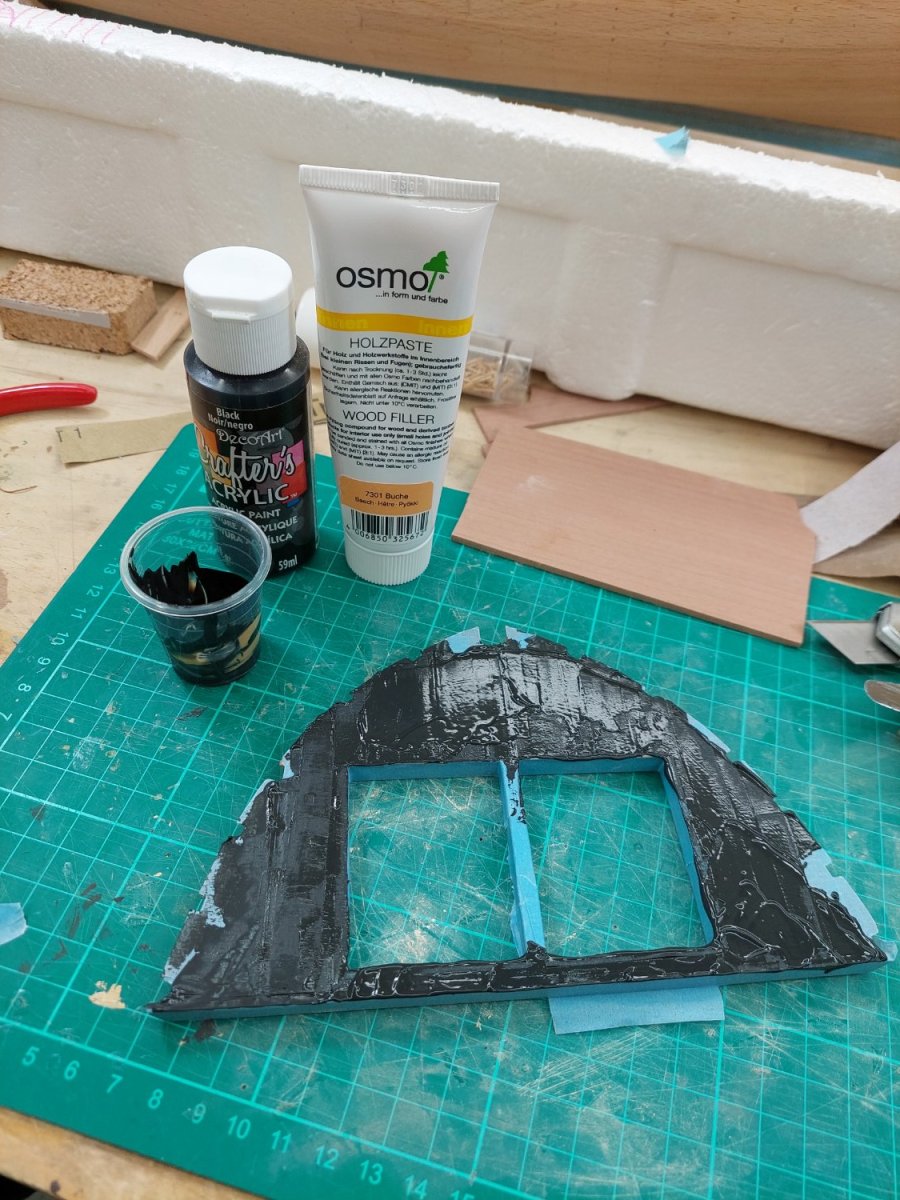
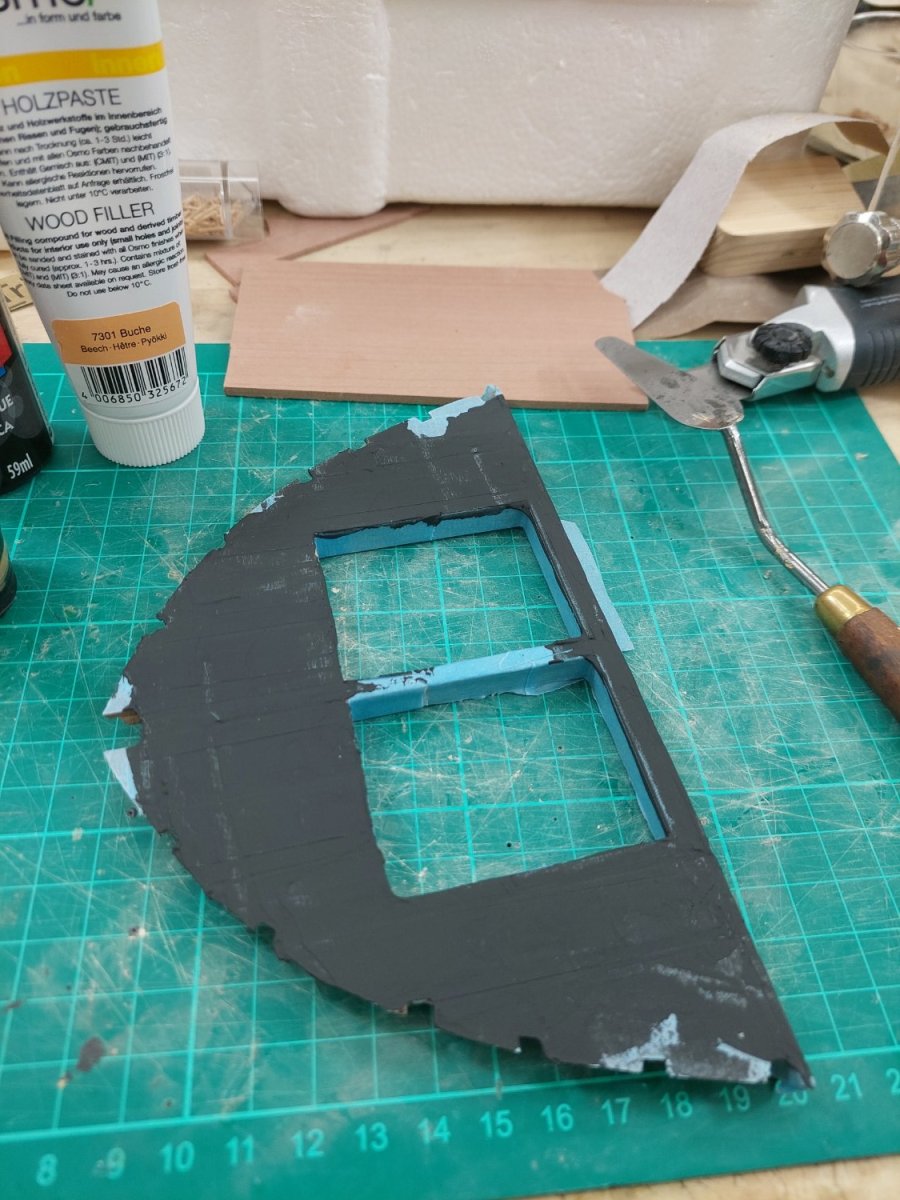
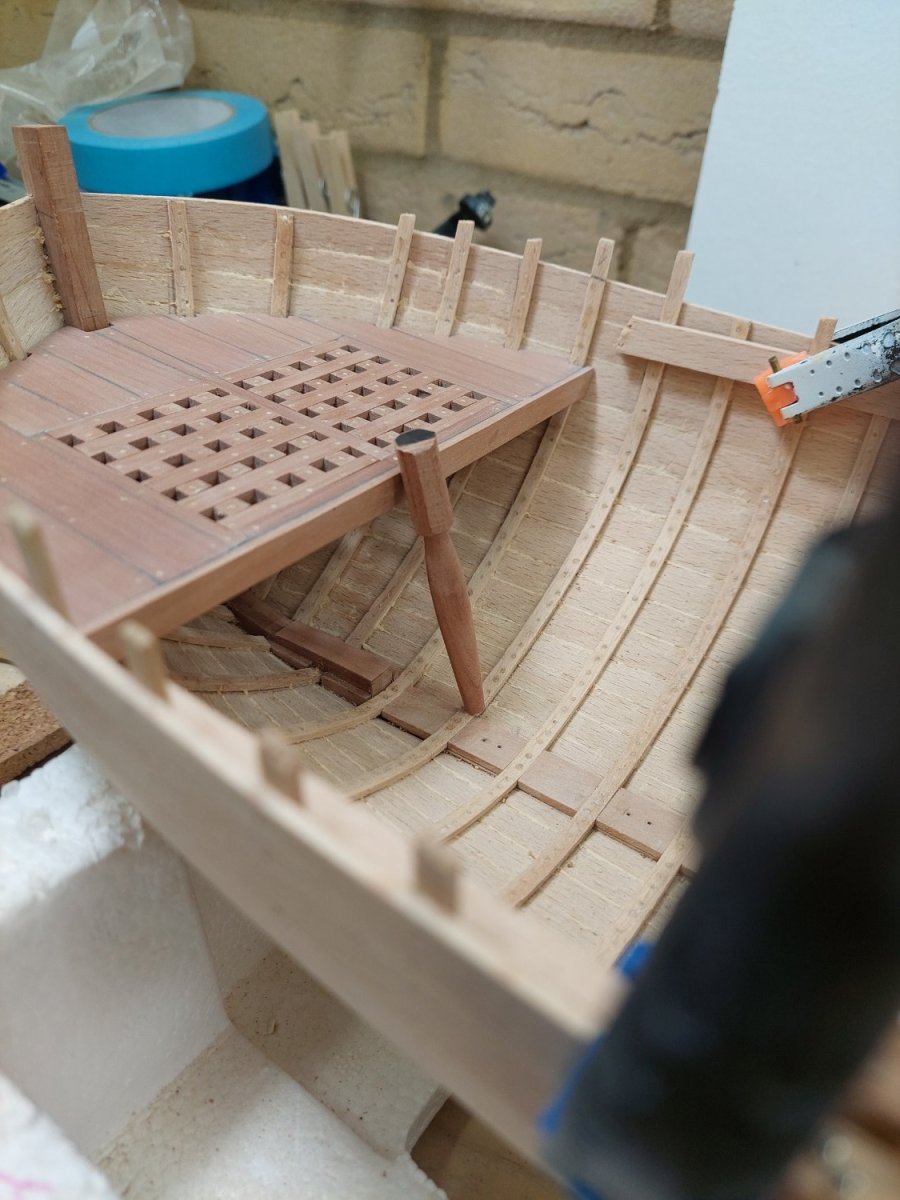
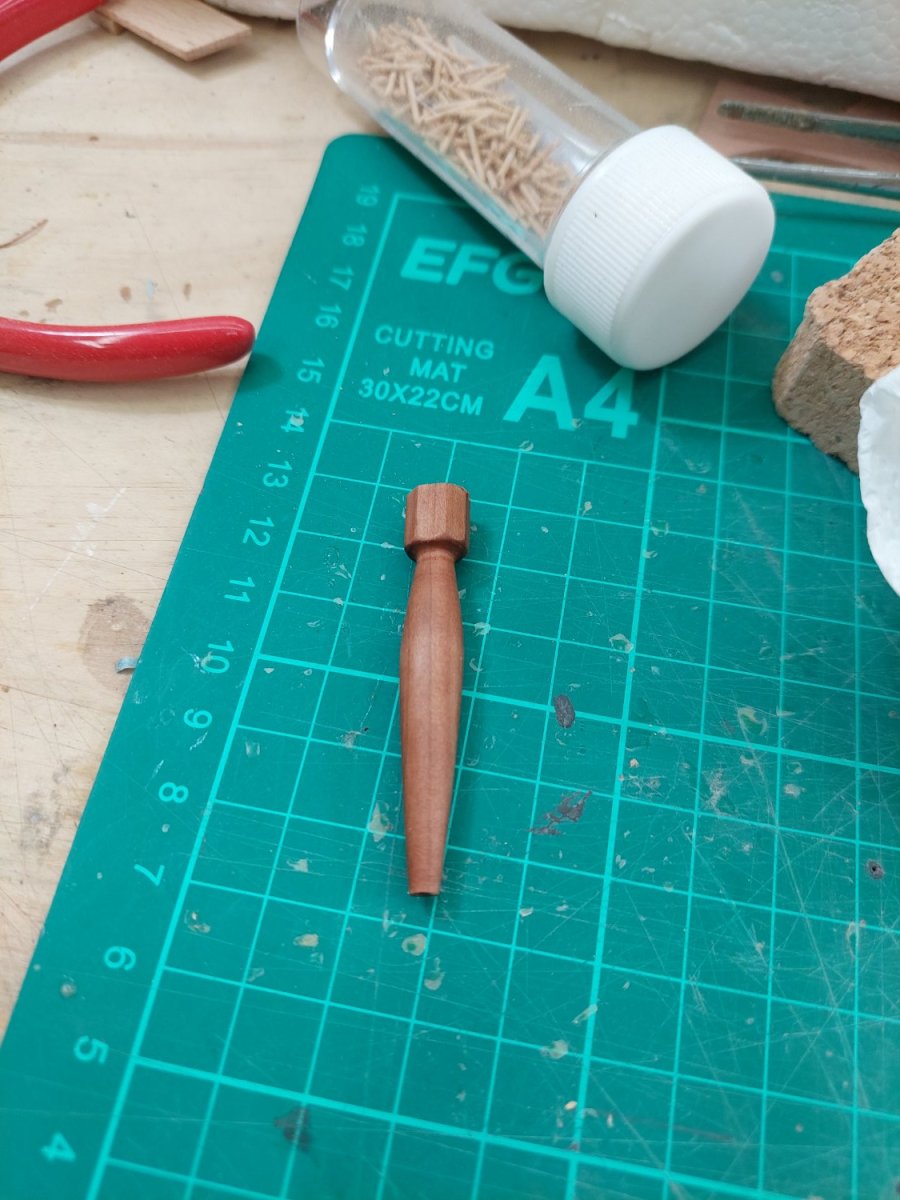
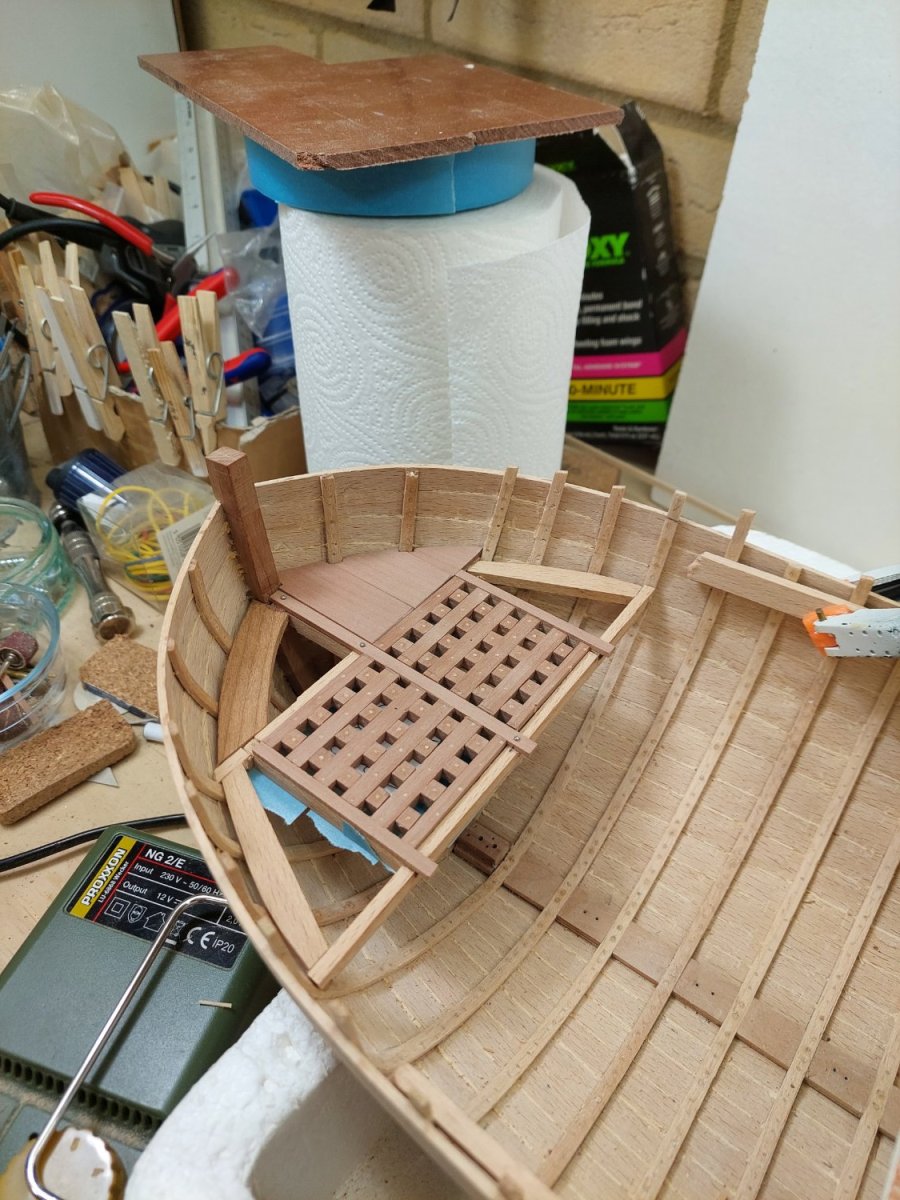
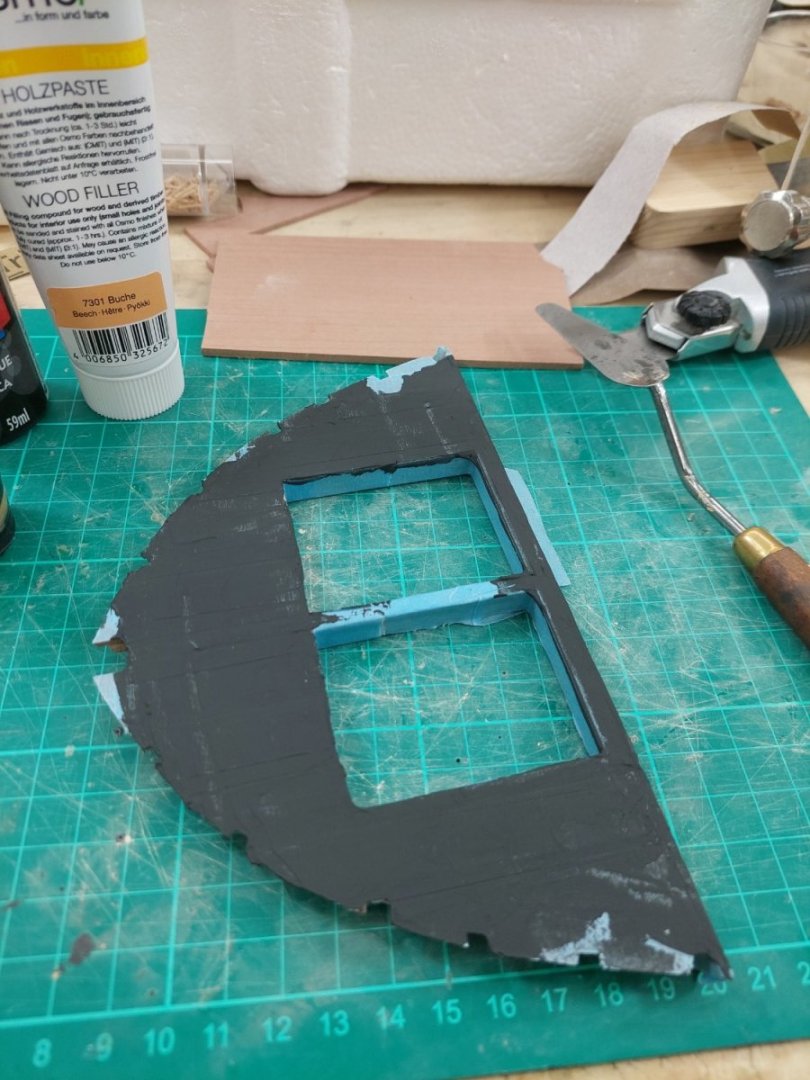
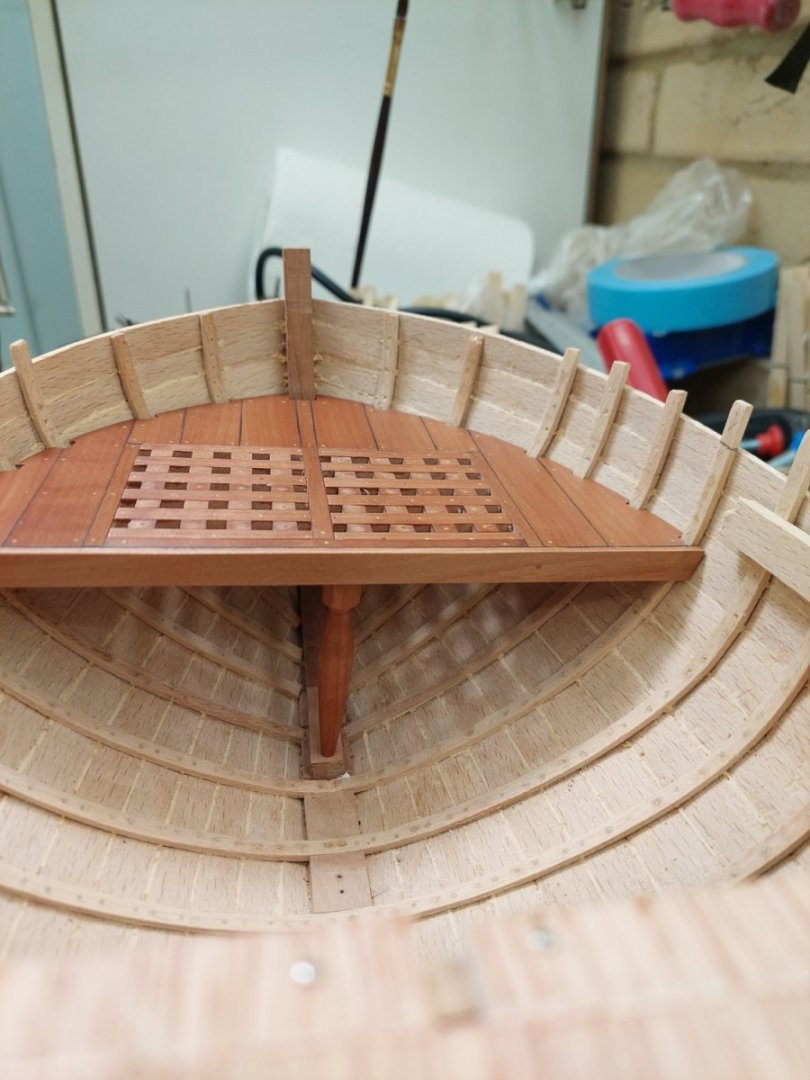
Some progress and at last, a couple of nice photos to post! I finished the pieces for the deck screwed things together, replaced with wooden nails, add reinforcing pieces underneath, glued everything together and sanded to 400 grit. Then I had to decide whether to have black or light caulking. Admiral said black, so black it is! I masked the pieces, mixed black acrylic paint with Osmo filler and splashed it on. Then removed tape and sanded everything smooth. The filler becomes light grey but with Tung oil will go ack to black. Then I secured the grating with epoxy thickened with gypsum. I also made a leg to support the deck using a drill sanding against the disc sander - very fast results. It does not look too bad! When I have time I ll glue everything together and move on Regards Vaddoc


- 232 replies
-
- 13
-
-
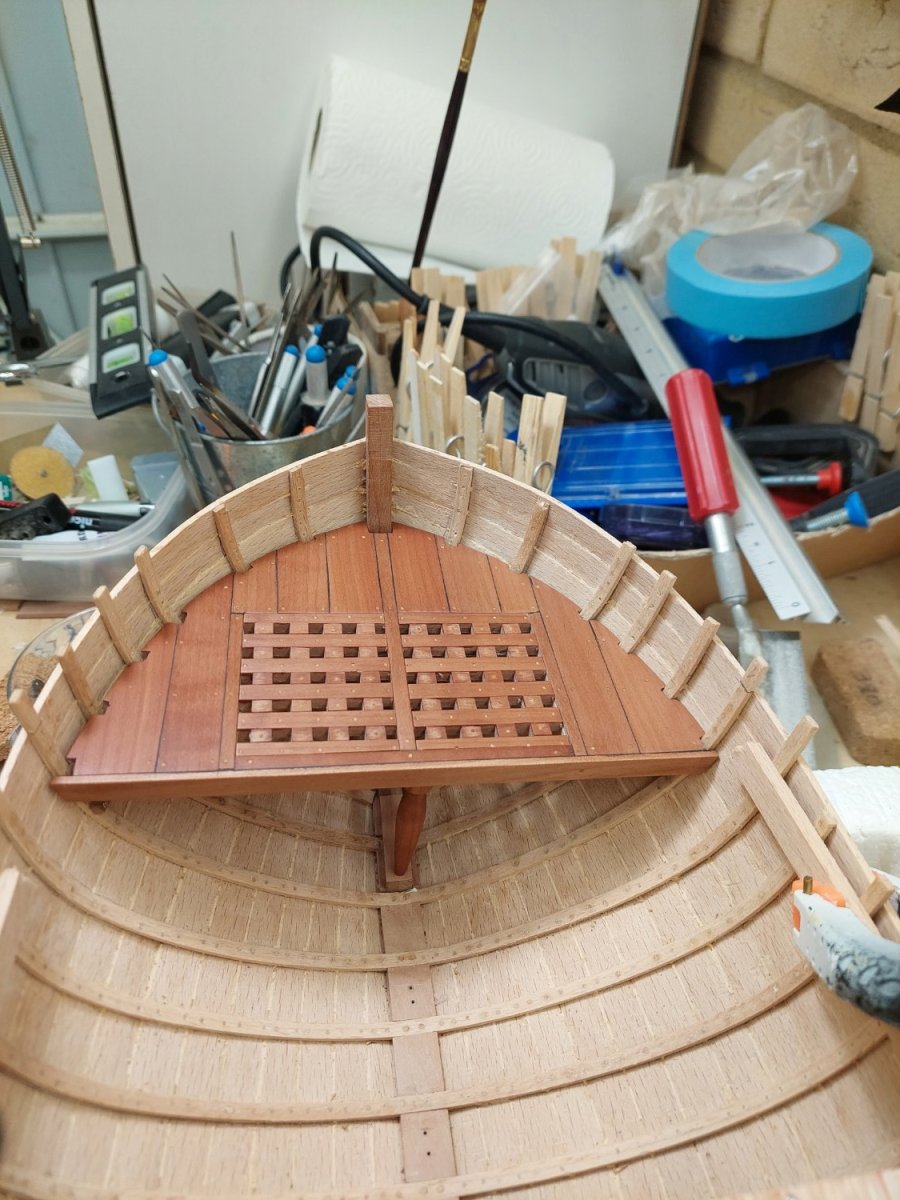
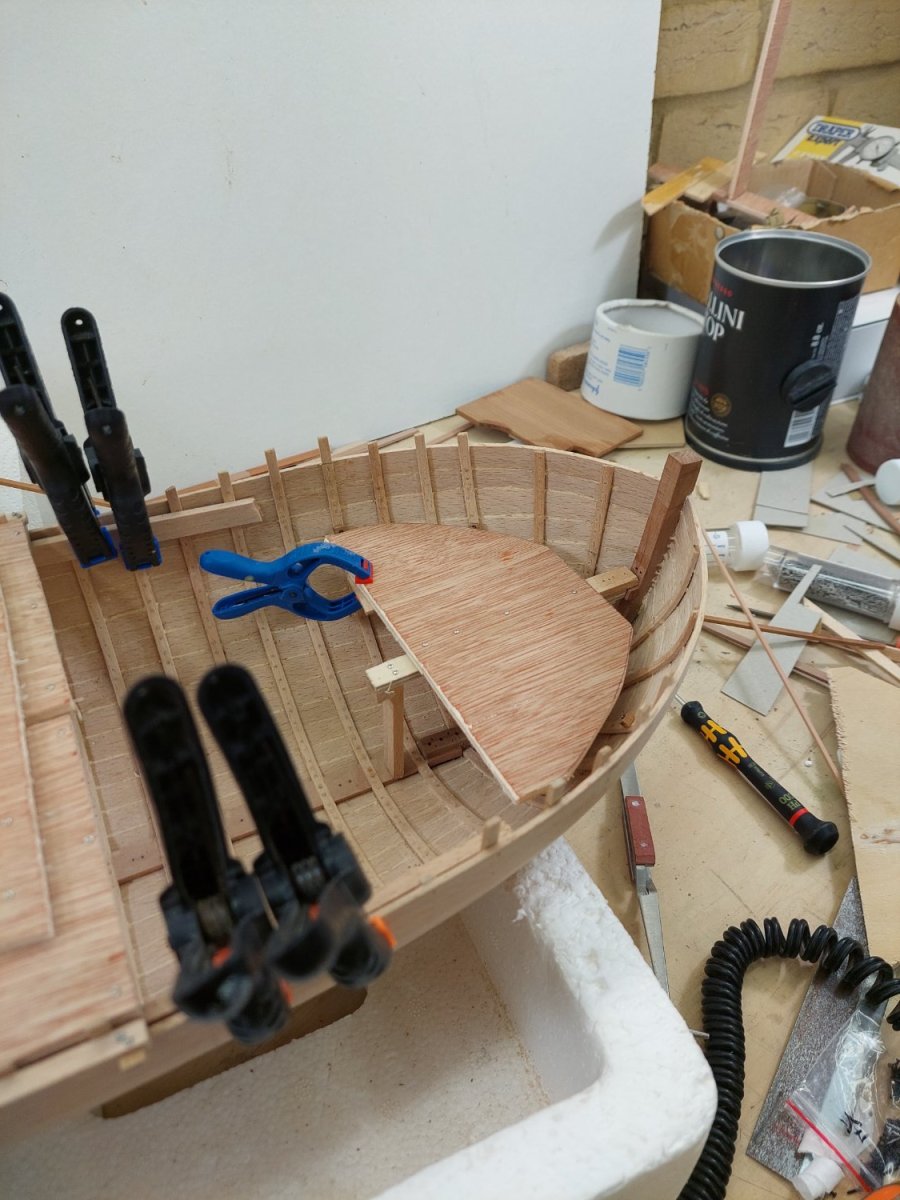
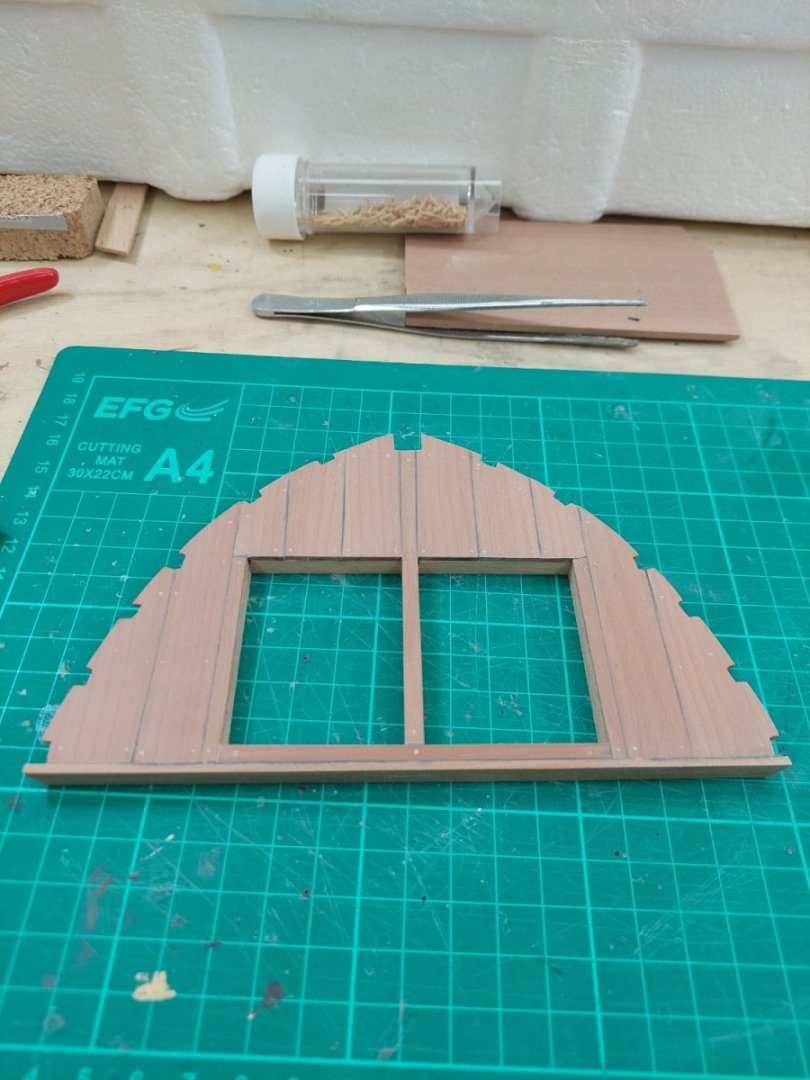
It would be very worthwhile but British homes are tiny and the admiral would not have it... Hakan, I ended up feeling I simply had not enough brain cells for the task! So glad finally it is done. Good to be back Gary. The mould has disappeared now that the garage has been heating up. The shape incident is interesting. I think initially the ribs were pushing the planks outwards but as slowly they started accepting their new shape, the inward pressure from the planks overwhelmed everything. So thwarts are there really to push the planking outwards - had not realised till now. I reworked the deck to make it look more proportioned and nice - photo bellow. Still needs work though Regards Vaddoc

- 232 replies
-
- 12
-
-
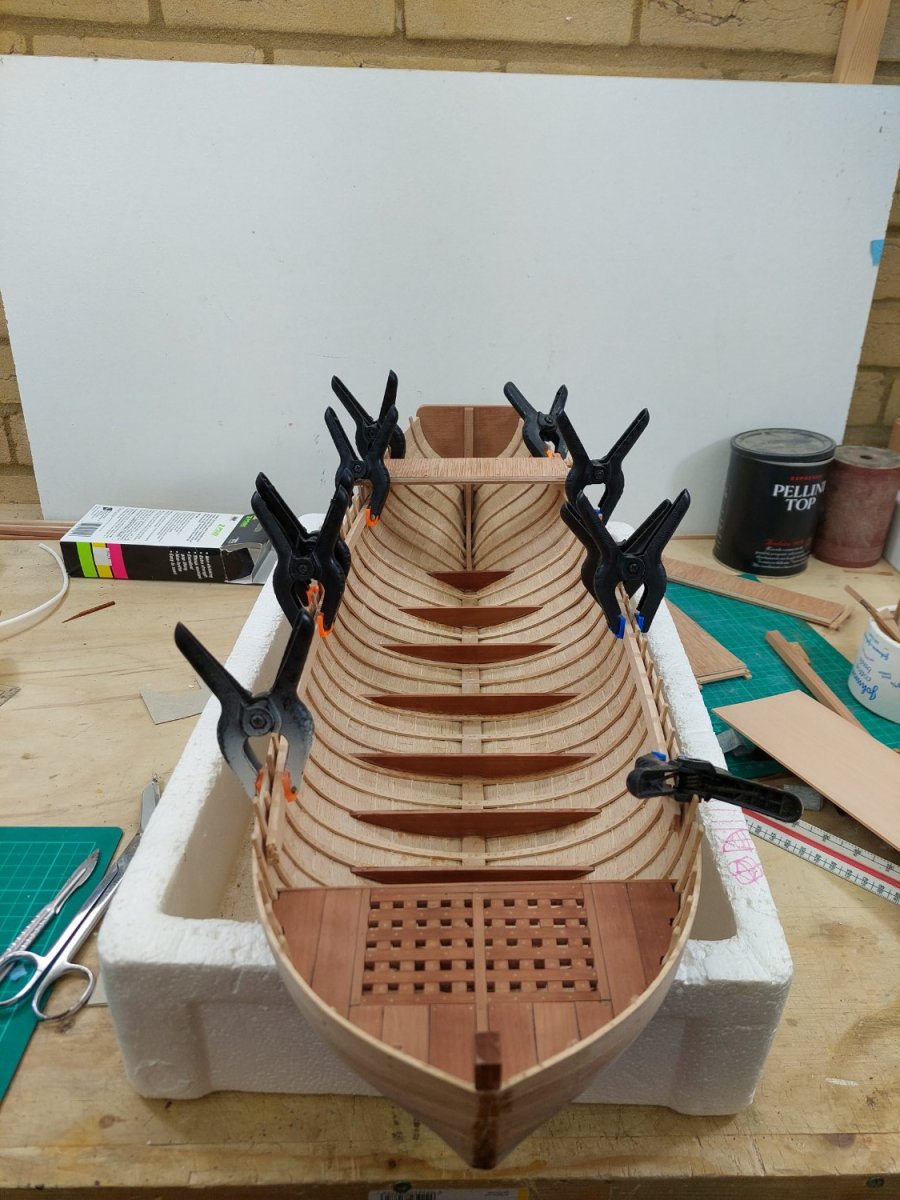
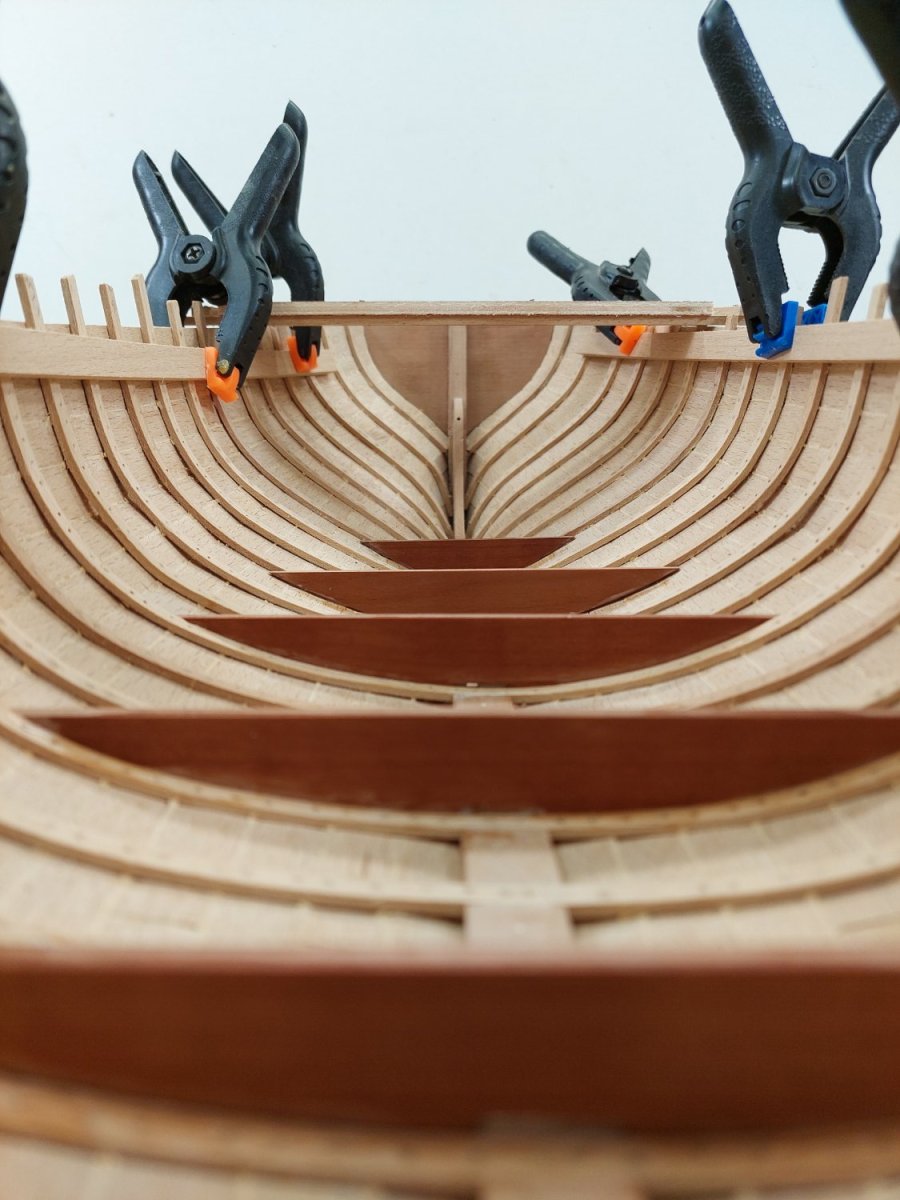
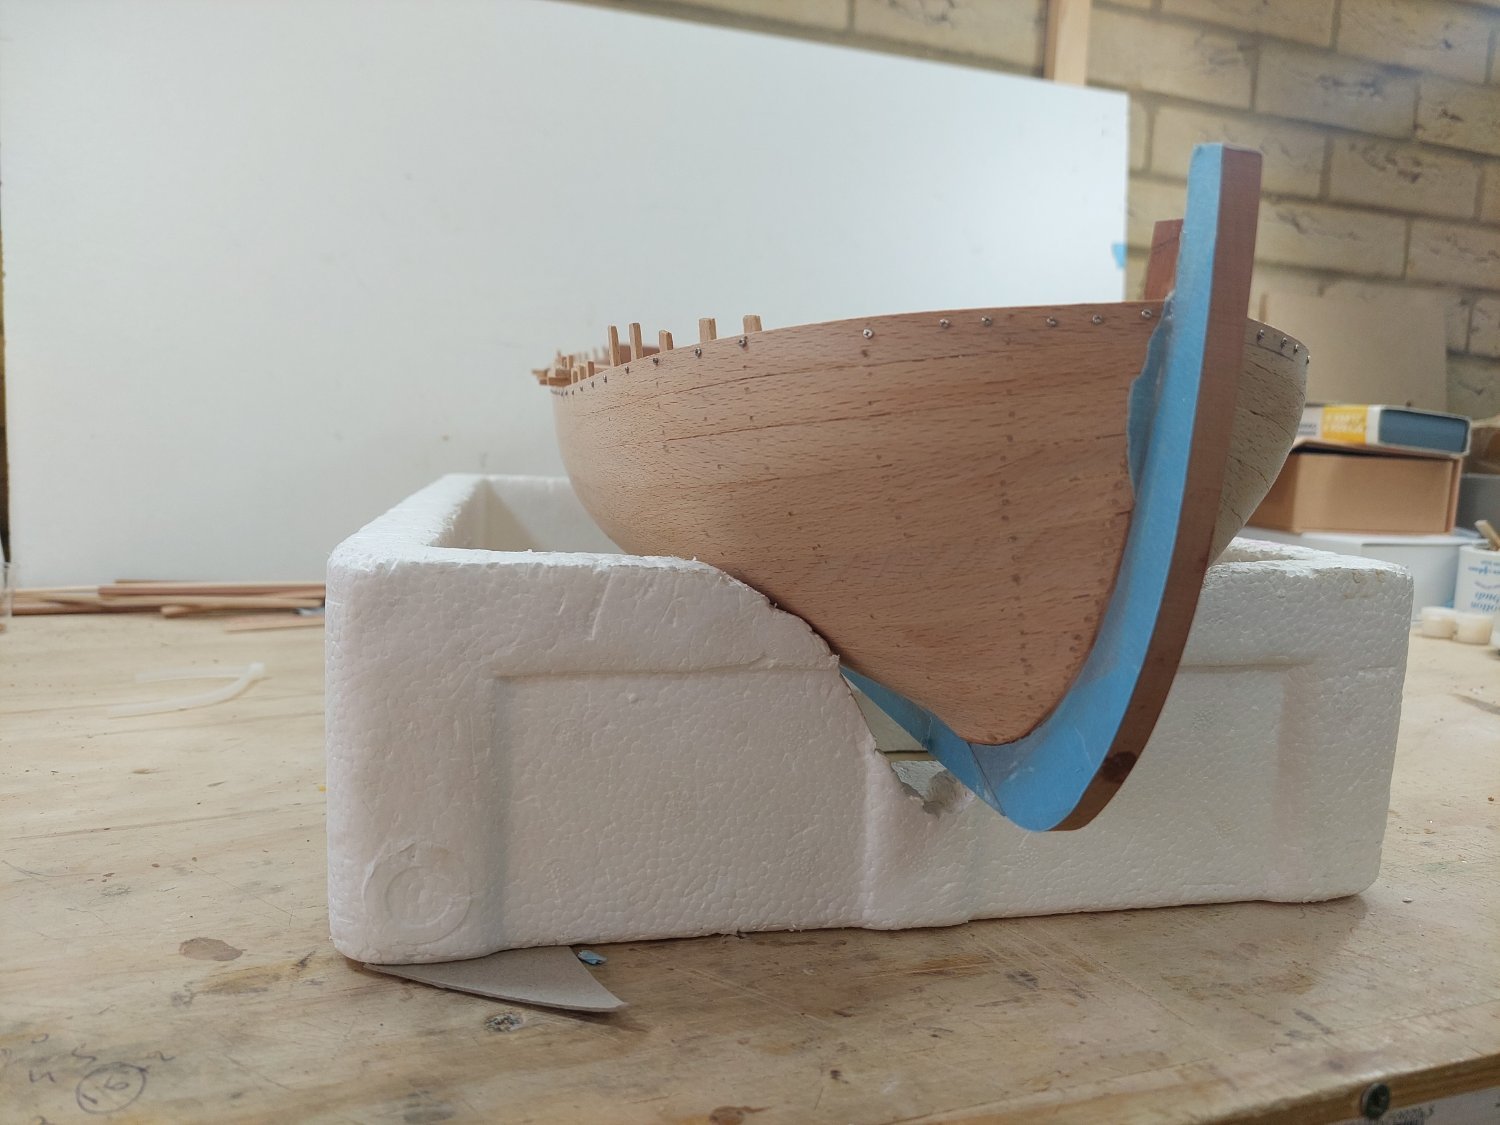
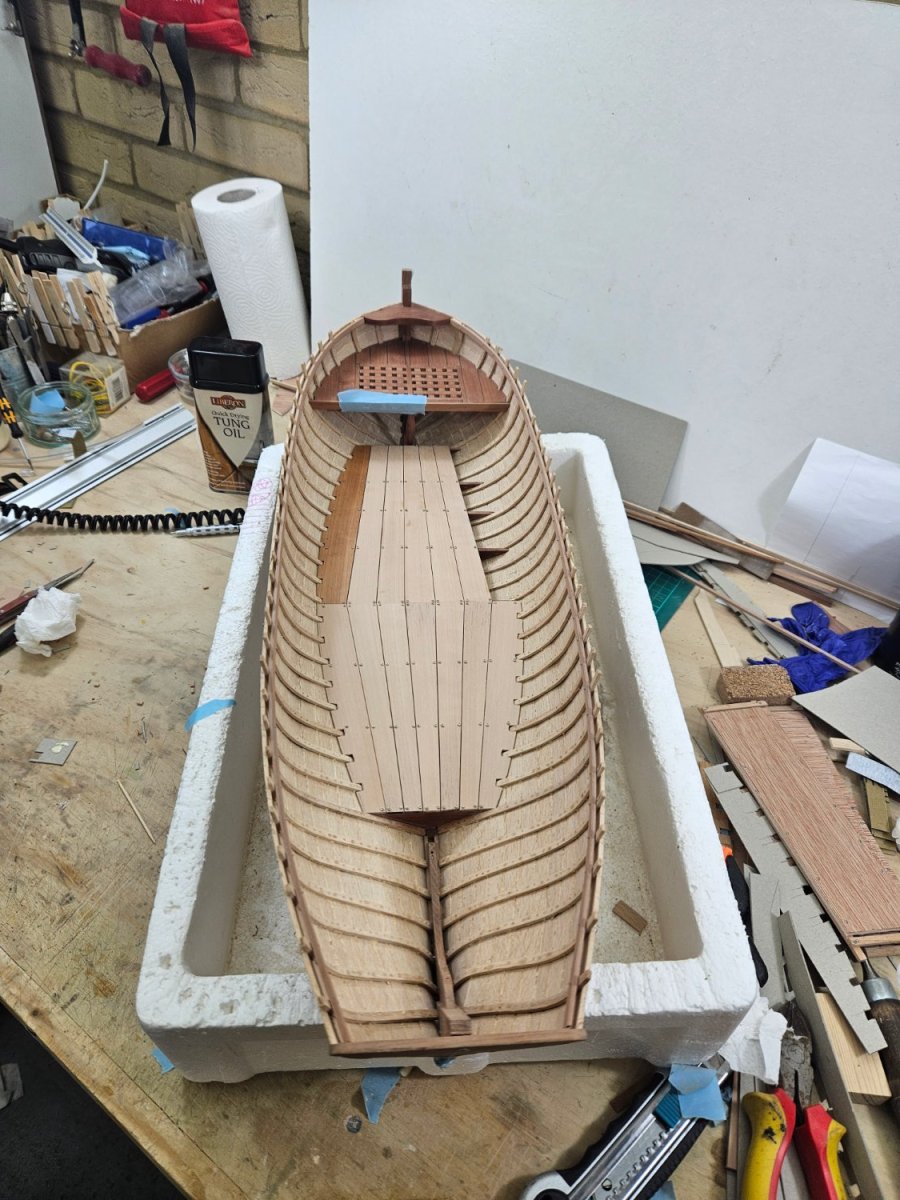
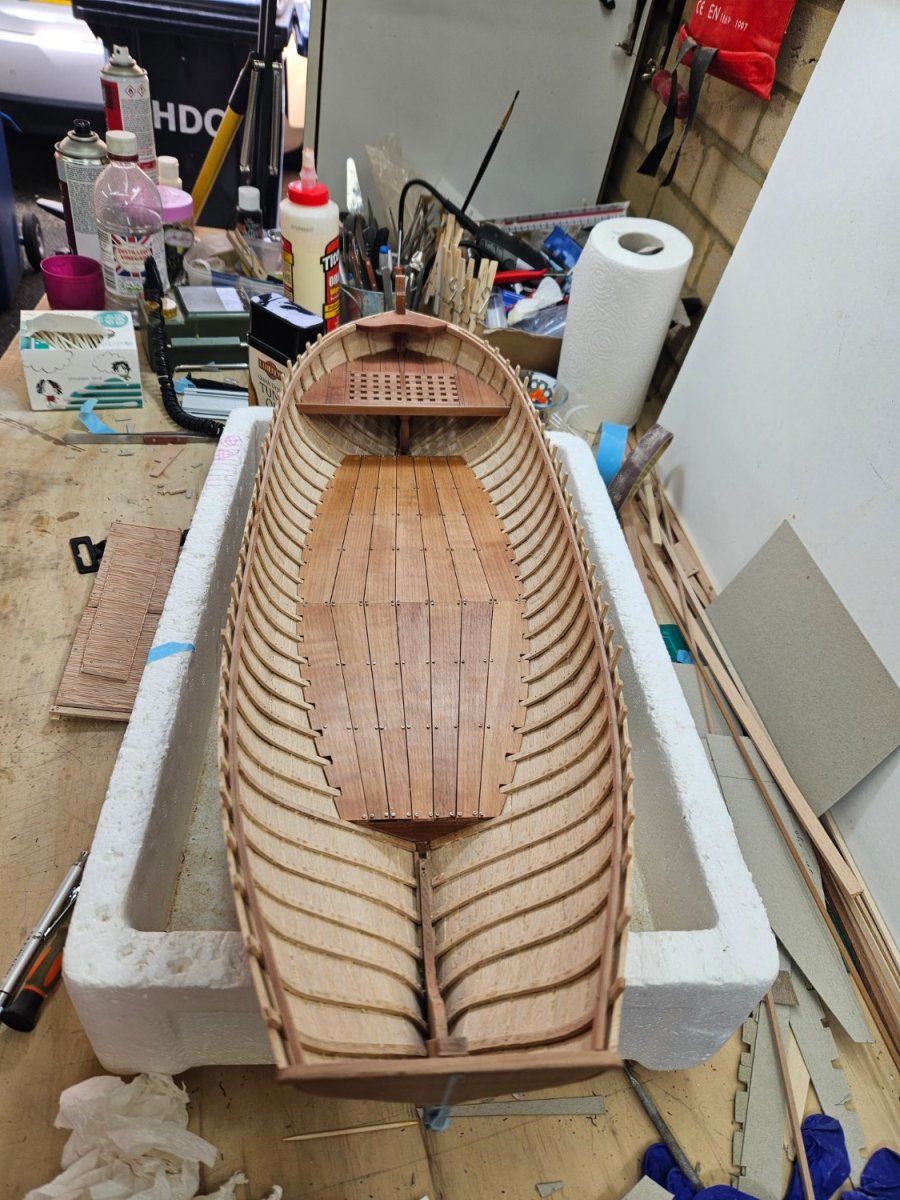
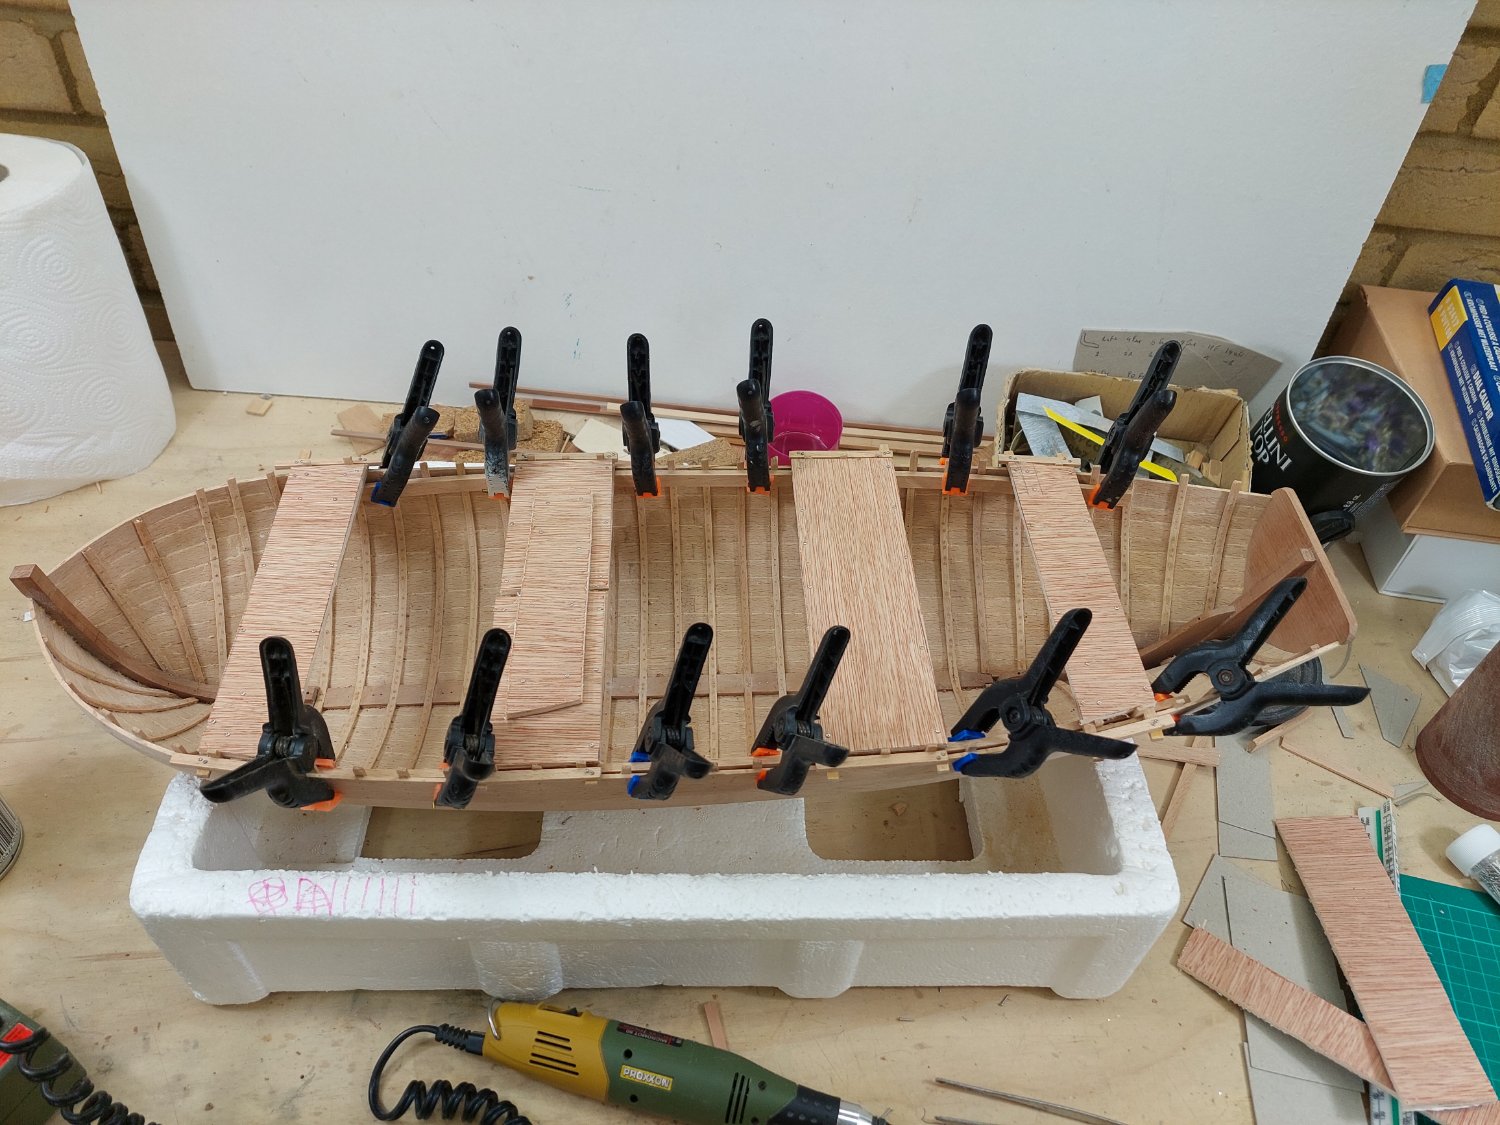
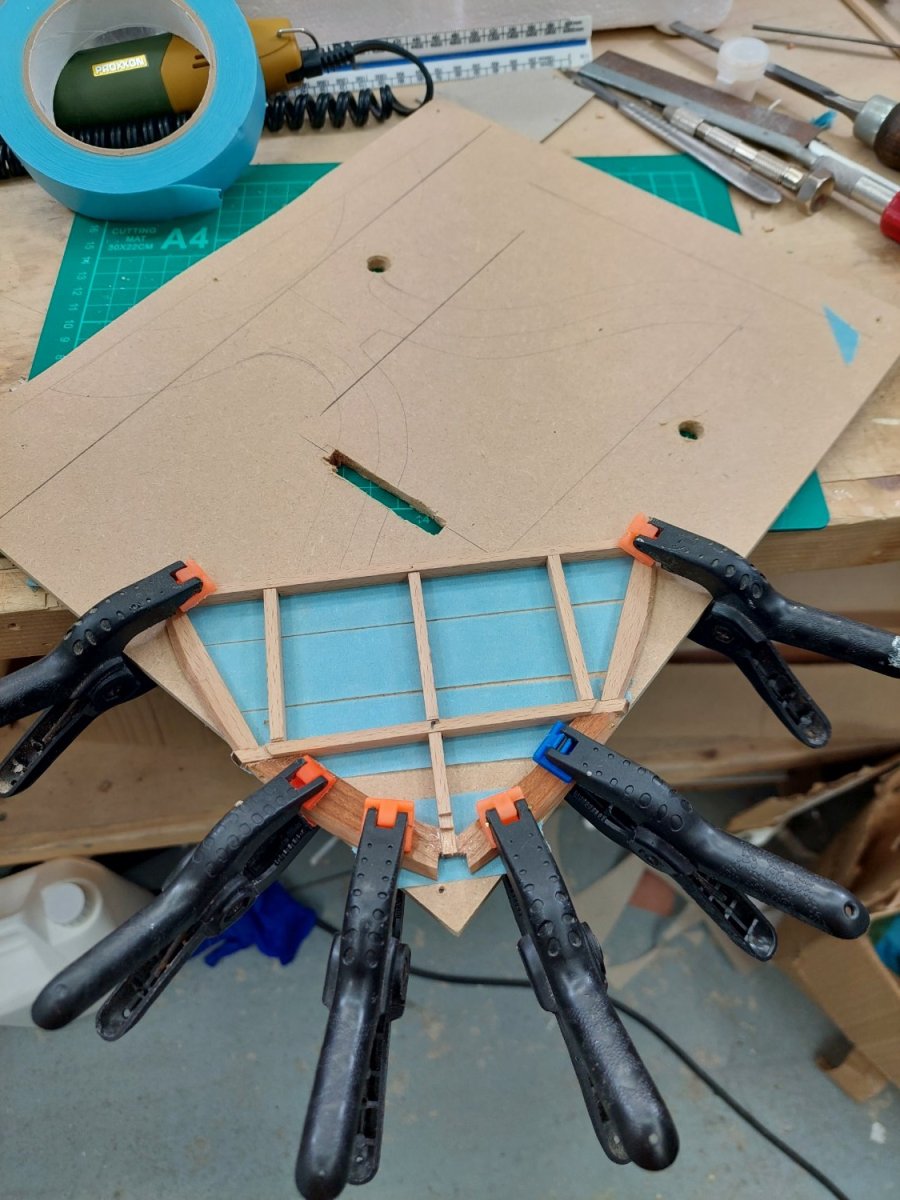
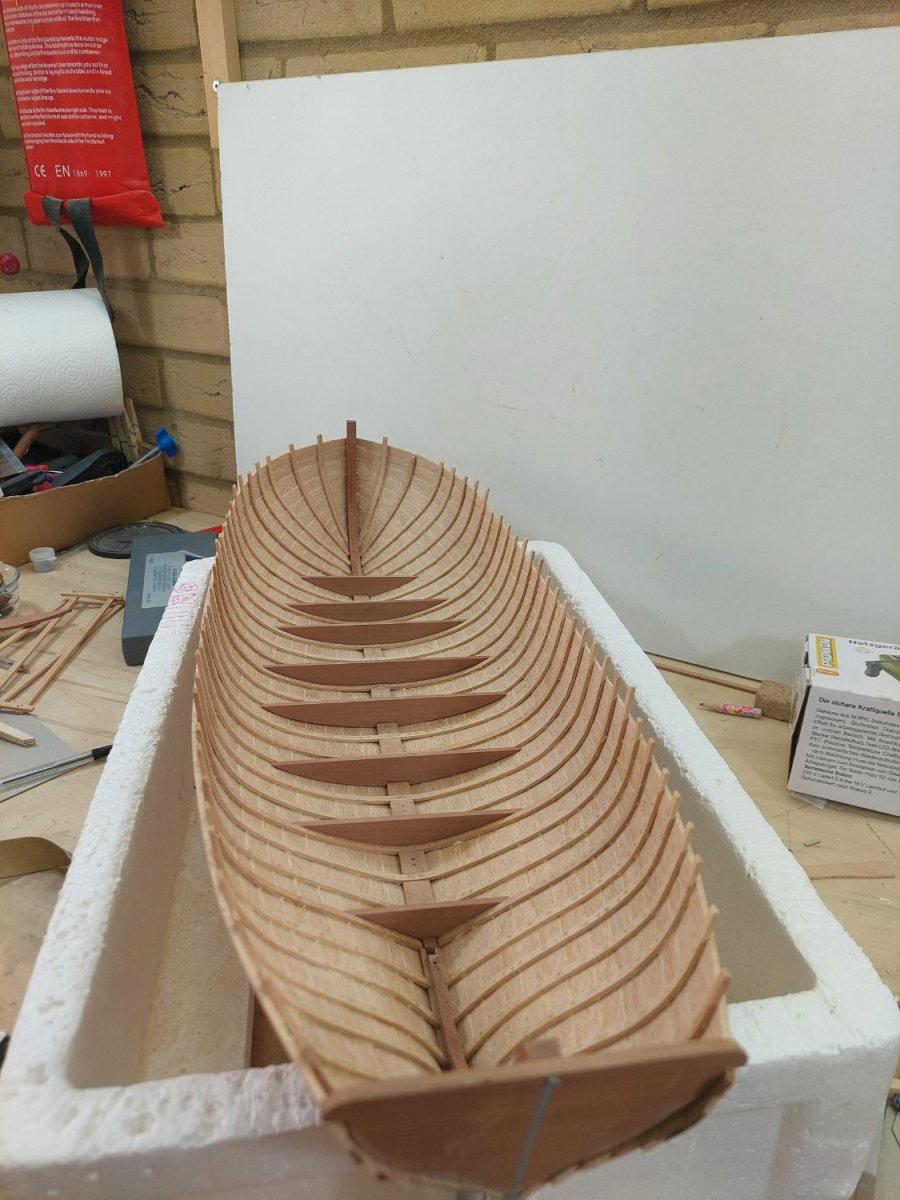
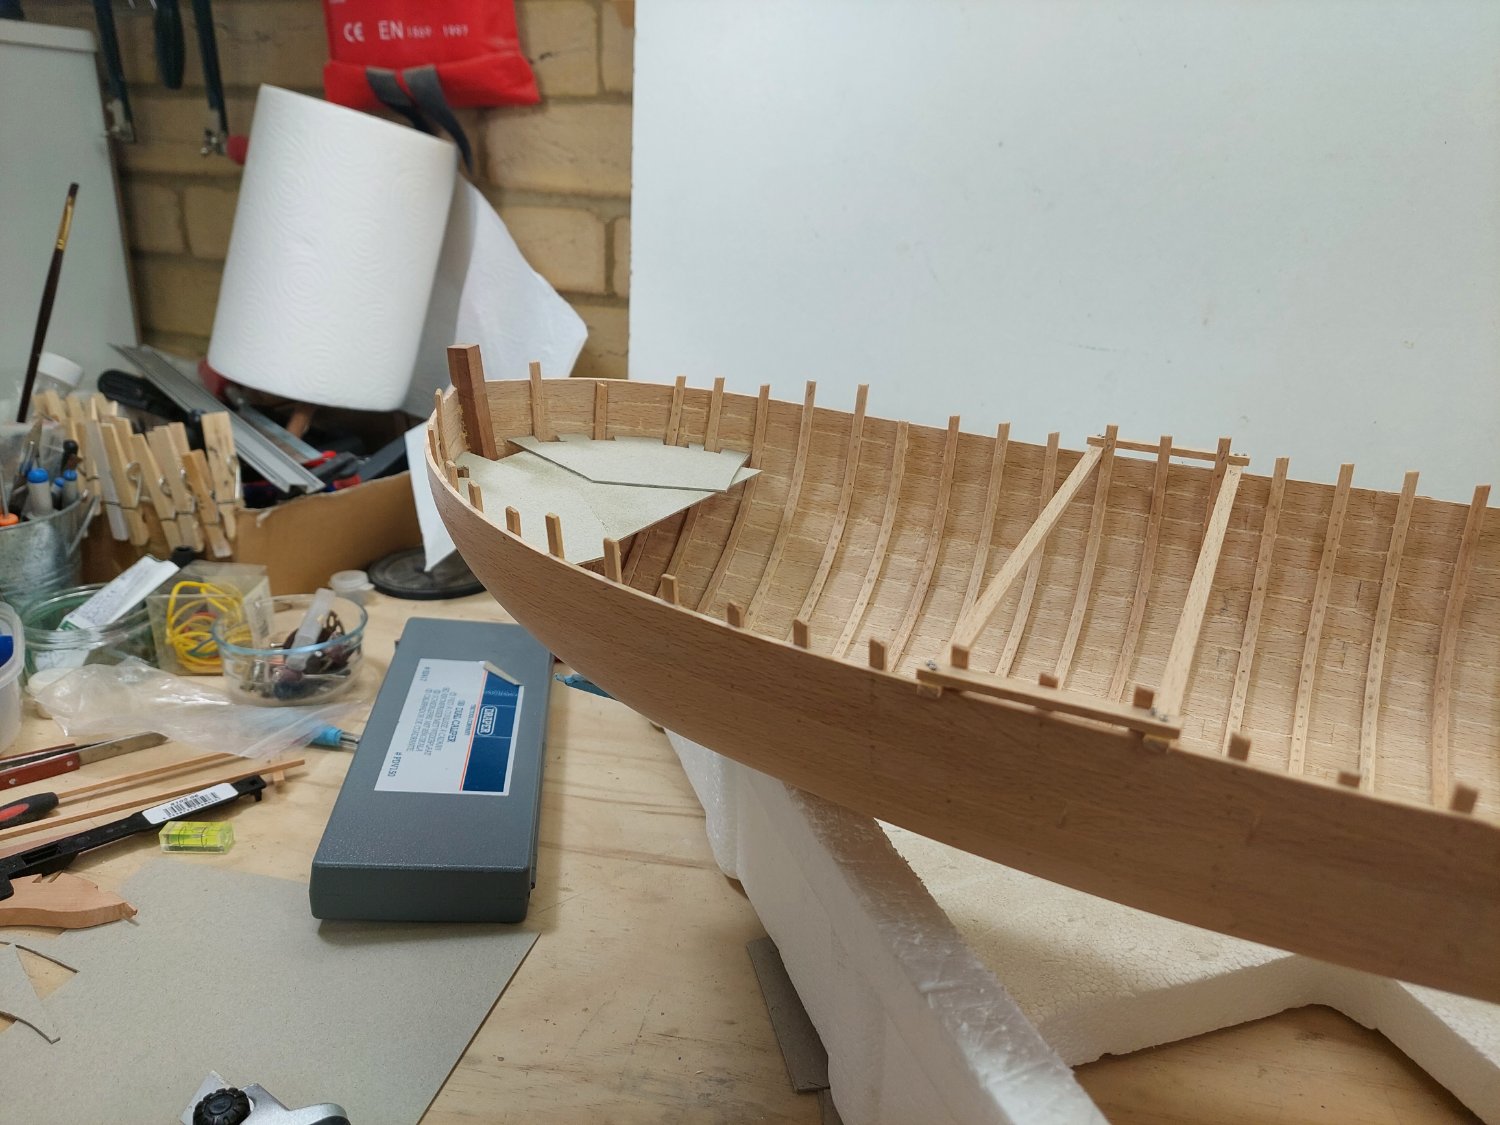
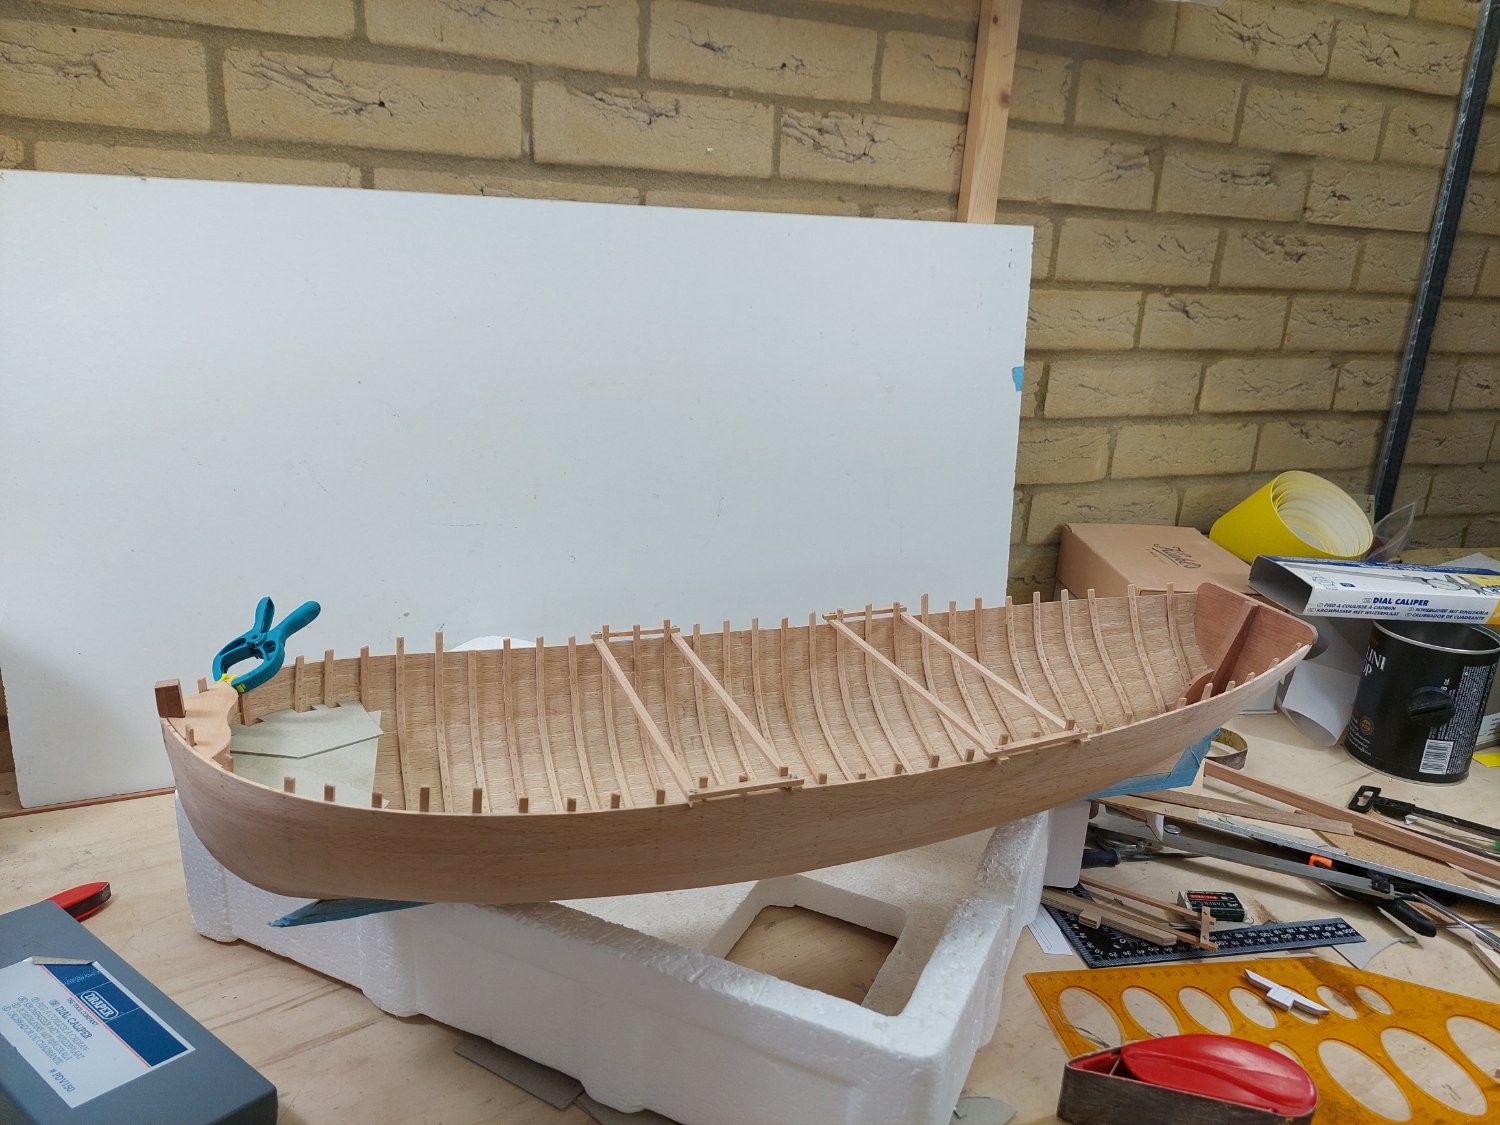
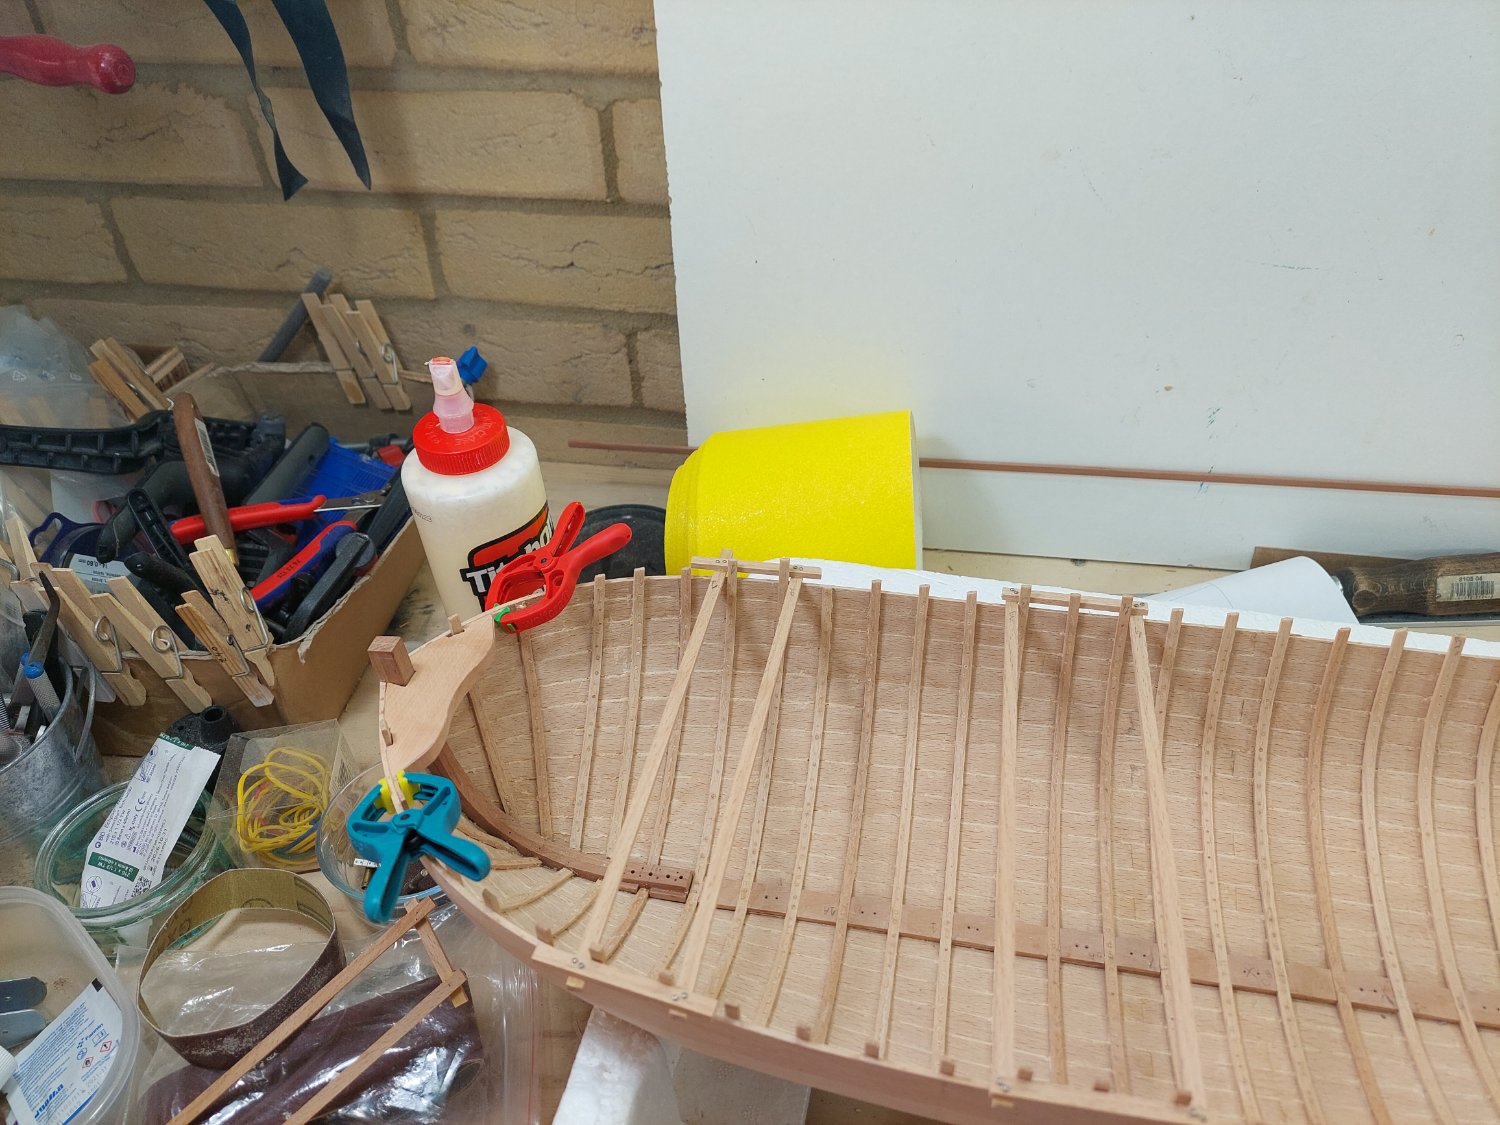
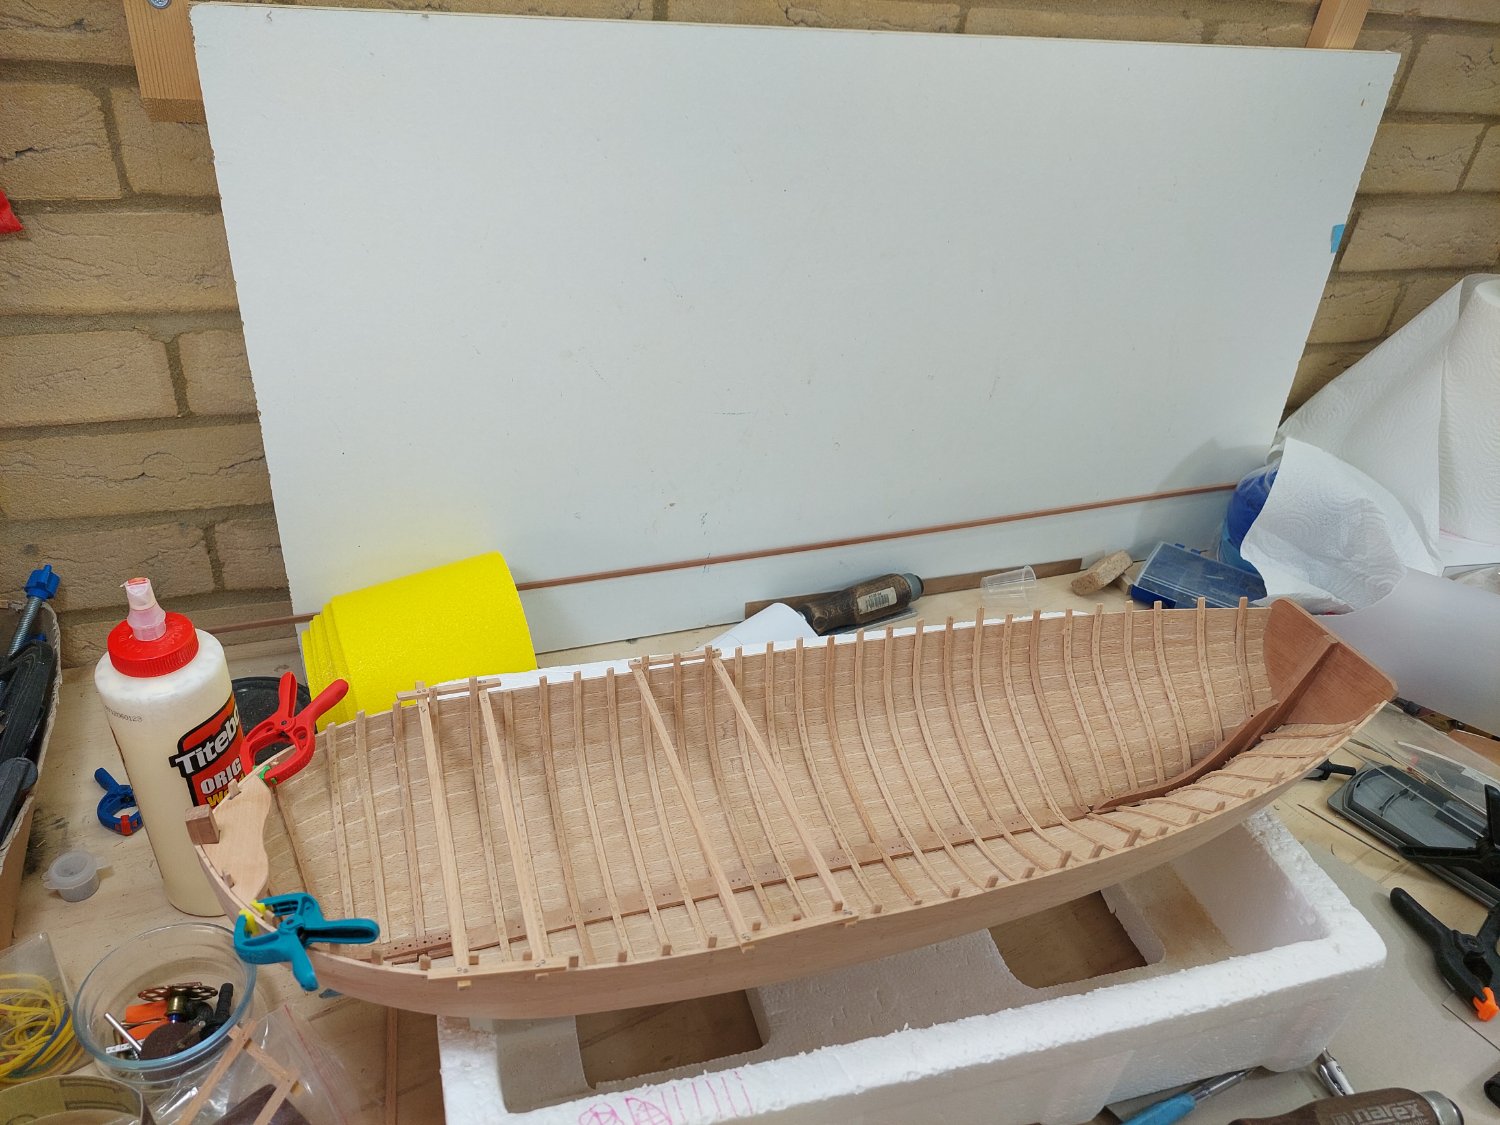
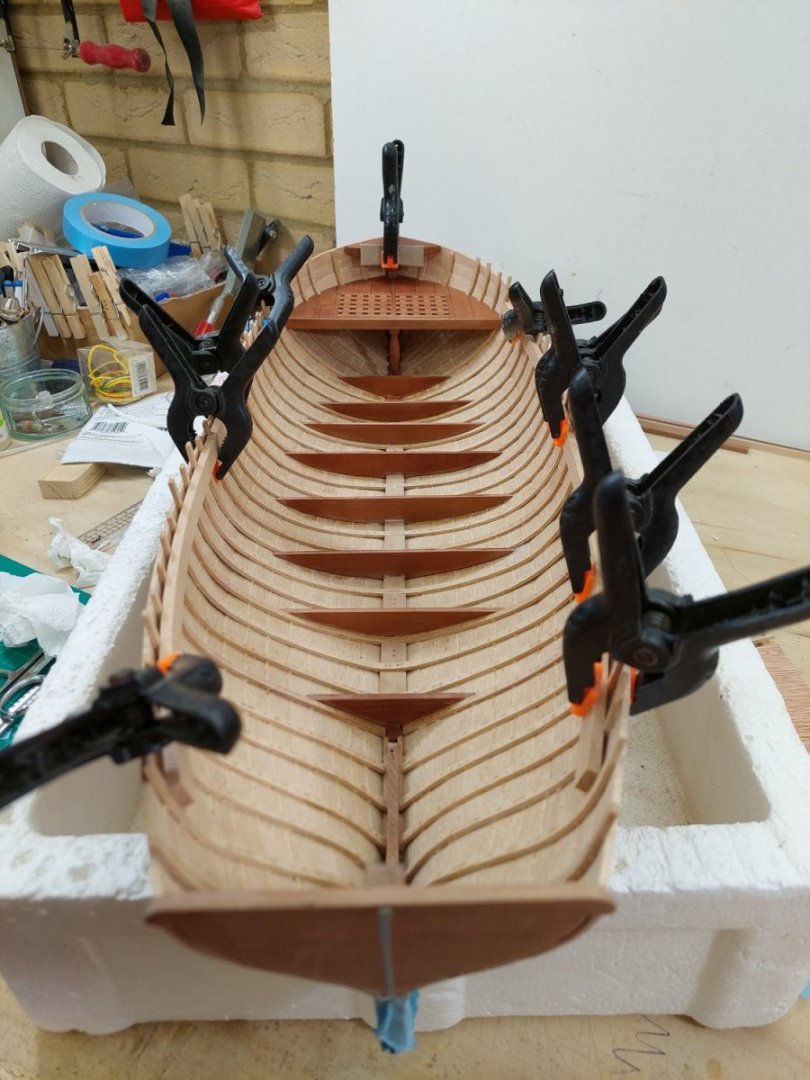
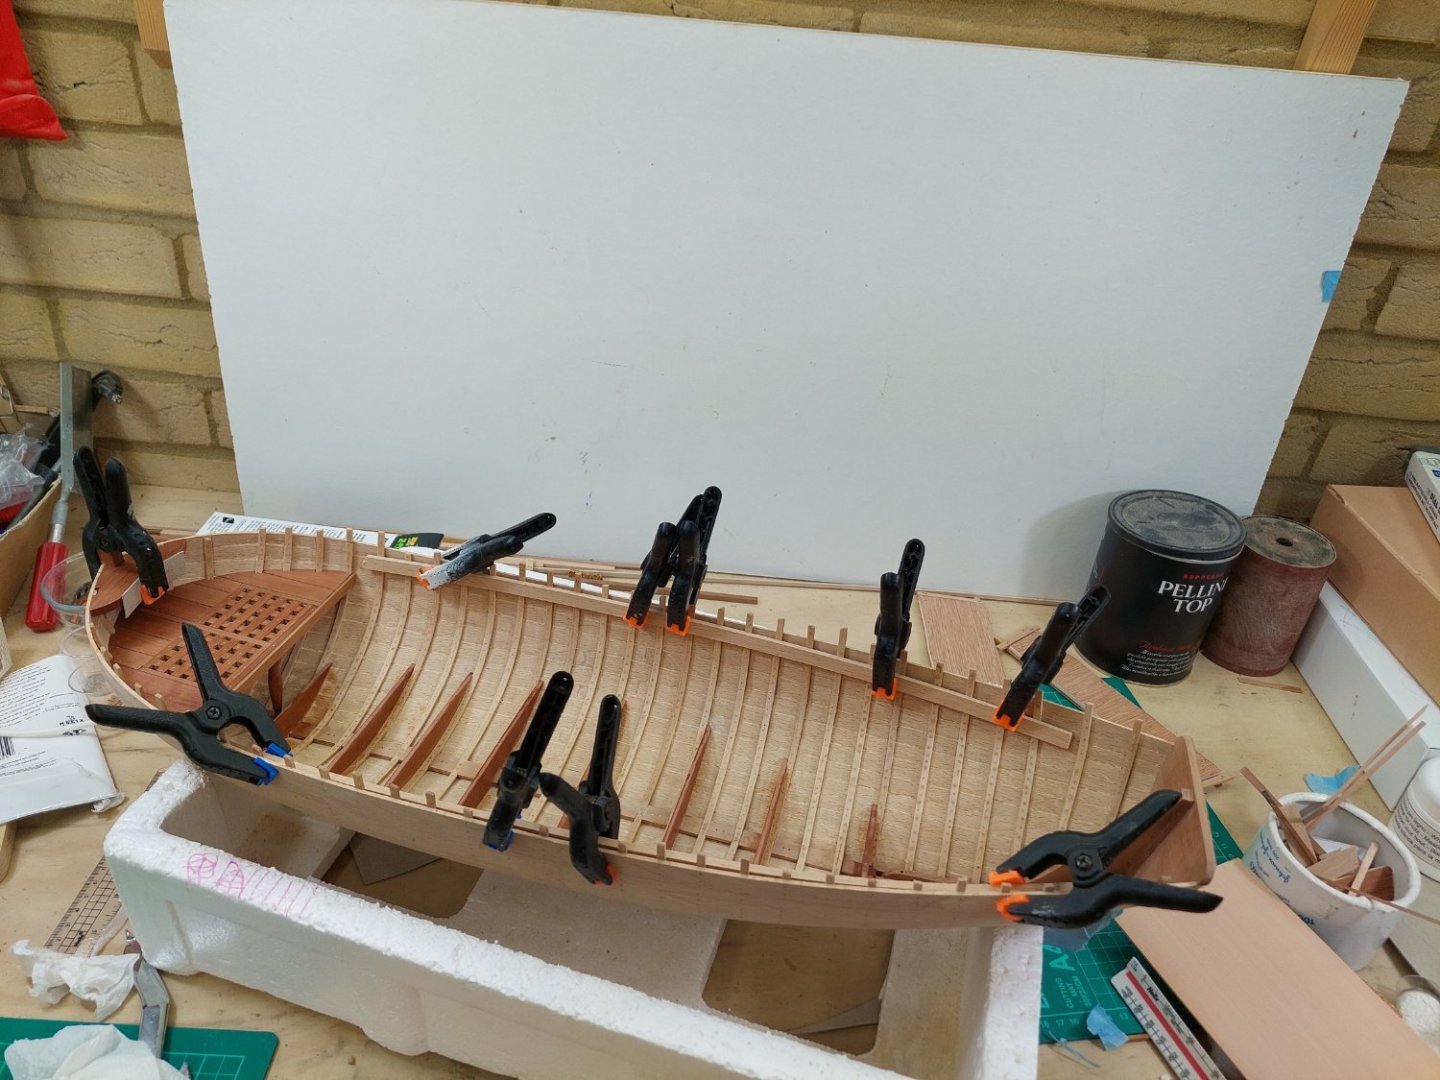
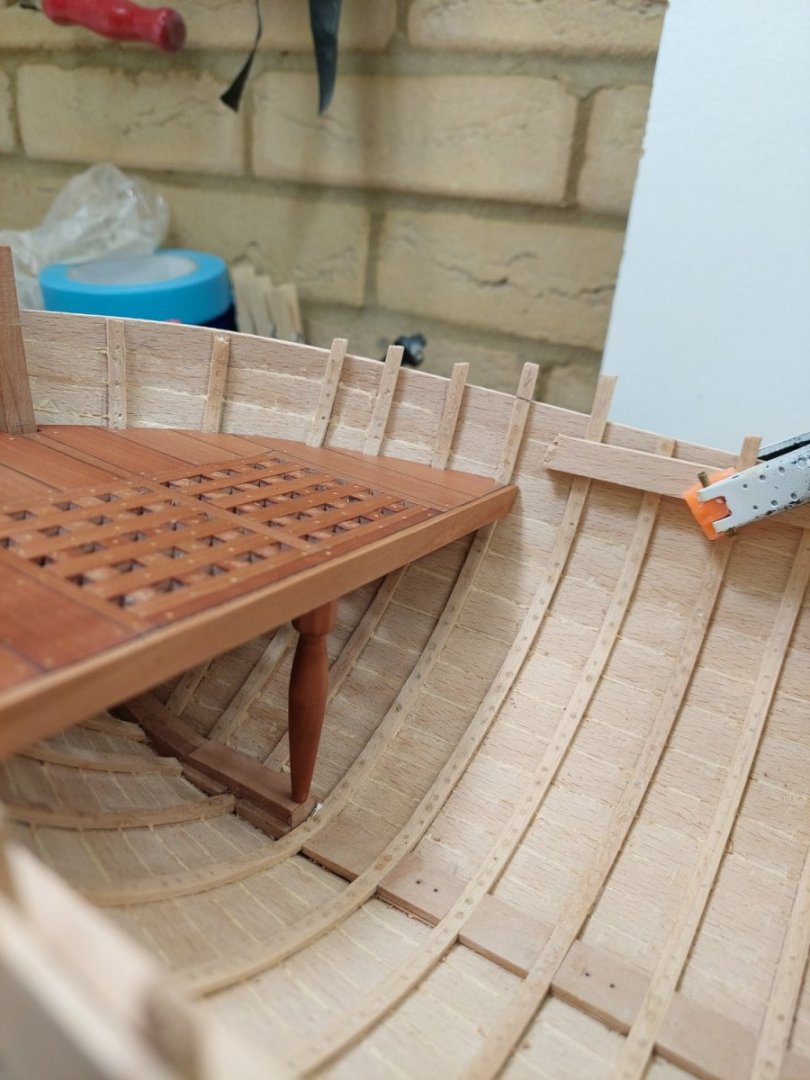
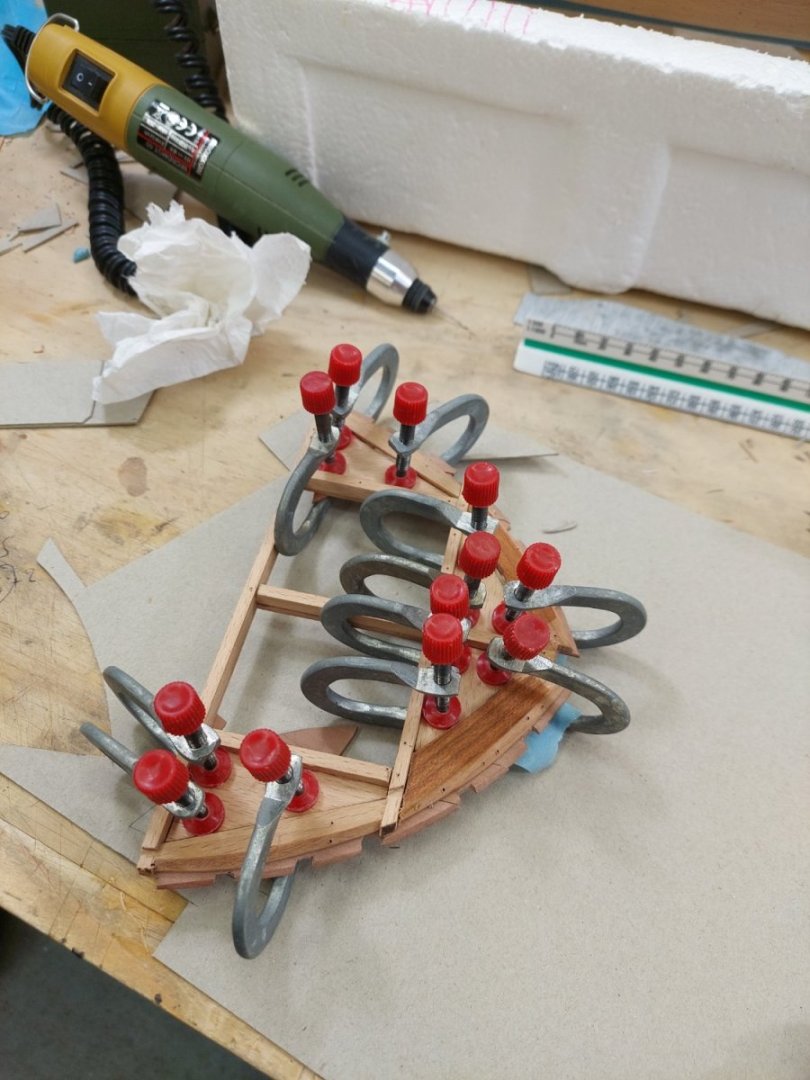
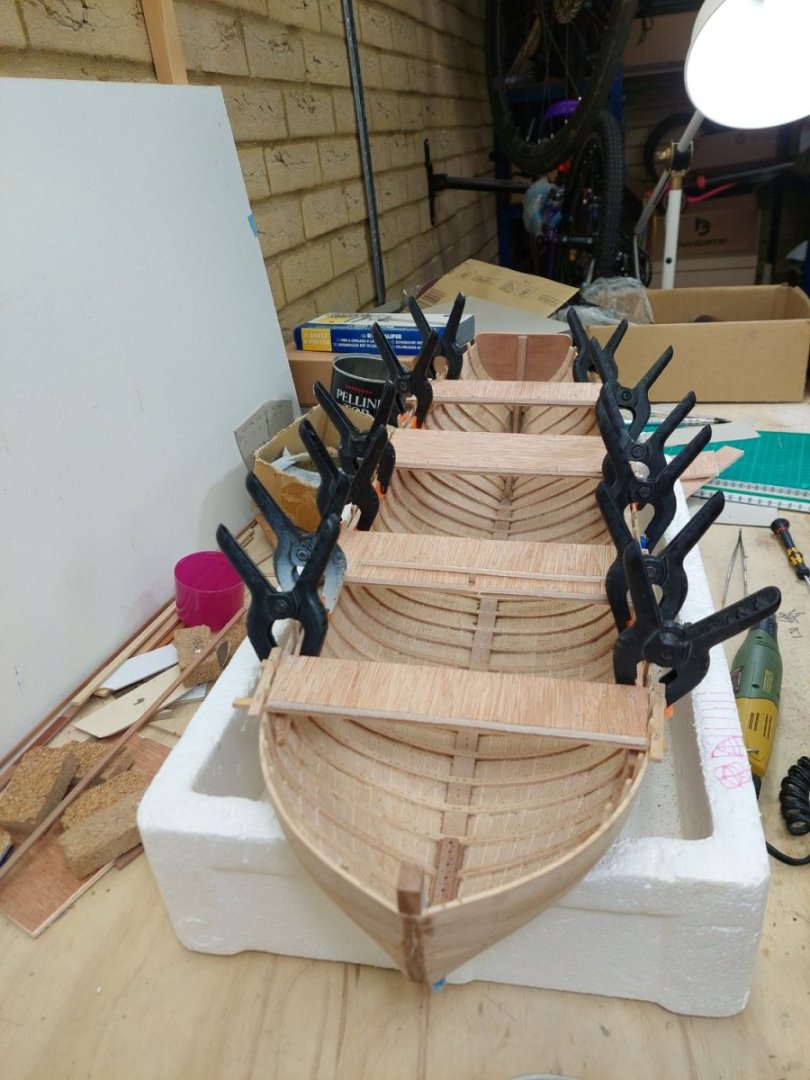
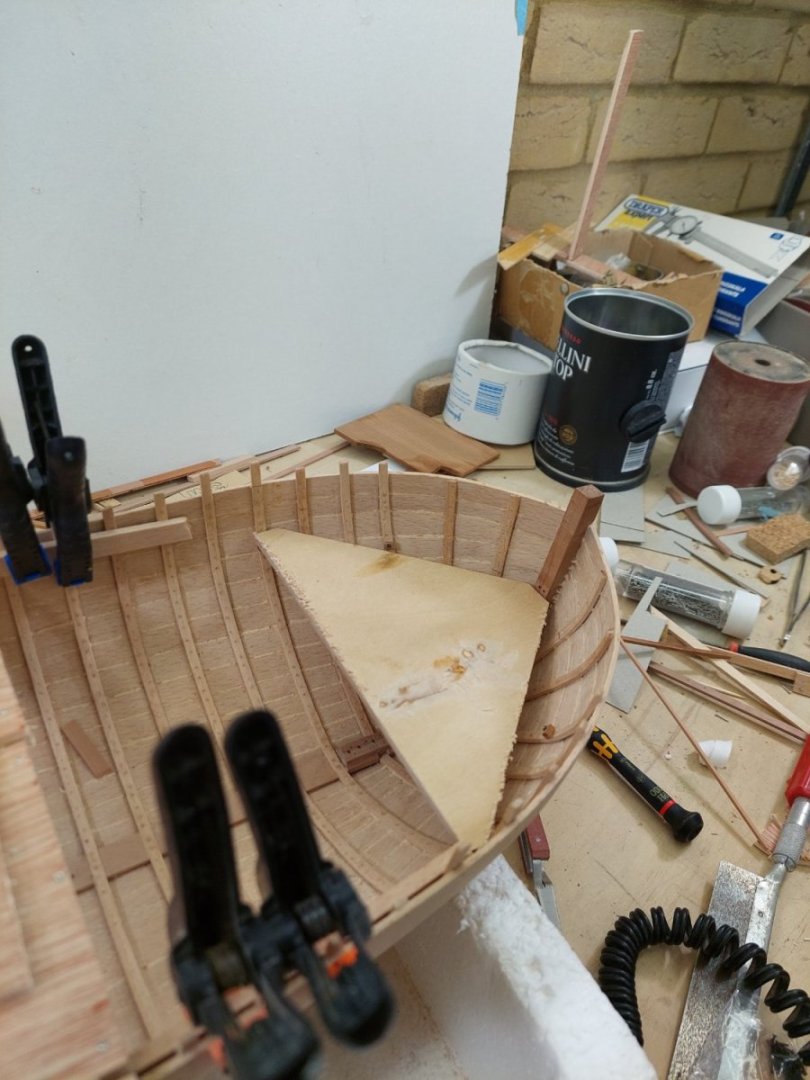
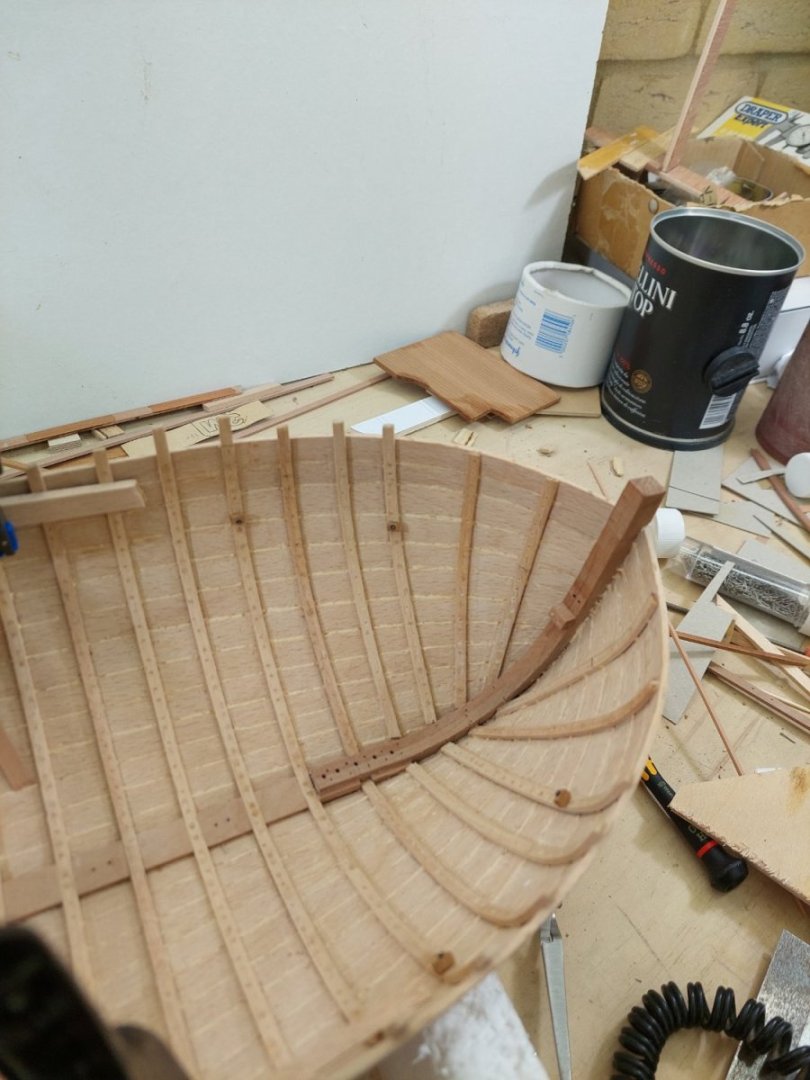
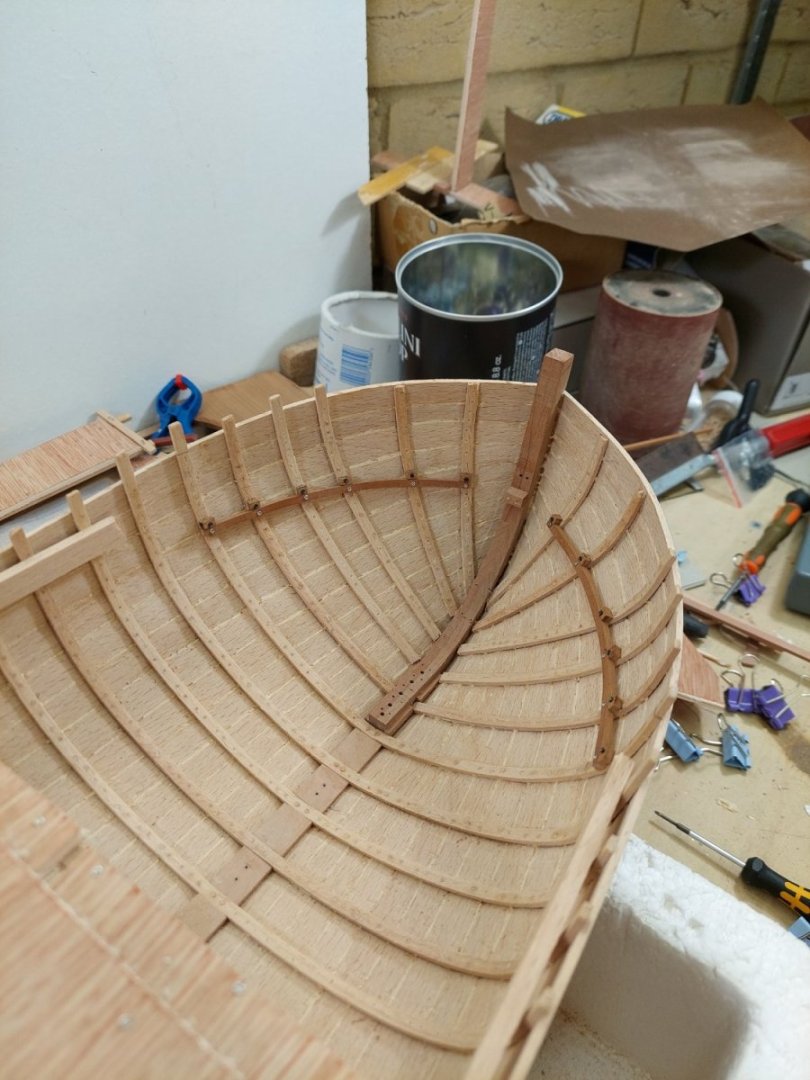
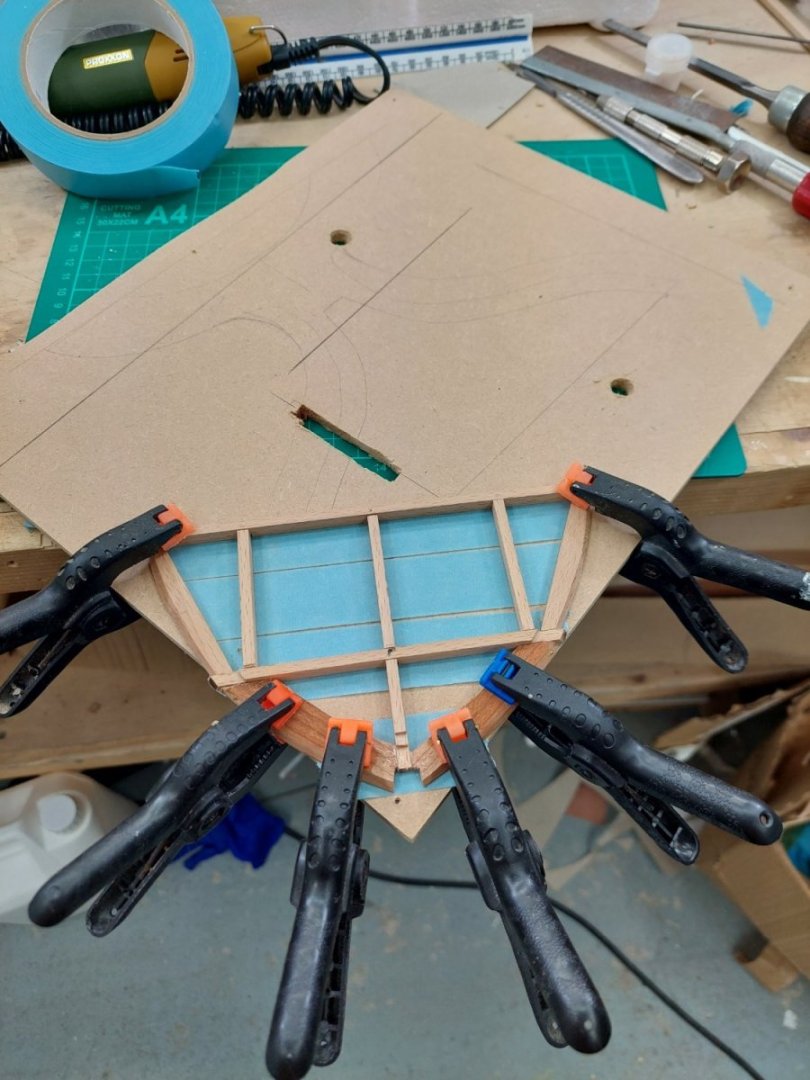
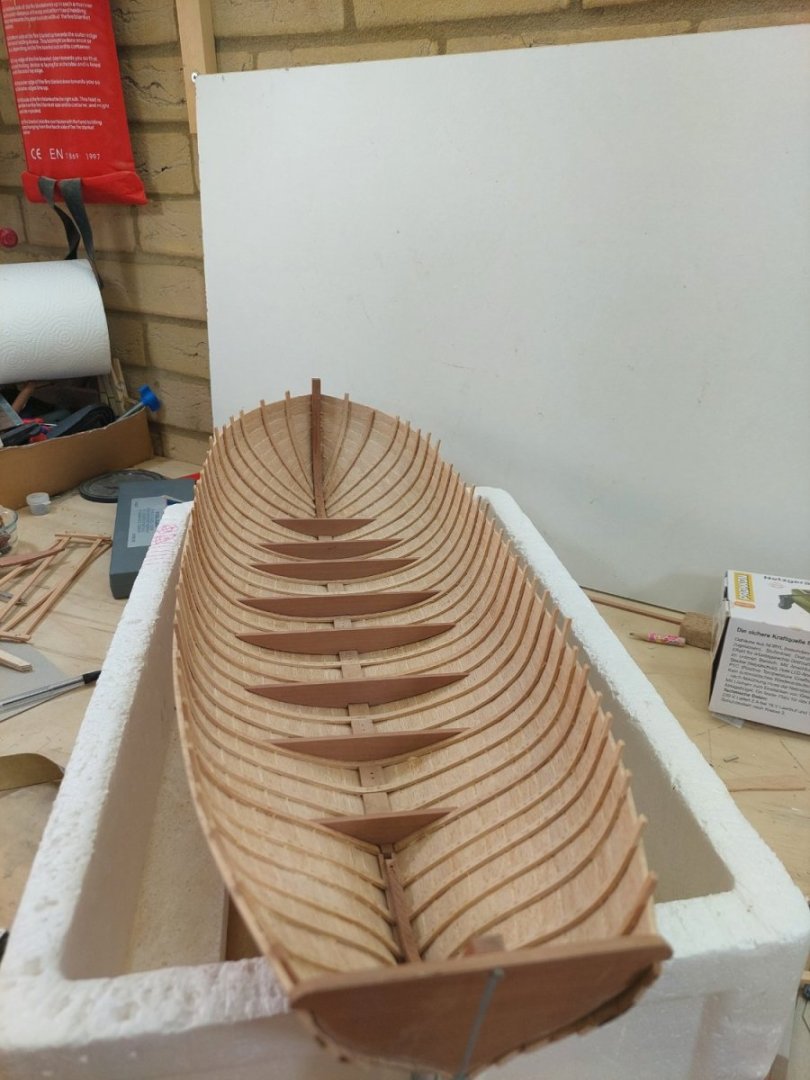
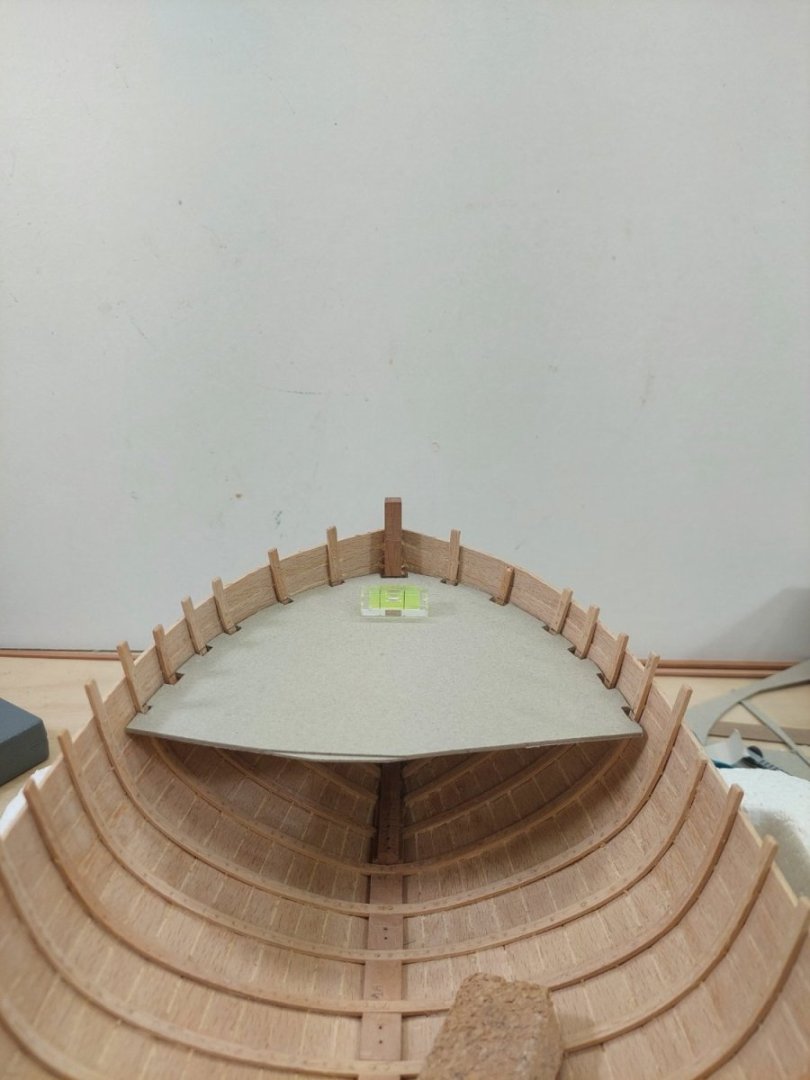
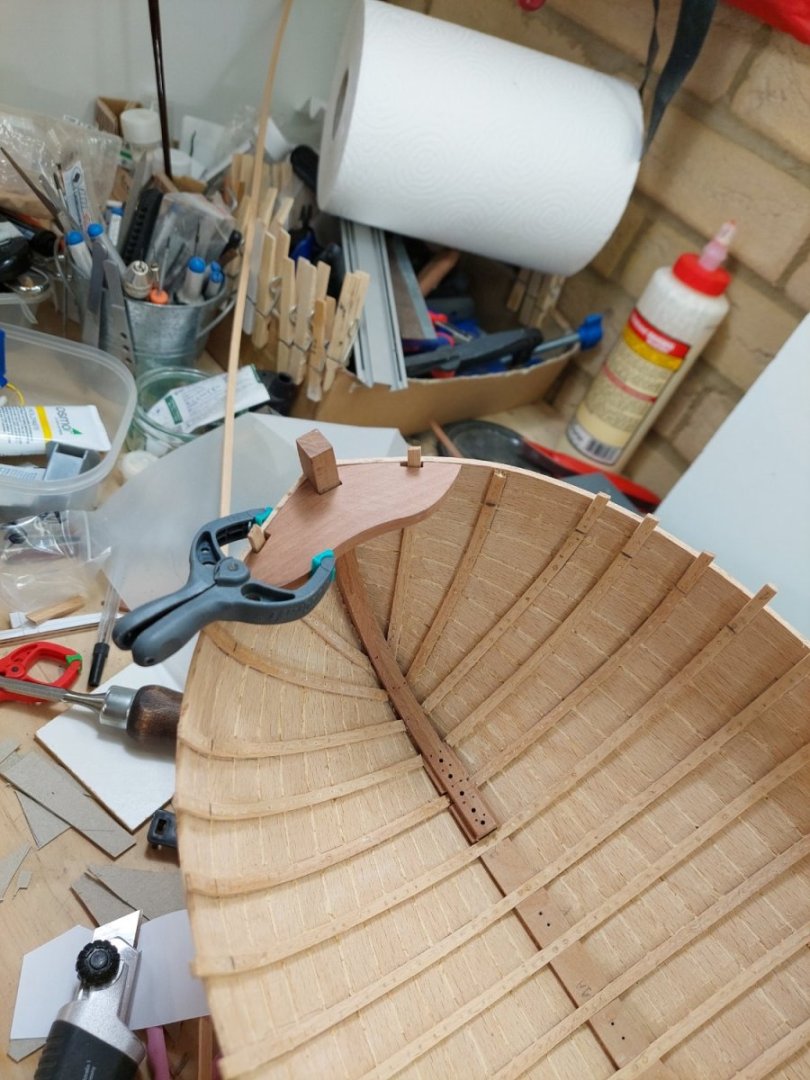
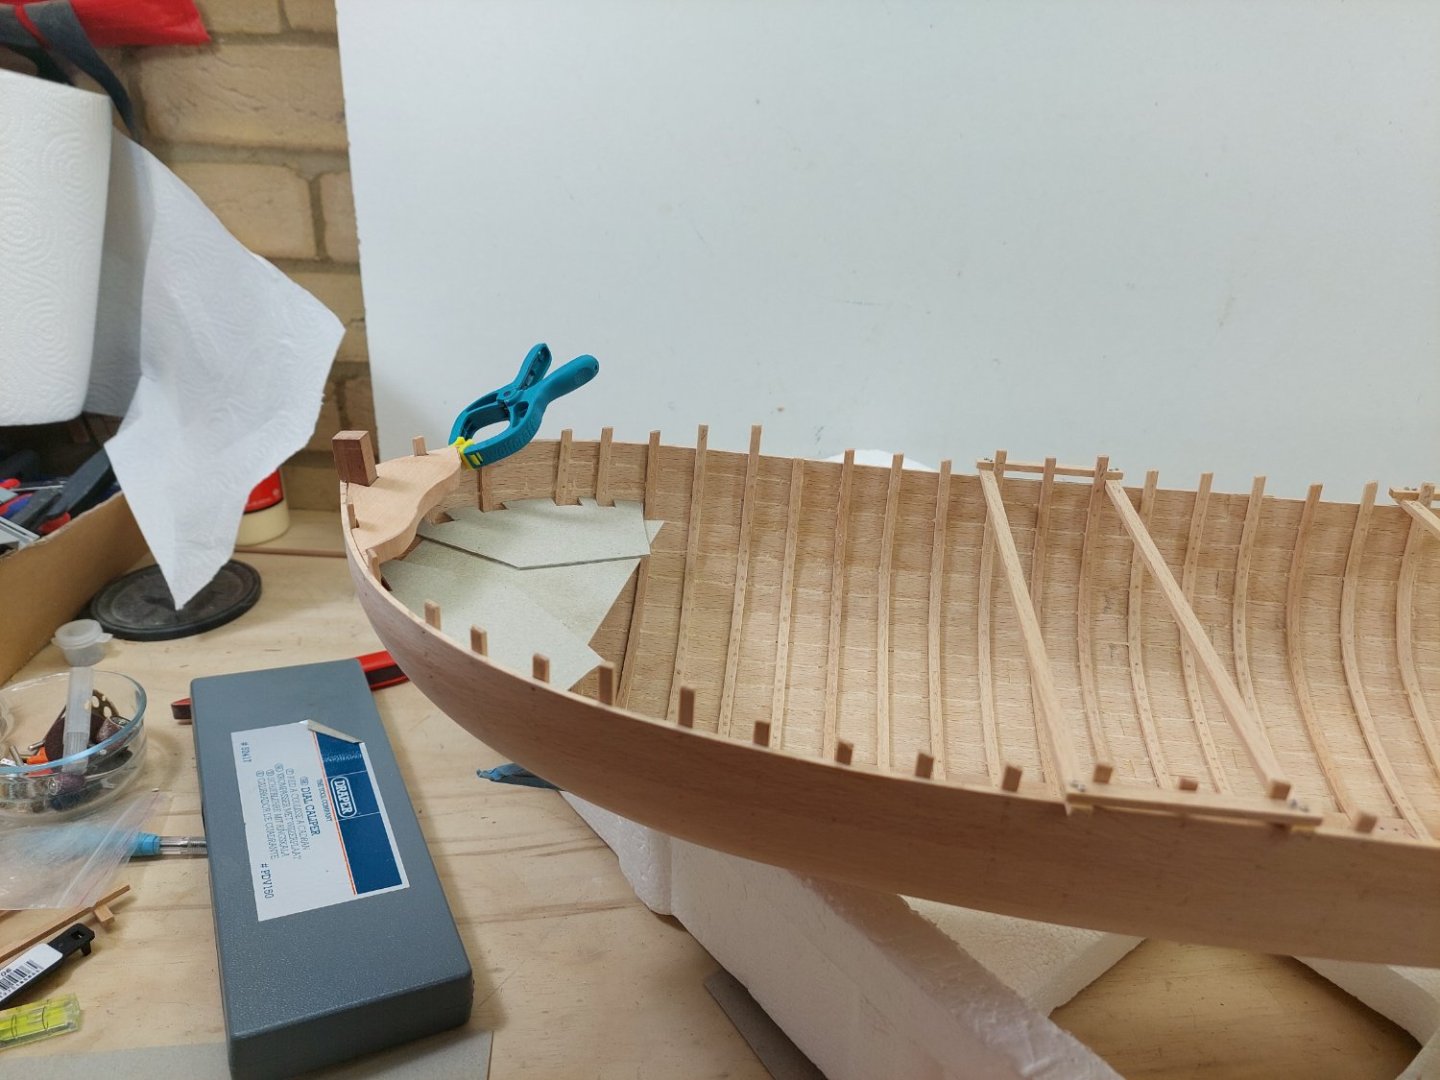
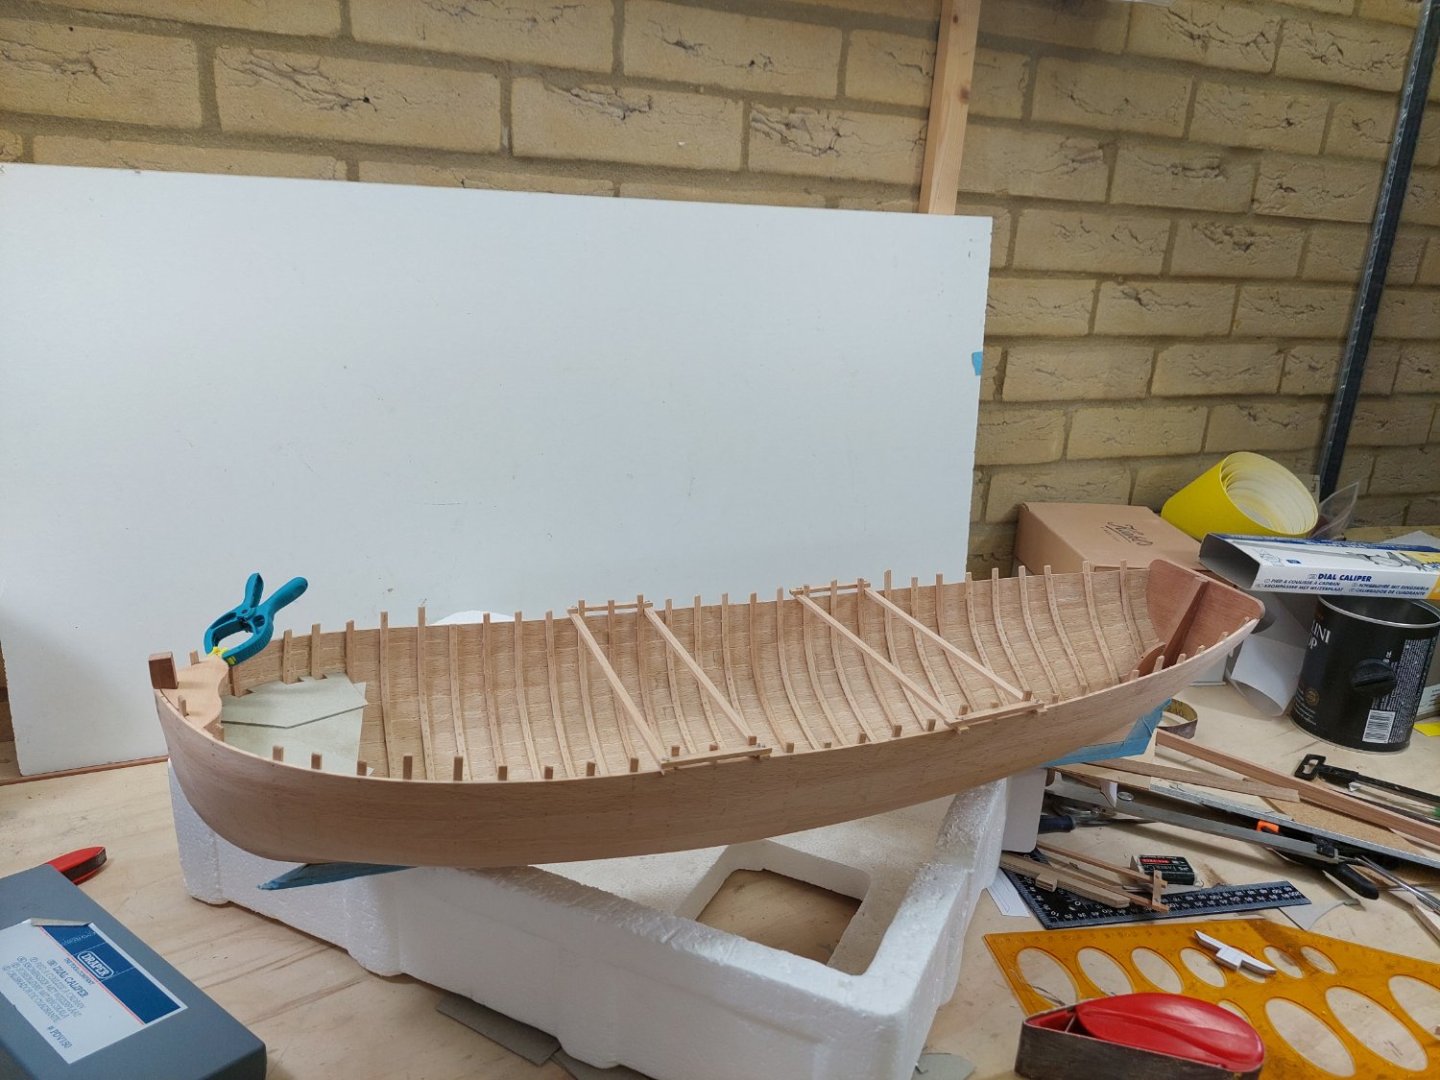
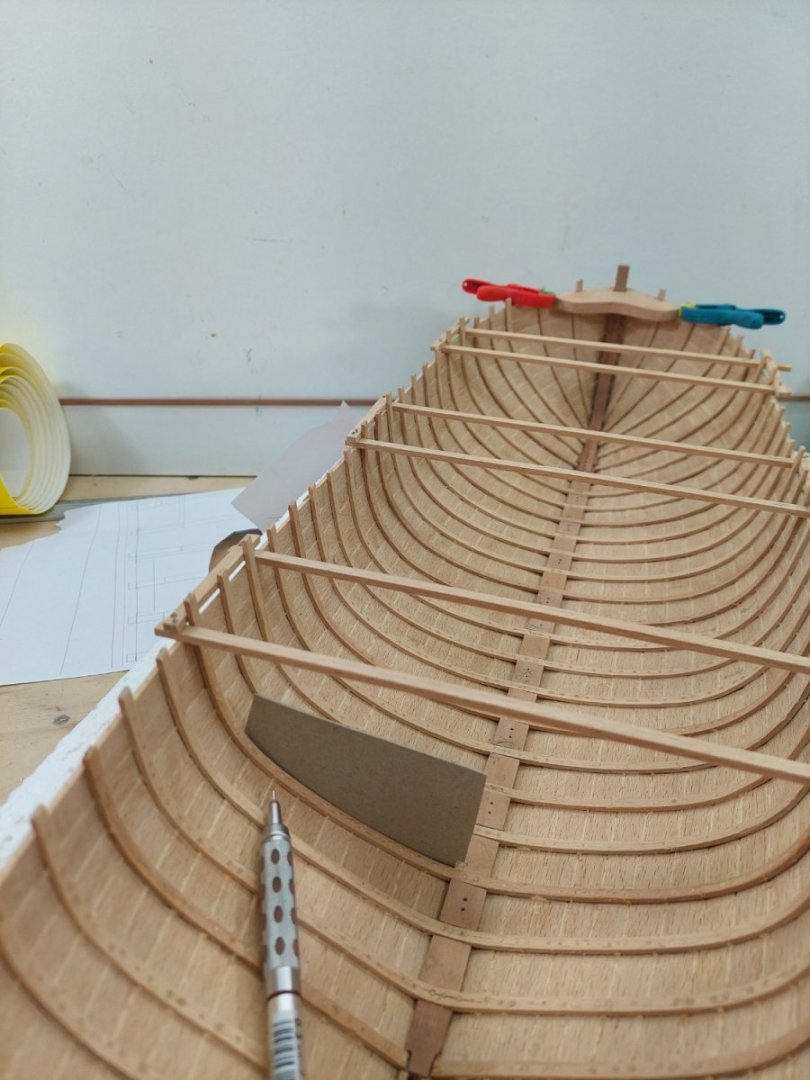
Oh dear! It has been 5 months since my last post. The cause has been twofold: Too much work but also serious difficulties with the boat. I returned to the shipyard and found two major issues. One was mould developing on the model. The garage where I do my modelling has not been heated for months with temperatures as low as -8 C. Thankfully it was like fine dust, easy to remove. But when mould starts growing on your model, it certainly is a subtle sign you 've gone into hibernation! The other was that the boat had dramatically changed its shape. Initially, the beam wanted to spread so I had to make braces to hold the sides. However, now this was reversed. The planks appeared to push the sides inwards and the beam was drastically reduced, pushing the stem and sternpost outwards. I started pushing the planking outwards with bits of wood, gradually increasing the beam, using the braces as guide - so happy I had taken this precaution. It took a few weeks to get the boat back into the proper shape. However, the sheer was now a bit wavy so I fixed a couple of very thick strips on the inner aspect - this did the job well. I also heavily reinforced the flimsy braces. Now, with the boat back in shape, I was able to proceed with the build. I am essentially making it up as I go as I do not have any detailed plans but I do not think I am actually far off. Now, I would like to have a deck at the bow. This proved a fantastically difficult task. I tried all sorts of jigs to mark the planking so that I could install stringers to support the deck. In the end, I started screwing little pieces of wood, and using flat sheets finally got it close enough. This took weeks and months - very difficult. Then I screwed the stringers which had to be soaked in boiling water as the curve was quite severe. The small wood pieces were then removed Then, I started making a frame with beams to support the deck. I forgot to take pictures though but again, was not easy. In the next photo the frame is ready, waiting for the epoxy to cure. Next, I slowly started adding the various pieces for the actual deck. It slowly is coming together now. I hope things will speed up a bit now. Till next time Vaddoc


- 232 replies
-
- 10
-
-
For hand held (rotary) tools in sub milimeter sizes, I am using Heller drills or Proxon drills. I have the small Proxon drill press which is wonderful. Small footprint, easy to use, just great. Combined with carbide drill is a great tool, can drill through anything with accuracy. Would be the thing to take to a deserted island, along with my disc sander. Carbide drills cannot be used with hand held drills, they ll break inside your piece and cause issues. Similarly, be careful using black hardened steel drills with hand held drills- they are also fragile although very sharp. To avoid breaking bits, go for the fastest speed without burning the wood, though some woods respond poorly and will start smoking when drilled.
-
Indeed Bob!😁 I was referring to methylated spirits.
-
It works wonderfully. It is not a primer, it is a sanding sealer. Water based so no toxic fumes. Dries in 10-15 min. Sands beautifully. Leaves smooth sealed wood. I have no need to use anything else. Usually slap a coat on sanded wood with no real care, wait 15min, slap another coat with or without a quick 400 grit sand, wait another 15 min, then do final 320 or 400 grit or whatever and wood is sealed and smooth. Completely colourless. Job done!
-
Good advice above, however I personally never liked Shellac or PVA for sealing wood. I ve been using Decoart wood sealer for years. Water based, dries in 10 min. Absolutely wonderful stuff. A bottle will last years and years - shelf life it seems indefinite. Deco Art Americana Multi-Purpose Sealer-8oz, Other, Multicoloured, 236 ml (Pack of 1) : Amazon.co.uk: Home & Kitchen
-
What a lovely boat Hakan! Life has kept me away from MSW and my shipyard but I went through your entire log today though - very enjoyable! Lovely scale. Great news regarding your health, I am so happy for you! Re: equipment: just get what you want! I d go for the largest disc sander you can afford, if you do not already have one. I am very interested to see how your planking with no spilling will go. Have you done any planning how the planks will run or just plank along? Do you taper the ends at the stem? Also, are you bevelling the edges of the planks? An advantage of CAD vs 2D is that all frame bevels are defined, inside and out and cut before hand so very little fairing is needed, if any. On another note, I think I have a few hundred (could be thousands - I do not know) treenails about 0.8 mm sitting around. I need to check but if still where I last left them and you could use them I could post over. Save you draw plate time. Regards Vaddoc
-
Now, what a good timing Allan! I ve been scratching my head trying to figure out how these boats were built back then, beyond the keel and planking. I ve been searching the net for my Yawl project but there is little info out there and May's book is not too helpful beyond planking. I am not able to see the document you uploaded though. Vaddoc
-
Jesus Boat ... Rhino
vaddoc replied to tabycz's topic in CAD and 3D Modelling/Drafting Plans with Software
Now this is very interesting. @Waldemar very elegant way of developing the plank overlap and frame notches. The biggest problem is indeed finding the run of the planks. I fiddled with it recently but could not make it work. Of course, CAD programs can unroll a curved surface so the shape of all spilled planks can be created. @tabycz your planks look fantastic. How do you draft the run of the planks on CAD? -
Wood data base suggests it would be the perfect substitute for boxwood so it must be great for modelling, suitable for pretty much all uses. Lancewood | The Wood Database (Hardwood) (wood-database.com)
-
Just caught up with your log Brian, what a fantastic model! But your log is by itself so very interesting. A moment in history that many of us across the pond were not aware of.
-
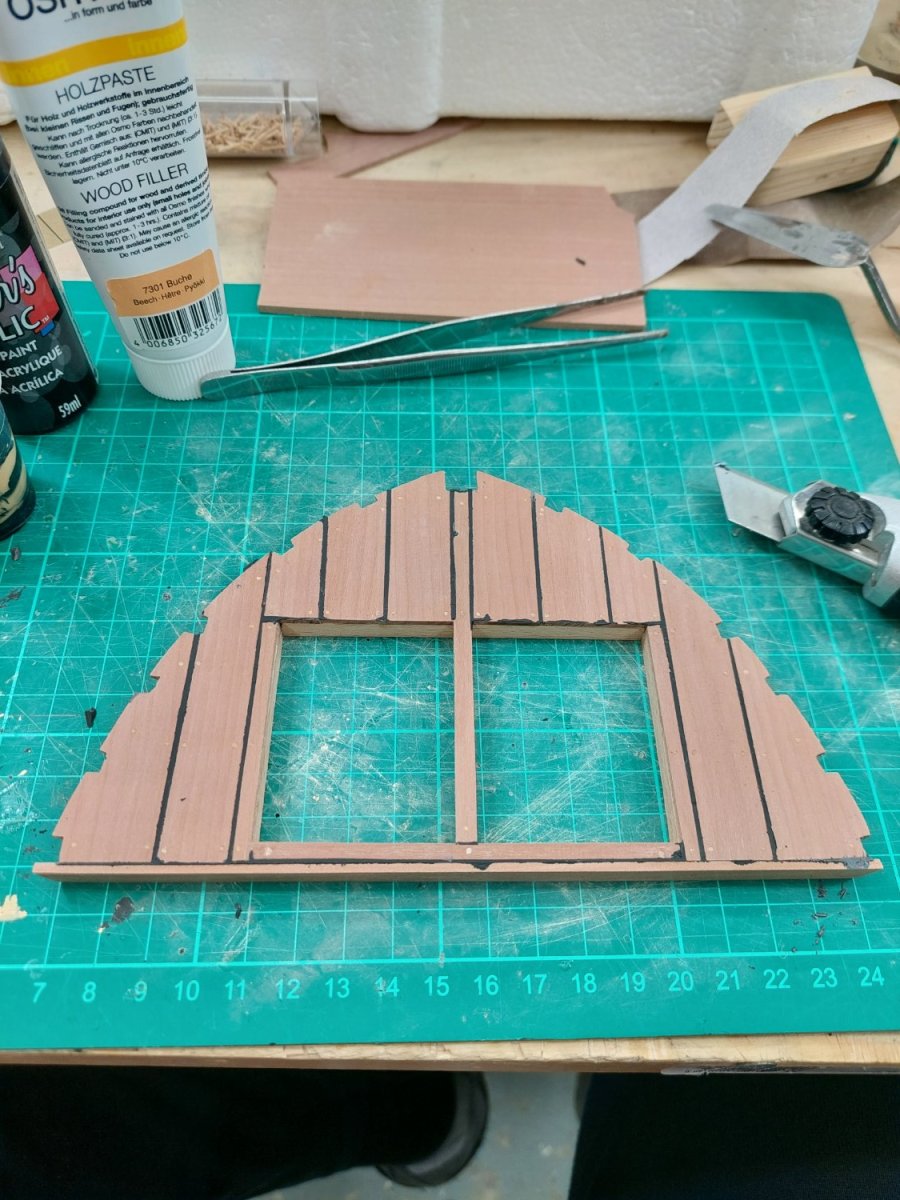
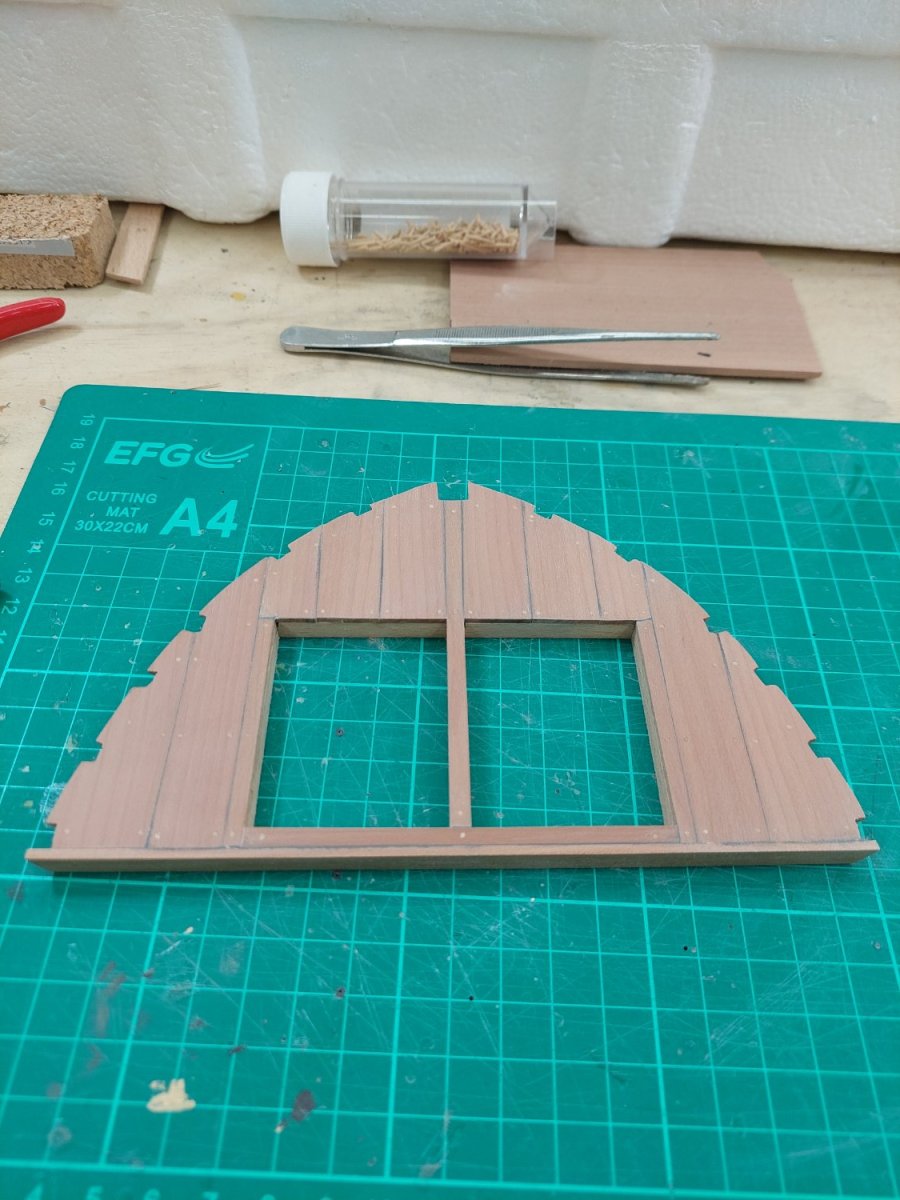
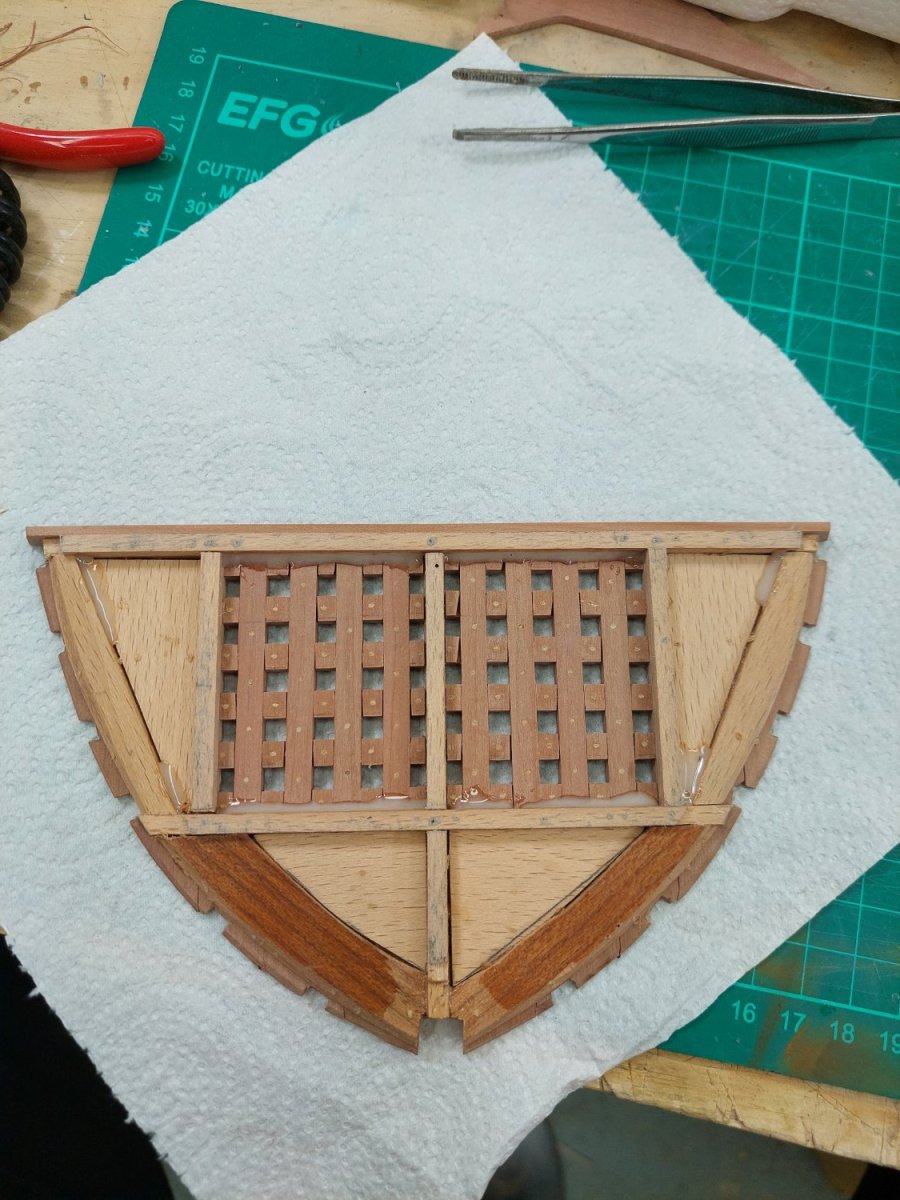
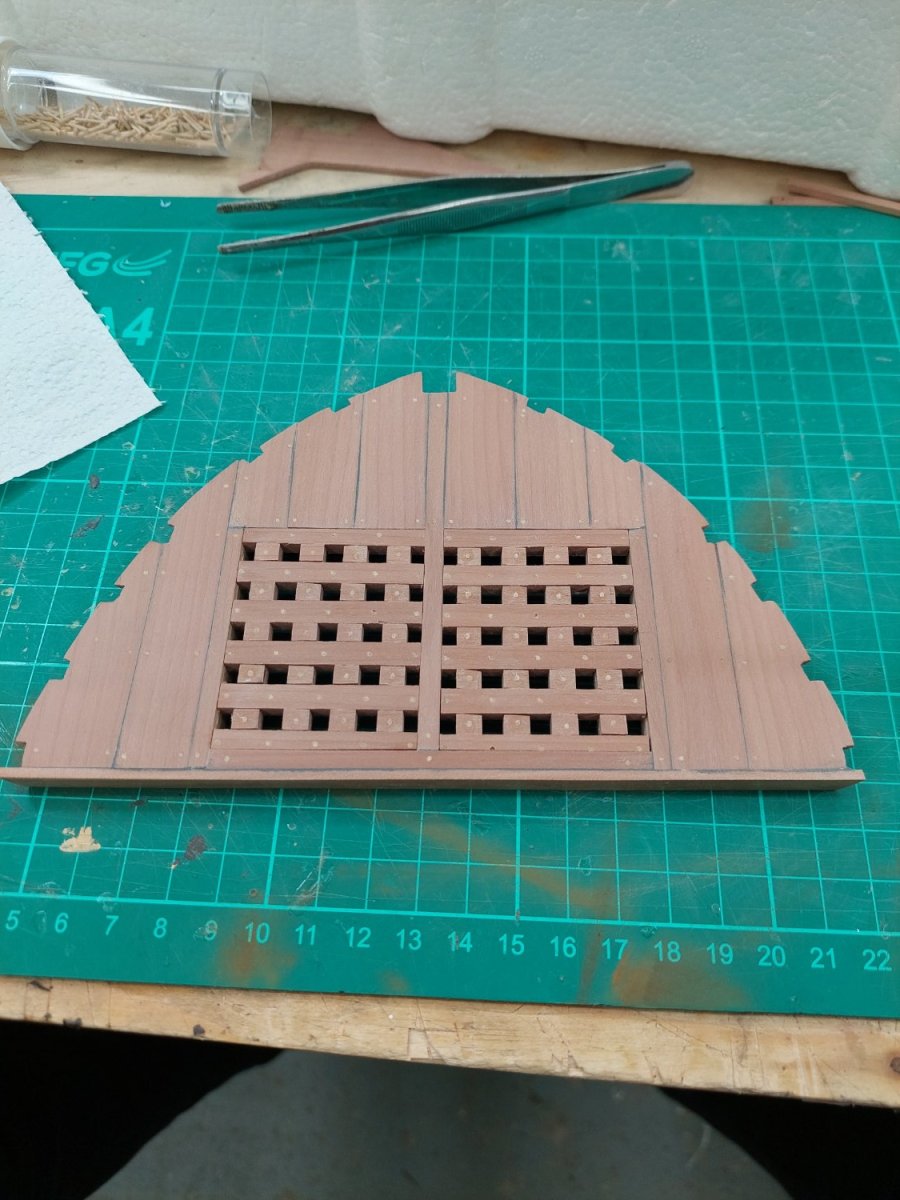
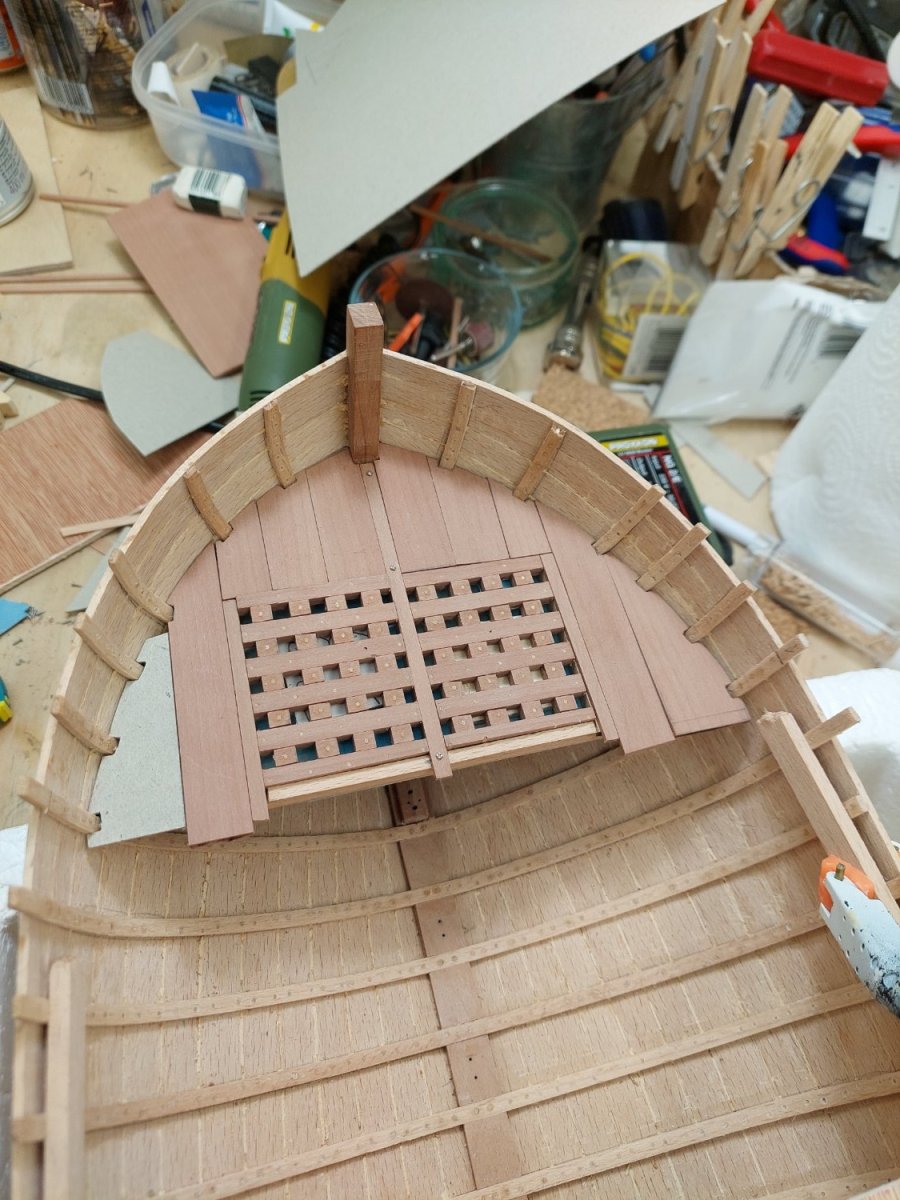
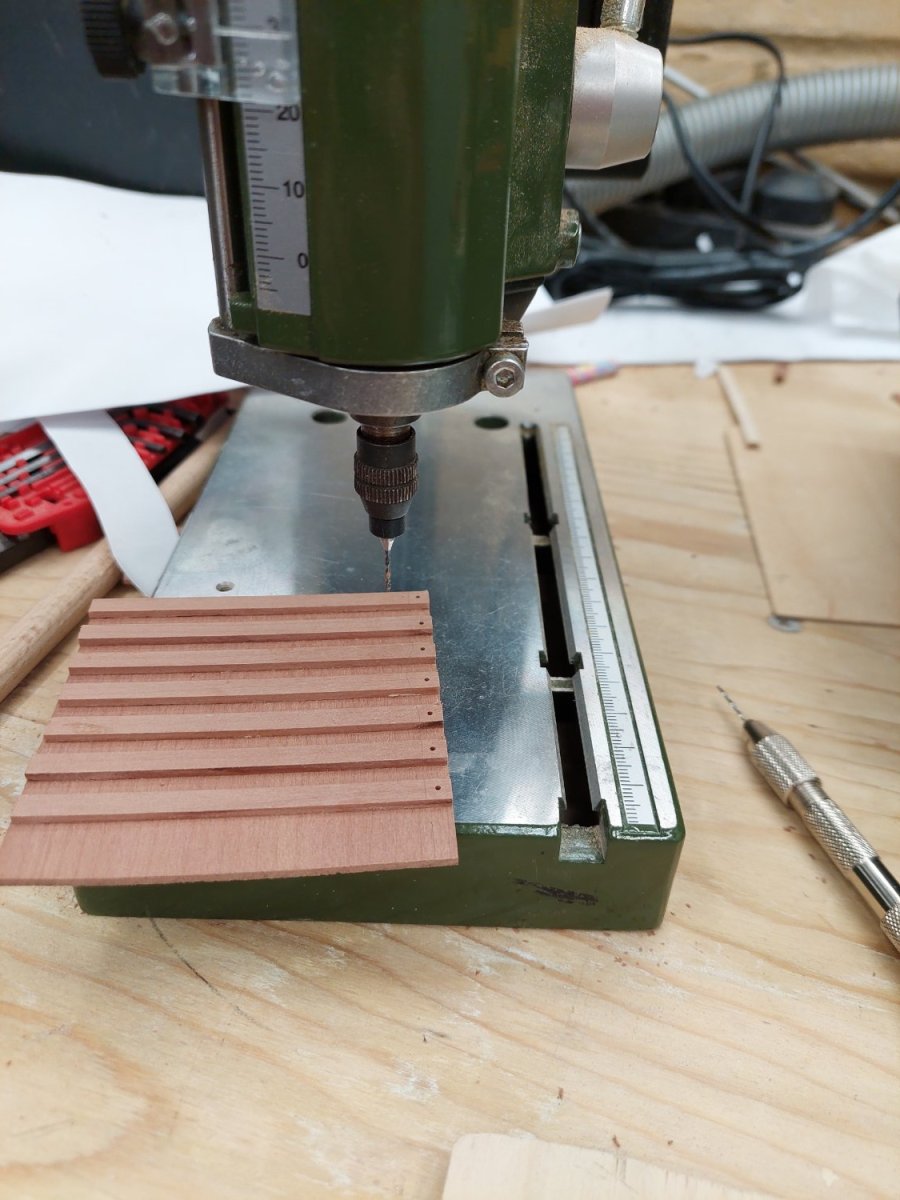
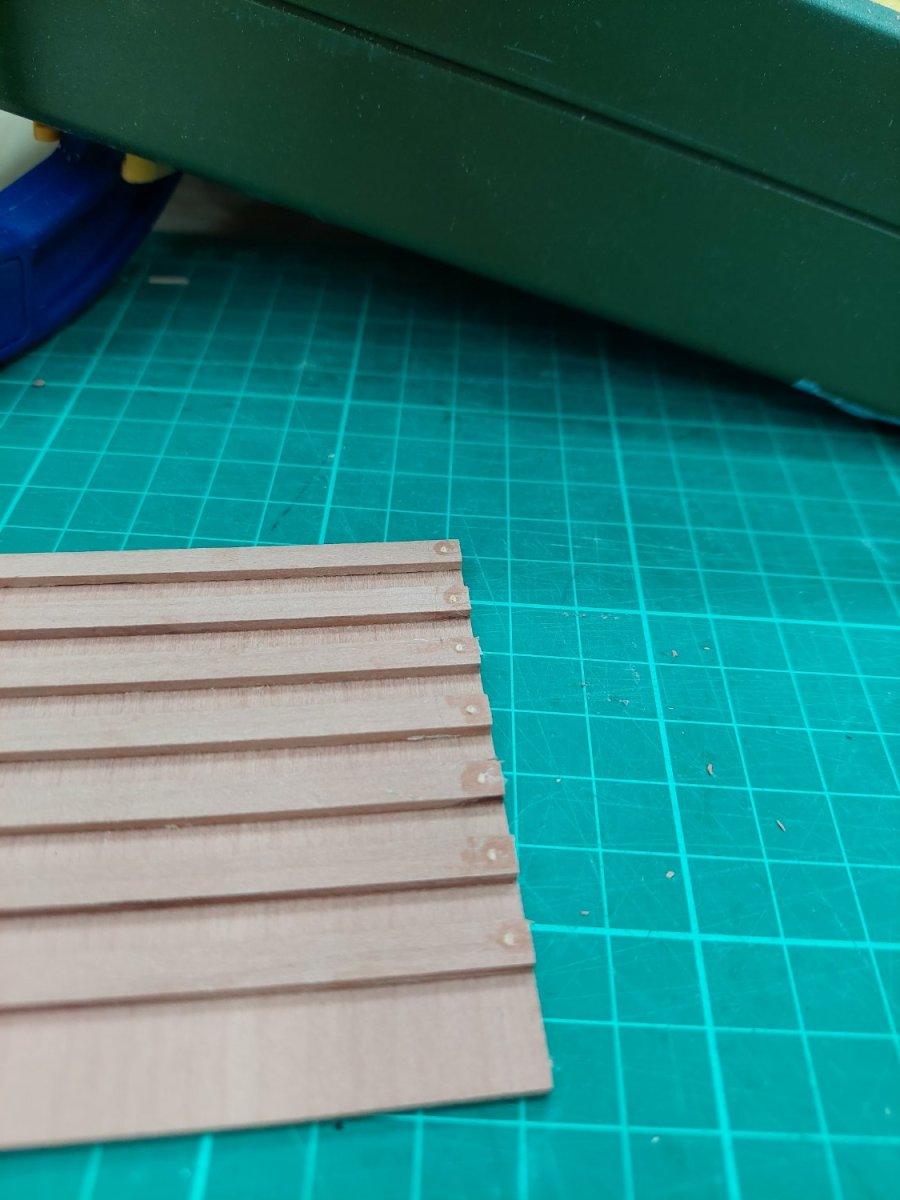
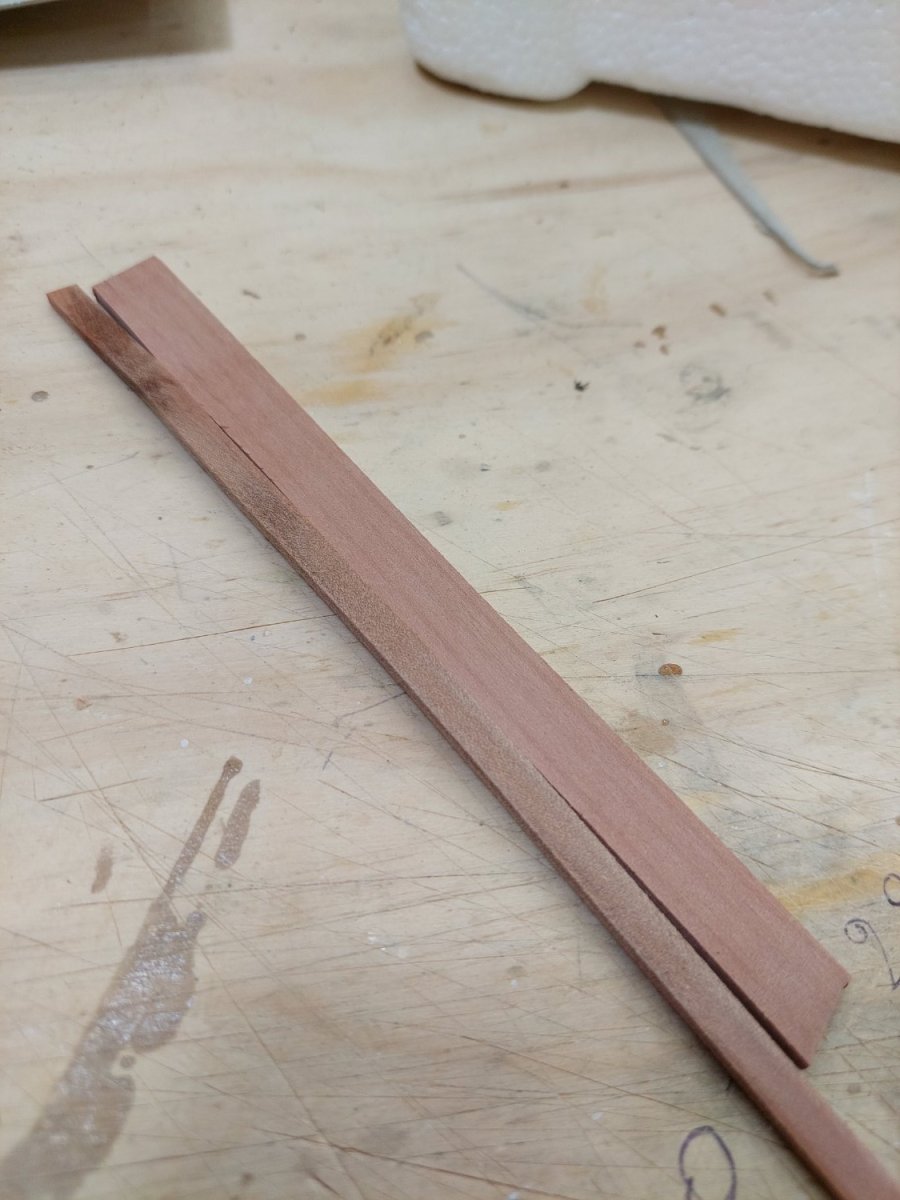
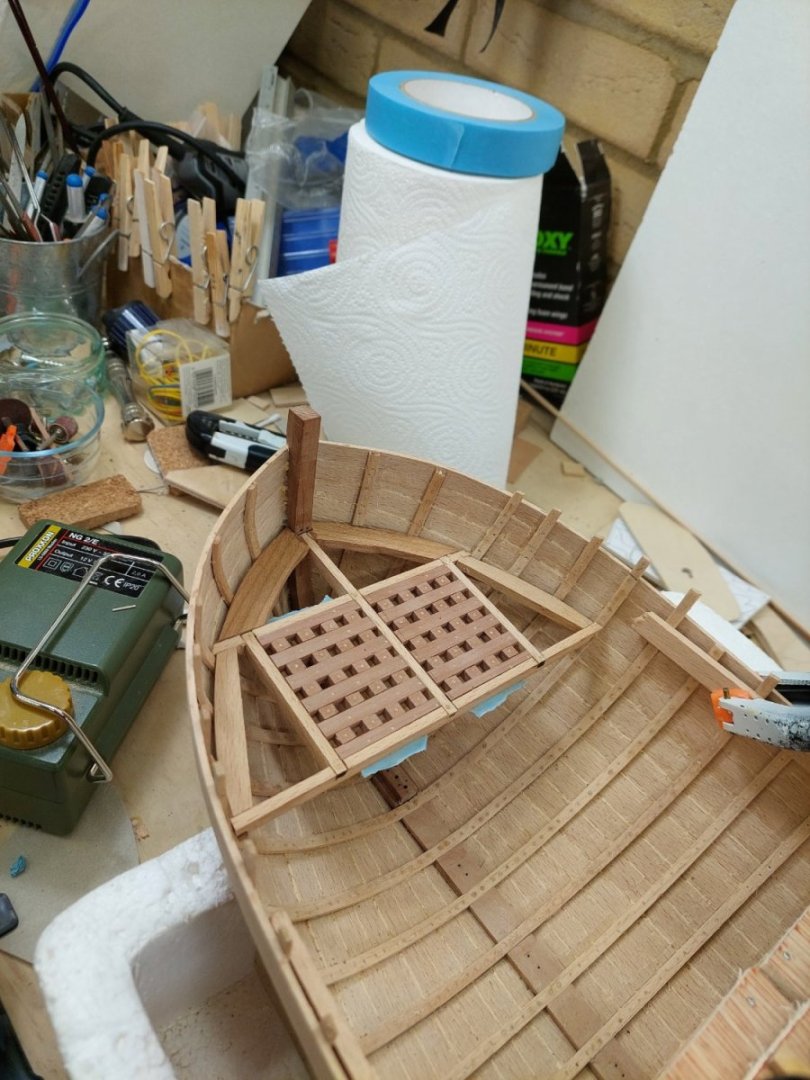
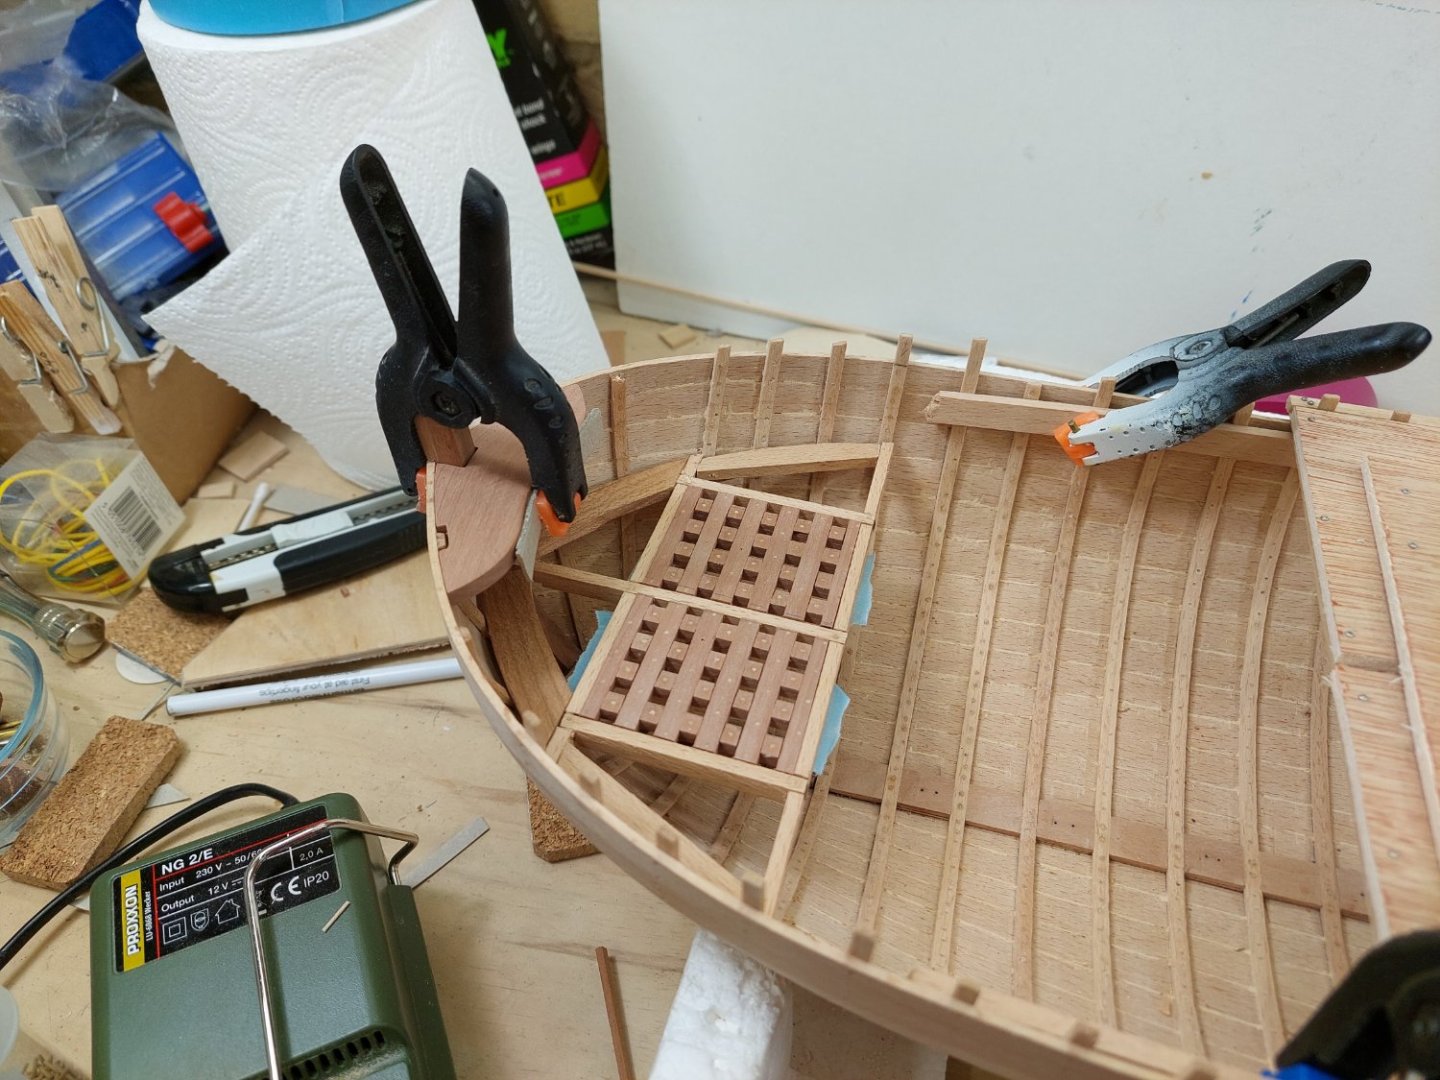
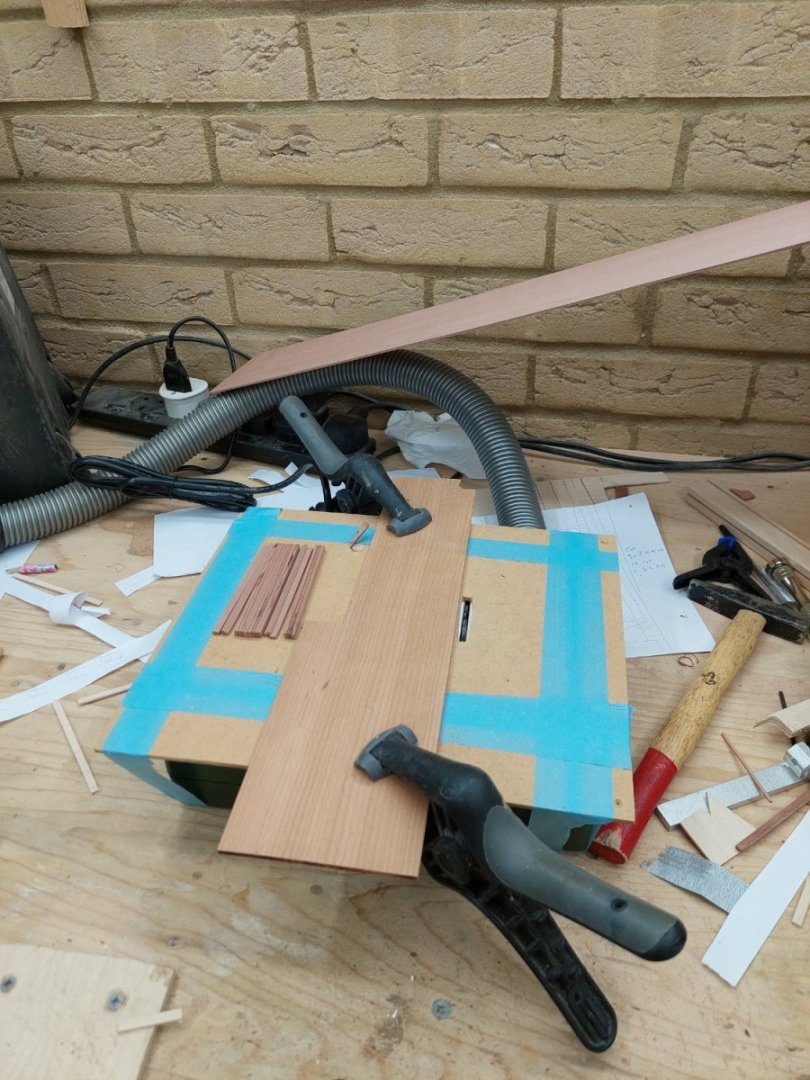
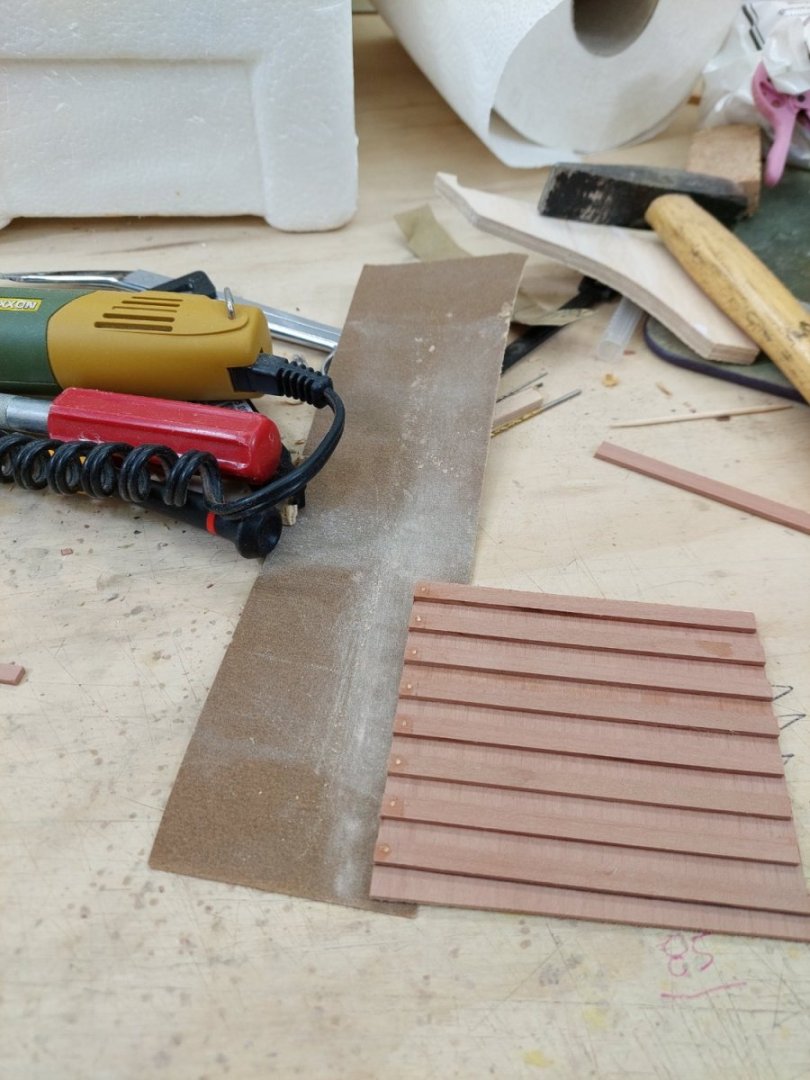
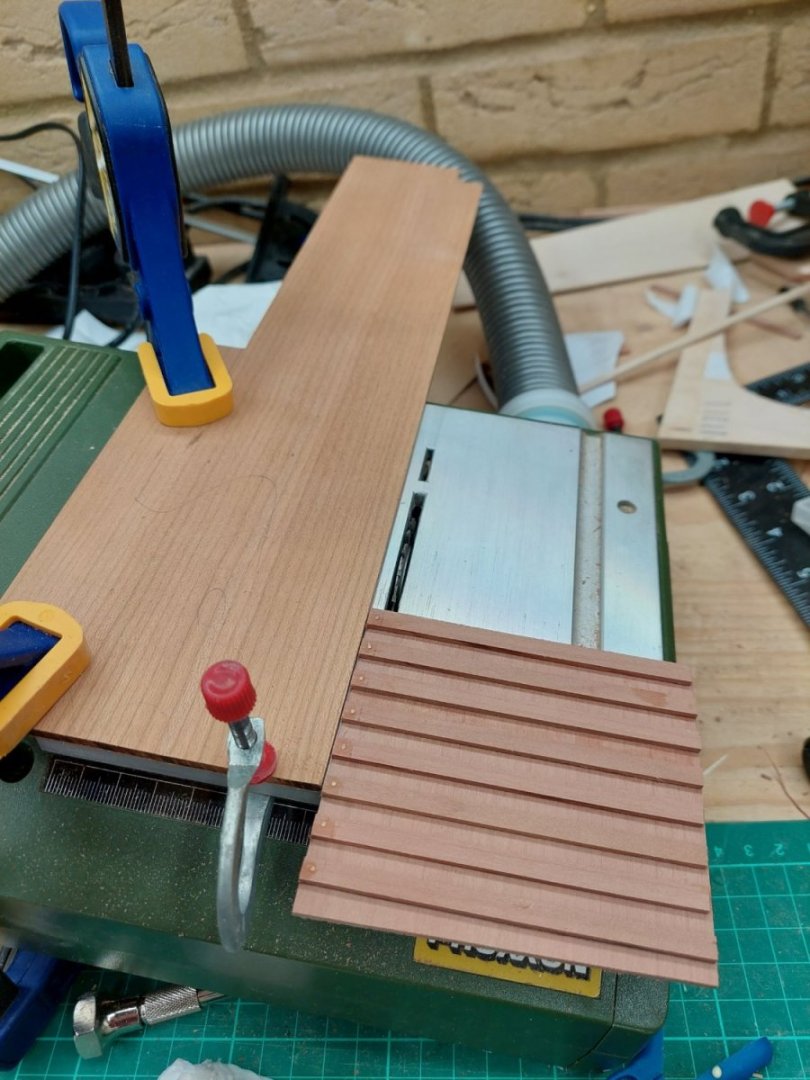
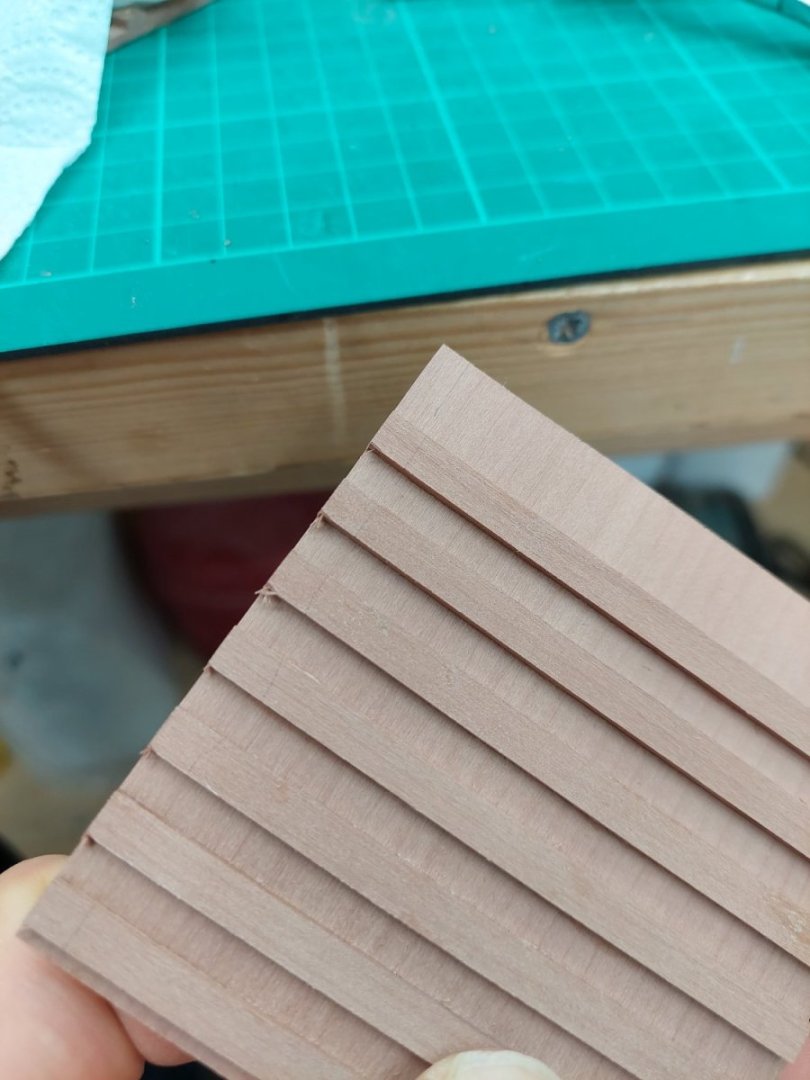
Greetings to all or should I say "Gratings!"? Yes, today we will be scratch-making gratings! Honestly, it is far easier (and less bloody) to get them from Chuck. But I had an itchiness to try and either way, I don't think there are gratings at 1:10 scale. Now, I did make gradings for the Deben but there I cut corners. They came out alright but were not done properly. I ve been scratching my head for the last 2-3 days and tried a few things that did not work. Sadly, a search on MSW was not too helpful. The problem is the scale. If the size of the squares equals that of the table saw blade, things are easy. But in 1:10 scale, my squares are 5 mm and the tine Proxon blade 1 mm thick. So here it goes: I have the small Proxon table saw, it is very underpowered but actually quite accurate and easy to use. I first added a sheet on top of the table saw so that I could clamp something to act as a fence. Then, I cut several 5 mm strips from a pear sheet, I think it is 3 mm thick. Then, I glued the strips on another piece of pear sheet. Then, I drilled, inserted treenails dipped in PVA glue, allowed a few minutes to dry (in the meantime worked on a second piece), then lightly sanded and cut a strip across. I actually forgot to take pictures but the strips produced look like this After I made very many, I managed to cut my finger, thankfully not deep at all. Then, I started to assemble the gratings. I had to trim every single square with a sharp chisel, by afternoon the dining room was full of tiny wood chippings but the gratings came out quite acceptable I think. They still miss a few tree nails and need sanding, gluing and trimming but I am happy. Apologies for the terrible photo, I ll take a better one for the next post. Of course they are far from perfect, the tree nails are in the wrong positions, the squares are not perfect or symmetrical, the grain runs parallel in all pieces instead of crossing 90 degrees (not an issue with pear) but I can live with these. So I have 3 pieces, one will go on the small deck at the bow, one to the floor aft and the third one I have not figured out yet where I ll use it. Best wishes Vaddoc


- 232 replies
-
- 10
-
-
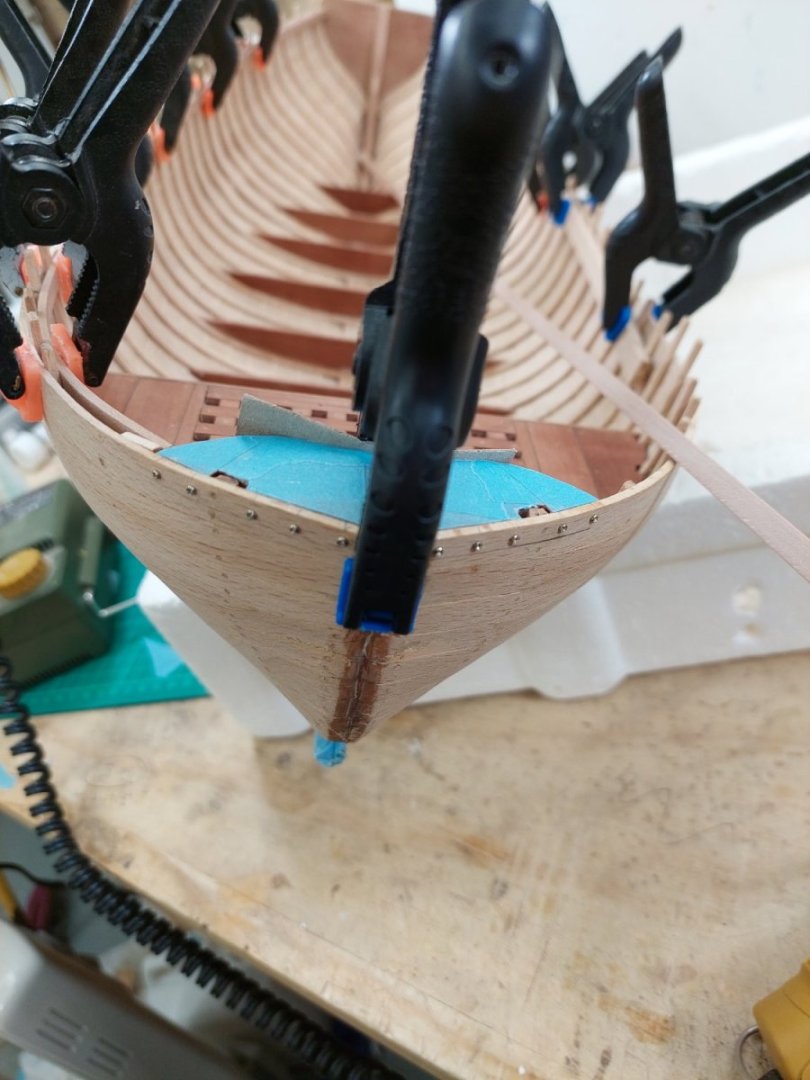
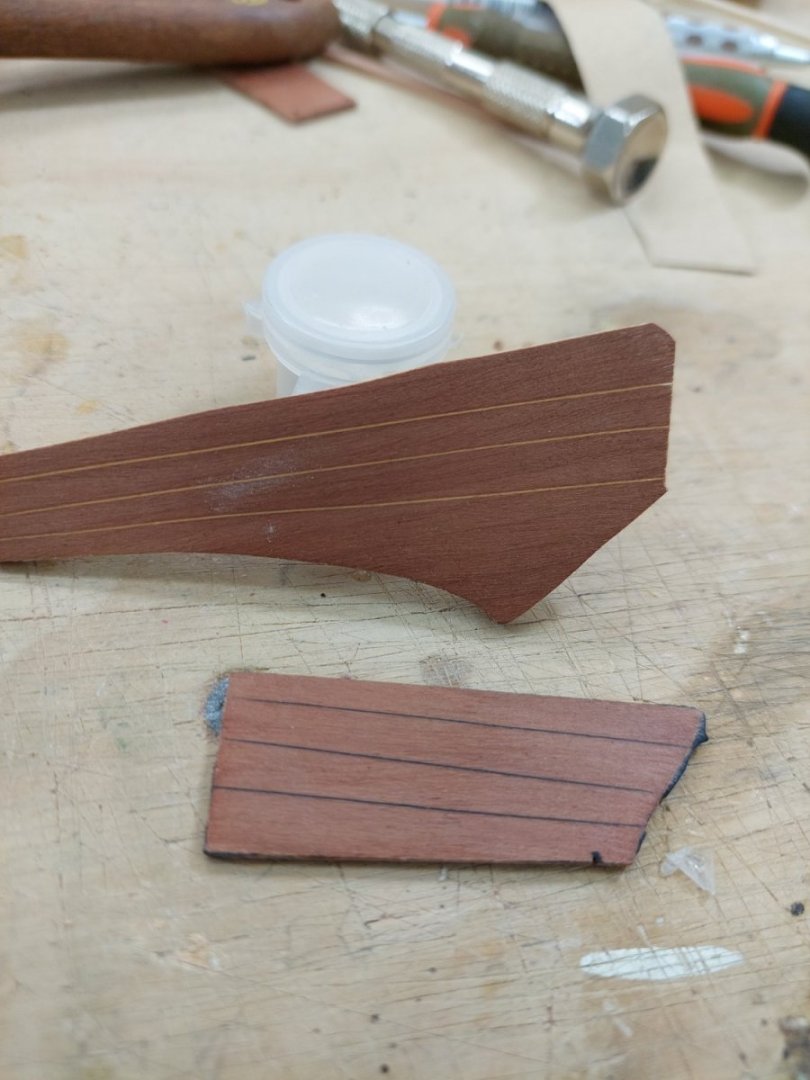
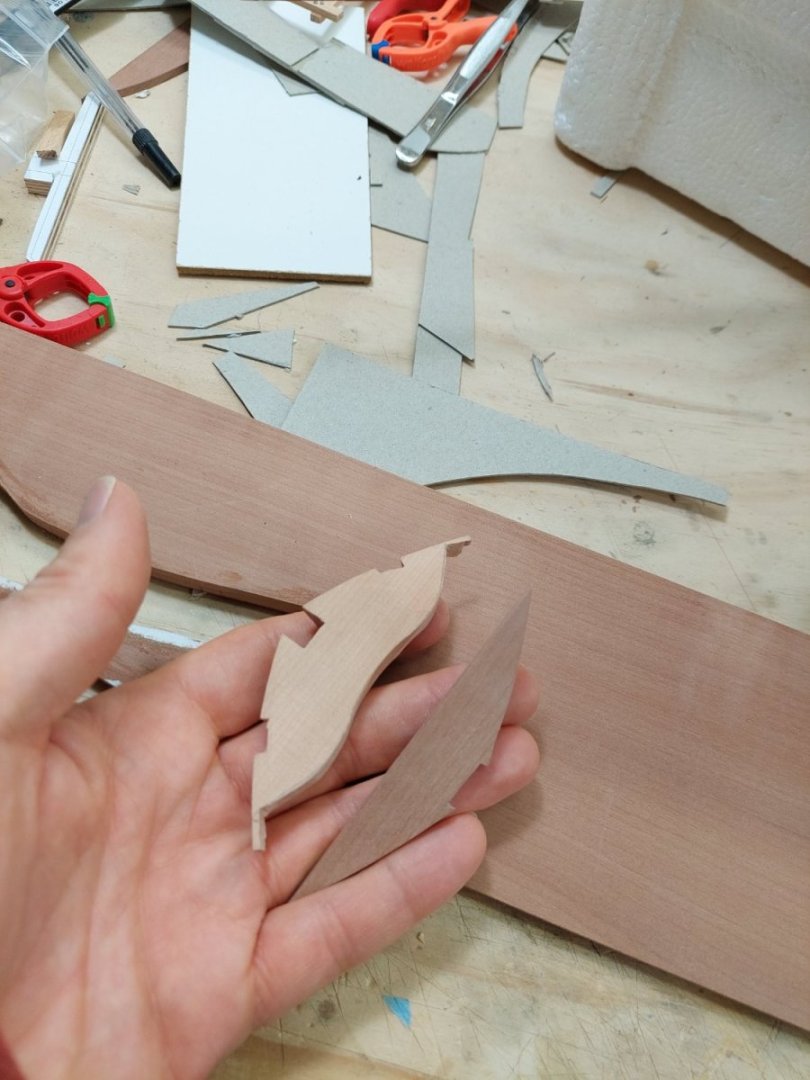
@mtaylor Thanks Mark, I am sure I ll figure it out, as always lots of good info on MSW. @Bedford I was not aware of Shackleton's open see adventure, amazing strength and indomitable spirit. Tiny boat! @iMustBeCrazy Thanks Craig, very interesting. Could I ask, I see you painted the boat inside. Would you do it again, or would you leave it unpainted? I would like to paint it but I am concerned the paint will bring out the many imperfections and will not look good. A bit more work done. I finished the floors, they came out ok relatively painlessly. I then started thinking how the small deck could be arranged. It took a long time and a lot of wasted cardboard, nothing is finalised but I have a vague idea how it will go. Then I made again the breasthook. The one I made was fine but the pear wood was the wrong colour, I used a sheet of apparently unsteamed pear that came from a not so good order of wood I got years ago. I made it again but this took hours, I kept messing it up. Finally, it came out fine. I then trimmed the excess plank length at the transom, I have been putting it off for some time now. This needed a seriously sharp chisel. I then boiled some pear wood strips and wrapped them around the hull to take the shape, I think it is time to start putting the boat together. Unfortunately, putting the end of the strips in boiling water had a dramatic effect on the wood. Even after it was cold, it was very soft and pliable and the colour changed from pink to a dead brown. The next photo did not capture the colours well. I ve actually never steamed pear before, I hope the colour will return after it dries. Vaddoc


-
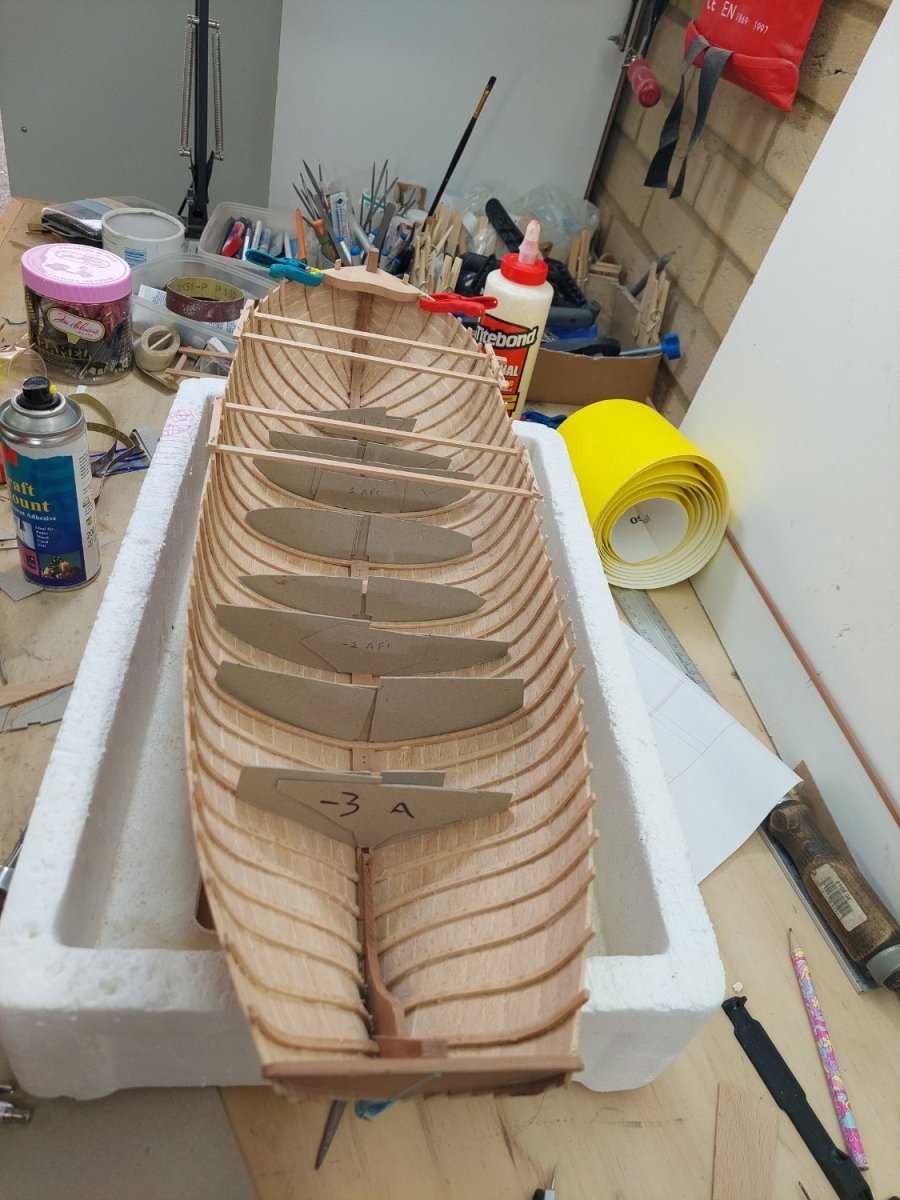
Well, it's official: I am Covid positive! I am actually quite well apart from some odd symptoms and fatigue and there is a good aspect to it: I ll be able to work on the boat for the next few days. So today some more progress. I first made a rough template for a deck to sit bellow the breast hook. I d like this deck to have grating but I do not have a mill so I must figure an easy way to do it with the tools I have. Next, I started cutting the floor timbers and sanding them to height (16mm so that the floor to top of thwarts will be 45 cm in full scale). Unexpectedly tricky, I made two and wasted some expensive pear wood. These are 16 mm high or 16 cm in the real boat. Kind of look a bit high and going a bit wide and high up the sides. I could lower to 11 cm but then as discussed above, the thwarts will sit 50 cm above the floors - a bit too much. I ll cut a few more timbers and see how they look. Regards Vaddoc

-
@iMustBeCrazy Thank you Craig! What you say makes total sense, actually I measured the height of my office chair and is indeed 45 cm. I could raise the floors timbers to such a height, this would make a very wide floor but I wonder if the bat will look a bit shallow compared to its length and whether in real life it would be a bit top heavy - but it is a very wide boat on the other side. also thanks for the high resolution pictures, very nice.
-
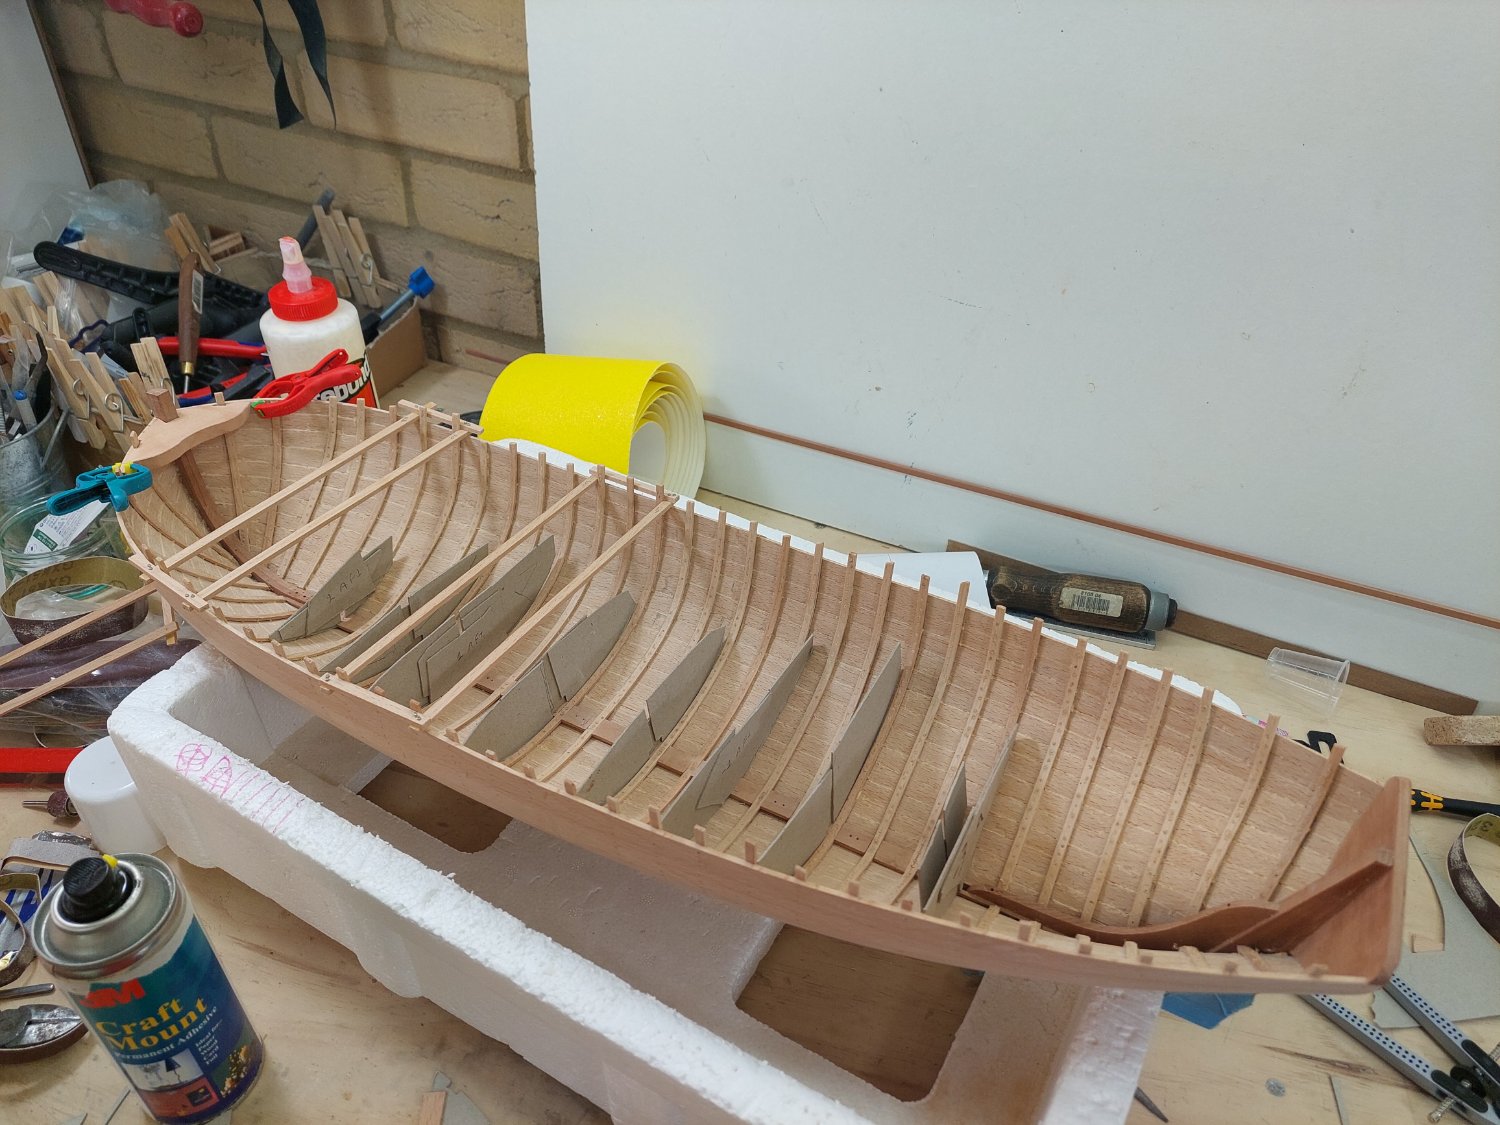
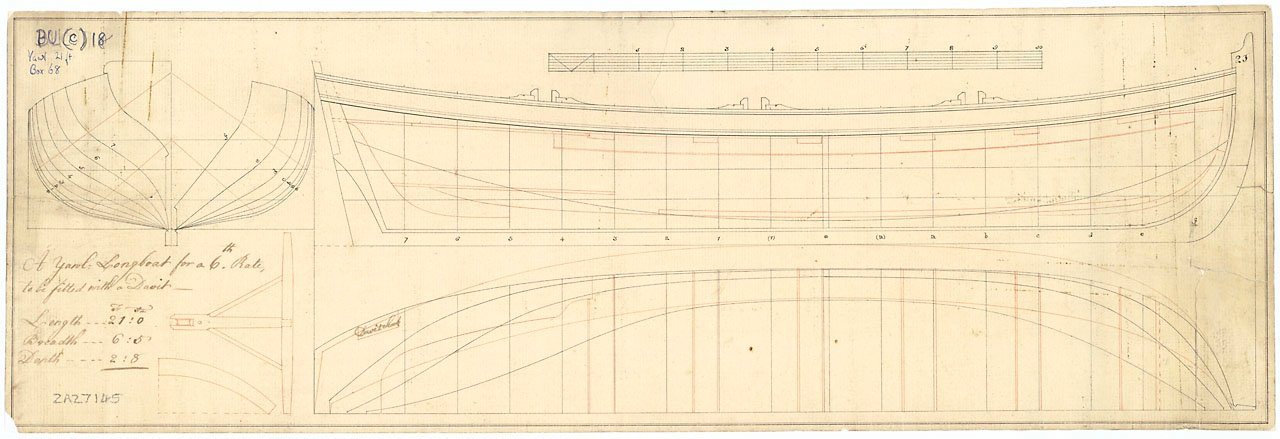
Well, time for another update! I was unwell and stayed home, so got to work a bit more on the boat. Now, there is some progress but also a lot of questions to be answered and decisions to be made. Any of your thoughts would be most welcome! First issue is how high to place the thwarts and the floor boards. I tried to find relevant info in books and the internet but did not get anywhere. In the end I measured the original NMN plans and the actual dimensions of the model and tried to use common sense for a realistic and comfortable arrangement. At midships, keel to sheer will be 83 mm or in real boat, 83 cm. I think the distance top of thwart to sheer should be 20 cm. The floor timbers should be something like 10 cm high to allow a reasonably wide floor and the top of the thwarts will be about 50 cm from the floor boards. I think this should be a realistic arrangement. Then again, those days people were probably shorter than we are today. Oh well... Time for a few photos. I first made the breasthook. It was a bit fiddly, sanding it curved and bevelled but actually I got it with the first attempt, which was good as pear wood sheets this thick are expensive. However, it did look a bit huge and out of scale so I reduce it - I think it looks much better now. I think I might add a small deck bellow the breasthook, I think this is what the plans show: I then made template for the floor timbers. Again, it was actually a pretty straightforward job. Now, these are my thoughts: I d like to seal the interior, prime it and paint it white but keeping the pear wood transom, keel and floors unpainted, these will be enhanced with Tung oil. The stringer that will support the thwarts will also be painted white but everything else added will be unpainted pear wood treated with Tung oil. The outer keel will be painted last. Alternatively, I could leave the interion unpainted. Just apply Tung oil, seal with water based sealer, rub with 0000 steel wool and then add all the remaining pear wood trims etc and last paint the outer hull. I do have a suspicion that if I paint the interior, since it is not well sanded and prepared, it might look horrible with all imperfections highlighted by the paint. Any suggestions would be very welcome! Regards Vaddoc


-
Work bench width and height - any recommendations?
vaddoc replied to Dr PR's topic in Modeling tools and Workshop Equipment
I used the design of the fellow in the link bellow. Heavy and super solid bench, cheap to make too. The selves underneath are very practical. I made a large one and then I made an even larger one. Go big, longer and wider than you plan. I think my benches are 90 cm high but I like to sit in tall stools.