HOLIDAY DONATION DRIVE - SUPPORT MSW - DO YOUR PART TO KEEP THIS GREAT FORUM GOING! (Only 20 donations so far - C'mon guys!)
×

puckotred
-
Posts
434 -
Joined
-
Last visited
Content Type
Profiles
Forums
Gallery
Events
Everything posted by puckotred
-
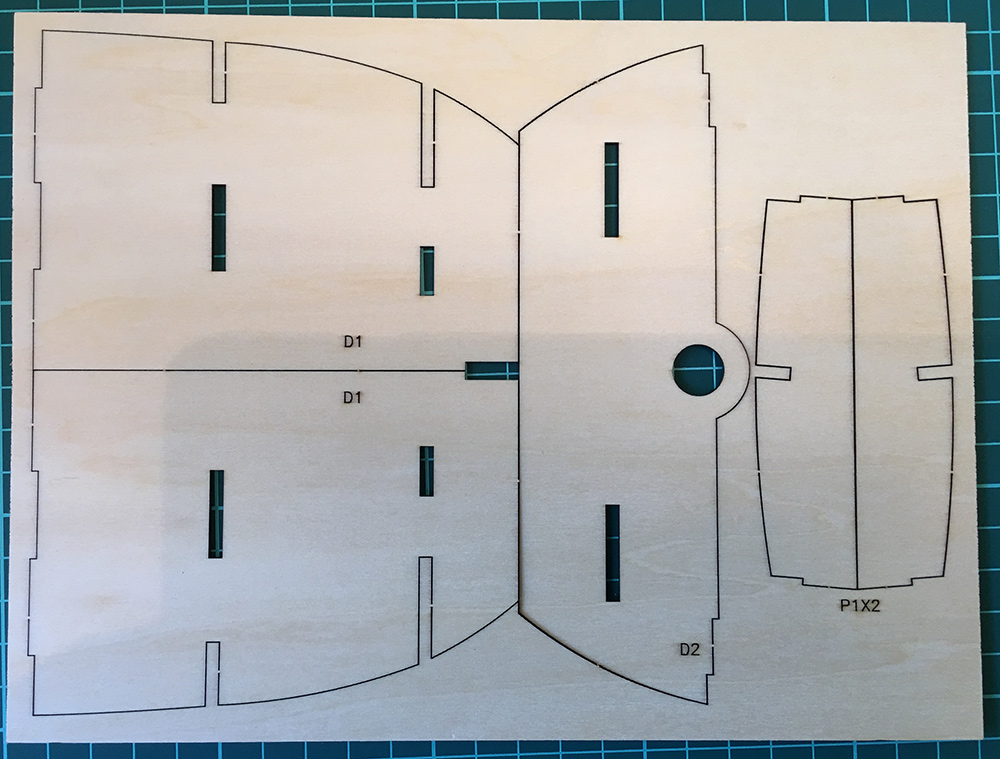
 Jan: One more frame to go in October. The stern is built like a box and can't really be called frames. I was wrong about frames 9 and 10! If you look at part D3 ("deck") here you'll see that the slot fits with the width of frame 9 and 10. So DeAgostini has some meaning with the "bulge" by frame 9. Now bedtime for me!
- 305 replies
-
- 5
-

-
- deagostini
- vasa
- (and 1 more)
-
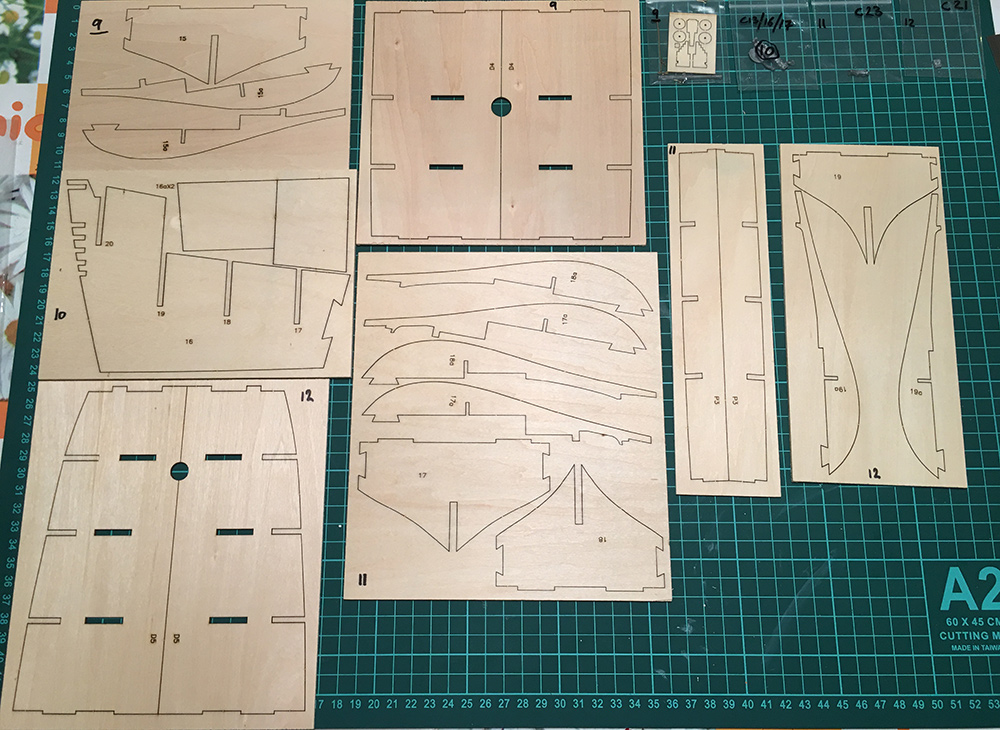
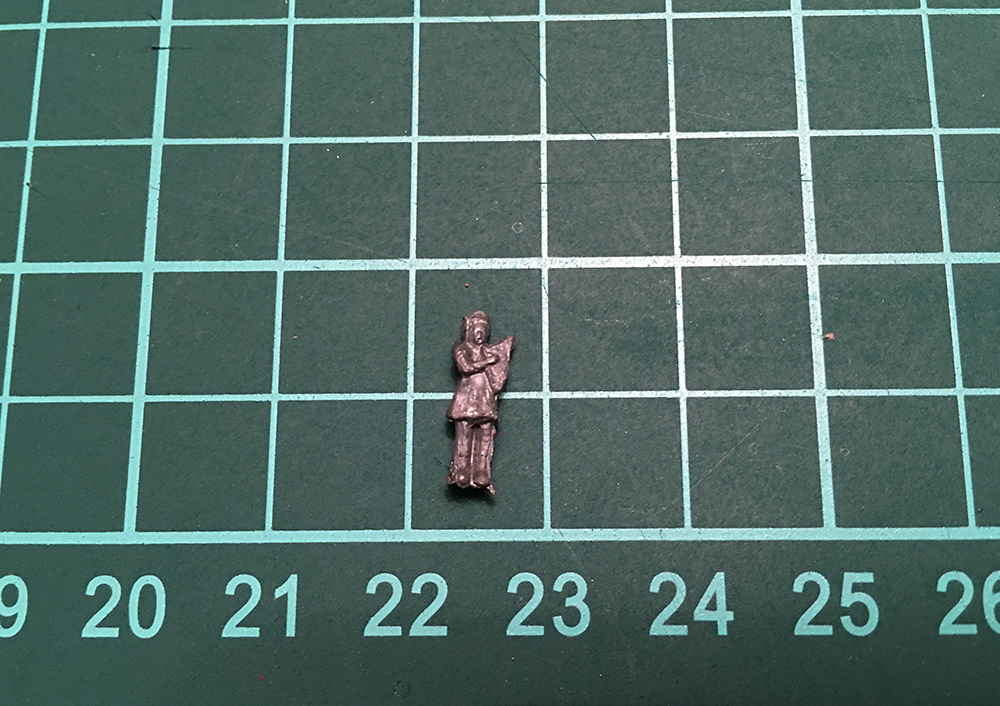
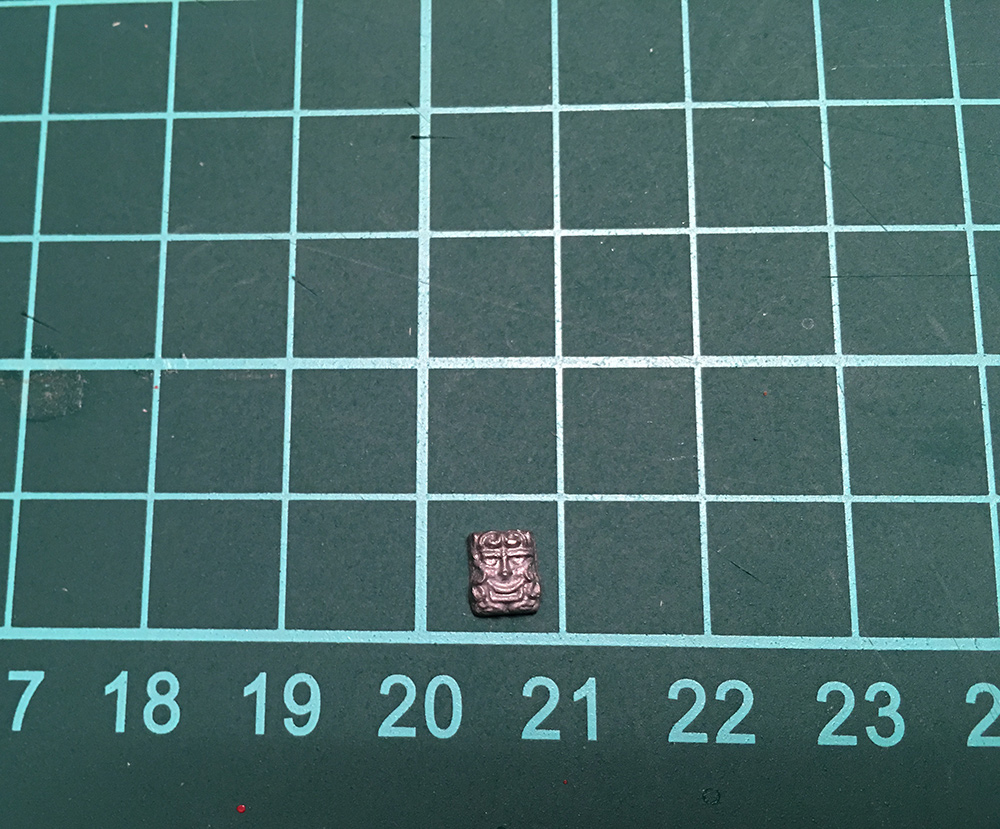
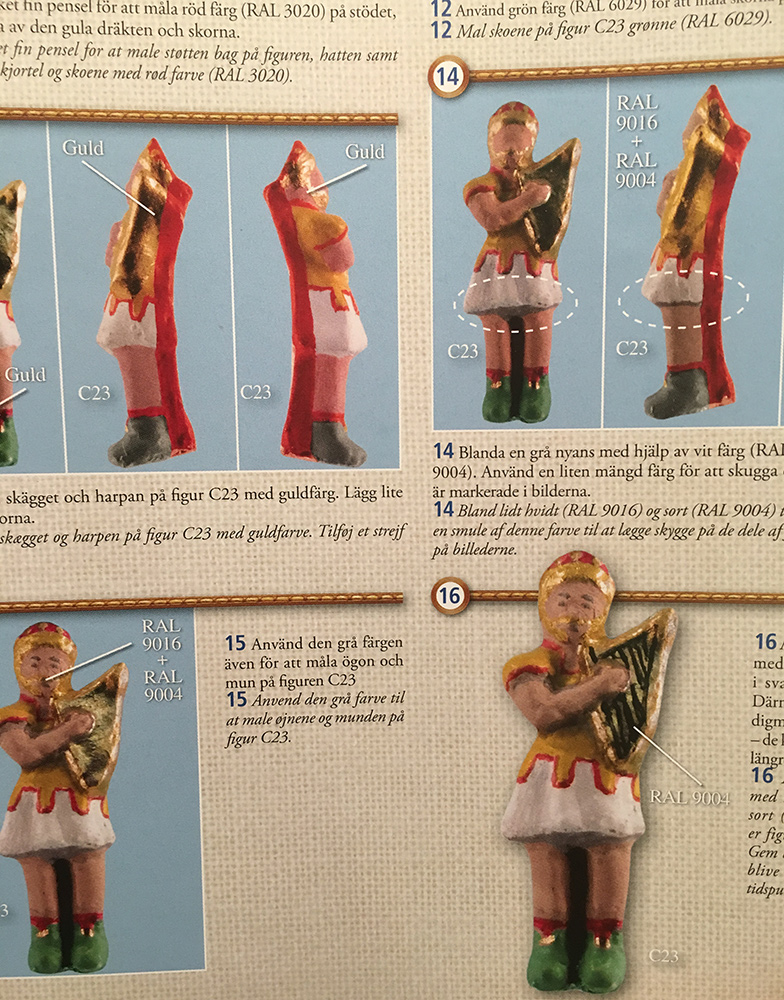
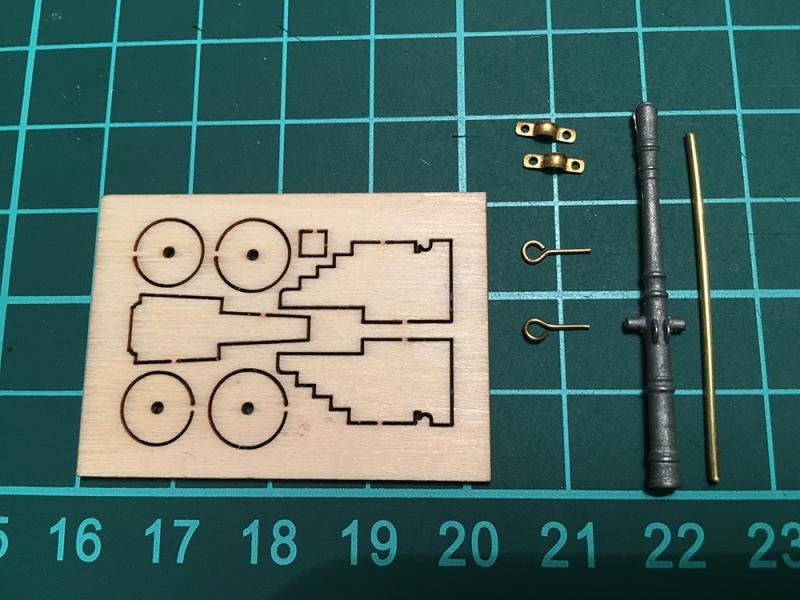
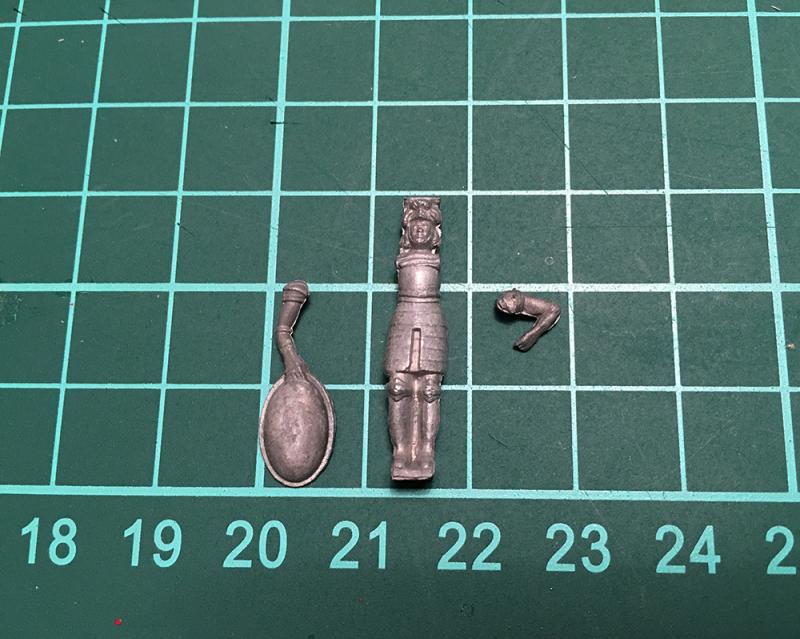
Hello folks, Sometimes it just happens! Shipment #4 arrived today! 2 weeks early!!! And I'm not even finished painting the decorations from last shipment. And this is the contents of issue 9, 10 11 and 12: frames15 to 19, the last bit of the keel and deck or whatever one should call them. More like reinforcements. One cannon: Another knight: A harp player: And a Golem or demon or something: If you look at the size of the knight and the harpist and then look at the instructions on how to paint them, you'll see that the level of detail is almost absurd! So you know I will need these (That came "free" in this shipment.): Well, back to painting last month's decorations!


- 305 replies
-
- 9
-
-
- deagostini
- vasa
- (and 1 more)
-
Hello Peter Remember I'm color blind, I have to go after what it says on the paint container. Thanks for the input, all help is welcome. I'll try without white this evening. The paints are Revell, Humbrol, Admiralty and Vallejo. Whatever I can get my hands on...
- 305 replies
-
- 3
-
-
- deagostini
- vasa
- (and 1 more)
-
Robin: The figures are primed, but the paint wears off after too much handling. Bob: (Let's hope the eyes will get better )
- 305 replies
-
- 2
-
-
- deagostini
- vasa
- (and 1 more)
-
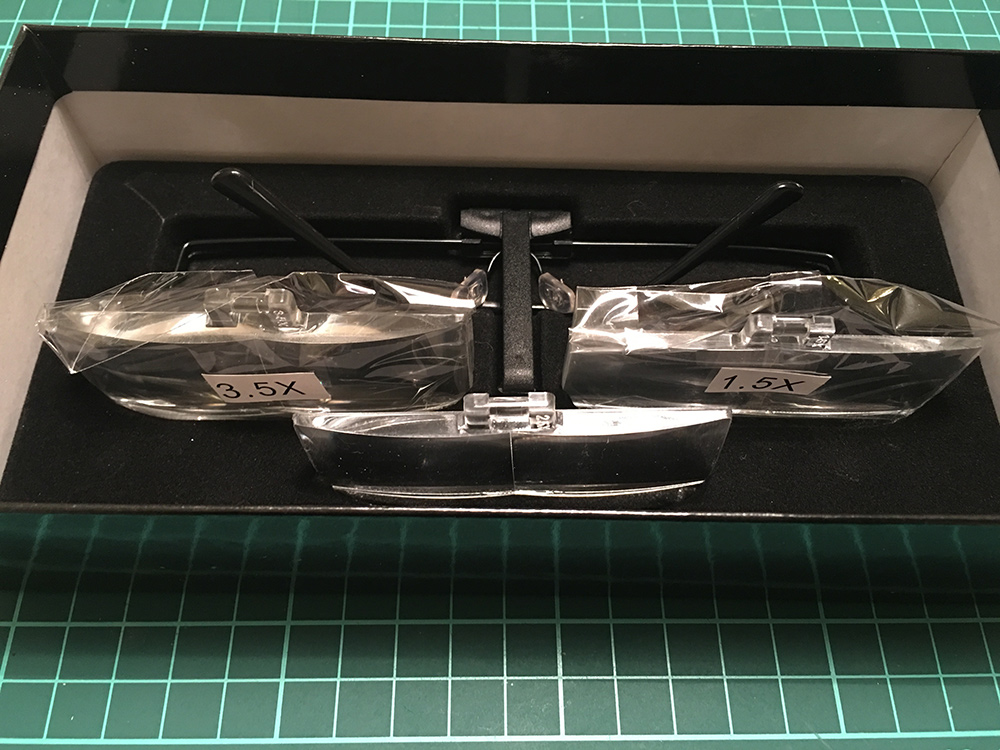
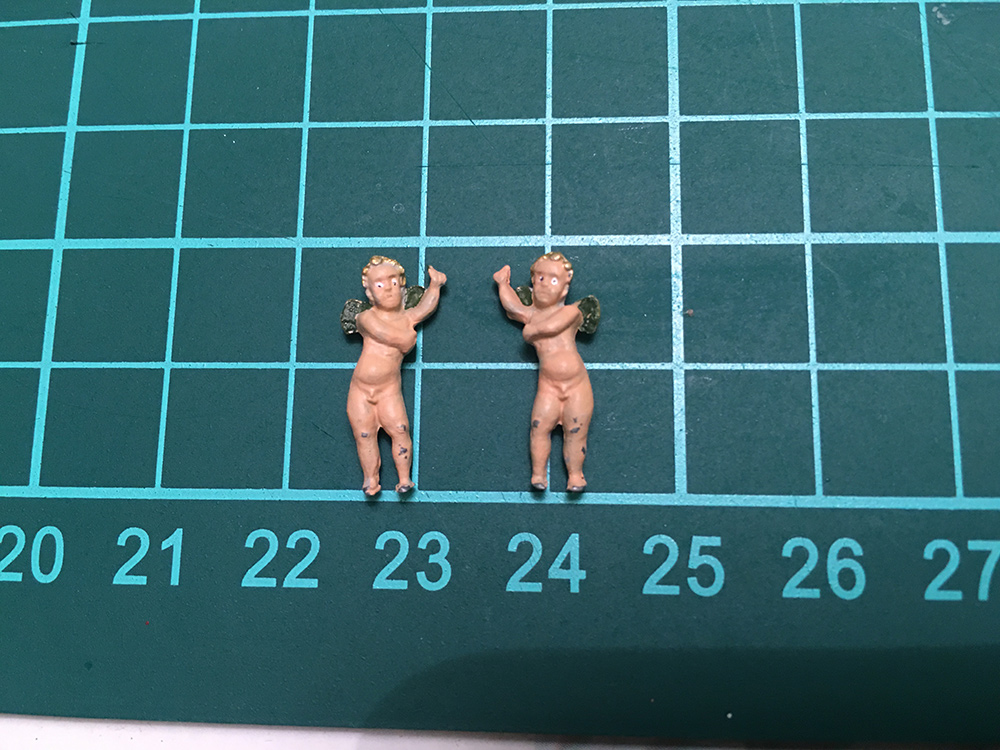
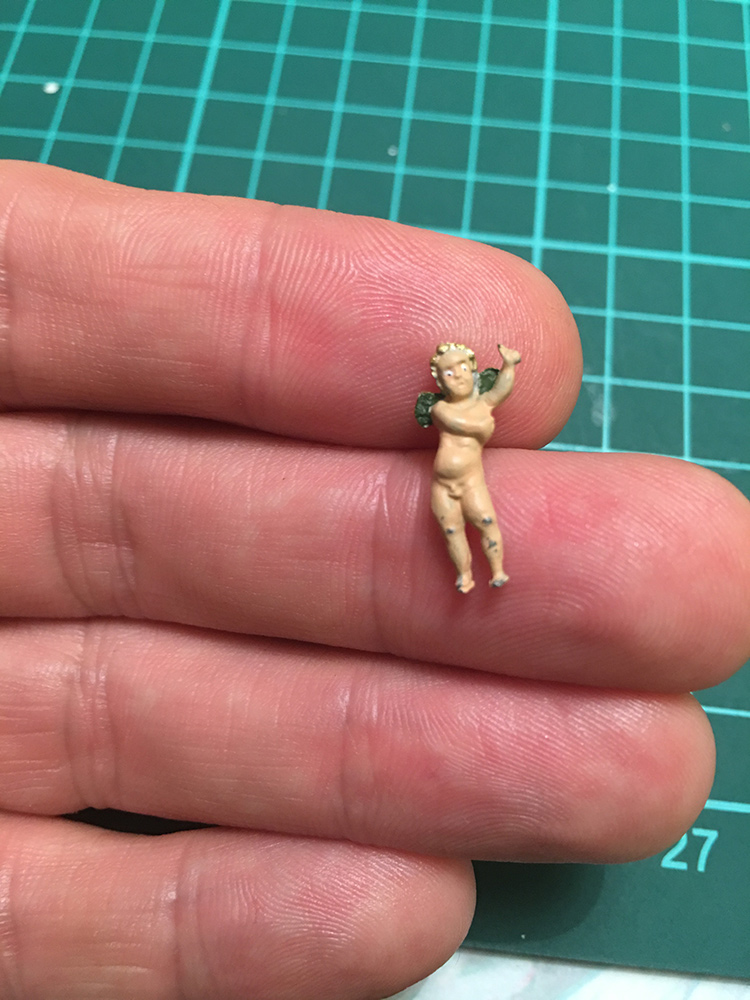
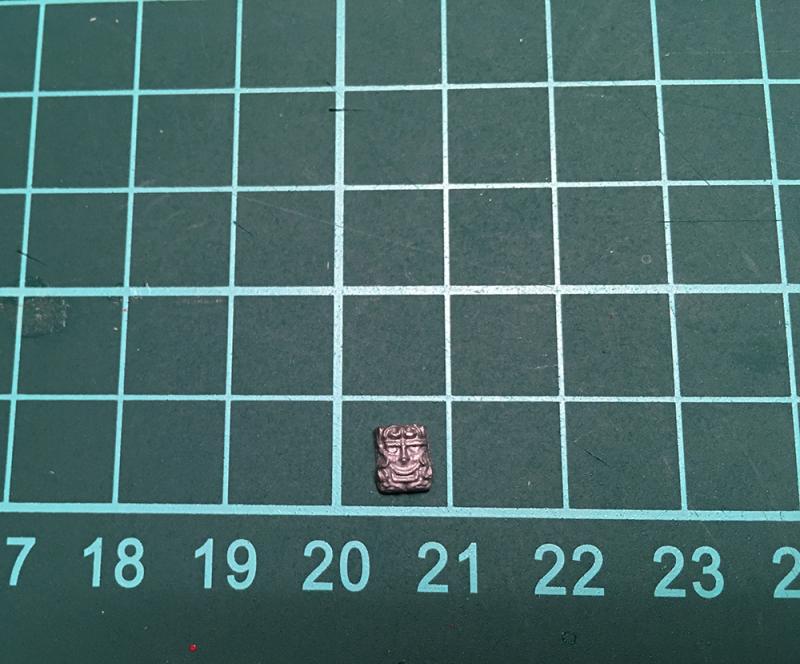
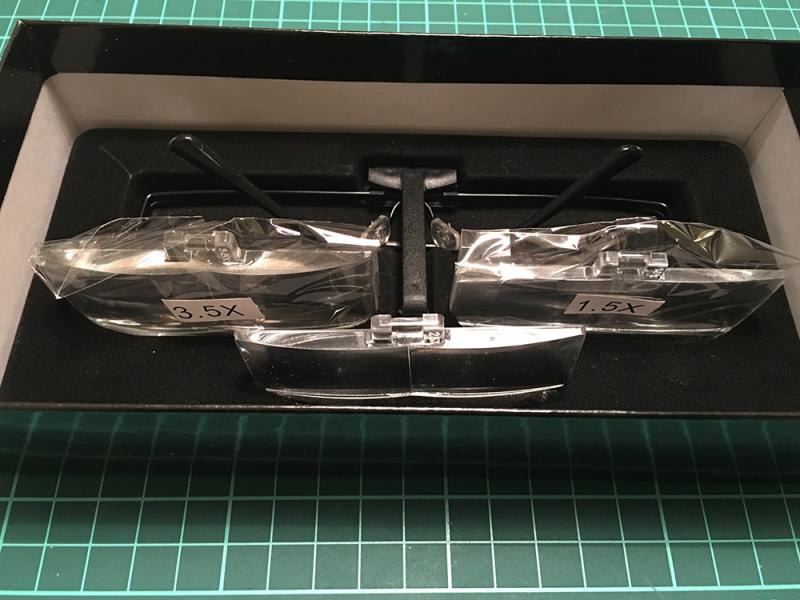
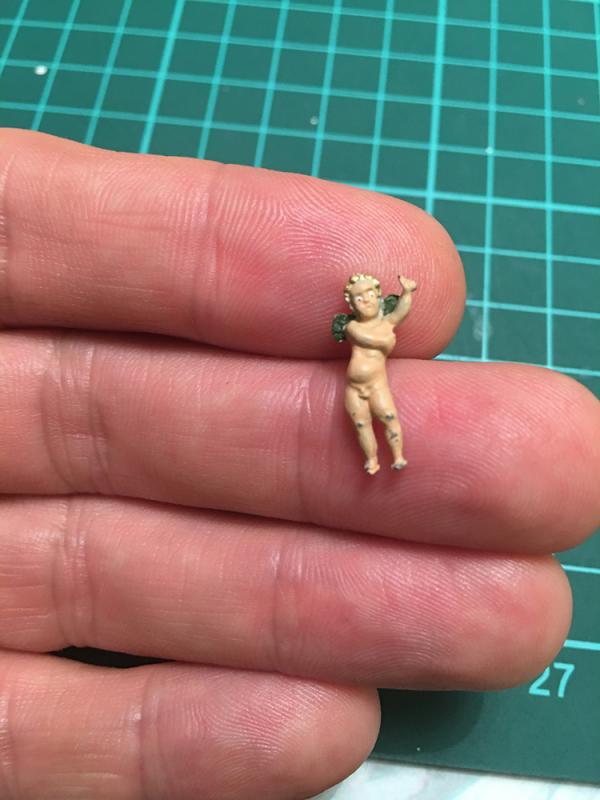
An Itsy Bitsy Teenie Weenie update: I started painting the decorations. This is how far I got after a couple of hours. Still have to redo the eyes a couple of times: And touch up on the skin. The figures are so small that when I miss the spot where the pupils should be I have to start all over with the whites again... It's just impossible to scrape the paint off so repainting is the thing. To illustrate the size of these little buggers: There are a pair of magnifying glasses with the next shipment. I may have to wait until they arrive...
- 305 replies
-
- 4
-
-
- deagostini
- vasa
- (and 1 more)
-
Good job, Sjors!
-
Ok, I'll go along with the frames as they are. just me getting picky with age I guess Thanks all for input.
- 305 replies
-
- 2
-
-
- deagostini
- vasa
- (and 1 more)
-
Bob: If you look at the last photo on page 6 there's a quite a dent in the planking But the Italians seem to be more worried with the sturdiness of the hull. Wonder why, it's a static model after all. oh well, We'll have to see. It might do with some sanding and such in the end...
- 305 replies
-
- 1
-
-
- deagostini
- vasa
- (and 1 more)
-
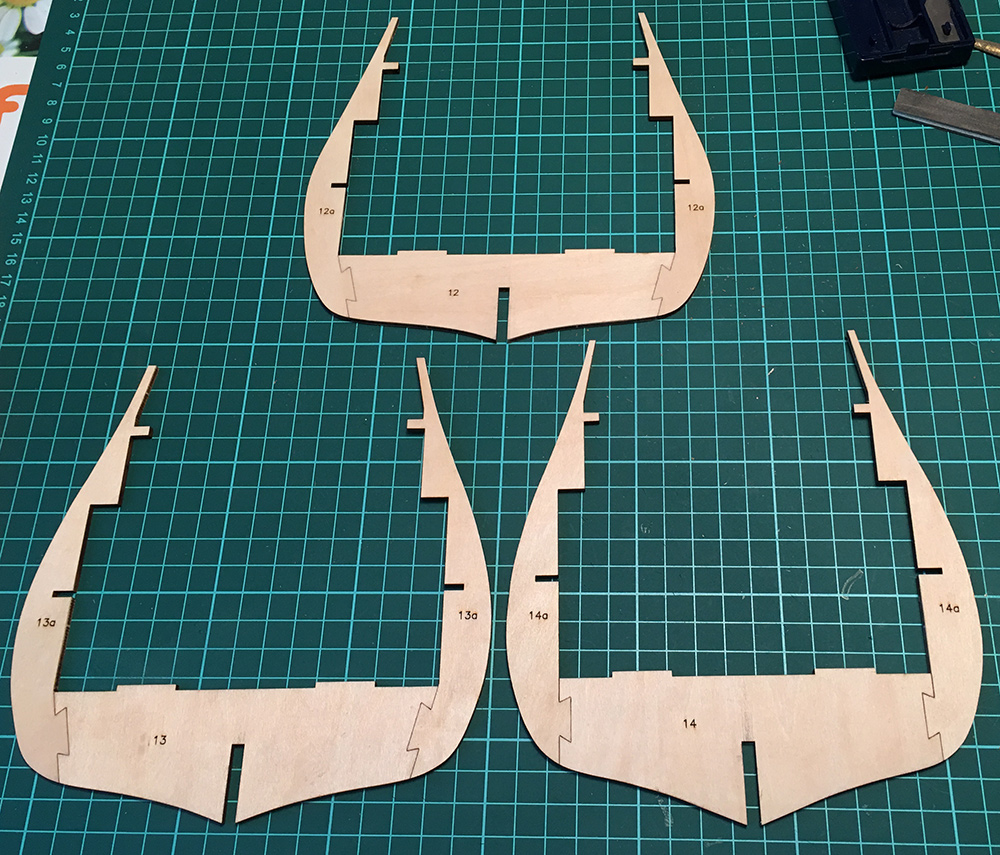
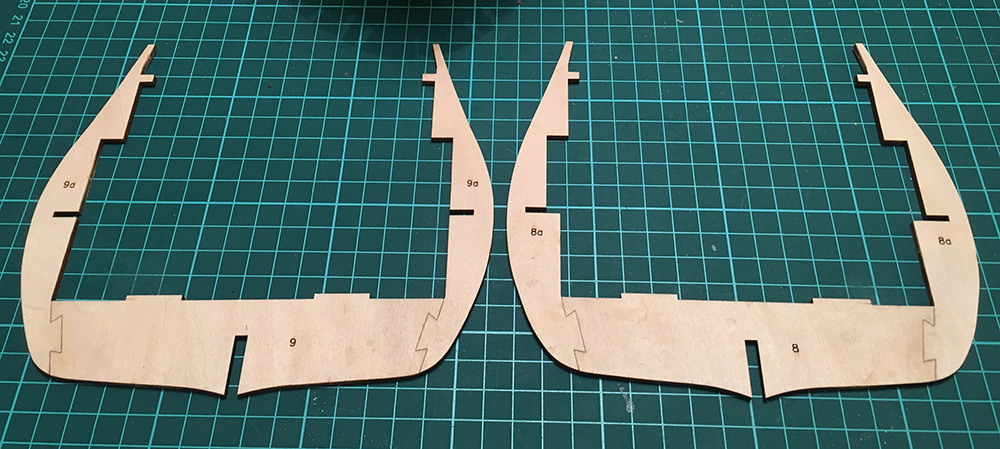
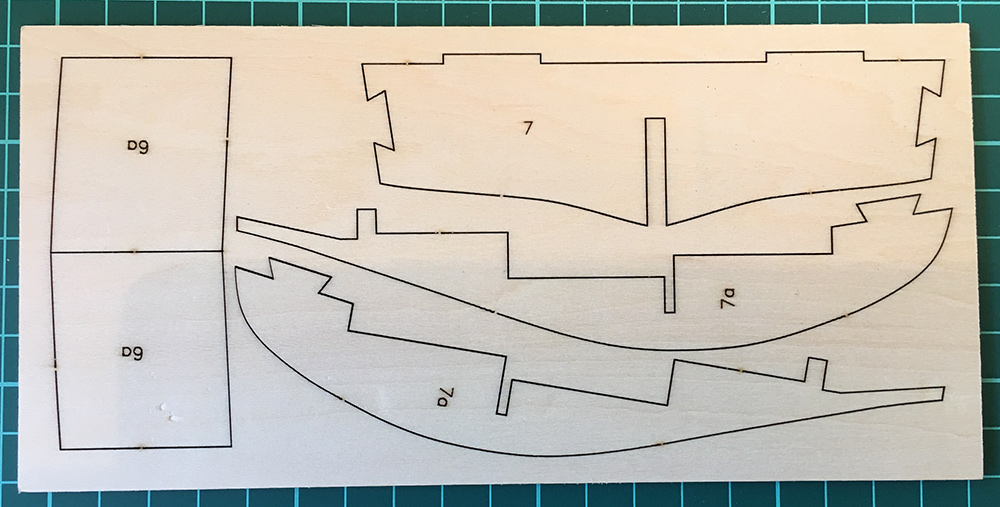
Zoltan: thank you!! been looking for builds for ages! Great!! Bob: The parts are numbered by assembly. So 8,9 and 10 are frames. 11 is the third part of the keel, 11a is the reinforcement of the keel joint. 12,13 and 14 are the frames on that part of the keel. Next will probably be frame 15, 16 the 4th part of keel with 16a being reinforcement and frames 17,18 and so on. Looks like a mess in writing but makes sense when you're building the stuff.
- 305 replies
-
- 4
-
-
- deagostini
- vasa
- (and 1 more)
-
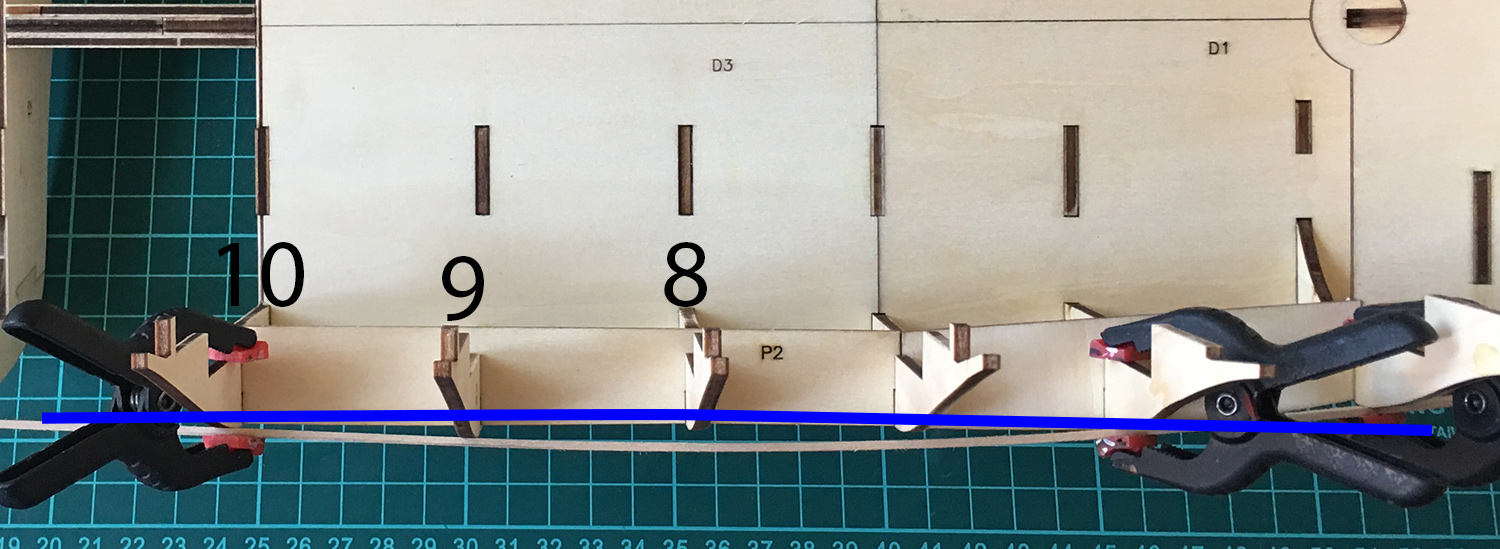
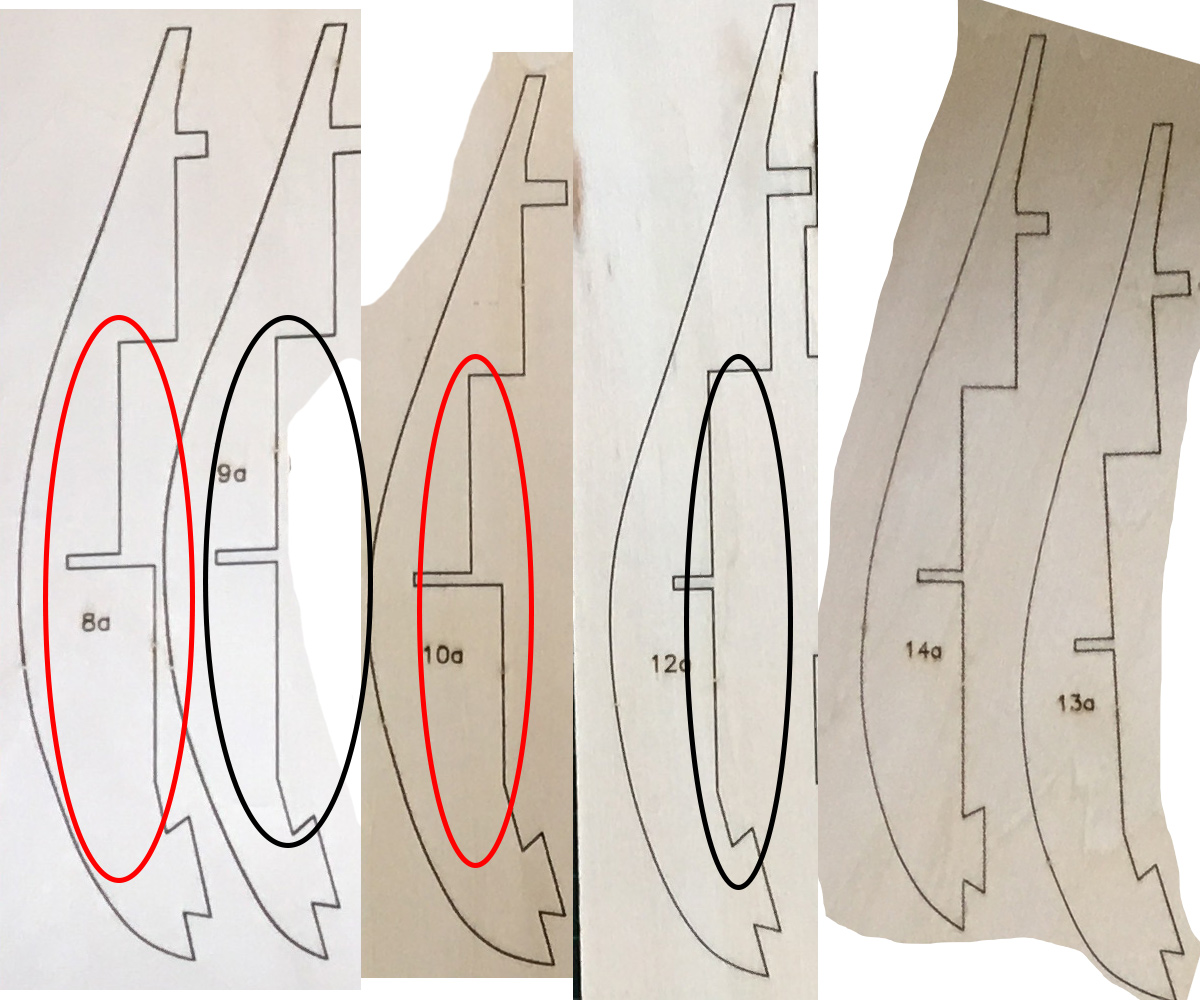
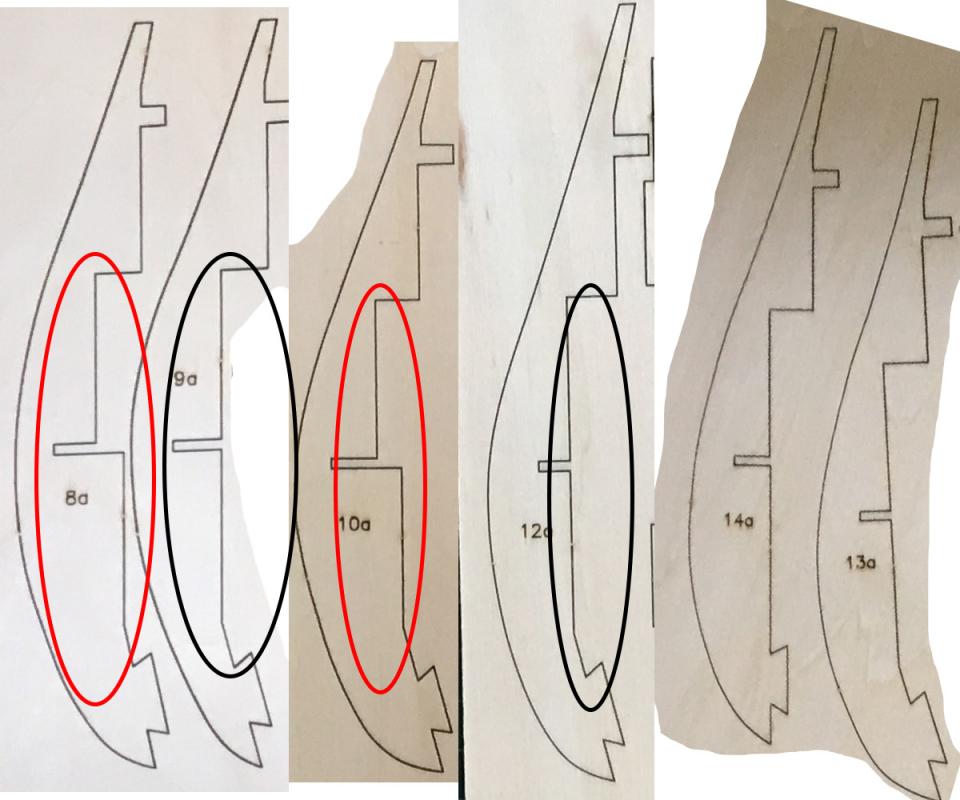
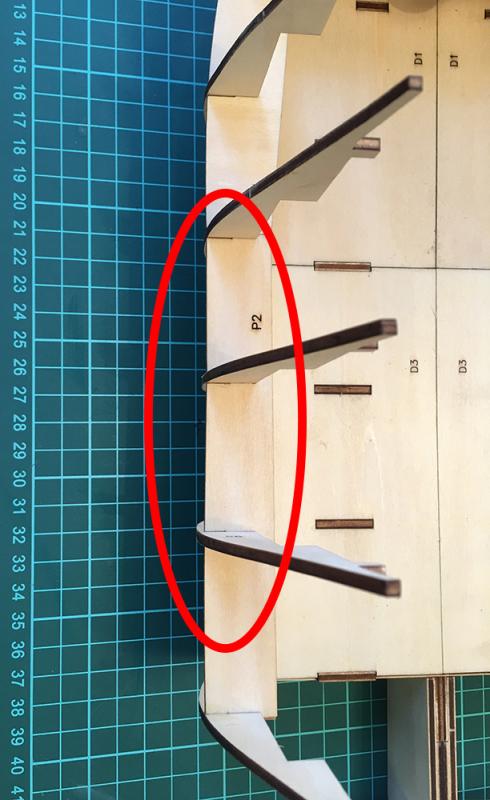
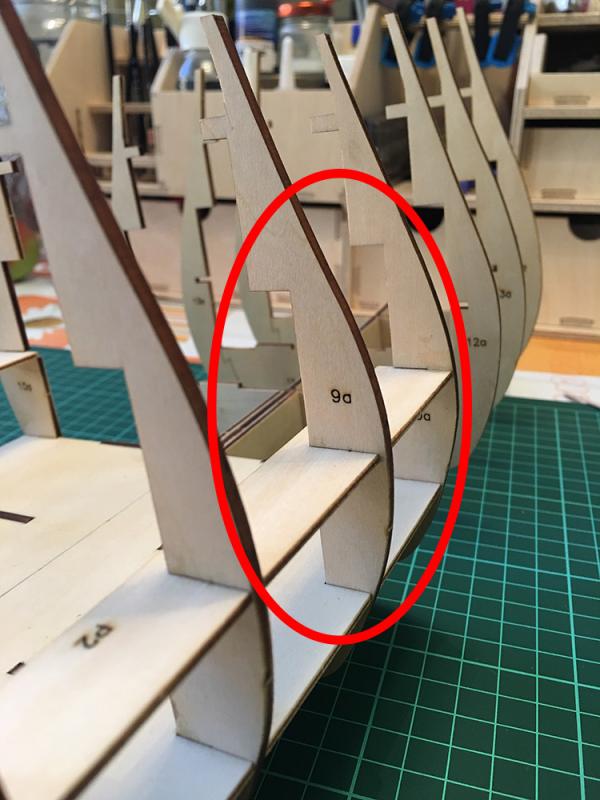
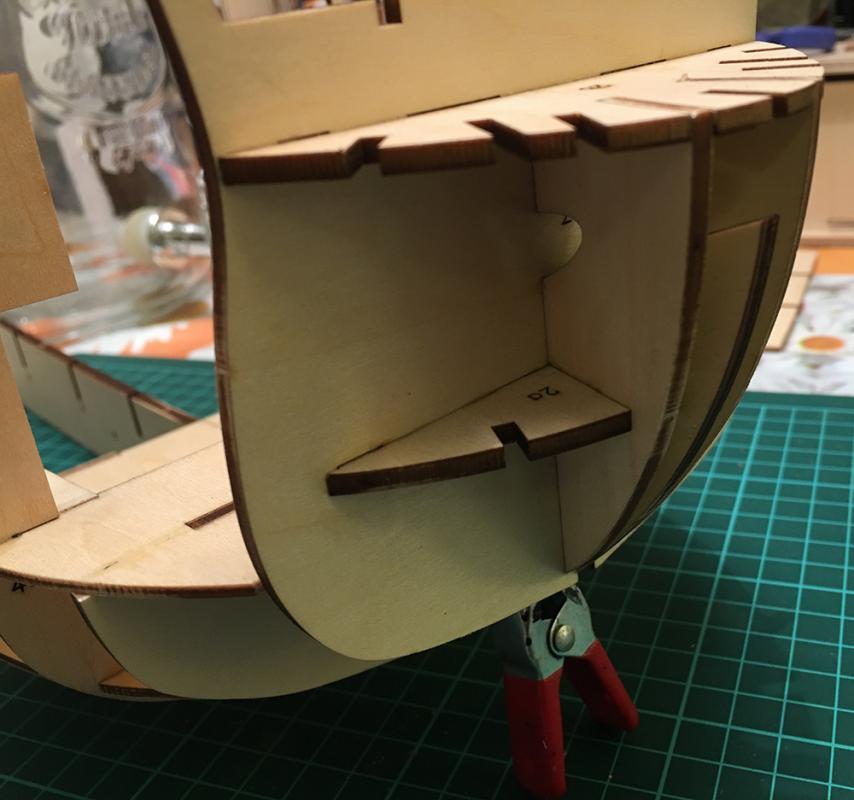
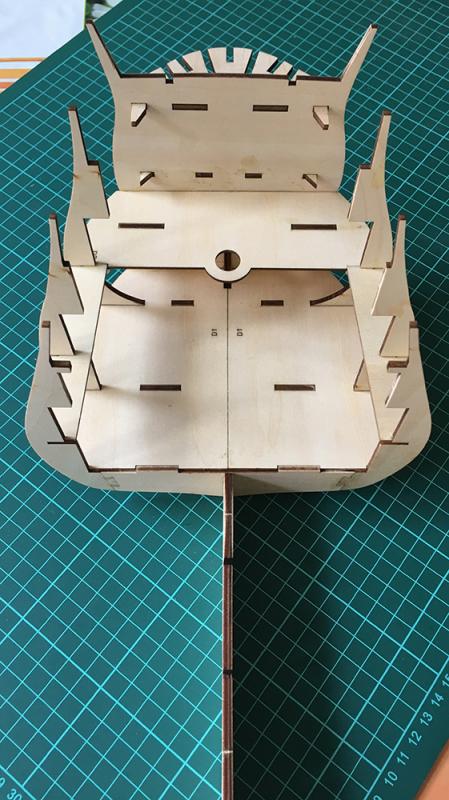
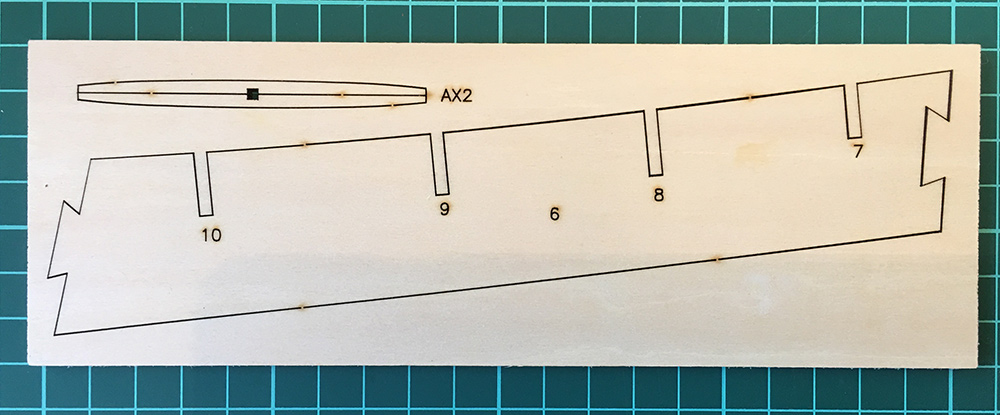
Jan: Thanks for your input. you are right, but I can still give them some extra work in compensation for my extra If 9 and 10 change place the curve would be smoother. (Outside part of reinforcement P2) Also the inner shape of the frames indicate that 9 and 10 should change place: All frames up to 8 have this little shelf, then 9 is straight and 10 has the shelf again. 12,13 and 14 are again straight. (red elipses = shelf, black = straight.) So, anyone building this, do not glue frames 9 and 10 in place until this little problem is solved. And yes, I should have seen this before I assembled and glued them but I was blinded by the otherwise excellent quality of the kit.

- 305 replies
-
- 8
-
-
- deagostini
- vasa
- (and 1 more)
-
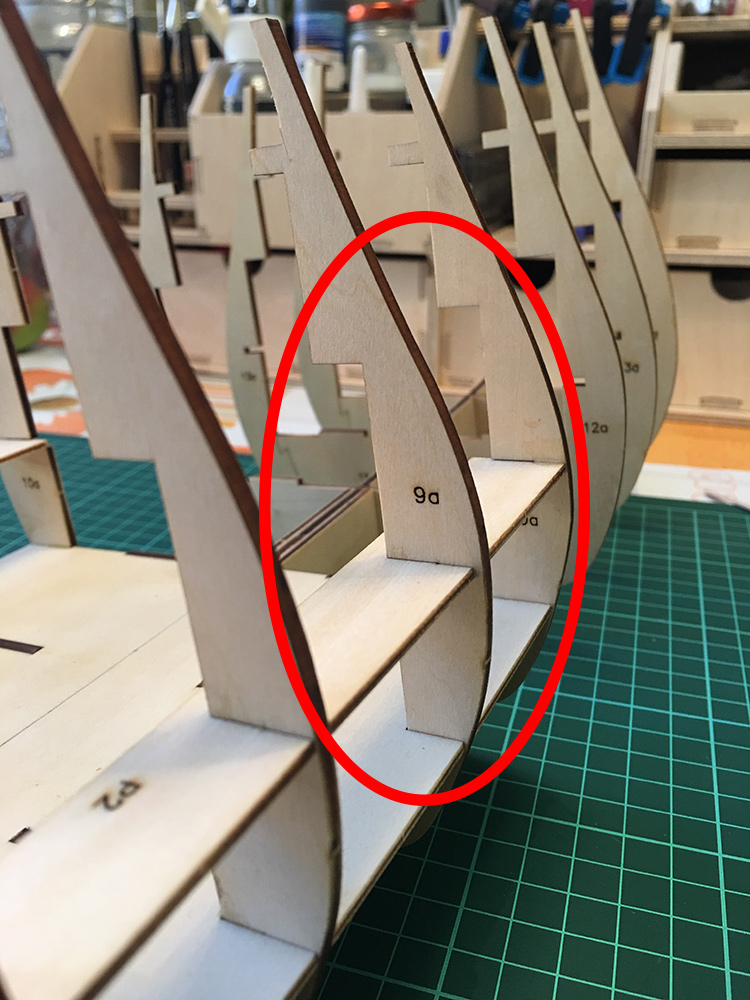
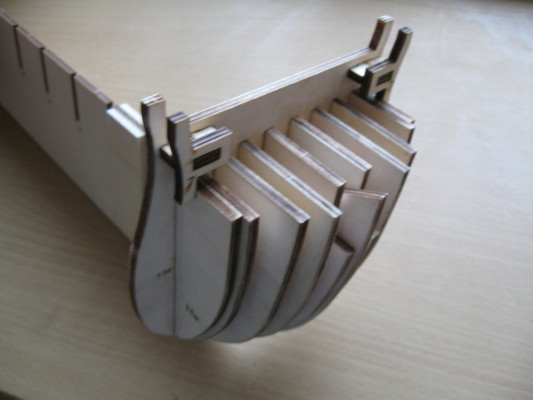
Zoltan: yes I know. But nothing happened there since 30th of May. (Maybe something made him give up ) It was that last picture from the rear that got me checking my frame actually. One can clearly see frame 9 sticking out. Bob: this is my disadvantage. Them having to replace the lot. If DeAgostini won't help me I guess I could try and copy the shapes of the frames on slips of paper stuck in between the reinforcements. Then sand away on one frame and add wood on the other... Either way, big mistake from me not checking thoroughly and from them missing this in production. (Or, I'm totally mistaken here That would be embarrassing...) Well well, on to painting decorations!!!
- 305 replies
-
- 3
-
-
- deagostini
- vasa
- (and 1 more)
-
Bob: The frame is too wide, and probably the whole shape differs between those two frames. But I contacted Edition Atlas who sent the complaint to the main office, and hopefully they send it along to DeAgostini so I can discuss with someone in charge of the lasercutting. And there is no other build logs Dr Per: No choking. Just a long "what the f***..." (You can add a infinite number of asterisks here) And yes, I go for the laser error.
- 305 replies
-
- 2
-
-
- deagostini
- vasa
- (and 1 more)
-
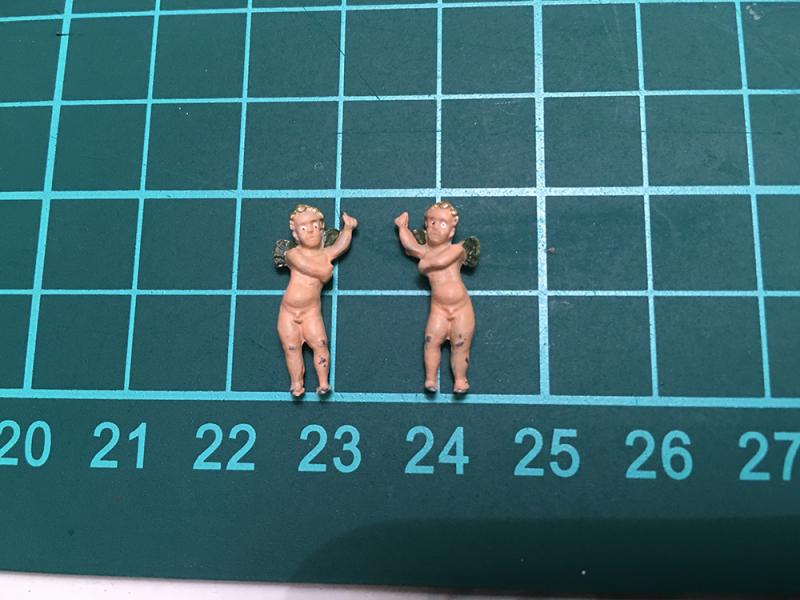
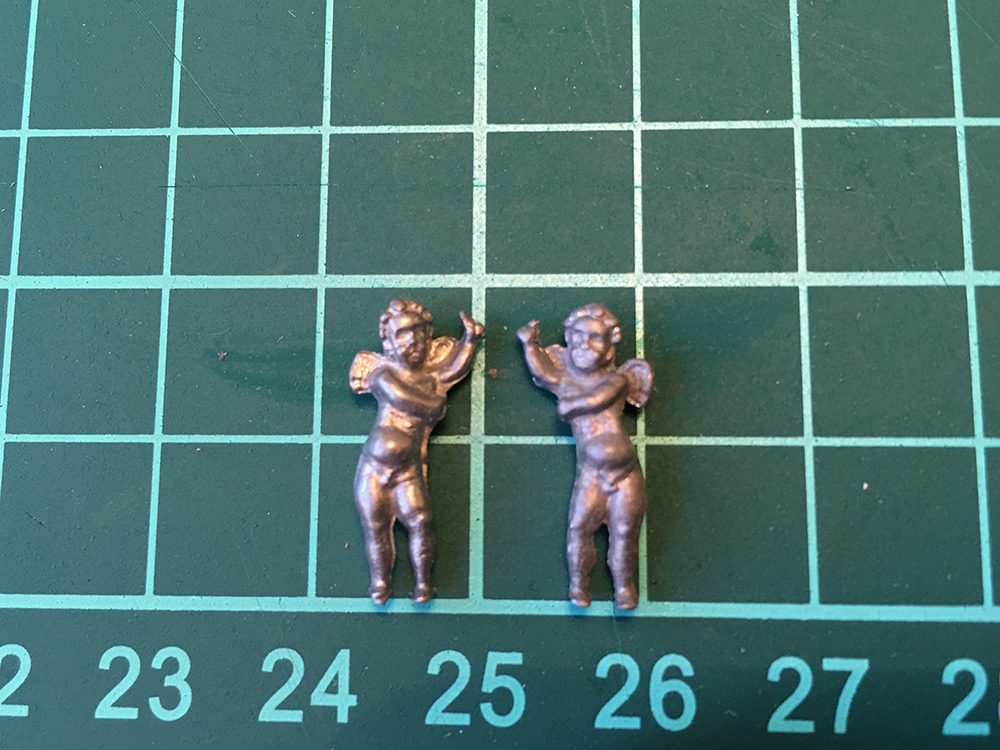
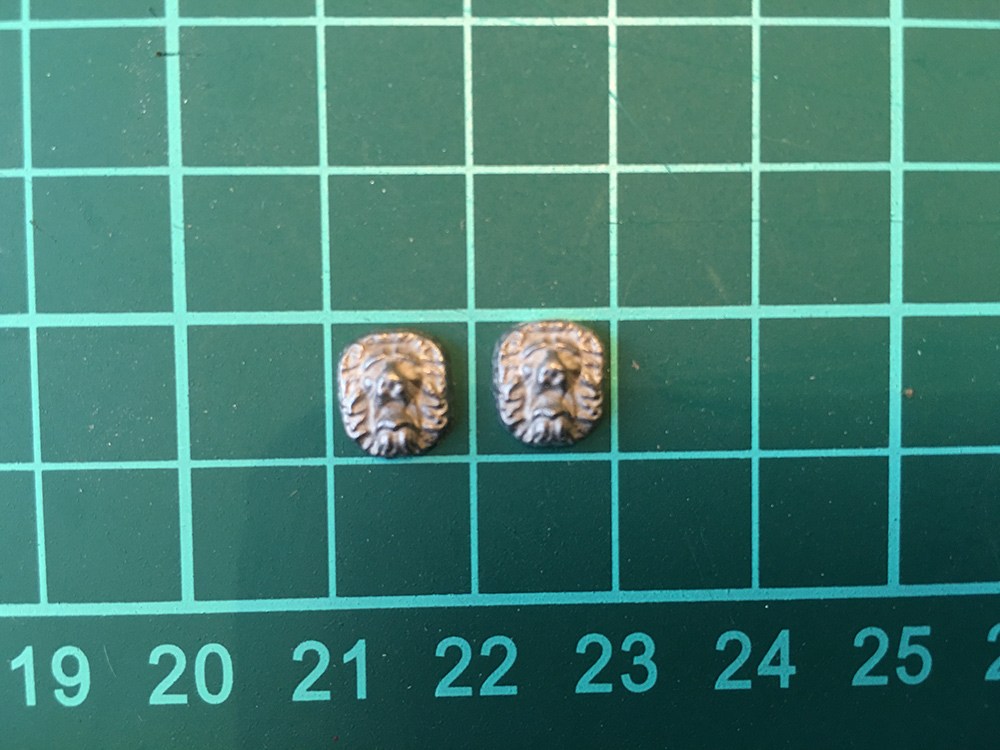
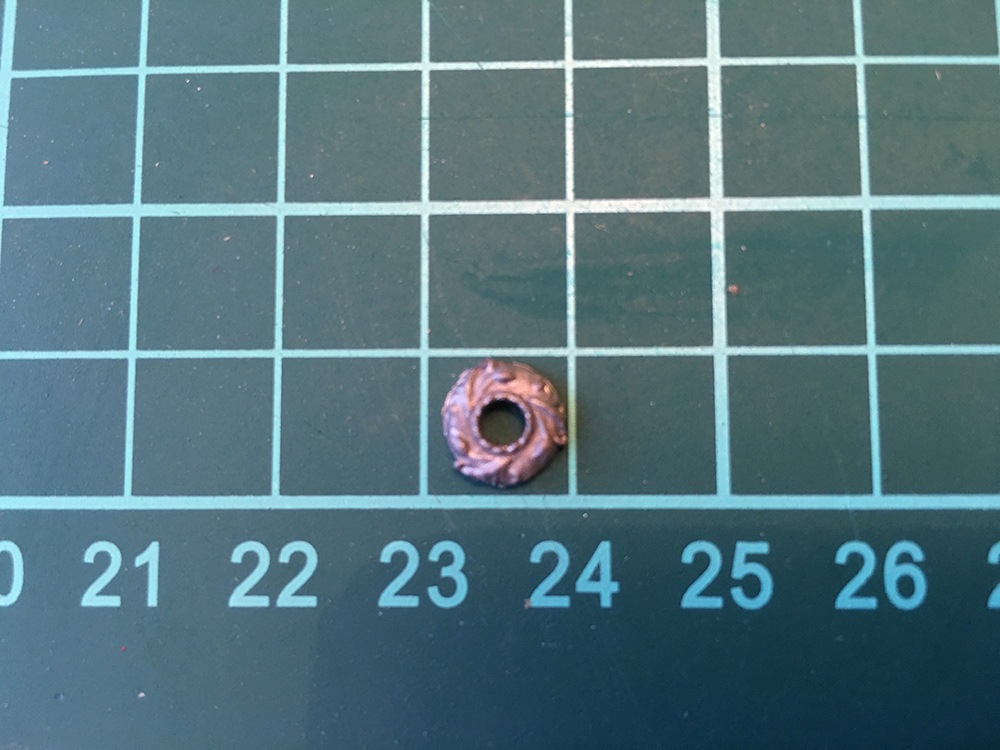
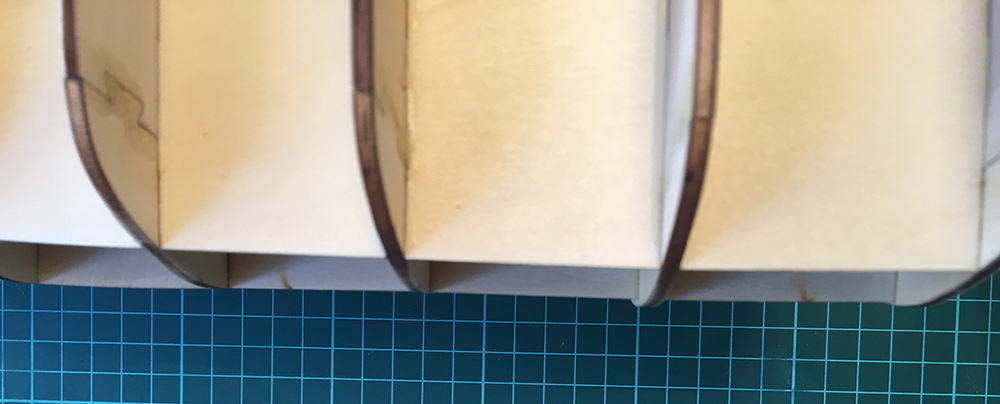
I completely forgot the decorations: The two Cherubs: Lions for gunports: Stern decoration: And the knight: But all is not well in paradise. It looks like there's something wrong with frame number 9. Look at this: I wonder if frame 9 and 10 should switch places. On the right frame 8, this is how frame 10 looks like. as does frame 12,13 and 14. View from the bottom: I know there is a inward curve here but not as severe as this. I will have to contact someone about this one way or another. The same mismatch is in the manual also. But it still seems wrong. And of course I have glued the frames well, with the deck on top fixed with AC.


- 305 replies
-
- 3
-
-
- deagostini
- vasa
- (and 1 more)
-
jan, I think it will be built up something like this Victory build: Some kind of filler system....
- 305 replies
-
- 4
-
-
- deagostini
- vasa
- (and 1 more)
-
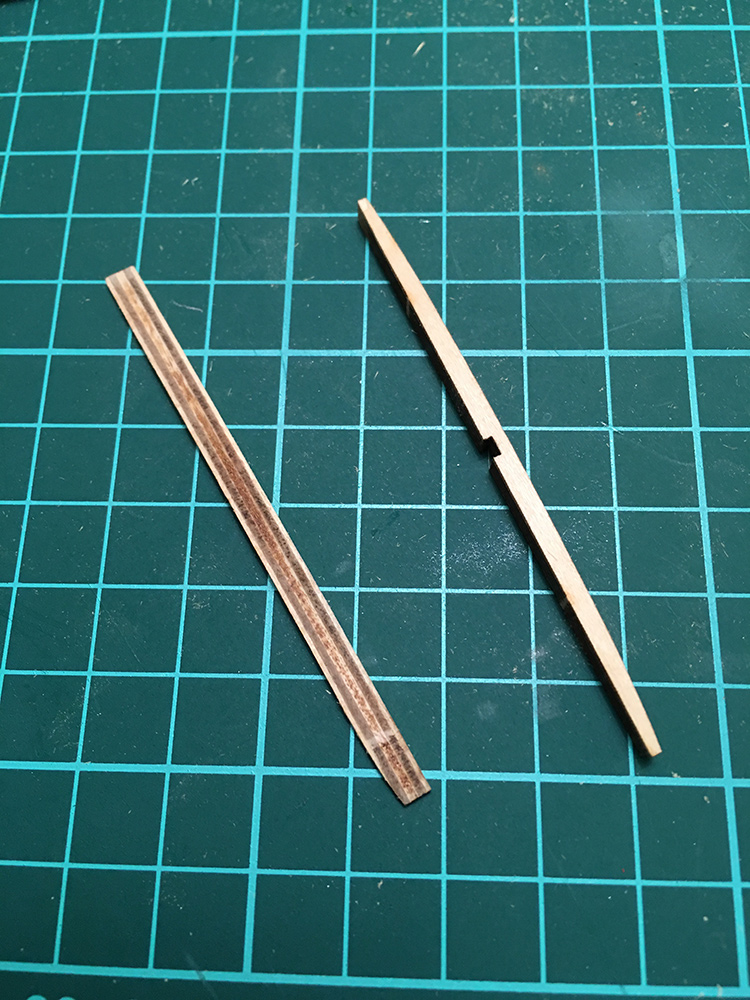
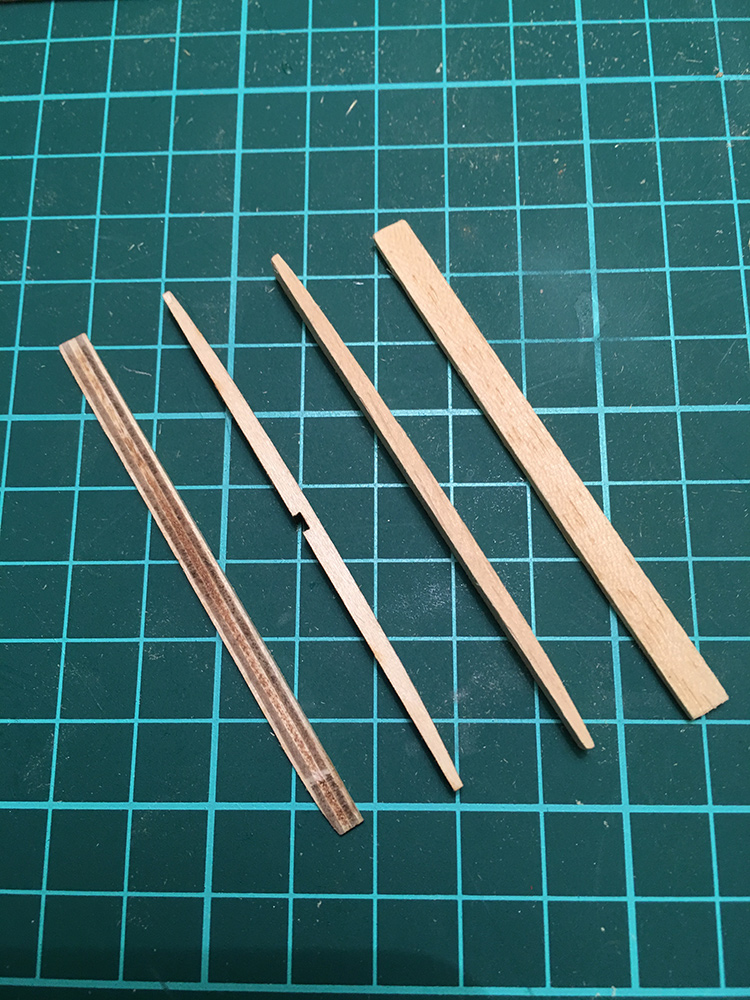
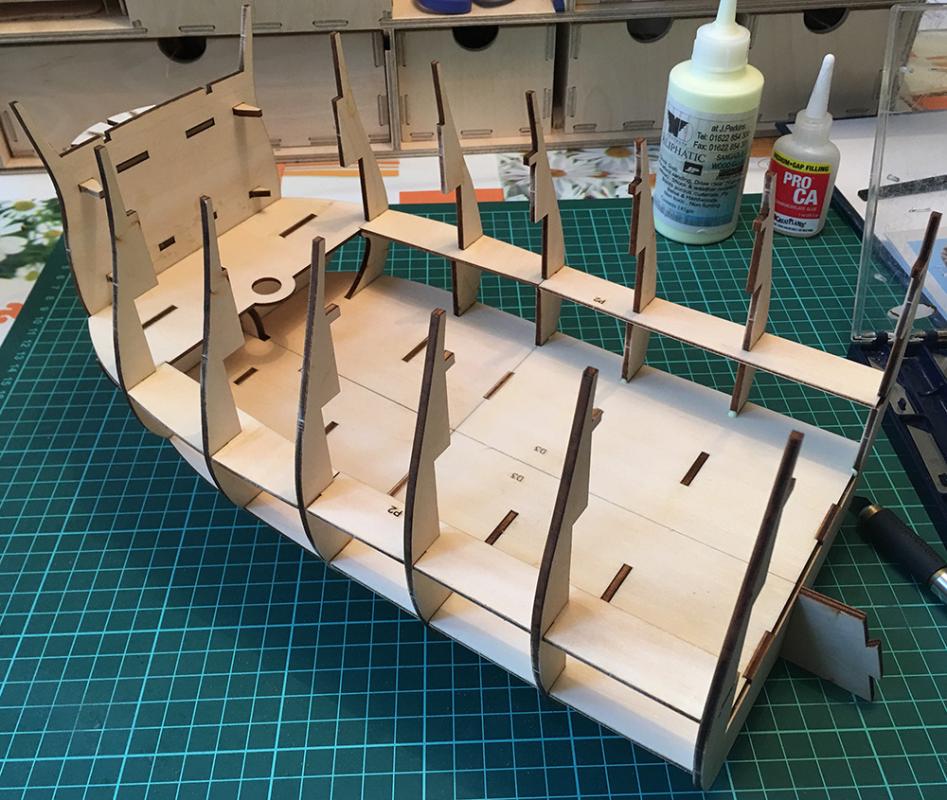
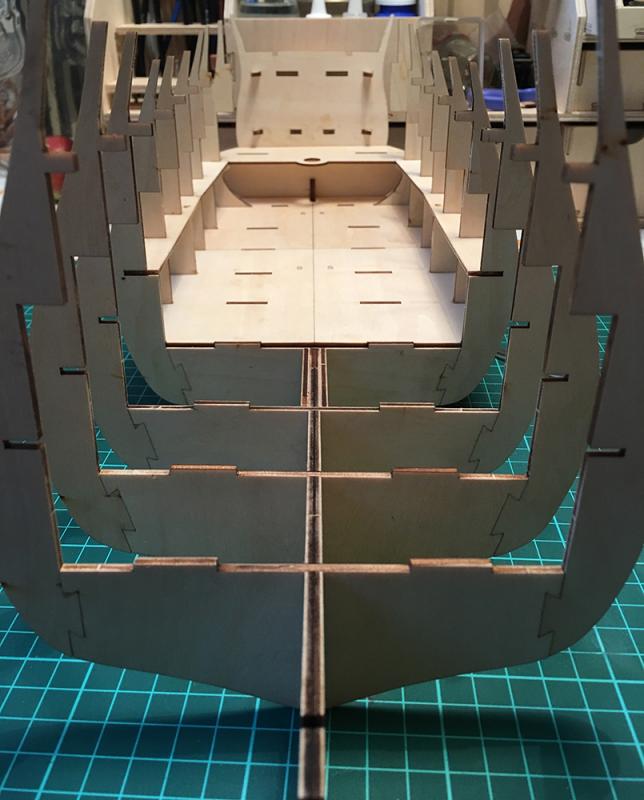
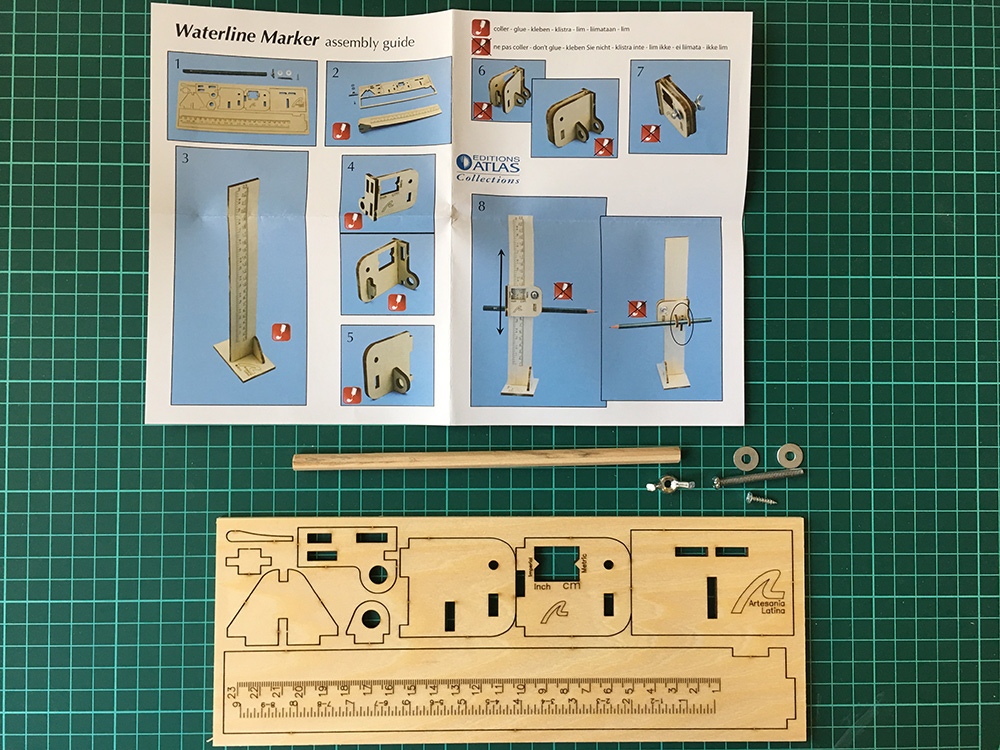
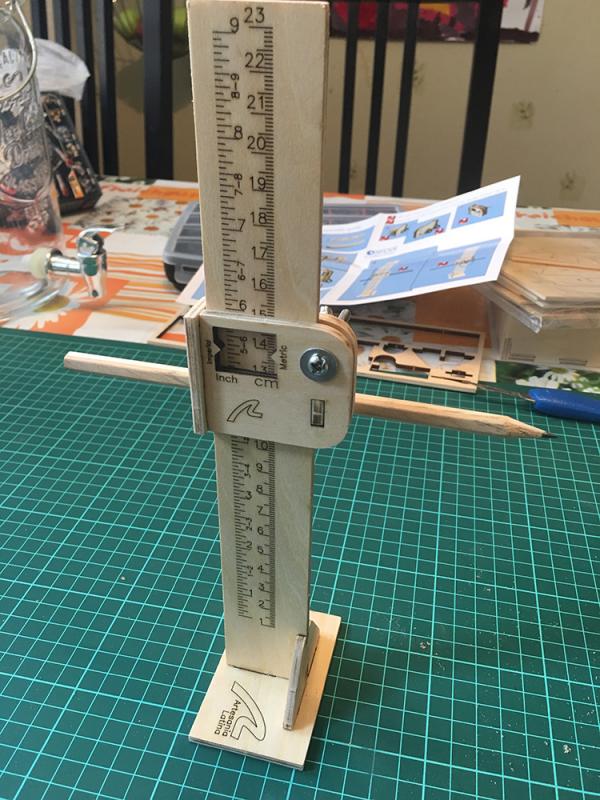
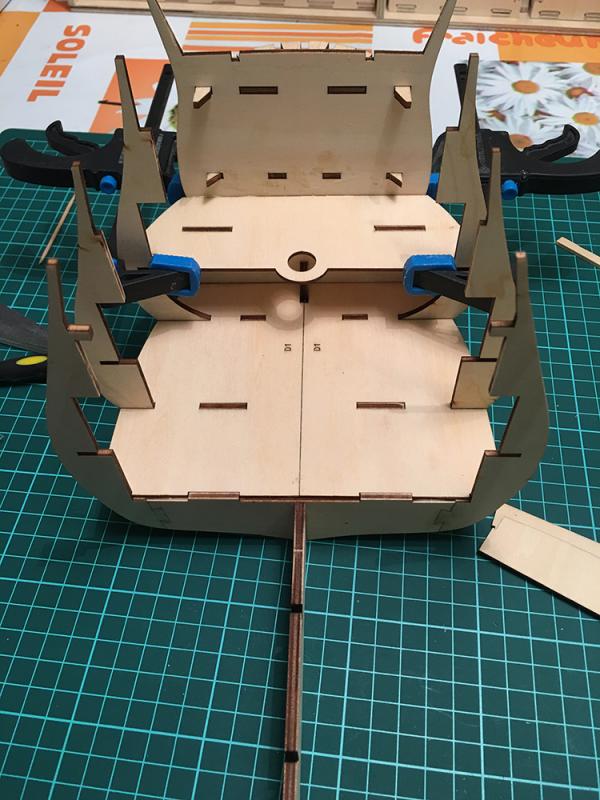
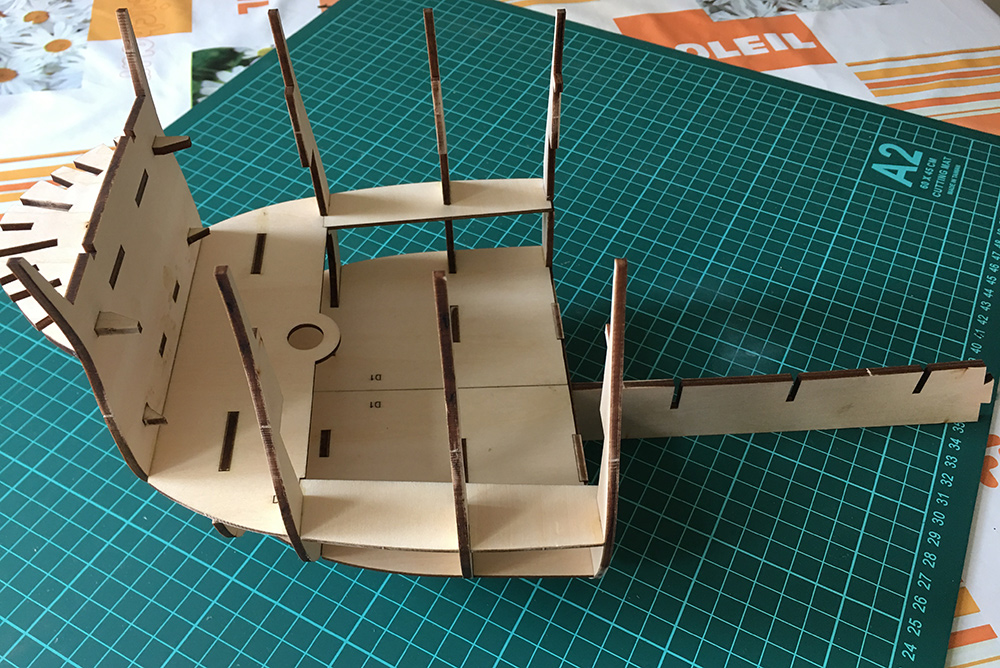
Hi guys, Thanks for the comments. Bill, I agree that it would have been nicer with some ship parts instead of the marker, but as I said : It's free, and as Bob said: Free is good On to the build: This shipments two first frames: As usual the laser cutting is great. Just had to sand away a little of the charring and they fit nicely together. The two "fillers" in the bow: In my previous post you can see them as parts 2x2c. 3 frames and the "deck" mounted: The last 3 frames: And here mounted with the 3rd part of the keel: And that was all of the hull for now. On to painting some decorations. They include two cherubs, two gunport lion heads and one knight. I also have to get more paint. Being color blind this is not my favorite shopping trip... Until then...


- 305 replies
-
- 10
-
-
- deagostini
- vasa
- (and 1 more)
-
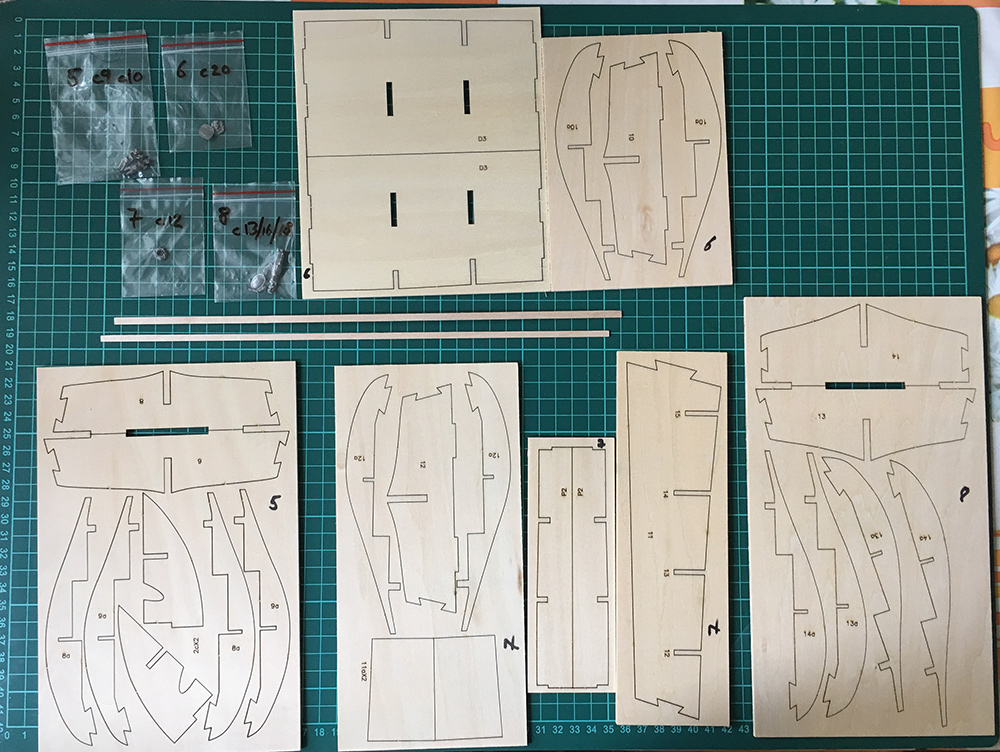
Hi all, 3rd shipment with issues 5-8 arrived today! This is the contents: Also this little surprise that I had forgot about: I usually use the old pencil-through-papercup trick and would never pay for anything like this. But it's for "free" : New update when I start building. (This evening I hope.)
- 305 replies
-
- 11
-
-
- deagostini
- vasa
- (and 1 more)
-
The Corel rudder is the same shape as on the Amphion! It's just longer on the Vasa. Yours is (from what I can recall) just like the real thing. Very nice!
-
Ok, so the bad got worse.... but you made it good again
-
Wow, that was some heavy rebuilding! More scratch than kit Wonder if she would have stayed afloat if the hull was shaped the "Corel-way"?
-
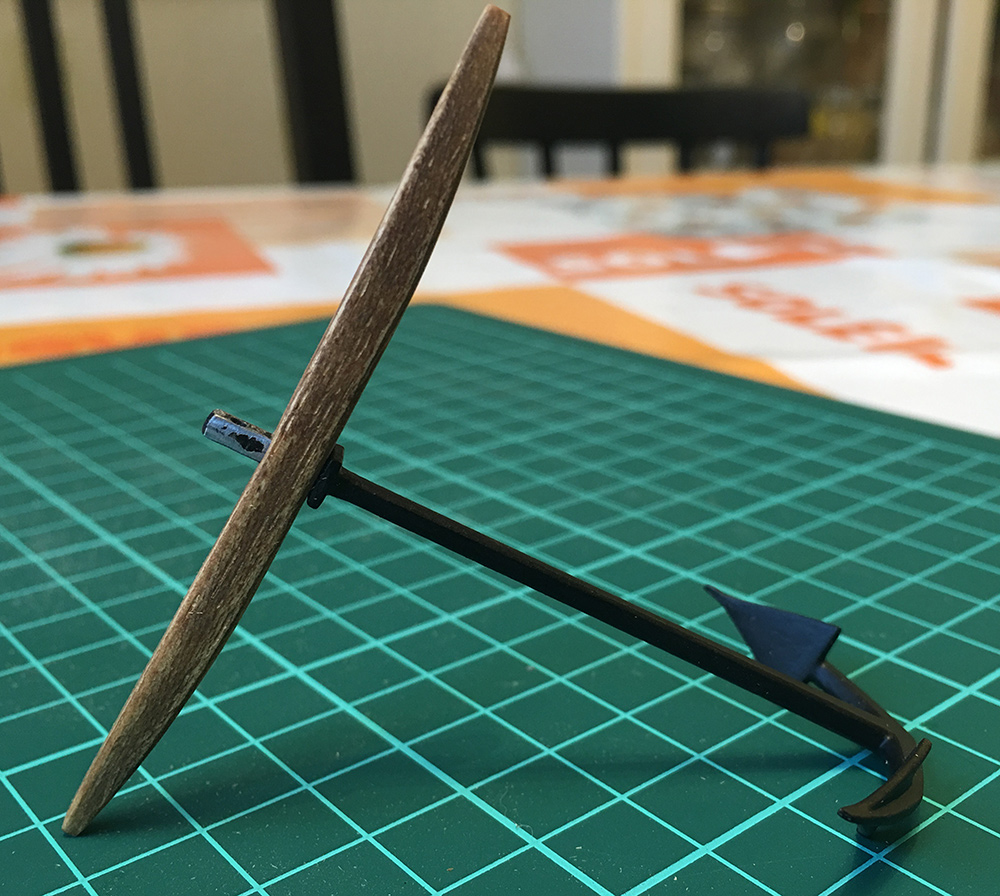
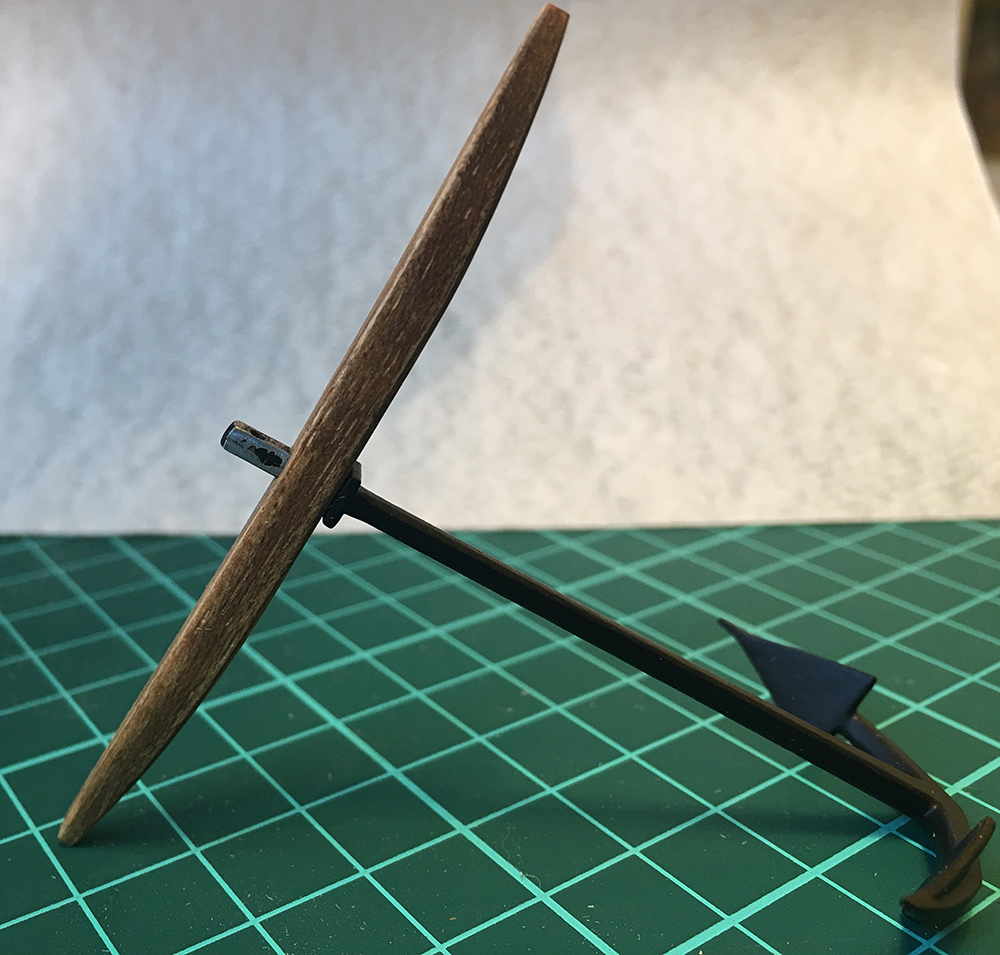
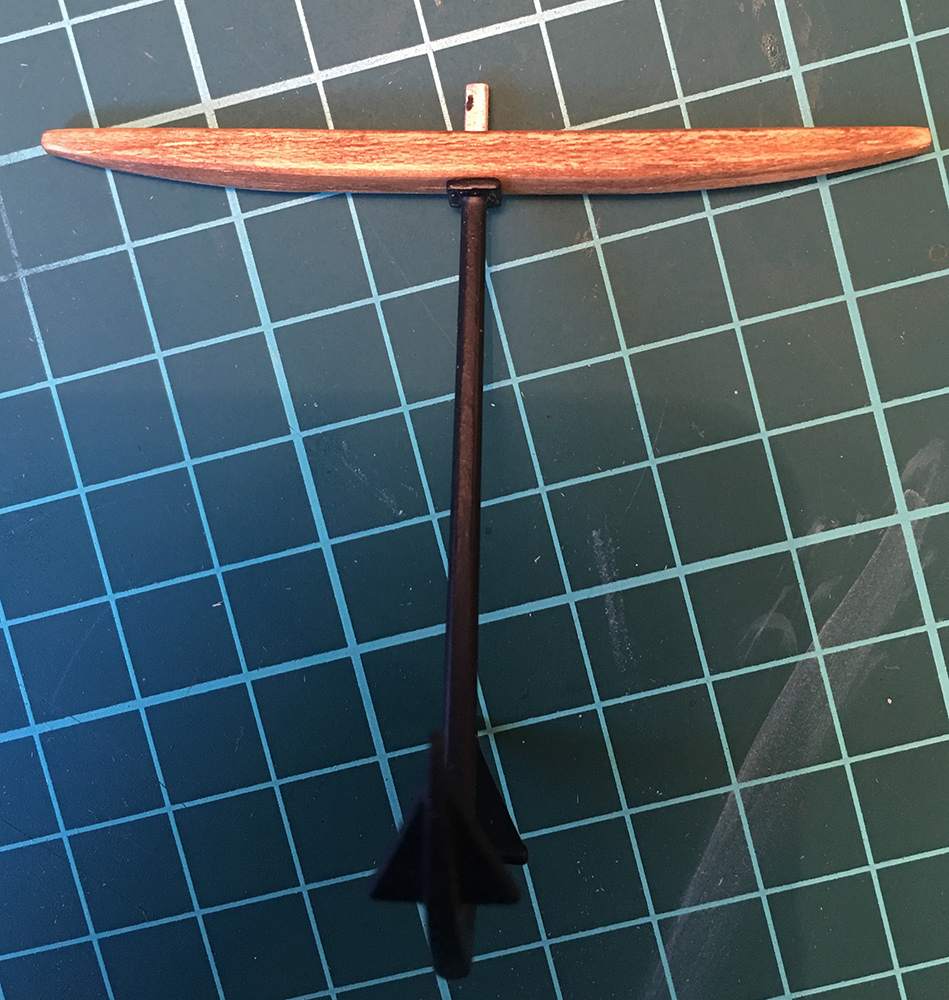
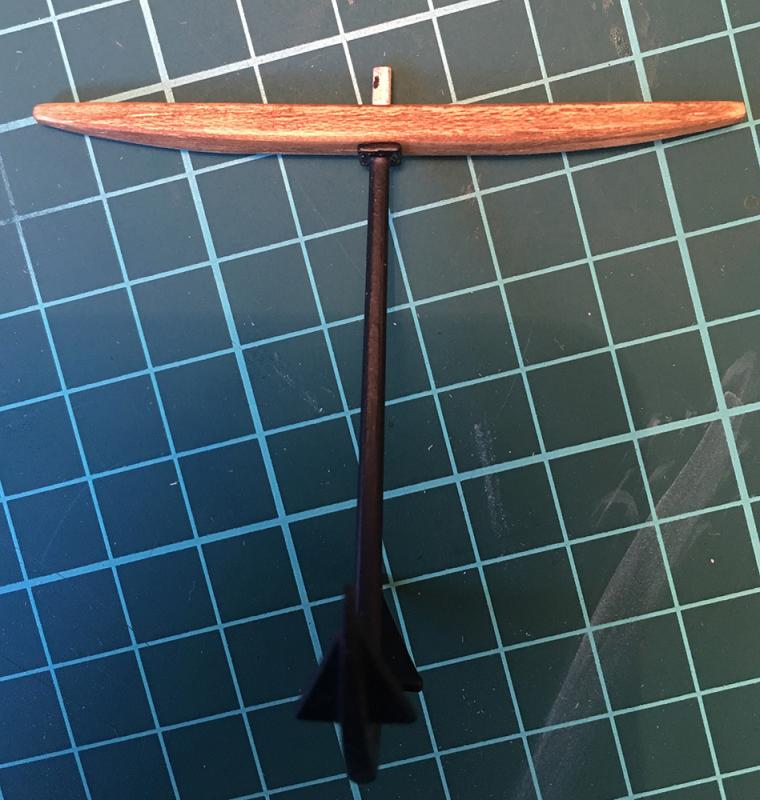
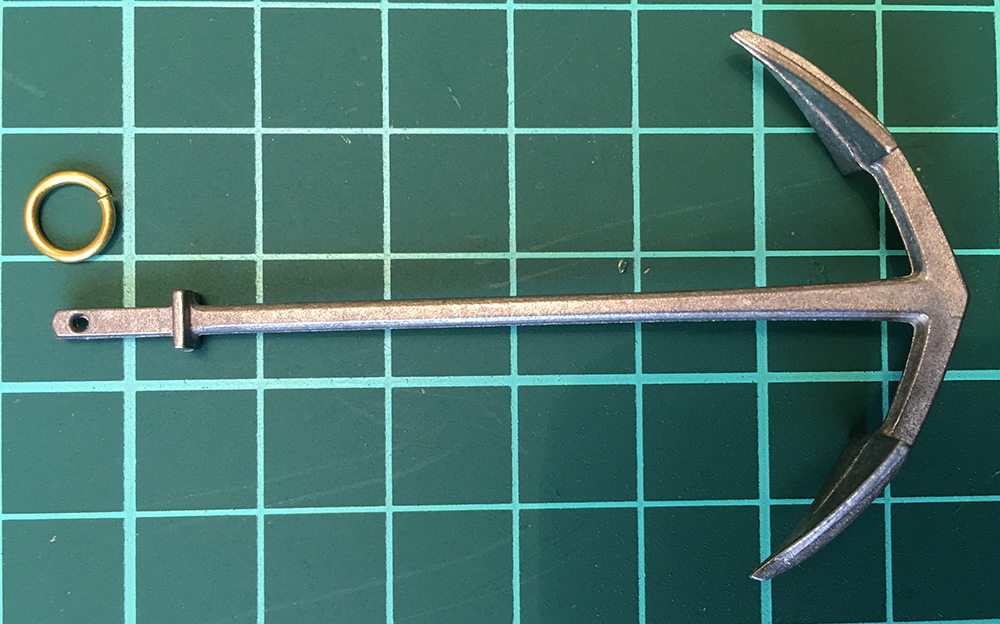
A small update on the anchor. Anchor is drawn by Fred Hocker from the Vasa museum so that will be accurate. But the anchor stock was not. Also impossible to hide the plywood layering so I made new. The plywood stock: Left plywood, right new from old scrapwood: Plywood: And the new again: Stained with oakstain: I have still not decided if I will do tree-nailing on the stock. About three weeks to next shipment now...


- 305 replies
-
- 12
-
-
- deagostini
- vasa
- (and 1 more)
-
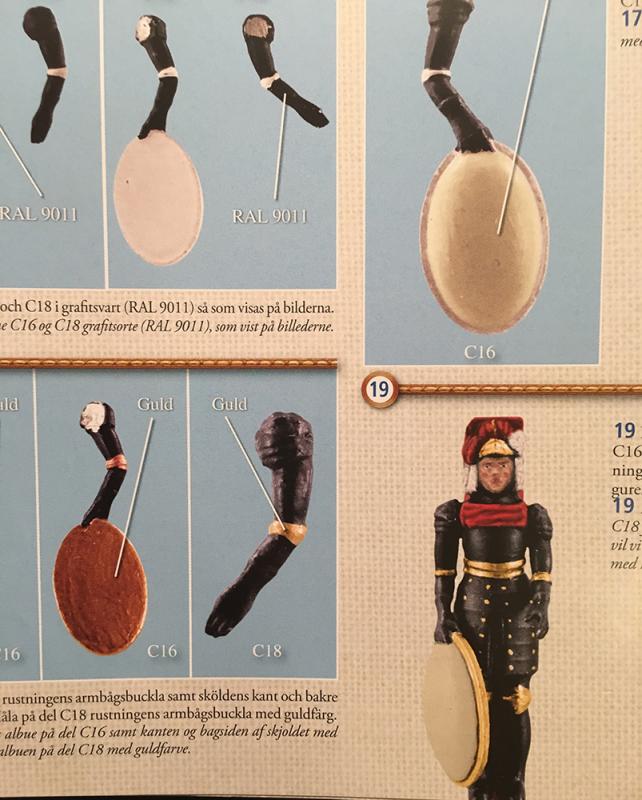
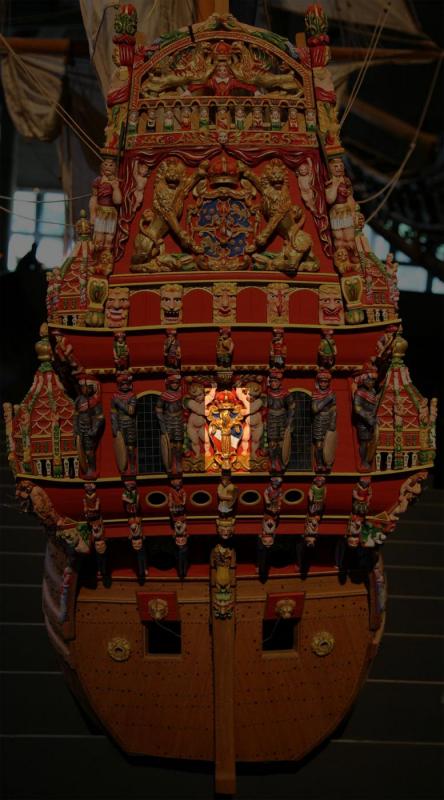
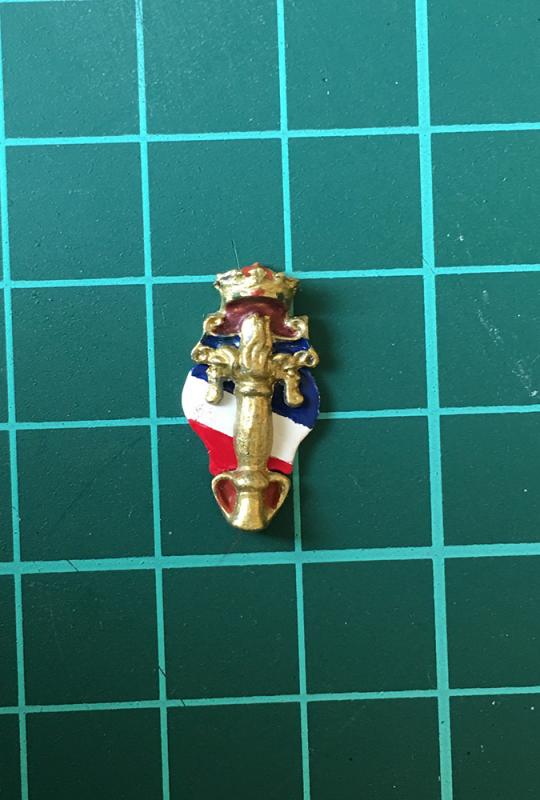
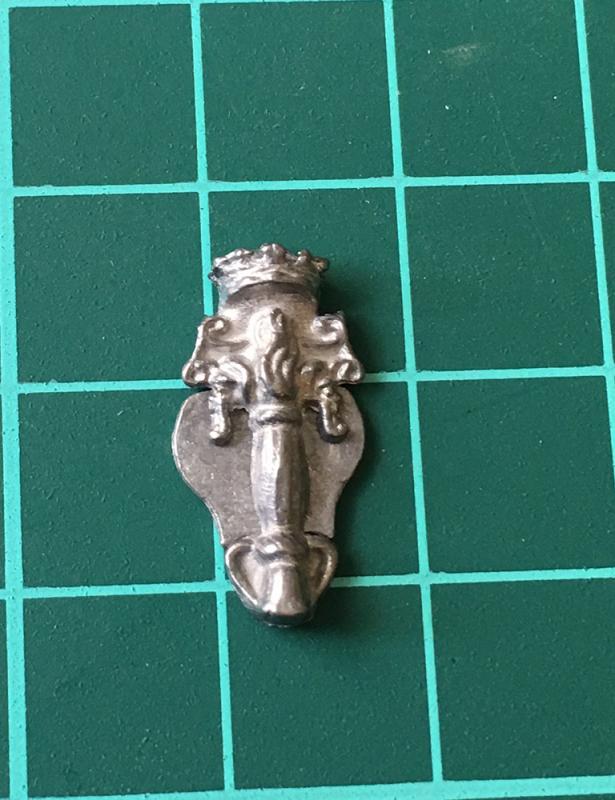
Cobr@ and Patric: I will probably go with "matt metal black from Admirality. if nothing because I like that particulary paint. It really looks like the old painted cannons and anchors you see in museums etc. Enemeink: I have visited that homepage before but forgot about it. Thanks for reminding me and giving me the link. Tiny update: The decoration: And where it will go eventually: The blue/white/red shield was a pain to paint, the whole thing only 20 mm high. Hopefully the fuzzy lines will not show as much when the whole stern is completed. Now only the anchor left, then another 5-6 weeks of waiting. But next time theres 4 issues coming, maybe they will last a week at least...
- 305 replies
-
- 9
-
-
- deagostini
- vasa
- (and 1 more)
-
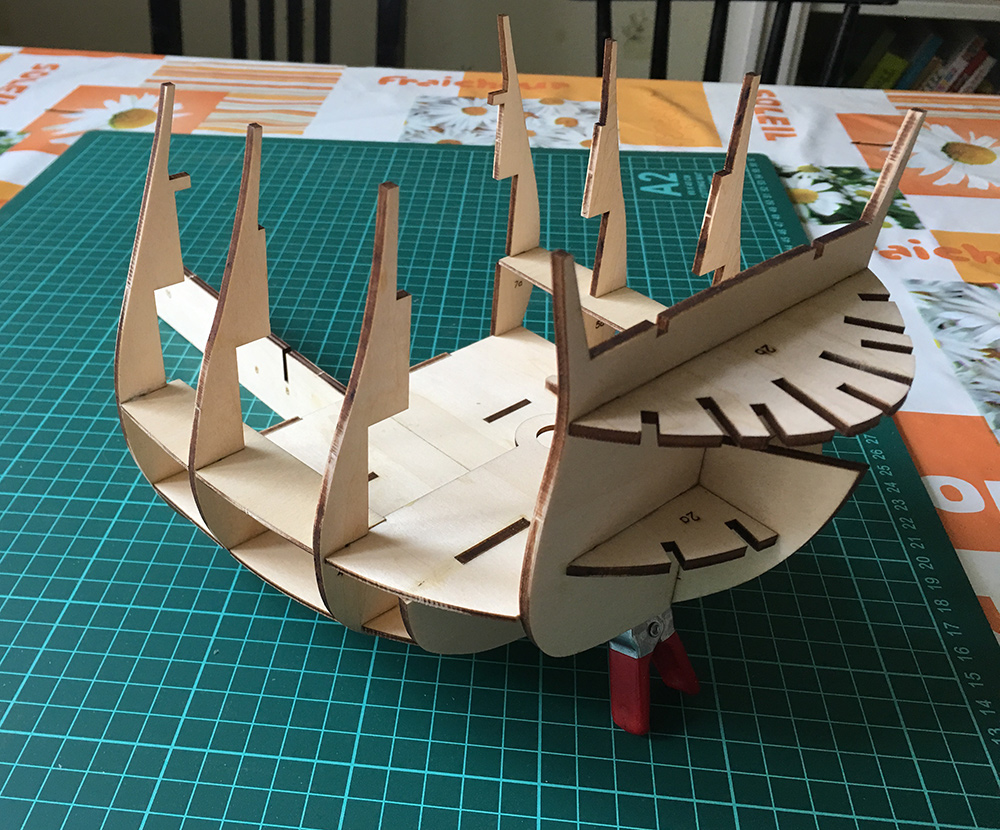
Bob: The wood is great quality, as is the laser cut. I guess the pre marking helps a beginner a lot. You'll have to be illiterate and blind to glue the parts in the wrong place. (I hope this comment won't jump up and bite me later on...) Jan: I've been thinking of one of these: Attached the frame and supports yesterday. Der FRAU has some strange idea that I should go to bed so I didn't post them last night... Frame #7 (the 4th frame), foremast support and bottom "deck": Cannon deck/frame supports glued on: She'll be one big tub, 4th frame 172 mm wide! Next is the anchor. Instructions say to paint it "metallic grey", gives the color code RAL 5011, which is labelled "Steel blue". I'll probably go with Admirality's matt metal black. We'll see.


- 305 replies
-
- 13
-
-
- deagostini
- vasa
- (and 1 more)
-
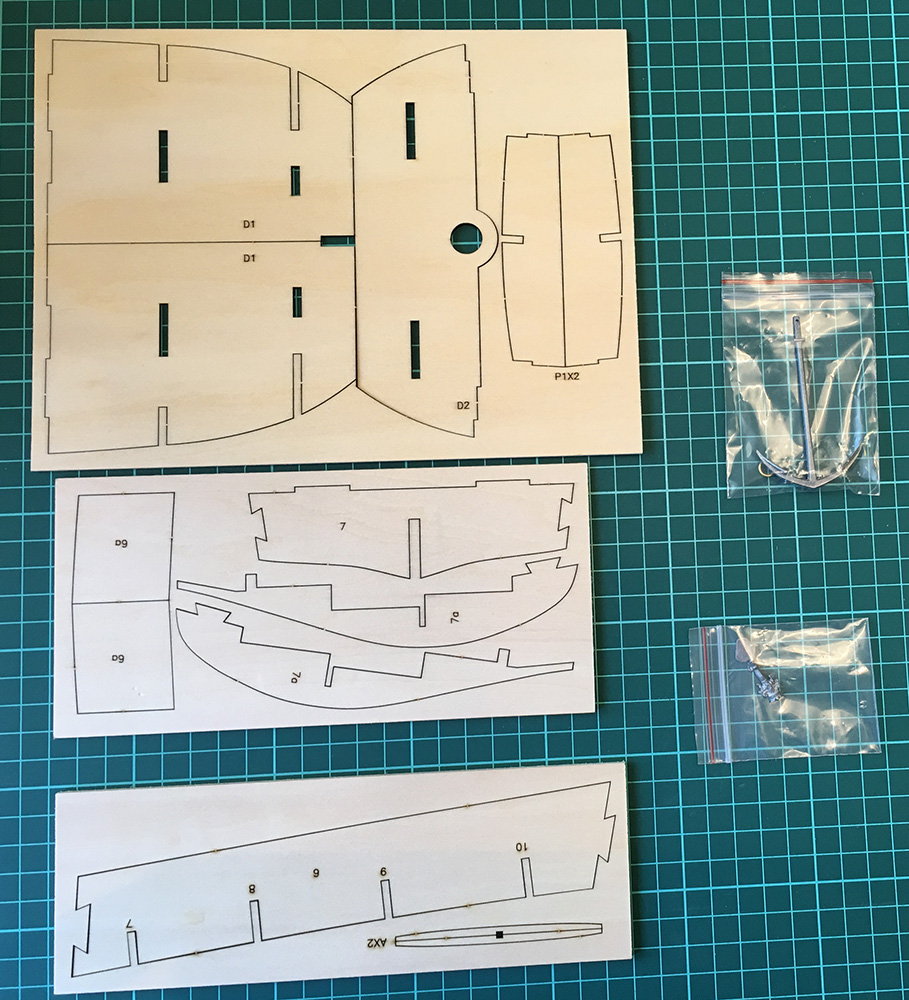
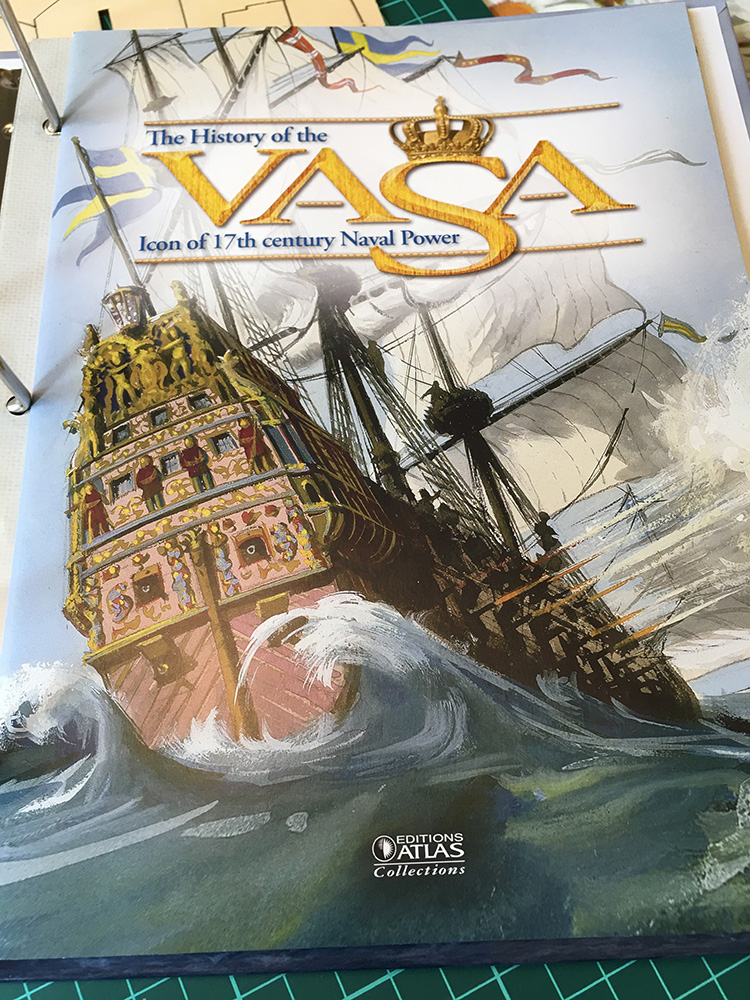
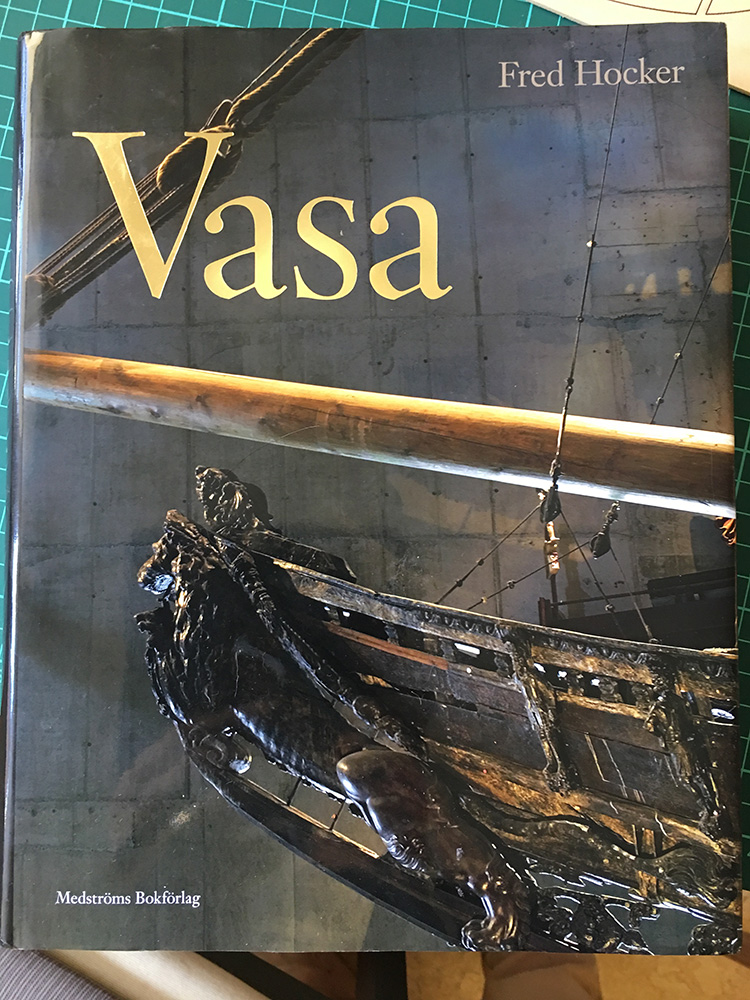
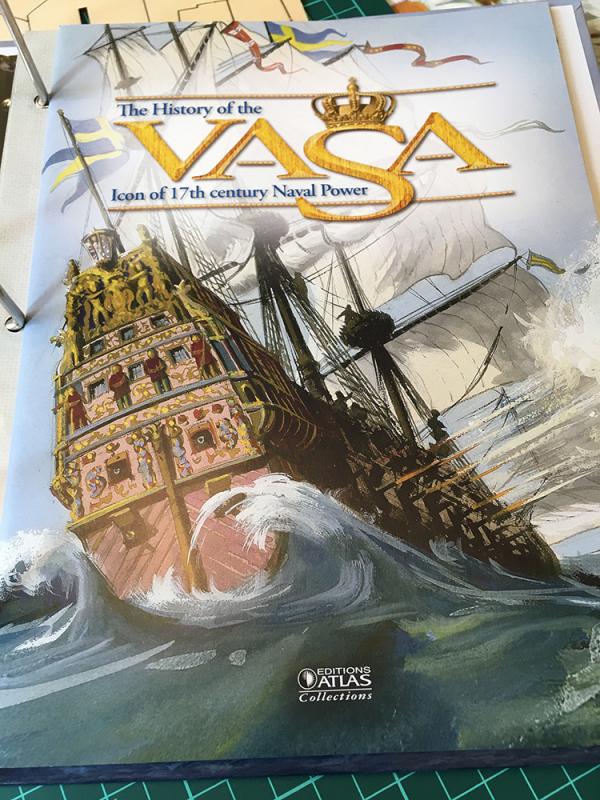
At last the second shipment arrived!! 6 weeks of waiting has come to end. (For this time.) One of those weeks the shipment spent circulating around the neighborhood as it was too large to fit in our letterbox, and some moron at the post office could not copy my name and address from the parcel to a piece of paper without misspelling the lot. Anyway, 2 issues with this shipment, next month there will be 4 issues so a little more to do then. This is what I got today: Parts for the deck: One frame: false keel part 2 and anchor stock: One anchor: Stern decoration: A booklet: Looks like most of it it is from this book: I will start building frames and keel this evening so until then...


- 305 replies
-
- 7
-
-
- deagostini
- vasa
- (and 1 more)