HOLIDAY DONATION DRIVE - SUPPORT MSW - DO YOUR PART TO KEEP THIS GREAT FORUM GOING! (Only 72 donations so far out of 49,000 members - Can we at least get 100? C'mon guys!)
×

puckotred
-
Posts
434 -
Joined
-
Last visited
Content Type
Profiles
Forums
Gallery
Events
Everything posted by puckotred
-
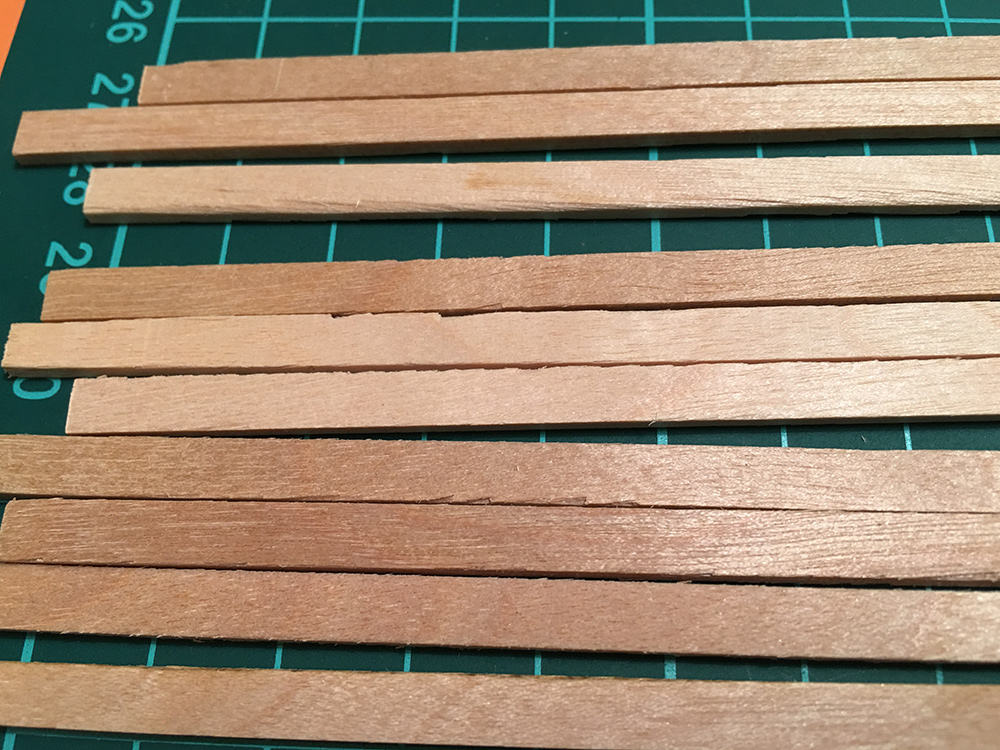
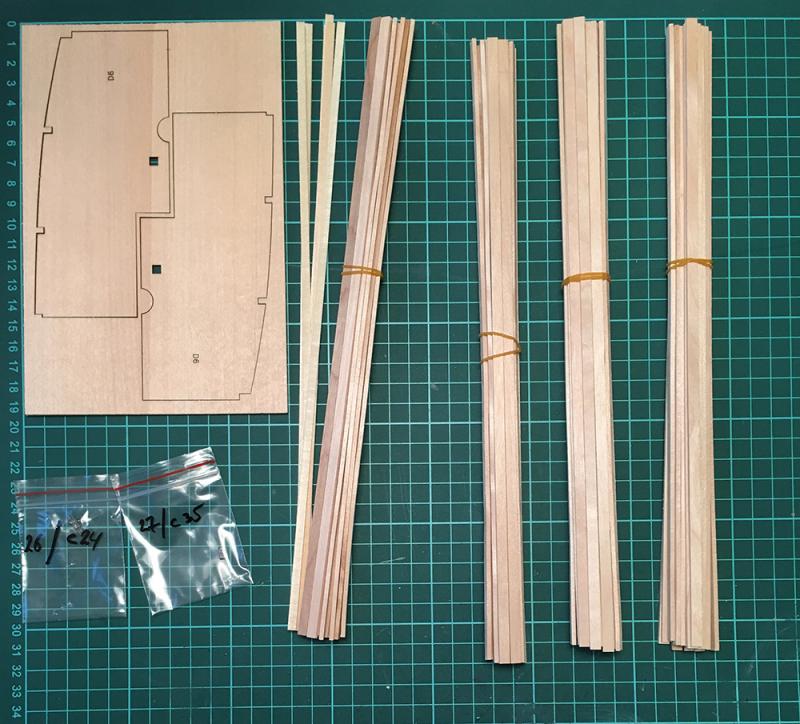
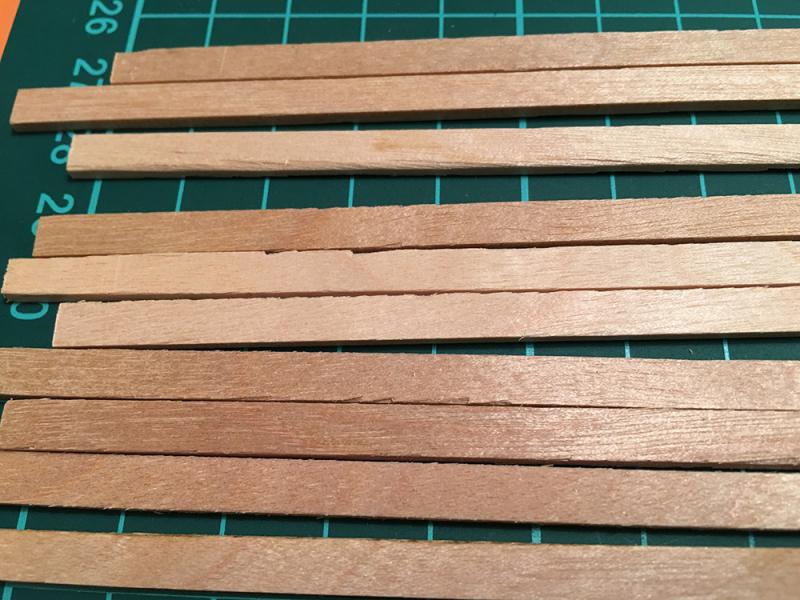
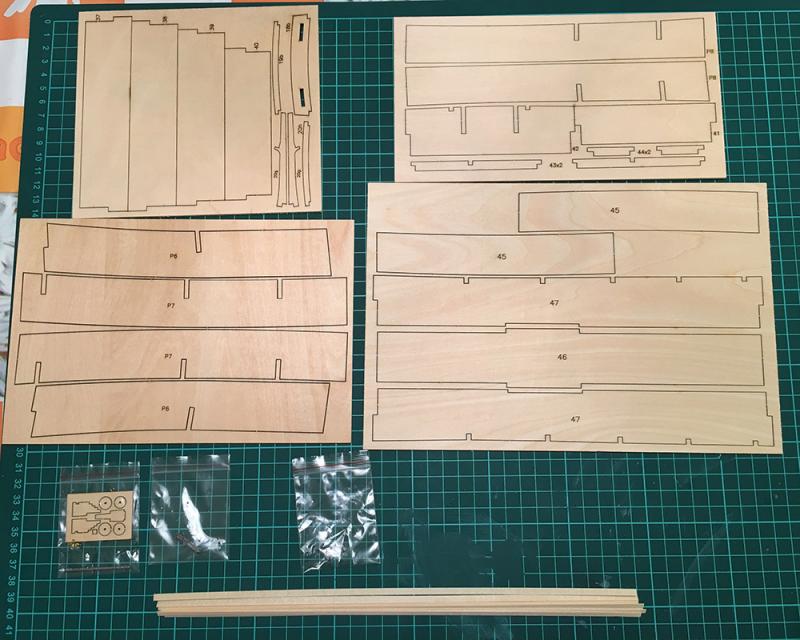
 Hello folks... Due to a lot of things happening at home I have not been able to do any building... I have to do a lot of sanding and fairing on the frames and can not do this in the kitchen. My work has also moved to a larger building and we have a lot to do there putting everything in place so I just can't sit down there and sand my ship as the others run around doing all the work... But a new shipment has arrived. Issues 29-32. This was in the bag: Mostly hull planks (81 of them. Good quality), one section of the deck and 3 decorations. There are now 188 hull planks at 300mm each. Thats 56,4 meters... (Around issue 48 the second planking will start so the poor quality planks will be covered) And the decorations: I will start painting the decorations again as soon as things quiet down here. Have patience...
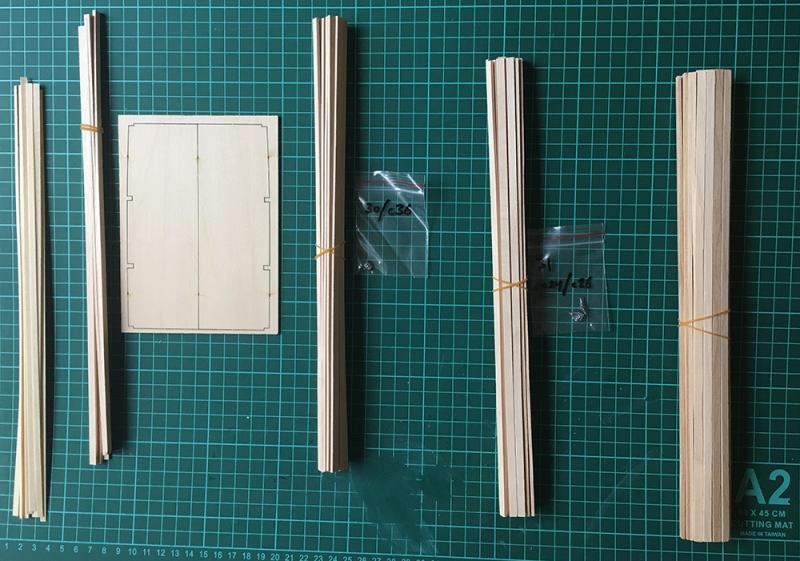
- 305 replies
-
- 8
-

-
- deagostini
- vasa
- (and 1 more)
-
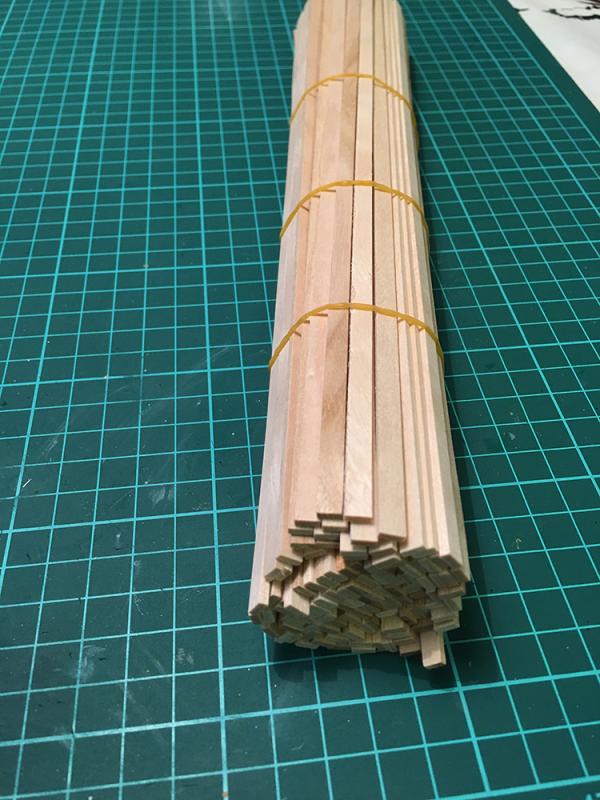
The flu has left the house here as well. if only the teenagers could do the same!!! Sjors: Was your bamboo also 2x5mm?
- 305 replies
-
- 4
-
-
- deagostini
- vasa
- (and 1 more)
-
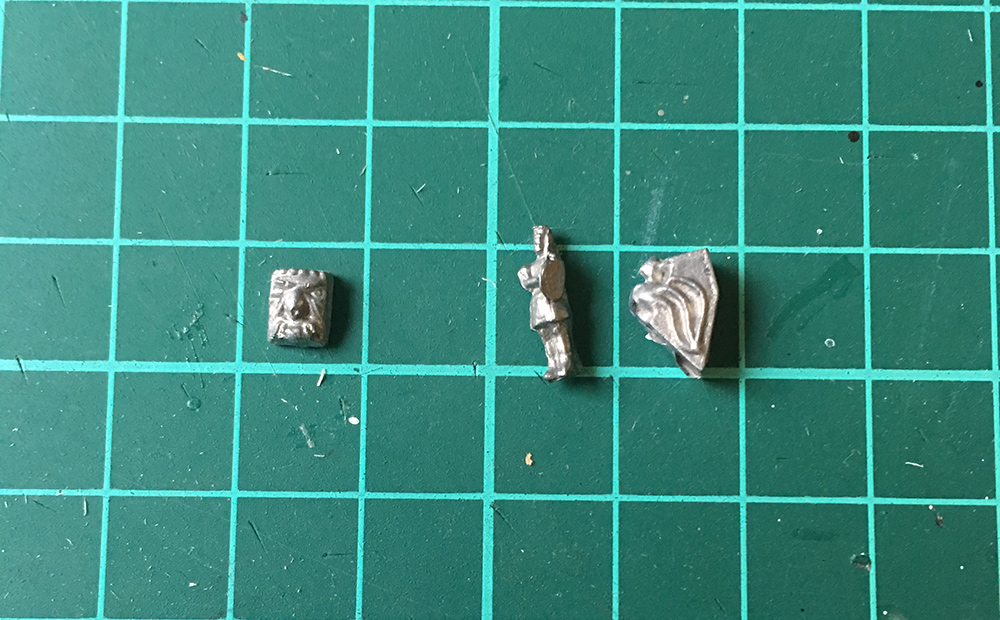
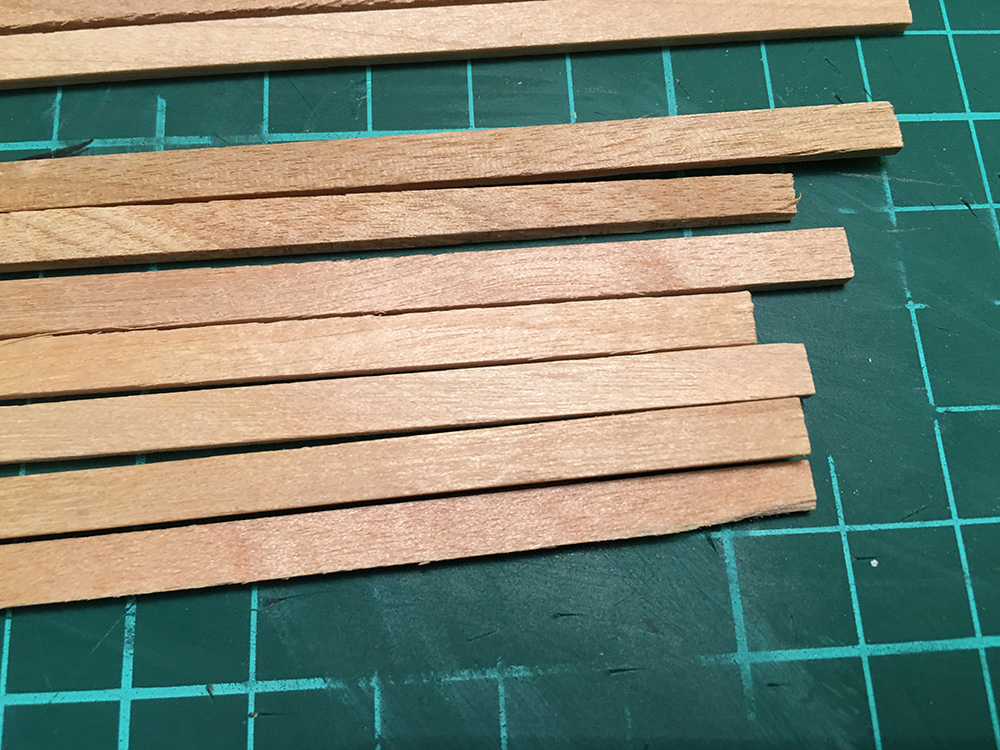
New shipment has arrived! The front part of the main deck, a couple of decorations and hull planks: The two decorations: And these are the 107 2x5x300 mm planks I got so far: Quality was MUCH better now. Maybe they just sent me some leftovers last time... Not much have been done due to two teenage nervous breakdowns and Der Frau having a dito, the two younger kids having christmas celebrations at school and me in the middle of it all looking stupid... But I'll try to do a little painting of the decorations now and then... and fair the frames... and plank the hull... Until then....

- 305 replies
-
- 5
-
-
- deagostini
- vasa
- (and 1 more)
-
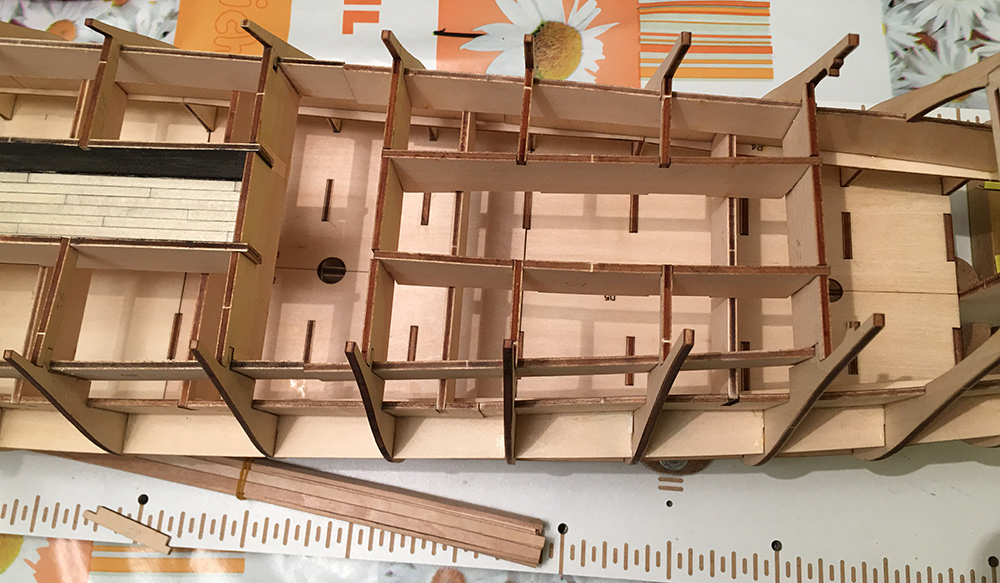
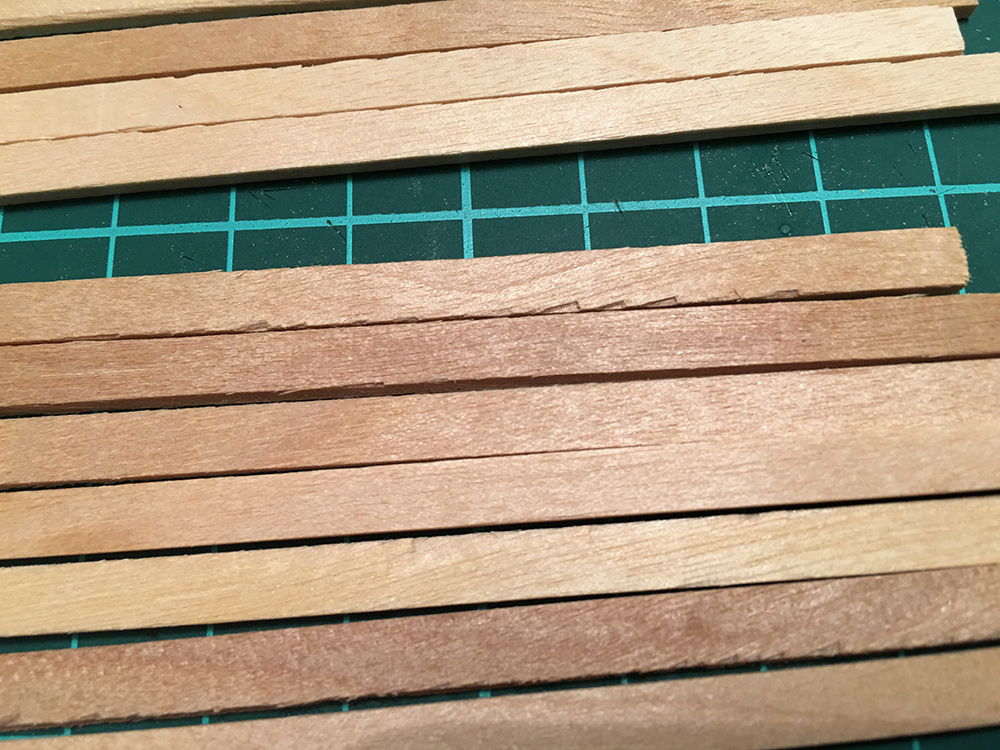
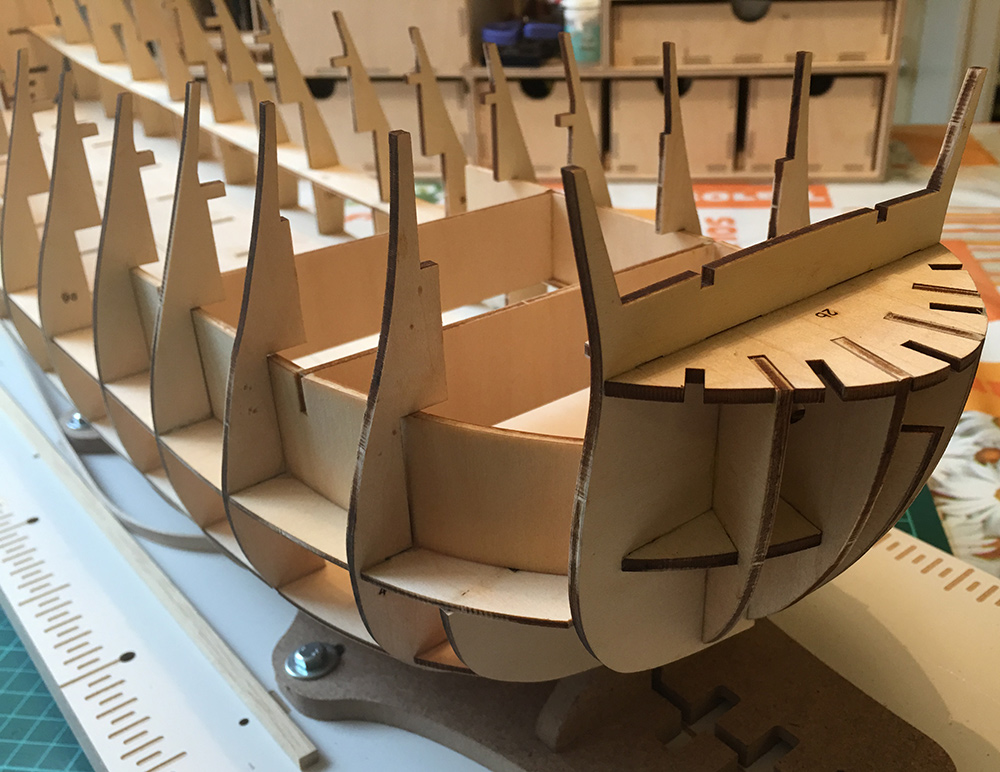
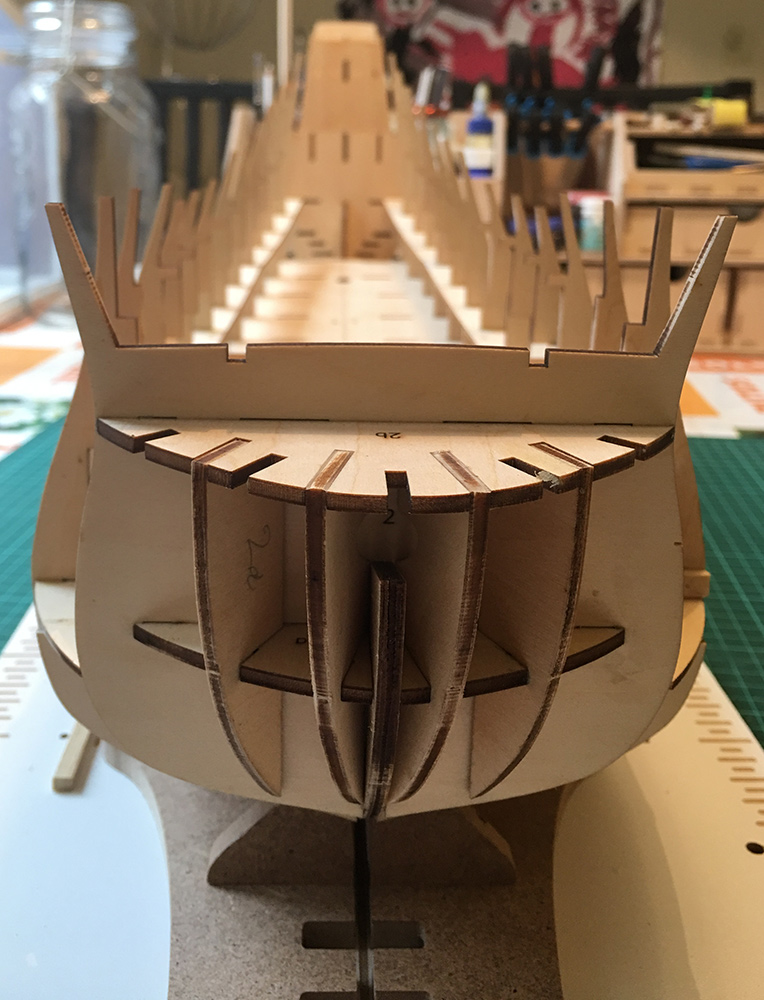
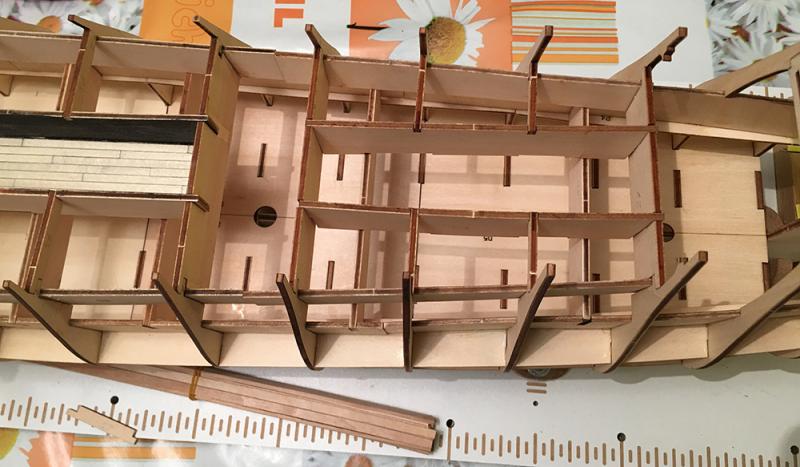
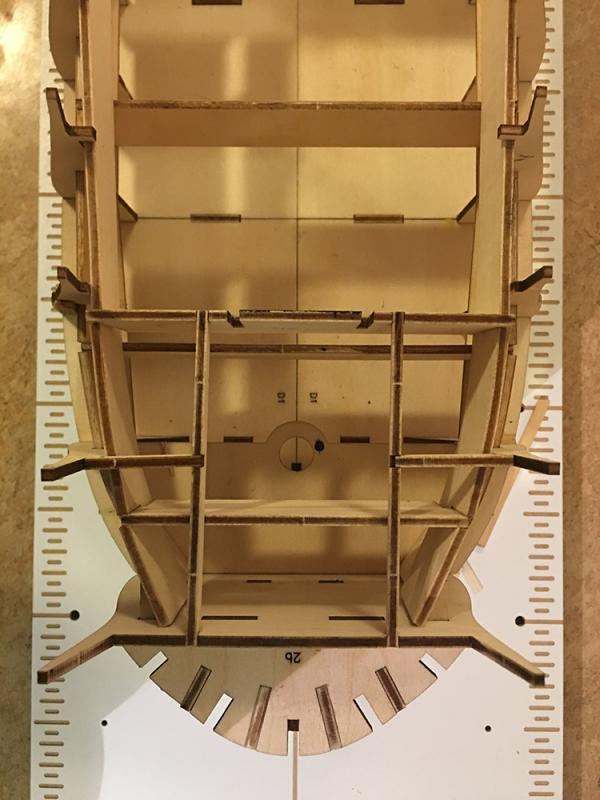
I went through the planking material and decided that most of it can be used by facing the bad cutting inwards... Because of horrible teenagers and a deadly manflu it took some time to post the update. There wasn't much to build this time but here it is: The reinforcements from the frames to the "well" should be at a 90 degree angle. but even if the frames are positioned by slots in all the reinforcements they where still off. I knocked the worst of them loose and glued them so that mostly they where at an angle. Fitting the second "well": This is how she looks now from above: And front: Now on to painting the decorations.... I'll be back!

- 305 replies
-
- 12
-
-
- deagostini
- vasa
- (and 1 more)
-
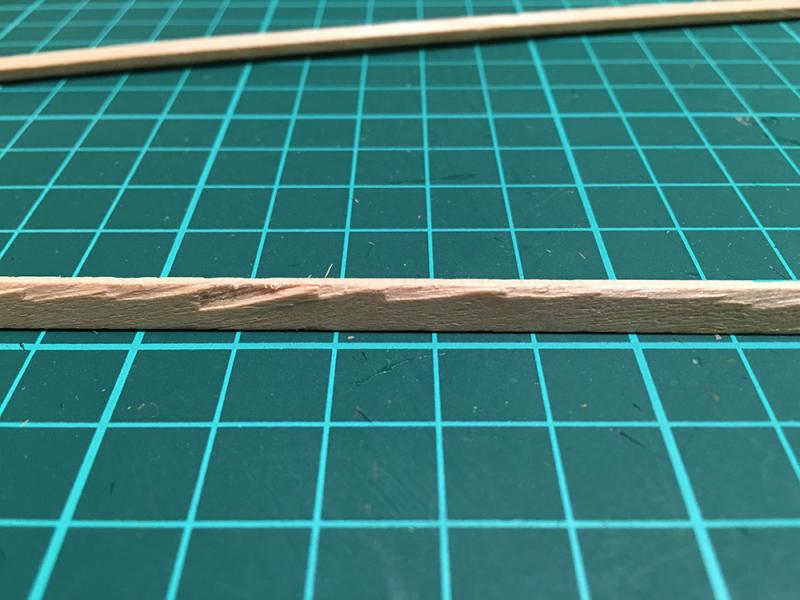
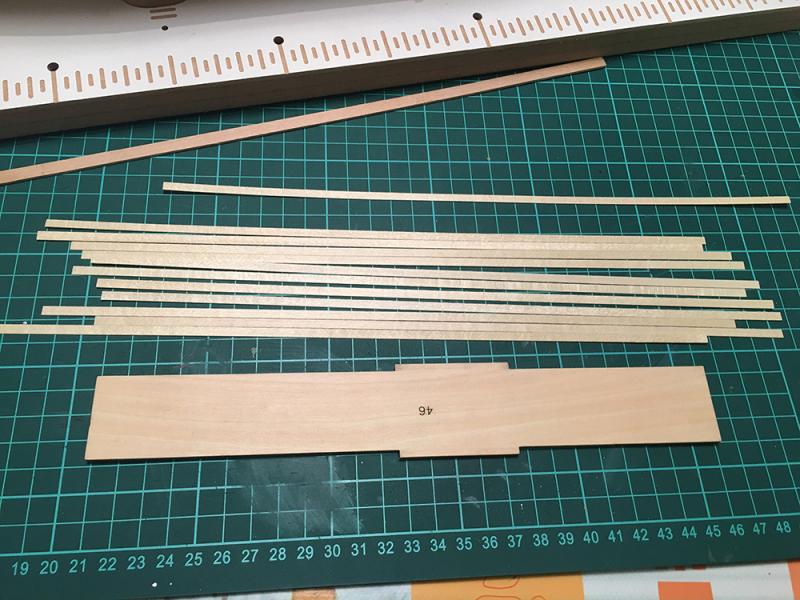
Thanks all for the reactions... I will go through all the planks and see how they are on both sides now that the initial shock has settled. The crappy side can go inwards. Did this on a Caldercraft kit that also had terrible strips, they promised to send replacements twice and never did so I gave up and built it anyway. If only I had the money to do that...
- 305 replies
-
- 6
-
-
- deagostini
- vasa
- (and 1 more)
-
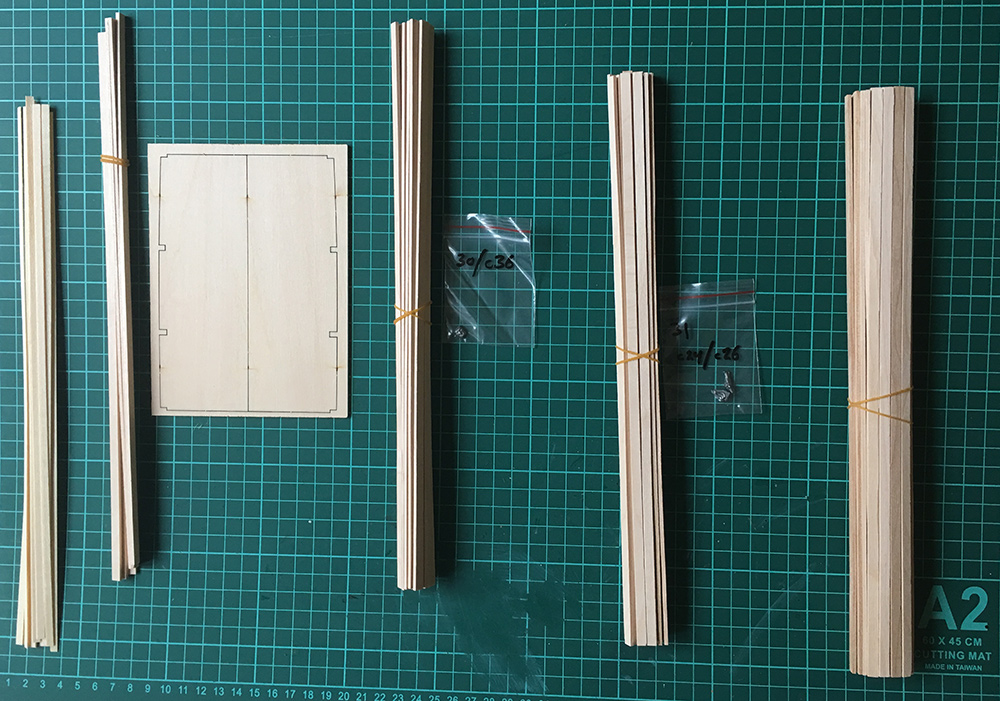
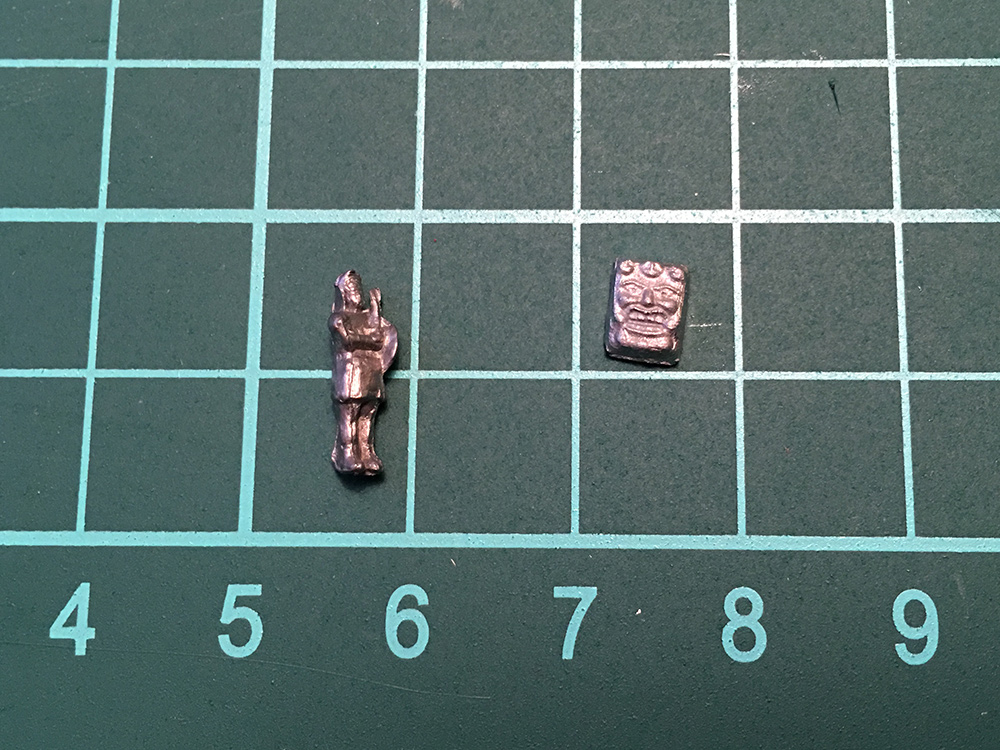
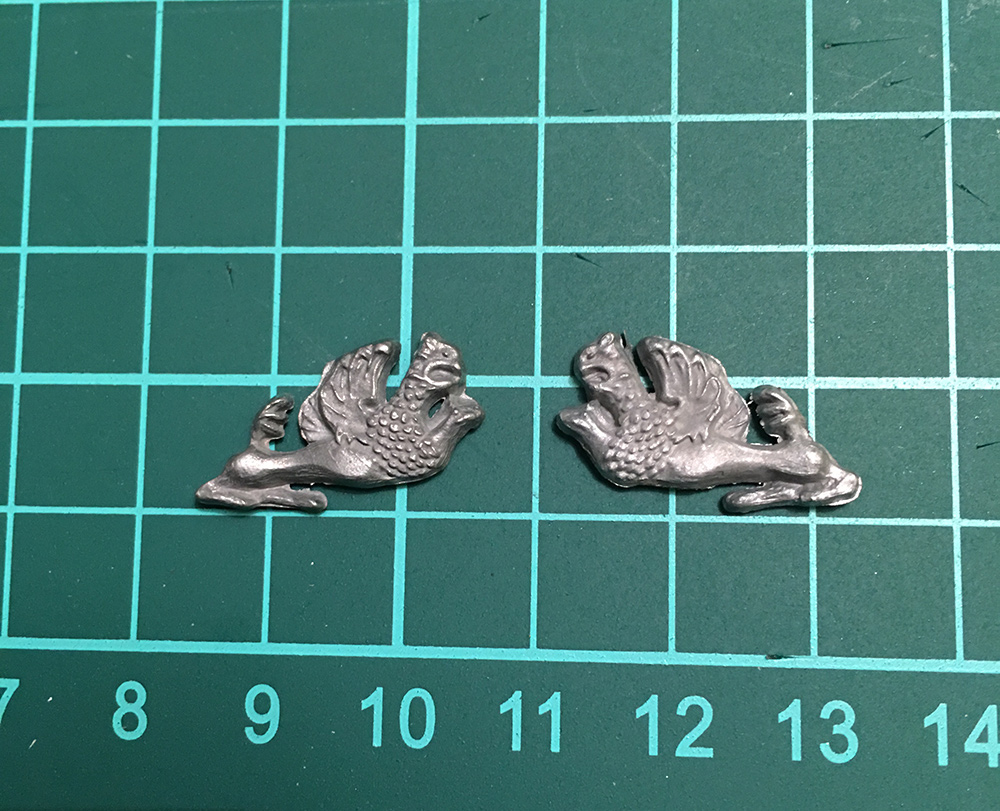
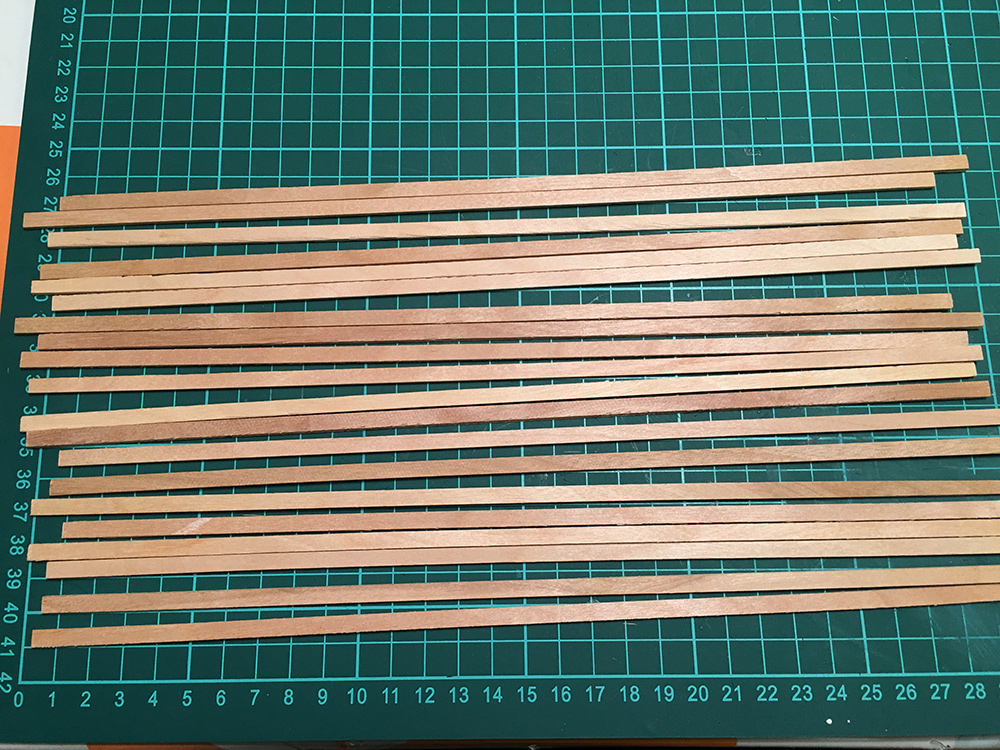
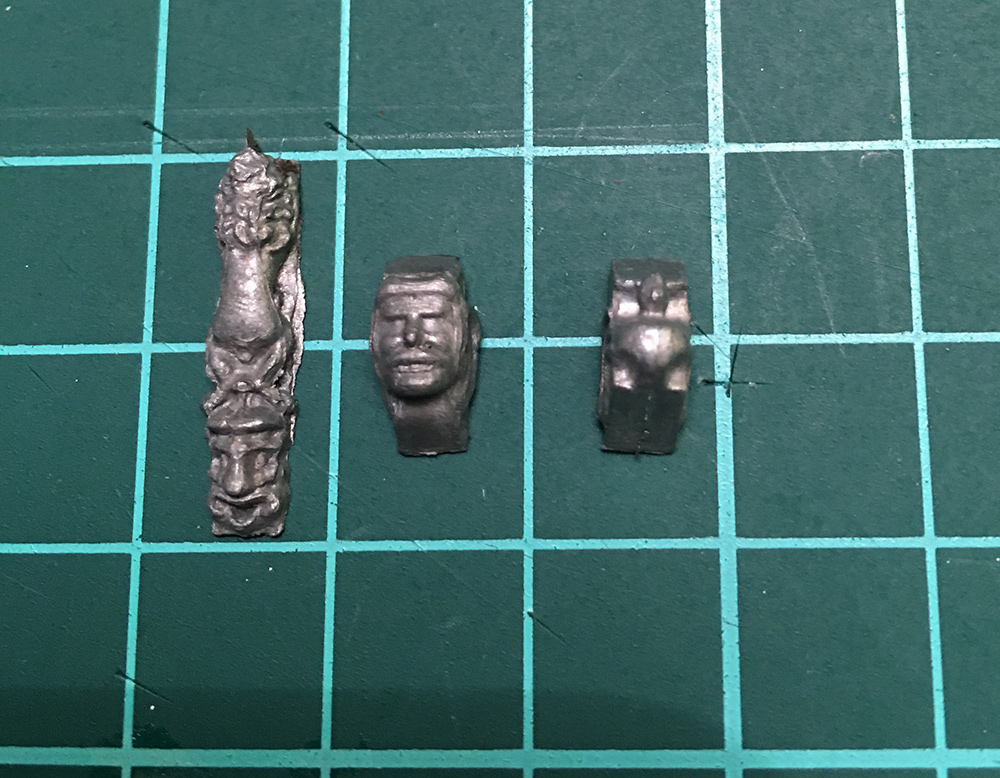
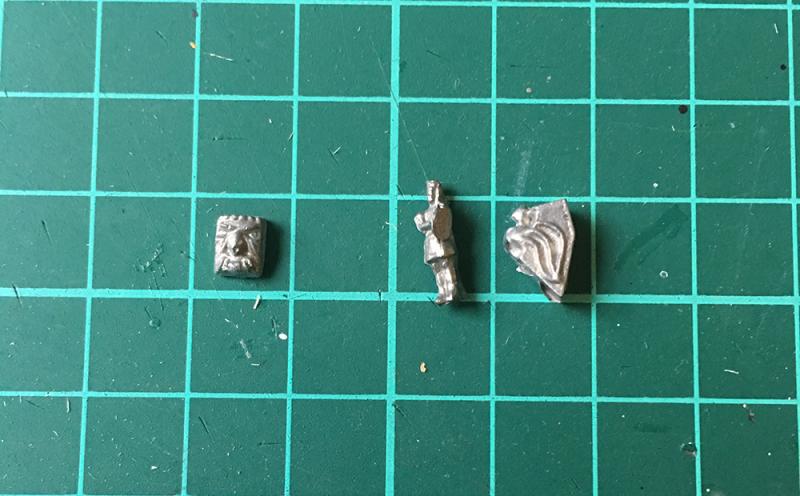
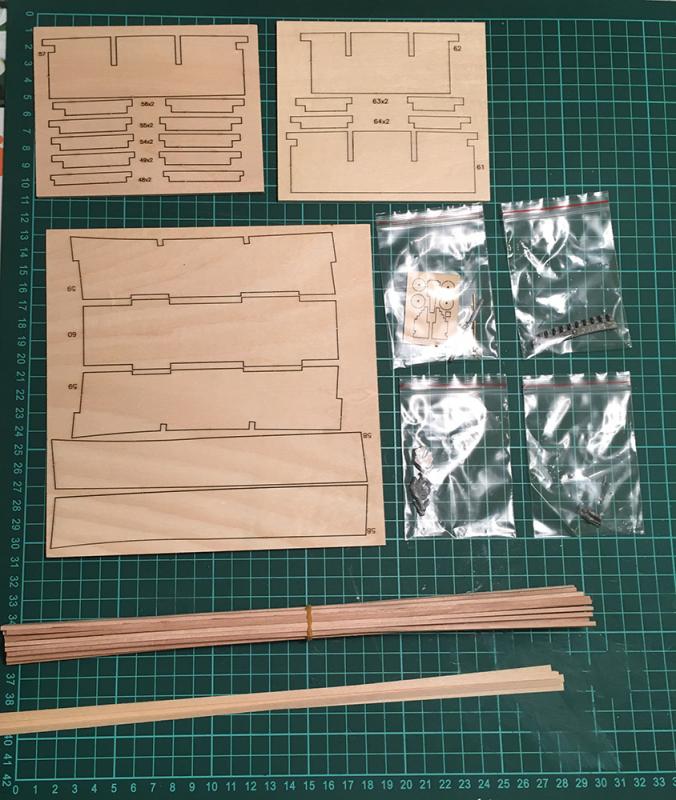
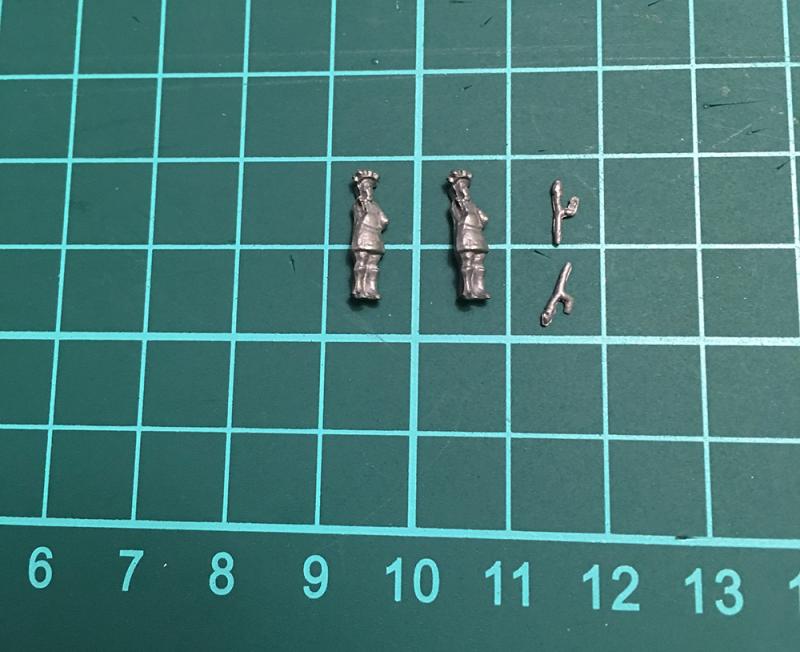
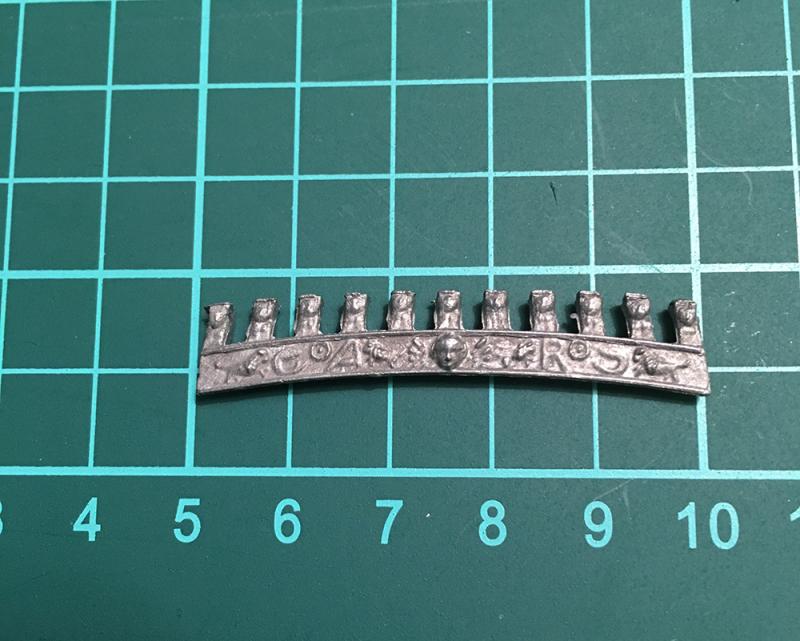
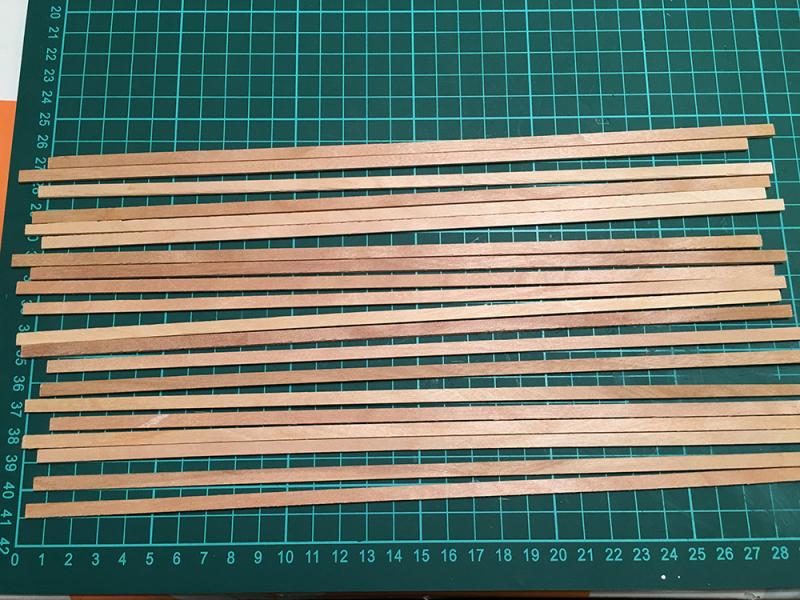
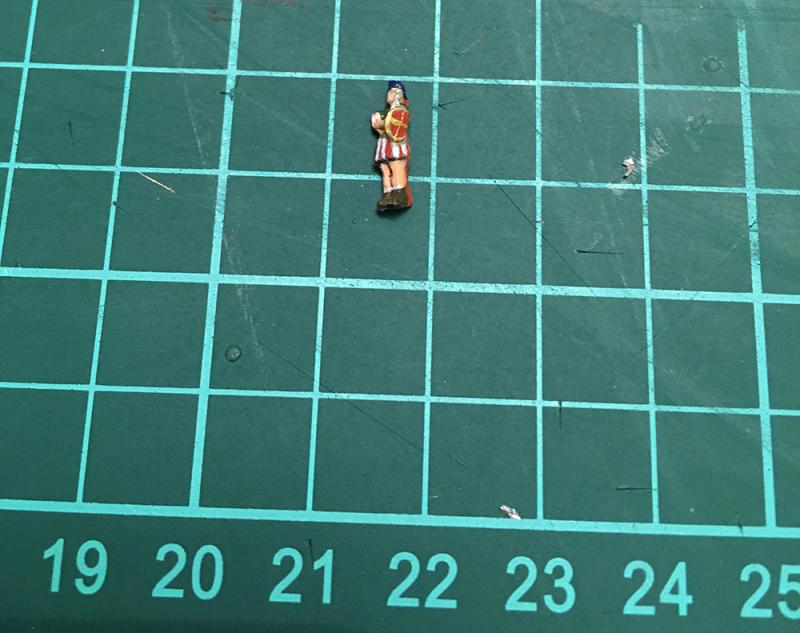
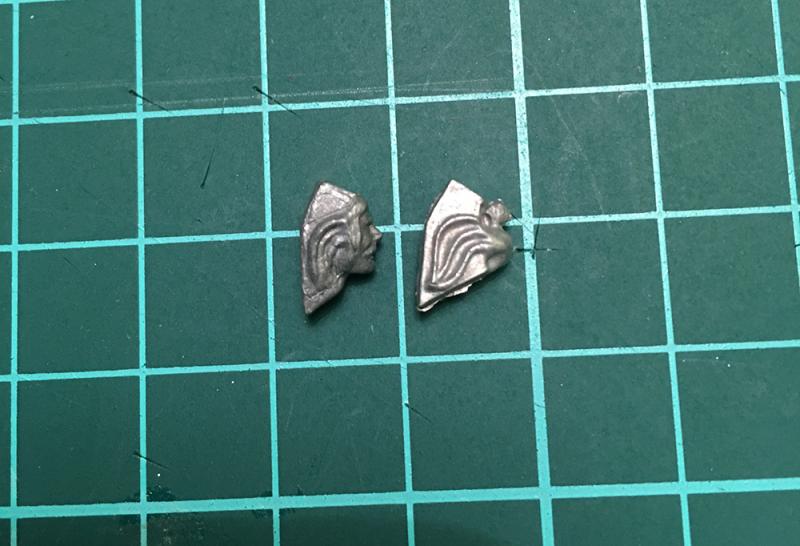
A new shipment has arrived..... And this is the contents: Mainly reinforcements for the upper deck Another Cannon: A couple of Griffins: Tiny men: A "license-plate" And now we come to the point where quality-check thought: "Well, F**k this... I'm out of here" This is probably the wood for planking the hull.... Seems like bamboo or something. And I hope to God the will be a second layer planking or we have a serious problem here... There is no planking shown in this months building instructions so we'll have to wait and see in late December/early January... I'll try and get time to start building this evening... But I think tomorrow will be the day....


- 305 replies
-
- 6
-
-
- deagostini
- vasa
- (and 1 more)
-
Hi Bob! I finally got my head out of my a.r.s.e. and had a look around. Great build! When I got to page 10 I realized I'd forgot to press "like" on the posts. But You know I like them all...
-
It will go on for about 3 years... 36 monthly shipments...
- 305 replies
-
- 2
-
-
- deagostini
- vasa
- (and 1 more)
-
Nice and clean. And nekkid ladies, bet that was a fun part of the build
-
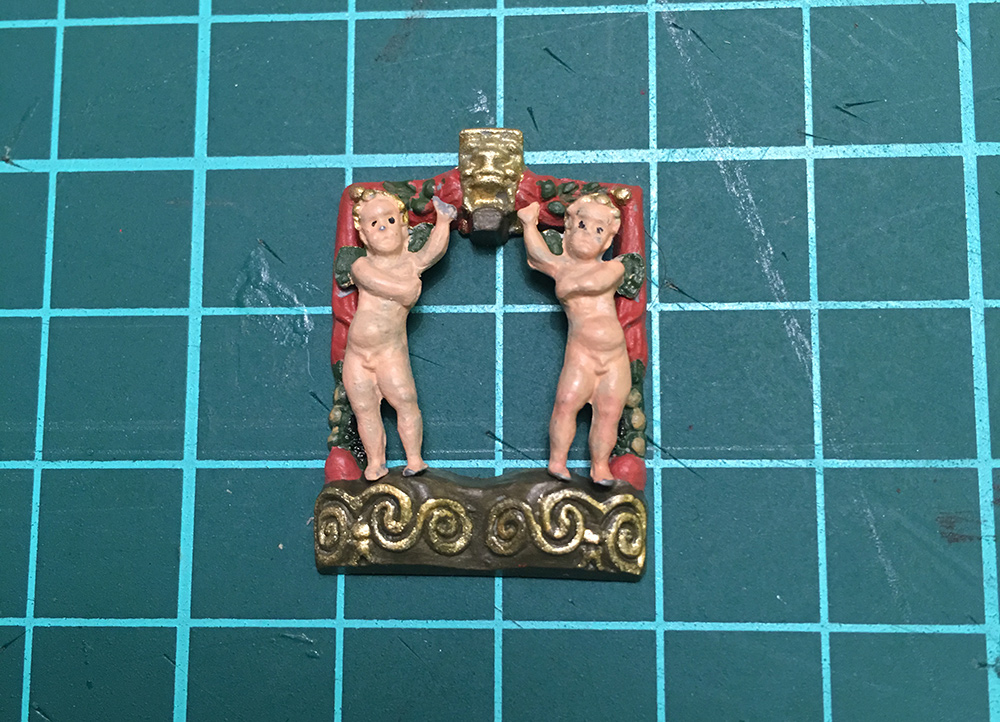
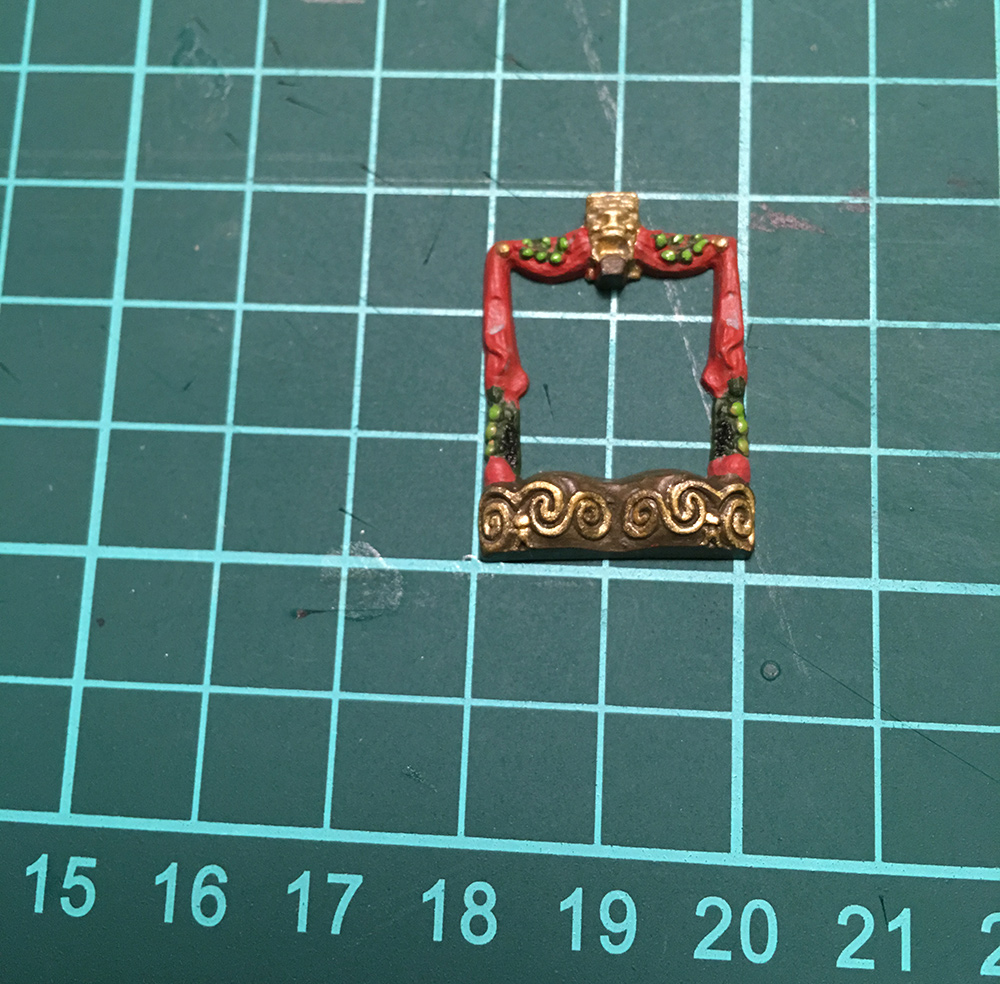
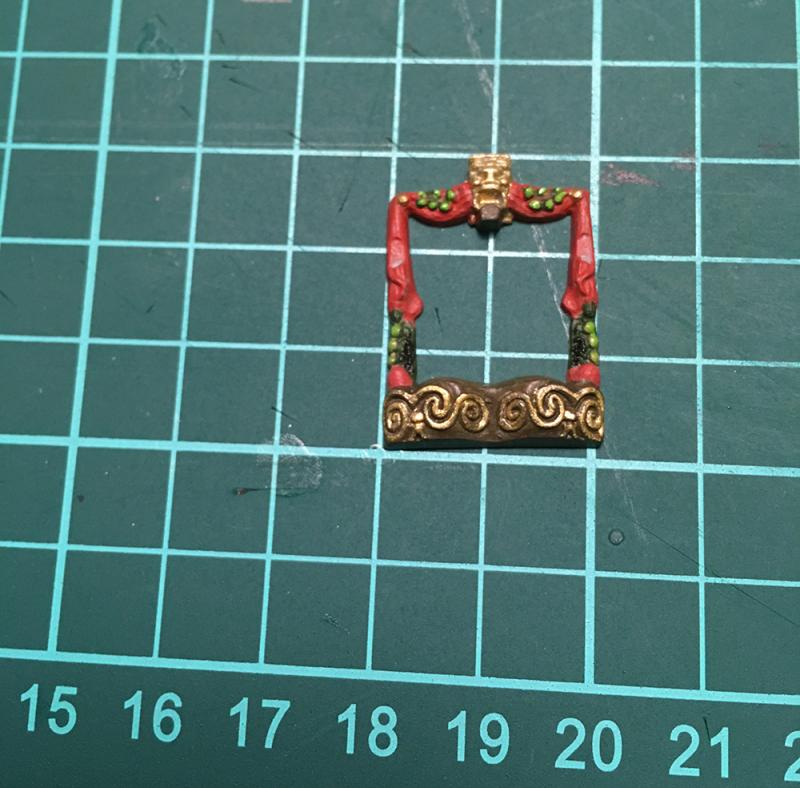
Ok, a small update again, done (almost) painting the dekorations for this time. Some touch ups to do but that's for later. A little guy that will go next to the harpist from earlier: The framing of the Cherubs: The repainted lionheads and whatever the other two decorations are: (Lot of touch-up to do here) And this is how the Cherubs will be placed: So far these parts have been painted: So, now you'll have to wait another 3-4 weeks....

- 305 replies
-
- 15
-
-
- deagostini
- vasa
- (and 1 more)
-
Thanks y'all!
-
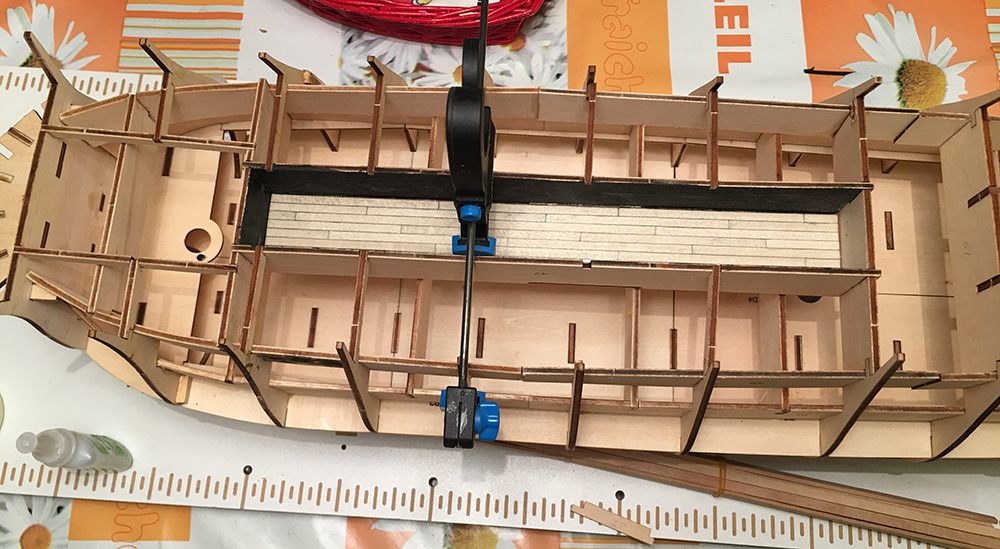
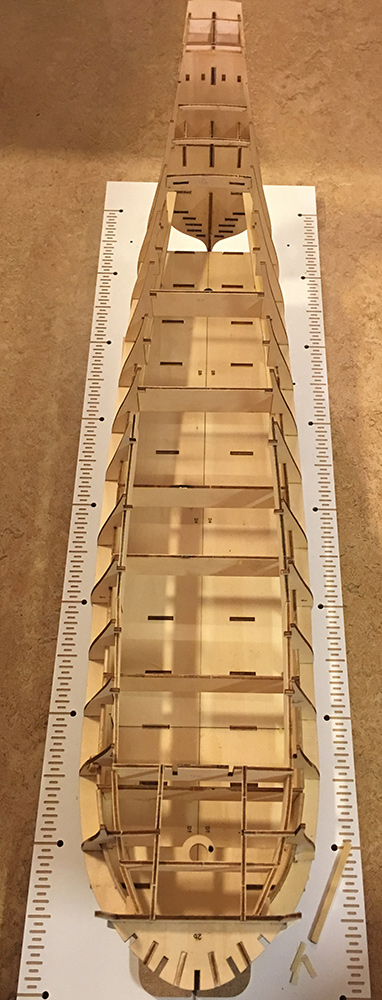
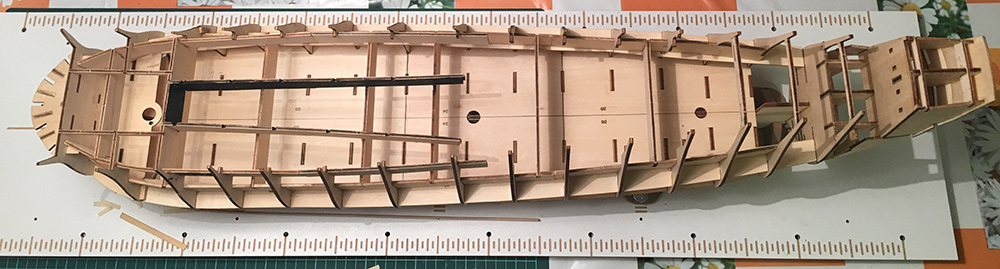
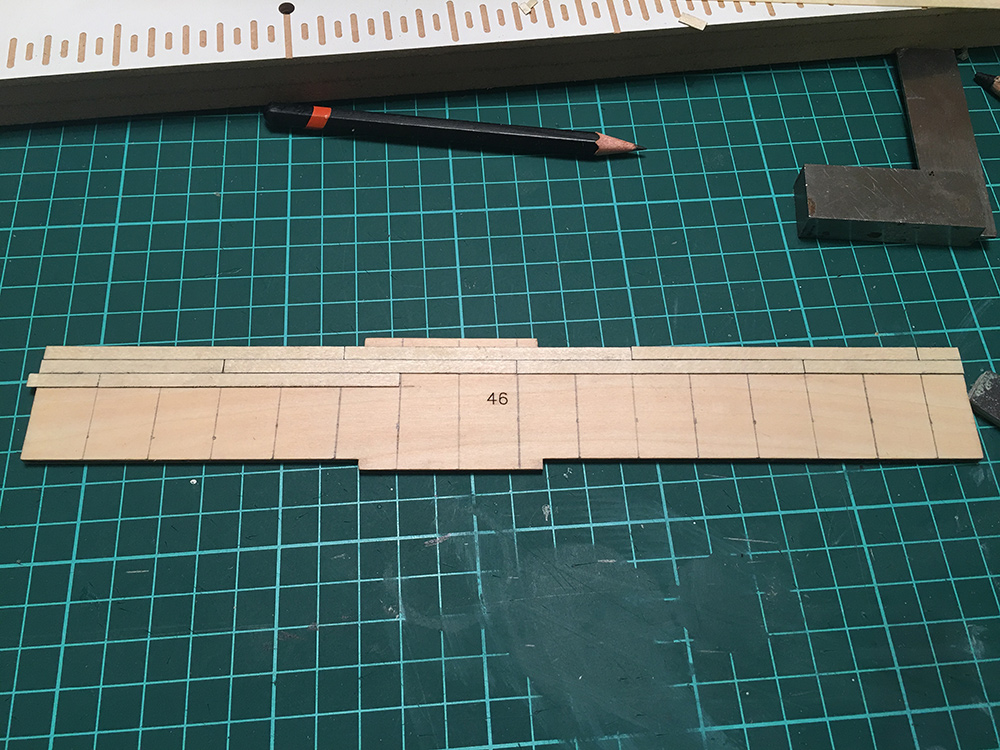
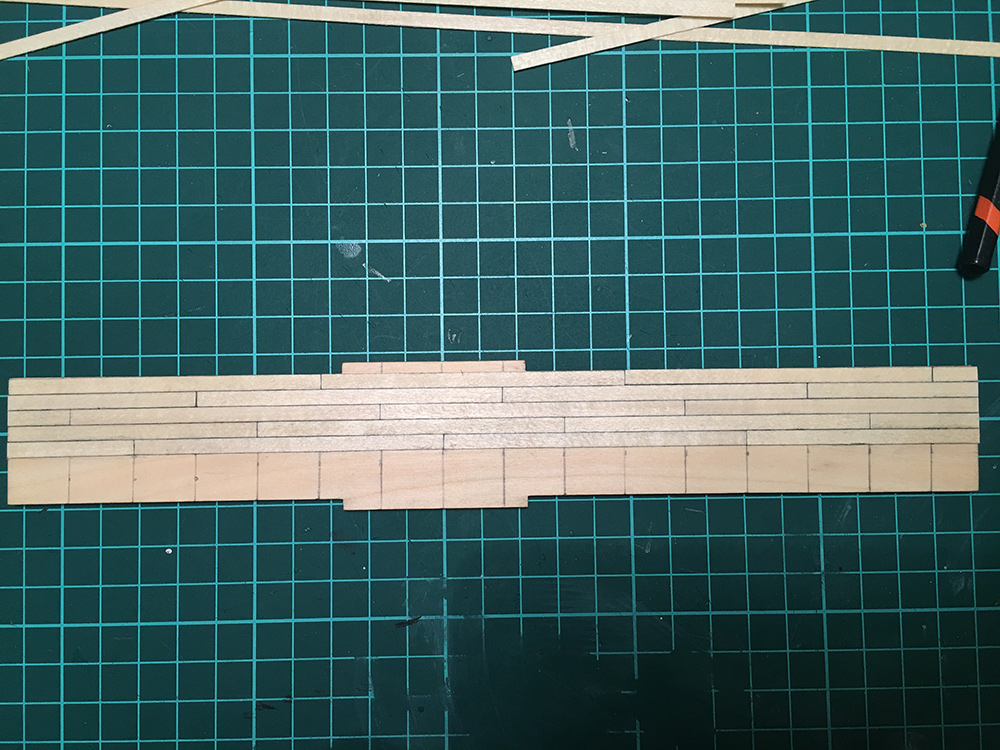
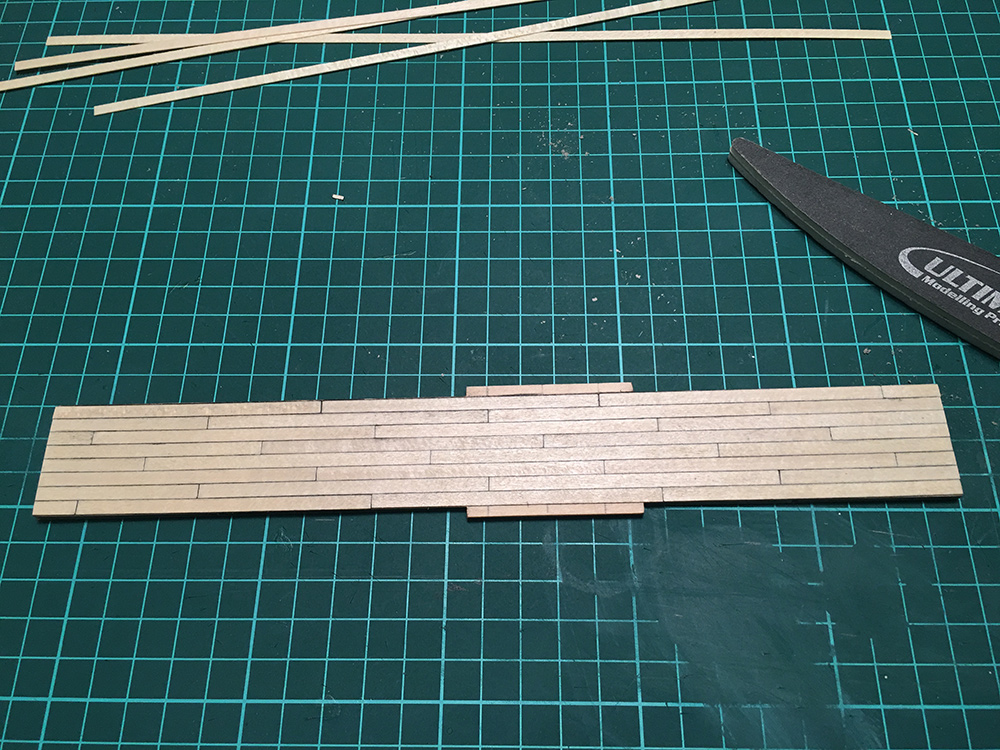
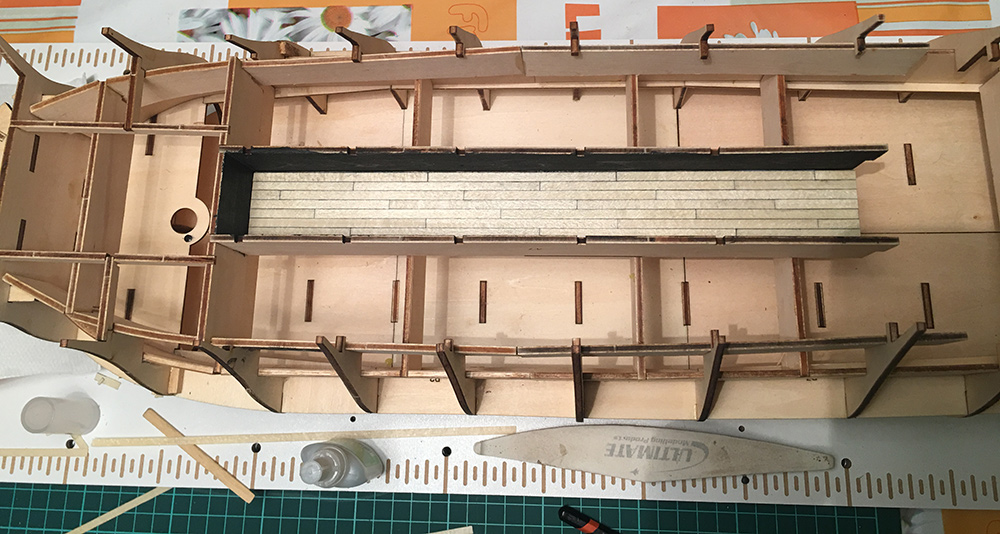
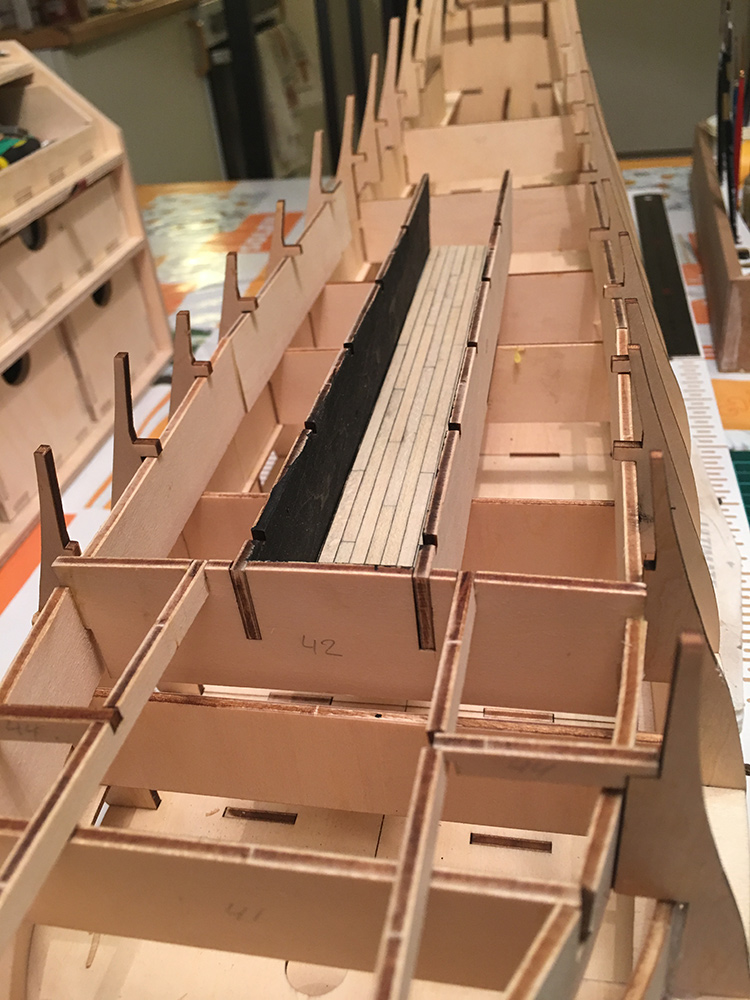
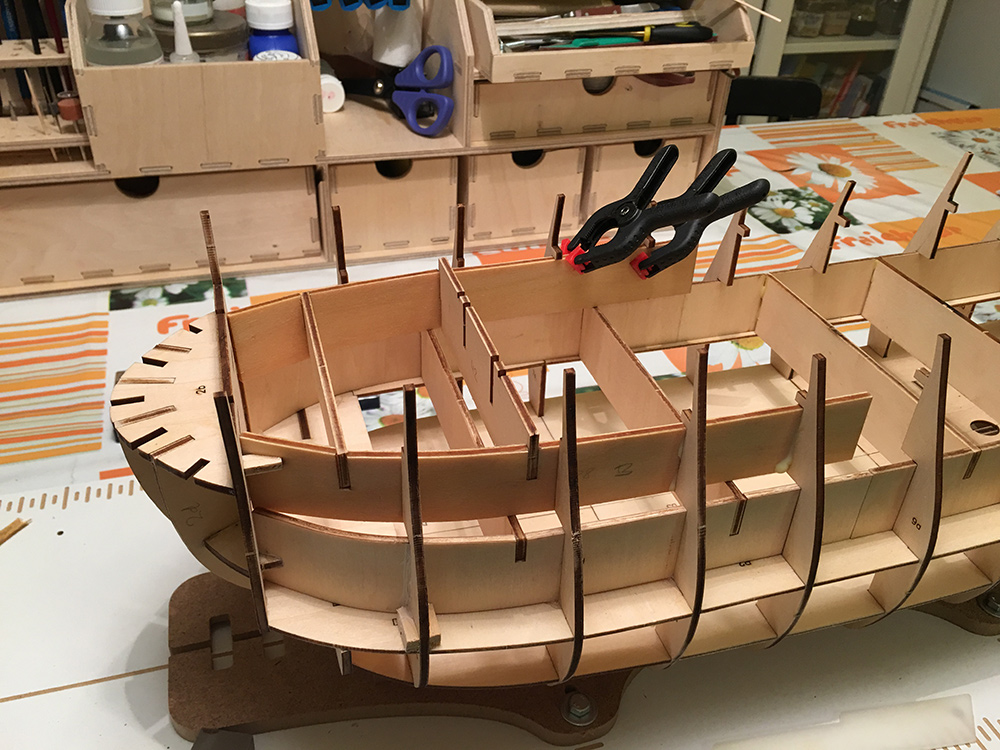
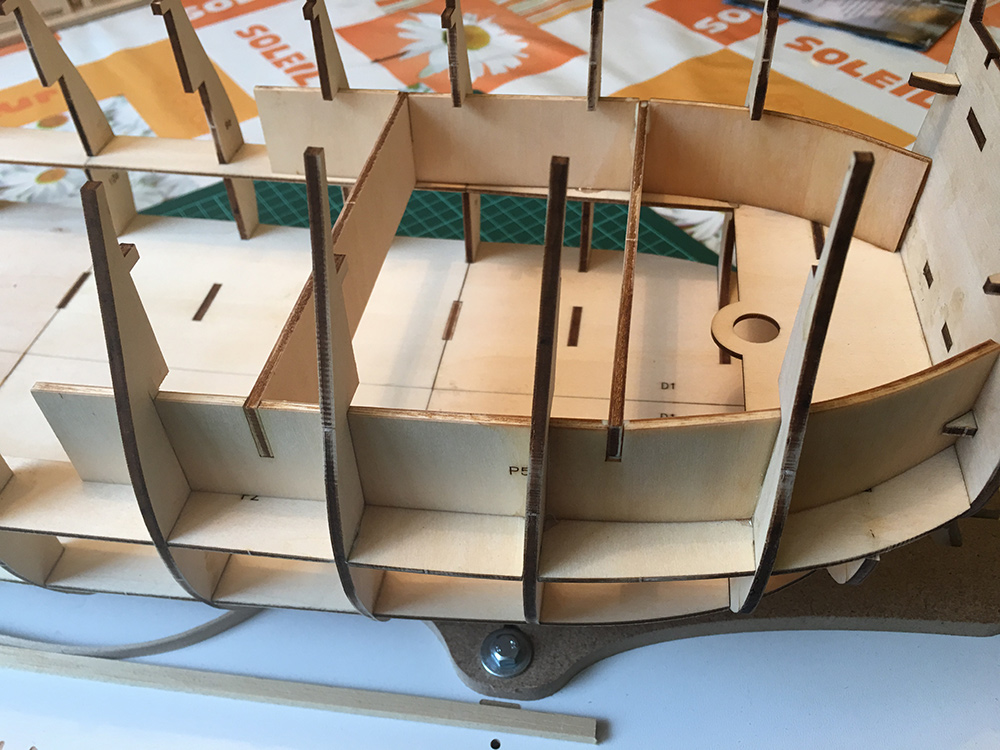
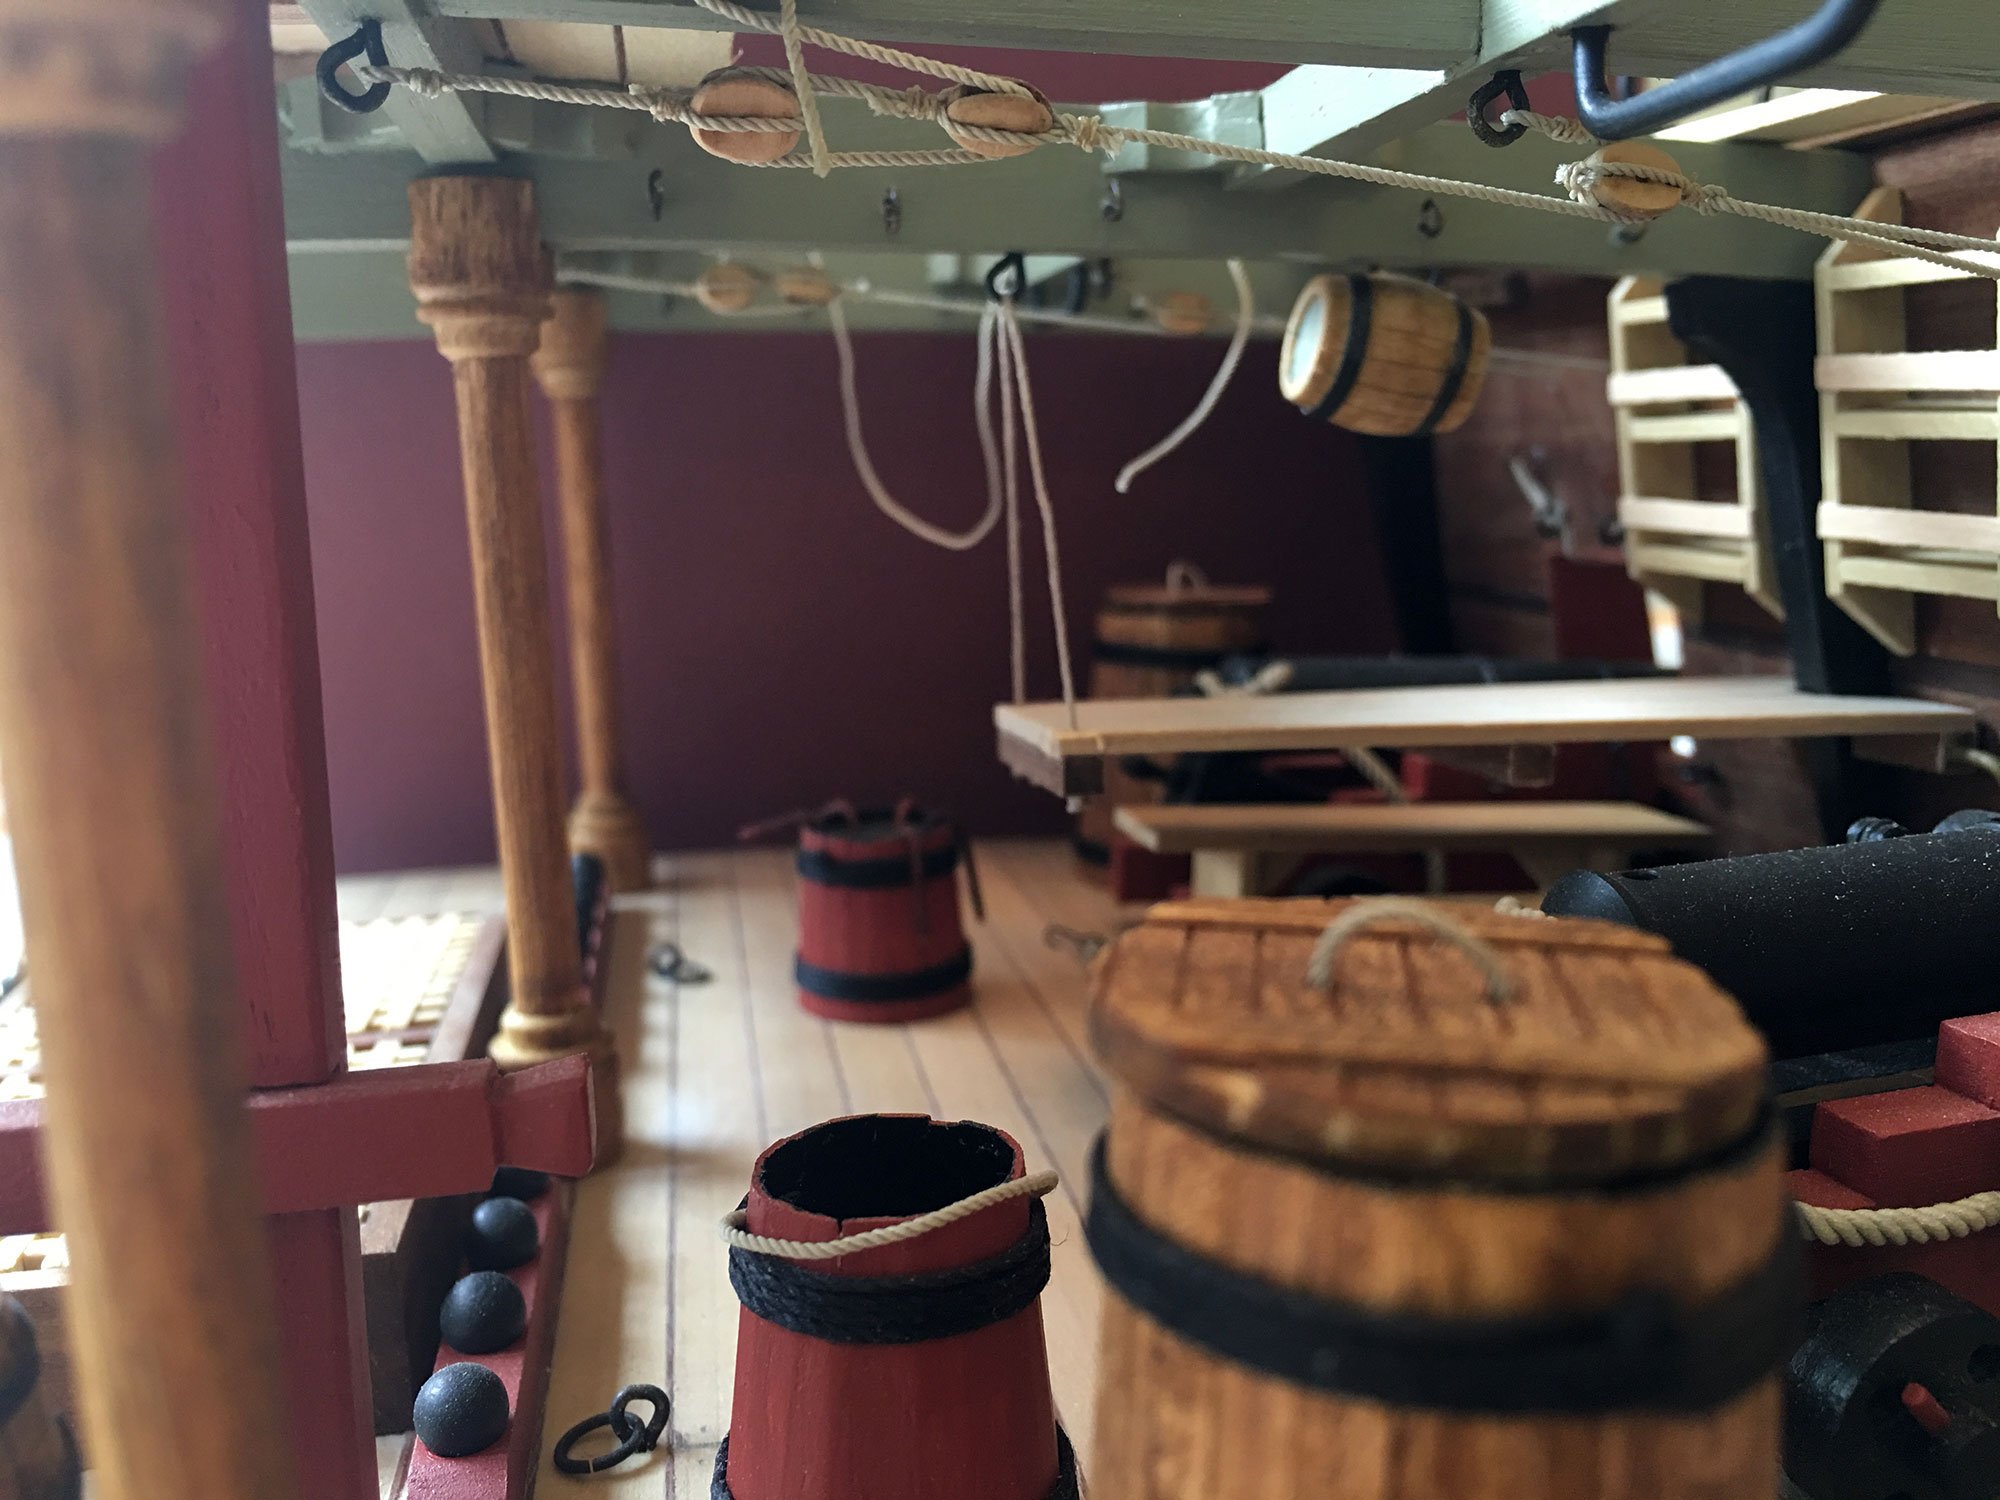
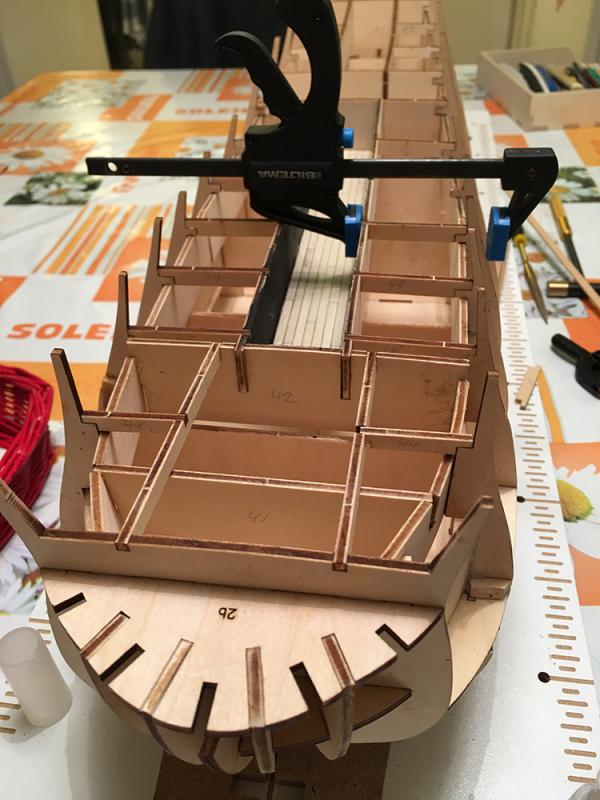
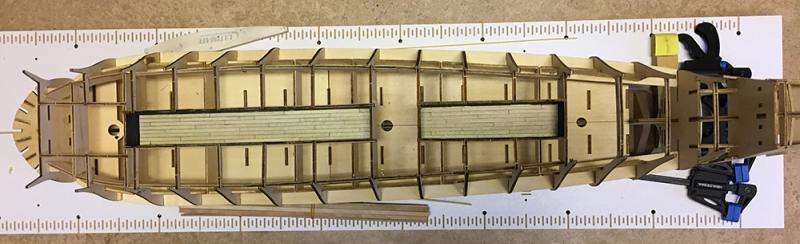
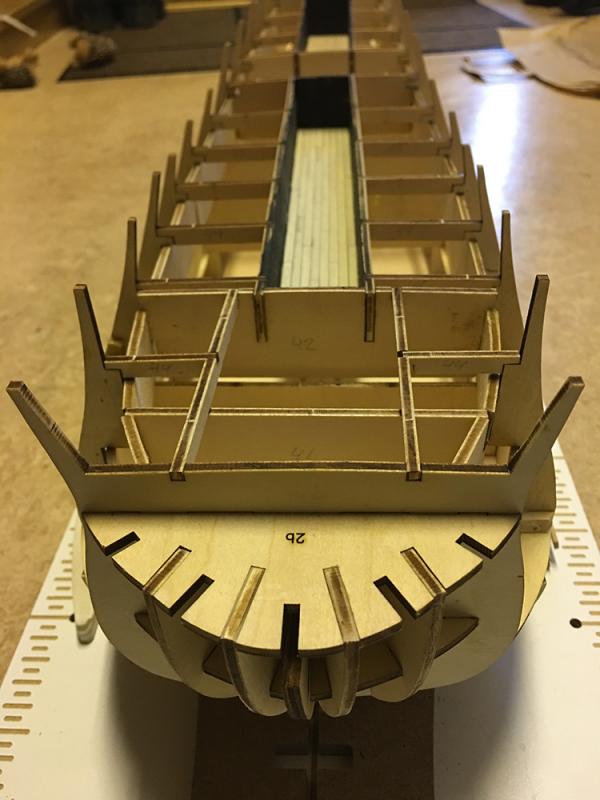
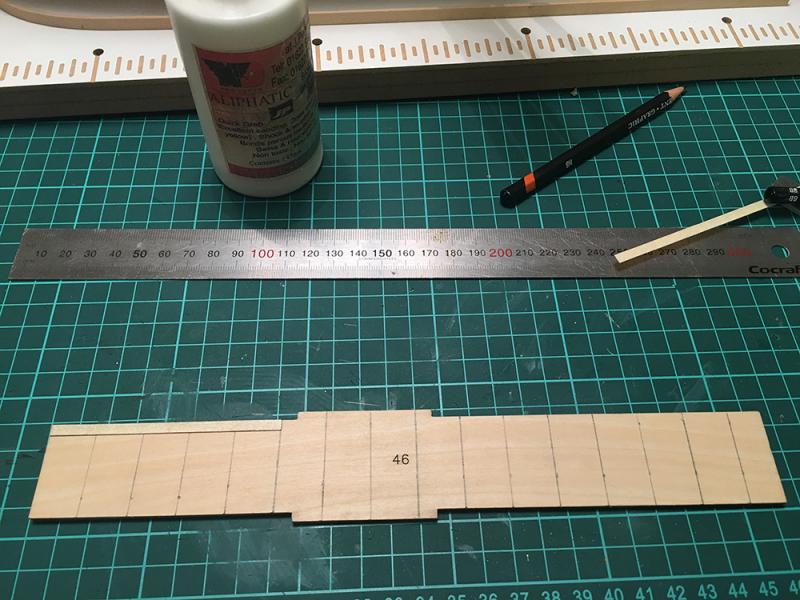
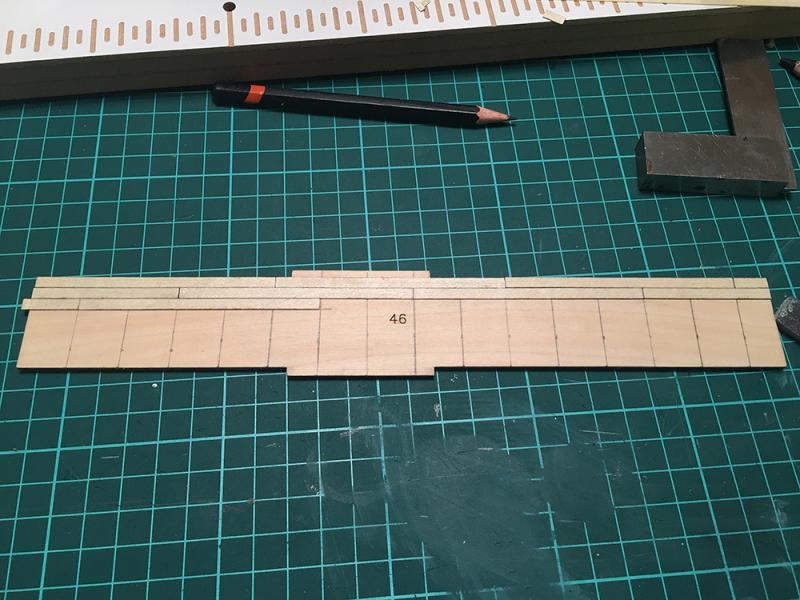
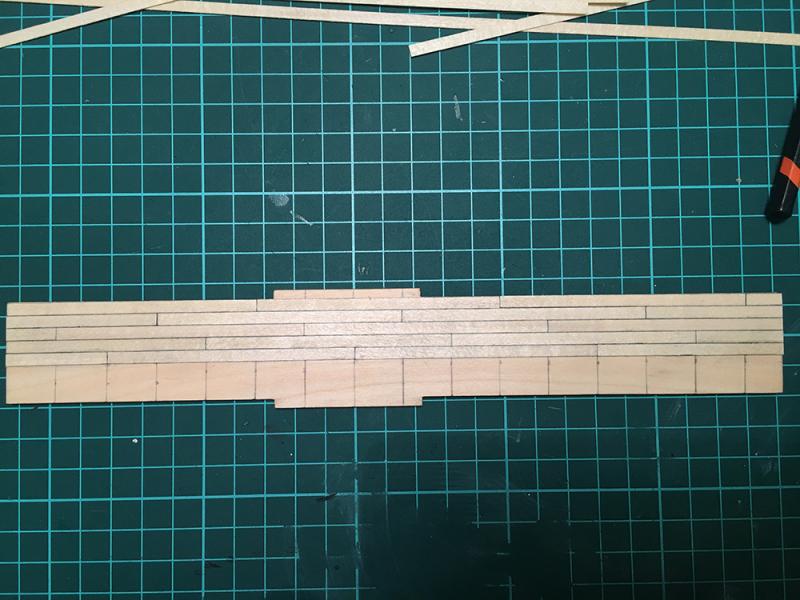
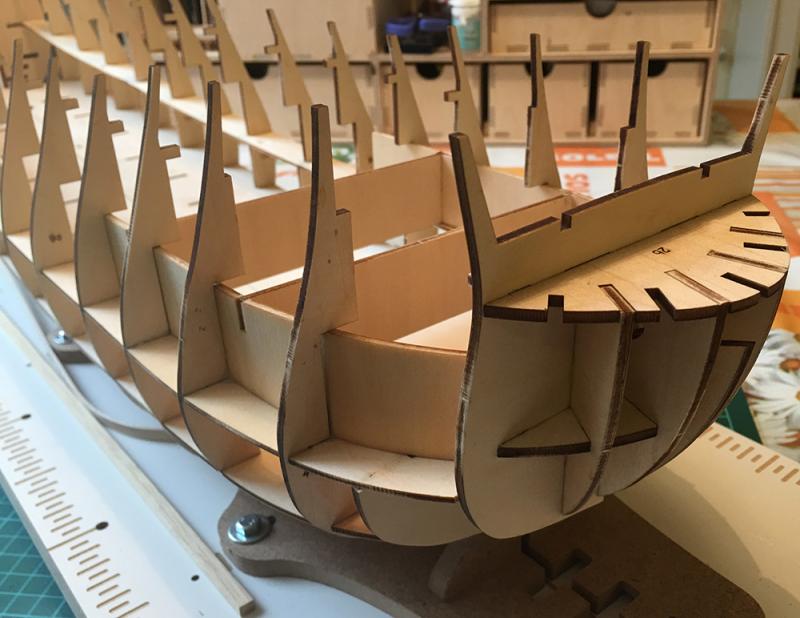
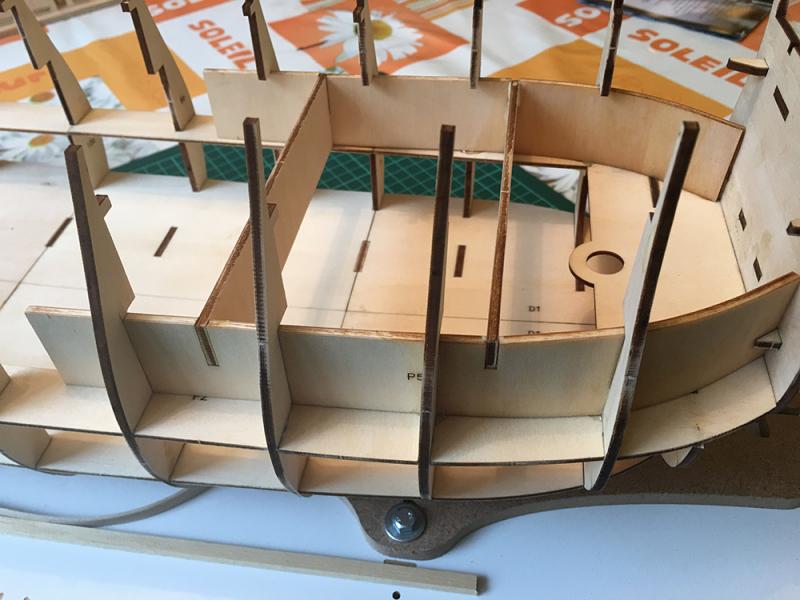
And here is the second part of this months shipment. A overview of the hull: Stern with extra bits on the frames: They could have designed this better. Lots of waisted time getting all the little parts straight... The support at the bow: This should have been straight angles but turned out far from that. We'll see if this has any impact later on... Hull again: And now on to some planking: Somewhere on the forum Ulises Victoria showed a nice variation of a 5-butt shift planking pattern. I decided to try it out here. I prefer to cut and prepare 1 plank at the time. This pattern is quite pleasant to the eye... And here we have the finished planking: And the well that does the false lower deck upon where the grating will go: I thought about darkening the planks but decided to leave them as they are so if anything shows through the grating it will be easier to see the planking. The pencil smudges from the edges make them look a little worn... And that, dear followers, is all the parts built for now. later there will be some painting of decorations. Until then... Edit: edited the name of Ulises Victoria and the document is HERE
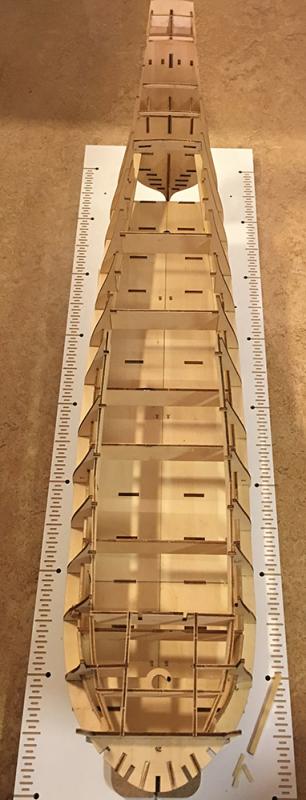

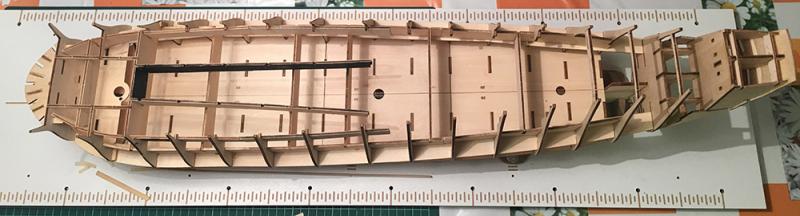


- 305 replies
-
- 12
-
-
- deagostini
- vasa
- (and 1 more)
-
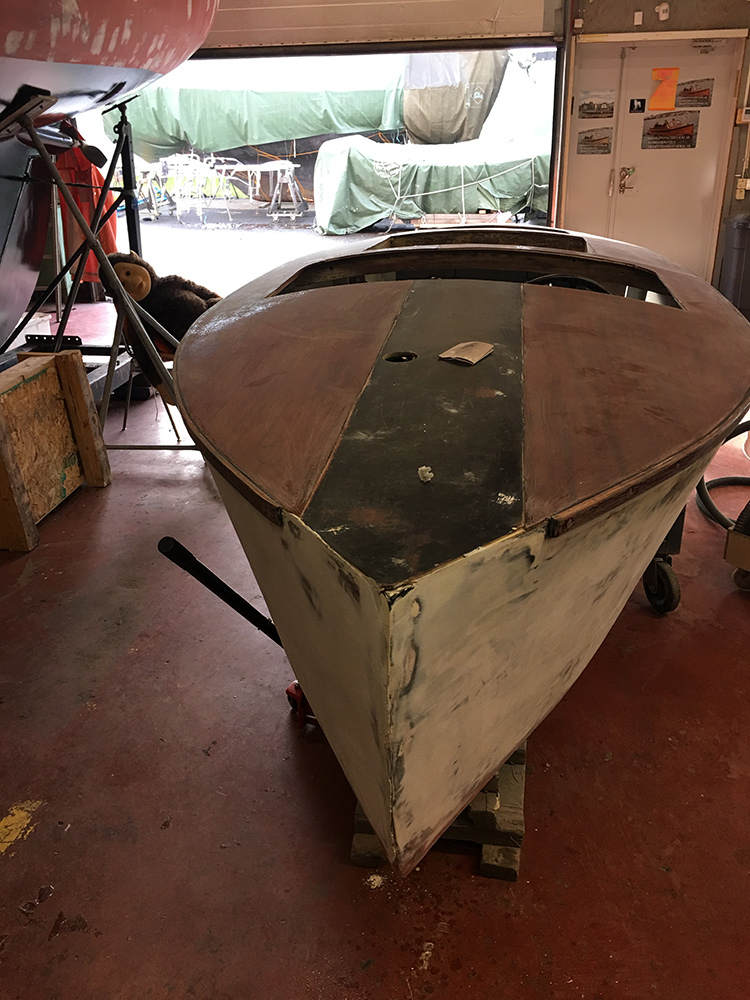
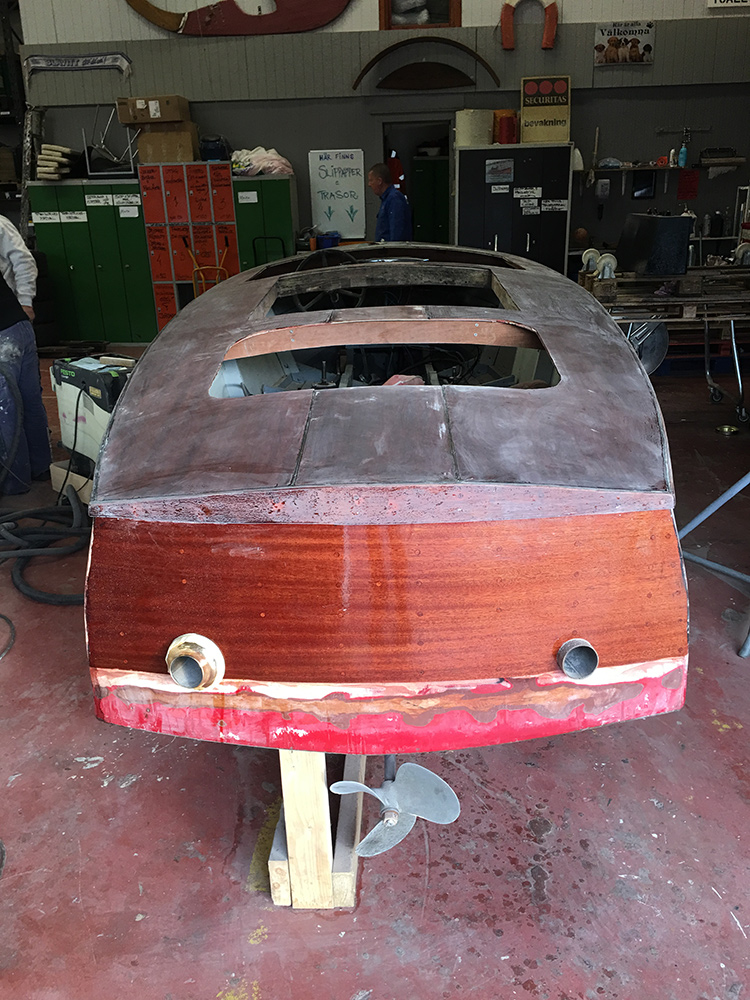
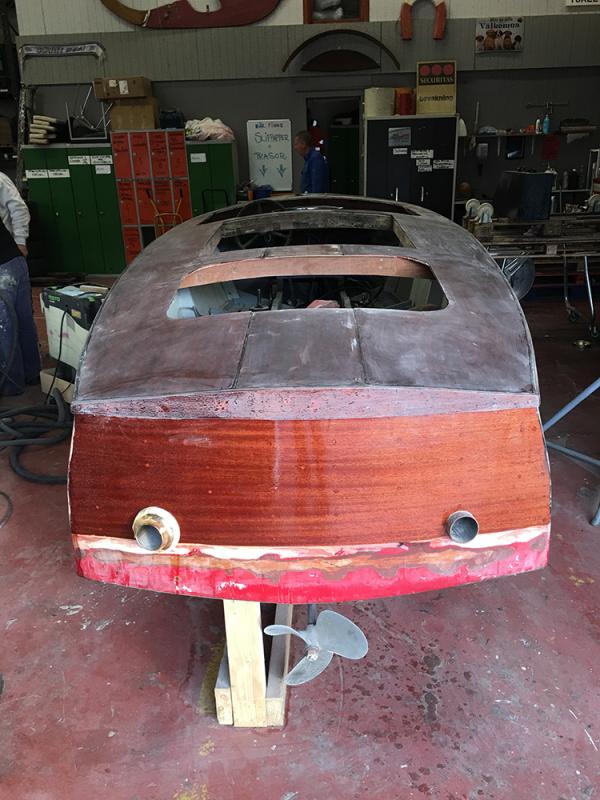
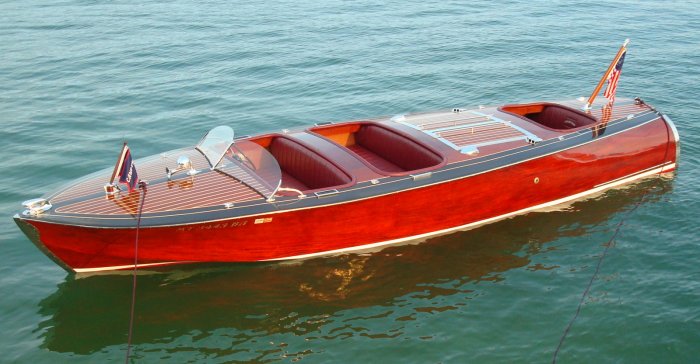
This is what I do at work: Renovation, can't remember what make this is but it's from San Fransisco This is an original Garwood from '46: And this is my scratchbuild: Glen's Monte Carlo. We hope it will look like this next summer: So the last thing I want to do at my job is build model ships....

- 305 replies
-
- 9
-
-
- deagostini
- vasa
- (and 1 more)
-
Thanks all. Don: Ah, yes it's a new day and unfortunately there's something called work and family that gets in the way.
- 305 replies
-
- 2
-
-
- deagostini
- vasa
- (and 1 more)
-
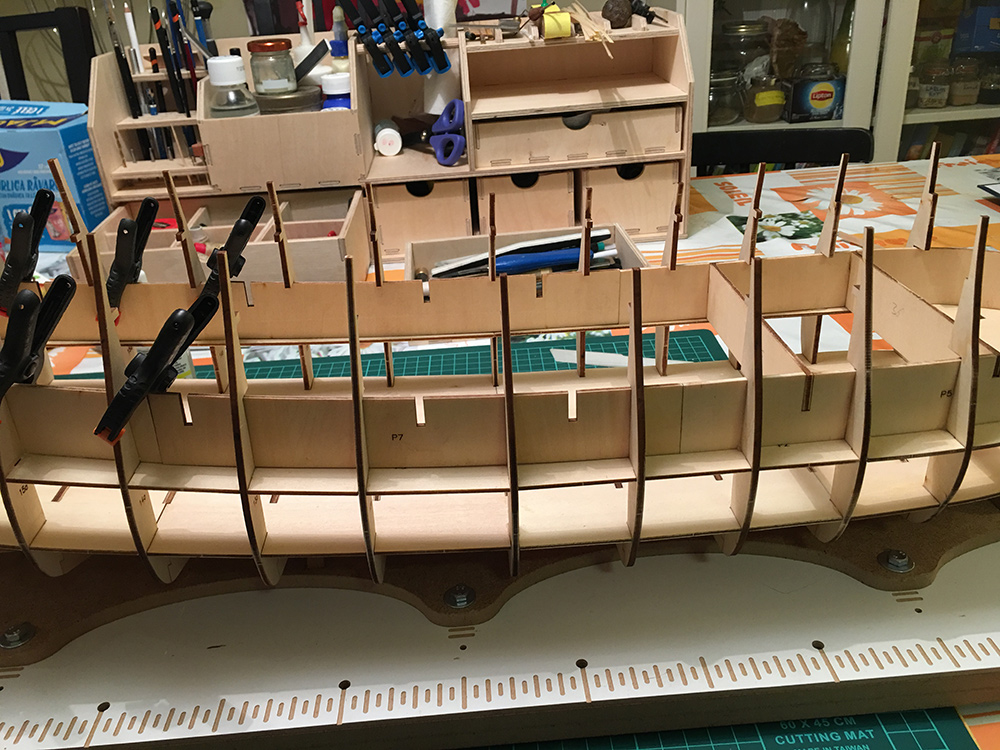
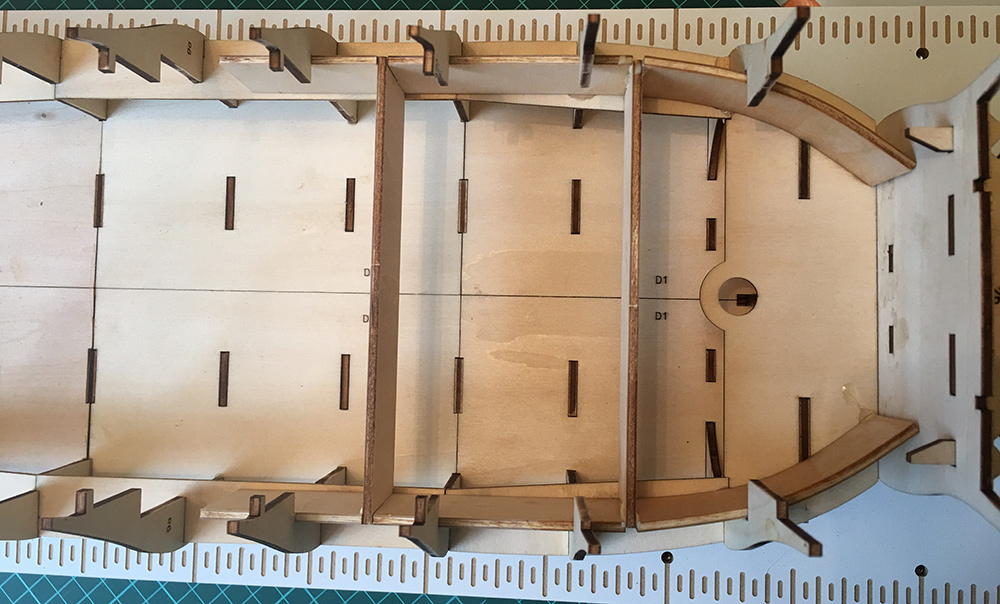
Here's the first part of this shipments build log. I'm afraid this part is not very exciting but... The dummy barrel supports continued: Next decks dummy barrel support: Also the reinforcements for the former parts act as... well, support for various other parts. Deck beams etc for the stern frames: Could be deck supports at the bow: More to come tomorrow and I think that part will be a bit more interesting... So stay tuned...


- 305 replies
-
- 12
-
-
- deagostini
- vasa
- (and 1 more)
-
Good to see you have the same patience as me... Some build pics this evening local time...
- 305 replies
-
- 3
-
-
- deagostini
- vasa
- (and 1 more)
-
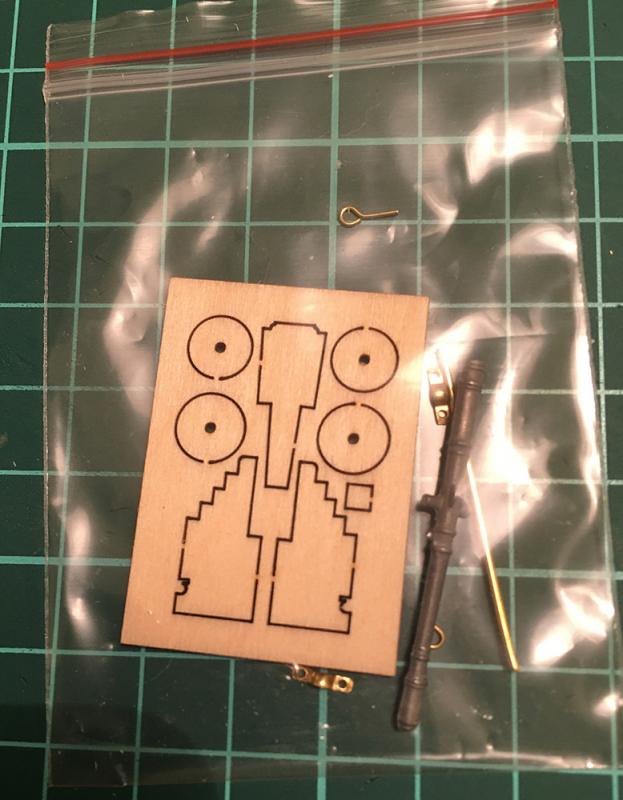
This shipment came a little early and life is good again And here is the contents: The decorations: The smaller ones in profile: There was also one 3-pound cannon. Building will start tomorrow, so until then....

- 305 replies
-
- 8
-
-
- deagostini
- vasa
- (and 1 more)
-
Thanks jan. No I haven't heard anything. Decided to not care and go on.
- 305 replies
-
- 1
-
-
- deagostini
- vasa
- (and 1 more)
-
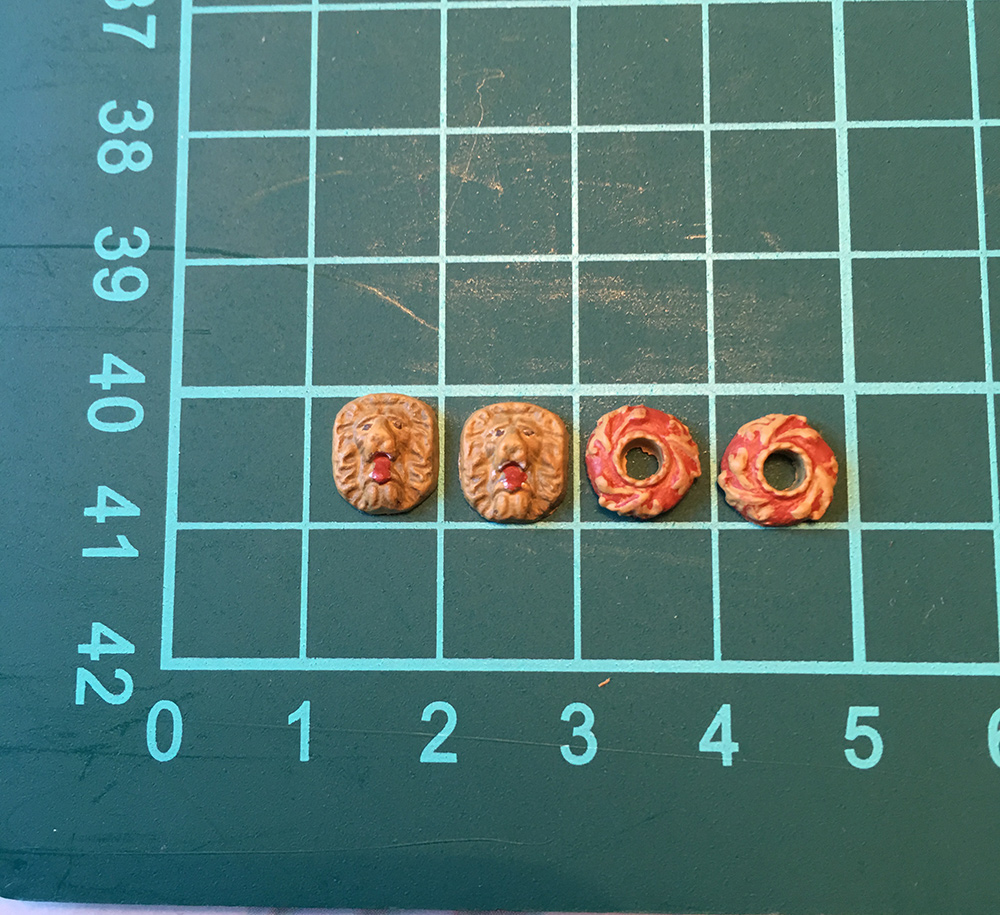
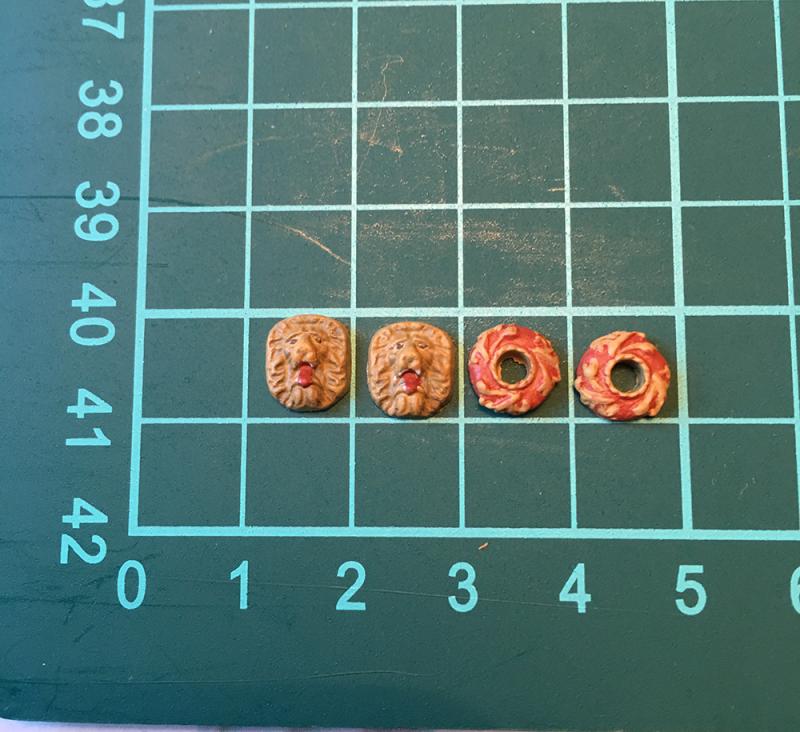
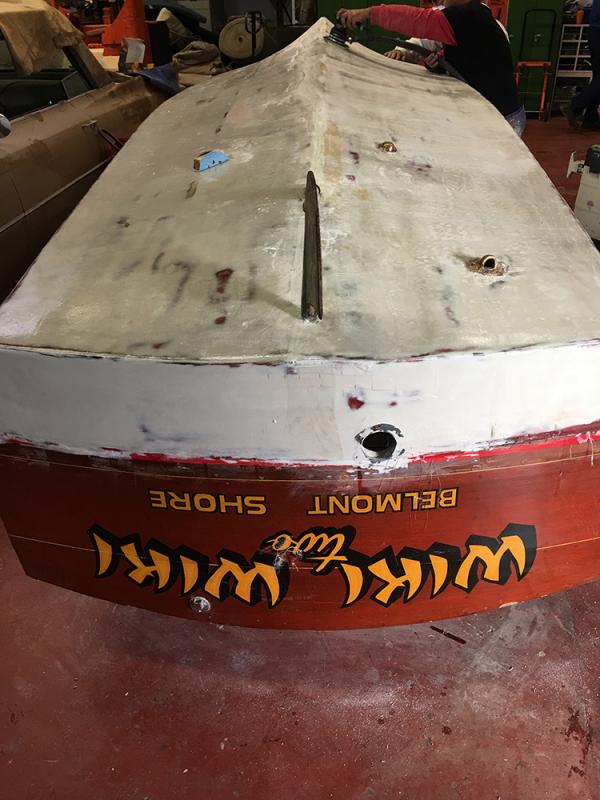
Thank you all for likes etc. Cobr@: 7 storeys high... Torbogdan: Yeah, no wonder she keeled over... Wackowolf: thanks for watching... Robin: I don't know if I should feel better or worse about it now... Anyway... The dummy barrel supports are fitted. The plywood refused to bend. In the end I poured boiling water on them and fixed them until dry. When I loosened them they went back to almost straight again. So I glued them on while still wet, breaking a frame at the same time. Here you see on the right some the wood I used to fix the broken frame with. And the bow fillers are in place. And that's it for this month. Now I have to wait another 4 weeks for the next shipment. Have two decorations to paint, and maybe I will redo the lion heads for the gun port covers. I believe they should be yellowish and not beige. We'll see. Thanks for watching...


- 305 replies
-
- 8
-
-
- deagostini
- vasa
- (and 1 more)
-
On my first build I blackened all the tiny PE hooks (20 of them I think) in one go. I spread them on the cutting mat and took a cup of coffee. Then I forgot all about them and cleaned up the workspace. The next day I discovered I had brushed them all in the garbage while cleaning.... My kids learned a lot of so called powerful language that day. I had to order new from England and wait 10 days for them...
- 52 replies
-
- 4
-
-
- panart
- posto di combattimento
- (and 1 more)
-
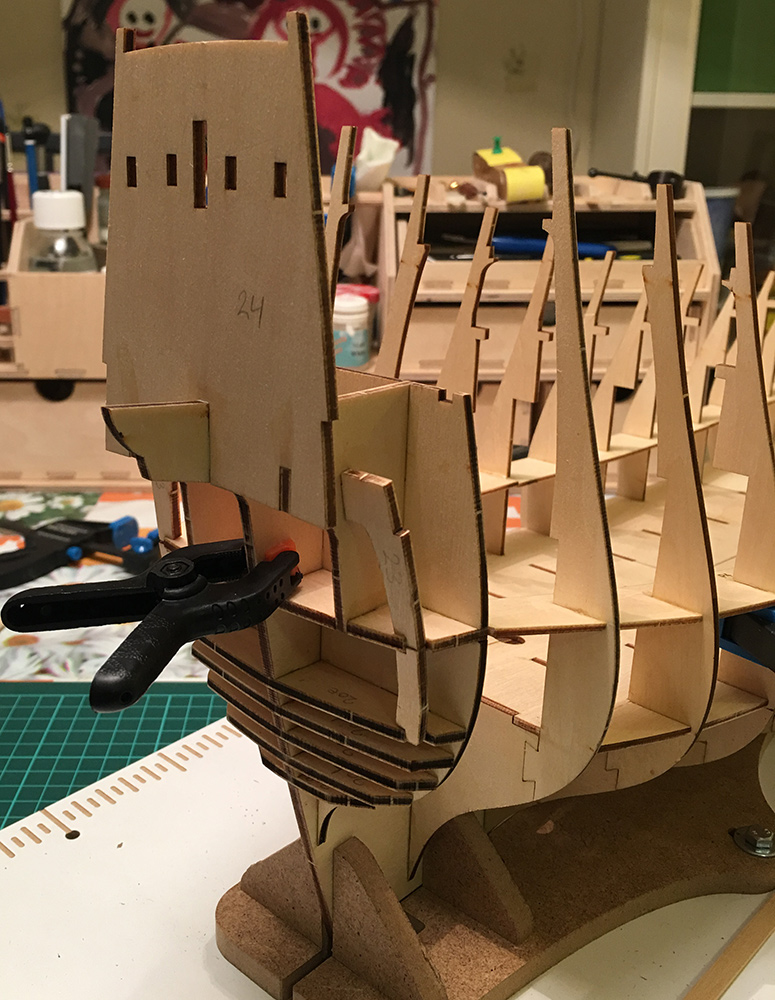
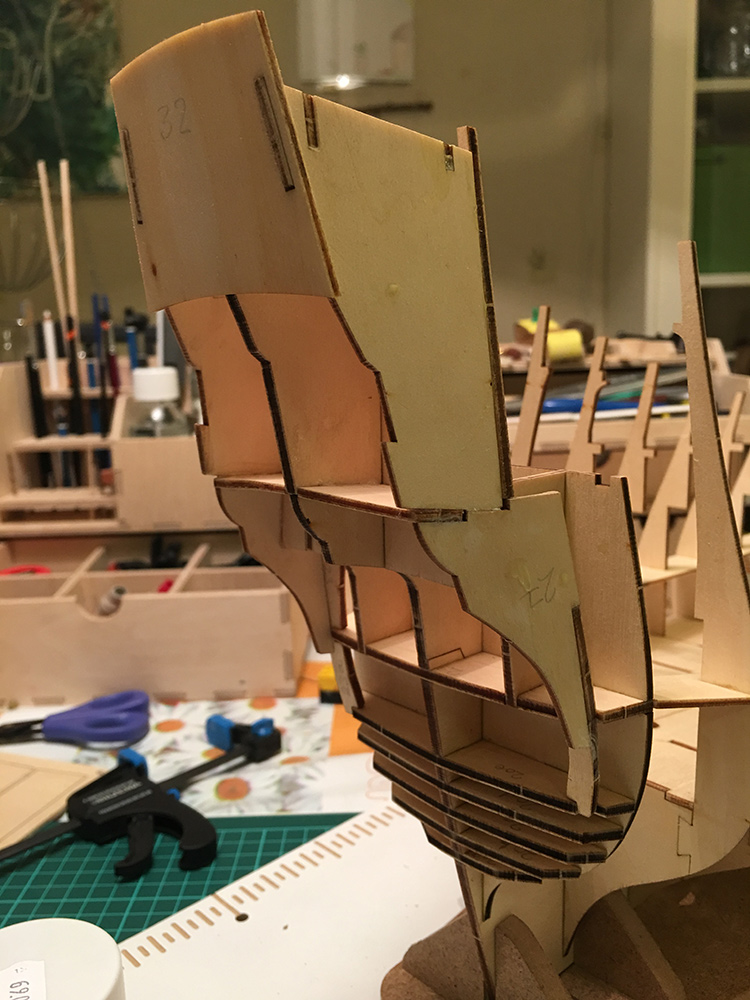
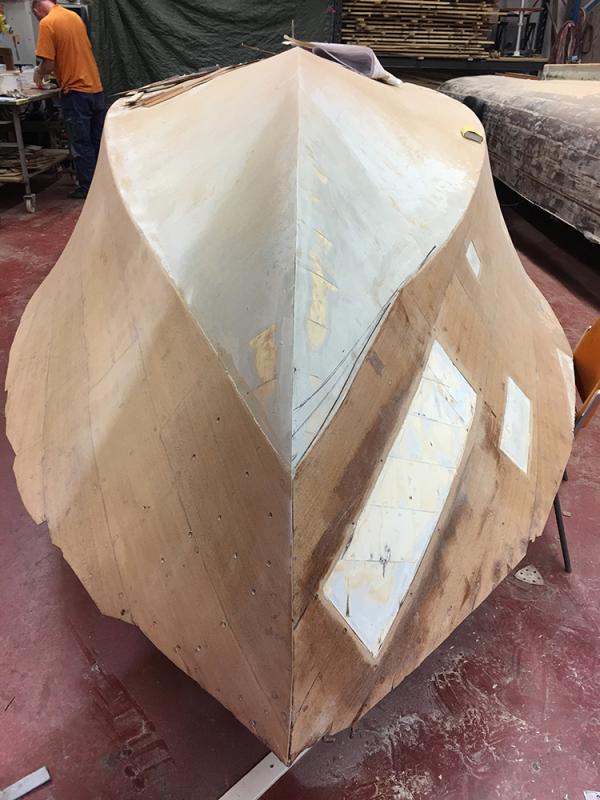
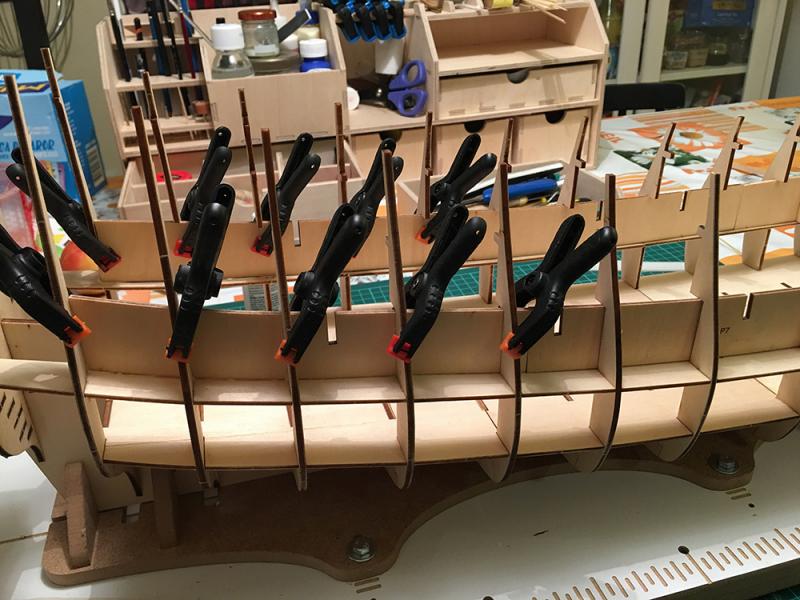
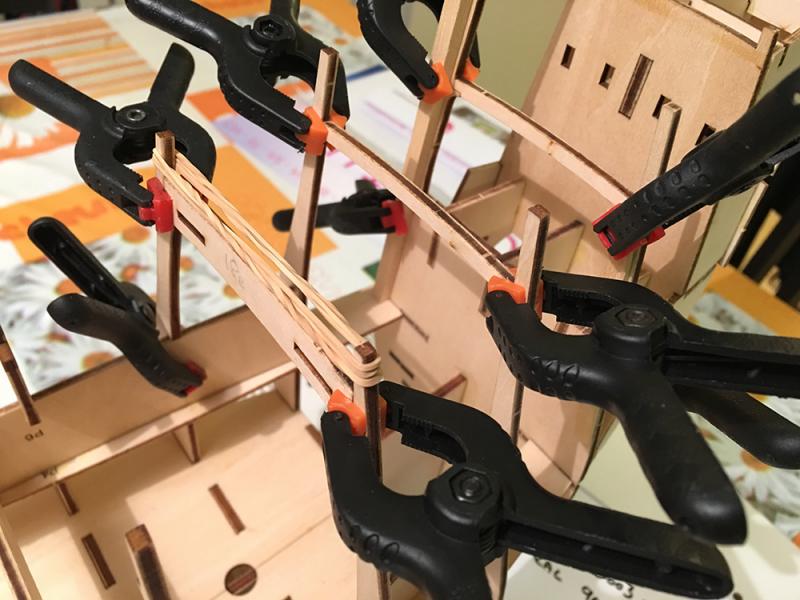
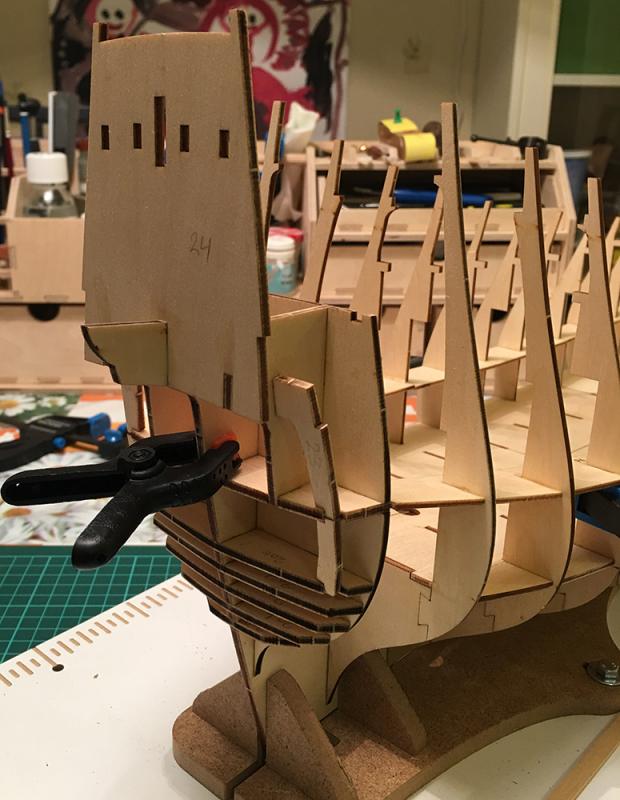
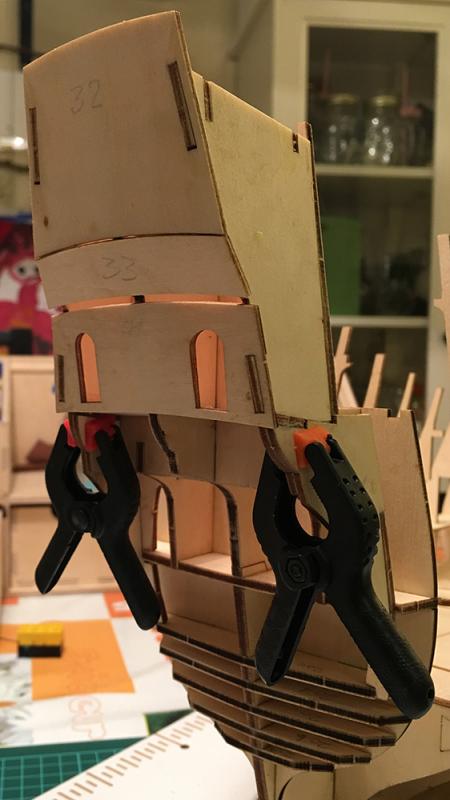
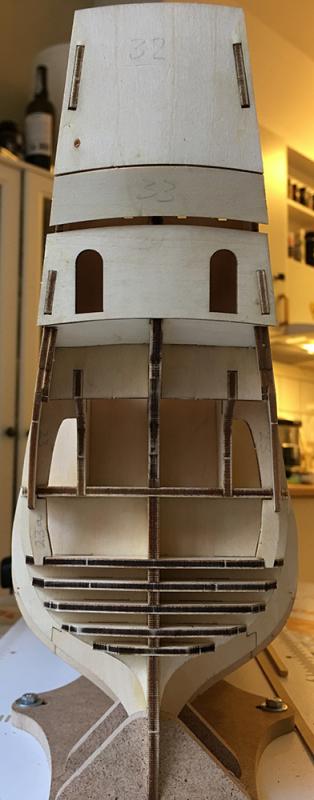
So, on to the stern. The first bulkheads are on: Some bending and CA gluing: All pieces there: And a view from behind: Nothing much to get too exited about, but this was the first part of the build that gave a small technical challenge with some parts had to be bent in different directions. later this evening: The dummy barrel supports part One (sorry for the clutter in the background)

- 305 replies
-
- 9
-
-
- deagostini
- vasa
- (and 1 more)