-
Posts
1,859 -
Joined
-
Last visited
Content Type
Profiles
Forums
Gallery
Events
Posts posted by catopower
-
-
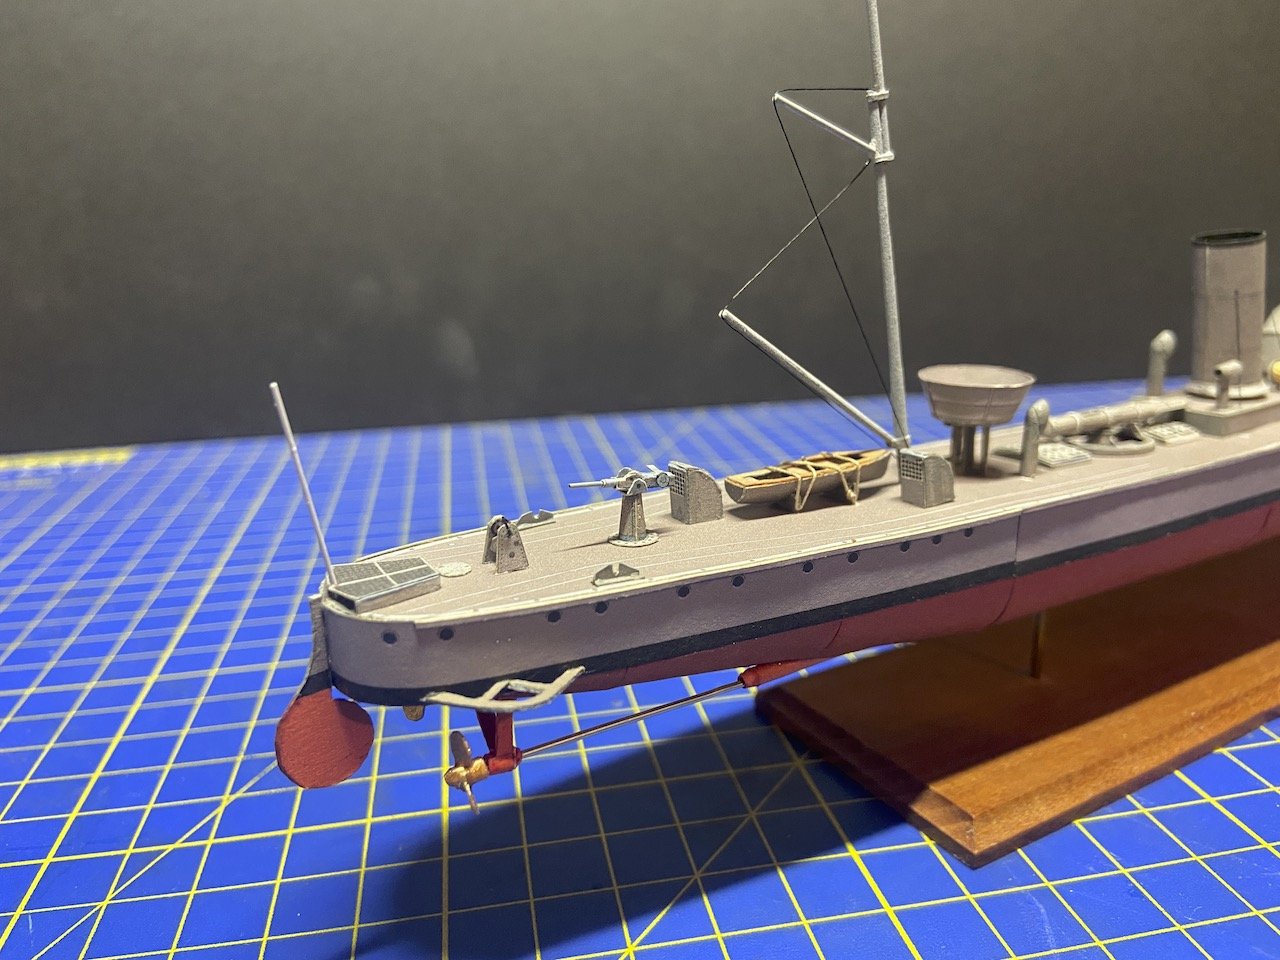
Tiny bits of progress. That's what this paper model project is down to.
I did manage to finish the remaining pieces of photo-etch railings. These were the harder pieces I decided to save for last.
There were two pieces remaining. The first was to finish the curved rail at the stern. It took a little doing to create the correct curve, and to cut the railing to the correct size. The ends of this piece had to be cut, so that I ended up with three "free floating" rails that just slightly overlap the existing, mounted rails.
This worked pretty well, though it took me a while to glue the piece into place, as I couldn't fully achieve the right curvature, and had to get the glue to hold it in place and to hold the right curve.
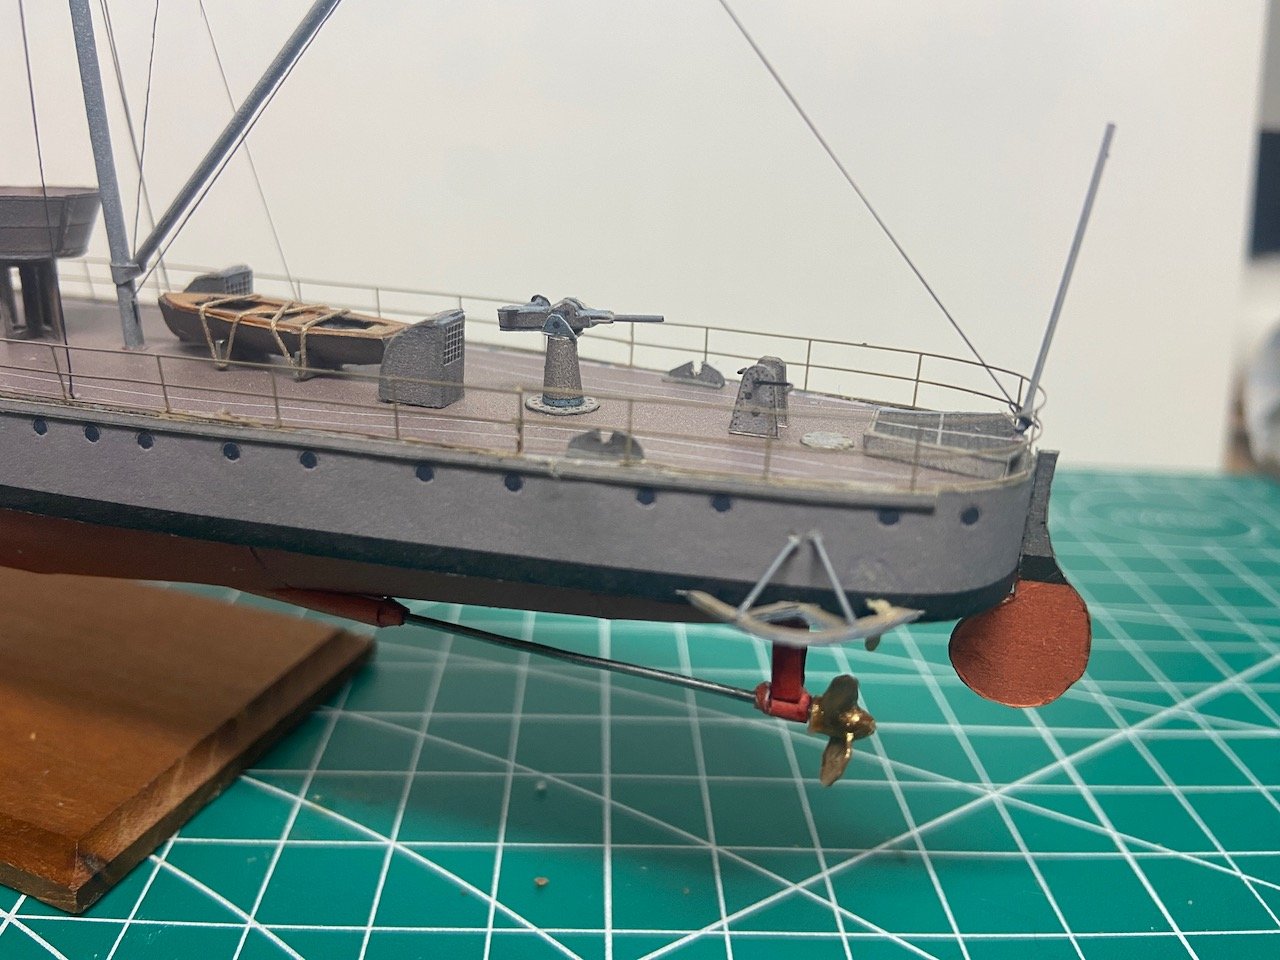
I think this turned out pretty well, as it's difficult to see where the rails are "spliced" together.
The hardest piece to add was the one on the forecastle, just abaft the gun mount. This required a double-curve which took me quite a bit of work to get close to the proper shape. To help out, I cut an extra forecastle deck piece so I could work out the curvature off the model. Again, I got the rail curvature close, but not quite. It was close enough to allow me to cut the ends, again with the three free-floating rails sticking out.
Once the curve was close enough, I glued it down on the model, holding it into place with tiny scraps of wood, coaxing the piece into position with the right curve. The ends were glued to the vertical "stanchions" of the existing railing, being careful to get the rails to line up as closely as possible. After the glue dried, I carefully snipped off the excess. Again, it seemed to turn out pretty well. It's not perfect, but at this scale, except until zoomed photos, it's hard to see any issues.
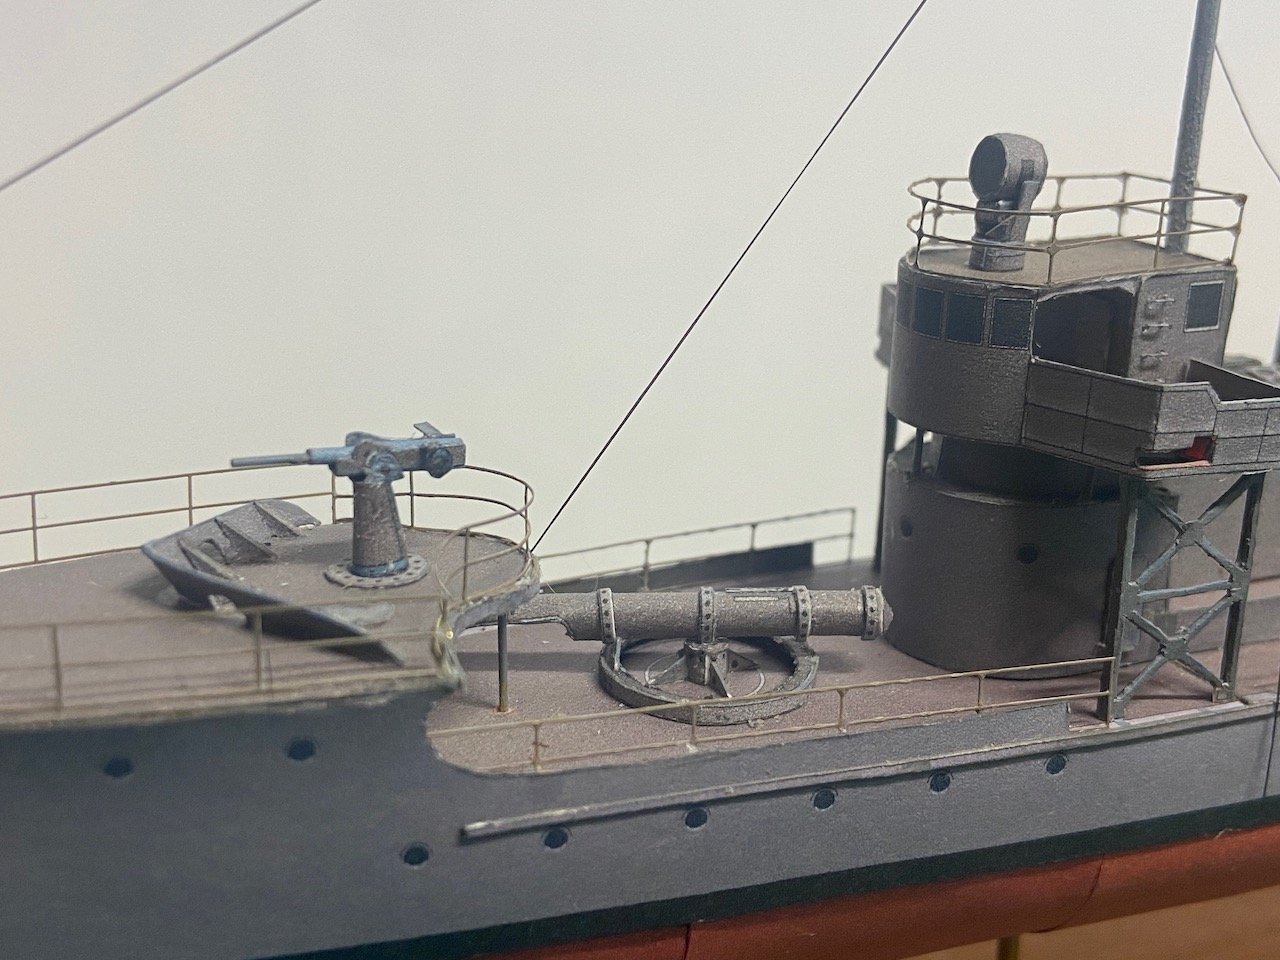
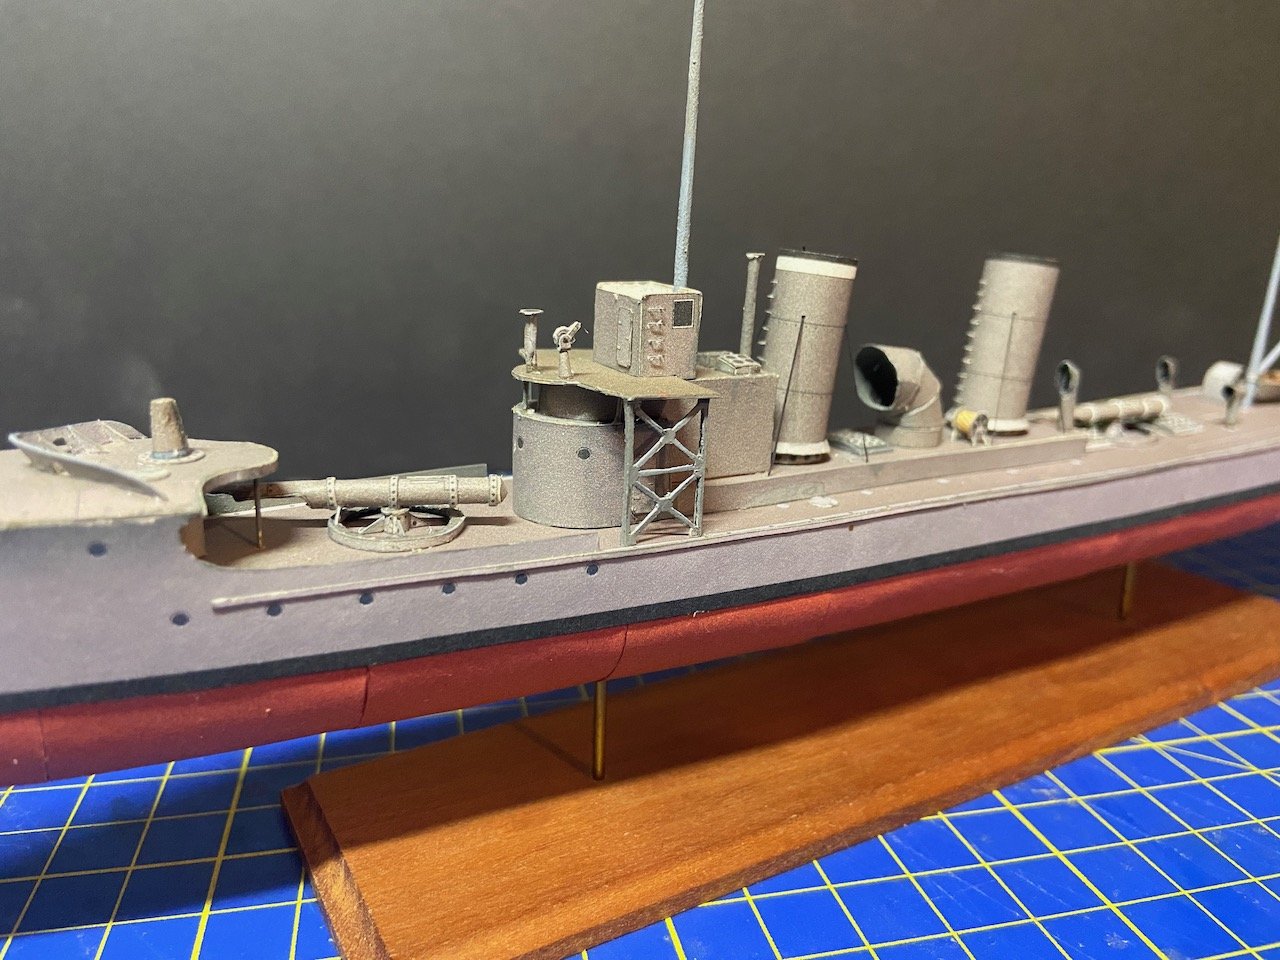
Lastly, as you can see in the above photo, I finished assembling the searchlight, and mounted it on top of the bridge.
Just a few things left to do on the model now. I have to assemble and add the anchors and a new anchor crane. I still haven't added a ladder that leads up to the bridge, and then I have a couple more radio aerials to add.
Oh, and then I have to add the rangefinder on top of the little platform just fowards of the aft mast. THAT piece, is going to be a challenge...
Still, completion shouldn't be long now!
-
Hi GrandpaPhil,
Taking on another build, and a big one too!
Your Speeljacht turned out really nicely. Will be interesting to see how this works out as an enlarged scale model, very daring of you!
I've been thinking about doing this myself with one of the Shipyard frigate kits, but only to take it from 1/96 scale to 1/72 scale.
Looking forward to watching your progress!
- Canute, Baker and GrandpaPhil
-
 3
3
-
I got a bit bogged down on the PE parts for the V108, but I'm oh-so-close to finishing the model. I just needed to step away for a bit, so I figured "what the heck" and started the hull of the USS Bagley.
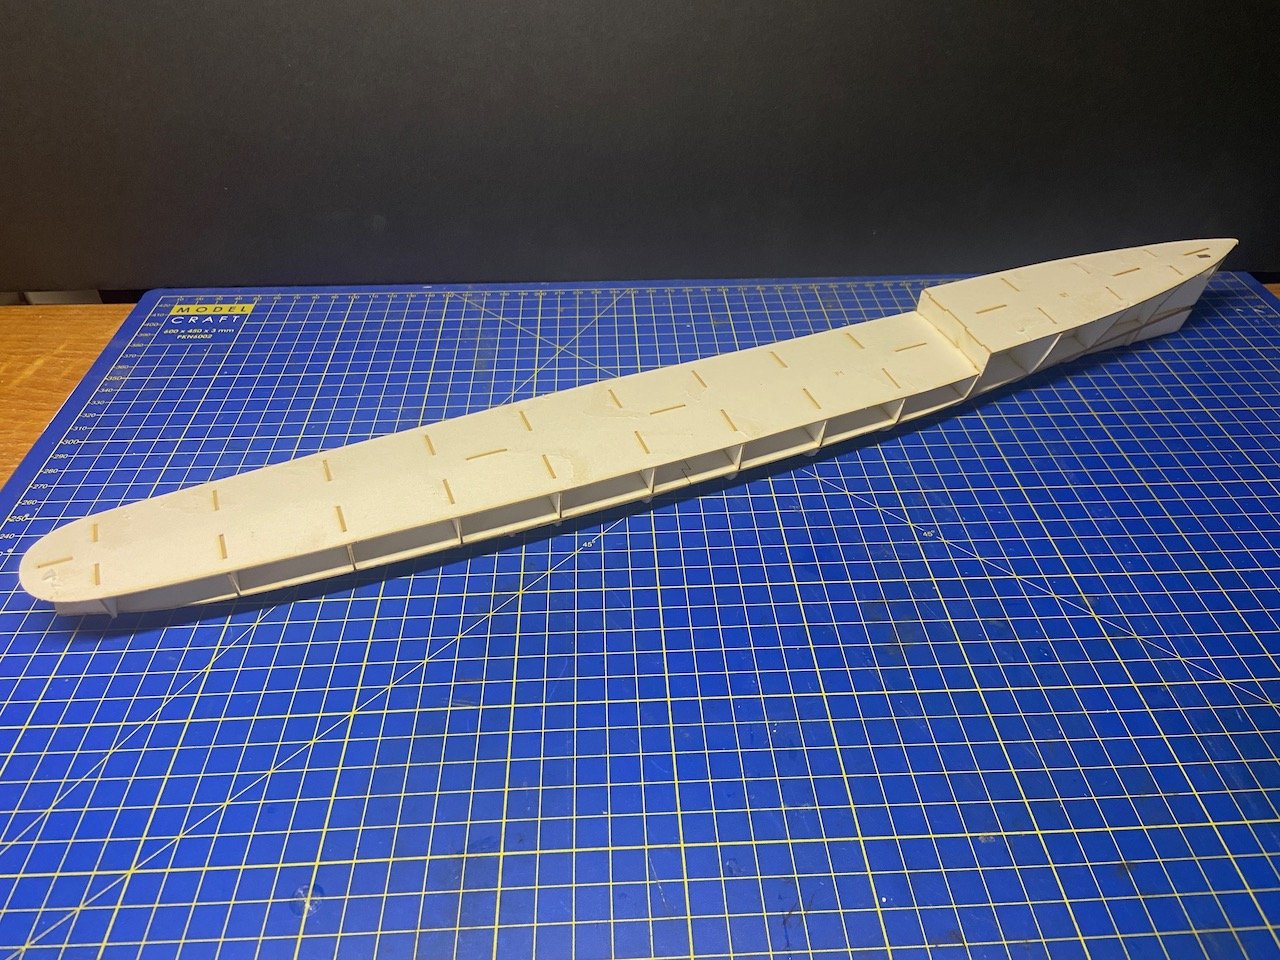
I may be in over my head with this kit, as there is so much that I don't know about. Like with the brass photo etching, progress may be periodically stuck, So, in terms of paper ship models, I expect I'll turn my attention back to Shipyard kits and modeling wooden-hulled sailing vessels. But, this is fun to play around with.
I haven't started a build log here yet, though I did on the papermodelers.com site here. I have a feeling though that I'm in over my head on this one!
-
A few weeks ago, I paused on this model, and started working on rigging a friend's ship model, as a shoulder problem and shaky hands have prevented him from working on his model for the last few years. I'd done quite a bit, but there's a lot more work required on the his model. So, I decided to see if I could make some progress on the V108 again this week and work towards completion.
I've gotten just about as far as I plan to with the the bulk of V108's rigging. This week, I secured the guy wires or stays of the aft mast, then started the process of adding photo-etched railings to the model. This is something I've never done before, and it's proved to be a bit of a challenge, but I'm making progress.
The hardest area, so far, is the first that I took on, the top of the bridge. This took a lot of shaping, cutting, and gluing together of the railing pieces, but I think I managed okay.
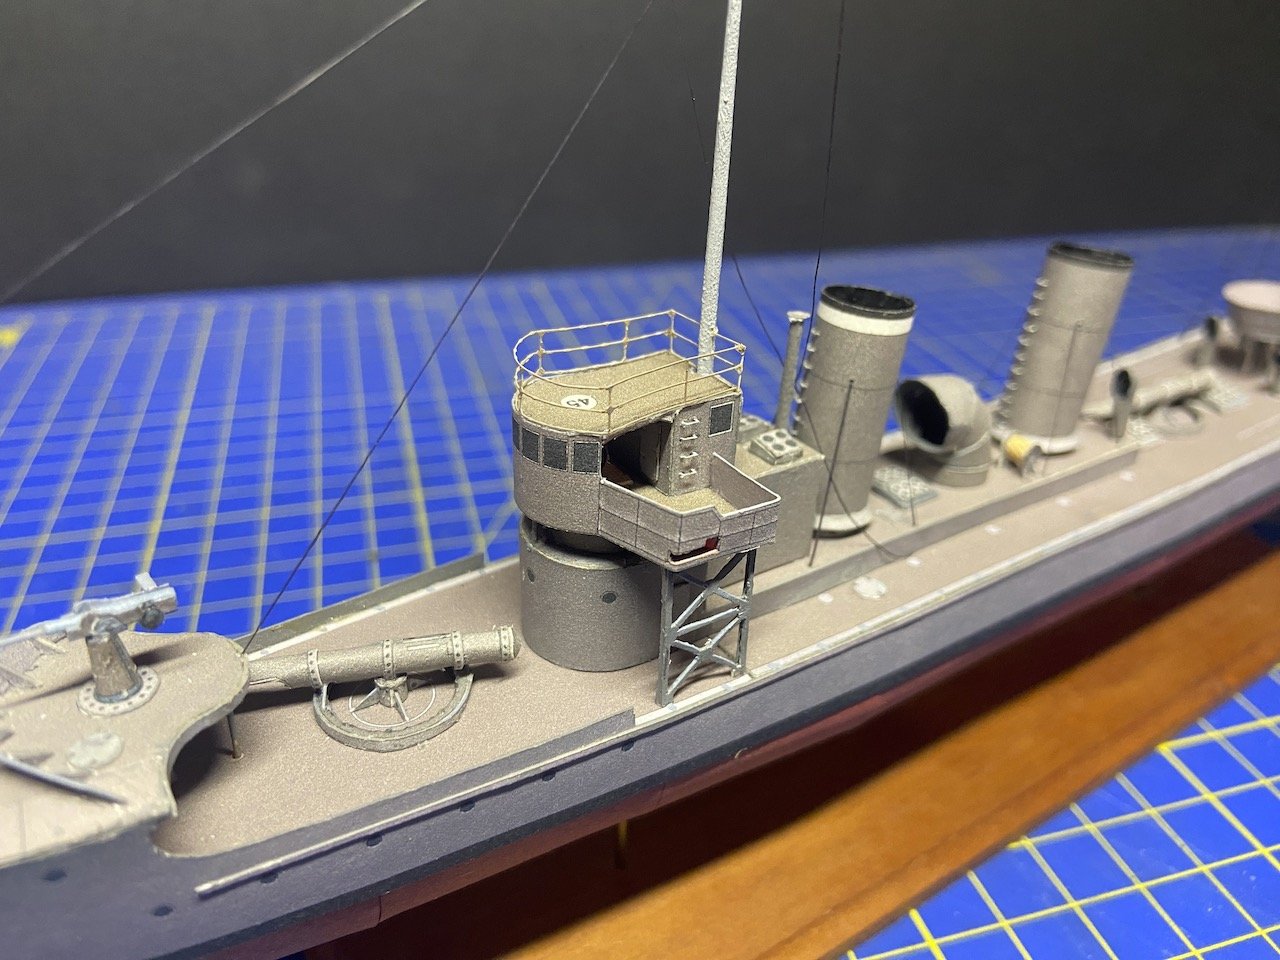
Once that was in place, I decided to pause to finish adding the propeller guard supports. These, I cut from steel wire, I don't recall what gauge.
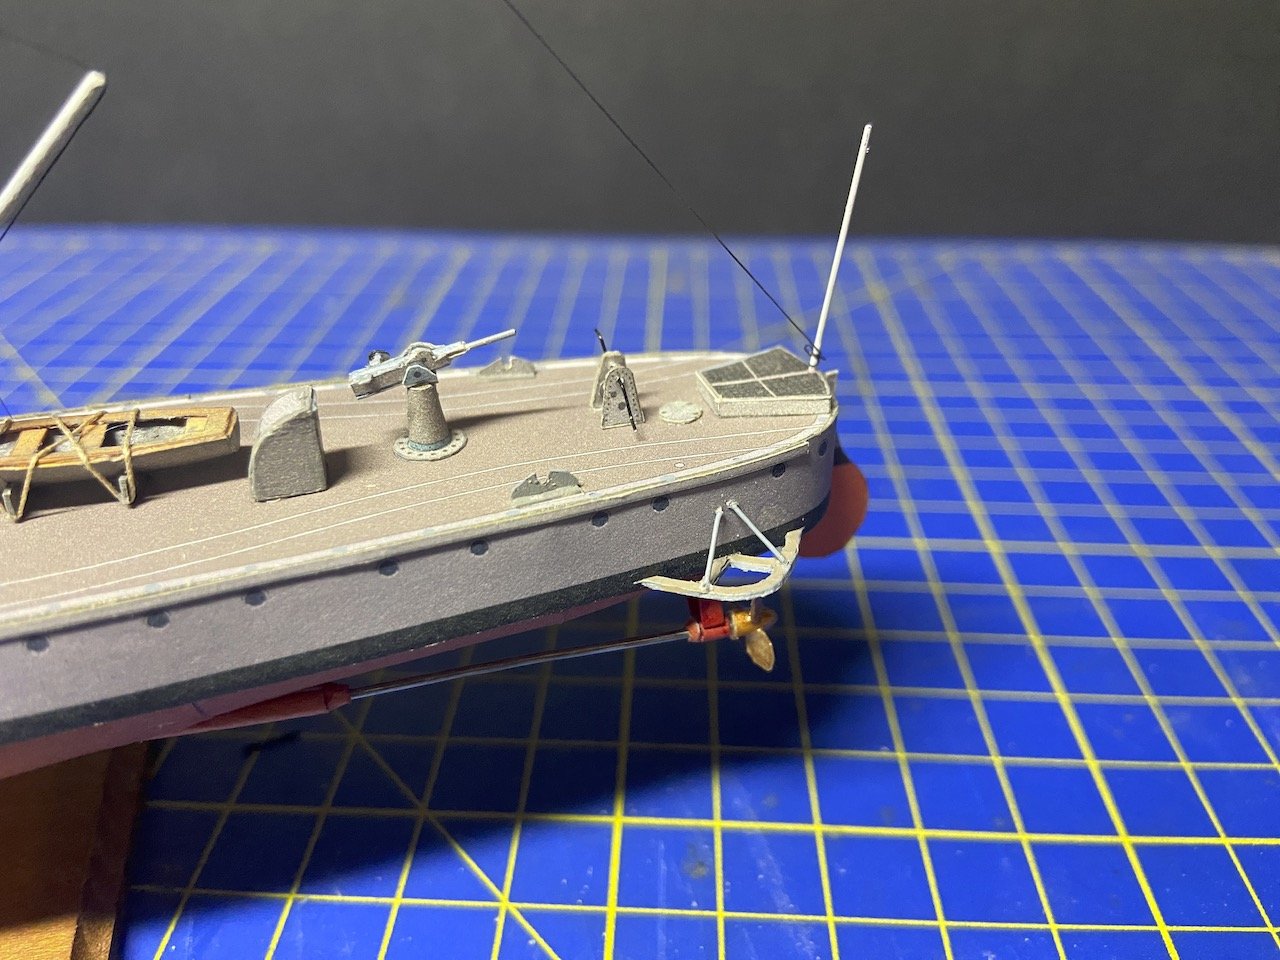
After that, I added the railing to the forward part of the main deck. This is partly hidden by the raised bulwarks, but that seemed to make it pretty easy to add the railings and to secure them pretty well. The railing aft of the bridge support structure was simple enough in that I used a full length piece of railing. I mean to start the railing closer to the bridge support structure, but ended up with a larger gap than I'd planned on. I suppose I could rip up the railing and redo it, but I'm afraid I'll do more harm than good. So, I'm just leaving it alone for now.
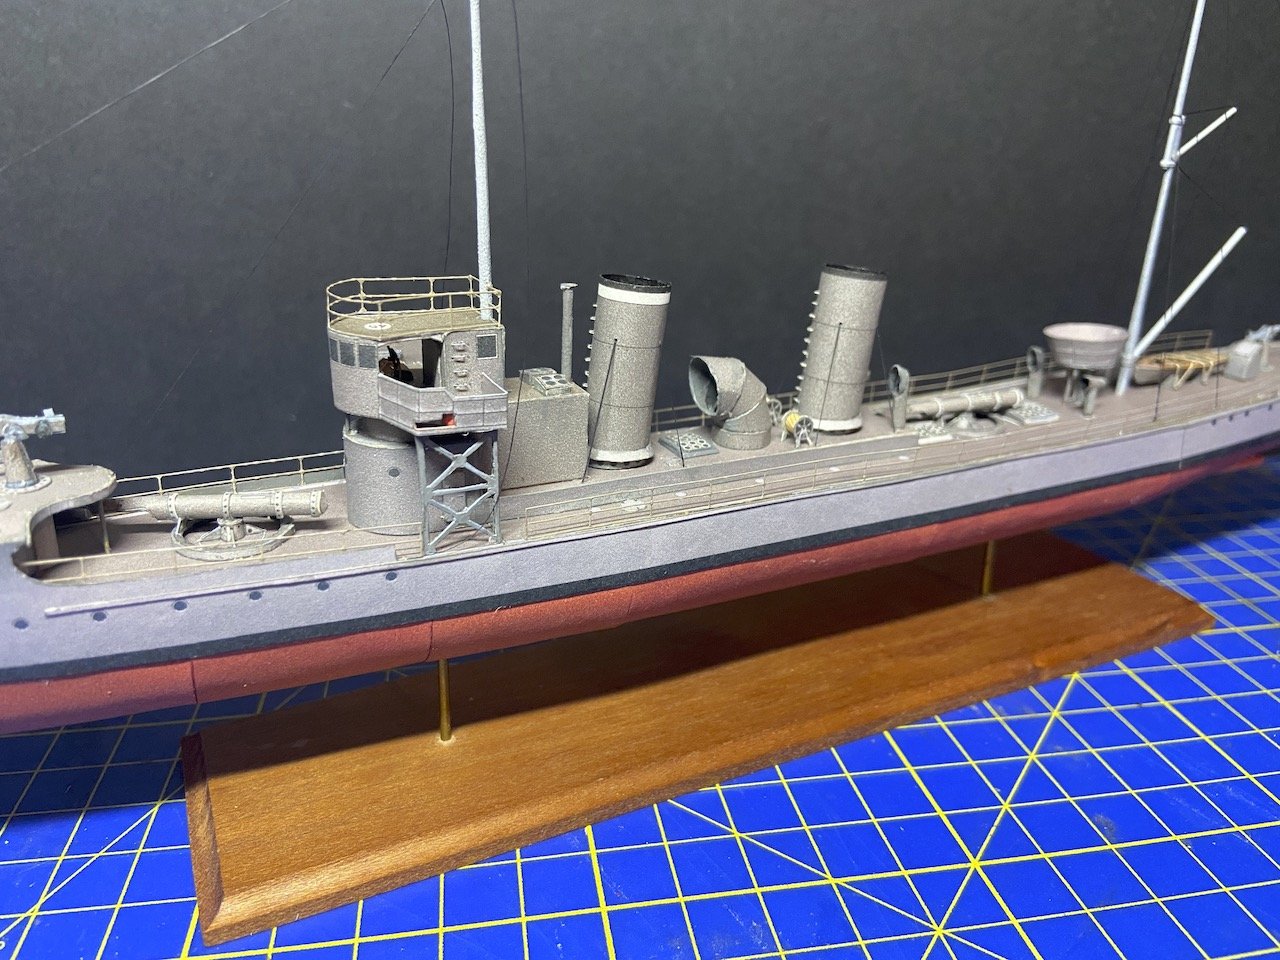
Putting the long railing pieces into place turned out to be more difficult than I expected. I found it a challenge to keep the railings sitting vertical, they tend to lean a little bit inward or outward. Also, I'm using Aleene's Tacky Glue. It seems to work pretty well, but as I keep playing with the part to get it to sit correctly, I'm kind of whipping up the glue, so it's not as transparent or as smooth as it should be.
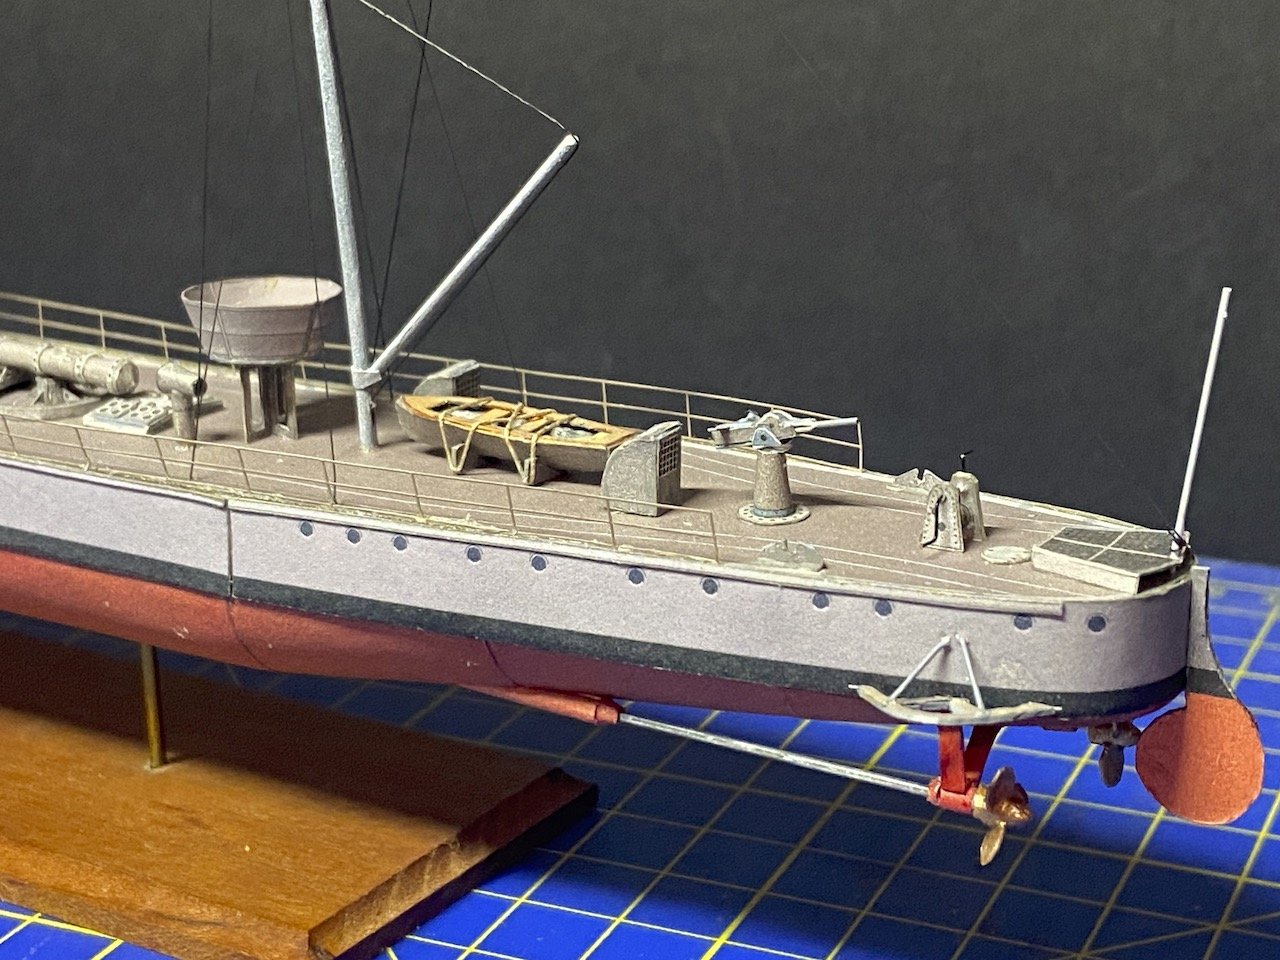
I'll need to look at this again and see what I can do to clean it up a bit. After that, I'll add a final piece that fits the curve of the stern and connects up with these other pieces. Then, I can look at mounting railings on the forecastle, which has a curved slope to the sides, so I'm expecting that are to be a little tricky.
Below, you can see how wavy the railing is, still. I'll be seeing if I can do anything to minimize that waviness. I need to consult with my plastic ship modeler friends about this.
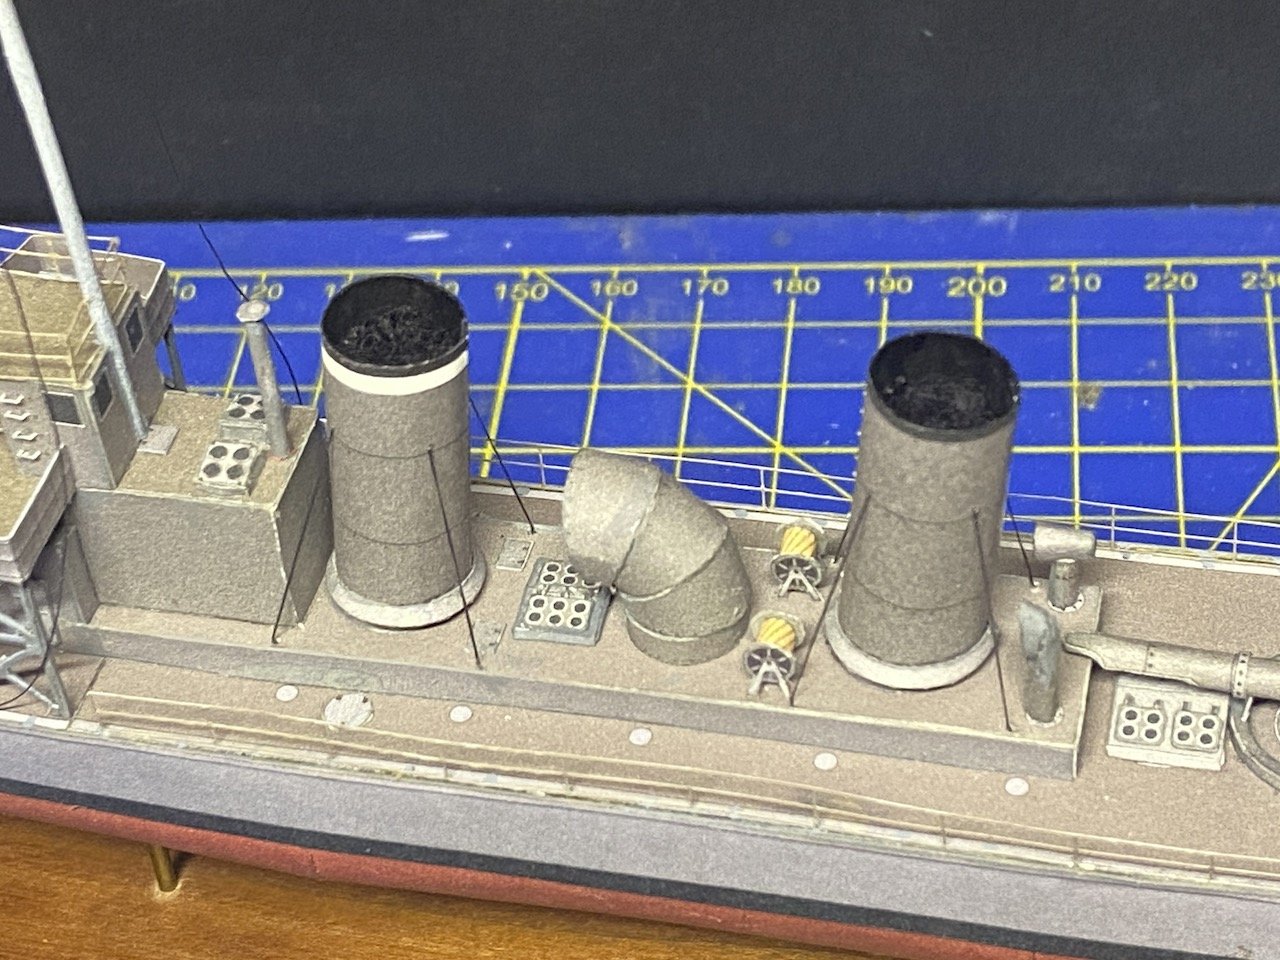
Note that the insides of the funnels show the pieces of the guy wires and some ladder rungs poking through. I decided to use a little bit of dyed cotton stuff down inside, like smoke from the boilers.
Anyway, the light at the end of the tunnel is looking quite strong now...
- ccoyle, GrandpaPhil, yvesvidal and 3 others
-
 6
6
-
I've never met him, but I've been connected with the SMA off and on over the years, and his name came up often enough for me to recognize it. I'm sure I've seen his work in their newsletter.
I'm very sorry to hear of his passing.
- Canute, Keith Black, Ryland Craze and 2 others
-
 5
5
-
Nice review, brunnels!
I've considered this kit many times. I actually like that it's 1/72 scale, as I have many other projects in that scale as well.
I think the main thing holding me back has always been that I have the Ancre monograph and I always thought I'd scratch build the ship, so I never followed up on buying the kit. But, I still like this one a lot, as it has an American history connection.
- GrandpaPhil, Canute and brunnels
-
 3
3
-
Hi Julie,
I've never heard the term header board. I know these as trailboards. As far as I know, they are just wood, and usually have a slight upward curve to them, so I don't think they were interchangeable.
I'm guessing that in some shipyards, there's one person who regularly carves these things. So, among the lumber schooners, many of them may very well look the same, or at least very similar.
- sheepsail, CDR_Ret and thibaultron
-
 3
3
-
While I'm working on building the searchlight, rangefinder, and a new anchor crane, I added the remaining bridge detail, which included the navigation lights and the wooden grating platforms.
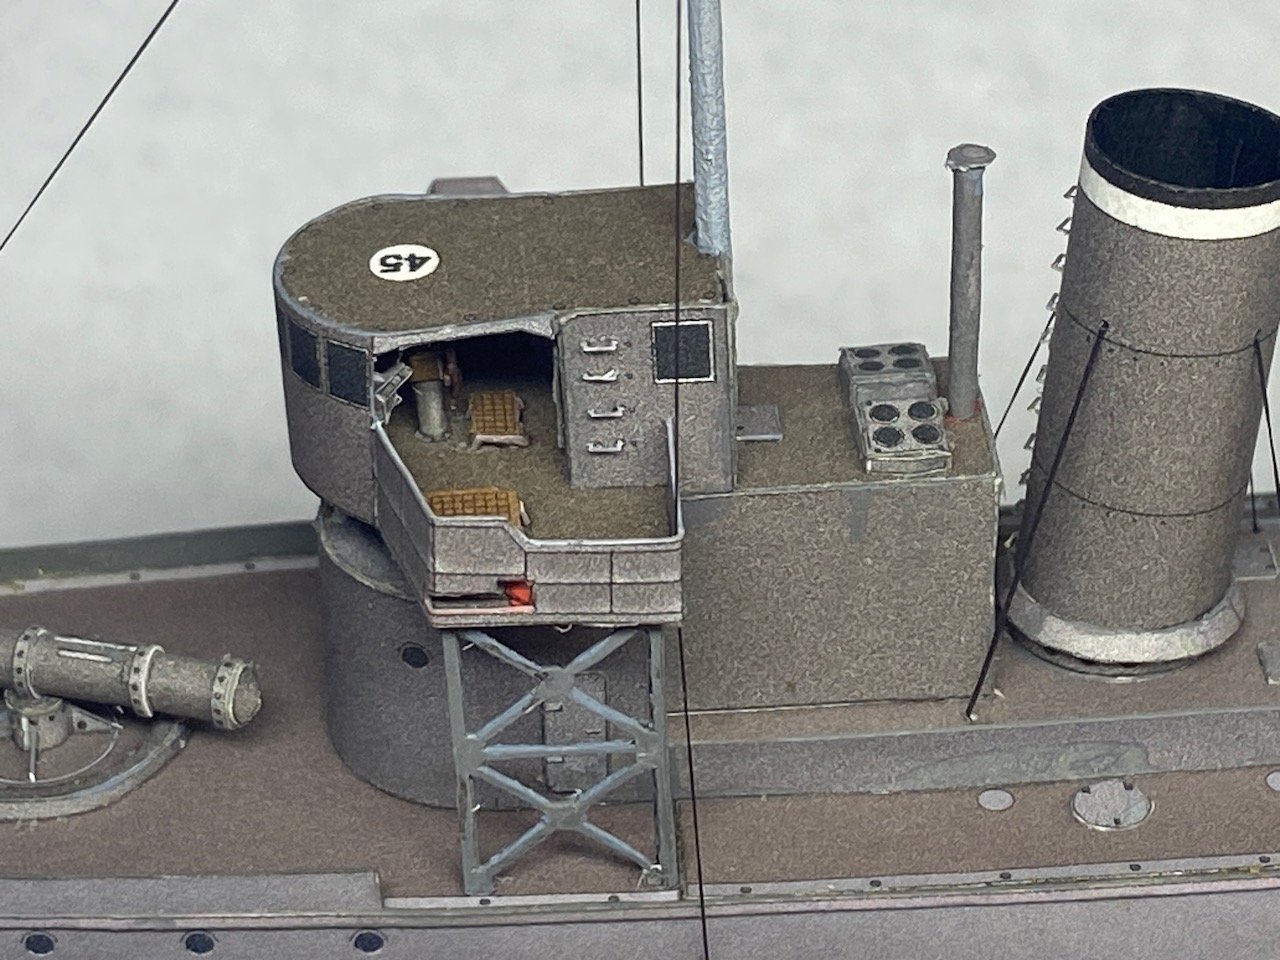
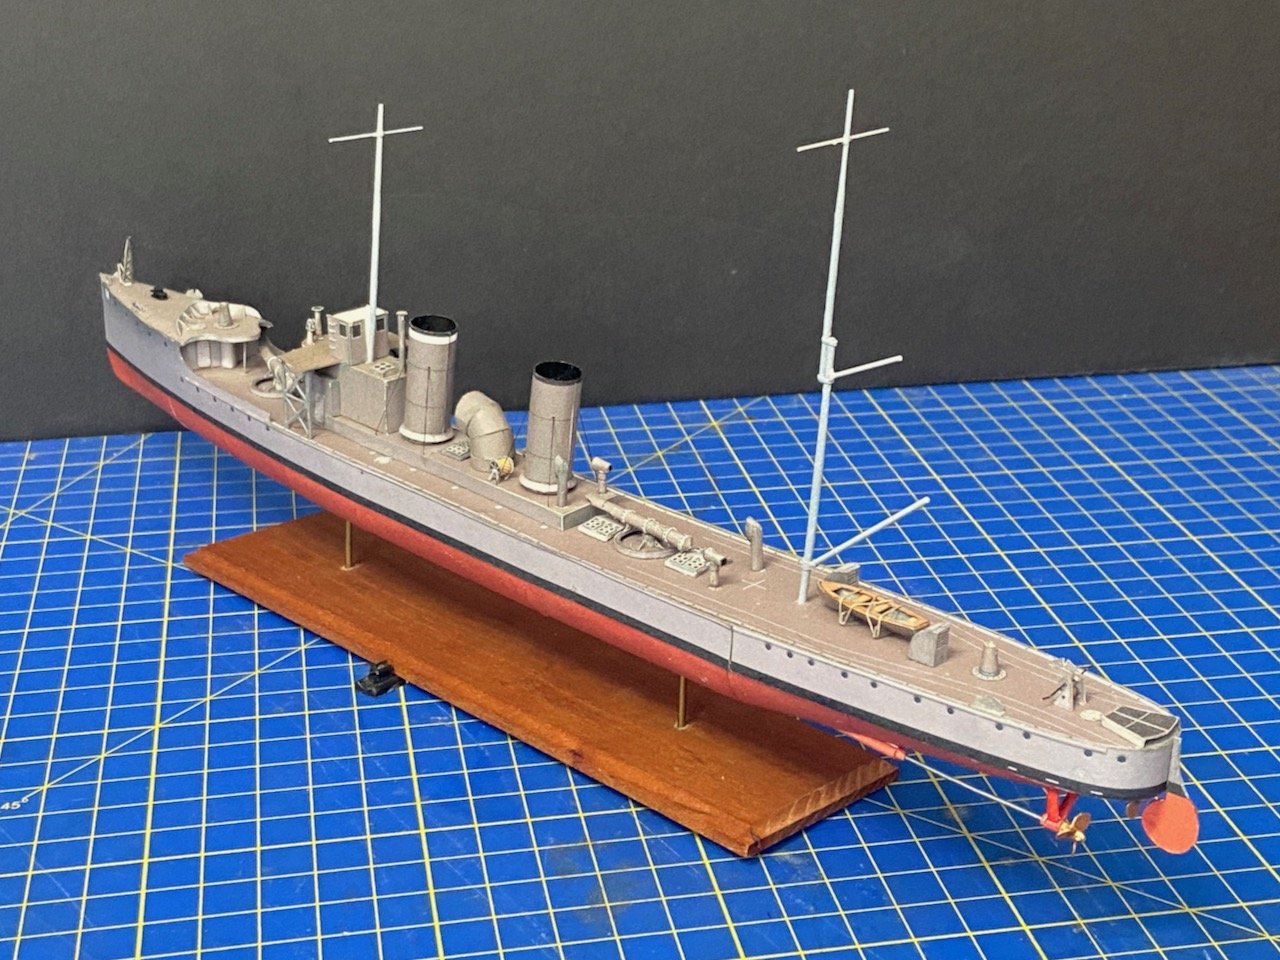
I also decided to go ahead and rig the ariels on the masts and mount the masts into place. This work might get a little bit in the way when dealing with the railings, but I just felt that I needed to move the project forward a little more. Also, those radio ariels that run down to the bridge wings in the above photo is not glued into place, it's just an extra long, weighted line that runs through a pinhole I drilled into the bridge deck. So, I can move those out of the way to add the top most railing.
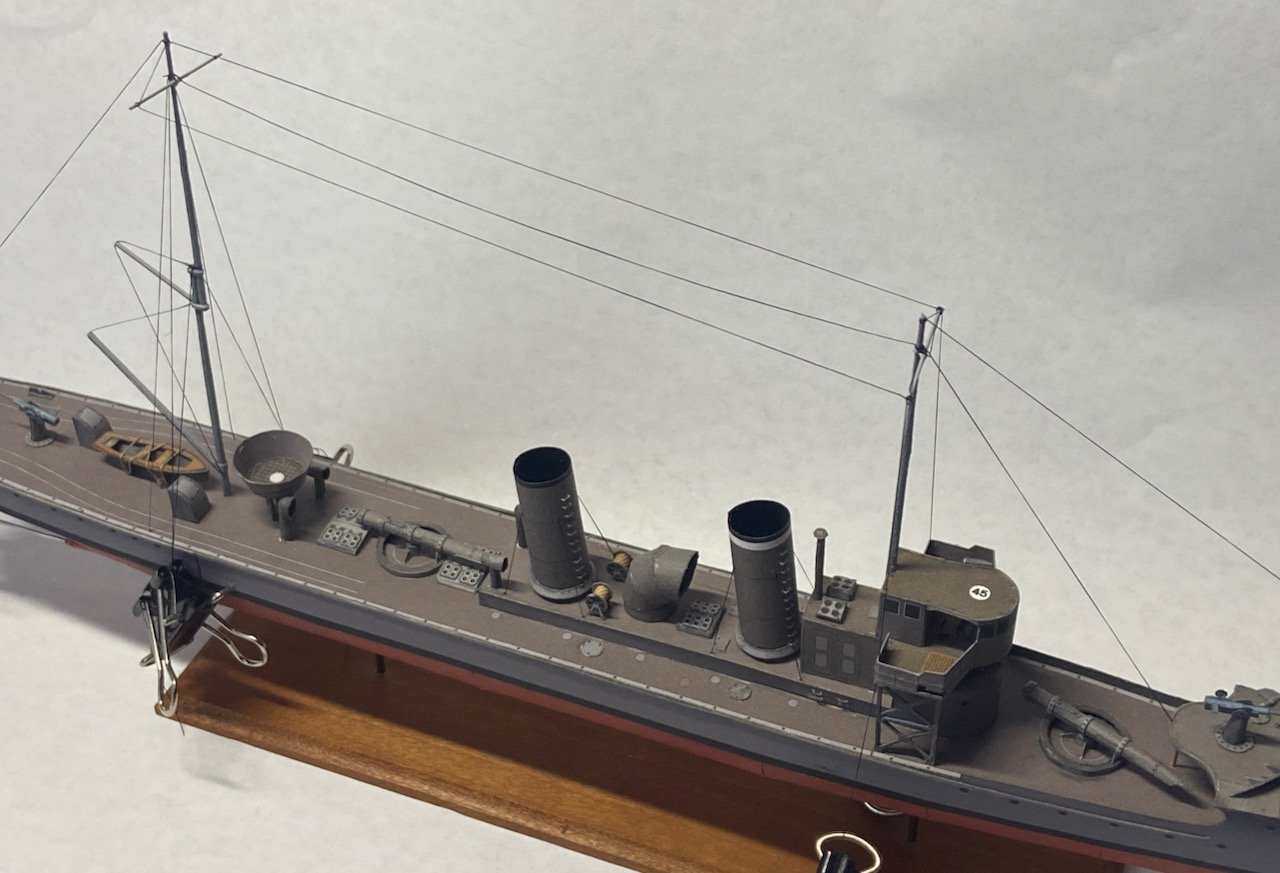
The aft mast stays needed a place to secure on deck, so I just drilled pinholes for those. For now, I weighted the stays with binder clips in about the location where they'll need to go.
As for the ariels I ran between the masts, that's just "un-educated" guesswork, as this part of the instructions didn't seem detailed enough. I'm happy enough with for this model
Next, I'll need to secure the aft mast stays before I start adding the main deck railings.
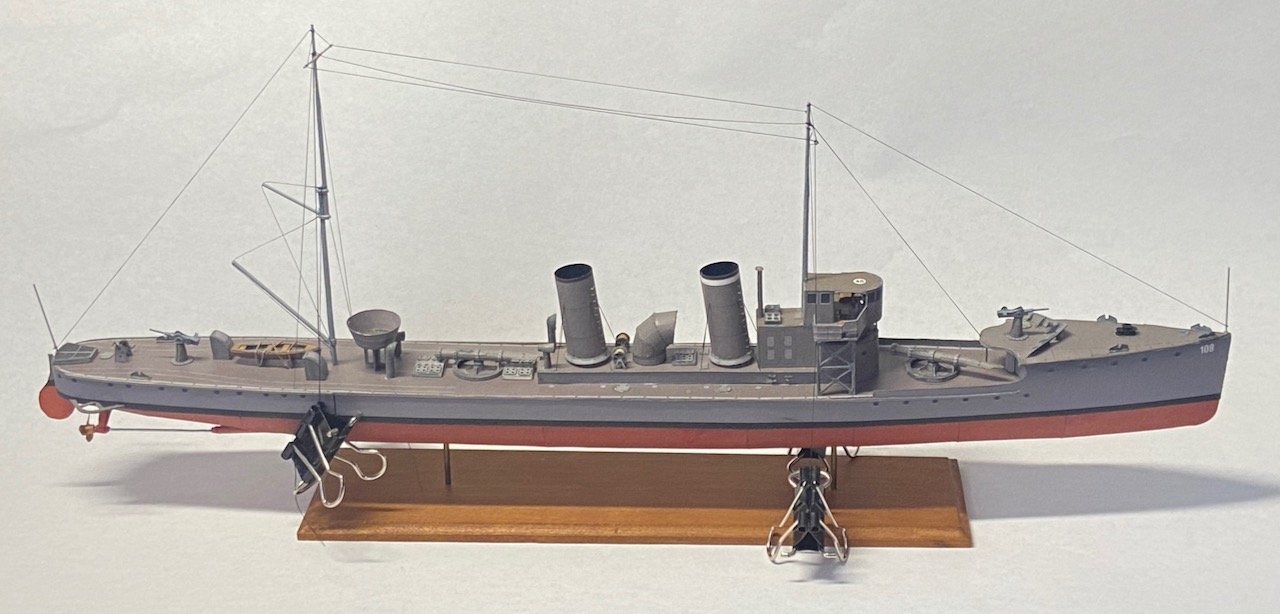
Oh, forgot that I still need to add the supports that run up from the propeller guards to the hull. That shouldn't be too difficult, and I'll probably do them next.
- druxey, ccoyle, GrandpaPhil and 4 others
-
 7
7
-
It's two steps forward, then another one step forward, then one step back, and another stop forward. Let's see... that's a total of three steps forward. So, we're doing well here.
I started rigging the aft mast. At this scale, there's really no place to tie off lines to. Also, it's not really clear from the instructions what lines are needed. There are a few small diagrams that include the run of lines, more or less So, I did what I could to pre-rig the aft mast. When I'm ready to permanently install the mast, there will be more rigging line.
I decided not to use the EZline stuff here, and just went with fly tying thread, since I felt the EZline would pull the booms out of position. But, in order to keep the regular thread taut, I just ended continuing the run of the line, so it wouldn't put a strain on the part. There's a lot more rigging to go, and for other things I may need to go back to the EZline for those.

I also tried out the railing and covering on the platform where the rangefinder will eventually be located. I think it looks okay, and I'm happy with it. So, I decided to move forward with using the kit parts to make the coverings of the bridge wings as well, which I added after I finished adding the new ship's wheel.
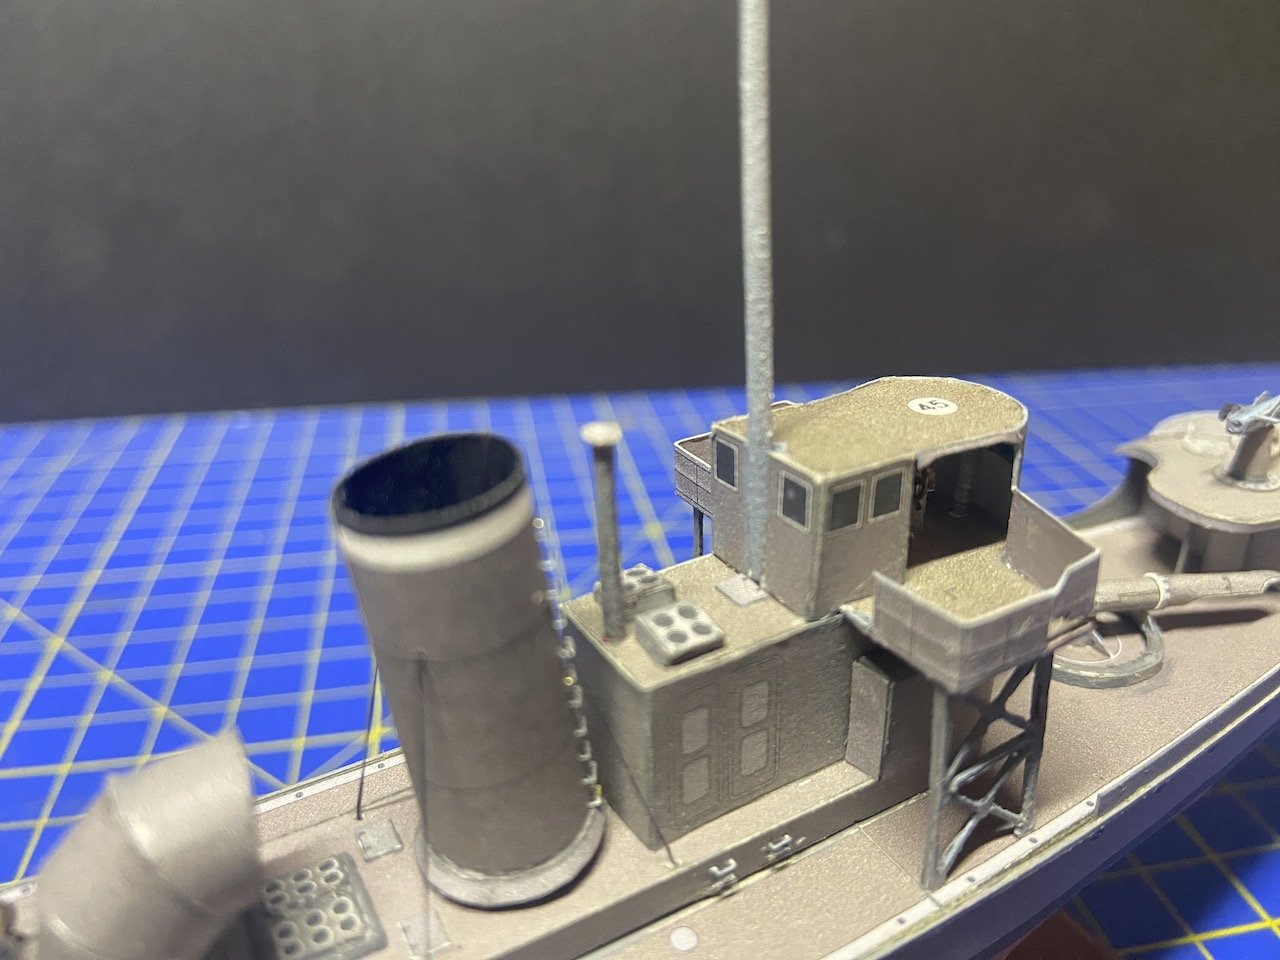
You'll see the mast that runs up the back of the bridge is in place here, but I'd originally made a hole for it in the superstructure that was a little too far aft. To cover it, I cut out a spare rectangular hatch and glued it into place. It's not supposed to be there, but nobody will notice. That mast isn't permanently in place, but I think I can fix it permanently now.

I don't know if now is a good time to do this, but I also went ahead and mounted the flagstaffs at the bow and step. I also managed to mess up the anchor crane at the bow, so I removed it and will have to make a new one. Note the forward 88mm gun in place.
Below, is another view aft showing the gun now in place, along with the aft flagstaff. Propeller guards are now glued in place as well, but I still have to add the wire supports.
Rigging and a few detailed assemblies remain, plus some stuff to put on the bridge wings, the anchor crain, and then the railings.
-
So, I started working on a new deck for the 1/72 scale Le Coureur model. This is basically just the same 1/96-scale model deck that I've enlarged. Laser cutting and engraving the deck from card, now that I've got settings for my laser that work better. Below are the plain, laser engraved decks.
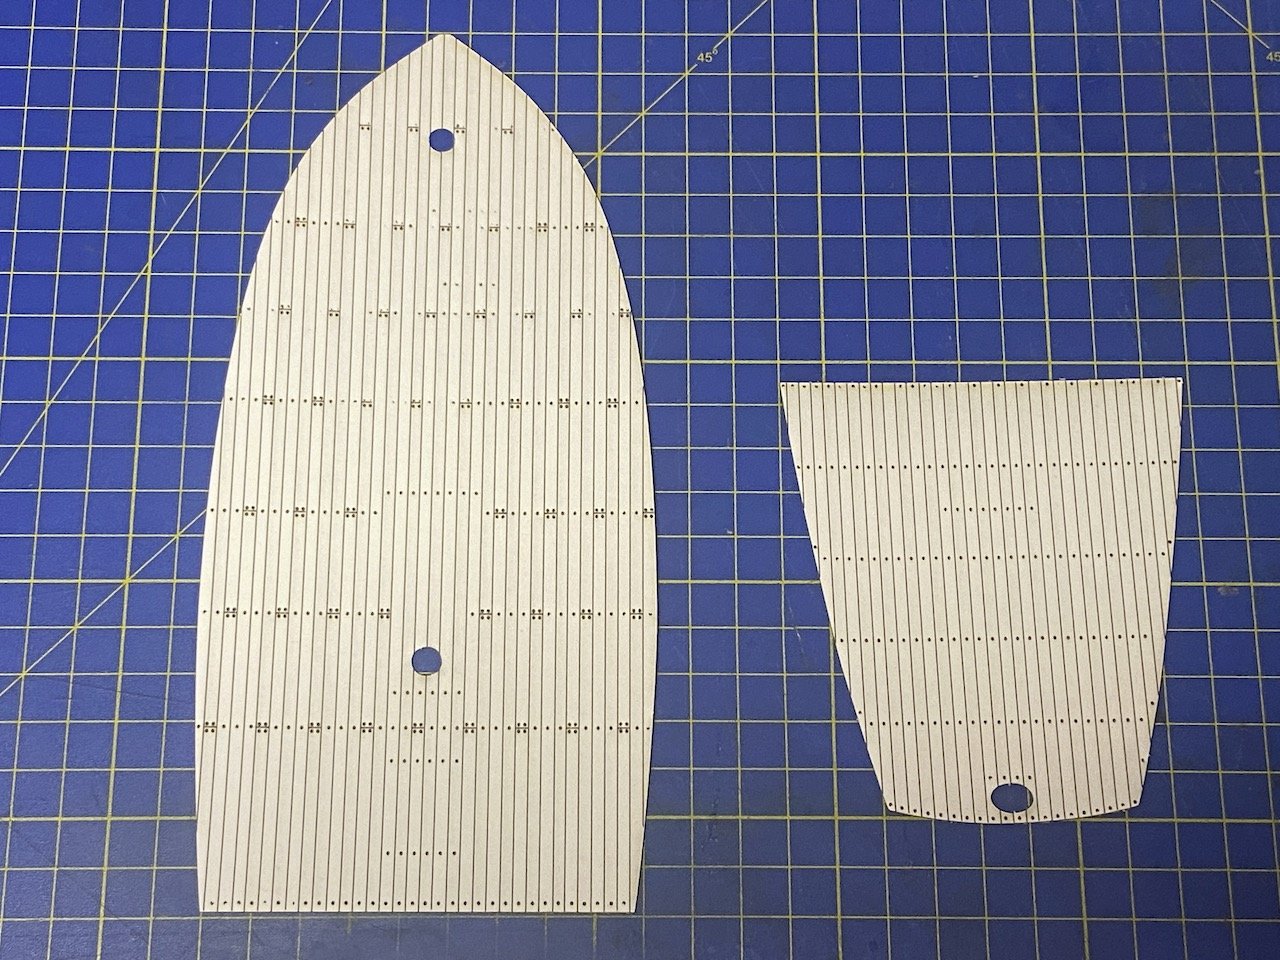
As per kit instructions for painting, I gave the decks a coat of a very light, cream-colored paint that's provided in the kit. I used a very thinned down mix and applied it to the card stock. It's a very light coating. The water curles the paper a bit, but it will flatten out when dry. After allowed a good 24 hours, I taped off a random selection of planks, and repainted these areas.
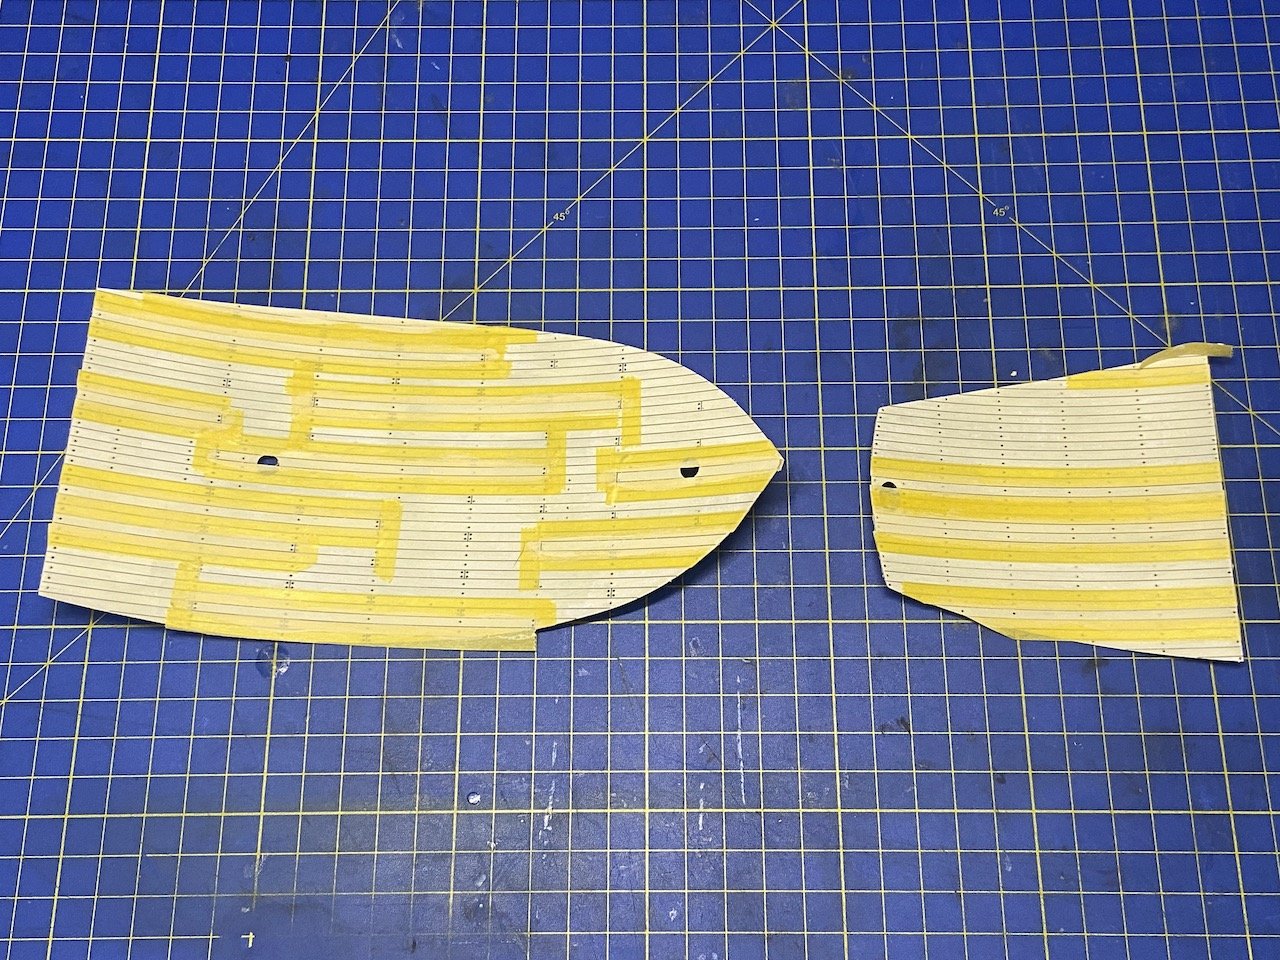
Again, a thorough drying before applying a paint mixture as given in the kit, but I think my application was thinned down maybe a little too much, but I think it will work as is. I may tape off some more random planks and repaint them before continuing. This should help offset some of the blotchiness that occurs when brush painting on absorbent material.
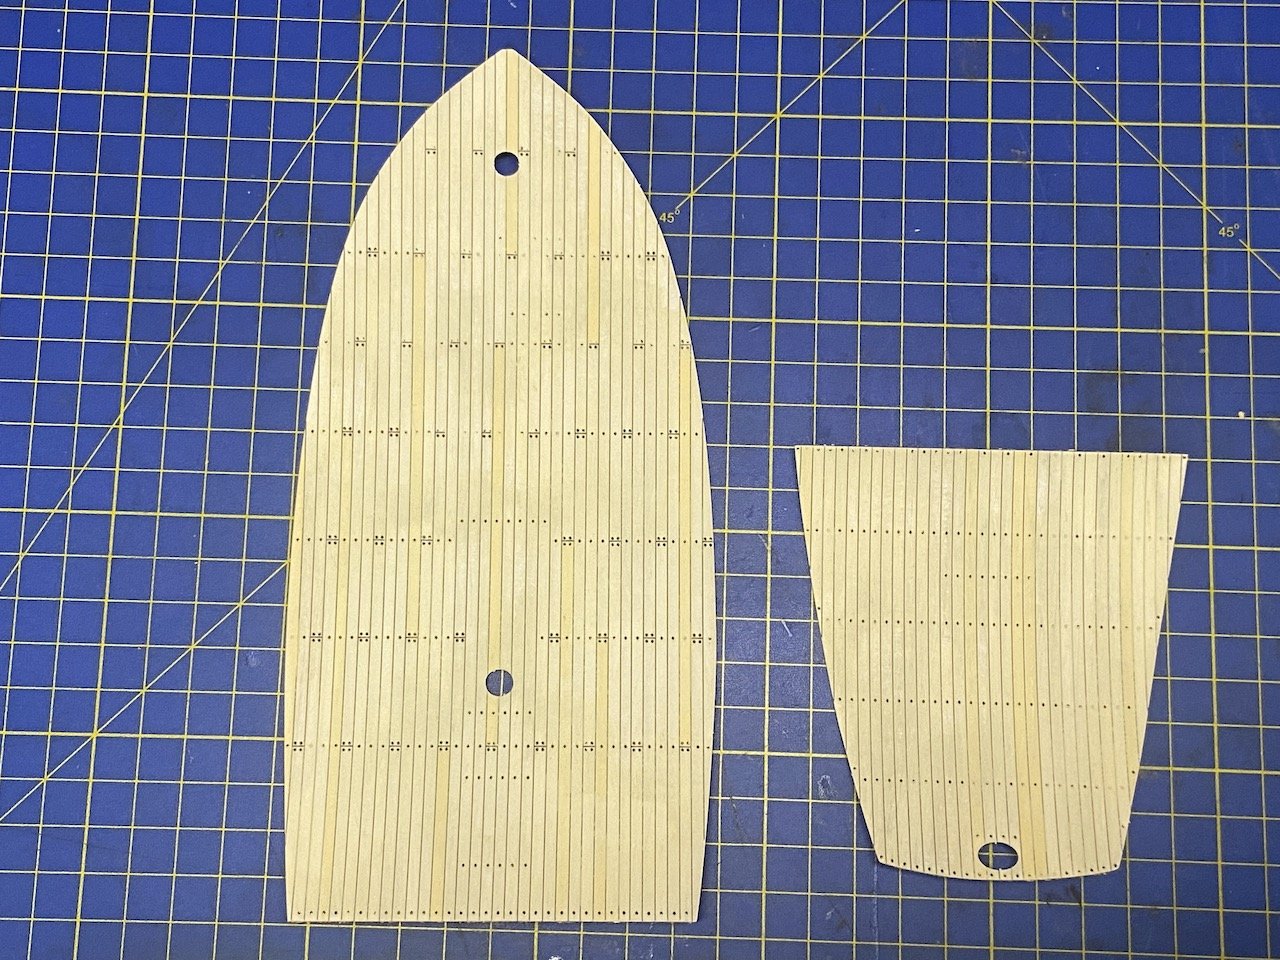
Still, the deck is a very light tan color and should work as is, though they look a bit pale in the photos. And, if I do too much more to it, I risk ruining it. I'll think on it a bit.
- rcweir, Desertanimal, Canute and 1 other
-
 4
4
-
Little bitty progress on the V108. At this point, I guess it's all "little bitty" progress...
Made some of the bridge instruments. I guess this is the compass and the engine room telegraph. You can kind of make that one out.
I'd actually just mounted the ship's wheel on its pedestal, but had to step out of the room while the glue dried. I got distracted by other stuff, then thought about it again, went to look for it. It complete vaporized... not a trace... not even a smooshed part! Have to make a new one. At least I have the spare parts sheets to work from. 🤨
With that, I decided to finish assembling the aft mast. Turned out okay. Most of it is all thin wooden dowel, except for the yard, which is 0.020" brass.
The masts aren't permanently fixed yet. I think I'm going to pre-rig the aft mast before I permanently mount it.
Thinking now about how I'm going to deal with railings. The one's around the direction finder platform, aft, lean out from the round platform, so they're conical. Chris made his railing from stiffened thread. I was just going to use PE brass for all mine, but I can't do that around that platform. Whatever I make there isn't going to match the PE railings elsewhere. I'm considering just using the printed paper part, which mimics the look of canvas backed railing. If I do that, I would probably want to do the same for the bridge railing.
I'm not sure how that will look, but that IS the way the kit was designed, so maybe it'll be okay. The aft platform and railing are simple enough to make, so I think I'll make the aft platform and see how it looks with the kit part. If It doesn't look good, I'll consider alternatives.
But, I think I'm ready to finish the deck guns next.
- yvesvidal, king derelict, Canute and 2 others
-
 5
5
-
14 hours ago, rpeteru said:
Have built a few card models myself. Dutch Liner SIBAJAK, Mauretania, Friederich De Grosse on the work bench,,
How about a photo of one of your card models? Would love to see what you're working on.
-
Hi Nick,
If you take the download from that link, you should be able to print it at whatever size you want. You should be able to choose the option "Scale to Fit" and choose to "Print Entire Image". I just tried that and it worked for me.
-
While I still consider myself a wood ship modeler, over the past several years, I've built a few card models. Almost exclusively, these have been kits from the Polish paper ship model kit publisher Shipyard, and really I've really enjoyed the process. Lately, I've looked at a few of their offerings and thought about how I might actually make some modifications to them.
For instance, their kits of the French lugger Le Coureur are beautiful kits and I've seen some excellent builds of them, but I'd like to do a deck arrangement that more closely resembles the plans published by Ancre. To that end, I started experimenting with some possibilities. I have Shipyard's 1/96-scale paper model kit, as well as their 1/72-scale laser-cut card model kit. I've been using the 1/96-scale paper model kit as a testbed for the larger laser-cut kit.
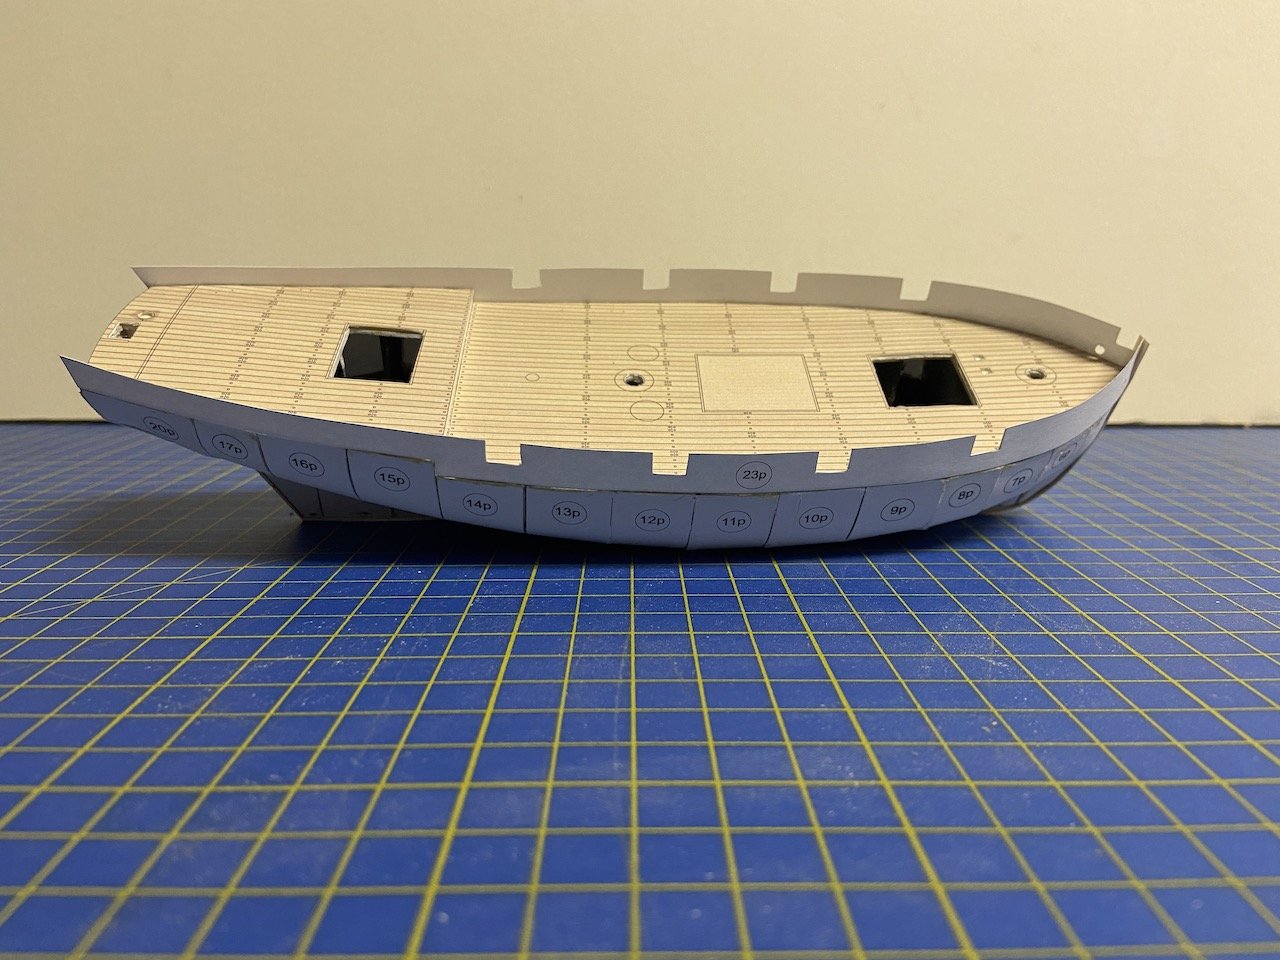
About a year ago, I went kind of overboard and bought an xTool S1 40watt diode laser cutter. Yes, it was somewhere around $1600, but there was a deal going on at the time, and I figure it was okay to splurge now and buy the monster, because there's a good chance I won't be able to do something like this in the future. Seemed like sound reasoning, and it got me the machine.
Long story short, I drew up Le Coureur's decks using Adobe Illustrator and basically want to replace the kit deck, since the kit deck has alignment markings all over it for the placement of the deck furniture as well as cut outs under their hatch locations, and I'm going to be making changes to all that. I figured cutting and scoring heavy card stock would be ideal, since that would match the way Shipyard's bigger kit is designed, with that being my final project goal.
Things were going okay, and I did a lot of experimenting with painting the resulting laser-cut and laser-scored deck, but i wasn't that satisfied with how the paint went on the card stock I was using. Then, I ran into an issue with the output from the laser cutting, and it took me weeks of troubleshooting until I finally fixed the problem – that was today, by the way. But, in the meantime, I'd temporarily given up on the laser-cutting idea, and just realized I could try to simply print the deck onto card stock. More long story short, I ended up with some printed decks that look pretty good.
These were simply output on my inkjet printer, and the small Le Coureur currently sports the new printed deck, shown below with a couple deck color variations. This wood grain pattern was something I only just discovered how to do with Illustrator.
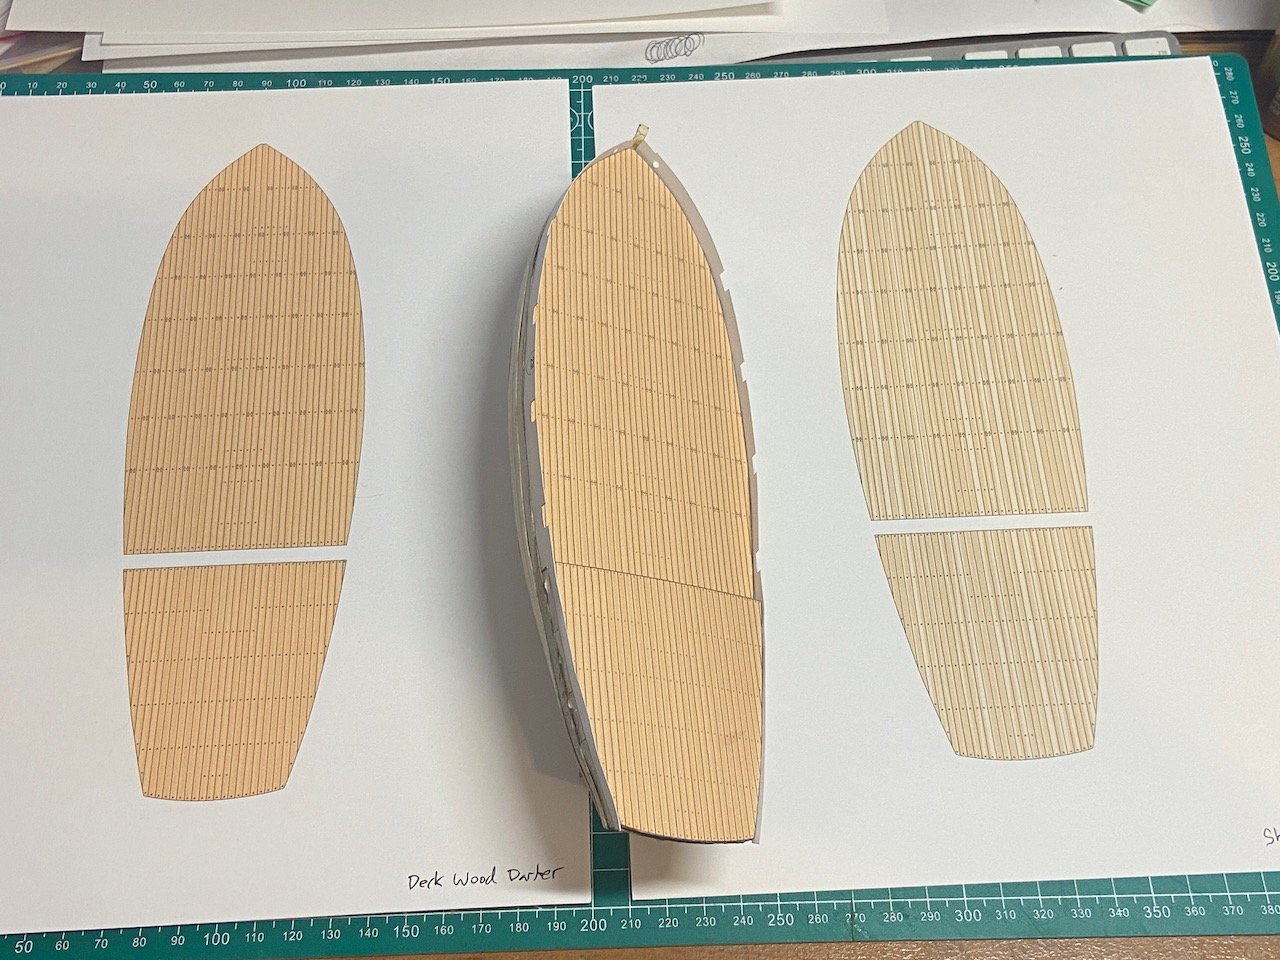
I'm not sure if this looks TOO clean, but on a card model, it's probably fine. You can see the treenail detail is nice and subtle.
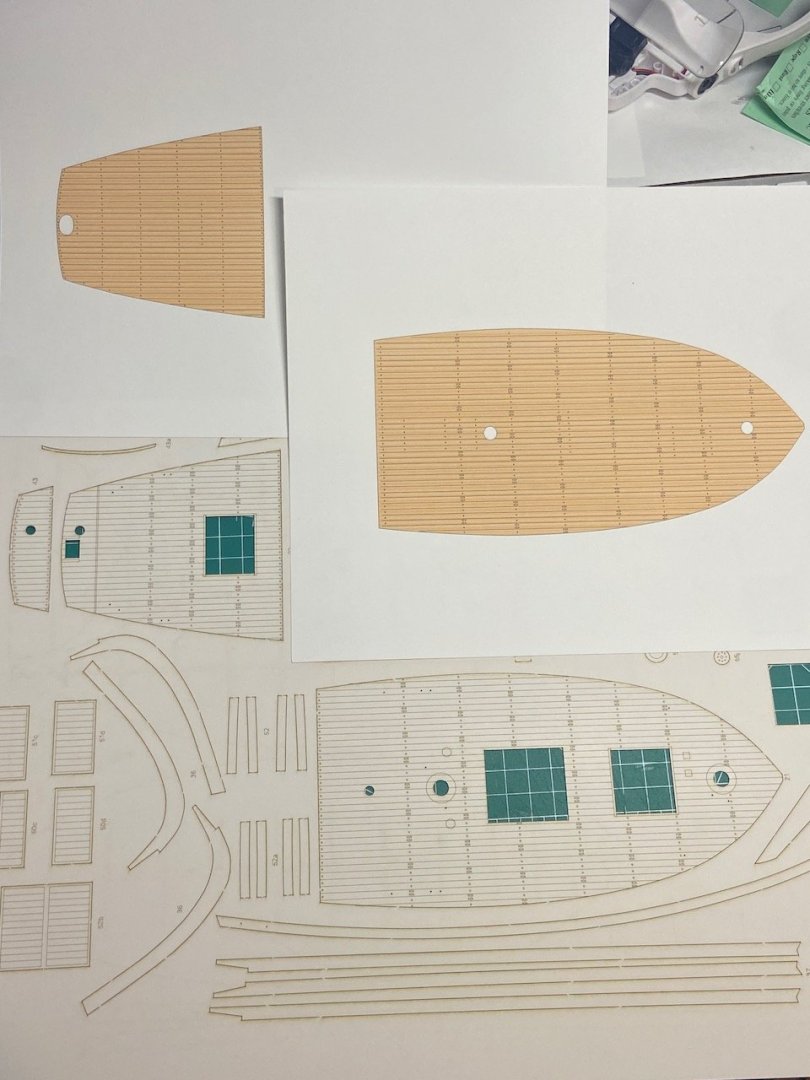
I printed one of the deck patterns at 1/72 scale for the larger model. You can see it and the laser-etched deck provided in the kit.
At this larger scale, the issue of the deck looking too perfect is amplified somewhat. So, I kept on working to troubleshoot the laser-cutting issue I was having. Today, I FINALLY figured out what was going on, and I was able to create some usable output again. But, in the meantime, I also picked up some wood veneer and trying working with that on the laser-cutter. And now, I have three options for the deck now. Here they are, all for the smaller 1/96-scale testbed model.
Top is printed paper, middle is laser-cut maple veneer, and the bottom is laser-cut card, which of course has to be painted.
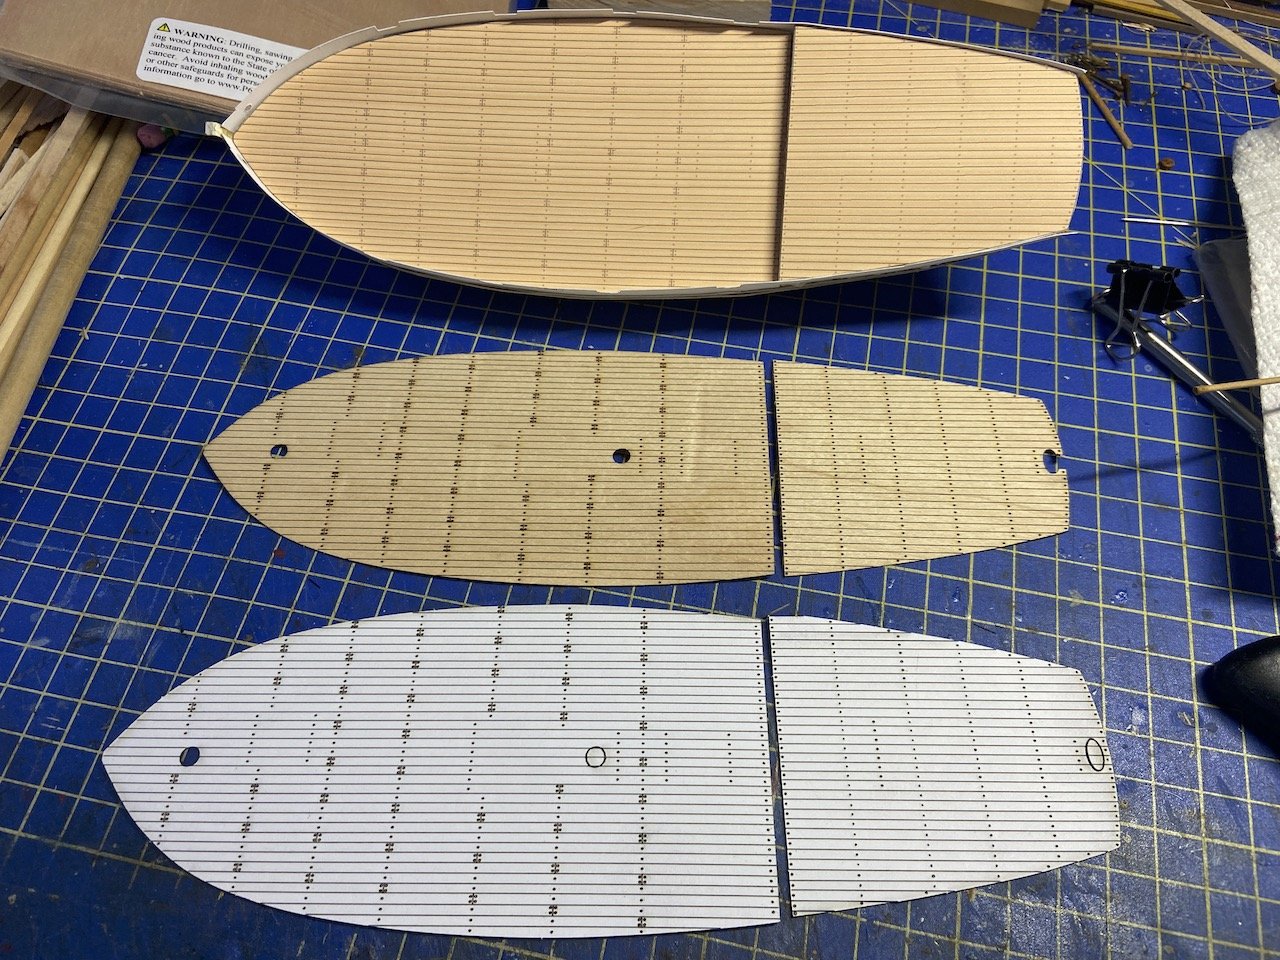
Not sure which way to go, but now, I have options that I really didn't have just a few days ago.
Next step is to see if I can now paint this type of card stock to look like wood. I've done it before with a couple Shipyard kits, and they looked okay, but I never was totally happy with the results. Below, you can see the deck, early in my HMS Wolf build. It came out a little splotchier than I would have liked. The one good thing about laser-cutting my own card stock deck. I can make new ones until I figure out how to get it just right.
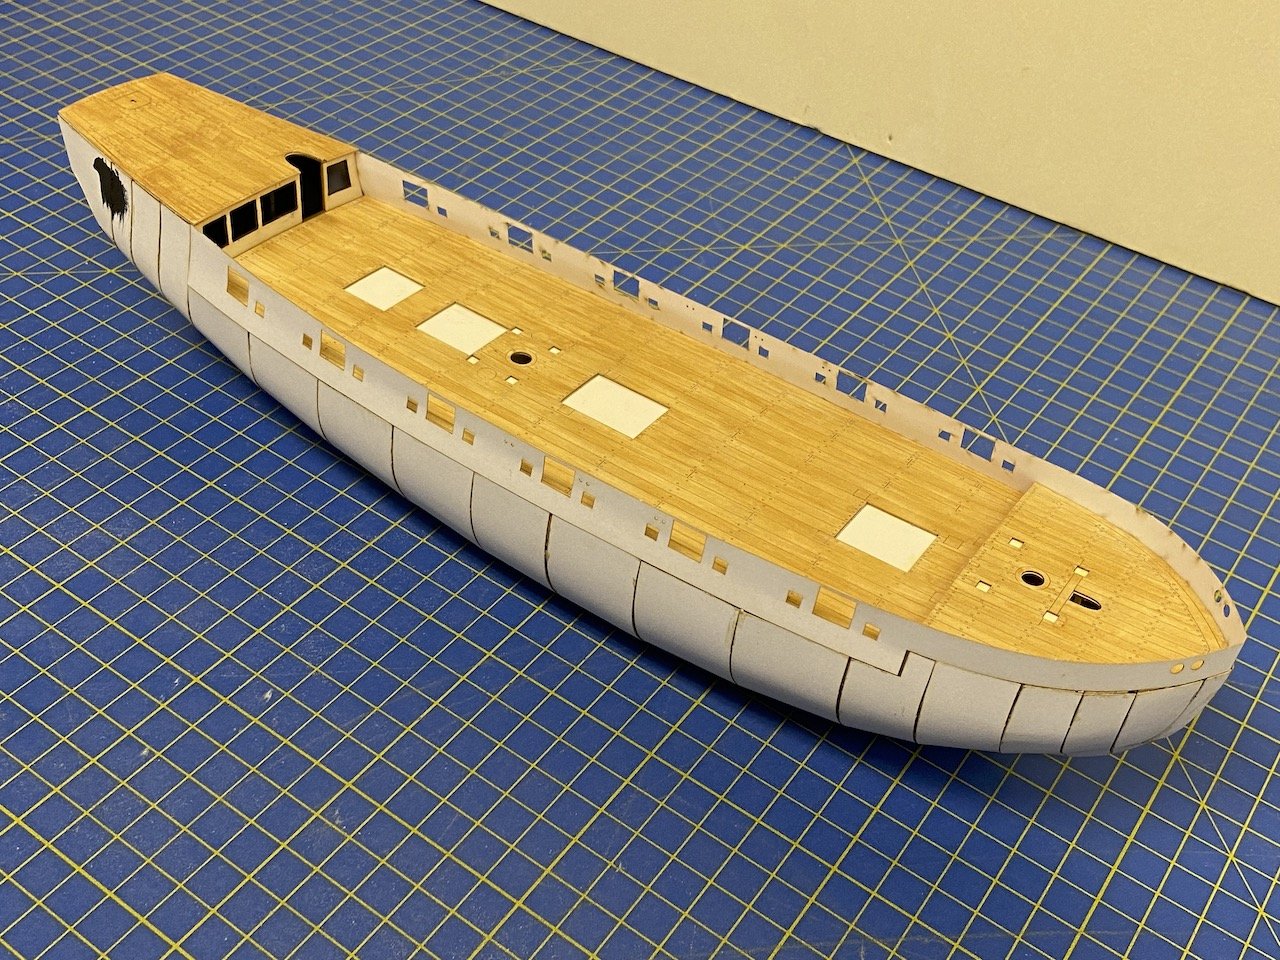
And, if I can't get it right, well there's always the wood veneer deck. Still might want to try that on a model...
- Ronald-V, Desertanimal, ccoyle and 4 others
-
 7
7
-
-
After our local ship modelers meeting down in San Jose today, I've been inspired to make some more progress on the V108.
First, I decided to try working on the funnel support guy wires using fine EZ Line. This is the first time I've ever used the stuff. Turned out to be a lot easier than I'd thought. I wasn't positive where these guy wires would attach to the deck. But, I've looked at various destroyers and noted that the wires mostly ran down to the raised deck of the superstructure. Given that, I just had to figure out how to keep the wires clear of the ventilators and reels.

Very happy with how that part turned out.
Next, I added the rudder and also added the crane at the bow. It's raised up too high I think, but it'll do.

Finally, I decided it was time to finish up with the bridge wing supports. I cut and glued the "folded" edges into place, then I glued pieces of wire onto the backside to stiffen the girders.

I trimmed the wire and painted the backsides gray, then glued them into place.

Following Chris' example, I set the support structure inboard a bit, so that it will clear the area where the deck railing will go.


There's still a lot of doo-dads to go on the ship, but I feel like I got a lot done, and really want to get the bridge finished.
-
-
Chris, thanks for the info. As my first steel navy paper ship model kit nears completion, I'm thinking about the next one. I'm using paint to color the white paper edges now. While that works fine for paper models I'm painting, for the steel navy ships, I expect that markers will be a cleaner way to go.
Thinking about this because my USS Bagley from Avangard in the Ukraine made it through the "customs blockade". I was surprised that I actually received the kit, especially after my order with Seahorse got cancelled last week. But, this looks to be a one-off solution.
I'll post about the Avangard kit separately, later. But, it will be a major step up in challenge, by the looks of it.
-
Progress is very slow this last week. Only small windows of time available.
However, I made use of a window of opportunity last night and overcame what I've found to be the hardest task yet...
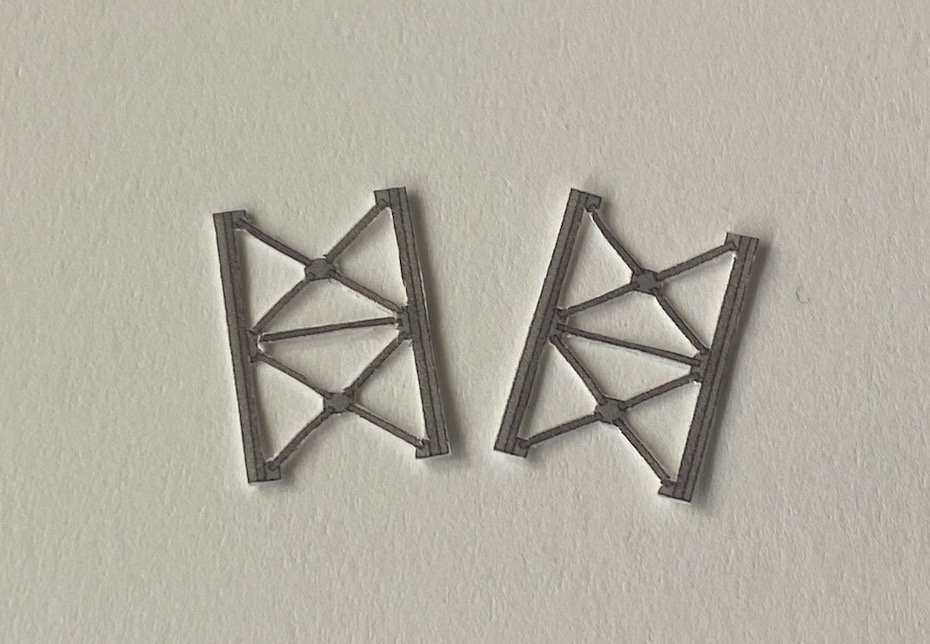
Thinking I may just reinforce these with some wire on the back sides, particularly some of those thin trusses. Still have to clean up the white edges.
Chris, what markers did you say you use? I should try them out.
Oh, and one more photo. Decided to finish up that stern reel. The handles are a bit large, but I had a hard time bending them at all without destroying the whole assembly. So, this is how it will be... I think.
- GrandpaPhil, Canute, king derelict and 3 others
-
 6
6
-
The kit looks like something that many people will love to see. I look forward to seeing some builds of this and the other recent kit releases.
Also, I feel it necessary to apologize for some of the comments on our forum that are rude and disrespectful to one of the valued sponsors of this forum. It aggravates me that some members here make such careless comments. Why would they feel the need to do this? I saw comments last night that I was considering responding to today, but I see they are now gone. Just as well.
Anyway, thanks for being a sponsor of MSW and please keep up the great work. I think your work makes ship modeling more accessible to more people. I personally prefer to use printed plans and hate watching construction videos, as I find them boring. But, these days, more and more people are accustomed to learning from instruction videos. Also, these video presentations show how beautiful a ship model can be, and create some nice anticipation for potential modelers.
Love the availability of figures for the kits!
-
If you're looking for a particular Shipyard kit that's out of stock at Ages of Sail, be sure to ask about it. Sometimes knowing there is demand is a motivator to gets things done, like reordering stock!
- GrandpaPhil, Canute and Keith Black
-
 3
3
-
Hi grsjax,
On the surface, the instructions look really nice, photos are clear, and are nicely labeled and all. I have their Navio Rayo "battle station" kit and their Frigate l'Hermione kit. I've heard from people who started the Navio Rayo kit and gave up on it. I haven't looked closely enough at those instructions yet. However, the Hermione instructions for constructing the transom are extremely vague, and the parts they provide don't fit as shown. There are no plans sheets and no instruction videos.
I also found that a template they provide for marking the gun ports is far too large for the hull and would result in the construction of a hull that hangs way too far beyond the rudder. The template also results in an incorrect gun port arrangement. The kit instructions show both a model being build with the correct gun port arrangement as well as photos of a model with incorrect gun port layout.
Now, overall, I'm happy with the model kit because I think I can build it into a really nice, relatively large scale model, and the bulkheads seem to be okay. But, it took me weeks to try to figure out how to make the stern look correct. I added parts and removed them twice. On the third attempt, I chose to ignore the instructions and got past the hold up.
Don't know about the Marieville. Instructions may be fine, but just be very careful as you step forward through the build. Check and recheck that everything makes sense!
-
-



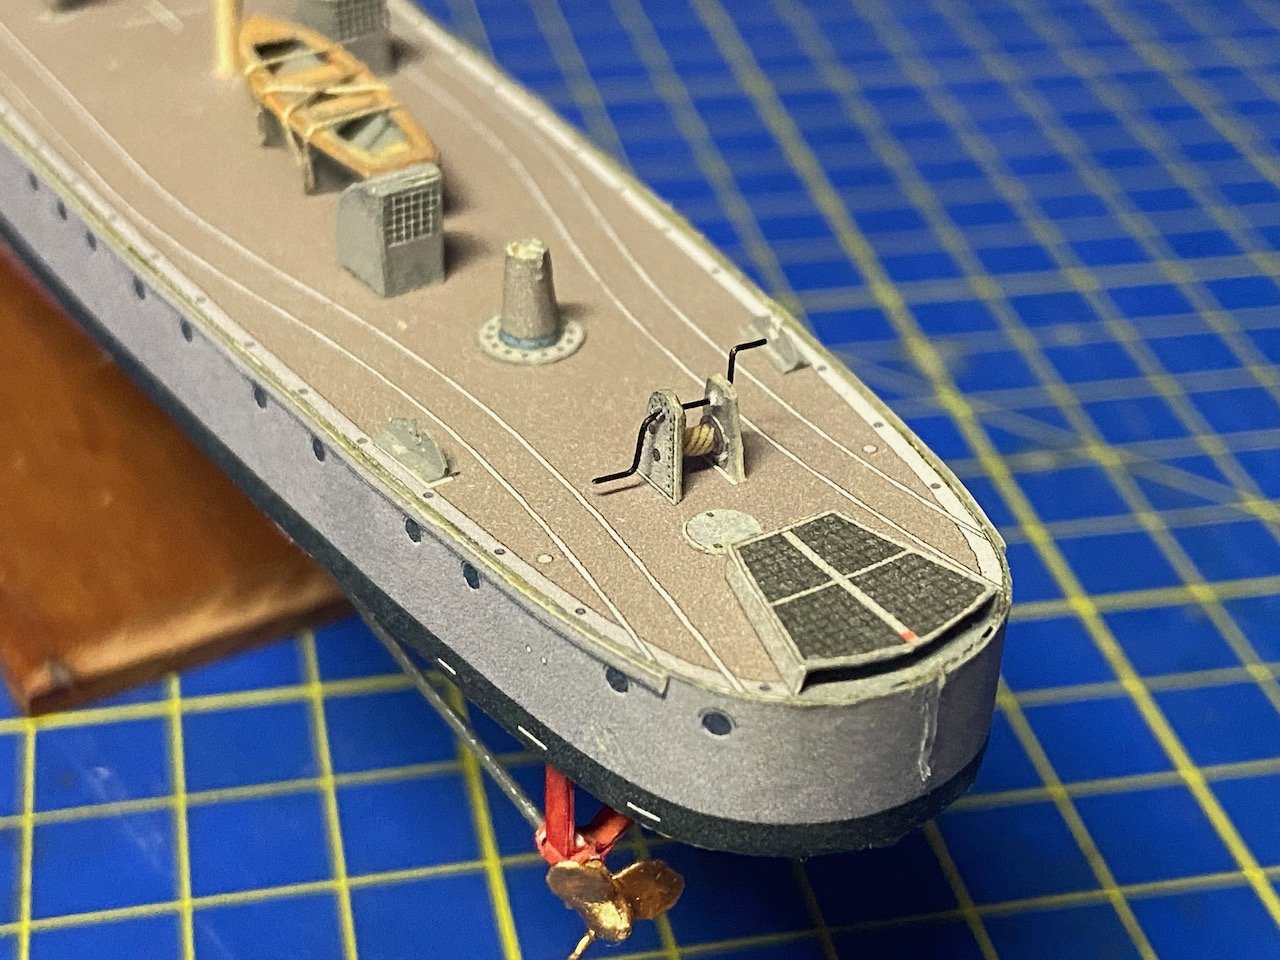

V108 by catopower - Digital Navy - 1/200 Scale - CARD - Torpedo Boat - MSW Tutorial Build
in - Kit build logs for subjects built from 1901 - Present Day
Posted
Or, perhaps, it's beginning of the middle? 😁
No pics this time, but the ladder is done, I think... the steps aren't as even as I would like. It's hard to line them up as marked on the paper.
The anchors look better, and I just need to add the stocks, which will be wire. Also, I'm almost done with the rangefinder – that's a tough assembly(!), not to be viewed too closely. 😕
With luck, my next post will be my last on this... soon!