catopower
-
Posts
1,900 -
Joined
-
Last visited
Content Type
Profiles
Forums
Gallery
Events
Everything posted by catopower
-

Amati/Victory Models HMS Vanguard, examples of natural wood finish?
catopower replied to Esap's topic in Wood ship model kits
Esap, I agree that model looks beautiful. If you look at the second of the "build" pages (there are links to two pages of photos), there's text in Japanese. Translated, it reads: Of course, this is a Google translation, so by the "well" or "black part of the wainscot" they mean the wales. I think they used the kit woods for the walnut and the tanganyika. That's pretty standard for Amati. Hope that helps! Clare -
Wow, that's a great deal! Would love to build this beautiful looking boat, but I think I have to clear some backlog first... ☹️
-
I too managed to get this kit, though partially constructed. Picked it up yesterday, along with a couple other items. I paid for a Sovereign of the Seas kit and was given a couple in-progress models that the owner wanted to give to a good home. So, I acquired the Amati Prince. I actually didn't know it was the Amati kit until I saw it. That's when I knew I'd struck gold. With all my other projects, I don't know WHEN I'll get around to this or the Sovereign of the Seas. At some point, I need to build a big "flagship" model. Vince, I've been enjoying reading about your build in the past and just reviewed it again. Hope to see more soon! Clare
-
Occre Polaris, is there a real role model?
catopower replied to ubjs's topic in Wood ship model kits
This is a different 'Polaris'. OcCre just labeled their kit Polaris, probably because it sounds good. My knowledge of the ship modeling kit industry is certainly not perfect. But, as I recall, much of the talent at OcCre were originally working at Artesania Latina. Some time back, Artesania Latina created a model kit of an American pilot boat, c.1800, they called the Swift. If you look at the Swift, you may notice a lot of similarities in shape and some features as OcCre's Polaris. And, Polaris, as has been mentioned by Gus earlier, is just what they named their kit that they built for beginning ship modelers. If you want to consider what kind of ship it might really represent, I would consider it to then be a ship of probably American origin, built around 1800, that might have originally been built as a pilot boat, but adapted to some other purpose. Perhaps a small coastal trader? Or maybe, given the name, something put into service to chart arctic waters? -
Hi Greg, I love how this model is coming along. I too think Constructo kits can finish into very fine models with some love and care! As far as I can tell, the kit is still in production, though. I don't know about other sellers, but Ages of Sail still has them in quantity.
-
Nice review! Looks like they've improved the brass photo-etch sheet. Other than that, it looks pretty much as I remember any Corel kit looking like. Unlike some builders, I don't consider that a bad thing. I love the looks of a well-built Corel kit (like Jan's!).
-
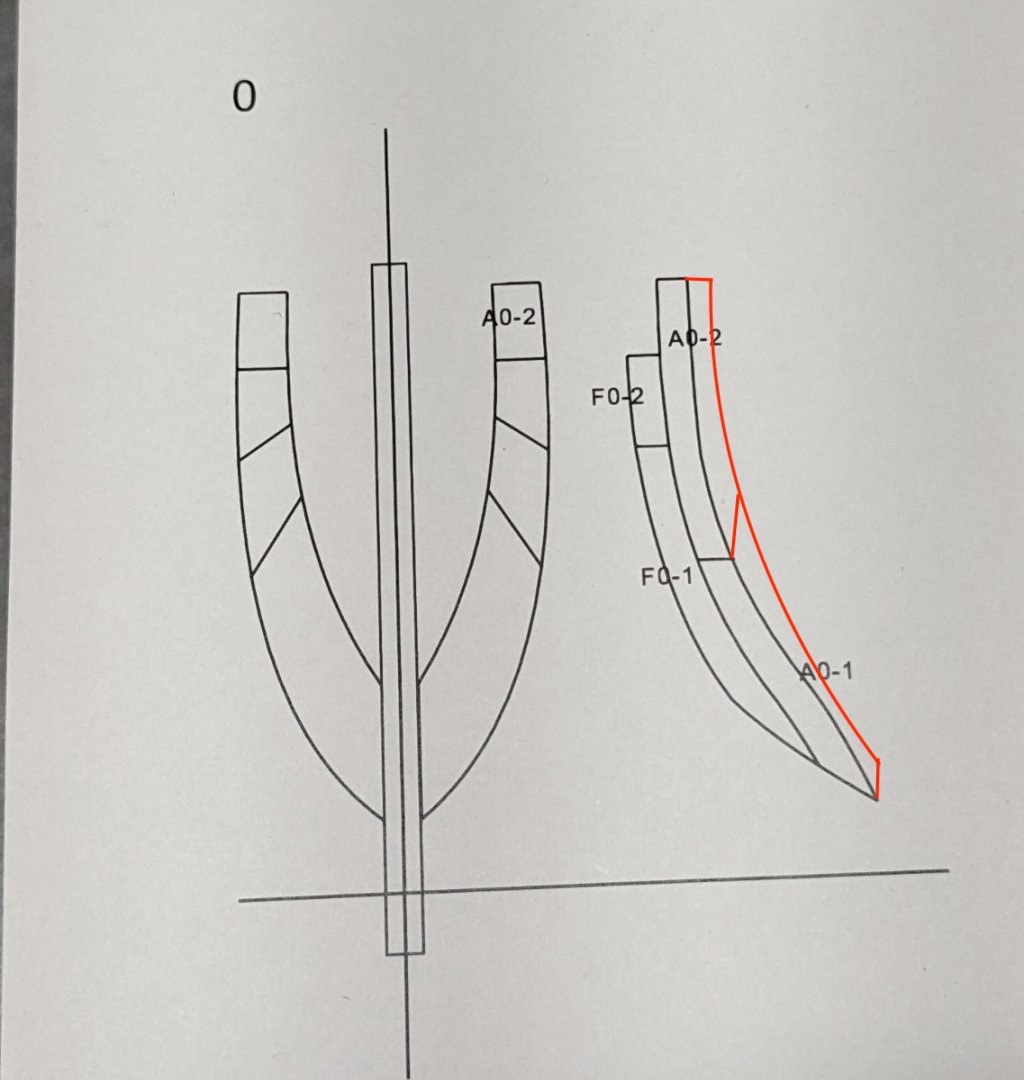
🙂 My turn! The right hand image shows the frame looking at it directly from the side, but the frame is rotated as it would appear in position on the model. So, it's viewed at an oblique. But it's only showing the outer edge of the frame, and not the whole frame itself. Might help if they had drawn in the rest of the piece, kind of like my very poorly drawn outline here:
-
3D Brig 'Rose' in Blender 3.3x
catopower replied to 3DShipWright's topic in CAD and 3D Modelling/Drafting Plans with Software
Thanks very much. My goal is only to try to make a few 3D parts, so the task should be a LOT less daunting than what you've been doing here. Maybe it will only take me 12 months... 😄 -
3D Brig 'Rose' in Blender 3.3x
catopower replied to 3DShipWright's topic in CAD and 3D Modelling/Drafting Plans with Software
That's incredible. I just started to try to learn using Blender, and I can make a box... maybe. -
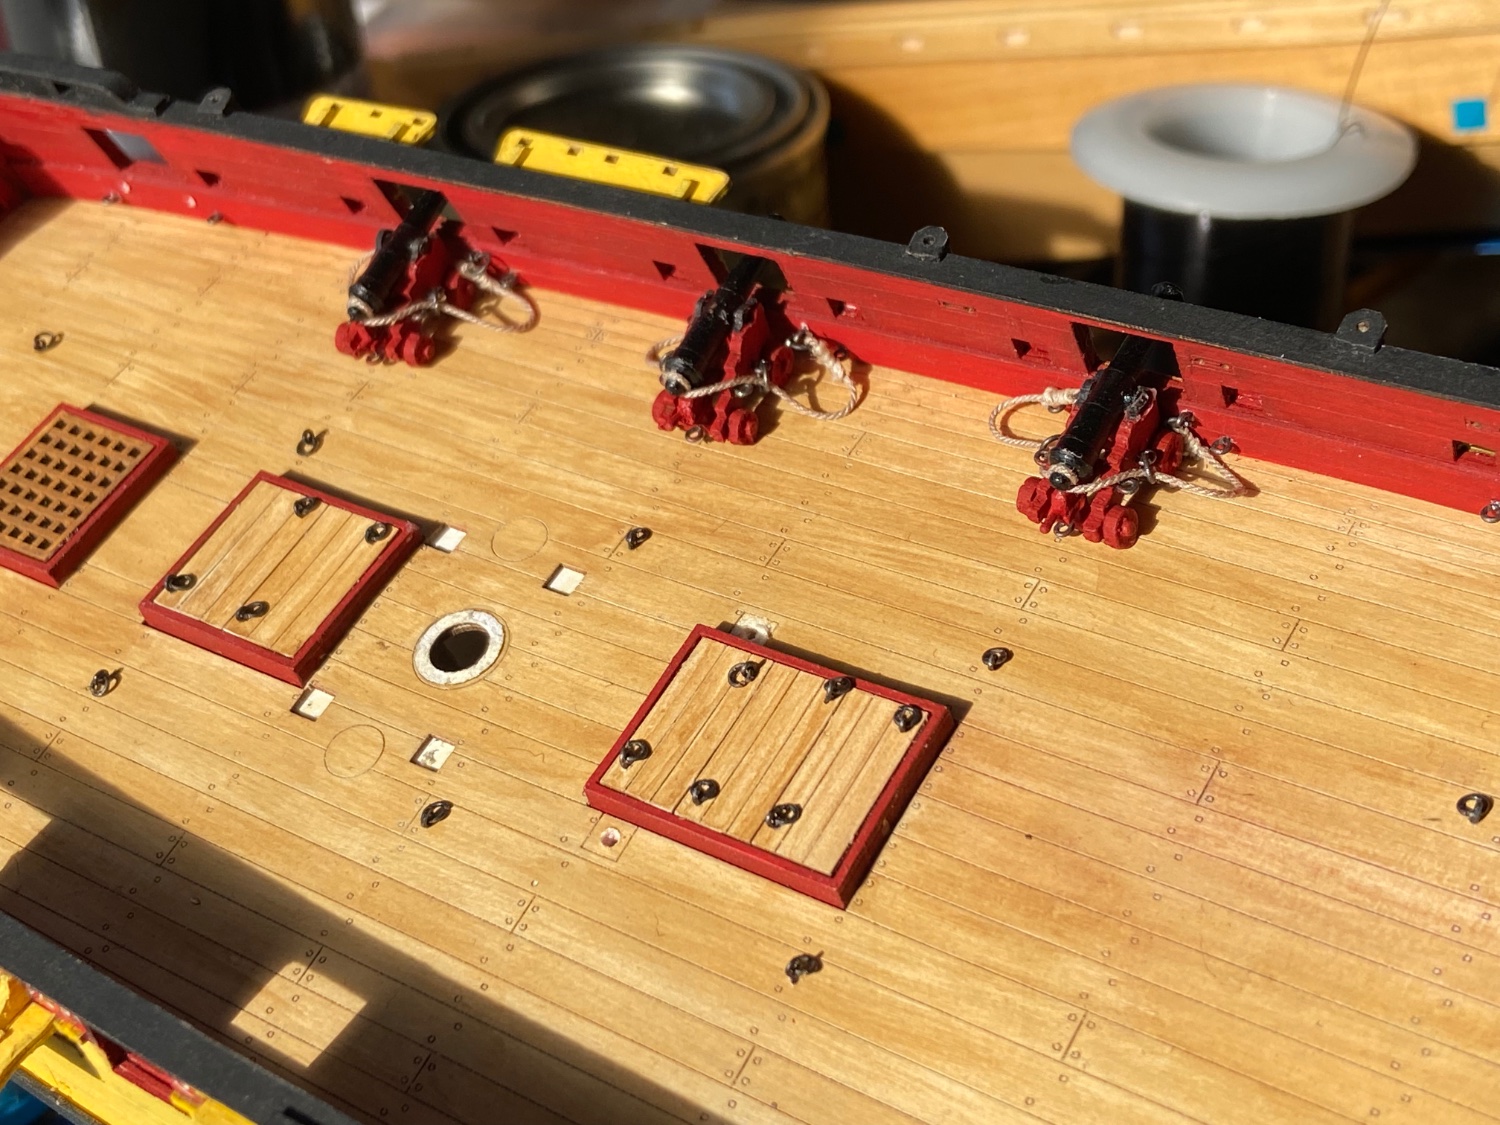
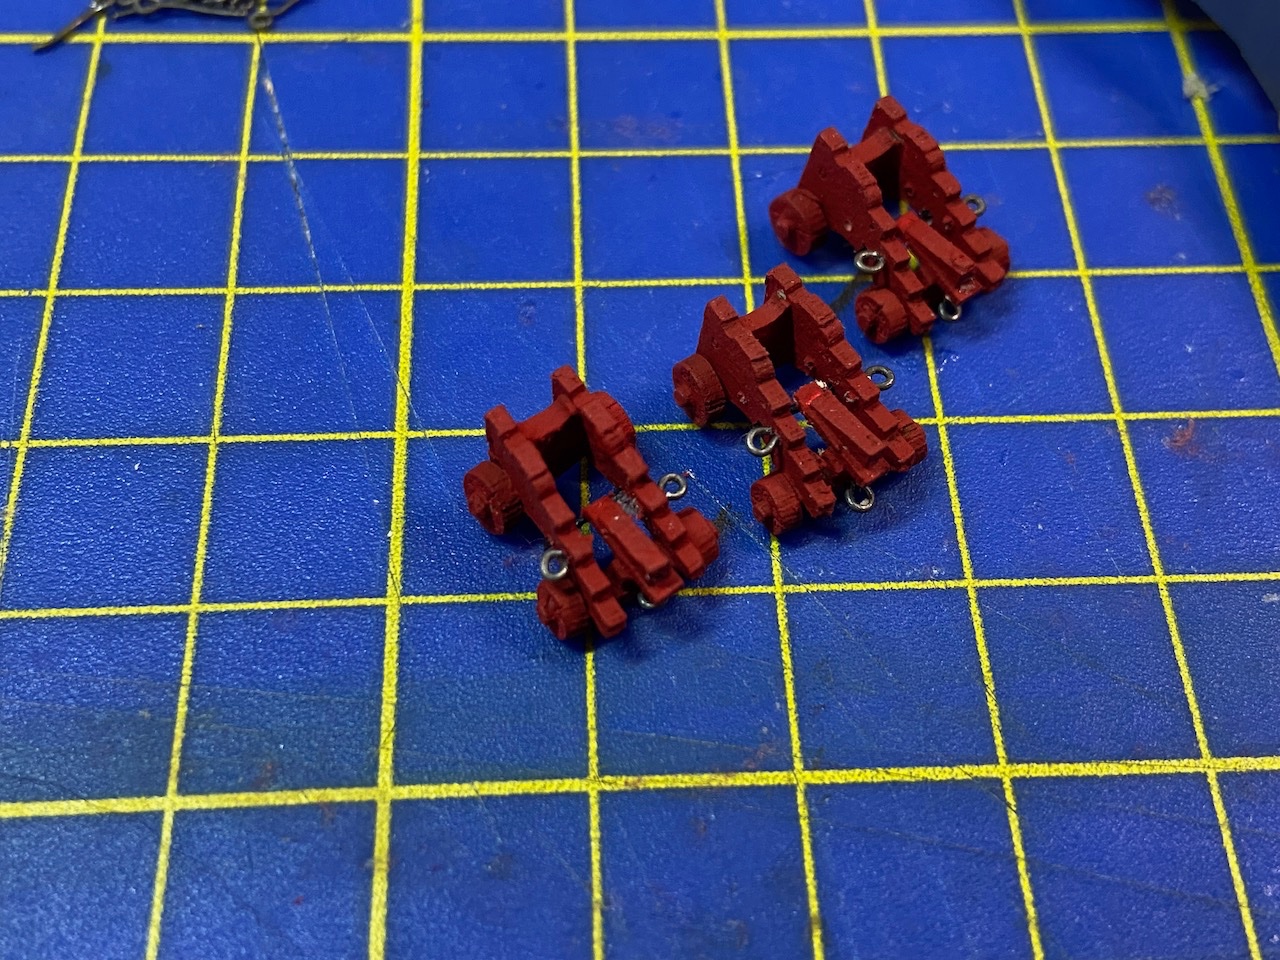
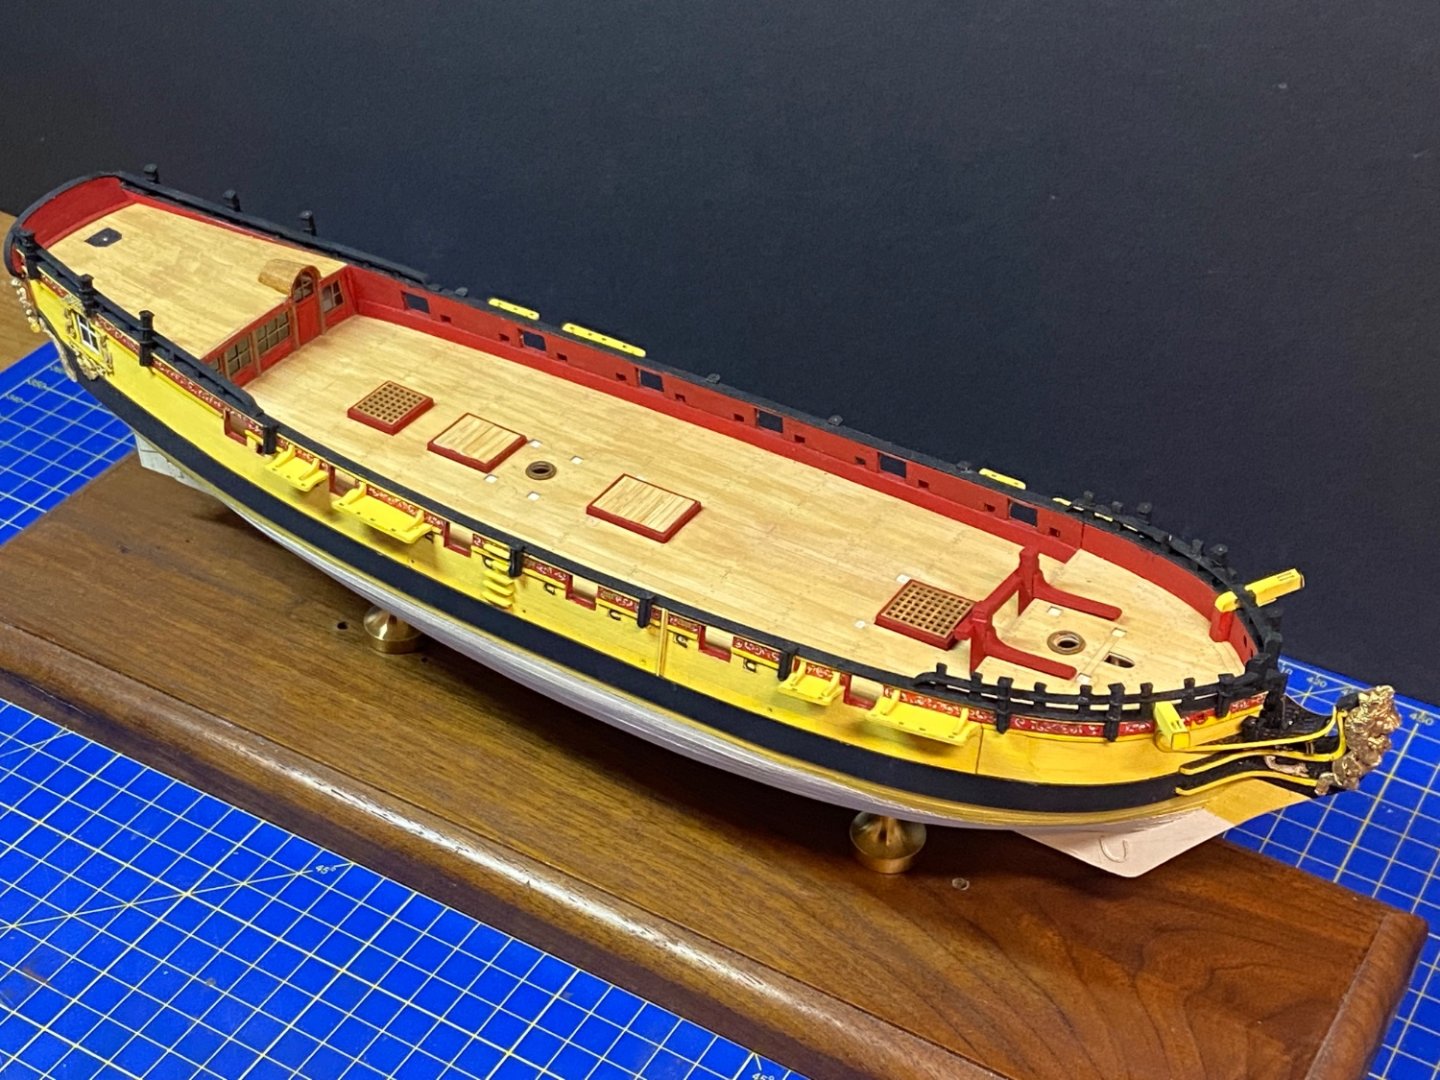
Thanks Druxey, Ben... slowly but surely! I managed to finish making all the ringbolts I need, for now at least. And, I set up the breeching ropes, though the ringbolts haven't been glued into place in the bulwarks yet. I've been waiting until I figured out how I'm going to deal with the gun tackles. At 1/72-scale, this ship's 3-pounder guns (according to the information provided in the Shipyard kit) have very small carriages. At this point, I don't think I can properly rig the gun tackles, so I'm now considering leaving them off. 🤔 Here, three of the guns are shown temporarily in position. Once I fix them into place, I'll adjust the breeching ropes so they look more natural (i.e. not floating in the air)...

-
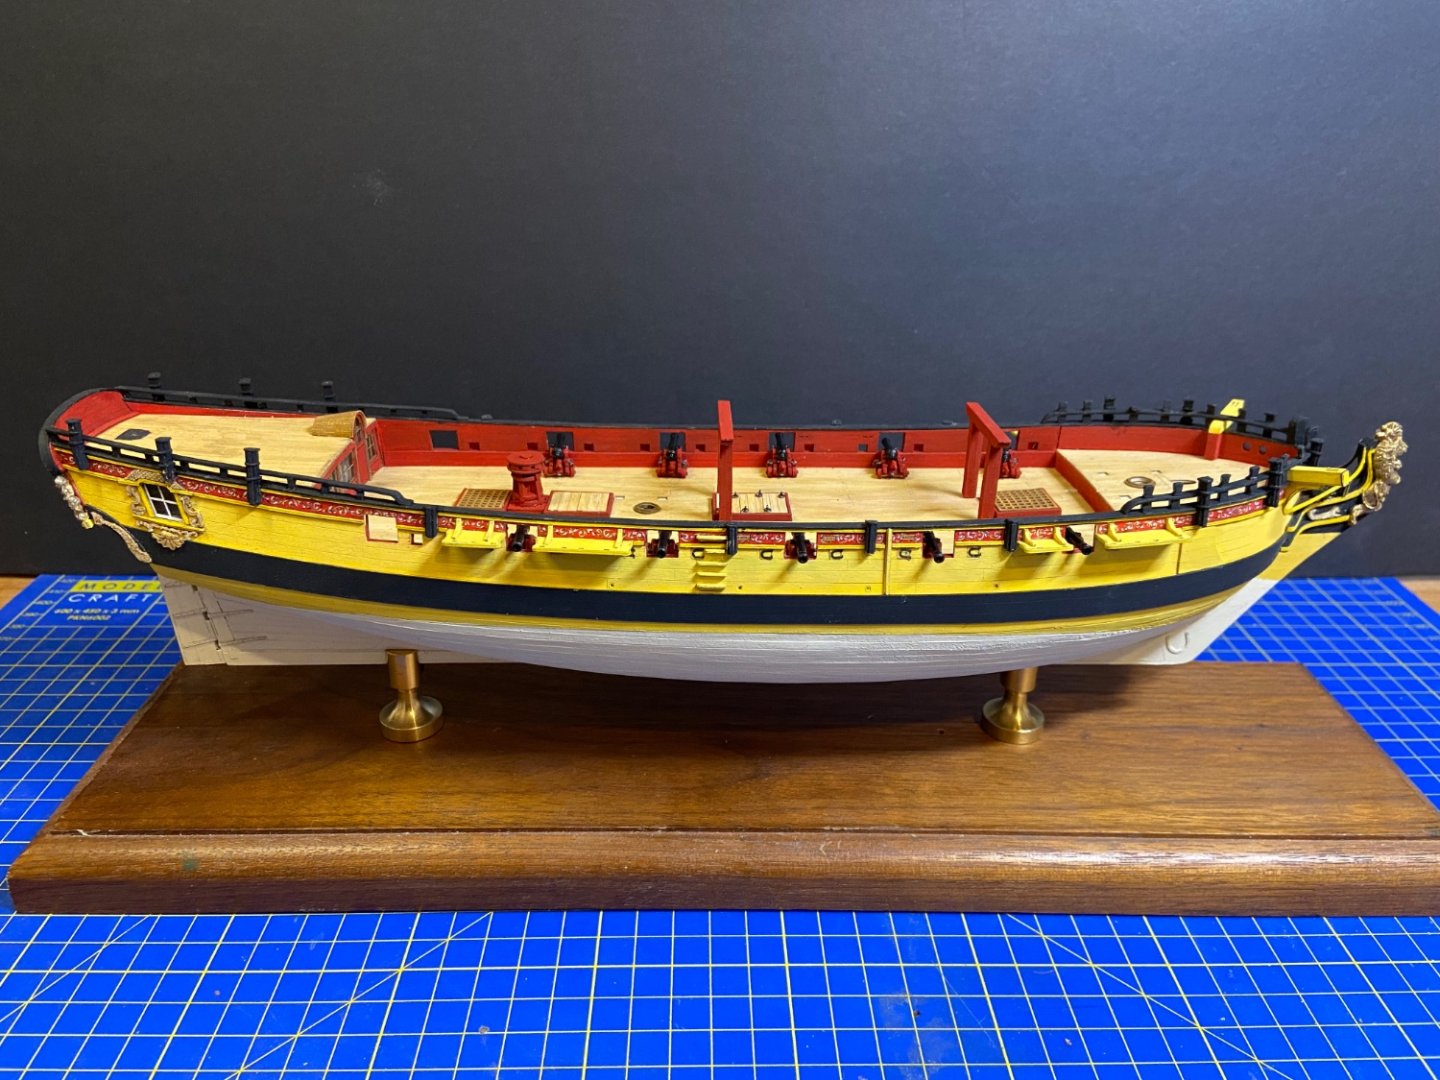
Gun carriages nearly complete, with the cannon barrels now added. Next will be to add the trunnion caps and then rig them into place on the model. Here's the model with most items on deck just test fit into place. Once the guns have been rigged in place, I'll start permanently adding all the deck furniture.
- 108 replies
-
- 11
-

-
I too got the GPM "Super Detail Set" for HMS Mercury, same as HMS Enterprise, and I also have the new Shipyard detail set for Santa Leocadia and looked closely at the contents list and images of the Shipyard set for HMS Mercury. There is overlap between the GPM and Shipyard sets, but the GPM sets are more complete.
-
review HMS Wolf 1754, 10-gun Brig (Snow) - Shipyard - 1/72 - CARD
catopower replied to catopower's topic in REVIEWS: Model kits
Hi JohnAB, The instructions are pretty clear, but I've found that you really have to be careful with them. They will sometimes not label all of the parts you require in one photo. You just have to be cautious and look at a few of the photos to make sure you got everything you need. I'm currently up to 6 "extra" parts! Nothing serious and no one but me would ever notice. But, I still love the kit and the way it's coming along. -
Hi Chris, Baltimore clippers are rather lofty vessels, with the bowsprit and main boom adding probably another 65% to the length of the model. That will probably mean that, overall, #13 will be longer than the Sphinx... maybe 33"/840mm? I'm going to have to rearrange the furniture here...
-
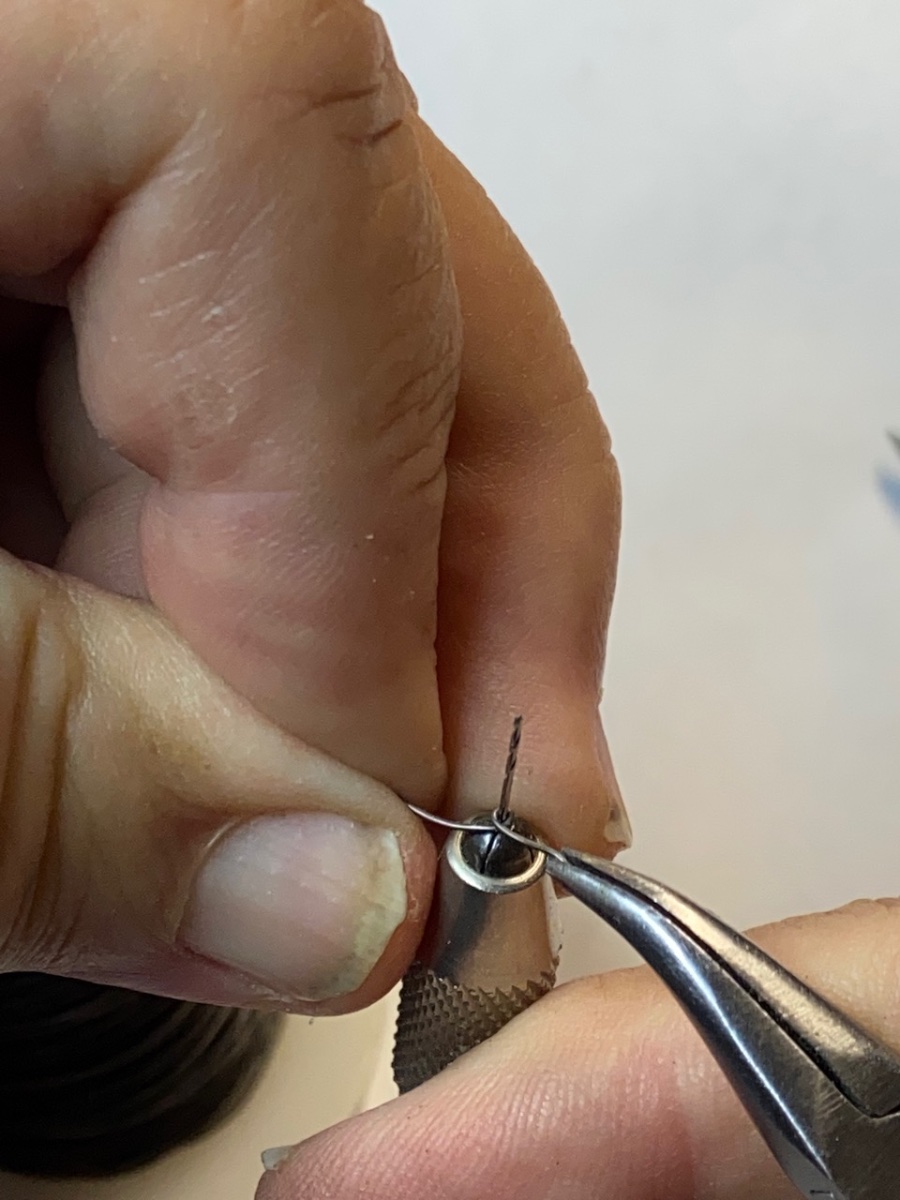
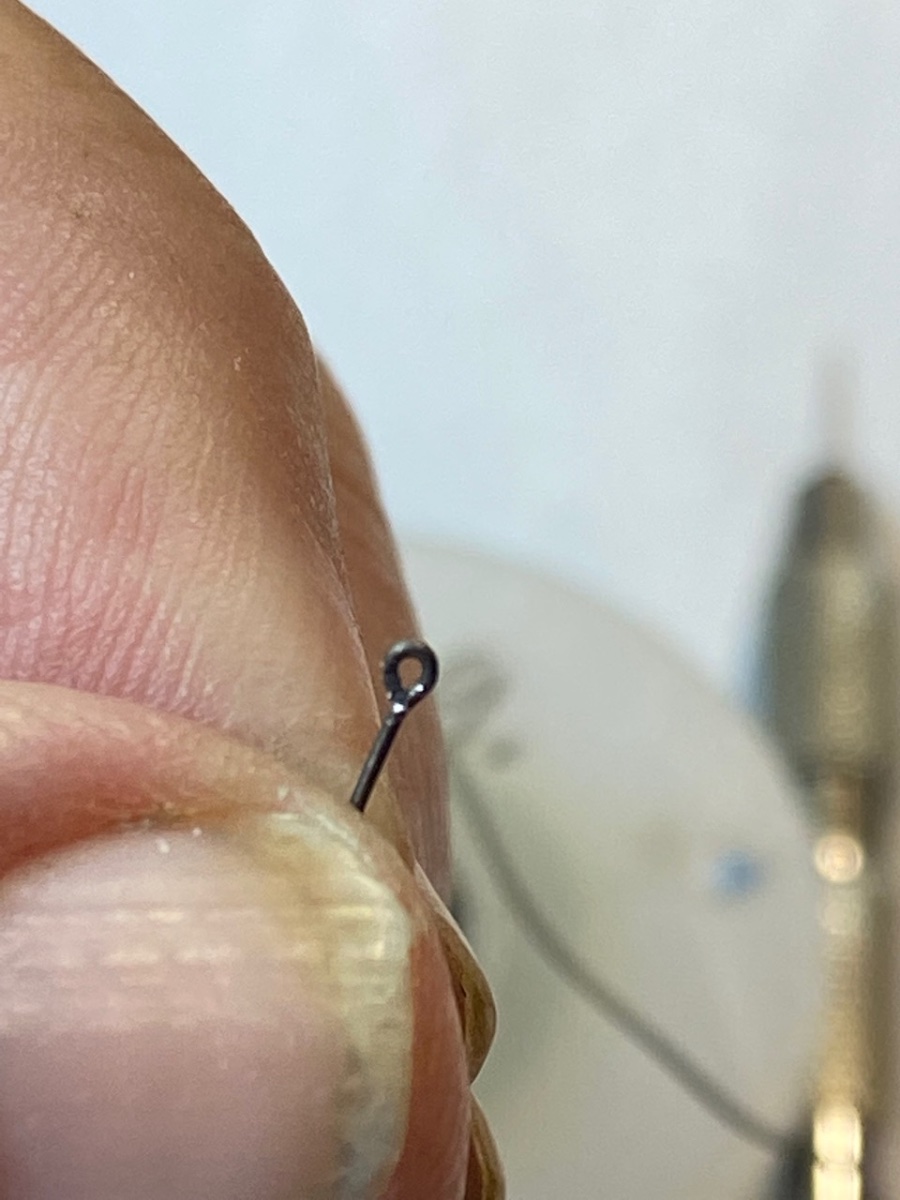
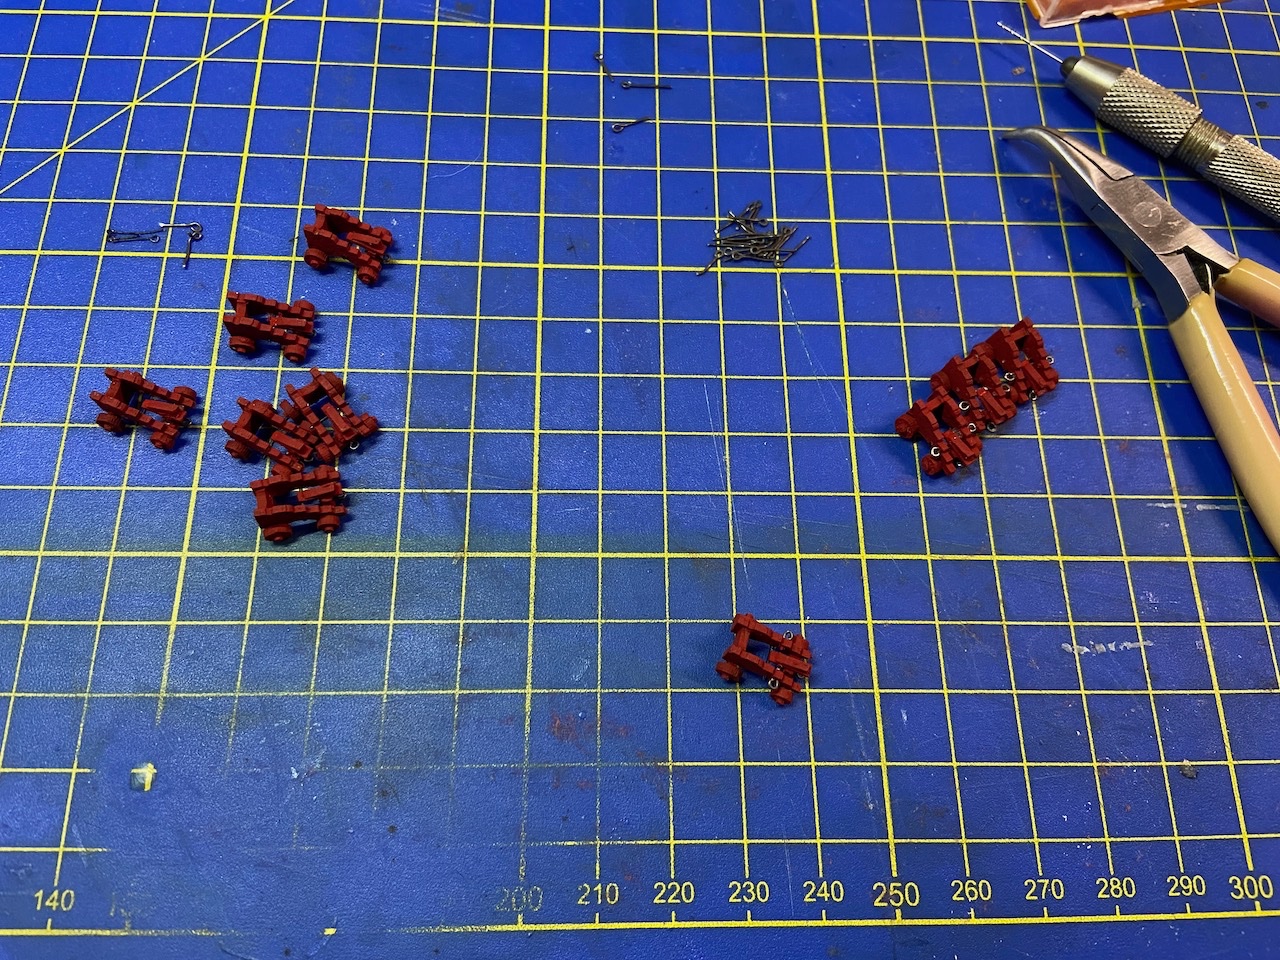
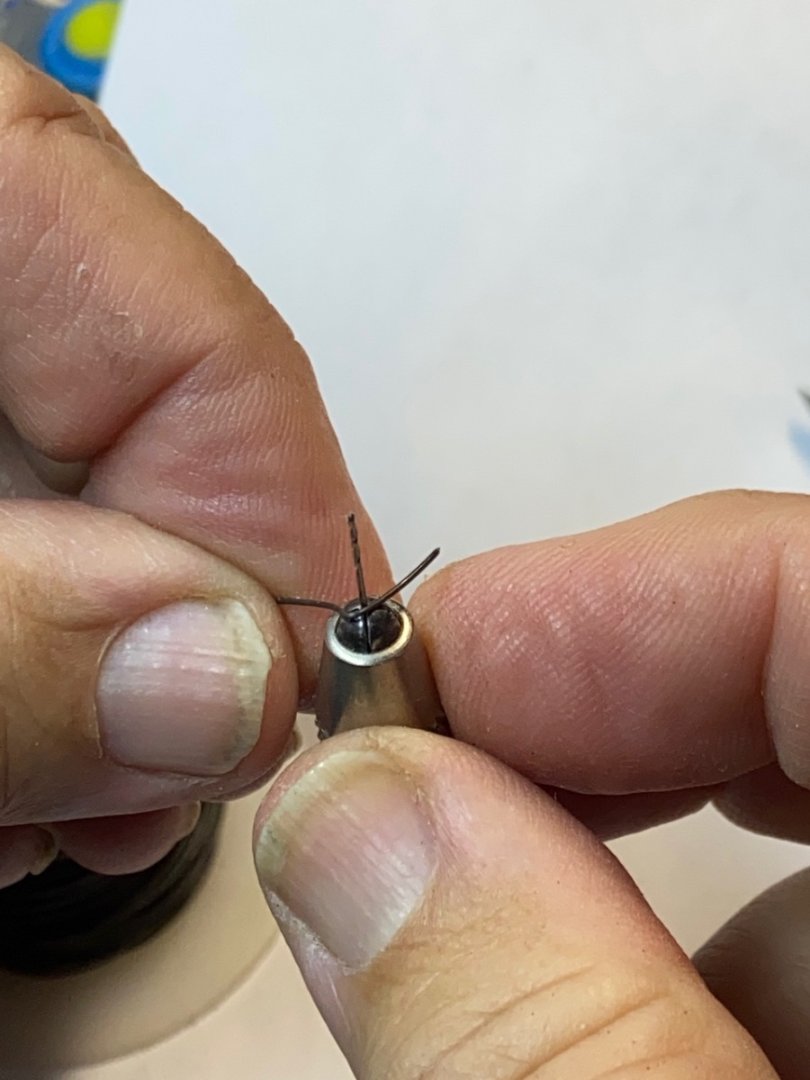
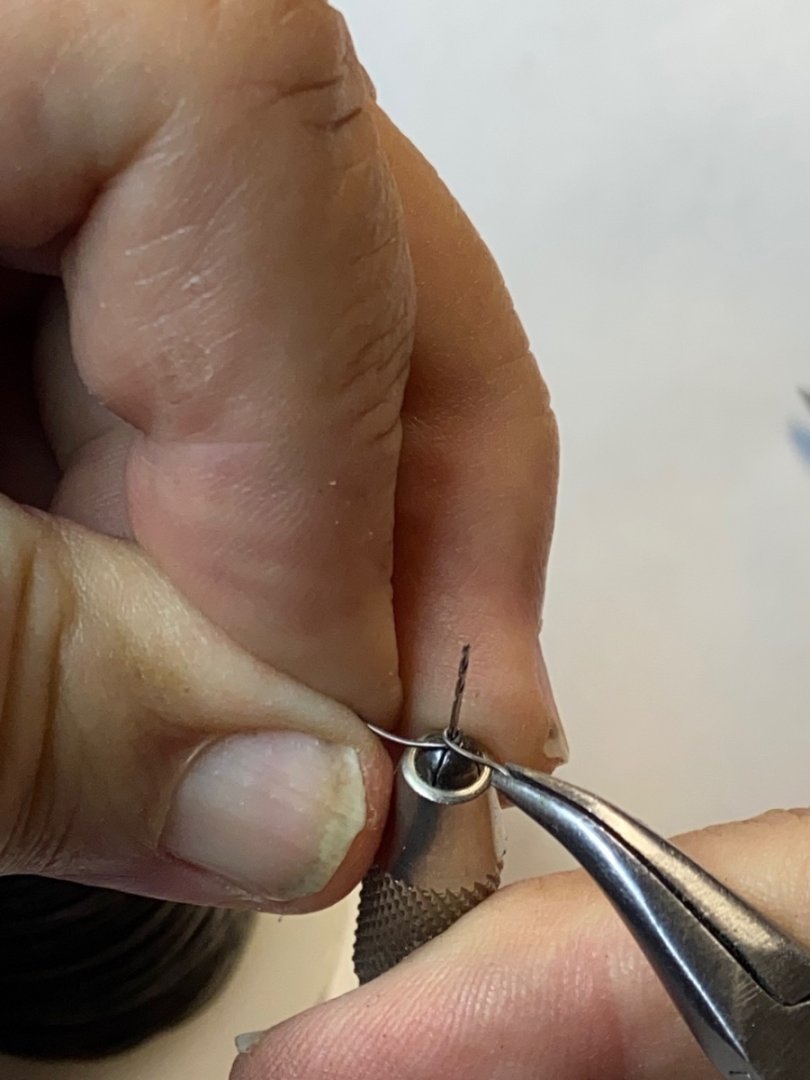
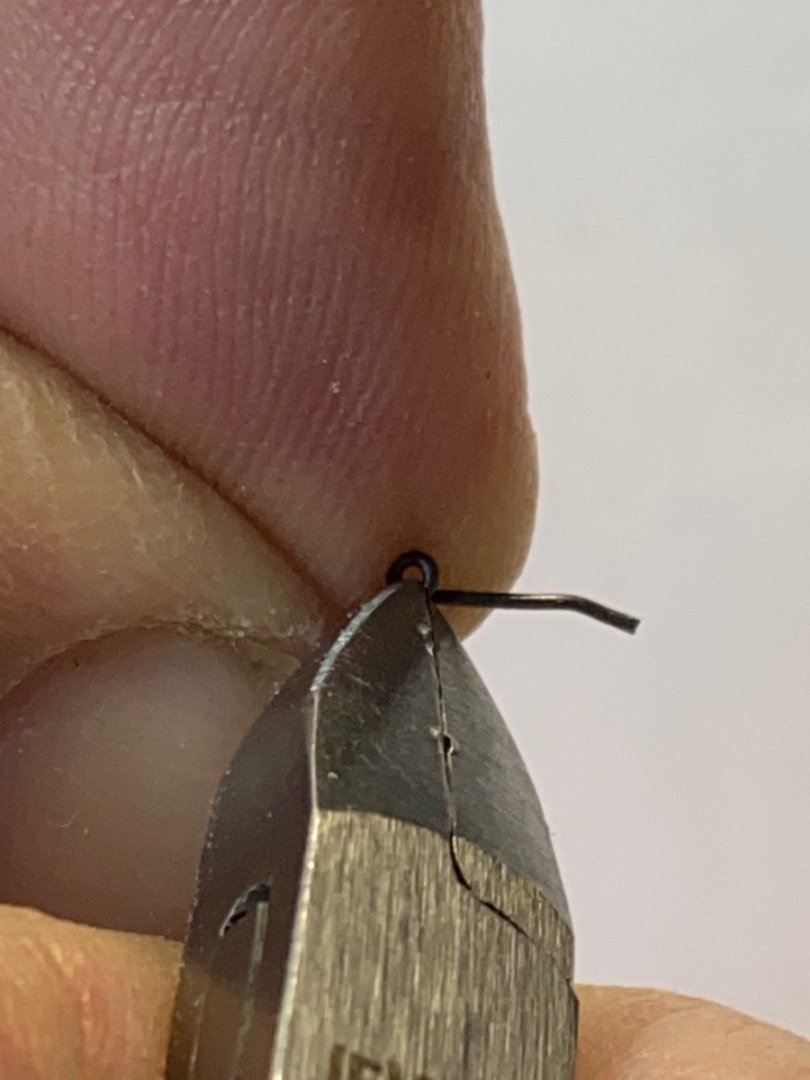
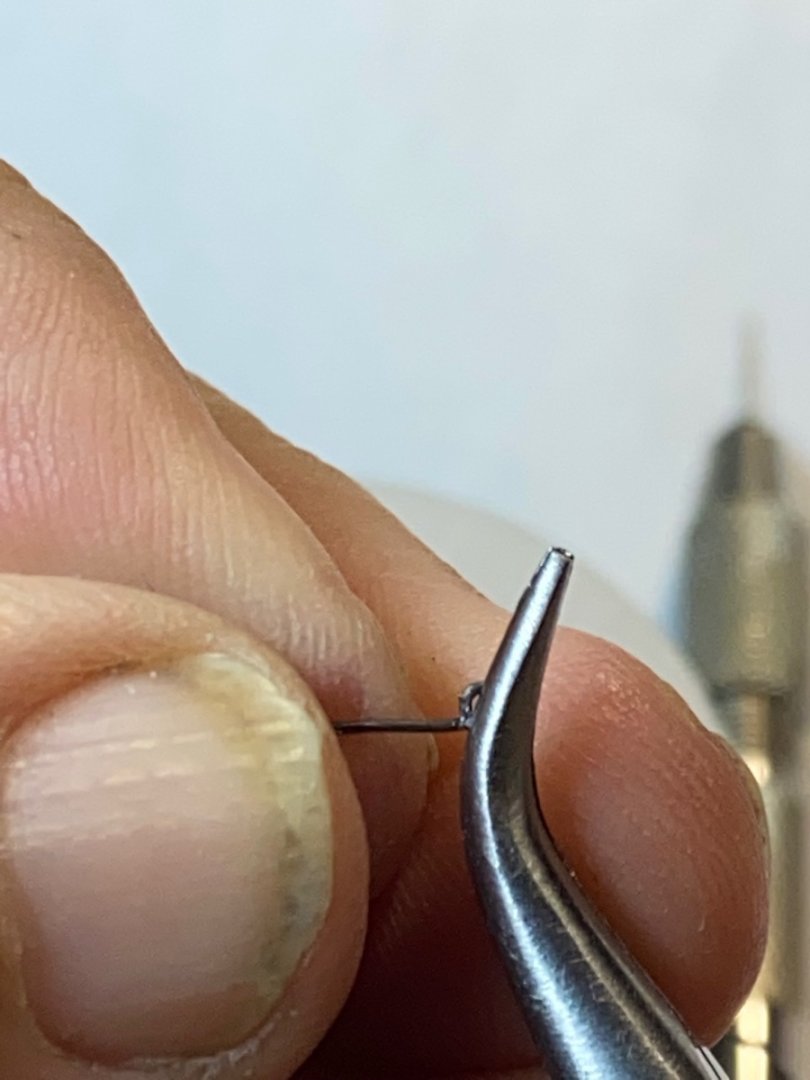
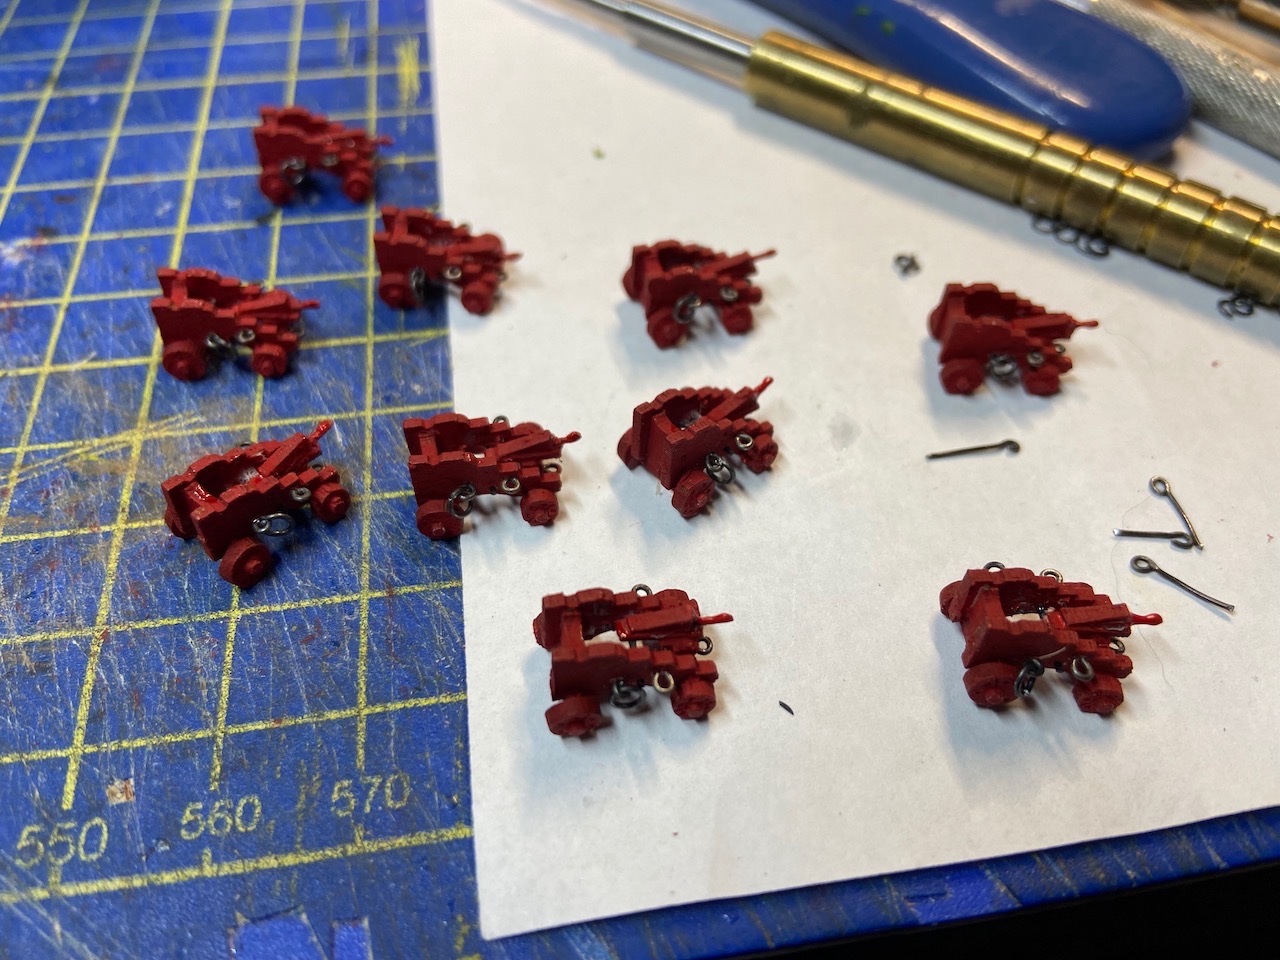
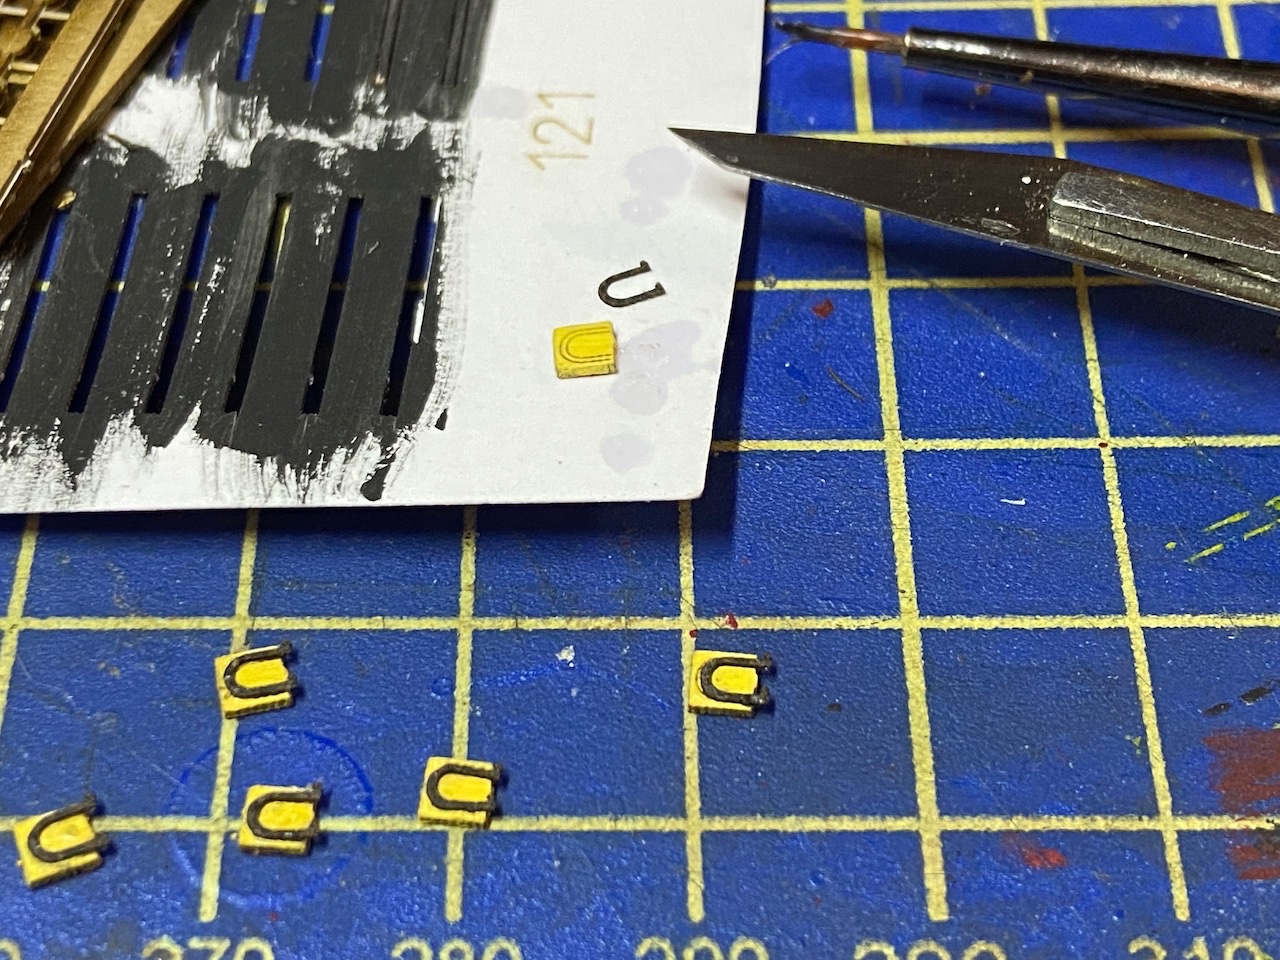
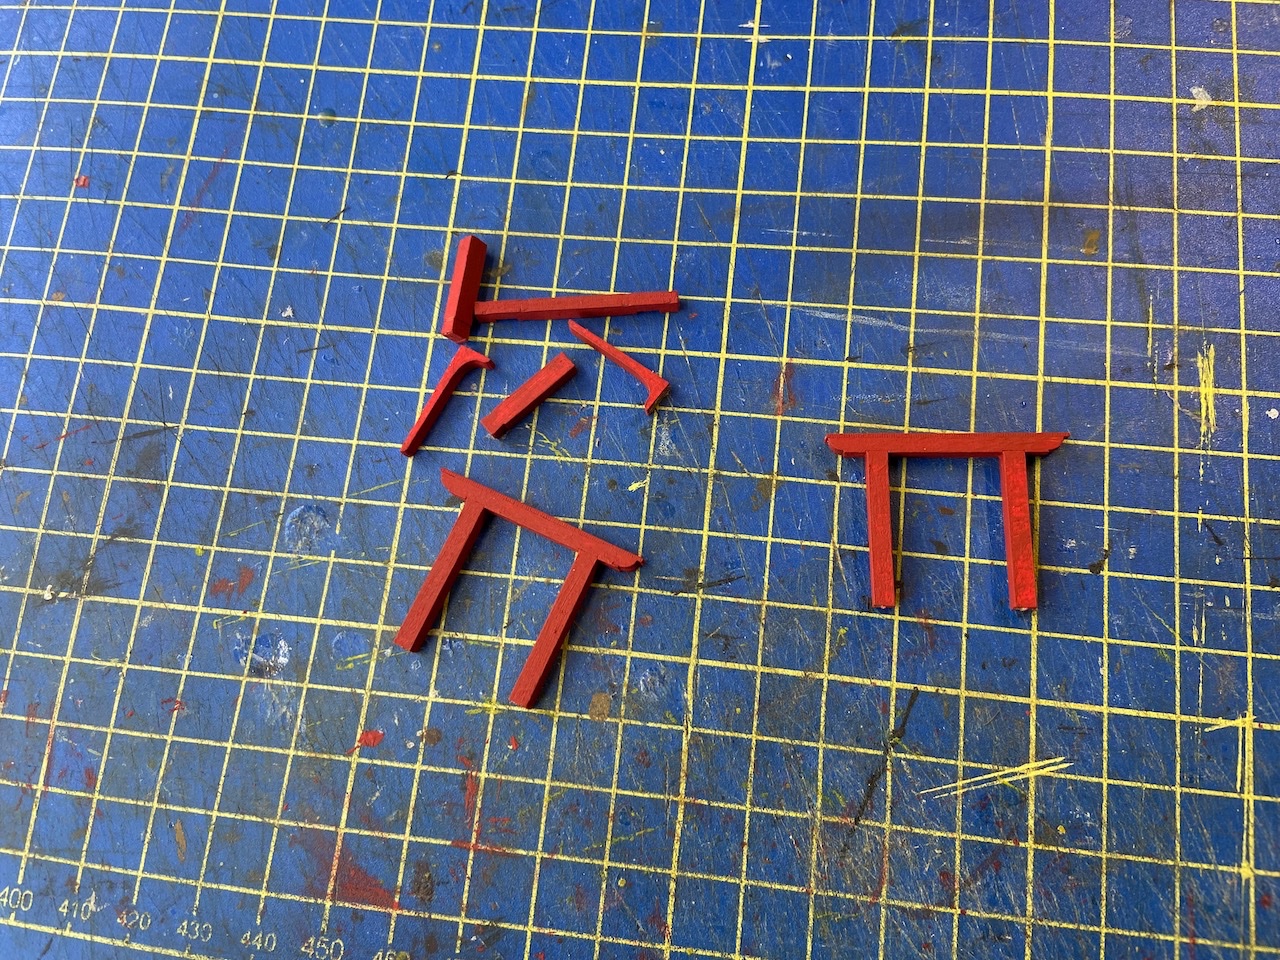
Progress continues to be slow at this stage, but I did decided on the above the deck paint scheme. I'm going all red, primarily. So, red gun carriages and wheels, and red hatch coamings. I chose this, mostly because I haven't used this color scheme before and, of course, because it does fit the era. I'll save natural wood color for wooden models, at least this time. I finished assembling the gun carriages. I had the common problem of the thicker cardboard parts being a little "squishy" and prone to damage, so I gave the completed carriages a touch of thin CA glue here and there, which hardens the parts as well as the joints, making them very solid. Afterwards, I painted them red, again, using a red mixture rather than the red paint straight from the included paint jar. I also started the long process of making and adding all the eyebolts and ringbolts. 5 eyebolts and 2 rings on each cannon means making a total of 50 eyebolts and 20 rings. I'm making them because the kit provides only spools of wire for the metal parts, and because commercially available eyebolts are too large. The kit actually has you using thin copper wire that they provide. But, I found the copper to be too soft for my liking. I've always made my own eyebolts out of black annealed steel wire, so that's what I went with here. I learned to make them the hard way, and still do it, forming a closed loop in a end of a piece of wire with the aid of a drill bit to form the loop. I'm going to try to make myself switch to the simpler method of forming an eye in the middle of a piece of wire, twisted around the drill bit. But, old habits die hard. It took a while to finish the gun carriages, but most of that effort was mental – switching gears to the production of the small metal work. As long as I'm on it, I'm going to continue the process for the gun carriages of another model project that's been sitting around. Plus, I need to make all the eyebolts and ringbolts for the bulwarks for the gun tackles and breeching ropes. Then, once I get the guns dealt with, I think it will be easier to then fit the deck furniture into place.

- 108 replies
-
- 10
-
-
I know a secret... 😉 Looking forward to the development of Number 13!
-
Hi Chuck, that info on the Allen is something I was unaware of. Thanks for the heads up on this. I looked up Crisman's work on the Allen and found some interesting leads. You may very well be right about Amati's kit being loosely based on the Allen. Just as the Allen appears to be loosely based on designs by William Doughty. Thanks for interesting and useful leads! Of course, it won't much difference to my model, which is essentially done. But, the information is interesting enough to follow up on.
-
Thanks Henry. I'm faking it this time, just tying off the line to the halliard. But, I do need to learn to properly bend a flag to a halliard.
-
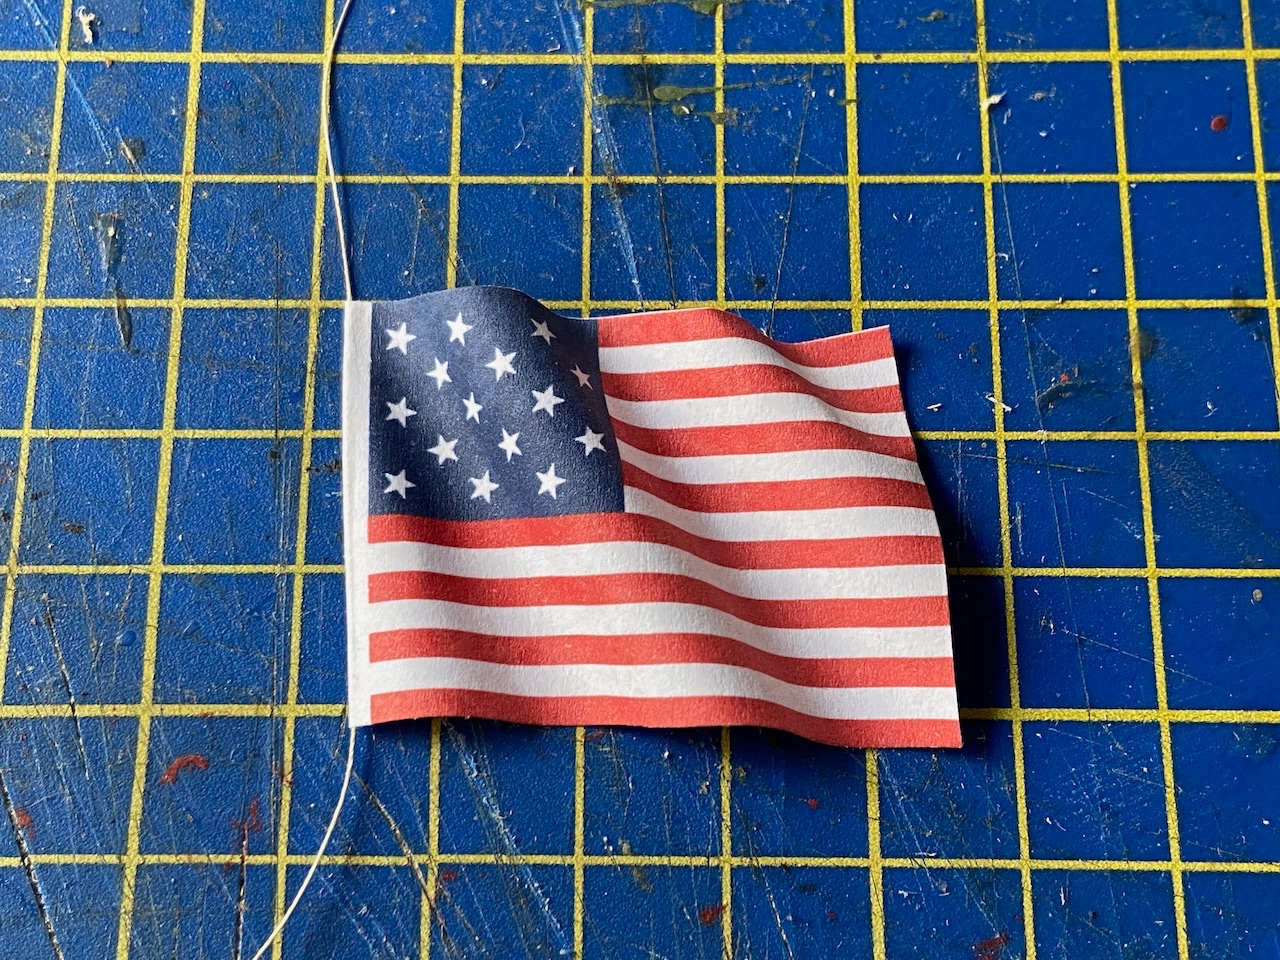
Thanks Phil (Dr. Phil?), I've been dragging my feet on this a bit, but today, I finally got around to making something in Adobe Illustrator. I haven't made a flag like this using Illustrator for a while, so I had to re-familiarize myself with the star tool. I was going to make some painting stencils using my vinyl cutter. But, seeing that this is a basic kit build, that seemed to be overkill. So, instead, I opted for a basic, fold-in-half flag printed on my Canon inkjet printer. I think it turned out quite well for what it is. The piece of line showing is not the flag halliard, but a piece of line that will help attach the flag to the halliard. I used 3M Super 77 to glue up the flag halves, and I may clean up some of white paper edge that you see on the red stripe and blue field at the top edge, or I'll just use scissors to carefully trim it. In any case, I'm pretty happy with how it turned out. As you can see, I went with the more square-ish proportions from before the flag proportions were standardized. Off to mount it on the model. Thanks all, for the help!

-
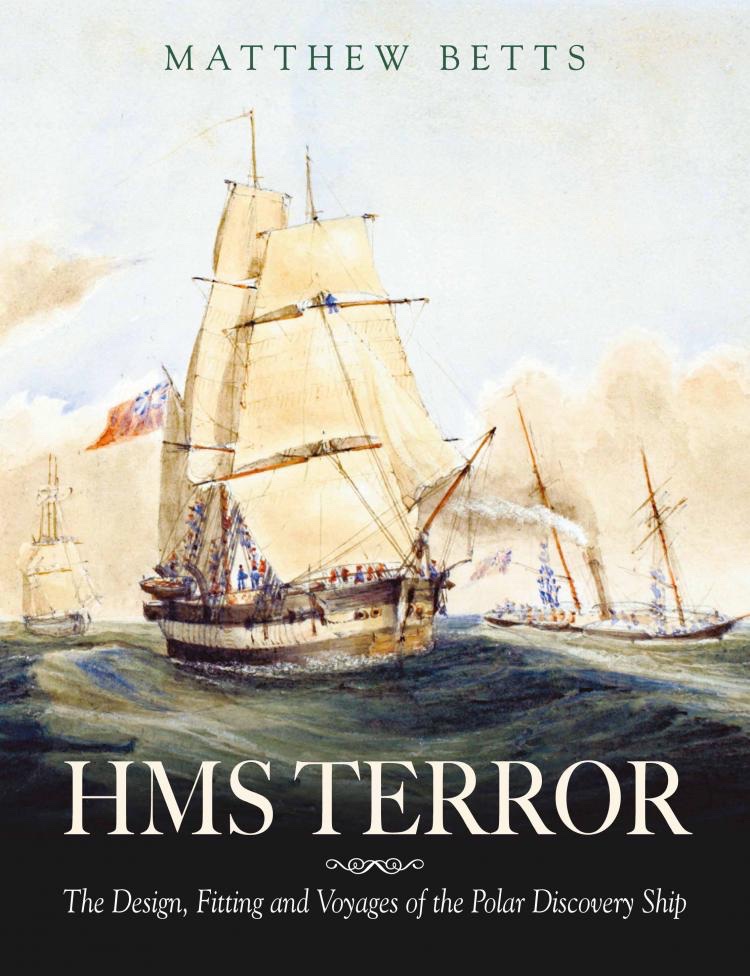
I was quite surprised yesterday when I saw that there was a new book available on the Arctic (and Antarctic) exploration ship HMS Terror of the ill-fated Franklin Expedition. What's more this is a book by Matthew Betts whose research, posted in his blog, buildingterror.blogspot.com, has been used in the development of OcCre's wooden ship model kit, in the development of the AMC miniseries The Terror, where he was also brought in as a consultant, museum displays, and more. The book is published by the Naval Institute Press. And, though they list the publication date as January 15, 2023, I have seen a photo of a copy "in the wild". The price is listed at $49.95, but apparently if you order your copy before the end of the year, you'll qualify for holiday pricing of 50% discount and free shipping – a better deal than Amazon Prime. Amazon, by the way, does carry the book, but price is $31.95 for the physical book. They also have a Kindle version for $24.99. However, you have to ignore the description of the books contents and its author, as Amazon seems to have mixed up this book by Matthew Betts with one by Ian Buxton. I have no information on the book's contents, except that it's 224 pages, and includes 250 color & b/w photos, prints, and line drawings, and the publisher's description: "This book documents the history, design, modification, and fitting of HMS Terror, one of the world’s most successful polar exploration vessels. Part historical narrative and part technical design manual, this book provides, for the first time, a complete account of Terror’s unique career, as well as an assessment of her sailing abilities in polar conditions, a record of her design specifications, and a full set of accurate plans of her final 1845 configuration. It is an ideal reference for those interested in the Franklin Mystery, in polar exploration, the Royal Navy, and in ship design and modelling." I'm sure much of the information can also be found in Betts' blog, buildingterror.blogspot.com, but I like supporting his efforts, so I ordered my copy today from NIP.
-
After a pause to get some other work done, I'm back to making some small progress on HMS Wolf. I took the time to consider the painting of the deck details, and got some ideas and information, but I'm dragging out the decision by working on parts unaffected by the decision, and working on parts that will be painted later. Some of the parts shown below need a bit more paint, but I might deal with that after some further construction work is done... Organizing assorted parts, some assembled, some not yet... Hinges on the sweep ports are incredibly tiny and there are NO SPARES... Advance work on mast tops. Why not? Capstan looks a lot better when not magnified by a camera! There are 23 parts that make up this assembly... Okay, the gun carriages don't look too bad when heavily magnified... FYI, I'm leaning towards painting the gun carriages red, and possibly the hatch coamings as well. This will make the deck very red. But, I don't have any models that display this kind of color scheme, so it will stand apart among my models. There's a long way to go yet, but I am getting close to the point where I'll have to start dealing with the masting and rigging. I've actually made up the deadeyes and just need to finish them up in preparation for mounting them. Pretty soon, I'll post photos of the full model again, once I have some of the deck furniture and other details in place. But, in the last photo of the previous post, you can see the model with most of the sweep ports in place. I actually did those a while back.
- 108 replies
-
- 10
-
-
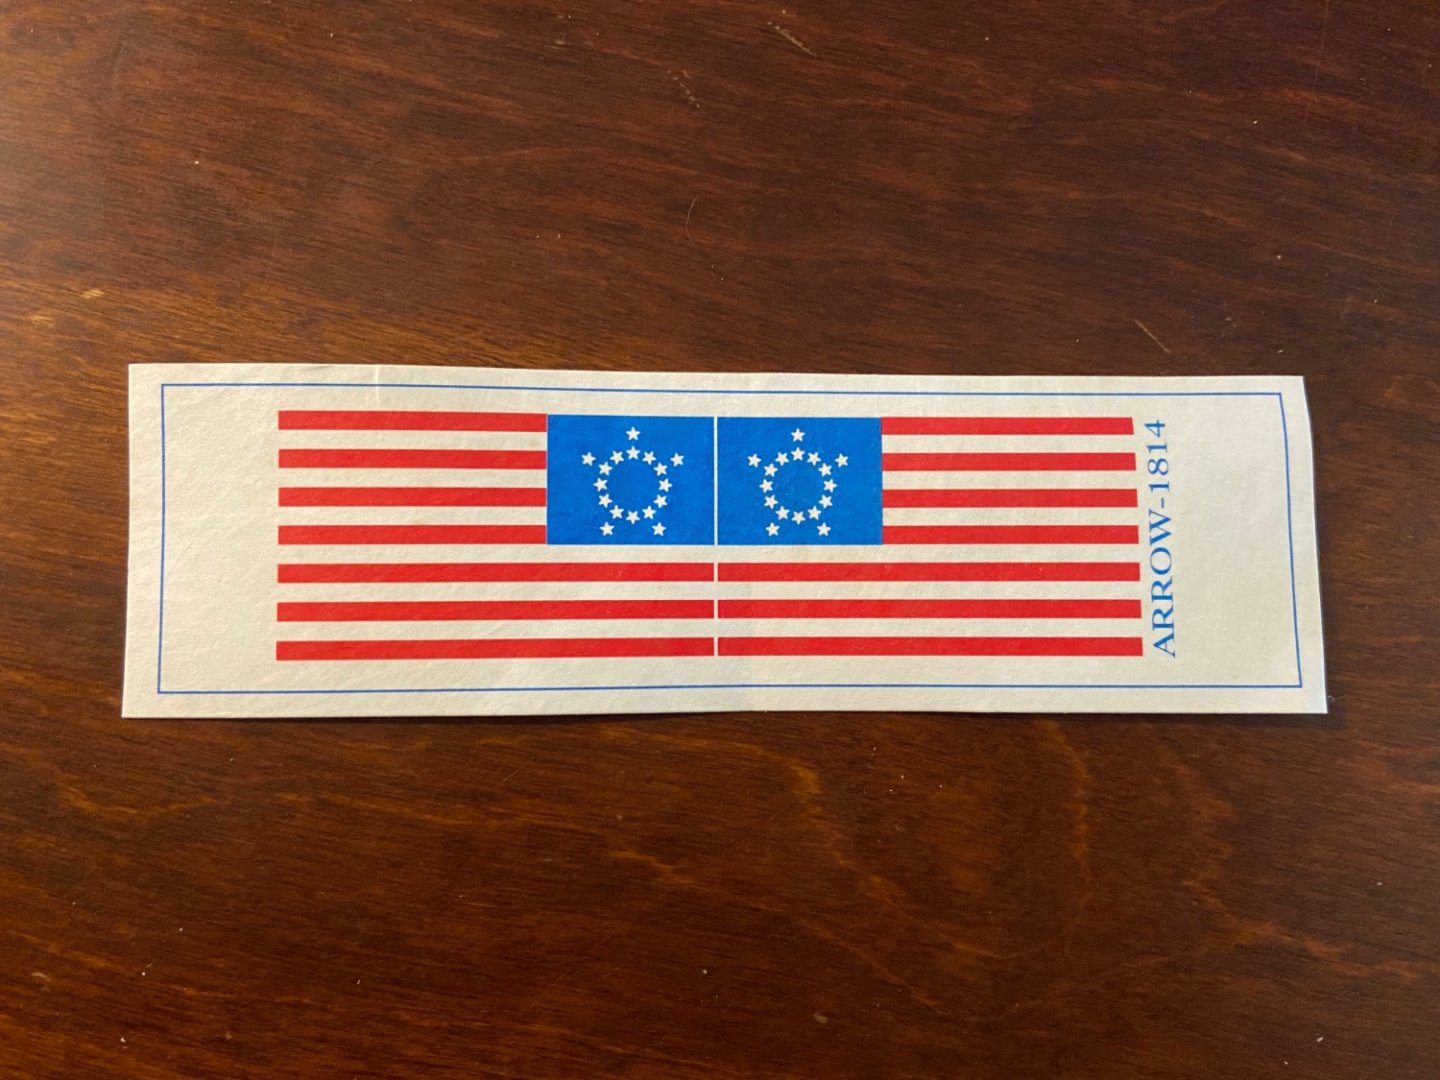
Thank you Henry! I knew someone here would know the facts. While the War of 1812 has always been a favorite subject of mine, it had never occurred to me that there were more states than stars on the flag during this time. I guess Amati's flag could have been one of many unofficial versions. I will probably go with the official 15 stars and 15 stripes flag. Much appreciated.
-
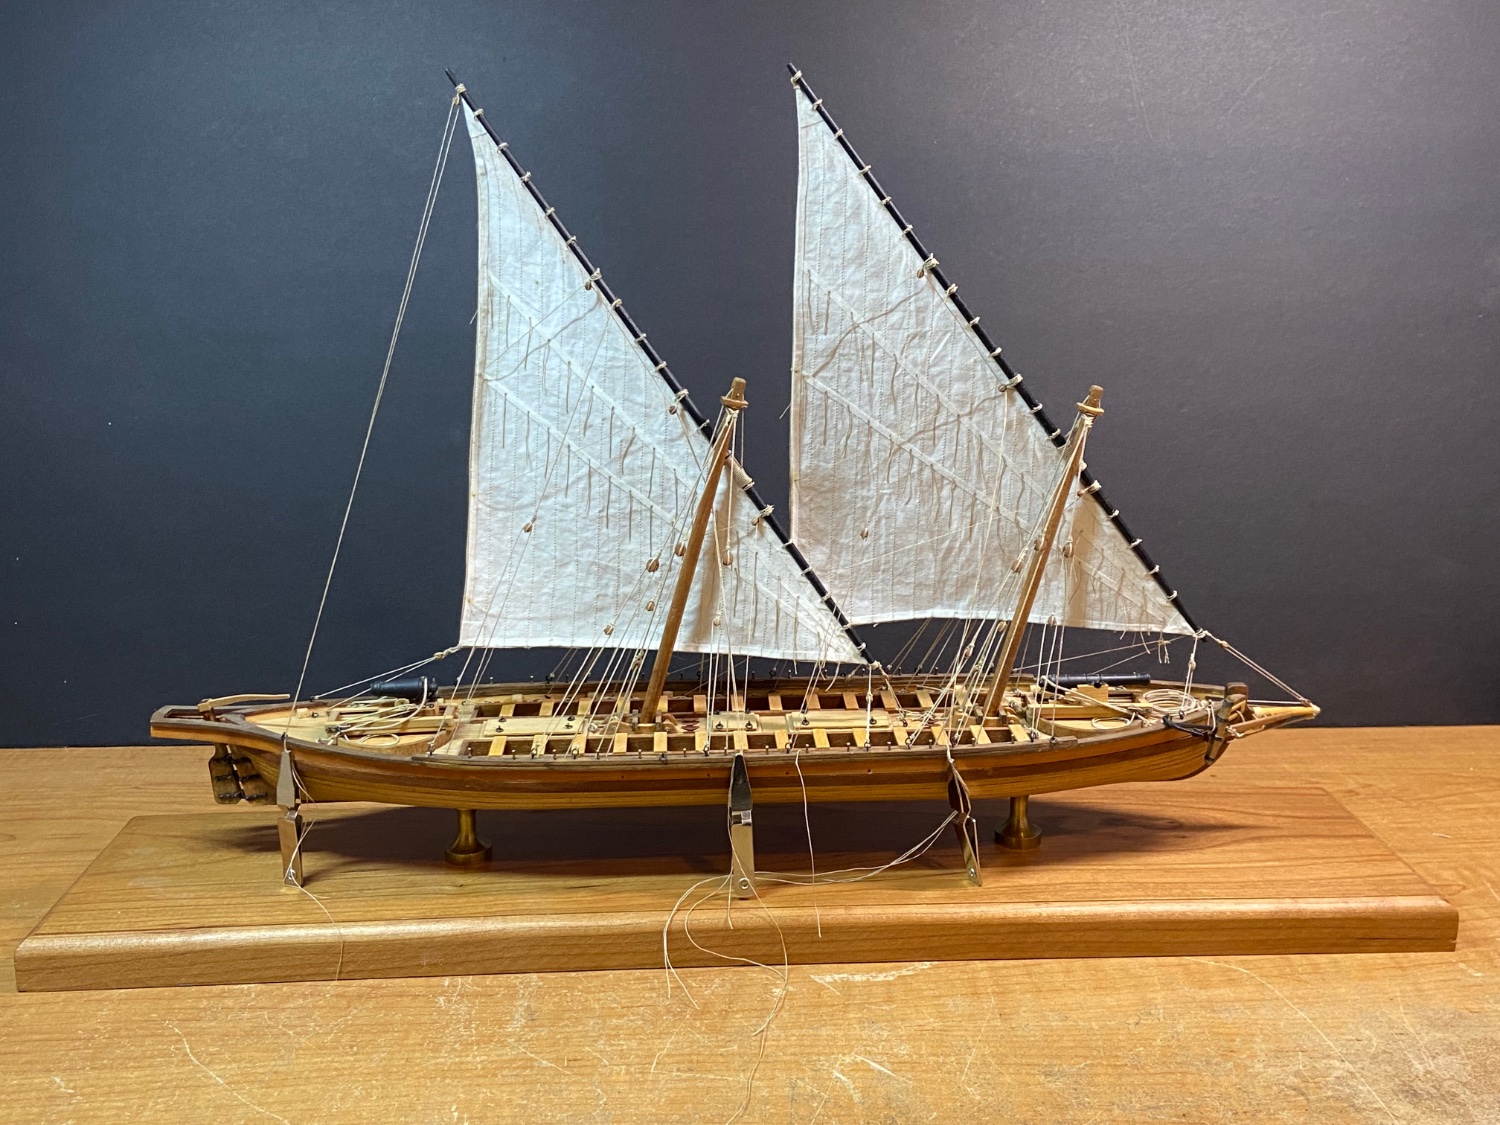
Just finishing up Amati's kit of an American Gunboat from the War of 1812 and I'm dealing with the flag now. FYI, this is a lateen rigged row galley that Amati calls the "Arrow" and bills it as a gunboat from the Battle of Lake Champlain. It is straight out of one of Chapelle's books, and apparently it may or may not have actually been built, but is a very interesting subject and has been a fun build. While I plan to make my own flag, I have the flag included in the kit, and it brings up the issue of a "proper" naval flag for the War of 1812. I've searched various online sources and don't see anything like this one, which shows 17 stars and 13 strips. It seems the US had 18 states at start of the war, with Louisiana becoming the 18th state in April of 1812. I would have attributed this difference to kit manufacturer error, which does happen. But, then it occurred to me that the most famous American flag, the "Star Spangled Banner" that flew over Fort McHenry, had only 15 stars (and 15 stripes). And, that seems to be the dominant configuration for any flag shown of the War of 1812. I know there was no real standardization of the American flag, and these things were hand made, and not to my knowledge by a "flag maker", but by seamstresses. Still, I have to wonder why it was made the way it was. Was there a conversation like: "How many states are there now? Ugh, one can hardly keep track of these things – they keep letting in more and more of them... Well, this one's just going to have to have 15. I'm certainly not going to redo it for the paltry sum we're getting paid." Anyway, I could certainly make a 15-star, 15-stripe flag with this gunboat, but I was wondering if anyone has more definitive info about it?

-
Ollie is right in that Artesania Latina has done a re-release of the Santa Ana kit. I don't believe anything has really changed, it's not touted as a revision, just a re-release. In any case, it's a nice looking ship. As for the plans sheet, I wouldn't suggest dismissing the kit outright because of a deleted plans sheet until after you've looked over the instructions, which can be downloaded from the AL website. You can get straight to it here. I'm sure you'll soon start to see the kit show up wherever Artesania Latina kits are sold.
-
Congratulations Snug on a fine job! Does Woody Joe know about your completed build? I know they always like to hear about such things. I'll have to add the kit to my list. Plus, now is a really good time to buy from Japan, given the exchange rates.
- 63 replies
-
- 3
-
-
- Finished
- Khufus Solar Boat
- (and 1 more)