HOLIDAY DONATION DRIVE - SUPPORT MSW - DO YOUR PART TO KEEP THIS GREAT FORUM GOING! (Only 13 donations so far - C'mon guys!)
×


olliechristo
-
Posts
412 -
Joined
-
Last visited
Content Type
Profiles
Forums
Gallery
Events
Everything posted by olliechristo
-
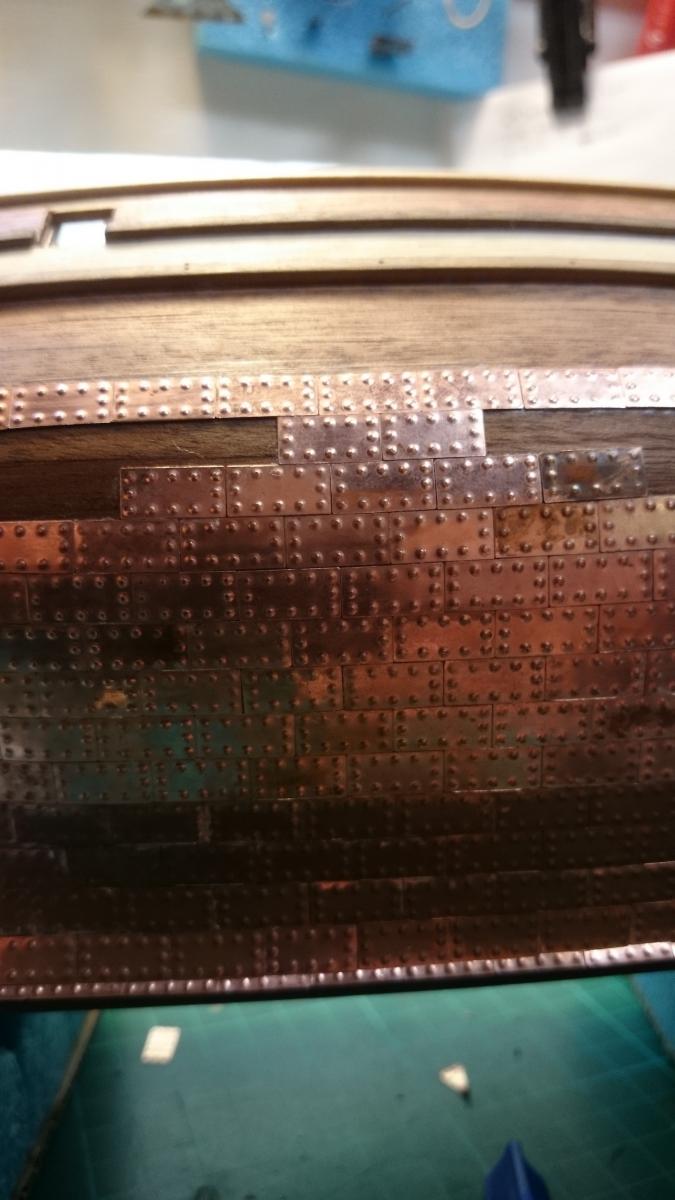
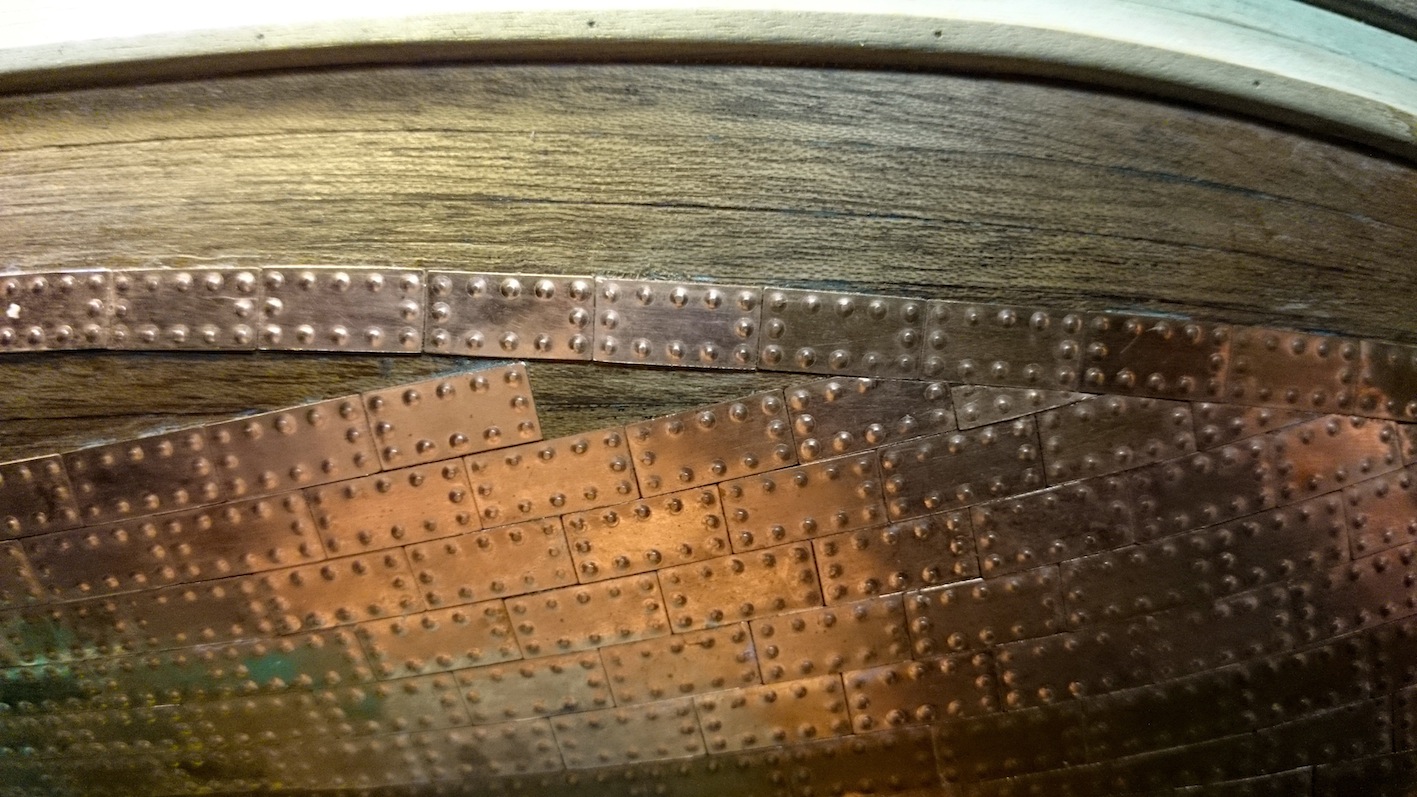
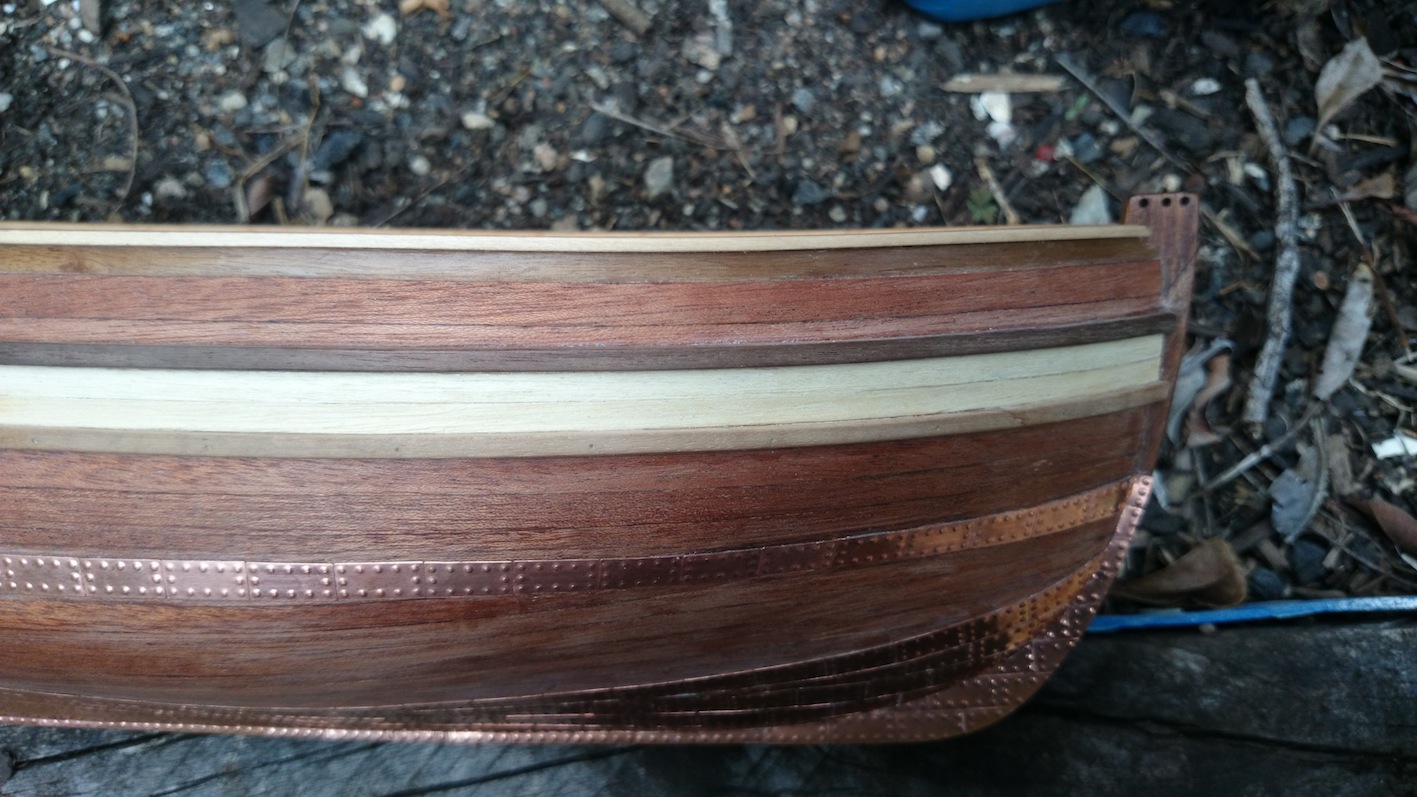
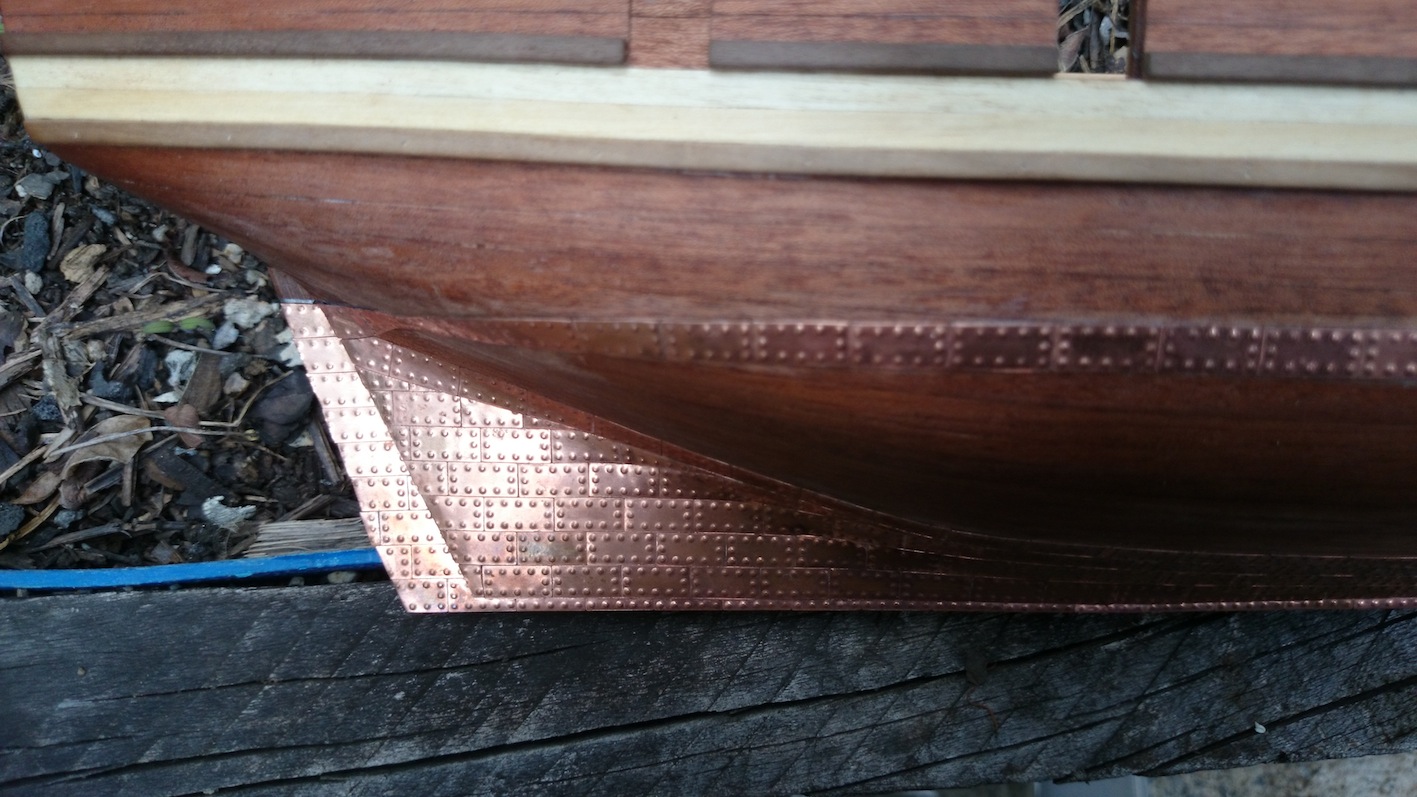
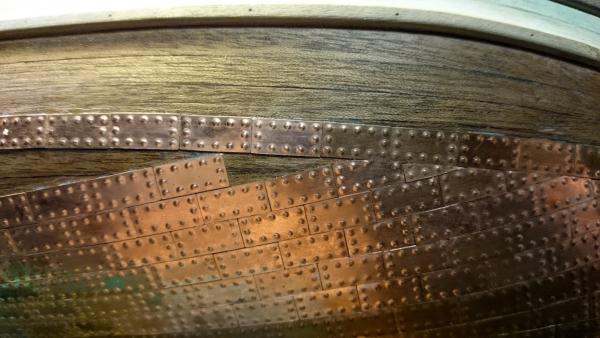
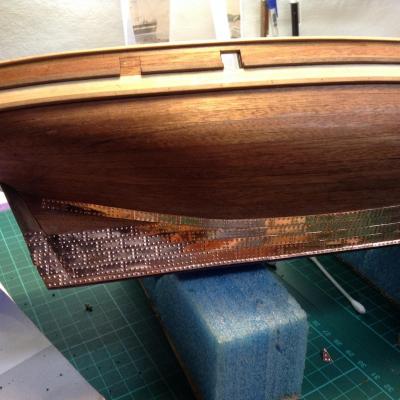
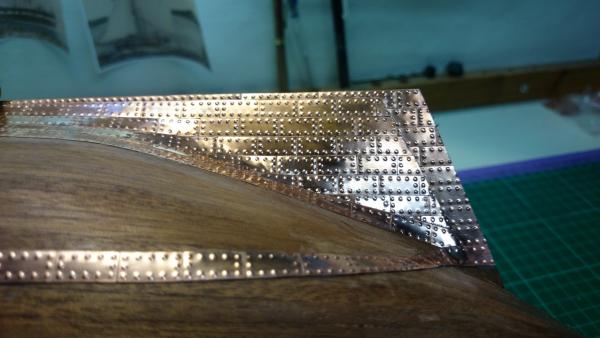
 Hi all, finished my copper plates.. adding 10 hours to log.. It was all going well till i noticed a few of plates were not holding... this could have been due to oil from fingers whilst cutting and filing... i advise sanding or scratching the back of plates to ensure a good bond.. any that seemed at all loose, i removed and re applied with scratched up back, they held well... Planning what to do next, rudder parts will be a while.. Will probably tackle, channels, anchors, skylight and other pin rails etc.. It all should start to come together now as i have already finished many deck fittings.. Thanks for looking.. Regards Ollie
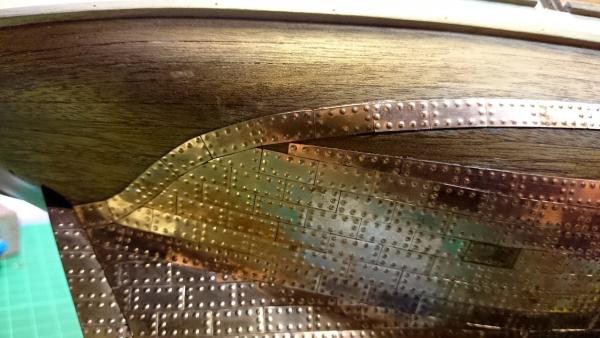

- 803 replies
-
- 3
-

-
- colonial cutter
- modellers shipyard
- (and 1 more)
-
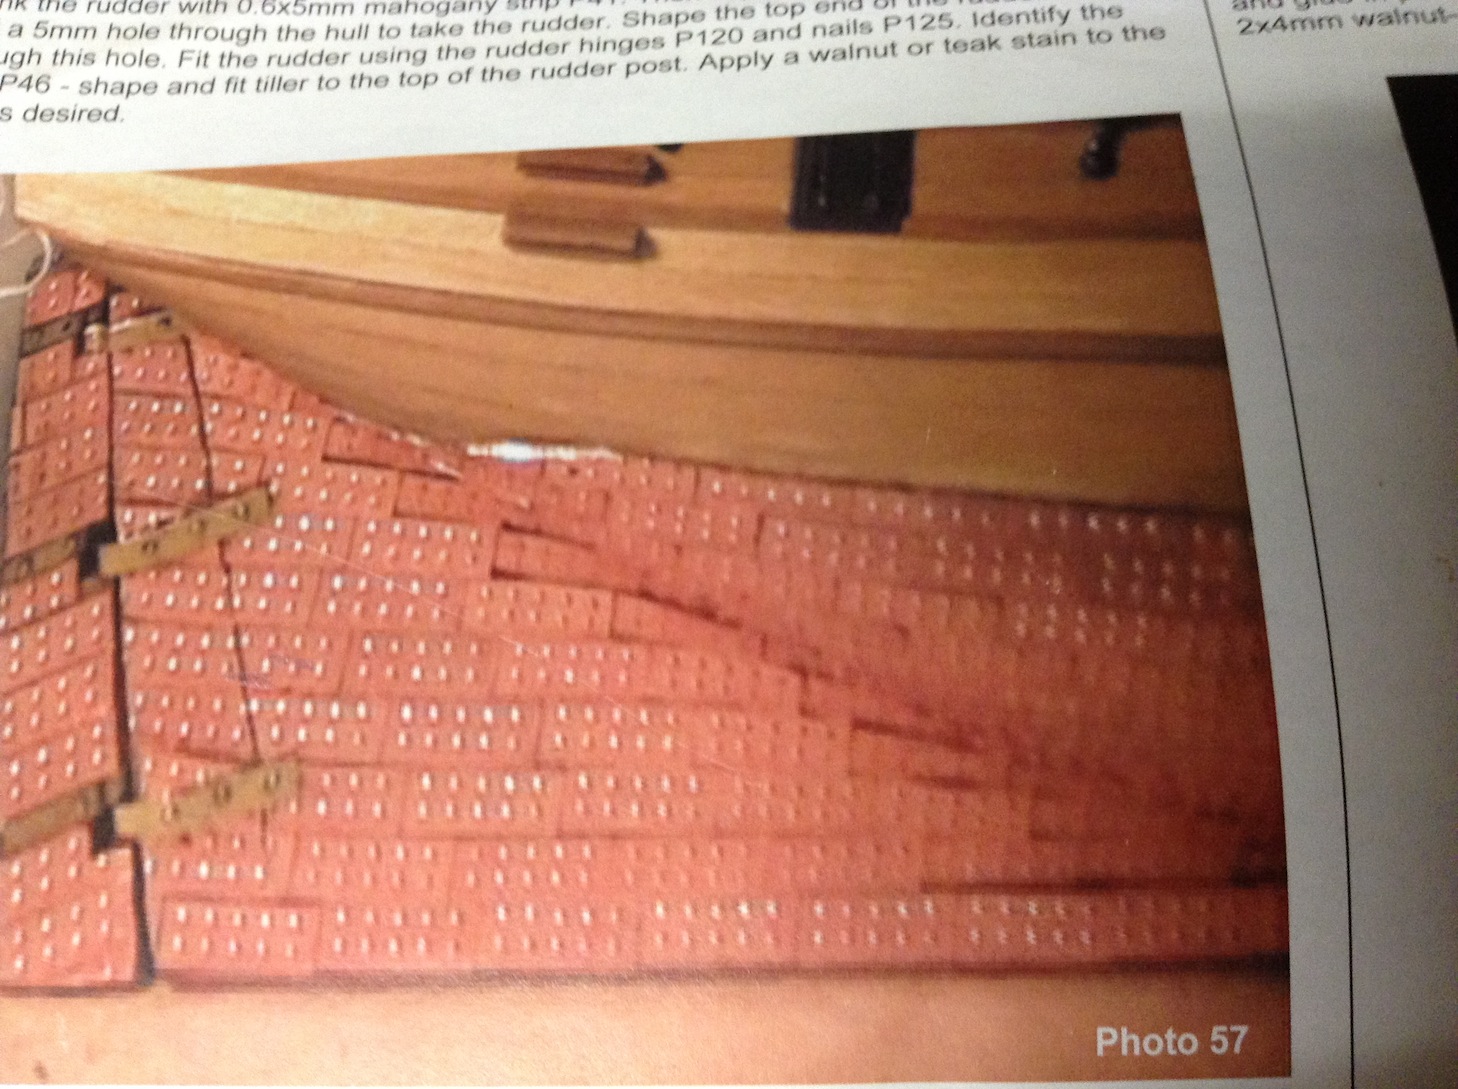
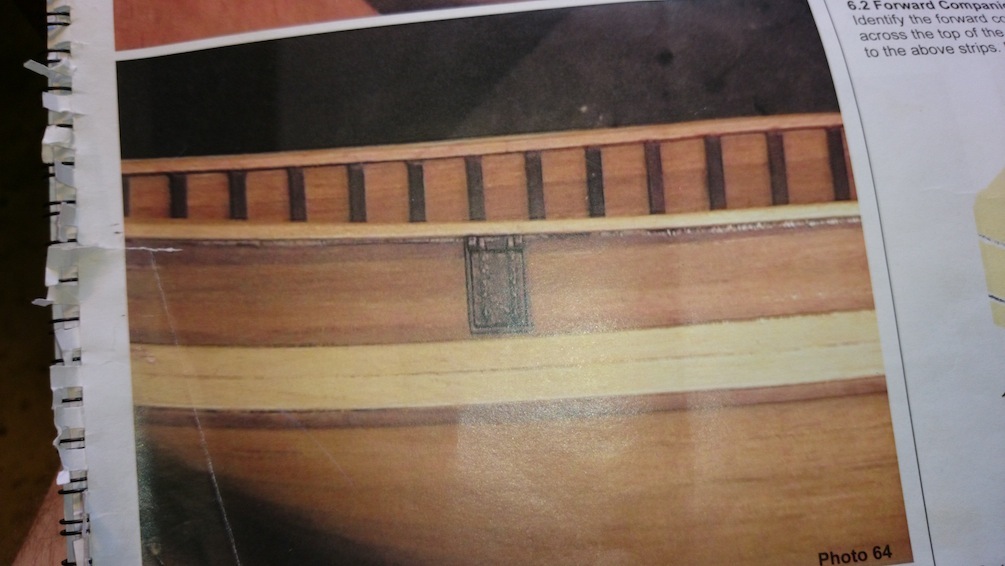
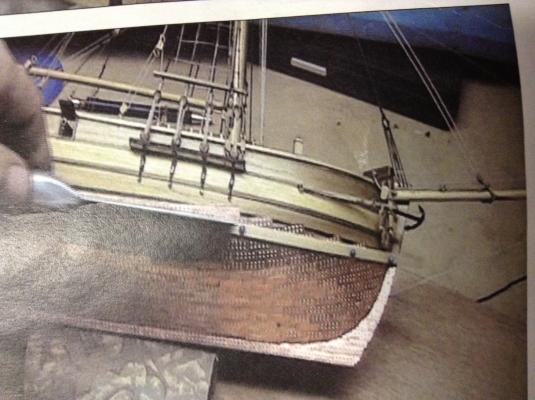
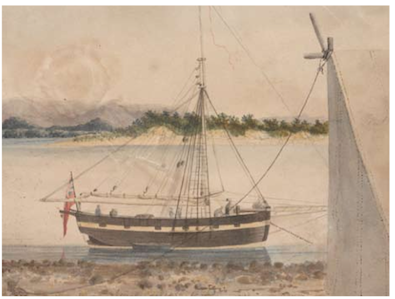
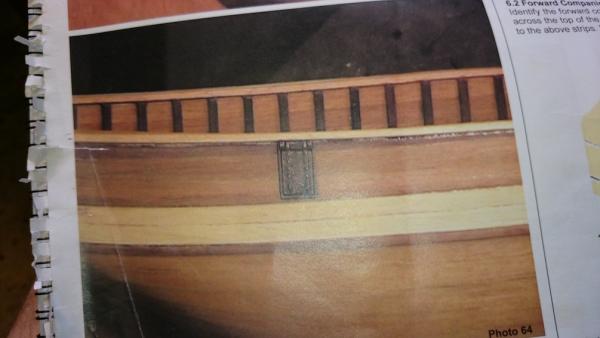
Hi Alistair.. Yes what you said sounds right in regards to this method, but i am in the deep end paddling with you mate.. Even my pictures in plans show two techniques.. many ways to skin a cat type scenario i suppose.. One shows stealers at stern and one shows horizontal, parallel plates. I also studied Rays Diana and Pegasus, you pointed me towards and like the way it finished up.. I tended towards this method for whatever reason.. The look i think.. I like having to cut less plates. Also whilst my plates do not actually overlap i am visualising that they are so plates are cut accordingly.. I hope that helps you understand my choices.. Ollie Heres a couple of pics from booklet to show you what i mean, i will be cutting up to the top row (which is already fixed now) as i see this as being much safer than cutting the water line on the ship as advised in plans.. .. one slip and your gone.. i didnt buy the dvd but you can watch part of it on the coppering, on youtube.. (modellers shipyard) Ollie


- 803 replies
-
- 3
-
-
- colonial cutter
- modellers shipyard
- (and 1 more)
-
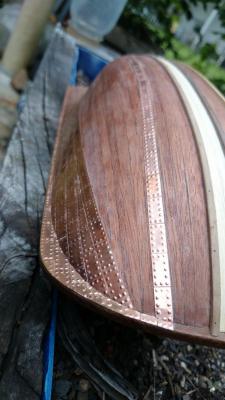
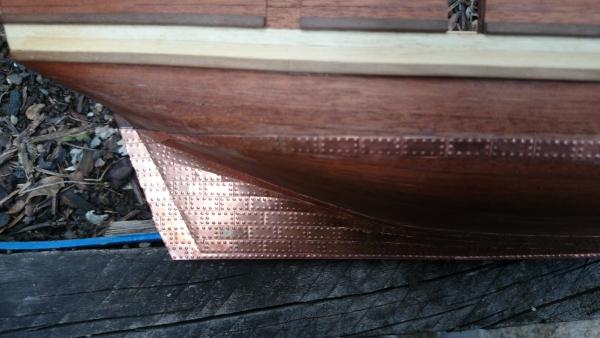
Hi all. I have spent about 10 hours since last mention of time.. I am plodding away at plates and really enjoying it.. Happy with the effect. Thanks for all the help and ideas as usual gang.. I have done the gore line technique and now i have a straight line to work off back towards water line.. I decided to raise the waterline at bow, it seems to show this on the instructions mdel.. Will post another pic when copper is done.. Thanks all.. Ollie
- 803 replies
-
- 4
-
-
- colonial cutter
- modellers shipyard
- (and 1 more)
-
I think that looks fine Rod.. I felt i almost laid my planks too tight and you cannot see the definition of planks that clearly.. I also think when you sand it will not be noticeable but defined enough if you know what i mean.. .. I hope that is of some help..
-
Rod that is all looking really good.. It may have been better/easier for sanding to leave stern post off till second planking done, but im sure you can butt the planks up nice and neat to finish at stern and wont come out much different. I think your planked keel came up nice too mate... From my little experience and what was advised to me is... go really slow on second planking, do as much reading as you can and yeah really take your time.. Did i say take your time.. Just one plank can take a bit of time to get right..... Regards Ollie
-
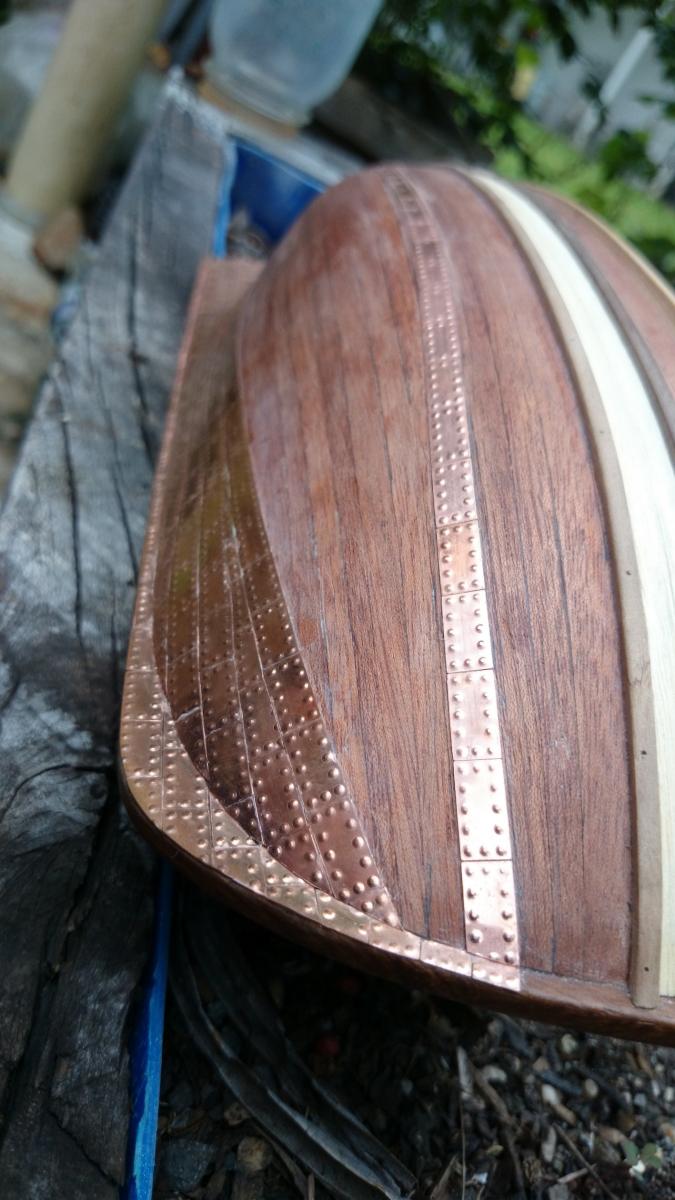
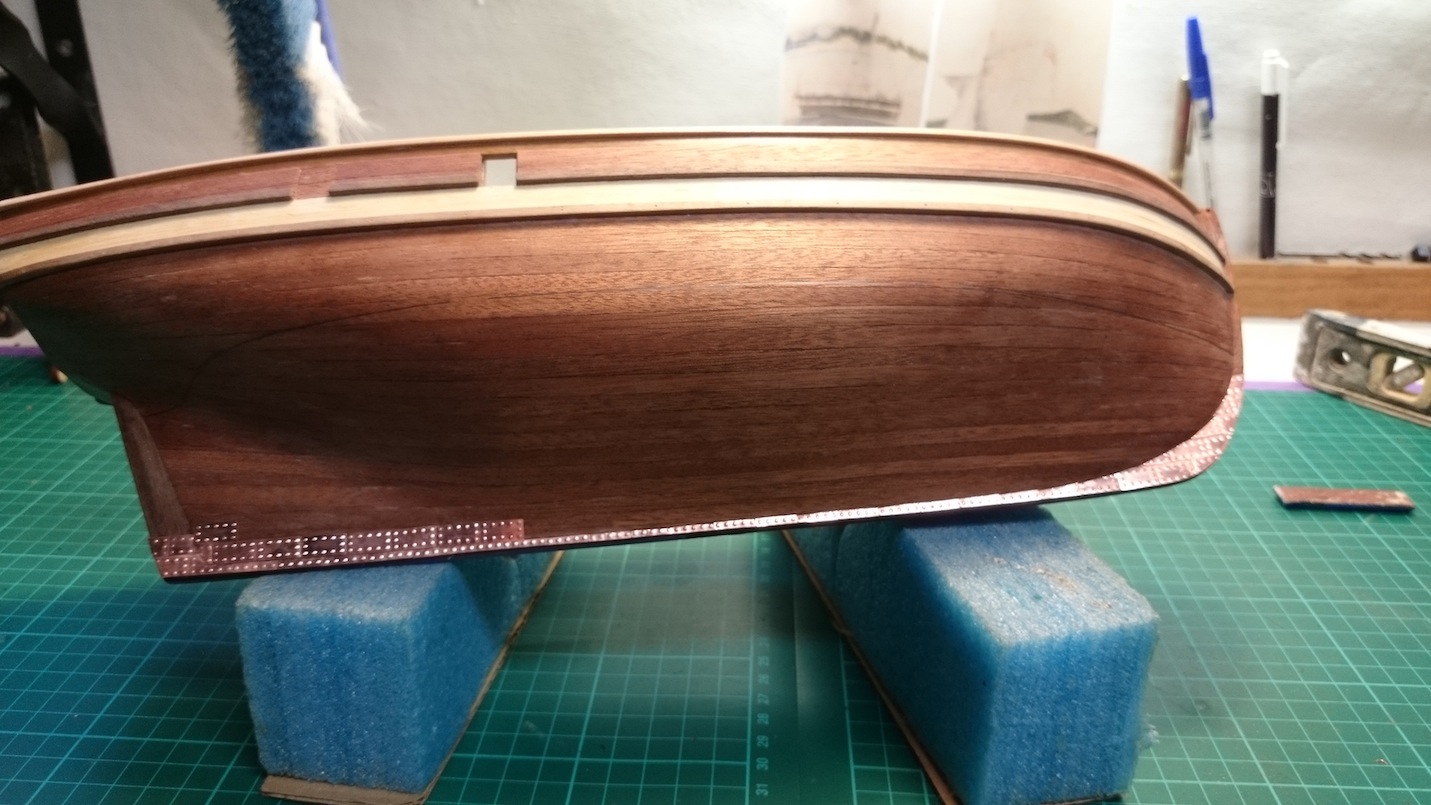
Thanks Rod.. Im only doing copper on one side,, which also means i have plenty of plates to play with.. this side is also painted. Its my more authentic side... The other side will remain all timber I get to try out most mediums... And i kind of get two models out of one.. Ollie
- 803 replies
-
- 3
-
-
- colonial cutter
- modellers shipyard
- (and 1 more)
-
If I was you I would start working on something else.. Or attack that tree
- 1,039 replies
-
- 1
-
-
- ballahoo
- caldercraft
- (and 2 more)
-
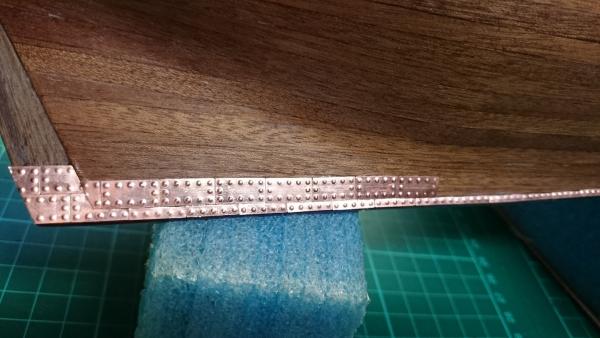
Thanks all.. Alistair that is really well said and resonates with me. I understand the overlap much better now, just to decide which way now.. I gather they overlap right to the next set of rivets.. They are 6mm x 12 x 0.2 thick.. I may leave keel as is and overlap the hull as I can see it would prevent a lot of cutting.. Regards all.. Ollie
- 803 replies
-
- 2
-
-
- colonial cutter
- modellers shipyard
- (and 1 more)
-
Thanks all.. John I did not know they should overlap.. Could be too late to change that,,, These instructions from kit are not helping much really.. Thanks all..
- 803 replies
-
- 1
-
-
- colonial cutter
- modellers shipyard
- (and 1 more)
-
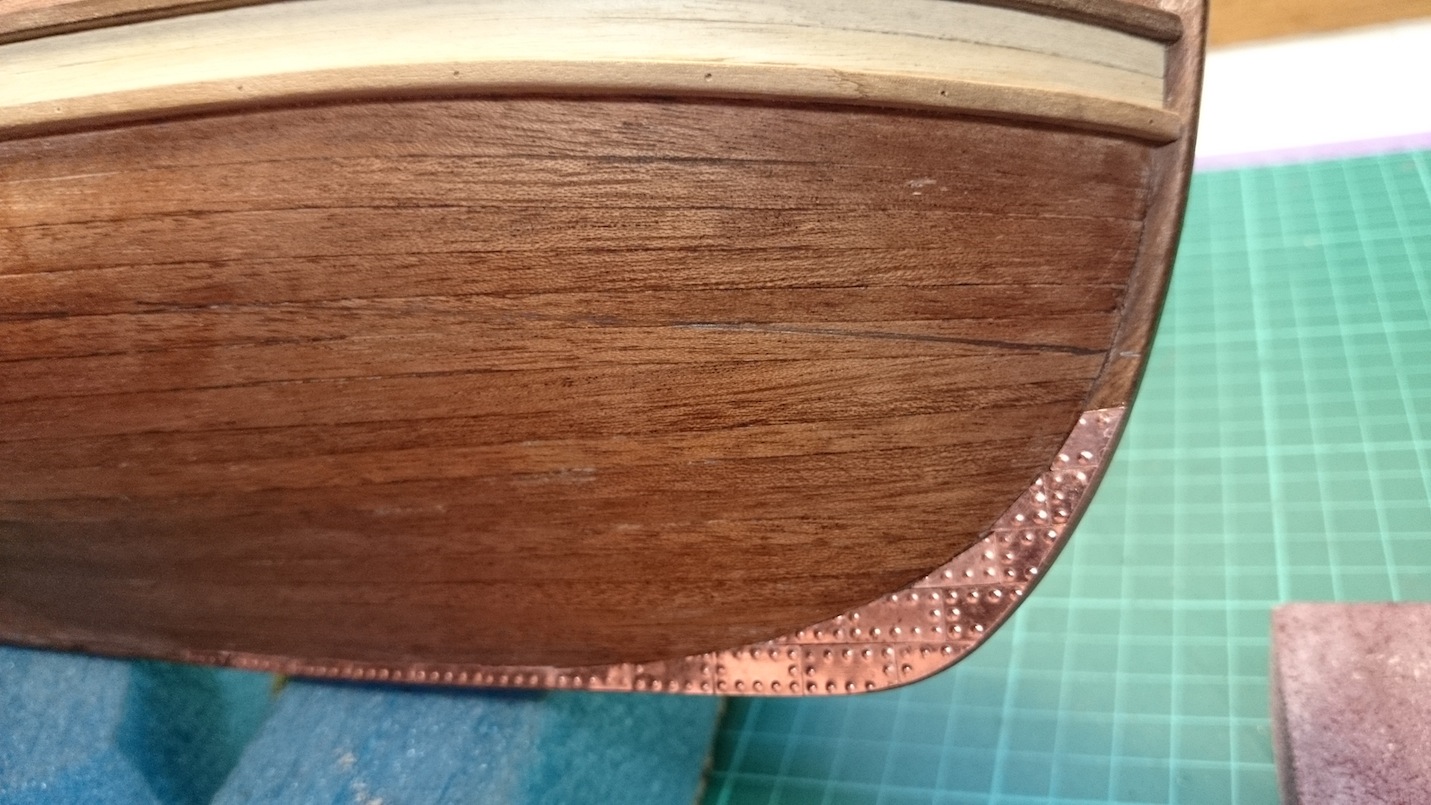
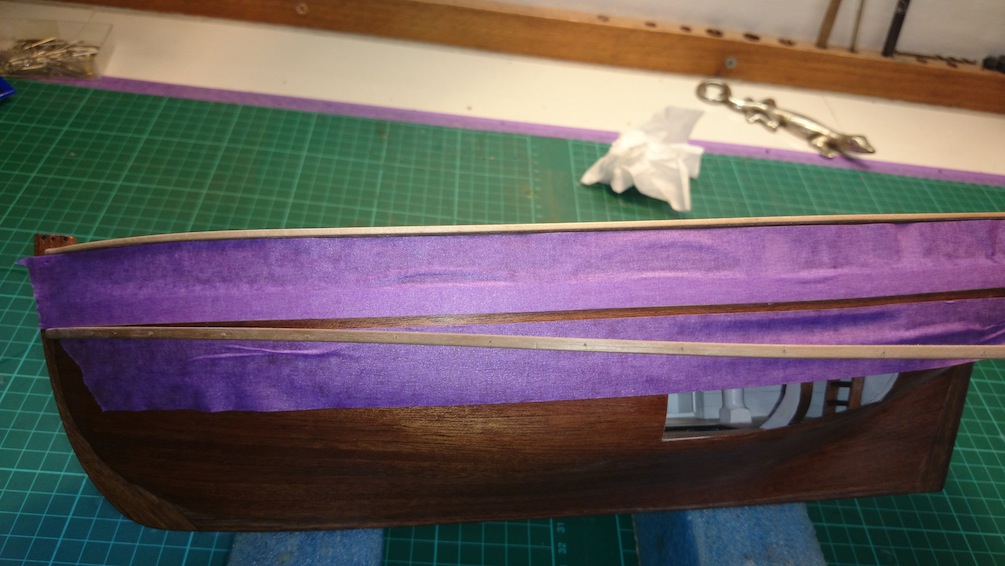
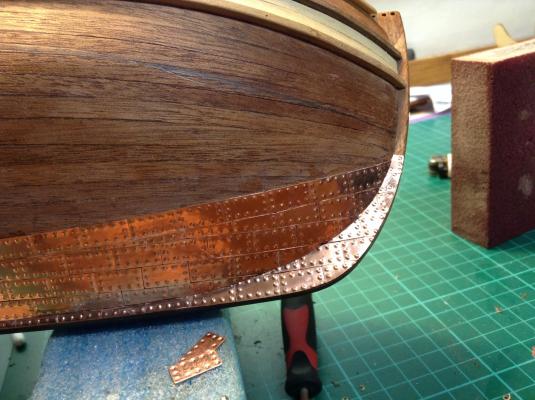
Hi all, started my copper on hull today.. Being a mosaic artist and tiler, i think i have this one sorted... I am very happy with how it is going and much like a mosaic or intricate tiling you just have to get into that meditative rhythm and hand cut most pieces.. . i got some gel CA in a very easy to use applicator.. Works well but will need a bit of cleaning up on some spots.. One thing i am wondering with marking of waterline.. Do you level referencing deck or the keel to mark it? Or does it depend on ship.? I have leveled the deck from bow to stern.. .. I think that seems logical.. Regards Ollie

- 803 replies
-
- 3
-
-
- colonial cutter
- modellers shipyard
- (and 1 more)
-
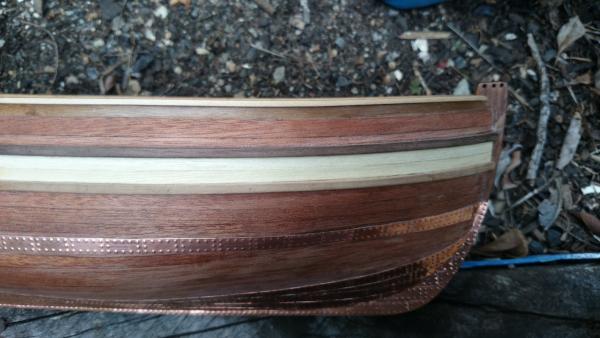
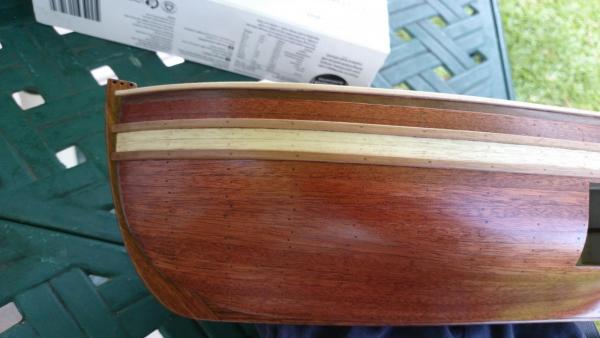
Hi all.. Thanks John, Bindy and tom.. Another 5 hours doing my fake tree nail detail on hull.. I have three different shades of putty i have made up.. I try many shades till i am satisfied.. I thank everyone here for the tips, to think i wasn't even going to do tree nails.. They certainly help the viewer understand the underlying construction of this tye of ship.. I am happy with it that;s for sure.. . I managed to achieve the effect i wanted.. Visible but not standing out obviously... Click on images to see closer up// regards Ollie
- 803 replies
-
- 6
-
-
- colonial cutter
- modellers shipyard
- (and 1 more)
-
Fascinating.. I really love what I am learning along the way. I need to do more reading, i just started the Nutmeg of consolation.. The kit supplies two canons, do you think this was what she had most of her life? Just the two canons and culverins John? Many thanks Ollie
- 803 replies
-
- 1
-
-
- colonial cutter
- modellers shipyard
- (and 1 more)
-
Yes I know what you mean, I am thinking of painting the dummy ports on the painted side.. I don't think there was actually any need for more canons and any room to fit them..She is a very small vessel.. i dont think we had too many pirates on our coastal waters of Australia so nut too much need for defence etc... I'm sure John could bring some light on this, when he's about.. ... Ollie
- 803 replies
-
- 1
-
-
- colonial cutter
- modellers shipyard
- (and 1 more)
-
I look forward to following you on this journey. What a lovely ship to build. I would like to build a Chinese ship, if i could find a sampan I would like to do that or scratch one... Your off to a flying start.. Yee Ha Regards Ollie
-
Thanks John.. I know i'm on the right track, just get a bit paranoid at times.. Eammon, Yes i will add more tree fake tree nails, these ones have not been puttied yet.. just full of sawdust. On the painted side i think i will just let the paint fill the holes and hopefully leave a slight impression, if they look too obvious i will putty them some... Ollie
- 803 replies
-
- 2
-
-
- colonial cutter
- modellers shipyard
- (and 1 more)
-
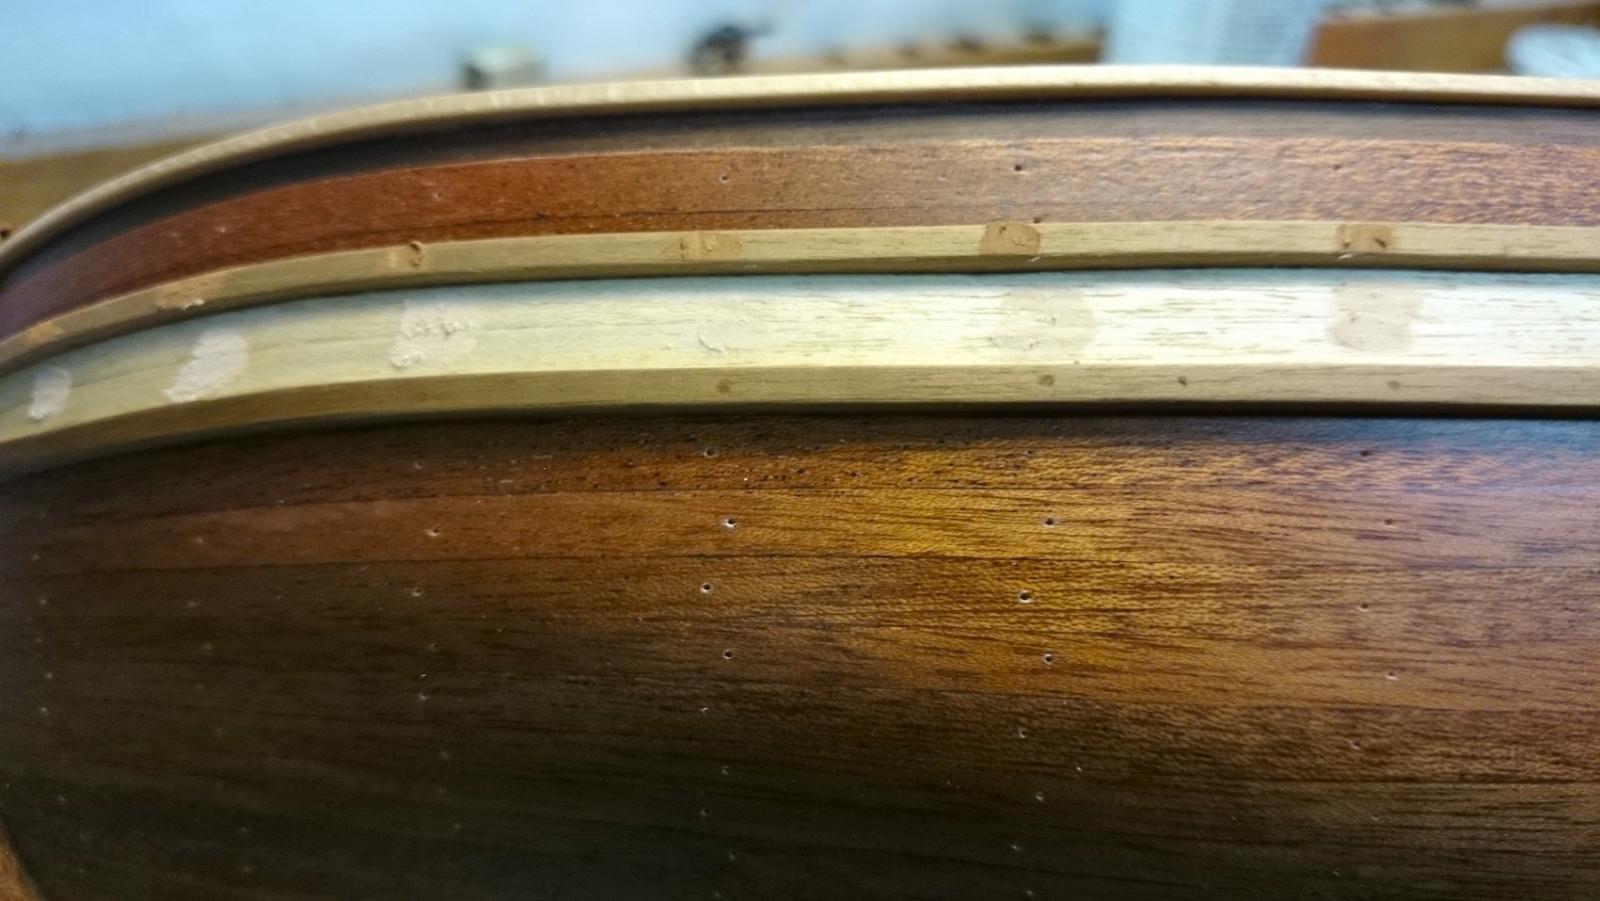
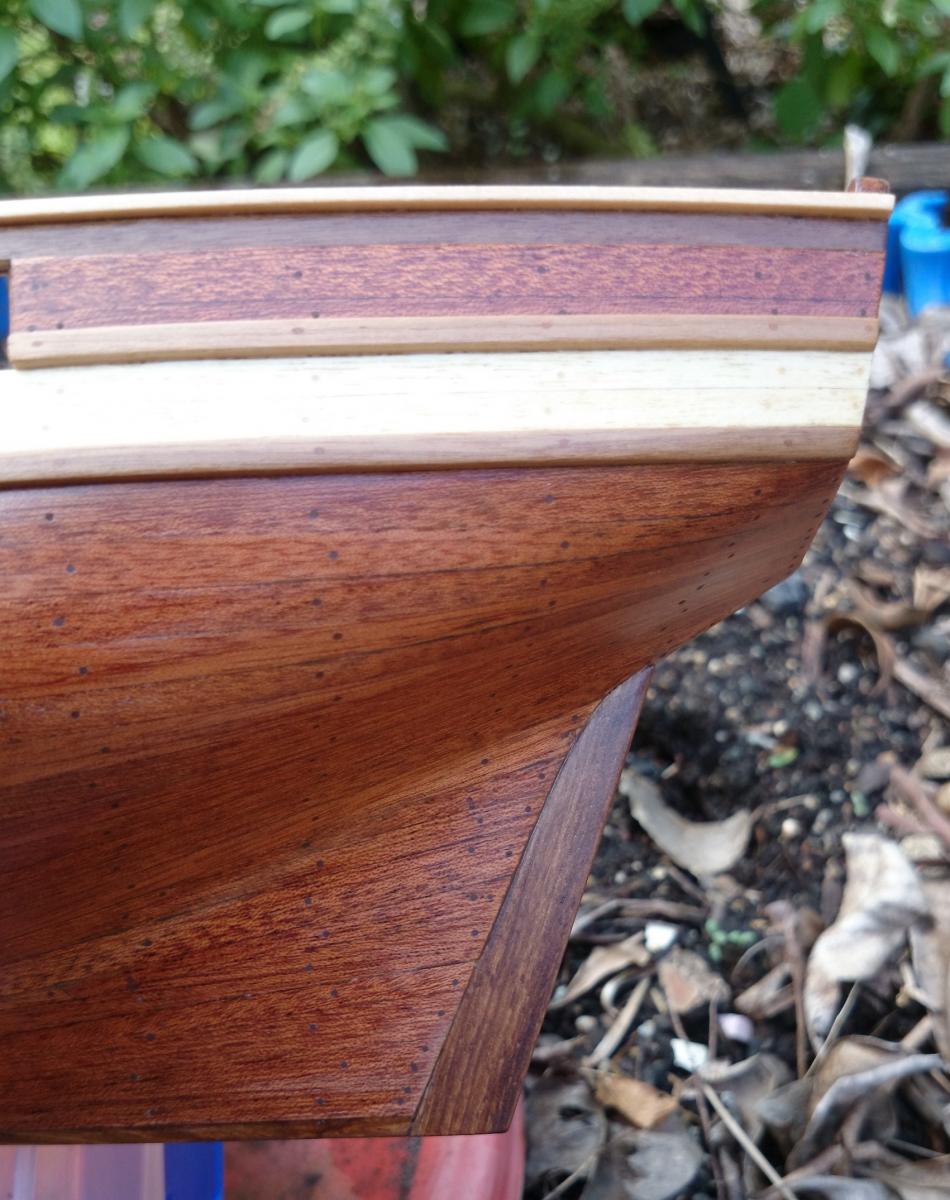
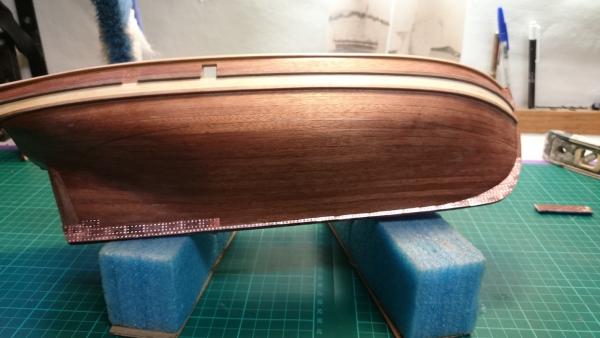
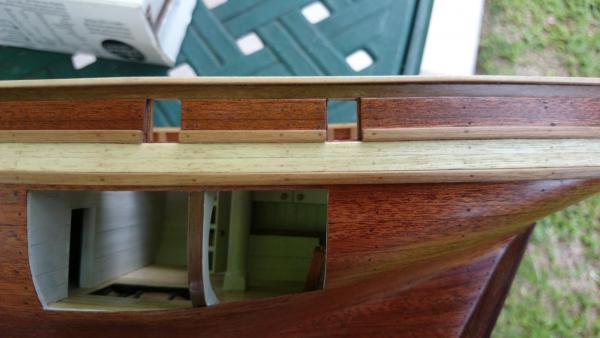
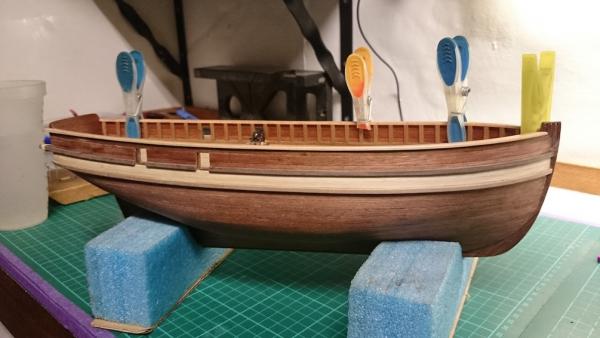
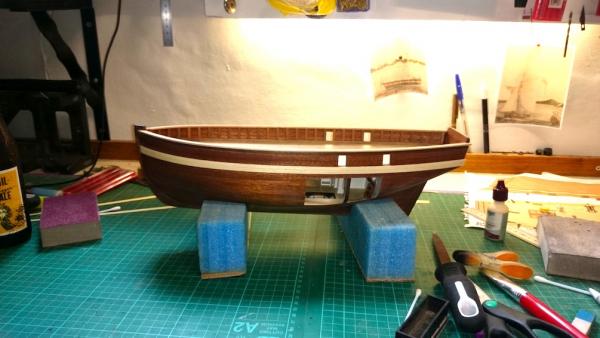
Here is how it looks.. Please tell me if i could have done my ports a better way. The side shown here is to be the painted and coppering side so some changes still could be made.. You may notice i was provided with one length of walnut that is considerably darker... The natural wood finish side i am yet to fix the top wale trim.. Regards ollie
- 803 replies
-
- 3
-
-
- colonial cutter
- modellers shipyard
- (and 1 more)
-
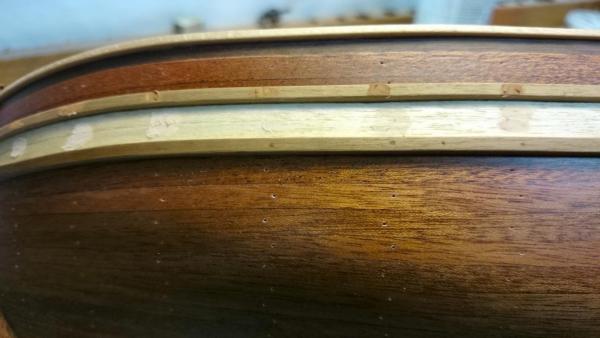
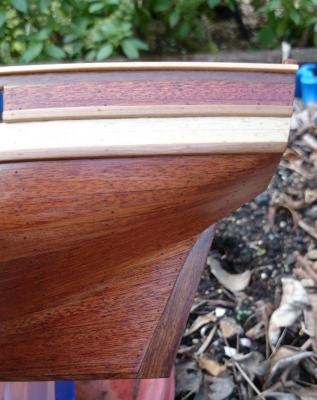
They are known as "sky hooks' Eamonn.. I have gone ahead with wales looking at the historic painting i noticed the gun ports actually intrude into the wales.. I hope this is okay as it looks a bit funny and i noticed this does not happen on many other ships. In the instructions and other builds ive seen the wales are continuous.. The painting with dummy gunports shows them going about half way,, In other pictures it shows gunports right into wales.. I couldnt have achieved that with deck heights to rails etc but in hindsight they could have been placed a little higher.. Scratch building my gun ports threw me a bit instead of using the cast ones.. ... I assume it is unlikely wales continue on gun ports lids? Regards Ollie


- 803 replies
-
- 2
-
-
- colonial cutter
- modellers shipyard
- (and 1 more)
-
I emailed the supplier and they replied straight away, sending some out on monday... Good service.. i thought they were gudgeons, but they are also a fish in my fishtank
- 803 replies
-
- 1
-
-
- colonial cutter
- modellers shipyard
- (and 1 more)
-
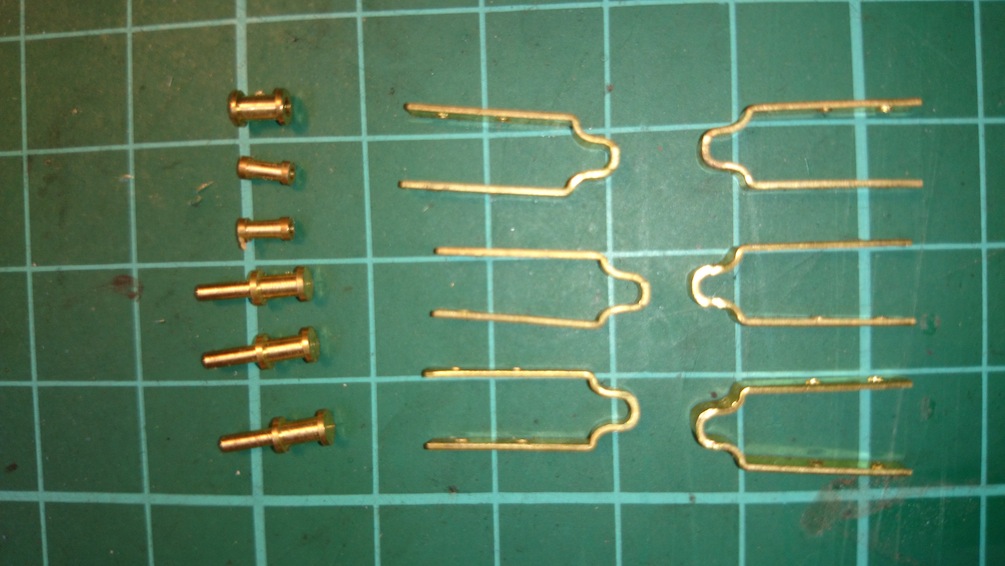
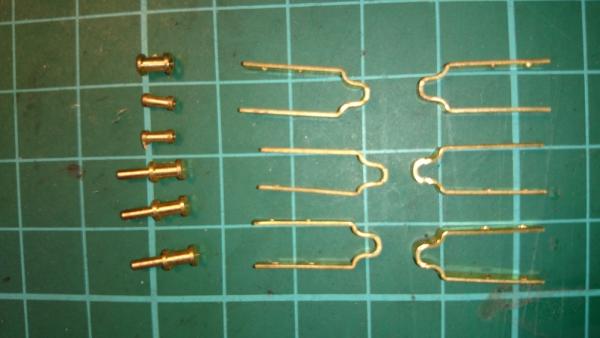
I have encountered a small problem, or misplacement.. I got out the rudder parts and seems two sleeve parts are too small.. And if i have lost the two larger sleeves (which i doubt) then what would the two smaller ones be for??? Please correct me on terminology of these parts,, just named 'rudder parts' in kit.. I will email the supplier and order more if i have lost them.. Ollie
- 803 replies
-
- 1
-
-
- colonial cutter
- modellers shipyard
- (and 1 more)
-
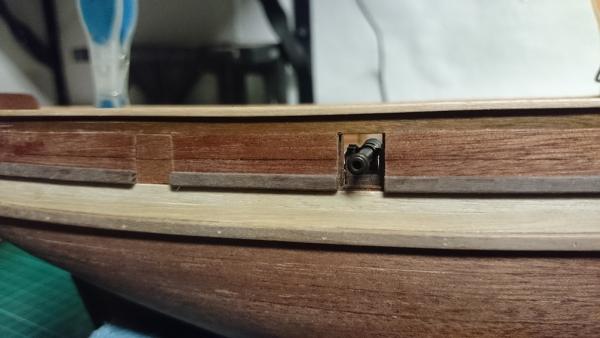
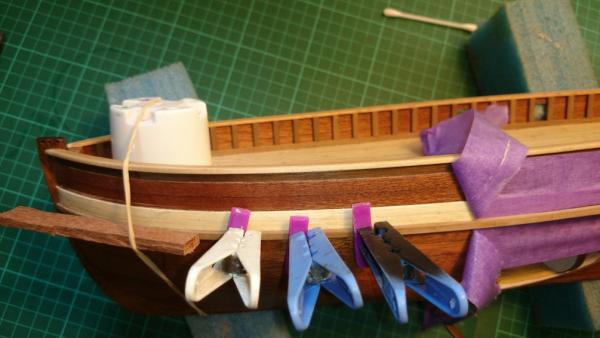
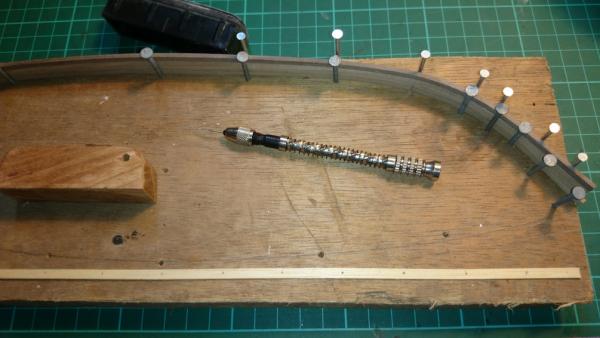
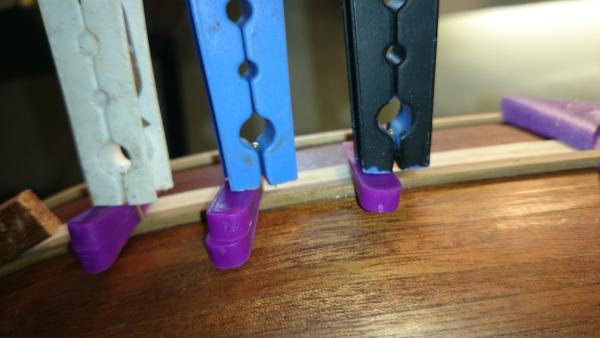
Okay, ive had 2 days work in the last fortnight and the rain just hasnt stopped.. so hence all the progress and posts.. Another 5 hours added... I have decided to do fake tree nails on hull and wales... Wales are in progress, the walnut isnt that keen on bending even after two soaks and bends.. You really have to overbend to allow for the spring back but i did fracture one wale.. caution needed.. I just wanted to show you all a way of holding planks i figured out, sure its been done by someone.. I tap a brass pin through pre drilled tree nail hole and wedge and peg to apply pressure.. working okay.. the rubber bands are ok too i suppose.. Regards Ollie

- 803 replies
-
- 2
-
-
- colonial cutter
- modellers shipyard
- (and 1 more)
-
I like the shape of the hull.. , GOOD TO SEE THE PROFILE I noticed glue doesn't stick as well to filler when second planking so the less the better, (sorry if i'm compromising your business) Can't beat that wood to wood bond Ollie
- 1,039 replies
-
- 1
-
-
- ballahoo
- caldercraft
- (and 2 more)
-
Eamonn, I received the post. I was impressed. Quick voyage too looking forward to more being sent.. ollie
- 803 replies
-
- 2
-
-
- colonial cutter
- modellers shipyard
- (and 1 more)
-
Thanks Alistair, and your right, a very good topic.. What you have said all makes sense to me. Like you I think I would do the pencil or pen caulking on hull planking as done on wet deck. As I got some way through my planks I wondered.. Was it the norm to caulk these.. Oh well too late.. I fear having gaps as I want to have my model as sealed as possible. I live in very moist tropical environment and it's at it's peak.. I think I will need to keep her in a dehumidified case to prevent damage in the long term.. btw now realising It's all these finer points that really make a model look as good as possible. Regards ollie
- 803 replies
-
- 2
-
-
- colonial cutter
- modellers shipyard
- (and 1 more)
-
Thanks Tom, that is amazing workmanship and the amount of time that must go into a ship like that Vasa.. Alistair, your work is outstanding, so I take that as a major compliment.. I was almost worried my planking was too tight..and couldn't see the lines between planks.. thank you.. . Ollie
- 803 replies
-
- 1
-
-
- colonial cutter
- modellers shipyard
- (and 1 more)
-
I can see I am gong to learn so much through watching this build John.. I one day i aspire to scratch a model in the way you are contructing. The frames are a real beautiful thing and your expertise and patience is really showing already.. Thanks and regards Ollie