HOLIDAY DONATION DRIVE - SUPPORT MSW - DO YOUR PART TO KEEP THIS GREAT FORUM GOING! (Only 72 donations so far out of 49,000 members - Can we at least get 100? C'mon guys!)
×
SGraham
-
Posts
538 -
Joined
-
Last visited
Content Type
Profiles
Forums
Gallery
Events
Everything posted by SGraham
-
 Thanks for the encouragement, Russ and David. I'm new to this painting thing. Have either of you ever rubbed oil-based stain over Model Expo paint? I've rubbed tung oil over acrylic paint before with no problem. I'm wondering if the ME paints will turn gummy. Steve
 -
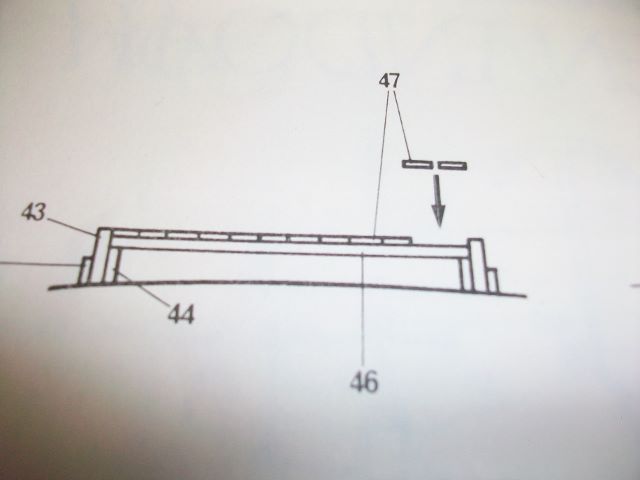
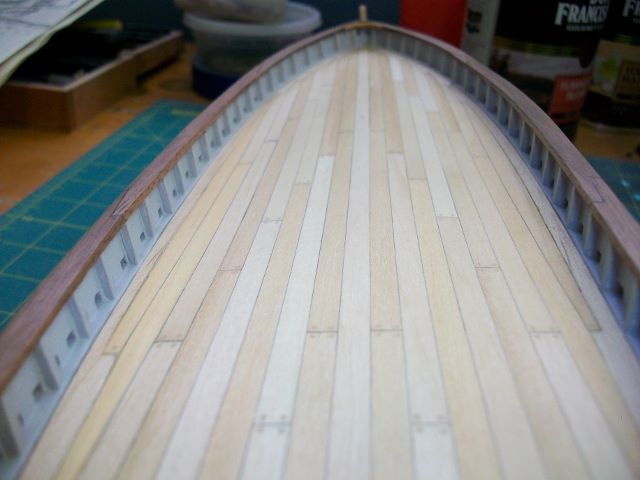
Those coamings look like they'd be nice to lean back on. How wide are the coaming boards in the real thing? Do they make them in one piece? Maybe laminated? Steve
-
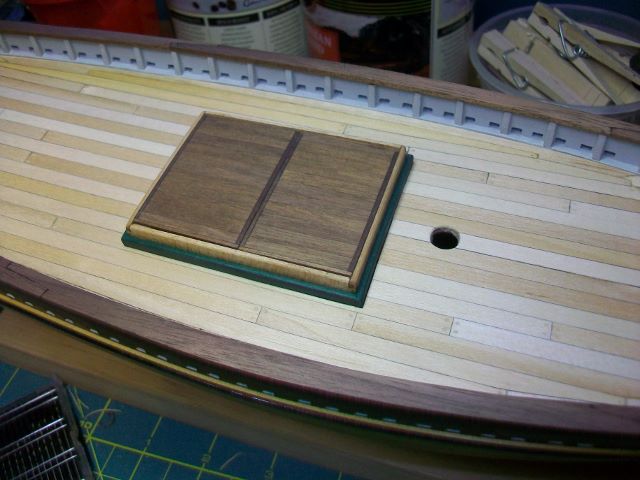
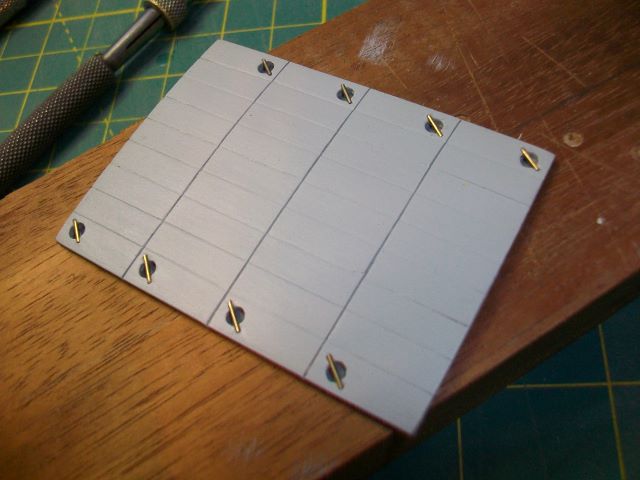
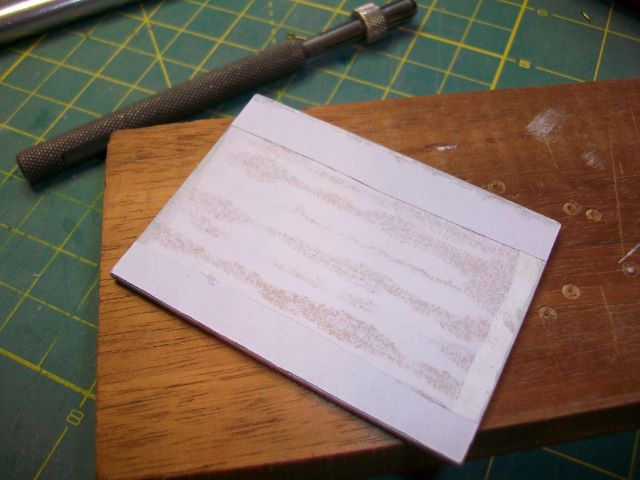
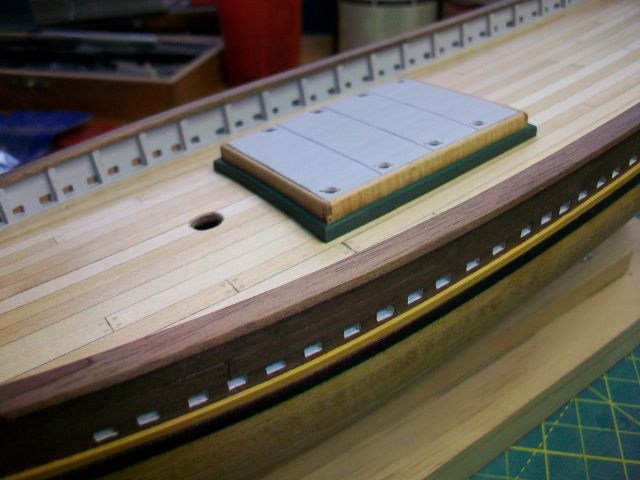
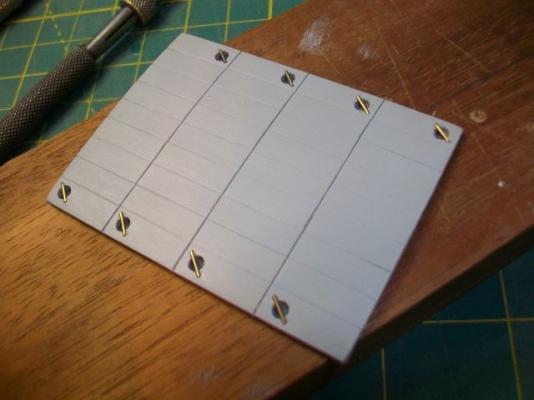
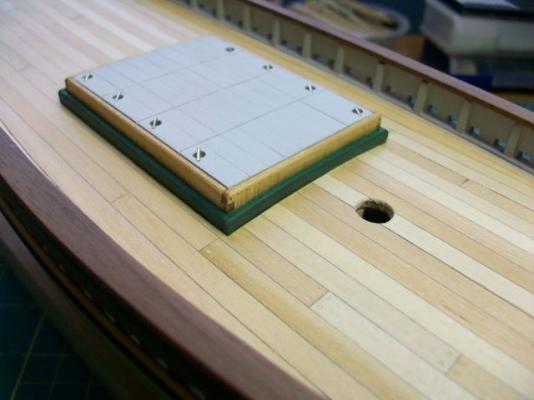
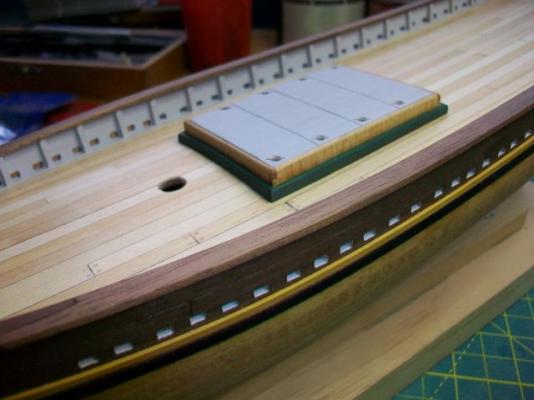
Thanks for the reply, Russ. That makes sense. I tried my first hatch cover in walnut. I really didn't like how it turned out. So, onto the scrap pile it went. Next, I built up another out of basswood. This time I remembered to slightly bevel the edges of the slats to be able to see the separation between them. I built the cover on a piece of paper to hold it together. I thought I'd paint the cover the same light gray as the bulwarks. Also, I found some pics online of hatch cover handles. They're from a liberty ship, but I really liked the concept. They made a round hole and then countersank a brass rod across the hole for a handgrip. I decided to go with this. After the paint cures, I may do a little bit of a dark wash over the cover to accentuate the lines. It all looks a little too clean. Thanks for looking! Steve

- 569 replies
-
- 13
-

-
- shenandoah
- corel
- (and 1 more)
-
Jesse, The maid is looking better and better. Great work on the scuttlebutt and windlass. Don't let your doctor see these pictures! Steve
- 607 replies
-
- 2
-
-
- scottish maid
- artesania latina
- (and 1 more)
-
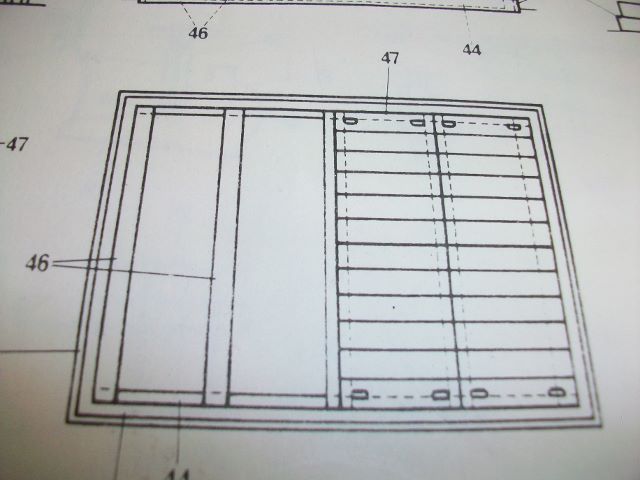
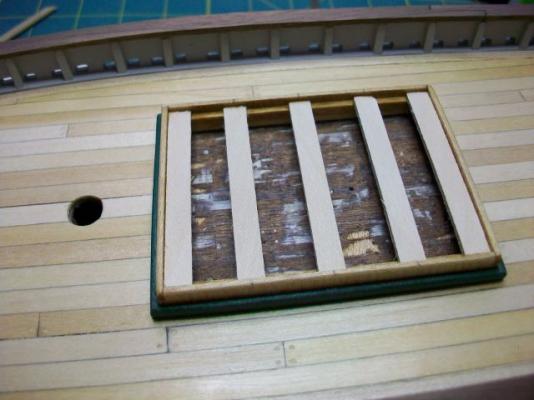
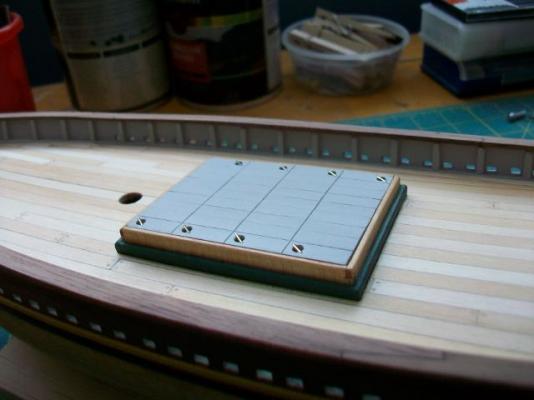
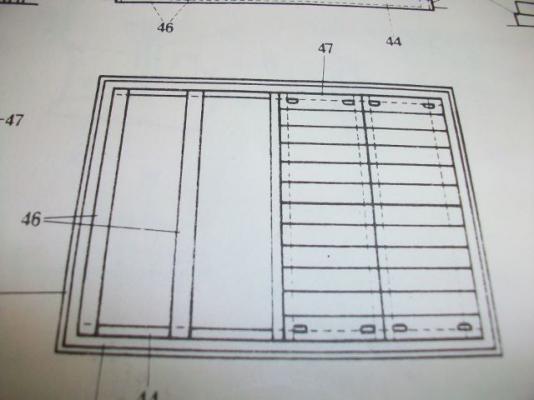
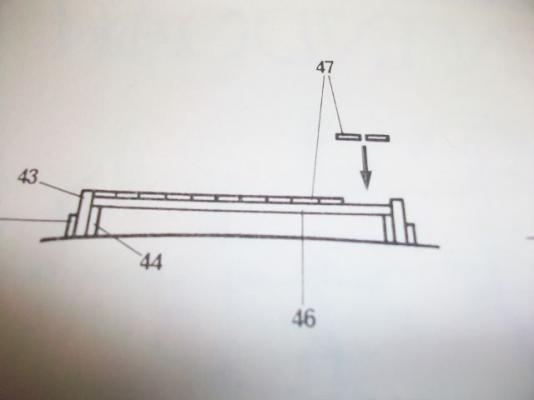
So, here's my question. The photos below show a top and side view of the hatch covers. You'll notice that they are made of small slats. I think there are 48 or so of them. On the real vessel, were these slats all loose or were they connected together somehow? Why did they do it this way? Was it to save labor when getting the covers off? Maybe so the covers could be stacked in neat piles when they were off? Also, it seems that there are handholds on the outside slats. They don't look like rings, but I'd like to put ring bolts there. Would that be in keeping with the era? Thanks! Steve
-
Thanks so much, Russ and David. Steve
-
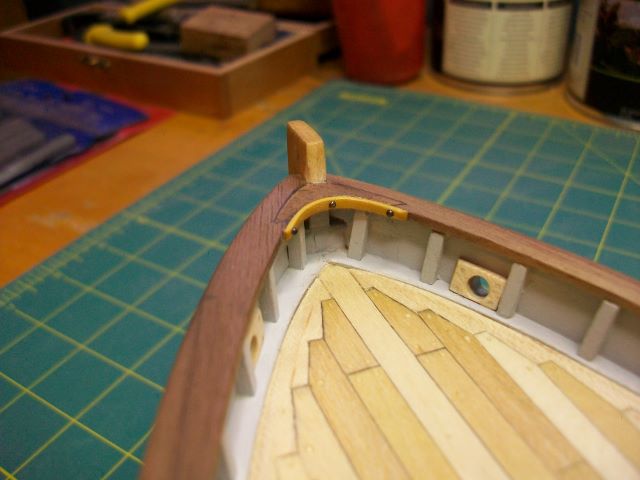
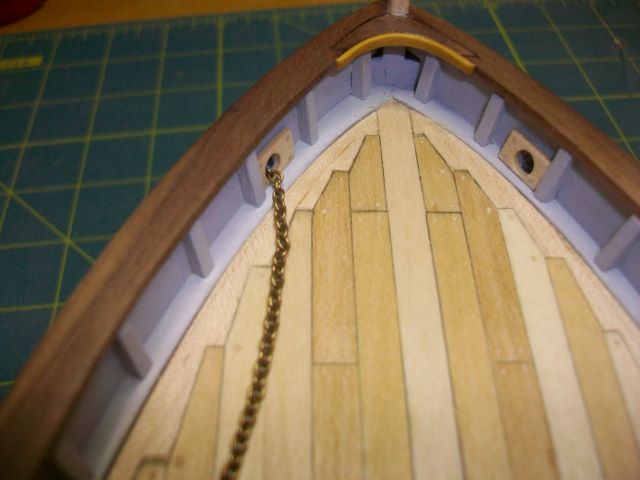
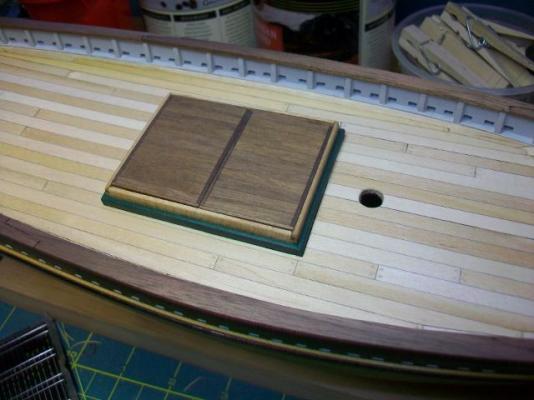
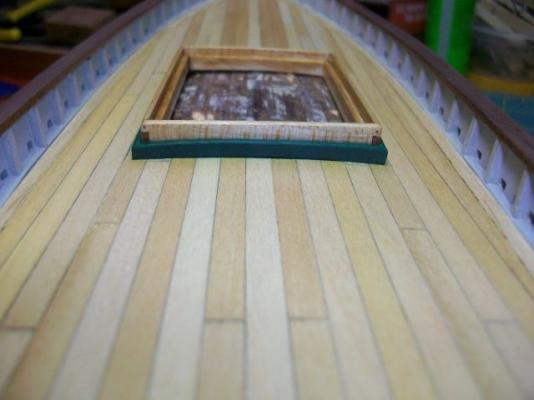
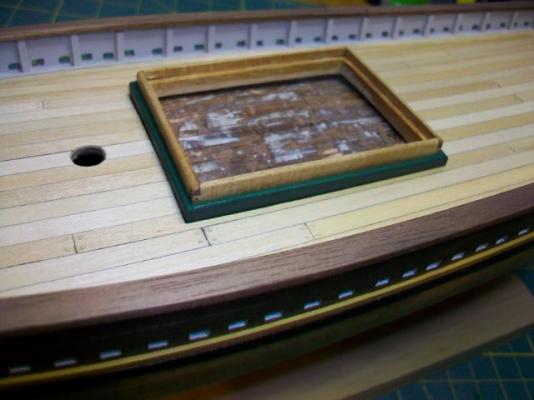
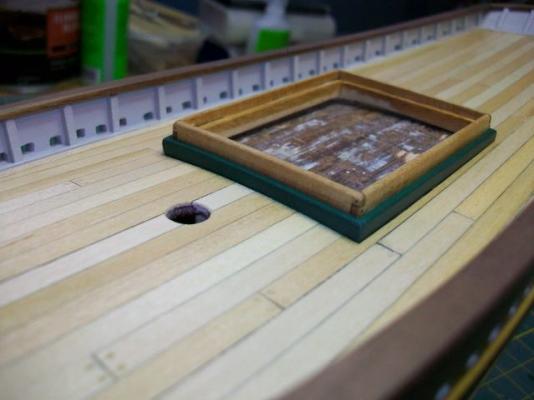
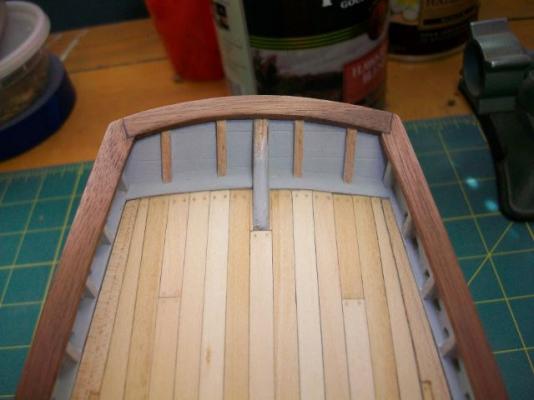
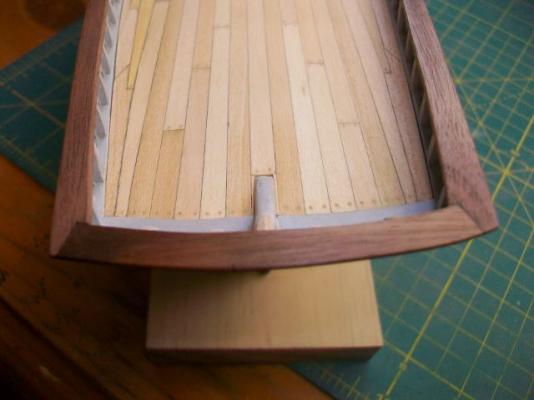
Thanks Bob and J and Bindy (and welcome back, Bindy). I'm working on the hatch right now. I've completed the coaming. I made it out of maple and finished it bright. Then I made the lower part out of lime wood and finished it with green paint. I've yet to make the hatch covers--I need to post some questions I have about those, but I'll do that later. J recommended a company called Scale Hardware. I bought some dome-headed rivets from them. The smaller ones I used to pin the corners of the coaming. The bigger ones I used on the strip in the bow bordering the breasthook. I used Brass Black from Birchwood Casey to darken the rivets. I found that a quick dip in naphtha followed by Brass Black applied with a Q-tip darkened them up nice and quick. The coaming isn't glued down yet. Thanks for looking! Steve

- 569 replies
-
- 7
-
-
- shenandoah
- corel
- (and 1 more)
-
Such clean building! That hull looks like it would slip through the water without even leaving a wake. Steve
- 296 replies
-
- 1
-
-
- herreshoff
- buzzards bay
- (and 1 more)
-
HALF MOON by jct - FINISHED - Corel
SGraham replied to jct's topic in - Kit build logs for subjects built from 1501 - 1750
Popeye, I think Hello Kitty faces on the sides of the hull would lend it great dignity. Go for it, sir! -
HALF MOON by jct - FINISHED - Corel
SGraham replied to jct's topic in - Kit build logs for subjects built from 1501 - 1750
Great info, Popeye, thanks! Steve -
HALF MOON by jct - FINISHED - Corel
SGraham replied to jct's topic in - Kit build logs for subjects built from 1501 - 1750
J, those darkened lion's heads complement the dark hull very well. What were they for? Steve -
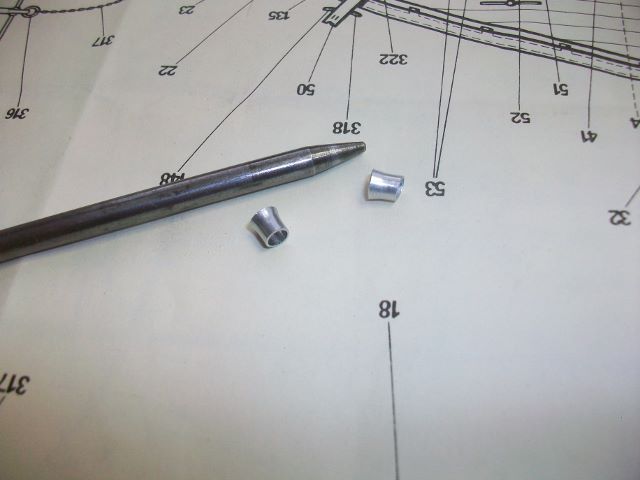
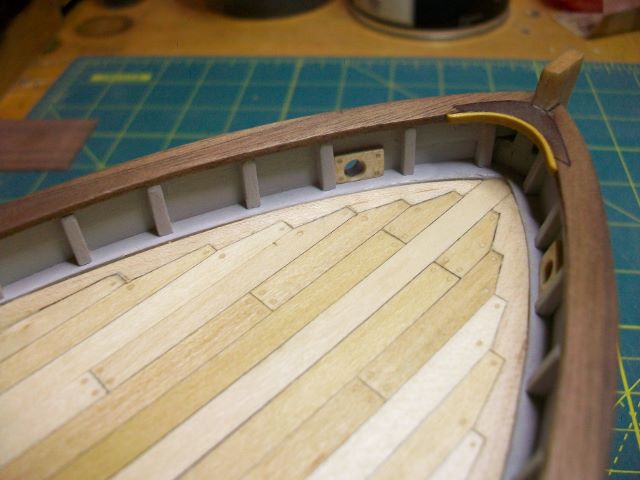
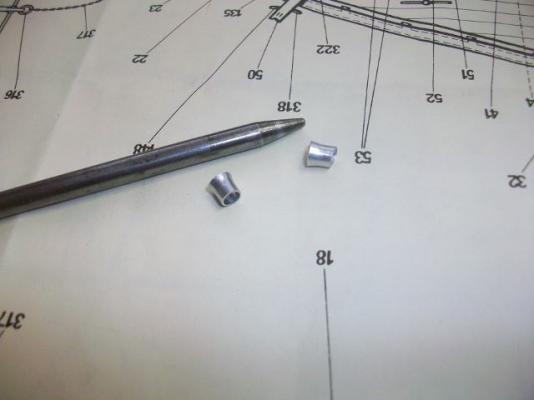
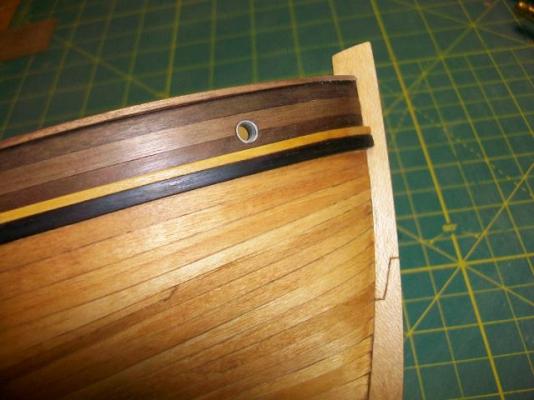
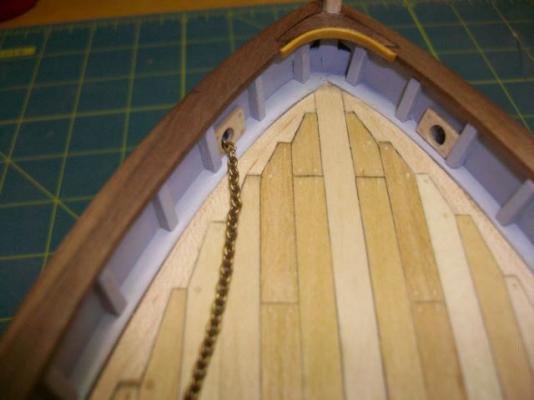
Well, I got a very little bit done today in the good ol' Glacial Progress Shipyard. I bought a piece of 5/32" aluminum tubing at the hardware store. I heard the hawse pipes were often lined with zinc. I thought the aluminum would look better than the piece of shoe hardware (looks like a grommet or eye or something) that came with the kit. It's missing one of them anyway. After cutting the tube to length, I flared one end with a tapered stake. The stake also made a great installation tool. After putting in the hawse pipes and sanding them flush with the inside and outside of the hull, I decided I didn't like how they looked on the inside at all. So, I made up a small piece of maple for each side to mask it and hopefully improve the looks. The jury is still out on that. Thanks for looking. Steve

- 569 replies
-
- 11
-
-
- shenandoah
- corel
- (and 1 more)
-
Oh the lines on that quartering shot from the port stern (first pic)! That's one sexy hull. Steve
- 296 replies
-
- 2
-
-
- herreshoff
- buzzards bay
- (and 1 more)
-
Thanks, David. I hope you're doing well. Steve
-
HALF MOON by jct - FINISHED - Corel
SGraham replied to jct's topic in - Kit build logs for subjects built from 1501 - 1750
Thanks J. That dark wash coat makes a big difference. Another item on my list of things to remember. Steve -
HALF MOON by jct - FINISHED - Corel
SGraham replied to jct's topic in - Kit build logs for subjects built from 1501 - 1750
Looking great, J. When you do the dark wash on the lion's heads, could you post a pic? I'm really curious to see the effect. Also, I'm not sure the ladder uprights are too thick. I like how they look. My comment stems purely from lack of information, though. I'm not sure how beefy they made ladders back in the day. Steve -
Pete, I just found your build log. What lovely lines on that little Buzzards Bay. Thanks for posting the inspiring pics. I'll be following with interest. Steve
- 296 replies
-
- 1
-
-
- herreshoff
- buzzards bay
- (and 1 more)
-
She's coming along so nicely. You'll have a beautiful ship to look at while your hands recover. Steve
- 607 replies
-
- 1
-
-
- scottish maid
- artesania latina
- (and 1 more)
-
Beautiful work indeed! Steve
-
Beautiful work! I can't believe how fast that deck is filling up. Thanks for the pics. Steve
- 607 replies
-
- 1
-
-
- scottish maid
- artesania latina
- (and 1 more)
-
Thanks J, Sam, and Jesse.
-
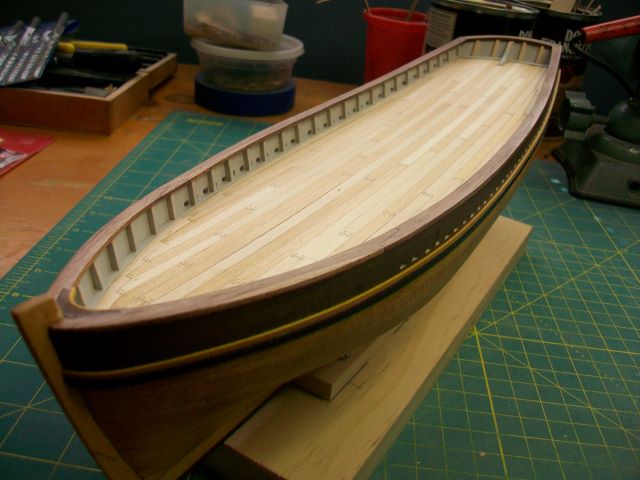
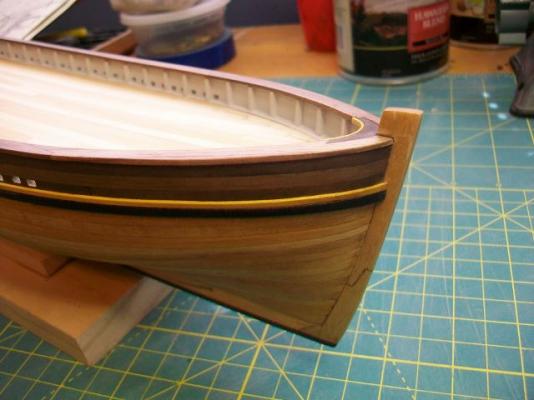
Got to work in the shipyard today since my Mother's Day shopping went smoother than I thought it would. The rail caps are officially installed. I chickened out on the hooked scarph joints--next build, I hope. I've got some paint touch up to do and some stain touch up on the stem. Thanks for looking! Steve


- 569 replies
-
- 10
-
-
- shenandoah
- corel
- (and 1 more)
-
Thanks Bindy! You know, I was kidding when I wrote that, but a book of that sort would be pretty nice to have around. Steve
- 569 replies
-
- 1
-
-
- shenandoah
- corel
- (and 1 more)
-
Hi Sam, I just read through your entire build log. I've got to say that your joinery skills give me a level of proficiency to strive for. Beautiful work. Steve