HOLIDAY DONATION DRIVE - SUPPORT MSW - DO YOUR PART TO KEEP THIS GREAT FORUM GOING! (Only 72 donations so far out of 49,000 members - Can we at least get 100? C'mon guys!)
×
SGraham
-
Posts
538 -
Joined
-
Last visited
Content Type
Profiles
Forums
Gallery
Events
Everything posted by SGraham
-
 What a beautiful boat and beautiful work. Those sandbaggers must have the prettiest lines of anything afloat. Steve
 -
Shabbat Shalom, Rony. In the shop notes section of this website there are a number of planking tutorials that will help you finish up the planking on your model. See the very first post under the section on Building, Framing, Planking and plating a ships hull and deck. In it Mark Taylor gives a link to the planking tutorials. I used them on my Shenandoah hull and found them extremely helpful. Your ship is looking very good, by the way. Steve
- 91 replies
-
- 1
-

-
- artesania latina
- Virginia
- (and 1 more)
-
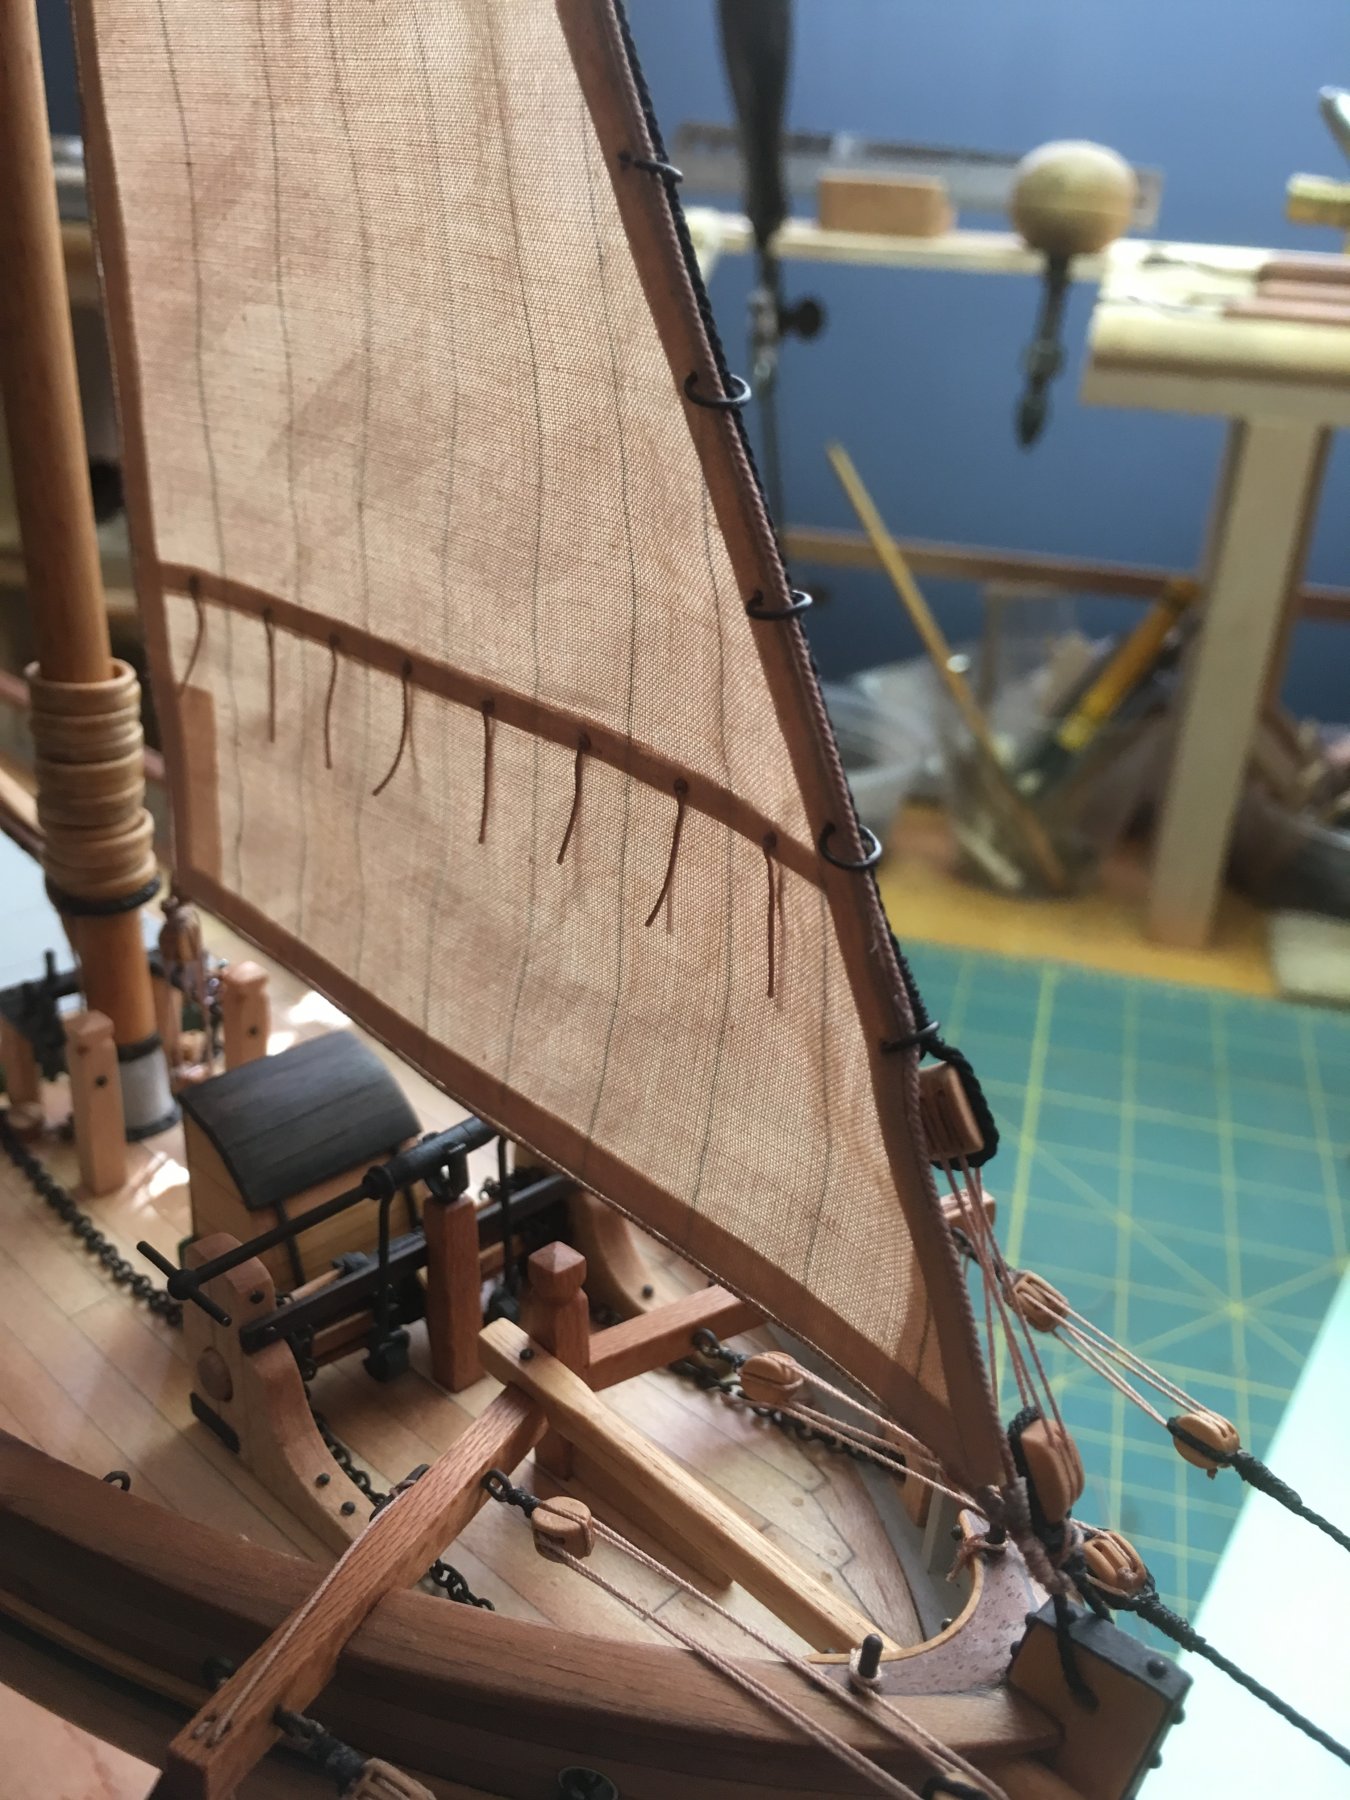
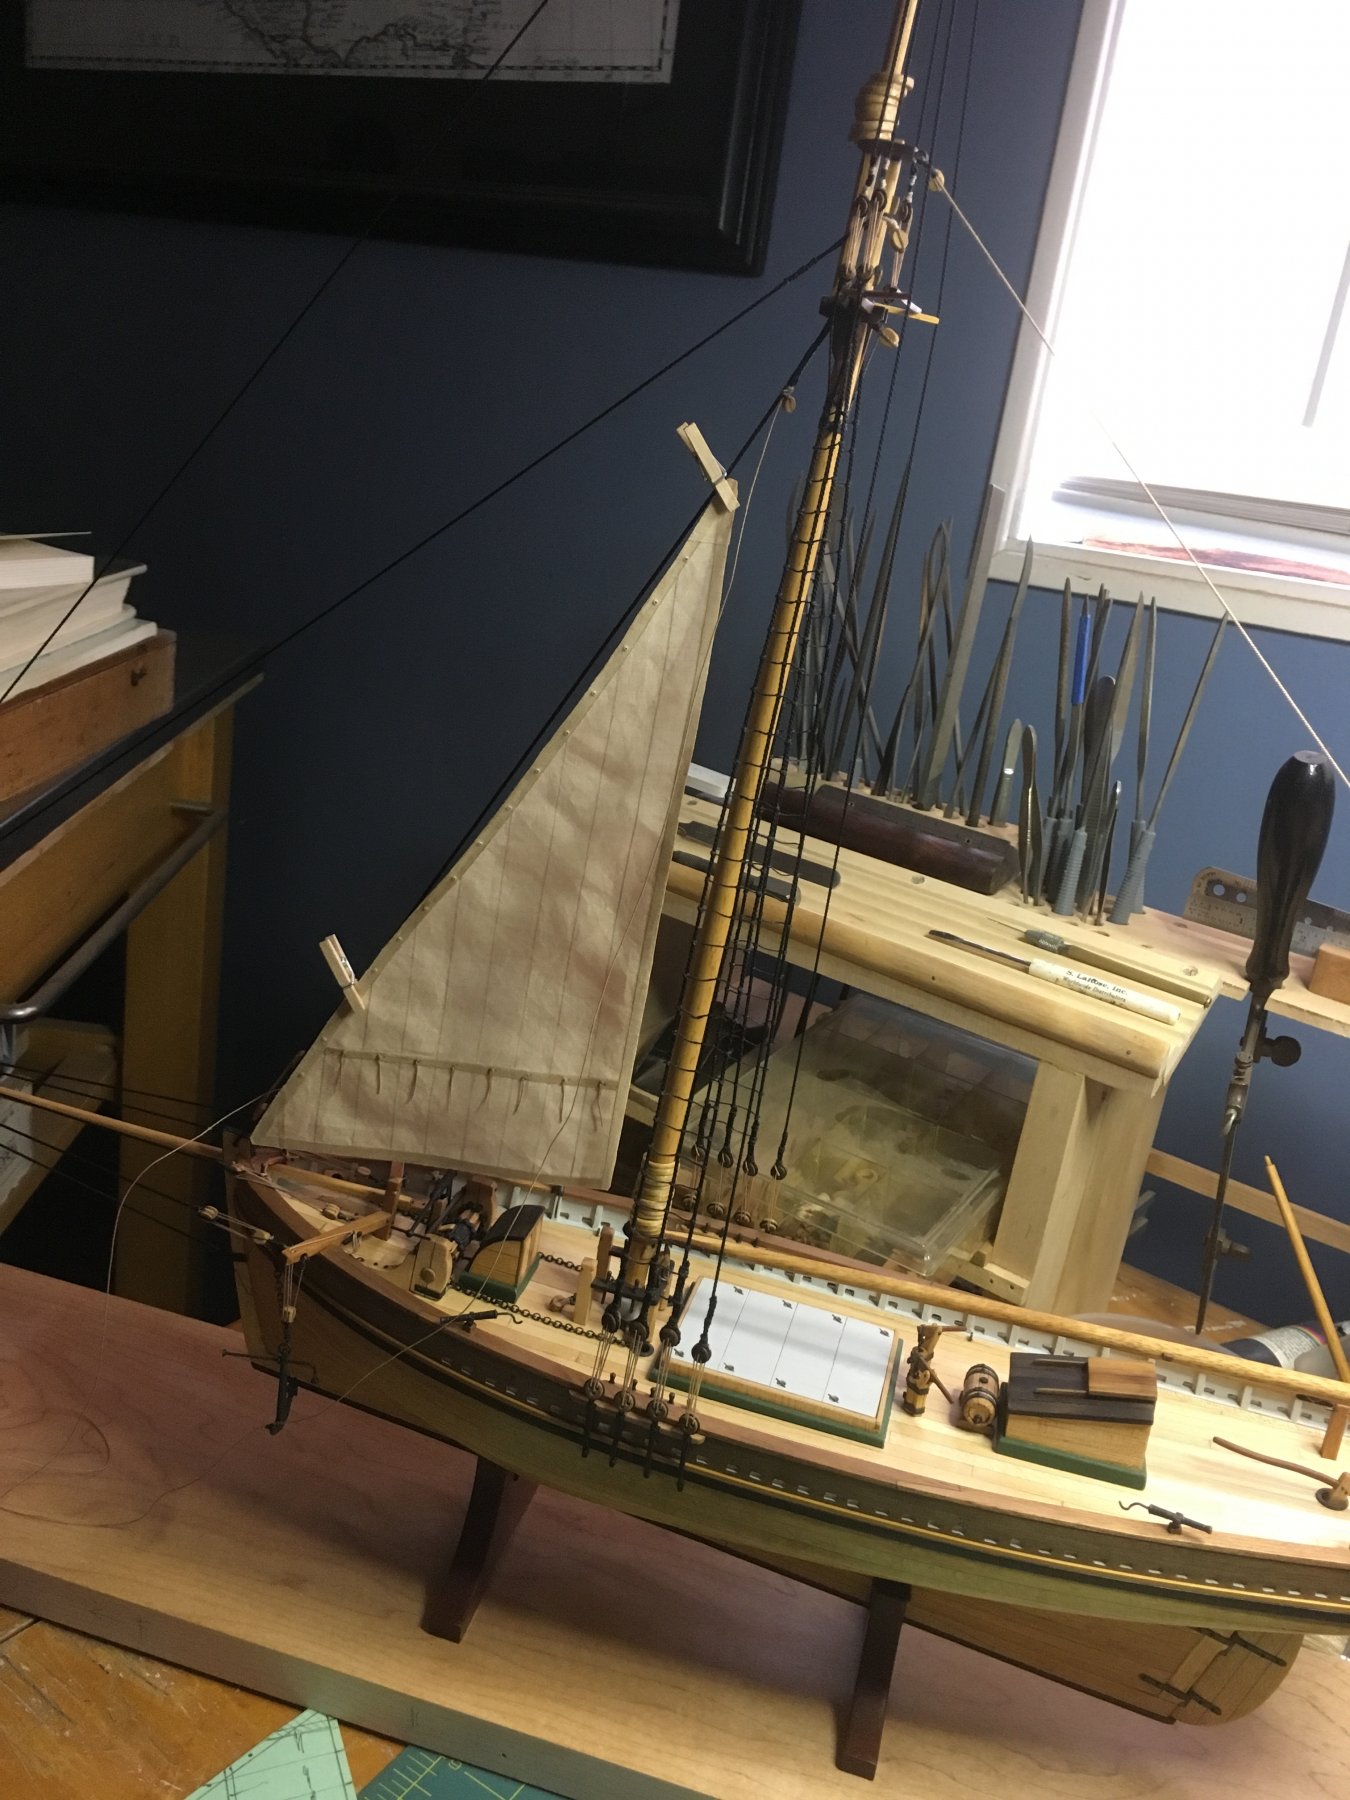
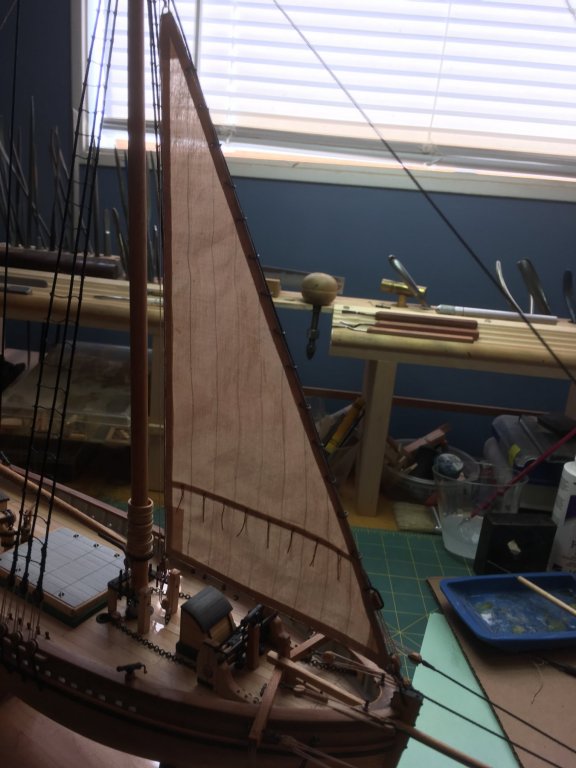
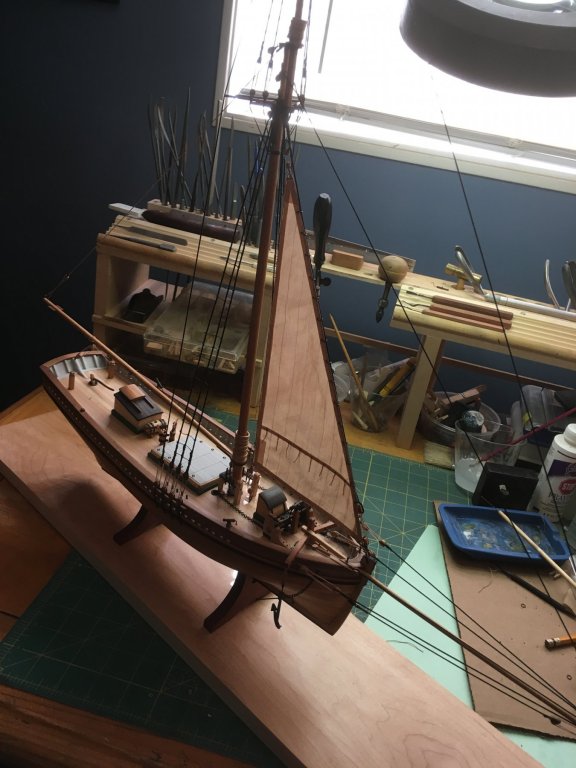
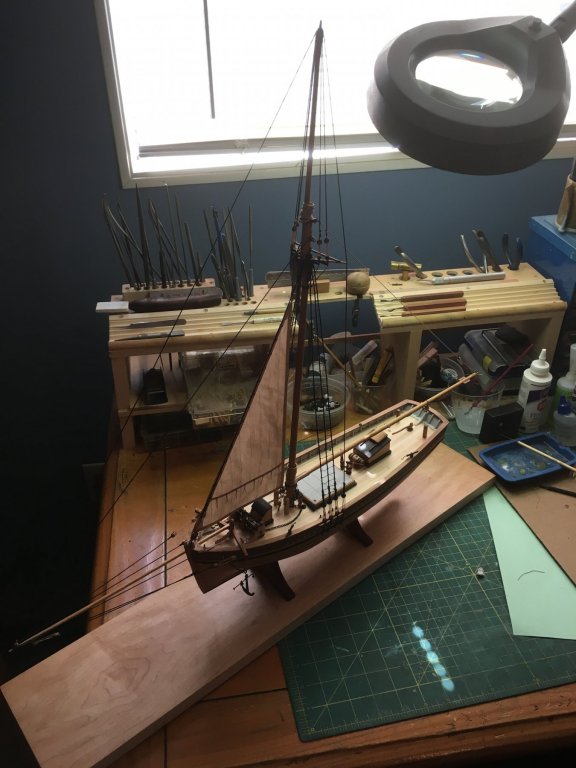
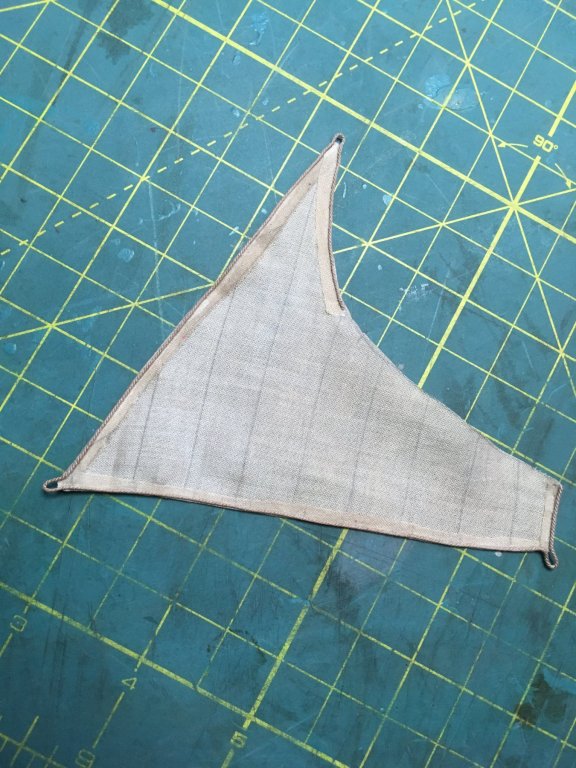
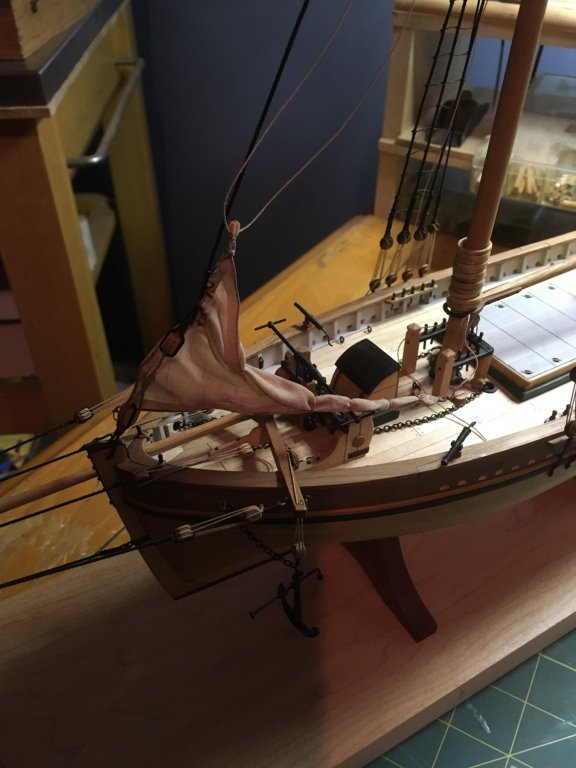
And here is the first sail bent on. It was quite a learning experience. Sorry about the redundant photos, but I'm kind of jazzed that I got a sail done. I think I'm going to add one jib and the mainsail and call it good.

- 569 replies
-
- 7
-
-
- shenandoah
- corel
- (and 1 more)
-
Thanks, J! I'm almost ready to bend this sail onto the stay. Should take me the rest of the day... Steve
-
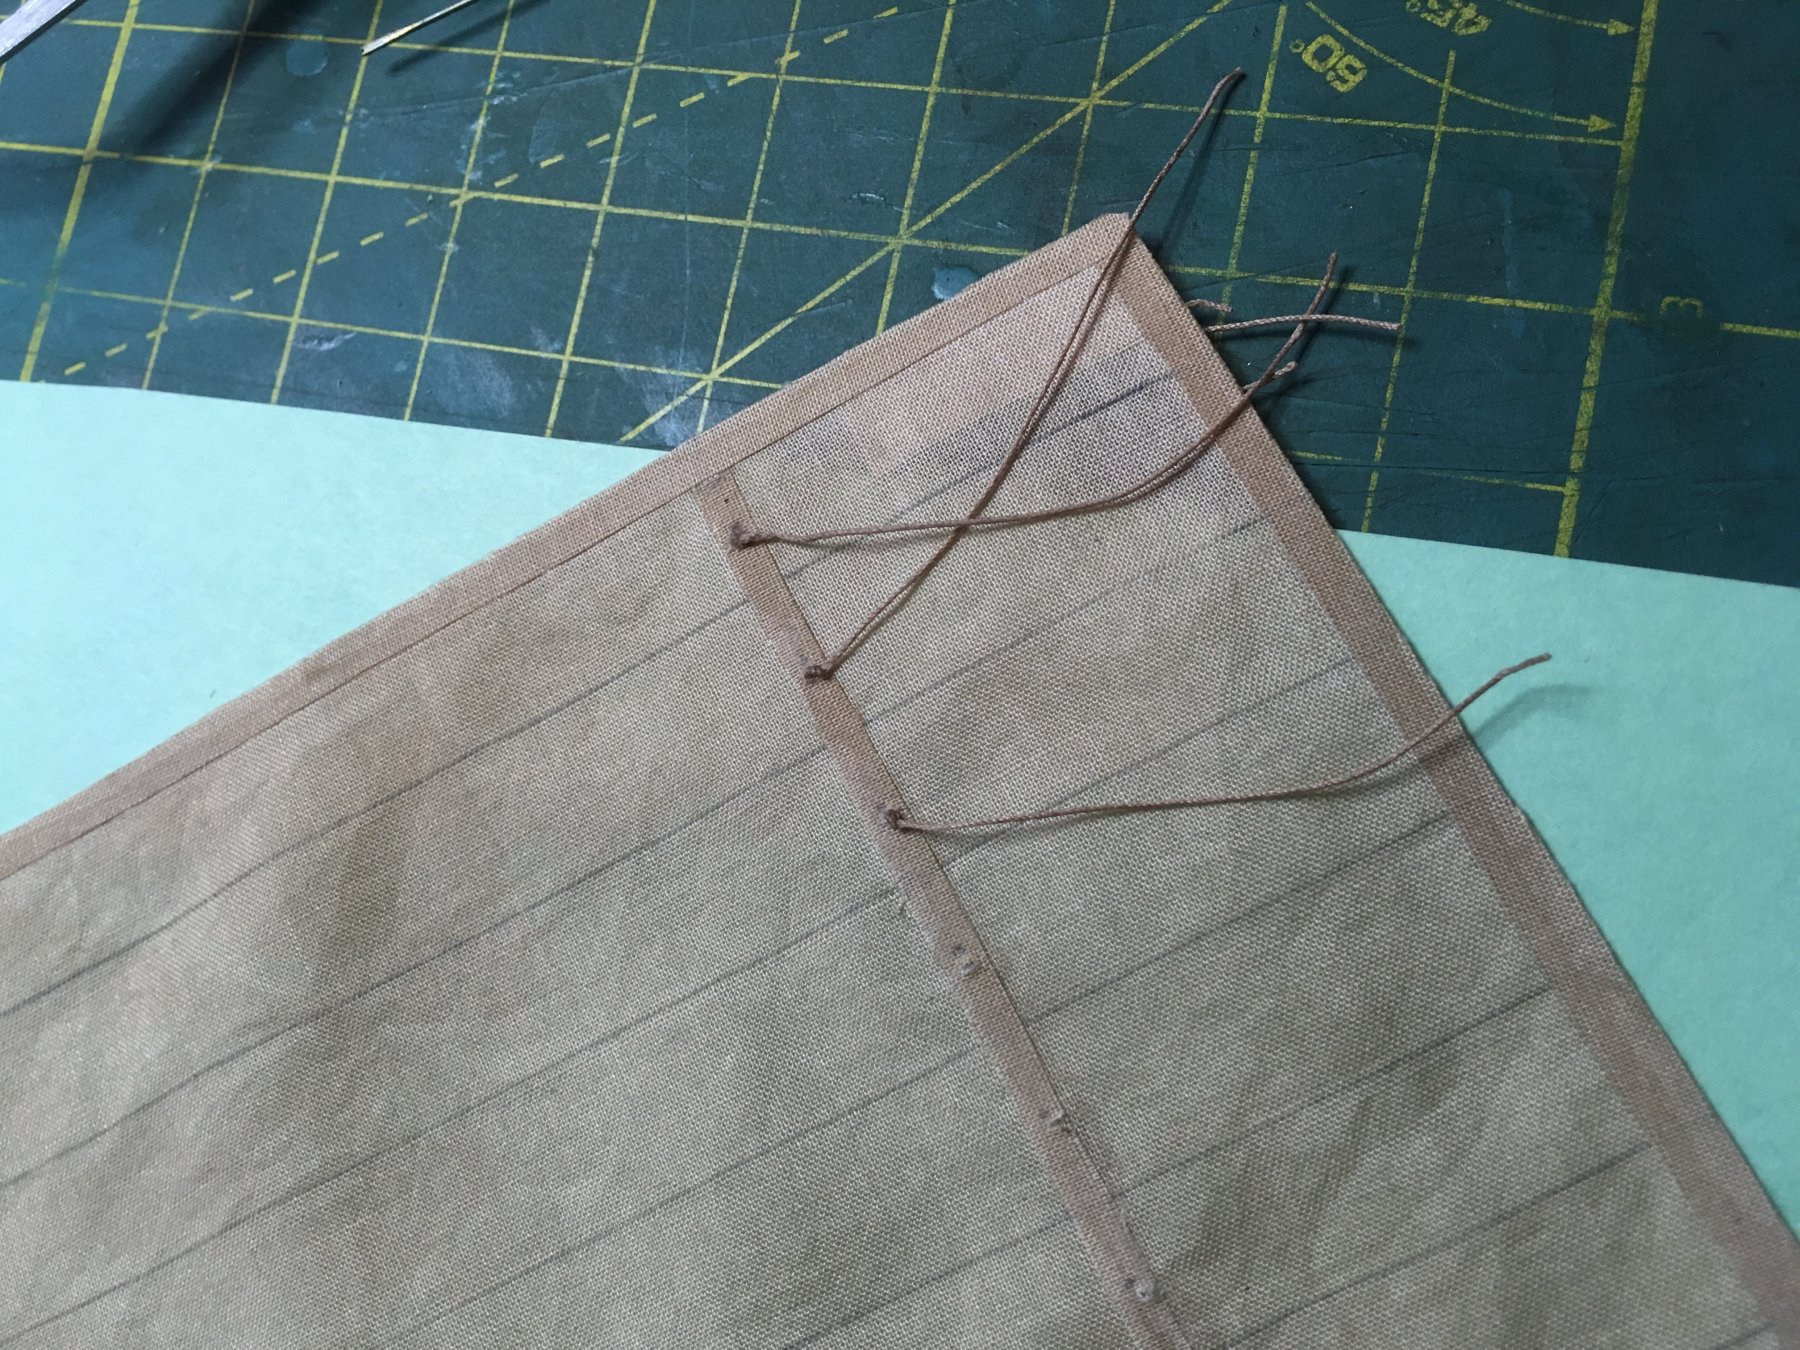
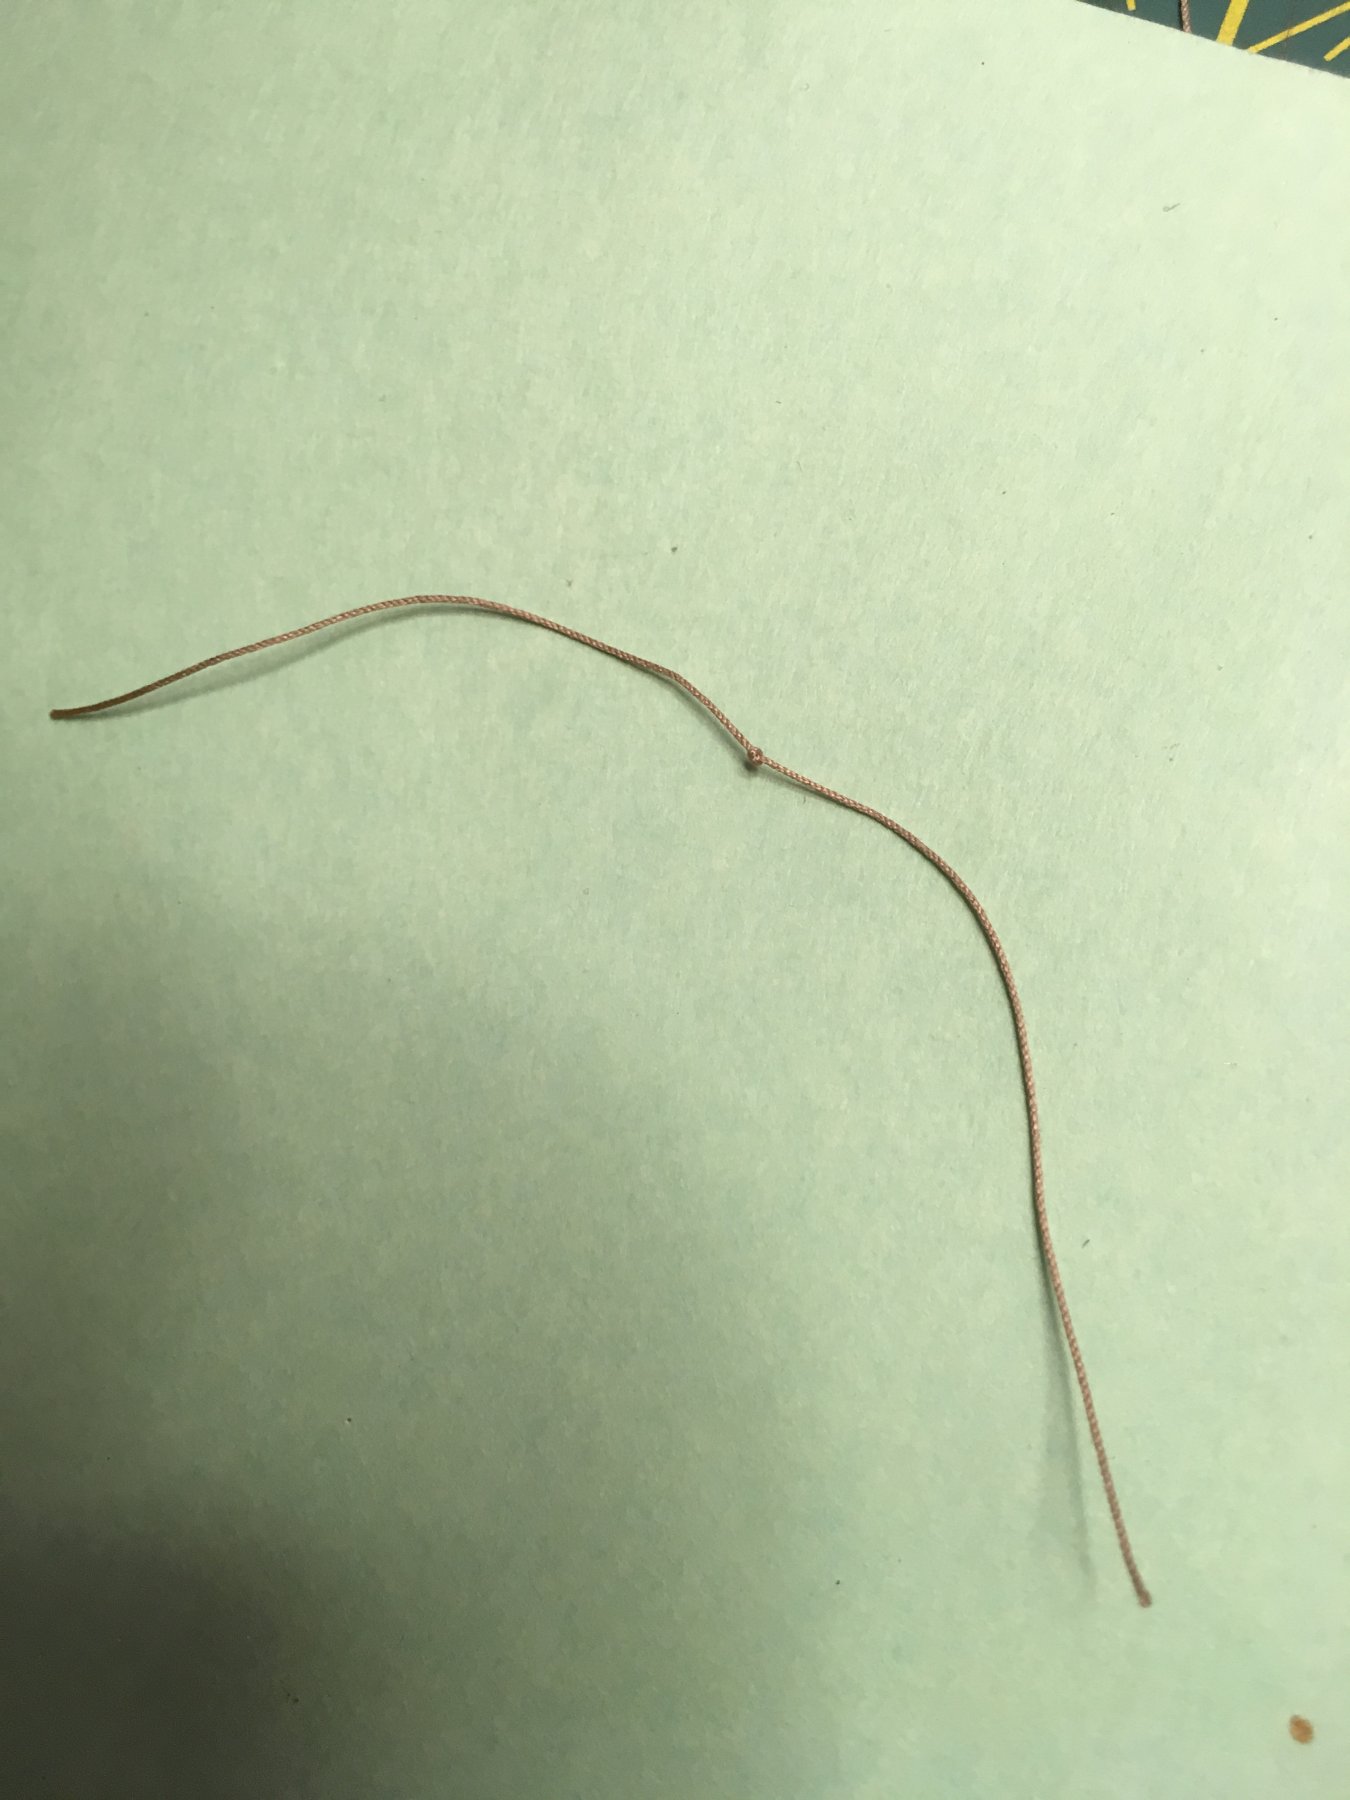
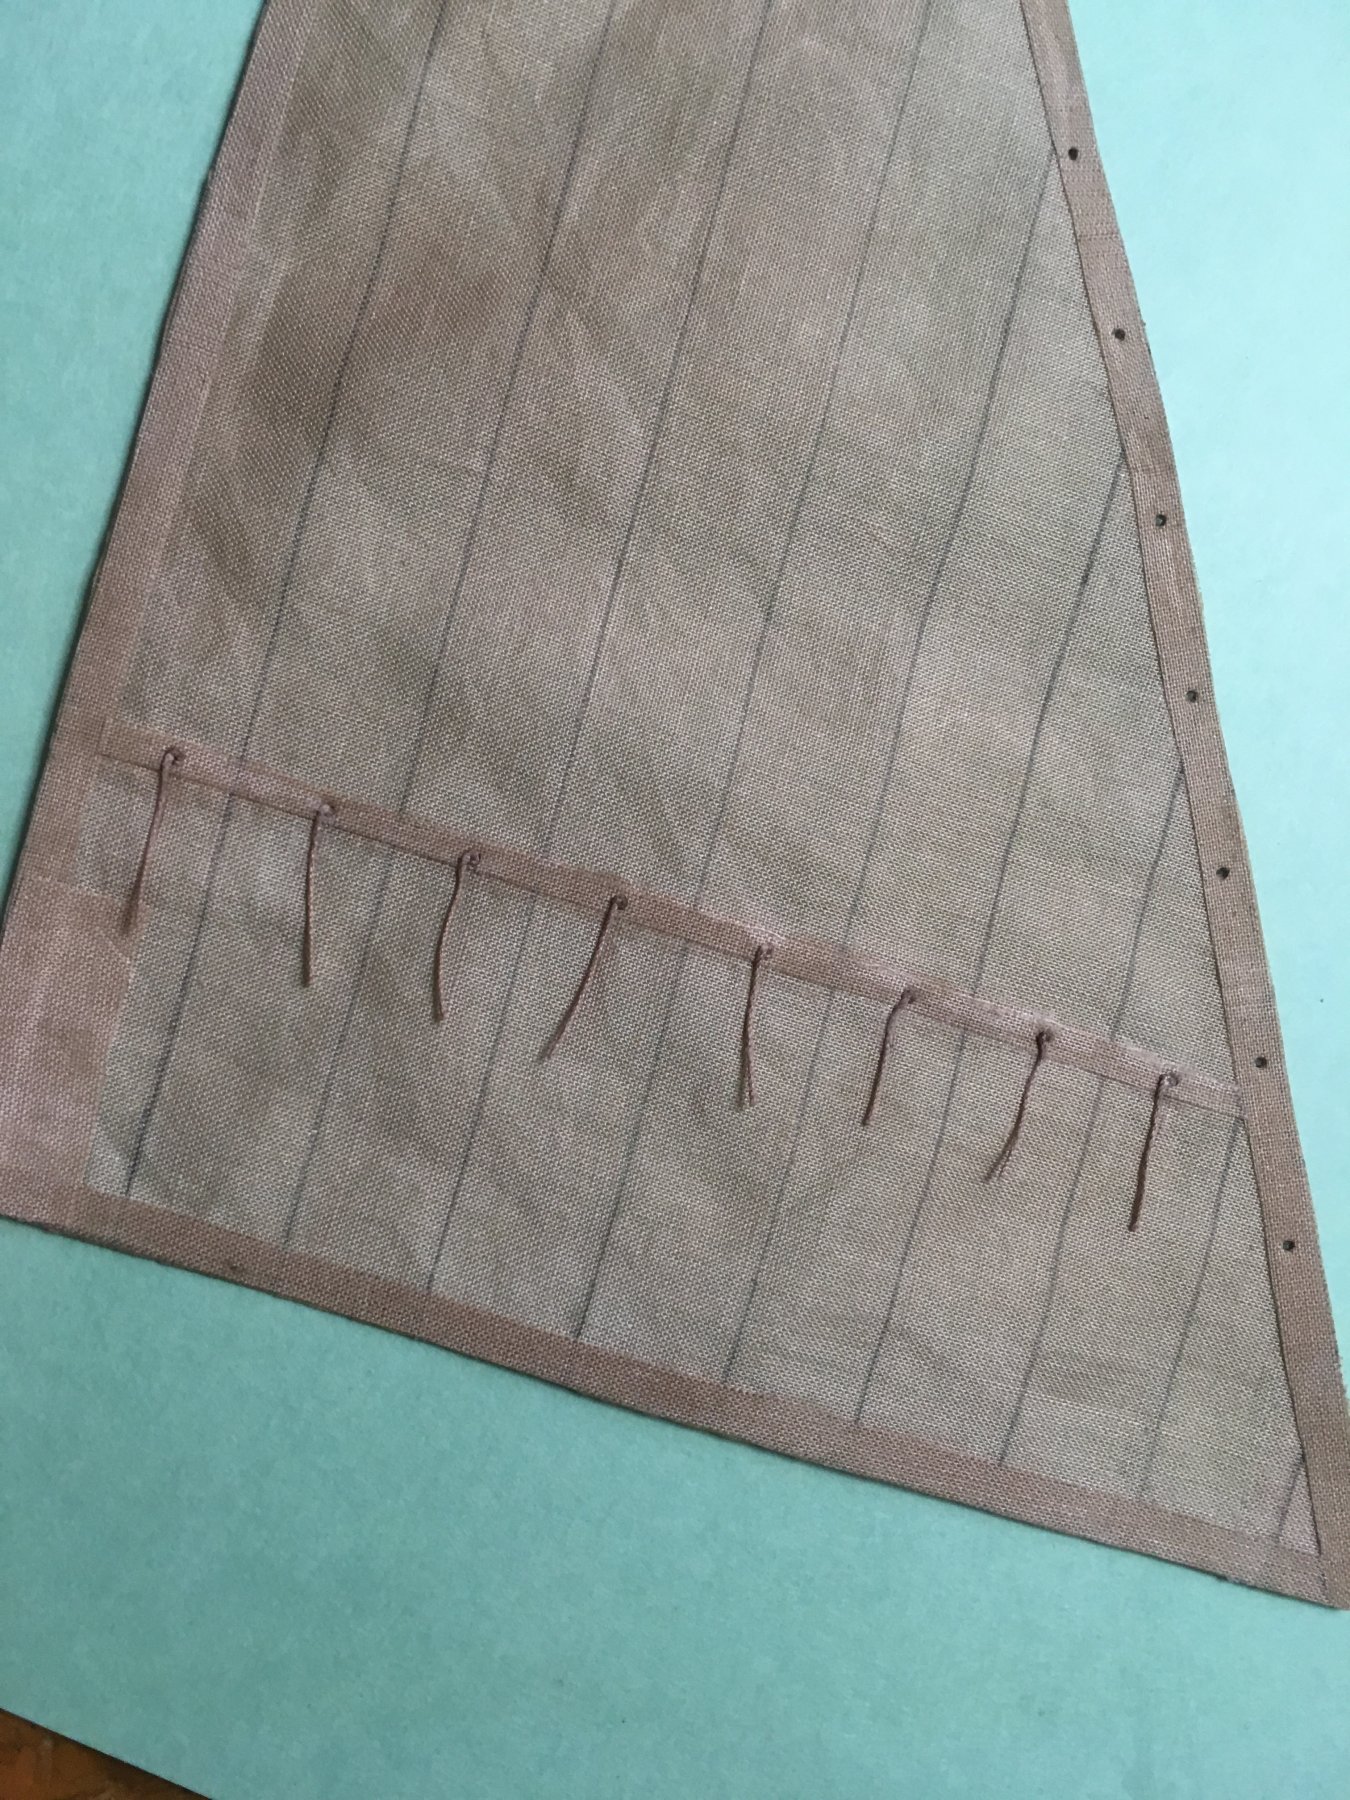
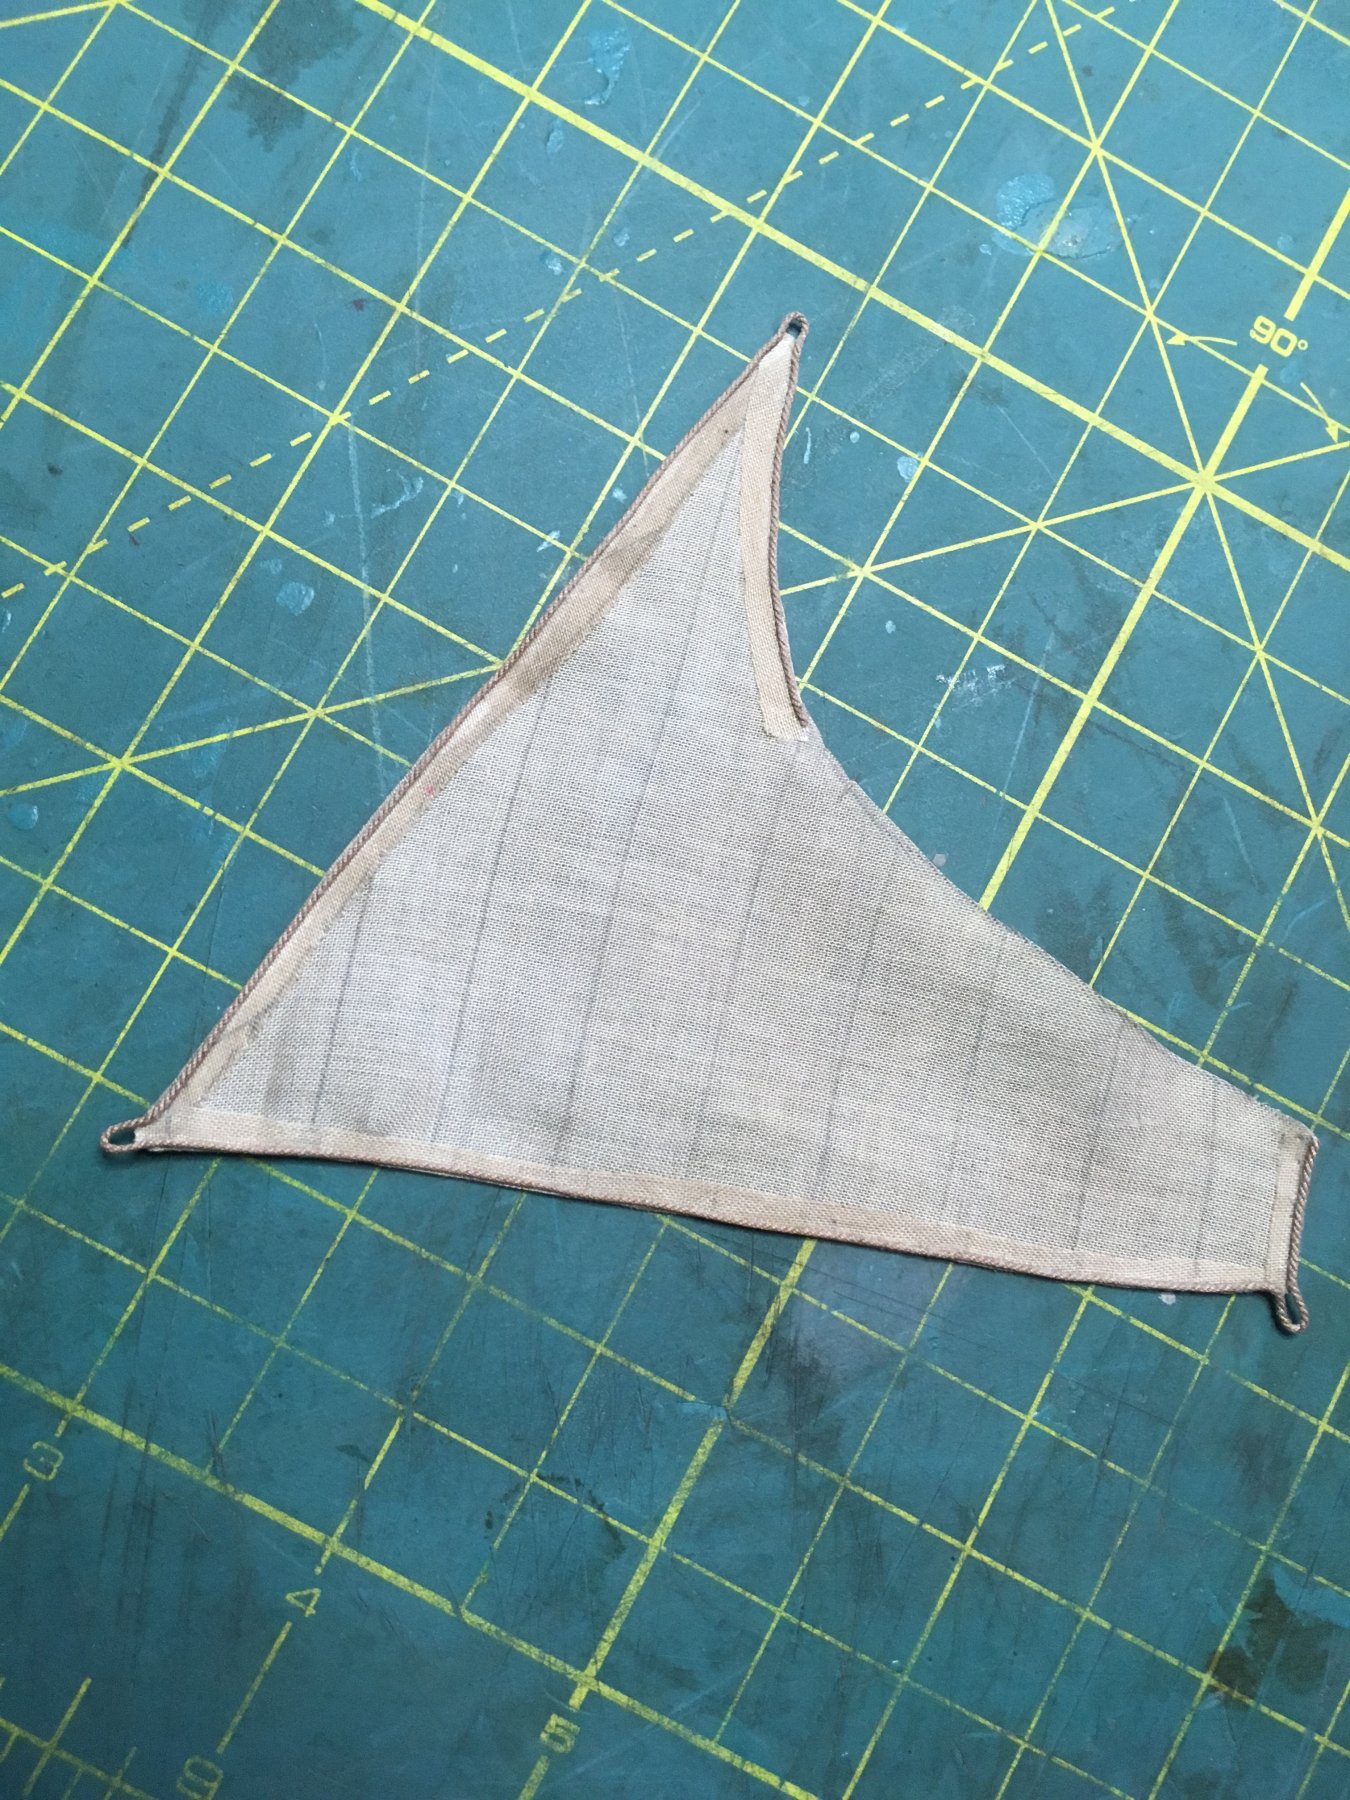
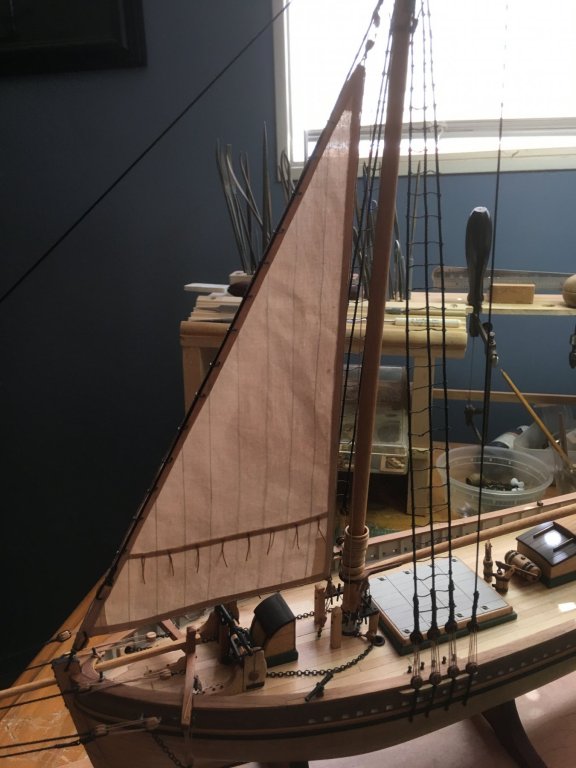
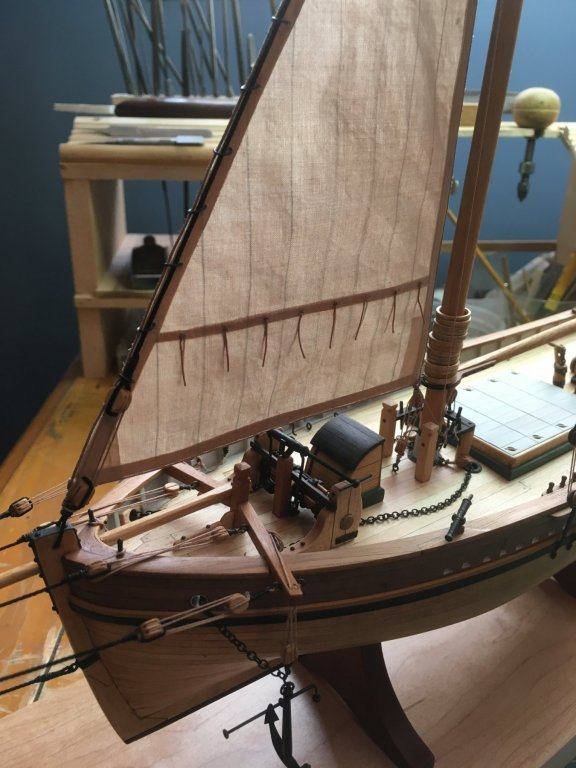
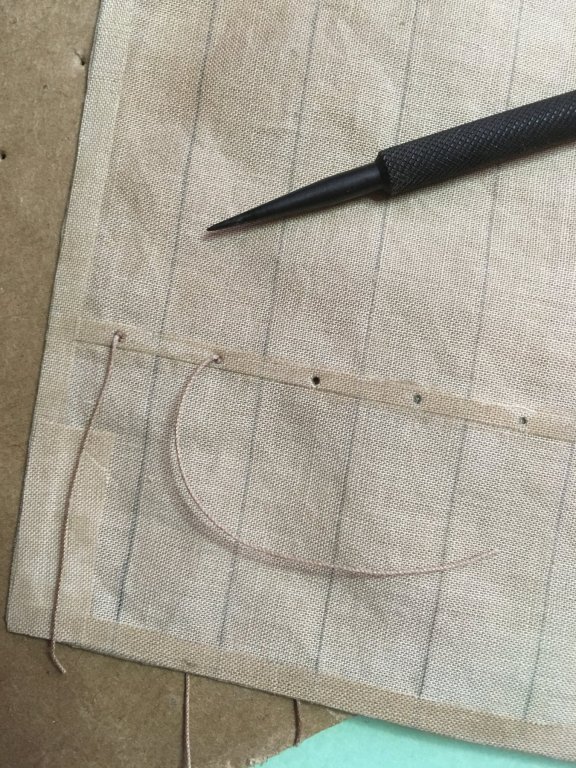
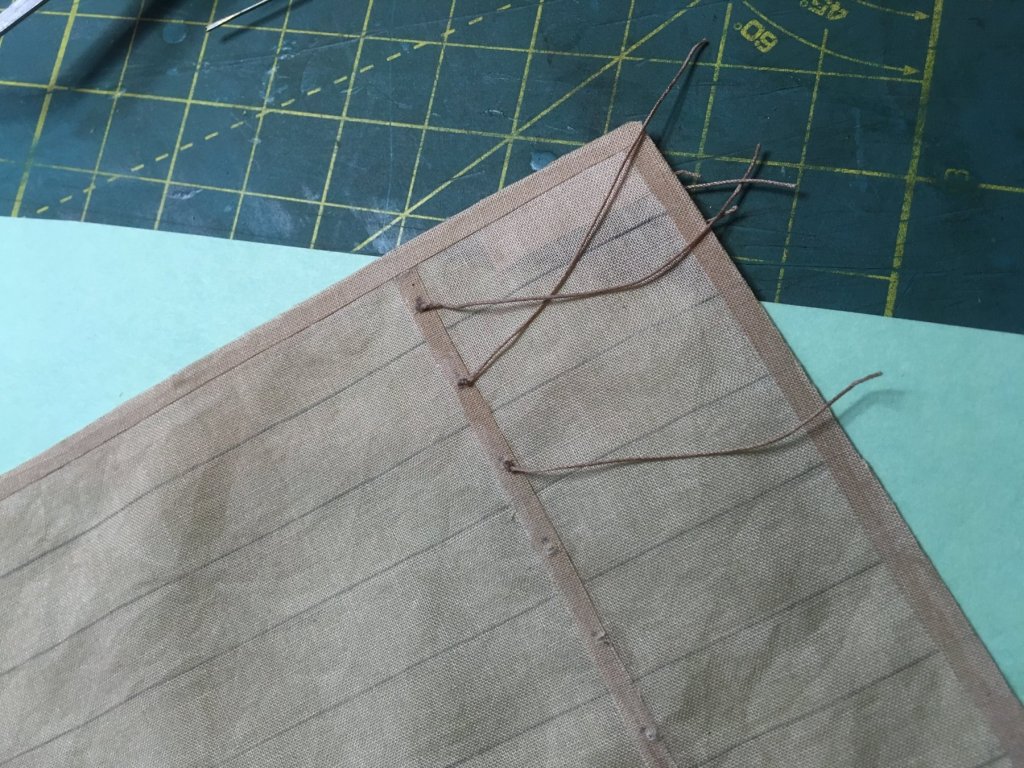
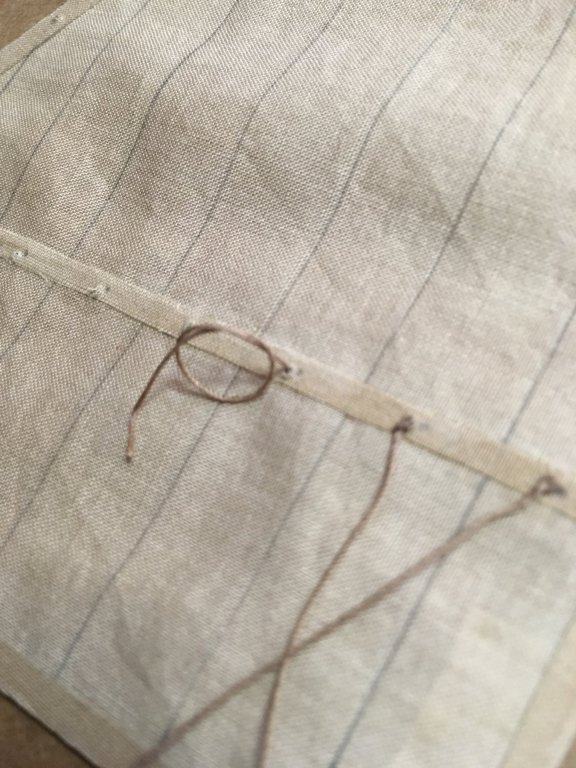
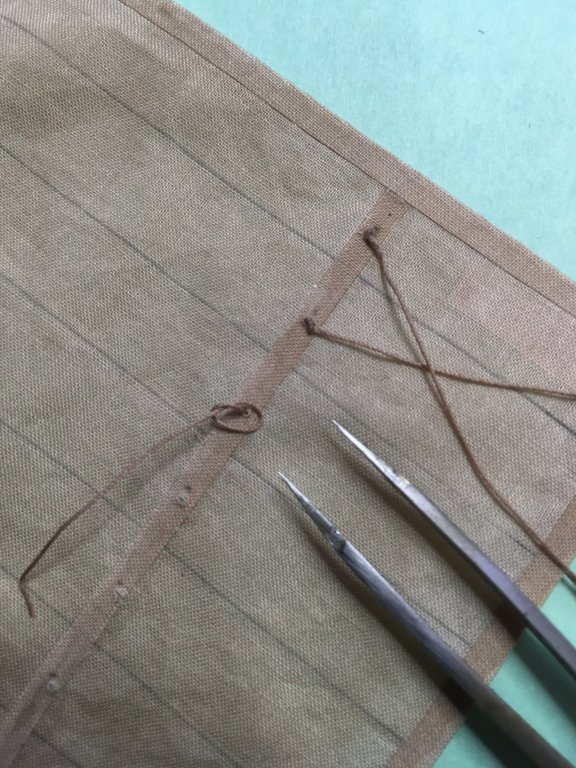
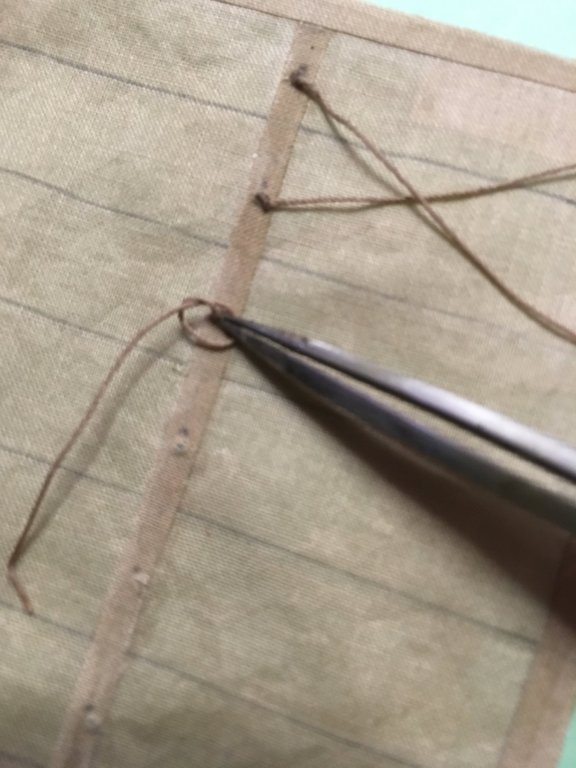
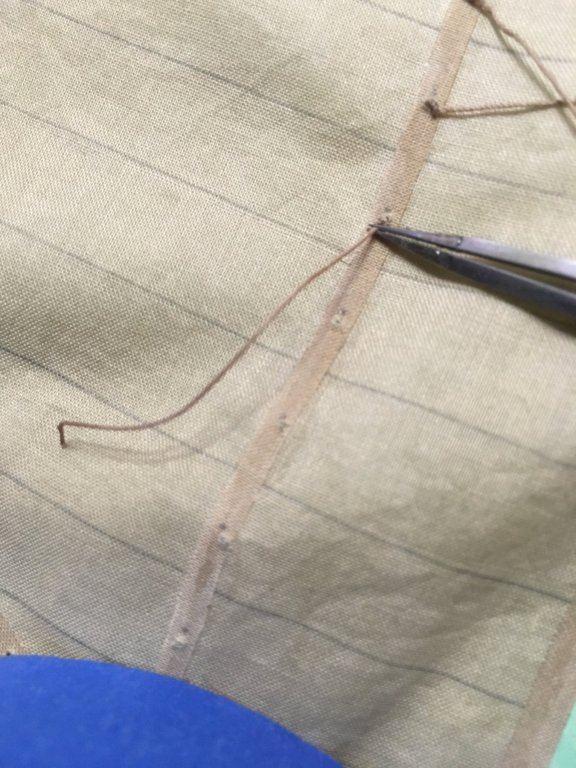
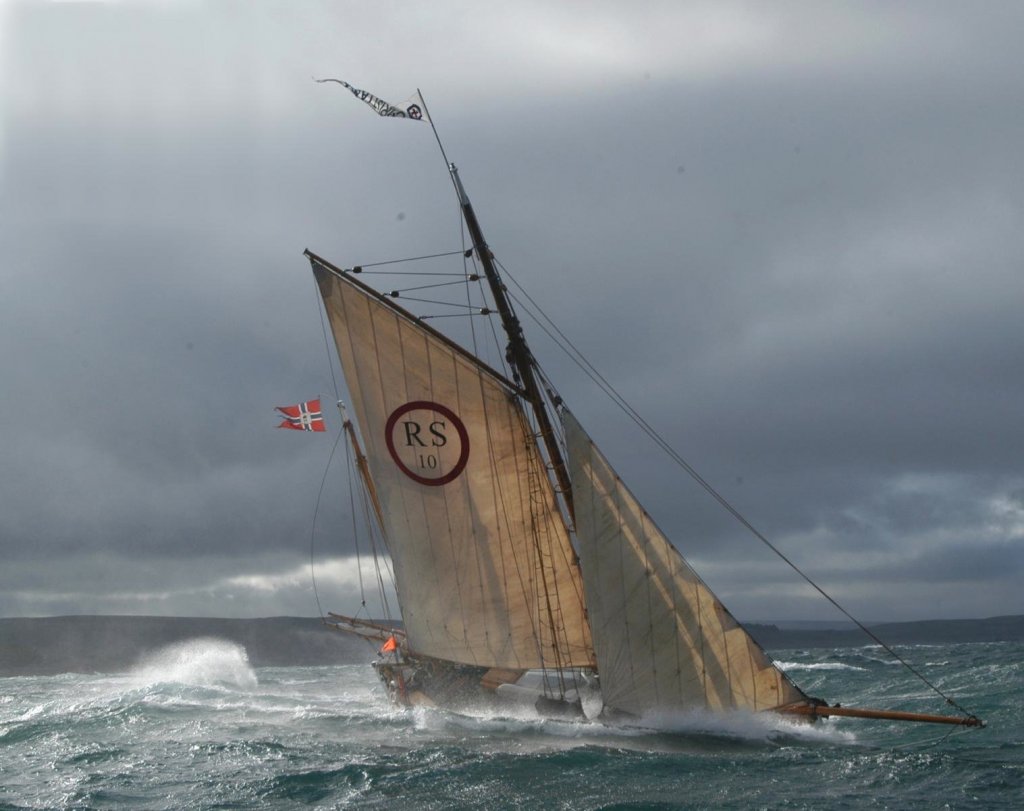
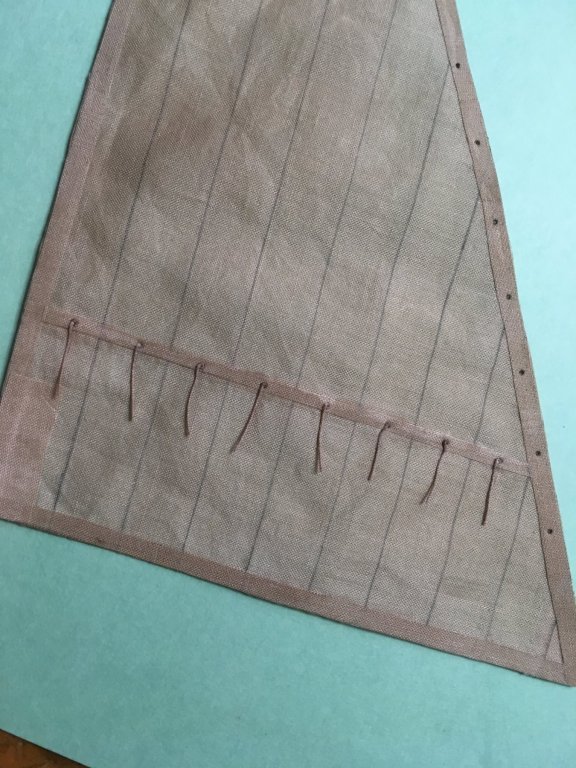
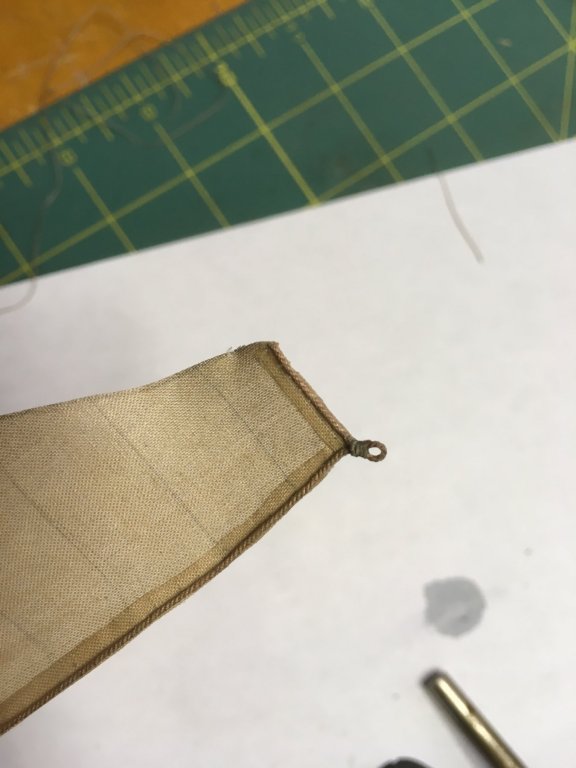
I decided to try my hand at making a full sail instead of a furled one. It hangs on the forestay, and I'm not sure what it's called. I think it could be the foresail. I used the lightest weight material I could find and stained it in a mixture of tea and coffee. Not having a suitable sewing machine, and not knowing how to use one anyway, I drew in the seams with pencil and glued on extra material for the hems and reinforcements. I decided to add a line of reef points but being as this is a fore-and-aft sail, I didn't know which side of the sail to put them on. There's a lot to know in ship modeling, and I think at least as much time is spent in research as is spent in actual building. So, I'm going to share what I learned about adding reef points in hopes that another beginning sailmaker might find it useful. Sorry if all this is too obvious! 1. Make holes by poking a sharp object through the sail, but be sure the sail is lying on cardboard or styrofoam while you are doing so. If you try to hold the sail in your hand while you are making the hole, seams will start to fray. 2. Don't make pencil marks on both sides of the sail for reef point holes. I have no idea why I did this, but I did. On this side of the sail, every reef point will have a nice dark dot next to it. They don't erase. Trying to erase them causes fraying. Next time, I won't put in a pencil mark on either side. The hole goes through the center of the reinforcing band, right between the seam lines. It should be easy enough to center it by eye... 3. There are reinforcing bands with reef points on both sides of the sail, which explains why I found many photographs showing them on first on one side and then on the other. Duh! 4. Here's how I attached the reef lines. I started with a longish piece of line and put a simple overhand half-granny knot in the middle. I dipped one end of the line in CA glue to make it stiff so that it would easily pass through the hole in the reinforcing band. After putting the line through the hole and pulling it until the knot is all the way up against the sail, turn the sail over and make another overhand half-granny knot on the other side. Don't pull it tight yet. You'll need a pair of sharp jeweler's tweezers for the next step. The photo isn't too good, but you need to grab the part of the line that is coming through the hole. If you grab part of the loop you'll get a loose knot. Firmly gripping this part of the line with the tweezers, start pulling the line tight with your free hand. Keep the tweezers on the line firmly against the sail. When the knot is tightened as far as it will go slide the tweezers out of the knot and reposition them on the other side of the knot. While holding the line taut with one hand, push down on the knot with the tweezers, tightening the knot against the face of the sail. Look at those dumb pencil dots next to the holes! If you look at this photo of a Colin Archer yawl, you can see that the reef points are pretty short, maybe 2 feet long. So, my reef lines got a nice trim on the port... And a little on the starboard side as well. I glued down a little bit of the lines next to the knots so that they would look like they are hanging down. This isn't one of those fancy cutters with the newfangled anti-gravity reefing lines. I'm pretty happy so far with how this one is coming out. Next come the bolt ropes... Thanks for reading! Steve


- 569 replies
-
- 6
-
-
- shenandoah
- corel
- (and 1 more)
-
I thought I would share the photos I came across as I was researching how to make furled jibs for my Shenandoah build. If anyone else has some other pics, they might like to add them to the thread. I hope this is helpful. Enjoy your researching and building! Steve PHOTOS REMOVED DUE TO COPYRIGHT ISSUES - ADMIN
-
Hi J. I just finished reading up on your Harriet build log. She's looking very nice. This model kit has intrigued me too for a long time. I have to say, your perseverance with that pilothouse was an inspiration to me. The end result is very good. Enjoy your times camping. Steve
- 258 replies
-
- 2
-
-
- harriet lane
- model shipways
- (and 1 more)
-
Thanks J. I'm going to try again today. Steve
-
Hello again to all. I'll start with a little update on the home situation and then move along to the Shenandoah. As many of you may be aware, my wife Suzie is suffering from Huntington's Disease. Because of this, she has lost the ability to swallow. As a result, she has been on a feeding tube for the past 3 years. A year ago, after a series of 4 serious pneumonia infections that developed into sepsis, I made the decision to put her on hospice. It really looked like we were gong to lose her any day. Well, the first thing the hospice doctor did was to see if Suzie was getting too much food through her feeding tube, causing her to aspirate the extra food, leading to the pneumonia infections. To make a long story short, after the doctor cut back on the food amount, Suzie's infections stopped. It's been almost a year, and she hasn't had one more infection. Whew! As you may well imagine, I'm feeling a lot better too! Anyways, I thought I'd reopen my Shenandoah build log since it has been my intention to fit her with a suit of sails. So, today I tried making a furled jib which wasn't a great success. Let me begin by stating that I have absolutely zero skill with needle and thread, or with cloth in general, for that matter. (I can hardly dress myself). Following a suggestion I read somewhere, I made a shortened version of the sail, as you can see below... The short version of the sail is so that the furled sail won't look too bulky and out-of-scale. This sail making thing is really hard, and it has a definite learning curve. So, here's what ended up happening... I ended up with something resembling a canvas tornado attacking the bow. I didn't have enough sail to work with, I cut the sail clips way too big, etc., etc. I also learned that when you attempt to attach a sail, the standing rigging goes slack. So, I cut off the sorry-looking monstrosity and re-rove the forestay so that it was nice and tight again. I'm going to do some thinking. Maybe a full suit of sails, or two jibs and the mainsail would look good. I may try a full one tomorrow, using cloth. I also saw on someone else's build log how they used paper and came up with some very nice looking sails. We'll see. Thanks for reading! It's good to be back.
- 569 replies
-
- 4
-
-
- shenandoah
- corel
- (and 1 more)
-
Honey, I shrunk the boat! Seriously, Jesse, that looks like the real deal. Steve
- 1,306 replies
-
- 8
-
-
- syren
- model shipways
- (and 1 more)
-
Great looking gun, Rony. The carriage and the slide look very nice with the oil finish. You're doing a fine job. Steve
- 91 replies
-
- 1
-
-
- artesania latina
- Virginia
- (and 1 more)
-
Michael, None needed at all! I took it in fun, and was answering back in kind. Steve
- 756 replies
-
- 3
-
-
- galleon
- golden hind
- (and 2 more)
-
Michael, Do I detect some seaside gloating? Yes, I'm melting! Steve
- 756 replies
-
- 3
-
-
- galleon
- golden hind
- (and 2 more)
-
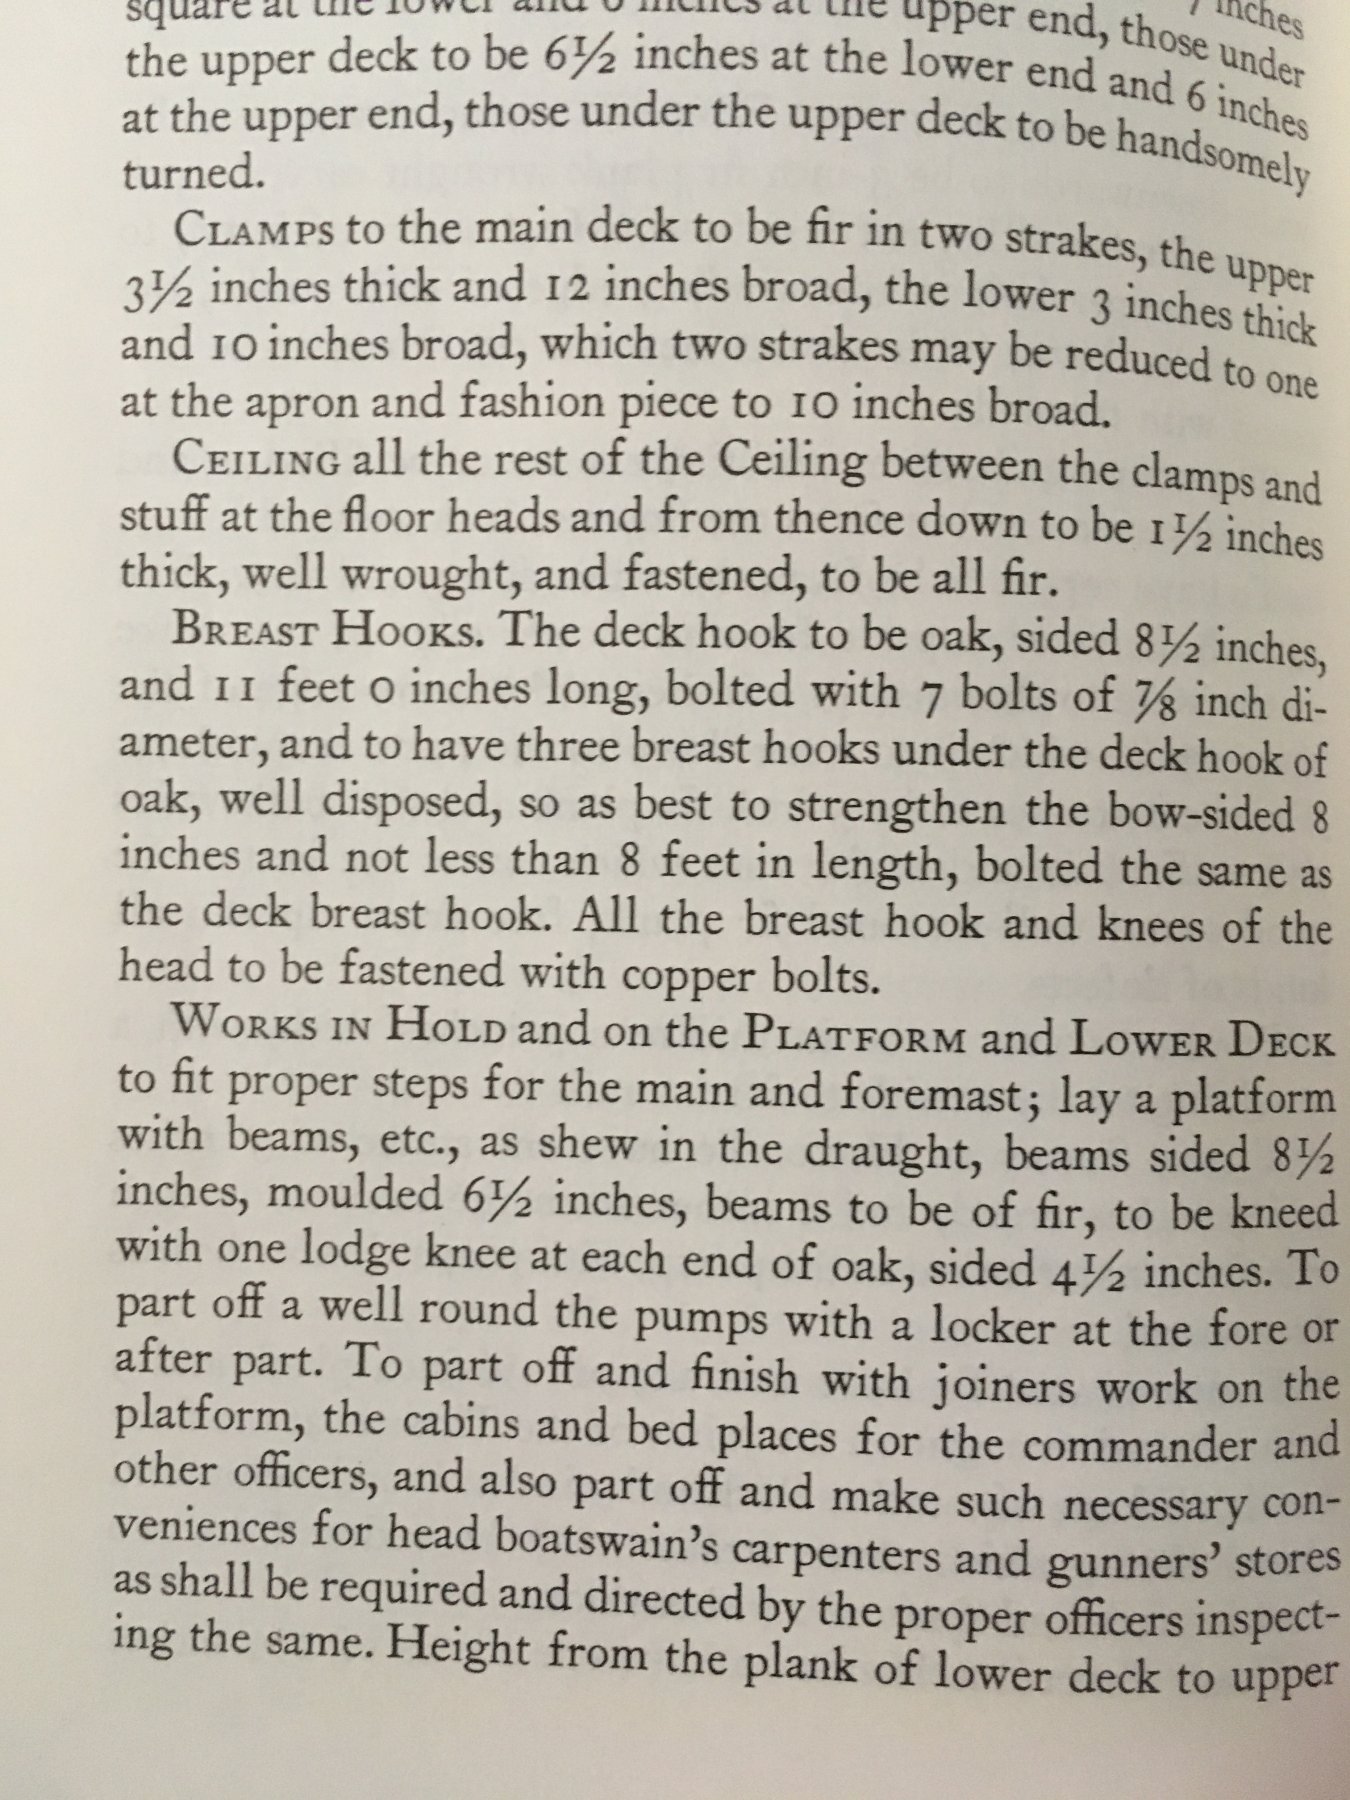
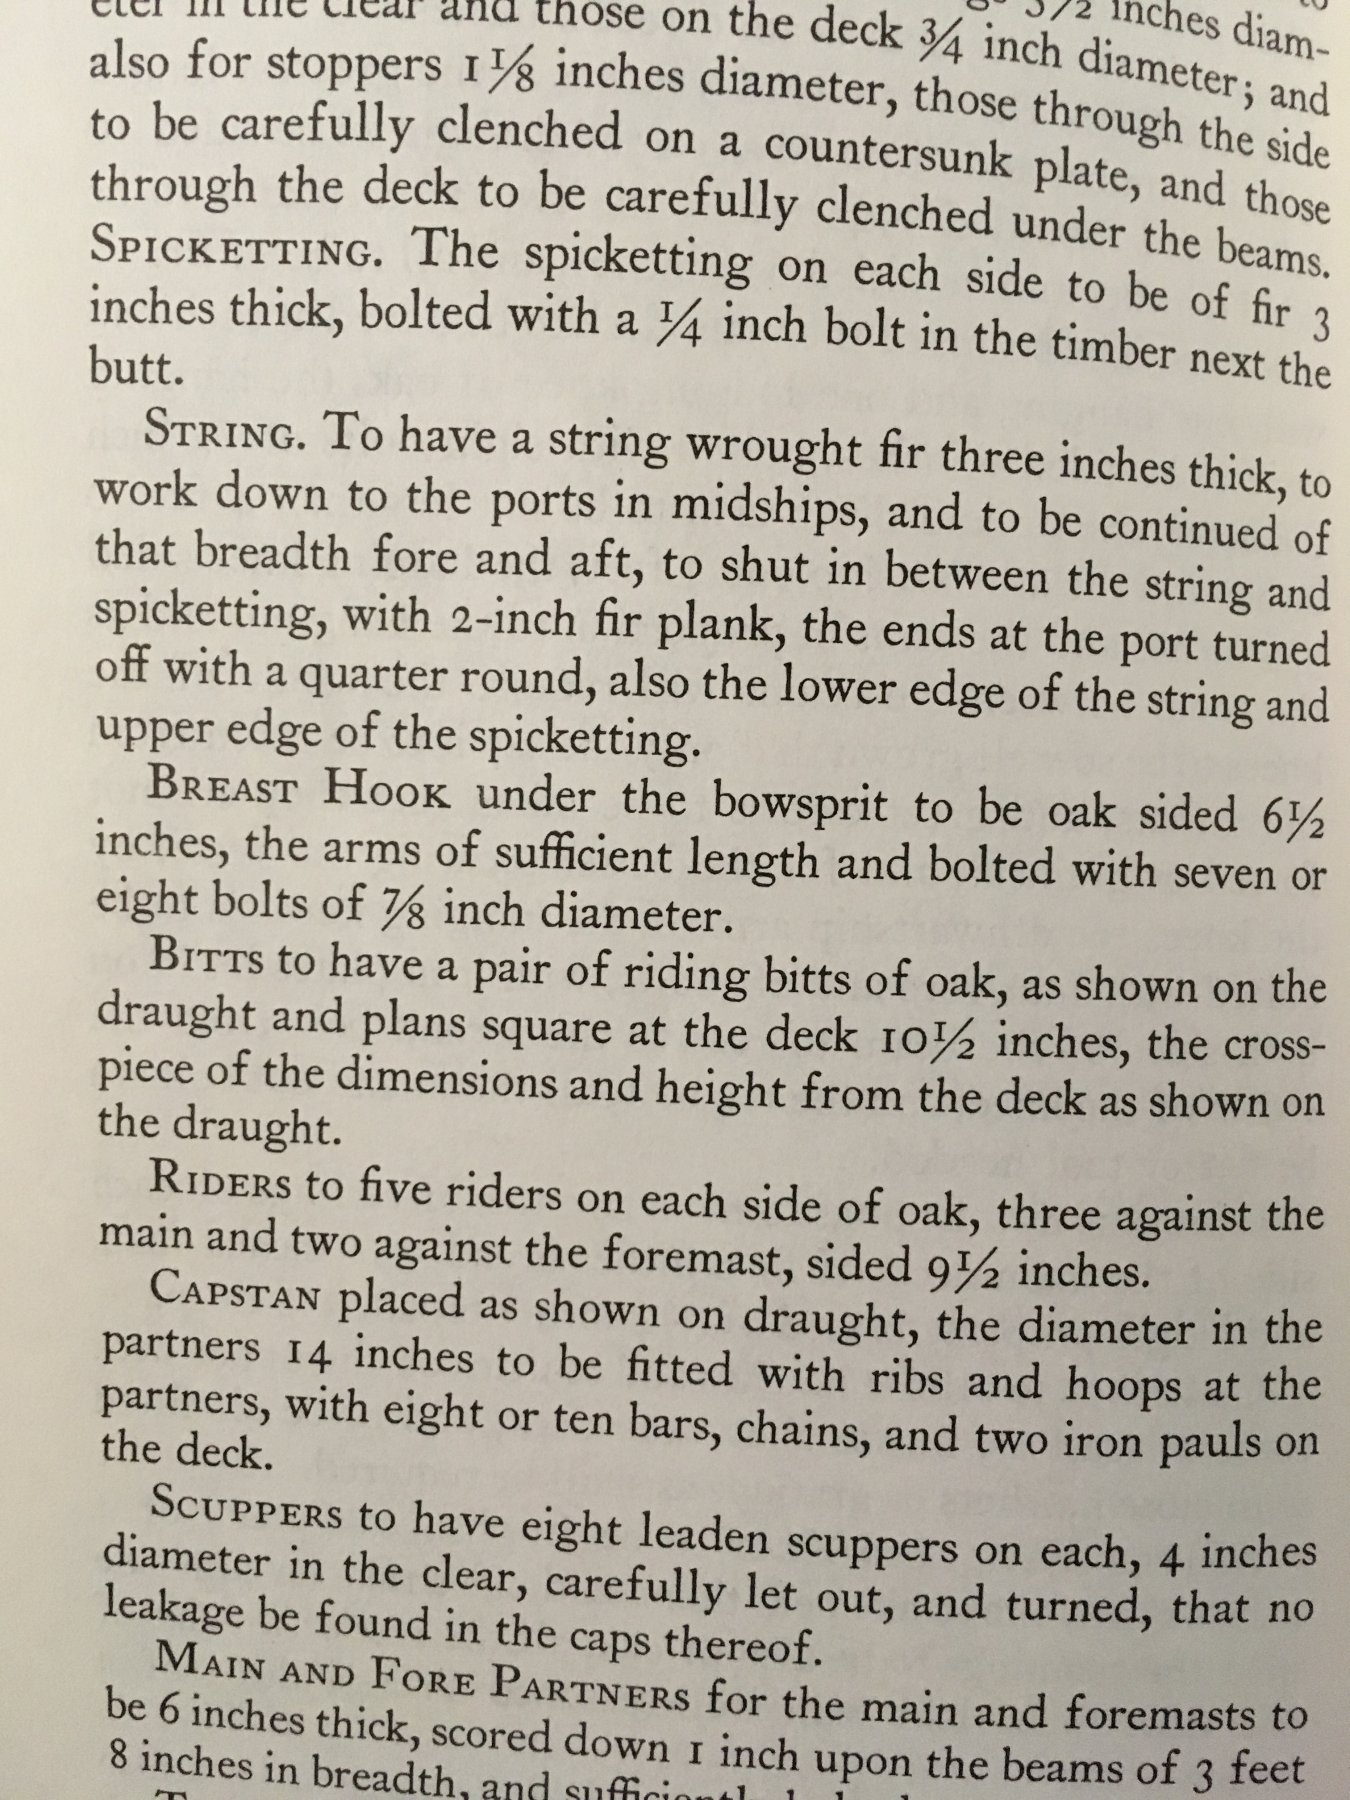
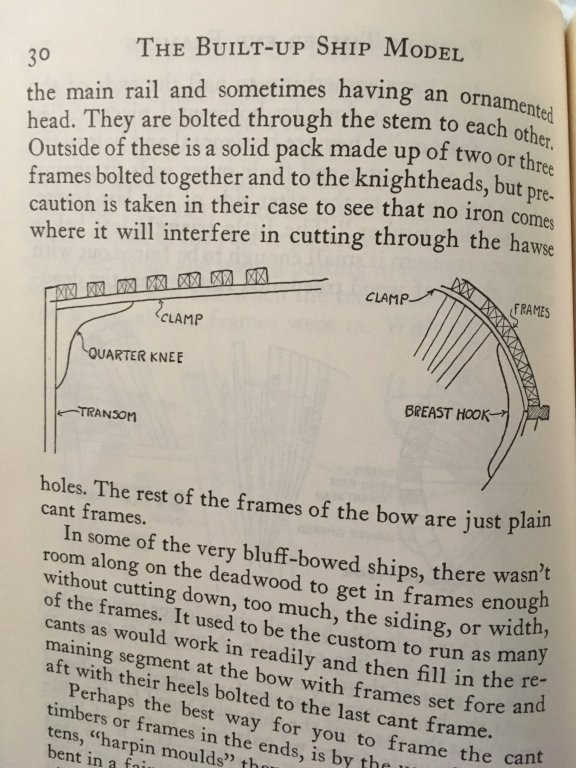
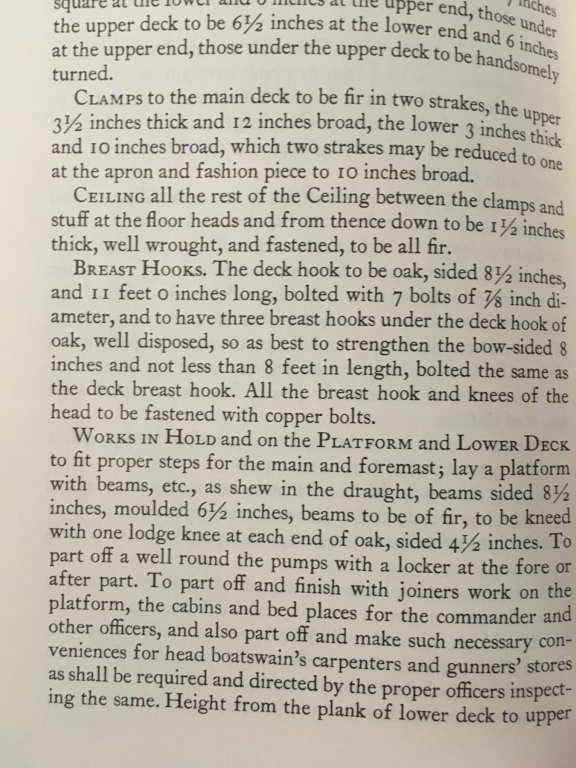
Hi Patrick, Your question interested me, so I consulted my very limited resources. In "The Built-Up Ship Model," Charles Davis includes the "Form of a Contract" from the Royal Navy to a shipbuilder for the specs of the 18-gun brig Raven in 1804. That's considerably later than your project, but maybe there's some continuity between the two. I know there are folks on this site who actually know what they're talking about, and maybe one of them will chime in! Evidently, there was more than one breasthook, at least on the brig Raven. At least one was located below the decking, as far as I can figure out, and helped tie the cant frames together in the bow. It was fastened to the frames through the deck clamp as were the quarter knees on the transom. See the first image. Here's the description in the Contract of this/these breasthooks: The Contract mentions another breasthook located under the bowsprit. So, on your model, I believe you could locate a breasthook between the deck and the rail, just under the bowsprit. I hope some of this was helpful. Cheers! Steve

- 756 replies
-
- 4
-
-
- galleon
- golden hind
- (and 2 more)
-
Beautiful work, Rony. I especially like how the Danish oil looks on the hatch and hatch covers. The contrast in the wood colors is quite striking. Steve
- 91 replies
-
- 1
-
-
- artesania latina
- Virginia
- (and 1 more)
-
Hi Rony, I think the Elmers wood glue you've been using should be fine. Someone who knows more might want to chime in here... Steve
- 91 replies
-
- 1
-
-
- artesania latina
- Virginia
- (and 1 more)
-
Rony, Your planking looks very smooth. Did your kit come with a bundle of very thin, darker brown strips of wood? I think that's why the wood on your model isn't looking like the wood in post #7. The model in that photo has the same wood as yours, but it also has a second layer of mahogany planks applied over the first layer. The mahogany planks are paper-thin; in fact, you can cut them easily with scissors. Those mahogany planks will look just the photo #7 when you apply the Danish oil to them. My apologies if you knew this already. Hope this helps. Steve
- 91 replies
-
- 2
-
-
- artesania latina
- Virginia
- (and 1 more)
-
Hi Sam, Yup, things have calmed down a bit around here. I just got done reorganizing the shipyard and plan to put a set of sails on the cutter. Have a happy Fourth! Steve
-
I'm very glad you decided to continue posting your build log. What beautiful craftsmanship! Steve
- 174 replies
-
- 1
-
-
- gaeta falcata
- marisstella
- (and 1 more)
-
Hi Rony, You're doing a fine job. You got the planking very smooth and fair. I'm impressed. I believe the second layer of planking you asked about in your last photo is mahogany. Beautiful wood! Keep the photos coming. Steve
-
+1 on one of those Buginese schooners with the long, raked prow. Beautiful craft. Steve
-
Beautiful shrouds and ratlines, Sam!
-
Welcome aboard, Jonk! I lived in Bandung for a few years back in the eighties. It's nice to see a ship modeller from Jawa. Steve