


Bob Cleek
-
Posts
3,374 -
Joined
-
Last visited
Content Type
Profiles
Forums
Gallery
Events
Everything posted by Bob Cleek
-
Treenail holes
Bob Cleek replied to Don Case's topic in Building, Framing, Planking and plating a ships hull and deck
Great information there! Just enough to explain the use of the term, "caulked trunnels." By that is obviously meant, variously, wedging the end of the trunnel, or actually caulking it, but not in the way described by one poster above as driving oakum in the seam between the trunnel and the plank! This latter meaning also better explains the purpose of a "trenail caulking iron" mentioned in the Antique Tool Collectors' Research Forum. http://www.numismalink.com/drew.ency.34.59a.html I've never before heard of the method described, but it makes perfect sense. The trunnel iron would be a "dumb iron" the width of a trunnel diameter used to split the trunnel end-grain and spread it to create a caulking seam. Oakum would then be driven into the crossed caulking seams in the head of the trunnel with an ordinary spike iron the width of the trunnel diameter, thereby spreading four quadrants of the trunnel end to apply pressure to the sides of the hole. These seams would then be stopped as any other caulked seam. The term, "caulking," is used consistently here, and properly, to increase the pressure against adjacent faying surfaces in order to create a watertight seal. The inboard end of a through-trunnel would presumably be simply wedged, as watertightness from that end would not be a concern. Trunnels which were set in "blind holes" which were not drilled entirely through the frame, would be "wedged blind," being split at the inboard end with the wedge partially inserted before driving, such that when the trunnel "bottomed out" in the hole, the wedge would be driven fully into the trunnel, spreading the end of the trunnel as it reached the bottom of the blind hole. This mechanics of caulking are often misunderstood by laypersons who think that it is the "caulking" material that "keeps the water out." (Although in modern general usage the term is used to describe the use of putties and tube-packaged goops to seal windows and bathtub seams and so do just that.) Not so. "Caulking" in the shipbuilding sense, is the practice of hammering material between joints to increase the pressure of the faying surfaces against each other which then, with the swelling of the wood in a wet environment, creates a tight seam under great pressure. That tight wood-to-wood joint is what makes the joint watertight. So, if one is anally oriented, it's time for them to start drawing little black (or dark brown) "X's" on the heads of all those over-scale trunnels to which they seem so attached. As for the good Mr. Caruthers' explanation of "caulked" plugs over countersunk fastenings as described above, I have to say "baloney" to that. Plugs are cut so their grain, when in place, will run the same as the host plank, not perpendicular to the surrounding grain, as do trunnels. (Were it otherwise, the plug's end-grain, being "tougher," would wear less than the face of the planks and, in short order, the plugs would begin to stand proud of the plank, resulting in a "bumpy" deck, making holystoning difficult, if not impossible, and protruding plugs liable to being knocked loose over time.) Trunnels, as described earlier, are held in place by being driven drier than the surrounding wood and then swelling up as they absorb moisture. Plugs are driven tight, but are held in place simply by that friction in their holes and may, or may not, be set in thickened shellac or other adhesive to ensure they stay in place. Plugs are not subject to the mechanical stresses that trunnels are. In fact, plugs are subject to little or no stress whatsoever once in place. Coating the countersunk head of an iron fastening with tar before the plug is set is sufficient to retard rusting which could serve to push the plug up and out of the countersunk hole. Traditionally, square-cut bare iron ship's nails had a string of oakum wrapped around the shank beneath their heads and the nail and oakum wrapping dipped in tar immediately before driving the square nail into the smaller round drilled pilot hole for the nail. The same was done beneath the washers with iron bolts and drifts. (This was in later times called "Chinese galvanizing," but I'm not exactly sure why. Perhaps it was a perjorative reference intended to convey a "quick and dirty" cost-cutting practice.) The plug was then set in the countersunk hole. There's no way to "caulk" a countersunk plug because its end-grain can't be split because it runs horizontally, not vertically, as does a trunnel's. Obviously, if a driven iron fastening were so loose that it was not watertight all on its own, watertightness was the least of its problems! -
Treenail holes
Bob Cleek replied to Don Case's topic in Building, Framing, Planking and plating a ships hull and deck
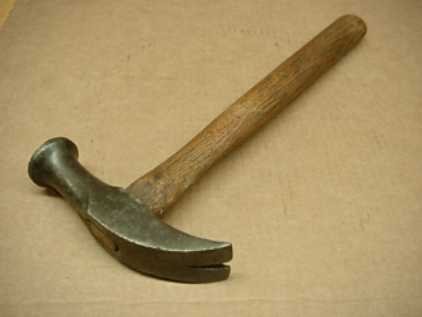
I don't claim to be an authority on Seventeenth and Eighteenth Century British Admiralty shipbuilding practices, but I do have a small bit of hands-on experience calking seams and driving trunnels. I may later stand corrected, but I don't believe seams on vertical surfaces were ever payed, which is the process of pouring hot molten liquid tar (or pitch compounds) from a hot can with a specialized spout designed for the purpose. Generally, then, it was only decks which were payed. I believe seams on vertical surfaces were "stopped" with similar "stopping" compounds of "plastic," rather than "liquid," pitch or tar applied with a putty knife. I don't dispute the obvious reference in the contemporary specifications to "caulking" trunnels, but, in that instance, I believe the reference is to the practice of sealing the end-grain with tar or pitch inside of the trunnel hole immediately before driving the trunnel or to apply stopping to wedged trunnels which had split or broken edges after driving. There is certainly no reason to drive oakum around a trunnel as has been described above in this thread. That's just plain silly. I've got at least a couple of dozen caulking irons in my caulker's bucket, which I obtained many years ago from the widow of a lifelong master ship caulker. While some are "bent irons," with their shafts bent to permit accessing difficult to reach seams, none are shaped like a gouge on the working edge of the iron for the purpose of caulking curved seams or trunnels. This is simply because such a gouge-shaped iron would prevent the proper driving of the caulking material which requires the iron to be "rocked" as the material is progressively driven down the length of the seam. Furthermore, caulking must be driven into a proper "V"-shaped "caulking seam" and there are irons called "dumb irons" which are made for the purpose of creating such seams. There's no such thing as a "dumb iron" for making caulking seams around the sides of trunnels. Making a caulking seam around the head of a trunnel would serve no purpose whatsoever, and would serve to weaken the holding power of the trunnel itself. Most of my caulking irons were made by C.Drew and Company, the foremost American manufacturers of wooden shipwrights tools back in the day. Fortunately, some wonk has posted the old Drew catalogs on the Antique Tool Collectors' Research Forum. http://www.numismalink.com/drew.ency.34.59a.html The Drew catalogs do mention "treenail irons," but provide no details or pictures. The author adds a detailed note, however, explaining that another apparently British catalog shows a picture of a "treenail iron" and describes the treenail iron as "like a spike iron but usually with a blunt edge about 1" wide" and the catalog explains that these were "Used for splitting and spreading the head of a trenail (British spelling) before inserting a wedge or caulking material." It remains a mystery why a caulker would ever have occasion to "caulk" a wedge, except that wedges or trunnel edges may chip, split, creating defective voids and these would be filled with stopping compound as the caulkers came across them when stopping the hull seams. http://www.numismalink.com/drew.note19.html Bottom line, it would appear nobody ever drove oakum around trunnels. Just imagine, were the assertion true, how much work that would be to create the caulking seam, drive the caulking material home. and stop the seam in thousands of trunnels ... and for what purpose? -
Treenail holes
Bob Cleek replied to Don Case's topic in Building, Framing, Planking and plating a ships hull and deck
Paying a horizontal seam with hot tar is a trick I'd love to see. Fascinating. i've never heard of caulked trunnels. or "Dutchmen" (a graving piece let in over a bolt in this case.) Trunnels are always driven as dry as they can be into tight holes so that when they swell back in the higher relative humidity, they will hold fast. They may also be tenoned, blind at the bottom, and/or at the top. There's no caulking in the world that is going to create a stronger friction fit than that (which would only be around the outer edge of the trunnel, anyhow.) I can't imagine what benefit there would possibly be to a "caulked" trunnel. As for Dutchmen, there's not enough meat on them for any sort of caulking to hold them in place reliably. Until the advent of modern adhesives, they were generally bedded and mechanically fastened. Is there a book that tells more about early trunneling practices? I sure can't wrap my head around what you're describing about caulking them. -
Neither do I, but catching up to them is challenging! I've come to accept that I haven't enough time left on this mortal coil to justify the time and energy investment in the steep learning curve CAD demands. I'm reconciled to dying at my drawing board, I'm afraid.
-
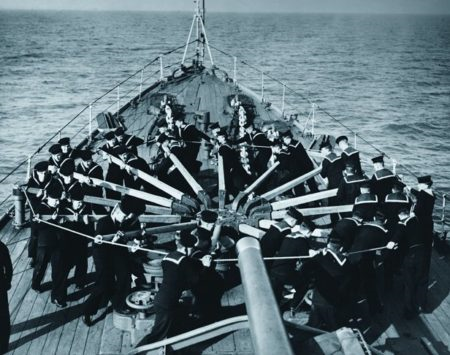
... which was the most practical posture, given that they often put their chest into it to push the bar. Oddly, though, the contemporary pictorial record frequently depicts seamen carelessly pushing the bars with their hands. Perhaps this was a casual approach used to take up a slack cable before the real work began. The guy on the right in the black cap is definitely a slacker, but then again, there's nothing on the drum! The men to the left are doing it right. The men to the right aren't. Likely "artistic license" in this engraving. It seems the Finnish Navy did things differently, but there doesn't appear to be anything on the drum in this apparently posed photo. I mean, really, who mans a capstan in their dress blues? Doing it right, but again, everybody's in their Class A's and this steam screw vessel appears underway at sea with white-painted anchor chain secured, clean and Bristol fashion, so what are they hauling, anyway? Germans, correctly putting their backs into it like they actually might be doing some real work.
-
Well, I guess you've established your bona fides! Welcome back! You're contributions promise to be of great value to us all. That said, from one whose experience overlaps your own, let me caution you not to be daunted by the masterpieces of today's digitally-sophisticated "micro-engineers" who are producing models we never dreamed possible twenty-five years ago! Our Preac saws and Unimat lathes that were state-of-the-art back in the day, are now but collectable reminders of times past, but we old practitioners of the manual arts still soldier on nontheless.
-
Justifying the purchase of a mill
Bob Cleek replied to Captain T's topic in Modeling tools and Workshop Equipment
So, Jim, now that you've got the R&D done, when might we expect this new Model Machines toy to go into production? -
Justifying the purchase of a mill
Bob Cleek replied to Captain T's topic in Modeling tools and Workshop Equipment
My problem wasn't the power, but the size of the tools. When we bought our current place 16 years ago, a house and a 1500 square foot workshop building on 2.5 acres zoned "commercial/agricultural," I noticed the two transformers on the utility pole with the "drop" to the workshop. The workshop had originally been a cabinetmaker's shop before the sellers had bought the place. There was no mention of what was obviously 440 VAC three-phase commercial-rate power to the shop, and I said nothing. I've never had the need to acquire any three-phase equipment, which can often be found dirt cheap on the used market, but I did pull two 220 VAC circuits off of the 440 VAC panel and wire the shop with 220 VAC outlets all around for my stationary power tools. Three-phase power is much less expensive than single phase, so the monthly bill on the shop meter is less than ten bucks. (Yes, I've thought of running a line from the shop back to the house, but you can go to jail for doing that.) Years later, a friend who worked for the local power company told me getting 440 VAC three-phase commercial service installed, assuming one could get a permit, would run at least $25,000 and I nearly wet my pants! Meanwhile, if I come across a big Bridgeport with all the trimmings for the price of hauling it away, I'm good to go. -
Hand-made violins by Bitao - FINISHED
Bob Cleek replied to Bitao's topic in Non-ship/categorised builds
Beautiful! Does it sound good? Have you ever visited the website of the Craftsmanship Museum that is run by the Sherline Company that makes small lathes? It's full of beautiful photos and information about the most amazing miniatures and models I've ever seen. (The website has a lot of "depth" beneath the home page, so play around with it to see how much is there.) Check it out: https://www.craftsmanshipmuseum.com/ And all moving parts in the prototype move in the miniature model! -
Treenail holes
Bob Cleek replied to Don Case's topic in Building, Framing, Planking and plating a ships hull and deck
Generally, one would drill before assembly. However, at most model scales, trunnels are invisible at scale viewing distance. In prototype practice, the trunnels were not of greatly contrasting color and never intended to be a visual feature of the design. In large measure, visible trunnels are a modern modeler's fetish, not an accurate depiction of the real thing. For a price, there are small right-angle handpieces for the Foredom flex-shaft system and professional "dental engines," which will drill at any angle you want in small spaces, like your mouth. For Foredom flex-shaft machines, about the size of a pencil: https://www.moldshoptools.com/catalog/list.php?category_id=51 For dental laboratory engines, the handpiece options are virtually endless. They come in a variety of angles and sizes. Search eBay for used dental laboratory equipment. There are many useful tools used by dentists and dental labs, which make bridges, crowns, and dentures and such, that are extremely useful to the modeler. You might ask your dentist where to go locally for used dental equipment. Dental technology has advanced greatly in recent times. Many dentists are using air-driven dental drills now. The older belt-driven equipment is often piled up in an office closet and may sometimes even be had for the asking! Here's a once top of the line belt-driven dental lab bench engine with a handpiece on eBay for $500: https://www.ebay.com/itm/133352050765?hash=item1f0c66d04d:g:hZoAAOSw-wVeYGMN With 45 and 90 degree handpieces and a few collets, bits and burrs, you'd be able to do just about any sort of drilling and carving a modeler could ever want to do in wood, metal, bone, or plastic. -
It is at that point where "craftsmanship" segues into "art." Subtle artistic techniques, especially restrained and skillful painting and weathering, can "suggest" features and details which are, in reality, not there. This is what I call "impressionistic modeling:" the art of creating a compelling impression of reality in miniature.
-
But expressing ideas often enables one to avoid a lot of unsuccessful executions! 😉
-
The MS Syren kit model is in 1:64 scale. Forgetting for the moment that coppering tacks are driven flush with the plate surface and don't "stick up" at all, the tack heads on her copper plating would be, at most, around 3/8" in diameter, but let's be generous in the spirit of artistic license and call them 1/2" in diameter. To scale, then, they would have to be .0078", and again, let's be generous and call that .008" scale size. So, the "tiny tacks" with their points cut off that Chuck recommends for dimpling the copper sheets will have to be about the diameter of a #92 twist drill bit, which is actually .0079" and, properly, produce an impression that does not rise above the surface of the plate, which itself renders the "dimpling" exercise pointless. (Pun intended. ) Applying the "scale viewing analysis" I described above to this Syren kit, the question to be answered if one were viewing this model from a distance of two feet, "If you are standing on the 43 yard line of a football field, what would a dime on the nearest goalpost painted the same color as that goalpost, look like?" For the sake of simplicity, we'll ignore variables such as the visual acuity of the viewer and atmospheric distortions. Of course, one needs to also make sure the scale thickness of the prototype's plates, which were probably around a quarter of an inch thick, are to scale as well, about .004", the average thickness of a human hair, so while you are at the football field, be sure to hang from the goal post a couple of pieces of overlaped quarter-inch plywood painted the same color and check out what that overlapping seam looks like from 43 yards away, too.
-
The catch is "at the appropriate scale," and this is true not only for tacks in copper plating, but for any detail on a model. A coppering tack head is between a quarter and three-eighths of an inch in diameter. At 1:48 scale, that .25" tack head is going to be .0052", less than the thickness of a thick human hair and at 1:96 scale, it will be .0026" or half the thickness of a human hair. (Good luck finding a watch gear for your shop made ponce wheel that will replicate that!) At 1:48 scale, a one inch trunnel is going to be .02", which is the diameter of a #76 twist drill bit and at !:98 scale, a #87 twist drill bit . (Remember also that trunnels were not generally made of wood of color which highly contrasted with the wood into which they were placed.) If you can work to these tolerances, by all means, go for it, but realize that even if your work is done well, very few viewers will notice it unless they are examining your model under a magnifying glass. At most common model scales, copper tacks and copper plate laps are virtually invisible at "scale viewing distance." The fetish with out-of-scale "rivets" and trunnels is the result of a lack of understanding of the importance of scale viewing distance. Scale viewing distance is the distance a person would have to stand from the prototype to equal the distance from which they are viewing the model. Another way of looking at it, so to speak, is that if you are looking at a model with your eyes two feet from a model built to 1:48 scale, the scale viewing distance is 96 feet, so you have to ask ask yourself, if you are standing on the 32 yard line of a football field, can you see a quarter inch bolt head on the goal posts closest to you? And if your model is built to 1:96 scale, you'd be standing on the other side's 14 yard line trying to see a quarter inch bolt head on the goal posts farthest from you.
-
14 hours ago, Bob Cleek said: The problem, however, is that no copper hull sheathing was ever riveted to a hull. Not once. Not ever. Fastenings were copper tacks. 4 hours ago, Gregory said: Interesting how this keeps getting lost or ignored in the discussion.. It is, isn't it? I sure don't get it. Shiny copper foil full of hugely out-of-scale "pimples" that don't remotely represent a prototype certainly doesn't make any sense to me at all. I suppose it's the "monkey see, monkey do" phenomenon. That and the fact that it appears a substantial segment of the kit builders have never been aboard a ship in real life, let alone a two-hundred year old one. I guess they come by it honestly. If they're having fun, I suppose it's a good thing anyway,
-
Ya think? In a book somewhere (like everything else I can't remember) and perhaps in the USN ship model mill-specs, there is a rule to follow for scale detail. It goes something like, "At 1:48 scale, all detail larger in size than a foot in any direction must be represented." (And conversely, all detail smaller than a foot in any direction may be omitted.) So at what scale would a quarter or three-eighth's inch copper tack head not required to be represented?
-
I think you have it backwards, the pounce wheel presses into the copper tape, creating concave dimples, flip the tape over and use the pounce wheel to create convex dimples that would better simulate rivets. Yes, the ponce wheel creates "dents" that look like "bumps" when you turn the copper sheet over and put it on the hull. These may indeed simulate rivets, more or less accurately, depending upon the scale. The problem, however, is that no copper hull sheathing was ever riveted to a hull. Not once. Not ever. Fastenings were copper tacks. When metal hulls came to be riveted together, a round-headed rivet was actually disfavored below the waterline in top quality construction. Countersunk headed rivets were used below the waterline create an smoother bottom.
-
You'd go crazy laying "wood tiles" to mimic copper sheathing. It would be far easier to paste paper tiles and then saturate them in shellac. (Layers of muslin cloth soaked in shellac were laminated into sheets to make insulated circuit board material in the days before plastics. Shellac lasts forever and is very thin, so it won't obscure details.) Then paint and weather that surface. another approach that would work well would be to plank up the hull in the ordinary way and then give the bottom a light coating of gesso and sand that fair. Then scribe the fine lines in the gesso depicting the plating joints with a flexible straight edge and fine knife blade or scribe point (But don't overdo it. It's just the suggestion of a line that you want.) Then paint and weather.
-
First off, the "ponce wheel effect" produces convex "dimples," while the picture shows concave dimples. Big difference. Second, the workmen in the picture are doing a really lousy job of it. (The hardhats are a dead giveaway. They're probably government subcontractors who belong to the roofers' union, not the caulkers' union, which I don't think exists anymore, although there once was one. See footnote below.) They are driving the tacks with carpenter's hammers, which leave large dimples and creases in the copper surface. A ship's bottom should be as smooth as possible to reduce friction resistance in the water. Copper sheathing is properly fastened with a "coppering hammer," which has a convex-shaped striking face with a rounded edge that permits the tack head to be driven flush with the surface of the copper sheet while minimizing dimpling and preventing creasing the sheet itself. A newly coppered yacht hull properly done. A copper plate on USS Constitution photographed during restoration: Note the absence of "rivets (sic)" on a well-portrayed copper bottom on a fine model of Cutty Sark: Footnote: Caulking in the United States became a trade widely practiced by free African Americans in the mid-nineteenth century. Many caulking crews were itinerant workers who would travel from shipyard to ship yard to caulk hulls on contract as their skills were required. Racial discrimination in the workplace resulted African American caulkers buying their own shipyard, the Chesapeake Marin Railway and Dry Docking Company in 1866. This was quickly followed by the formation of the Colored Caulkers' Trade Union in 1868, one of the first African American trade unions to be created and the precursor to the Colored National Labor Union. When the founding president of the Colored Caulkers' Trade Union became the president of the Colored National Labor Union, he was followed as president of the Colored Caulkers' Trade Union by Frederick Douglass. Famed as a leader of the American abolitionist movement, few today realize that Frederick Douglass was a ship's caulker by trade and trade unionist, as well. See: https://aflcio.org/2021/2/11/pathway-progress-baltimore-caulkers-take-charge-their-own-future and https://en.wikipedia.org/wiki/Isaac_Myers
-
The paper does indeed have to be to scale, of course. IMHO, the problem arises because folks can't let go of trying to use "real" copper on their models and trying to portray their scale copper sheathing as shiny as a new penny. Real coppered bottoms look a lot more like old copper pennies, not new ones. New copper sheet will be "new penny shiny" straight from the mill, but within weeks, if not days, in the salt air, will be developing a patina, first bright green (verdigris) and later moving to "copper brown." Once the hull hits the water, all bets are off, since the hull will rather quickly foul with marine growth. A verdigris patina will develop at the waterline where air and water mix, while below the waterline it will become copper brown covered with "bottom crud" to one degree or another. Save for the time when it's actually applied, brand new shiny copper sheathing just isn't seen in real life. Folks who are impressed with "real copper plating" are drinking kit manufacturers' Kool Aid. It's just marketing hype.
-
Not hardly. I've seen enough copper-sheathed bottoms in real life to know what they really look like.
-
No need to think any longer. I'll confirm that fact. Thin (proper scale thickness) archival bond paper glued on in "plates" of the correct size, following which the plates are shellacked to stabilize them and render the scales impervious to moisture, and then painted and weathered appropriately will do the best job of portraying a coppered bottom. The standard office/classroom paper cutter is just the ticket for getting out the plates.
-
Yes and no. Been there, done that, got the tee shirt. Such a paper cutter will cut uniform widths of copper sheet, but the shearing cut will cause the strip to curl. The copper strip then has to be straightened by putting one end of the strip in a vise and pulling hard on it from the other end with a pair of vice grips attached until the strip straightens out. That said, I've seen very, very few models with coppered bottoms which did not significantly detract from the model's appearance.
-
Split Rings.
Bob Cleek replied to Schaye Goldcwaig's topic in Metal Work, Soldering and Metal Fittings
Does counting the number of different sized rings and the number of different types of rings on the plans offer any clues? If you have the same number of (probably smaller) rings as you have gun tackle attachments, you'll know which ones to use on the gun tackles. Otherwise, I'd just give a call to Model Shipways and ask them. Somebody there can probably answer your question.

