


Bob Cleek
-
Posts
3,374 -
Joined
-
Last visited
Reputation Activity
-
 Bob Cleek reacted to rwiederrich in Glory of the Seas 1869 by rwiederrich - FINISHED - 1/96 - medium clipper
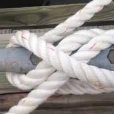
"Masting and Rigging the Clipper Ship and Ocean Carrier" A used one of Ebay for $28~ $60
Rob
-
 Bob Cleek got a reaction from michael mott in Elbe 5 1883 by Mirabell61 - FINISHED - scale 1:50 - pilot schooner as she appeared c. 1890
I know her well. She was on S.F. Bay for many decades, known as Wander Bird. She was a rig-less houseboat in Sausalito when I first met her in the early seventies, thirty years or so after she'd completed her voyage west around Cape Horn to San Francisco before the War. Warwick Tompkins had skippered her around the Horn with his wife, two young children, and a paid hand. Warwick was a well-known local yachtsman, as to this day is his son, Warwick "Commodore" Tompkins, who was four at the time of their voyage.
Warwick M. Tompkins wrote two books about his family's voyage around Cape Horn in Wander Bird: Fifty South to Fifty South, 1938, W.W.Norton & Co., NY and Two Sailors, 1939, The Viking Press, NY, (a story of the voyage written from the perspective of the Tompkins children.) Both of these books are full of good photographs showing details of the vessel which would likely be very helpful to the modeler. Fifty South by Fifty South, contains together with the expected narrative of the voyage, an appendix containing many technical details on the vessel . Warwick Tompkins also made a 35mm movie of the voyage entitled In the Wake of the Clippers, which a modeler would probably be interested in watching. I've never seen the movie and I don't know if it is still extant. I'm sure "Commodore Thompkins" would know. I expect he could be reached through the St. Francis Yacht Club in San Francisco.
Wander Bird was later acquired by Hal Sommer, a local tug boat skipper and acquaintance of mine, who spent years restoring "the Bird" to mint condition and sailing her on the Bay. Wander Bird was for many years the centerpiece of the classic yacht community on San Francisco Bay. I was fortunate to be able to witness a lot of the work done on her and I learned much about larger wooden shipbuilding by watching Hal, his son Ross, and other "old timers" working on her. Wander Bird was ultimately sold and moved up to Washington, I believe, and then returned to Germany as a museum ship.
The restored Bird sailing off Yellow Bluff heading home to Sausalito, CA on S.F. Bay. Note the two crew aloft at the mainmast doubling. I have no idea what they are doing up there, other than "skylarking," but I doubt that. Hal ran a tight ship so I doubt they were up there for fun. They wouldn't have been raising setting a topsail in than wind and on that course and there's no evidence of one on deck,
She carried a rafee topsail earlier in her life:
I'm looking forward to your build log!
-
 Bob Cleek got a reaction from Canute in Looking for a good "starter" pin vise set
Ah, but if you needed to know the time in order to navigate, I bet you would be!
-
Bob Cleek got a reaction from Canute in Air brush vs paint & brush
Absolutely! That's one of the biggest advantages of an airbrush. Also, if you are airbrushing with acrylics and you thin them with denatured alcohol , they will dry much faster because alcohol evaporates much more quickly than water.
-
 Bob Cleek got a reaction from muzzleloader in Air brush vs paint & brush
Just a tip if you haven't tried it as yet: You can practice technique using water as a medium on absorbent paper, perhaps with a touch of watercolor or food coloring mixed in if your paper doesn't show much wet/dry contrast. Often, just plain water will show up quite well. Brown paper bag paper works well because it gets dark when wet. In this way, There's really no clean-up after practicing that needs to be done unless you've run some colored water through your gun and even then, all that's required is to just rinse it out.
-
 Bob Cleek got a reaction from tarbrush in Elbe 5 1883 by Mirabell61 - FINISHED - scale 1:50 - pilot schooner as she appeared c. 1890
I know her well. She was on S.F. Bay for many decades, known as Wander Bird. She was a rig-less houseboat in Sausalito when I first met her in the early seventies, thirty years or so after she'd completed her voyage west around Cape Horn to San Francisco before the War. Warwick Tompkins had skippered her around the Horn with his wife, two young children, and a paid hand. Warwick was a well-known local yachtsman, as to this day is his son, Warwick "Commodore" Tompkins, who was four at the time of their voyage.
Warwick M. Tompkins wrote two books about his family's voyage around Cape Horn in Wander Bird: Fifty South to Fifty South, 1938, W.W.Norton & Co., NY and Two Sailors, 1939, The Viking Press, NY, (a story of the voyage written from the perspective of the Tompkins children.) Both of these books are full of good photographs showing details of the vessel which would likely be very helpful to the modeler. Fifty South by Fifty South, contains together with the expected narrative of the voyage, an appendix containing many technical details on the vessel . Warwick Tompkins also made a 35mm movie of the voyage entitled In the Wake of the Clippers, which a modeler would probably be interested in watching. I've never seen the movie and I don't know if it is still extant. I'm sure "Commodore Thompkins" would know. I expect he could be reached through the St. Francis Yacht Club in San Francisco.
Wander Bird was later acquired by Hal Sommer, a local tug boat skipper and acquaintance of mine, who spent years restoring "the Bird" to mint condition and sailing her on the Bay. Wander Bird was for many years the centerpiece of the classic yacht community on San Francisco Bay. I was fortunate to be able to witness a lot of the work done on her and I learned much about larger wooden shipbuilding by watching Hal, his son Ross, and other "old timers" working on her. Wander Bird was ultimately sold and moved up to Washington, I believe, and then returned to Germany as a museum ship.
The restored Bird sailing off Yellow Bluff heading home to Sausalito, CA on S.F. Bay. Note the two crew aloft at the mainmast doubling. I have no idea what they are doing up there, other than "skylarking," but I doubt that. Hal ran a tight ship so I doubt they were up there for fun. They wouldn't have been raising setting a topsail in than wind and on that course and there's no evidence of one on deck,
She carried a rafee topsail earlier in her life:
I'm looking forward to your build log!
-
 Bob Cleek got a reaction from mtaylor in Air brush vs paint & brush
Absolutely! That's one of the biggest advantages of an airbrush. Also, if you are airbrushing with acrylics and you thin them with denatured alcohol , they will dry much faster because alcohol evaporates much more quickly than water.
-
.thumb.jpeg.fc5d633a7b34428fcf19419a73d56d55.jpeg) Bob Cleek got a reaction from EricWilliamMarshall in Woodshop/Woodcraft Books
Bob Cleek got a reaction from EricWilliamMarshall in Woodshop/Woodcraft Books
Tage Frid Teaches Woodworking: Three Step-by-Step Guidebooks to Essential Woodworking Techniques. Book 1: "Joinery," Book 2: "Shaping, Veneering, Finishing," and ""Book 3: "Furniture making," In print for probably close to 40 years now, this is considered by some the Bible on classic hand tool woodworking. Originally three separate volumes published by Fine Woodworking, and then in a three volume slip-cased set by Taunton Press. Written by the late Tage Frid, a traditionally trained Danish-born woodworker who was a big player in the American custom art furniture movement. Nearly everything in Frid's books translates easily to modeling because he covers well the basics of traditional woodworking hand tools. Modern power woodworking tools are covered, as well. Profusely illustrated. A recognized primary reference work on the subject. Tage Frid Teaches Woodworking: Three Step-by-Step Guidebooks to Essential Woodworking Techniques: Frid, Tage: 9781561588268: Amazon.com: Books
It's also available in online in PDF format: [pdf] Download Tage Frid Teaches Woodworking Ebook and Read Online (saintlukebc.org)
-
Bob Cleek reacted to kurtvd19 in Air brush vs paint & brush
I belong to a local IPMS chapter though I seldom build plastic models. We just had one of the founding members of our chapter pass away. He built airplanes and never used an airbrush. He won many awards at IPMS contests and when people found out he didn't use an airbrush they didn't believe it. His models stood up under close scrutiny at these contests so he was competing against expert airbrush users.
A brush in the hands of an expert can produce a great finish just as an airbrush can produce a bad paint job in the hands of somebody who never practices. Both depend on the skill of the user to produce a great paint job. In my opinion it is easier to accomplish with an airbrush but only after a lot of practice - but a lot less than with a brush.
-
 Bob Cleek got a reaction from Old Collingwood in Air brush vs paint & brush
Absolutely! That's one of the biggest advantages of an airbrush. Also, if you are airbrushing with acrylics and you thin them with denatured alcohol , they will dry much faster because alcohol evaporates much more quickly than water.
-
Bob Cleek reacted to Old Collingwood in Air brush vs paint & brush
I am still quite new to Airbrush painting and agree there are Two sides to it 1)The cleaning and preperation of the airbrush/spraybooth and 2)The actual using of it and practice getting used to the feel of it and the flow of paint out of it.
But like all things its practice - practice - practice that make all the difference.
One last thing - Airbrushes make it possible to put down thinner layers of paint than a brush - making surface details really stand out more than a thicker brush painted layer.
OC.
-
Bob Cleek reacted to druxey in Air brush vs paint & brush
Yes, surgically cleaning out airbrushes is a drag, but essential. Bob: that is a great tip!
-
Bob Cleek reacted to michael mott in Air brush vs paint & brush
That is a really great bit of advice, I wish I had though of it Bob. There you go one learns something new every day.
Michael
-
 Bob Cleek got a reaction from Cleat in Air brush vs paint & brush
Just a tip if you haven't tried it as yet: You can practice technique using water as a medium on absorbent paper, perhaps with a touch of watercolor or food coloring mixed in if your paper doesn't show much wet/dry contrast. Often, just plain water will show up quite well. Brown paper bag paper works well because it gets dark when wet. In this way, There's really no clean-up after practicing that needs to be done unless you've run some colored water through your gun and even then, all that's required is to just rinse it out.
-
 Bob Cleek got a reaction from Dave_E in Air brush vs paint & brush
What Kurt, the air brush guru, said.
It depends upon the level of your modeling skill. There's little point in putting lipstick on a pig. When you're ready for an air brush, you'll know it. If you aren't an accomplished brush painter, that will be sooner, rather than later, as your skill grows. Most of the masterpiece models displayed in museums were build before air brushes were invented, but they knew how to paint with brushes in the old days. The learning curve is much less steep with an air brush.
That said, don't throw out your brushes just yet. A brush in the hand of an experienced painter can do just about anything an air brush can, and then some, while the same can be said about airbrushes. Each have their unique capabilities. I'd expect most serious modelers use both with equal ability.
-
Bob Cleek got a reaction from Canute in Air brush vs paint & brush
Just a tip if you haven't tried it as yet: You can practice technique using water as a medium on absorbent paper, perhaps with a touch of watercolor or food coloring mixed in if your paper doesn't show much wet/dry contrast. Often, just plain water will show up quite well. Brown paper bag paper works well because it gets dark when wet. In this way, There's really no clean-up after practicing that needs to be done unless you've run some colored water through your gun and even then, all that's required is to just rinse it out.
-
 Bob Cleek got a reaction from shipman in Air brush vs paint & brush
What Kurt, the air brush guru, said.
It depends upon the level of your modeling skill. There's little point in putting lipstick on a pig. When you're ready for an air brush, you'll know it. If you aren't an accomplished brush painter, that will be sooner, rather than later, as your skill grows. Most of the masterpiece models displayed in museums were build before air brushes were invented, but they knew how to paint with brushes in the old days. The learning curve is much less steep with an air brush.
That said, don't throw out your brushes just yet. A brush in the hand of an experienced painter can do just about anything an air brush can, and then some, while the same can be said about airbrushes. Each have their unique capabilities. I'd expect most serious modelers use both with equal ability.
-
Bob Cleek got a reaction from shipman in Air brush vs paint & brush
Just a tip if you haven't tried it as yet: You can practice technique using water as a medium on absorbent paper, perhaps with a touch of watercolor or food coloring mixed in if your paper doesn't show much wet/dry contrast. Often, just plain water will show up quite well. Brown paper bag paper works well because it gets dark when wet. In this way, There's really no clean-up after practicing that needs to be done unless you've run some colored water through your gun and even then, all that's required is to just rinse it out.
-
Bob Cleek got a reaction from Old Collingwood in Air brush vs paint & brush
Just a tip if you haven't tried it as yet: You can practice technique using water as a medium on absorbent paper, perhaps with a touch of watercolor or food coloring mixed in if your paper doesn't show much wet/dry contrast. Often, just plain water will show up quite well. Brown paper bag paper works well because it gets dark when wet. In this way, There's really no clean-up after practicing that needs to be done unless you've run some colored water through your gun and even then, all that's required is to just rinse it out.
-
 Bob Cleek got a reaction from druxey in Air brush vs paint & brush
Just a tip if you haven't tried it as yet: You can practice technique using water as a medium on absorbent paper, perhaps with a touch of watercolor or food coloring mixed in if your paper doesn't show much wet/dry contrast. Often, just plain water will show up quite well. Brown paper bag paper works well because it gets dark when wet. In this way, There's really no clean-up after practicing that needs to be done unless you've run some colored water through your gun and even then, all that's required is to just rinse it out.
-
Bob Cleek got a reaction from michael mott in Air brush vs paint & brush
Just a tip if you haven't tried it as yet: You can practice technique using water as a medium on absorbent paper, perhaps with a touch of watercolor or food coloring mixed in if your paper doesn't show much wet/dry contrast. Often, just plain water will show up quite well. Brown paper bag paper works well because it gets dark when wet. In this way, There's really no clean-up after practicing that needs to be done unless you've run some colored water through your gun and even then, all that's required is to just rinse it out.
-
 Bob Cleek got a reaction from MEDDO in Air brush vs paint & brush
Just a tip if you haven't tried it as yet: You can practice technique using water as a medium on absorbent paper, perhaps with a touch of watercolor or food coloring mixed in if your paper doesn't show much wet/dry contrast. Often, just plain water will show up quite well. Brown paper bag paper works well because it gets dark when wet. In this way, There's really no clean-up after practicing that needs to be done unless you've run some colored water through your gun and even then, all that's required is to just rinse it out.
-
 Bob Cleek got a reaction from Roger Pellett in Air brush vs paint & brush
Just a tip if you haven't tried it as yet: You can practice technique using water as a medium on absorbent paper, perhaps with a touch of watercolor or food coloring mixed in if your paper doesn't show much wet/dry contrast. Often, just plain water will show up quite well. Brown paper bag paper works well because it gets dark when wet. In this way, There's really no clean-up after practicing that needs to be done unless you've run some colored water through your gun and even then, all that's required is to just rinse it out.
-
Bob Cleek got a reaction from mtaylor in Looking for a good "starter" pin vise set
Ah, but if you needed to know the time in order to navigate, I bet you would be!
-
 Bob Cleek got a reaction from Gregory in Looking for a good "starter" pin vise set
Ah, but if you needed to know the time in order to navigate, I bet you would be!