md1400cs
-
Posts
2,870 -
Joined
-
Last visited
Content Type
Profiles
Forums
Gallery
Events
Everything posted by md1400cs
-
 As always Patrick another awesome in progress build log 🍺 Cheers,
 -
Nice well researched updates. Re: Doris her SotS is, in my opinion, by far the most beautiful example. AND she hand made all of the hundreds of gold decorative bits as well. I think that she has a log here at MSW??
-
Evan, By coincidence I found your log. Clicked and read your opening intro to this build. hahaha - So you are not a "fan" of this ship. I then went through your superbly explained and photographed log. Well - you have indeed become a Titanic fanatic (huge compliment) making sure that your example could arguably become the best possible example of this Trumpeter kit given your scratch work (love the rudder BTW) and then you removed incorrect kit castings fixing those with your custom work. Great work!!!. Will also follow with much interest. PS: I did see the movie until the end haha. Cheers,
-
Peter, Very nice indeed - Looking great !!! Congrats 🍺
- 366 replies
-
- 2
-

-
- bellerophon
- victory models
- (and 2 more)
-
Siggi, I have been followed this amazing log since its first timber was cut - that said, many “likes” but few comments. Your work and this ship are so beyond my skill set - BUT I have so enjoyed following 👍👍 and I have learned so much as well. Regards,
-
Marc, As always such a pleasure dropping by --- PS: Yes, that Modelships.de site has amazing models - I've known about it and spent lots of time looking through some of those builds for several years now. AND the double click closeup images are so helpful for learning about how to add details to a build. Cheers,
- 2,699 replies
-
- 3
-

-
-
- heller
- soleil royal
- (and 9 more)
-
Thanks Frank, Enjoy your year end holidays Cheers,
-
Patrick, Yes your treenails look just perfect indeed. I put those on my buy list from Cornwall - great find!! Regards,
-
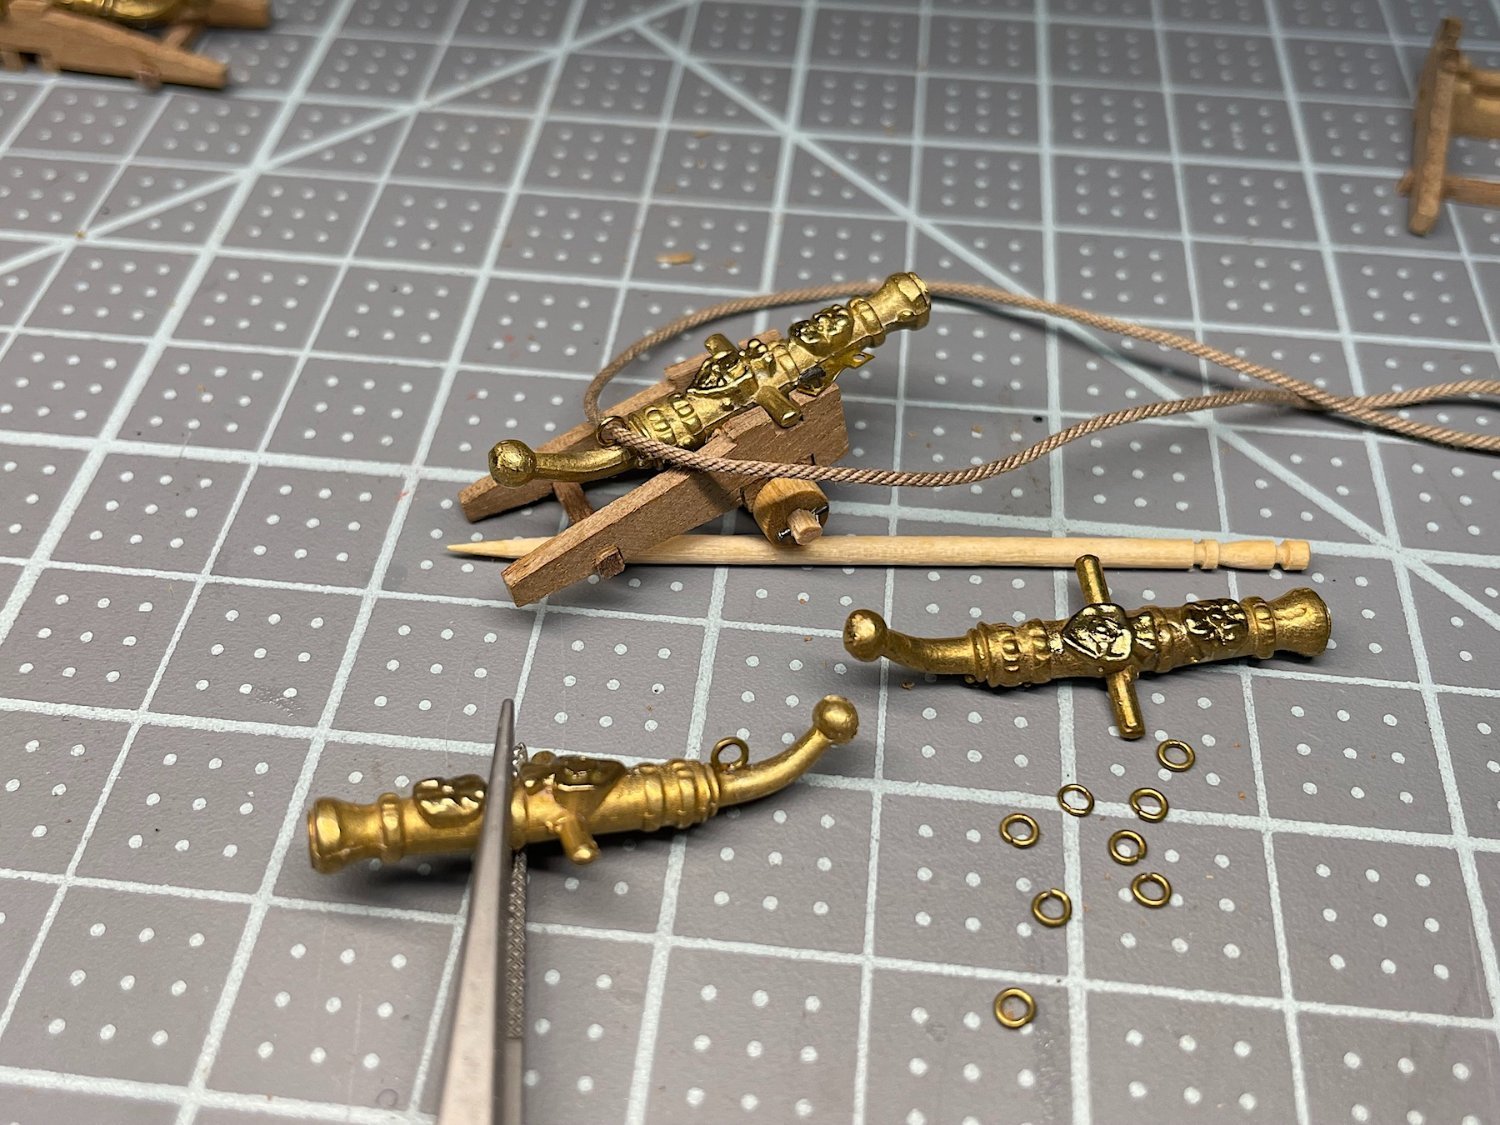
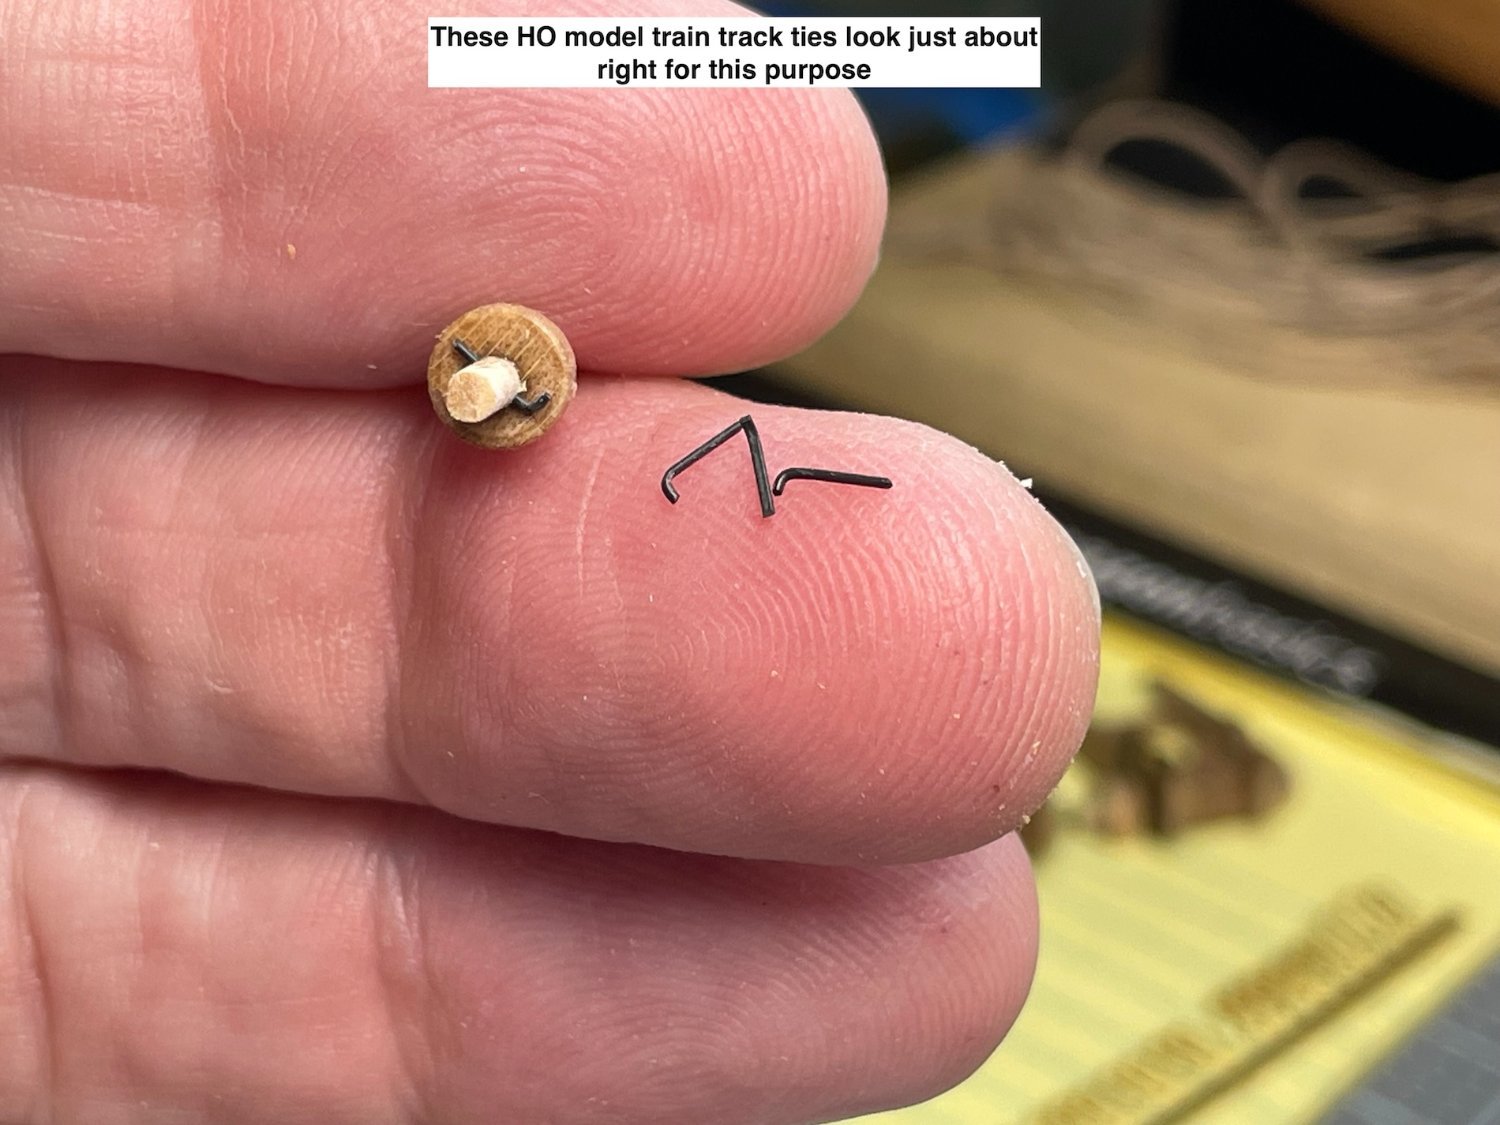
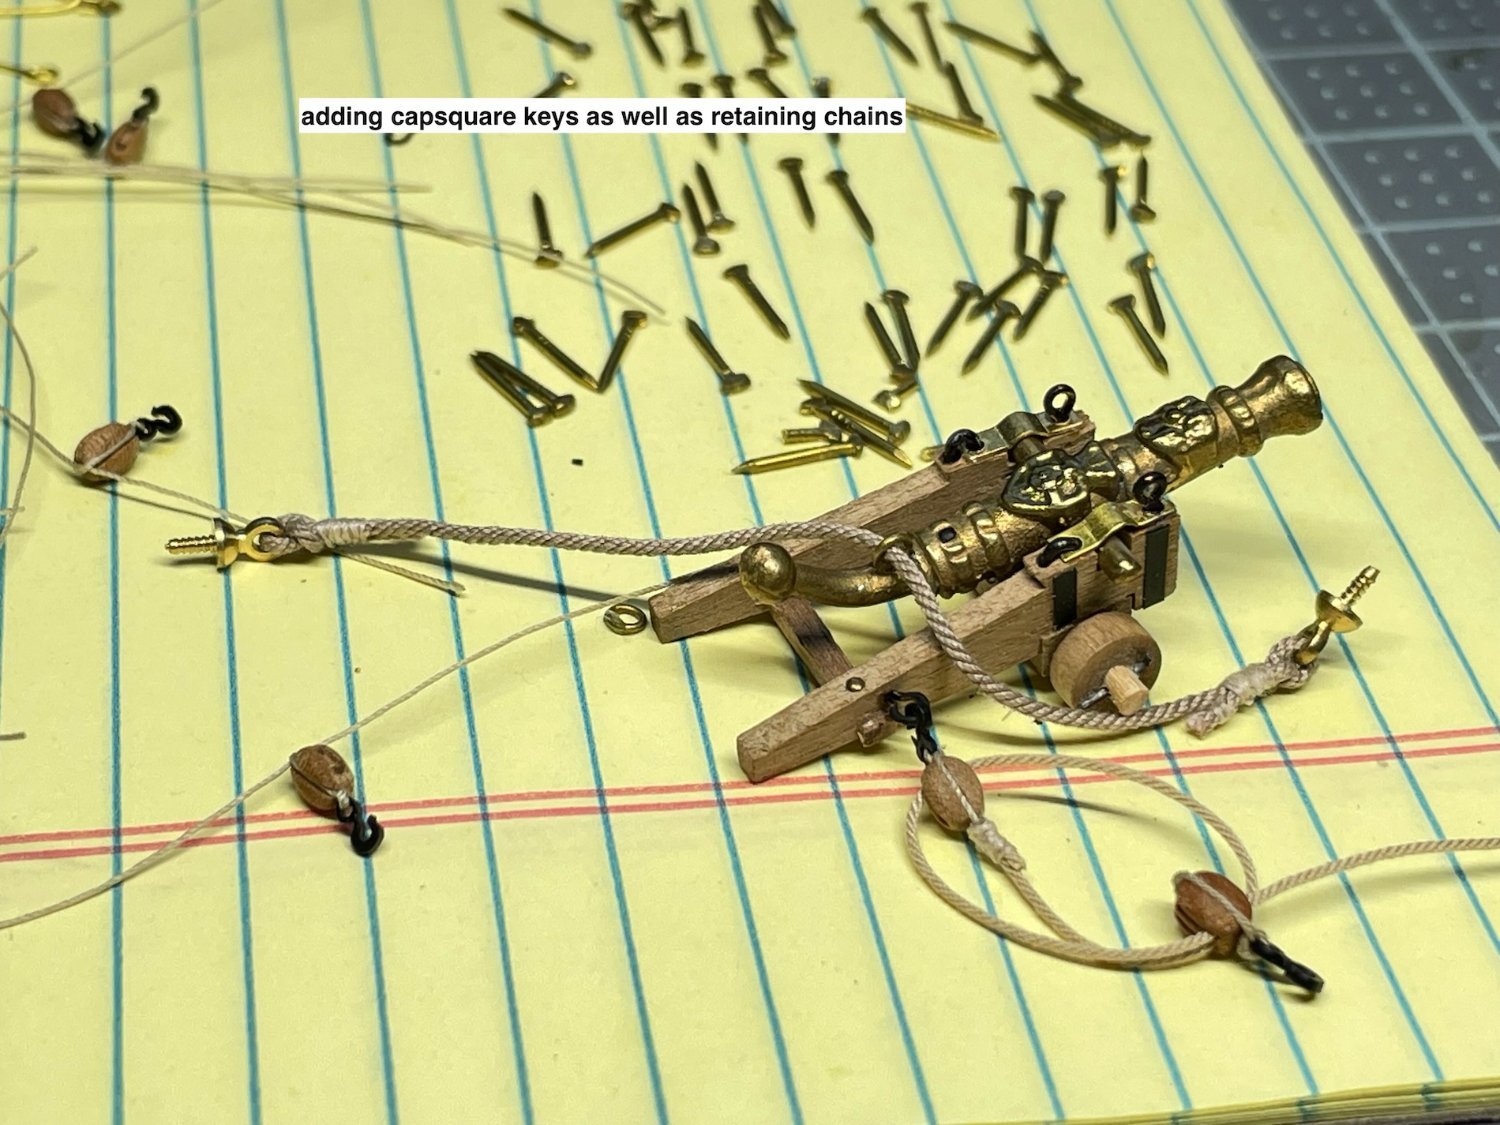
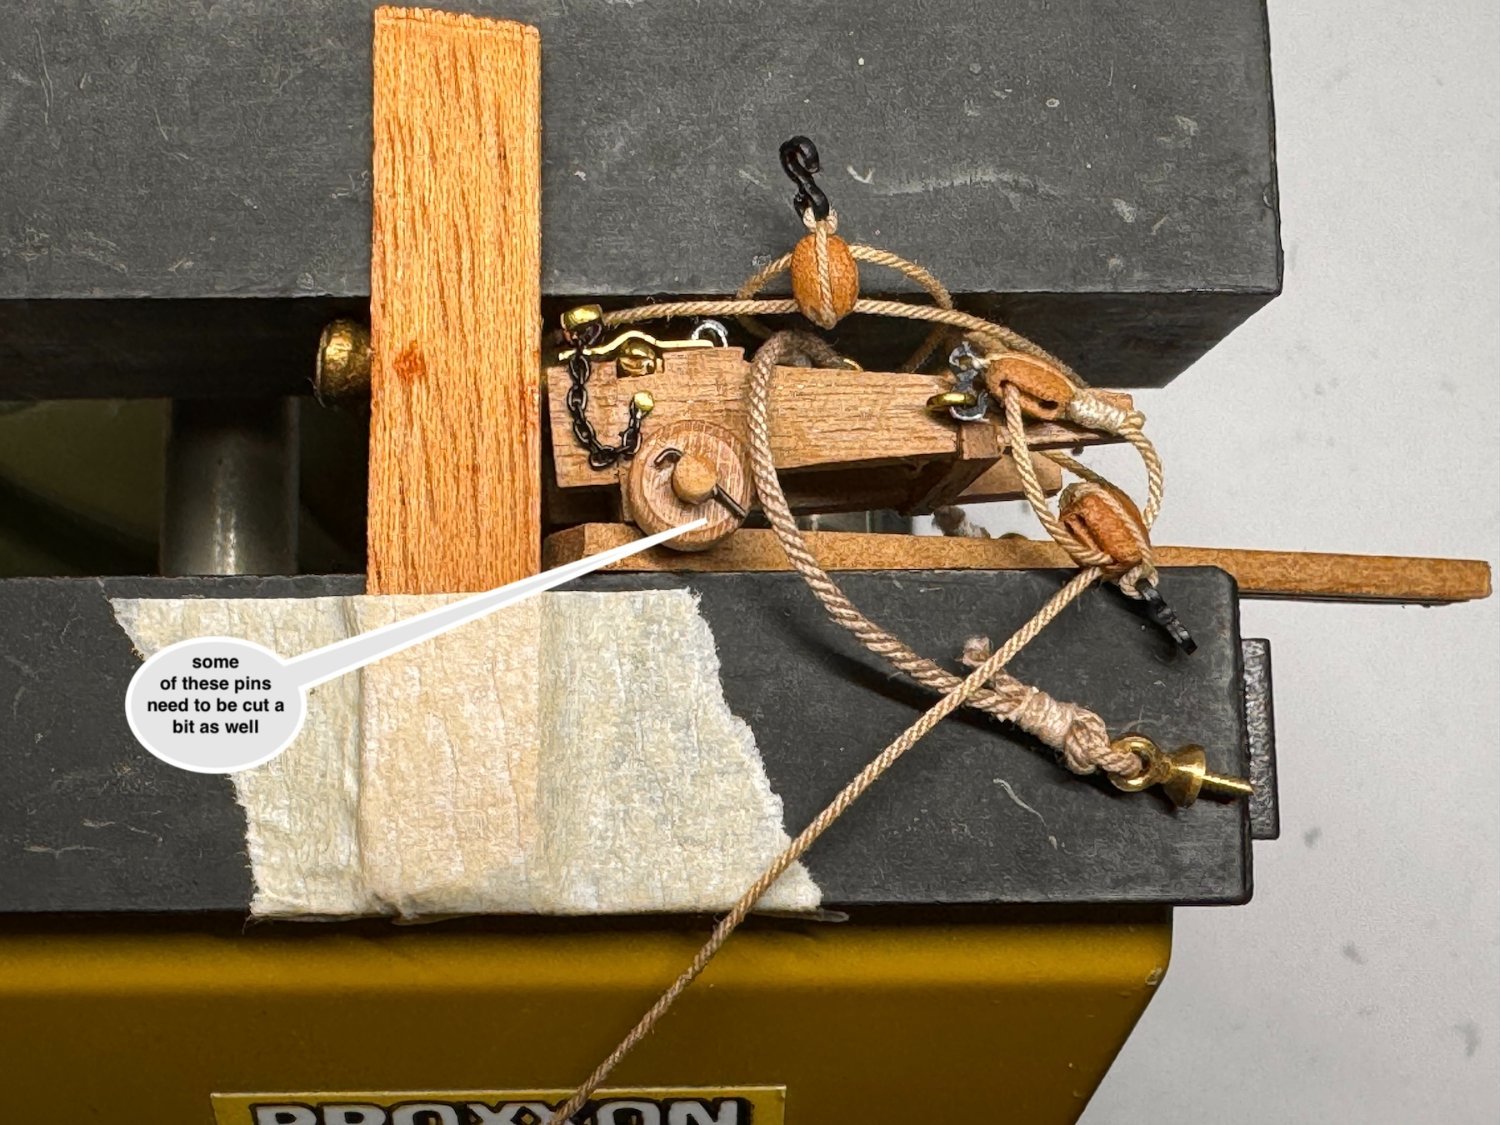
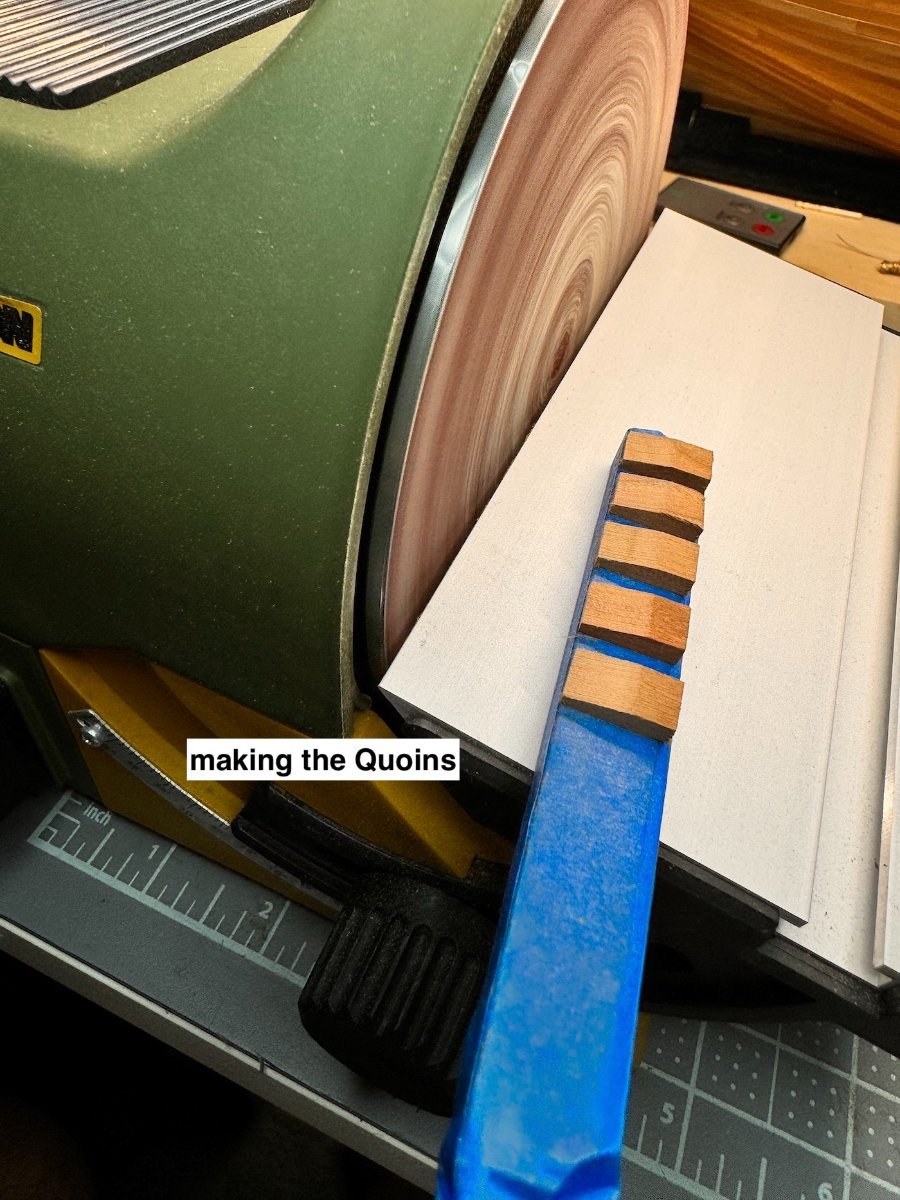
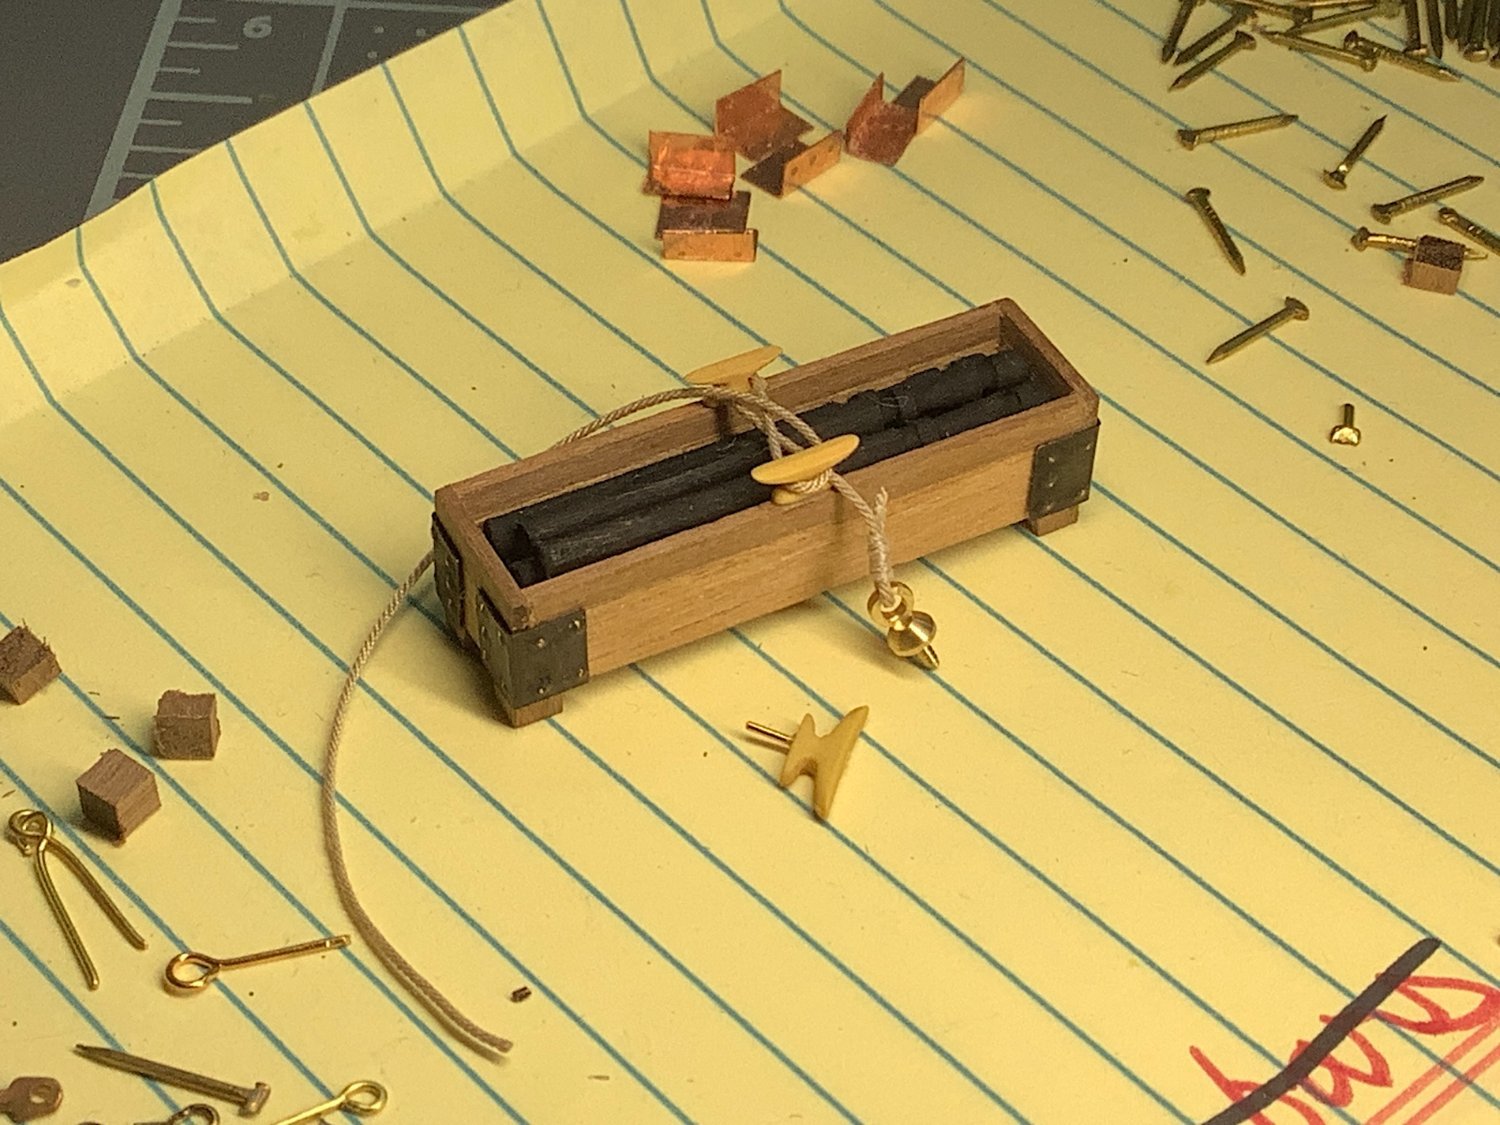
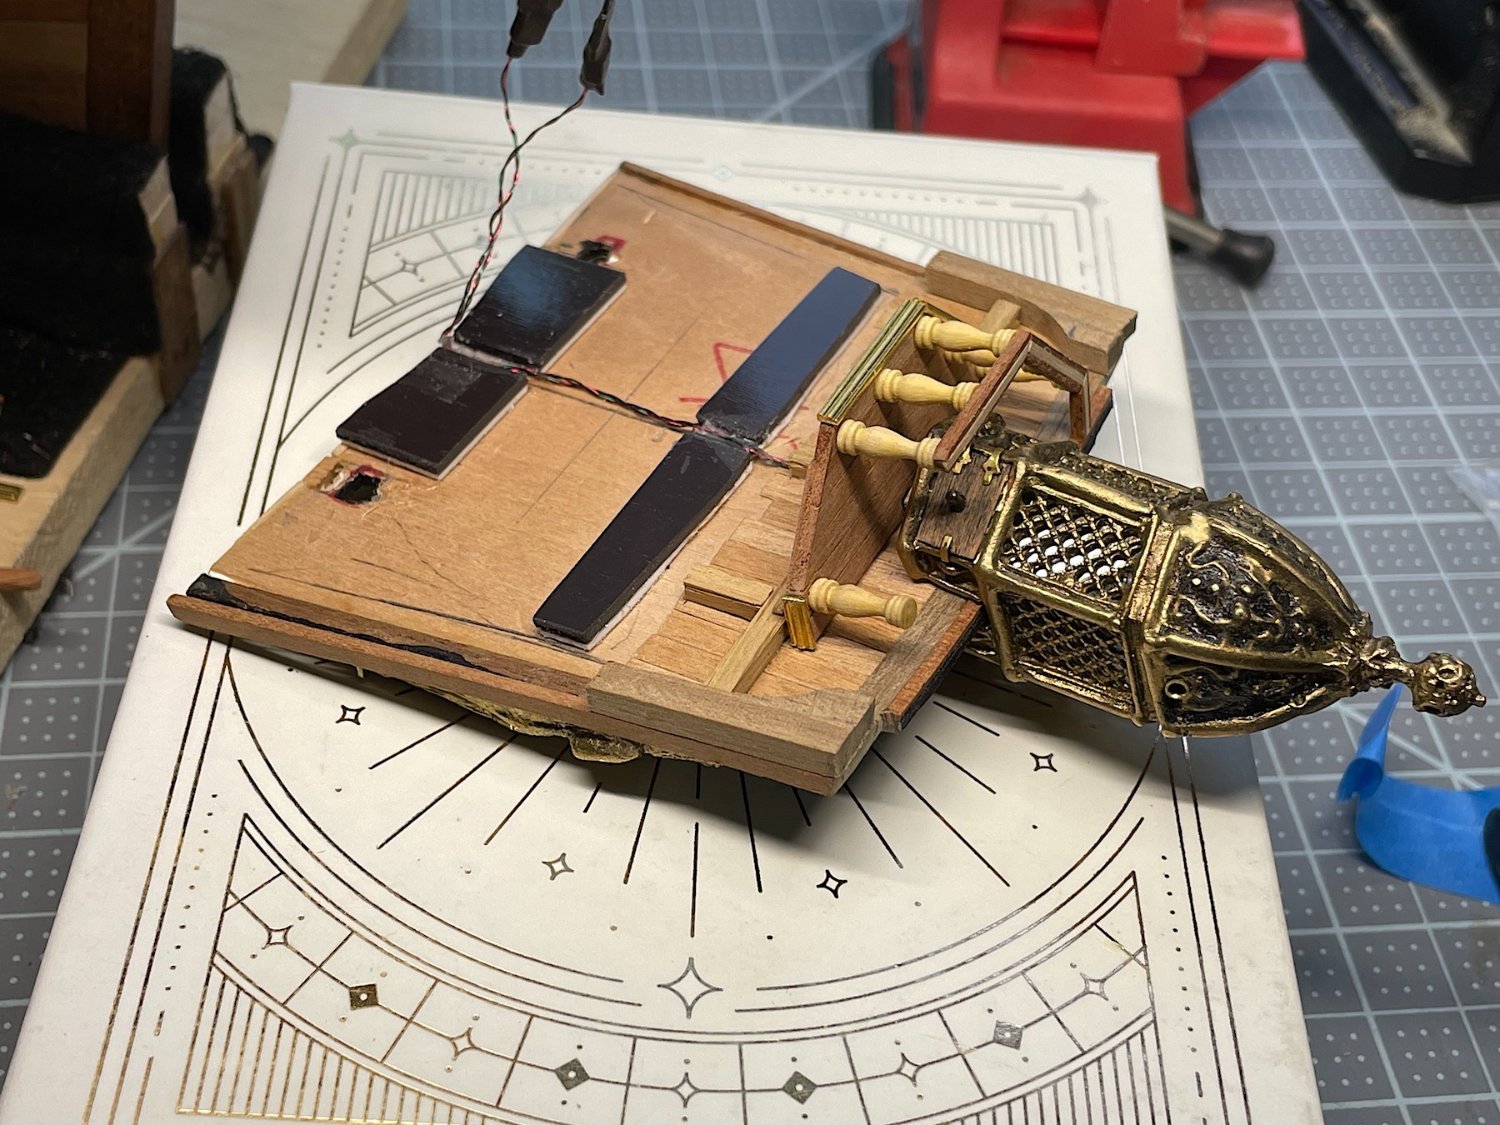
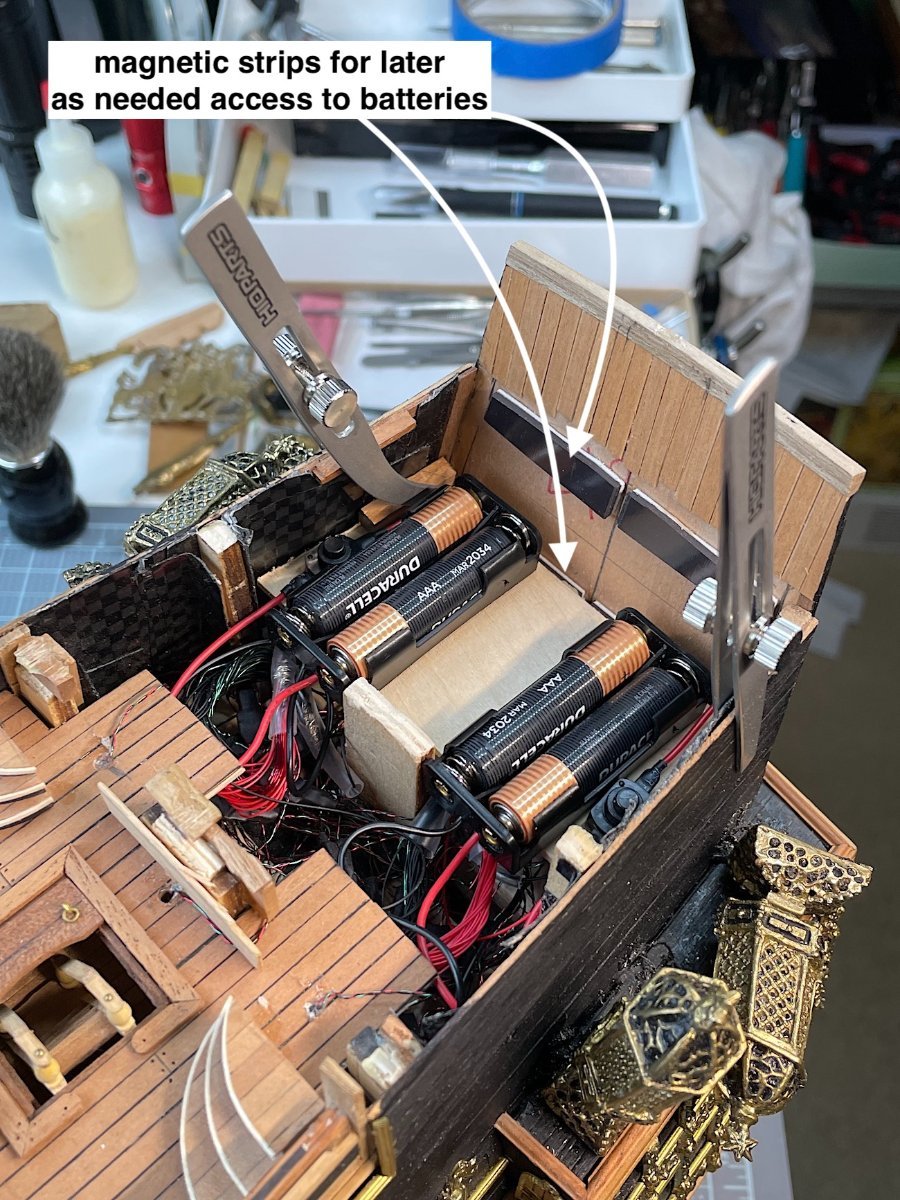
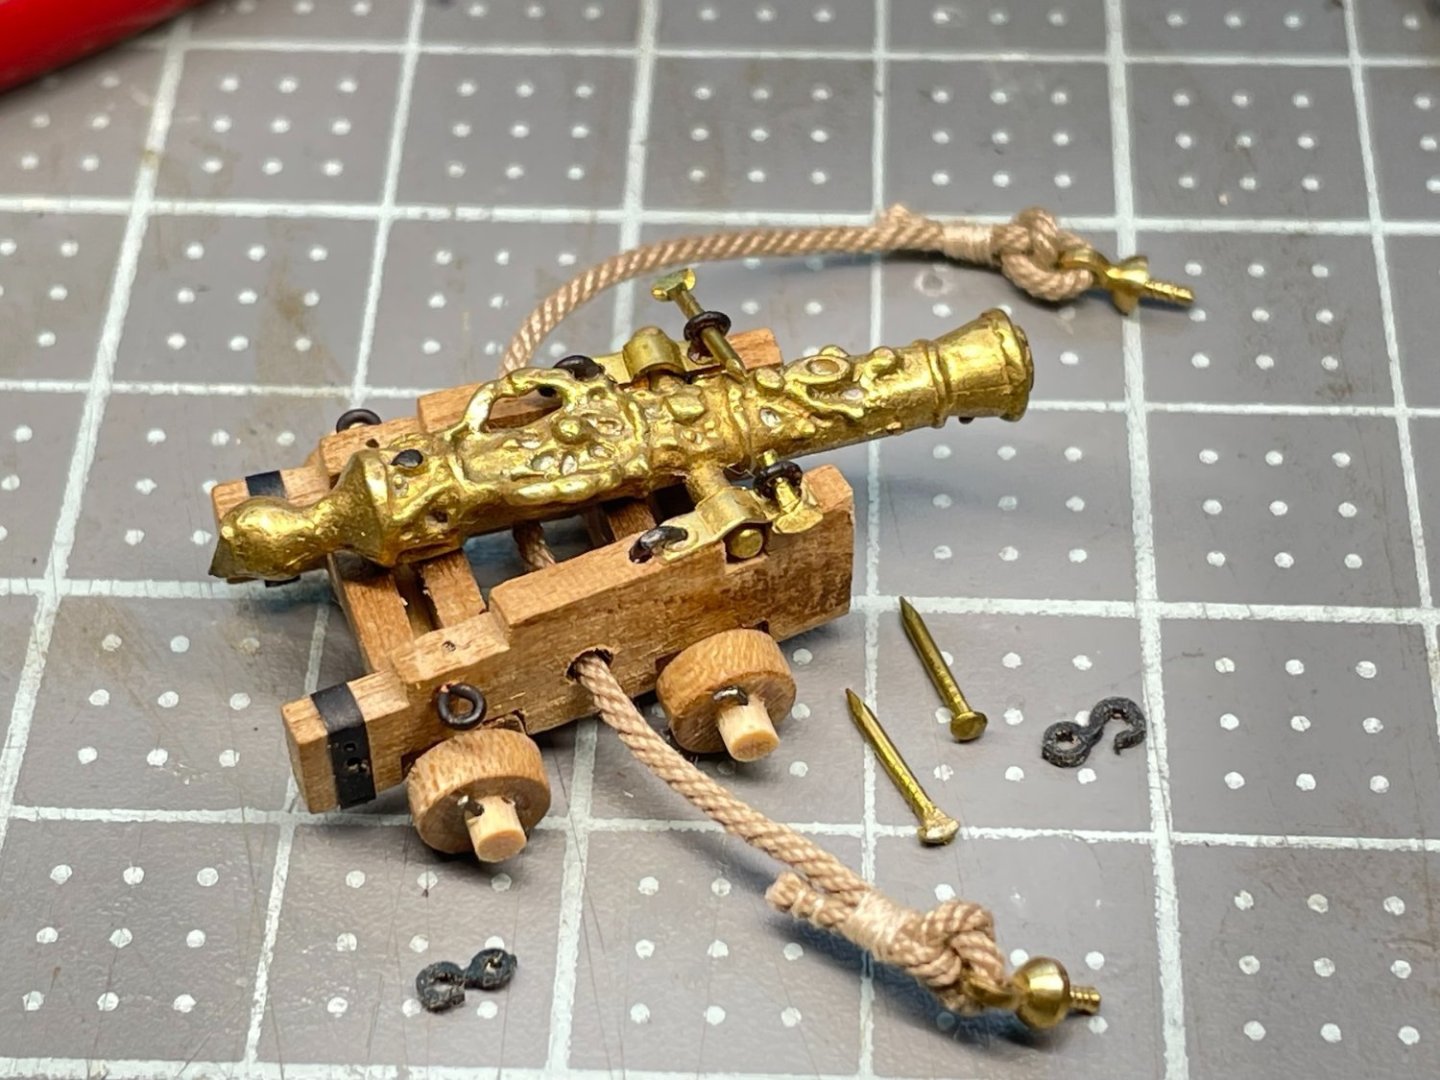
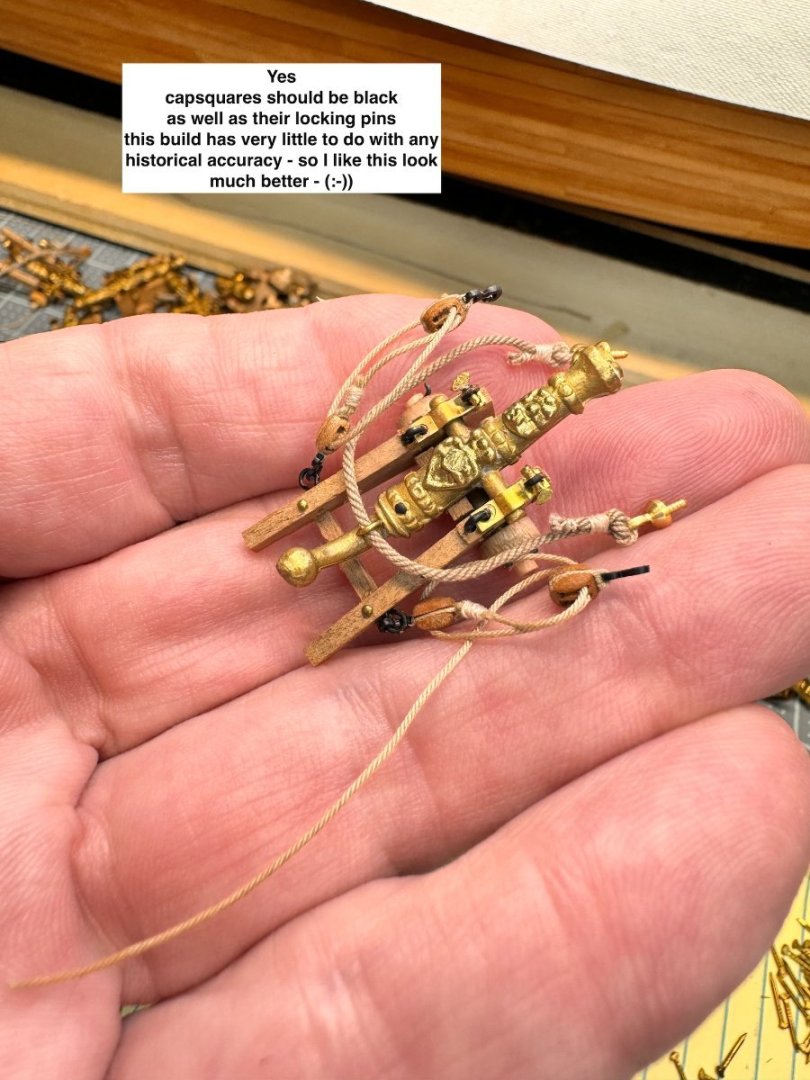
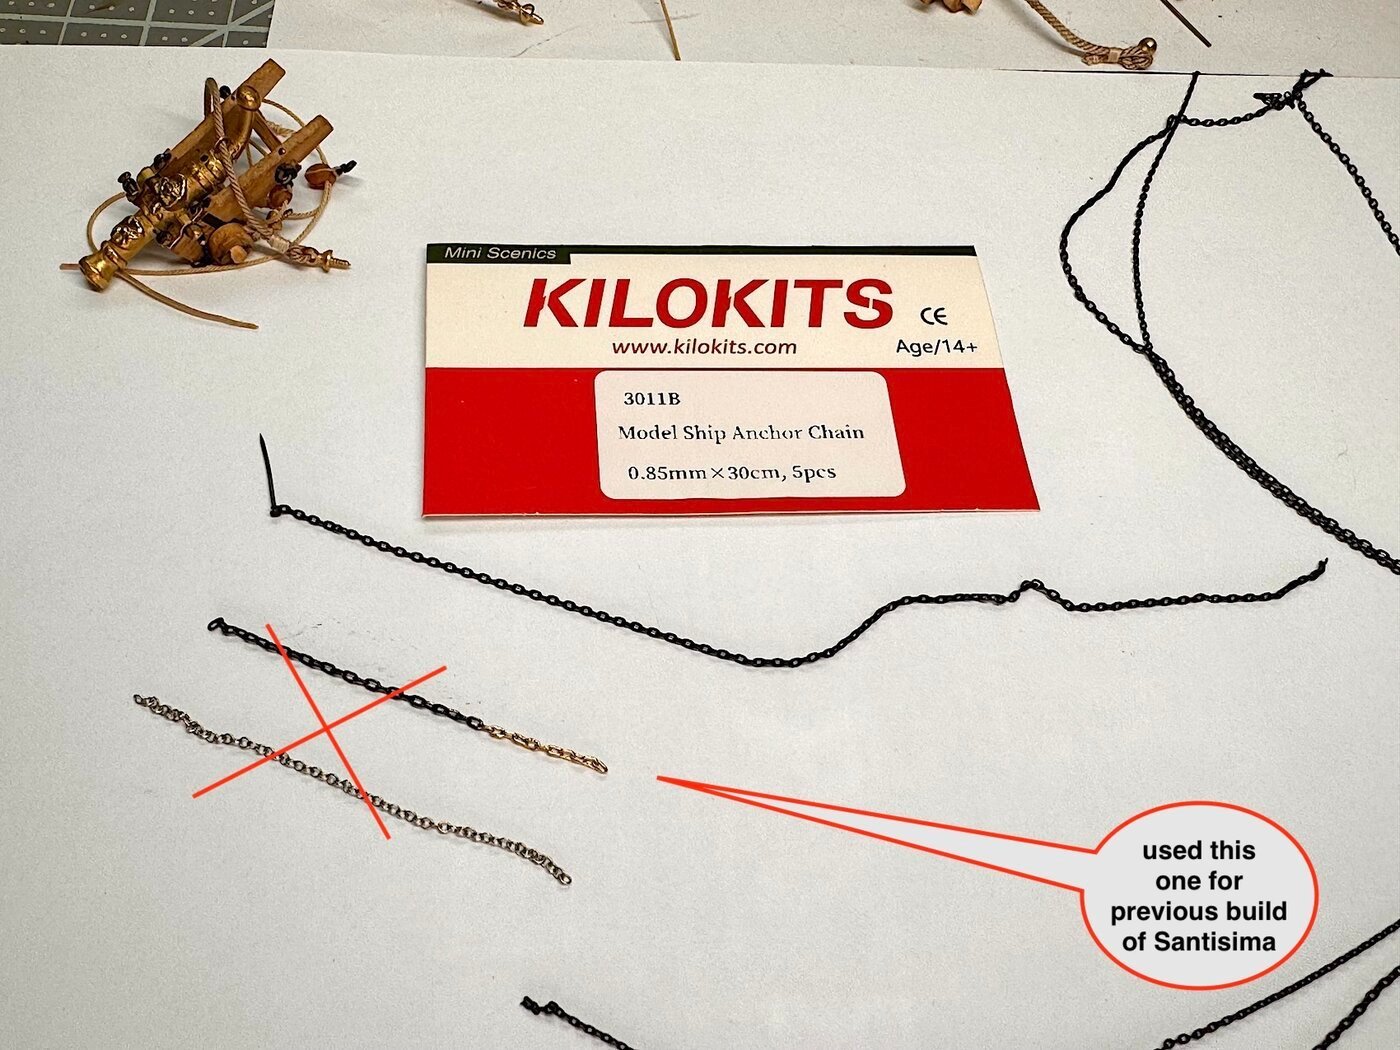
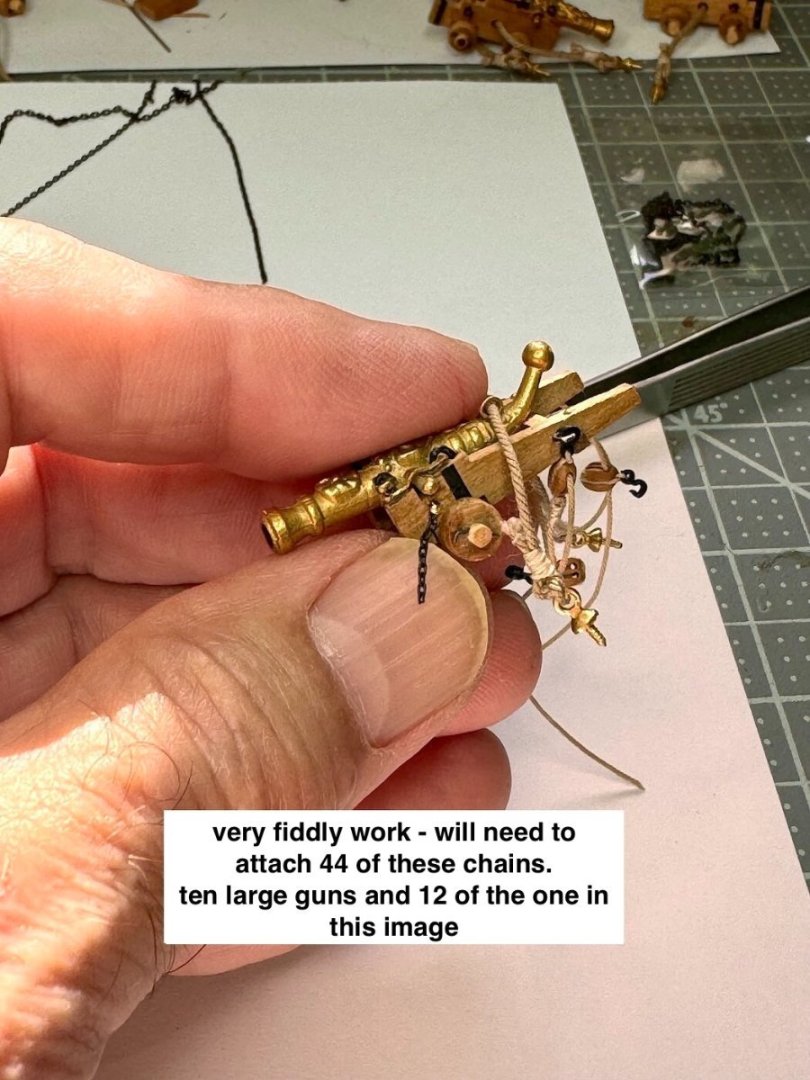
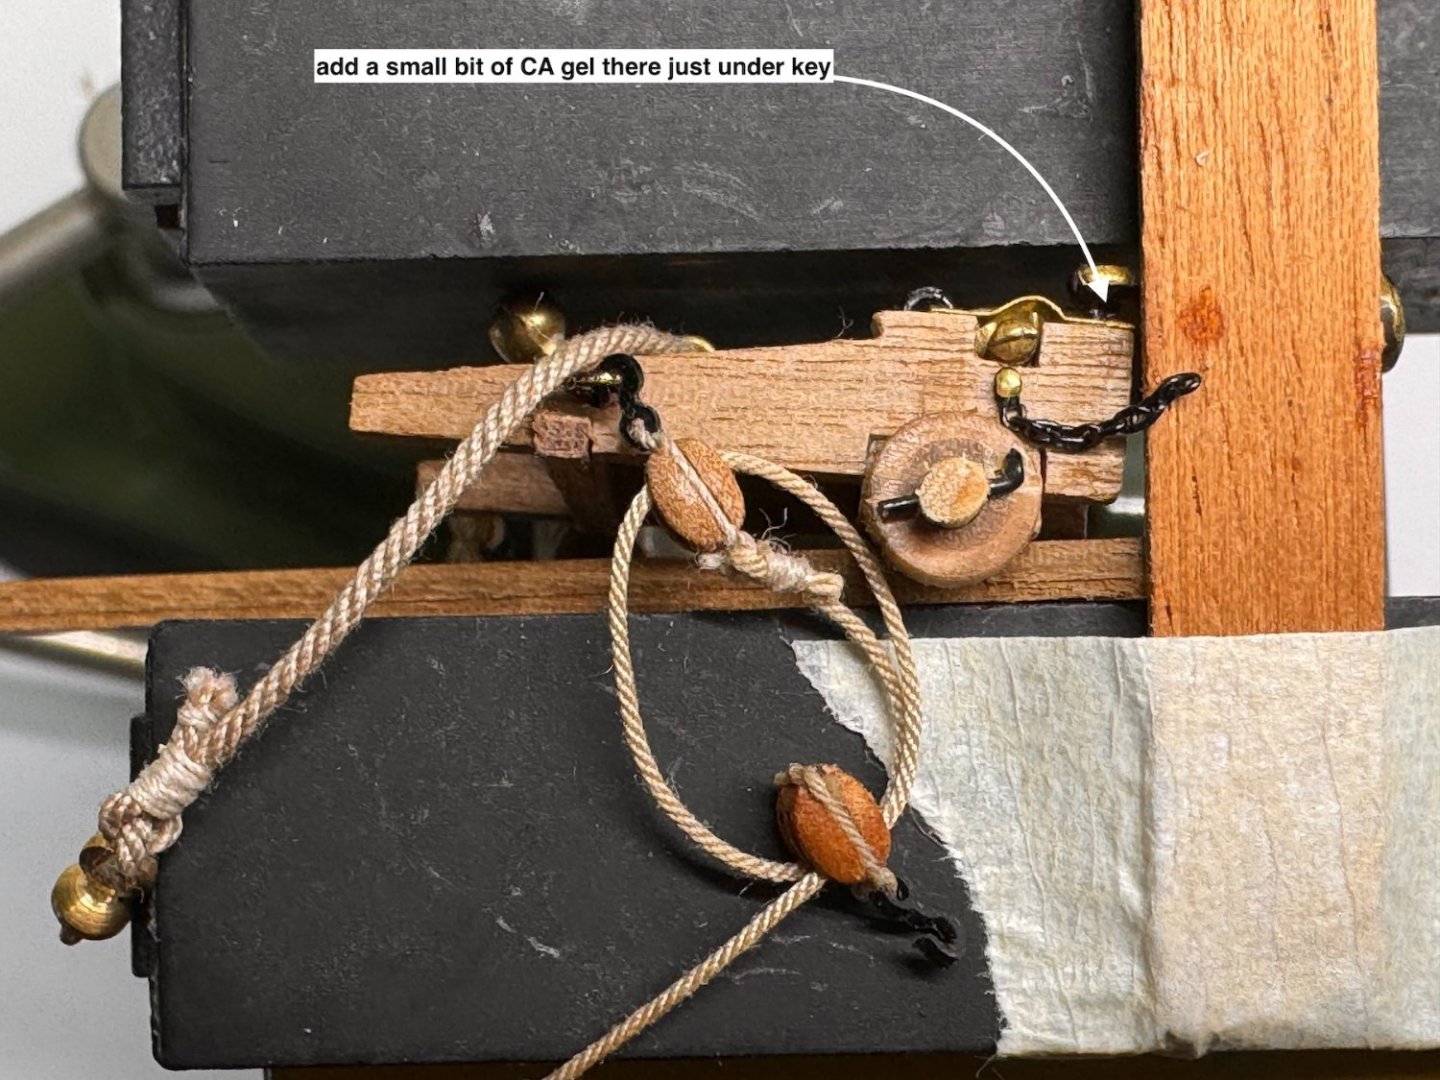
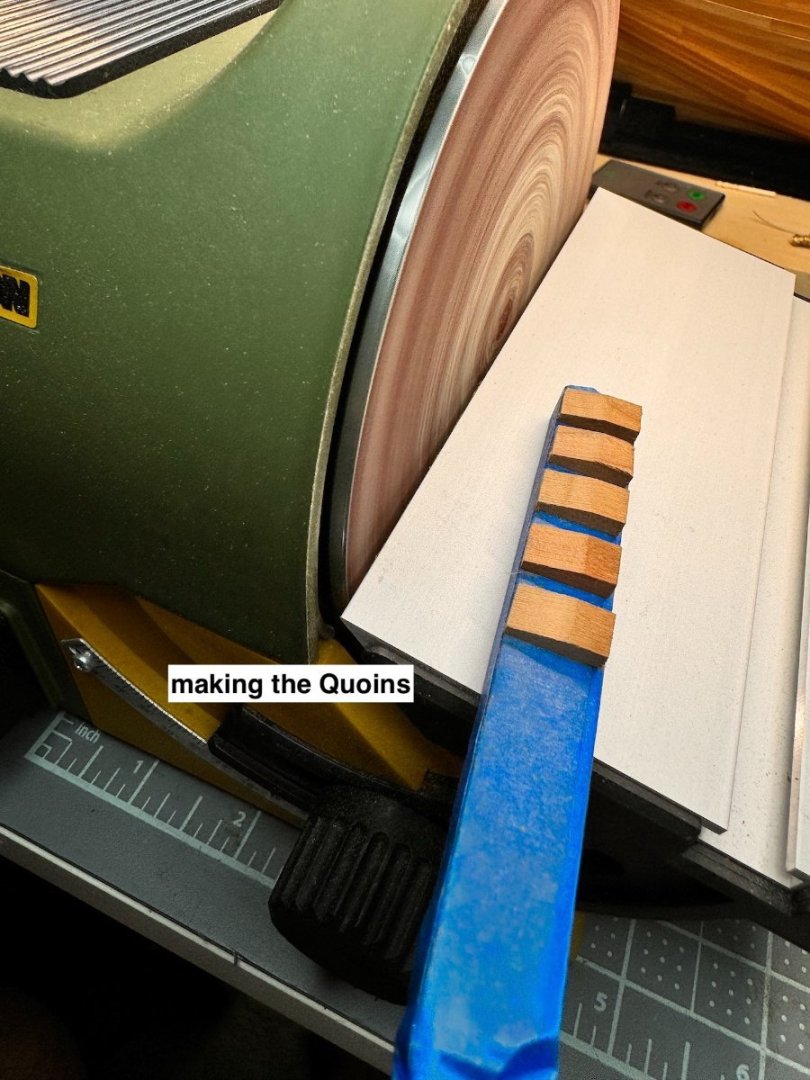
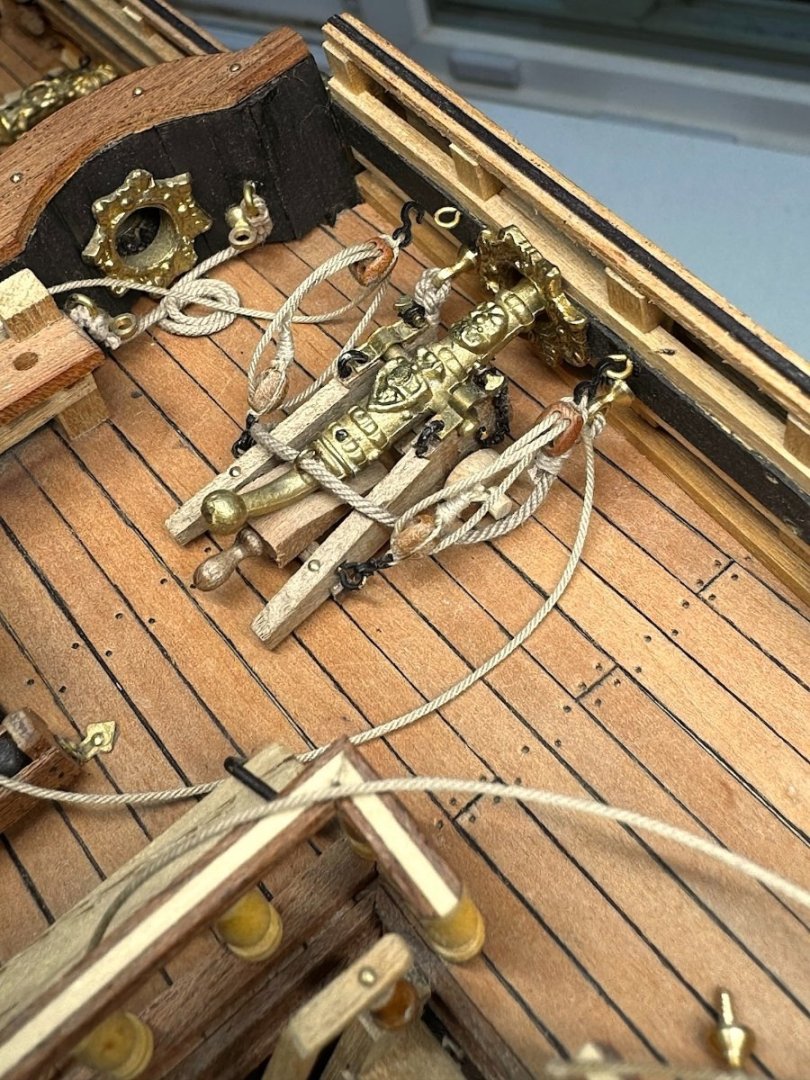
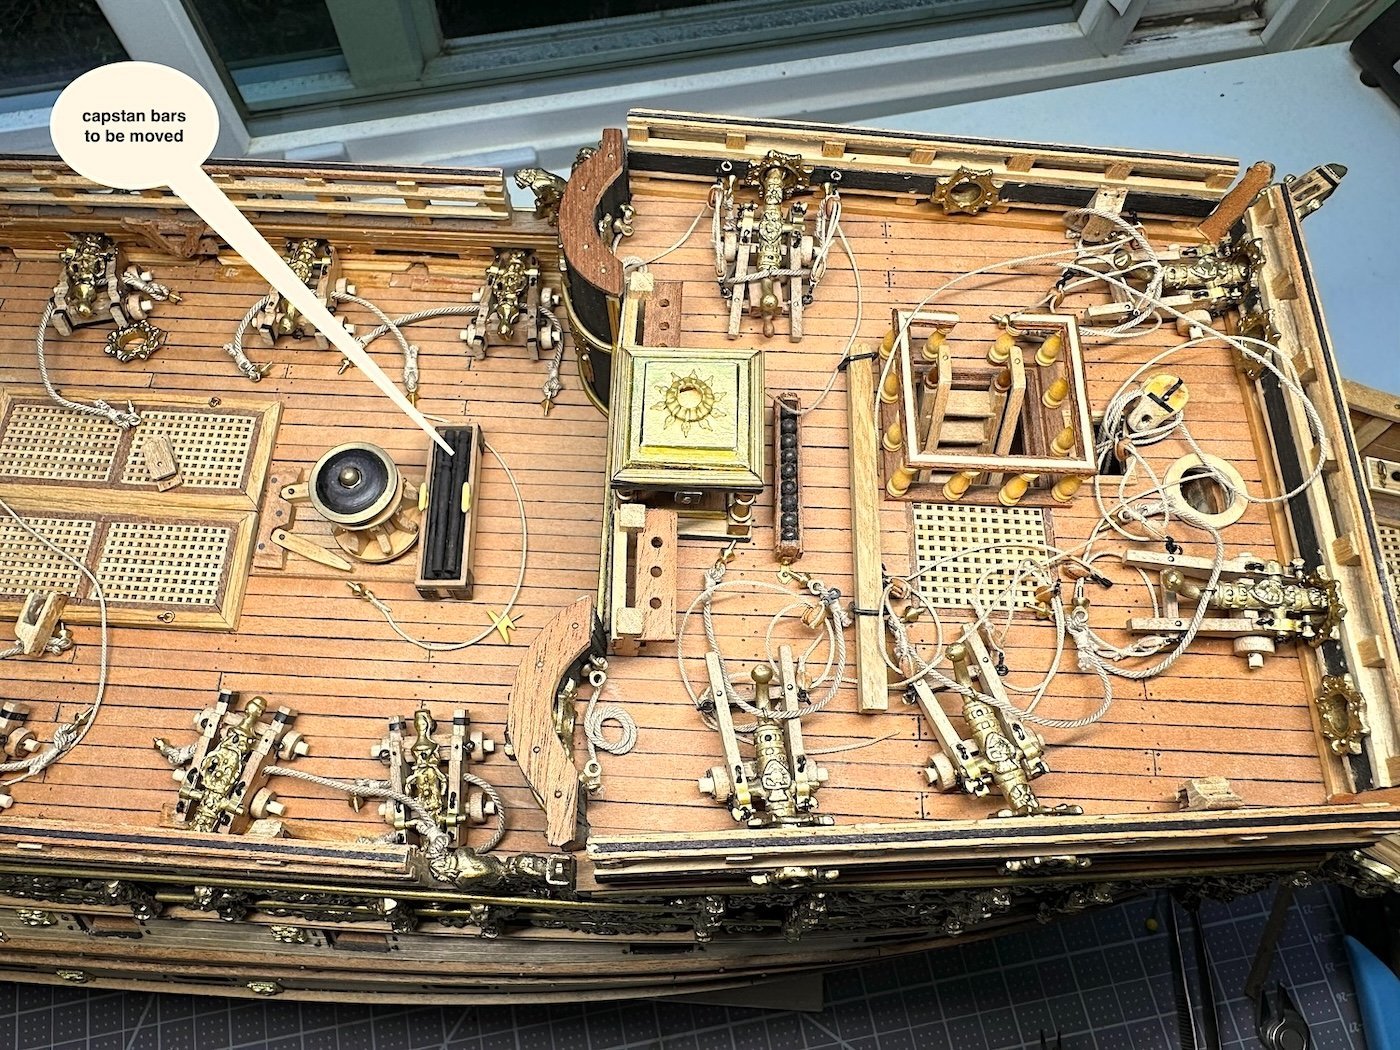
Hi all, Patrick – yes, the magnetic panels - seemed to be the best idea given that I much later in this build decided to add lights. Peter – as always thanks Mark - thanks as well - your work is so excellent happy that you like how this bit of the build is looking Richard – so glad that you dropped by and are again working with your awesome Bluenose - thanks for the kind words. -------------------------------------- It’s been quite a while since I’ve posted an update. Started work detailing the carriages. Short text - images have some notations. Thanks so much for your still continued interest in this very “slow boat to China” build log. Enjoy your year-end holidays…. Cheers,


-
Richard, As always - your work in close up images looks even better - Yikes 👏😊😎 such superb work indeed. Cheers mate…
-
Patrick, Been remiss not dropping by often enough to your current project - always a good visit 😄 Regards,
-
Frank, YES indeed beautiful model - congrats. I also think a combination of steam and and sails would be a great next idea. Nice to visit 1600s, almost the 1700s - creative thinking to move into the late 1700s and into the 1800s - again big congrats!!! Cheers my friend
- 510 replies
-
- 1
-
-
- reale de france
- corel
- (and 1 more)
-
Hi, Just getting back to looking at logs - been away from this hobby and dropping by for several months - Good luck with your new SotSeas project. As mentioned above the castings of the current product are much less detailed than from the vintage edition from Sergal (those 600+ bits were solid bronze). I have been very vocal about this in my dormant log - that I will get back to soon - Will follow your new project with interest as well (my previous build was the Vasa) PS: loved the museum - visited twice the last time was in 2018 Regards,
-
Peter, IMO - in this hobby your work cannot possibly be improved upon - You're so at the top of this hobby pyramid. Stunning work down to the smallest of tiny details. Brilliant build log. A great pleasure to have followed it along. Regards,
- 208 replies
-
- 3
-
-
-
- kitbashing
- Woodcarving
- (and 4 more)
-
Hi Peter, Just logging back in to MSW. I SO need to post comments re: your just completed awesome log. WOW!! will do... At least I got front row seats for this one. You will, again build a masterpiece. PS: just went back and read your intro to this project another WOW!! Cheers,
- 30 replies
-
- 1
-
-
- Corel
- wappen von hamburg
- (and 1 more)
-
Peter, Just really catching up - been away from the hobby for some weeks, as well as the forums.... But my Gmail inbox had lots of your links - Wow!! your work is so superlative to the smallest detail - camera close up images love your work.. Oh and the sails well 👏. Your log is brilliant.. Hmm I do need to re-open my shipyard soon...on my mind or so it's been said haha Cheers,
- 208 replies
-
- 1
-
-
- kitbashing
- Woodcarving
- (and 4 more)
-
Peter, Just found your log - Beyond impressive - Learning a lot here 🙂 Cheers,
- 208 replies
-
- 3
-
-
- kitbashing
- Woodcarving
- (and 4 more)
-
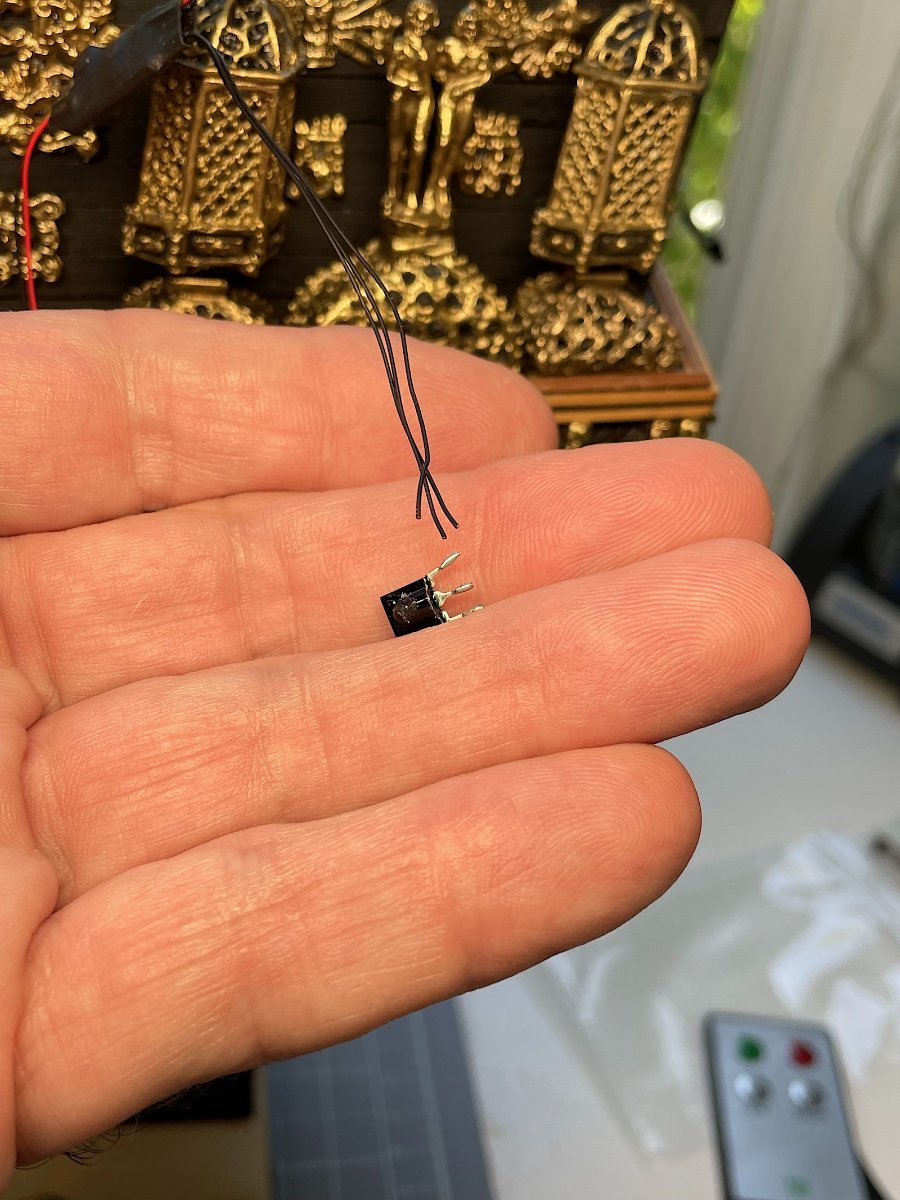
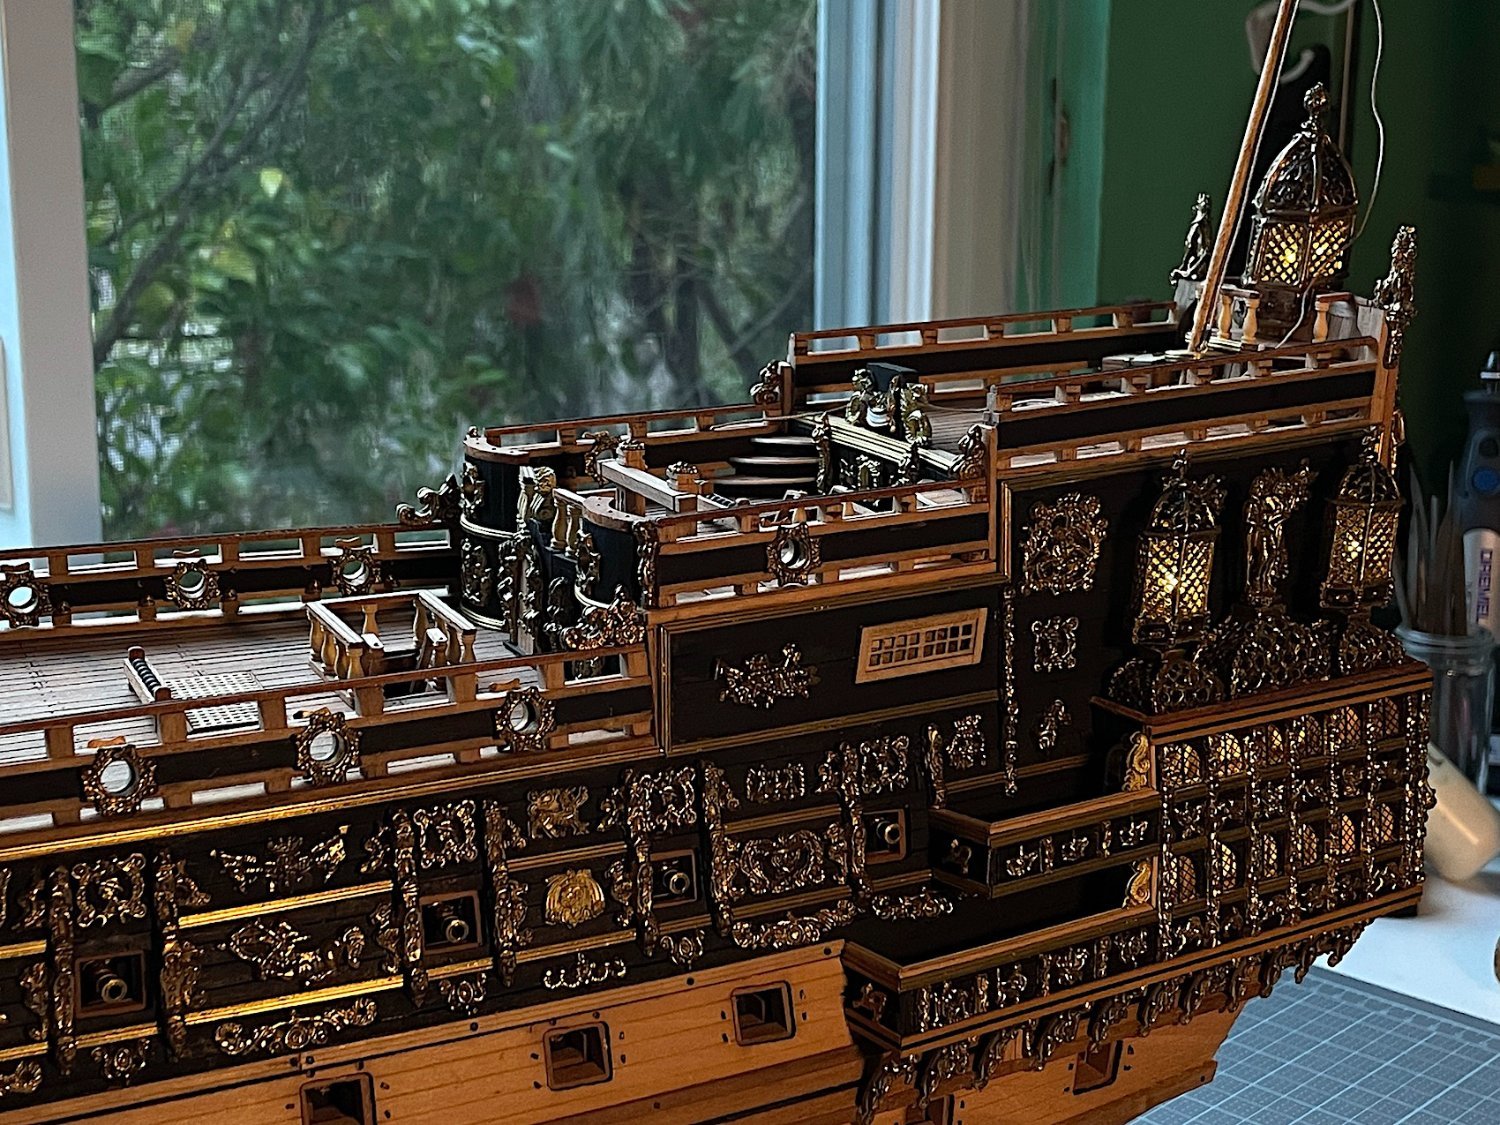
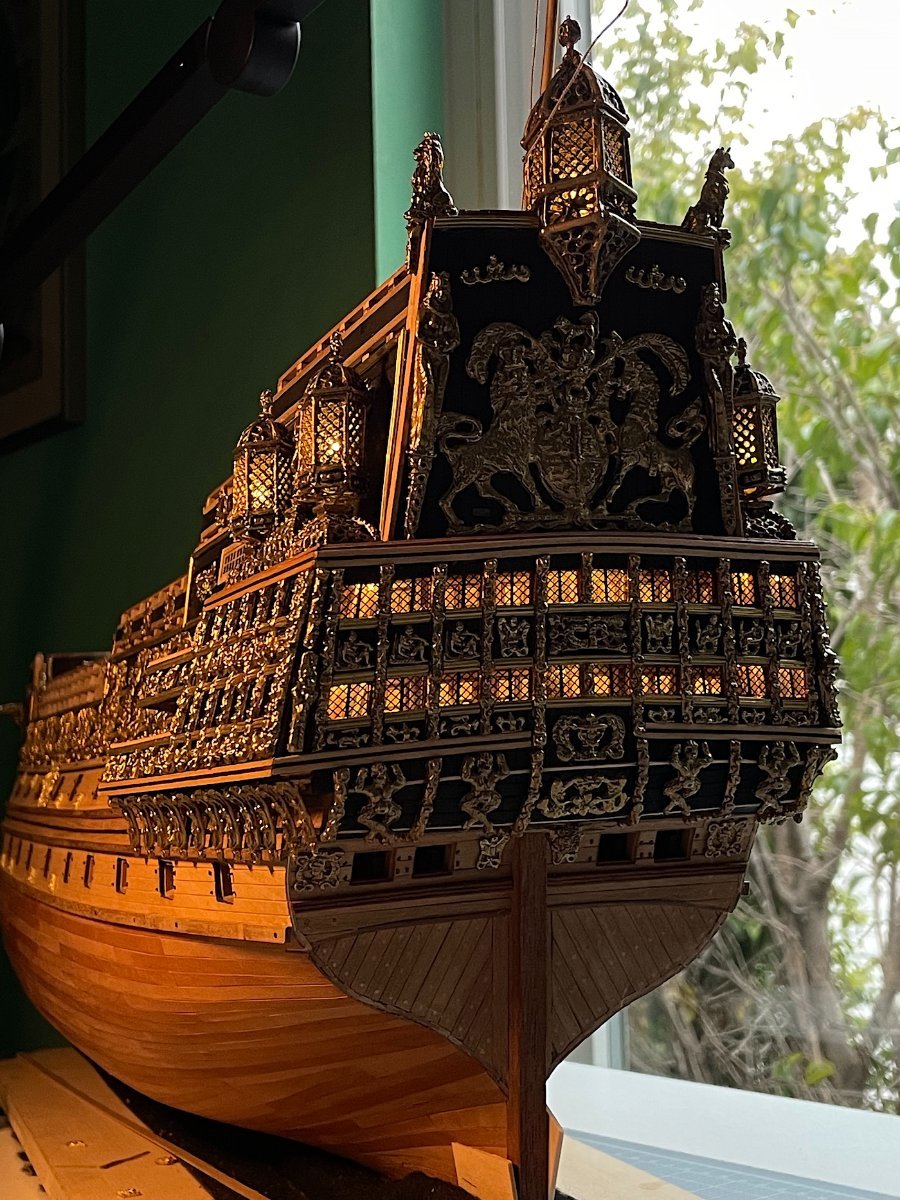
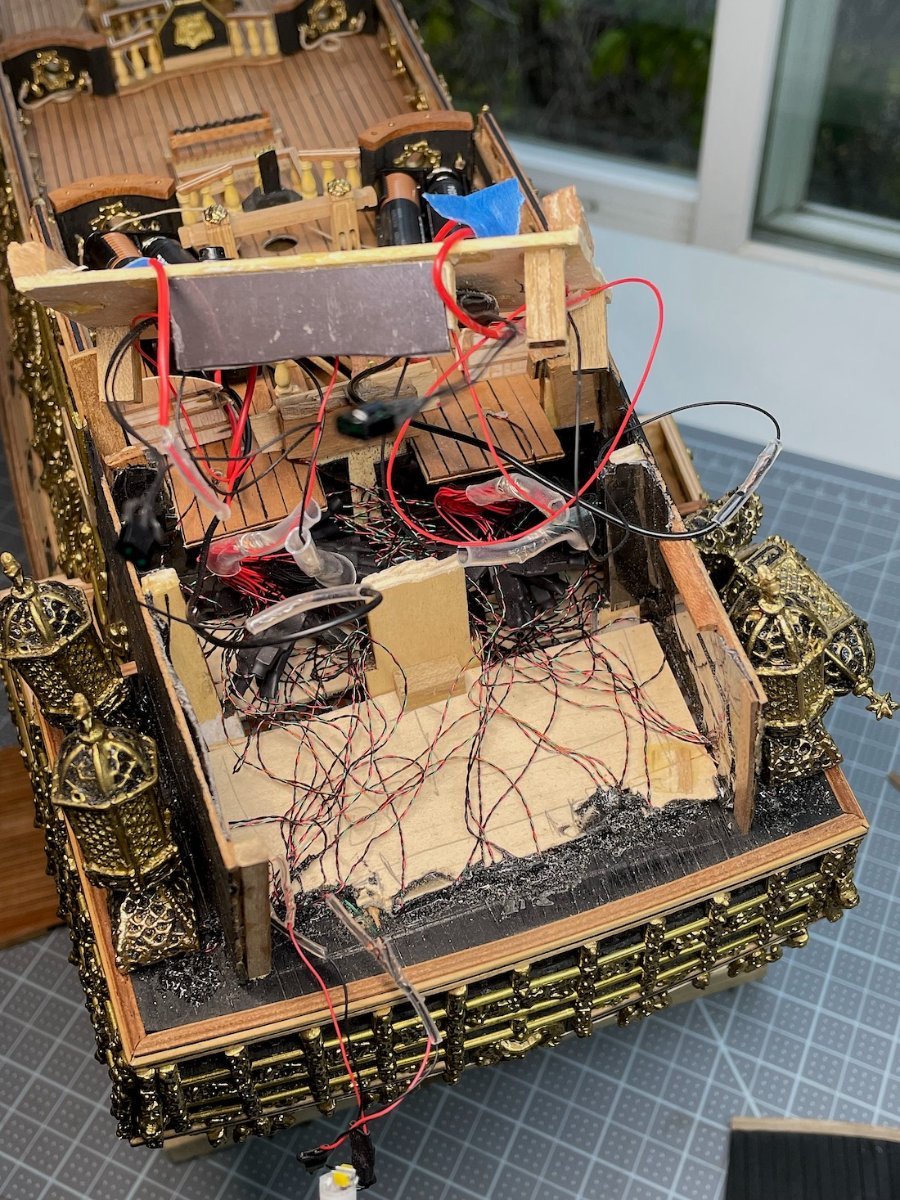
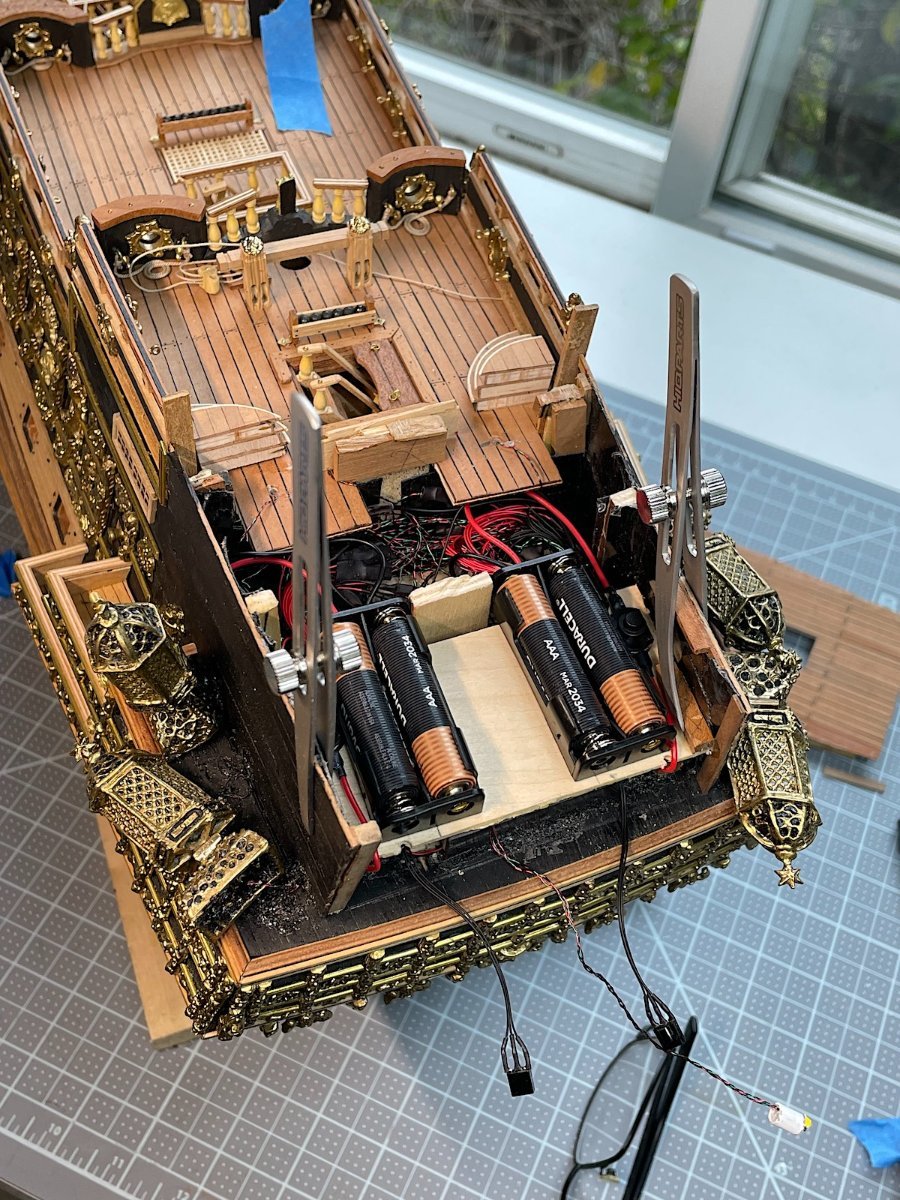
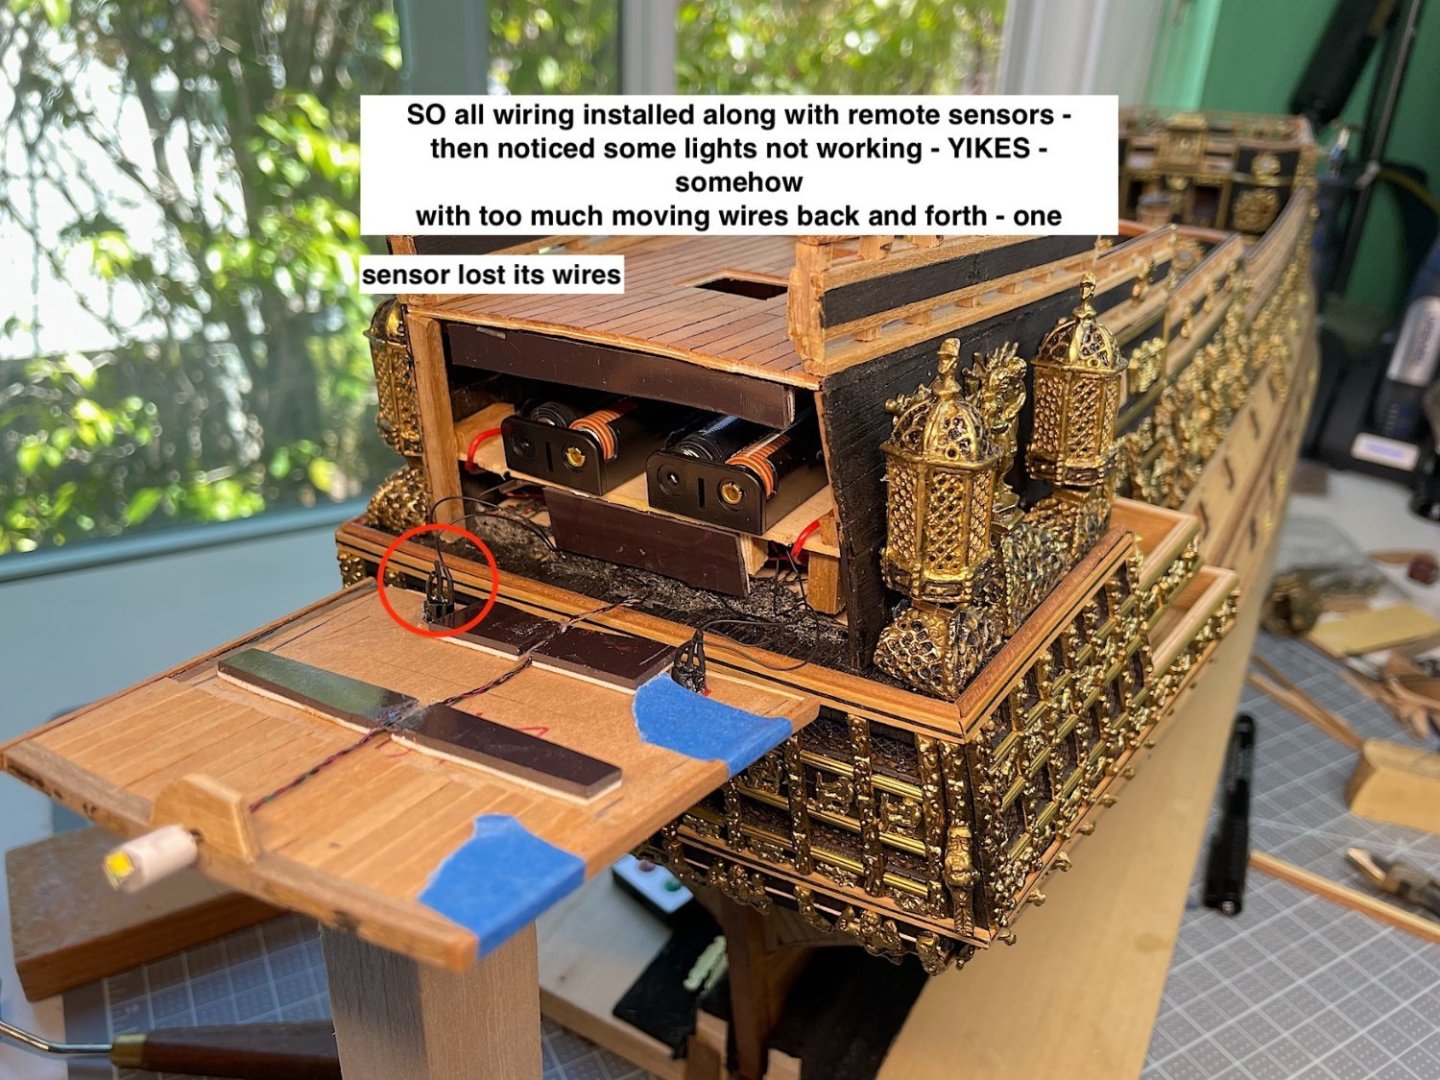
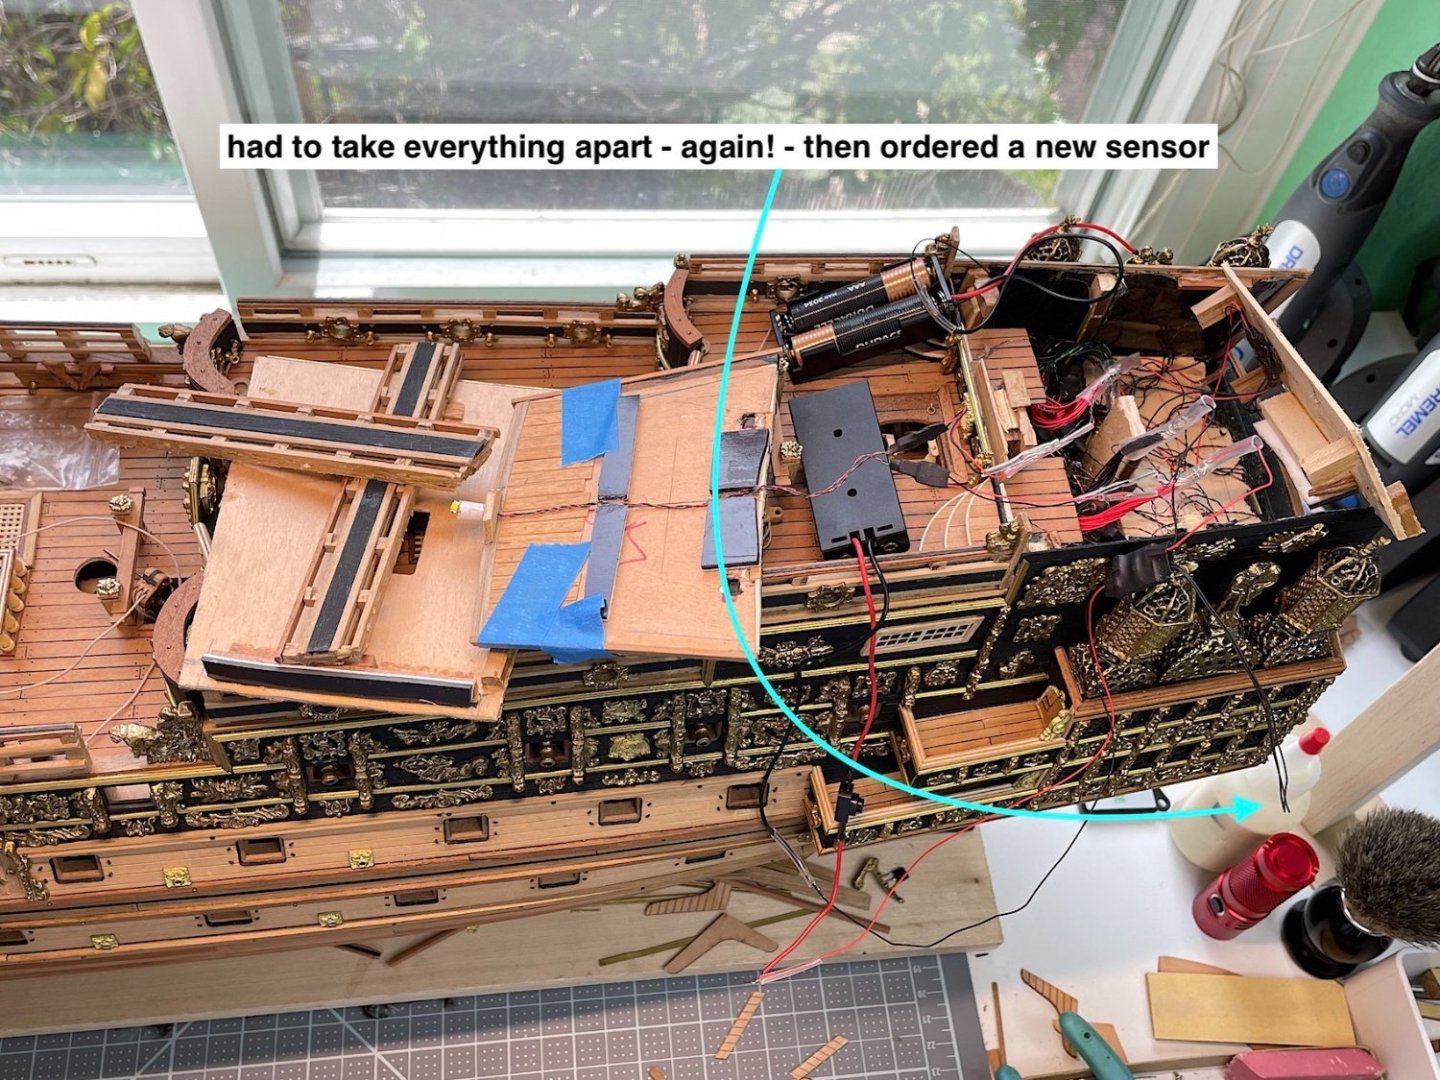
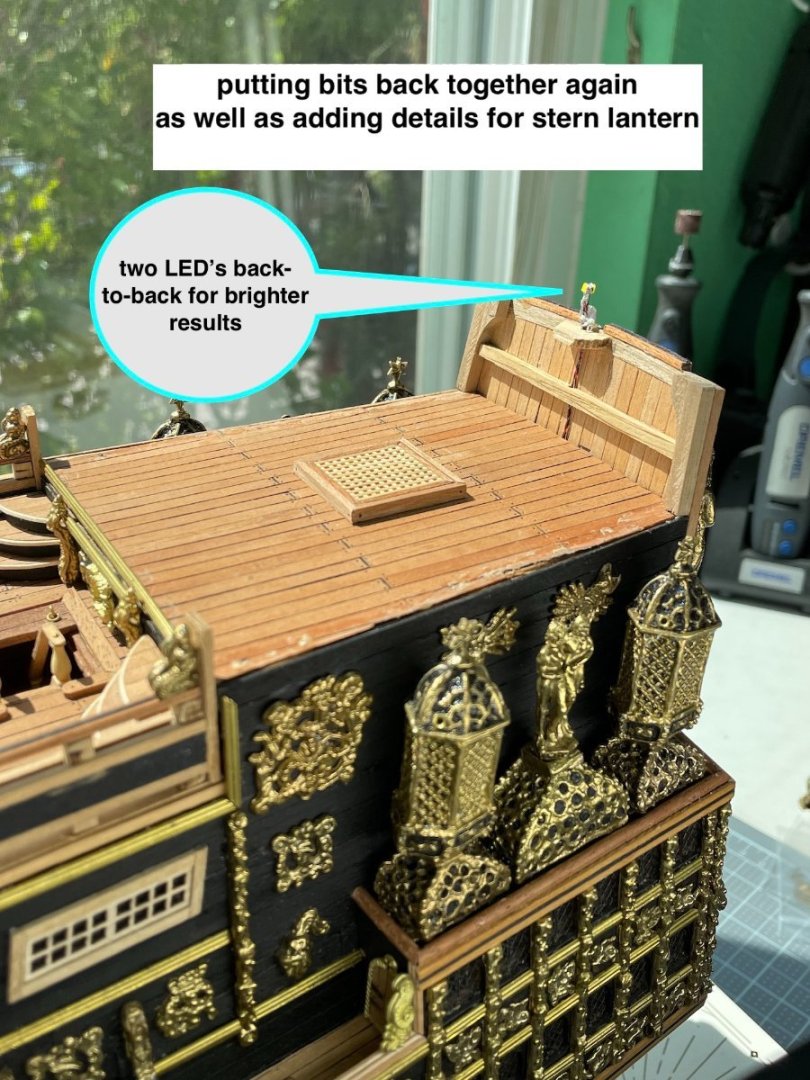
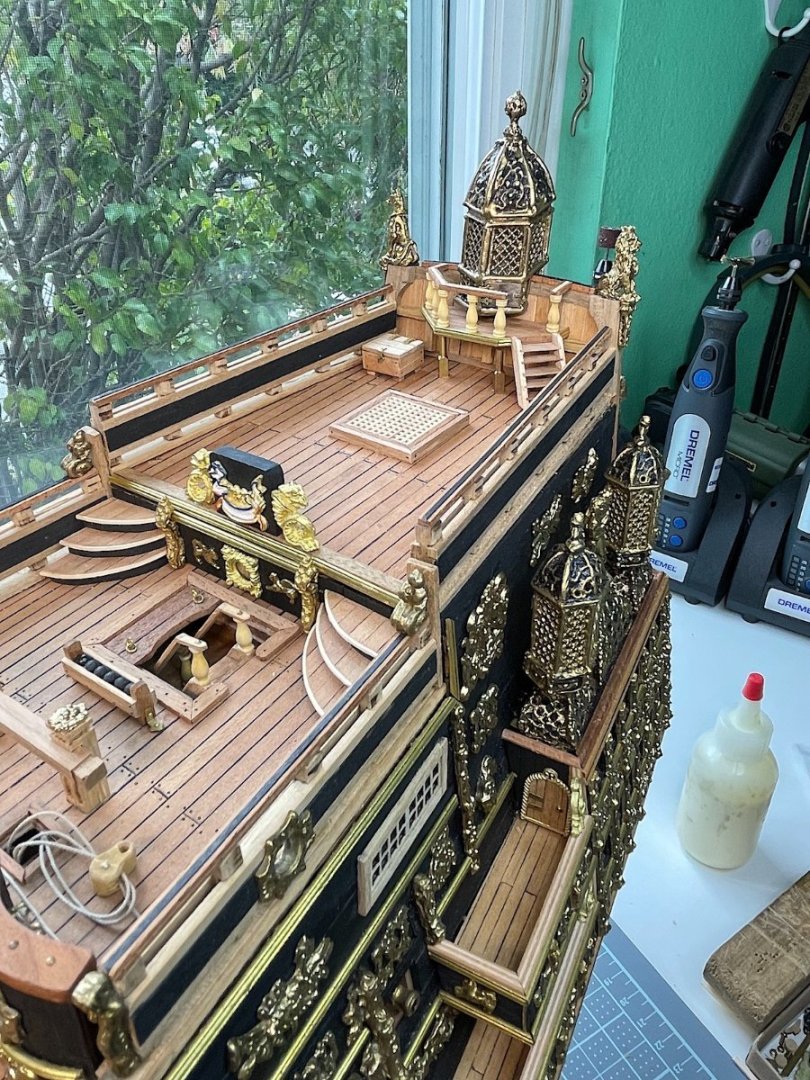
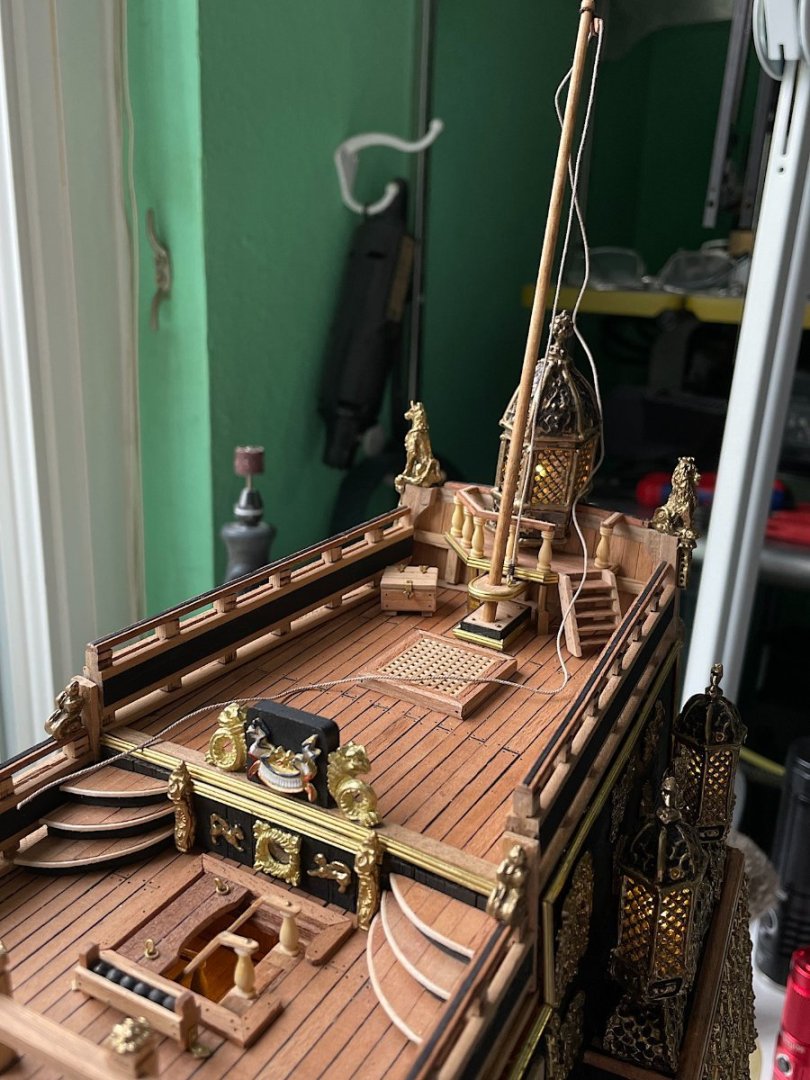
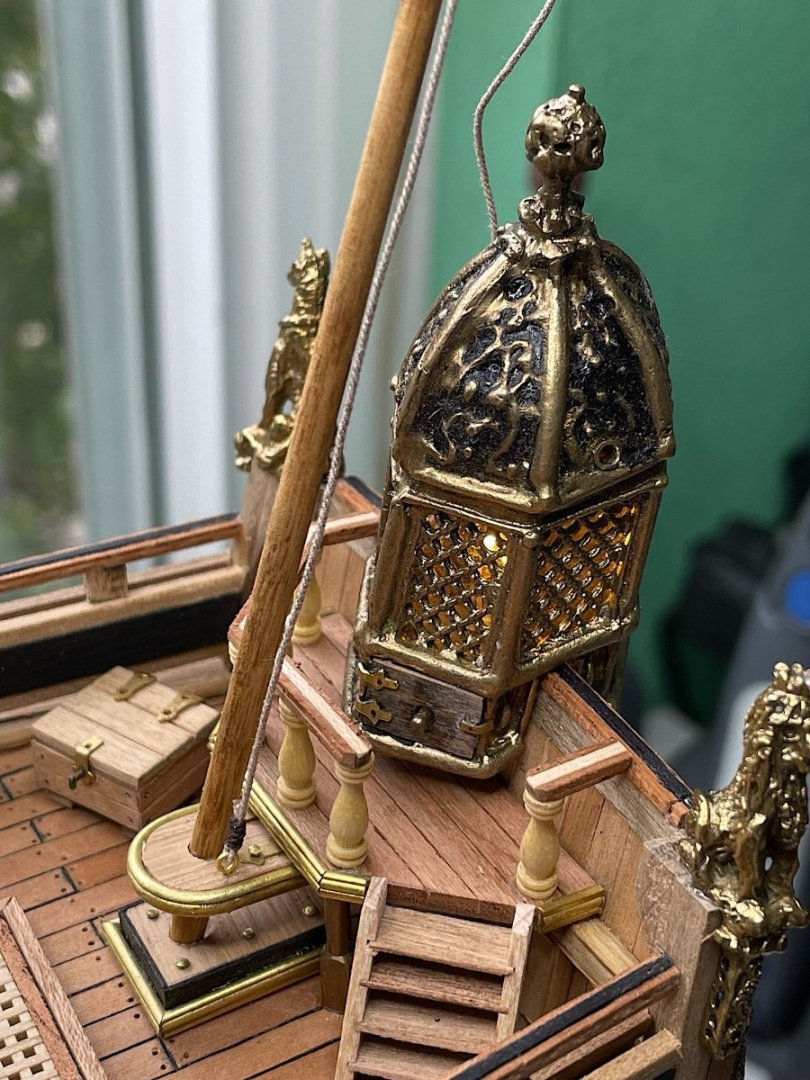
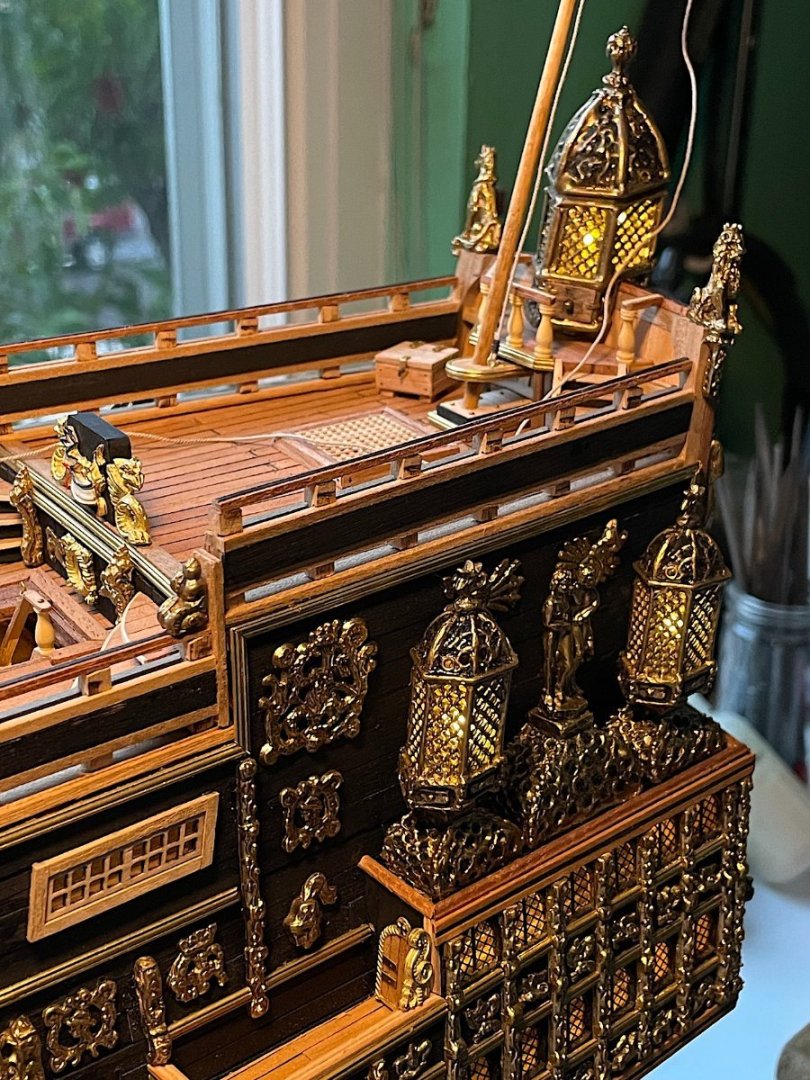
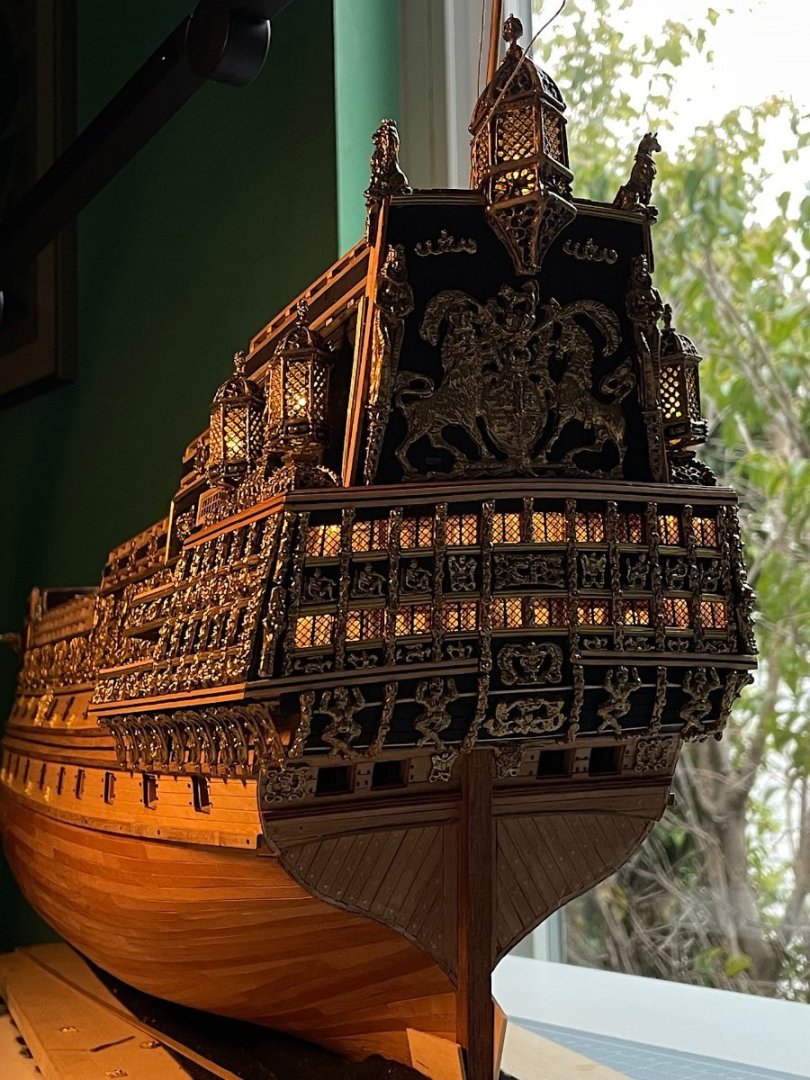
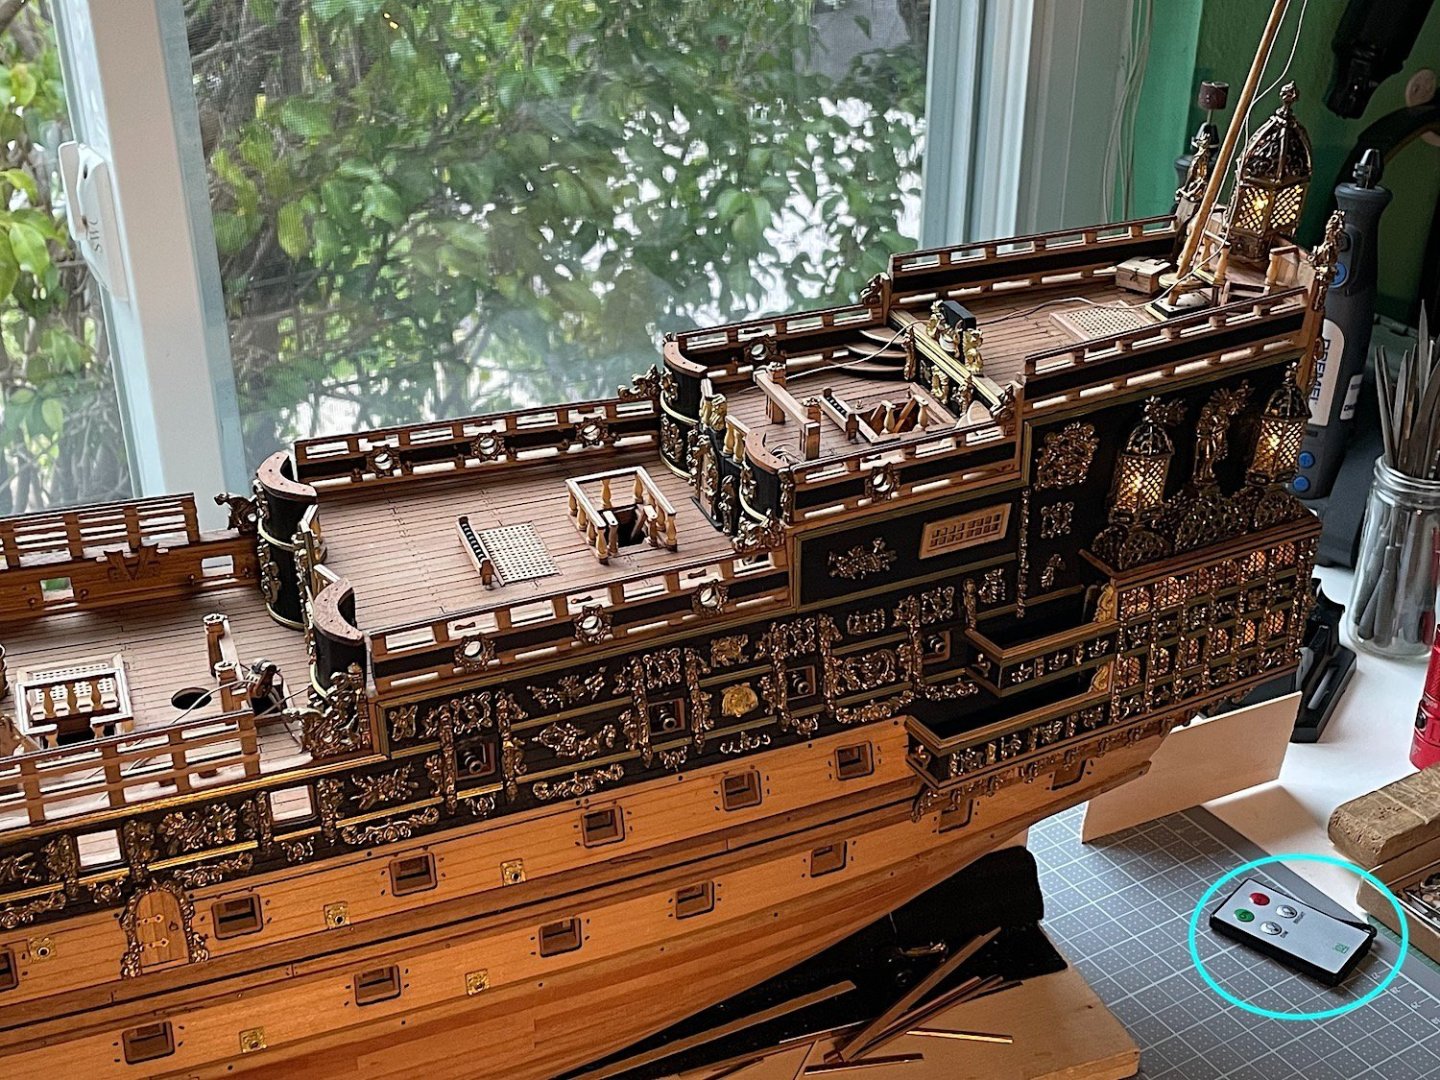
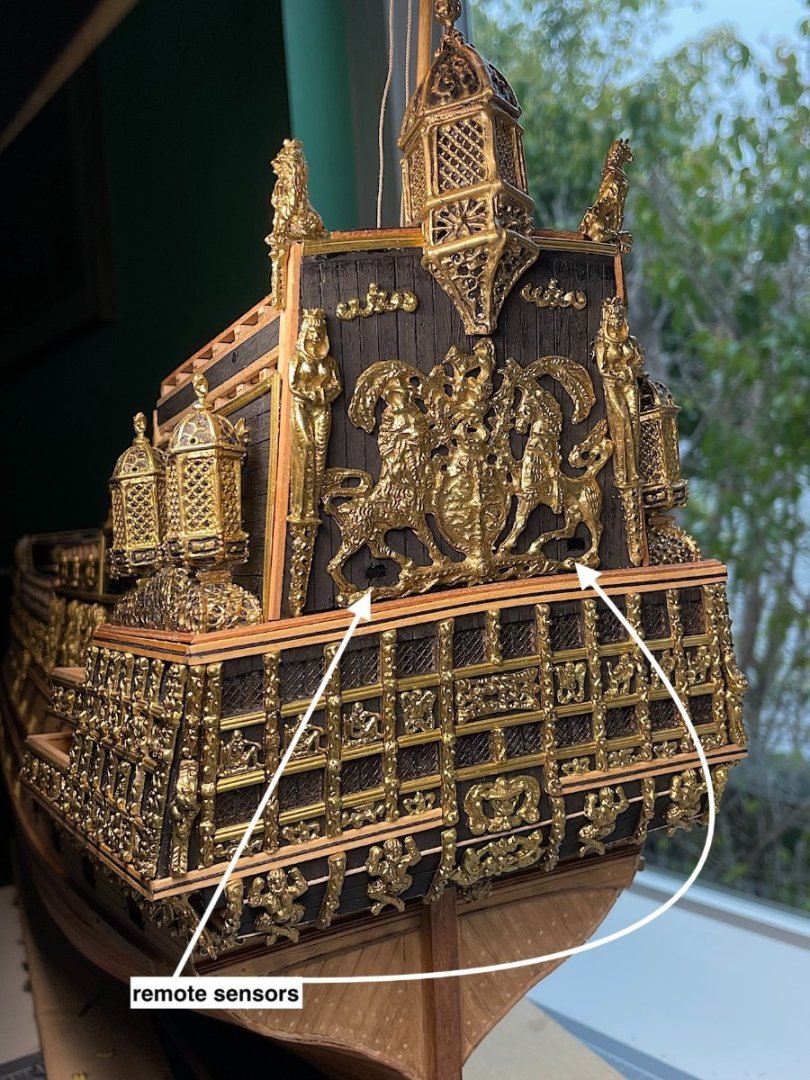
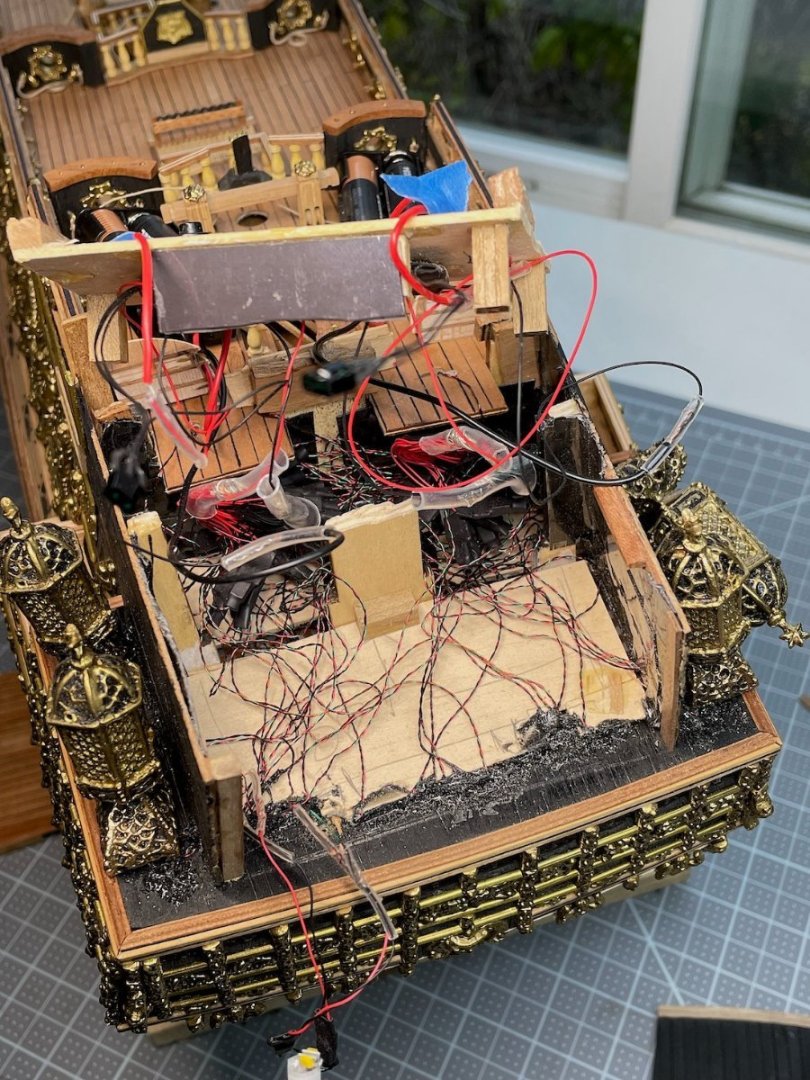
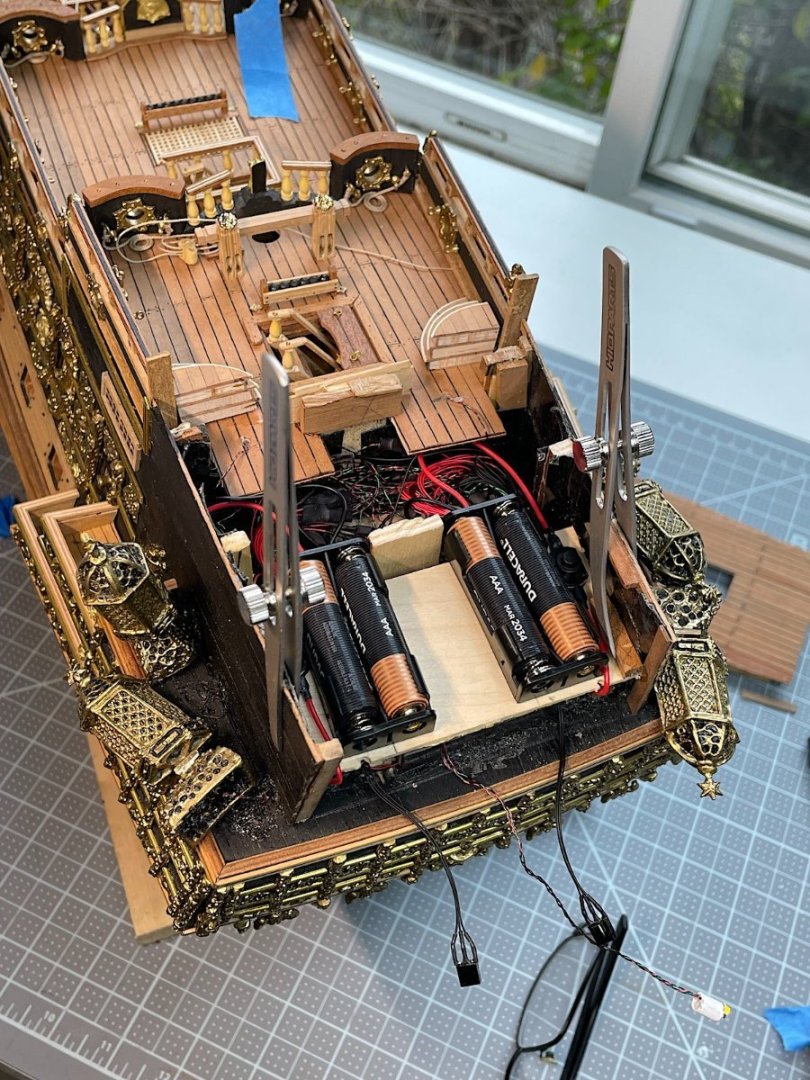
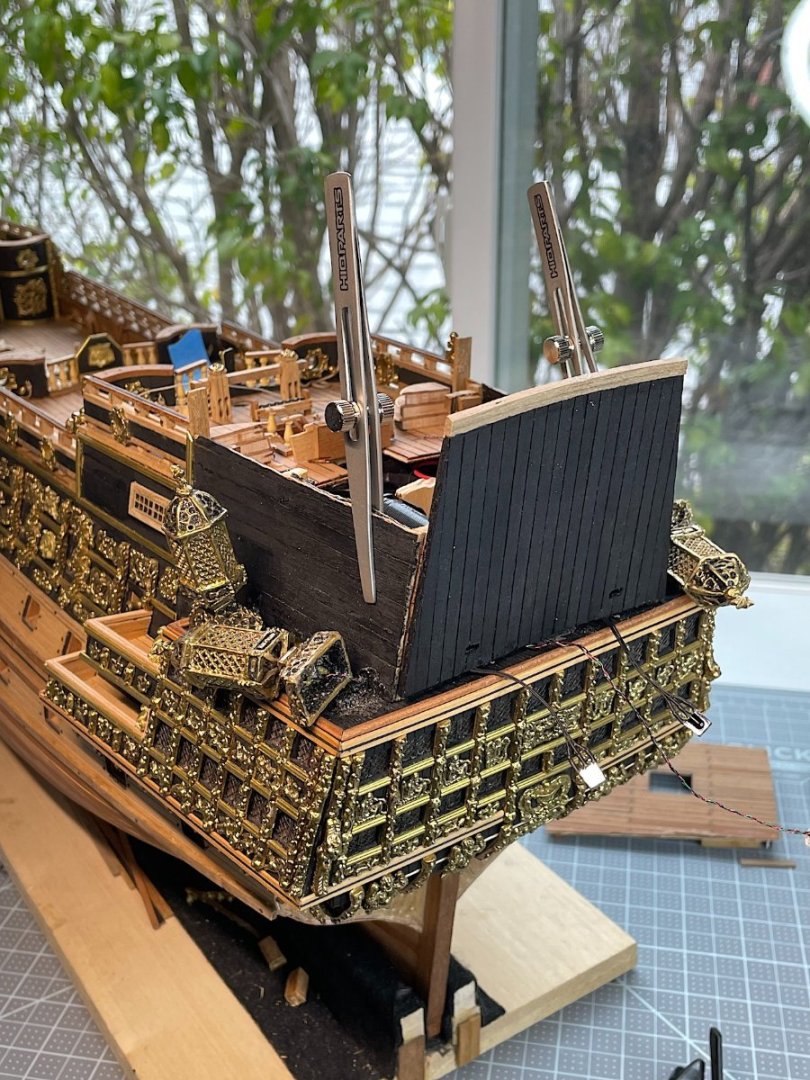
Lighting and stern update. The images don't show the great subtle flickering lighting effect. I will need to post a video. I suppose that I will also need to add the video to my youtube channel then copy/paste the link here?? (will need to create a new channel my current one is only aviation related) All 50 LED lights, battery packs and remote were purchased from Evans Design.. As always thanks for your likes, dropping by and comments


-
Yes you are indeed right the bronze bits are super nice. Some parts are soooo tiny that gold plating would be nearly impossible IMO. And given the cost for some 500+ bits would be, for me, above my pay scale. That said I did, in fact, have the bow ornament (king and horse) gold plated - not cheap.. came out very beautiful - The vintage bronze bits needed almost no "Dremeling" I'm very satisfied with how they look. I did use a brass brush (with a Dremel) to polish them then sprayed all of them with a clear lacquer metal protector to preclude earlier dulling. Regards,
-
Larry, I don't have any suggestions regarding hull gun port openings. The vintage manual requires you to cut out, from the 1/1 scale plan sheet of the opening images - then past those to the hull working from there - very weak - indeed. The templates are a huge improvement in the current kit. If you could locate a build log for the old kit - that may be helpful. I don't know of one...... That said the "jewel in the crown" of the kit that you have are the 600+ solid bronze decorative bits. I have SO vented in this log about how poor the current product quality for these bits are by comparison. Regarding McKay - that book will be super useful if you intend on adding full sails and "correct" standing rigging. The Mantua instructions are known to be mostly wrong. It is also a great source of general information, with the exclusion of the square tucked stern. Amazon has in both formats. https://www.amazon.com/Sovereign-Seas-1637-Reconstruction-Powerful-ebook/dp/B088ZT37VJ/ref=sr_1_1?crid=98E8GMBE3F2V&keywords=john+mcKay+sovereign+of+the+seas&qid=1683048087&sprefix=john+mckay+sovereign+of+the+seas%2Caps%2C137&sr=8-1 This site might also be helpful (use Google translate) https://www.modelforum.cz/viewtopic.php?f=183&t=46754 Scroll down for gun openings. Regards,
-
The issues with the SotS are that empirical data are not very informative, sketchy at best, and much of the ship's history have not been well documented regarding how it actually looked throughout its long life no two artists have the same ideas - especially in comparison to, let's say, the Vasa of similar vintage (irrespective of its much later resurrection). Though regarding Vasa accurate rigging requires some guessing according to Dr. Fred Hocker, whom I had the pleasure of spending an hour with at the Museum in 2018. He mentioned that for the running rigging of the 1/10th the English of the period were very helpful. Dutch information was/is sketchy at best during that period. And many nationals from other countries were hired during the build. Many of us have seen stunning examples of the SotS in museum images and in scratch build logs. No two are the same in its infancy... Given some "fog" that this ship owns, I for one have decided to add touches of artistic creative license to this current build. The Sergal, and the Deagostini being the only available kits from which to work also limit historically accurate work. Regarding Deagostini I have read from a super accurate source who noted that the Deagostoni's images, from their listing, are NOT from their completed kit (stern) but, actually from a one-of scratch built project. Hmmm???? Build on - enjoy - 100% of my friends would have no idea of any errors of any kind... with the exception of my Admiral who seems to always find "something" that just doesn't look right. 🤣 😘 AND of course members here who so enjoy the intellectual and artistic foibles (accuracy) of this hobby. Regards,
-
Hi all, Seems as if log had been "standing still". That said the 40 LEDs have been installed - now just need to button things up. Next post will be when all is back together. I will try to add a video that will show the really nice gentle flickering of the lights including the five lanterns. So appreciate your continued interest in this log. Regards,

-
Hi Larry, Click here for current manual. https://www.cornwallmodelboats.co.uk/manuals/mantua/787.pdf Thanks for your post within my log. Hopefully helpful. Still a work in progress, but hull, and decks are completed. Good luck!!
-
Patrick --- Just catching up - as always your research is top notch 👏 Regards,
-
Marc, such superlative work. PS: Enjoy my birth city 😍
- 2,699 replies
-
- 3
-
-
-
- heller
- soleil royal
- (and 9 more)