
MORE HANDBOOKS ARE ON THEIR WAY! We will let you know when they get here.
×


Pirate adam
-
Posts
228 -
Joined
-
Last visited
Content Type
Profiles
Forums
Gallery
Events
Everything posted by Pirate adam
-
Johann, I continue to be amazed by the detail of your research combined with the level of craftsmanship on your model. It is inspiring how much work you have put into answering questions related to details most people would just skip over. I hope you realize your build log is surely becoming one of the most valuable resources related to rigging in this period available on the internet. Thank you very much for sharing. Adam
-
Chuck, This is a cool idea for hopefully making the hobby a lot more accessible for people just getting started or who don’t have the tools to scratch build a lot of the tiny bits. It is amazing seeing the possibilities being unlocked by laser cutting, computer aided machining, and 3D printing. I am blown away by the quality of the latest things I am seeing with 3D printed carvings, figures, and bits like your capstan base that would normally take a ton of work in metal. Adam
-
Thank you Druxey. I think I will do that for the other side. I was weirdly nervous about making the holes too big, but making them in advance will save some risk later. I bought some sanding cord that I will use to make the existing holes bigger to where I get my little needle files in. Adam
-
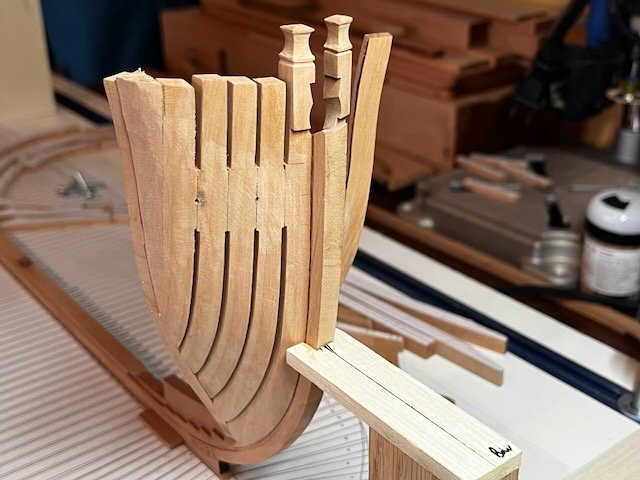
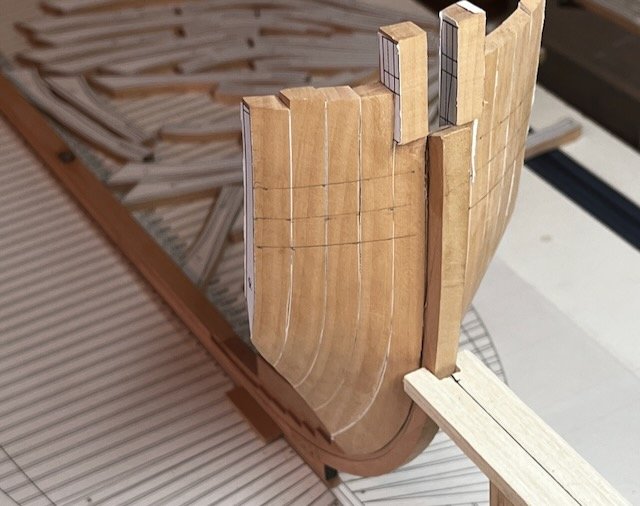
I finally got a chance to start assembling the bow section. One side complete. This was very satisfying after wrestling with the hawse timbers for weeks. I will be very happy when this part is done and I can move on to the remaining cant frames and finally the square frames.
-
The blocks look really good. I like the color. They look like ancient wood. They also look fun as an army of blue droids.
-
Looking good. I love the shape of the French frames with the extreme tumblehome. Adam
-
Looking amazing. The milling is tricky and you made it look easy. Adam
-
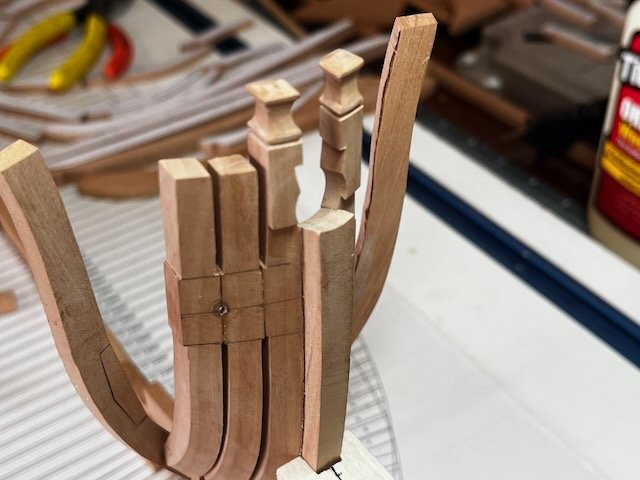
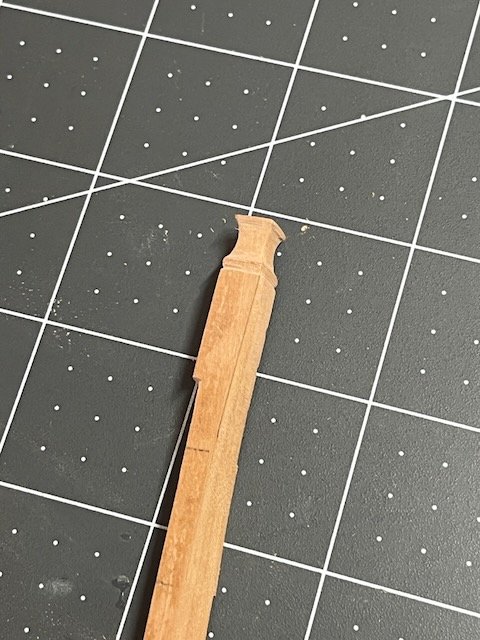
I formed the knight heads on the top of the bollard timbers. I just used chisels, files, etc. The shape on my admiralty draught was relatively easy to form. Next step will be to file in the opening for the bowsprit and its chock. I hope not to encounter another piece on the ship as complicated as the bollards. Adam

-
I then removed the frames from the model and pulled them apart. This was super easy due to label paper on the frames. I then cut down each frame using the mill to create the air gaps. I won't even get into how many hawse timbers I made to get to this point before everything looked right and fits properly with the first cant frame. Next I will file in the hawse holes per the instructions in the Swan practicum. I also still need to do a bit of shaping of the bollards to get them to fit properly on the tapered stem, and then I will try to shape the knight heads. Adam
-
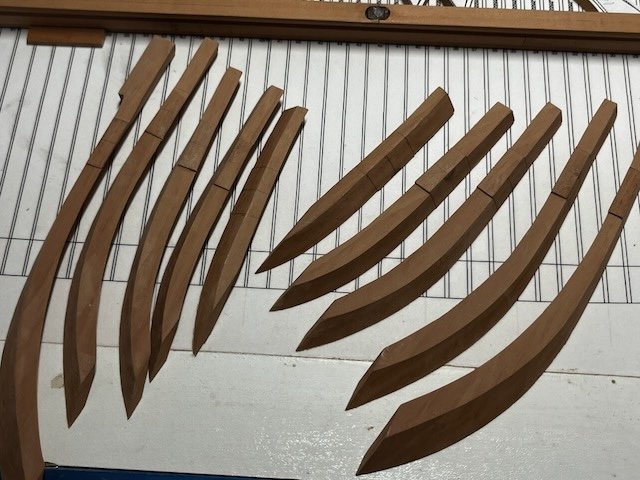
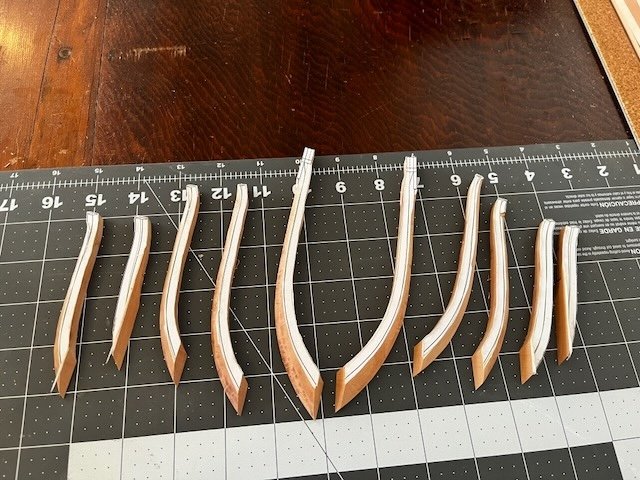
Finally some progress on the pointy end. I cut out the frames in the usual manner. I printed out an extra set of frame drawing, so I could add them to both sides of the frames. I did some pre-beveling, and then glued all the frames together into 2 stacks (not shown). I then did some shaping on the inside and outside of the frames before temporarily attaching to the stem. I marked the heights for the hawse holes and the level of the material that will remain when I cut the air gaps.
-
Pear, boxwood, and holly would all work great depending on the look you are going for. I would recommend looking through the various build logs and seeing if there is a certain look you like more than others. I would probably go with wipe on poly vs tung for some of the lighter woods, as it can give a bit of an orangish hue over time that probably isn’t what you are going for. I definitely love the look of tung oil on pear or cherry. Adam
-
This is normal. The frames you are referring to as floating are simply single frames vs. the other frames which are doubled. Keep in mind the futtocks are still bolted to the one below with chocks or scarphs just like all the others. Surely this is not as strong as a doubled frame, but it gives 2 advantages. Firstly lighter weight high in the ship where weight isn't desirable. Secondly the gaps between frames were meant to help keep the wood dry. Keep in mind these were still enormous pieces of wood in real life. Those frames will be more delicate when you are building the model, but you will find the assembly to be plenty strong once combined with the various wales, planking, etc. You can find lots of examples on build logs on the site including the various Swan class models. I suspect the frames become cant frames starting at station 23, but I couldn't say with the information in the drawing. Adam
-
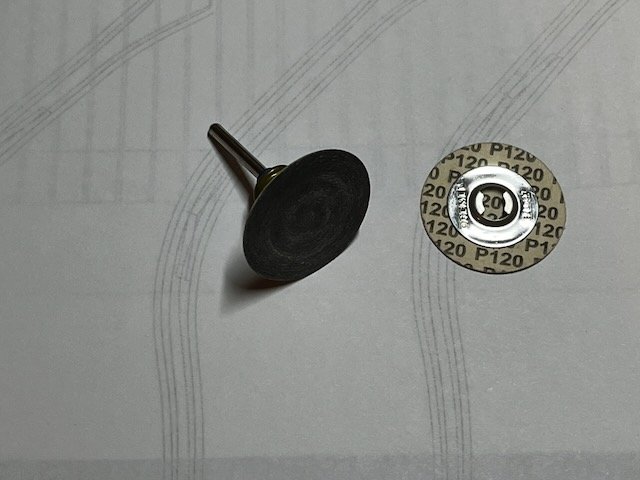
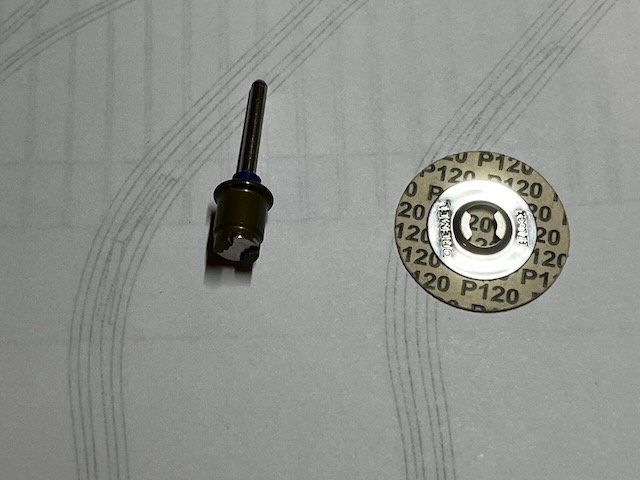
This is the attachment I like. It attaches with a spring loaded clip on the shaft so no hole or fitting on the front of the sanding disk. They use the same attachment for some of the polishing wheels .
-
Alan, It looks great. I hope you chose enjoy summer! Adam
-
I just went through this process on my Crocodile build and will start with the bow cants soon. I used just about every tool imaginable. I will ask Druxey to close his ears when I say I did a ton of the fairing with a sanding disc tool (one that attaches perpendicular to the shaft via a clip on the back - not the drum shaped sander which guarantees disaster) on a Dremel tool equipped with a right angle attachment. Using a 120 grit disk at low speed allows to remove material at a reasonable pace without too much risk of disaster. Keep in mind I left a full 2mm inside the lines of the frames so plenty of wood to work with. You do have to be careful so not to ruin frames. Then I switch to hand sanding with sandpaper glued to various pieces of plywood, thin battens, etc. it is something best done a little at a time over the course of days. I will still need to do some thinning of the frames later which I I’ll do entirely with hand sanding. It is a bit shocking to see how thin the frames are when you get to the prototype thickness which is 5.5” at the heads for my model. The tiny size of the timber heads is one of the first things that jumped out seeing some of the dockyard models in person at the navy academy museum. Adam
-
Dale, Below are a couple pictures of rope displays I have been lucky enough to come across. The first is from the ropery at Chatham dockyard. The second is from Mystic Seaport. They show that even in new rope there is a pretty wide variety of colors that would change over time. The ropes in the Chatham display are from left to right hemp, Manilla, coir, sisal, and synthetic. The ropes from Mystic are labelled. Some of the hemp ropes from Mystic are tarred as well. If you are interested in rope making I would recommend doing a google search for the ropery at Chatham Historic Dockyard. It is super interesting and there are lots of pictures of the process. They continue to make and sell rope in the same facility used to make ropes for the Royal Navy in the age of sail. Adam
.jpeg.470fc2171e3cffc4e1531eb9ac733381.jpeg)

-
My main advice especially on this portion of the ship is to make sure to leave plenty of wood for fairing once the frames are in place. It isn’t all that much fun to remove later, but it is tons easier and will look nicer than if you need to add shims later. It is SO easy to accidentally take too much off when you cut the bevels off the model. Adam
-
There is a good planking diagram for a 74 if you search for Berwick 1775. I look at the Arrogant and Elizabeth drawings a lot, as I am looking at Edgar 1779 as a possible one-day "ultimate model". Adam
-
That is awesome. Adam
-
Alan, Of course starting something new is just another part of the learning process, especially for a project as ambitious as this. The good thing is the risk of destroying the work you have already done is low. I am really looking forward to following the progress on the wales. It will make an already epic model even better vs settling on straight planks. Then the rest of us will be asking you for help! Adam
-
Kevin, I agree with Paul. Thank you for doing the podcast. What I loved about the podcast and all of your videos is the level of honesty regarding mistakes and how often you have to re-do parts, etc. I think that is super important for both newcomers and not-so-newcomers to the hobby to hear. I also loved your matter of fact comment that while you don’t currently have the right skill level to work with brass, you will of course have that in time. I think sometimes people forget that guys like David took a long time to master the various crafts in this hobby no matter how skilled they are. Looking forward to seeing Ulysses and of course the rest of Thorn. Adam
-
Siggi that turned out incredible! Very unique and beautiful. Adam
-
I think the red is the way to go. It looks good and seems more logical. Adam
-
I have had success in a similar situation using the cans of compressed gas used to clean computer keyboards. Stubborn bits can be brushed off with a soft paintbrush. Adam
-
Very cool model and nicely done. Adam


