HOLIDAY DONATION DRIVE - SUPPORT MSW - DO YOUR PART TO KEEP THIS GREAT FORUM GOING! (Only 24 donations so far out of 49,000 members - C'mon guys!)
×


Pirate adam
-
Posts
241 -
Joined
-
Last visited
Content Type
Profiles
Forums
Gallery
Events
Everything posted by Pirate adam
-
This is great. I think one of the coolest aspects of this hobby is the number of skills you can try to master along the way. I haven't gotten to the carvings phase, but it definitely will allow you to take your already beautiful model to the next level. Adam
-
Greg, You might consider some wireless LED puck lights for the lighting. You could either sit them on top or there are some inexpensive remote control ones that could be stuck to the inside of the case. Adam
-
Transom drawing question
Pirate adam replied to Pirate adam's topic in CAD and 3D Modelling/Drafting Plans with Software
Thank you druxey and Allan. I am thrilled to get inputs from people with so much experience in this area. Something that blows me away about this hobby is that there are even 3 people on earth that care enough about such an obscure subject to spend time thinking about it on a Saturday morning. I agree that I think this is almost a case of too many references available for one ship. I will go with the contemporary drawing which is consistent with the drawings available online and from the NMM for Crocodile as well as Pelican, Hyeana, and Eurydice. I am blown away by the clarity and beauty of the actual prints from the NMM. I have both Crocodile and HMS Zebra 1777 as well as the Swan books (and the Euryalus books 😀), so I won't be running out of modeling subjects anytime soon. Adam -
Transom drawing question
Pirate adam replied to Pirate adam's topic in CAD and 3D Modelling/Drafting Plans with Software
Thank you Allan! That helps confirm I'm not just going crazy. I think I have been double counting in the section about transoms in Steel (wing transom, filling transom, deck transom, transoms below the deck or filling transoms in number) as I add up the wing transom, deck transom, and filler dimensions. Adam -
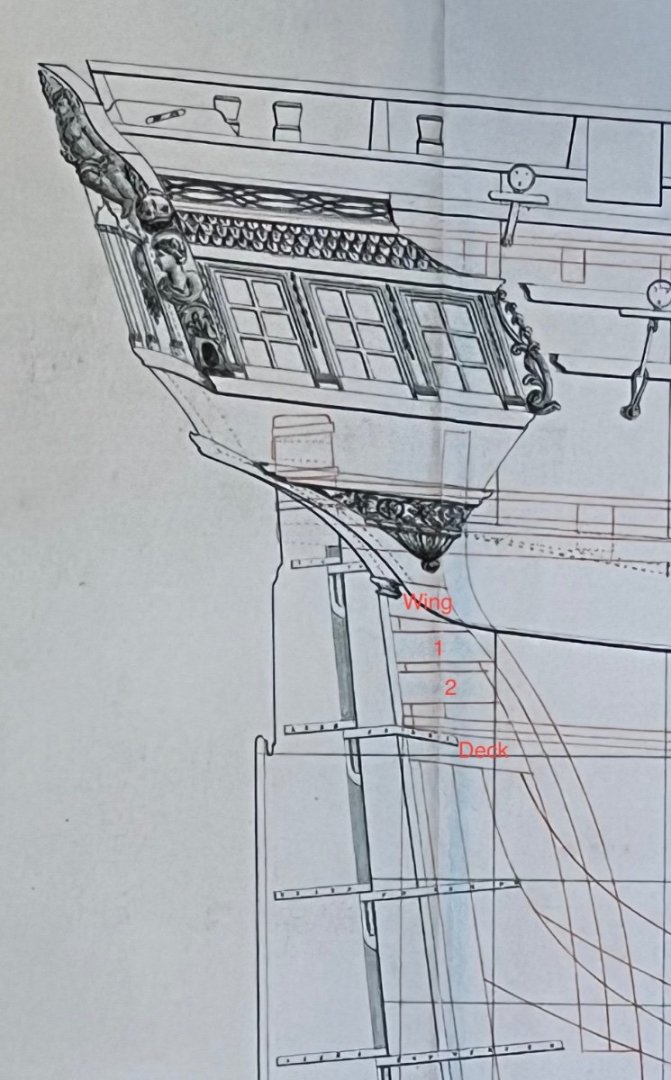
I have a question for the more experienced plan drafters out there. I am thinking of building a model of the HMS Crocodile of 1781 as a future build. This ship was a Porcupine-class post ship and sister ship of the more famous HMS Pandora. I have the beautiful draft of the ship from the NMM as well as the Pandora Anatomy of the Ship book. I have been studying the draft and the Pandora book, as well as the tables in Steele's, and some of the other drafts online on the NMM site and Wikipedia. One thing I can't seem to figure out is the configuration of the transoms. Both Steele's and the ATS book indicate the ship should have 5 transoms. No matter how I look at the draft, squint my eyes, etc. I only seem to see 4 transoms on any of the historic drafts as seen below. Any thoughts? Am I missing something here?
-
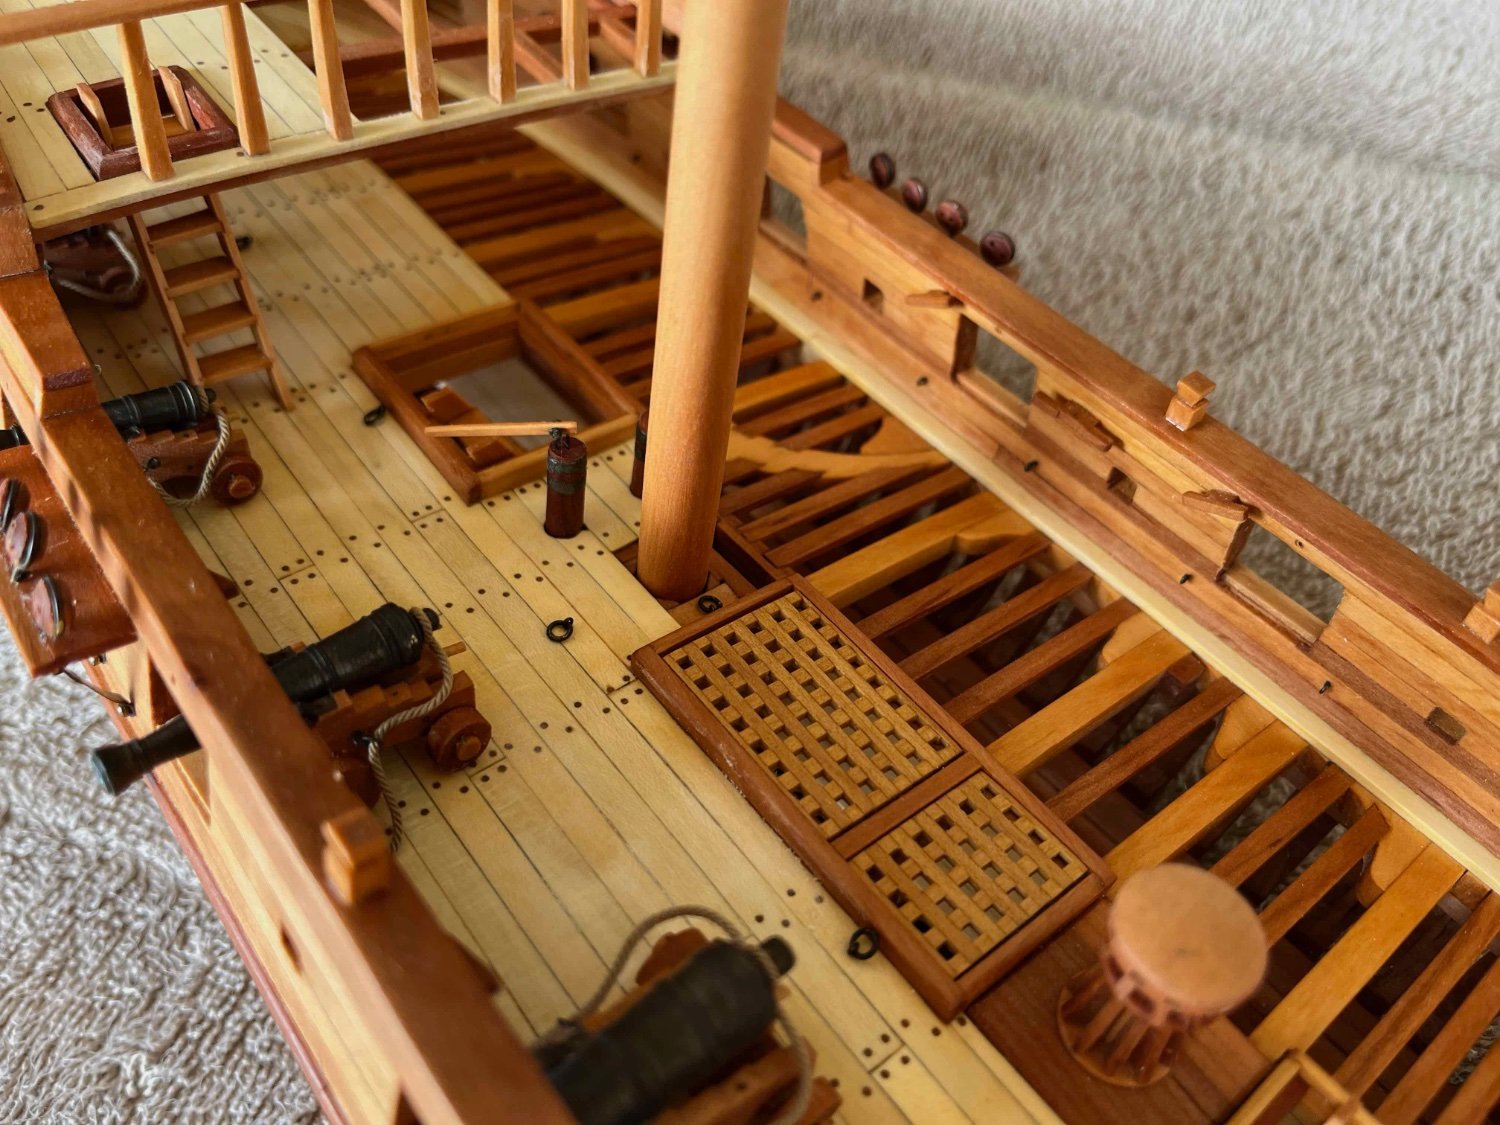
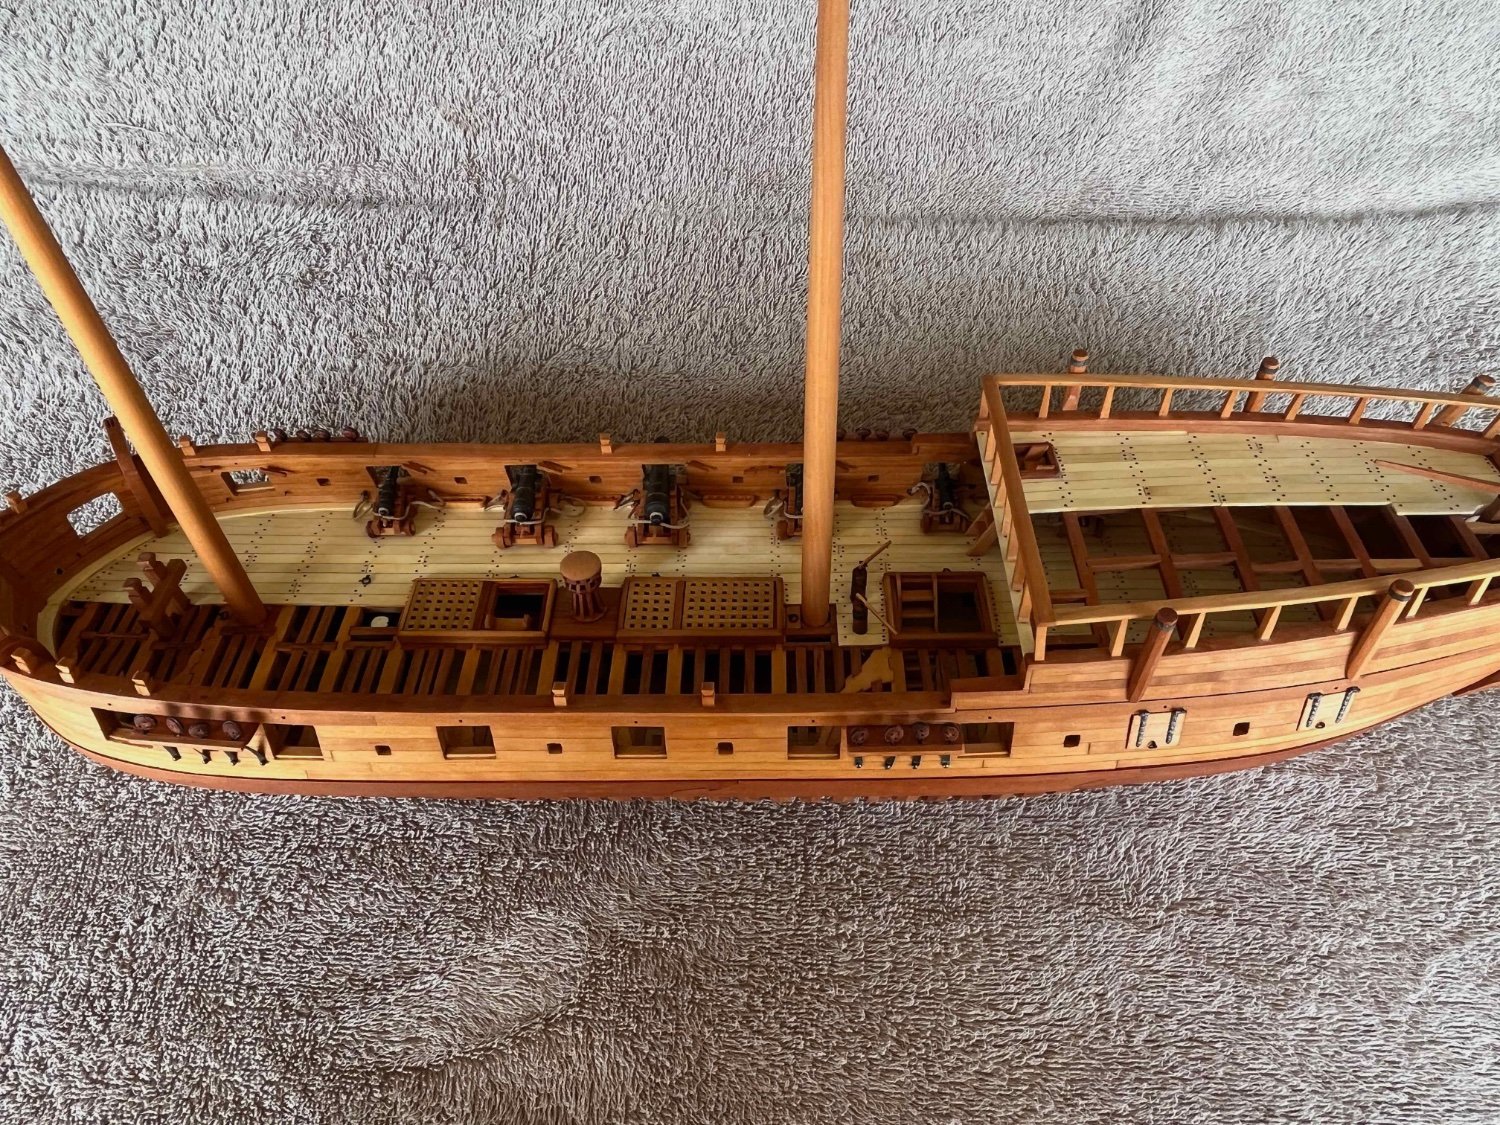
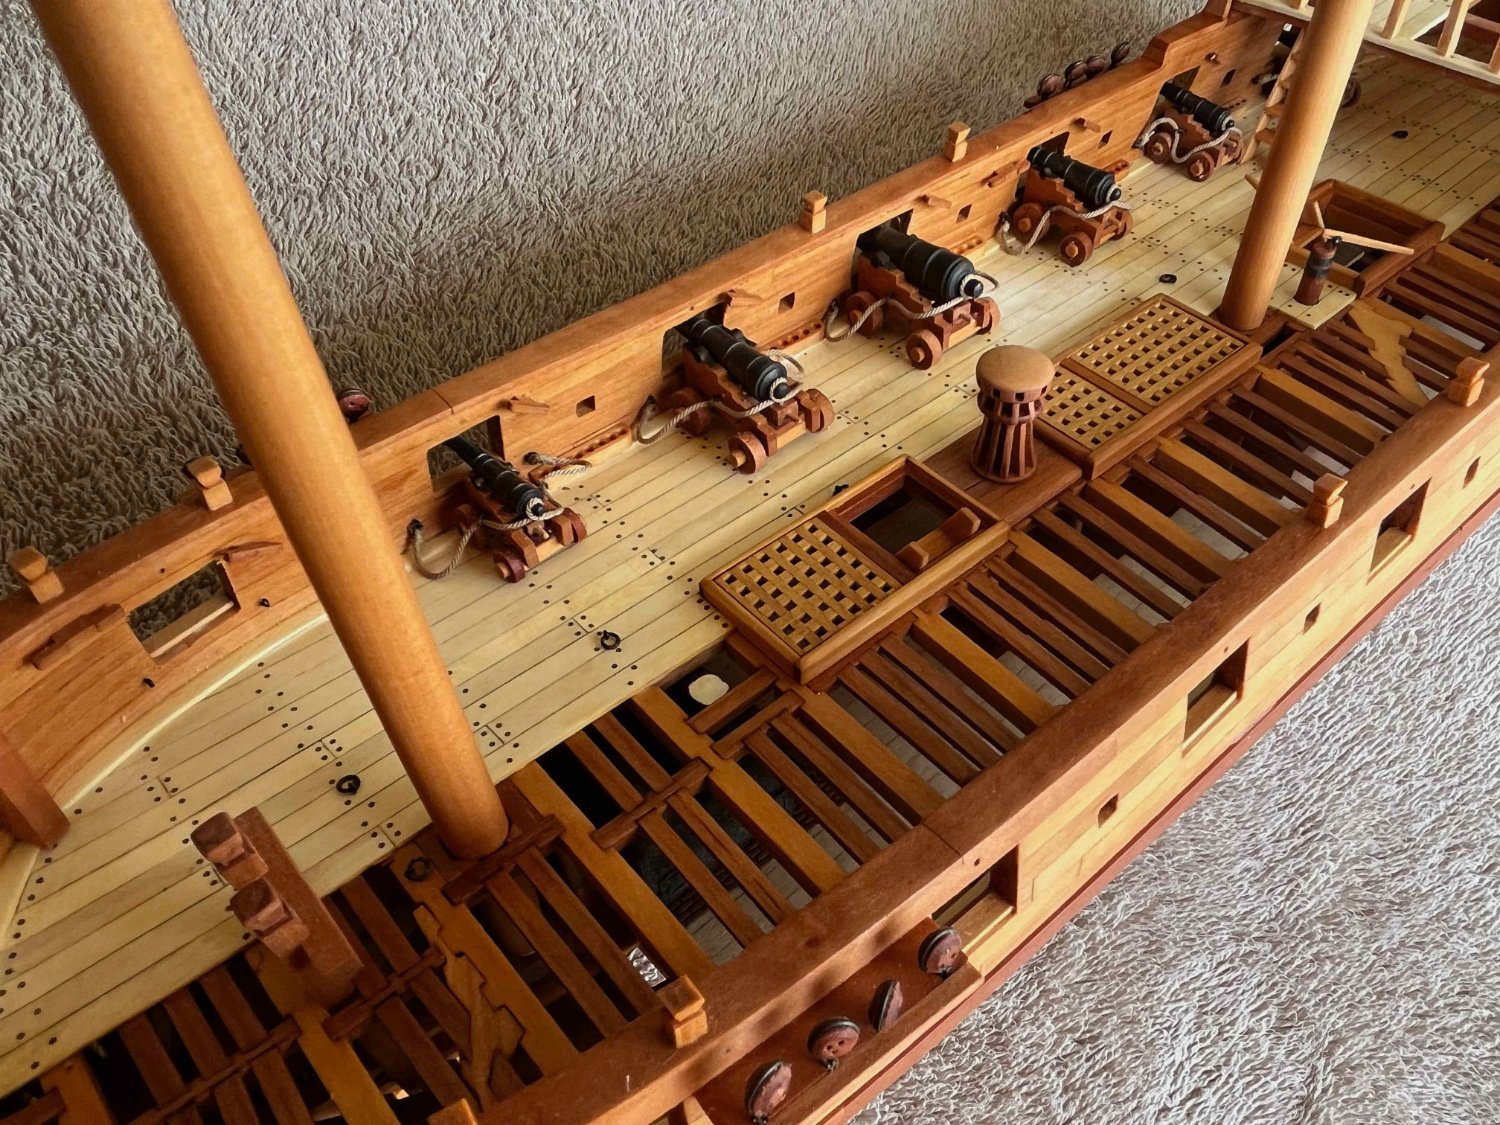
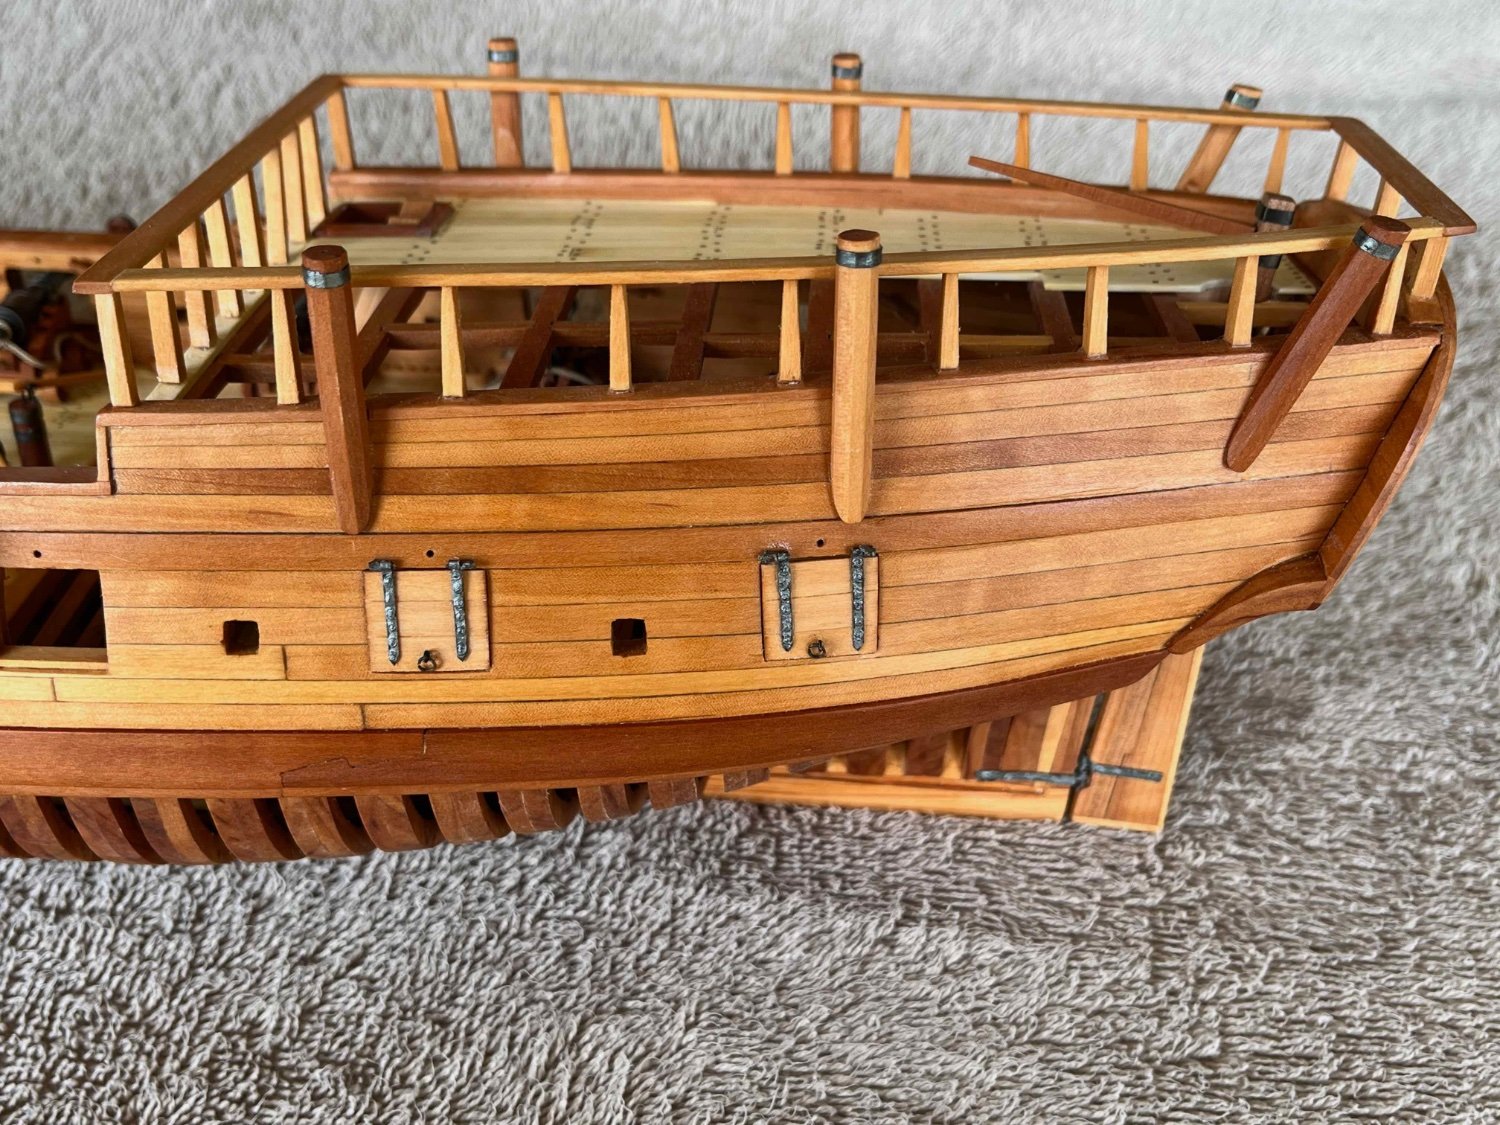
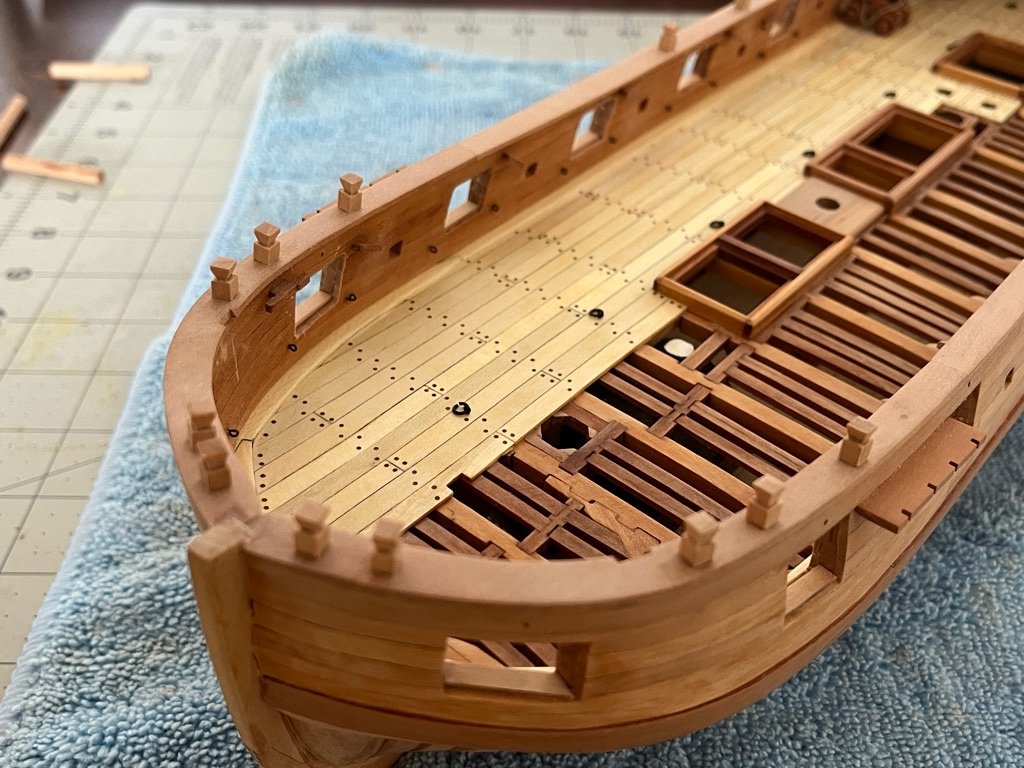
Updates. I have most of the work done on the hull. Still some work to make the swivel gun mounts and anchors.


-
Nicolas, Your project is really cool. I am interested to see a lot of the work people have been doing with CNC machines. Marsalv’s le Gros Ventre log is one of the best I have seen for showing machine setups. I don’t consider myself an expert by any means, but there are a couple tips I have learned from other modelers on the site with regards to the basic woodworking. The first is that I have moved almost entirely to using chisels for cutting small parts rather than hobby knives. Even inexpensive chisels can be kept insanely sharp, which really helps. It is also easier to cut square edges. The second is to mostly use sandpaper that has been attached to plywood or wood blocks with glue or 2-sided tape. It makes it much easier to sand to lines without rounding the edges. That will help a lot with fit. I don’t think there is anyway around having to do some sanding and manual cutting even with CNC or manual machining. A lot of modelers highlight the edges of planks by simply running over the edge with a dark pencil before gluing the joint. Others have had good luck with tinted glue. Adam
-
Congratulations Marsalv! I have learned so much from this build and Pandora. I can't wait to follow your next build from the start. Adam
- 589 replies
-
- 1
-

-
- le gros ventre
- cargo
- (and 1 more)
-
I have a lot of experience painting plastic airplane models over the years. I think it is especially important to clean plastic parts if you will be using acrylic paints. There are a several things this helps with: 1) oils from your skin or mould release can prevent the primer or base coat from adhering properly causing sections to peel off later especially if you will be doing any masking. This will cause extreme frustration when it happens. (BTW, you can usually get a do-over with acrylic by soaking the painted part in windex and rinsing the paint off) 2) oils from your skin can leave fingerprints that show up when you paint 3) cleaning helps get rid of hairs, dust, etc. I use liquid dish soap and rinse with cool water. Adam
-
This is cool to see a different approach to constructing the hull.
-
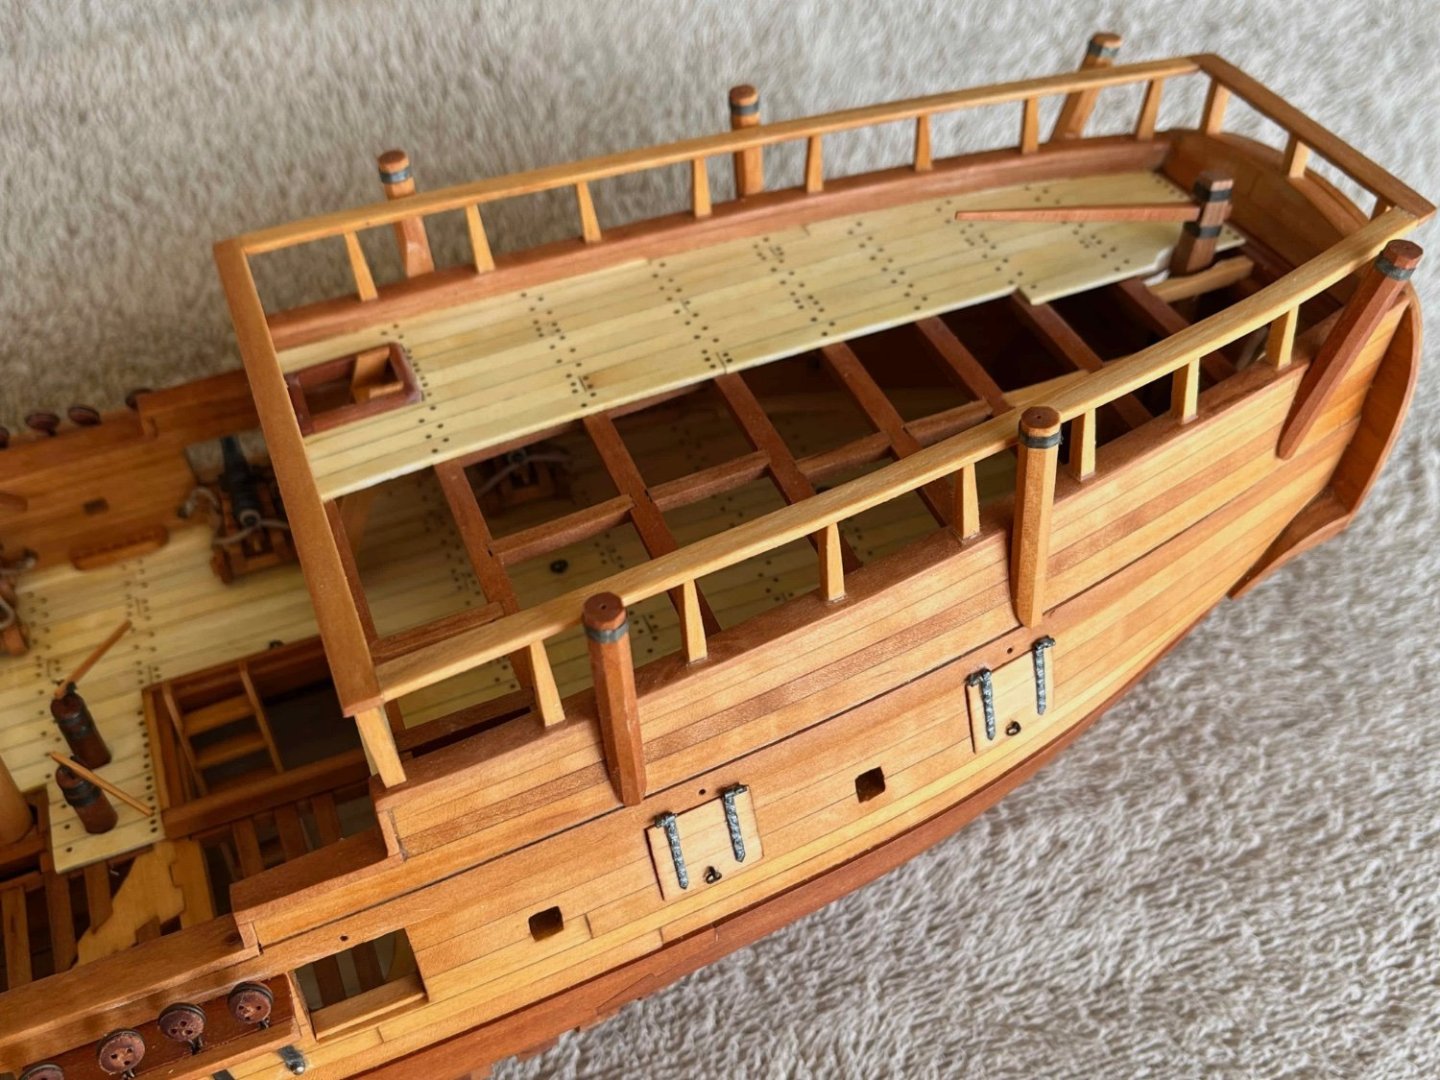
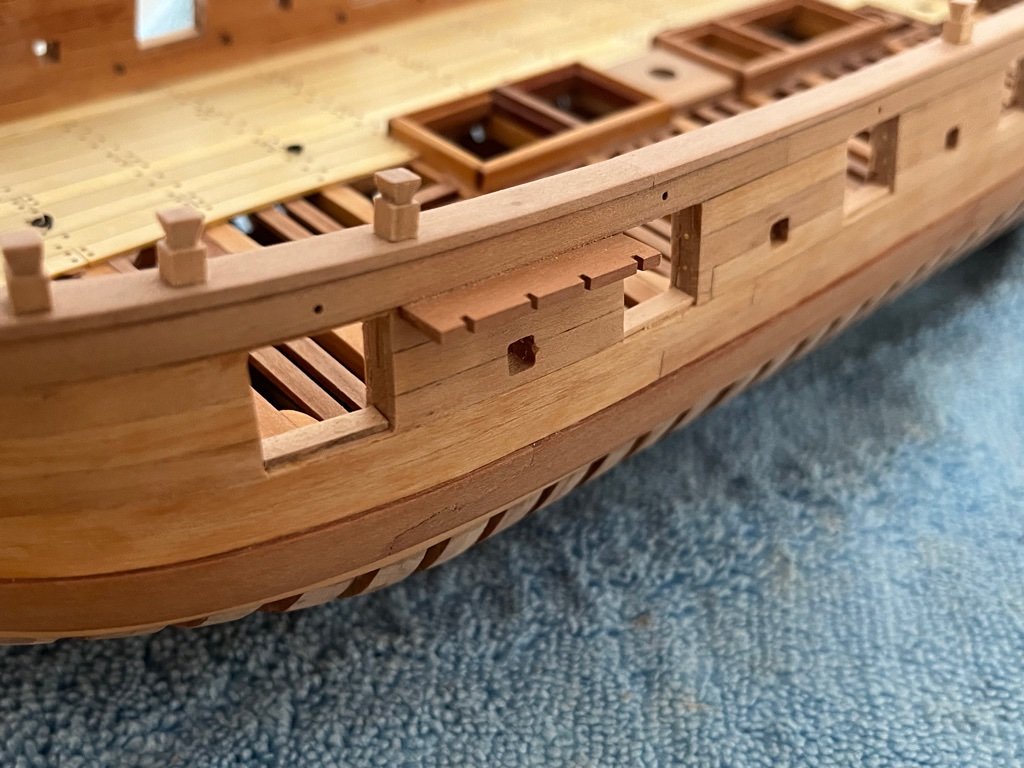
Timber heads and channels installed. I am thinking I may actually end up with a sailing galley
-
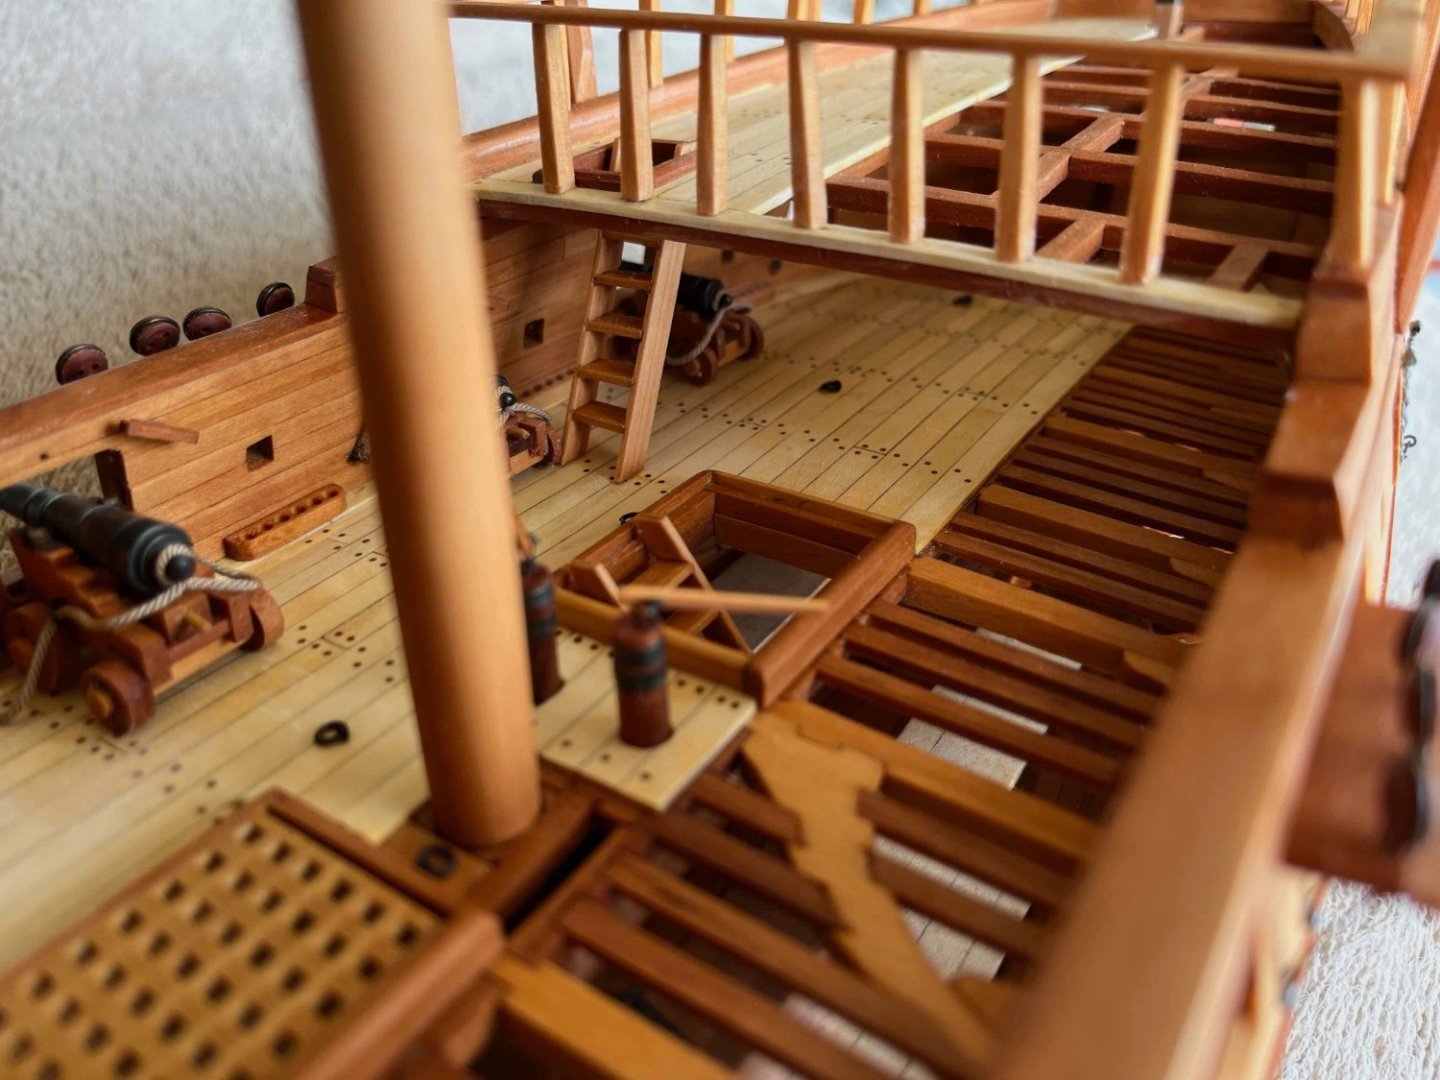
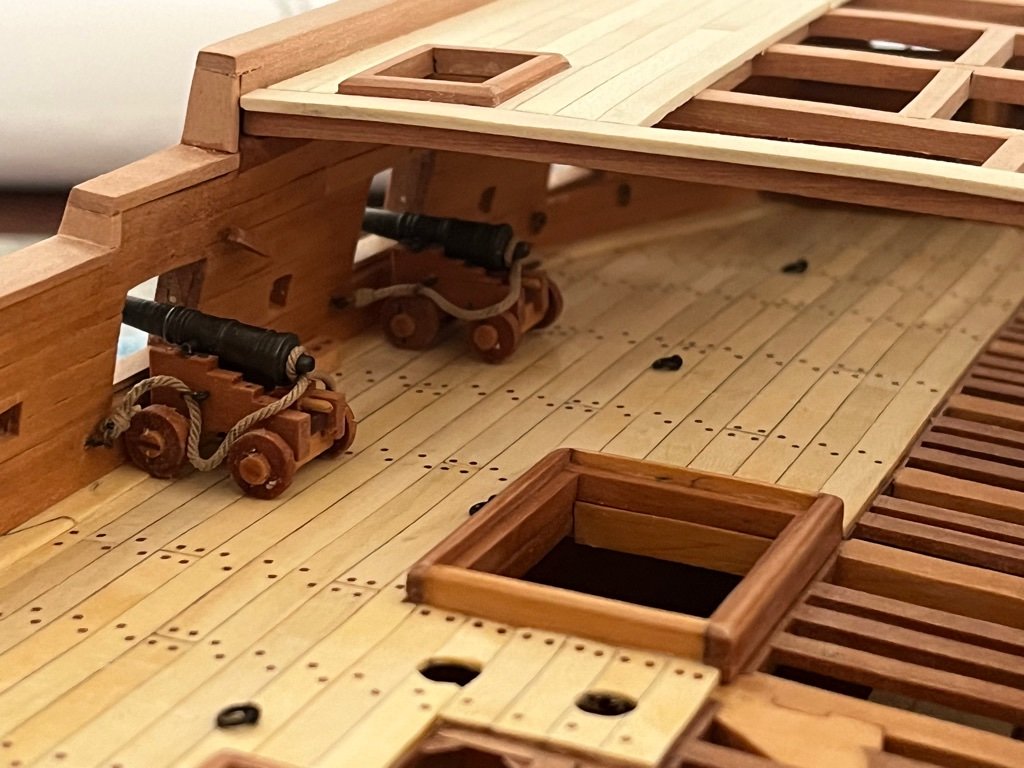
Quarter deck framing and decking in place.
-
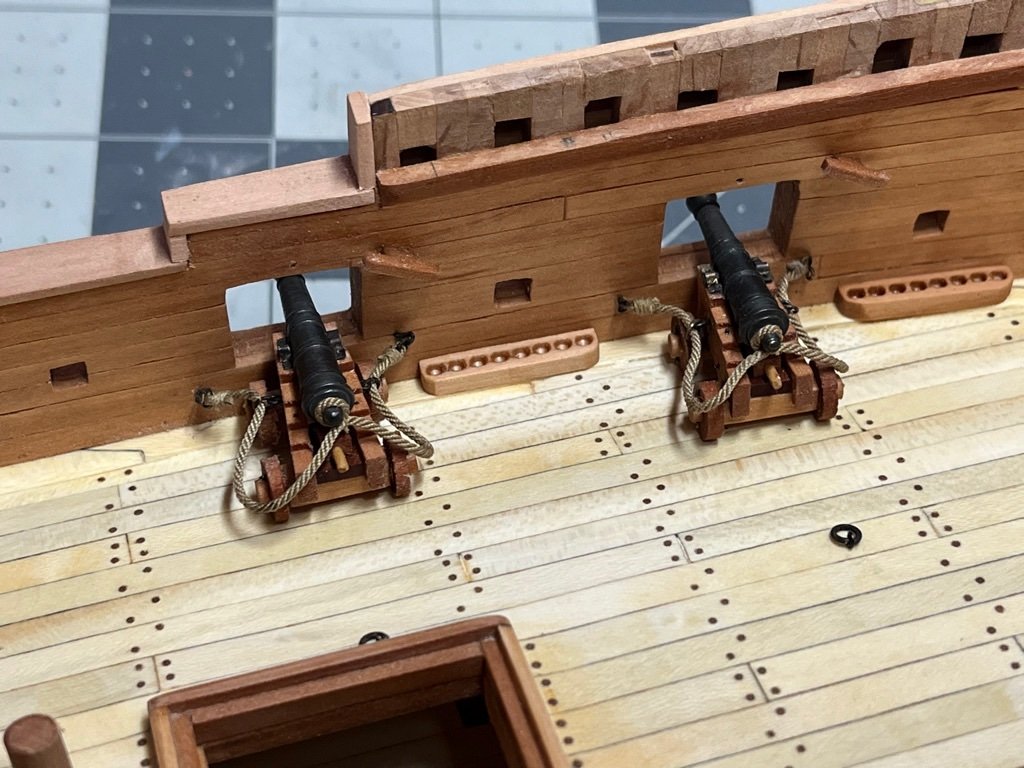
I had to install 2 of the guns before installing the framing and decking for the quarter deck.
-
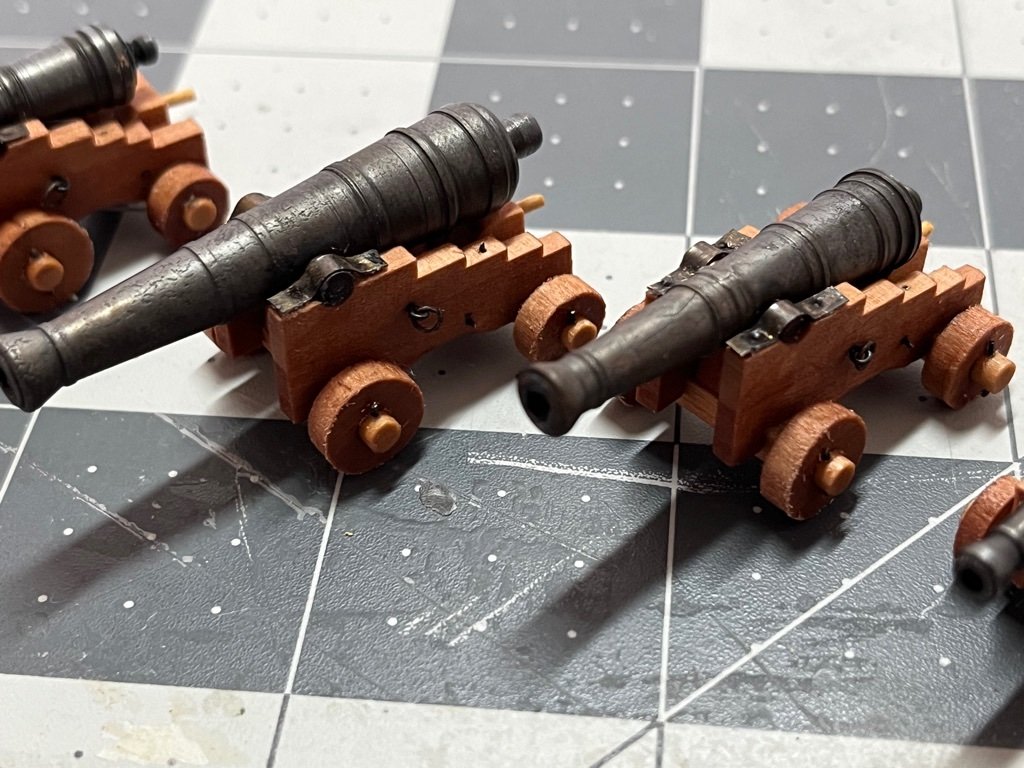
Lots of progress since my last post. I have finished all of the guns and gun carriages. I had some issue with the brass blackening, but I am actually super happy with how they turned out. There is a bit of a cast look despite being turned from brass.
-
I would recommend reading through Chuck's planking tutorial in the planking and framing section. The best way to do it ends up being to mark the number of planks you need on each frame and taper the planks accordingly. It is a bit of extra work, but the most surefire way to get the line of planks you want. Adam
-
Congratulations Rusty! That turned out amazing. I love the colors! Adam
- 642 replies
-
- 3
-
-
- winchelsea
- Syren Ship Model Company
- (and 1 more)
-
I buy a lot of paint for my plastic models from Michigan Toy Soldier. They carry AK Interactive. https://www.michtoy.com I have found them great to deal with. Adam
-
This turned out really great Fred! I think the Speedwell will be a great build. Looking forward to it. Adam
-
Plastic or Wood models? Your Favorite?
Pirate adam replied to Bill97's topic in Modeling tools and Workshop Equipment
I agree with mtaylor. You probably have more or less all of the tools you need to build one of the Model Expo kits if you have been building in plastic for a while. One thing I would add to the tool list if you don't have one is a pin vise and a set of small drills. Little files are also good to have. I build lots of plastic airplane models in addition to wood ship models. The biggest difference between plastic and most of the wood model kits is that you will have to do a bit more shaping, sanding, etc. on the wood models. A cool thing about the wood kits is you will most likely end up with a kit that is very unique and your own depending on how you finish, rig, etc. -
The frame alignment jig is genius and so simple (like so many genius things are). Something similar could be easily adopted to any plank on frame build by carefully measuring room and space. I am putting it in my mental notebook for my planned upcoming Swan build. Adam
-
Congratulations Chuck. This has been an amazing build to follow, and the engineering that you have put into the kit is amazing. I have learned a lot from following, and the end result is incredible. Adam
- 1,784 replies
-
- 5
-
-
- winchelsea
- Syren Ship Model Company
- (and 1 more)
-
This is spectacular! The downside is we get spoiled by seeing years of work in each installment. Adam
-
The rigging is amazing Johann. I'm not sure I've ever really seen anything quite like it. I am going to read this section again and again before I do any rigging on my model.