HOLIDAY DONATION DRIVE - SUPPORT MSW - DO YOUR PART TO KEEP THIS GREAT FORUM GOING! (Only 20 donations so far - C'mon guys!)
×


Pirate adam
-
Posts
240 -
Joined
-
Last visited
Content Type
Profiles
Forums
Gallery
Events
Everything posted by Pirate adam
-
Gantry style building board dimensions advice
Pirate adam replied to davec's topic in Modeling tools and Workshop Equipment
My build board for Crocodile is 36" x 16". This is for a 6th rate 114' 3" on the gun deck. The nice thing about this size is pre-finished melamine shelf boards are readily available in this size. You can see in the picture that I have pasted the framing diagram to the board. That gives a good indication of how much space will be available around the hull (I would heartily recommend doing the same or at least making a paper mock up based on widest frame and length of ship as per Mike's recommendation). Believe it or not in real life the centerline of the framing diagram is right in the center of the board. I would probably make another 6" longer if I was to do over again. You can see the stern is getting a bit close to the edge. I went with the t-tracks closer to the edge vs. closer to the model. I originally had in mind to do a build board that could be used later for a 4th rate ship, but the size was going to be a hassle for something that might never be used. The nice thing about the size I have is it is easy to move around for cleaning, putting in back seat of a car, whatever. It will surely start to get heavy once the hull comes together. You may consider putting some handles on the ends. Adam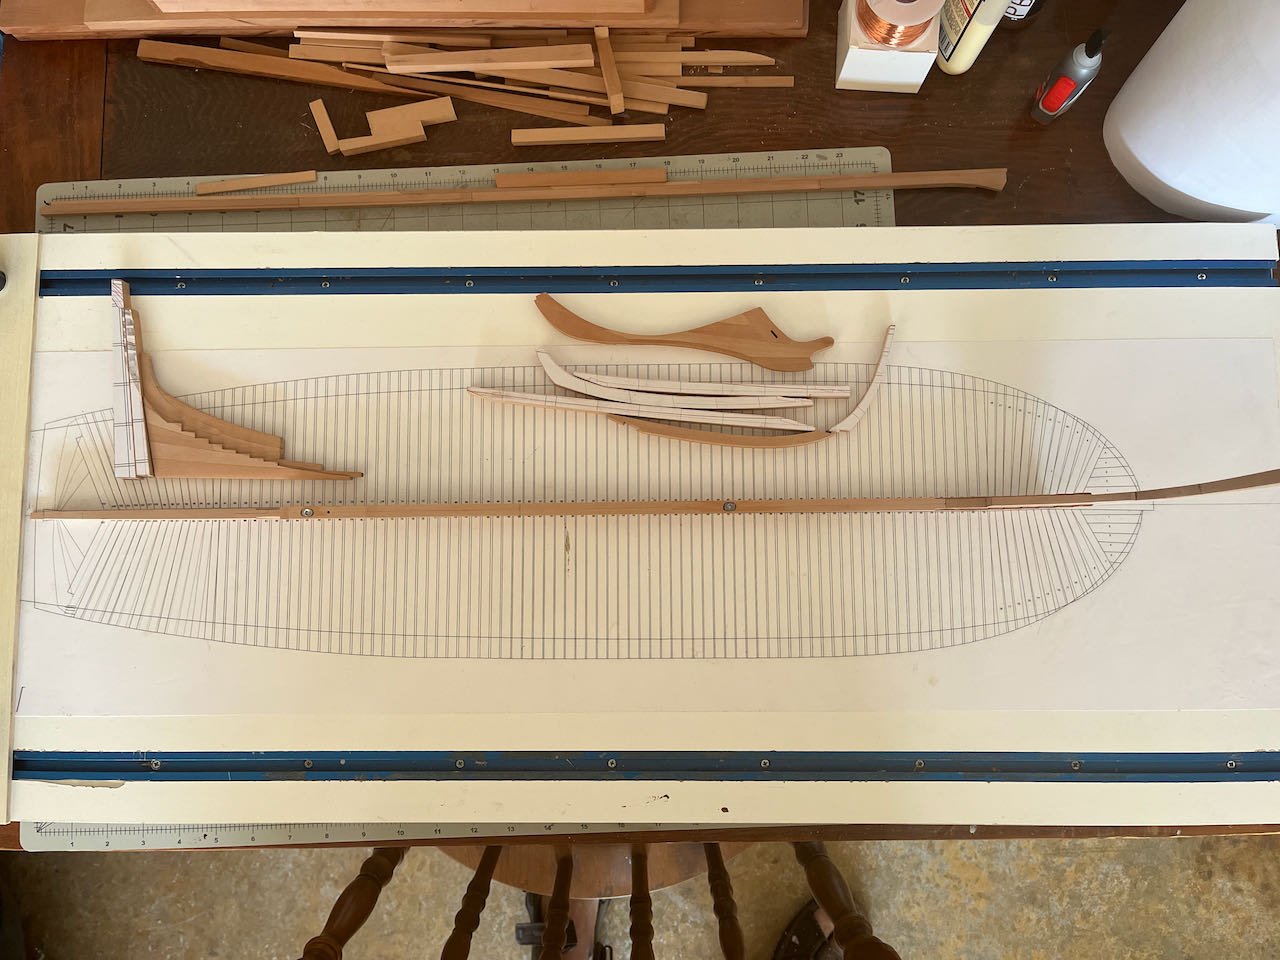
-
(inexpensive) Lathe recommendations
Pirate adam replied to palmerit's topic in Modeling tools and Workshop Equipment
I have been fortunate enough to have been able to build a nice collection of model building tools over the years. I have a Sherline lathe and love it. With that as context, I am in agreement with Greg that a lathe is not only not required for making masts and spars, it really isn’t that great a tool for it. The reason I say that is most masts and spars have lots of sections that aren’t round. It is usually easier to start with a piece of wood with a square section, then cut or file that into an octagon. Once you have an octagon it is usually quite easy to create the round sections with plain old sandpaper. I have found that to be tons easier than using the lathe. Making spars on a lathe is actually weirdly difficult. There are lots of examples of making masts that way on this site. If you are looking to buy a lathe that would be good for both ship model and woodworking projects, I would recommend looking at some of the mini and midi lathes sold by Woodcraft, Rockler, or others. Just my 2 cents worth. Opinions vary. Adam -
Wow that is really looking great. I love how the window turned out. Adam
- 99 replies
-
- 2
-

-
- ancre
- La Mahonesa
- (and 1 more)
-
Remove Tamiya paint
Pirate adam replied to JoniP's topic in Painting, finishing and weathering products and techniques
Windex will also usually work for acrylic paints. Generally the longer they have dried the harder to remove. Adam -
Congratulations! What a beautiful model. Great work. Adam
-
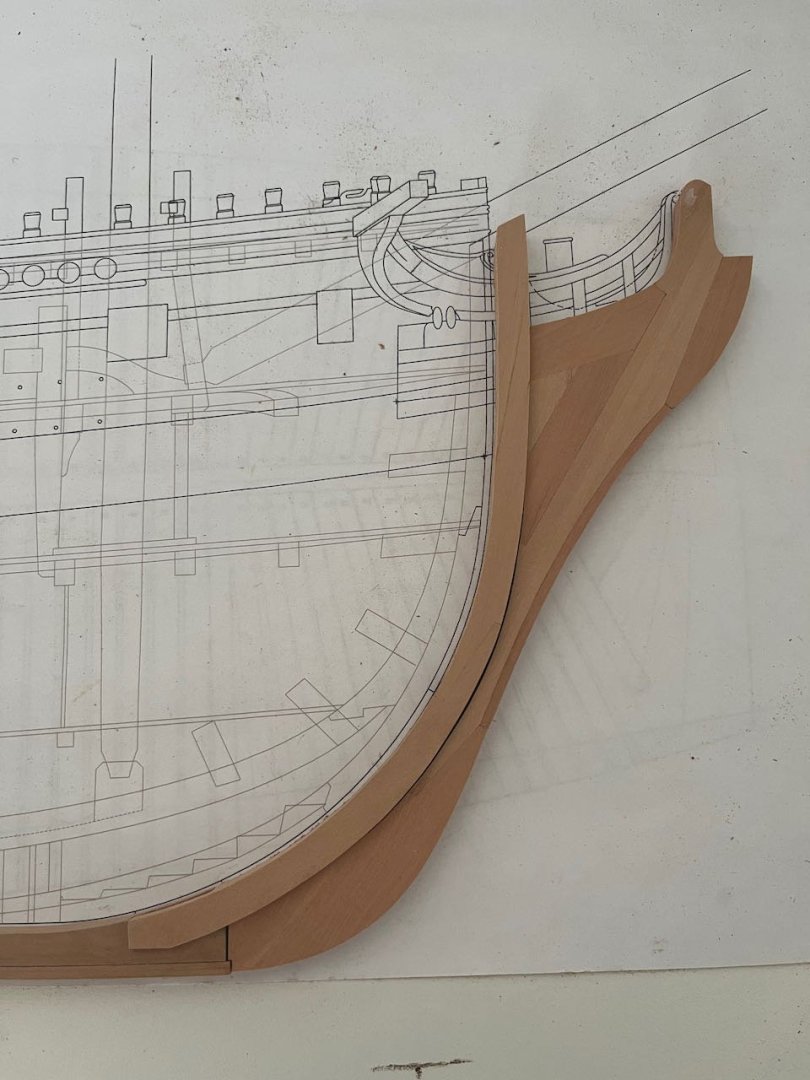
Finally some progress. I will not say that the lower apron has been one of my favorite parts to make, but went together without any drama. The upper apron was weirdly way more trouble and resulted in a cut finger, but nothing serious. I told my wife that no wood ship model has ever been built without at least a little blood included. She told me to be more careful. Knee of the head and forward portions of the keelson won't be attached until later, but they have been sanded to fit. I'm amazed at how big the chunks of wood and complexity of fabrication must been like on this portion of the ship in real life. Adam

-
Research in the HMS Ulysses 1797, a Roebuck class ship
Pirate adam replied to Kevin Kenny's topic in Nautical/Naval History
Kevin, It is really neat you have a ship with a tie to your family history. I will offer my two cents on the scale. Years ago I started a model of HMS Alfred using the Harold Hahn plans at 1/8th scale. I did a ton of work on the framing and put it on the shelf after finding myself constantly frustrated with the tiny scale. I also find it just doesn’t have the same “feel” of the 1/4th scale models. I don’t know if I will ever finish it, although I keep it safe. I get so much more satisfaction out of my Washington galley at 1/48. I spent a ton of time thinking about this topic before I started my Crocodile which is just a bit larger than a Swan class. I spent a lot of time looking for pictures of models with people in the pictures for perspective and thinking about where that would fit in the house. Have you considered 1:60 (1/5) scale? It is kind of an unusual scale (not that unusual actually if you look at the National Maritime Museum models), but it is the one used in the Naiad books by Ed Tosti. I read those books constantly, and the parts in the drawings still seem manageable. His build log was super inspiring. It doesn’t quite split the difference between your 2 scales, but would knock off some size. I love following your Thorn. I bet it would love a big brother Adam -
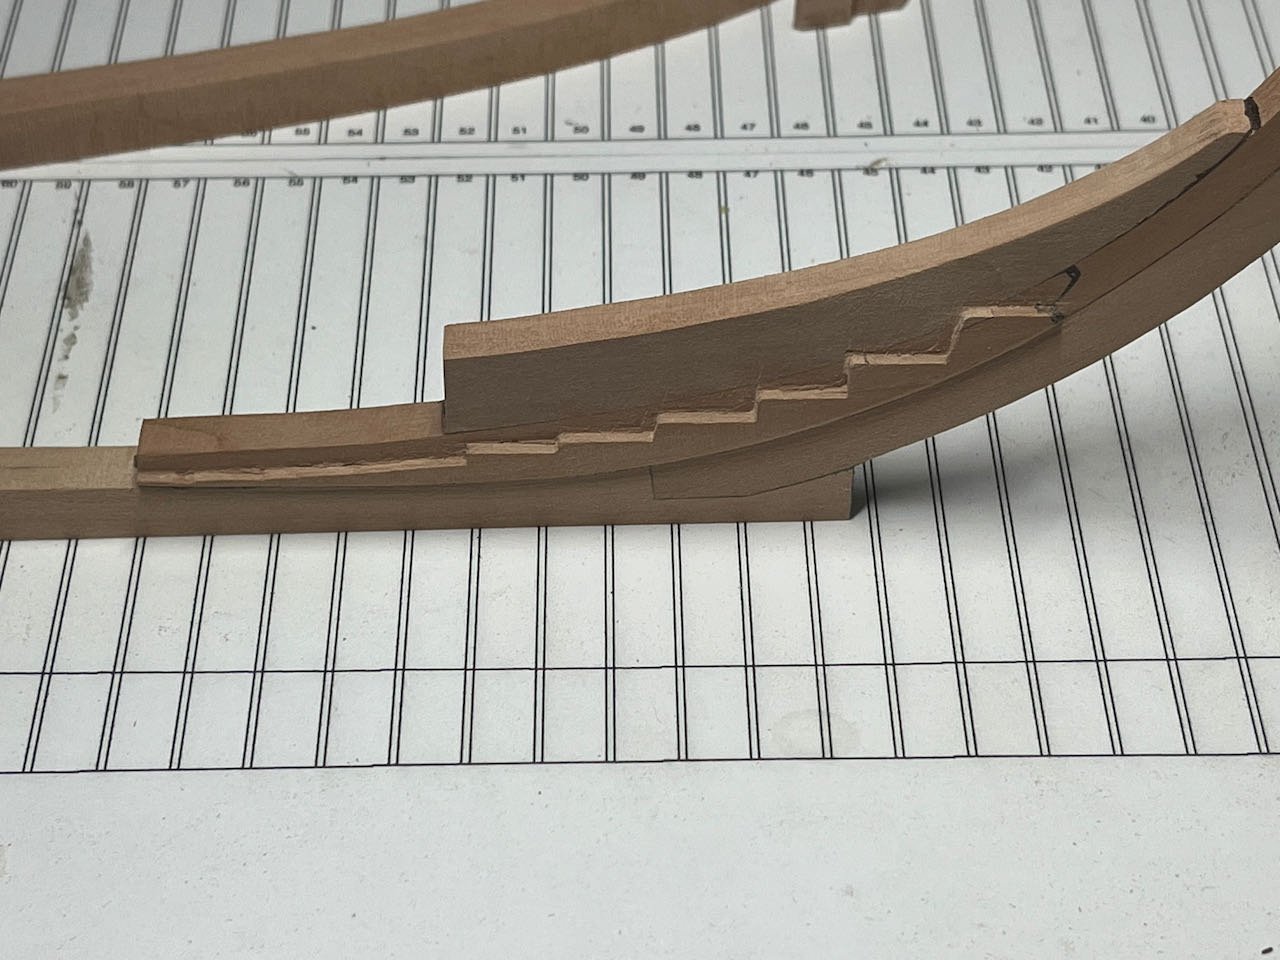
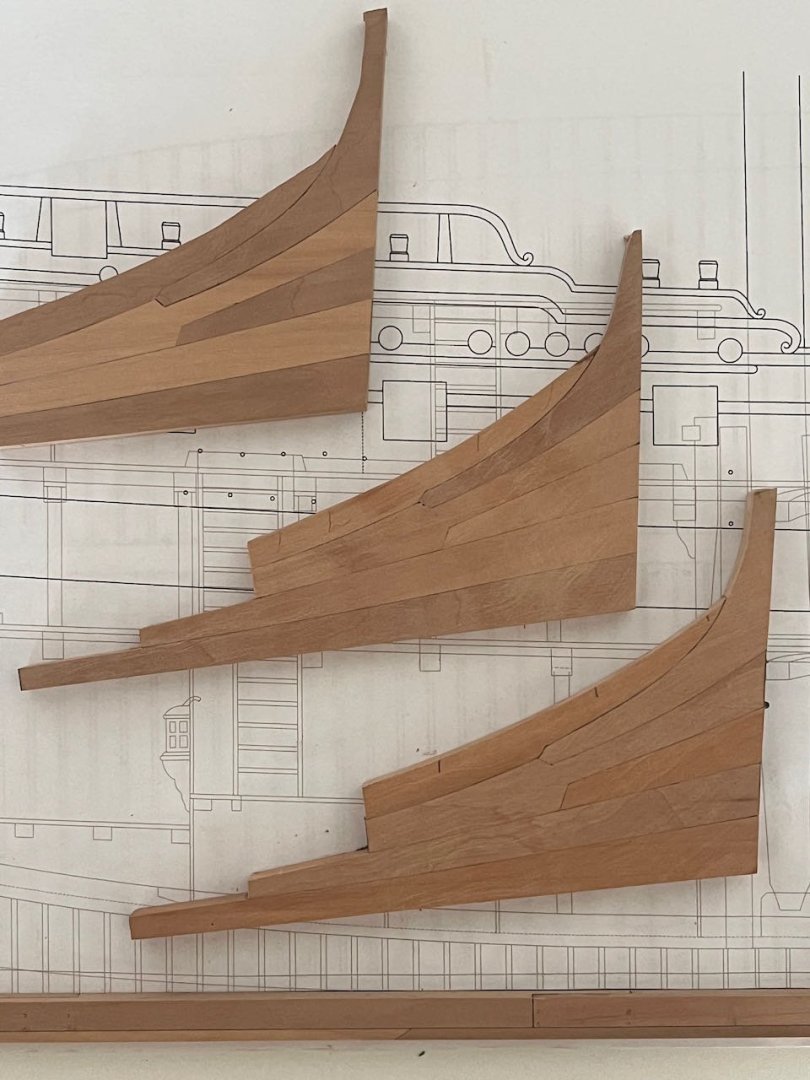
I have cut the ledges on the stern deadwood. I used a combination of the Sherline Mill and chisels. I was happy to have the 2 practice pieces before cutting into the actual model. Still some cleaning up to do along the bearding line portions.
-
Staring at the stern deadwood for a while made me realize it wasn't right. I didn't leave enough wood on the forward portion of the deadwood to allow the last few square frames to sit properly and fair into the bearding line. I'm not sure how I missed this in the other examples. I adjusted my drawing and remade the deadwood. I actually ended up making two more because I accidentally rounded off the portion on the second version in a way that would have interfered with the proper alignment with the underside of the wing transom. I am happy with the final version. I knew that this model would require so re-do's, as it is a big step up in complexity from the kits I have done as well as the Washington galley. There is some additional complexity with using my own plans. Things should be a bit more straightforward as I get to the frames. The very nice thing is I now have a couple practice pieces for cutting the steps on the deadwood.
-
Johann, It continues to be an inspiration to see that this level of detail is possible at this scale. I would think that was a digital rendering if I hadn’t been following along through the steps. Great work making every piece its own little model. Adam
-
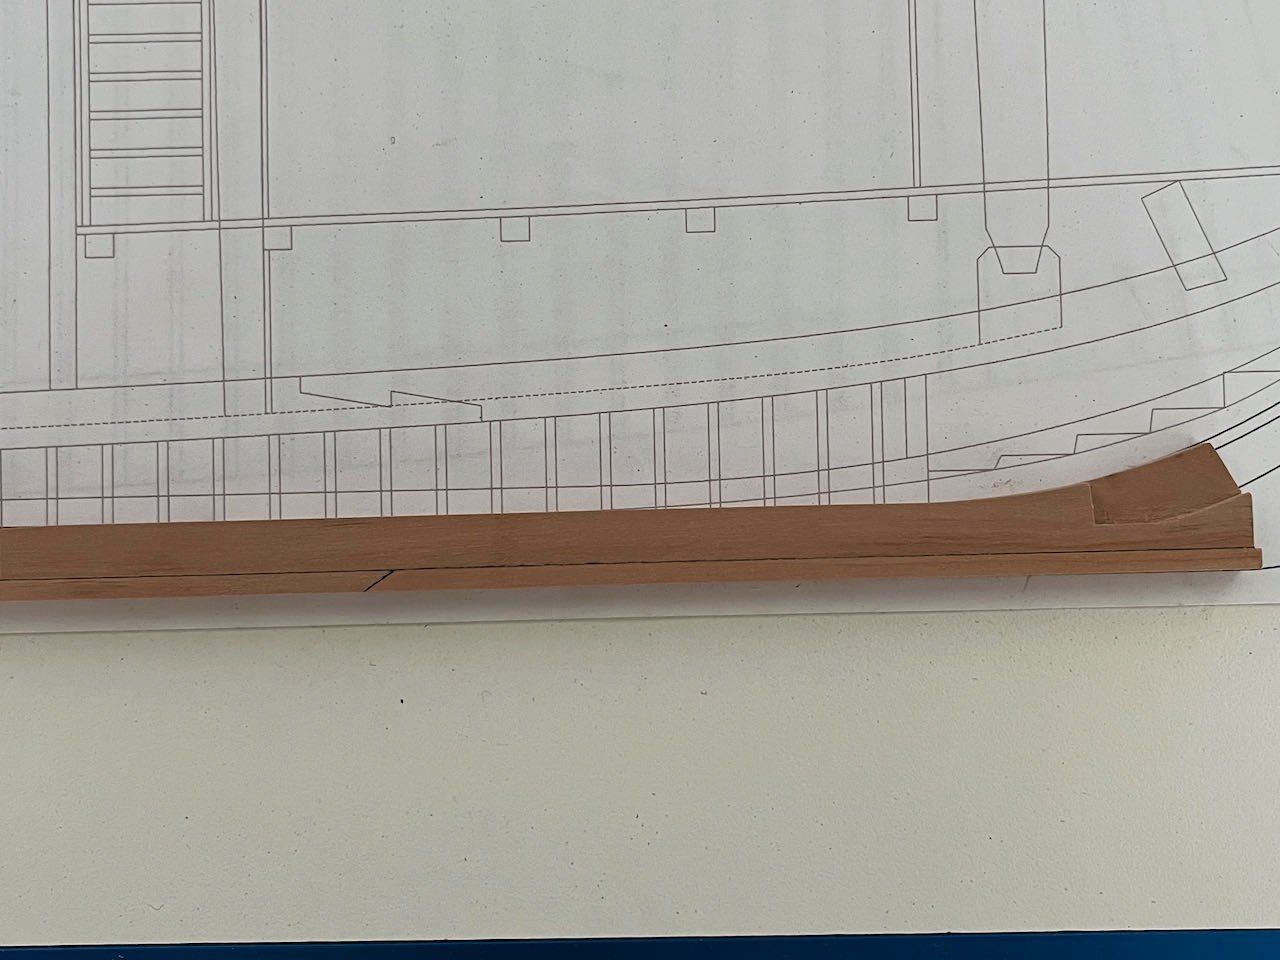
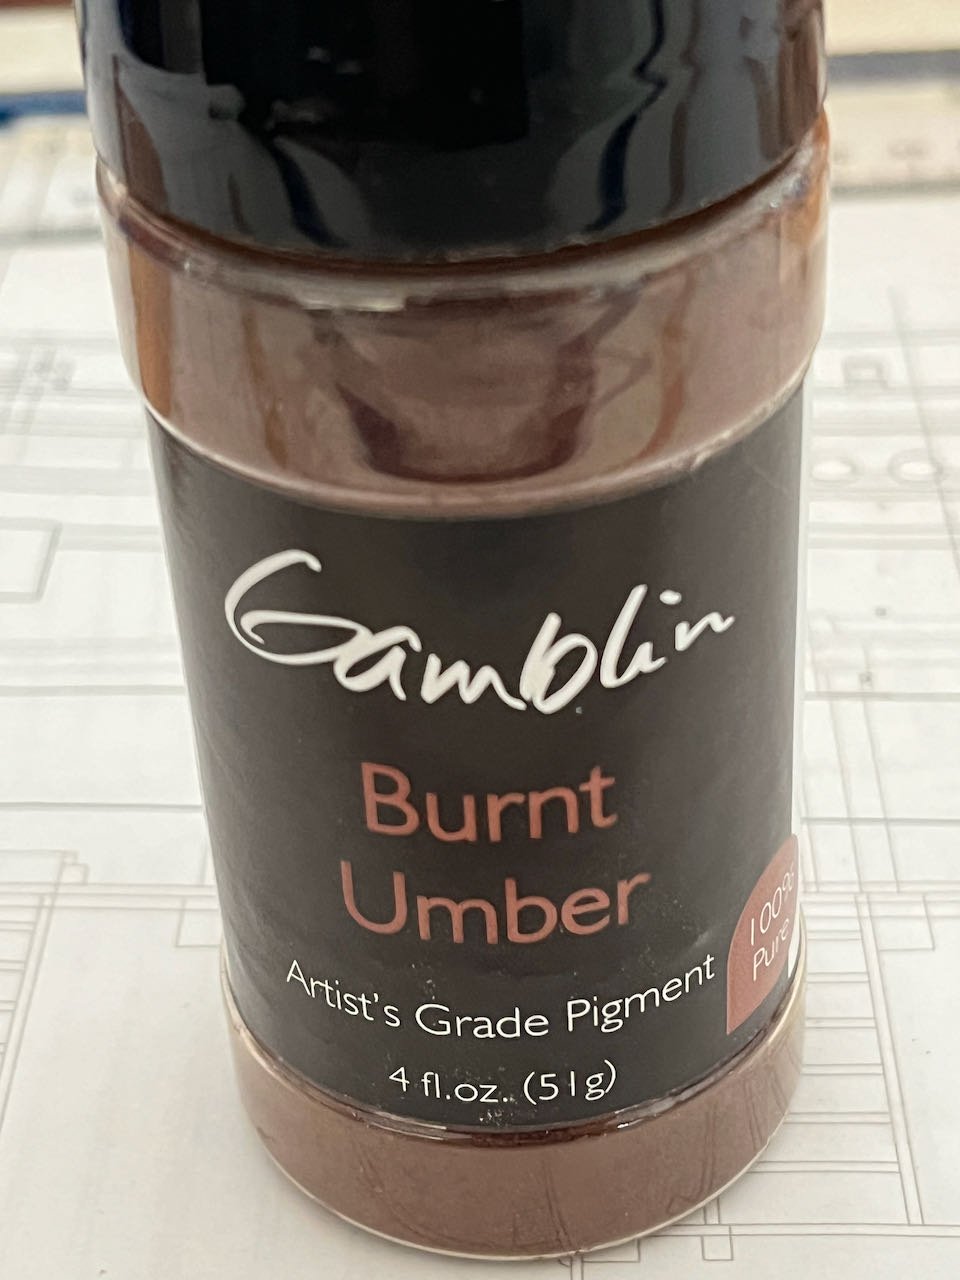
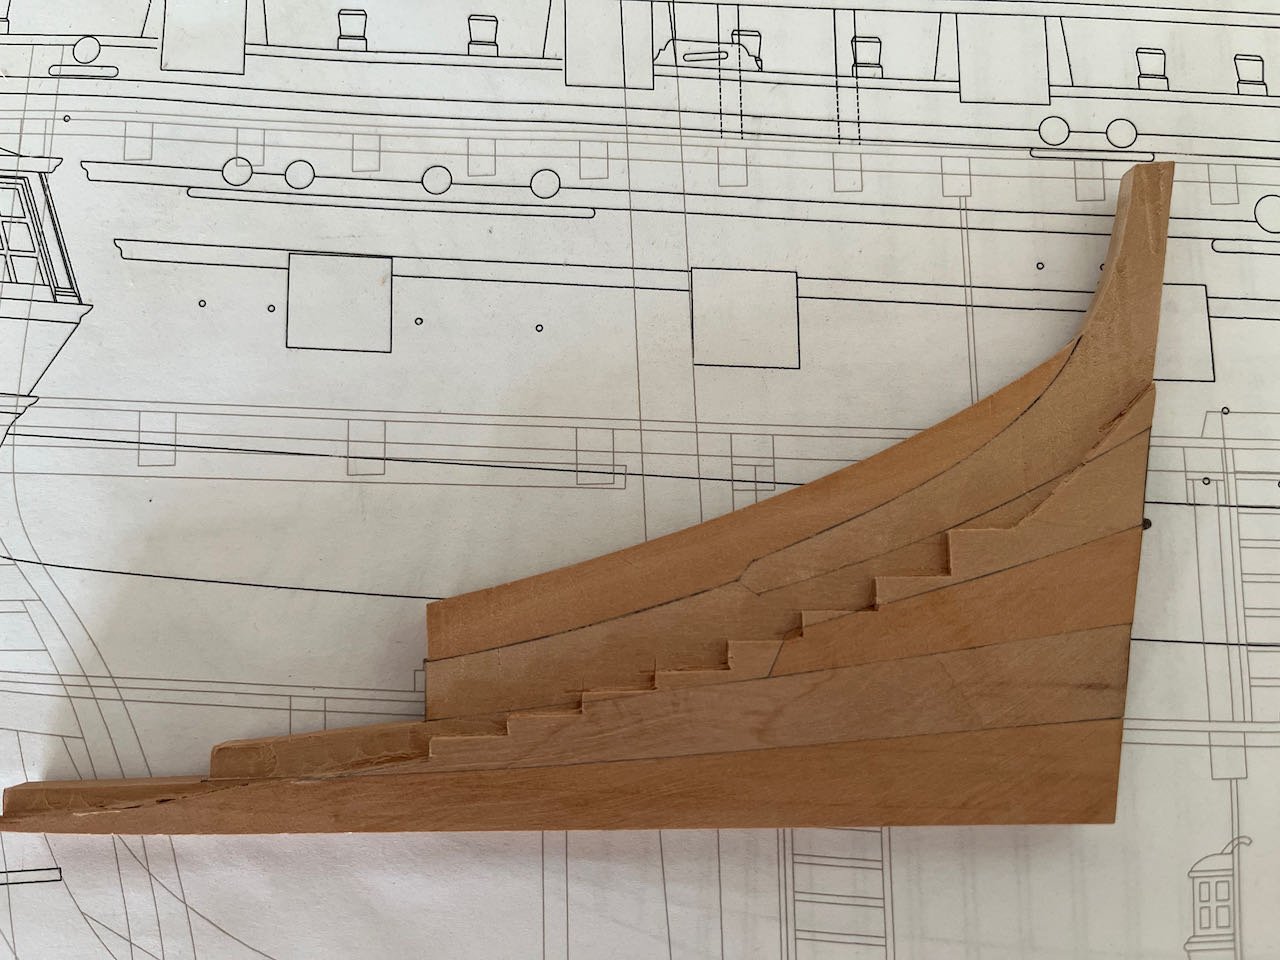
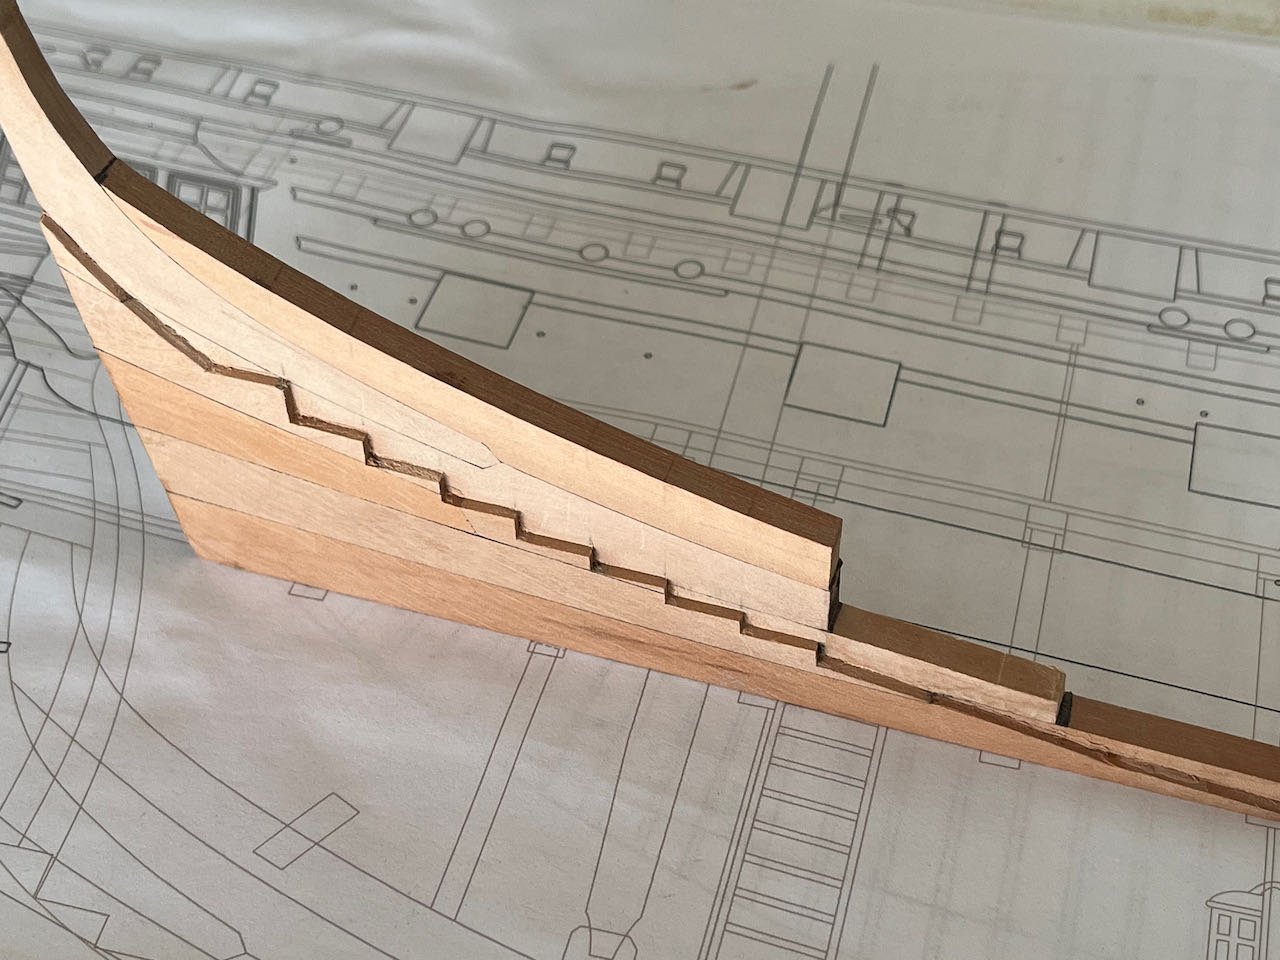
I have switched to an artists pigment mixed with wood glue to add color to the seams. I am very happy with the results, as it adds nice color as well as providing some gap filling capability. The lines on the stern deadwood above are totally smooth to the touch and not actual gaps.

-
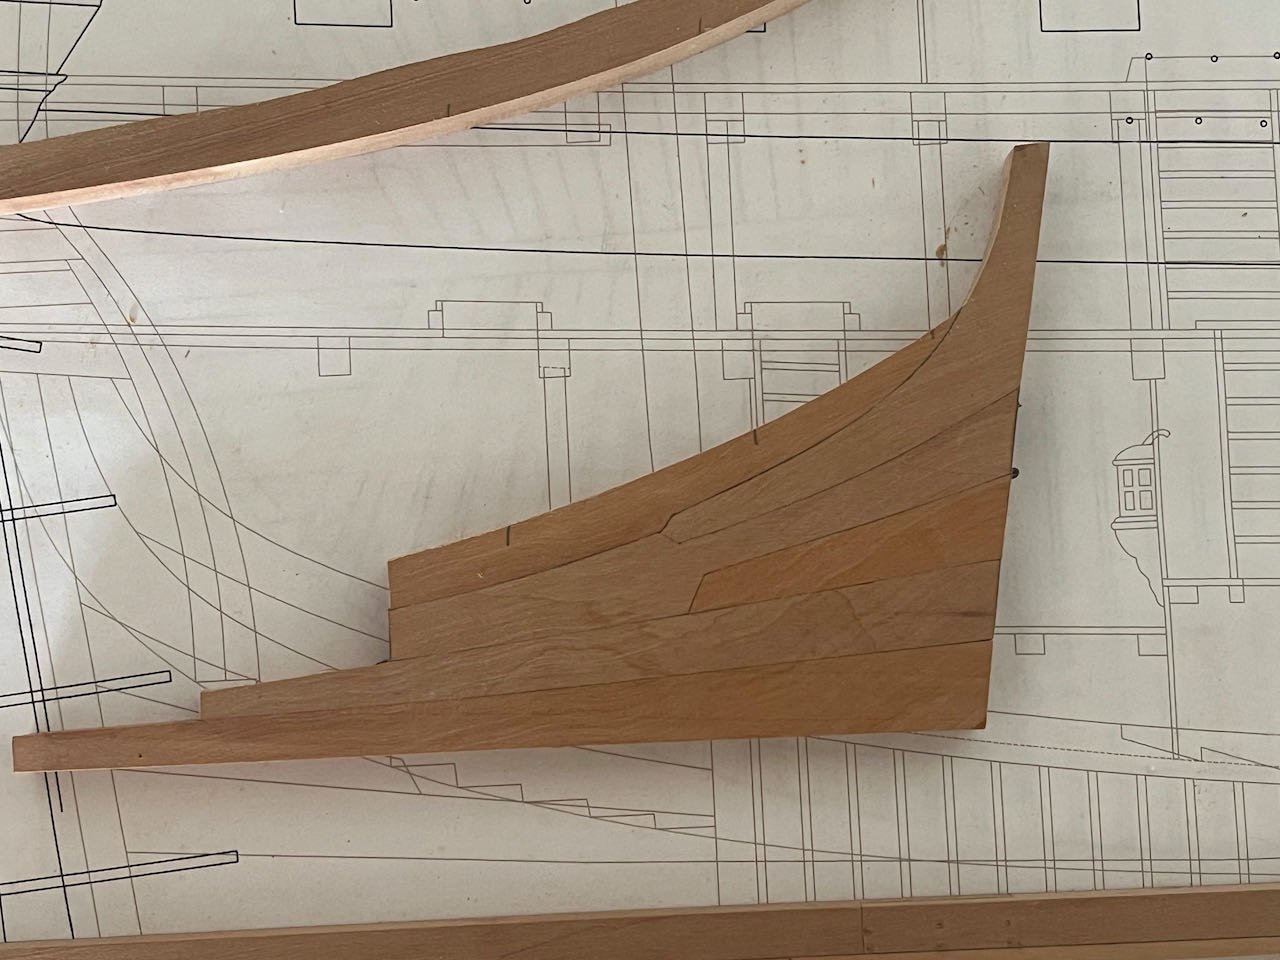
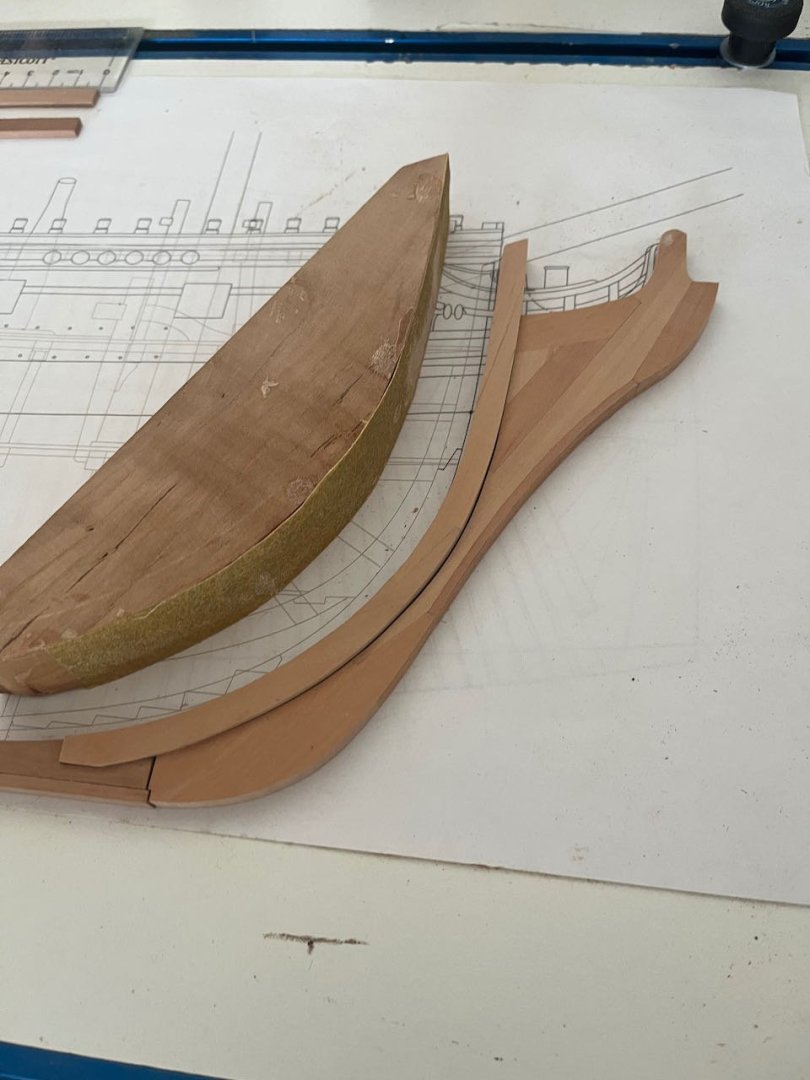
I am back at it after some time away for work travel and family stuff. I have completed the layup of the aft deadwood. The top and fore surfaces still need to be cut back to the line so are a bit rough looking. My drawings didn't include the layout of the deadwood, so I made some choices based on similar ships, Pandora Anatomy of the Ship book, Ed Tosti's Naiad books, and David's HMS Swan series. Adam

-
HMS VICTORY 1765 by albert - 1/48
Pirate adam replied to albert's topic in - Build logs for subjects built 1751 - 1800
Wow, that is looking incredible. I am really looking forward to seeing your Victory continue to progress. It will be a masterpiece. Adam -
I personally prefer the second picture for a model of a ship made from wood. The scale joint lines would be very thin, but I think it is a bit of a waste to try to remove them completely. Adam
-
L'Amarante by marsalv - 1:36 - POF
Pirate adam replied to marsalv's topic in - Build logs for subjects built 1501 - 1750
I am really excited to follow along from the start. Your Pandora and le Gros Ventre logs were both very inspirational. Adam -
I am super excited to follow along on this one from the start! Adam
-
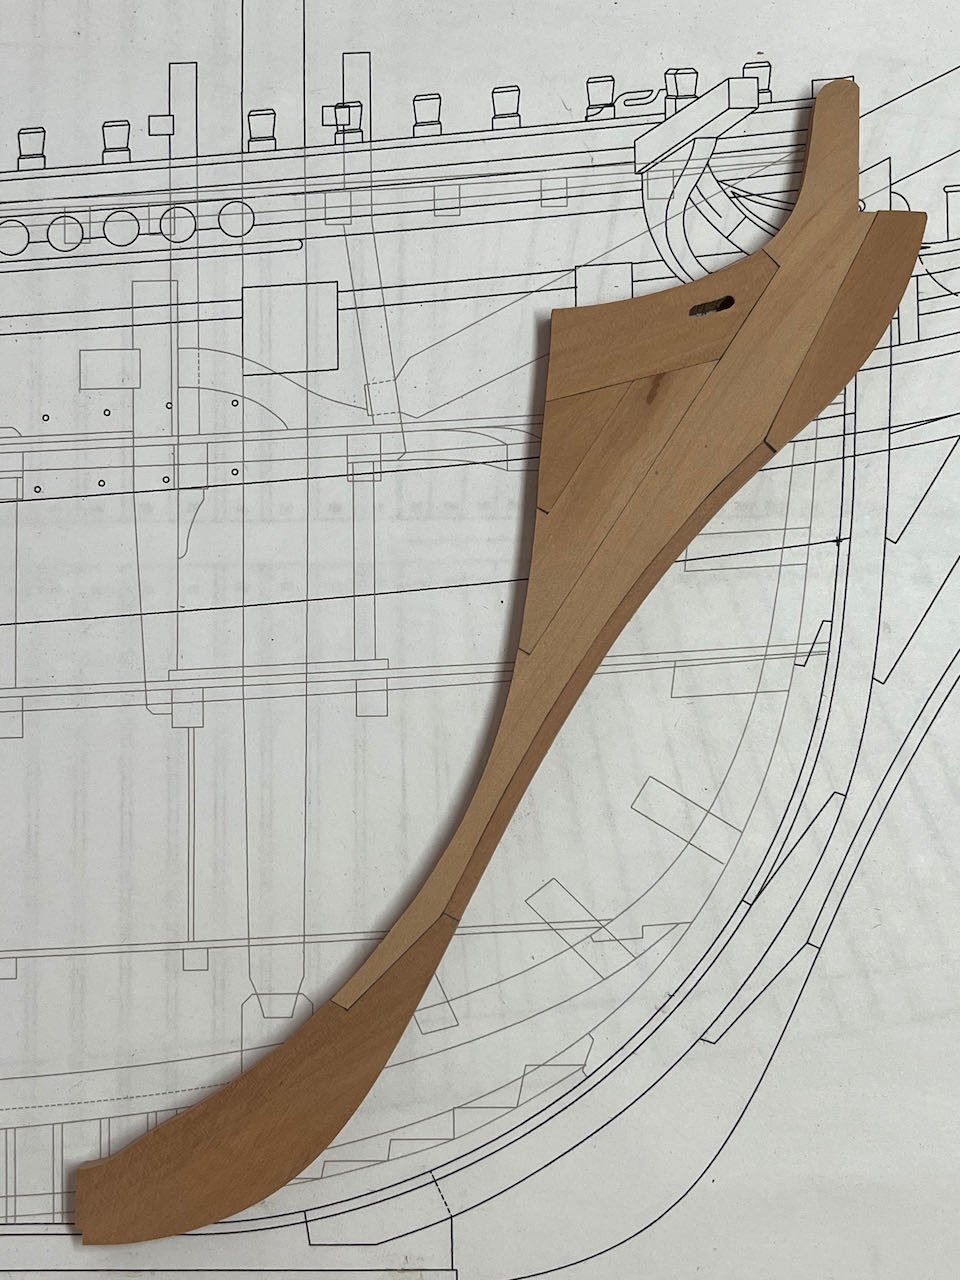
Knee of the head Mk. II. I messed up the first one when I was sanding the backside to fit the stem. I learned my lesson and made up a sanding block with the same profile of the stem to sand back the second version. This time I used brown artists pigment mixed into the Titebond glue. The lines are hardly visible, but show up nicely when the wood is damp. I will stick to that approach for the rest of the build. The stem, keel, and knee of the head are just on the bench for show and not glued up yet. Adam
-
I diverted from the steps in TFFM to build the knee of the head. I will work on fairing this piece to the stem and then put it away for safekeeping until the fore cants and hawse timbers have been installed. It still needs to be tapered in both directions and the slot for the gammoning cleaned up a bit. I used druxey's recommendation of painting the edges of the joints brown before gluing. I like the way it turned out. I am expecting some powdered brown pigments from the Amazon guy today that I will try mixing with glue going forward. Adam

-
I experimented with adding some brown acrylic paint to some Titebond glue. I liked the look of the joint on some test pieces. I may have added too much paint though, as I was able to pull the test pieces apart rather easily after the glue had dried. I will parallel path trying druxey's approach of painting the edges along with just adding less paint to the glue. Adam
-
My experience with blackening fluid is it seems to work better when dramatically diluted with water (think 90% water). This slows down the chemical reaction and helps prevent the thick buildup of black that comes right off. I dip it for 20 or 30 seconds several times until I get the color I want. It is important to keep that stuff out of your eyes, etc. though. Painting is easier if you want a pure black color. I think most of the iron was painted black in real life. Adam
-
I love seeing your 3D drafting in parallel with the construction of the model. It is a work of art as well. Adam
-
Druxey, I used the pencil approach for my last model. I liked the look especially on the deck. It is especially effective with lighter colored wood. The only thing I found is certain pencils have waxier lead that can reduce the strength of the joint. The joints on my keel scarphs should be bullet proof (fingers crossed), as I put 6 copper bolts in each joint with some CA as well as wood glue on the joint faces. I am going to switch to the brown glue approach when I get away from the timbers for the keel and the knee of the head. I don’t want to mess around with potential de-lamination when I get to the frames. I have loads of colors of Vallejo acrylic paint from plastic airplane modeling during the pandemic so will experiment with that approach as well. I agree with you and Allan that the more understated look is nicer Adam
-
This has been really interesting to follow. It is amazing how you are able to do the 3D design work and bring it to life with the printer. Adam
-
Glued up the keel and false keel. I used black tissue paper between the joints after testing it for color fastness when applying finish to a scrap piece. The black tissue paper comes with a level of frustration that I was not prepared for, but it does end up in a crisp black line between the parts. I am finding tiny pieces of black tissue paper all over the house, as it static clings to everything. Hard to believe it has already taken 11 pieces to get to this point. I am following the steps in The Fully Framed Model, so next up is the lower stem. Adam