HOLIDAY DONATION DRIVE - SUPPORT MSW - DO YOUR PART TO KEEP THIS GREAT FORUM GOING! (Only 20 donations so far - C'mon guys!)
×


Pirate adam
-
Posts
240 -
Joined
-
Last visited
Content Type
Profiles
Forums
Gallery
Events
Everything posted by Pirate adam
-
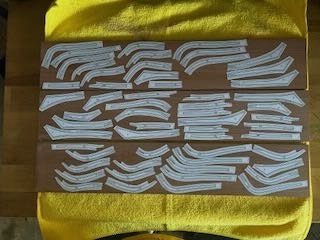
With the transom shenanigans out of the way I am finally ready to start making frames. Here I have marked out the blanks for the aft cant frames. The black lines are the actual lines for the frames. I added the green lines to make sure I have plenty of wood for fairing the cant frames as well as to make sure the frames are sufficiently tall. Experience tells me that I just can't help myself when it comes to leaving enough wood otherwise. Familiar sight for anyone who has built POF. Adam
-
I made a slightly larger building board to provide a bit more room to install the frames at the ends of the model. Long story short, when I setup the new build board I found some issues with the alignment of the transoms and aft fashion piece. I have known for a while that something wasn't right with the alignment, and happy to figure it out before doing a ton more work. I envisioned this would be a problem that would follow me through the whole build, so got out the isopropyl and re-built the transoms and aft fashion pieces. I also used the opportunity to add a 4th filling frame which looks much better to my eyes. Adam
-
I think it would be a shame to paint it black. The wood is beautiful. Adam
-
I love this. Great work Greg
-
It is pretty straightforward. Dividing the circumference in inches by 3.14 will give you the diameter in inches. Then just divide by 48 to get the scale diameter in inches. example: 6 circumference rope. Divide by 3.14 gives 1.91" diameter rope. Divide by 48 to get 0.0398" diameter in real life for 1/48 scale. Adam
-
I can verify that the Anatomy of the Ship Armed Transport Bounty book has tables of the various ropes in the rigging. It would make a nice reference for anyone building a model. Adam
-
This seems like a very sensible plan for the long term. Getting away from the need to source large quantities of wood should simplify things immensely. I was able to see the 3D printed Syren blocks for the first time at the Northeast clubs show and was pretty blown away. Looking forward to seeing some of the other parts you come up with now that you have mastered the printing technology. Cool thing about moving away from the kits is we will likely see a much bigger variety of models being created by people using Syren parts. Adam
-
I Have an Itch to Scratch
Pirate adam replied to SaltyScot's topic in Modeling tools and Workshop Equipment
One thing that hasn’t been mentioned that you may already have based on your comments on well equipped wood shop. I would recommend a good set of wood chisels and the means to keep them extremely sharp. I use a set that is nothing fancy with sizes between about 1/8” up to about 1/2”. These are super handy for all sorts of work and well worth the investment. Another thing that I have recently added that I don’t know how I lived without is a small jewelers saw and various blades. They are relatively inexpensive online and incredibly useful for cutting out tiny shapes that aren’t so easy to do with a coping saw or scroll saw. Adam -
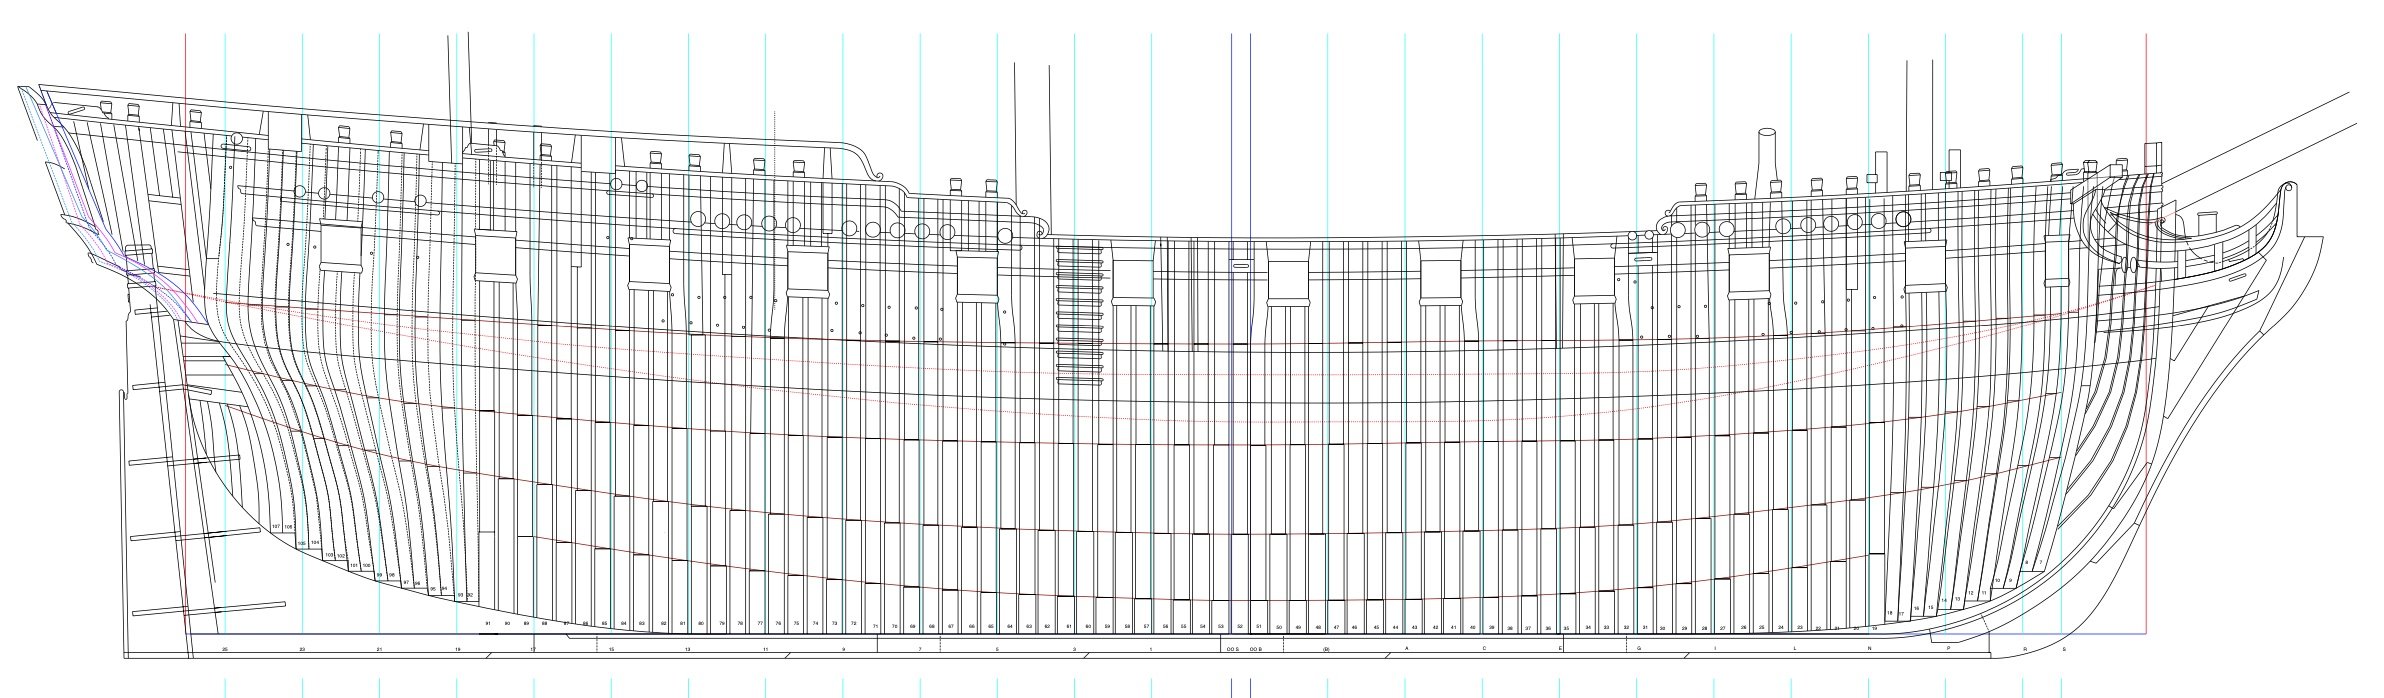
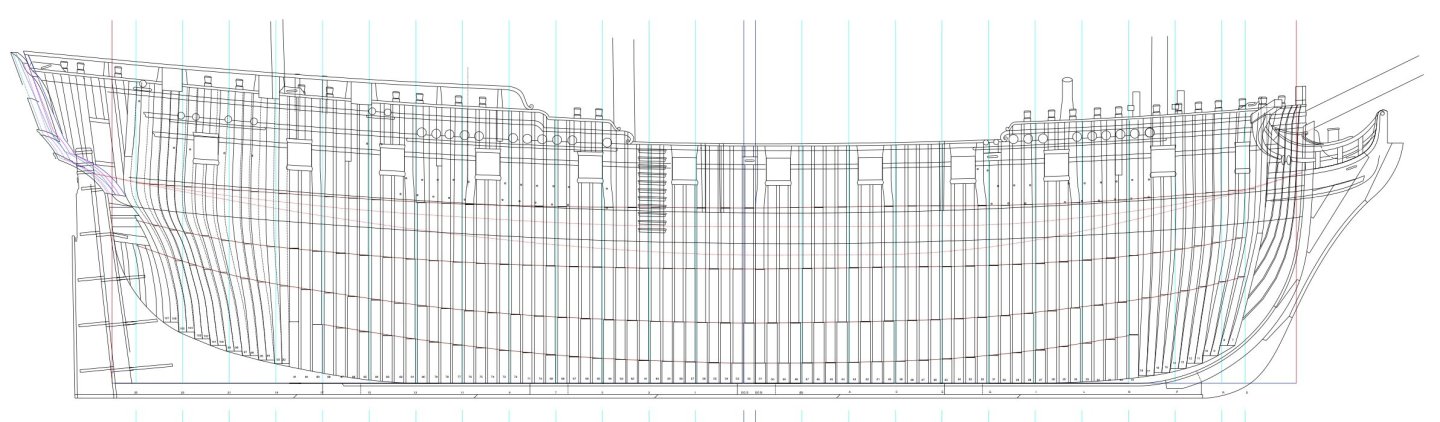
No posts for a while, but I have been very busy over the winter revising some drafting before I cut out the remaining cant frames. I'm finally feeling good about the framing layout, so back to cutting wood. I will have some actual progress soon. The drawing below is where I netted out on the framing layout. I had originally intended to use the framing plan from the AOT Pandora book, but moved away from that based on the other references available. There wasn't a complete framing drawing available from the NMM for Crocodile or any of the other Porcupine class ships, but there are partial framing plans available from for sister ships Siren and Hyena. There is also a full framing plan available for the Sphinx of 1775, which is a smaller, but similar ship. I used those along with the scantlings for the 24 gun ship from Steel combined with the assumptions below to arrive at my final layout. There is some guessing involved, but I don't suspect anyone will ever look at the finished model and tell me convincingly that it is wrong. I am satisfied with the result. Assumptions used in frame layout: 1) All floors equally spaced and following both the dimensions and room and space from Steel 2) Frames aligned in line with all the frames shown on the partial framing diagram for Siren 1779 3) Minimal use of cast and shifted frames to assure frames were aligned with each gunport 4) Maximum use of top timbers to align with the timber heads shown on the plan. 5) Cant frame angles adjusted to line up with both gunport and top timbers whenever possible. The assumptions above actually resulted in a layout very similar to the one for Sphinx which I actually only came across when I was 90% done with drafting.
-
I would do the deck beams in pear to match the lower platform and the deck with the boxwood matching the inner planking. I don’t think you can go wrong either way. Adam
- 968 replies
-
- 1
-

-
- hahn
- oliver cromwell
- (and 1 more)
-
It is amazing to see some of the things that are becoming possible as people are learning to make full realization of the capabilities of 3D printing. I’m looking forward to seeing what the carvings look like when painted. Adam
-
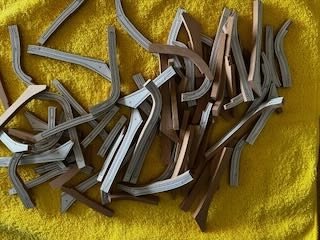
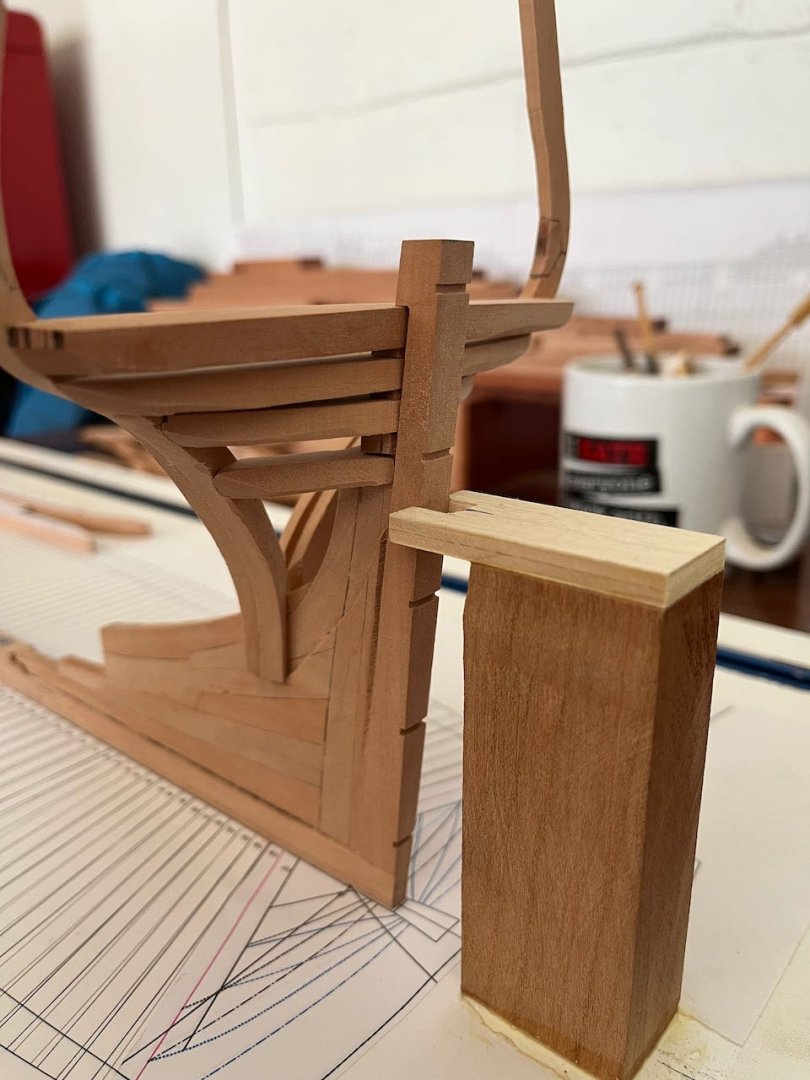
Slowly but surely. I managed to break the top timbers off both of the aft frames while wrestling with the filler pieces. Two lessons learned the hard way despite all the helpful hints in people's books and build logs. 1) the direction of the grain of the chocks matters 2) I will wait until I have a few more cant frames ready to stick to the deadwood, so that I can glue spacers at the top to provide a bit more strength. In the meantime I am making tree nails. I must say as much frustration as this portion of the model has caused the results are very satisfying. Adam
-
I love the display. Adam
-
Washington galley is a great project. I think you will like it. Adam
-
Mark, I can certainly verify the accuracy of that statement. Adam
-
Christian, Yes, I made the plans myself. I bought the drawings from the NMM, and then re-drew them in Turbocad largely following the article by Wayne Kempson as well as the Swan and Naiad books. It has been a really interesting learning process and to be honest a bit humbling. It is safe to say that drafting a set of POF ship model plans is an exercise that “builds character.” I have a whole new level of appreciation for the authors of the various monographs. I’m finally feeling good enough about the frame plans to be close to starting to cut out and assemble the cant frames. Adam
-
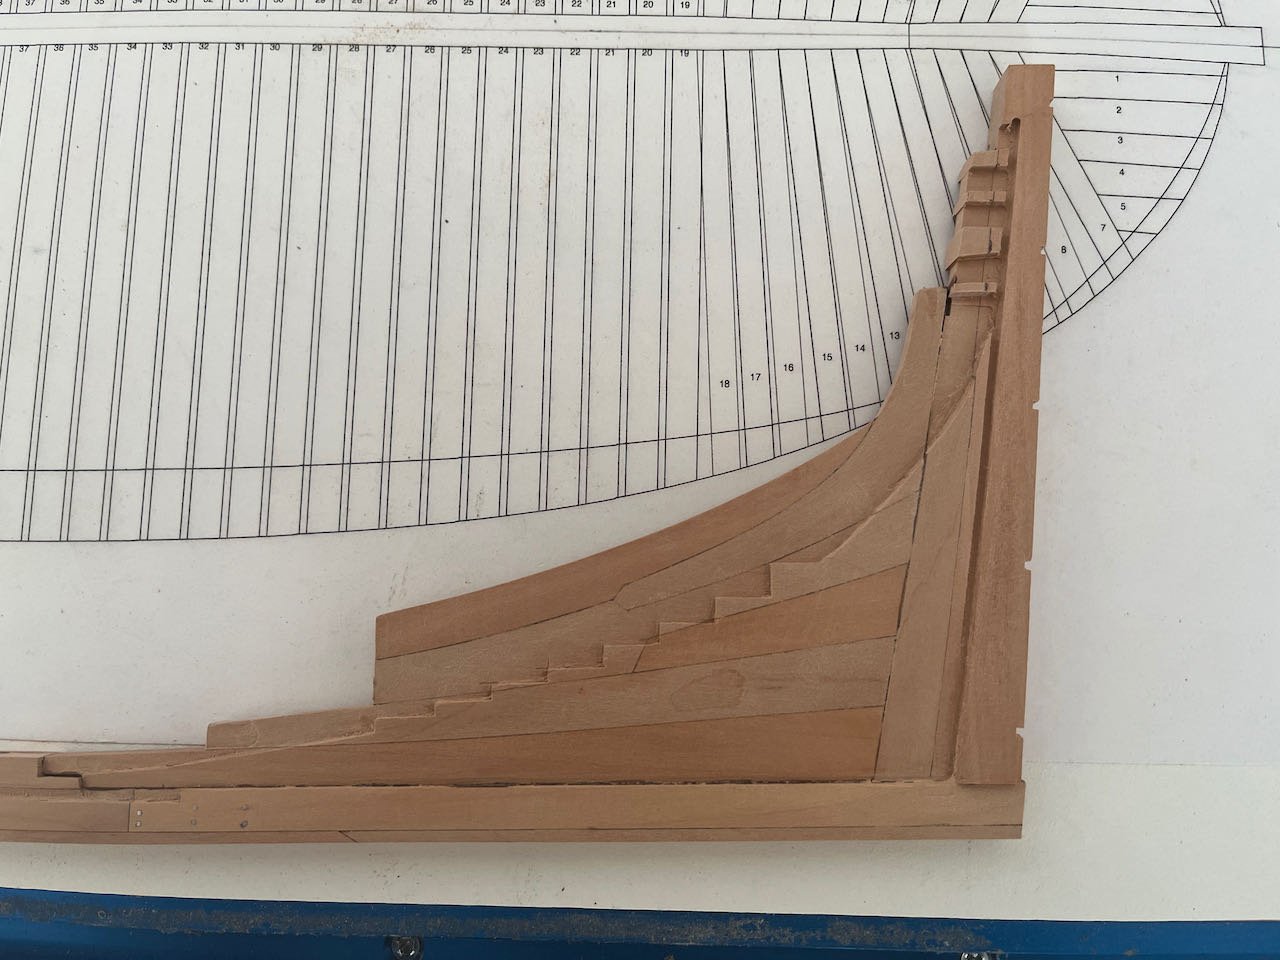
Transoms cut out and in place.
-
PE parts on models.....
Pirate adam replied to Nirvana's topic in Metal Work, Soldering and Metal Fittings
It is totally up to you, but I would paint them. There are plenty of people that build plastic models and don’t paint them at all. The Britmodeller forum has tons of good info on plastic models and painting. Very helpful and likeminded group to this one. Adam -
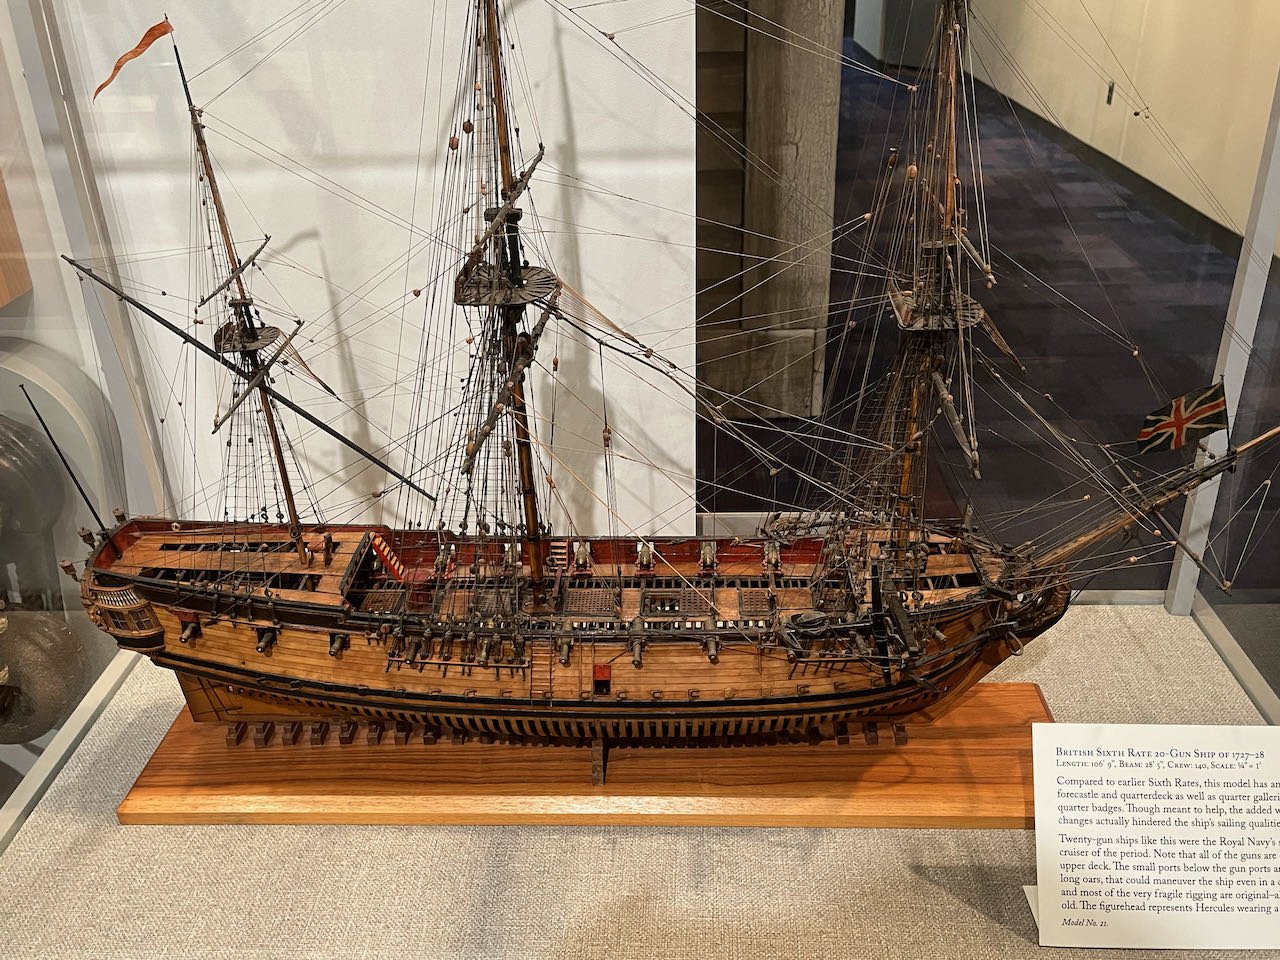
I was recently lucky enough to make a visit to the museum at the Naval Academy in Annapolis. I told my wife I am basically going for something like the ship below. I'm not sure she was convinced. I would 1000% recommend the museum at the academy (and visiting the academy in general) for anyone who gets a chance. The collection is amazing and either really inspiring or a tad demoralizing if you are into ship model building. I have been to most of the big museums, and there is really nothing like it at this point.
-
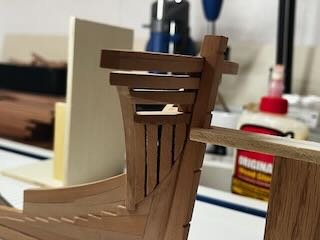
Un-stuck and back to building. I had to do bit of re-drafting on my plans before I was finally sure I more or less have the stern assembly right. Tricky to get the waterlines right around the transoms. Lots of foam board mockups before I was convinced. I have the transoms made and the stern deadwood and stern post assembly glued up. There is a pesky little gap in the front of the sternpost where I cut a mortise I shouldn't have in the front part of the post. I will fill it in later, but it will be covered up anyway. Still some cleaning up to do, but overall I am happy so far.
-
Proxxon DB250 3 Jaw Chuck
Pirate adam replied to mrcc's topic in Modeling tools and Workshop Equipment
I use something called 3 in 1 oil on my Sherline chucks. One thing to keep in mind is that no matter what type of oil you use some will inevitably fly out when you turn on the lathe for the first time. It is worth making sure nothing is in the area that you don’t want to get oil machine oil on. Adam -
I meant Porcupine, not Porpoise. That's what I get for trying to type while eating a plate of nachos. Adam
-
This conversation is interesting to me, as I am working on a POF model of another of the Porpoise class ships the HMS Crocodile 1781. I am working from my interpretation of the admiralty draughts from the NMM. Working from the draughts is definitely something that “builds character” lol, as there is never ending learning to figure out how they guys did things back then. One thing I would mention is I am deeply skeptical of the frame configuration in the Pandora book. The authors don’t list a framing drawing in their references, and their drawings show a design that makes immense use of filling frames in a way that doesn’t seem practical. I have the book, and it is a fantastic reference. That said I think the authors had to do a lot of guessing due to the drawings available. The National Maritime Museum has admiralty draughts of some of the ships in the class (see Hyena 1788) but they only show some of the frames. For my model I have recreated (ie, guessed) at the layout from the scantlings and what seems to make sense from the admiralty draughts. I ended up with something very similar the the HMS Sphinx 1775 framing patterns which they have available at the NMM. You might check the Sphinx drawings as a reference, as it is a very similar ship. I just guessed at the structure of the head based on the designs in the Swan and Naiad books. You can see where I netted out in my Crocodile log. My conclusions were very similar to thukydides above. Adam
-
Alan, That really stinks, but look on the bright side. That is way better news than you won’t be posting for a while because you are off to spend some time behind bars or got a horrible medical diagnosis. It will go lots faster the second time around, because you have answered so many questions and figured out so many challenges the first time. Just stick with it. This will be an amazing model in the end. The fact you weren’t willing to just settle with the wrong deck position is testament to that. It would have been really easy to just decide to model the lower decks with port lids closed and move on, but you didn’t. Adam
-
That will be an impressive fleet!