

knightyo
-
Posts
533 -
Joined
-
Last visited
Content Type
Profiles
Forums
Gallery
Events
Everything posted by knightyo
-
 Same here. Due to a stressful job, nothing very productive gets done in the evenings anymore. All of my hobby time is now done on Saturday or Sunday morning after my first cup of coffee, before the Admiral wakes up and assigns me my duties for the day. Alan
 -
I bought that exact kit after reading RGL's build log. You can make an incredibly impressive model from that kit. Alan
- 1 reply
-
- 1
-

-
This will be a fun topic. Some modelers don't even use any type of finish, and instead just burnish all of their work. Alan
-
This looks like a very fun kit. The anchor styles are also intriguing; gigantic "newer" style anchors up front, and the "older" style in back. Looking forward to watching this build develop. It looks like you are off to a great start. Alan
- 32 replies
-
- 3
-
-
- Viribus Unitis
- Trumpeter
- (and 1 more)
-
I think you could have the best of both worlds by switching from the creation kits to the creation of practicums in which the modeler sources their own wood. I can't justify the expenditure of hundreds of dollars for kits, but I CAN justify tens of dollars for practicums, or even series' of practicums for tens of dollars an issue. I think there is a large segment of modelers who would purchase practicums as opposed to kits, as they are less expensive, and also don't show up as brightly on Admirals' radars. Alan
-
I received a battleship kit around age 7 or so (Revel Missouri) which I destroyed; I think I also probably sniffed too much of the interesting model glue. The thing that really spurred my life-long interest in building was the positive reinforcement I received from people regarding the "models" I made from cardboard; mostly fairly crude representations of Star Wars vehicles. The cardboard was free, there were no toxic glue fumes, and I honed my skills for a good while before eventually getting another plastic kit in which I was able to build a respectable model. Alan
-
I choose the model in my closet that I have the most guilt for not yet having finished. Alan
-
I know that the folks who purchase rope won't like this, but I think life is too short to be making rope if it's not bringing in a lot of cash. It's far more satisfying for you to design ship kits, right? If it were me, I'd stop selling rope, and exclusively start designing kits/practicums. Alan
-
I'd love to tackle the small battle station kit! Is there any chance of a 1/64 version? Alan
-
Ebony! You sir, deserve a medal for attempting to work with that wood from the devil. Please make sure to take all safety precautions while working with that stuff. Your model is gorgeous. Alan
-
My wife has a condition which has resulted in severe scarring of the brain, and it's been a continual "rewiring" process for years. The brain definitely does figure out how to do certain tasks again by rewiring itself to bypass damage. To get back motor skills, I'd actually recommend an x-box or similar game in which the game is played exclusively with your hands. The more you use your hands, the quicker the brain will rewire. Video games are the first things that come to mind for me, but anything which forces your hands to perform over and over and over and over... It works, it just takes time. The other thing I'd recommend is to purchase Drawing on the Right Side of the Brain. It is an amazingly enjoyable book which teaches you how to draw, and I think consistent drawing would also be beneficial for the rewiring process. Alan
-
Worst Planking Job Ever
knightyo replied to rhephner's topic in Building, Framing, Planking and plating a ships hull and deck
It looks like you are beginning to conquer the hardest part of the hobby. I don't have a single model that didn't end up being painted on the bottom; you can also add weathering to a painted hull to turn what you might have initially considered a liability into an asset. Some modelers also like to add a second layer of thin veneer planking of high-quality wood over the top of the hull. P.S. You can also "save" your first model by strategically gluing thin strips of balsa or basswood, sanding smooth, painting, sanding, and then repeating as often as it takes. Alan -
Actually, maybe thin, laser-cut plastic templates that a modeler could use to "sponge" paint through onto the carriages. That might yield the most realistic look of all. Edit: I think there needs to be a North American distribution center for these kits. I'm assuming that if I purchase this kit, I might as well book a flight to the U.K. to pick it up in person as that would probably be cheaper than the shipping cost to the states. Maybe I'll schedule a vacation for the wife and I to visit the U.K. "just a sec honey, I need to go pick something up real quick".
-
The variations of this build are really going to be fun to see. I'm hopeful that at least one builder will also add a sloth. Alan
-
There are few things more satisfying than a freshly sanded hull. It looks superb. Alan
-
I'll be excited to see what projects you develop now that you won't be stuck allocating so much time to cutting/sourcing, etc. It sounds like you will have a lot more fun in your work. Retiring at 67 in order to get SS max? Alan
-
Maybe a small funnel into a tube of the proper length and diameter
-
Am I reading this correctly that in NOT creating the kit based upon the ship that was used in the movie, that the kit you are creating matches more closely the ship depicted in the books? If that's the case, I think most of the interested modelers would prefer your version anyway. Alan
-
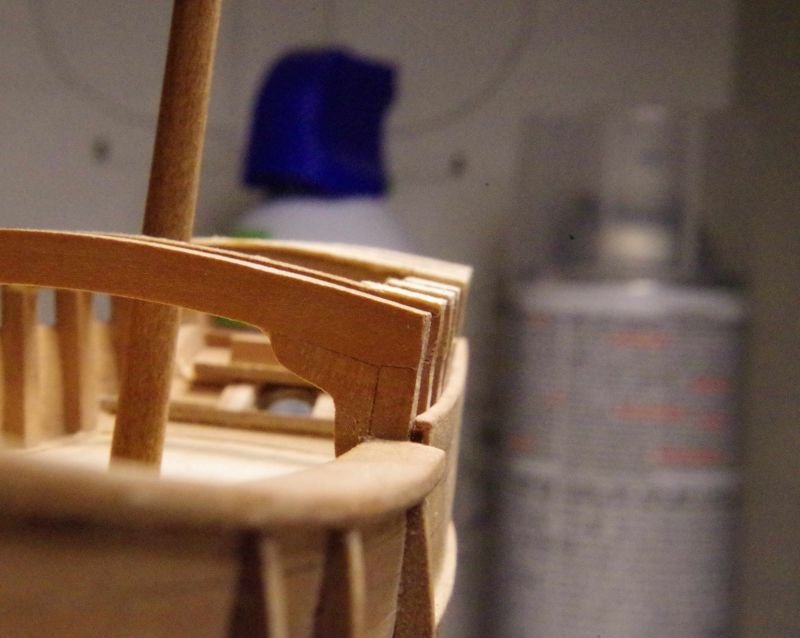
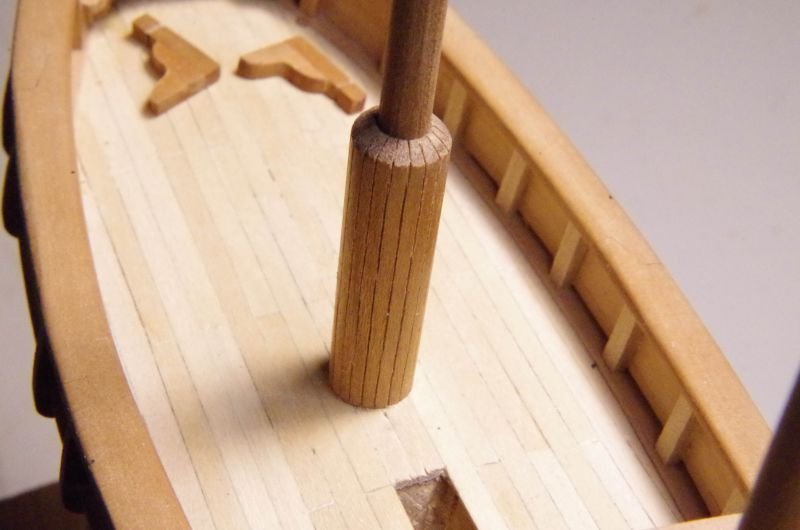
Still plugging away as time permits. The deck beams and hanging knees have been installed. It's not an optical illusion that some of the beams appear to be missing. I had to install the beams and sand them to proper shape, before cutting a few of them out to allow for the installation of the fragile internal components consisting of a lighted lamp which will sit on a shelf above the rudder and the binnacle, which will sit right behind the mast shown. I'm trying to do all of the "rough" work before attaching the fragile pieces and rudder. (note to self: don't forget to shellac interior before installing deck above). Below, the main mast and its partners have now been installed. The tops of the partners just need a touch more careful sanding to get everything uniform and then they will be done, apart from the eventual shellac. The parts laying on the deck are my next mini-project. They still need to be further refined before installation.
-
I won't ever be able to finish the models I already have, but this is mighty tempting. I have to ask.. Have you thought about having Aubrey/Maturin figures as an option as well? I'd imagine just about everyone who has read the novels would buy them, especially if they were molded playing their respective instruments. Alan
-
I've performed that method of planking on a number of ships. It feels fun and rebellious to plank in that manner. Just sand the ends sharp to fit on each end, and use plenty of wood glue. Once the hull is sanded, provided it's going to be painted, or have another run of planking over the top, it will be fine. If you look at my Syren log, some of the photos show this type of planking method used. The hull is then covered with copper, so no one knows that it was improperly planked. Alan
-
Kurt, I half-wonder if there should be another clickable link under the NRG Journal (cover of the book) on the home page. I think that could yield a fairly steady revenue stream. Alan
-
I ordered a copy within about 2 minutes of receiving the email notification. That is a fantastic price for the information contained within, and will probably generate a very large number of orders. Alan
-
I think I made this declaration about 2 moves ago. Alan
