
HOLIDAY DONATION DRIVE - SUPPORT MSW - DO YOUR PART TO KEEP THIS GREAT FORUM GOING! (Only 44 donations so far out of 49,000 members - C'mon guys!)
×

knightyo
-
Posts
527 -
Joined
-
Last visited
Content Type
Profiles
Forums
Gallery
Events
Everything posted by knightyo
-
Shellac + Bitumen
knightyo replied to Loracs's topic in Painting, finishing and weathering products and techniques
I like #5, the shellac garnet -
I beg your pardon, I'm afraid you have the advantage of me...
knightyo replied to JohnSGG's topic in New member Introductions
I offer my humble felicitations and trust that one of our estimable colleagues in your vicinity shall offer assistance befitting of your charming object. Yours respectfully, Alan PPS, Maturin sends his compliments and asks that you pay no mind to the fingers in the side table. -
Thanks Per! I'm still plugging away at it. The supports to the upper deck are now in, and I'm now just in process of making everything look tidy in the steerage section. Alan
-
I actually have a secret wish for an Aubrey/Maturin set; adding Killick with a coffee pot would be magnificent. I'm sure Chris wouldn't be able to make a profit on them due to relatively small number of people who would purchase them, but I sure would. Maybe they could be a premium option with an HMS Surprise kit down the road. Alan
-
Those figures are fantastic! I can tell that it's been irritating to have them critiqued so much, but having modelers critique the figures to that degree is exactly what you want and need. Very few people have the opportunity to have their products critiqued to that degree before they put them on the market. The critique is what will help to ensure that the figures are top-notch and maximize the number sold. I've already purchased a number of your other figures and don't even intend to put them into a model. I purchased them solely because they are fun look at. I'm sure I'll purchase this most recent set as well. Alan
-
Thanks Bob! This was my first time using chemical as a blackening agent. Never again. I was expecting the metal to darken, but the reaction just created a black film on the surface of the metal which easily flaked off revealing the bright copper underneath. I've now "sealed" the areas in which the film has flaked off and have applied primer and black paint over the top; also went ahead and blackened the bolts, so the resulting product is a surface that is a little bumpy and does not look machined. My initial hope was to have flawless straps with differently colored bolts in order to show off the small work. That desire went right out of the window, but I guess in the result at least looks more realistic in the end, at any rate. Alan
-
This build thread is incredibly fun to read. I can tell that there have been some differences in opinion in within the last page, but I hope that everyone continues to post their thoughts, even if they think they might contradict the information someone else is providing. I think it's better to have a number of dissenting opinions about something, than NO opinions. That's the difference between a fun and thought-provoking log, versus a single builder just talking to him or herself. It's also fantastic to see the reference material that people are providing, as that's a gold mine for other builders who follow. Thank you for sharing your build with everyone Steven; it's one of the most interesting logs on the site right now. Alan
-
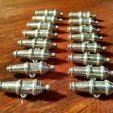
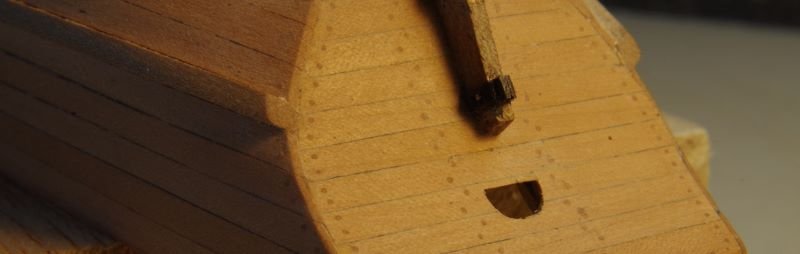
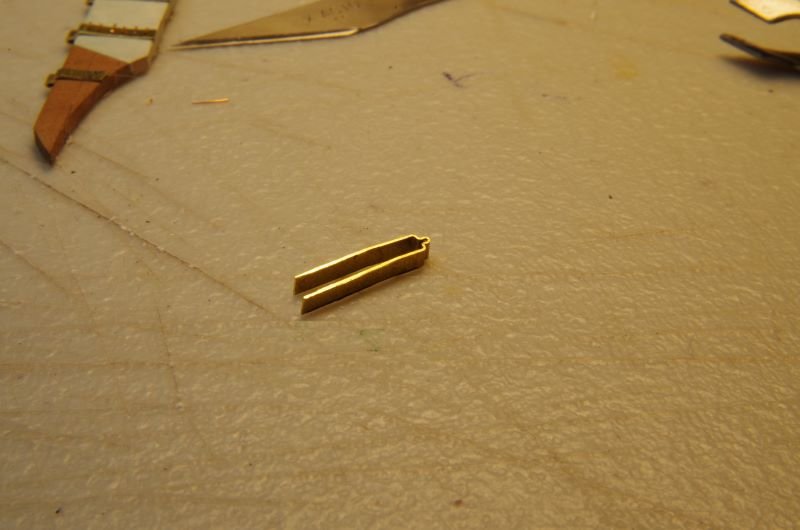
I find the below to be the most enjoyable part of building a ship. Yes, I'm pretty sure I'm on the spectrum. These are pear, and from old pear blocks I had on hand. Rough-cut dowels were pulled through a standard progressive drawplate, and the ends sanded down to points allowing me to gently glue them into the predrilled holes. And then clipped/sanded down Just a photo of the topside of one of the pintles before the holes were drilled into the sides. And finally, the rudder assemblies are about complete. I'm not going to hang the rudder until the topside is complete and the model has been installed onto its base. The ends of the bolts were cut via a rolling motion under my X-acto blade which provided a tiny lip on the ends. They were then inserted into the pintles/gudgeons with a bit of superglue; overall, they hold the pintles/gudgeons more securely than I thought they would. I'm trying to decide whether or not they should be blackened or left bare. Each one of them reflects light at a different angle, so while it's fun to show that I created such small bolts, it's also frustrating, in that they don't look uniformly placed. I think I'll eventually prime/paint over them as they should be black in color anyway.
-
Ok, that's just shocking. I'd nervous to steer that ship on a lake. lol Alan
-
I see a recipe for kittens with a cat in both bow and stern; I see that one of them also knocked one of the checkers. down. I also like the tombstone cutaways. Everything looks fantastic. Alan
-
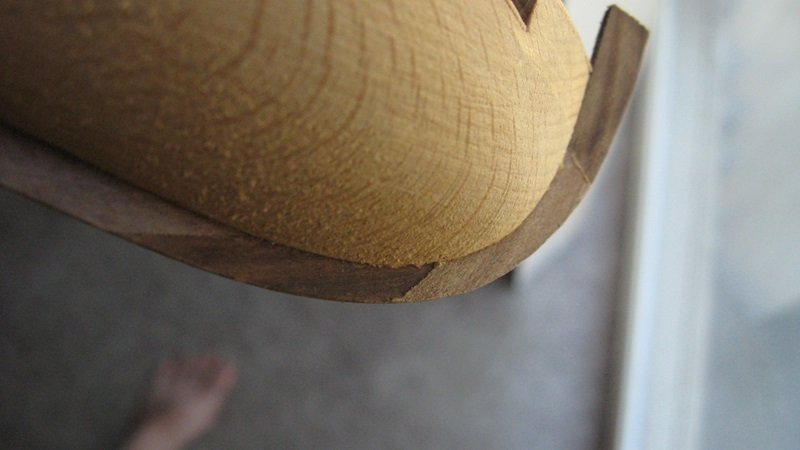
Hello, Gregory was exactly right. Below is a photo of my mini-Mamoli Nina. The keel parts are glued into the pre-drilled groove all the way along the keel. Since the keel will be painted below the waterline, it doesn't really matter what pattern of pieces you cobble together down there as long as they are all snug in the groove, and against each other. It also helps to install pieces which stick out too far as well, so the entire keel/stem can be sanded down as one unit after the glue dries. Alan
- 26 replies
-
- 7
-

-
- Solid hull
- Bregante
- (and 2 more)
-
Warship identified off Florida coast 3 centuries after it sank
knightyo replied to Gregory's topic in Nautical/Naval History
They were just experimenting with fiberglass cannons. Alan -
I'd wager that your shipbuilding experience creating stealers had an influence on this solution. Alan
-
Hello Kai, Since you enjoyed the Hornblower books, I would like to recommend the series by Patrick O'Brien which covers the same era, if you haven't already read them. That series of books is so enjoyable to read that many people read the entire series annually. Alan
-
From one Oregon introvert to another, welcome aboard! Alan
-
There are also mini LED's that flicker, simulating fire, that one could install in the fireplace if one wished to go overboard (I couldn't help myself) with the build. Alan
-
I do it the same way as portrayed in the video, but the tool that works best for me is the edge of my steel ruler. It takes a little while to get the knack, but once you have it, you can create them very quickly Alan
-
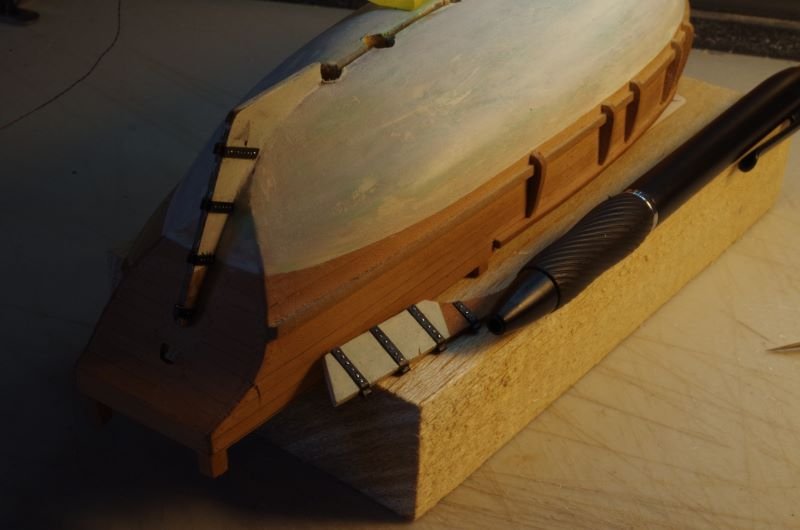
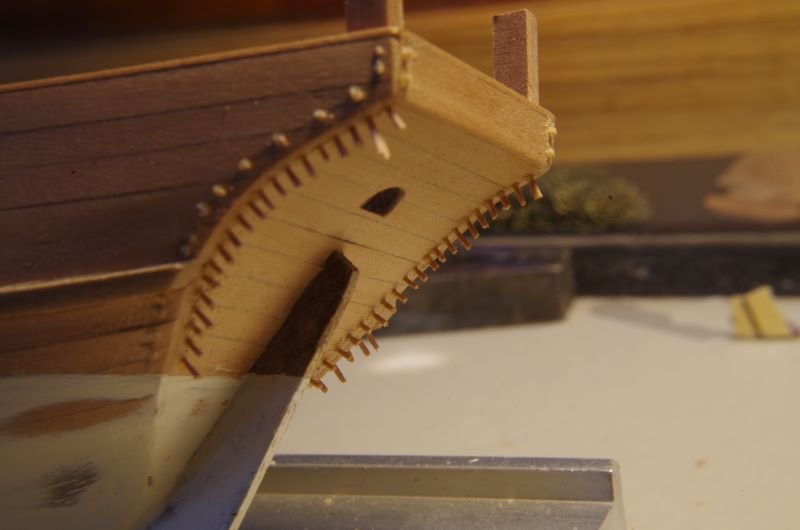
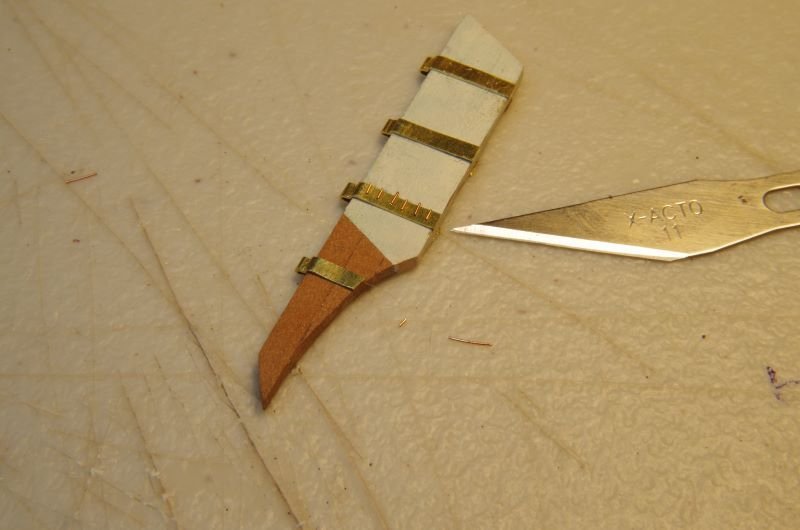
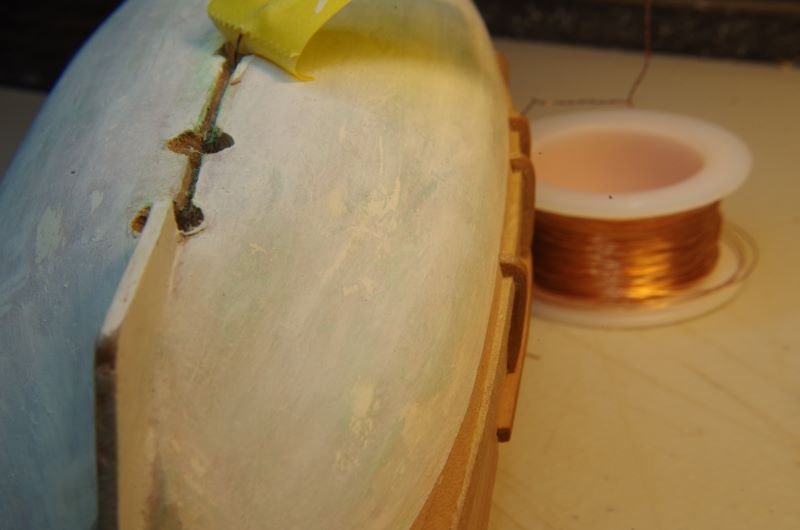
Metalwork around the rudder has been slowly taking place, and the straps are loosely placed on the rudder. They will be further shaped to the rudder and blackened before being permanently affixed (no idea how I'm going to permanently affix these. The wire bolts won't really have any strength long-term, so am really pondering this one). I had quite a learning curve in learning how to uniformly fashion the straps; many, many scrap pieces throughout. The photo also shows the bits of 30 ga wire that will be made into bolts. I'm just laying them down on the strip in the middle to see how the thickness of the wire will look from a scale perspective. I'm thinking of having 2 bolts per plank. The rudder is basically made up of 3 planks. I've also been experimenting with the finish on the hull. Goal is to try and make the finish appear to be as "real/aged" as possible, so there are a lot of green/brown washes on there now in addition to other white washes. The plan is to have shellac on the model, and I'm thinking of extending that down all around the acrylic on the hull as well to give it a bit of a wet/shiny appearance. Still debating that one, however. The gouges in the hull are for the brass tubing in which the lighting will run through from the ship down into the stand where the power source will be. When the tubing has been installed, the keel will be replaced and everything tidied up.
-
That's actually perfect. If you decide that you've sanded too much off, it's easy to reapply. I applied/removed acrylic to the hull of my Nina for a long, long time until I finally ended up with the look that I liked (applied different wash "layers" with slightly different colors as well. You might be able to get a pretty nice effect by applying washes of greys/greens/browns, showing not only the standard wear of the black, but also the effects of a boat that has been in the water with sea life). As Baker mentioned, it would probably be best to practice on scraps first. It's all your personal choice, however. The model is looking great! Alan
-
Hi James, I would also fill the spaces between the bulkheads with blocks of wood (balsa would be easiest), and sand to shape. It would then be easier to see the curves with the eye, and also far easier to plank those areas. Alan
-
That must be the intro to the fight scene.
-
Yes! With a flashlight whilst also swearing. Now THAT would be an authentic scene.
-
You will have to let us know when this moving comes out. It will really be fun to see the ship modeling part, knowing that you helped! It makes me wonder if any of the cast will be drawn to the hobby as a result of seeing your models, the process, etc. (Your Speedwell is looking absolutely stunning) Alan
-
Hi Loracs, I think your door frames are good as well! I was just thinking that the doors themselves might look better if you made them out of wood as well. Although then that would also require you to create hinges, etc. It never ends how much detail we can put into these projects. Alan
-
This gave me a good laugh. I guess the good part about it is that a guy would never keep bits and pieces and assorted sawdust on his is table; he'd clean everything up after each session, resulting in a nice and uncluttered work area. The only wood I'd never work with is ebony. I've used it once, and vowed never again. Your project looks fascinating, and I do hope you continue to post your progress. I think a lot of build logs eventually get a comment the builder isn't thrilled with; it's just a function of so many different people from so many different backgrounds/demographics, etc. I've noticed my own posts are different in tone depending upon the time of day and the amount of caffeine in my system. I think the pros of having so many positive and helpful posts however, outweighs the cons of occasional posts which come across as off key. Alan

