HOLIDAY DONATION DRIVE - SUPPORT MSW - DO YOUR PART TO KEEP THIS GREAT FORUM GOING! (Only 44 donations so far out of 49,000 members - C'mon guys!)
×

knightyo
-
Posts
527 -
Joined
-
Last visited
Content Type
Profiles
Forums
Gallery
Events
Everything posted by knightyo
-
 Thanks Steven! Montaigne has made me think about adding perhaps two chests or maybe even a small side table. One with a scroll of my name/build date, but perhaps the other with a scroll with a funny/inappropriate limerick or such. That would sure be a surprise to a future viewer. It would destroy whatever thoughts they had about the builder, however. lol Decisions, decisions...... Alan
 -
Chuck, I'll bet you've been cringing wondering how long it would take someone to ask you if you were also going to create a mini-Winnie as well, yes? It even rhymes. Alan
-
Those are absolutely gorgeous. I also think they look the best when matching the color of the surrounding wood, and agree that the center looks best as constructed the same as the outers. Are you going to have individual panes for each "square", or one sheet of acetate for each pane? The posting recently in which someone used a heat gun to "melt" plastic sheet around panes giving the illusion of individual windows was pretty nice. Alan
-
It looks like we share the same long middle name . Maybe the scroll can be placed into a small sea-chest somewhere on deck. I do know that there are a few flaws on the deck in the cabin area that should probably be covered, so it should work out pretty well.
-
One of my longstanding and fairly irritating quirks is to jump into a project, get so focused upon what I’m doing, and ending up doing something exactly wrong because I’ve forgotten the big picture. That quirk has shown itself again; at some point, I’d forgotten that the drawer in the binnacle is actually what the compass itself sits within; it’s not a separate stand-alone drawer for maps, etc. The below photo from “The ships of Christopher Columbus” shows how that drawer is supposed to be used, which I’d completely forgotten about once I started to cut wood. That shouldn’t be impossible to fix however, and it will actually allow me to create a little more elaborate compass than I’d originally intended. I think I’ll cut a piece of brass round-stock to shape, insert a small printed compass image within, with perhaps a coating of something over the top replicating glass. I’ll unfortunately have to get rid of the scroll/map in the drawer with my name/build date, which is disappointing. I guess the scroll/map turned out to be slightly oversized anyway.
-
I agree that depressions should be filled, but that it would be far better to fill with wood than filler. For my Triton, I filled the spaces between the bulkheads with basswood, but would use balsa wood if I had it to do over again. Balsa is so much easier to sand/shape. Alan
-
I'd love to see the log of that!!
-
This is very true. What I use works for me based upon my physical characteristics and preferences, but might not work as well for others, or even the majority. Alan
-
I have Reed's books as well and have always been very tempted to build the exact ship he did in the exact manner. I know I'll never get around to doing it however, at the slow rate of speed of my other projects. One thing I'd point out to anyone considering a small scale is that once you are used to working under magnification, it's not really any more difficult to build at a small scale than it is large, especially once you get used to "bracing" your hands/work. I've grown very attached to a pretty low-quality, inexpensive magnifier I use to work on my Nina. I tried the optivisors, but to me, they were almost more of an irritation than a help. It's much easier to work under a "desk lamp-arm style" magnifier. The only drawback to working in a small scale is your audience. If you build a ship that is a couple of feet long, your viewers will probably be far more impressed than they'd be by a tiny ship, which may have taken you just as much time to build. They may also be more likely to label you as weird. However, since we are really supposed to be enjoying this hobby for ourselves alone, neither factor should matter. Alan
-
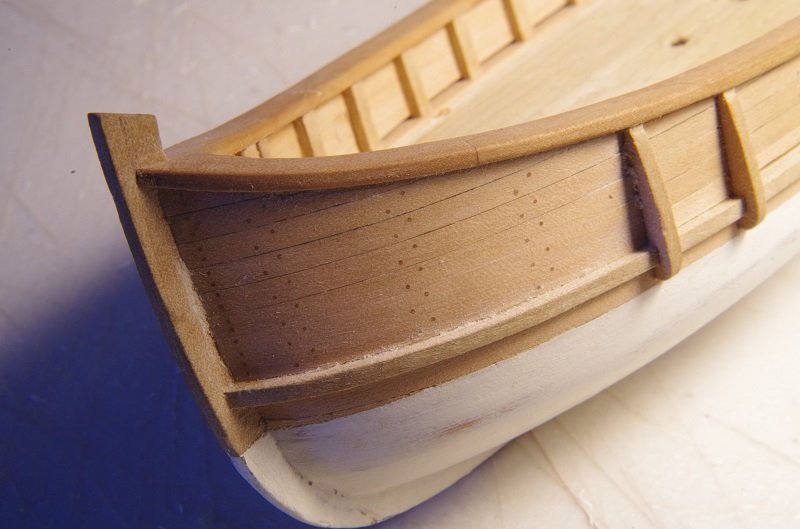
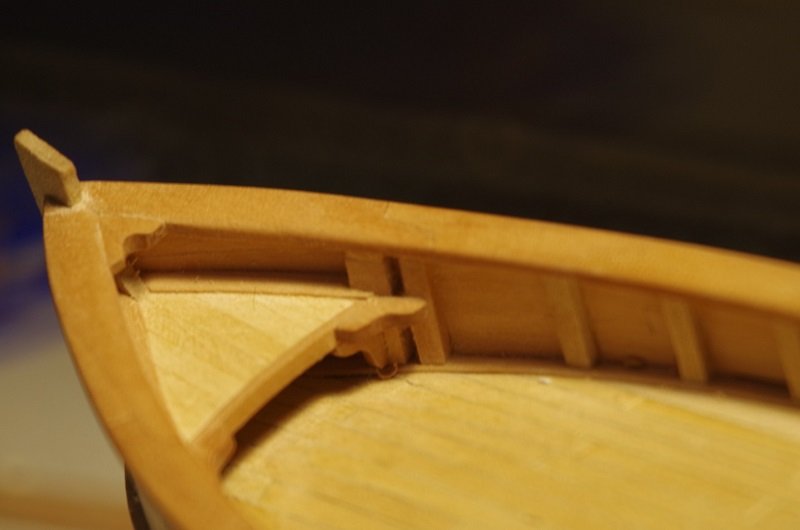
The trennails are about done in the bow area. I'm now leaning towards shellacking the model after it's been cleaned up. The inboard parts of the bow are about complete now as well. Now it's time to start trennailing the decks, knees, etc.
-
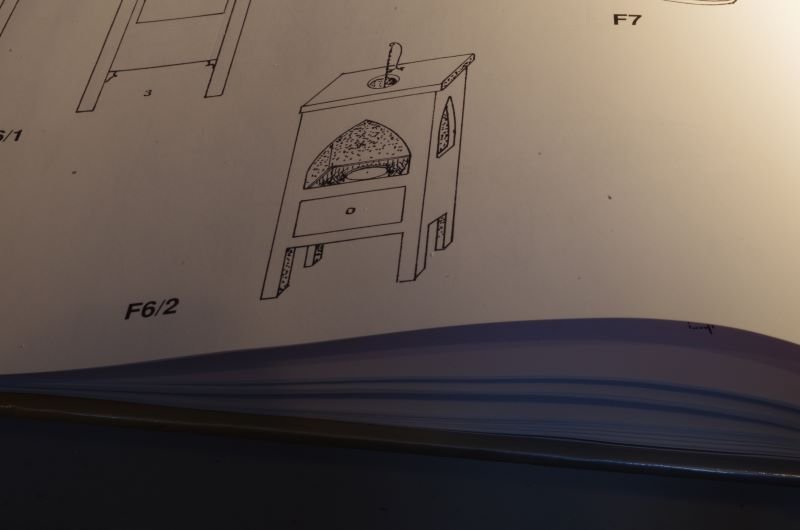
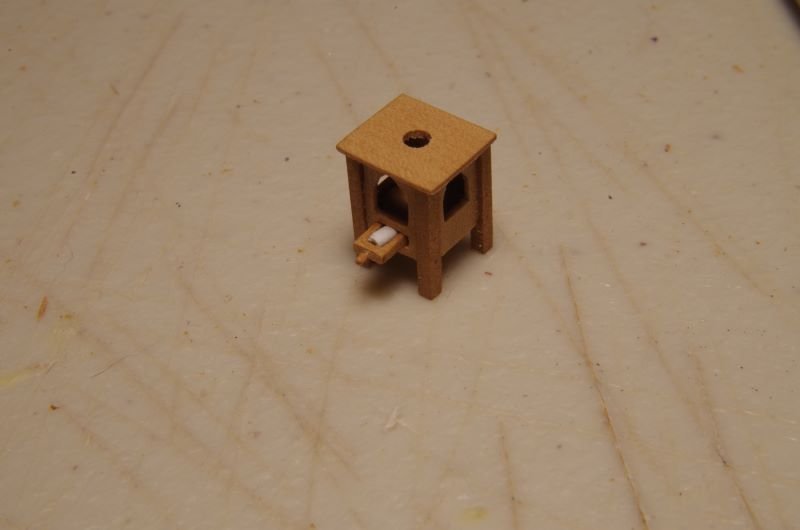
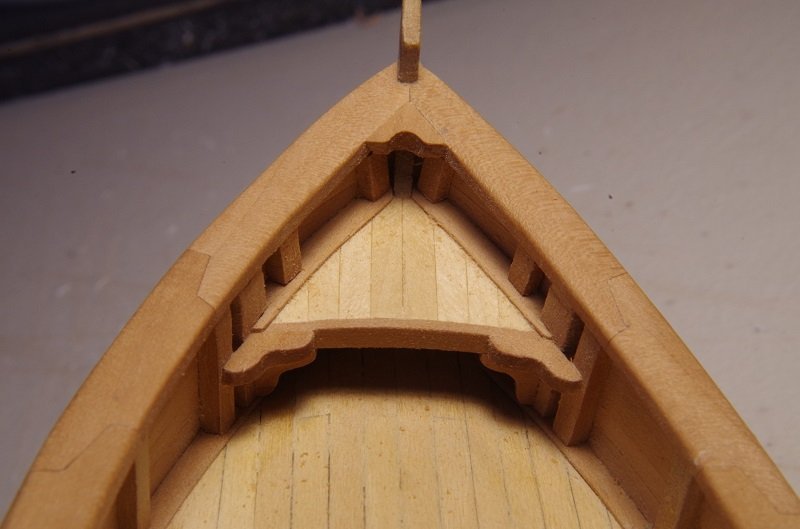
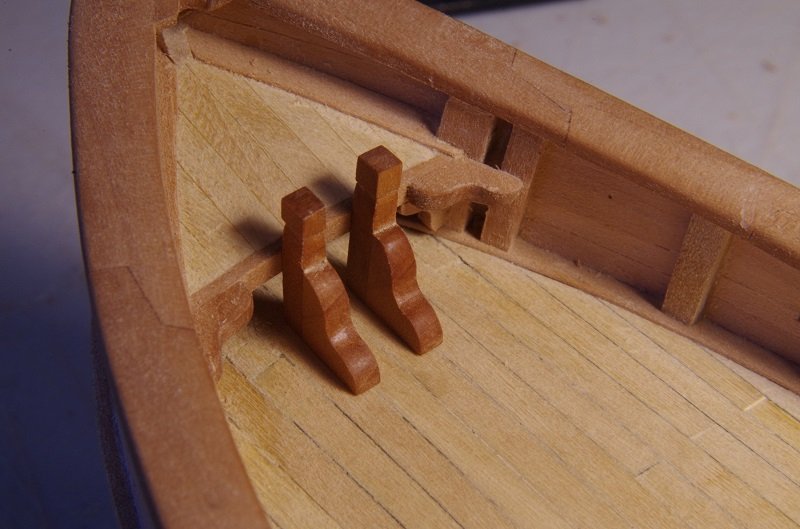
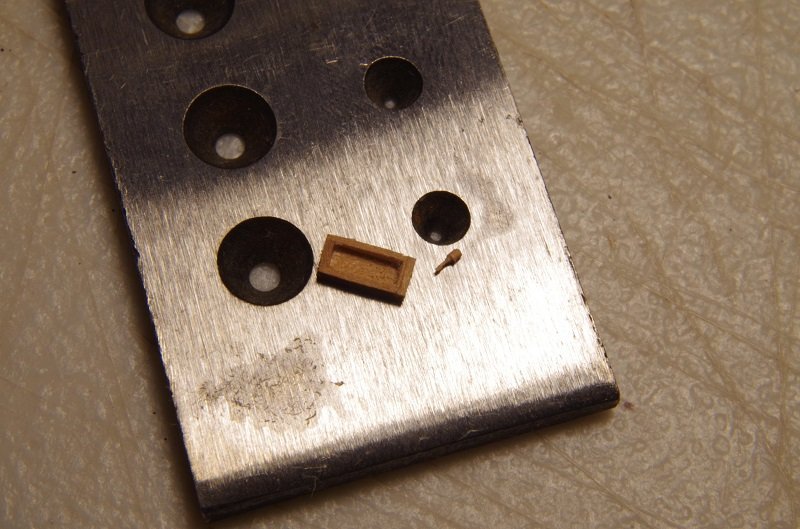
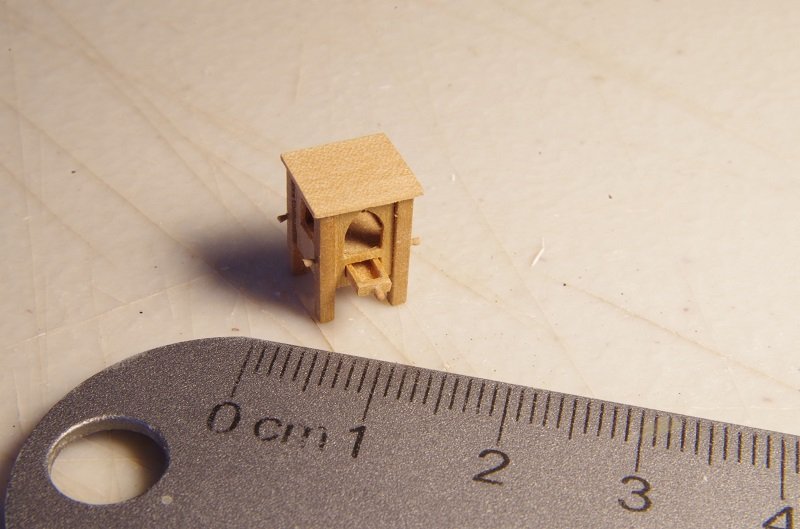
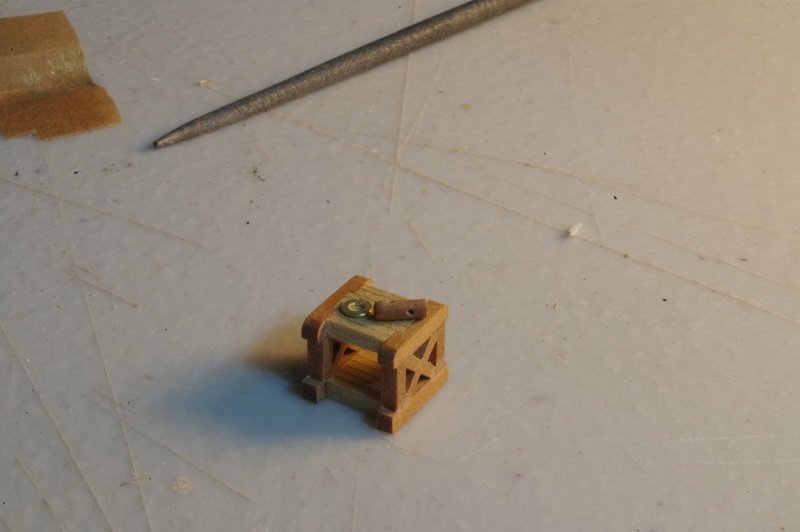
Ok, still plugging away on this one. The below parts have been burnished a bit to see what the final look might approximate. They are still a bit thick however, so will be thinned out a bit, and the recessed areas near the tops will also be thinned down more. Then they'll receive trennails along with the adjacent knees. I'm still building up the back quarterdeck area, so not really affixing anything to the deck yet which could be knocked away. Binnacle! I've been building up the binnacle, which I'll be able to install after the masts have been installed, and the quarterdeck complete. Below is the drawer, and a little knob which was almost impossible for me to make. They are resting on my drawplate next to the smallest hole. I couldn't see what I was doing with these pieces unless working on them under magnification, but I'm happy with them now that they are done. Below is the main body of the binnacle with the drawer hanging out. If my printer will do it, I'm going to print a scroll with my name and build date, and will then place in the binnacle drawer which I'll leave slightly ajar. The "pegs" sticking out of the sides will be clipped off and sanded down; they are just trennails which have just been glued in and are drying. There will actually be 4 more attached lower on the legs. Once that's done, I'm going to be cutting a circle in the top of the binnacle for a light to hang down into it, which will illuminate a very small compass, providing my printer can print it small enough. Since the backside of this binnacle will be resting against a mast, I'm thinking of installing a very small led up through the deck and between the binnacle/mast, and into the back of the binnacle, which can then provide light. Hard to explain, but I'll post pics.
-
I think you might have hit the nail on the head with that summary (I couldn't resist). I'll bet that's exactly what we are seeing on the replica Pinta as well.
-
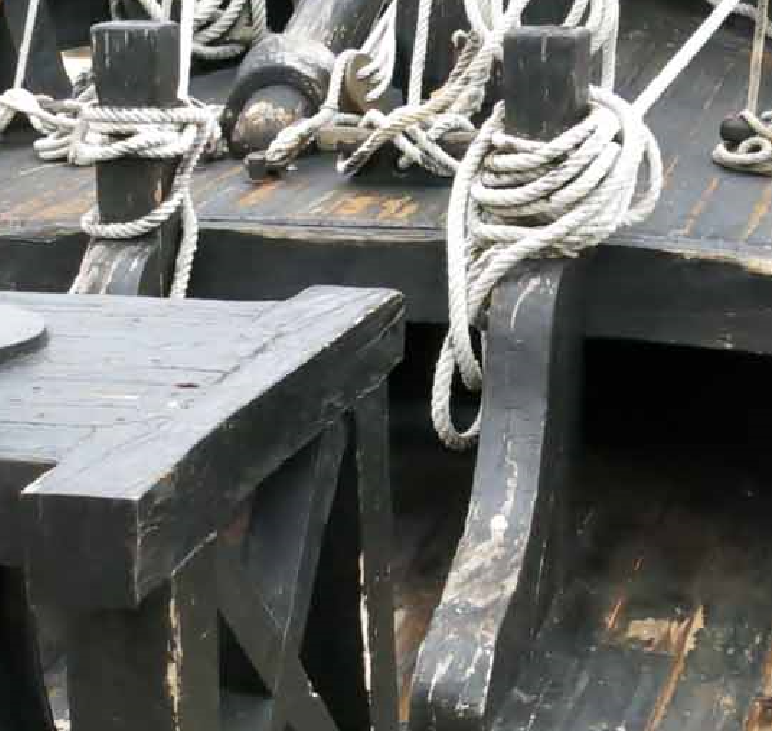
Thank you Allan, that was exceptionally helpful, and explains why there were only bolts shown on the bottom parts of the standards on tlevine's work. I might do two bolts on the bottoms of the standards, and trennels on the tops. Below is what I'm approximating, (working replica of Pinta), but it's hard to tell how they were constructed there. I don't see any bolt protrusions, but for this working replica, they might not have been trying to replicate the original to that degree. Or, they were, and trennals are just the way to go all around. Decisions.. Alan
-
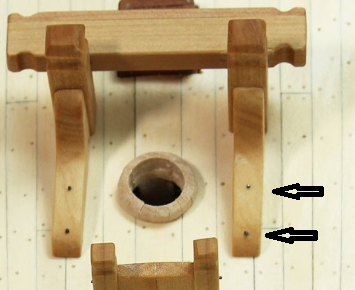
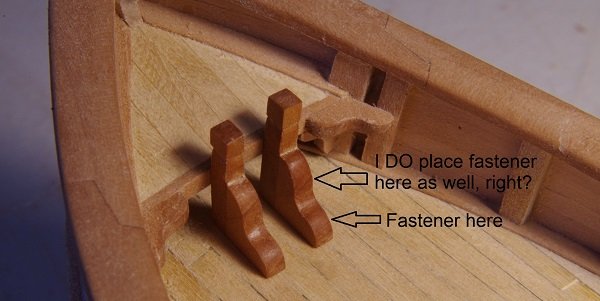
This might be a fairly obscure question, but regarding a photo from tlevine's Swallow log below... Are "fasteners" to be inserted ONLY on the bottom portion (see arrows) of the standards? I'm close to attaching similar components on my 1492 caravel (bottom photo), and am not sure of how I should reflect the fasteners; for that matter, I'm not sure if they should be trennails, or raised nails. Any guidance on this would really be appreciated. I do know that the standards are currently too thick, so will be adjusting that, but I'm really wondering about the fasteners. Initially, I was thinking that I'd apply fasteners to the upper sections as well, but now I'm assuming that tlevine's fastener's are correct, and that I'd I'd install two of them, both on the bottom section of the standards, but wanted to pick the collective brain of MSW on this one. - Alan
-
My palms became sweaty while reading this thread. I never would have made it in the navy. Ironic, as building models ships is my passion. lol Alan
-
Wow! That water turned out great! Alan
-
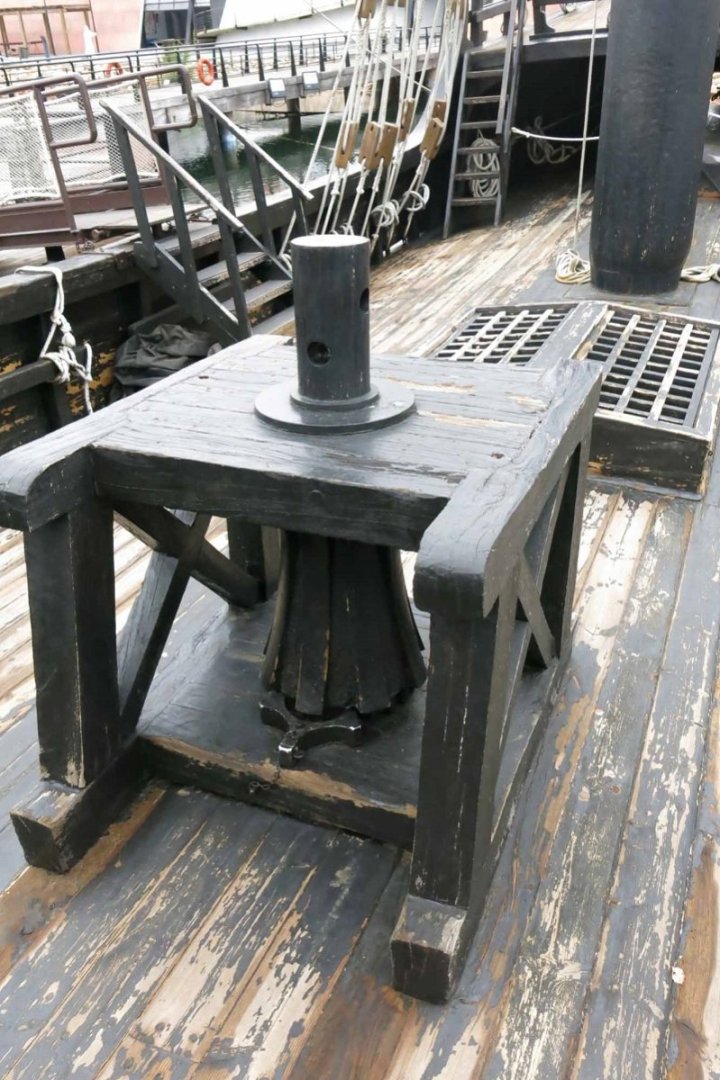
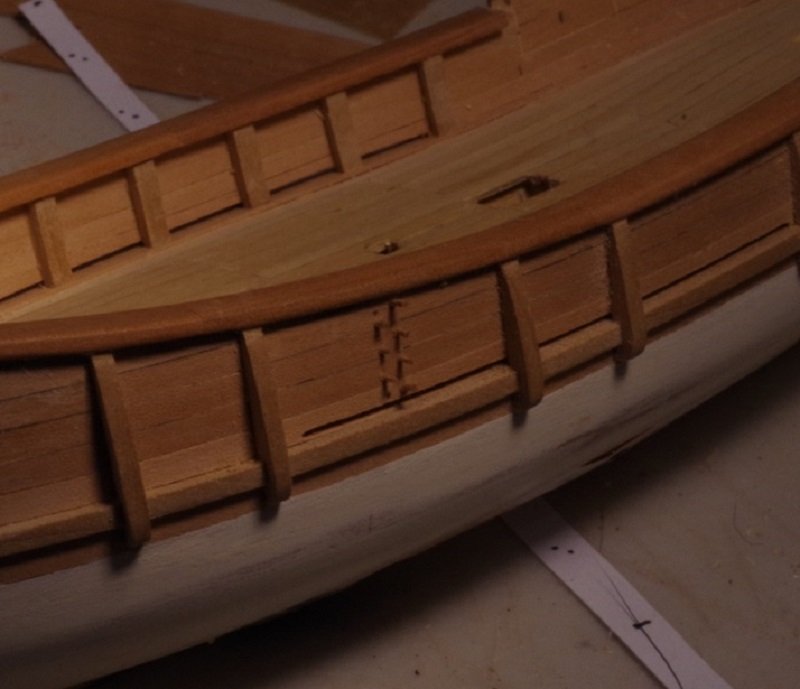
Ok, so working at my usual pace, but incremental progress is better than none, I suppose. The entirety of the hull inside and out is now planked with pear. It's dusty in this photo, but compressed air and brushes should remedy that before any finishes are applied. I'm considering applying tung oil and/or shellac, and will be experimenting quite a bit with both. The replica Pinta had a unique looking capstan which caught my eye, and which I wished to replicate on the Nina. Who is to say that the original Nina didn't have this type capstan as well? Below is a start, but will need to be "skinnier" to match the replica; especially the center "X" sections. Not pictured are a few more brass parts I've cobbled together which will need to be blackened. Time to start working on these little guys. Making these at this scale is quite a challenge, and I'm having to make these under magnification. It's still a satisfying exercise, however.
-
Thank you both! I will start performing some fairly vigorous experimentation with both shellac & renaissance wax. Ironically, scraping is indeed how I started out finishing the rails; however, I was clumsy and ended up with numbers of fine "cut" lines that I ended up sanding out with a very high grit wet/dry paper. What I'm left with is burnished large surfaces and unburnished small pieces, recessed pieces, etc. Alan
-
As I've been toiling over my small Nina project, I've ended up basically burnishing the wood in numerous sections. The rails for instance, are swiss pear, and in a "burnished" state really have a nice look. Are there any recommendations regarding what to apply over burnished wood? My Google searches have made it pretty clear that standard finishes are out as the pores of the wood are effectively sealed when the wood is burnished, which makes sense. Has anyone experimented with applying any type of finish over burnished wood? Alan
-
It would also be fun to see something completely different in style, like an ornate Xebec or a ship of an earlier period with all of the carvings, moldings, etc. Alan
-
I'll bet I'm not alone in my modeling process. If I build something and the joints look magnificent, I'll leave it as natural wood. If what I've built needs filler or is sub-par, it gets painted in order to hide my sins. 😊 Alan
-
If it were me, I wouldn't give them away. I might pin them up in my hobby area as "art" or find some other use. If giving them away, the person who they were given to would be less likely to purchase the plans from someone who should receive legitimate payment for their work, etc. Alan
-
RGL, you should know that you are responsible for about 5 of my model purchases. Oh they'll never be finished, but this thread inspired me to buy them. lol Alan