HOLIDAY DONATION DRIVE - SUPPORT MSW - DO YOUR PART TO KEEP THIS GREAT FORUM GOING! (Only 44 donations so far out of 49,000 members - C'mon guys!)
×

knightyo
-
Posts
527 -
Joined
-
Last visited
Content Type
Profiles
Forums
Gallery
Events
Everything posted by knightyo
-
 The bottom-most pieces on each side give me the shivers on the difficulty scale. The carvings look great! Alan
 -
This is fantastic! I'm wondering if there should be an old oil can on the bench along with an old coffee can to hold misc bolts? Alan
- 189 replies
-
- 10
-

-

-
Welcome! I'll be joining you in the rain in a few months. Currently in Idaho, and moving to Salem "ish" area for a new job. Looking forward to your Swift log. If you are redoing sections of the older kits with higher quality wood, they should come out great. Alan
-
Man those sails look fantastic. I've always shied away from incorporating sails because mine always looked like old undershirts. It would be great if Tom provided a tutorial. That's probably one of the least-understood skills (I think) in ship modeling. Alan
- 421 replies
-
- 8
-
-
- medway longboat
- Syren Ship Model Company
- (and 1 more)
-
Fascinating times. My aunt was a WASP in WWII, and may have flown these. I definitely remember hearing that she flew Mustangs. As a little kid, I was very intimidated by her. She was as tough as nails. Alan
-
Micromaster 3D parts for tribal class destroyers
knightyo replied to RGL's topic in REVIEWS: Model kits
That detail is insane. Really, really great parts! Alan -
The HMS Queen Elizabeth with the newly arrived American F-35's would make an interesting project. That's an interesting joint multinational deployment about to take place. It could even be an international modeling project. One of you could do the air wing, one could do the ship, and it could then reside in my living room when finished. Everybody wins! Alan
- 1,090 replies
-
- 4
-

-
-
- showcase models
- vendetta
- (and 2 more)
-
The Bitumen Experiment
knightyo replied to ChrisLBren's topic in Painting, finishing and weathering products and techniques
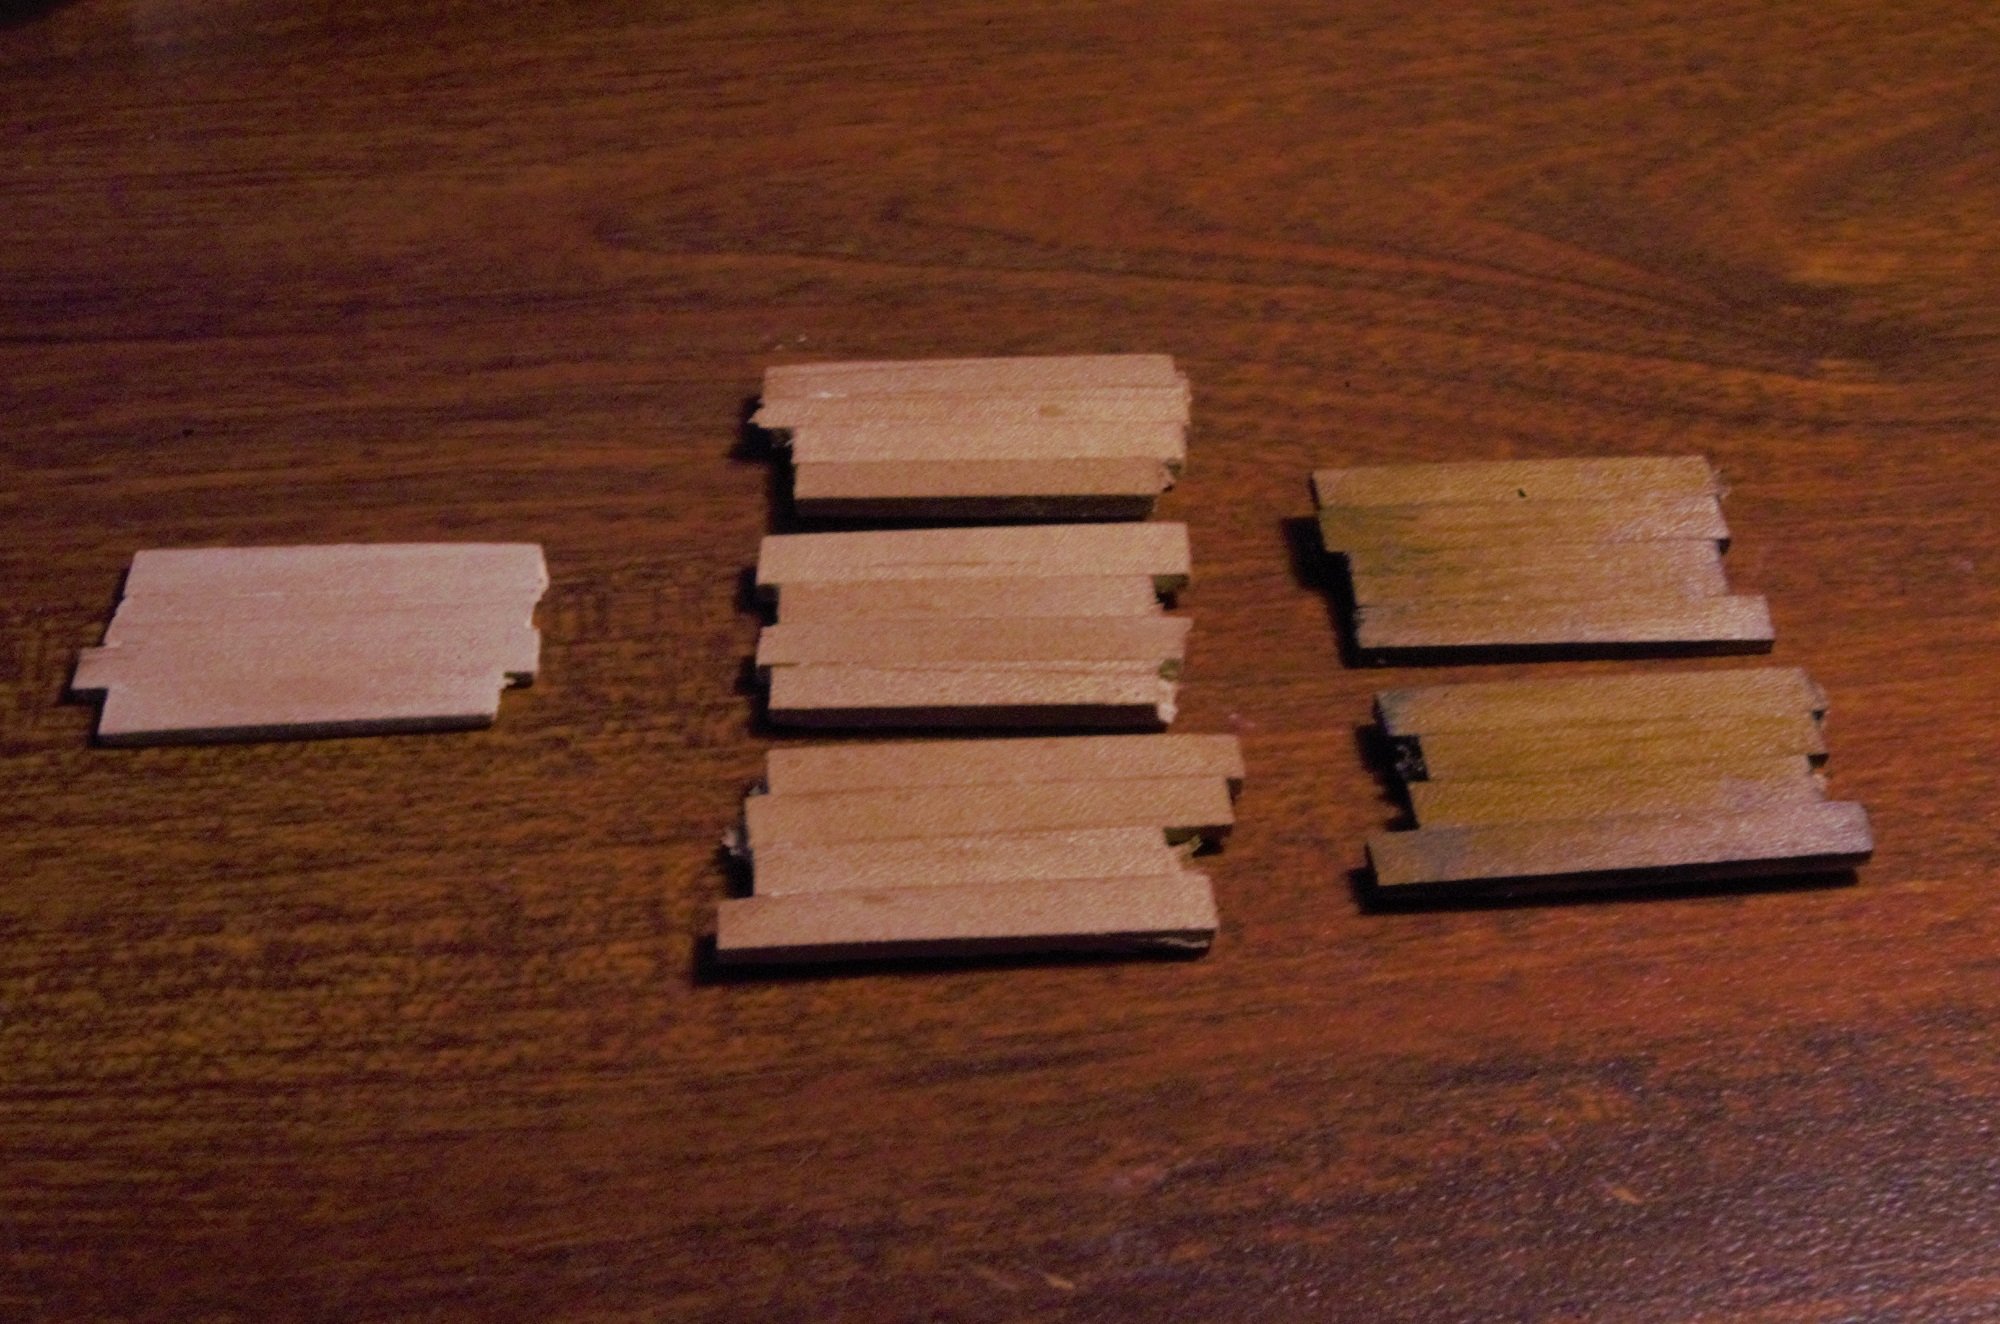
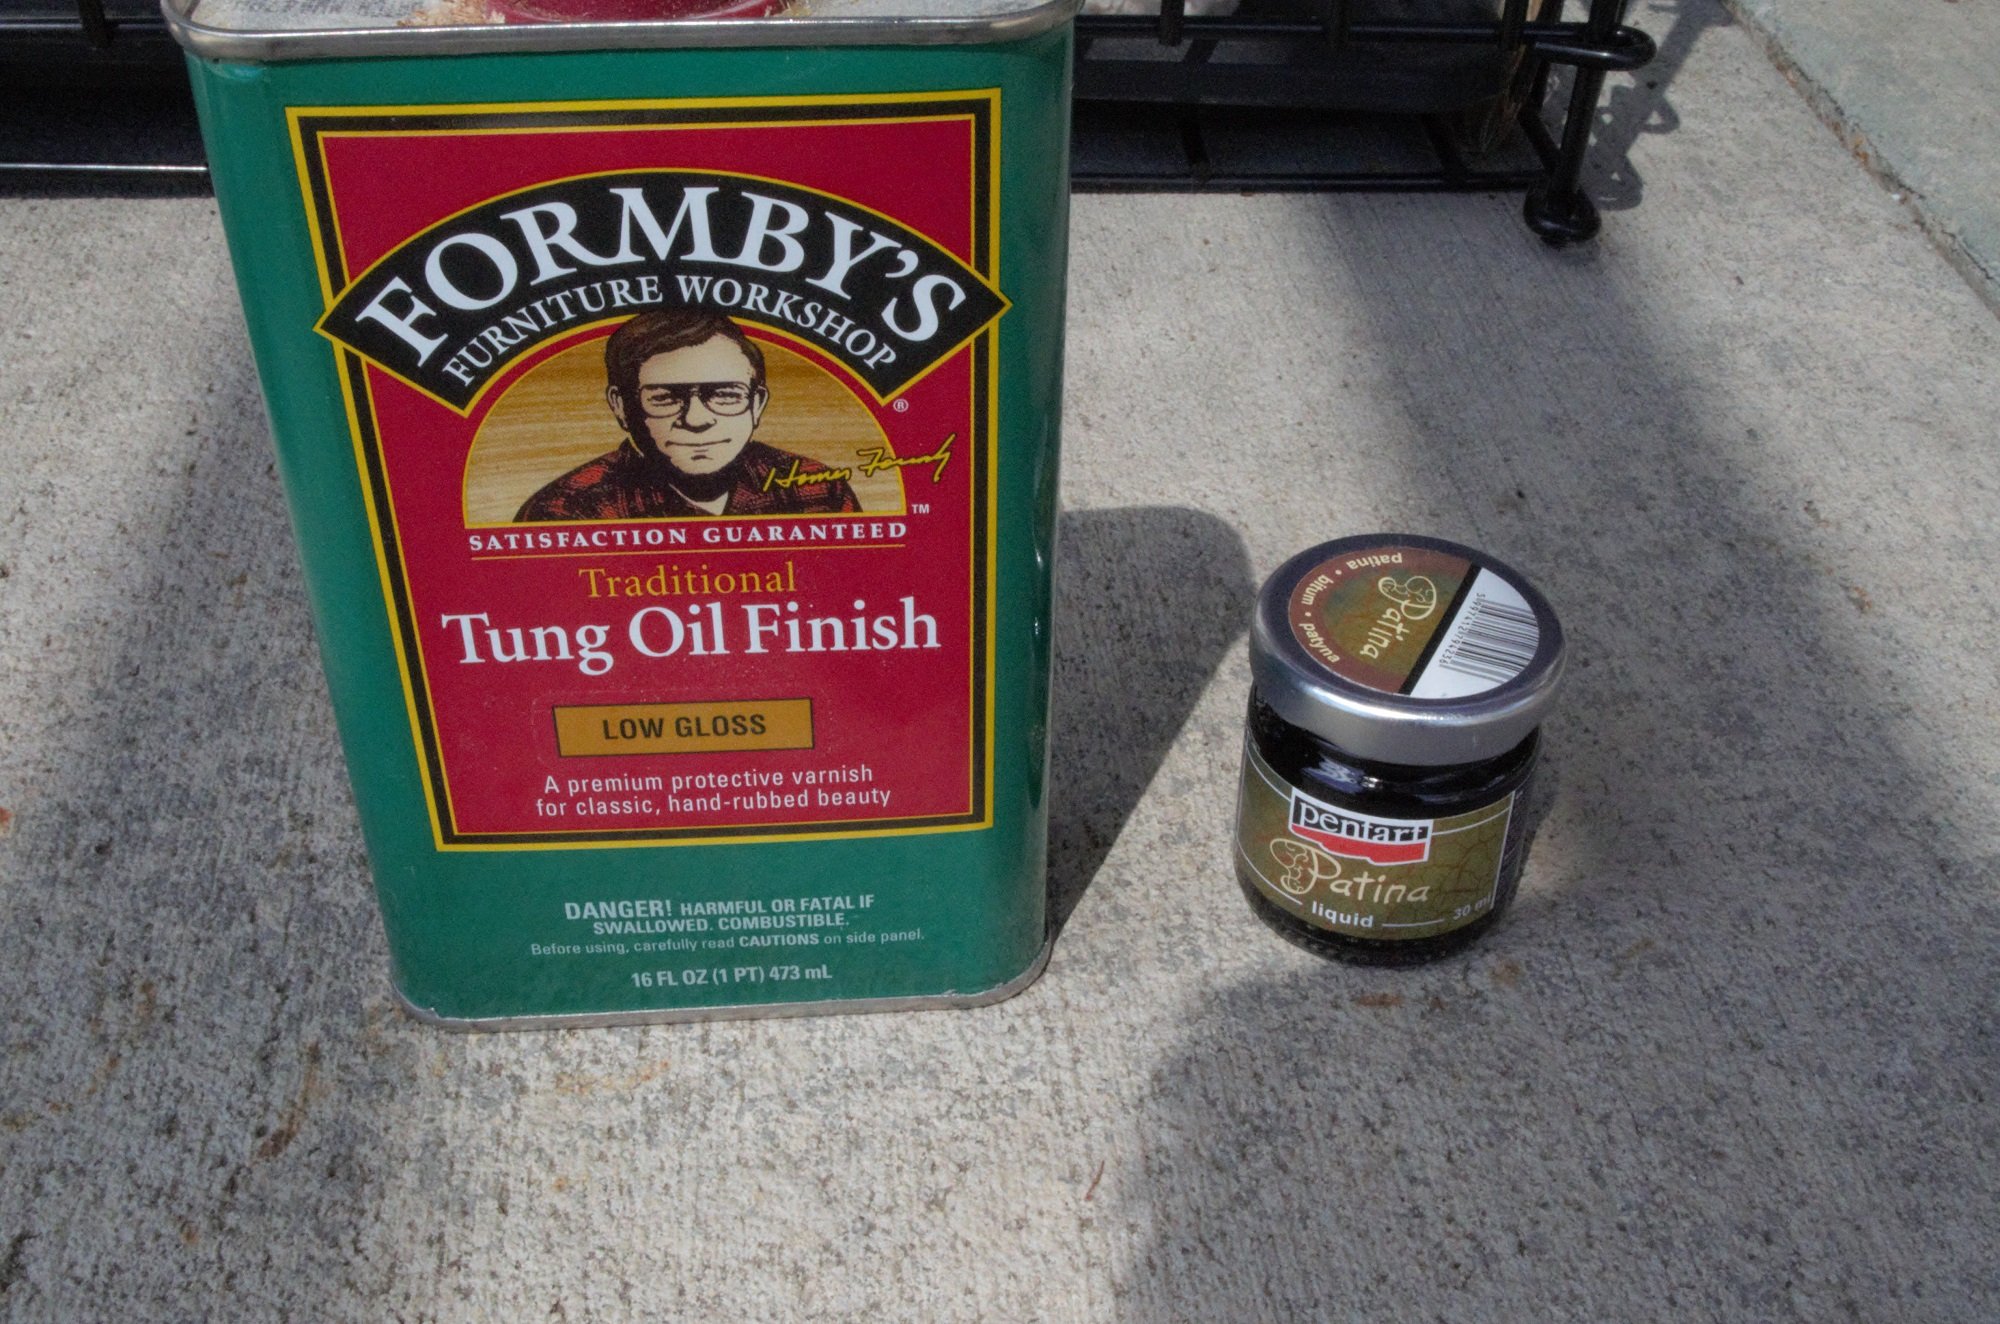
Below is a pic of an experiment I ran on my swiss pear. The left column is just unfinished, the middle column is pear with Formby's Tung Oil Finish (which I learned isn't actually Tung Oil), and in the right column are pieces which had Pentart Patina liquid (50/50 mix of mineral spirits/Pentart) applied over the top of dried Formby's. I'm going to keep experimenting to see if I can get something between the middle and right columns. Maybe starting out with a 90/10 mix of mineral spirits/Pentart; it was surprising how dark and strong that medium was. I'd love input on the combination of these two products or similar products, as stains/finishes is an area in which I have the least amount of knowledge. Will these products react with one another over time? Should either one not be used to begin with? My goal is to reproduce a fairly "aged" look to swiss pear with a finish that will last a long time. Alan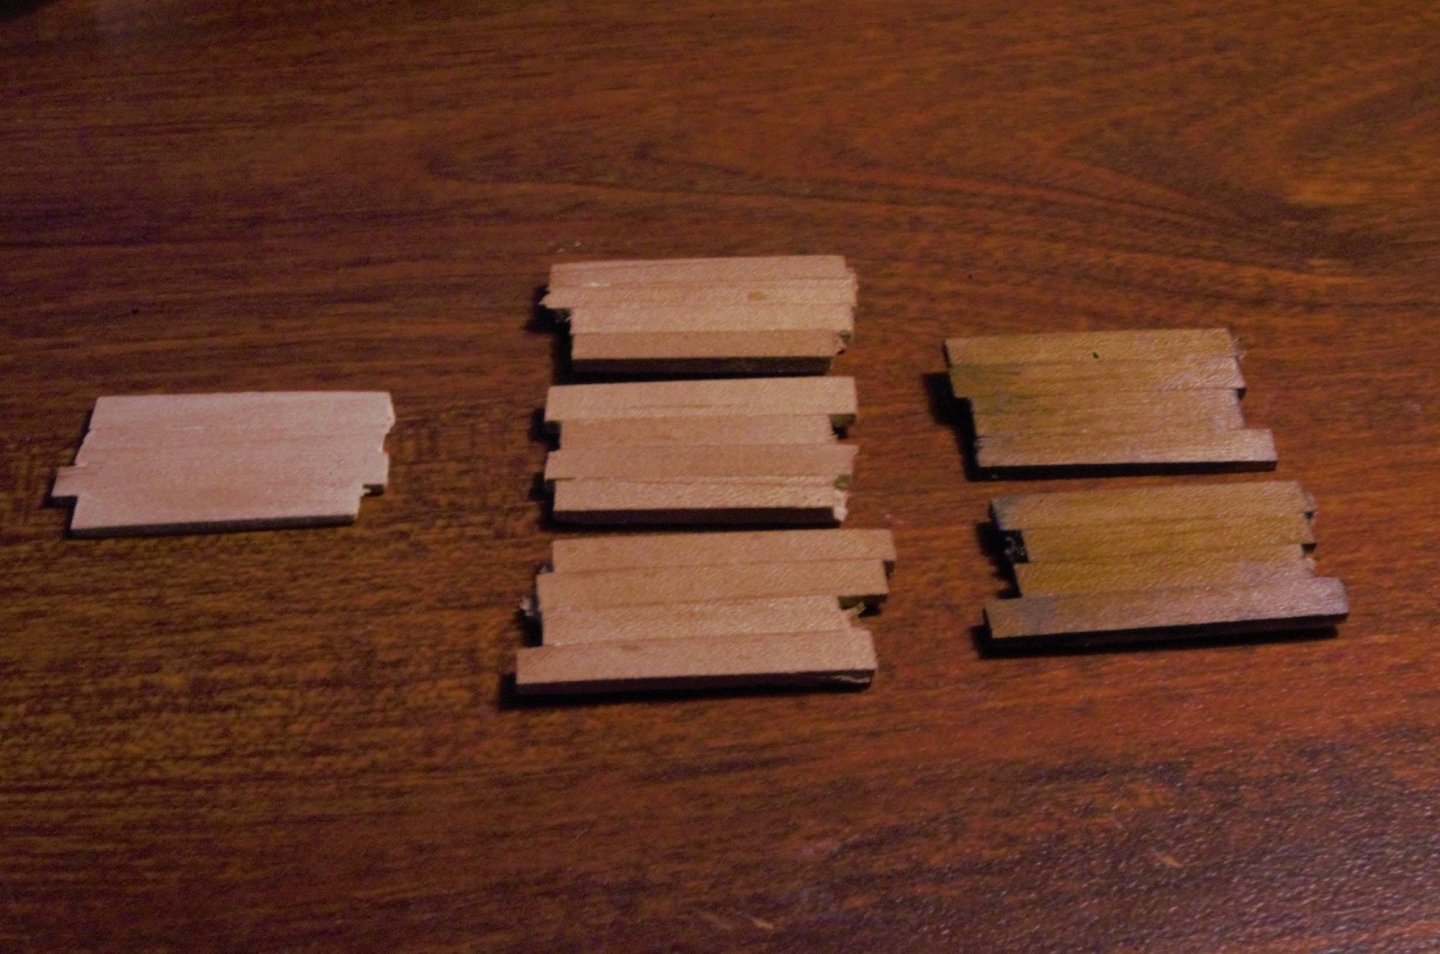

-
I now realize that I have sinned. Mark, I'm sorry for derailing your log; I just wanted to provide a quick photo of my experiment since I knew you were using the same type of wood that I was. I'll post my experiment in the proper forum, as it really does seem like there could be some very robust and fascinating conversation on this topic! Alan
-
Hi Bruce, According to the can, Formby's is comprised of tung oil and other "fine penetrating oils". The can also indicates that it contains aliphatic hydrocarbons. No, I have no idea what those are. The guy in the video below tipped me off about the tung oil finishes. He has a few other products on his bench, one or more of which might be available on your side of the pond as well. He indicates that most of them, unless they specifically state "100% tung oil" on the bottle/can, are usually only 5% actual tung oil, with the rest being resins, etc. Is this a bad thing however? It sounds like these products result in a finish which won't need to be reapplied periodically which tung oil apparently does. I can't fathom having to reapply a finish over a completed ship model, so I'm thinking these alternate products might be the way to go. I do wonder however, if the Pentart is ok to apply over the top of the Formby's and how that will hold up over time. It seems like we have a few chemists on the forum, so I might bring this up in the Finishes section to see if anyone has additional information on this point. With the amount of time we spend on our projects, it would be horrifying if the two products didn't interact nicely over time. Alan
-
Another thing you can do is experiment with the type of finish to apply over your pear. Below is a pic of an experiment I ran on mine. The left column is just unfinished, the middle column is pear with Formby's Tung Oil Finish (which I learned isn't actually Tung Oil), and in the right column are pieces which had Pentart Patina liquid (50/50 mix of mineral spirits/Pentart) applied over the top of dried Formby's. I'm going to keep experimenting to see if I can get something between the middle and right columns. Maybe starting out with a 90/10 mix of mineral spirits/Pentart; it was surprising how dark and strong that medium was. Alan


-
I'm thinking safety glasses are probably in order for Popeye moving forward. Alan
- 1,090 replies
-
- 7
-
-
-
- showcase models
- vendetta
- (and 2 more)
-
Rope-where to go since Syren is no longer making it?
knightyo replied to bear's topic in Masting, rigging and sails
When it's time for me to make my rope, I'm going to purchase Chuck's rope making device. He published a tutorial for it, and it looks like it would be very satisfying to use. Alan -
Those mines look awesome. And thank heavens you have your models in a safe location now. Alan
-
HMS Bounty by Alan S
knightyo replied to Alan S's topic in - Build logs for subjects built 1751 - 1800
I agree regarding the walnut. I wish my walnut was that fine grained! Your build is looking great so far. I'm also an Alan S. I'm glad that this is actually your log, and not something I posted in a sleepwalking mode during the night. Alan -
Man I wish the photos on that site enlarged more. The detail on that model is insane! Just stunning detail when looking under the deck at the structures at the bow and stern. Alan
-
Berlin 1674 by Strelok - 1:100
knightyo replied to DaKea90's topic in - Build logs for subjects built 1501 - 1750
I think this ship would be fantastic to see in unpainted wood. I also wouldn't worry about whether or not the plans are 100% accurate, as no one will be able to prove they are wrong anyway. Alan -
Your build looks great so far! And after looking up the book you mentioned by Hameichi Hara, I purchased said book, as it looks great. I've been "building" my Syren model since about 2008, so it's nice to see another modeler who is deliberate with his work. Alan
-
This is beautiful work! Alan
-
Wow! That longboat is superb. Alan
-
I think it depends on how "tight" the outside planking is, and whether or not the plank fits perfectly in place without really needing to be glued to the underlying surface. If it were me, I'd probably dremel out the underlying filler and reinstall a new plank on top of the "old", and sand to the correct depth to ensure the outside planking had a solid and long-lasting surface to adhere to. Take my opinion with a grain of salt tho. I'm famous for going with the most difficult and unwieldy approach whenever possible. Alan
-
The Bitumen Experiment
knightyo replied to ChrisLBren's topic in Painting, finishing and weathering products and techniques
To resurrect this one a bit... What grit do you guys think planks should be sanded down to before tung oil, pentart mix, bitumen, etc are applied? Alan -
Yessssss...... There can never be too many guns. 😁 I love the capstan as well. It really looks fantastic. Alan
- 1,784 replies
-
- 2
-
-
- winchelsea
- Syren Ship Model Company
- (and 1 more)
-
US Brig Syren by knightyo
knightyo replied to knightyo's topic in - Build logs for subjects built 1801 - 1850
Well, it did take me about 13 years to pull the trigger on that decision. 😉 -
That deck is absolutely gorgeous. Alan
- 607 replies
-
- 3
-
-
- winchelsea
- Syren Ship Model Company
- (and 1 more)